
Leaderboard


Popular Content
Showing content with the highest reputation on 03/20/19 in all areas
-
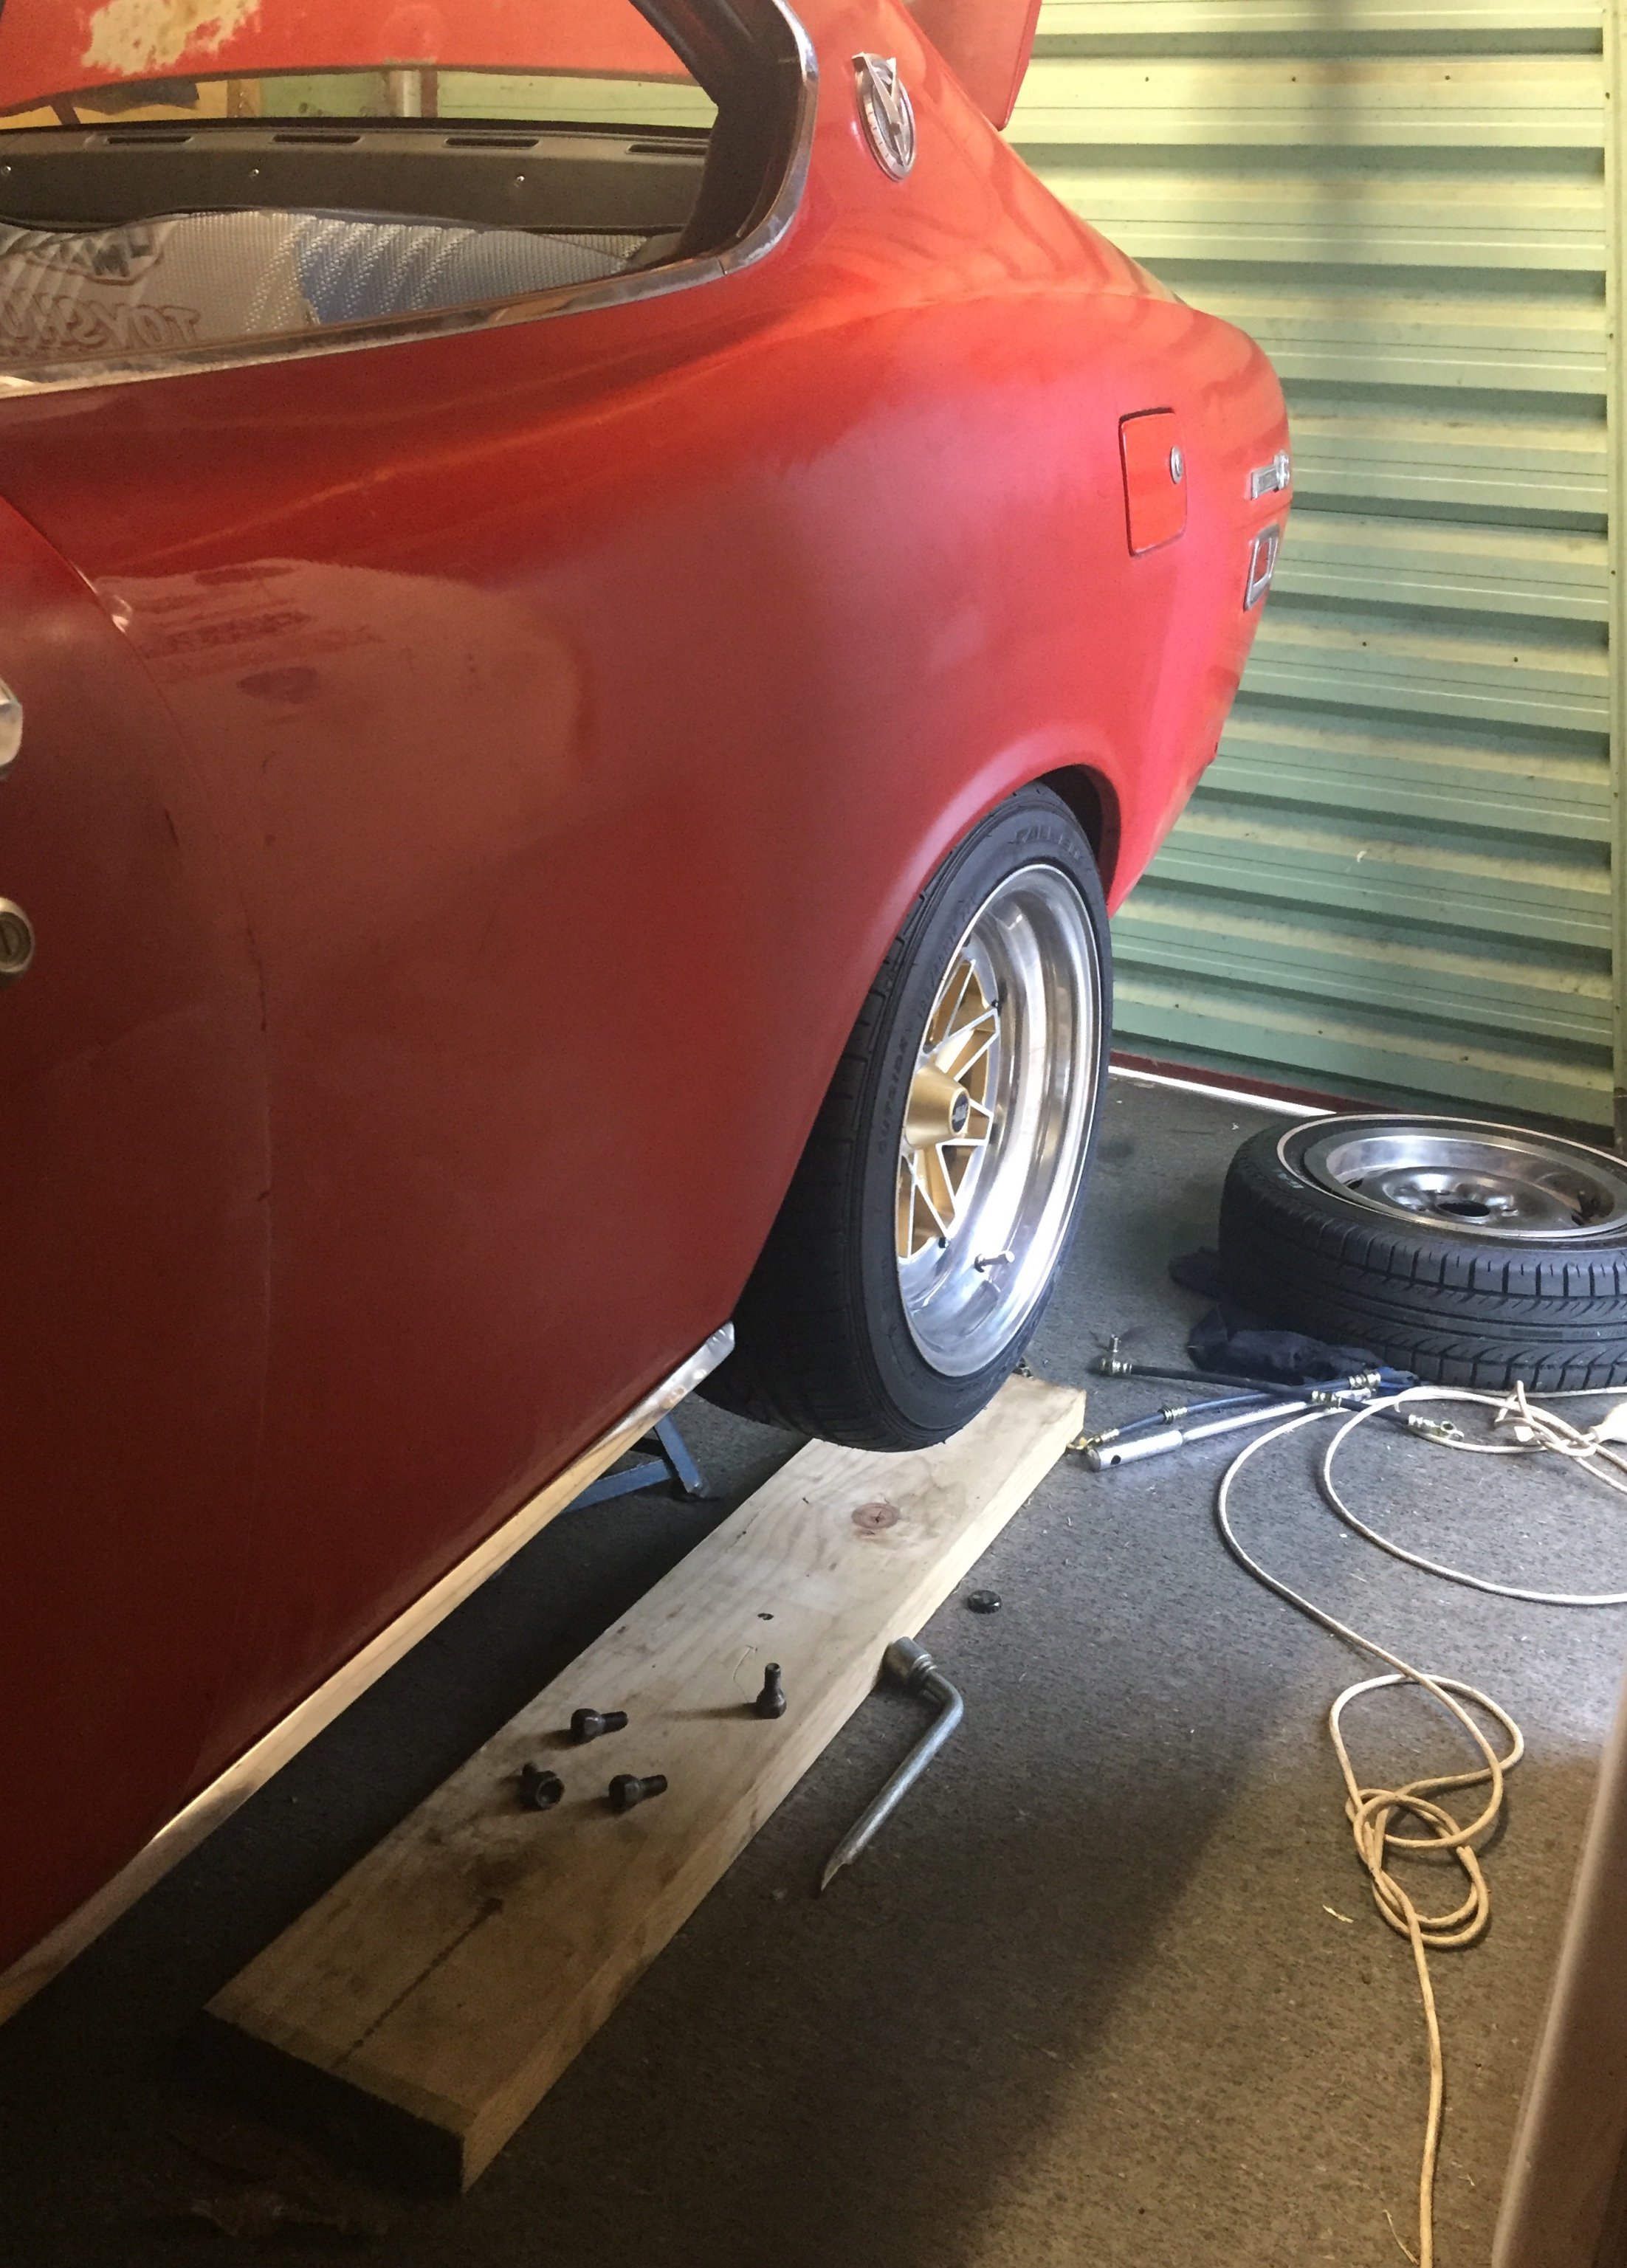
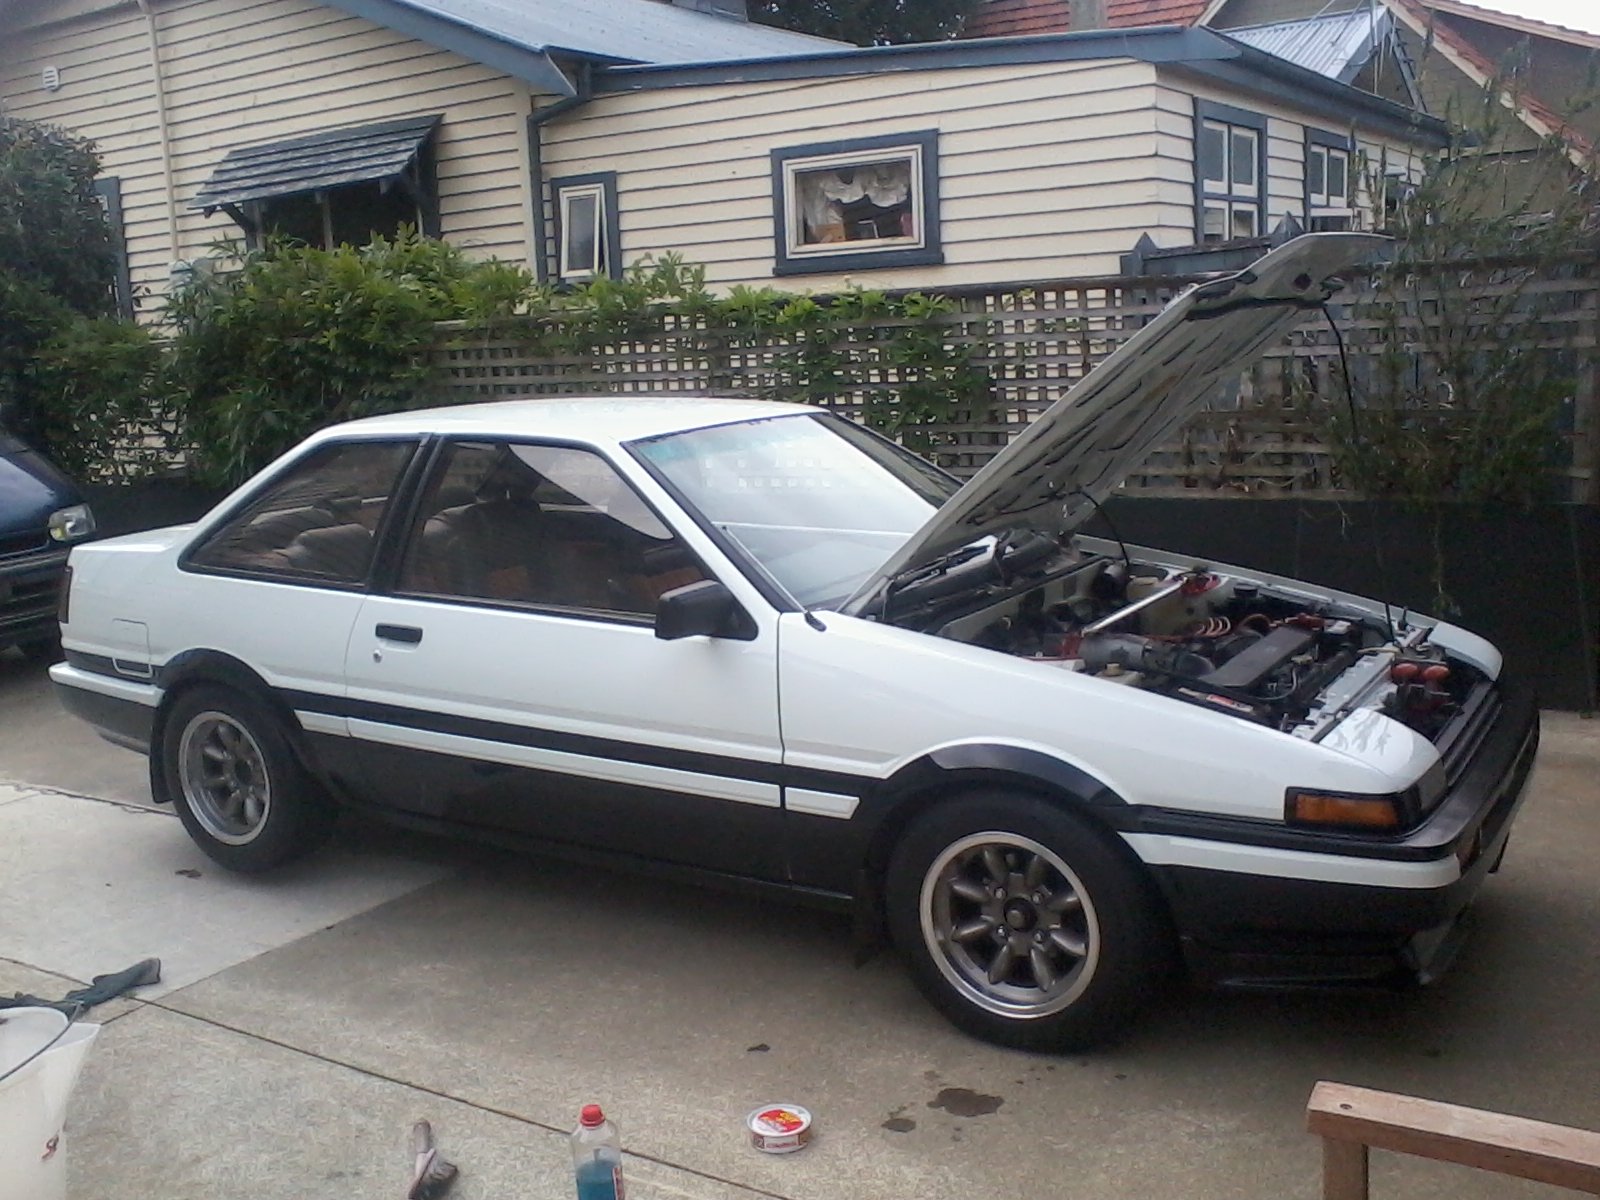
This was tucked away over winter having some tickling. It was running really well last year, but was drinking a bit of oil, and would let out a puff of smoke when opening the throttle wide after a period of pootling. Compressions were good on all 4, symptoms pointed to valve stem seals, which is a common issue for these engines at this age. As a 'while I'm here' job, I decided to replace the inlet cam VVT pulley, as this had developed a rattle (again, extremely common due to wear of the internal teeth that engage to actuate the vvt timing change). NOS pulleys are available, but expensive , but the only other choice would be going standalone management and aftermarket vernier pulleys with a VVT delete - something I wasn't particularly keen on as I like that it runs so sweetly on stock management. I bit the bullet and bought a pulley and set of Supertech valve stem seals from Battle Garage in the US. Oh, and also a TRD 0.8mm high compression head gasket. Got the head off: Cleaned up the block surface. Take a look at the top of the pistons and take a guess at which ones have been burning oil... Head was in good nick, but the valve faces were all quite badly coked. Pulled these out, and cleaned them back to being mint, then lapped the valves/seats, reinstalled stem seals, valves, springs, clips, shims and buckets. All moved nicely and looked much fresher than when it came off. Refitted the head on the block, using the thinner HG - this is supposed to raise compression ratio to approx 11.5:1 (from 11:1 stock). Minimal gainz expected as it's on stock management, but is good futureproofing and is a small enough bump to not worry about detonation (I only put Super in it anyway). Replaced the VVT pulley, fitted cambelt (kept old tensioner, as this has only been on there for 1yr/1000km and was still mint), and got it all timed up and back at factory specs. Have driven it several times since and it feels just the same, seems to be using a negligible amount of oil (i.e I haven't noticed a drop at all so far, win!), and doesn't produced an annoying VVT pulley rattle at idle. Quite happy all in all! Have a recent snap from a local breakfast meet:11 points
-
Imp work has taken a back step due to this rusty old 4wd bus thing that has come in for work... However we are both still sneaking in plenty of time on the wee car. Its so exciting to see it come together that we cant help it. Hence I have also been fairly quiet on the forums etc. So when I left off last time it was door cards I think. Or painting the engine. Yeah- that little engine. It looks quite pretty with a little blue bonnet on its head I must say... Now the doors. I cleaned out the threads on the hinge plates, oiled them, cleaned and painted the old screws and then we carefully manoeuvred the doors into place and set the gaps. I knew they would come up good because they were good on the car when we got it. They do look good. They look factory. However I think this car was assembled on a Friday afternoon at the NZ Todd Motor Corp and they had been into the beers already. The wing tops, factory, don't quite match the profile of the door tops, factory, which don't quite match the door or sill bottoms. Factory. Looking at other Imps I think this is fairly par for the course on what was a cheap run around. I'll live with it Then it was the careful task of fitting the 1/4 light windows and the rest of the glass and runners. I rummaged through all my window parts and pieced together the best I could from the stash... I had to lengthen the front glass runners to suit the new bailey channel seals that I'd bought. The new type is soft backed whereas the old ones were steel backed. The runner extension bridges a 40mm gap between the bottom of the 1/4 light and the runner. I folded up a profile the same, butt welded it, cleaned it up and all good.. I fitted the runners, the best glass I had (or so I thought at the time having since now found extra windows hidden behind the lathe which appear to be even less scratched) and then fitted new weather strips on the outside. All very posh for a 53 year old car. Then the door handles. Again it was into the stash of parts. Hannah had already selected, cleaned and polished the best handles of the bunch. I went through all the door locks, hatch lock and ignition barrel managing to get a working set which matches one key. Always a nice thing. I had to make new handle rubbers as the old ones were completely perished. Trying to cut neat holes in thick rubber is never easy but over the years I have made a set of hole punches to suit. I needed a new larger one though... which then made neat holes... Handles fitted and working fine we moved onto the door cards. Actually genuinely excited about this because after the restoration of them came up so well we knew they would look ace against the blue. Even not to bad with the mx5 seats. Nice clean shiny interior handles too along with freshly painted door bins. Very happy with it all... The Mx5 seats dont look too bad in there but we would much prefer to have some red seats.. To match the rear seats which I reckon look great!... I had also fitted the door seals. Not original and a bit too thick to start with but once I cut the bottom out they now now squish perfectly and work well. However- they have either shrunk or were never cut long enough to start with leaving a gap an inch long. I shall have to fill it with some more of the same profile. Now the doors were done it was onto finishing the transaxle rebuild. Ages ago we had scored a later stronger mk3 box from an Imp at the Marshlands graveyard in Christchurch. This car here in fact... I then had a right good collection of boxes... I had stripped down the broken box from the racecar which had some chips in the teeth and was generally in a bad way. These transaxles are so cute (if a gearbox could be cute?..). So dinky. The little diff. Nicely made wee boxes... The later mk3 box has a stronger casing due to extra ribs being cast in around the diff support bearings helping to stop case flex. There is also a breather hole built in a neater way in the back plate, the diff spider gears run the side loads against bronze bearings rather then just the bare cage, the output shafts have pressed on drive lugs rather then just held on by nuts. All the sort of little tweeks one expects as a cars design gets improved through its life. Sadly when we removed the box from the car, which was on its side, I had forgotten to release the gear change coupling from the shaft. The box at one point ended up hanging its weight off this and bent the shaft plus broke the casing. Initially I thought I could just swap the end casing over but they are a different design. There is a breather hole plus the o ring seal that seals the shaft was moved from the shaft itself to the inside of the alloy guide stub (in order to move wearing the alloy down from an O ring attached to a shaft sliding with the hole to fixing the o ring so the hardened shaft now runs within the ring- good idea that man) Photos of broken bits. Note the different casings... I had to fix the casing. I skimmed it flat in the mill.. Milled a step down... Made a small tool with some HSS to machine an inside groove... Machined groove in alloy and a step to on outside for a slight interference fit into plate lug which was then tapped into place with some retaining compound... Cool. Sorted. Then I did some cooking... and pressed a brand new frozen bearing into the case to replace a fairly rough feeling old bearing... I had to weld a block of alloy into the bellhousing to take the pivot ball for the Datsun clutch assembly and then the whole lot was reassembled... Then I had to do a three point turn within the available space, easy with an Imp, so I could par it in a spot with better access to the rear. Next up is to sling engine in place and make a new crossmember to suit because I dont like the one it came with.7 points
-
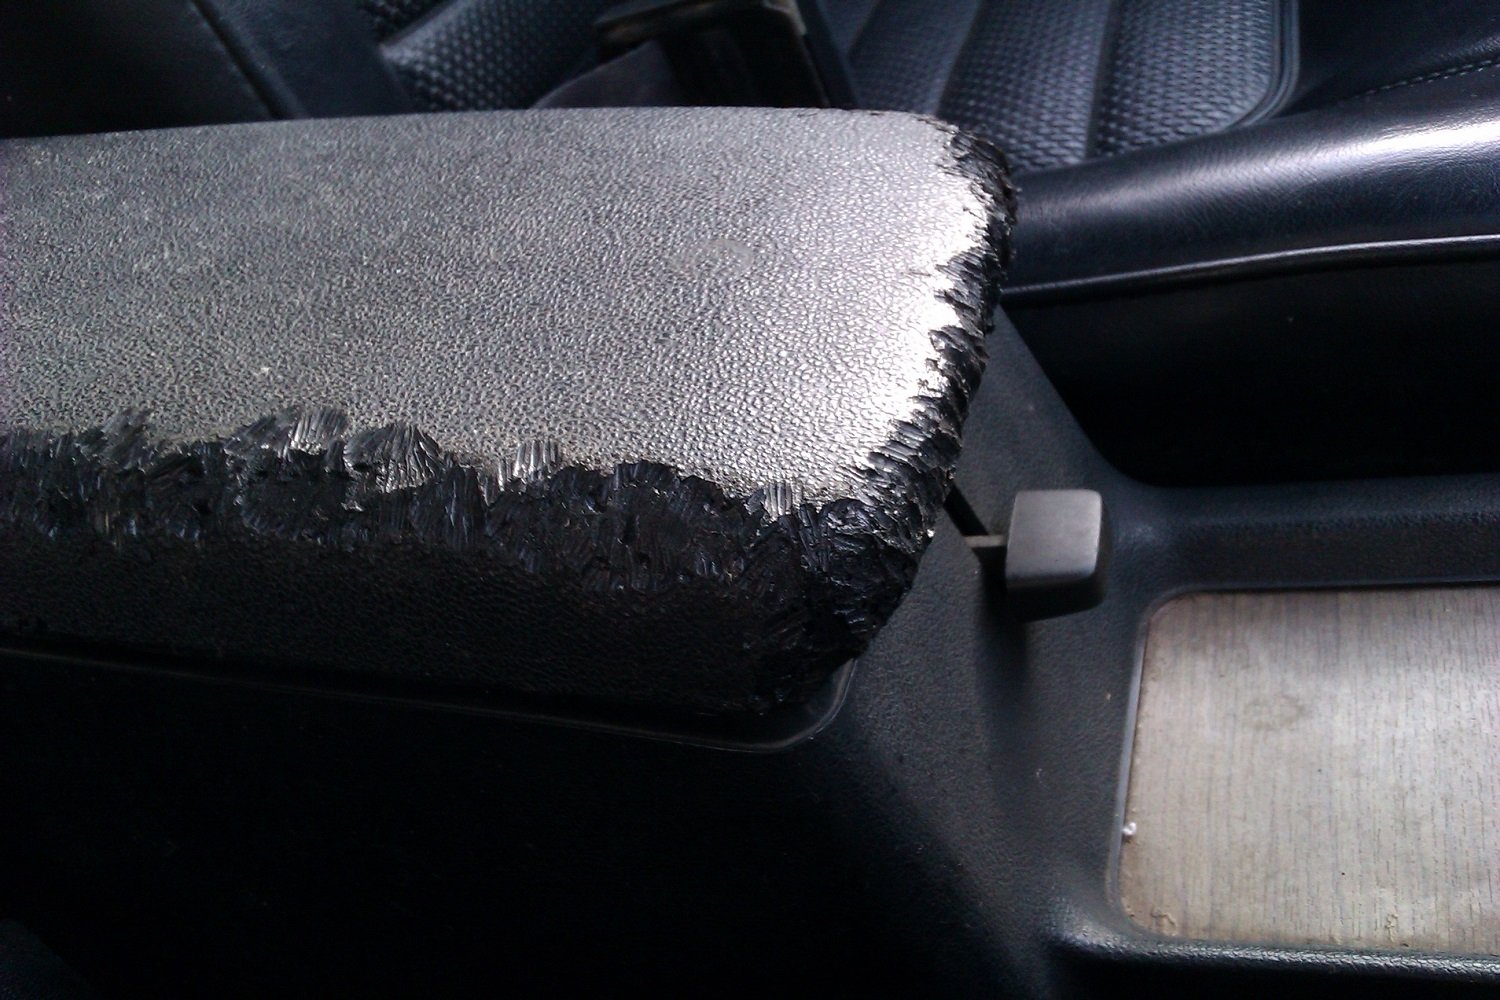
3 years and 5 days later ? Fucken hell. I've finally pulled my finger out and got on with getting the Hako road legal. It's been seven years since it arrived. There were various reasons why it's basically sat in the shed for all that time but one of the main problems changed last year. The indicators on the Skyline are illegal in this country. After 1965 cars must have orange indicators front and rear, there was no easy way to rig it up using the original system and I wasn't prepared to butcher the loom and add extra orange lighting etc. To register an import it had to pass an MOT test which also served as an vehicle identification process. No orange indicators mean't no certificate & no registration papers. In their wisdom the powers that be decided that from May 2018 all cars 40 plus years old didn't need to have the annual MOT test. This is obviously bonkers but there really aren't that many pre '78 cars left on the road here and I'd say that almost all of them are in the hands of people with at least half a clue what they're doing. What this mean't for my Skyline was that it didn't need to be tested to be registered. It has to be "roadworthy" but doesn't have to be tested. The indicators are still illegal but you have to get pulled over by a copper who knows his stuff. The upshot is that I sent all my paper work off, had a random inspection to determine that it's not 2 cars welded together, etc & I'm now awaiting my documents and registration number. It needs a few things sorting and I've arranged with the local MOT tester to have the car "tested" on training mode so I'll get all the print outs but it won't be legally binding. 10/10, GC, etc. Biggest problem has been a mouse that moved in at some point over the winter, it may have been the one I evicted from the Hilux. Little bastard ate my centre console, plug leads and steering column stalks. Fucker. Update soon /pic 4 fred
 6 points
 -
In a few days I’ll hopefully post a video of my son and I skating it. He’s only 6 but is seriously better on ramp than I am. I want to seal it to protect the wood.. the internet seems to say use polyurethane. I’m worried that it might make the ramp (plywood surface) too slippery? Does anyone have any experience?6 points
-
I suggest you start with the example code called blink, and read the pages associated with each keyword/ library routine, i.e. "delay" and "digitalWrite". The answers are there.2 points
-
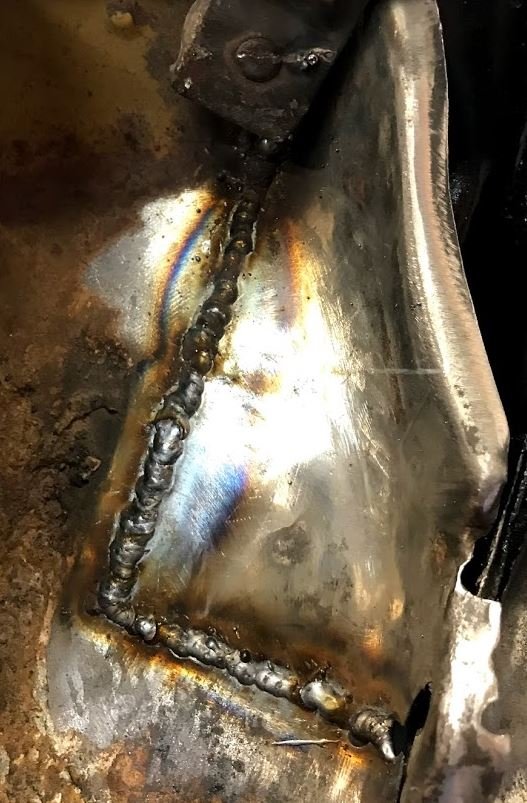
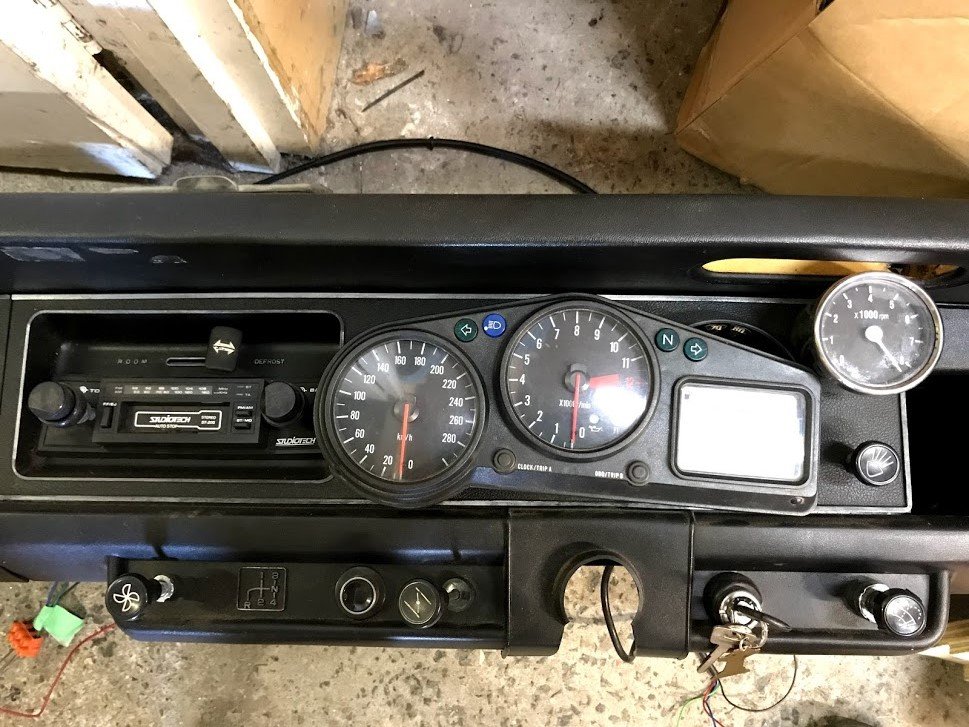
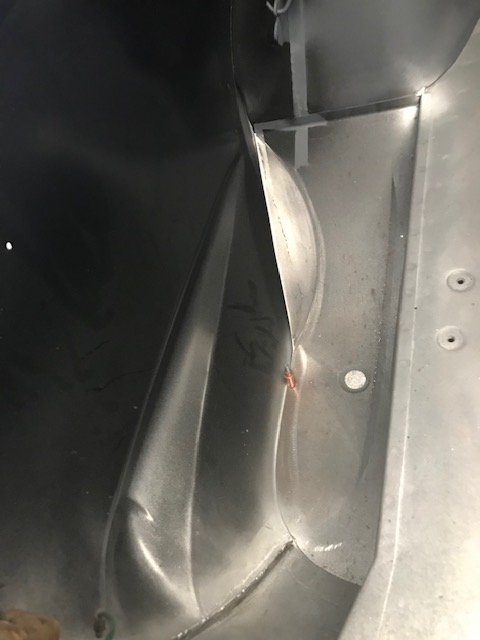
First patch welded in, I was a bit worried about the 50 year old steel but it didn't seem any different than new steel. Came out ok Also for motivation I put the bike cluster roughly where I want it on the dash:
2 points
-
be gentle with rusty hes a good boy2 points
-
Easy enough, yeah. Easier to not at all though. Get old mate to check his amendments...2 points
-
Wowee this week is disappearing on me! Lets get to it. Motukaraka point, just off Greys Rd round Pauatahanui. Tomorrow! 6.30ish Be there! MAP!2 points
-
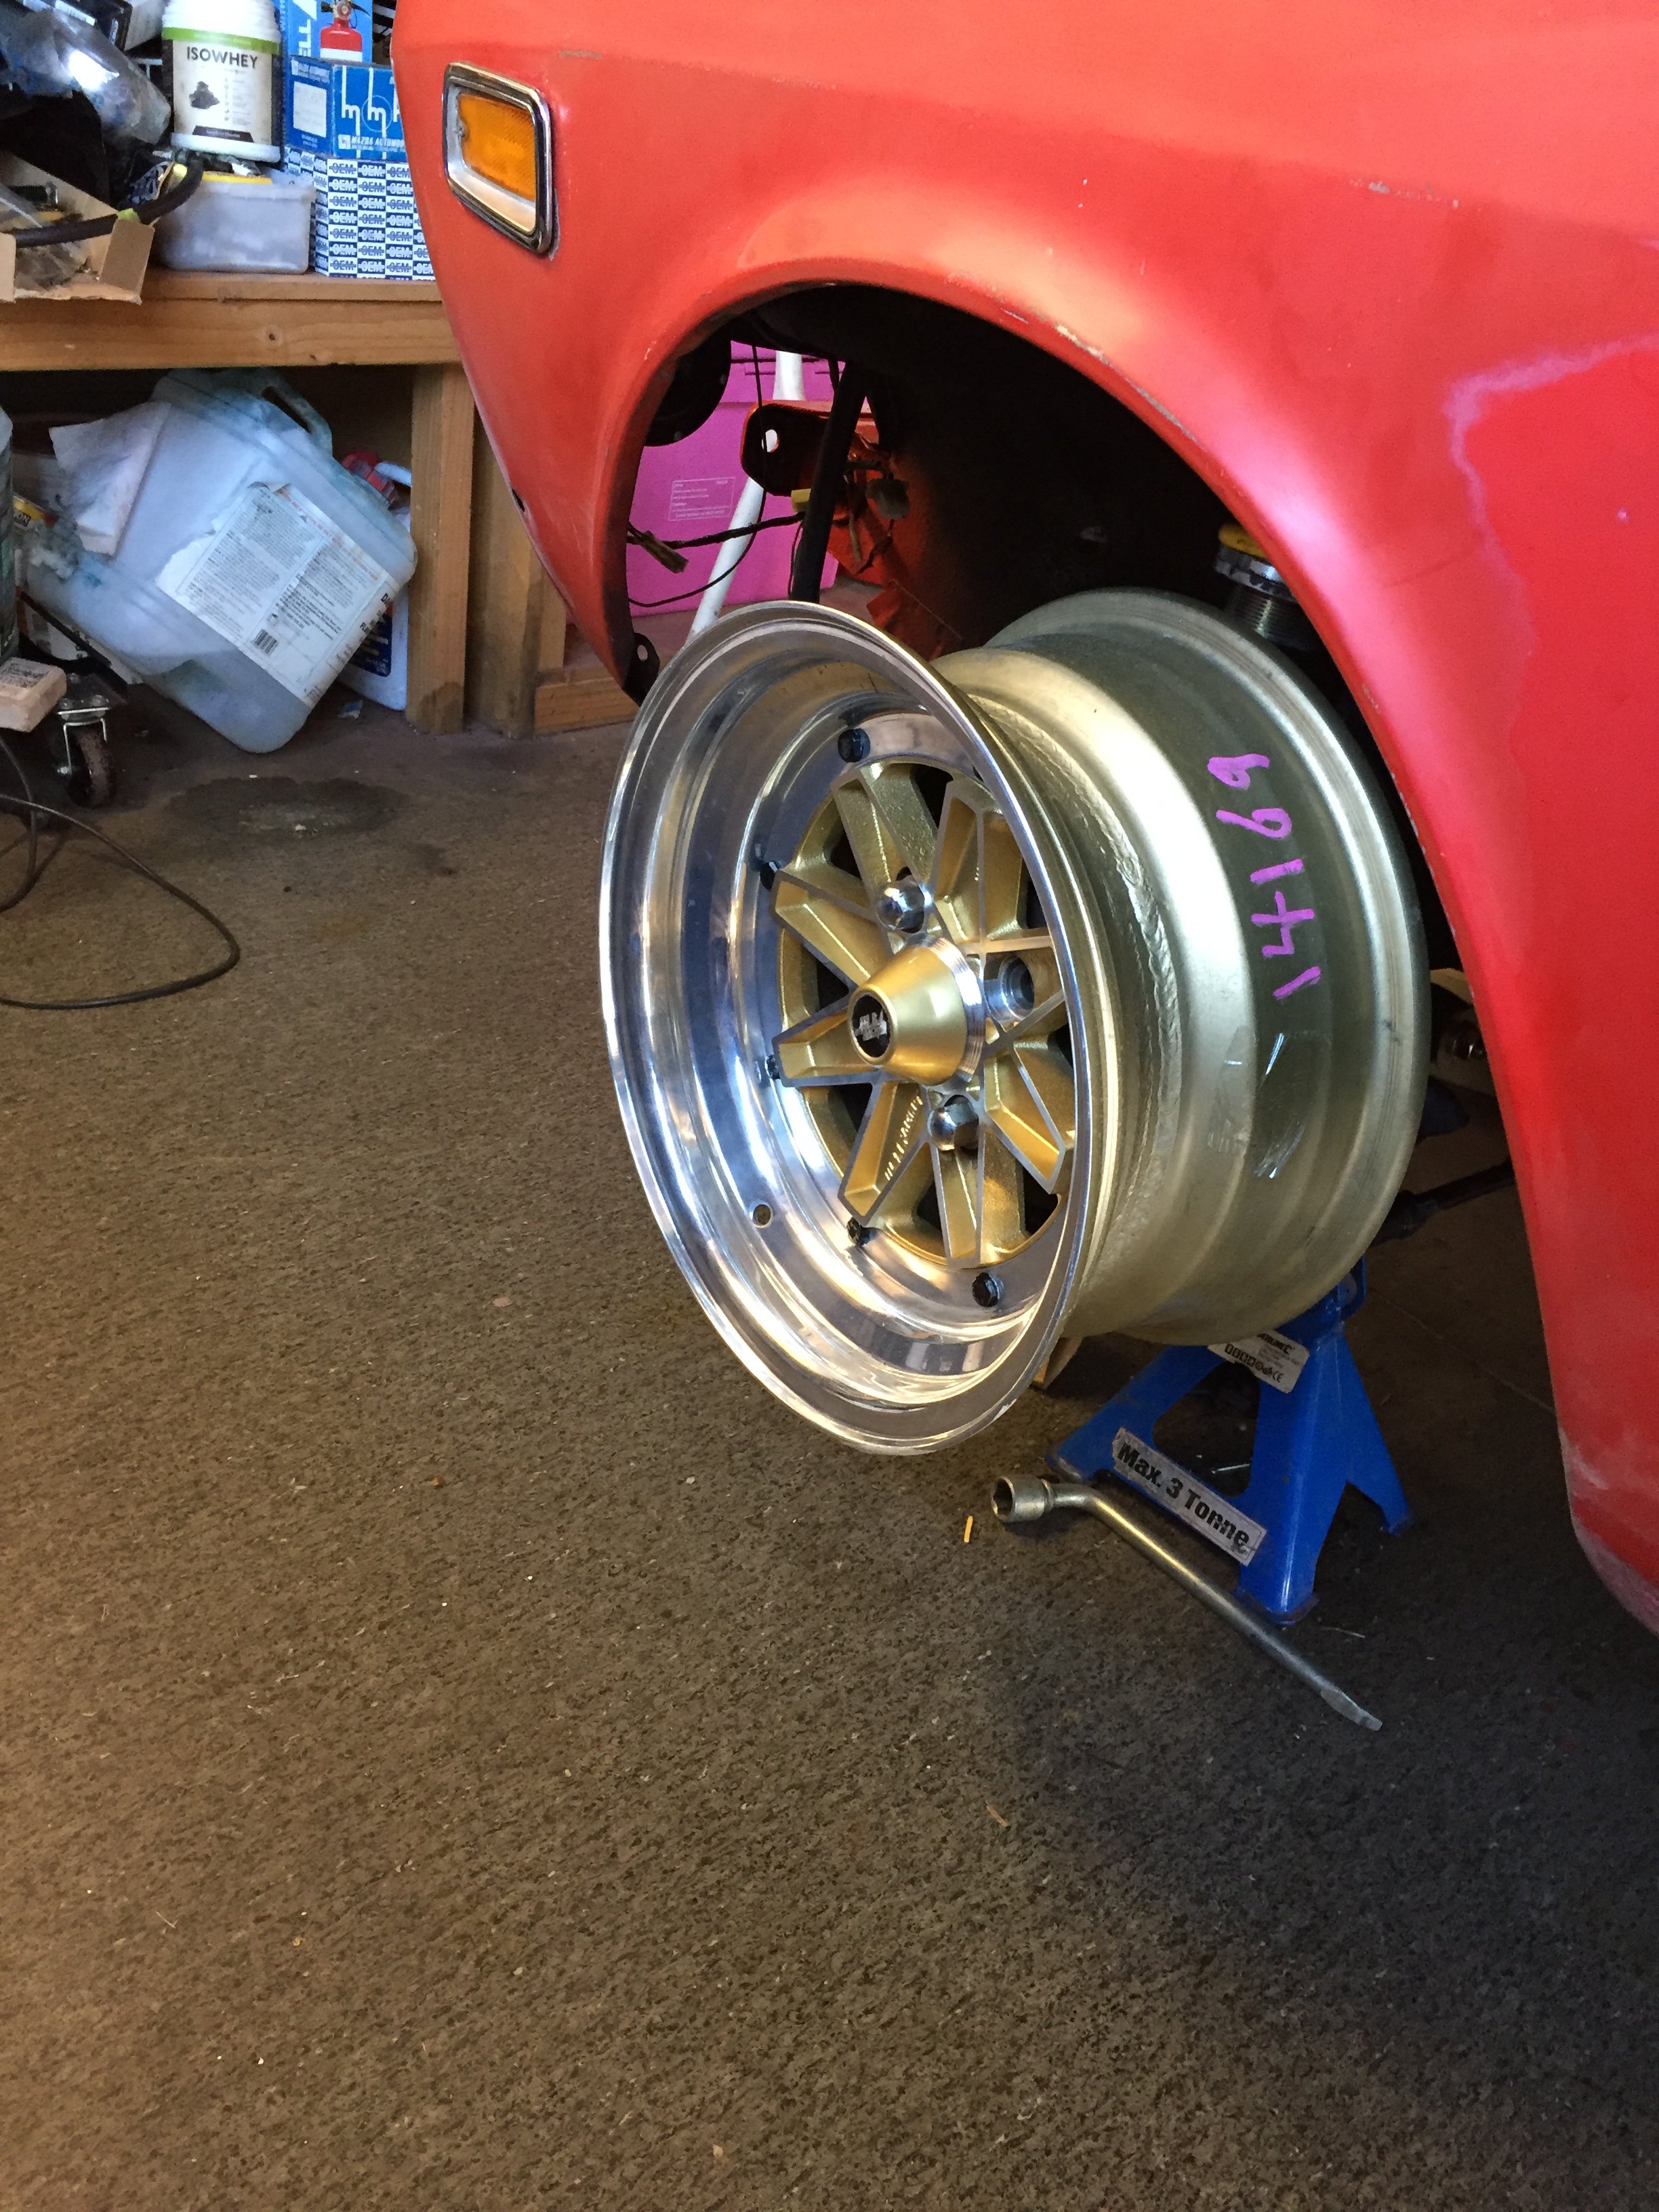
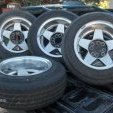
SSR Jilba 14x7 zero offset in 4 x 110 I might be lipping them to achieve 14x8.5
2 points
-
@4AGEMAD's project thread: I highly approve of this car! Nice work. Someone must have really loved it to justify converting it so well. My dad's car is like a pre-facelift version of yours. This is the car that gave me my username. Keep up the good work!
1 point
-
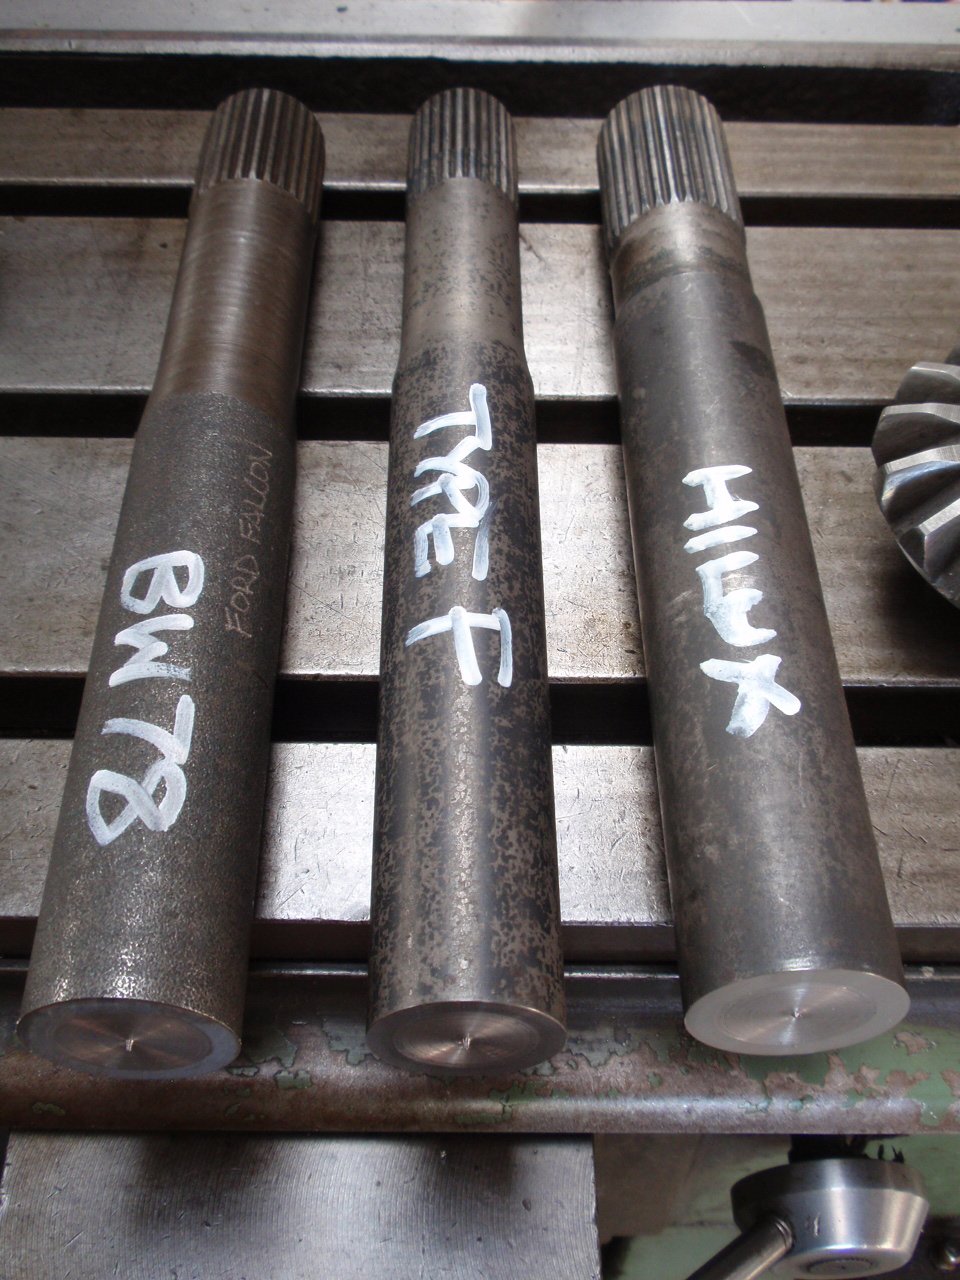
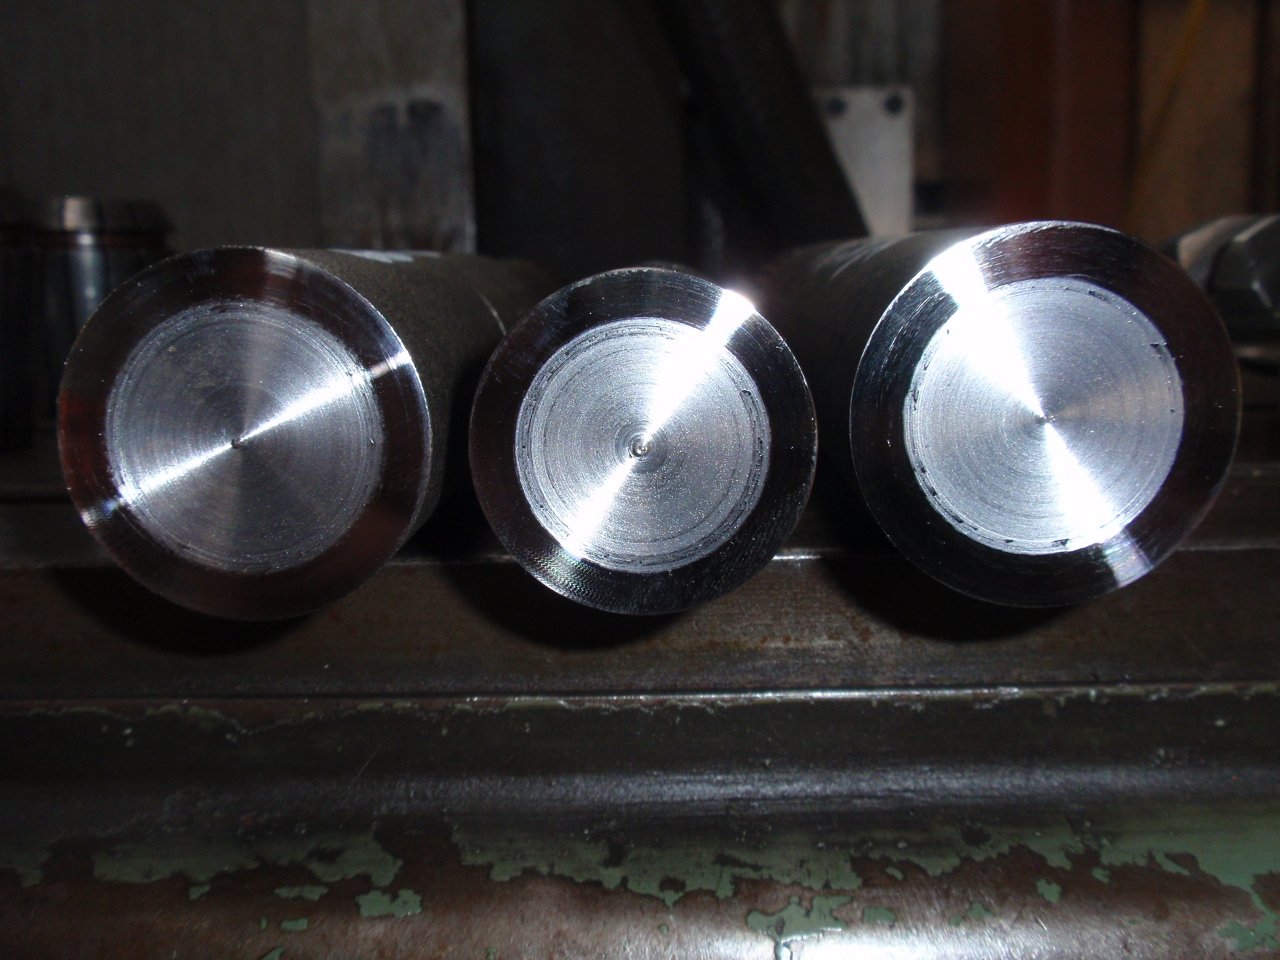
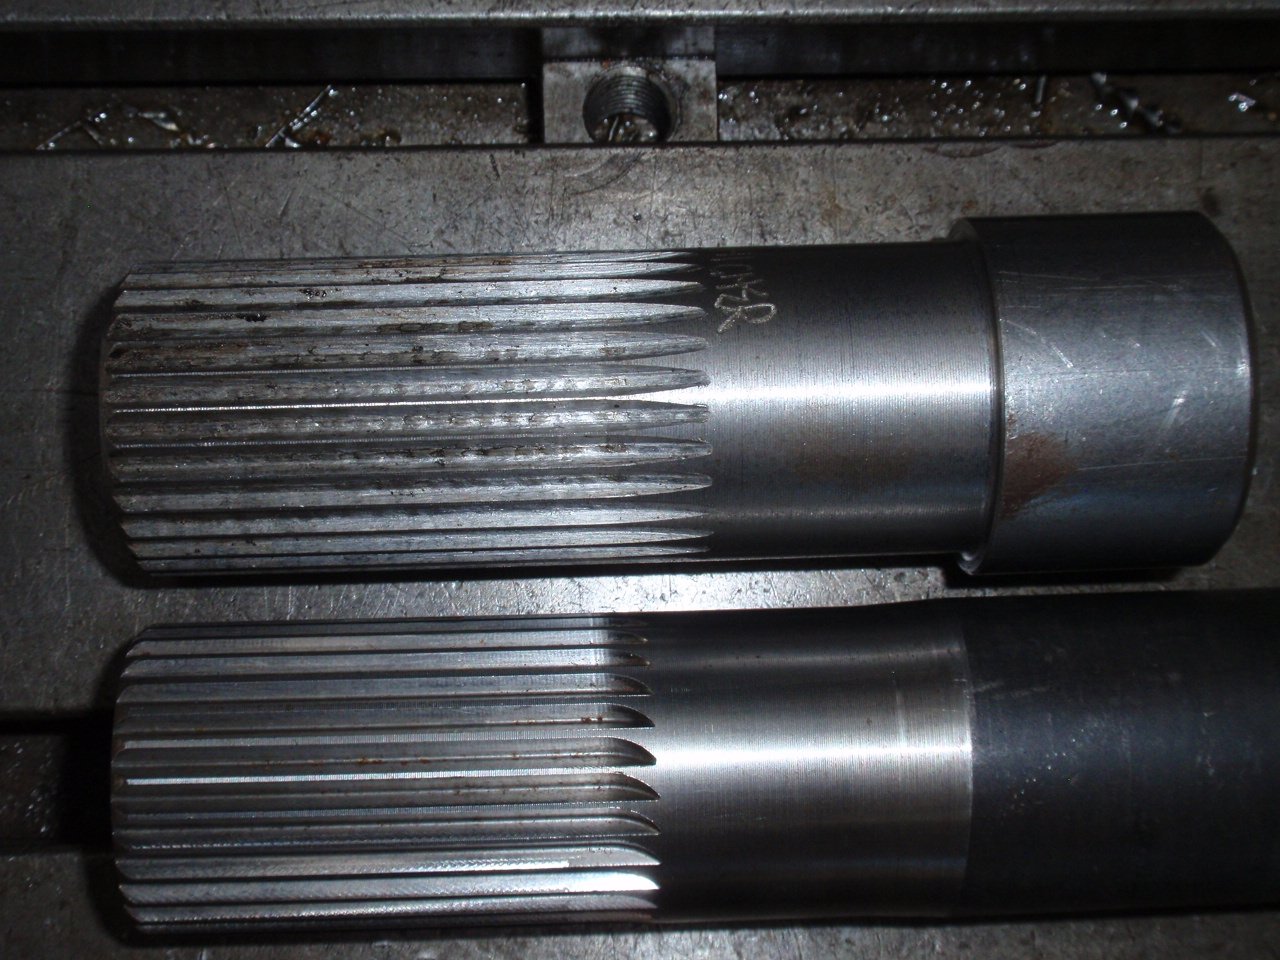
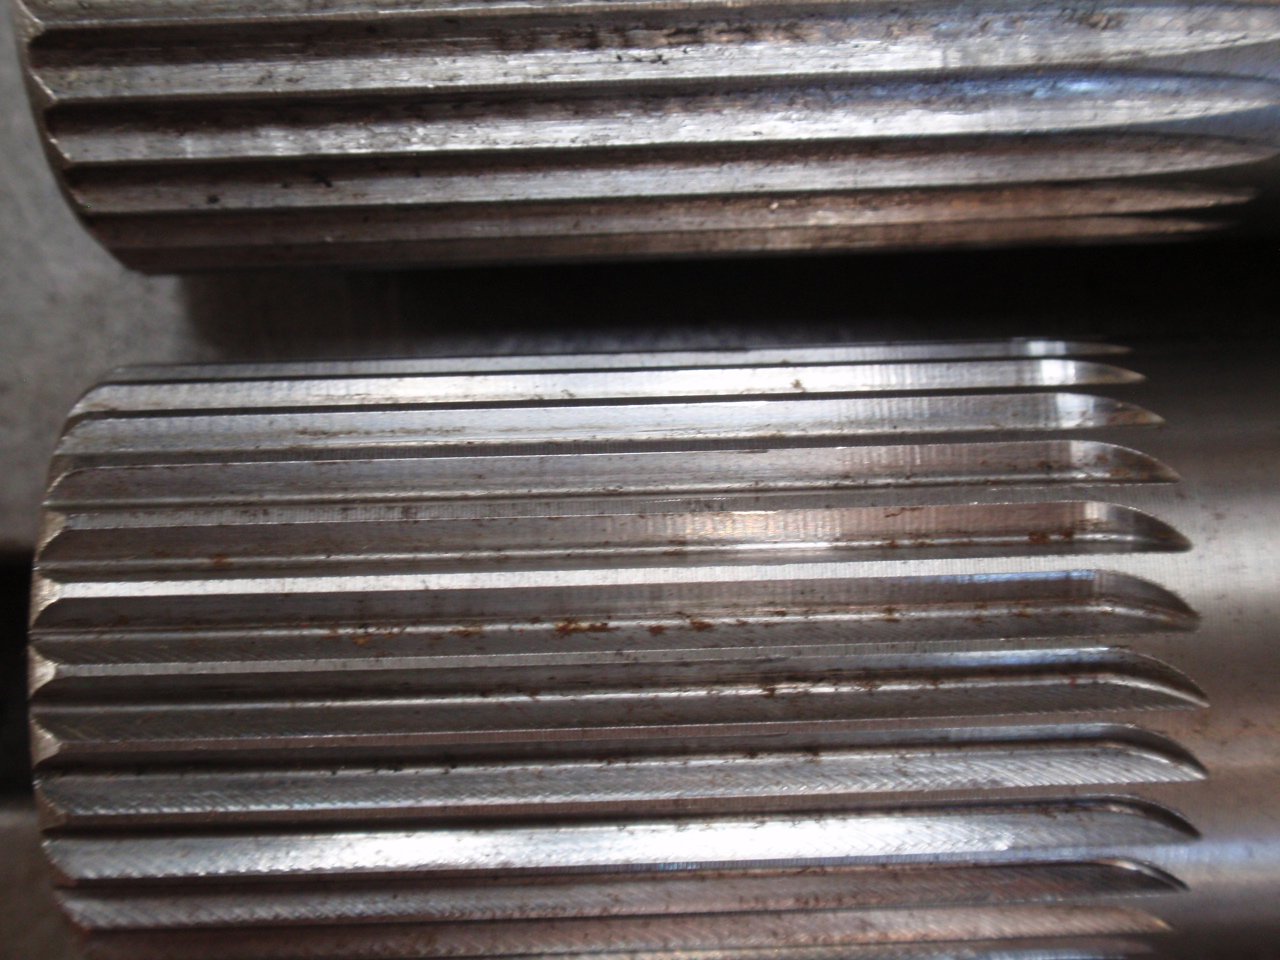
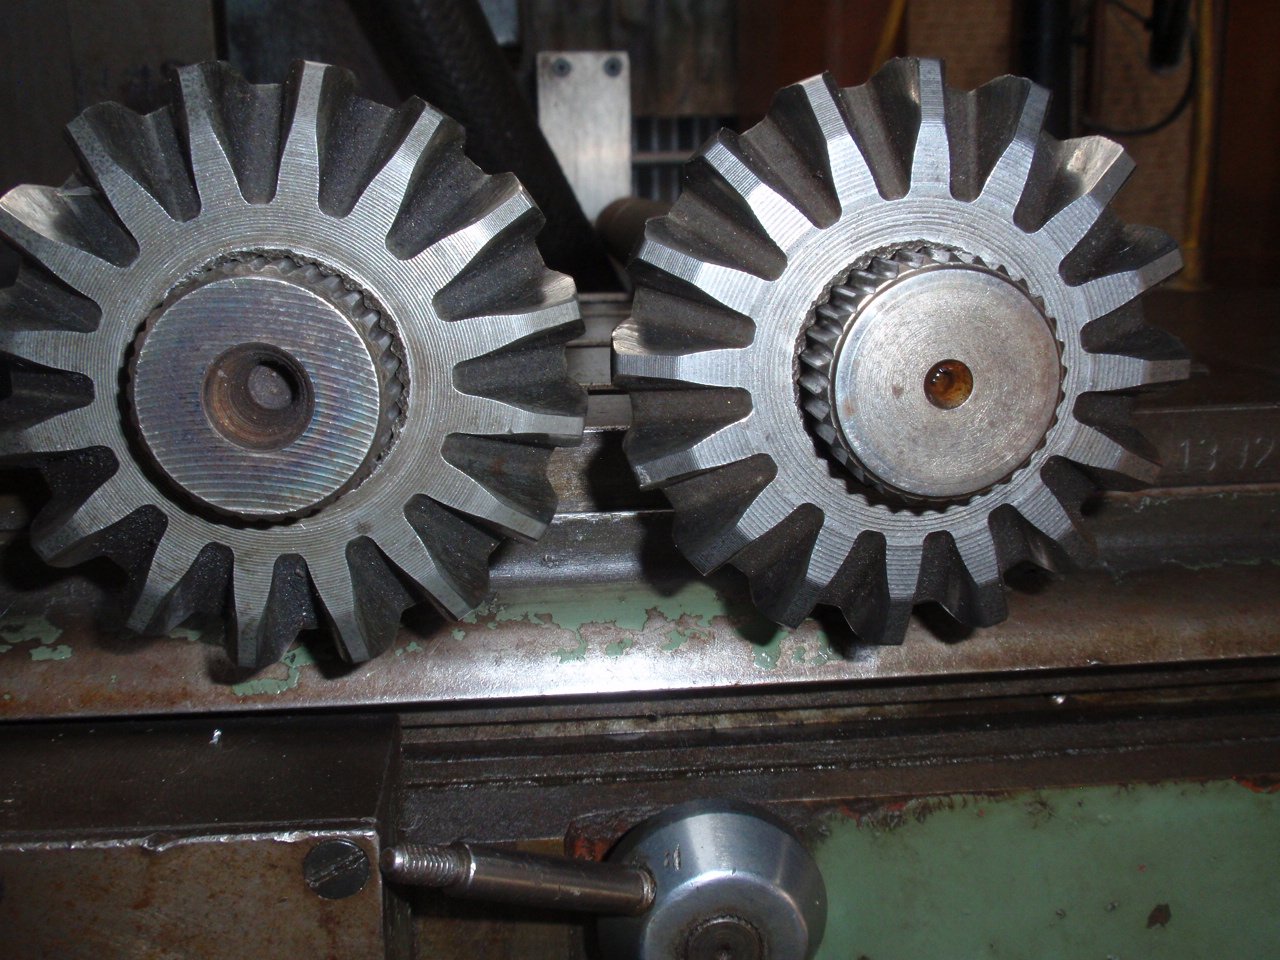
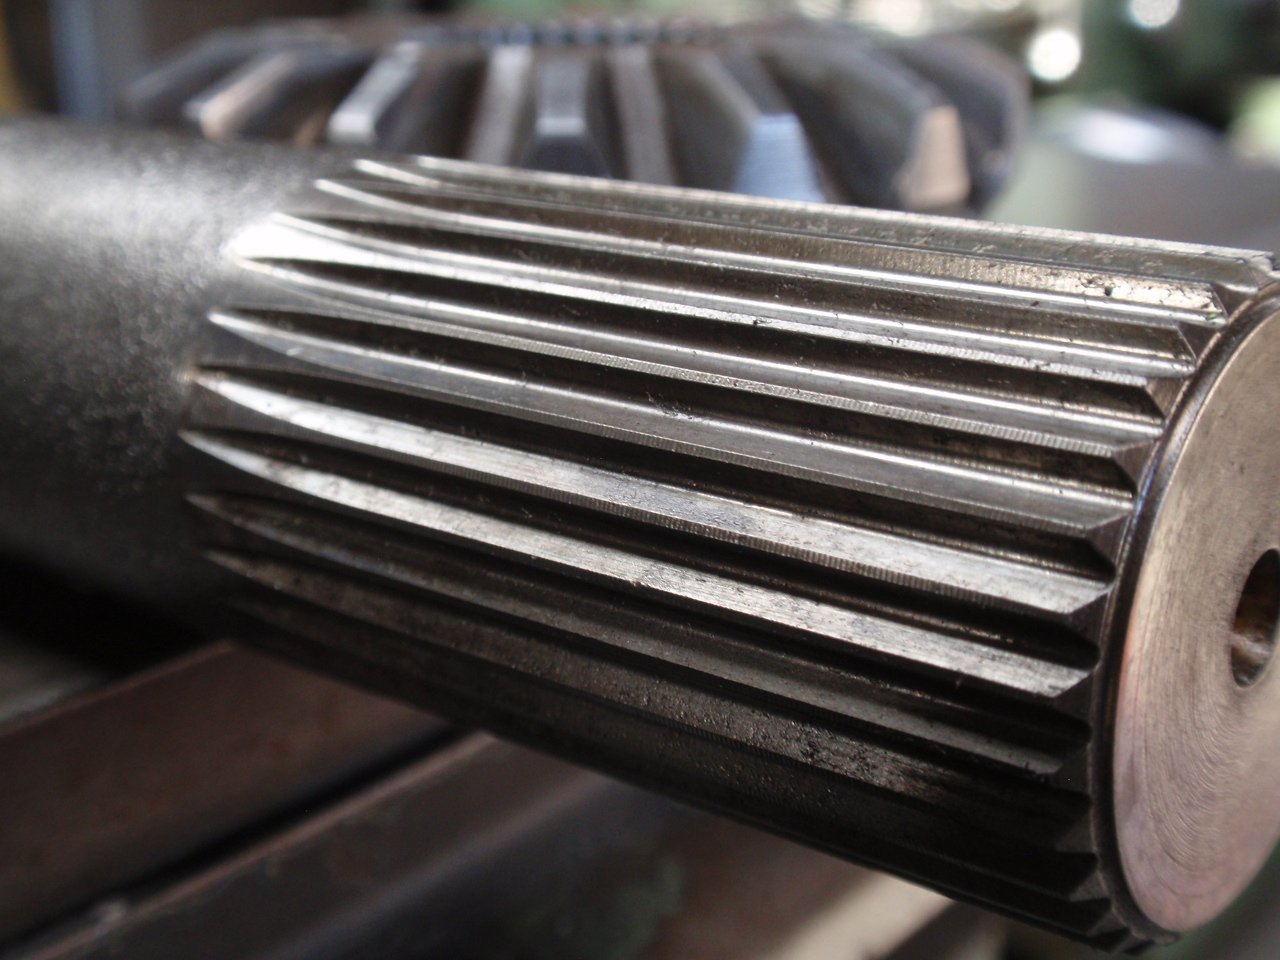
More axle tech/shit. 3 common axles. The shiny outer ring is the part of the axle that has been hardened. The middle is left unhardened. This is done to achieve a balance of strength and durability while still being ductile. Two examples of spline work. Only one of them is an axle. The top item is a piece of round stock that was used to practice resplining on. The bottom piece is an actual axle. Both pieces feature 30 splines suitable for Hilux. Look closely at them and you'll note that the top piece looks a little bigger about the diameter - even on the spline portion. Given the previous picture showing the depth of hardening ... you'd want to be attempting to remove the minimum amount of material you can from an axle's diameter. Furthermore ... the bottom item has been subjected to a shit quality respline job. The person that cut these splines didn't ensure the cutter was aligned the the job. Pfffft. So not only was it undersized (sloppy) it had been cut outta whack too. Someone got ripped, plus it looks like some chatter was going on too a little bit. Two 30 Spline axles with Hilux side gears slid on. Only one of them was a Hilux axle though. This one started life in a BW78 equipped Ford Falcon. A 28 Spline BW78 axle will just' take a Hilux pattern set of spline on it. Notice the was minimal machining done to the BW axle diameter prior to cutting in the splines. It only just made the minimum required major diameter.
1 point
-
don't know what they are called but I believe Mitsubishi use them? so scrap yard hunt if all else fails?1 point
-
One thing which has been a ball buster until i realised why. Any program that scans the com ports looking for a device fucks with any others doing the same. If i have arduino ide open i cant connect on pclink. And vice versa. Took a while to figure that out...1 point
-
yeah that^. was going to draw a pic, that would be much better. znoelli in auckland makes them to order1 point
-
Why not get a custom wheel spacer made up that locates everything correctly?1 point
-
Possible in+1. Thoughts on a pukerua bay beach meat some day? Shits lovely down there. Unsure about certain locals but they live in town now anyway.1 point
-
Cheers boss - you are welcome at anytime aye. Always a beer in the fridge and the 14s are down for a test fit.1 point
-
.1 point
-
I see you have removed the CCI oil injection, your left hand main bearing will fail very soon unless the case has been modified so it can be oiled by the airfuel mix, I would be keen to know as I want to do this mod my self1 point
-
Got the new suspension in over the weekend. Out with the Old The rear was easy enough. Compressing the front strut. I decided to just cut one coil out and I'm glad i did. It lowered it about an inch and still rides really well. The shorter and stiffer Camaro rear shock helped compensate for the cut coil. I used just replacement front strut cartridges. The tie road was beyond gone. Just had rust for lubricant. New control arm going on It lowered the back 1.5 inches and the front about an inch. With how bad all the suspension was the starlet now rides a thousand times better. Before the steering was numb and you couldn't feel the road at all, now it is much more direct. Before when you would go over a bump the suspension would shimmy left and right and it felt like riding on marsh mellows. I feel much more confident and safer now.1 point
-
Notice I make judicious use of the term OEM and go to lengths to ensure the reader is reminded that this/these are the type of axles i am talking about above ie. the ones issued by Ford (or whoever) in the bum or your car as original equipment. My thoughts on the aftermarket axles that I've come into contact outlined later.1 point
-
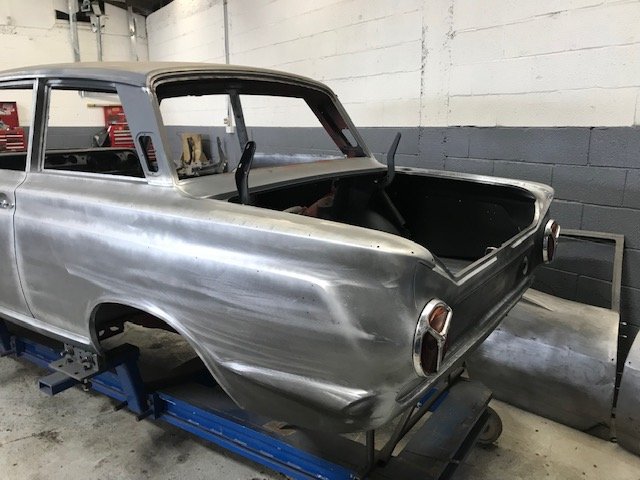
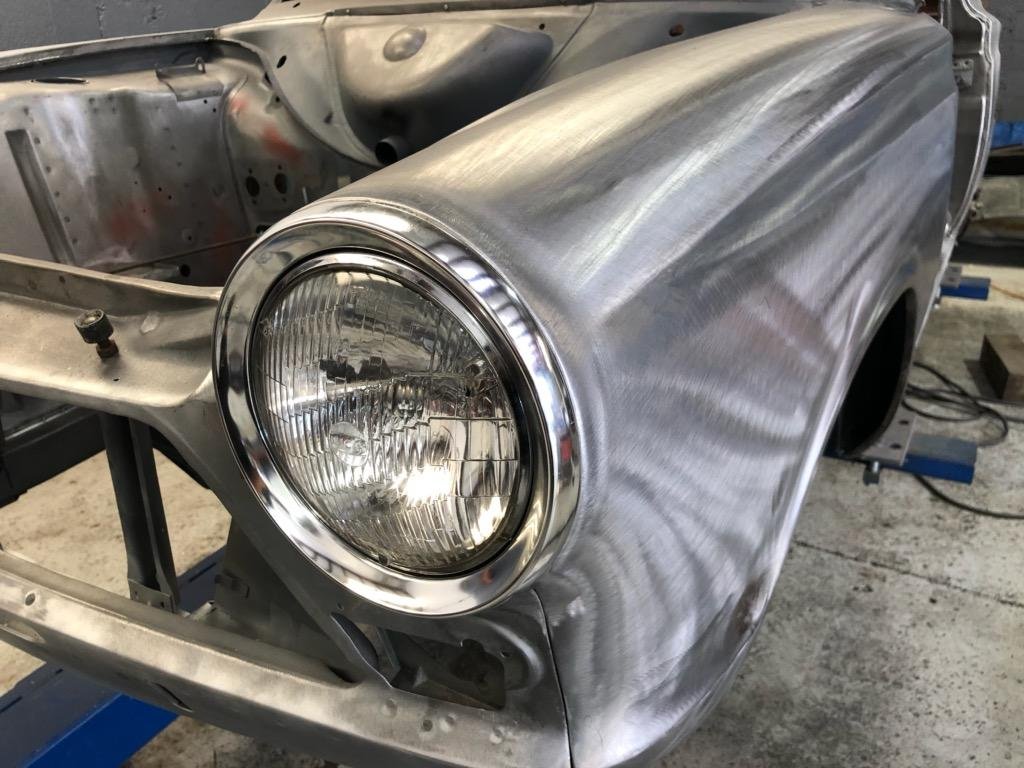
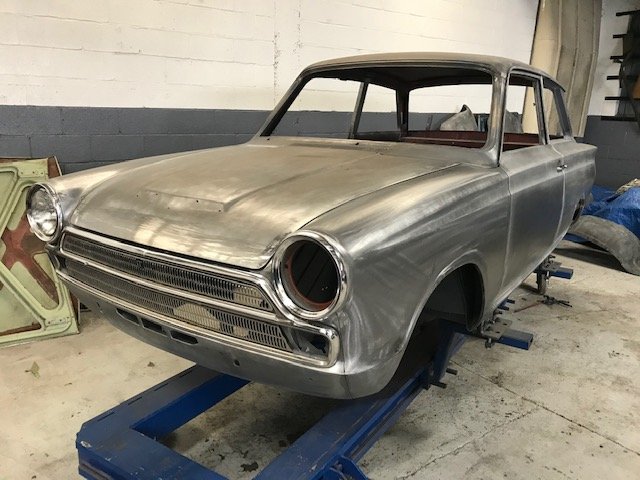
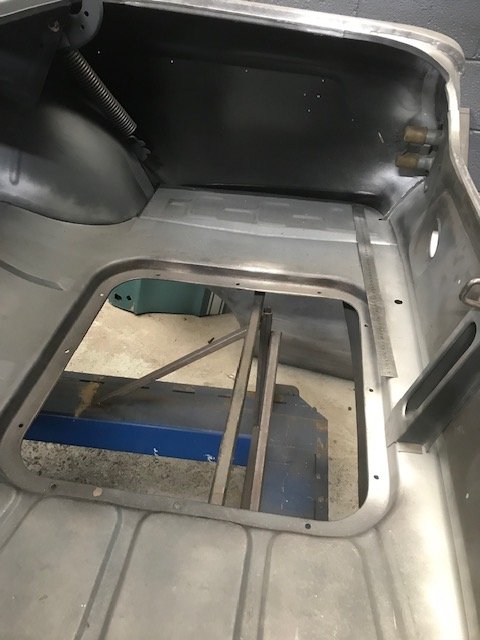
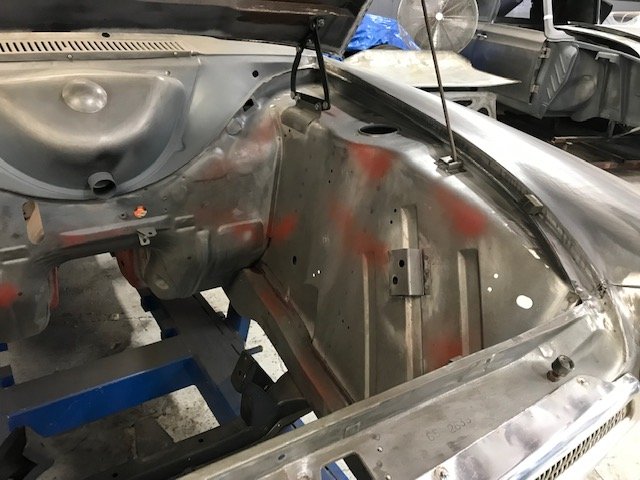
More progress with gapping the doors bonnet and boot. All welded back together again. Trial fitting allthe exterior body parts to check all good and also fitting the front and rear screens and rear quarter windows to check new rubbers all work.
1 point
-
Peter the rust defeater finished the boot. hes done an amazing job and once i tidy and paint it all up you wont be able to tell its been replaced. 2019-03-12_07-29-34 by sheepers, on Flickr 2019-03-16_05-02-02 by sheepers, on Flickr 2019-03-16_05-02-41 by sheepers, on Flickr with that done there was only one small bit left to do and the car is rust free so i did that. it took me two days to make this small piece and weld it in. i can't do to much really before the leg tells me its time for a rest so yea, progress has slowed somewhat. 2019-03-17_03-42-44 by sheepers, on Flickr 2019-03-17_03-42-53 by sheepers, on Flickr that last photo isn't very good. anywho, the welding is now finished. Nick the sparky came over and sorted out putting relays into the power feeds for the electric windows so the switches don't take the full current. so that done and choice. now i need to get the heater core reconditioned and install some new ball joints and tierod ends and then try to get it complied . it'll take a while but i should be able to sort all that in between whinging about my leg/back.1 point
-
Lifes been CRAZY busy at the moment, me and the mrs are up most nights till 12 in the morning after work slaving on our old toyotas to get them ready for toyota fest (i keep meaning to show her how to forum). But finally making progress and have a bit of free time to update. Carrying on from previous post, assembled the brake caliper adaptors to hubs Next day after work, into fitting all suspension components so to have it driving and in for wheel alignment for cert. Spent quite awhile bleeding the whole system, wilwoods were a bit of a pain with their tiny bleed nipples but came out mint and brakes soo much better than stock as youd hope lol Relbuilt rear calipers and new rotors on rear, nice to have my handbrake working again.. Made up these hoops being the last piece for cert and had my friend whos a ticketed welder to glue them together Went for cert today and she flew through no worries!!! Just needed to raise front slightly but no issue The cert plate should arrive next week so just need to piece interior back together and add a high stop light then fingers crossed for compliance!1 point
-
Slow progress, hopefully will jam the engine back in this coming week.1 point
-
Ill be pulling out the Motor/Box late this month. Any interest please contact me, it is on retard me, I will do a better deal for someone from here. Selling the complete LS3 ecu Trans pedal package. Pretty much a straight bolt in if you have a small block chev based car/boat/van/truck/camper/plane/chainsaw. Have bought another box with fancy stuff in it that is good for 800hp/lotta torque, still a 6l80 but better. Photos to follow when I go dig out the new engine from hidey hole that missus doesnt know about... shhhh Its kinda a little bit tempting to overdrive the boost a bit to make the most of the gearbox. Im unsure as to how much the driveshaft/12 bolt will live with, so will probably leave it alone at this stage.1 point
-
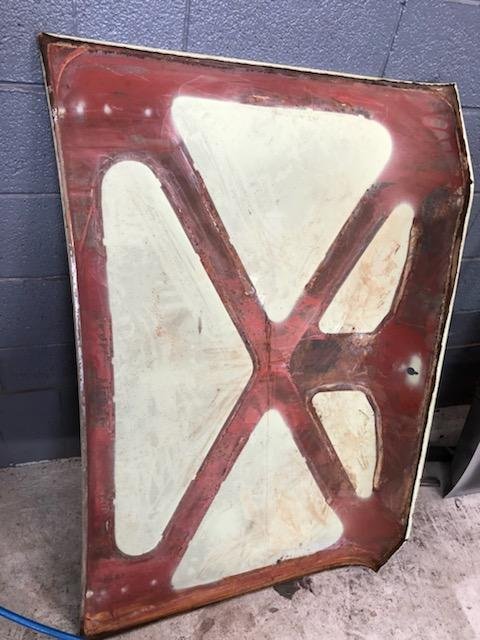
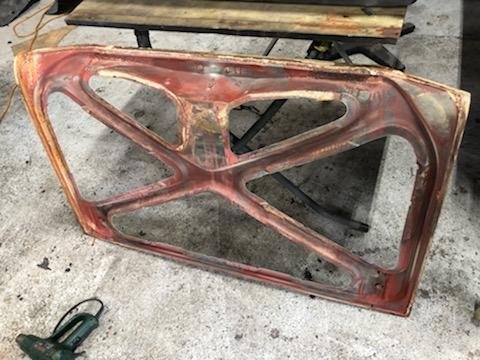
yea cool so 8 weeks looks more like 8 months at the moment. this is my spine, 2019-03-11_07-36-39 by sheepers, on Flickr the eagle eyed among you will notice that at the bottom of my spine where it fucks off to the right there is a disk which has prolapsed into my nerve. its a long road to fix this. there is no fix really, you just wait and try not to do anything that will make it worse. what makes it worse? moving as far as i can tell as well as being upright. both of those things so far have sucked to do, but it is getting better. very, very slowly. ive been told i can do a few light things in between sitting down so ive been doing that. took the passengers door apart and just re-set things and greased stuff, got the key lock working better, just maintenance sort of stuff. as you can see this has never been fucked with before, i was the fist person to remove the plastic off the inside of the door. 2019-03-11_07-36-04 by sheepers, on Flickr i spoke to Peter the rust defeater about the boot floor and he agreed to give me a hand and do the boot floor replacement for me. its nearly done. hes cut the old floor out, made the replacement panel fit and get it ready to weld in. ive painted it and tomorrow he'll weld it in. with this done the other things the car needs to go through compliance i should be able to do myself. we'll see. 2019-03-07_05-55-15 by sheepers, on Flickr 2019-03-07_05-55-23 by sheepers, on Flickr 2019-03-11_07-35-47 by sheepers, on Flickr 2019-03-11_07-35-31 by sheepers, on Flickr1 point
-
Work has been continuing at pace on my large model car build as we both clean bits and piece it altogether. Its fun. Its taking far more time then I ever remember. I always forget about just how long these 'little jobs' take. Made longer because the car looks so clean and fresh so how can we possibly put dirty or crusty bits back on. I ordered some new 175/60 13 tyres last week. Of course the rims look yucky. Not a fan of all silver rims, especially Minilights. I have always planed to paint them to how I want them to look. Really make the rim dish stick out as much as possible. So my friendly local garage where I now get my tyres from popped the old tyres off, we took the rims home and I did this... Which was fun and quick. Very handy that the Viva shares the same 4" PCD. The rims ended up like this.. I then selected a colour from a book of swatches lent to me by the local paint shop. This process of selection took bloody ages! Just how many 'metallic greys' does the world really need?!!! Paint finally selected, bought and Hannah masked the rims very carefully (I tried to do one rim and gave up- I really have no patience for that). I threw some paint at the rims... Because Hannah had endured the boredom that is masking wheels she got the fun job of peeling off the tape.. They looked fantastic. I was very happy. So here is a sexy rim shot... then with tyres... But they cant go on the car just yet. Many jobs to do with the Imp back on the hoist. First off. Radiator pipe work. I had bought a length of stainless pipe a while back along with some 90 degree bends I could chop up. I measured, cut, tacked, checked, tigged and ended up with these... I blocked the ends up and filled them with water to double check them. Two little pin holes. Glad I checked. Whilst full I weighed one. 3.5kg. Not as heavy as I was expecting. Phew. I then fitted them up... Next step was the brakes. The front calipers and discs are from a ED Honda civic. I had never bothered to check that they were free when I removed them from the race car. Oh. Wish I had. Seized! Bugger. I managed to free the pistons with a bicycle track pump and sure enough the pistons were rooted as were the seals. I priced some up from several places. !!!!!!! Crikey. Rebuild seal kits were horribly expensive in NZ. I wanted to sort them out asap so didnt want to wait to get stuff from the states. So I tried an old place in chch I've used in the past who re-sleeves brakes in stainless. He sold me some seals cheap and I machined up new pistons from some stainless. Made quicker by the larger drills we got from my uncle with the lathe... Front brakes all sorted. While I was there I machined up some nice spacers for the caliper mounts rather then the stack of odd washers that had been doing the job. I also added back in the missing flexible line tabs I'd forgotten to do whilst rebuiding the shell.. I then re-fitted the rear brakes, after having unstuck, cleaned out and reassembled the wheel cylinders which luckily appeared new, as do the shoes and the drums! Then onto the master cylinder. That lovely one from Russia with love. It fits so well into the imp pedal box but I needed to make a push rod, something to secure pushrod in place and a pushrod yoke. All really fun little jobs at the bench. It came up well and fits in nice. Fitted it in place and made all new brake lines and clutch line. Re-used the old 8mm fuel line from the race car but neatly this time. Ideal for future power upgrade... Clutch line was copper, left over from the Rx3 in the UK. Fine for clutch lines but not for brake lines in NZ, which have to be steel. I've made the pipes long enough to swap positions on the master depending on whether it has biased springs inside. Time will tell on that. Added new tubing from the, nicely cleaned and fitted by Hannah, fluid reservoir... While I was in there I had also found an ideal piece of stainless mesh left over from our compost toilet build. Perfect size to fit in here neatly... The steering rack boot had a small split and was leaking like a proper British car does- all over the floor. I was getting bored with placing bits of carboard everywhere I moved the car but I cant afford a new boot plus shipping so instead, as per some advice from a fellow local Imper friend I added some grease nipples. Much better then oil puddles everywhere and no protection within the rack!... Fitted a new universal on one of the driveshafts to replace a knackered one. New one has a grease nipple. Yay for IMProvements We both worked together on the door cards, a job we had been putting off. Glued some new felt on to the new hardboard and then glued on the sweet looking red and black vinyl, which had come with the car from Christchurch. They'll look great against the blue... This afternoon Hannah cleaned up the Datsun engine, masked it up and I sprayed it with Black epoxy (Resene Durapox). I had also cleaned up the rocker cover and fuel tank for the same paint. The rocker cover will get some nice blue next... And that is all for now folks. I was really hoping to have the car on the road for a classic car show next weekend but there are still so many jobs to do. Wiring, put the transaxle back together with its new bearings, make a new improved, tidier engine crossmember, plumb in the engine. However it was great to have a date to aim for and we are both really excited about getting it on the road before Hannah's brother comes to visit in a few weeks time. So I'll just keep cracking on with it (in between the paid work we have building up that is..)1 point
-
@JasonK might have some space? Maybe @Bistro and @LoveChild are attending too...? Anyway, we'll be there from Wednesday to Sunday once again
1 point
-
A HUGE thanks to @TimShadboltfan27 for bring me a set of wheels down from Auckland. I removed the 20s and on went the OEM M3 Style 24 17x7.5" wheels1 point
-
So....something awesome happened on Saturday. After more than 6yrs of ownership, I finally got to drive the coupe. I don’t think it’s moved under its own power since 1989... It’s super super super low, therefore the fronts need winding up a tad. a tune is needed too as it is clearly running rich. The clutch and brakes worked to plan and I can feel it has a load of grunt It’s nice to see it in the shed facing the other way for once and even nicer reversing it in like that. Now to button up the leaks and squeaks then I will look to book the cert inspection in at some stage. Cheers1 point
-
Swap the strut tops?1 point
-
Morning campers. I had got to the point where I was pretty sure I wanted a Sedan more than a Coupe. I then asked David to send me some pics of the one at Classic Car Nagoya. This was the first, slightly underwhelming one he sent.. After that he sent me about a hundred more from every possible angle. It was a very solid looking but rather stock 2000 GT with a GT-X (twin carb) engine, and the 'wrong' type of Watanabe's. The price ? A very reasonable 1,300.000 Yen. I decided that at the price I couldn't really go wrong, I was still struggling a bit with the whole Sedan/ Coupe thing and that's where the name Betty came from. Please watch this.... Coupe's are Wilma Flintstone, Sedan's are Betty Rubble. David then sent me an email that would make my mind up. They had just got this in.... SSR's, L26 with triples, a bit scabby but as far as he could tell pretty solid. They wanted 1,800,000 Yen but I'd have to be quick. Nope, didn't want a Coupe. Looked like Betty was the one. Thankfully a couple of days later a hipster came in with a pocket full of cash and bought the coupe. Over the months I had got a good relationship going with David but still fancied getting an independent inspection done. Earlier I had spoken to a well known Import firm in the UK and the guy had said he would be happy to inspect a car for me. I emailed him about CCNagoya and Betty, said I was aware it would cost a couple of quid but could he go and have a look at it for me. This was his reply. Hi Dan, Japan’s a very expensive place to travel in, cost of a train there and back is roughly 350 GBP’s worth plus a day’s time and other expenses. TBH I’m probably not the right person to go see it as my time isn’t cheap for this sort of thing. Especially with Sterling being so weak right now it could get pretty expensive. If it were an order for a car it would be different as the whole package includes all of my time & travel to select a car, plus other associated work, but to look at a car alone – it’s probably not worthwhile in terms of total costs, especially if the car turns out to not be right. You’d then spend a lot of money for nothing. A 4 door’s not nearly as desirable BTW. Can’t fit the longer 2.8 6 cyl engines into those I believe… engine bay’s too short. Best ask ***** he’d know more of course, but I’d go for a 2 door if I were you… Best wishes, Oh well, thanks for that. At least I hadn't sent him all my money before to get a car. Gawd knows what would have turned up. At this point I decided to take a risk, trust in human nature and buy the bloody car. I sent Eleven British Grand half way round the world to a bunch of people I'd never met, only one of whom could understand me for a car I'd never seen and I still had no idea how I would get it home. Couldn't lose, eh ? More pics ! Next time.... Getting it back to Blighty. Prepare for high jinx on the ocean waves.1 point
-
This will be my last one for a long time and I can't even bring an old car. Somebody make a burger fuel in Whangarei plz0 points


This leaderboard is set to Auckland/GMT+12:00