
Leaderboard


Popular Content
Showing content with the highest reputation on 03/06/19 in all areas
-
welllllll, ive brought another bike. Long story slightly shorter is I really enjoyed the ride down south, with a somewhat stressful operations / planning / contractor management type job and busy family life pulling on the helmet and heading away for a few days is just such an amazing head clearer. The XR is lush for weekend trips but its a stay in back packers type bike, id never be able to load it right up with camping gear and head off on big trips. My father in law has a real lush Honda RD06 Africa Twin, to non motorcycling people the Africa twin came after the success of BMWs R80 G/S (the other big bike i have) in Paris Dakar and honda cleaned up for a number of years. Capitalizing on the race success of the NX650 (africa twin race bike) honda had HRC make an available to public version called the XRV750 (its a 750cc watercooled V twin). these bikes werent made in massive numbers and became immensely popular for adventure motorcyclists as the can be loaded right up, are a pleasure to ride and are uuuber reliable. they have a massive following these days and are very sought after, if one does pop up for sale they only last a couple of days and are snapped up. Honda stopped making them in 2001 with the final RD07A. (tin 2016 honda put out a new africa twin which is a parallel twin for like 22k that you will see baby boomers riding to cafes on). Sooooo, one popped up on trademe for $2500 starting bid and $3500 buy now (tidy looking ones go for 4.5-6k+) and it was missing all the cool bits of an africa twin, some rear plastics and the uber cool color scheme as it was painted yuck rattle can yellow, has vom inducing checkerplate in places and a grot non factory front guard. I can look past some of these things and certainly did when i found out how good mechanically this thing was, looks can be changed, as i did with the XR etc, and it works well for me cos the fact it looks gross put other buyers off and i got it cheap $2500. also the fact its in queestown might have put people off but that just sounds like perfect adventure to me, im flying down on the 30th to ride it back up via molesworth. I sold my CB50 to @Mitch.W to cover a good chuck of the investment / garage space for the AT, was sad to sell it but choice that its staying local with someone whos gunna hoon it good. so this bike has a very passionate current owner and its got a bit of history, he purchased it in 2008 at 23,000kms and road across canada / usa and down south america - when he got back (bike now at 60,000kms) it had a small score on one of the pistons and he asked the local bike ship to pull and inspect over winter when they werent better, long story short the shop changed hands and they completely rebuilt the engine with a cost of $6700 (he has reciepts) to which he then argued and they agreed to split the bill 50/50, so good for me the bikes now at 70,000 kms with a brand new engine, has also just had brakes and wheel bearings done. here is bike in current grot state, the checker plate is grot as well as the paint but the gerry can plastic panniers are ugly but very clever, it keeps them as narrow as the handle bars for offroad riding so you dont get caught on stiff, the wont rip like textile ones and unlike alloy ones they have a bit of give so wont snap your rear subframe / mounts when you drop it. so ill ride it the 1100 odd kilometers home over 2 days, then probs ride it some more, aquire some replacement plastic parts (front fender, tail section) and might have a crack at making my own fibreglass side covers that stick out less than factory ones to have the option to keep the bike slim when panniering up. then plan is over the winter to give it a bit of maintenance, something i like doing to all new bikes mostly so i can figure out how they work so i know how to fix in middle of nowhere, slap a coat of white on it and then get some rothmans decals made up from the Dakar bike of the era as per this beautiful one oh and for those wondering, this is what the bike would have looked like when new, such cool graphics.14 points
-
Congratulations on becoming middle aged!8 points
-
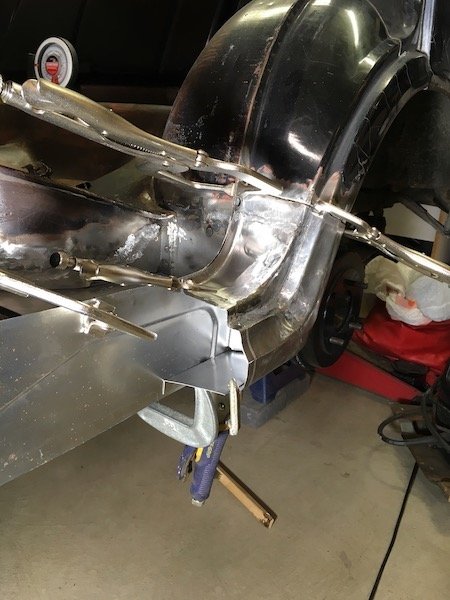
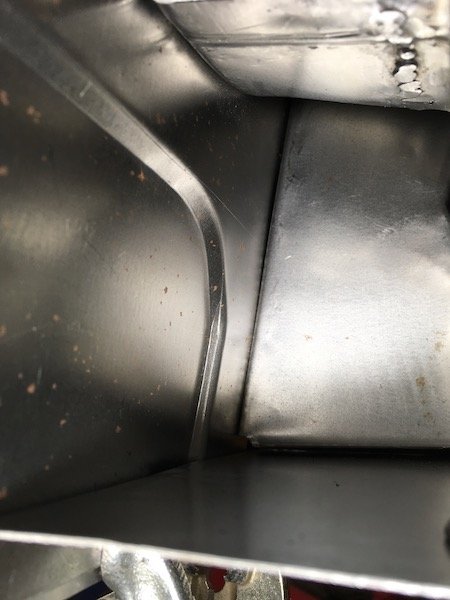
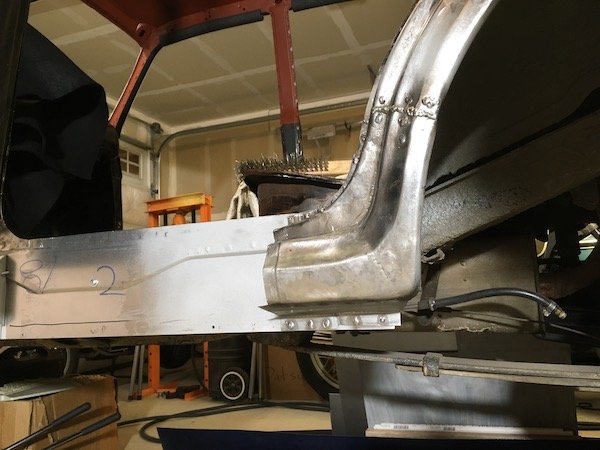
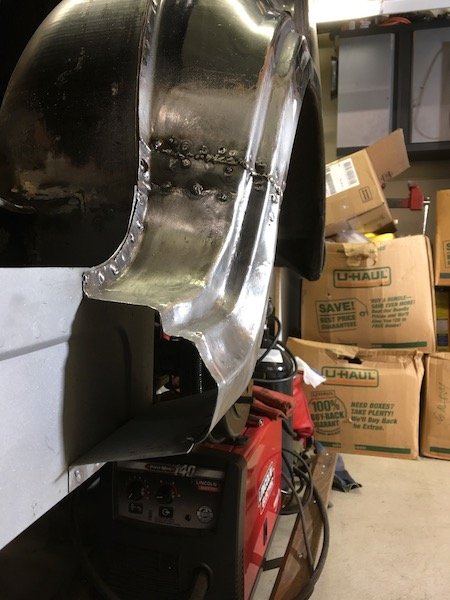
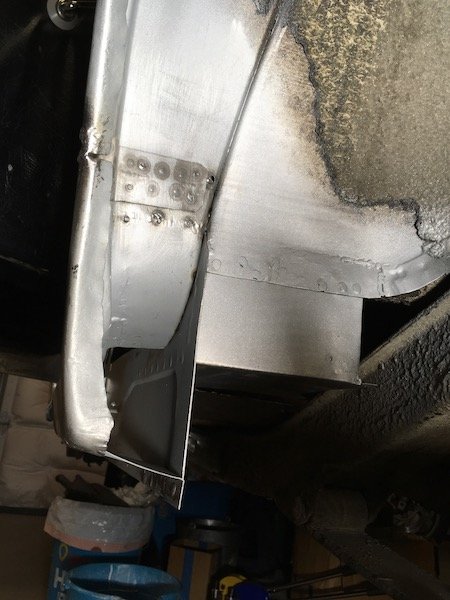
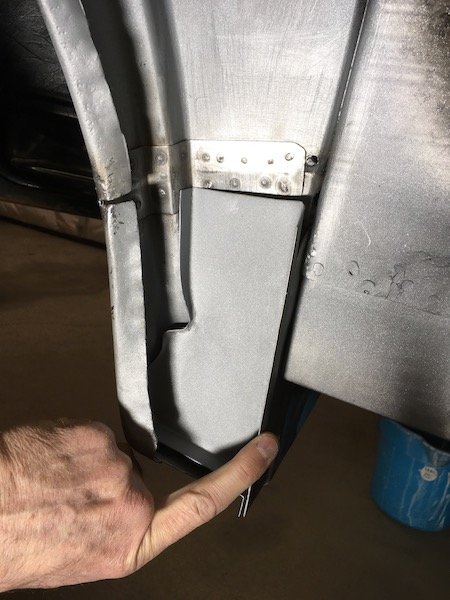
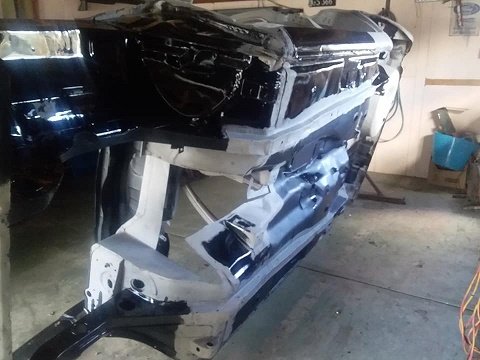
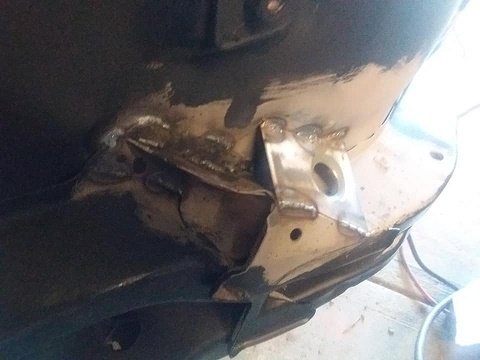
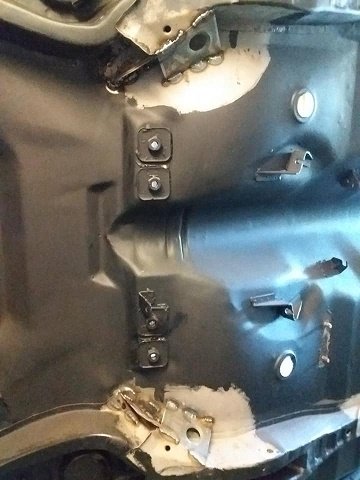
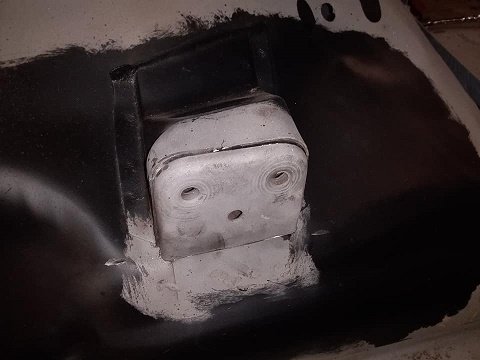
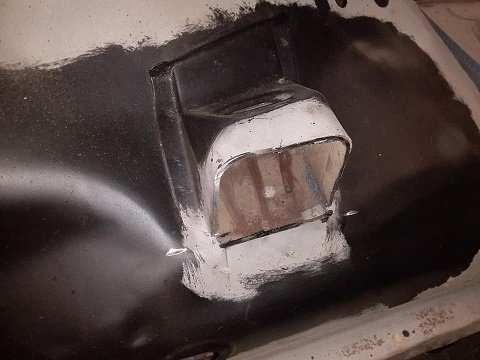
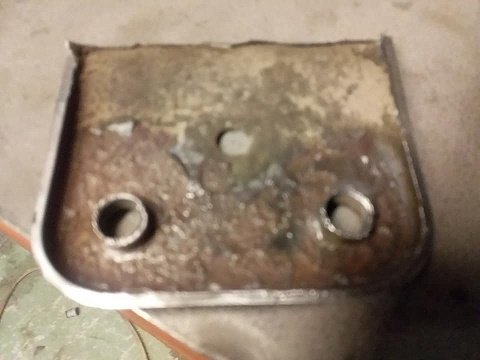
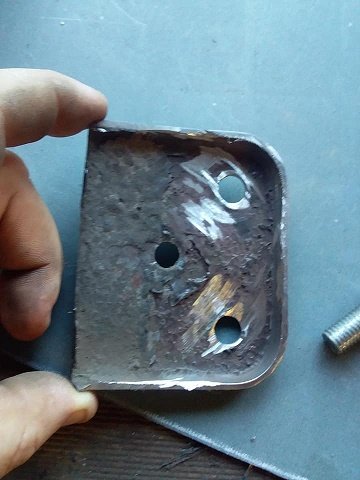
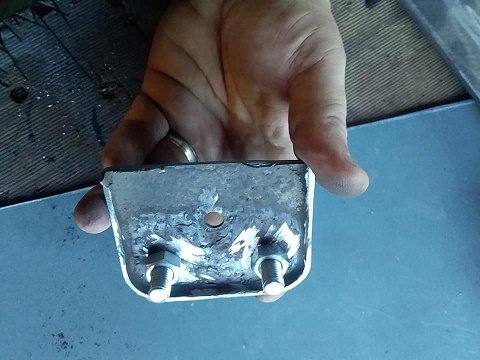
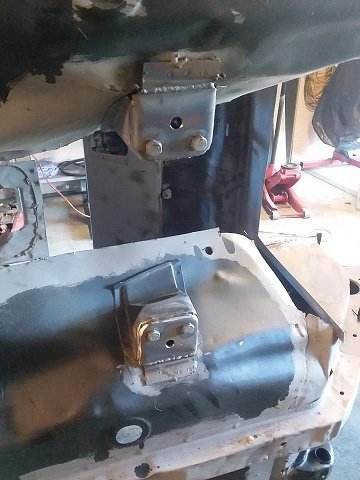
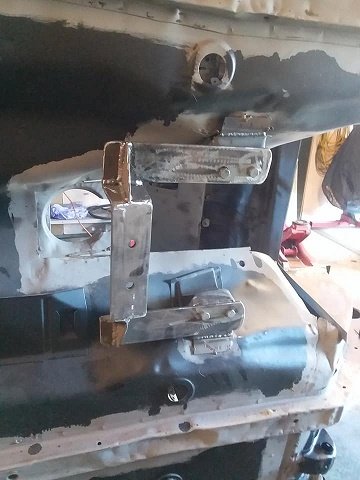
And then the repaired dogleg and base was welded back on. Still not happy with the quality results. Some tweaking of the lower outside body line is needed, finish welding and small holes to fill. First early trial fit checks, outside and inside views: Then flange adjustments, to fit more flush with the not so perfect outer sill panels I had made, and weld. I also decided to add a splice plate behind the butt weld. Then I find my end cap plate is now just a bit too wide. It can be adjusted and cap welding will wait for last anyway to close out the sill box. Got some more work to do on this
 7 points
 -
I took this picture in the Honda Museum in Japan which I think might be appropriate here now.6 points
-
You and Dakar Dave can hold hands side by side riding into the sunset6 points
-
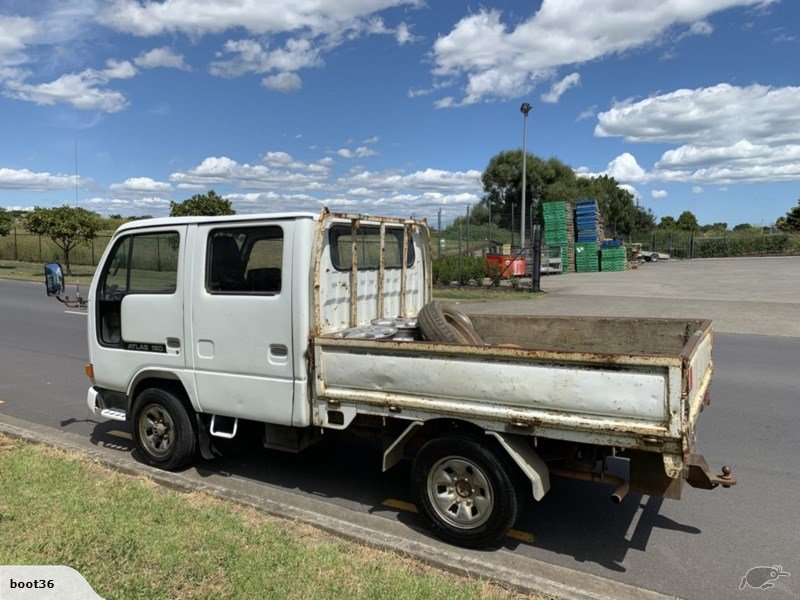
I give up. I've bought a boring Jap 4x4 double cab from Auckland and am suitably ashamed. It was fun pulling big Yankee iron to bits (well sometimes it was fun), but it's going to take too long to get this mighty beast operational and I just can't wait three months to be mobile in my own wagon (having said that the PoS I did buy won't be here until the end of April) Fuck you AllTorque. You were right, but I'll never admit it publicly. LOL
6 points
-
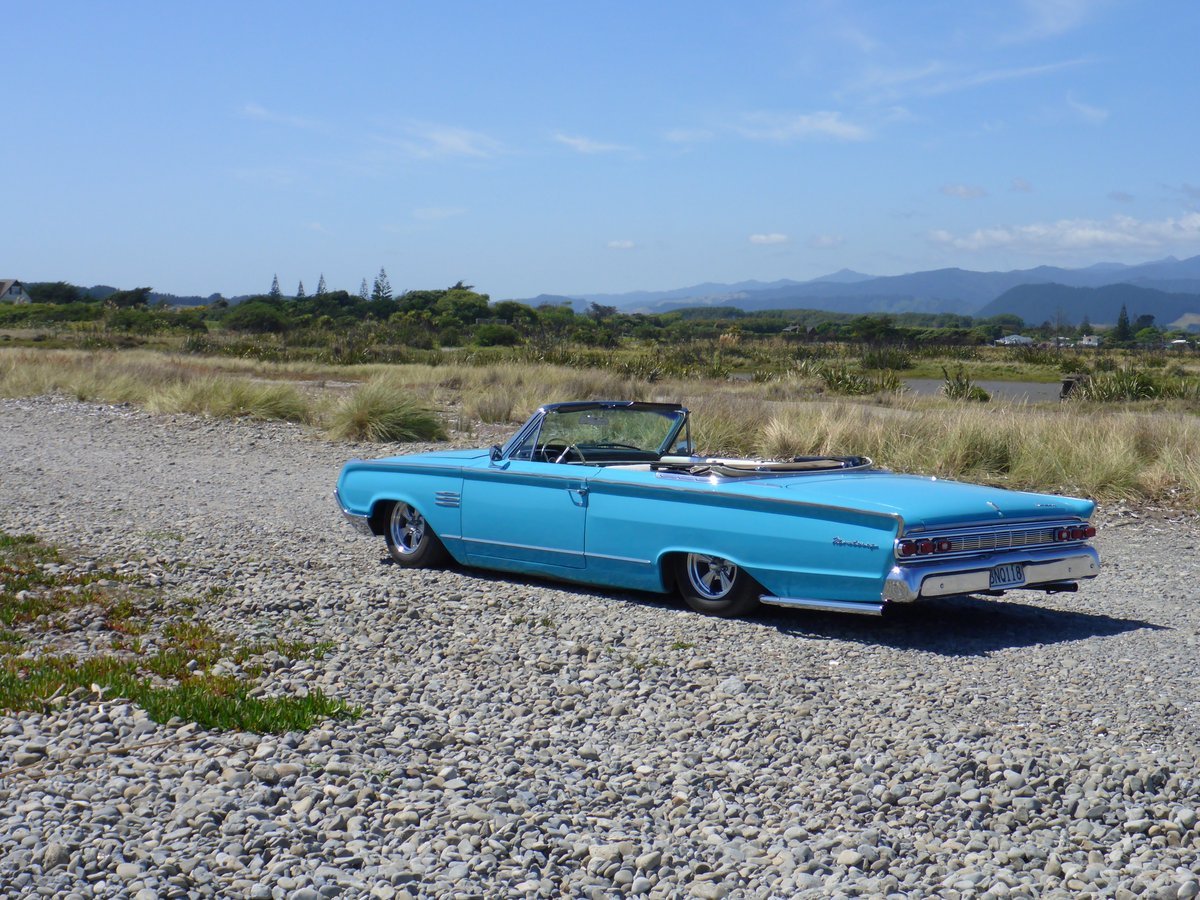
Drove this for the first time in a year. Might drive it again next year.and Mr Van Pelt took a pic on old wheels at a raised height with a flash camera.3 points
-
Had Geophy follow me to drop off a customers kombi after work and then we sat in mine. I then suggested he catch the window as I pop it out. Surprise surprise we found this orange stain under the rubber. A quick wire wheel and scotch and well that's that problem fixed. Let's see what this weekend and the following weeks bring.3 points
-
well its worth $100 at this point right... Marginal cost pricing says the ship is coming back regardless so the return ride should be $50. All part of my quest to be like UJ.3 points
-
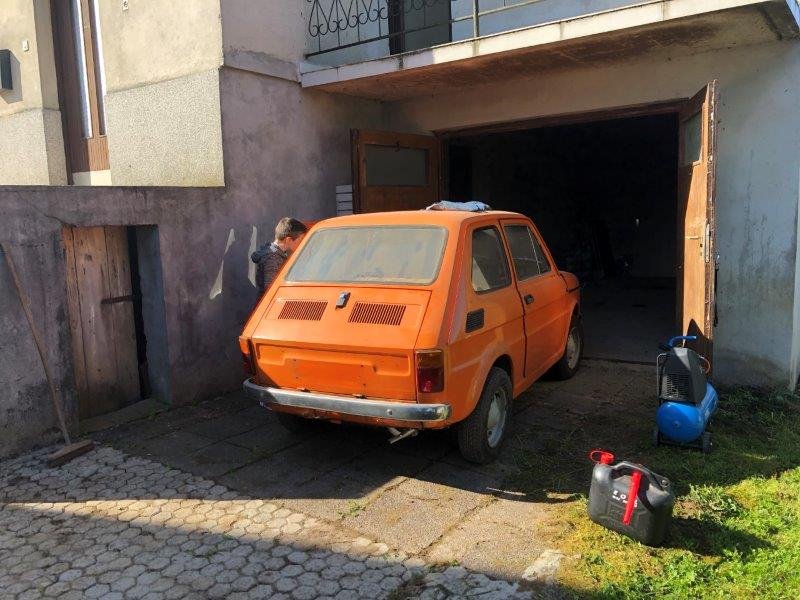
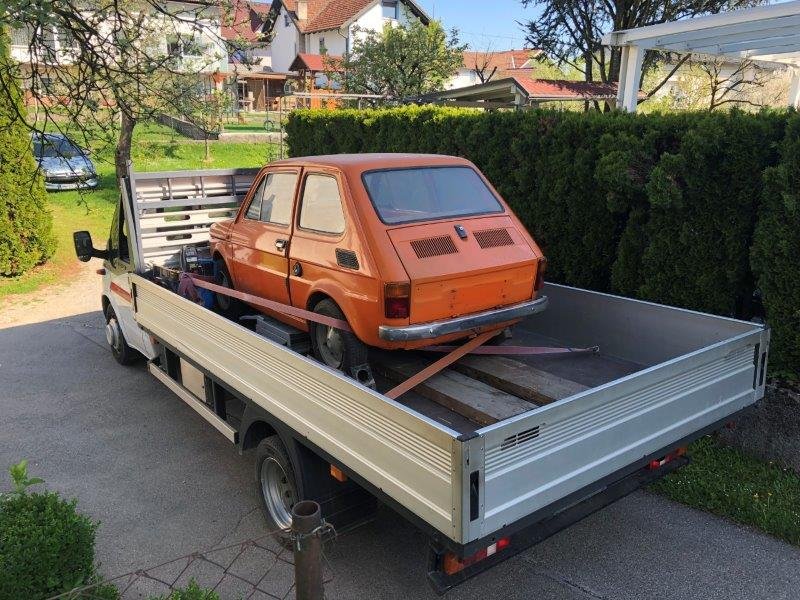
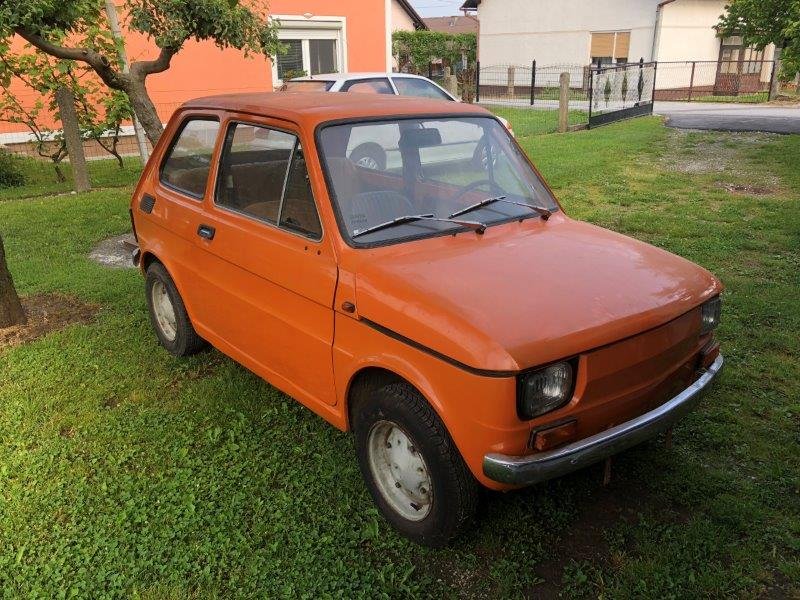
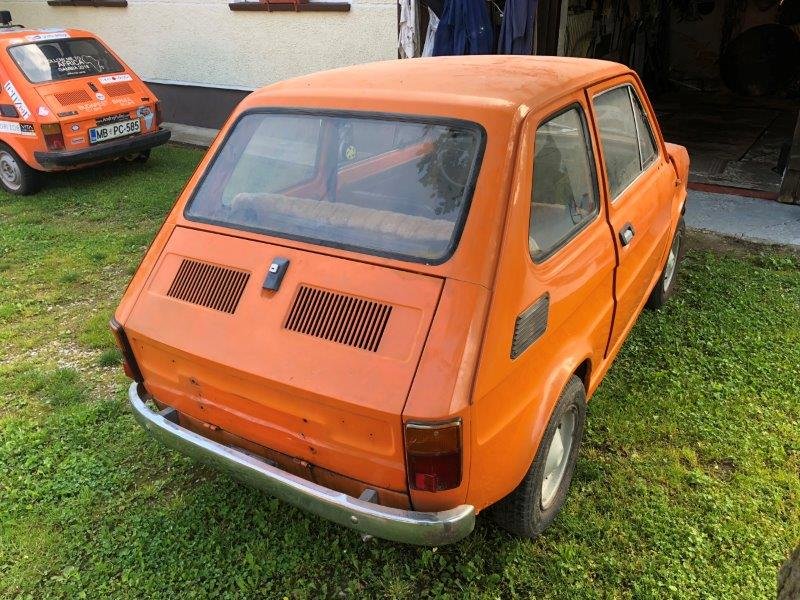
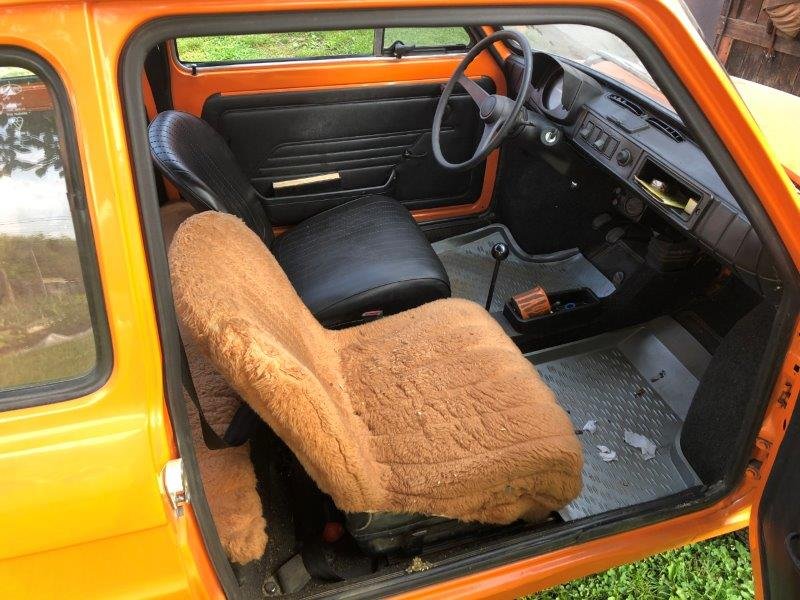
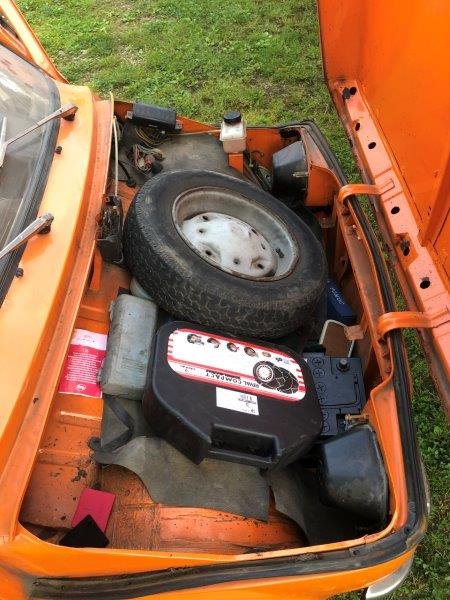
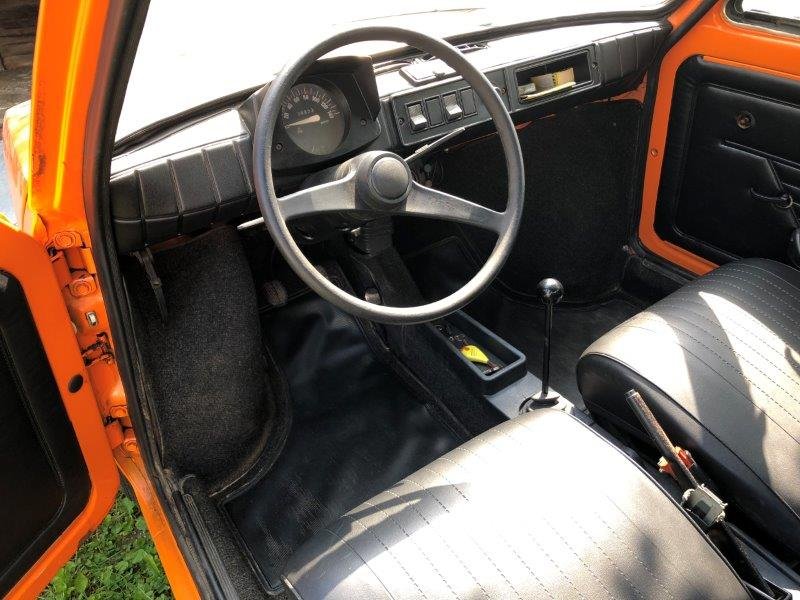
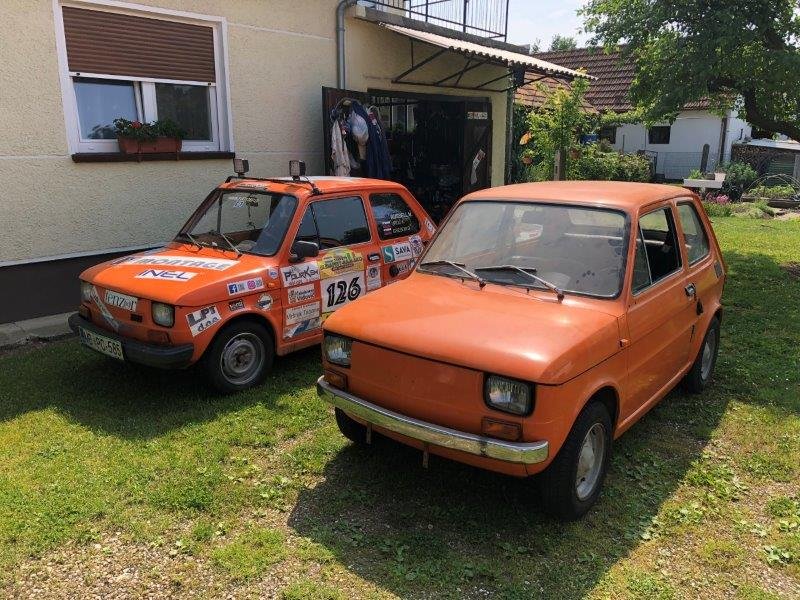
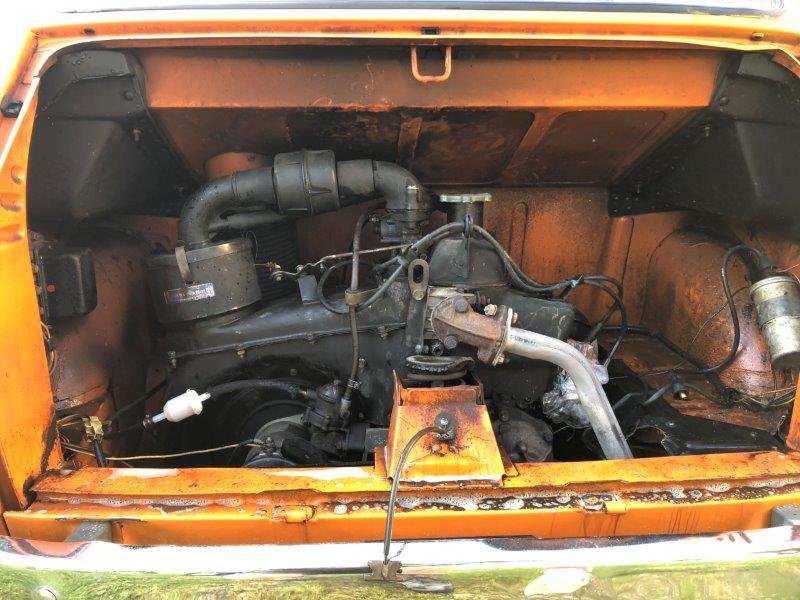
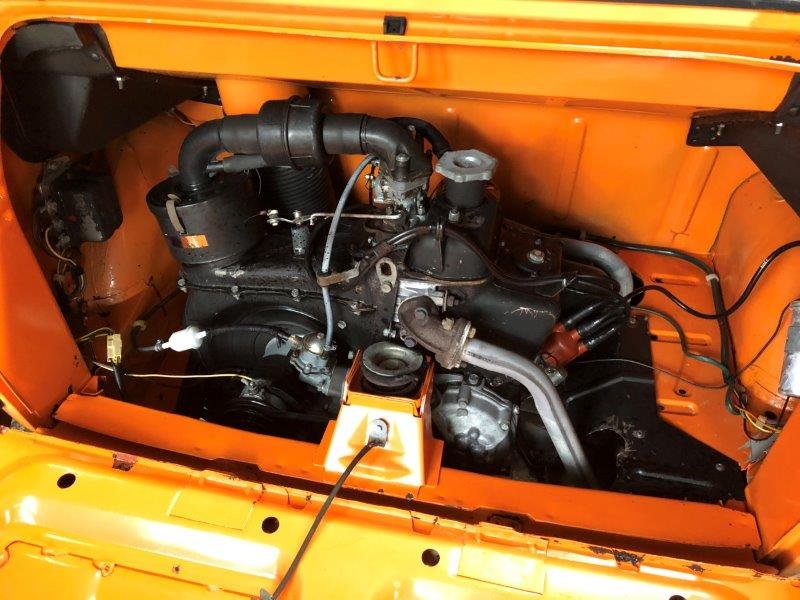
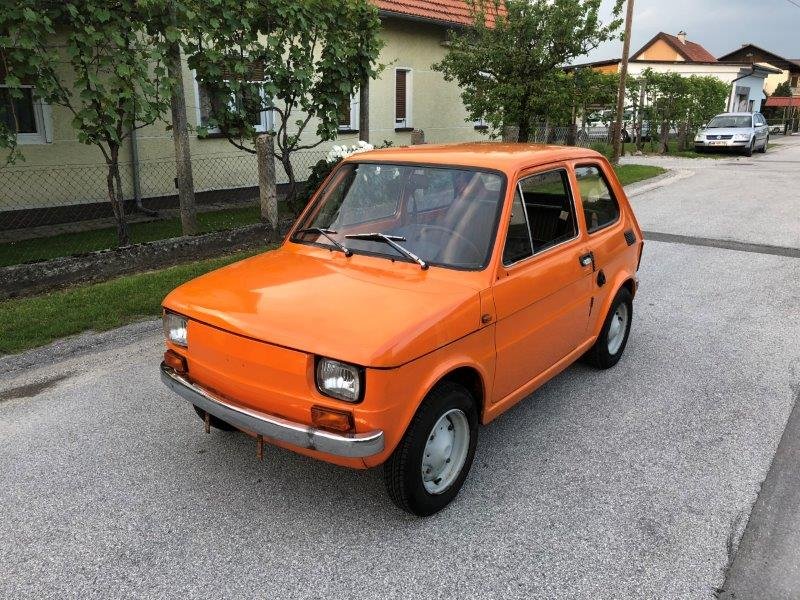
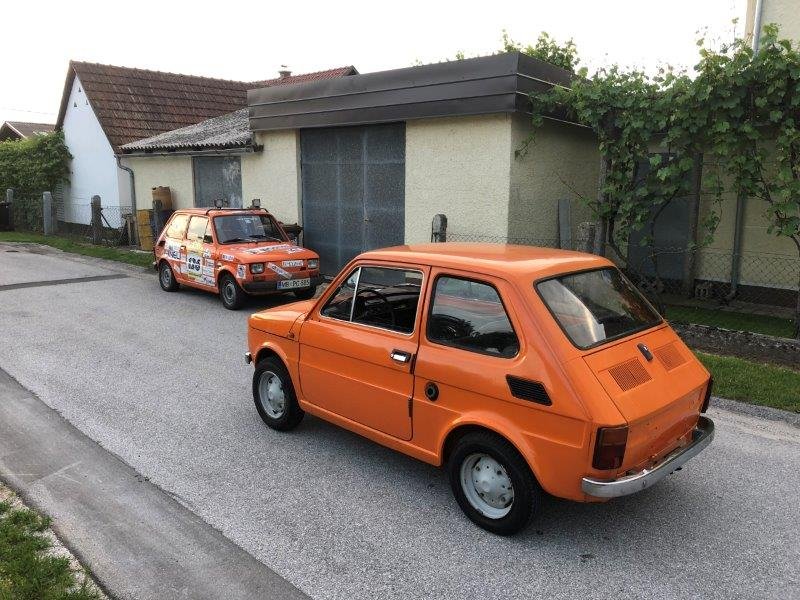
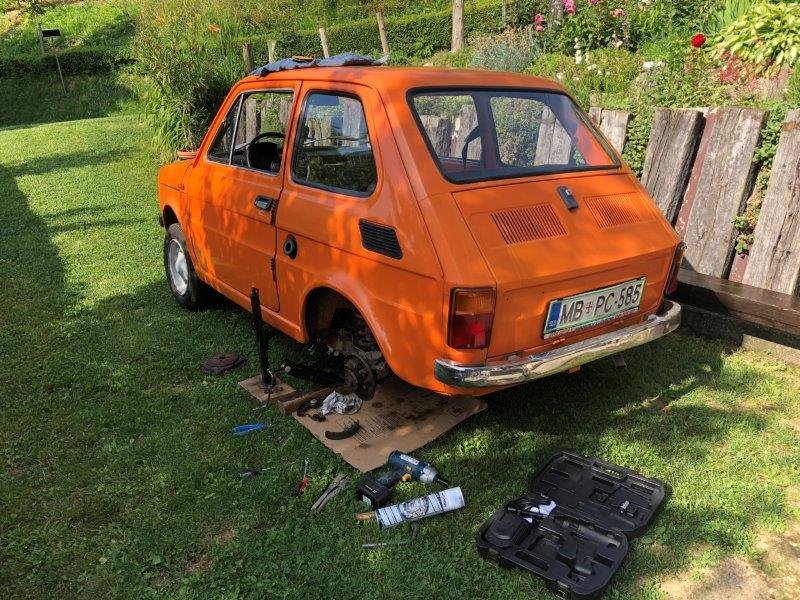
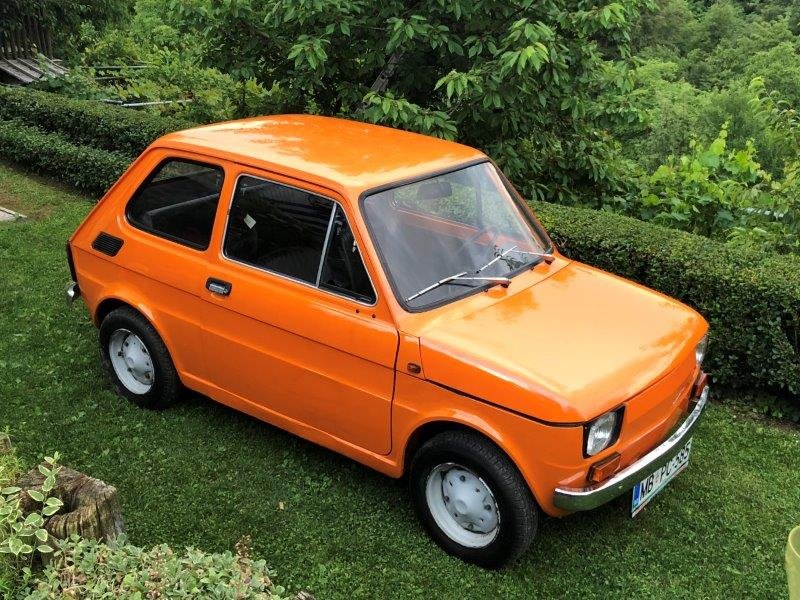
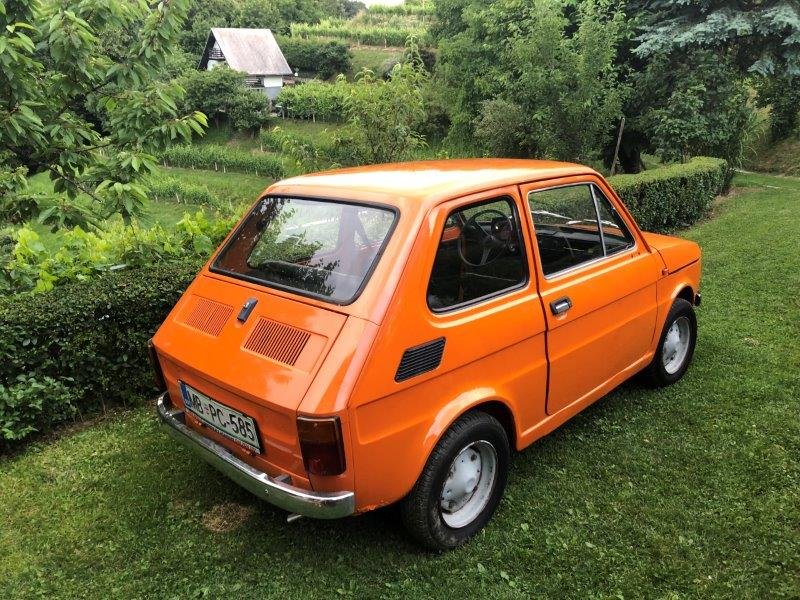
Oh forgot to show video of rally. So after the rally I got a private message on Facebook, that one guy want to give me his Fiat 126p if I want. I asked him about details, but he was just saying: "It was from grandmother, I don't know the condition of the car, but before she passed away she was driving with it. Come take a look, and if you want I give it for free." I couldn't sleep for few days, and after a month or so, we finally went to pick up another Fiat 126p. Parked out from garage Loaded on truck Back home Brothers Than I started cleaning My friend polished it for me Driving around with it and figure it out that rear breaks need a bit of attention - quick fix So yes, car is running ok - he should get some attention but for short distance is good. Otherwise it is 1981, with the same 650ccm 2 cylinder engine, produce all 24 horse power. The only difference with one I've been to rally is that they got different bumpers - older models hat chrome, newer had plastic. Later on there were also Fiat 126p BIS, which was 700ccm and watercooled. Also interior was different. Thats all about Fiats maybe some Opels later if anyone is interested?
3 points
-
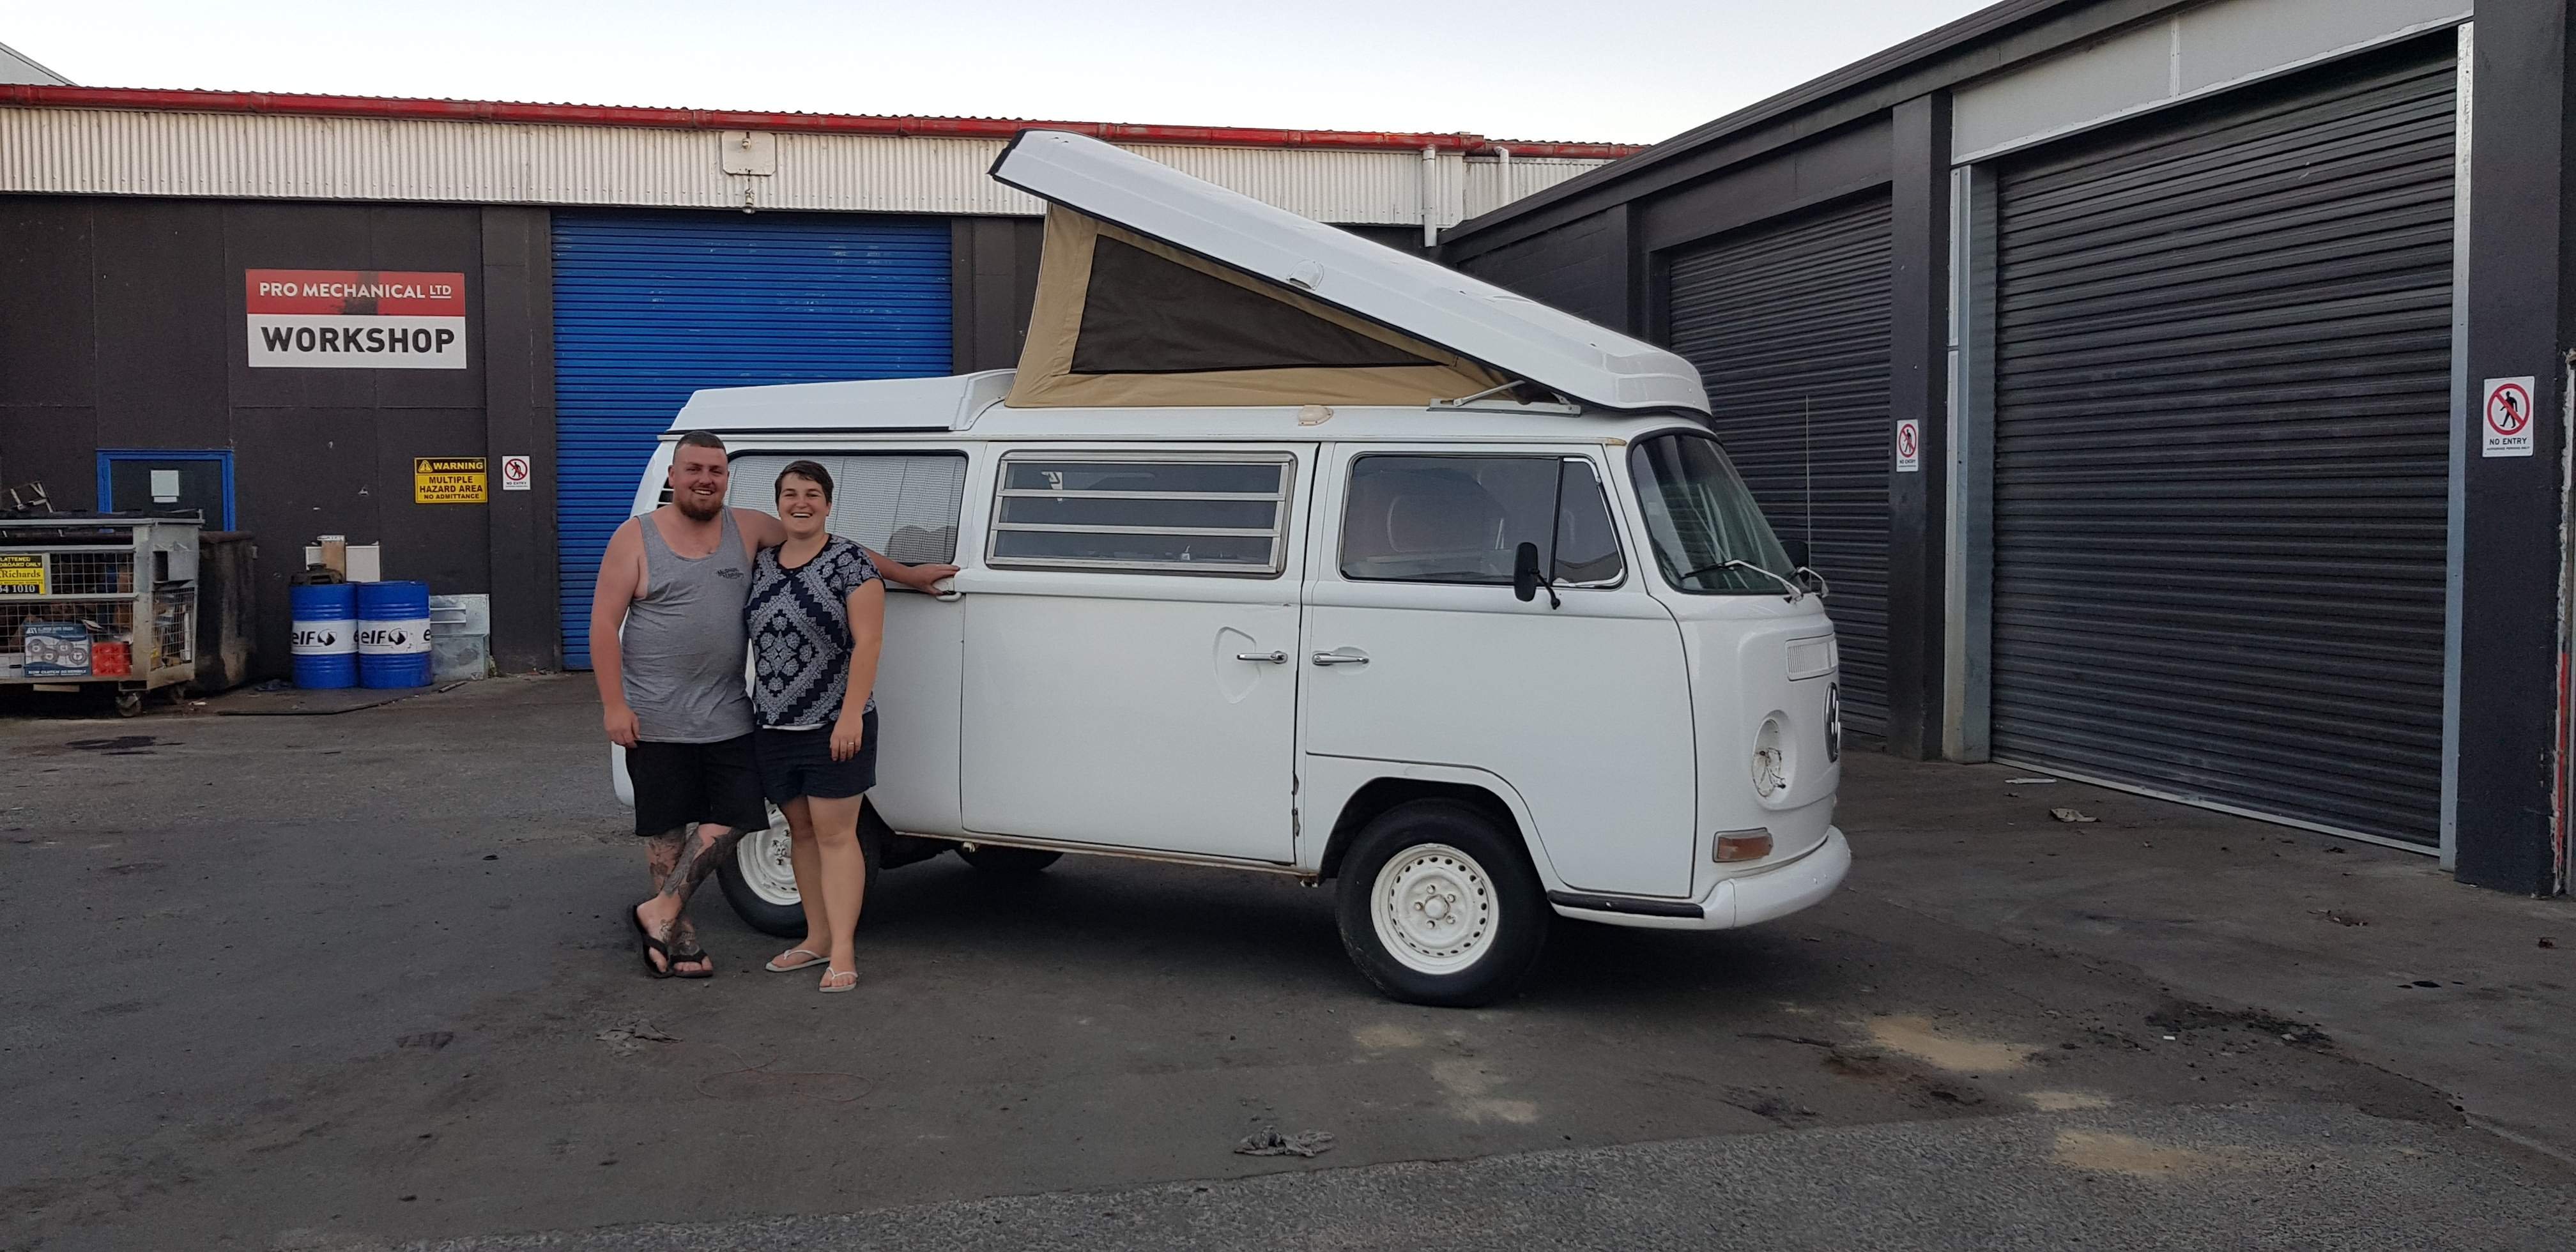
So what really happened was I was scrolling trade me Tuesday night after work. Kass said he saw a kombi he liked on there. I continued to see what was on there and came across this. It was listed for 5k no reserve and a buy now of 7k. (a kombi in our price range) I immediately forwarded the link to @Mrs 64valiant followed by a phone call. She looked at it briefly and said give him a call and see if we can view it on Sunday. Proceeded to call him and date was arranged. I then started to get my hustle on and try sell some of my other things. A guy had only messaged me in the weekend wondering if I wanted to sell my oval. Well I sure as hell do now. Boom sorted a price and hell yeah. Wednesday morning wake up go to work and do a few things and check trade me. Shit cunt fuck. Some one clicked the buy now. Only Tuesday we didn't quite have the full amount of money to make anything happen. So thought wonder what the account looks like now. Ahh crap yup some bills had been paid and well I could have now afforded the kombi that was now sold. Ahhh well. Better luck next time. Proceeded to be upset and have my dreams crushed and the rest of it all. Drive to Hawke's Bay and had a hell of a good time and witnessed some friends get married. Also brought cone4u numberplate cause well the kombi didn't go to plan so I could lest drown my sorrows in the p plate for my ice cream trailer. This morning we started with unloading all the bbq trailers and went on our merry way when as I was about to drop the trailer at @Archetypes I get a txt. Hey man the buyers have backed out are you still interested in the kombi. A couple of phone calls away and well yup off to Auckland. 1st stop was to drop the oval off at the sellers place that I sold it to. Was a bummer cause I had already sold this and only selling to buy the kombi that had already sold. But hey things happen for a reason right. Next stop the kombi. The owner lived in Melbourne so was yarning to his dad and trying not to get to excited about it all. A phone call was made to his son and boom, money transferred and well time to push in on the trailer now. Here are the photos from trade me. Fucken excited.3 points
-
So yeah I skipped a few stages of this build. We painted it white. Put the steering wheel on the other side and a few other things like smaller stud pattern and put a westfalia on it and in it as well. Edit : we brought another low light kombi.
3 points
-
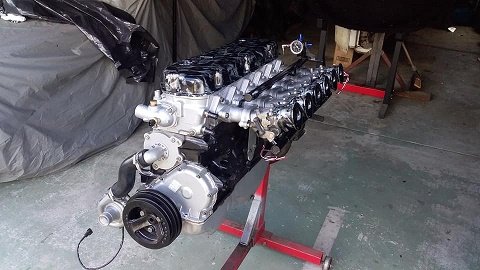
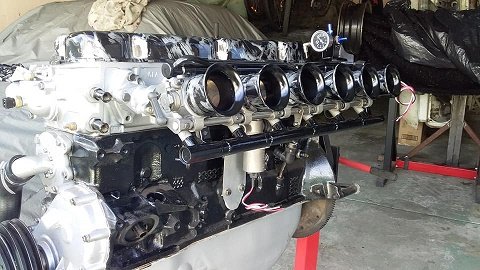
As mentioned above. trying to keep everything the same apart from throttles and adapter. But also didn't want to cut up my 20v setup. just in case this doesn't work. Found some thick wall ali pipe, that just happened to have the same 60mm od, as trumpets on the 20v setup and also 52mm id, which is the same as the bmw throttle inlets. so all i needed to do was machine a taper into the pipe from 52mm out to 53.5mm. Went and used the old boys lathe. found this hanging around his shed. gentle hint maybe...? test fit seems good, same length and top half as the 20v setup. which is plenty big, the taper was pretty aggressive before, possibly little too much. few more little things to do, then will be good to go3 points
-
haha ive been waiting for this slack, unfortunately there are far too many boomers around on "adventure bikes" that dont go off the tarmac. Im looking at this as another challenge to be able to go away for a week or so self sufficient and see places i couldnt otherwise get to without support crews etc, and the challenge of riding a 200kg bike in places that a 200kg bike shouldnt. i look at my father in law and what he does on his Africa Twin, 2 up with his wife on the back, in terrain i would find difficult on my XR250. im def keeping the XR for weekend trips or technical trips, but look at the AT as a "motorcycle caravan" But your right @Truenotch, its essentially the motorcycling version of an MX5, so now we have something in common.2 points
-
nope can confirm it is a steel. i need to mention its got rust, no engine and some other minor issues that dont need to be mentioned...... but all those issues are easy fixable. still for the price we paid for this one we wouldnt have got our other buss to any where near this stage. the guy we brought it off is selling his other kombi for 22k. even the mother inlaw is happy for us and thinks its a good purchase. she is probably the one who mostly would have been like "ahhh greg why on earth have you brought another bloody car" although i havnt told my mum yet.2 points
-
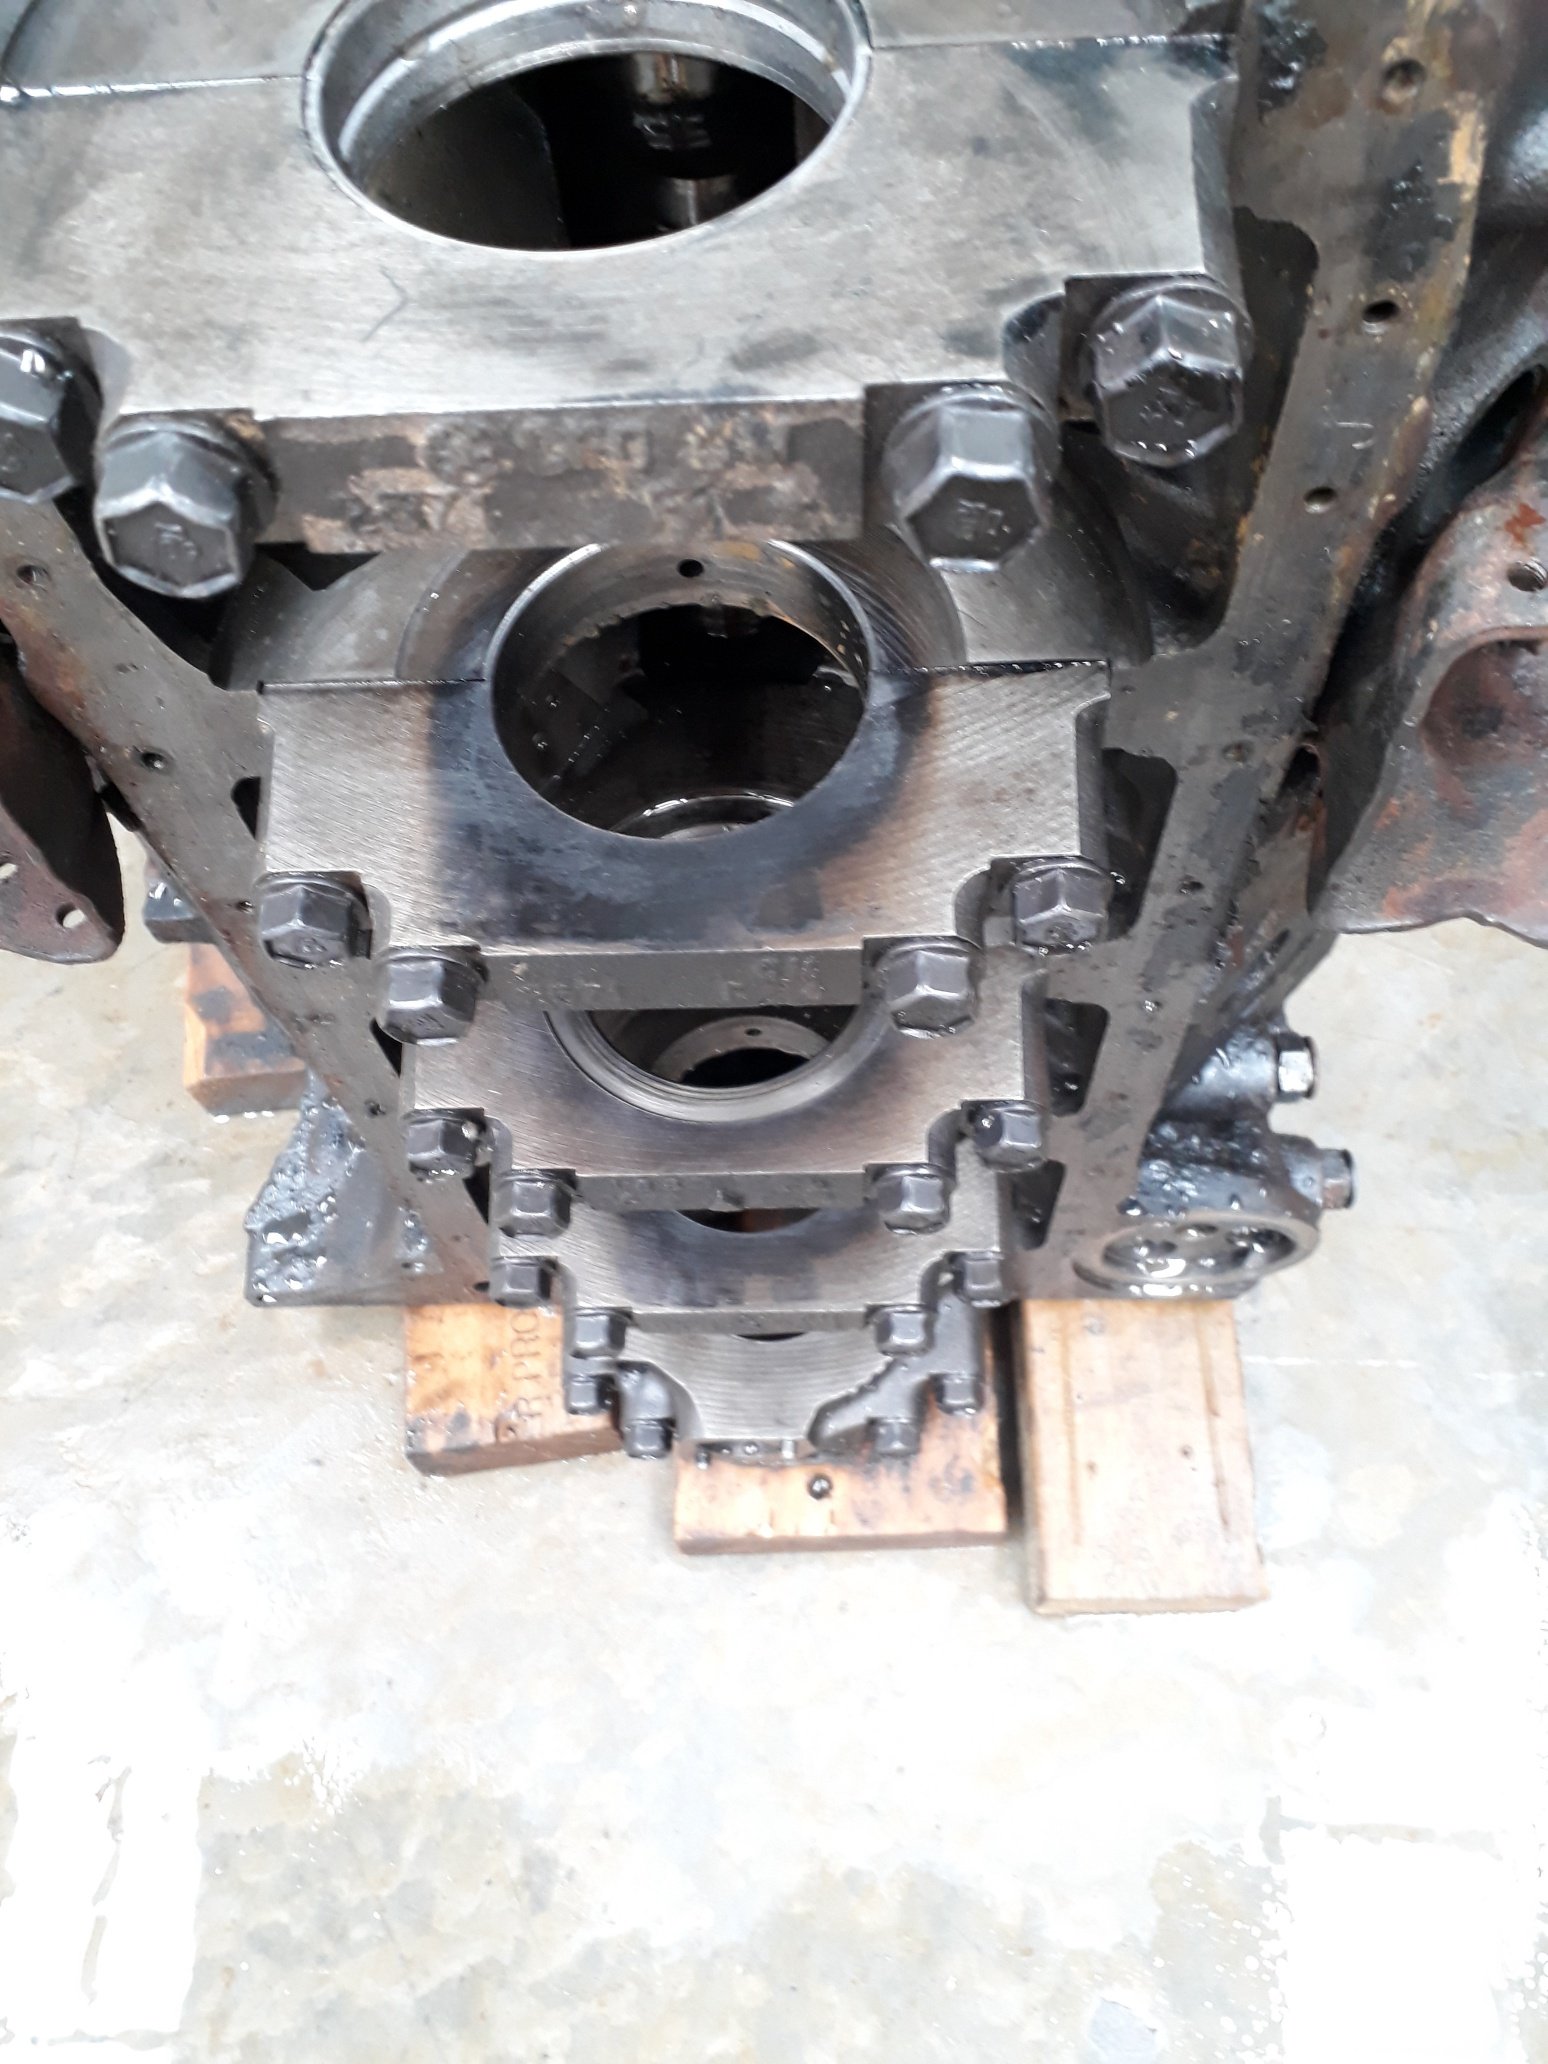
I wouldn't recommend waterblasting a block with the cam and lifters still in, but I didn't have any other way to get it cleaned so I spent 45 minutes pumping bore water onto a ute, then borrowed a petrol blaster and a hose. Gravity feed to the blaster wasn't the best, but at least the block is clean enough to see a bit better, but probably still oily enough not to rust much overnight. The blackened main caps tell a story of no bottom end oil flow and spun bearings. I am not sure which happened first. I reckon I'm going to order a set of gaskets, bottom end bearings, a timing chain and just slap it all back together.
2 points
-
2 points
-
It's a work truck mostly, but when I build a cabin for the back it will be an expedition vehicle, and when society breaks down it will be used to make armed raids on fuel dumps. Mostly I just think it will be fucking awesome.2 points
-
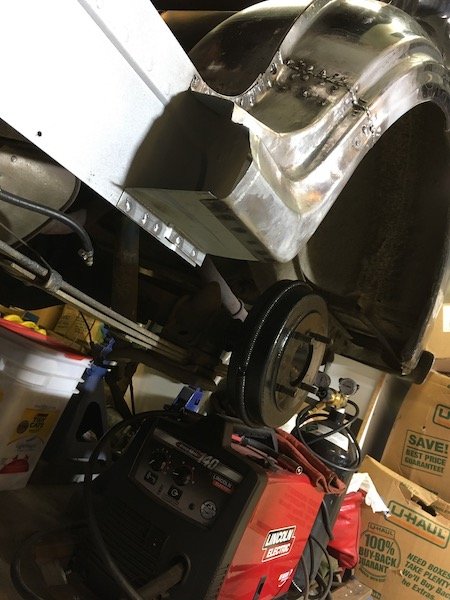
Not been on here much at all for a few months, mostly cos an unnamed mod changed one of my posts to make me look like even more of a cunt than I actually am without indicating that they had done so, this gave me a complete sense of humour failure so I lost quite a lot of interest. I guess I am over it now but we will see how things go.... Anyway I have been up to a bit of stuff in the absent months, I will let the pics mostly do the talking. Cost 3x boxes of beer White dust is from fingerprinting, was stolen and recovered.. Fitted pretty nice with minimal sheetmetal cutting Engine is seized, need to find another, but will use this to set up the mounts. Made a removable subframe for the rear and mid body mounts Later model safari steering box, this might be a sticking point but i have a plan that has been agreed with the cert man in principle. The box is rotated forward from the original position, the tie rod position is exactly the same though Front body mounts and steering box mount are all tied in. I have a design for this in CAD which looks pretty good. Fitted the Safari clutch booster in there with relative ease Engine is just propped there, I have moved it back 570mm to help with weight distribution/radiator clearance/etc. It also means I can use a SWB rear driveshaft. Gear linkage might be fun, although apparently the gearbox in a Condor/Atlas with the FD42 has the same box housing, the top plate and gearshift mech should respectively bolt on/be able to be modded to fit. Took it to a weighbridge to check axle loadings, 1755kg all up, 1130kg on the front. Axle ratings are 1500kg front and 1800 rear so should be good to go. The weighbridge was reading 65kg heavier by the time we were done so this is probably worst case. GVM of the Safari was 2505kg, so will be racecar. There is a lot to do yet, as I said the engine is seized so need to find another + turbo to put on it. Build the front cab mount and steering mount, engine and gearbox mounts Need to think how to build the front driveshaft, probably a shorty shaft to a frame mounted carrier, then use the standard front axle. Need to find FD42 gearbox linkage Probably needs new tyres and at least one more rim for a spare Need adjustable panhards and adjustable rear lower trailing arms to get the axles in a better position. It had a 2" lift that translates to about a 3.5" lift with the current weight, so axles are a bit off to one side and the rear will need rotating so the driveshaft flanges are parallel. Need to airbag the rear for load leveling. Need to convert the AC pump to continuous air for the airbags and whatever else Will need to build a deck with big ass drawers underneath for my tools. Will probably will have a budget hoist of some variety, maybe just an arm with a chain block. Electrical will be a nightmare as the cab is 12v and the chassis is 24v, need to talk to an auto sparky to discuss my ideas. Still need to 100% make sure that my cert guy will be able to take it on, there is no one in Nelson with 1D unfortunately. Piece of piss really.1 point
-
I was building a Ford Escort Mk1 gasser and documenting the build on here and on facebook, but a few things made me totally change direction. After spending a huge amount of time on the Escort chassis, I still wasn't happy with the compromise of it. That coupled with the amount of new (read bloody expensive) panels needed to make it as good as I wanted it made me lose a bit of interest. Total interest was lost when I started to build the engine and found a crack through one of the bores. So the shell/chassis and all of the engine parts were sold off (at quite a handsome profit I'd like to add), and I concentrated on my bike for a while. Then this popped up for sale. It's a 1938 Ford model 7Y (which is dimensionally and physically similar to a Ford Pop). It's very straight and solid and was bought complete. The nice stuff from the Escort build will find it's way to the 7Y, so it will still be 'Cheatin' The Reaper' - just a genetically modified version. It didn't take long to strip it down to just the body, leaving the chassis to be sold off along with the engine, gearbox, interior etc I designed a new chassis, made out of 75x40x3 steel box, which is at this stage at the moment: Front suspension is parallel leaf springs. I made the shackles & mounts: Then narrowed the drop-tube axle to suit: I found a nice and perfectly sized fuel tank on TradeMe and made the crossmember to suit. This is 75x40x3 box again, with 3mm gussets: I've bent up the hoops for the rollcage (no pics yet) and am just waiting for a nice full day to get the whole lot jigged up and welded together. Rear axle will hopefully be a Jag IRS. Engine will be Ford V8. Body will be chopped about 2.5" and front end will be fibreglass flip front. Keep checking either here or on facebook: https://www.facebook.com/mk1gasser/1 point
-
Yeah would have plenty of room to take em to chch1 point
-
So stoked for you bro ! This is absolutely perfect for what you want to do and its great that its got such epic history and that you got it for a song. Fizzing to see you make it mint like all your other bikes1 point
-
This is quite interesting, for those who care about PCVs enough to read it https://www.google.com/url?sa=t&source=web&rct=j&url=http://www.baldwinfilter.com/literature/english/10%20TSB's/94-2R1.pdf&ved=2ahUKEwj48un9pujgAhWJTn0KHaMmDp4QFjAHegQIDhAh&usg=AOvVaw1N00Pbi73gt7mxCHUc1cHA Apparently you should replace them every 16,000km1 point
-
So this was my project - currently on wait, because Im away from home. If is in wrong threat or something, please admins / mods to move it. I didnt find any "trips" raleted section. About the car. Its Polski Fiat 126p, produced in Poland on 1985. It is 2 cylinder aircooled engine with 24hp. Car weight around 620kg without any gear. Story of a car... 3 years ago I managed to save Fiat 126p from 1985 from one of the Slovenians fields. The story of the car was, that was in a garage for 5 years, than they have birthday party in that garage, put it out and never went back to garage. So it was in the field for few years before I bought it. When the owner agree to sell the car, we went to pick the car in style As every "project" start I wash it to see how it really looks. The story behind why I bought that car is that I wanted to participate in the biggest amateur rally in world, called Budapest - Bamako 2018. Because to the finish line of the rally is around 8600km I had to "fix" the car before I start with the rally. I found brand new engine in Poland, sitting in the attic of the house from 1987. When I get the engine with 0km on the clock, we open it, change all seals and anything that was "need" to be changed after so years and kick to start it. Because I had to remove my back seats for travelling material, I installed some isolation to prevent noise from back of the car. After we fit the engine in the car, change all the bearings and everything need to be changed around suspension, my friend polished car for me for my friend wedding. Because I didn't want to go to rally with 0km on the clock, me and my girlfriend decided to make a quick trip around Dolomites and the sea. The whole trip was Slovenia - Austria - Italy - Switzerland - Liechtenstein - Switzerland- France- Italy - Slovenia. We did together 4117km in 15 days with a lot of 2000m+ mount passing and nice routes. Breakdowns? Both brand new rear tyres were worn because of new back suspension - the position of the car was to high. So meanwhile we got some sponsors and had to "decorate" car with the stickers before we start the rally. In 12. January 2018 we started from Slovenia, the goal was Banjul in Gambia. We reach the finish line on 28. January and we did 8395 KM. Because I didn't want to sell the car in Gambia, and I didn't want to spend money on the boat shipping I decided to drive it back home. I reach back home in Slovenia 17. February 2018. Me and my car did together 17.200km in 36 days. I spend around 1135L of fuel had to change front right bulb and 2 tyre tubes (they were a little bit to big ). Engine in rally Engine back home The car is still running good, but it is in vintage car museum in Slovenia, because I'm currently in New Zealand. And that on last picture is me Facebook page of the car and trips: https://www.facebook.com/Fiat126pGoesToAfrica/ Webpage about rally: http://www.fiat126p.si/en/ Discussion treat:1 point
-
1949 lowlight inner guard panels Have had them in my pile for about 6 years, the grill for 10. Need them to clear the headlights. The lowlight grill won't fit even without headlights because the headlight swage area hits the inner guard. Rust out on top, wheel flicks muck up there I guess. Hilights have the same problems rusting out the headlight bucket. The headlight heat should dry it out anyway so it's a sound design.. Both were rusted, one just looks better than the other. Enough to copy it anyway. I would quite like a shrinker stretcher set. Maybe next rusty project. Hammer and dolly and some extra time gets it done I guess.1 point
-
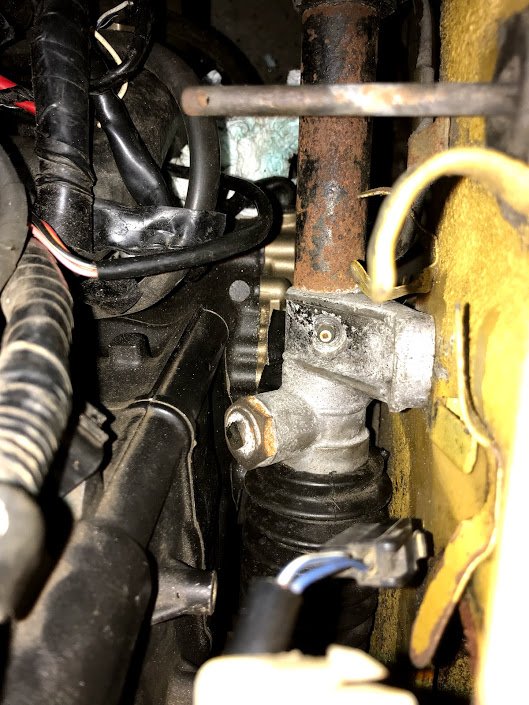
So yea, knocking it out like a schoolboy. I have a cert man now, very excited. Bent some laser cut profiles and glued them together Tacked the xmember on for positioning purposes Sealed up where I cut the old xmember out so water didn't sit in there and rust it Looks strong enough, it 5mm plate. Tacked in place, I will weld it with the chassis turned so I get a nice weld all around. Then time to replace the temporary front mounts Cut off the old mounts for reuse. Glued some shit together. Might yet plate either side for extra strengths, it is probably strong enough though. The old mount is welded to 65 x 5mm box section, so all of the weight is going through the weld. There is a fat bead but still. Mounted the clutch line. Does anyone know the logic behind the secondary bleed that comes out of this block? I would have thought it was unnecessary. I will fit something but I am guessing it needs to be higher than the clutch master...? I pilfered all the brake and clutch stuff off the dyna chassis, and have had success straightening out the lines with a vice, then rebending where needed. I am using rivnuts into the chassis or existing mount points if convenient. Had to drop the power steering pump 50mm to clear some vital cab related stuff, just made an adapter plate. I might brace it up a bit. Modded the adjuster plate to match the 50mm drop. Modded the throttle cable mount as this is literally all it needed to hook up the Dyna cable setup. My solution for the steering is pretty much sorted and been ok'd, I just need to set up the original box and check the bump steer limits, then set up the new system and check again. I want to fix the castor first though as this will have a slight effect on things. I measured the lift accurately with the cab on and it is a fraction over 2". This means that drop boxes are pretty much overkill and will mean more castor than factory, so i have ordered some castor correction bushes which should bring it back to factory spec. The pitman arm is currently getting modified to suit my new tierod end, the boys were disconcertingly vague about the possible cost of this. Next I will sort the brake and fuel lines, this should be piss easy. The fuel lines need to be 570mm shorter, but i may just route them with a bit more flexi. Handbrake will be making up a pivot bracket to connect the two cables and correct the pull ratios, this should also be trivial. Hopefully have sorted an engine, I just need to find a couple of hundy more $$ from somewhere. No doubt I can just sell dick pics to desperate fembots, again trivial. Also I bought a hilux rear driveshaft. PCD of the mounts is very close to the Safari front shaft ones. It has a hangar bearing so I will make a chassis mount and get it shortened so it can mount the front shaft. That will do for now.1 point
-
At what point are you going to put this in the too hard basket?1 point
-
Morning smoko time. Time to unload everything that was jammed in side it for the trip home. Then assembled it all to home is should be1 point
-
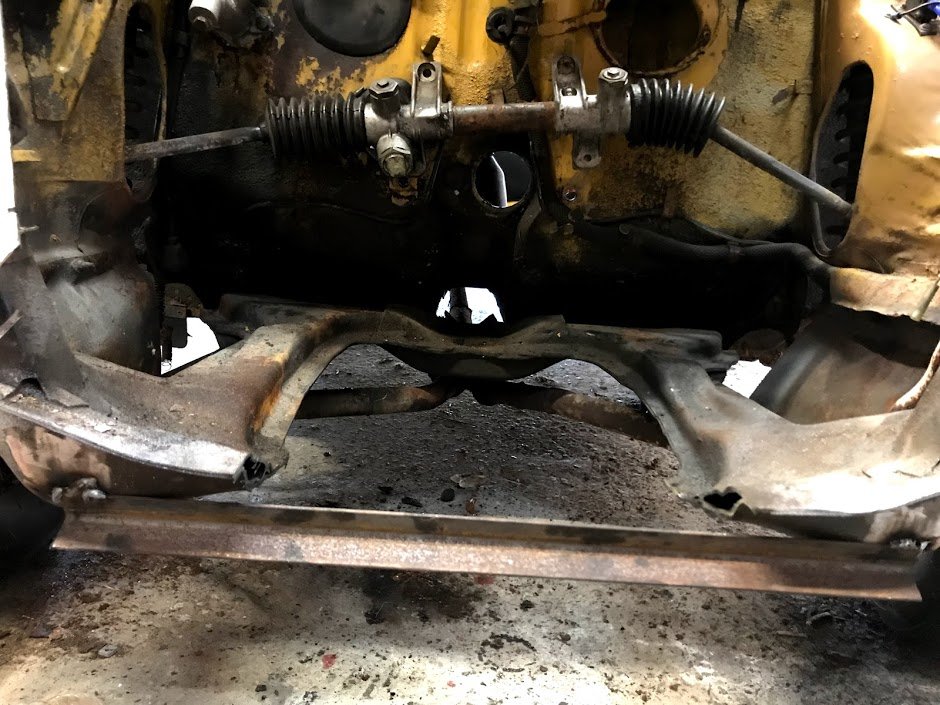
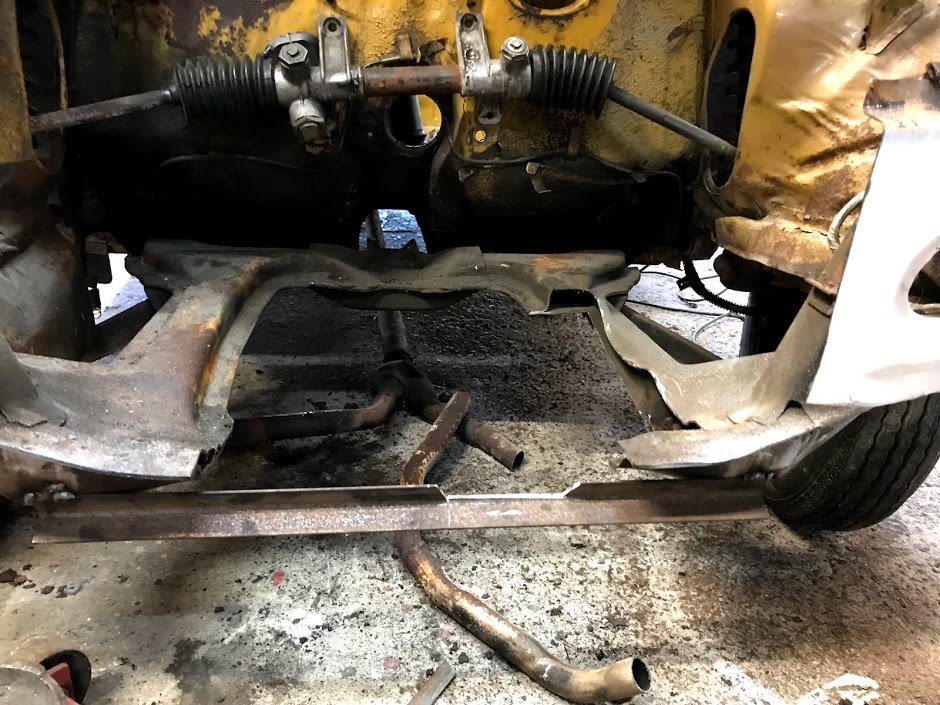
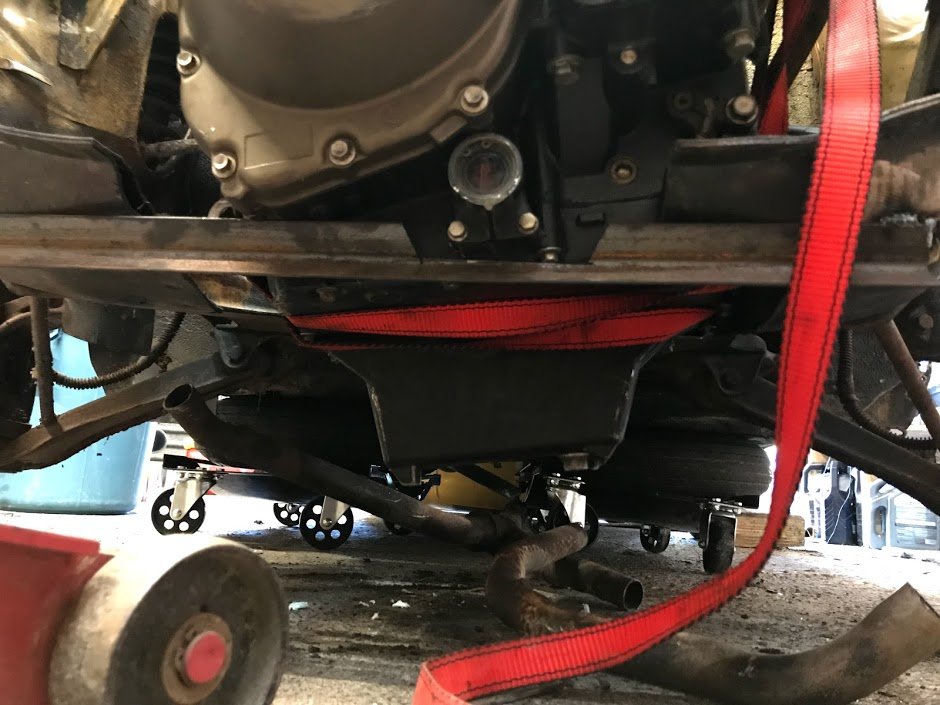
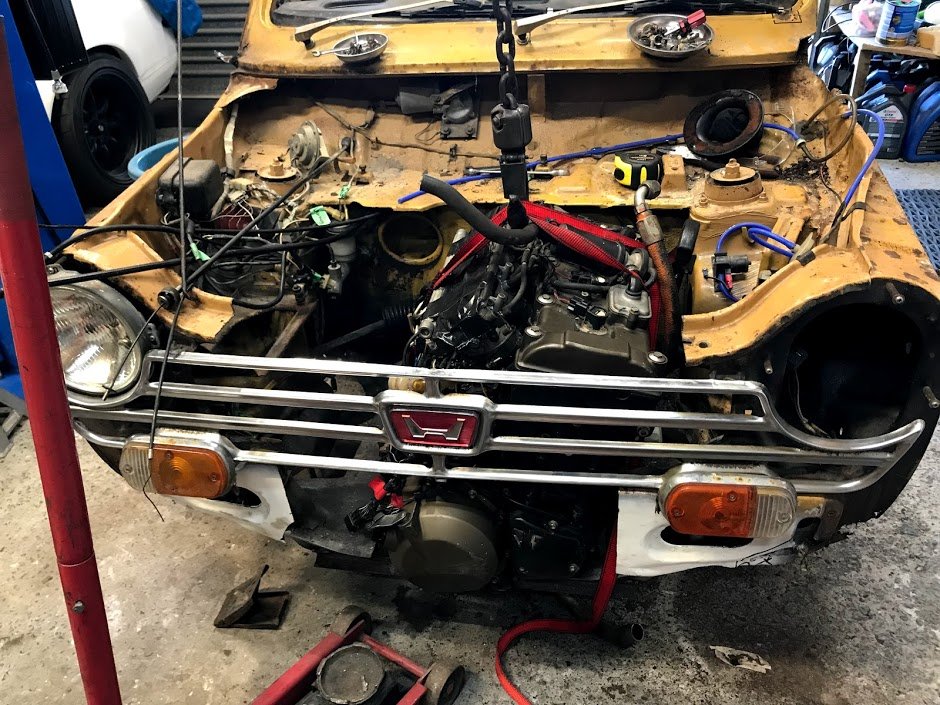
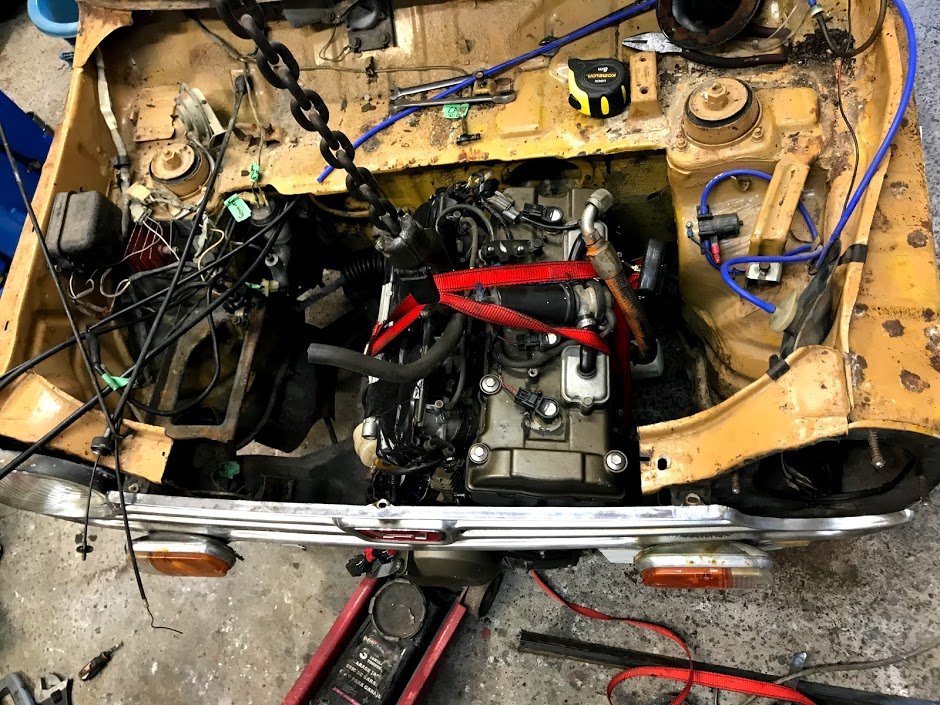
Well no turning back now, I've started cutting the subframe of which I'll make up new sections once I've finalised the position etc. I thought I might be able to keep part of the front section but it all had to go, to stop it from moving I welded on a bit of angle steel. This dropped it down nicely but the angle steel needed a notch cut out for the oil level sight, it still needed to move over to the passenger side too. So more cutting. Looking much better, the oil filter sandwich plate is resting on the subframe now so the engine isn't level yet but far better and is about 10cm further to the passenger side. This is as far back as it can go without cutting the firewall, but it is within 20mm of the closest protrusion from the steering rack. I also bit the bullet and cut the tab off the stator cover which is the oilfeed because it was almost impossible to get it to fit around the steering rack. This is a magnesium casting, so I cut it slowly and manually. Didn't burn down the house. Plan is to block the original feed then tap into the casing and have an oilfeed that way. No reason it shouldn't work, but if it doesn't I can just get another casing. They seem to be easy to get, I guess because they get damaged when riders drop their bikes. It's sitting much better in the engine bay now, I will try get it a bit further over because I'm worried about draiveshaft UJ angles. But for now it fits behind the grill! The front clutch cover was always going to stick out, I'm not sure what I'll do here but at least clutch changes will be easy access....
1 point
-
Work has been continuing at pace on my large model car build as we both clean bits and piece it altogether. Its fun. Its taking far more time then I ever remember. I always forget about just how long these 'little jobs' take. Made longer because the car looks so clean and fresh so how can we possibly put dirty or crusty bits back on. I ordered some new 175/60 13 tyres last week. Of course the rims look yucky. Not a fan of all silver rims, especially Minilights. I have always planed to paint them to how I want them to look. Really make the rim dish stick out as much as possible. So my friendly local garage where I now get my tyres from popped the old tyres off, we took the rims home and I did this... Which was fun and quick. Very handy that the Viva shares the same 4" PCD. The rims ended up like this.. I then selected a colour from a book of swatches lent to me by the local paint shop. This process of selection took bloody ages! Just how many 'metallic greys' does the world really need?!!! Paint finally selected, bought and Hannah masked the rims very carefully (I tried to do one rim and gave up- I really have no patience for that). I threw some paint at the rims... Because Hannah had endured the boredom that is masking wheels she got the fun job of peeling off the tape.. They looked fantastic. I was very happy. So here is a sexy rim shot... then with tyres... But they cant go on the car just yet. Many jobs to do with the Imp back on the hoist. First off. Radiator pipe work. I had bought a length of stainless pipe a while back along with some 90 degree bends I could chop up. I measured, cut, tacked, checked, tigged and ended up with these... I blocked the ends up and filled them with water to double check them. Two little pin holes. Glad I checked. Whilst full I weighed one. 3.5kg. Not as heavy as I was expecting. Phew. I then fitted them up... Next step was the brakes. The front calipers and discs are from a ED Honda civic. I had never bothered to check that they were free when I removed them from the race car. Oh. Wish I had. Seized! Bugger. I managed to free the pistons with a bicycle track pump and sure enough the pistons were rooted as were the seals. I priced some up from several places. !!!!!!! Crikey. Rebuild seal kits were horribly expensive in NZ. I wanted to sort them out asap so didnt want to wait to get stuff from the states. So I tried an old place in chch I've used in the past who re-sleeves brakes in stainless. He sold me some seals cheap and I machined up new pistons from some stainless. Made quicker by the larger drills we got from my uncle with the lathe... Front brakes all sorted. While I was there I machined up some nice spacers for the caliper mounts rather then the stack of odd washers that had been doing the job. I also added back in the missing flexible line tabs I'd forgotten to do whilst rebuiding the shell.. I then re-fitted the rear brakes, after having unstuck, cleaned out and reassembled the wheel cylinders which luckily appeared new, as do the shoes and the drums! Then onto the master cylinder. That lovely one from Russia with love. It fits so well into the imp pedal box but I needed to make a push rod, something to secure pushrod in place and a pushrod yoke. All really fun little jobs at the bench. It came up well and fits in nice. Fitted it in place and made all new brake lines and clutch line. Re-used the old 8mm fuel line from the race car but neatly this time. Ideal for future power upgrade... Clutch line was copper, left over from the Rx3 in the UK. Fine for clutch lines but not for brake lines in NZ, which have to be steel. I've made the pipes long enough to swap positions on the master depending on whether it has biased springs inside. Time will tell on that. Added new tubing from the, nicely cleaned and fitted by Hannah, fluid reservoir... While I was in there I had also found an ideal piece of stainless mesh left over from our compost toilet build. Perfect size to fit in here neatly... The steering rack boot had a small split and was leaking like a proper British car does- all over the floor. I was getting bored with placing bits of carboard everywhere I moved the car but I cant afford a new boot plus shipping so instead, as per some advice from a fellow local Imper friend I added some grease nipples. Much better then oil puddles everywhere and no protection within the rack!... Fitted a new universal on one of the driveshafts to replace a knackered one. New one has a grease nipple. Yay for IMProvements We both worked together on the door cards, a job we had been putting off. Glued some new felt on to the new hardboard and then glued on the sweet looking red and black vinyl, which had come with the car from Christchurch. They'll look great against the blue... This afternoon Hannah cleaned up the Datsun engine, masked it up and I sprayed it with Black epoxy (Resene Durapox). I had also cleaned up the rocker cover and fuel tank for the same paint. The rocker cover will get some nice blue next... And that is all for now folks. I was really hoping to have the car on the road for a classic car show next weekend but there are still so many jobs to do. Wiring, put the transaxle back together with its new bearings, make a new improved, tidier engine crossmember, plumb in the engine. However it was great to have a date to aim for and we are both really excited about getting it on the road before Hannah's brother comes to visit in a few weeks time. So I'll just keep cracking on with it (in between the paid work we have building up that is..)1 point
-
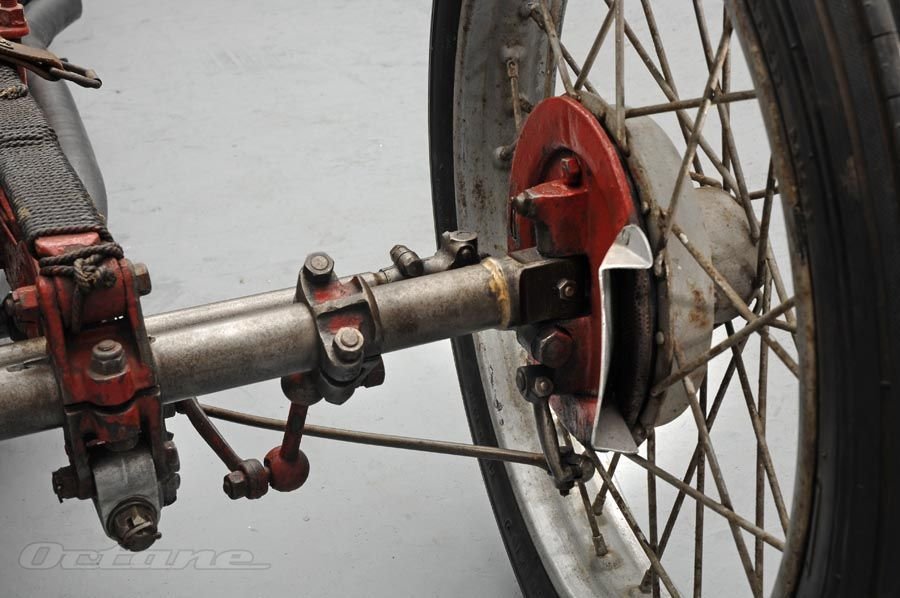
Good progress on the front axle this weekend. I'm doing a tubular GN style front axle the same as Bloody Mary had. Axle end blanks. 4140 Outer profile milled and kingpin hole bored Ready to go in the axle tube The axle tube. 1 1/2'' 4130 3/16 wall, should be strong enough..... Axle end in. These will get brazed into the tube Complete axle And mock up, made a couple of temporary axle clamps to hang it off the springs. Bloody Marys front axle showing the Austin 7 front stubs and wheels
1 point
-
Did a few little pre Beach Hop jobs, changed oil etc. Visited beach.
1 point
-
Slap some new bearings, You live on island time now, plenty of time to do it again1 point
-
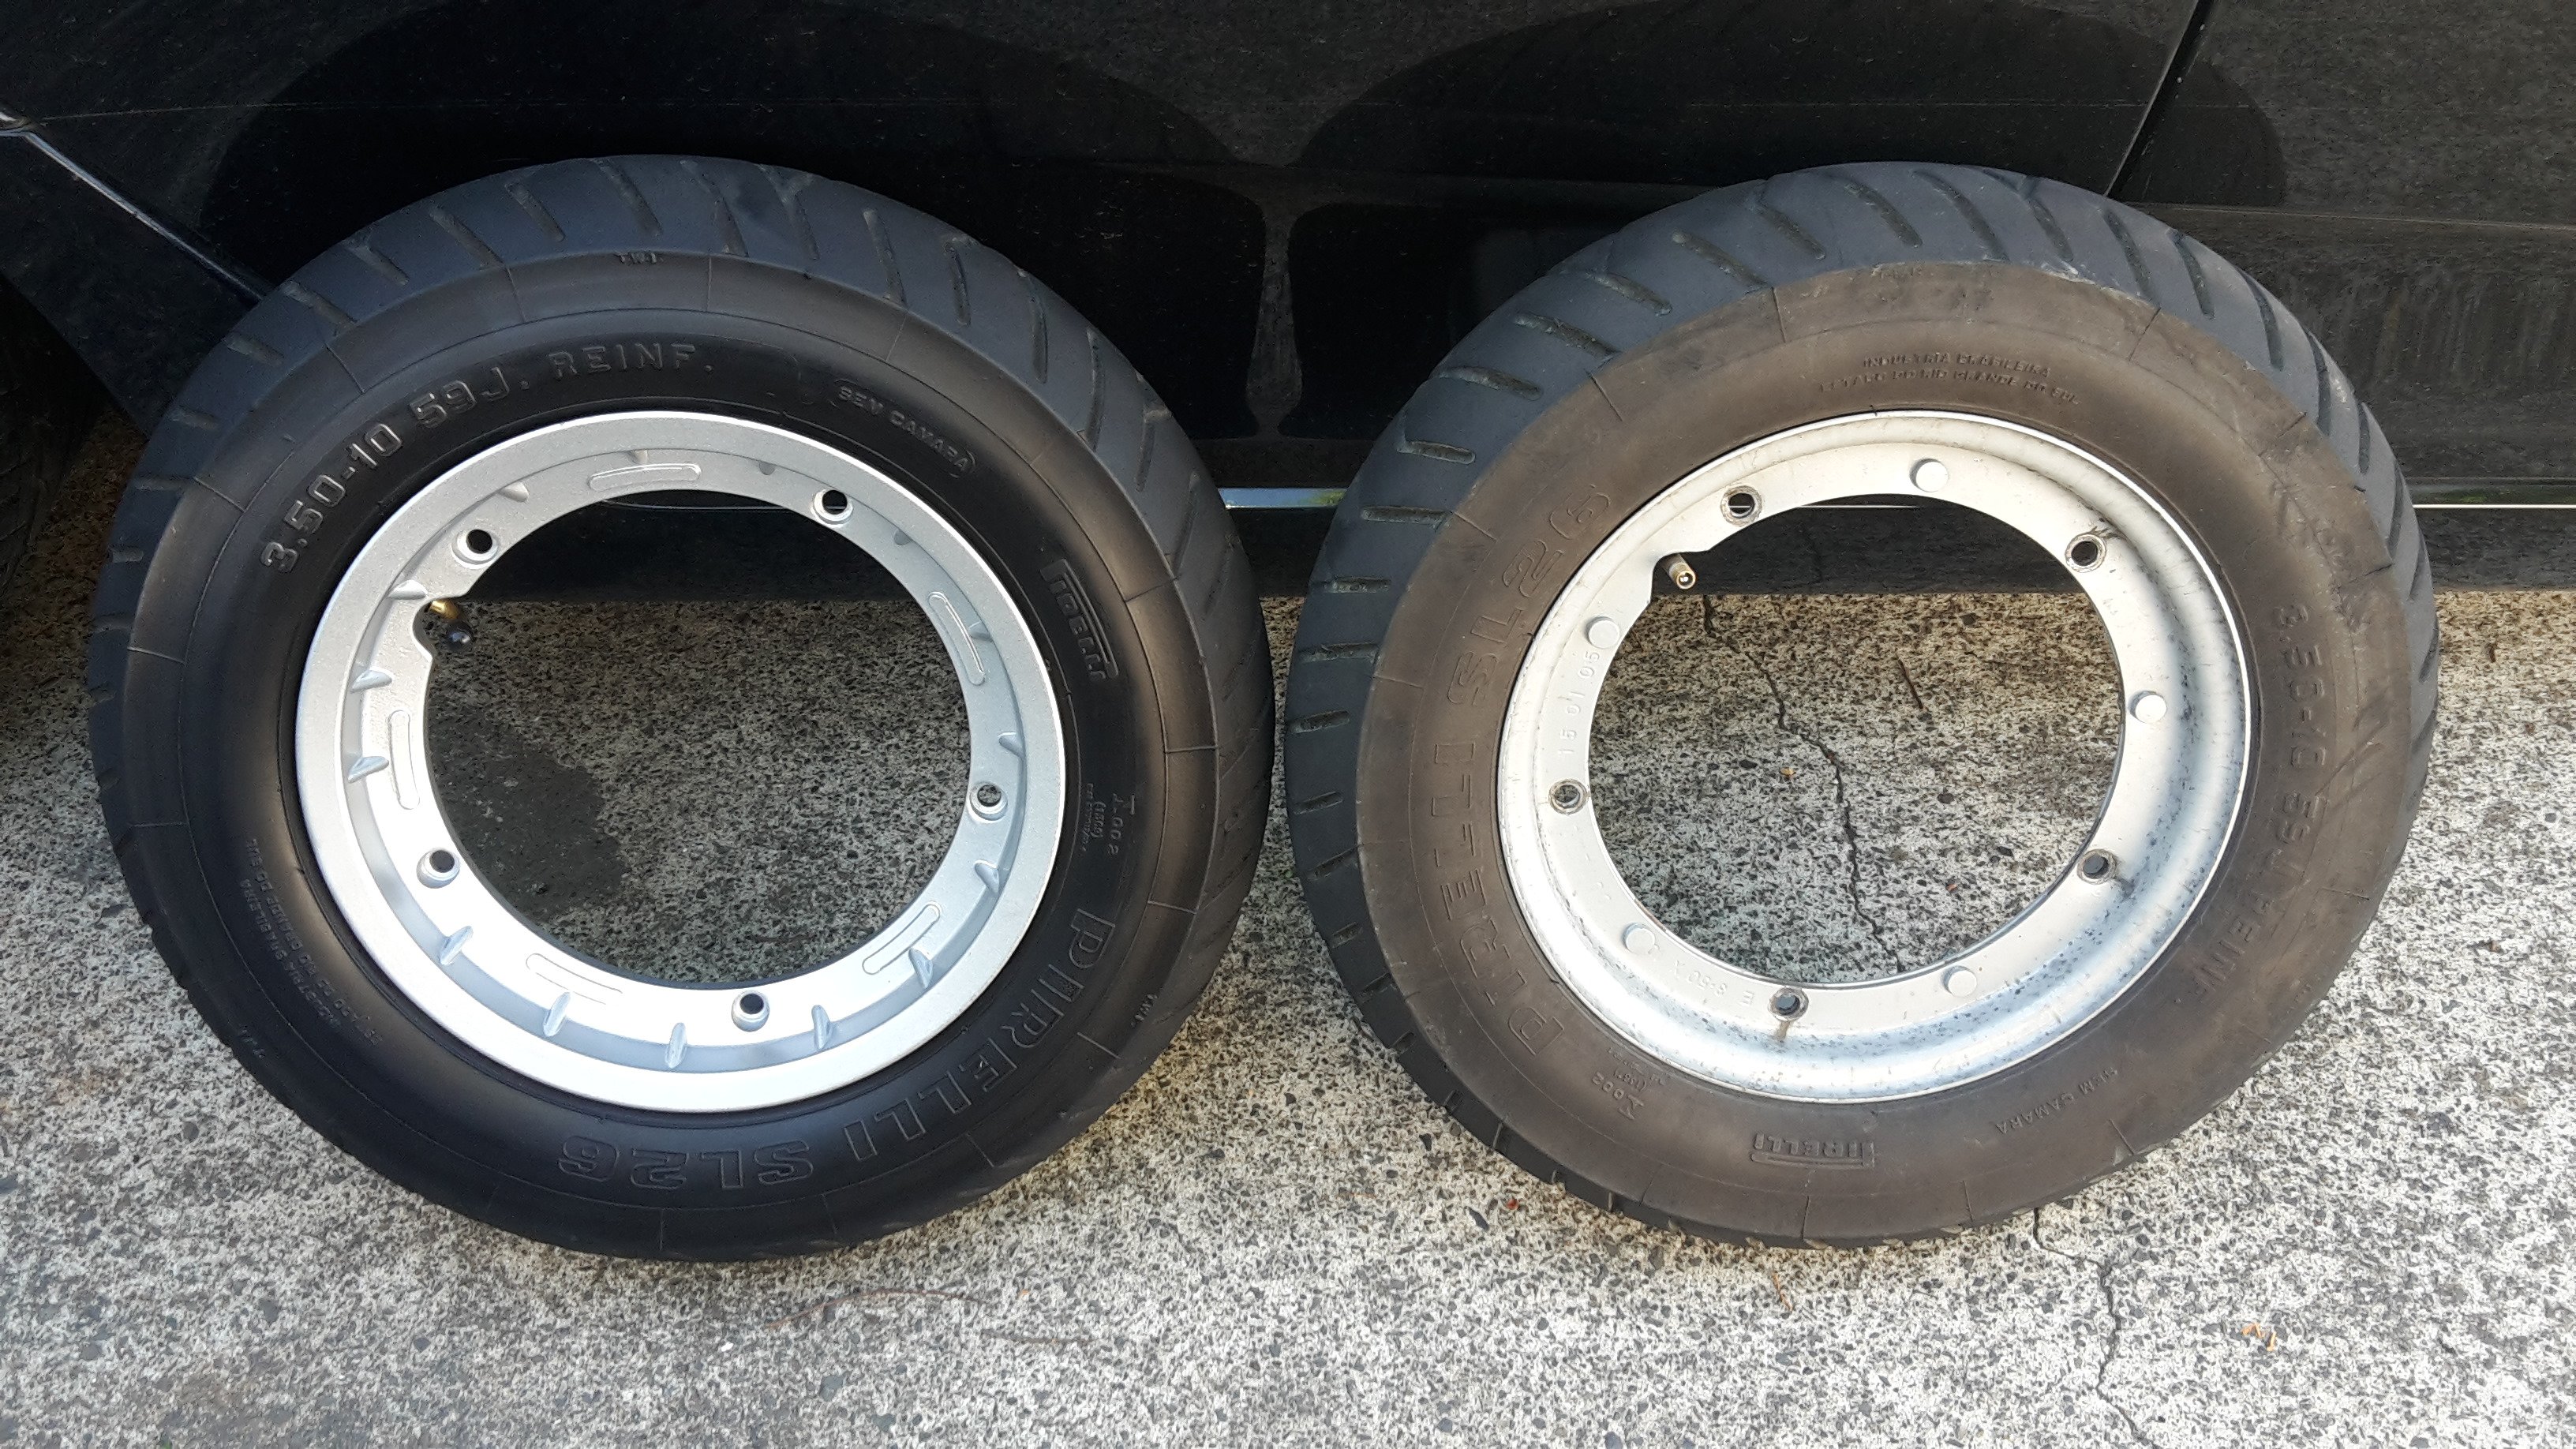
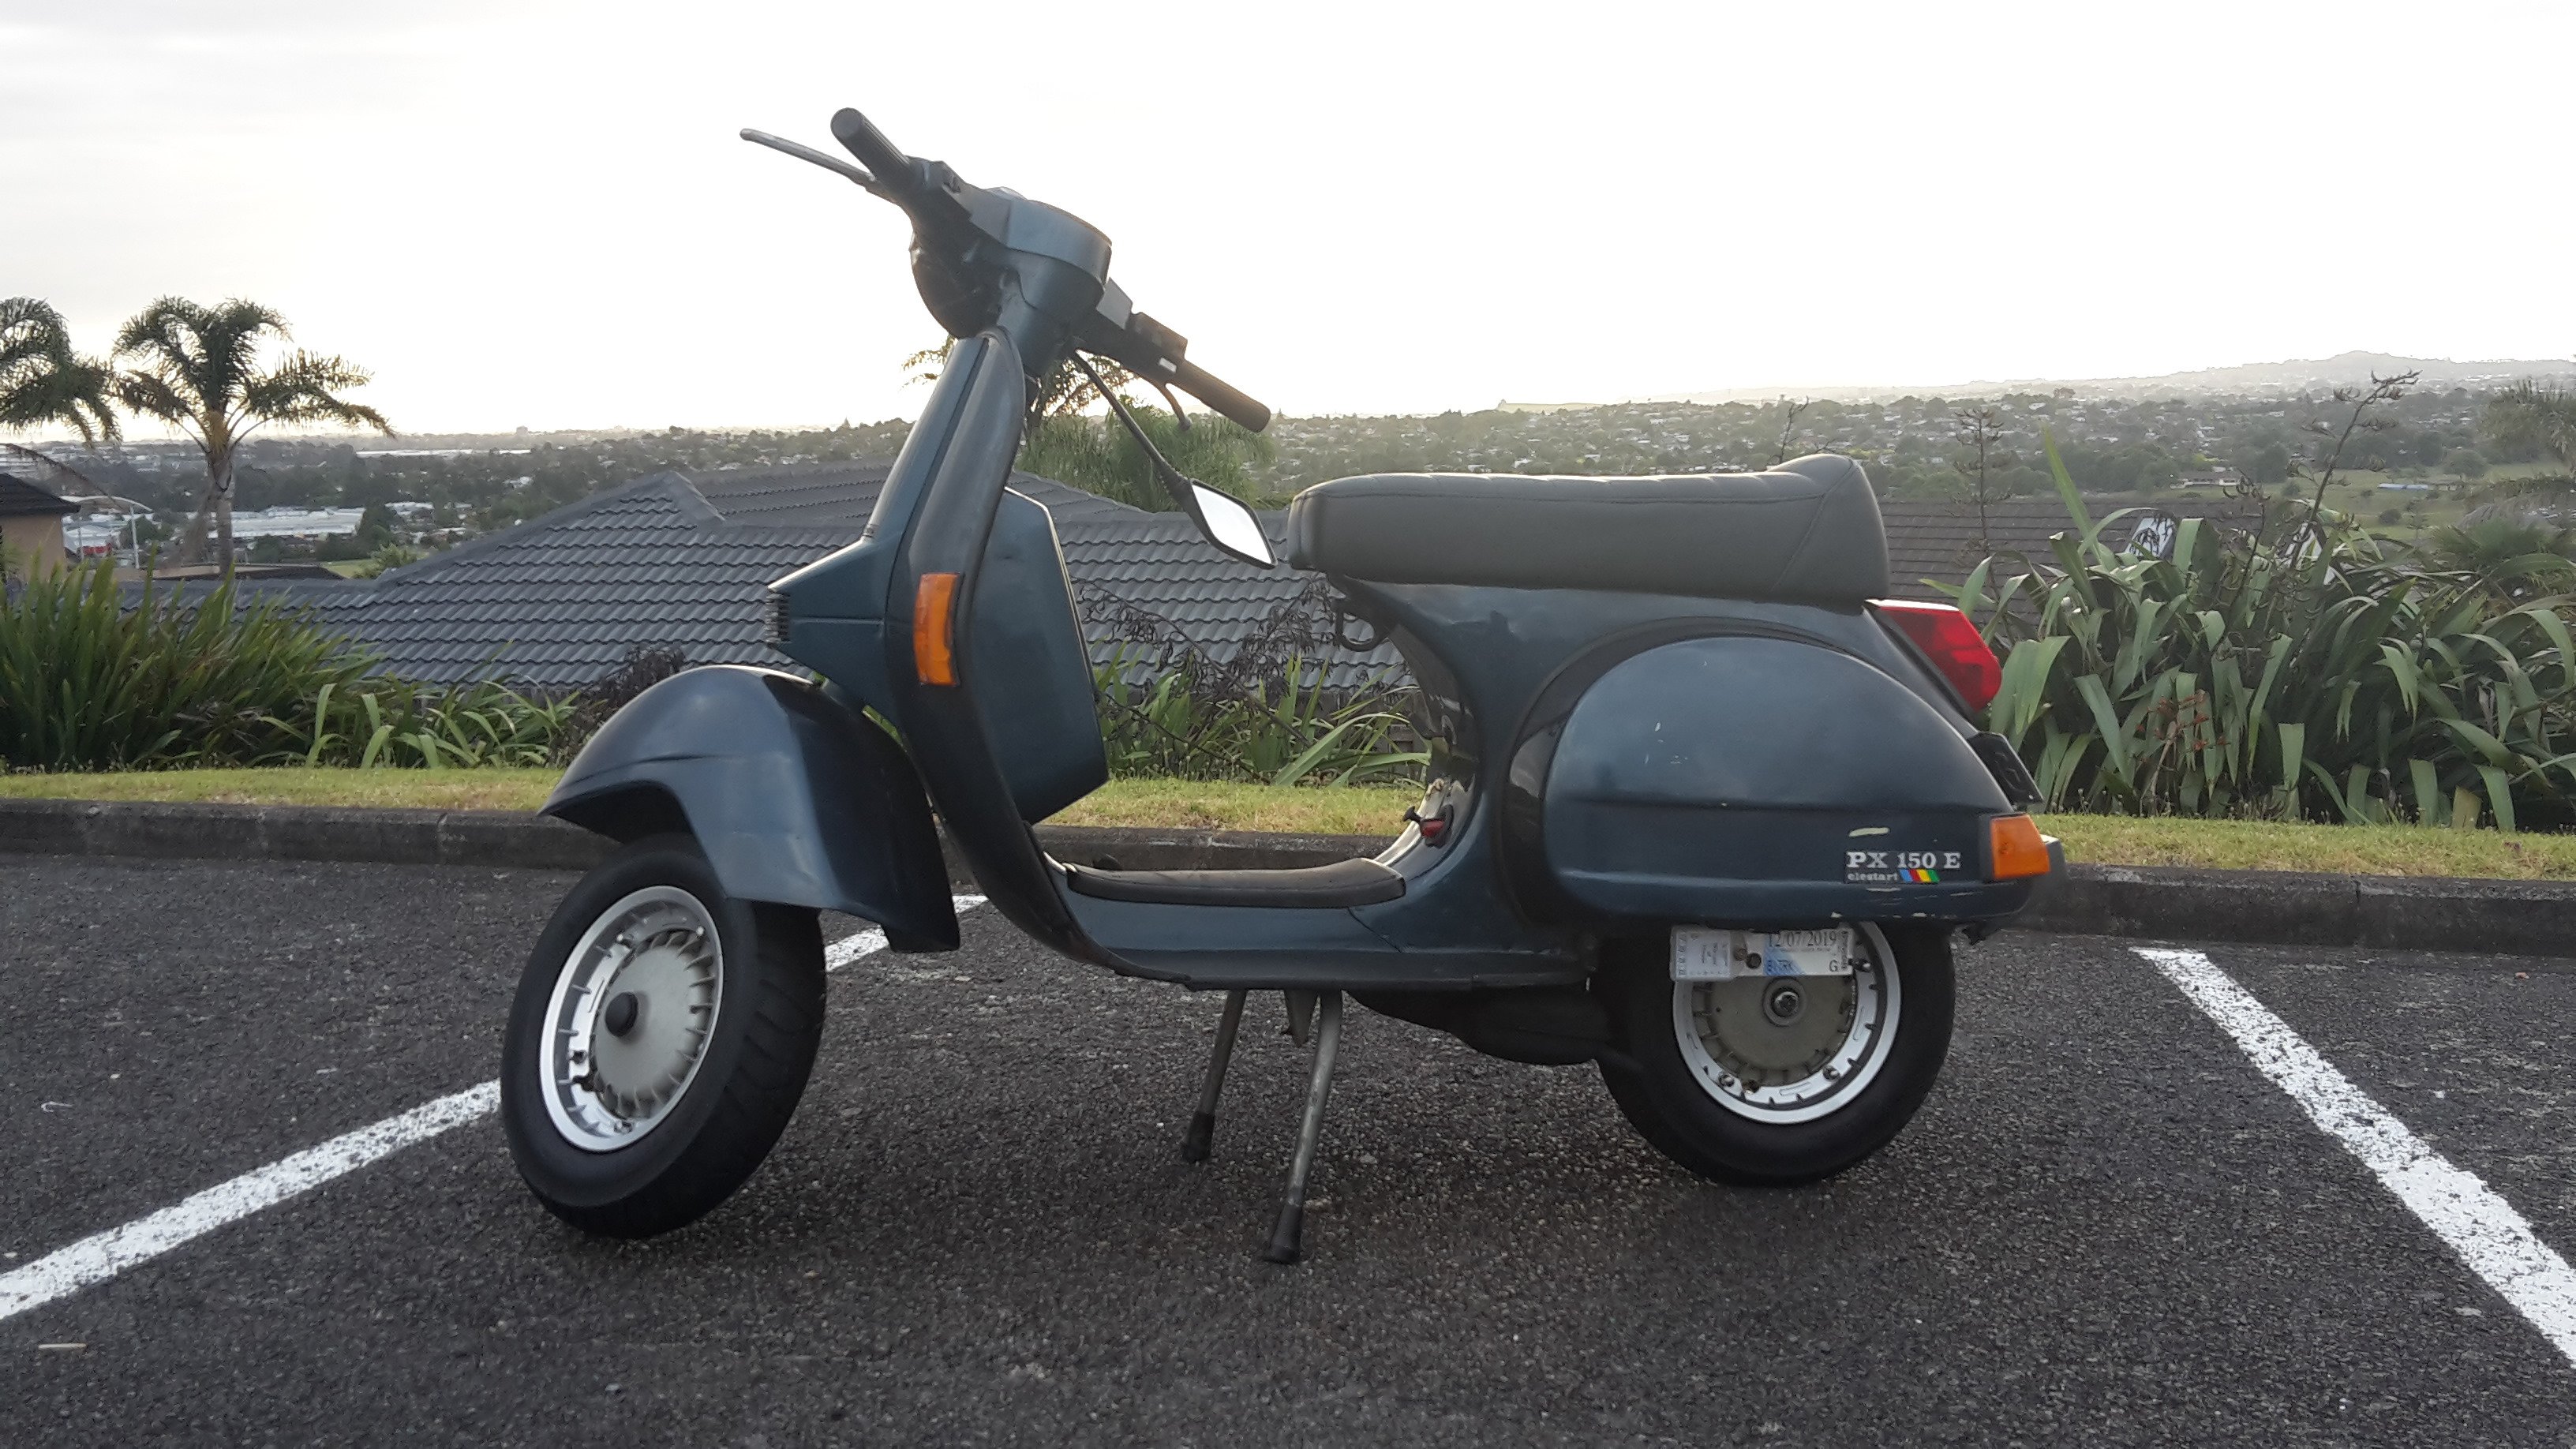
another day at blizzshop and we banged new tyres on, loooooooooooong whistle they look lush. the vee rubber front tyre appears to have a larger inflated diameter than the cheng shin rear. but hey, will suit me fine. whacked a new spark plug in and seems to have resolved the misfire issue! its so easy when you know how! so all thats left really is to wang a new battery in there, replace headlight bulb and action bronson into the sunset. probs a new pair of grips wouldnt go astray. here it is parked up next to its not so distant cousin CB501 point
-
More boring but important stuff.. cleaned/painted and "rebuilt" the rear calipers 2nd Caliper was also full of that cancer stuff handbrake lever works properly now pushing the piston out further than before Gave the hubs the same treatment and put in new bearings. Trying to just have everything ready to just bolt in and go, hopefully after work my mrs kp sunroof turns up and will go out and try bolt the hubs etc on till the front brake lines are made. Big mission to get it ready for Toyota fest but will try!1 point
-
thought while its in its side ill stitch and gusset the upper arm mounts all so took the time to fit the stuffed gearbox mount threads.
1 point
-
i see this thread, i go search the tard for 944s, i remember i have no money, i come look at this thread, i go search the tard... i'm in a retard loop.1 point
-
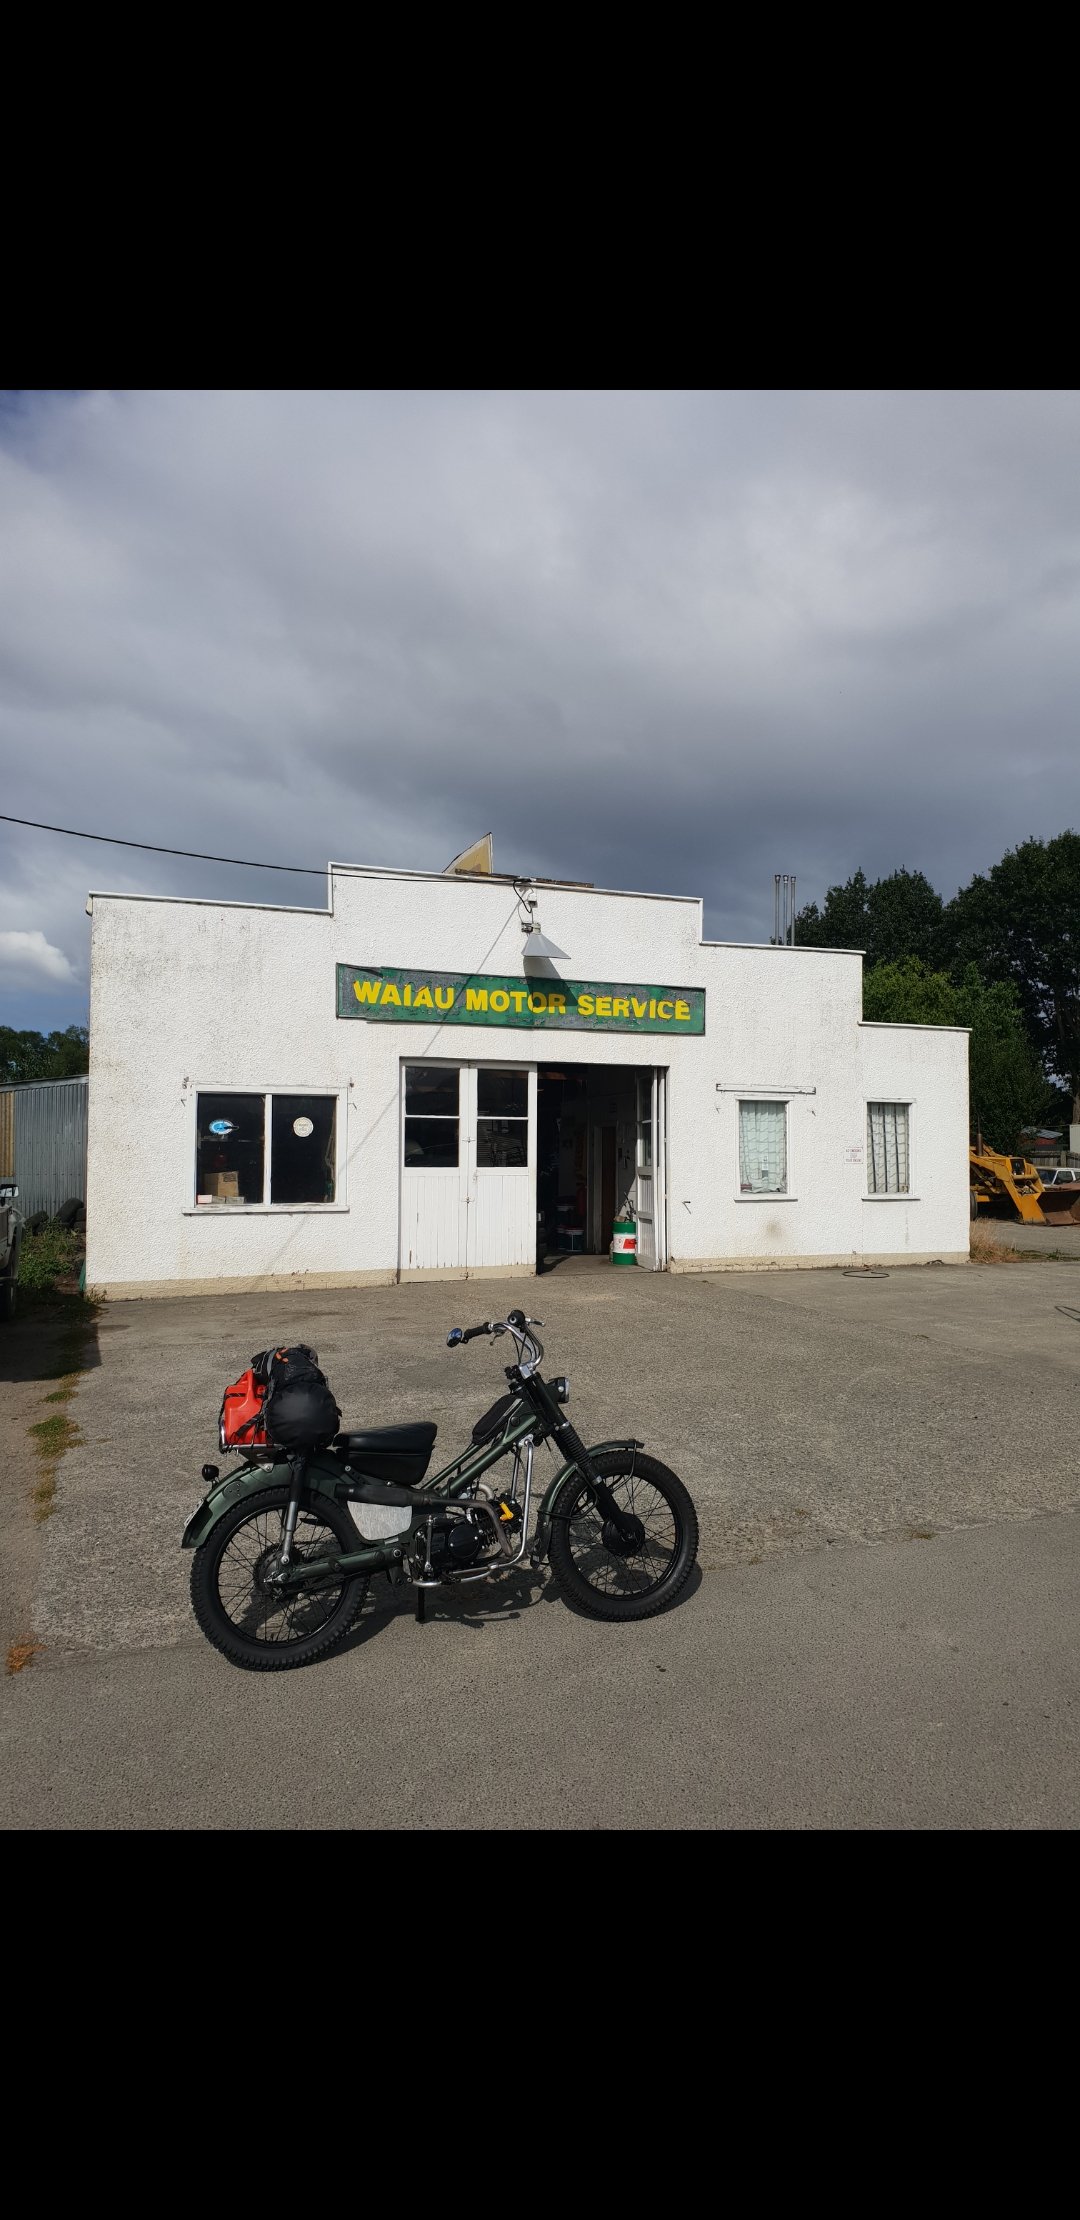
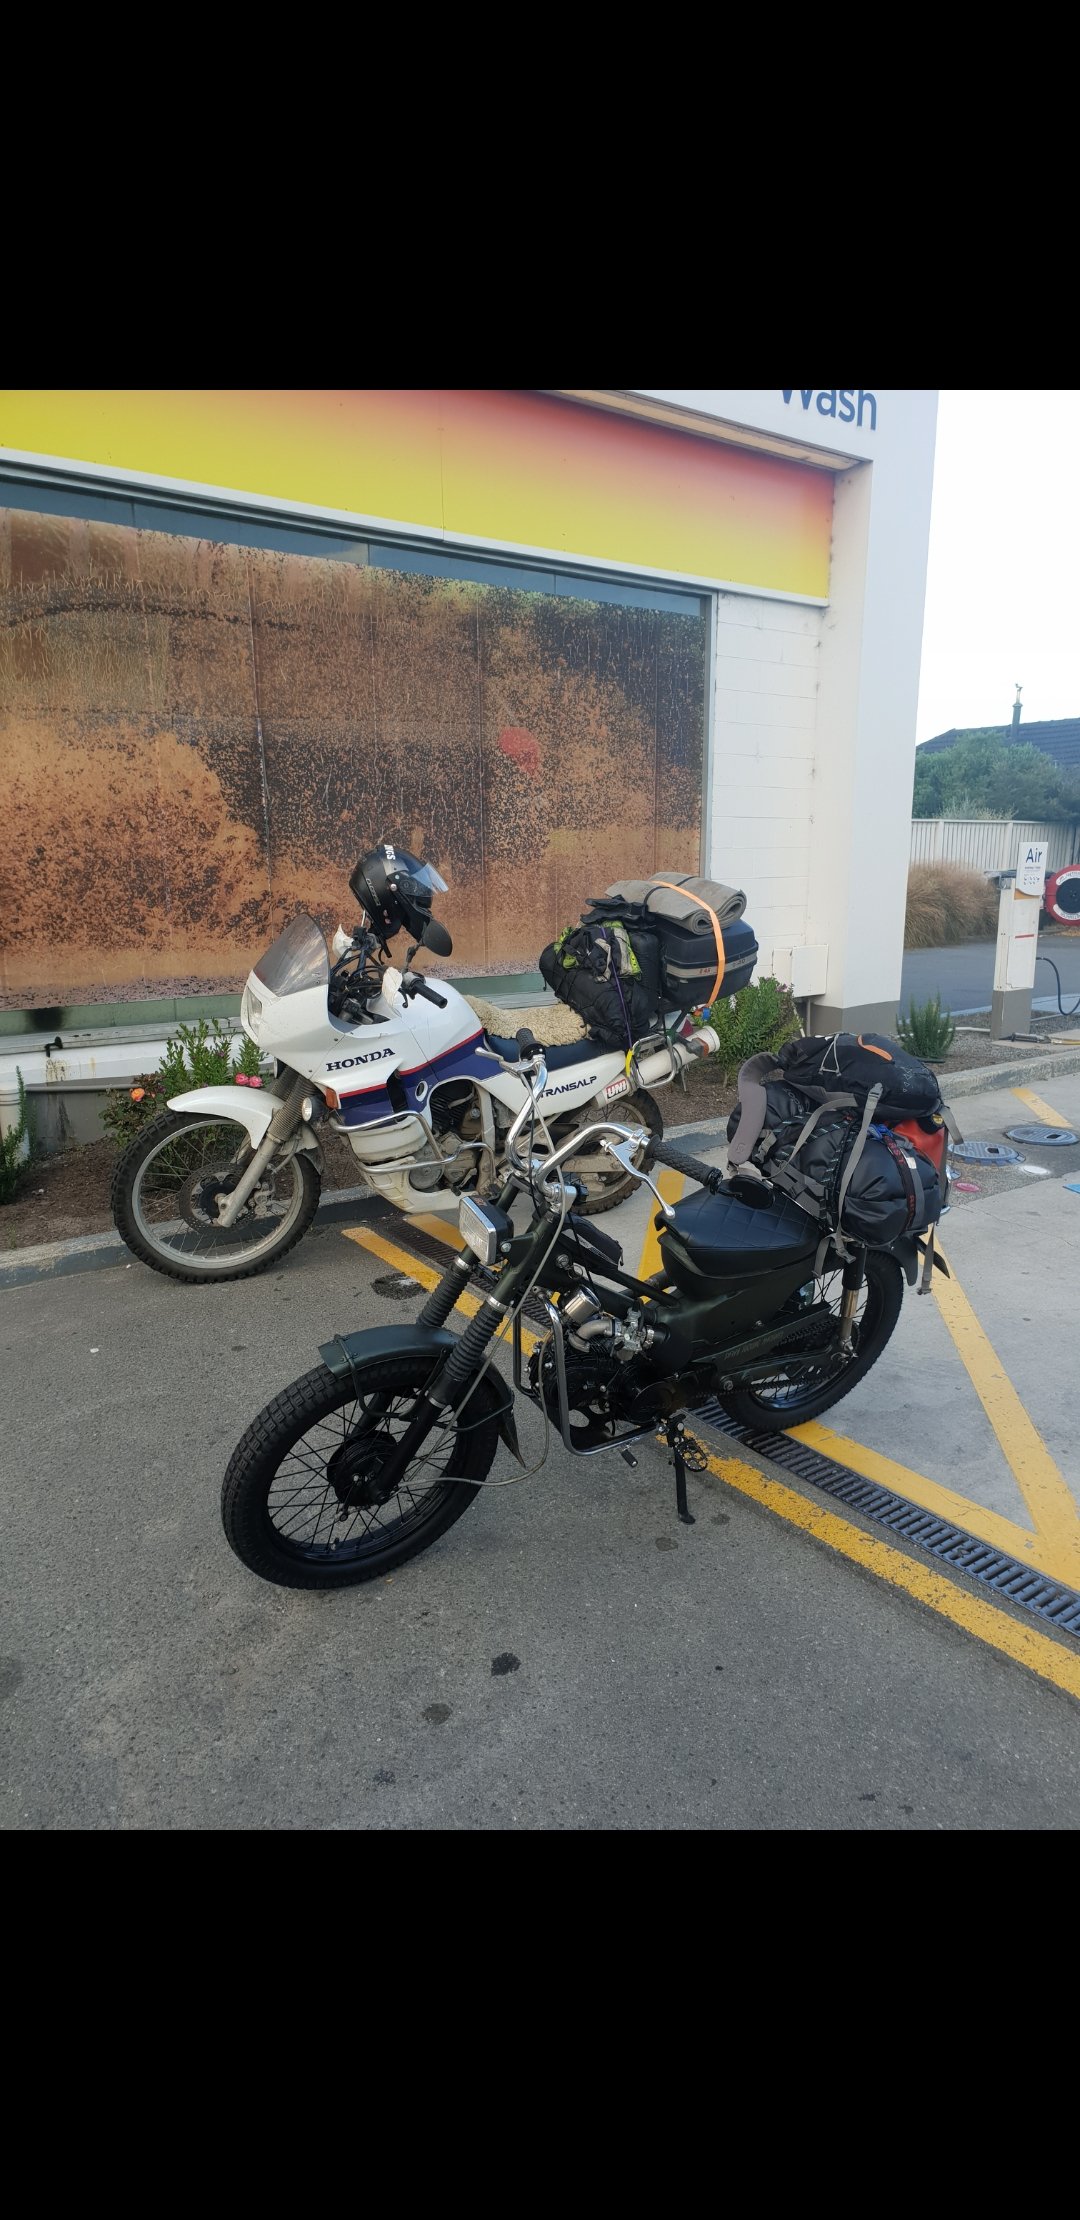
So over the last few months I probably put another 1000km of daily duties and exploring . Then I had a big upcoming ride for Heyholes Stag party which was gonna be the Molesworth Rainbow loop but due to fire risk that was closed and Blizzo came up with a new route. Before the ride I changed the oil and spark plug and chucked on a new rear tyre and gave the bike a good check over. Packed up my spares and tools into my new 20L drybag and a 5L fuel can and headed off last friday morning with my mate Brent on his old Transalp. We rode to Culverden then headed up the Inland Kaikoura rd and had a much deserved beer and feed before he headed back to Hanmer Springs. I carried on up the coast and stayed at my folks place in Renwick. Brent showed me a few gravel back roads on the Inland Kaikoura rd and I clocked up 380Km that day. The next day I left my folks at 8am and headed up the Wairau Valley knowing the Wellington lads on bigger bikes would catch me leaving from picton a little earlier and we met half way up the Valley and cruised up into some twistys. My bike died suddenly but was a quick fix as the coil wire plug had just popped off. Carry on to St Arnaud and gas up before heading off the sealed road onto the Porika track which was steep and rocky but a fun challenge for my bike being so small . We then headed down into Lake Rotoroa after a couple beer stops and then headed onto Braeburn track and out of another valley into Murchison for late lunch and beers. From there we headed up the valley and over the Maruia Saddle then into Springs Junction then straight lined it to Hanmer Springs for a big night. Up first thing in the morning for a soaking wet and cold ride back home to chch while the others headed north up the Inland Kaikoura rd. My bike performed so well and kept up with the 200s and 250s well enought and held a good 90kmhr on its own . Prob smashed close to 950km over 3 days and only had sore ears due to straight pipe. My next mission might be Danseys Pass and pop into Cardrona Valley to see a mate. Best thing was all the old boys fizzing over the posties at the gas stations and being blown away how far away from home I was. Great fun on small bikes always !
1 point
-
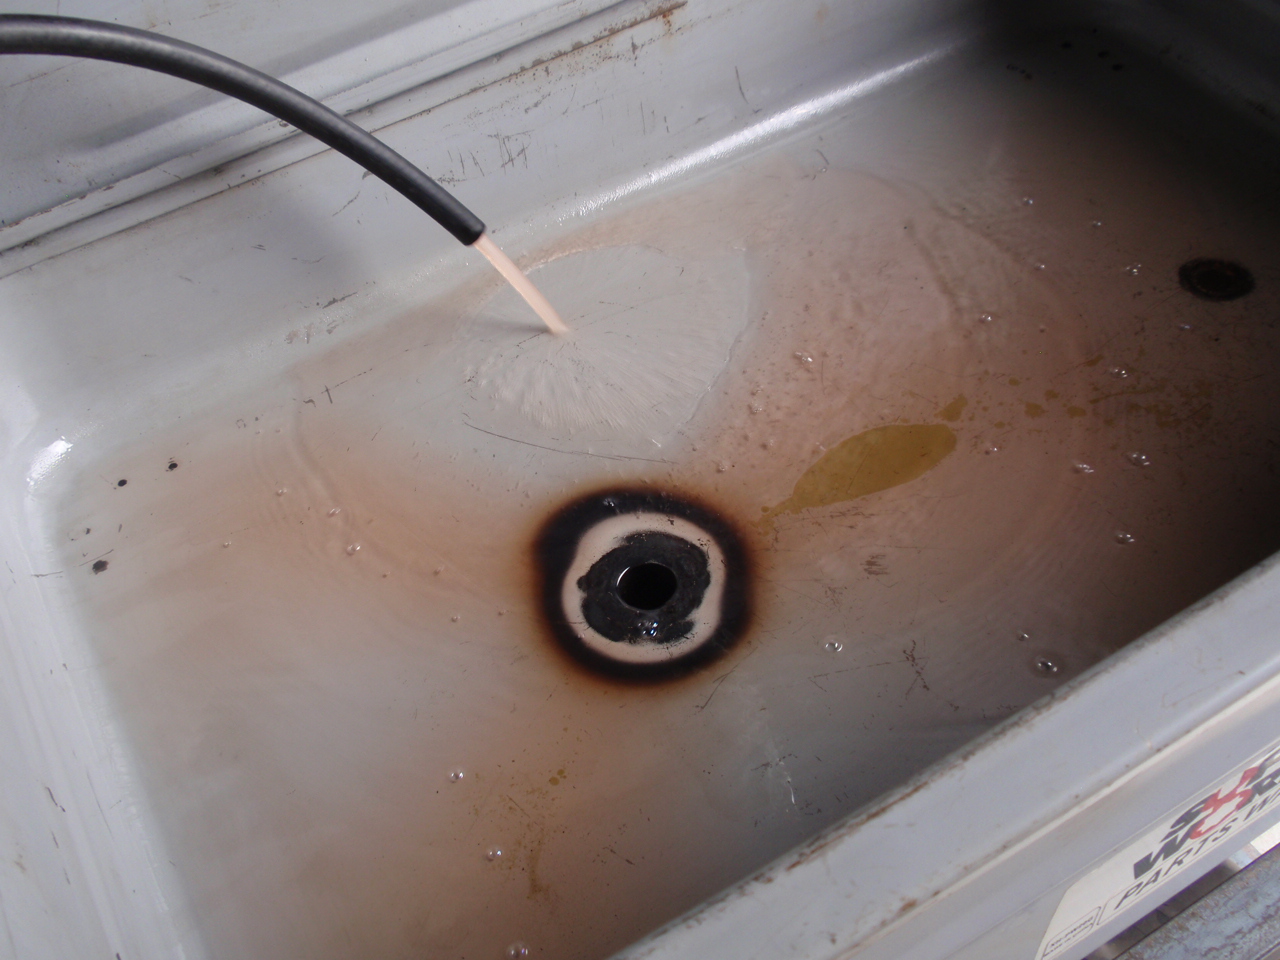
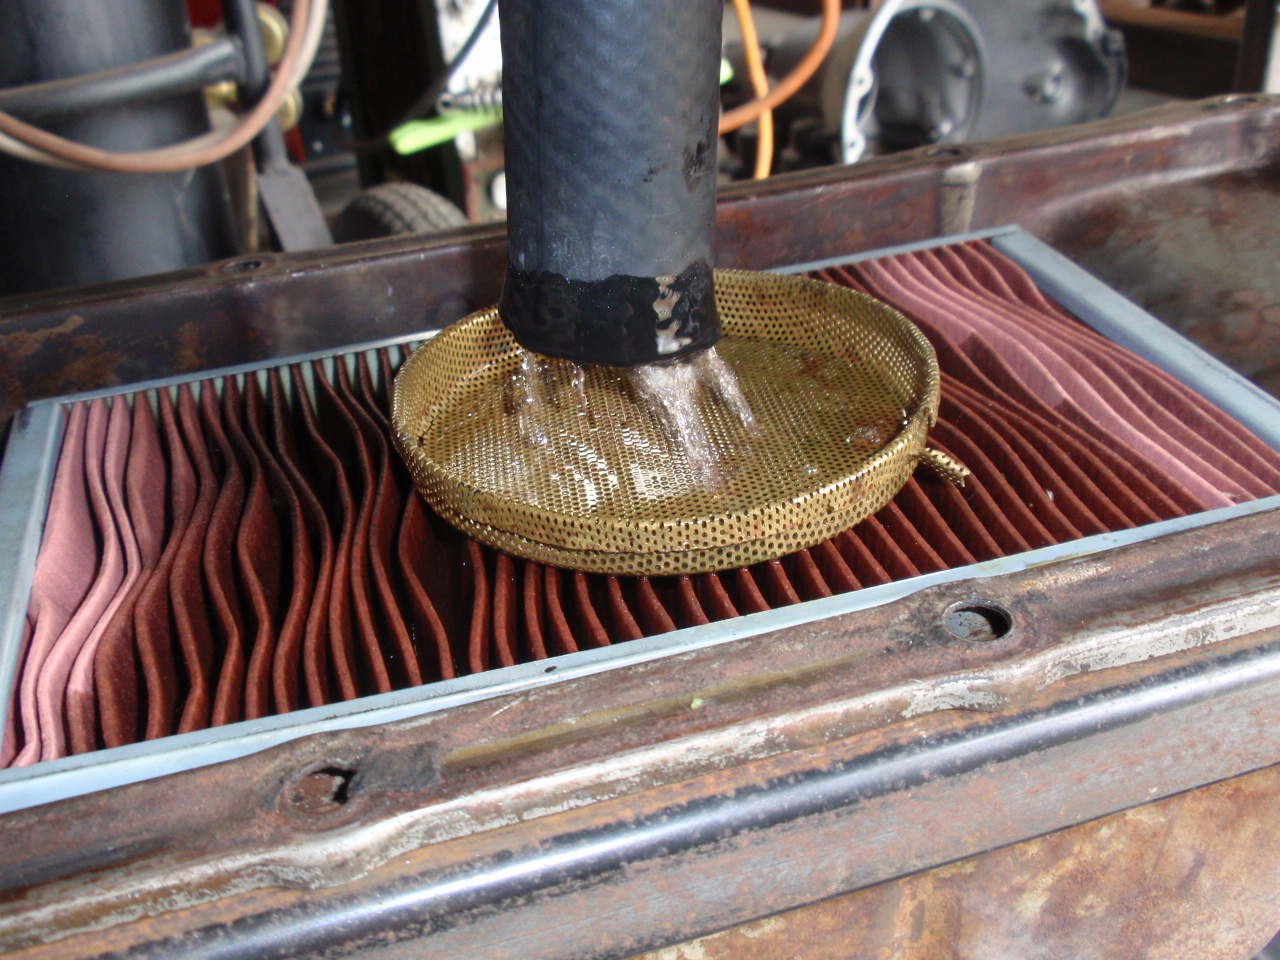
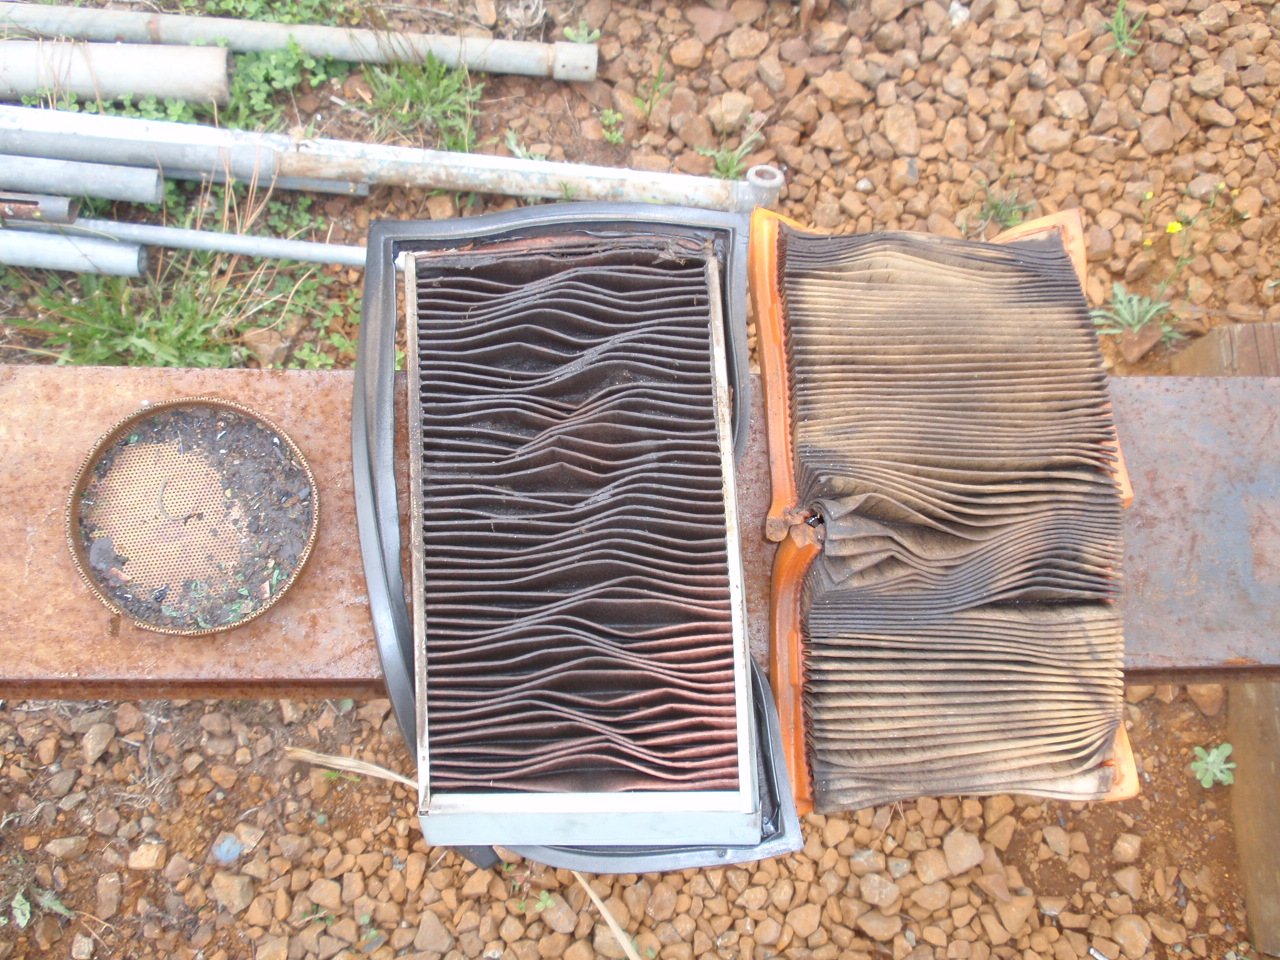
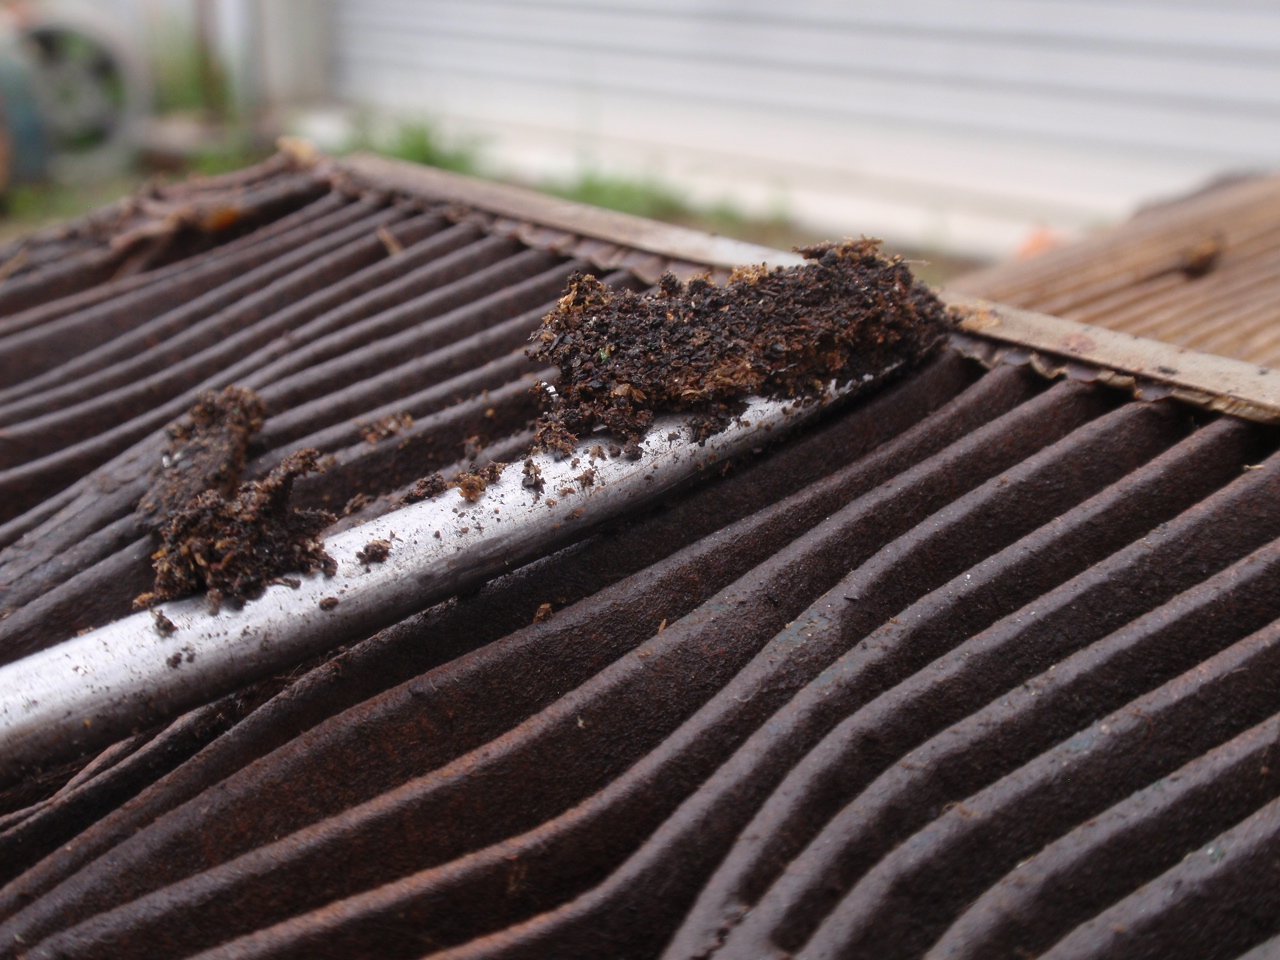
Feed back ... theory proved. I changed the filter system in my home built parts washer today. It was the first time I'd opened it up pretty much well since it was built. It hasn't done alot of work but it has proven to be invaluable when its been needed. This is what I found when I opened it up. Starting from the left in the pic there is the strainer (round thing) then the top filter (middle) and then the second filter (right) Noticeably it can be seen the top filter is way dirtier than the bottom filter. The strainer stopped the bigger stuff. The top filter caught most of the fine stuff in its folds. The screw driver shows what been trapped. The whole filter was clogged like this. The second filter was alot cleaner but still pretty gungy. I changed both out and cleaned the screen. You'd never see this sorta stuff in a typical oil filter setup. You'd just know it was blocked up because the flow would stall. This shedrat approach is the ducks nuts, has massive filtration area, and best of all - is free. Yeah baby.
1 point
-
Oh I forgot to mention a while back that I managed to get my Mum to do a spot of sanding to when she visited. I doubt she would have lasted log though but I think she did like the fact she had a trapped audience to waffle on to while she did sand... However- that was obviously before paint. Now we are right into the fun jobs of piecing back together the big kitset. The trickiest thing is trying not to get too carried away with cleaning things but it always does seem such a shame to put messy, rusty or dirty items onto a clean shell. I think in the future I'll try to stick to ratty cars like the Viva wagon. Saves time when things can be messy So yeah.. cleaning things. First the bumpers. I straightened both as best I could and Hannah then cleaned the backs and painted the surface rust in Por15... I then trial fitted the front but once bolted up it was slightly wonky. I ended up having to whip up a bending tool to straighten out the slightly bent mounting points... All straightened I mounted the bumper and stood back to admire the first bit of bling... We then hauled in the other two Imps and went over them like a team of car stripping Piranhas and removed all the last morsels of useful bits... With bits removed they then needed cleaning. Hannah quite enjoys these jobs and did a stirling job of making things all shiny again... I filled the roofline and inner wings over the rear arches with cavity wax. Much more enjoyable this time round then the first time I ever used some back in Blighty on my Rx3, in winter on a very cold day. This time round it flowed perfectly... Together we fitted the head lining we removed from Imp 3- the one rescued from Christchurch. Its a bit discoloured around the edges where the contact adhesive that the original factory worker had brushed in place has stained it right through. Not much we could do with that. But its rip free, pulled up nice and tight and looks better then nothing. Its in keeping with a 54 year old car... I then made a engine cover stay. Because the cover is fiberglass and had no mounting points for a stay I had added some before painting along with a suitable point on the car with them further apart then the standard imp placement to take away extra leverage over a flexible f/glass lid. Now to connect the dots. I had a rough Idea of what I was going to make when I added the mounts and just went with it. I had a piece of stainless the right size and used a plastic knob from an old broken cafetiere I had stashed in my bin of 'might be useful one day' bits. I bent the stainless rod in such a way that when the lid is opened it slides up and drops over a stainless bolt then cant go further. To drop the lid you have to lift the knob slightly- this way a gust of wind cant lift it and make it drop. It works sweet as!... Next big job was to get the wee car back on its wheels because I had some work coming in that required the hoist. I refitted all the suspension and luckily had collected 4 decent shock absorbers with good shafts. However the springs were going to be too long. I'd happily pay the $200 for some Montie Carlo springs. For those not aware they are the popular lowering spring set for Imps that most people fit. However the freight costs for a set to NZ is too much for me to cope with and anyway- I have 3 full sets of springs I can play with for free. I like free. So out with the Makita... After doing a heck of a lot of web browsing I deduced that one coil off the front and half off the back would be a good starting point. Totally aware that I'd be raising the effective spring rate I reckoned this would still be OK. The car is going to be a touch heavier all round anyway but too much extra stiffness to the coils without adding extra damping would be no good. I definitely cant afford new posh dampers at this point so I played it safe... I then heated the cut ends up with the Tig in several zones, flattening the coil as I did. This worked well- the heat didn't travel very far. Its not optimum. Optimum was what I used to do back in the day when I spent 3 months of my apprenticeship working for a Blacksmith resetting leaf springs and shortening coils etc. But I dont have big furnace at my disposal nowadays so Makita it is Then cut the ends flat and they came up sweet. It will be really interesting to see how it sits on these and this I wont know until the car is fully built up to full weight. I reassembled the struts and finally I was able to fit the minilight wheels from the racecar on and lower the Imp to the ground. Ooooooohhhhh. I dont know when this car was last rolling but I suspect it was a very long time ago! It felt so good to roll it away from the hoist, stand back and admire it. Plenty of premium positive camber to come out as the weight piles on. I'll soon be ordering some better sized new tyres and getting them onto the rims. While the car is off the hoist Hannah can continue assembling interior bits and I'll be attending to some work on other peoples cars.1 point
-
We move shit around and install it. The stuff is mostly big and unwieldy and I have a big box of tools I need to take. There is a long convoluted justification involving being unable to find a decent replacement for my current work vehicle, but this is tedious and mostly unbelievable so I won't bother. The real reason is that I think it will be cool and I am only happy in myself when I have a nice big chunk of interesting stuff to do that isn't work.1 point
-
Damn that's cool, never have I started reading a project thread and been so disinterested, and then so rapidly brought around as I have on this thread! "Heres a slogged out looking dyna I paid beers for, several pictures later and a few words and it looks like a beast"1 point
-
And fitted my aliexpress tubeless rims. Not too bad for china spec parts, little bit of de burring on the valve holes and had to tidy up the threads in the wheel nuts they were supplied with. Swapped the rear tyre to the front, left the spare and cover off, made a thing to hold rego and wof tags.
1 point
-
Learnt a lot in the past month and a bit. Main thing being that you should probably lube your fuel injector o-rings when you go to put them back in. Got the engine running, was only running on half the cylinders. Discovered there was no fuel going to the rear half cylinders, so decided to pull out the injectors. Took them into town and put them on an injector tester and nothing happened. Was told they can gunk up after sitting for awhile. So went off back home and gave them a spray with some cleaner and smashed them on the ground until they started clicking freely again with power to them. Got them all sounding really good, so in they went (without any lube, thinking back it should of been something that should of come to mind, but I guess I was just in a rush to get it running!), as they went in they must of torn the o-rings. I got the intake and everything back on and together and we started it up again. Ran mint!! So turned it off to see how it would start again, flat battery. Chucked the charger on, and then decided we'd put the wheels on, piece it a bit more together and go for a drive up the driveway. By time we got it together and off the hoist, a few hours had past and so had a decent amount of fuel past the o-rings and into cylinder no.5. Cranked it over and it didn't want to start very easily, so gave it a few more attempts and finally started up with a lovely knocking noise! We thought maybe it was just something loose in the bellhousing, as when we first started it we quickly realised there were no bolts in the flex plate to the torque converter. Anyway drove it up and down the driveway and then back on to the hoist. Decided over Christmas we'd pull out the transmission to have a look in there, other than the weights on the flex plate being ripped off by the torque converter there was nothing that obvious. Started the engine without the trans in and it still had the knock, which was a disappointment. Our neighbours Tony and Jason, who are a bit more mechanically minded came over on Boxing day after hearing that it wasn't transmission related, and went over everything they could think of. Eventually after a good few hours we narrowed it down and decided to check how high each piston is coming up by sticking a threaded rod with a nut on it and turning the engine over by hand. Got around to cylinder no.5 and it was about 5-6mm lower than the rest. Was obvious at this stage that we had a bent rod that was caused by hydraulicing the engine with fuel. Out came the engine, onto a stand, flipped over and then pulled the sump off. It was pretty bent! The crank smashed up the bottom of the piston, but other than the rod and piston everything else looked good. The engine is now at the rebuilders and injectors have been professionally cleaned with new o-rings. The buggered o-rings on the injectors. Since I had awhile off work over Christmas and the engine debacle halted progress a bit, we decided it was a good time to sand out all the runs in the clearcoat and give it another couple of coats with some flatter clear since I wasn't quite happy with the last stuff I used. Used some PPG autothane clear with flattening base in it this time. Was way easier to spray, looks waaaaay better, a lot smoother and a more consistent flatness. Also the extra coats covered the rust up a bit more, as before it didn't seem to be covered well in the rusty areas. With the engine out it was a good time to go through and tidy up a few things. Made up some stainless heatshields that cover the wiring on one side and the fuel and brake lines on the other. Also wrapped some of the exhaust in heat wrap to try and help keep some heat away. Ignore the plastic cable ties, the ones that came with the wrap were too short, and I'll change them soon. After trying to drain the coolant I decided it'd much easier if there was a drain plug, rather than having to disconnect a hose and having it run straight onto a crossmember. Next thing to do was sort out the fuel filler. Turned out the u-bends I bought for the headers were the correct size I needed, so took one of them, cut it to fit and welded a breather pipe on the side. Made a stainless pipe that goes from the 1 5/8" u-bend to 2" on the tank. Also added some gas struts to the rear bed lift up part. Whilst under the rear end noticed the rear airbags were only mounted on the bottom with bolts and no washers. This was mostly because the mount was so close to the diff tube and the airbag mounting holes had quite a small PCD, you couldn't fit much else in there. Came up with these plates that mount to the airbags with a countersunk screw and then have the studs stick through the outer of the slotted hole in the diff mount. Heaps of room to get a nyloc nut and washer now. Was running out of stuff that I could think of to do, so my Dad made a start planing and fitting the Matai wood planks that I bought quite a while ago. Fitted in they looked a bit weird being natural, too bright or something. Had some Japanese stain lying around that we tried and I quite liked it. So went and wiped that all over it once it was fitting well. Then wiped over some Scandinavian oil and came it out really nice. Got the windows installed, he still needs to come back and finish them off. The front window stainless trim doesn't fit as well as I'd hope it would, sorta sticks out a bit, but we're sure it's in there properly. Probably a combination of the crappy re-pro rubber and trim not being 100% right to start with, as I've heard of a heap of people having troubles with windscreen rubbers not fitting nicely on these. Supposed to be taking this to Nats in less than 6 weeks hahaha1 point
-
Another bike ticked off the to do list. The XR250R from a page back that i started restoring is finally finished. just need to make a bit of a rear rack / fuel can mount for our 800km feilding - picton - molesworth - hamner - rainbow rd - lake tennyson - nelson - picton - feilding trip coming up next month. Im really happy with how this bike turned out, people bag 250s for being slow but this thing still pops wheelies pretty easily and with the 6 speed sits on 115km/h quite comfortably without revving high. She got a clean sheet wof this morning, although riding it this afternoon my horn stopped working ha, along with my USB charger. gunna try ride the shit out of it over the next couple of weeks to make sure its reliable for the south island adventure.1 point
-
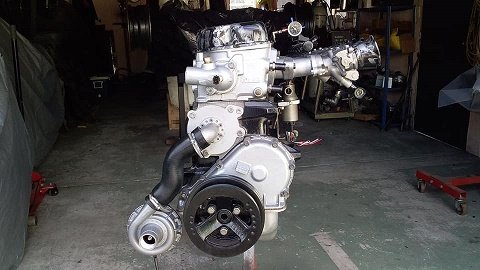
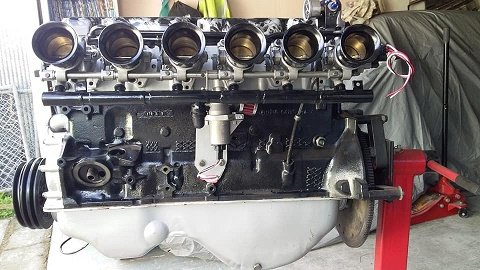
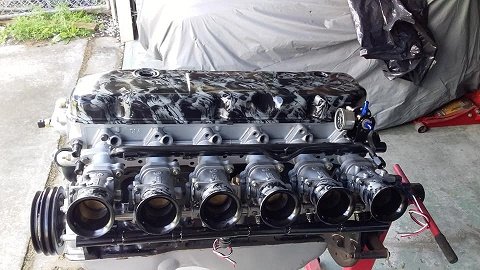
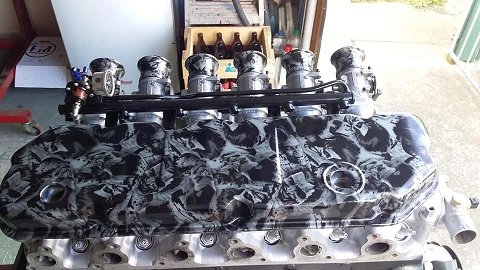
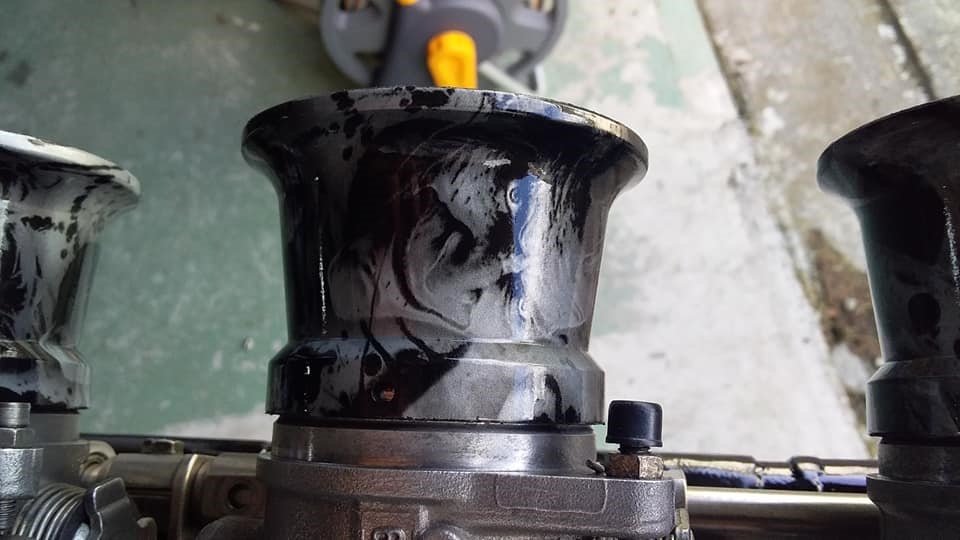
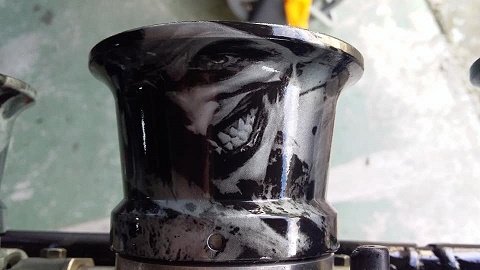
just a quick update motor is almost done ..just need to sort the throttle linkage (pretty much sussed) injectors (might get the factory ones cleaned or go later model) spark (going coil on plug from a later model) and last but not least headers ........going to make from scratch . apart from that Hydroprint Hq here in nz did the rocker cover and trumpets for me and i love it.
1 point
-
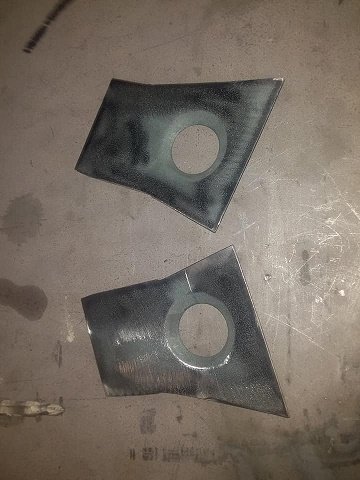
I said I should post more often so they're smaller, but here we are, another big post. I didn't think I had much to post because the majority of it has been wiring and that's boring, so not many photos. Air horns are now fully plumbed up. Used one of my dads cast aluminium fuel logs and used it as the manifold which has the main inlet and then each individual line to each horn. Bought the biggest battery that would fit inside the box I made earlier. Then drew up a clamp for it, laser cut it from some ali and folded it up. Getting better at ali welding! Fitted back into the under floor hole. Bought some battery cables and hooked them up to the main engine power junction. Wanted a killswitch mounted somewhere, made up a bracket for it out of stainless steel. Decided under the seat was the best place that is still reasonably easy to access and hidden from sight. Made an aluminium glovebox since the original cardboard one had seen better days. As the dash is quite short, it would of been hard to tuck up the fuse box behind it and not have it being a eye sore. So designed the glove box to fit the fuse box inside out of sight, which also tucks the wiring up. Started with the air bag wiring as it was the easiest to do and I don't have very much experience with it, other than a couple of weeks work experience nearly 5 years ago. Once the airbags were all done and working, I made a start wiring the rest of it. Started at the rear and worked forward. Need to make a reflector of some sort for the licence plate light. Since the engine had already been rewired at some stage, it had it's own fuse box and relays ready to go. Decided to mount the fuses up under the dash, after extending the wires to reach. The relays stayed in the engine bay since they shouldn't need to be accessed as often. Had to rewire the starter relay as it had full power going through the inhibitor switch and apparently that wouldn't be good for the switch, so cut and swapped around some wires. Stole the power steering pump off of my parent's Mercury that also has a Nissan V8, since they won't be needing one for a while yet. Only just fits, the pulley is pretty close to the chassis rail and the tensioner bolt is very close to the crossmember. Got a new high pressure line made up by using the original fitting from the Nissan line and the rack end of the Jaguar line. Assembled the inner and outer fenders and then lifted them in place, to check everything still fits. The engine bay looks pretty nice (other than the ugly engine)! The accelerator cable needed a new bracket to hold it in place since the original didn't work that great anymore. Made up a V2 under dash panel for the ignition switch and other numerous switches. Looks better than the first one, it might end up black eventually I think, brushed stainless doesn't really match anything else. From left to right has the ignition, heater, fog lights, wipers and horn switch. Also charge and oil pressure lights. Made a stainless steel bracket to mount the tacho gauge under the dash. Also above it is the headlight switch. Had to make a bezel for it as the hole in the dash was 25mm and the switch was supposed to only fit in a 8mm hole. Park/indicators and headlights all wired up with some waterproof plugs. Managed to blow the 6v sealed beams in the fog lights, so got some new GE 12v ones from America. Made some stainless steel spacers for them to sit on. Need to get enough courage to drill some mounting holes in the front splash apron now. Noticed the transmission mount was broken, asked around and found Nengun.com had genuine new ones far cheaper than any where else I found. Bought some oil filter relocation sandwich plates, as the oil filter was nearly impossible to access with the inner fenders in place. Had to get a new adapter nut turned up since the supplied one was too short like they seem to be. Made a new mount for the oil filter plate since the one that came with it was pretty pathetic and weak. Then got some fittings and hose, cost way more than what I thought they would.1 point
-
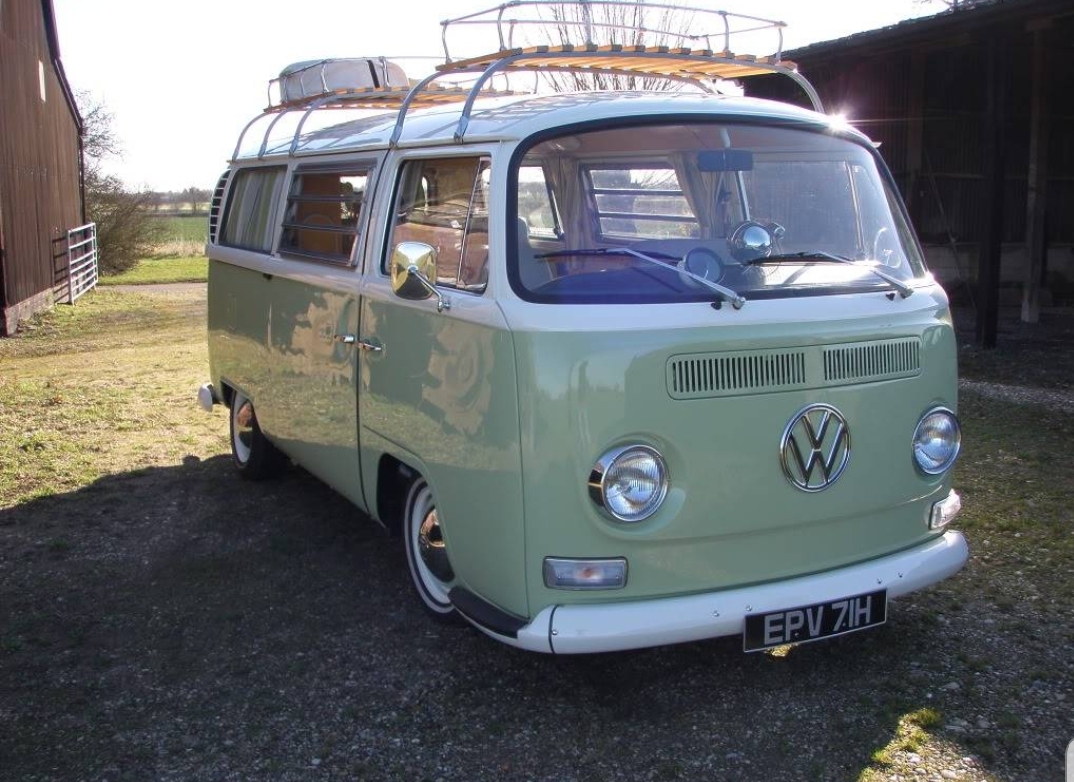
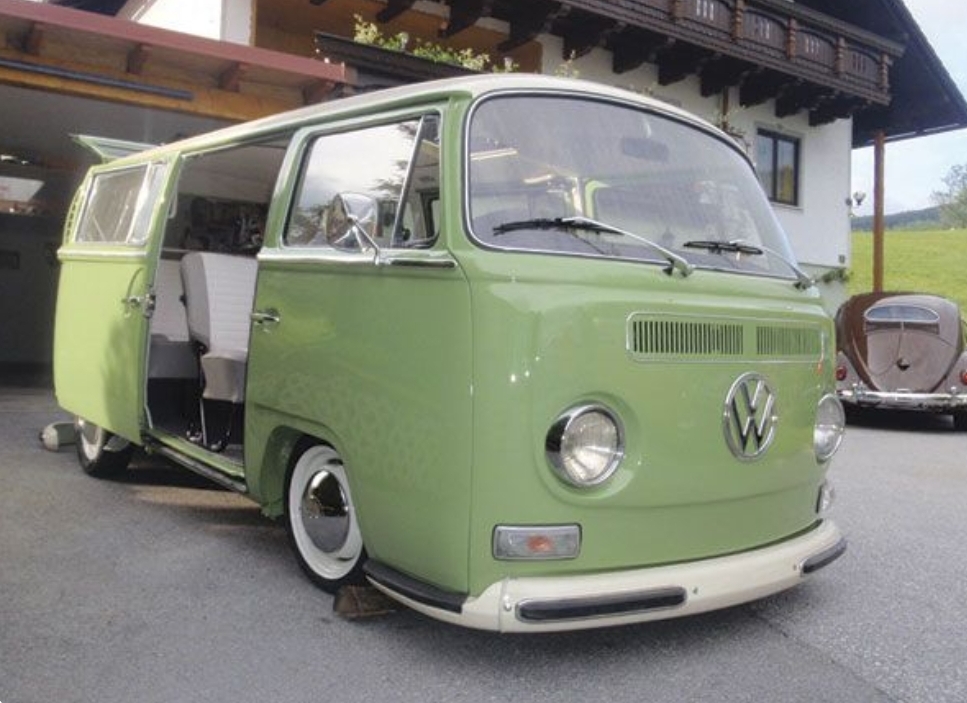
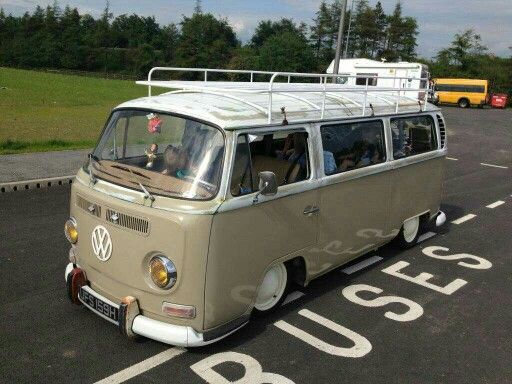
Sooooooo need to start thinking about this. Paint. Anyone got a colour on a bus they have liked or a picture they had saved. I'm looking at these I like this green but not full body colour. Also digging this beige/brown/clay colour.
1 point
-
Done a few wee jobbies on the ol girl lately, it's all pretty much ready to go! I'll go for a warrant next week and see what they fail me on.. Still need to get some new bars and grips. Was going to get some gears off Dime city cycles but shipping is pretty bloody pricey. Ahwell! Pics..1 point


This leaderboard is set to Auckland/GMT+12:00