
Leaderboard


Popular Content
Showing content with the highest reputation on 03/01/19 in all areas
-
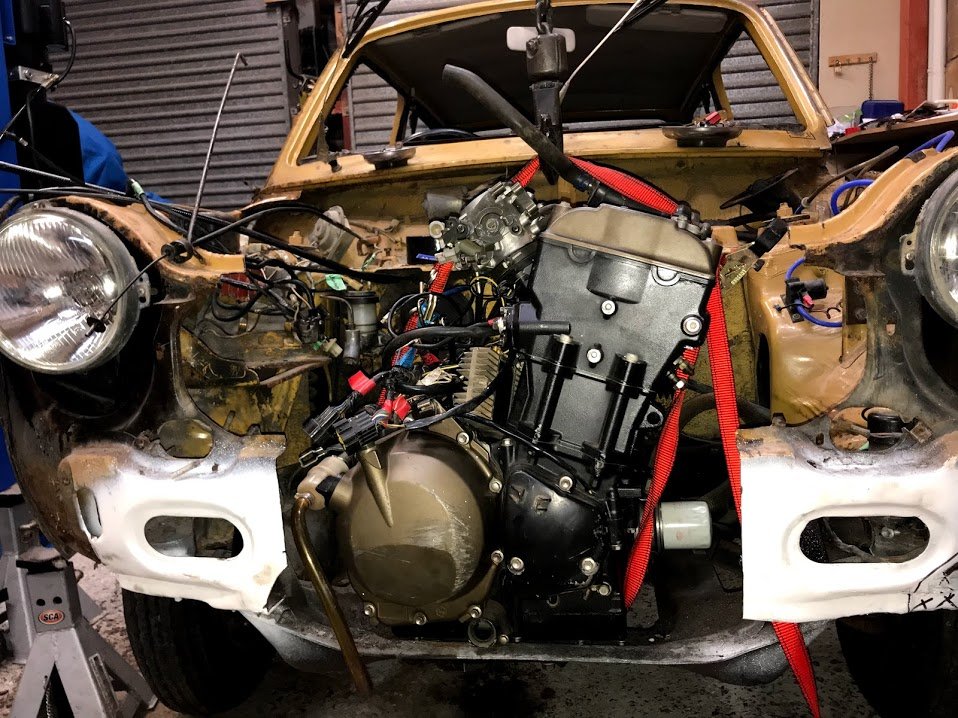
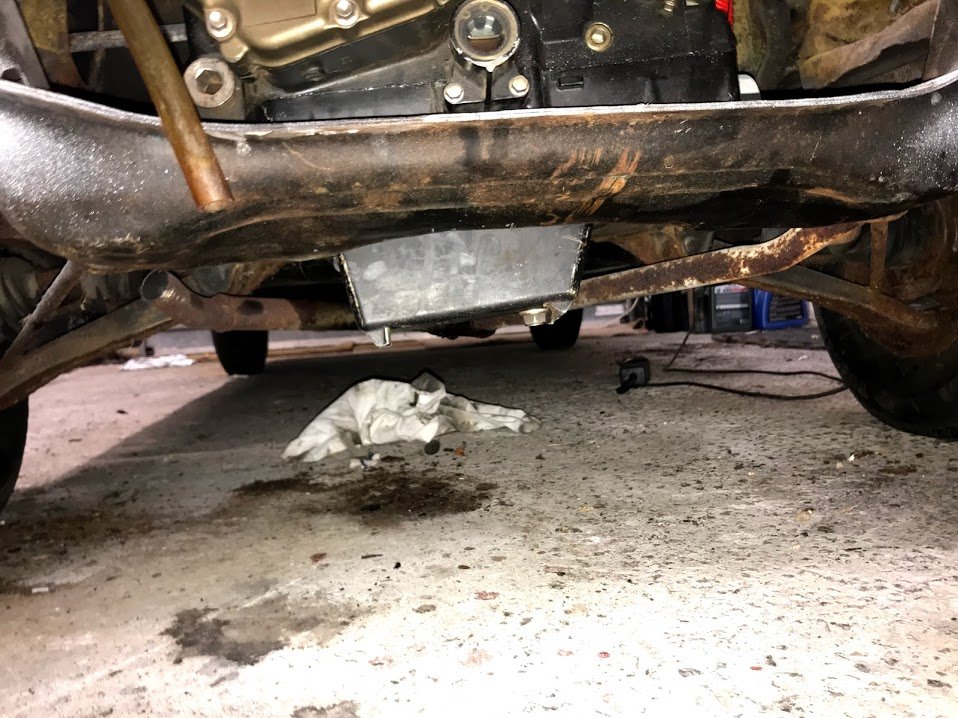
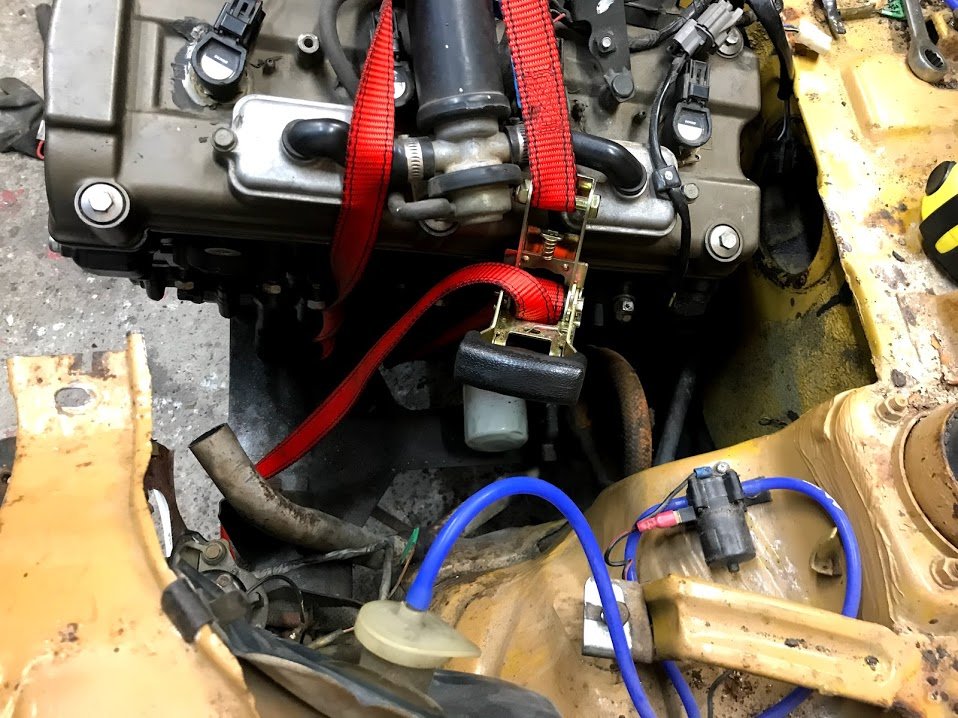
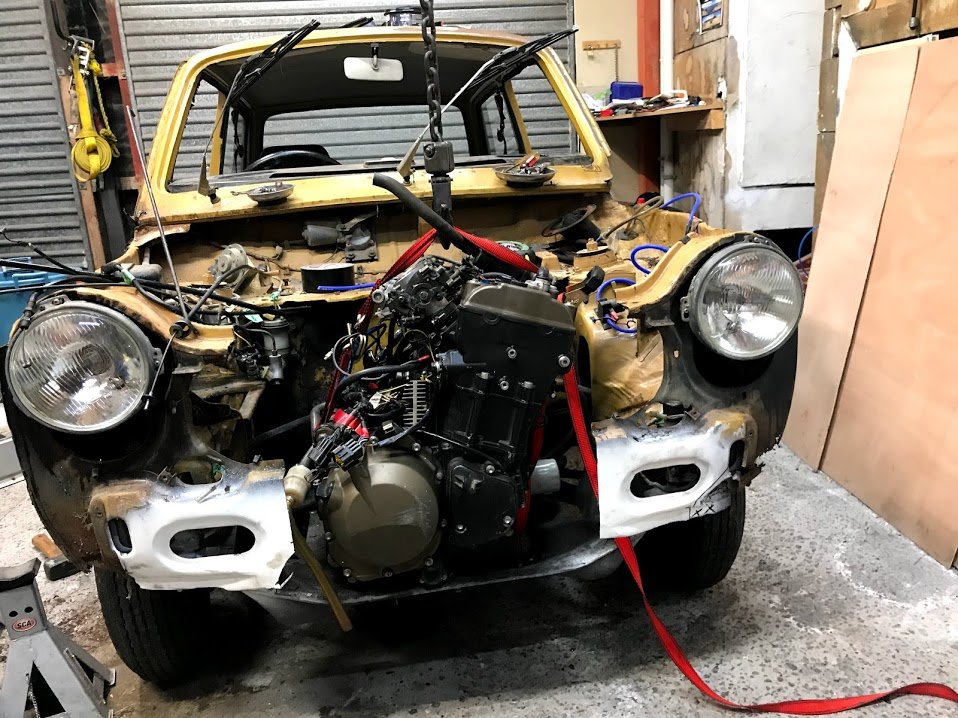
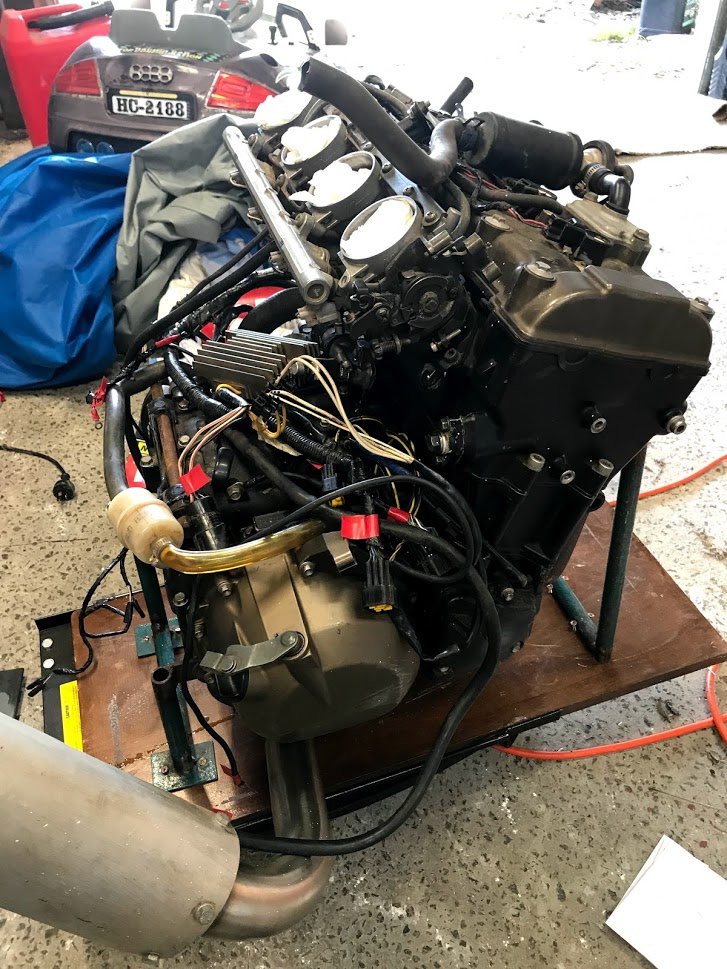
Test fit, a very vague proof of whether its going to be possible versus what I had in my head. With NO cutting or moving anything, it JUST fits under the steering rack but I can't lower it or move it back anymore because its resting on the subframe. It will need to move over to the passenger side to get the sprocket more centred, I should be able to get away with not having it perfectly centered though. Motivation to crack on with the rust repairs though! As you can see here, it should clear the bonnet, and it is resting on the front of the subframe, I will be able to cut out a section of this and still retain the foremost part of the frame. Meaning it will drop down a bit more: The sump design for the bike is very 'deep' but only on one side of the sump area because the exhaust normally runs next to this sump section. I plan on cutting up the sump to gain ground clearance as well as increase the capacity plus look at baffling: This just looks fucking cool... Extractors need to fit here, but I also need to move it further over to this side of the car to center it with what will be the driveshaft tunnel. It is also currently resting on the oil filter sandwich plate (which I need to return to the previous owner). I also have the original Kawasaki water to oil cooling sandwich plate, but I think I am going to need to fit filter relocating adapter anyway. The part of the subframe it is resting on should be able to be trimmed. Front view, it'll go over to the passenger side more and a bit further back. Fitting a radiator is going to be interesting....
 11 points
 -
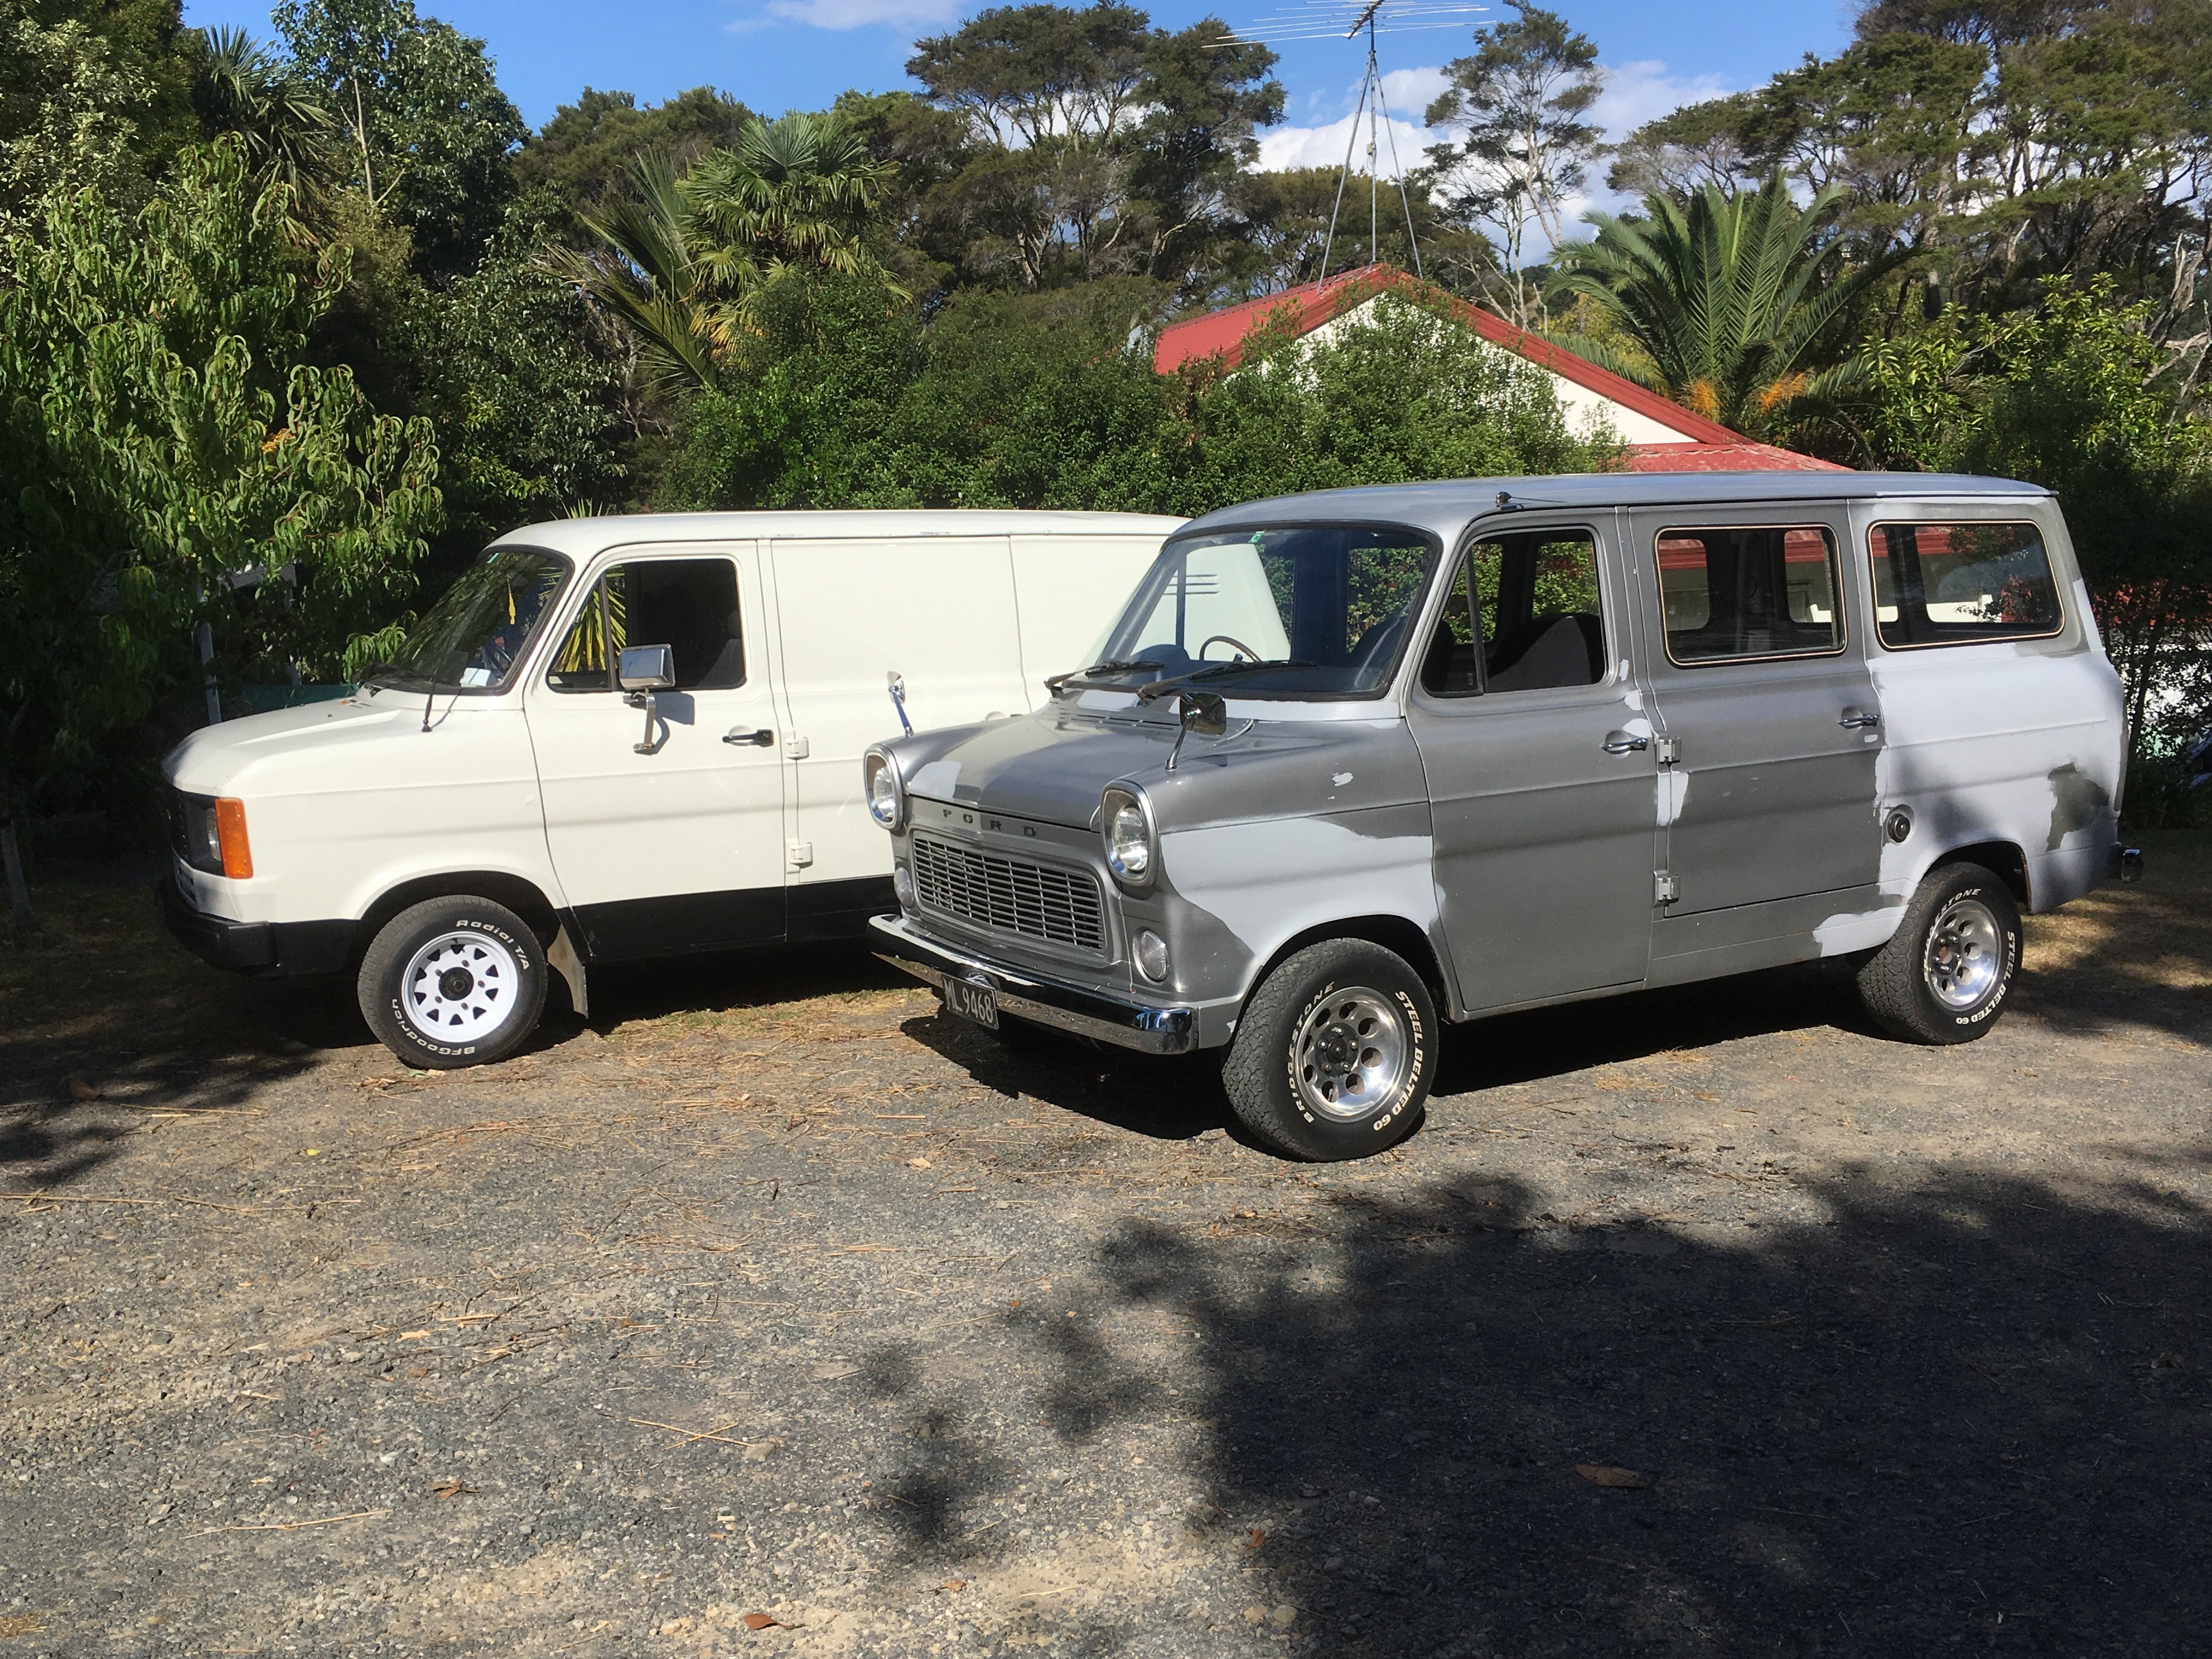
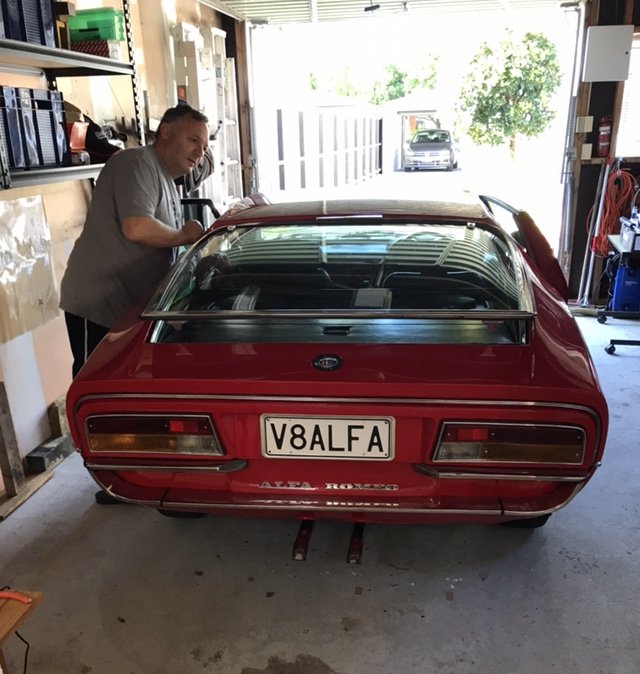
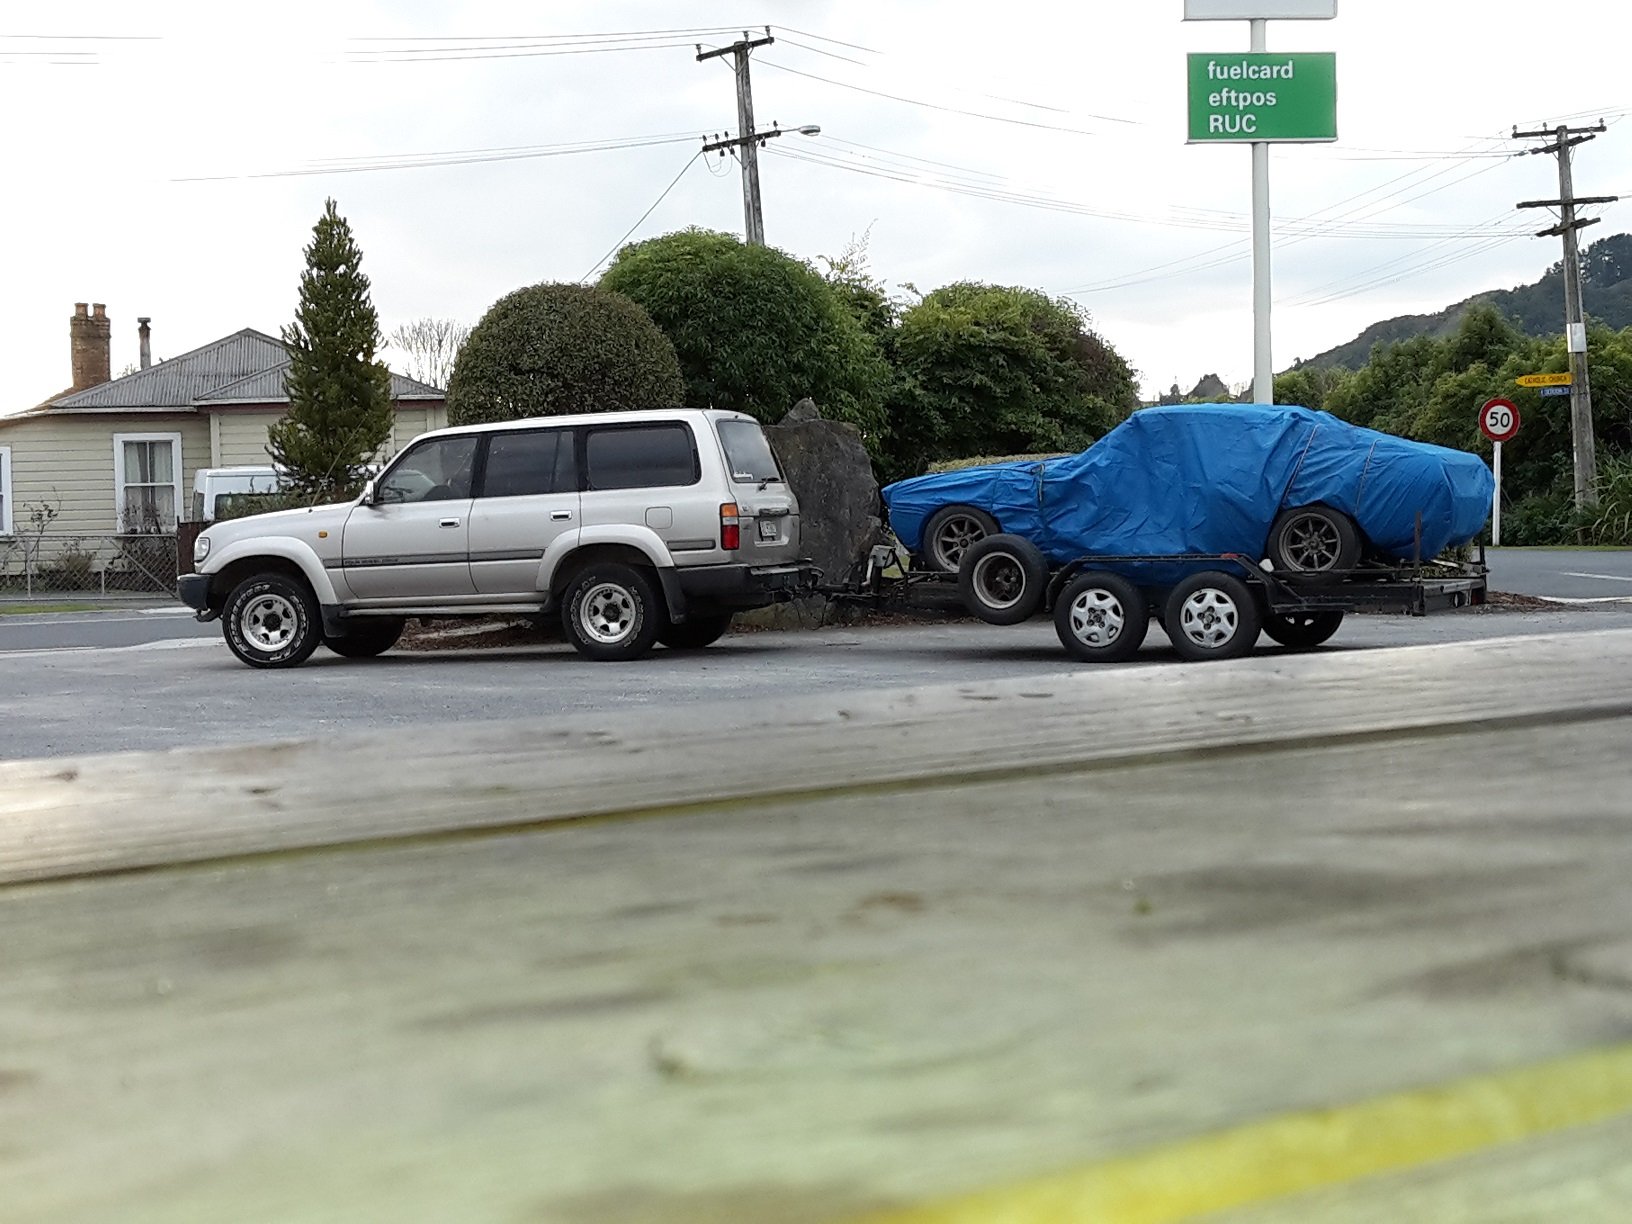
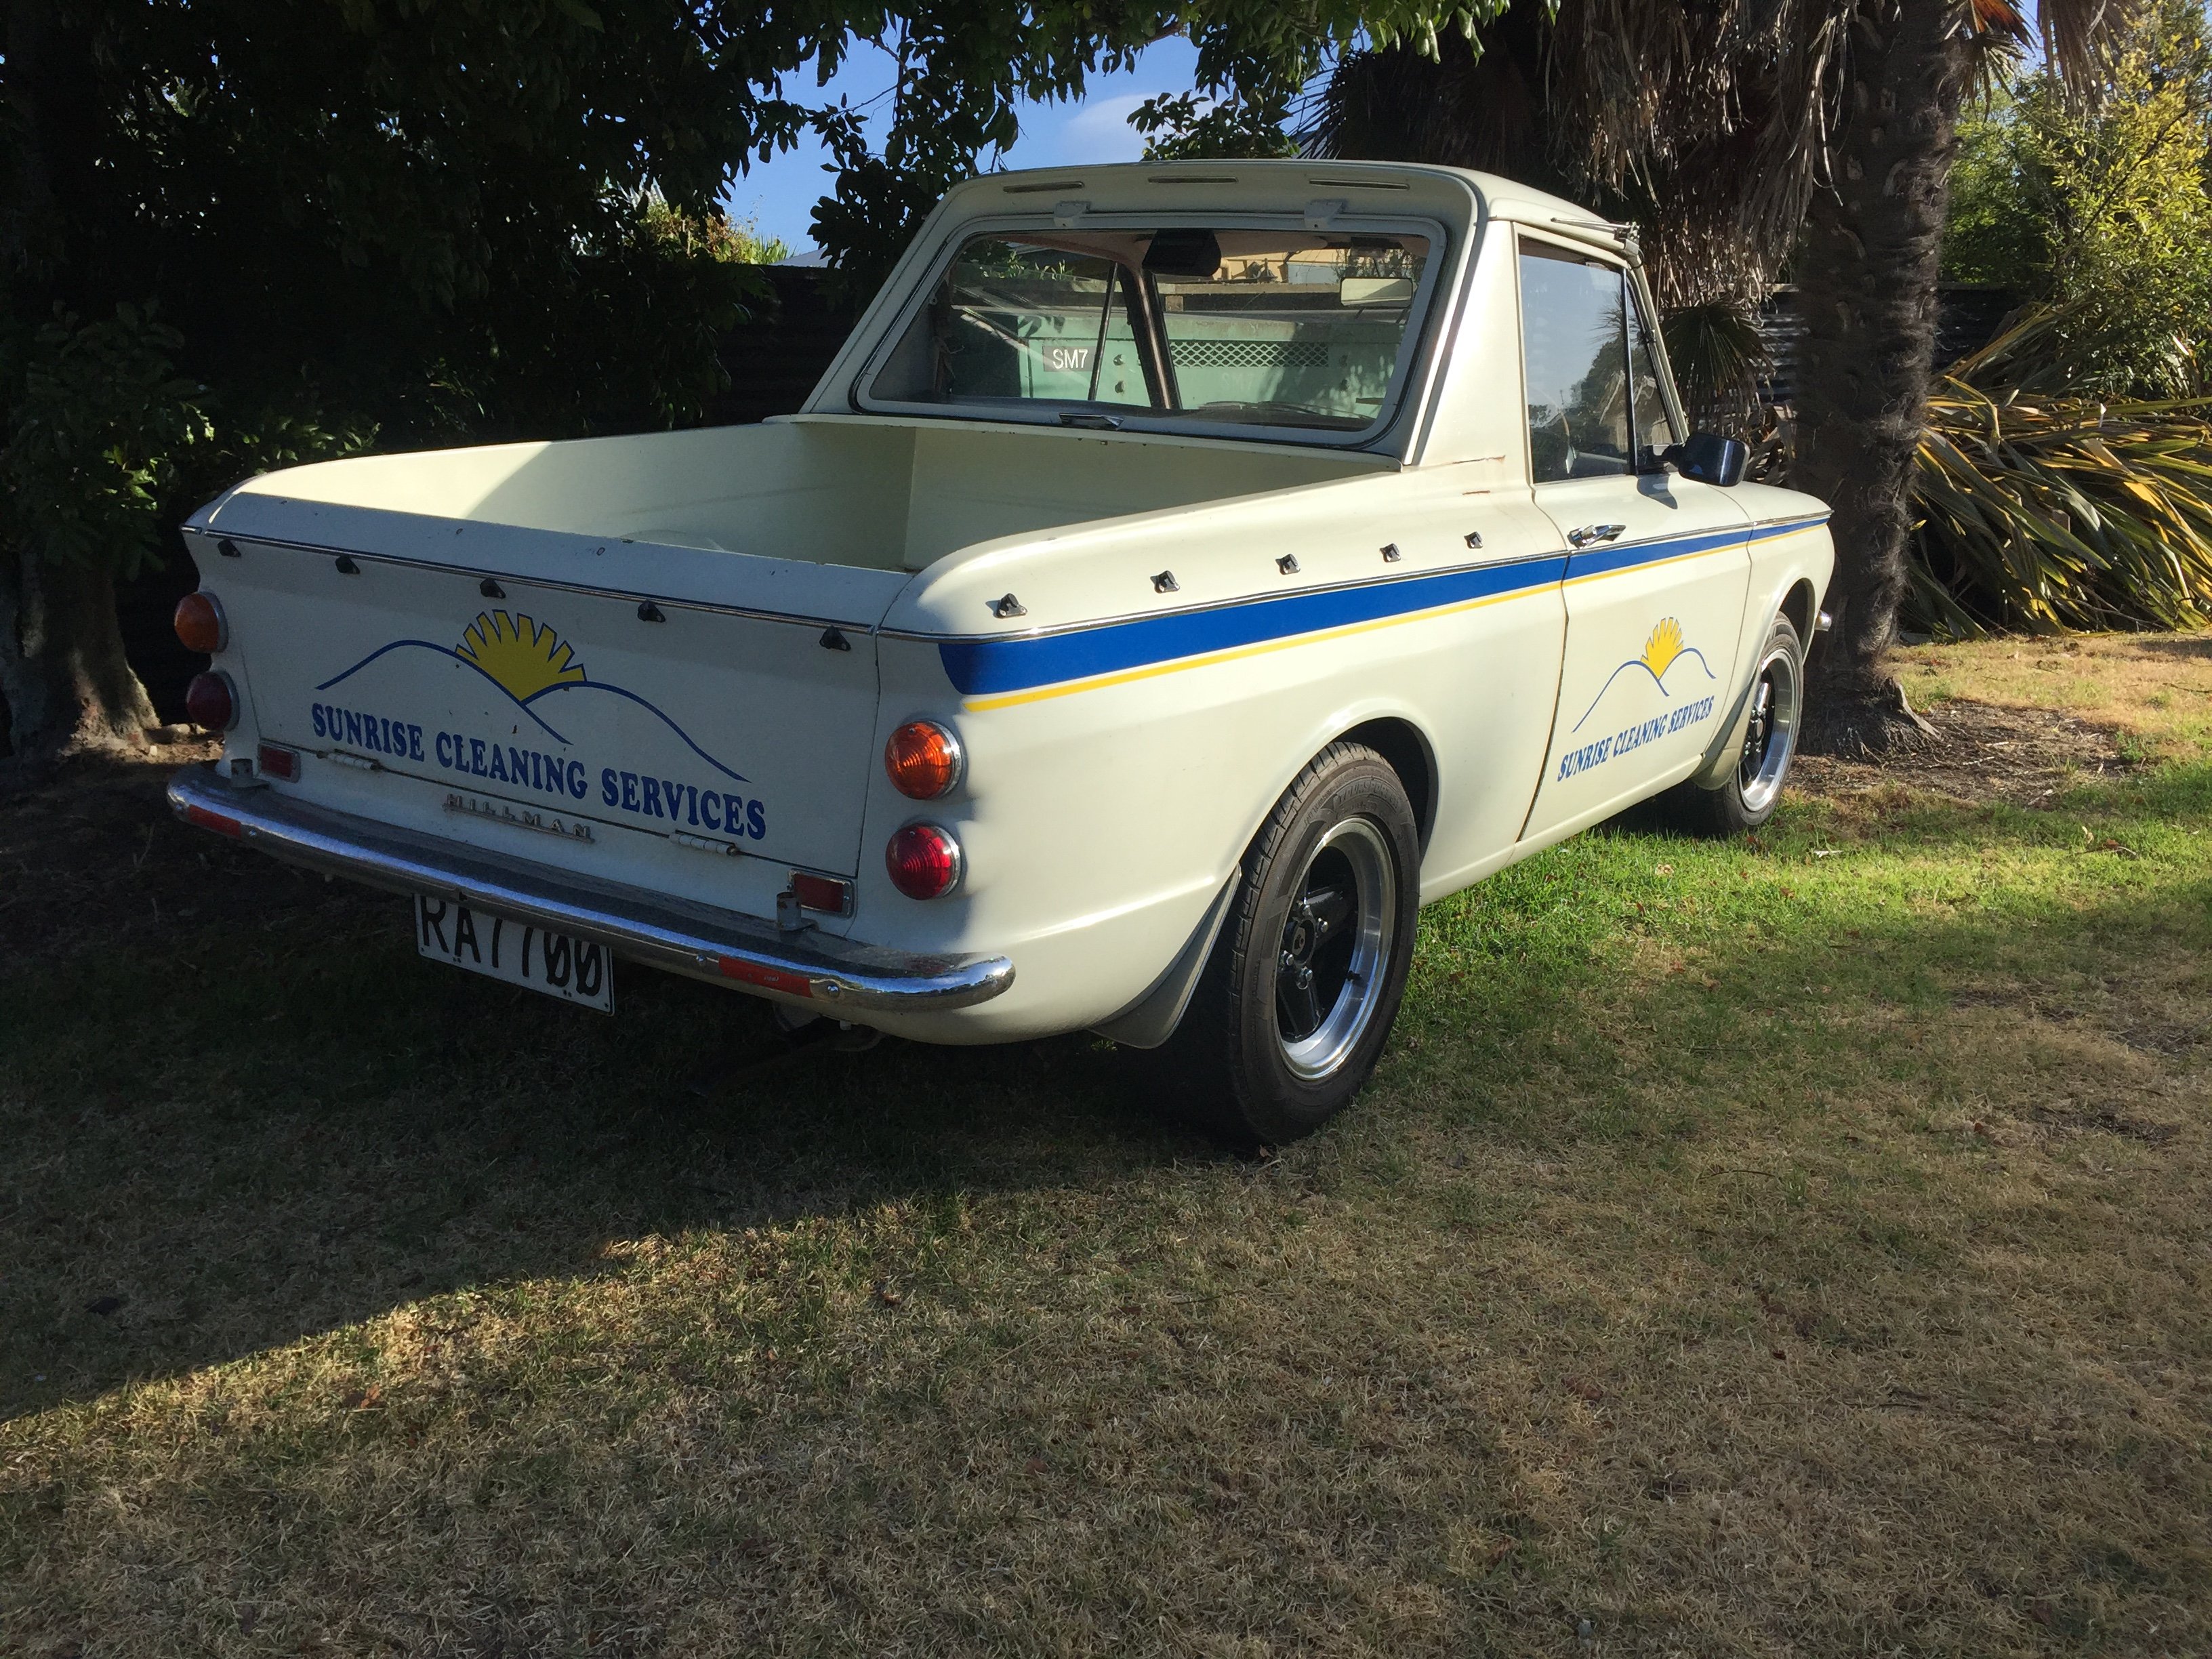
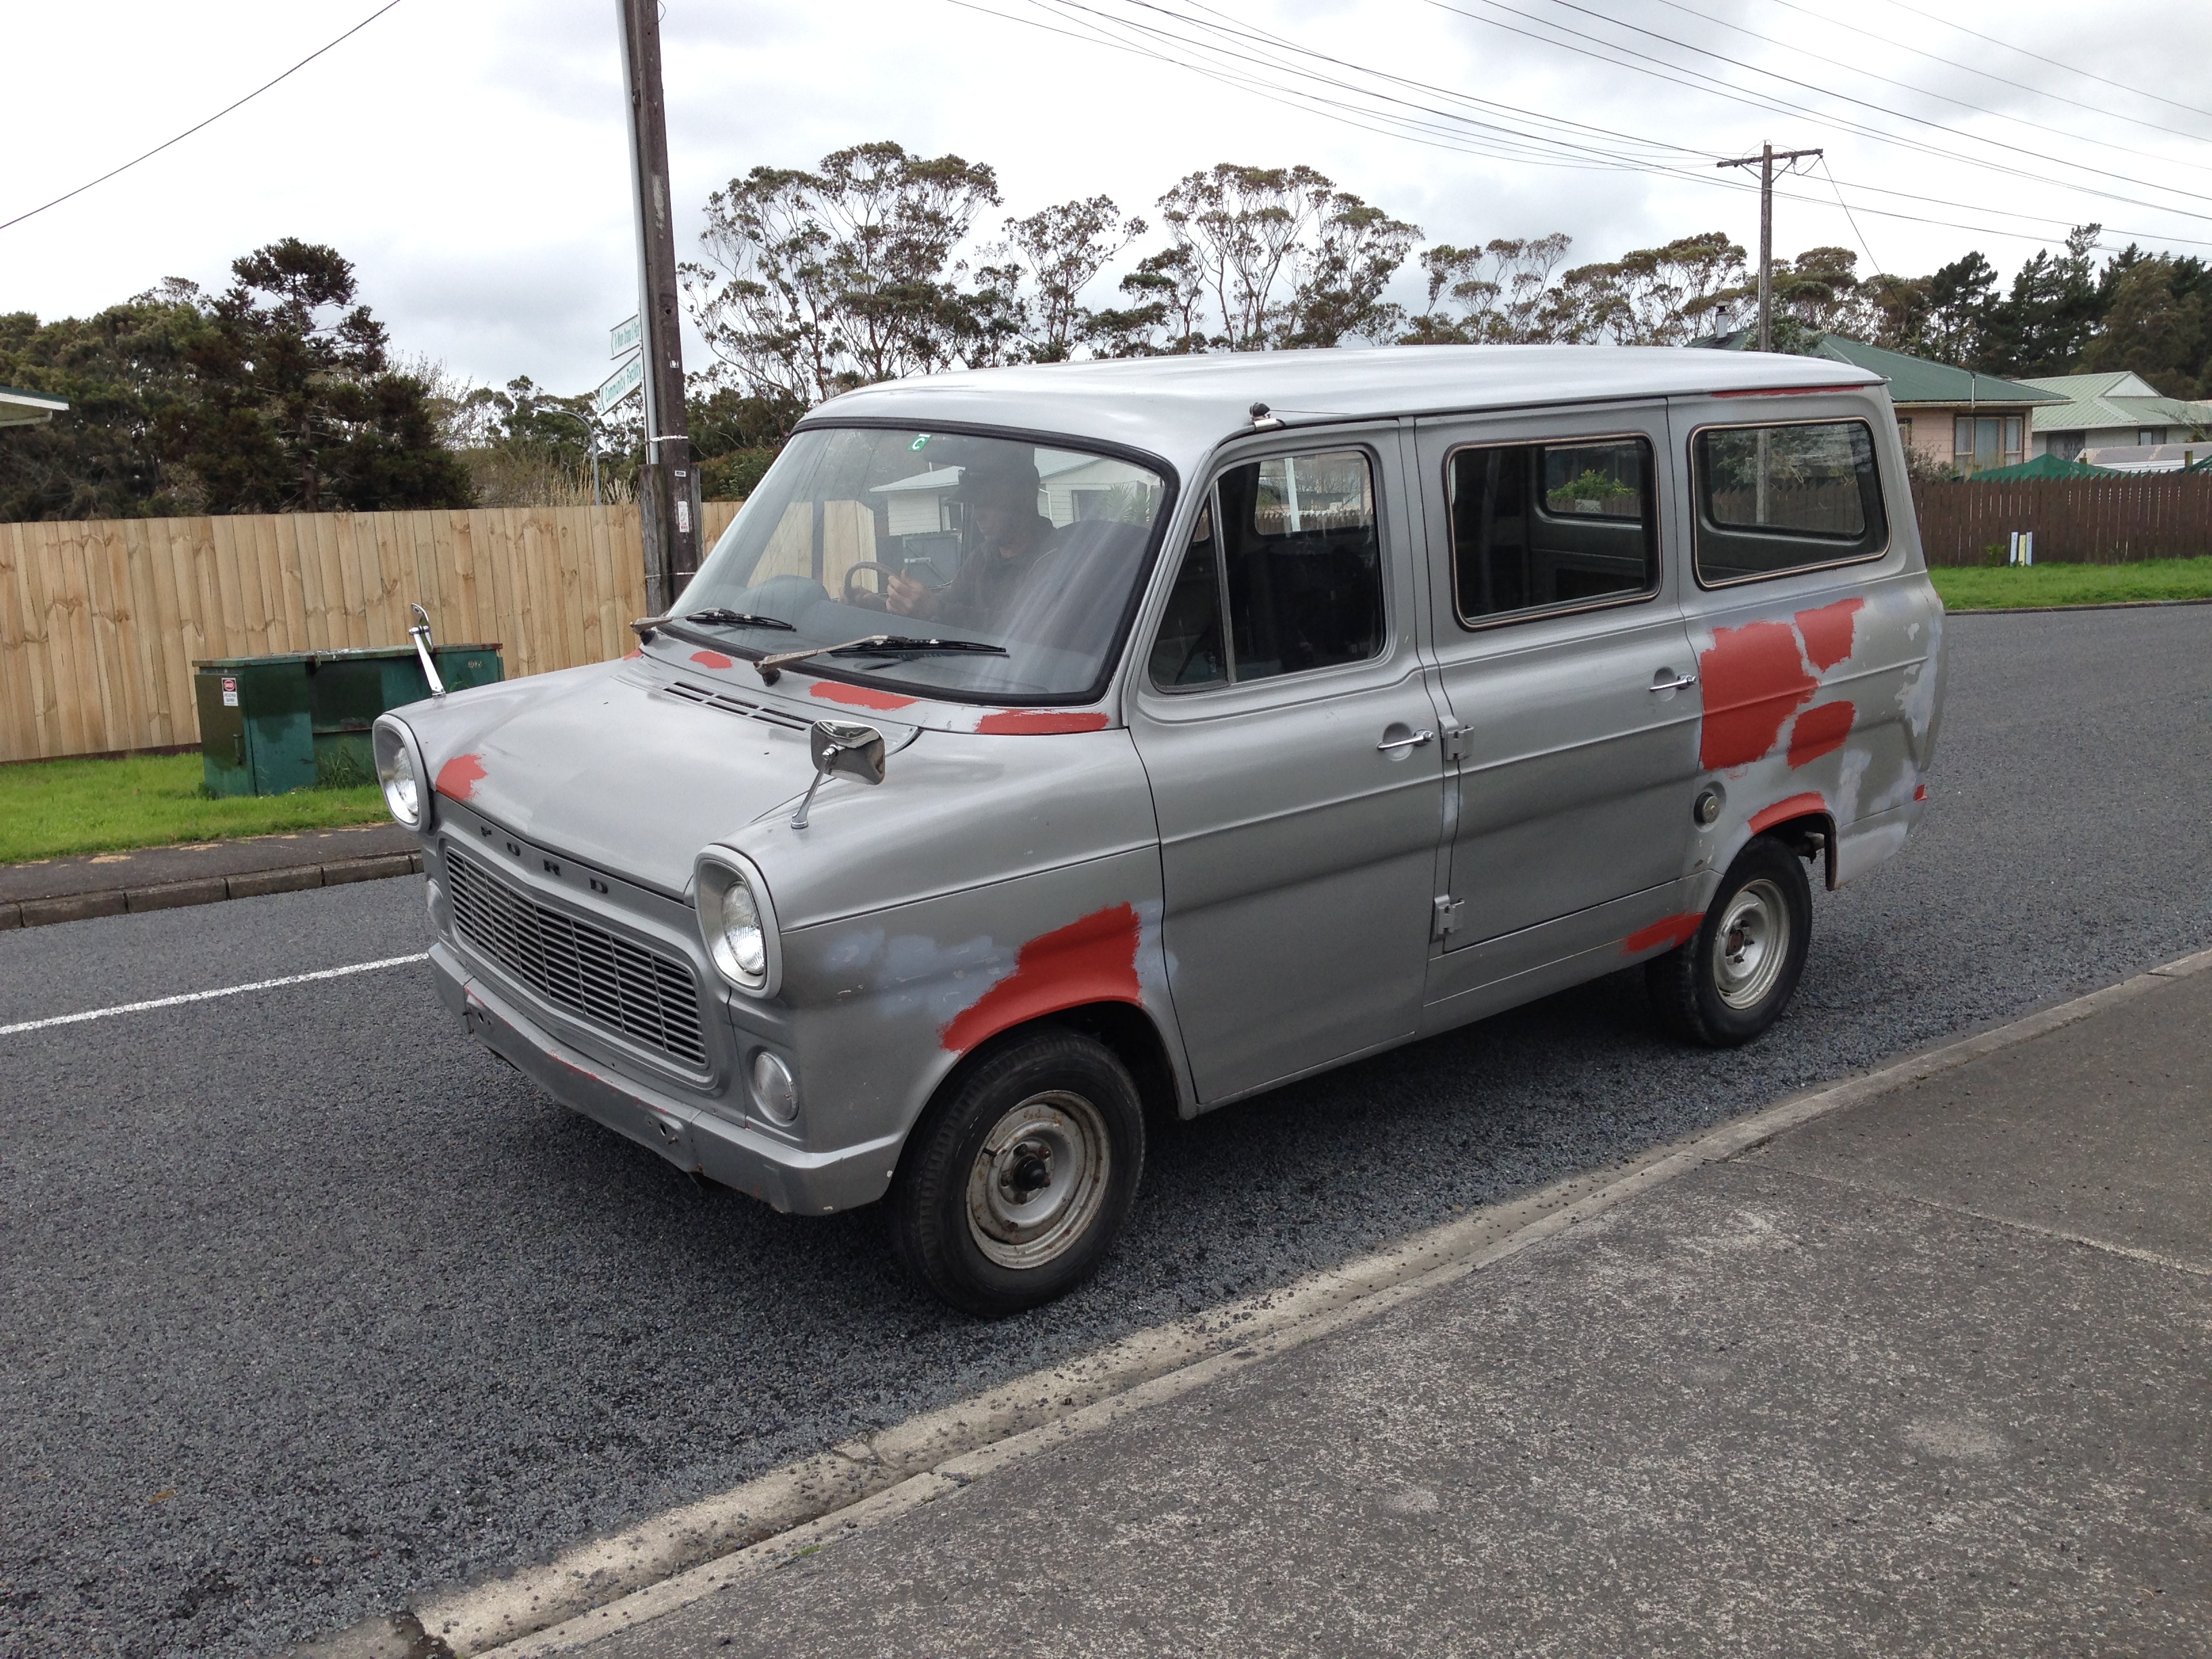
I had a call from the production studio last week, who are in season 5 of the TV programme "Westside" - a story set in the 70's and 80's about a West Auckland family trying to make it in the world. So I dragged out the Mk1 and Mk2 and cleaned them off, ran them up and down the road a bit, and then trailered them over to the TV studio. Feeling a bit guilty that I have not begun the restoration on them that was promised to them, but nice at least that they are out earning a few dollars to assist in this work which will happen eventually!
8 points
-
I put those brakes back together, they look freakin mint and the Endless pads are awesome. It's got Goodridge braided lines and etc too now. Aside from that I have just been driving it. It's running super nice and didn't break down or give me any drama once, all summer. 1991 Porsche 944 S2 2019 (58)-Edit by Richard Opie, on Flickr 1991 Porsche 944 S2 2019 (48)-Edit by Richard Opie, on Flickr 1991 Porsche 944 S2 2019 (31)-Edit by Richard Opie, on Flickr 1991 Porsche 944 S2 2019 (10)-Edit by Richard Opie, on Flickr 1991 Porsche 944 S2 2019 (154)-Edit by Richard Opie, on Flickr7 points
-
So yeah. Dragging this post up from the depths. This is still a project. I sold it to my mate rob about 3 years ago but he never picked it up. So I bought it back off him. Finally bit the bullet and have taken it into my mates mechanic shop and he is going to get her going for me. Motivation is finally coming back and thought updating this post might help with that!
5 points
-
Put a 50cc 5th wheel on it and register as a moped4 points
-
Yeah will definitely have to do a couple of early morning runs.... Have been working on getting a front axle put together. I’m using Austin 7 front drums and stubs. These needed a bit of a rebuild Reamed out the kingpin bushes with an adjustable reamer Set up the stubs in the mill, indicated the king pin to get them square. The dividing head was very good for this job The worn bottom surface that needs remachining And after Then needed to make a couple of new kingpins to fit. 4140 bar stock Finished4 points
-
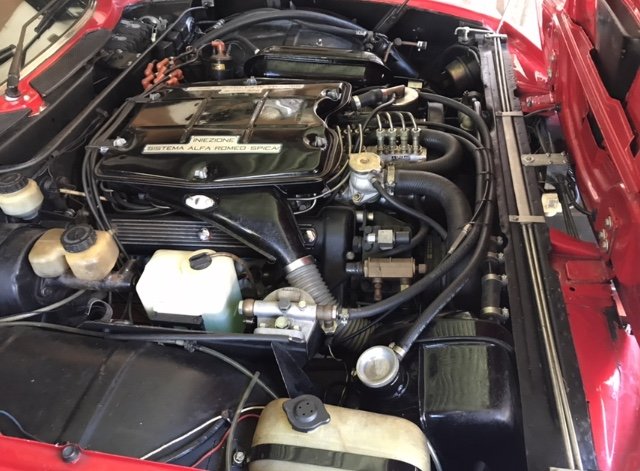
Started a thread on his behalf because he sucks at interwebbing, but also because it’s got a lot of interest so thought people would like to see it and I’ll get him out to some OS things in it. had a fair bit of resto work. from custom milled stainless led high stop to milled stainless rear seat luggage latch mounts. motors 2.6L v8 with mech injection, and factory dry sump setup. motors just had a full rebuild inc the sump setup etc. upgraded 4 pot front brakes and a couple other things using factory bolts ons from other Alfa models rear suspension is pretty shot, and it sits a little high. Got some parts from alfaholics on the way. old boys pretty slack with work updates etc but if anyone has and questions or photos of any part just message me and I’ll get it up
3 points
-
Not fitted the boot gauge yet, but ive made and fitted curtains, insulated and boarded the floor, and made the bed. Guy I bought the van off gave me a coupe of sheet of ply that used to be in the back and a few more offcuts as well, as well as the ply i took off interior ladder rack thing I also had some 32mm ply offcuts from an art week project i helped me ol' mate with, and most of the soft materials (curtains and insulation and foam, mattress) i already had, so this has been built for 'free' so far but i did have to buy more screws. Nice to use some hoarded shit up and make some room. Blank canvas with so much room for activities. Internal roof racks are from the PO - Guy had it set up for carrying a ladder Also covered over the brown chip board lining where it would be seen with check vinyl. Underfloor insulation - not sure how much difference this will make but cant hurt. 6x9s in too, same position as old van These 5mm odd sized MDF sheets were $5 at M10. Should be enough to stop my patella twisting off in one of the floor channels and stop the insulation rpping as well as providing some sound deadening and insulation too. Especially with a layer of fatigue foam on top, then the factory vinyl floor and some more foam under the last of the check vinyl. Much cosier too. Our last vans had house carpet on the rear floors, i think this will be a bit easier to keep clean and no less warm, especially with the fancy head liner, and we can always throw down a rug, or put in some underlay Made the bed, design was kinda dictated by the wood i had, but it tuned out really good. The sides are fixed, (but with only 4 screws per side) and very solid being made from 22mm ply, and the middle (17mm ply + 32mmply x 70mm cross members) is in two halves, So, they can be rotated and sat on the floor to do van stuff, OR put in place to make the bed platform and do caravan stuff. These are fixed to the fixed sides with 4 screws in the middle seam to stop them levering out when i sit on the end of the bed - the whole thing stiffens up the whole van like a cross brace And im pooped, so test lie down completed successfully! Now to the sink. And boost gauge.3 points
-
https://www.trademe.co.nz/motors/car-parts-accessories/personalised-plates/listing-1967810770.htm?rsqid=9e76378ab6024de8980482b80a9f5a64 Possible plate for the caravan Good investment for future tinfoil based business as well3 points
-
It's a slick machine. Glad you stuck with it.2 points
-
Nah the Chathams is more.remote than that. 750kms of water between there and timaru. You can't even drive to another town to buy anything. Two planes a week (cost me $750 return in 1999) and I don't know how infrequent the boat is. (IM long overdue to go back actually ) Ling/ I was thinking though @Unclejake before you even order that stuff sit the motor on the ground, fill the cooling system with water, apply compressed air to the cooling system, and remove the glow plugs, and the rocker covers. Then have a listen. The fact it's seized might mean a few things. Fact is my mate told me most fol down there are incapable of maintaining anything. Add the harsh environment, and it's a perfect storm. Did it run when parked? If you do a bit of due diligence pre tear down you might get an idea where to focus your inspections.2 points
-
The Cobra Transit - yeehaa! What's it packing under the bonnet? Ford actually built a total of one of these back in the day................
2 points
-
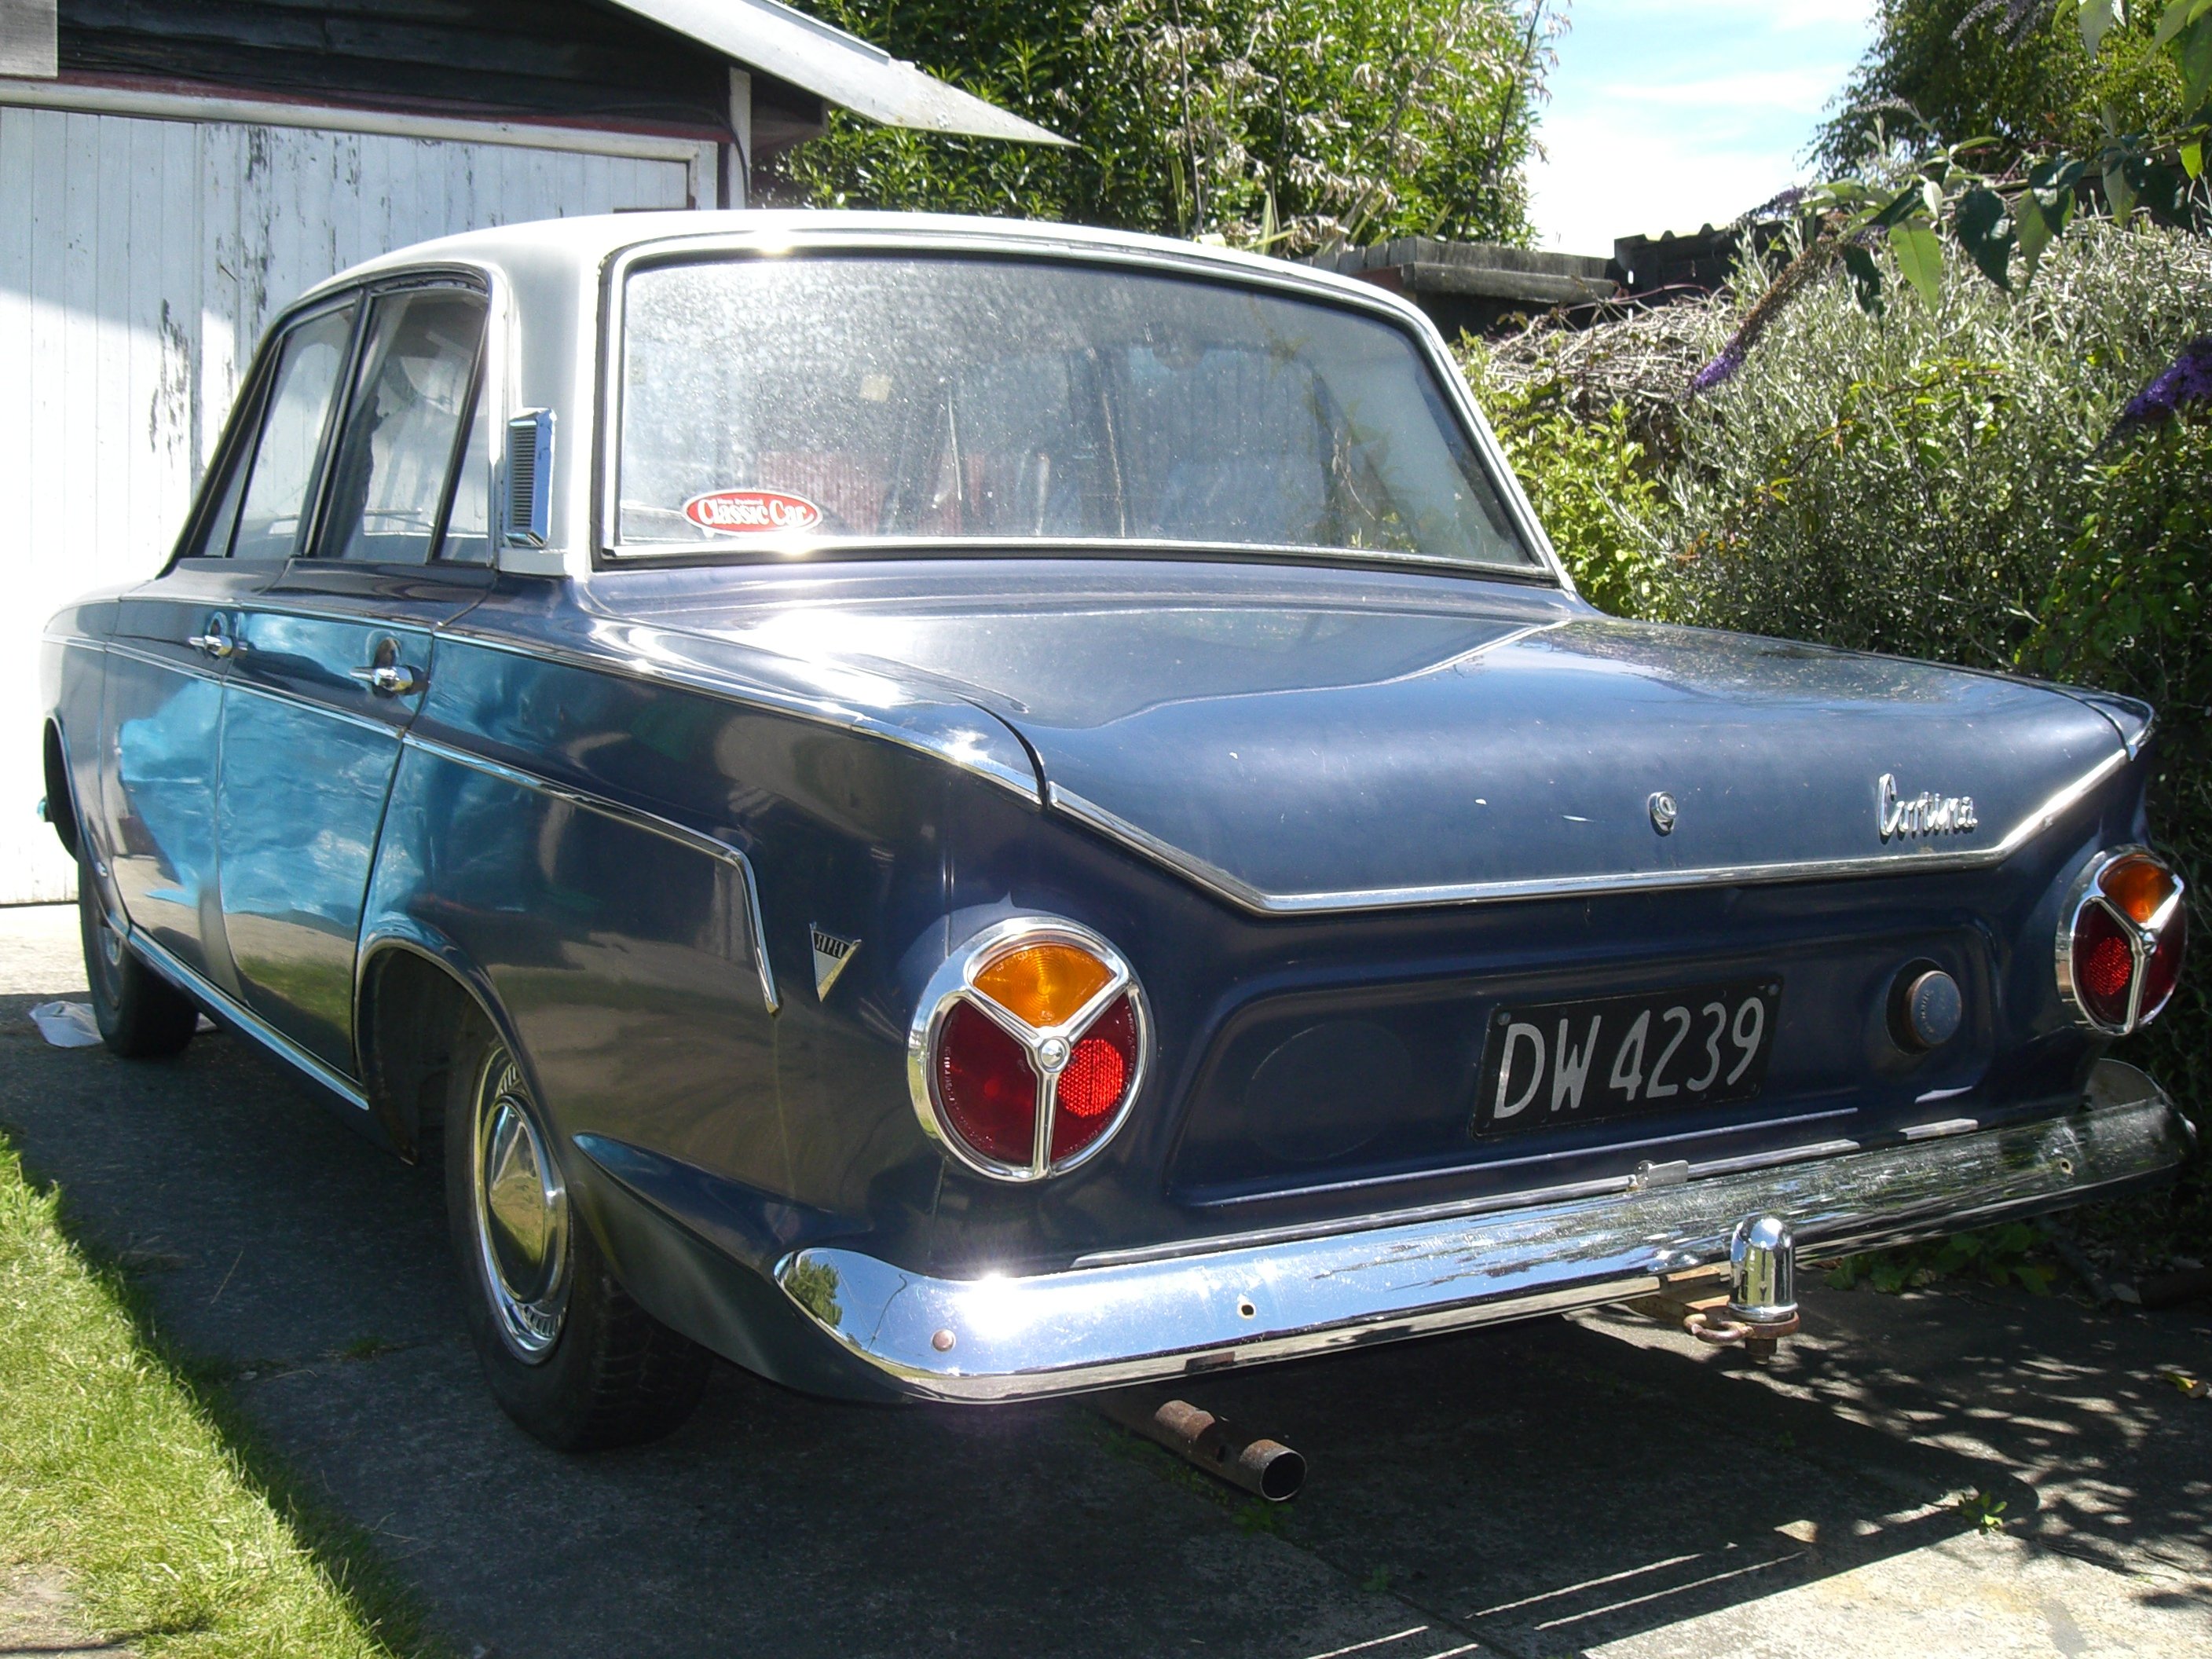
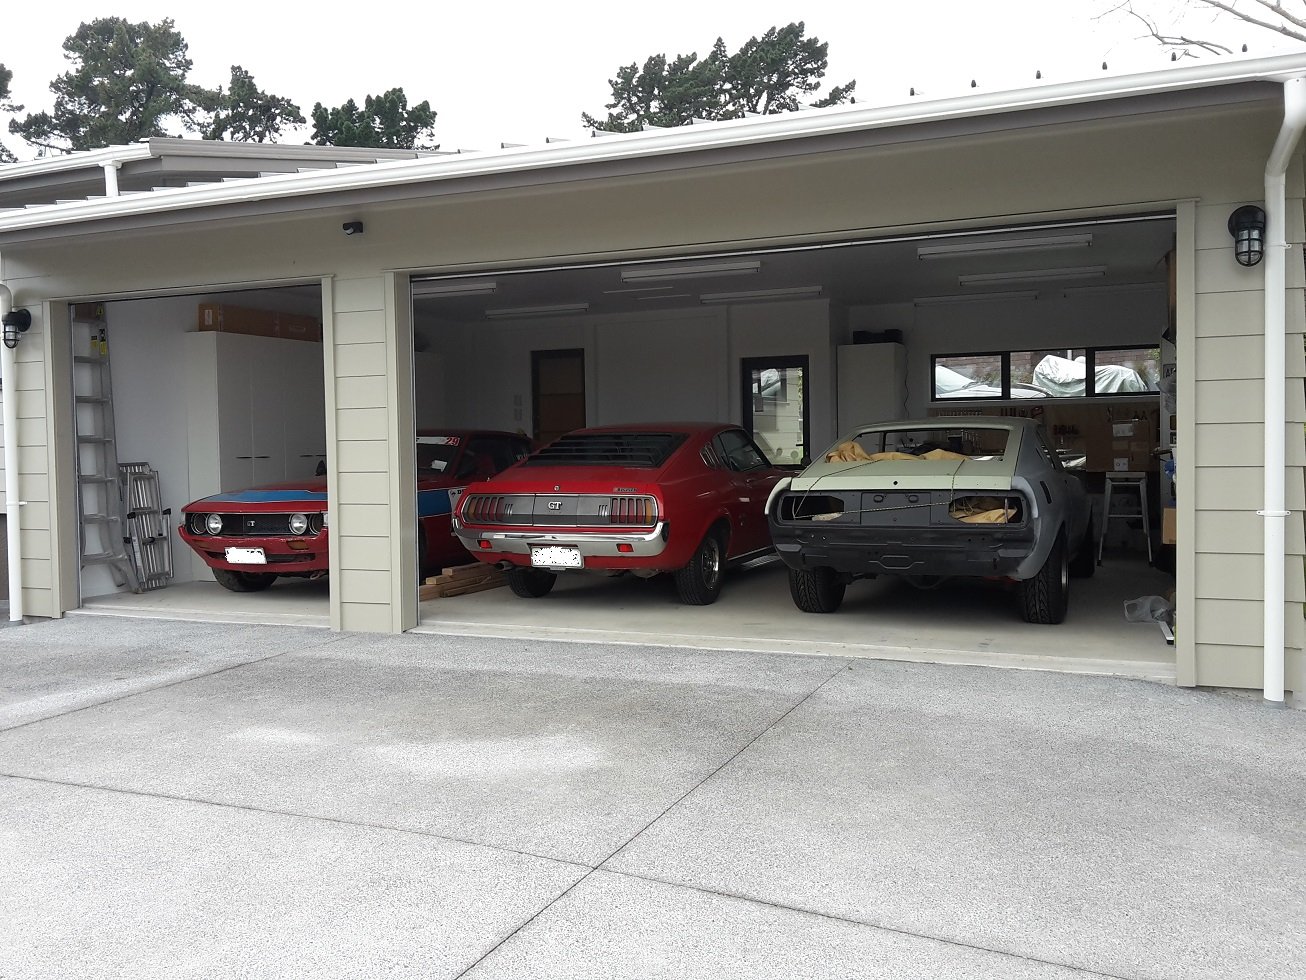
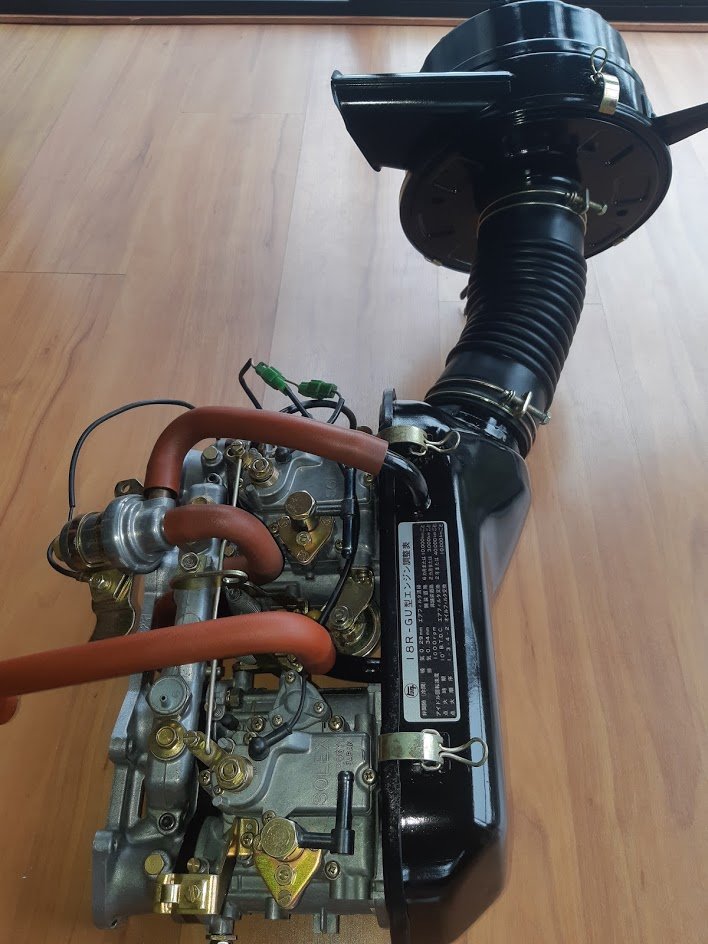
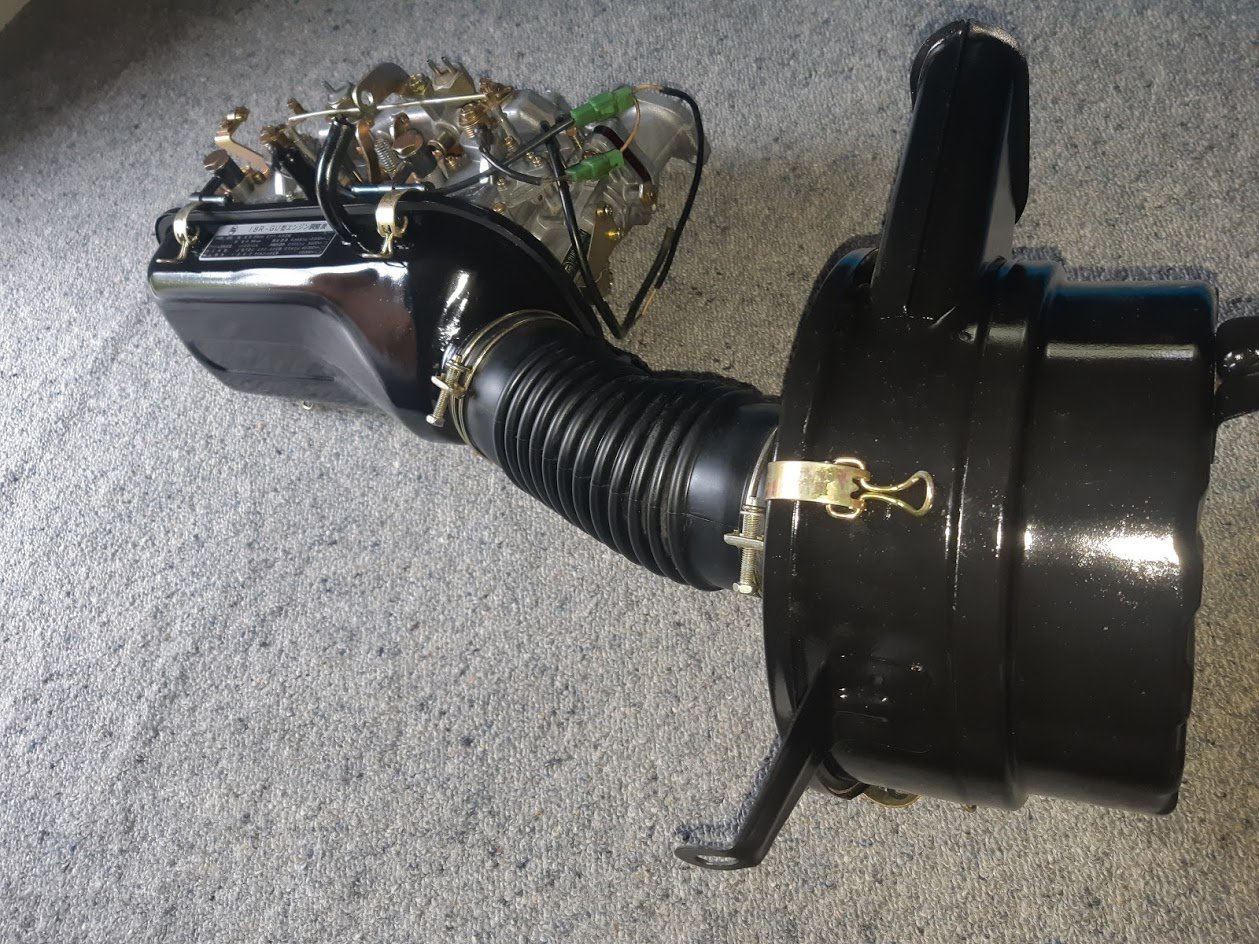
A long overdue update on this car. Re-added the pictures due to photo-fukkit fail I picked the car up from the panel beaters in late 2015. It was unable to be finished due to the ill health of Murray the panel beater. Amazing work done, just need to get my ass into gear and get it finished and painted. Not a lot has happened to it since as i have been busy working on the Racer, building the garage, engines and other things. It is still being worked on at a very slow rate. and it is keeping good company in the shed. Smaller bits like the carbs and airbox for the engine have been done and are sitting in the cupboard ready for refit.
2 points
-
2 points
-
So this was my project - currently on wait, because Im away from home. If is in wrong threat or something, please admins / mods to move it. I didnt find any "trips" raleted section. About the car. Its Polski Fiat 126p, produced in Poland on 1985. It is 2 cylinder aircooled engine with 24hp. Car weight around 620kg without any gear. Story of a car... 3 years ago I managed to save Fiat 126p from 1985 from one of the Slovenians fields. The story of the car was, that was in a garage for 5 years, than they have birthday party in that garage, put it out and never went back to garage. So it was in the field for few years before I bought it. When the owner agree to sell the car, we went to pick the car in style As every "project" start I wash it to see how it really looks. The story behind why I bought that car is that I wanted to participate in the biggest amateur rally in world, called Budapest - Bamako 2018. Because to the finish line of the rally is around 8600km I had to "fix" the car before I start with the rally. I found brand new engine in Poland, sitting in the attic of the house from 1987. When I get the engine with 0km on the clock, we open it, change all seals and anything that was "need" to be changed after so years and kick to start it. Because I had to remove my back seats for travelling material, I installed some isolation to prevent noise from back of the car. After we fit the engine in the car, change all the bearings and everything need to be changed around suspension, my friend polished car for me for my friend wedding. Because I didn't want to go to rally with 0km on the clock, me and my girlfriend decided to make a quick trip around Dolomites and the sea. The whole trip was Slovenia - Austria - Italy - Switzerland - Liechtenstein - Switzerland- France- Italy - Slovenia. We did together 4117km in 15 days with a lot of 2000m+ mount passing and nice routes. Breakdowns? Both brand new rear tyres were worn because of new back suspension - the position of the car was to high. So meanwhile we got some sponsors and had to "decorate" car with the stickers before we start the rally. In 12. January 2018 we started from Slovenia, the goal was Banjul in Gambia. We reach the finish line on 28. January and we did 8395 KM. Because I didn't want to sell the car in Gambia, and I didn't want to spend money on the boat shipping I decided to drive it back home. I reach back home in Slovenia 17. February 2018. Me and my car did together 17.200km in 36 days. I spend around 1135L of fuel had to change front right bulb and 2 tyre tubes (they were a little bit to big ). Engine in rally Engine back home The car is still running good, but it is in vintage car museum in Slovenia, because I'm currently in New Zealand. And that on last picture is me Facebook page of the car and trips: https://www.facebook.com/Fiat126pGoesToAfrica/ Webpage about rally: http://www.fiat126p.si/en/ Discussion treat:1 point
-
New rims you say?1 point
-
About 3 and a half minutes? I'd hope so too! Its a starter. Its not rocket science.1 point
-
I am the third owner. First was DB Breweries, until 1976, next was a guy Andy Walker, who pulled out the V4, fitted a 302 V8, C4 and 9" rear end, and used it to tow/service his Mk1 BDA rally car in the 1980's and 90's. It was parked up for about 10 years when I bought it off him around 2014. Needed a new battery, carb overhaul, as well as a few mechanical repairs, but was otherwise in pretty decnt shape. I have lots of NOS parts ad panels for it. Will be reinstating the original rear tail lights, deleting side windows, fitting an overdrive auto as well as a few other upgrades to make it nicer to drive. More about it here: https://oldschool.co.nz/index.php?/topic/45288-browndogs-1972-v8-transit/1 point
-
No to put a downer on the plate idea - but It will have to go on the tow vehicle, not on the caravan. Max of 5 characters on a caravan personalised plate1 point
-
Oh man that is so brilliant! I so badly need it. But I have this slight problem of my wife... If you guys can convince @Mrs 64valiant I will buy it.1 point
-
https://www.youtube.com/watch?v=3eBiObla54w1 point
-
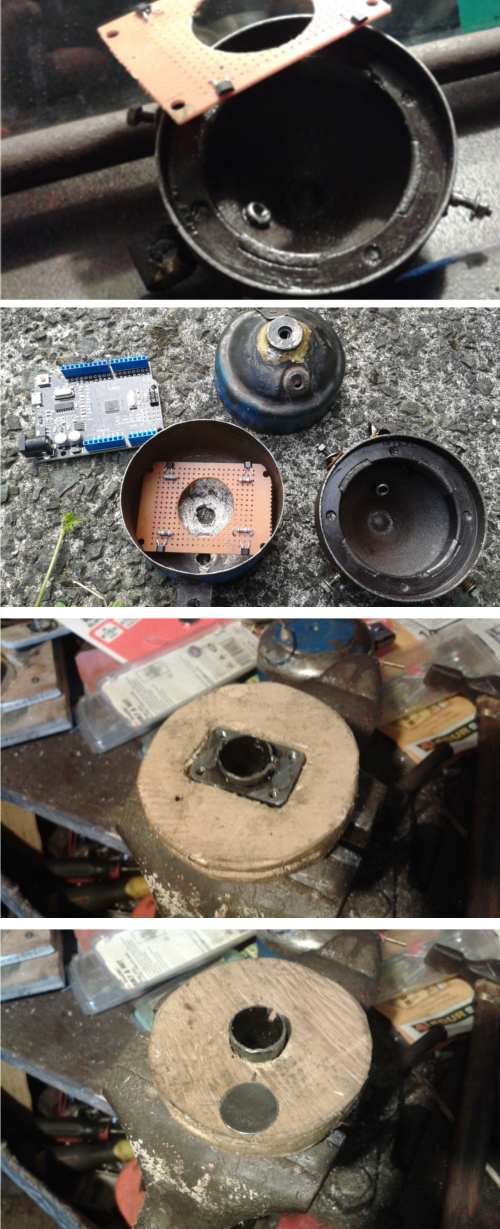
It wouldn't be ideal because of the shape of the core but if you made a bigger horseshoe shaped core you could slip the primary wingdings onto that . you could probable use floor sweepings for locating the crack by throwing them on the block with the electromagnet on.1 point
-
Holy shit mate every project you do ends up looking mint. Well done, still wish I had the motivation you do!1 point
-
if we drain the propellant can they go in the airplane? you can fill them back up with lpg on your end1 point
-
the three pack of aerosol crack test kits are 1 - a cleaning agent which can be substituted by buying a can of brake clean or acetone. 2nd can is the dye penetrant - it can be substituted by mixing food colouring with acetone to make a very light penetrant to get inside the cracks. The third can is an aerosol white powder that dries to the component it is sprayed on. I wonder if you ground up the centre sandwich section of gib board if that would work to create the powder. If you have any cracks the food colouring will show up through the white powder as it is absorbed. So first clean, then food colour (wipe excess off), then powder and you'll know......pretty sure you could get all those ingredients over in the Chathams1 point
-
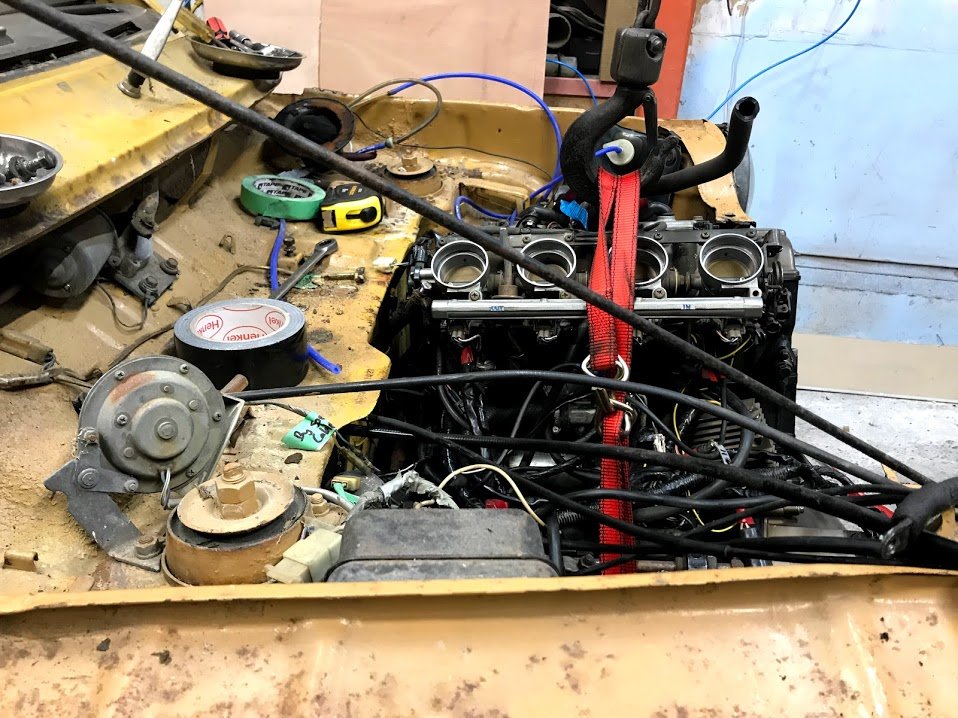
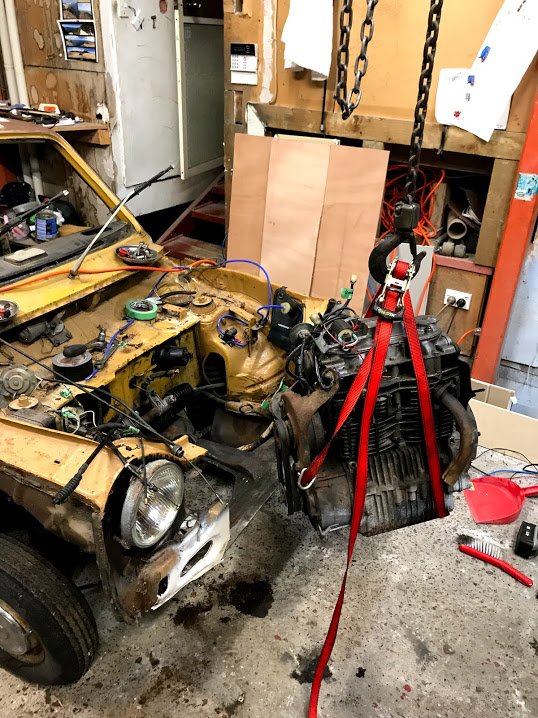
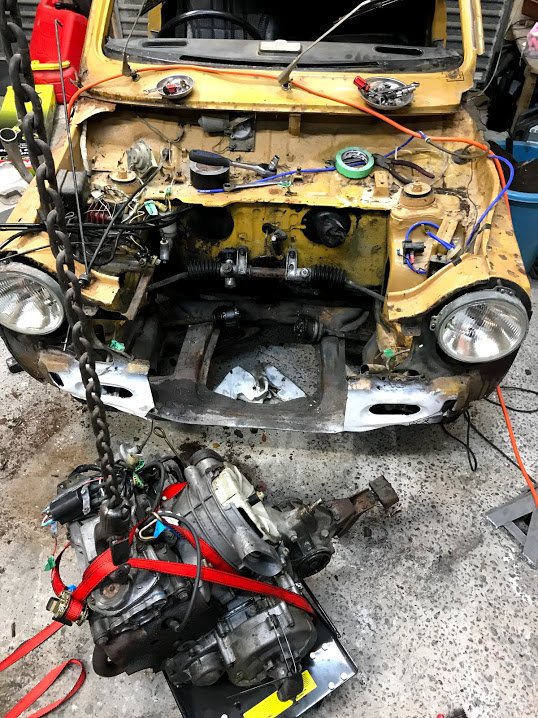
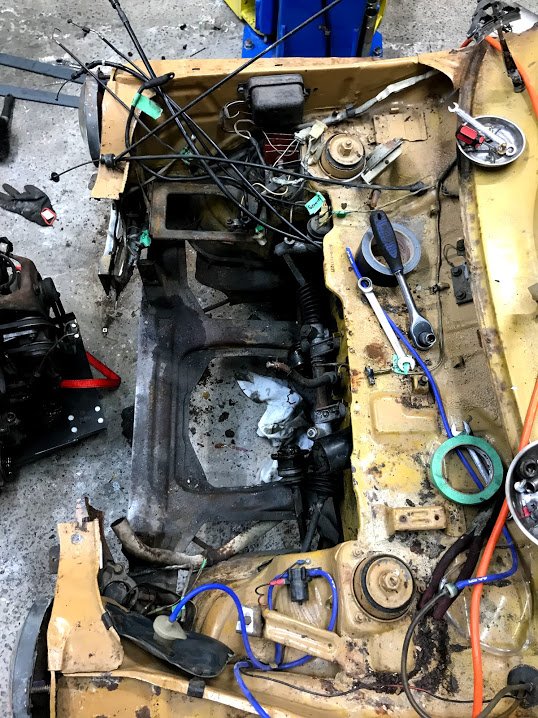
Late night engine removal. Realised taking it out the top meant steering rack had to be moved because the gear selector rod and the rear mount JUST don't fit through the gap. Look at all that room!
1 point
-
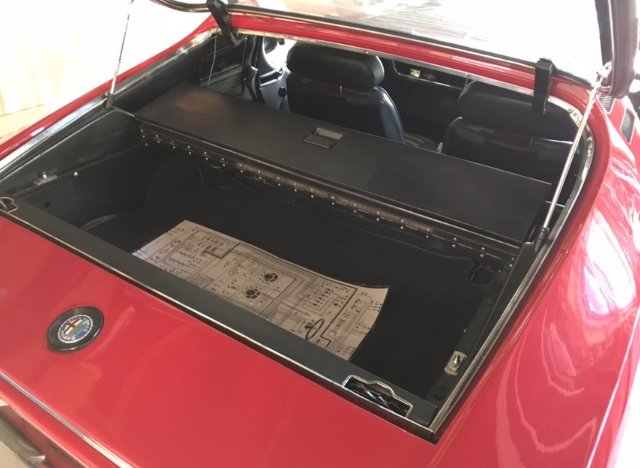
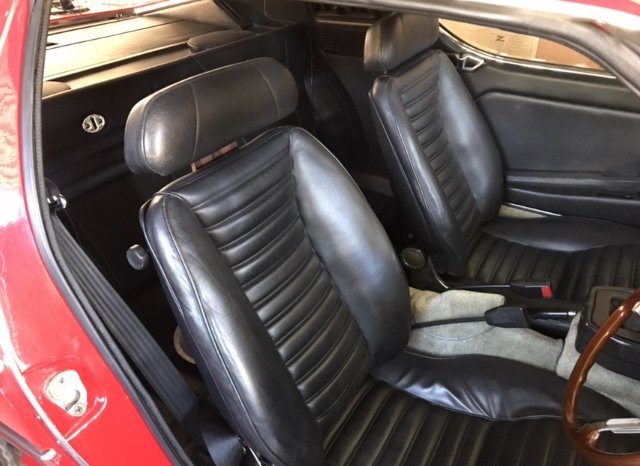
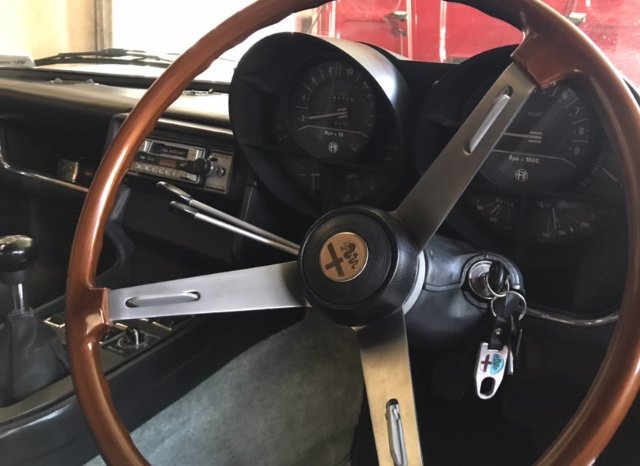
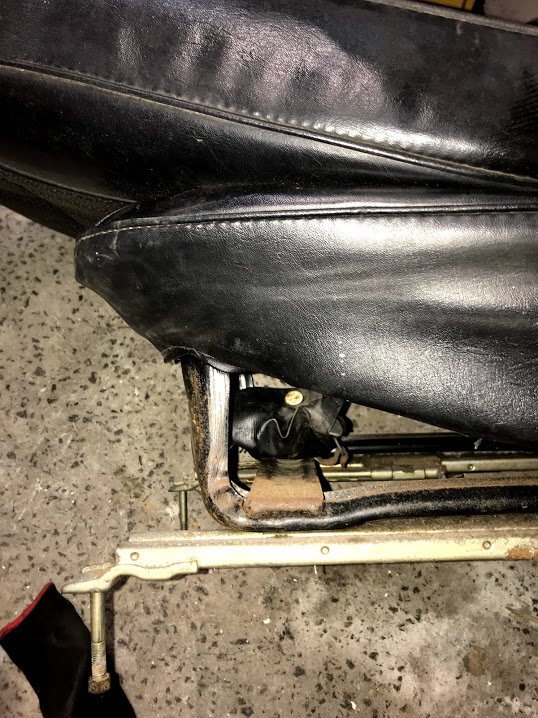
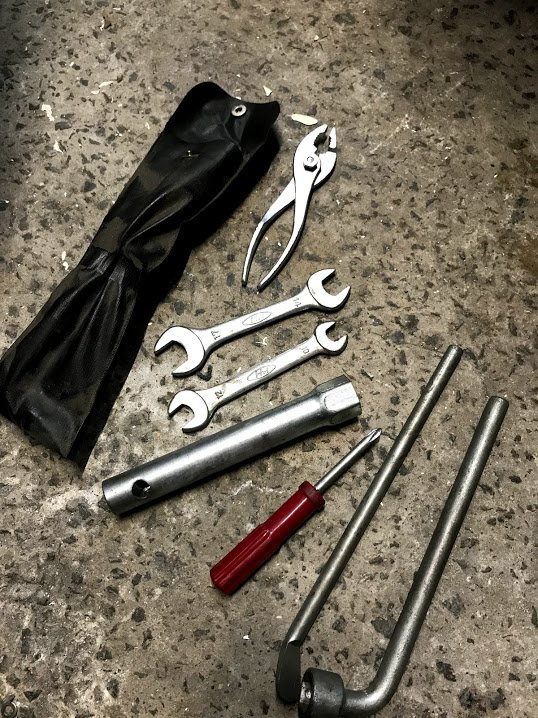
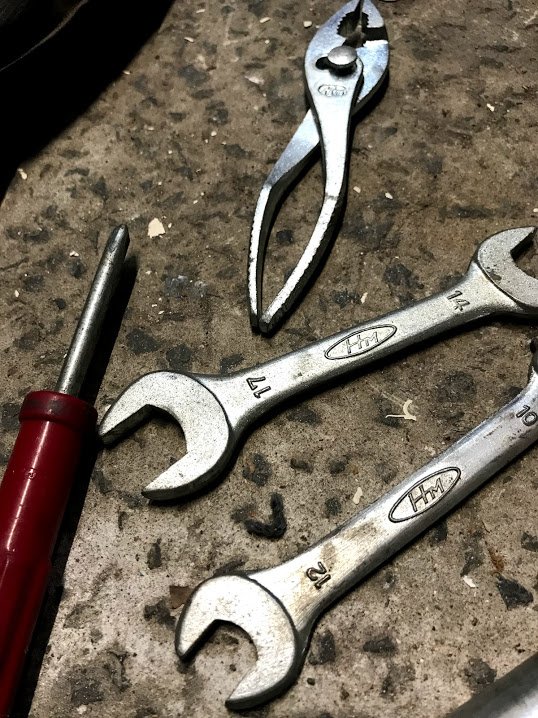
Kind of cool, I took the passenger seat out and found there is a genuine original tool kit strapped under the seat, you can't see it unless your passenger has feet eyes. It looks like it has never been taken off or opened in 47 years, based on the condition of the metal under it and the contents. Each one is embossed with (HM) which I guess must be Honda Motors?
1 point
-
So yep, those are bmw 52mm throttles. I wouldn't suggest running out and fitting them to your average 4age. have had to do a lot of little mods, to get them close enough together for the port spacing. right down to having to anneal the throttle shaft, as i had to re-drill it and mr bmw hardened the shit out of one part where the bearing ran. Anyway attempted to teach my self how to cad. sent it to @niswhale who cut me a template/test run out of mdf Amazingly i drew it right first go. and i was about to resort to hole saws and angle grinder.. After a lot of dicking around all the throttles fit on the flange. Have half made a fuel rail for some massive 980cc injectors i brought when was going to try outboard injection. To start with they will be just there to bung the holes. later on if all goes well will switch to them and retune. but for now changing as little as possible other than throttles, in the name of proper @Roman science. Hello tempted to run with mdf.. but this part is on its way from @Stu (cheers cnt) Since metal isn't fun anymore, its made from acetal. aka fancy plastic.1 point
-
Oh thanks. It took me days slaving behind my super graphics computer (note 4) to craft those pics. Some of that time was indeed just trying to get decent photos because we'll, as we all know, taking photos of animals is always tricky and dinosaurs are no different. The Romans were no easier to snap.. Poncy bloody Italians always worried about their hair.1 point
-
What are you going to do with your other Imps Alex?..............
1 point
-
AWWWW YEAAHHHH
1 point
-
Yet another issue that was discovered on the car was that there were signs of oil leaking from the bottom of the vanos solenoid cover. This is a clear indicator that the solenoid seals are beyond their useful life. The other issue I noticed was that one of the bolt heads was missing from the cover, so that needed to be addressed. They are common for breaking over time, so I made sure to have some replacements on hand. I ordered a whole vanos rebuild kit, including new M5 seals (as per a very useful guide) but decided as I was limited on time, and the vanos appeared to be working OK now it was plugged in, I didn't want to take the time to rebuild the whole thing yet. It also didn't help that my fan clutch tool hasn't arrived, so I couldn't remove the fan to access the vanos unit. The solenoid seals are the most common point of failure anyway, and with mine leaking, it's a fairly easy thing to replace. First is to remove the solenoid cover. Its held on by 4 screws, with either a hex head (if original bolts) or torx (if replaced). The broken off bolt was still there, just with no head. I used some vice grips to slowly turn it until i could spin it out The cover was missing one half of the gasket, and had evidence of the bottom solenoid moving in the housing (the black circle on the cover is from the solenoid pressing against it). The bottom of the cover was caked in old oil The solenoids popped out easily, and as expected the seals were flat. The gauze filters were still fitted (usually removed when serviced), although most of the gauze was missing, like the last lot I serviced. Using a small screwdriver I broke off all the brown plastic for the filter, and removed it. I also used a scalpel to cut off the old seals. The old seals were hard as plastic, well overdue for replacement As with my last guide I used a 9v battery and brake cleaner to clean out the solenoids. They were surprisingly clean though, with nothing gross coming out of them like the ones I did on my old M3. Both give a nice solid click when powered. The new seals were fitted, and you can clearly see the improved shape of the M5 seals Everything was thoroughly cleaned, and the solenoids refitted to the vanos unit New gaskets were fitted to the cover, along with a thin smear of sealant to keep them in place The cover was then refitted, with one new bolt (I can't fit my Torx driver in the space with the fan fitted). I will fit all new bolts, and join the solder points on the solenoids, when I remove it all to refresh the vanos later. I noticed when I had the valve cover off that the intake cam sensor had a very big air gap. I know from INPA that it appears to read OK, but I wanted to look further into this. It turns out, looking at the sensor, the previous owner had pinched and hulk smashed the O-Ring on the sensor so it was sitting out quite a bit. The screw was finger tight too. Yeah it shouldn't look like this It turns out you can order these seals separately, but I didn't know I needed them so dug through my viton O-Ring kit and found one that fit well. The one in the photo was too big, but I did eventually find one that sealed well The sensor now sits flush with the head. It probably isn't making any difference, but it bothered me as it was. One last test needed to be done before I could go give it a try, and that was to fire up the old beast and run the DIS vanos leak test. This test is used to see if the vanos solenoids can keep the cam at a certain degree over a certain period of time or if the seals leak, resulting the cam angle slipping. There is some allowance for variation, up to about 5 degrees off target over 10 seconds if I recall correctly. I didn't test beforehand, I should have but I forgot, but after the seals my solenoids can hold the cam at about 3-5 degrees off target for as long as you want. That's pretty good in my books, for a vanos unit that has done almost 300,000km and never been rebuilt. I'll be interested to see if there is as much variation after rebuilding the vanos unit. So, after all this work, there was only one thing left to do. Hoon. The car runs and drives very well, with plenty of power. It feels much more like my old one, pushing you into your seat when you put your foot down. There are still some issues, like the misfire at idle, but overall it's significantly better than when I got it. Not to mention, it looks better! Loving the Style 24s and new Pirelli Dragon Sport tires.1 point
-
Okay, it's been a while since my last post, but the car has still been progressing. I left off with the exhaust on the ground waiting for exhaust gaskets, and needing to replace the valve cover gasket. The parts arrived, so I got on with it. With the arrival of the exhaust gaskets for the manifold to center section flanges, I could refit the exhaust. This thing is a damn beast, but with some carefully juggling, wiggling and bolting, I got it back into place. Just as a quick side note, when cleaning up under the car I noted that two of the nuts I removed from the giubo were completely wrong. That wouldn't have helped the balance of the drive shaft. They all got replaced, as they are Distorted Thread locking nuts. The top of them is basically squished and distorted, so when you put new nuts on, they bind on the threads and wont come loose. Reusing them is a no-no, because they will no longer bind like they should. Similar concept to Nyloc nuts, but can handle higher heat. With the underside work done, I could finally refit the wheels with new rubber on them and lower the car down a bit and finish the work inside the car. I needed to refit the clutch pedal, as I had removed it to replace the bushes. I tried some flashy delrin bushes, but unless I removed the whole pedal box and fitted them on the bench, there was no way I could press the bushes on in the car, they were just too tight. Instead I went with a pair of new OEM bushes, slathered in grease. Thanks to the bolt I fitted that was missing from the pedal box, and the new bushes, the clutch pedal feels much better now; it doesn't move off the side, and I don't hit the dead pedal now. The other thing I wanted to do whilst under there was to replace the throttle cable, as my original one was well munted and made the throttle sticky. It was also ugly, and I don't like ugly. Removing the cable was easy enough, once you get the plastic clip out of the firewall (have fun one that one), it was just a case of pulling it through the engine bay and disassembling where it attached to the linkage. This is where it all kinda went wrong, all over one tiny little stupid (but crucial) bit of plastic. As I was attaching the white plastic clip back on the end of the cable so it could attach to the linkage, I dropped it. Of all the places, and things to drop, it was a plastic clip, between the 5th and 6th intake runners. It didn't come out the bottom, and I couldn't go magnet fishing because it was plastic. I tried moving and jiggling things in the area to see if it would drop down, and even lifted the car up and tried to fish around with my hand from underneath to find it. It didn't work, I had only one option left. The whole intake had to come off. Thankfully removing one isn't too hard, and it's something I had done before on my old M3, it's just bit of a prick to get at some of the hoses and bolts. Oh there it is, sitting on the starter motor... This little bastard. I then proceeded to immediately drop it again; onto the floor this time, so until it was ready to go back on, it went into my pocket. Having the intake off did give me a chance to have a quick look around, and give the throttles a quick clean, so it wasn't all bad. Back together it went, and on went the new throttle cable (assembling over a large rag, so I wouldn't drop it again. See, I learn from my mistakes!). Whilst setting up the new cable I encountered two things that made me facepalm. One, the throttle return stop had been mangled, and bent back. This stop is what stops the throttle pedal linkage going back too far when you take your foot off the pedal. If it goes back too far, there will be too much slack in the cable and you will never adjust it out. No prizes for guessing how I found this issue. I bent it back as flat as I could, which made the pedal sit better, and allowed me to correctly adjust the cable. Being bent back was no accident; it took a lot of work to bend it forward again, so I can only suspect it was done intentionally to compensate for the stuffed cable. The second issue, was that the throttle stop was badly adjusted. On my car because the shell was originally auto, instead of a normal solid "stop" under the pedal, I have the kickdown button still. The throttle stop/kickdown button sits behind the pedal and is what stops you putting pedal to the metal, or more accurately, damaging the throttle cable by trying to pull it further than the throttle plate will allow. On the flip side, if it's not adjusted enough, it will stop you getting to Wide Open Throttle (WOT). The whole thing is on a thread and screws into the floor, but does have a locking nut that stops it goes in too far. On my car that locking nut was wound way out, which meant that the stop couldn't be wound in as far as it needed to be, which means by the time the throttle pedal stopped, I was only seeing about 3/4" opening, not WOT. No wonder this car felt slow! I wound the locking nut down, and wound the stop in enough that when the kickdown button (which now does nothing but offer some nice physical feedback through my foot when pressed) is pressed, the throttle is 100% open. With that mess cleared up, I moved out of the interior and into the engine bay for one last job for the day. The valve cover gasket. I noticed it was BADLY leaking down the back corner, so ordered a replacement a while back. I had intended to rebuild the vanos whilst the cover was off, but decided to postpone that (for reasons I will explain in a later post) and just stop it leaking. Replacement is easy; Remove the coils, a whole bunch of bolts, and then the cover itself. When removing the coils, you also need to move the loom out of the way, so I rest that on the strut tower. I didn't notice, or remember, that the coil connectors are actually numbered via a small brown plastic tag on each wire (as seen in the photo), so instead I put a small dot for each coil it went to (1 dot for coil 1, 6 for the 6th coil) with a paint pen. This is the connector for coil 2. The dots are covered by the locking clip when assembled. It never hurts to over mark things before disassembly. And off comes the cover. It takes a lot of wiggling to get the back to clear the cable holder and the rear cam cap, but it does fit. This is the corner that was leaking. The gasket wasnt that old, it must have been replaced when they did the head work, but for whatever reason it just didn't seal here The other leak I had was a bad one into a couple of the spark plug tubes, via the rubber washer on the bolts. I ordered a bunch of these (you need 20x btw, I came up two short). The old ones were hard as rocks and shorter than the new ones I cut them all off the bolts, and pressed the new ones on. I slathered them in red rubber grease, and used a socket and a hammer to press them on. Much quick and easier than doing it by hand. Pop the new rubber washer over the threads, hold the socket on top, and give it a few good whacks with a hammer until it pops over the shoulder. The new gasket was then fitted to the head, with a small amount of sealant in the corners of where it goes over the cam bridge in the front, and then back on the cover went. The bolts were then refitted with the new washers. Now, with the bolts be VERY careful refitting them. They are too easy to pull the threads out of the head if you over torque them. In this case I did them to 8NM working from the middle outwards and all was well On went some new coils, and it looked like an engine again. Some testing shows no signs of leaking anymore, which is good. The clutch pedal and throttle feel much better, with less slack and more immediate response. Unfortunately despite replacing the bushes in the shifter, there is still too much play (although FAR less than before), and it appears to be coming from the joint at the bottom of the shift lever itself, so that will need to be replaced, maybe with a short shifter? The biggest disappointment is that despite replacing the coils and checking the spark plugs, there is still a very noticeable misfire at idle. It sounds like the old girl has some wild lumpy cams. I'm working on this now, so hopefully I can nail it soon.1 point
-
So some of you are really into programmable ignition and electronic sensors. I tried to make my own electronic ignition. After 3 seconds one of the MOSFETS running a coil shorted out. After 7 seconds all of them had. Each mosfet was rated at 20 amps. But considering they were dealing with the primary and ... lets face it. some of the secondary output (These old timers are like that) i don't think they were up to the million volt task. At least 2 hall effect sensors survived. Barely.
1 point
-
I just couldn't help myself but take this photo... Having fun stripping remaining bits from the other two Imps, cleaning and painting bits and generally playing about with what is a big model car. Proper update soon.1 point
-
I moved the shell onto the hoist and removed the last bits of rot, tiny bits around the front arch.. Work then continued on the cooling circuit. I need to get the pipes from the engine up to the front. Most people with Imps doing a front radiator conversion either run the pipes inside (too hot), under the gear change in the centre tunnel (I want to keep that easily accessible and to do it properly without having pipes below the floor line I'd still need to make some tunnels to close over) or they use the existing heater hoses (too small). The setup in the race car was like this... Fine for a race car but way too hot and in the way for a road car. I have had the intention of fabricating a separate tunnel to house the pipes ever since getting the race car. This is because if I was to run the pipes inside no matter what I try and do to insulate them there will be a fair bit of heat escaping into the cabin, plus they'll take up more room. With a tunnel the heat can instead radiate out into the airflow there should be very little transfer into the cabin. They'll take up less room and with a simple false floor above the tunnel in the front the passenger should not even know.... Plus any leaks go to the ground, the pipes can be easily attended to and the well.. it just seems a neat way to do it So I started by chopping down the removable cover (covers where the brake pedal mount would be on a l/h drive car) so I can weld it back in for a neater stiffer area. Then I marked out some lines and started cutting away... Then I cut and folded some tunnel sections up and welded them in. I have tried to keep the curves as gentle as possible without encroaching too far into the footwell. I had to make sure the pipes would be clear of the front suspension arc. Meanwhille Hannah kept busy stripping useful parts out of the racecar shell... I cut more bits out, formed more tunnel sections and ended up with a lovely clear tunnel front to back... I now need to fit the rear seat in and see how I can avoid passengers getting a hot bum. I'm not sure how close it sits to the metal base. I might just have to wrap the pipes and make some heat shields as i can box it lower due to the rear swing arm mounting point box section. I'll also add a bracing section near the front across the floor where the new pipe tunnel has potentially created a 'side impact crumple zone' or something.. Then its seat mounting time. Then paint prep!!!! That will be where things start to get very, very, very tricky! What colour? I have my mind on a on a few different light blues and even some light greens. Decisions...1 point
-
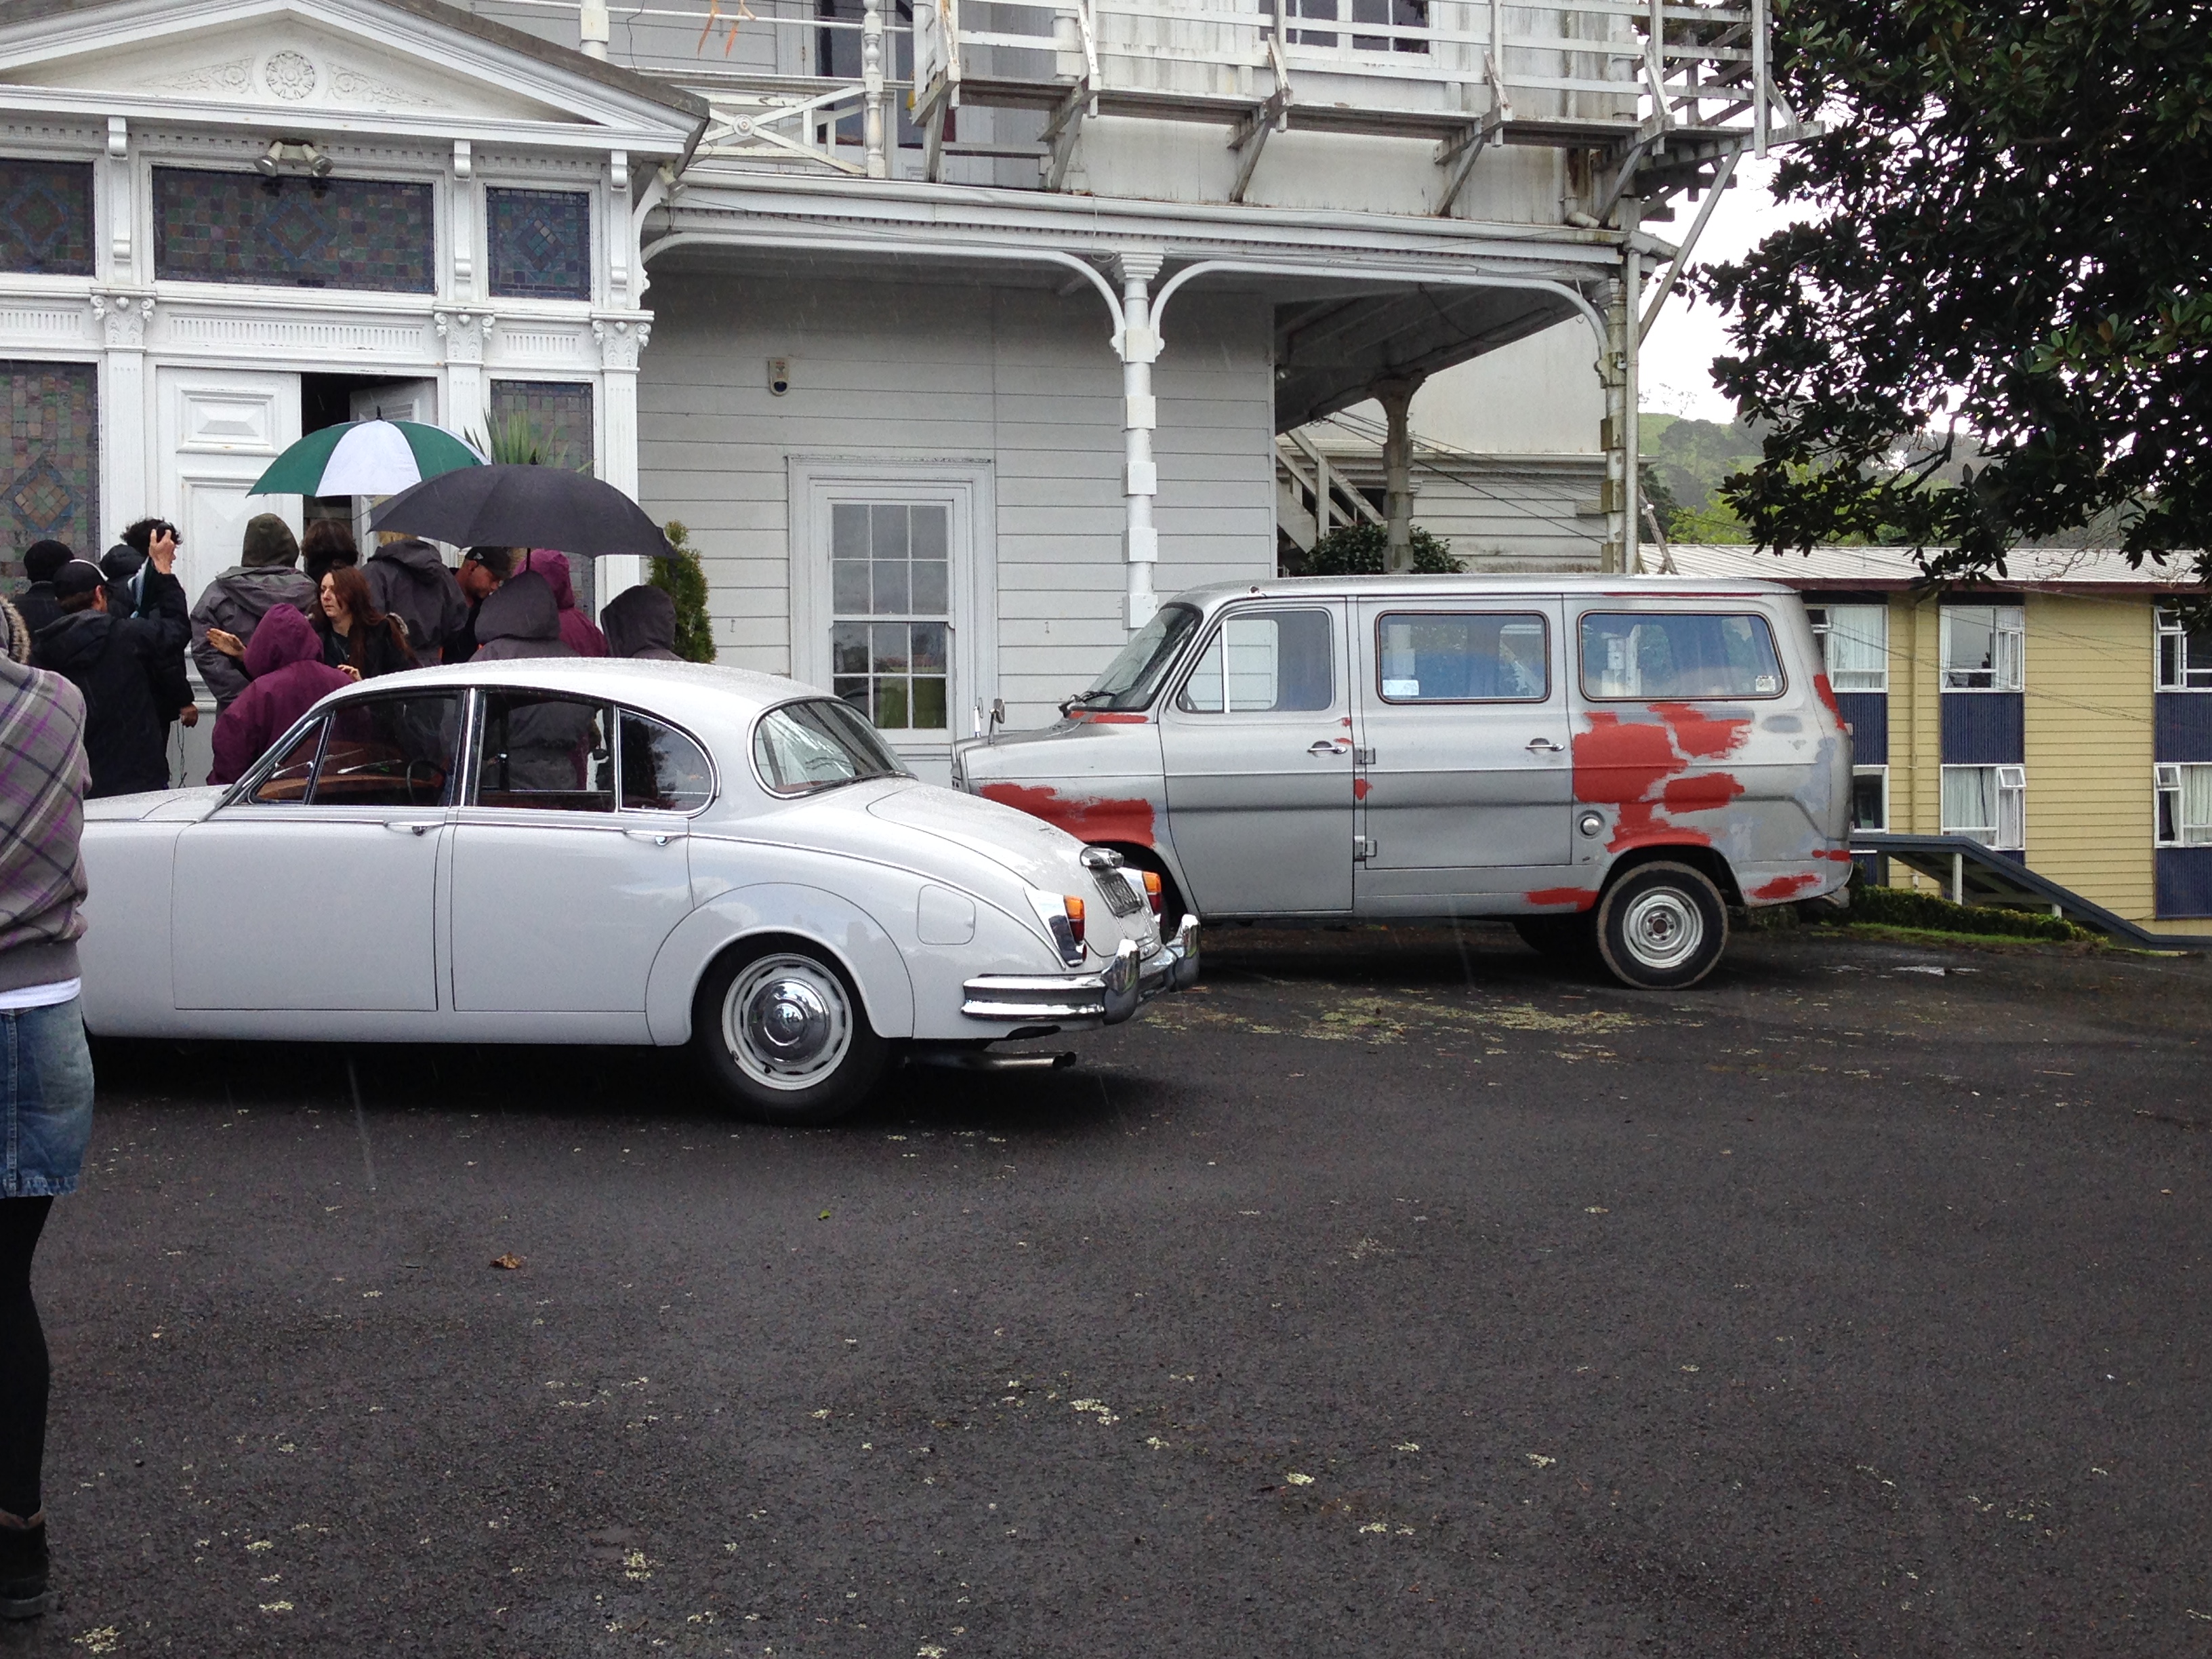
appeared on last nights TV programme "The Dance Exponents" as the band van:
1 point
-
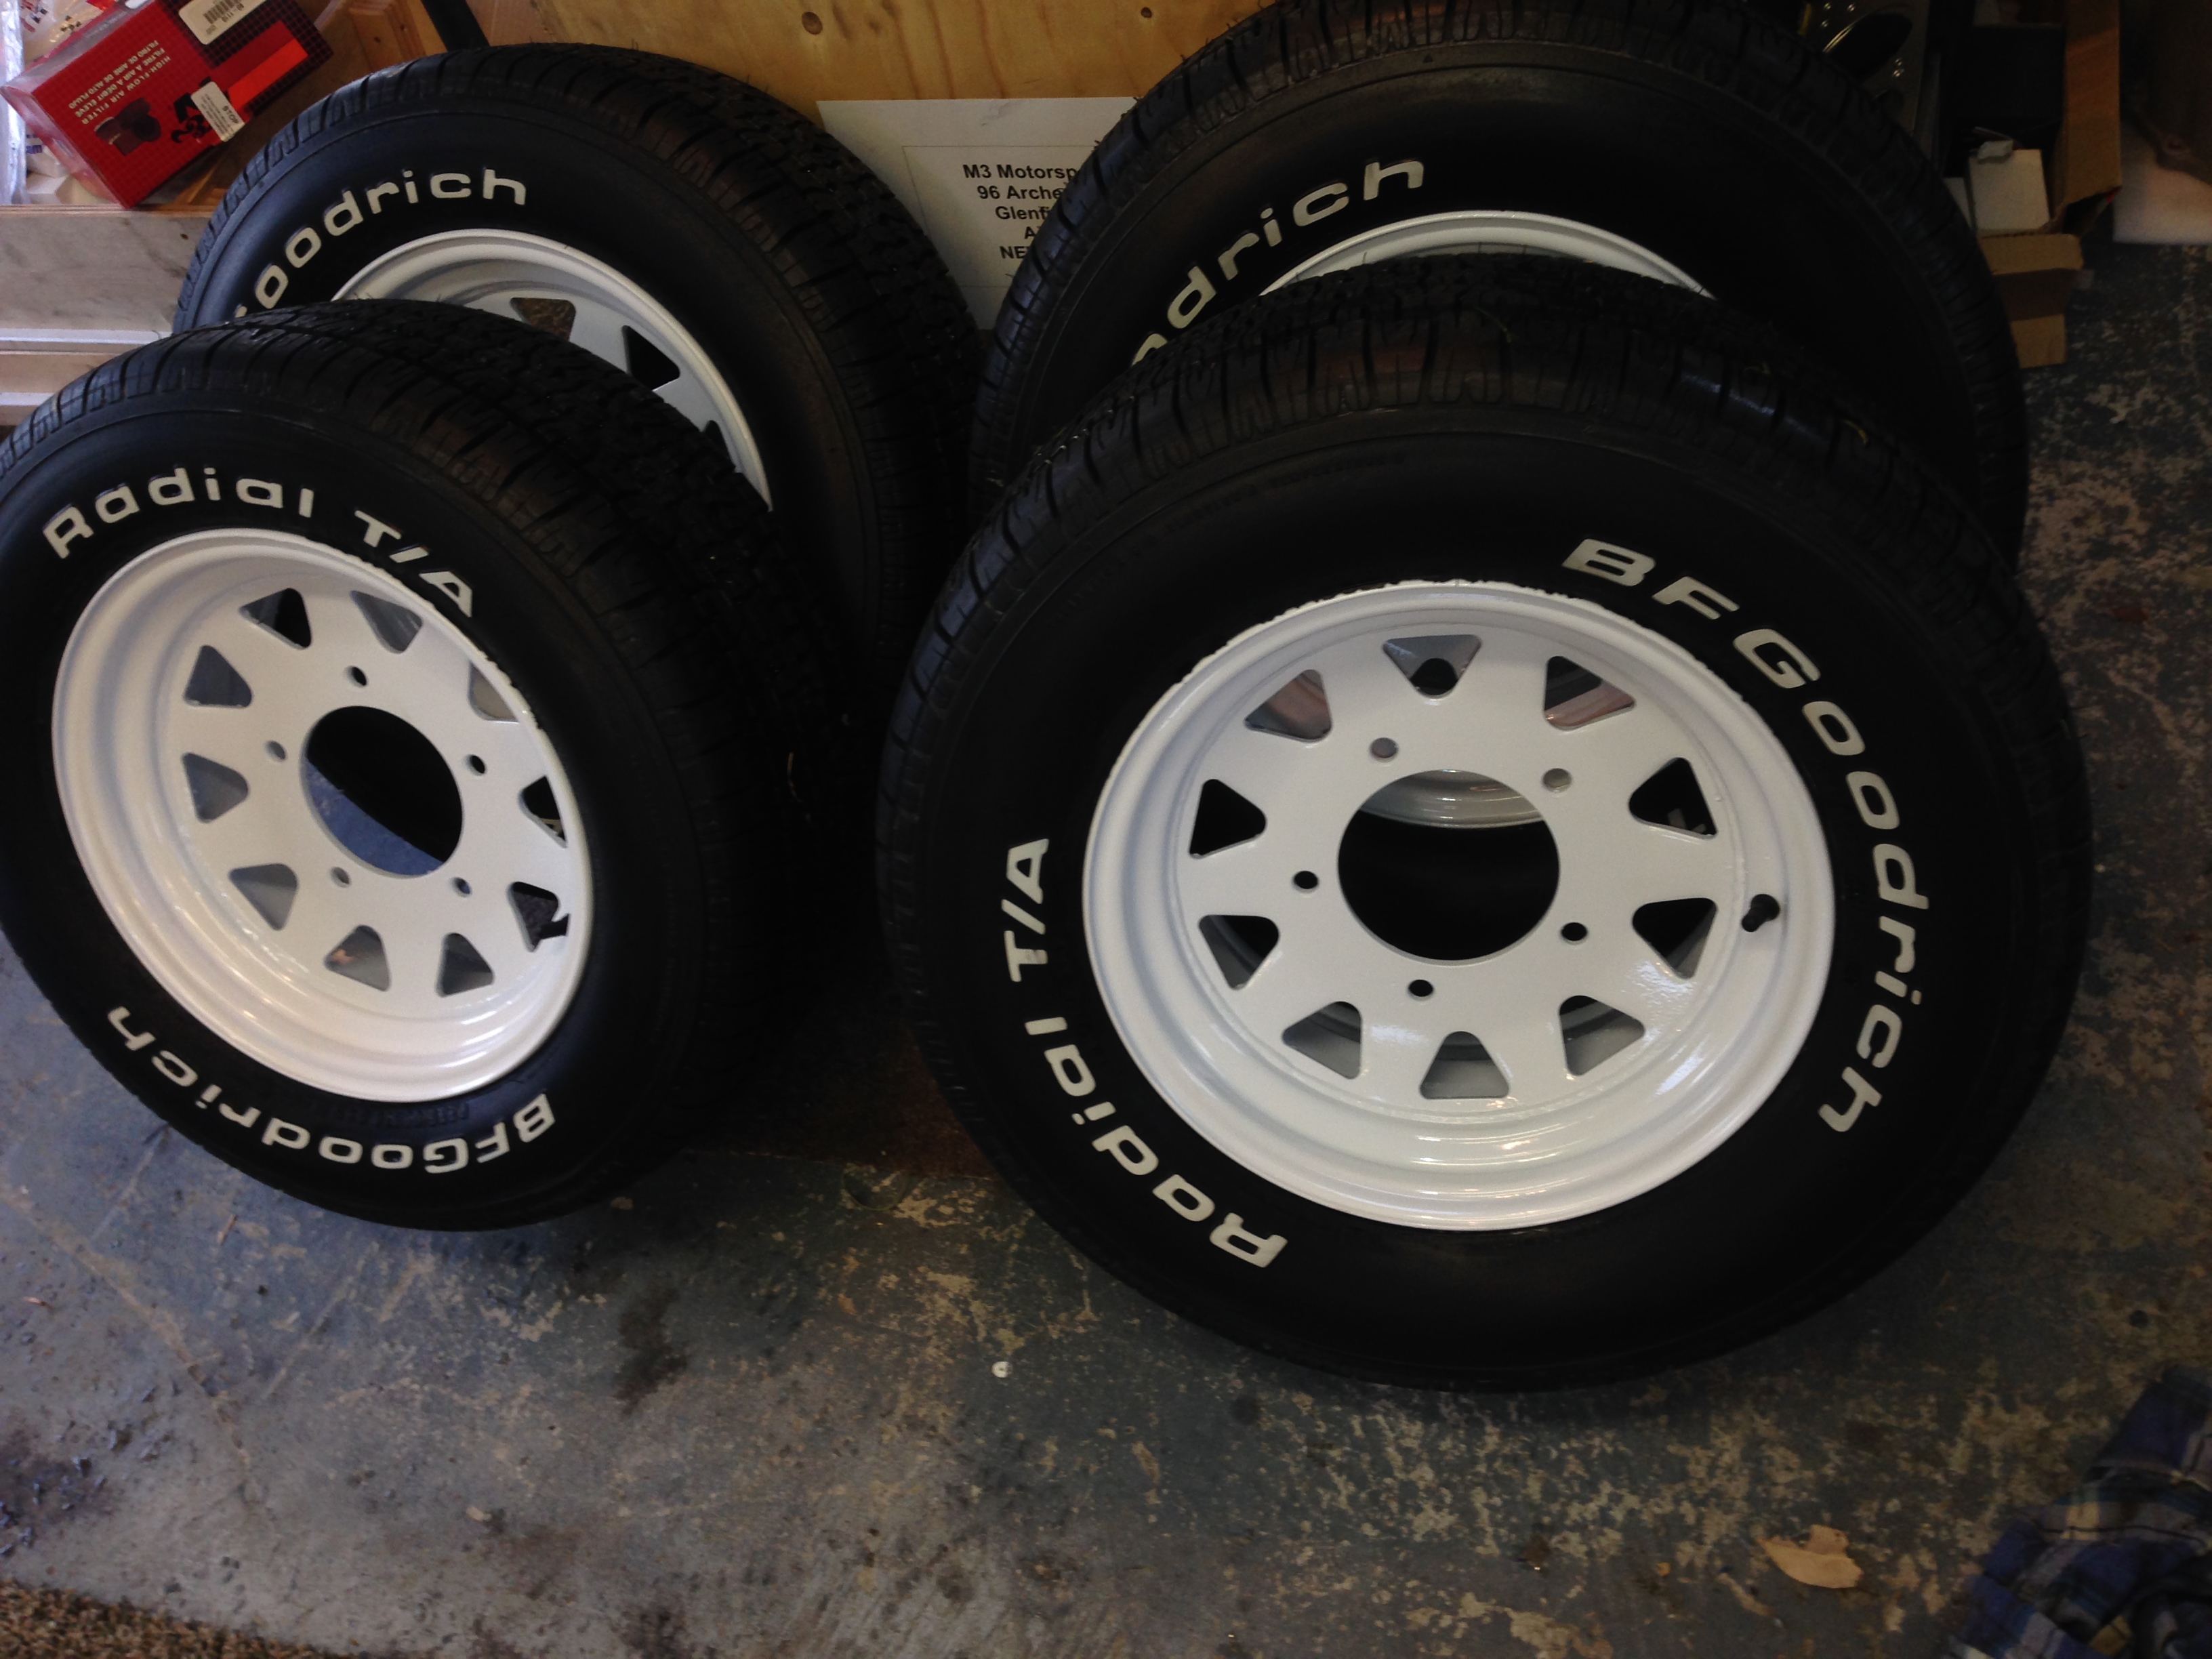
Haven't touched the van for a while, but got back into it last week. Wheels were looking a bit second hand, so I stripped the tyres off, had the rims powder coated, and fitted the new tyres I bought, old school BFG T/A's in 225/60x14 for the front and 245/60x14 for the rear. Despite powder coating being a pet hate of mine, they were done this way from new, and painting was going to be very expensive, so I decided to go this way. I have the diff out at the moment, changing the ratio from the 2.7 that the previous owner fitted (ridiculously tall in first and reverse) to a more clutch friendly 3.45 from an EL Falcon. Van has a T5 box fitted, so will still have long legs in fifth gear. This van is also going to be used in a TV mini series set in the late 1970's, so getting it ready for its starring role, makeup, hair, wheels ..... Discussion thread: //oldschool.co.nz/index.php?/topic/45067-browndogs-1978-ford-transit-sundowner/
1 point


.JPG.35fd4217fdb595f4acc76f1702061012.JPG)
This leaderboard is set to Auckland/GMT+12:00