
Leaderboard
.thumb.jpeg.384ff72c8d2b0ee0d34a7bdedb55bdcf.jpeg)


Popular Content
Showing content with the highest reputation on 02/13/19 in all areas
-
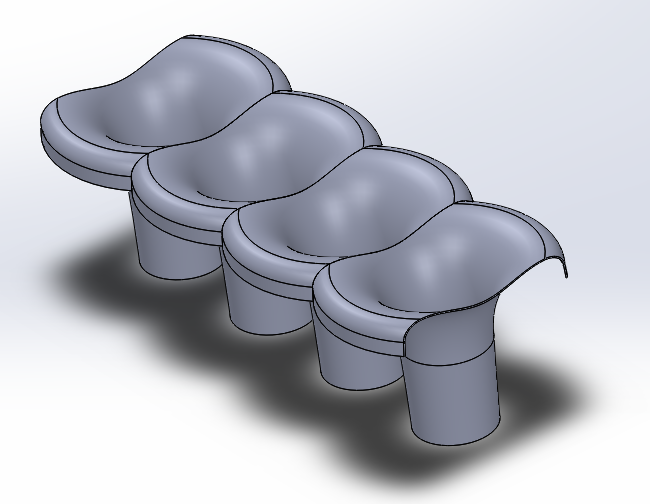
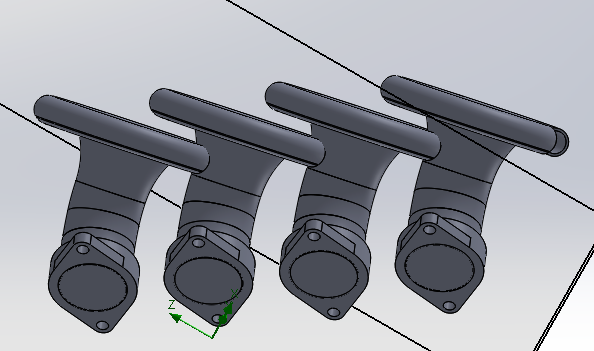
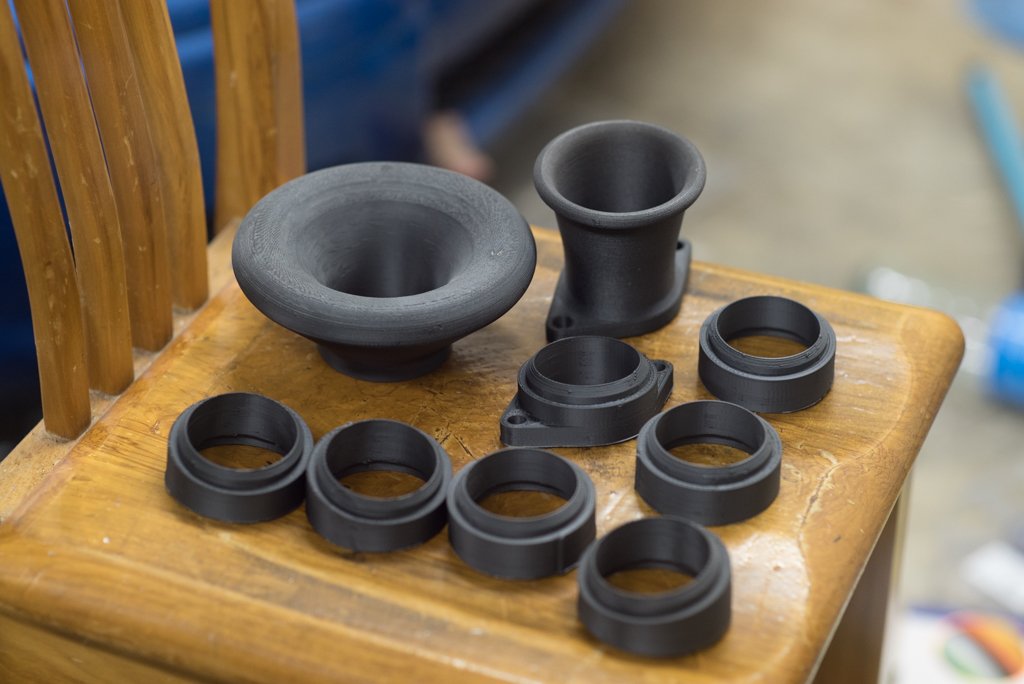
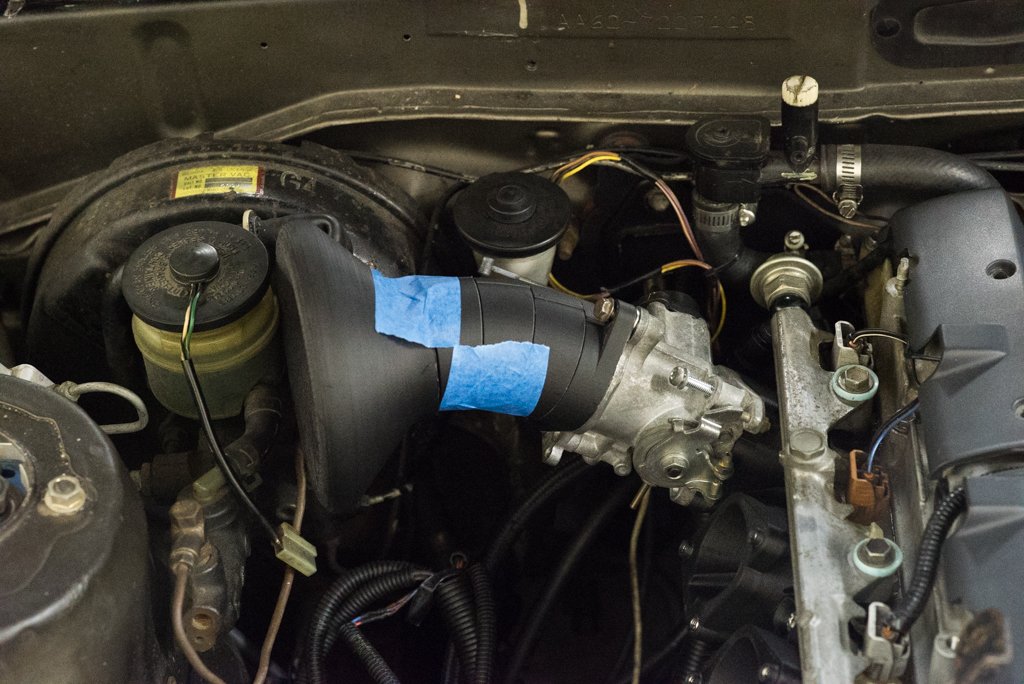
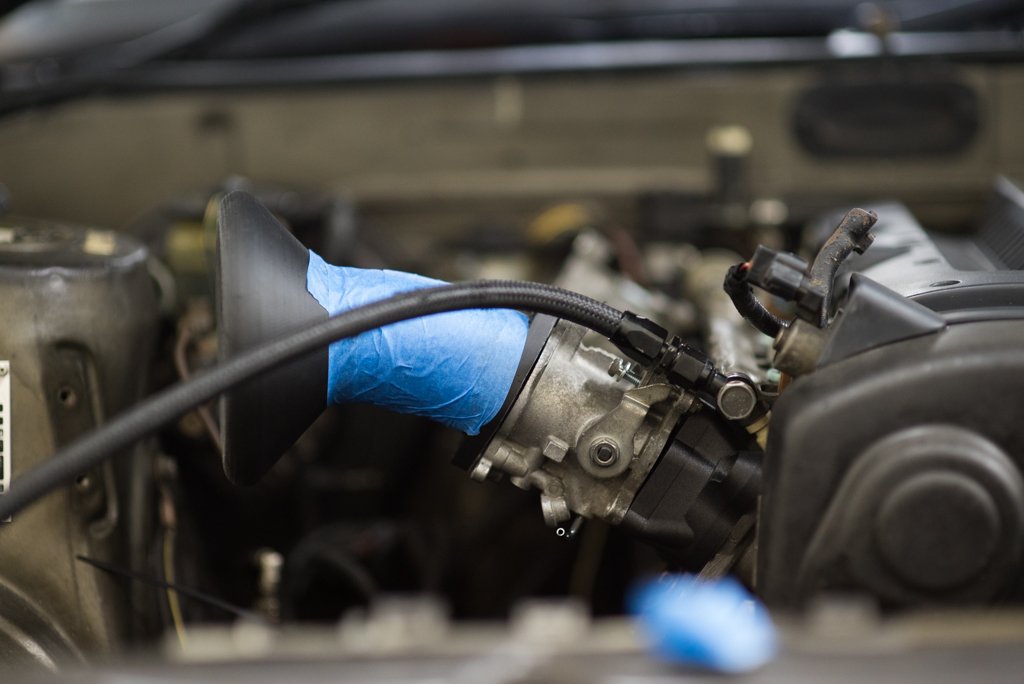
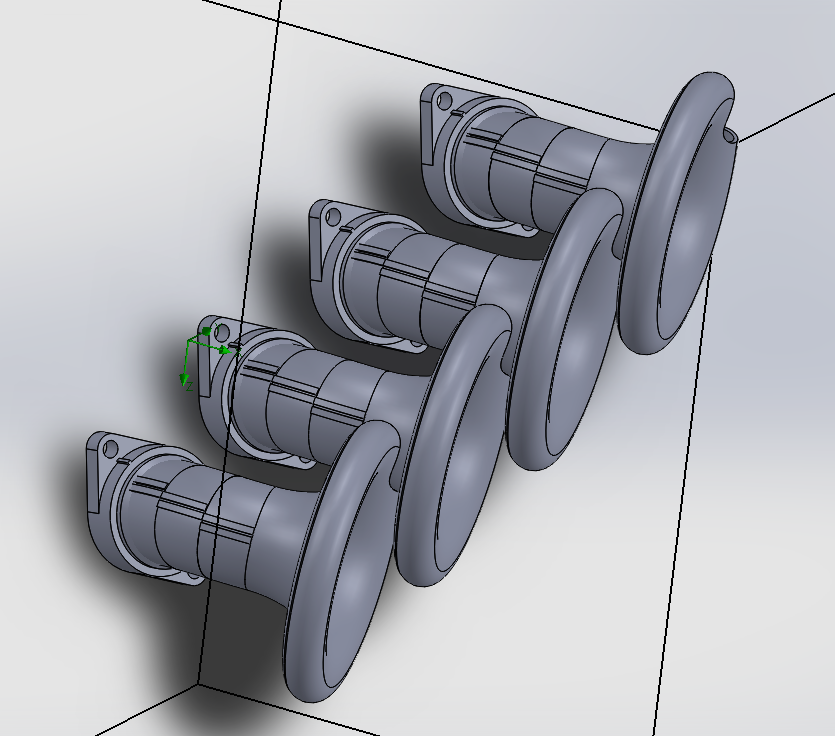
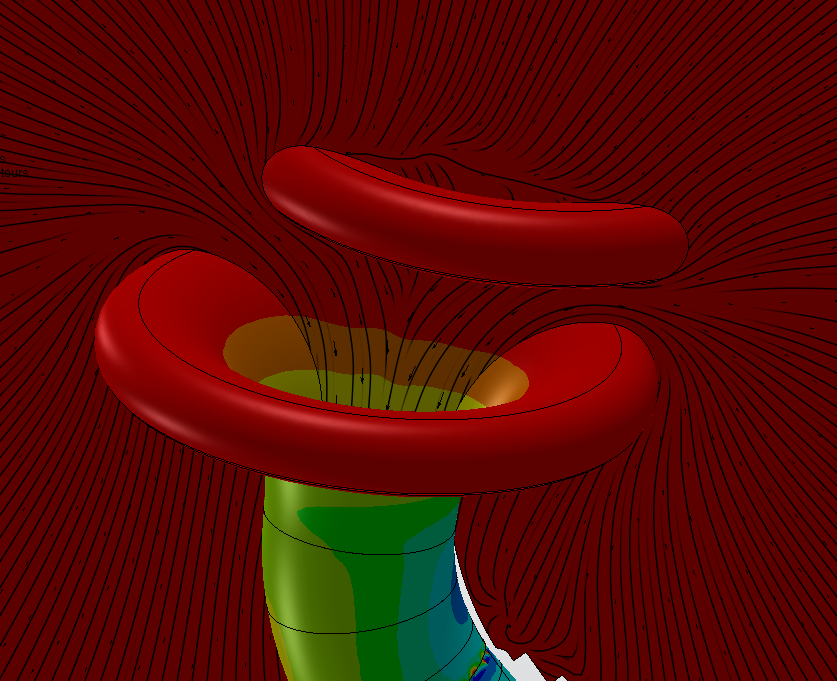
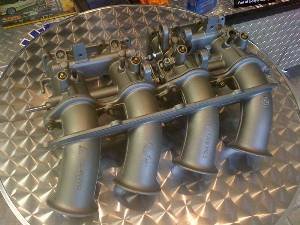
Soooooo for a while now I've had an obsession with getting a "proper" bellmouth geometry on something. I successfully made a big one for the big single throttle but I really need a different radiator arrangement to make it work so its been on the back burner. But the geometry to give completely straight flow is massively massive compared to what is usually used, so its a problem when you have 4x throttles close together. With the space that is available, you have to trim down the sides of each trumpet by this much to fit 4 alongside each other. (Obviously dont need to trim front or rear but lazy modelling) So it looks like you lose most of the useful area of the bell... And looks like it would be prone to "stealing" air and maybe fuel from adjacent cylinders? Not so good. Probably better just having a smaller radius on each. Either way, I printed out a full sized bellmouth (without trimmed sides) so I can size it up in the engine bay. As it turns out that thanks to having a brake booster I've got zero room for a trumpet this big anyway on the rear and hitting the bonnet on the front will be a problem too. I've seen those cool kits where people have all of those parts you can clip together to help build an exhaust manifold. So I thought I'd try the same thing here but for an intake. So printed some parts so I can try some combos for a single runner. Base piece, a bell, 3 x straight 20mm sections and 3 x 10 degree sections. Also pictured is the bellmouth provided with the ITB kit, for an indication on how rediculous the bigger one is haha. Unlike those fancy exhaust kits though mine doesnt actually clip together because aint nobody got time for that. Also, turns out printing the straight ones was a waste of time as there's not even enough room for just the bends. Neither front or rear really fits. pooz. So I'm reprinting the bend parts with 15 degrees per segment and a bit tighter radius to see how much that helps. Based on what looks like will fit though, tipping the trumpets slightly towards the front of the engine bay is actually pretty cool because it allows more useful bellmouth area per runner. A lot more! Most of the air comes from around the sides rather than straight ahead so will be interesting to see how this goes. The question is, is the efficiency gain of the big bell worth the efficiency loss from the bend. And is the bend worth the extra runner length gained. And does any of this make a difference when you're trying to wheeze through a 45mm throttle. And the biggest question of all, will I actually finish making any of this? Some preliminary nerding seems to look like the bellmouth partially shrouding the entrance shouldnt be an issue so long as there's a bit of gap. The colour scale on this, red is 101.3kpa and green is 101.0kpa so pretty minimal loss hopefully EDIT: Just found what the factory BMW S14 engine runners look like, makes me feel like I might be on the right track. Even if the big bellmouth isnt necessary, perhaps there is a real life benefit to having them staggered to allow more clear air around each runner than you can get with straight pipes that are butted up to each other.
 18 points
 -
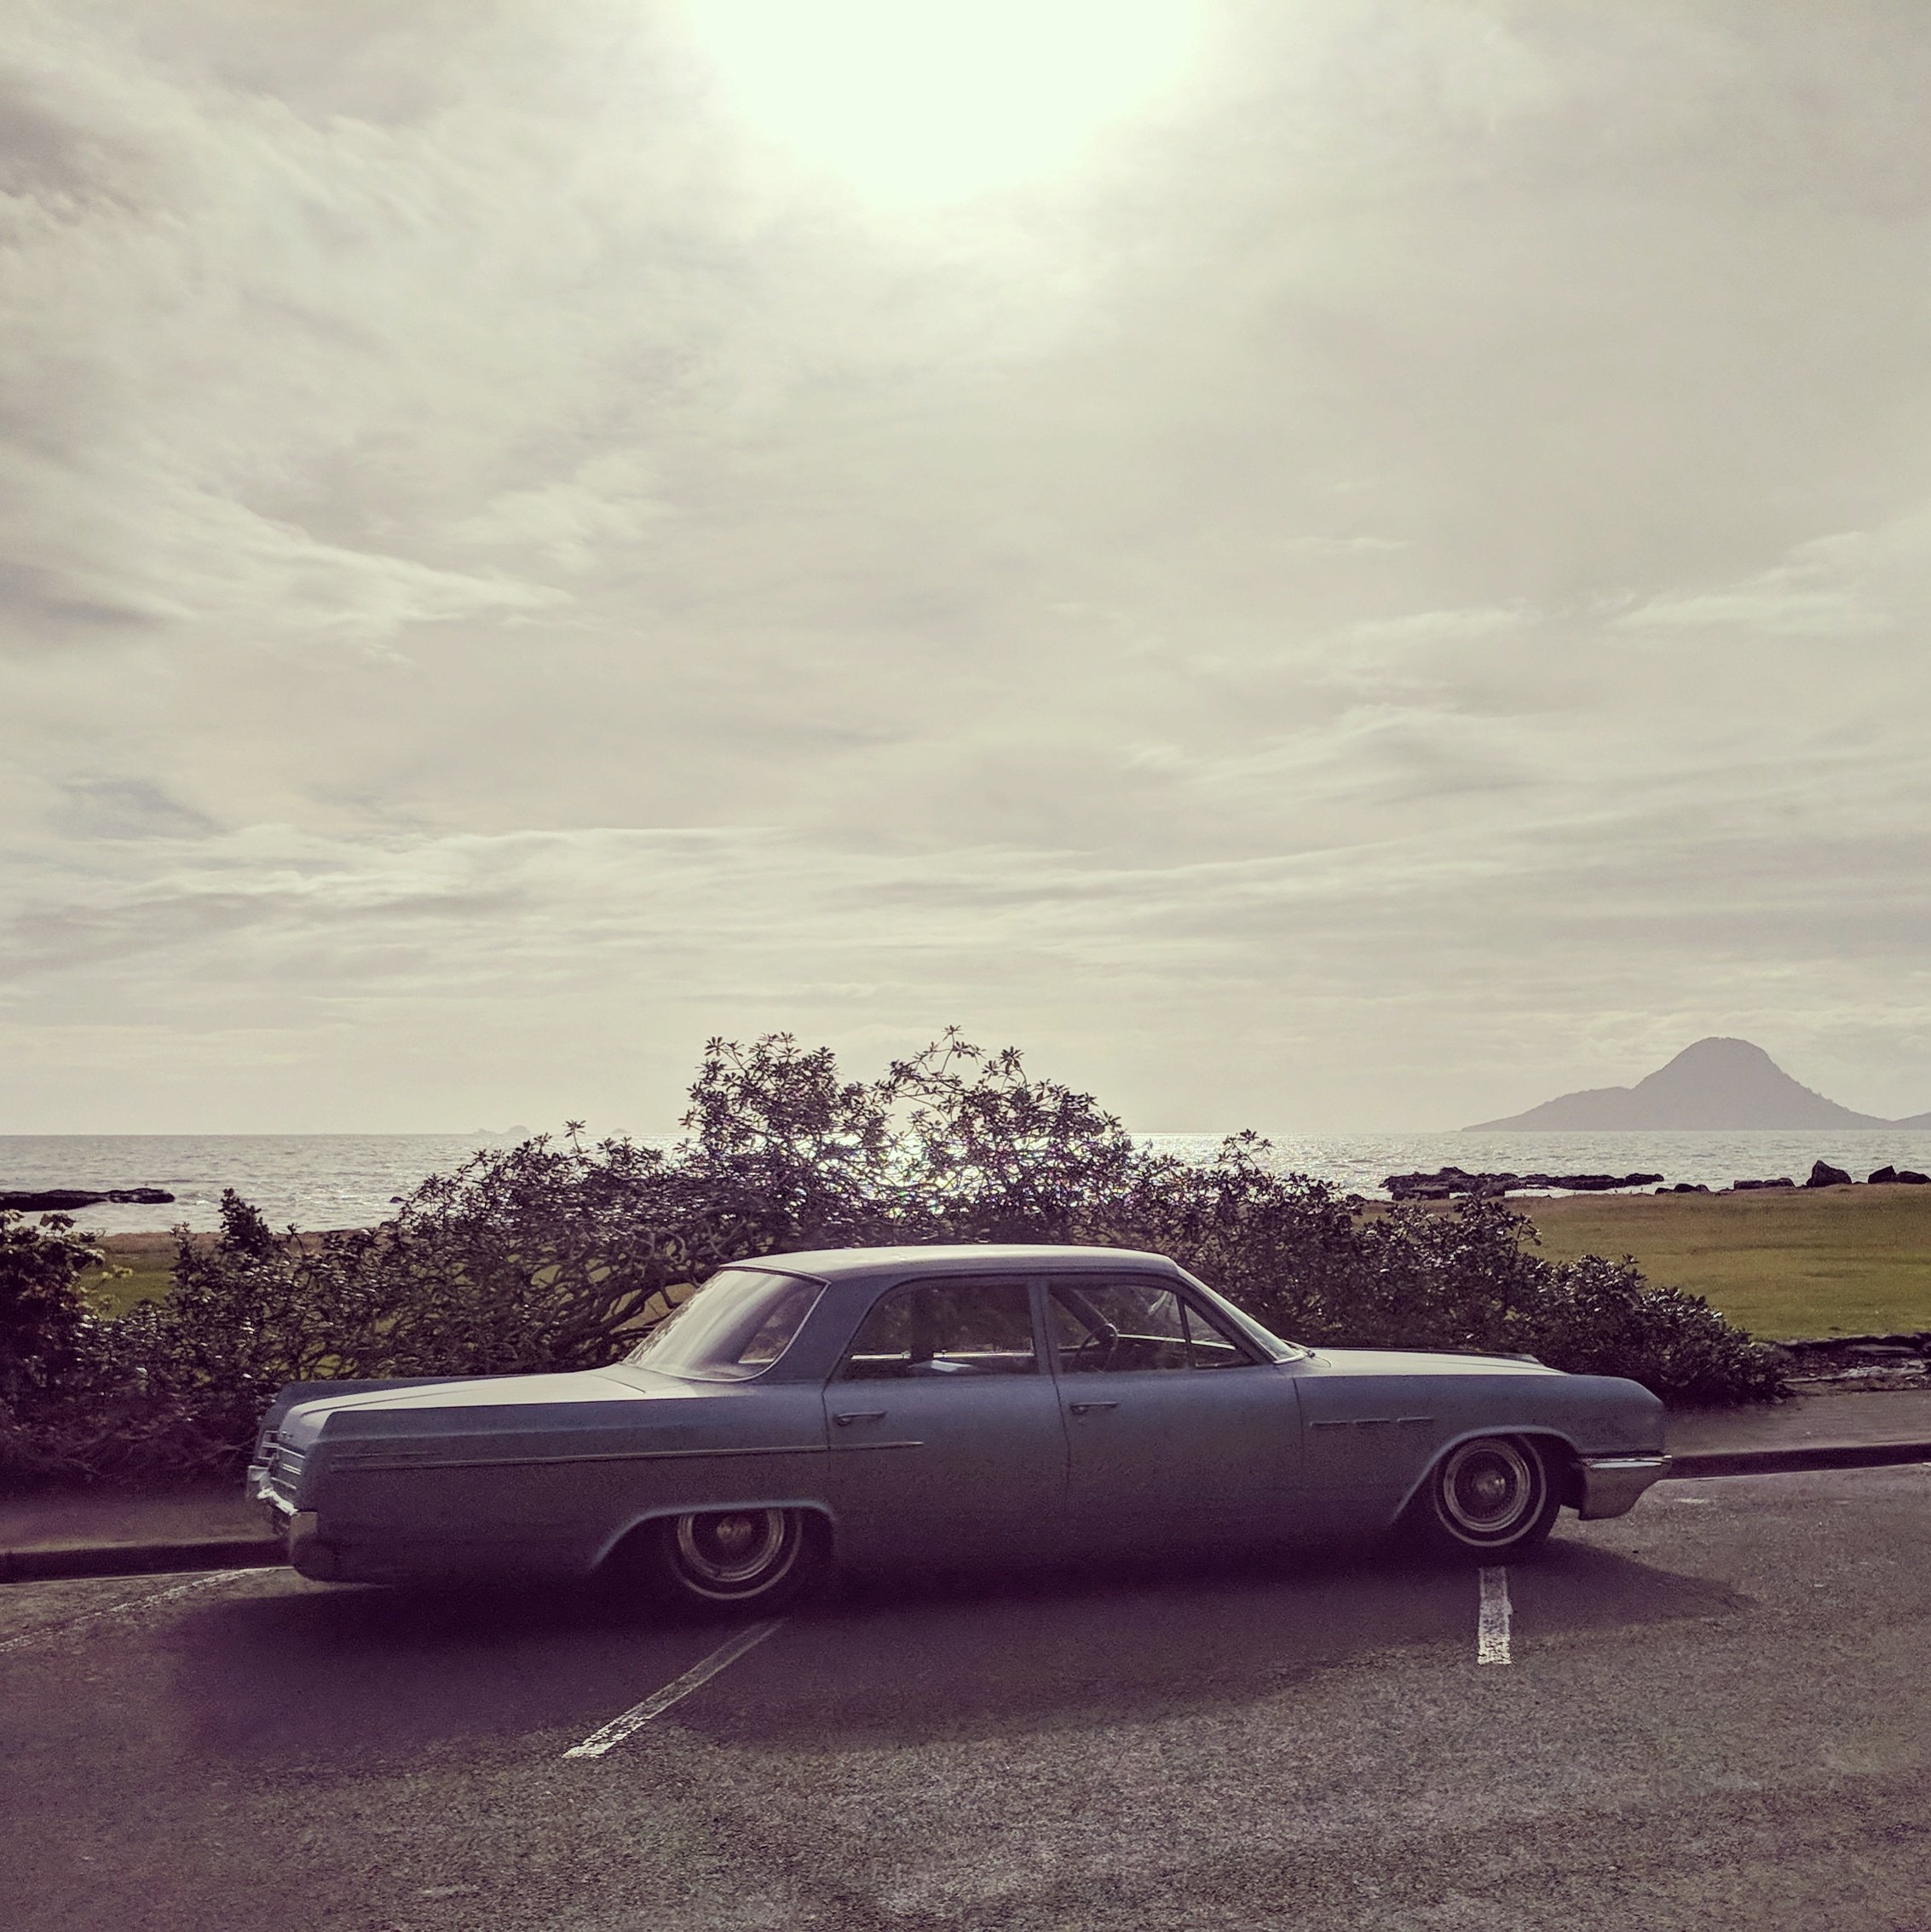
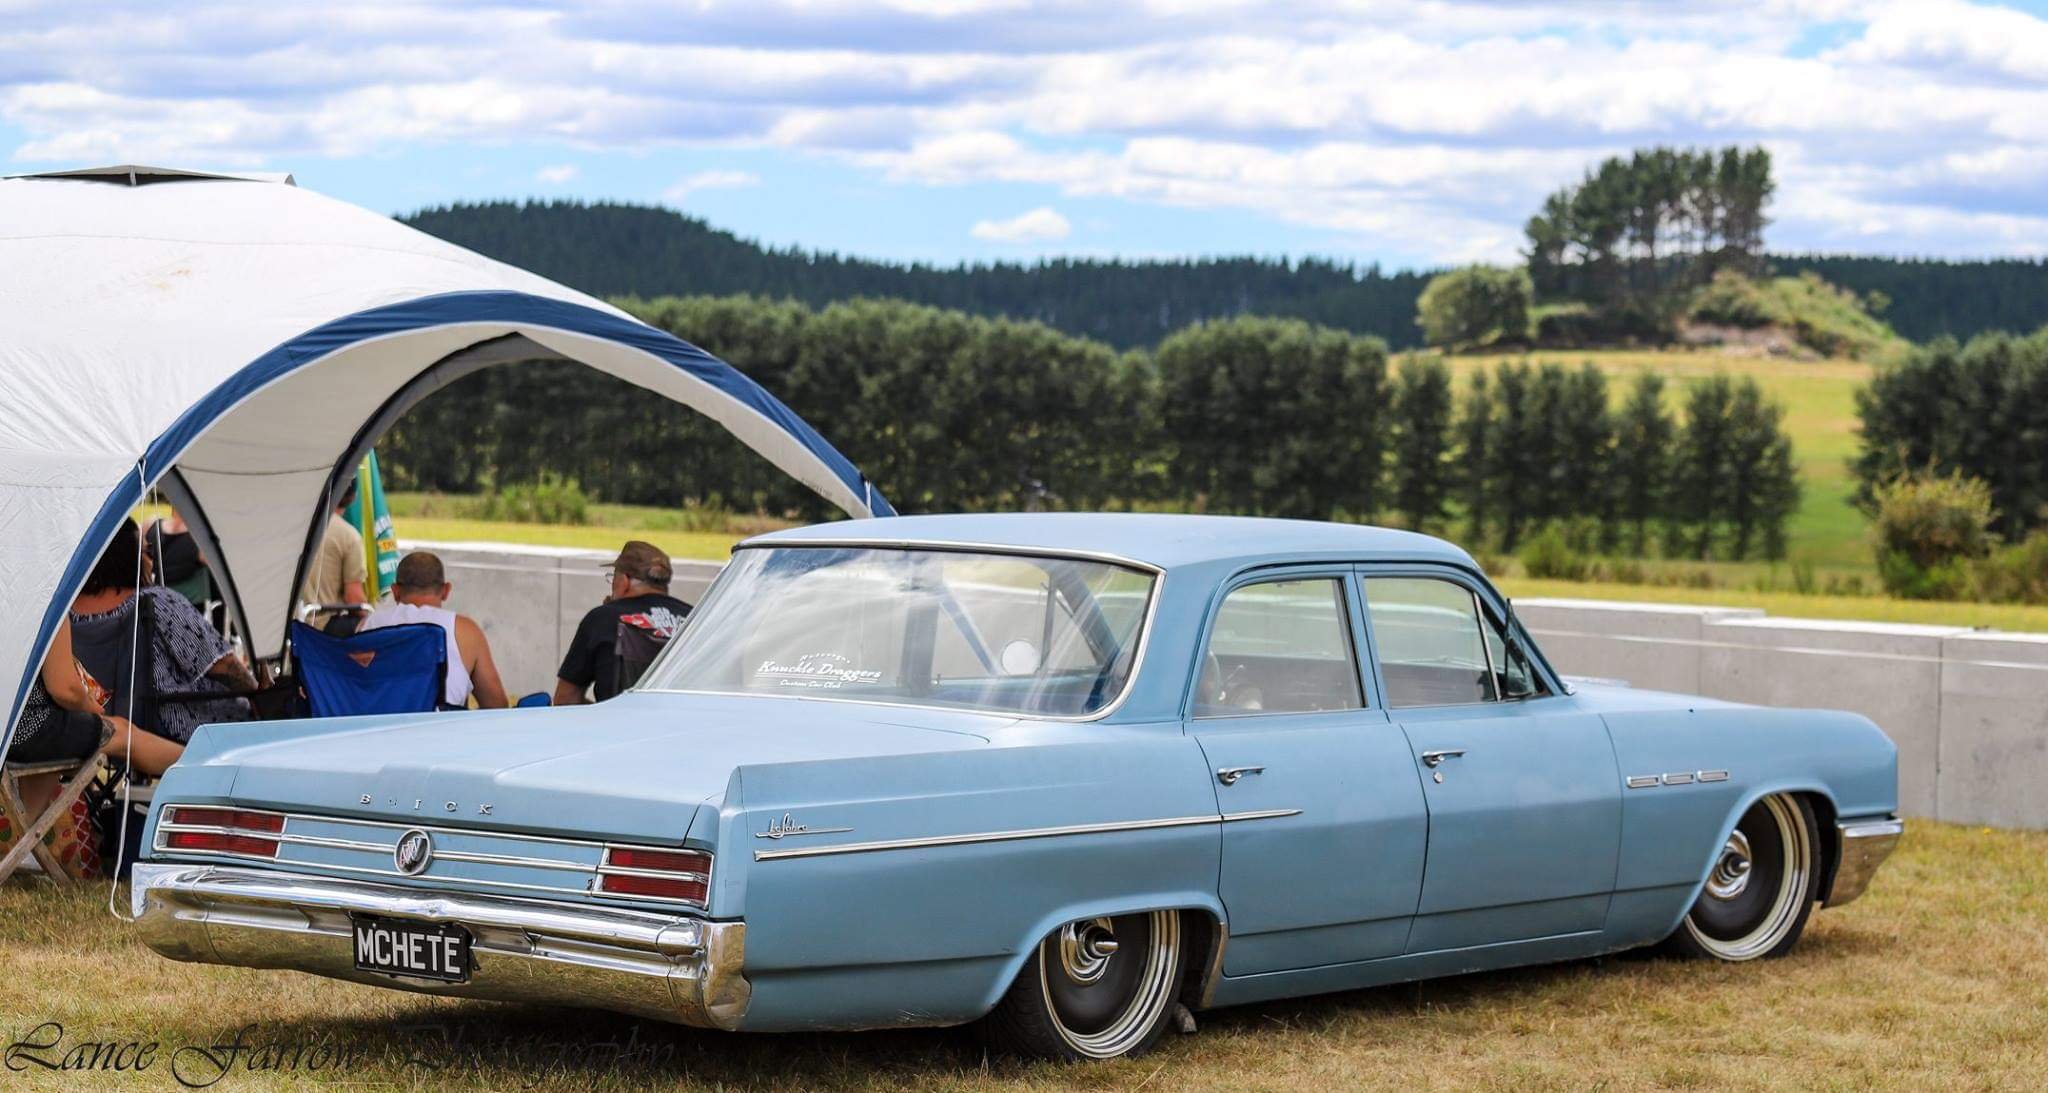
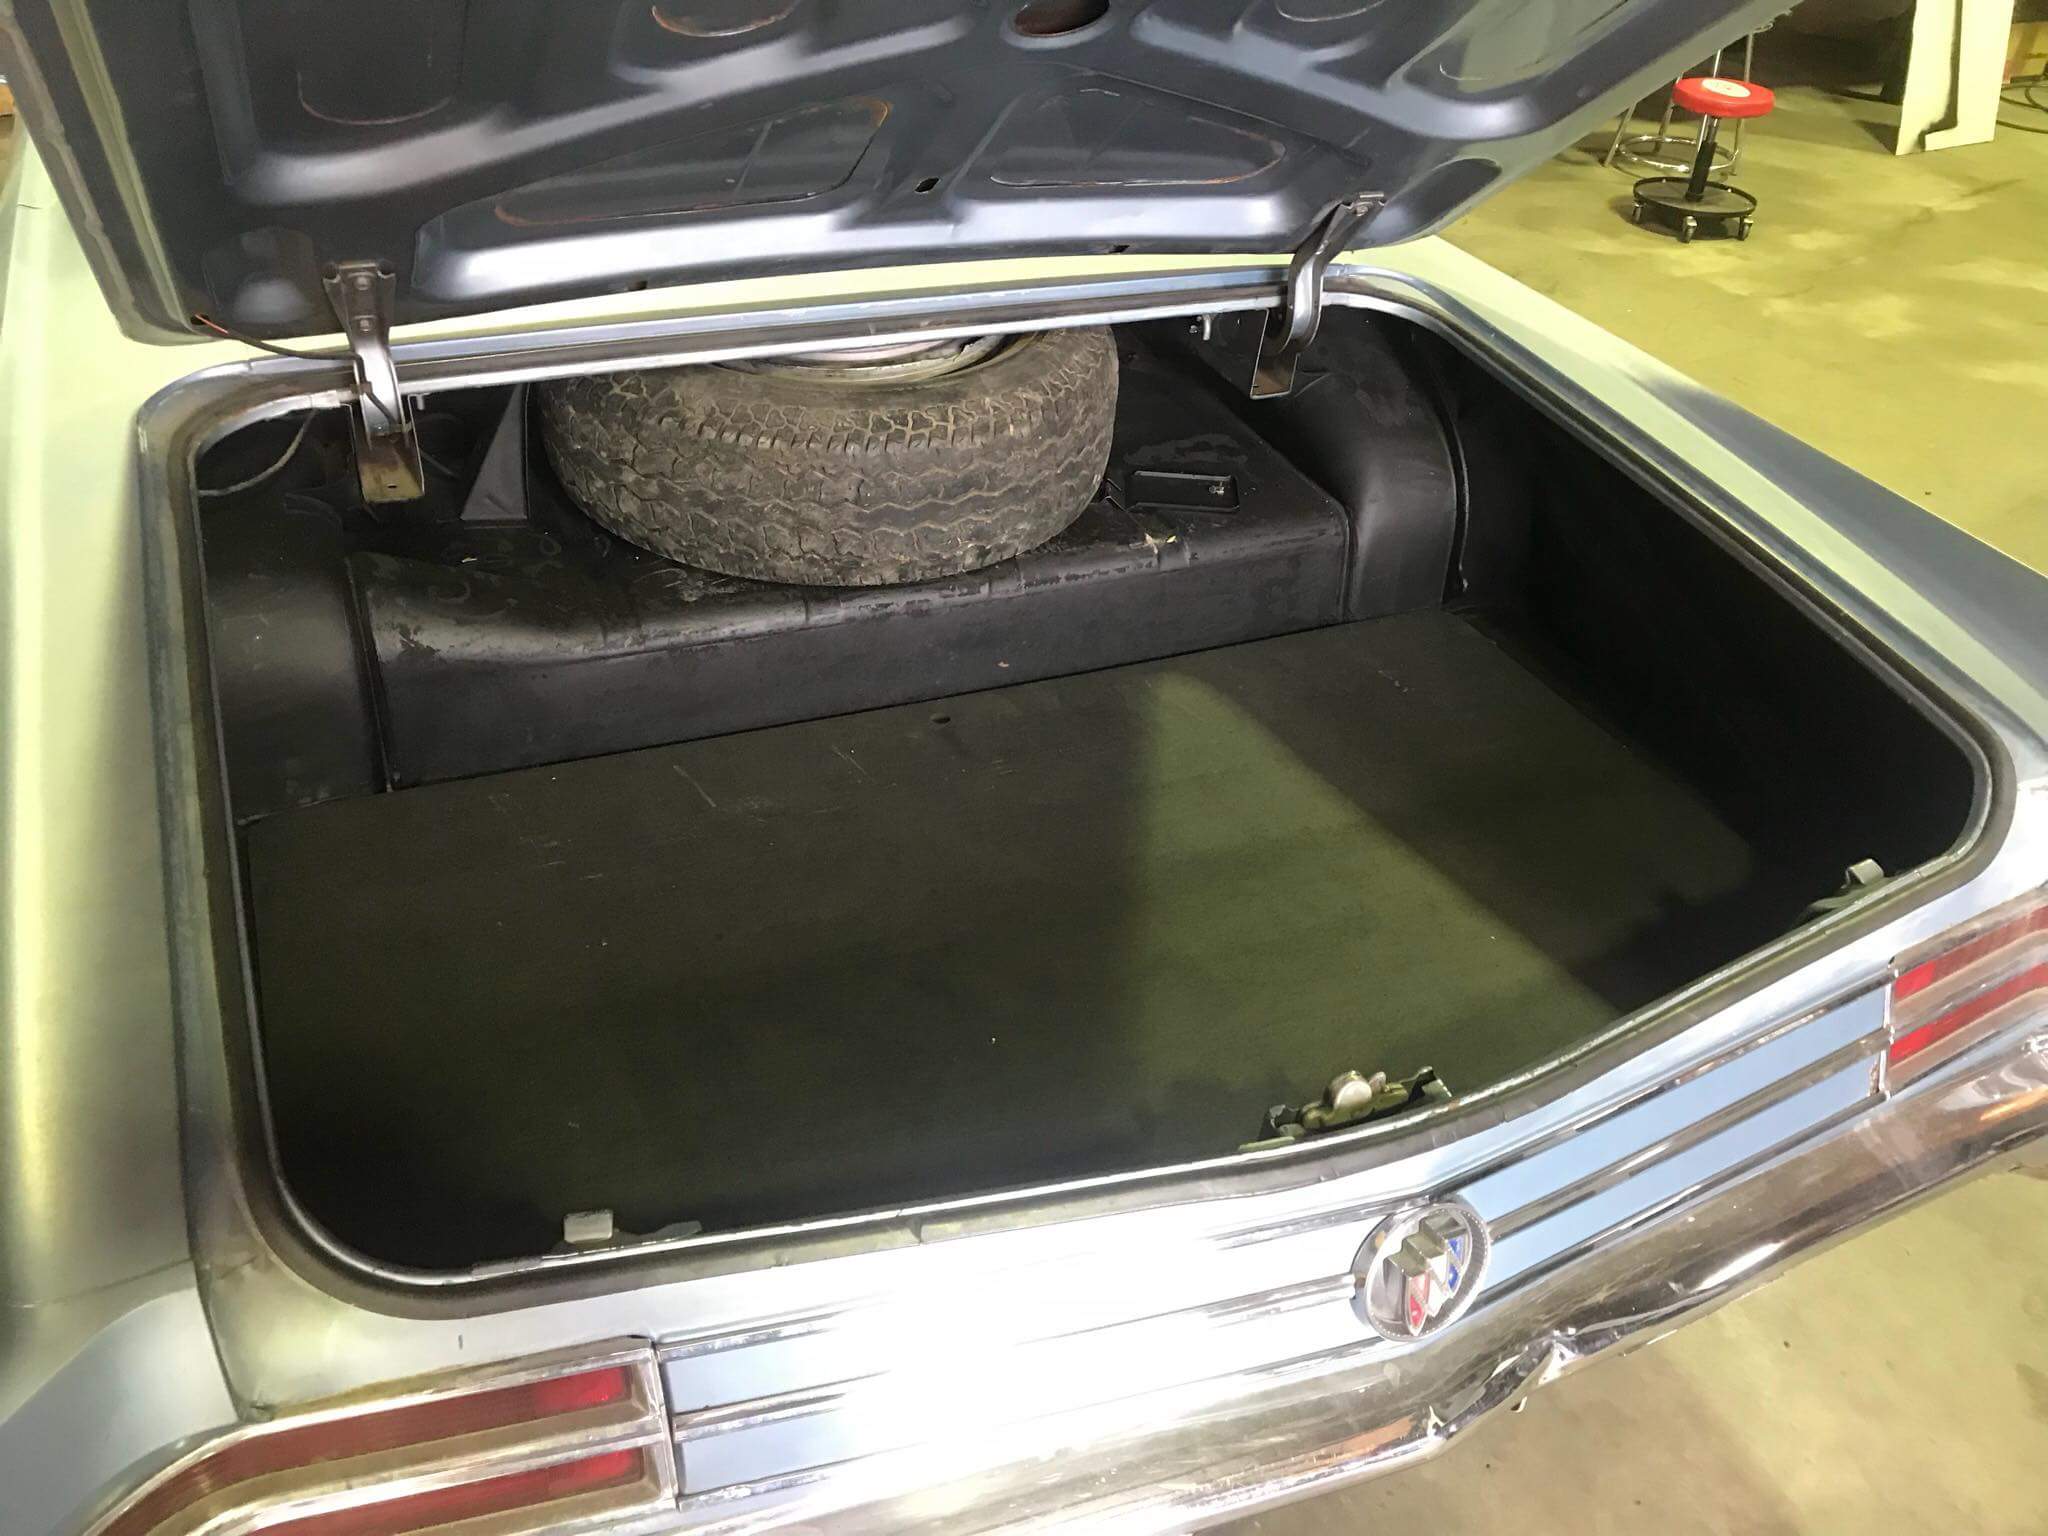
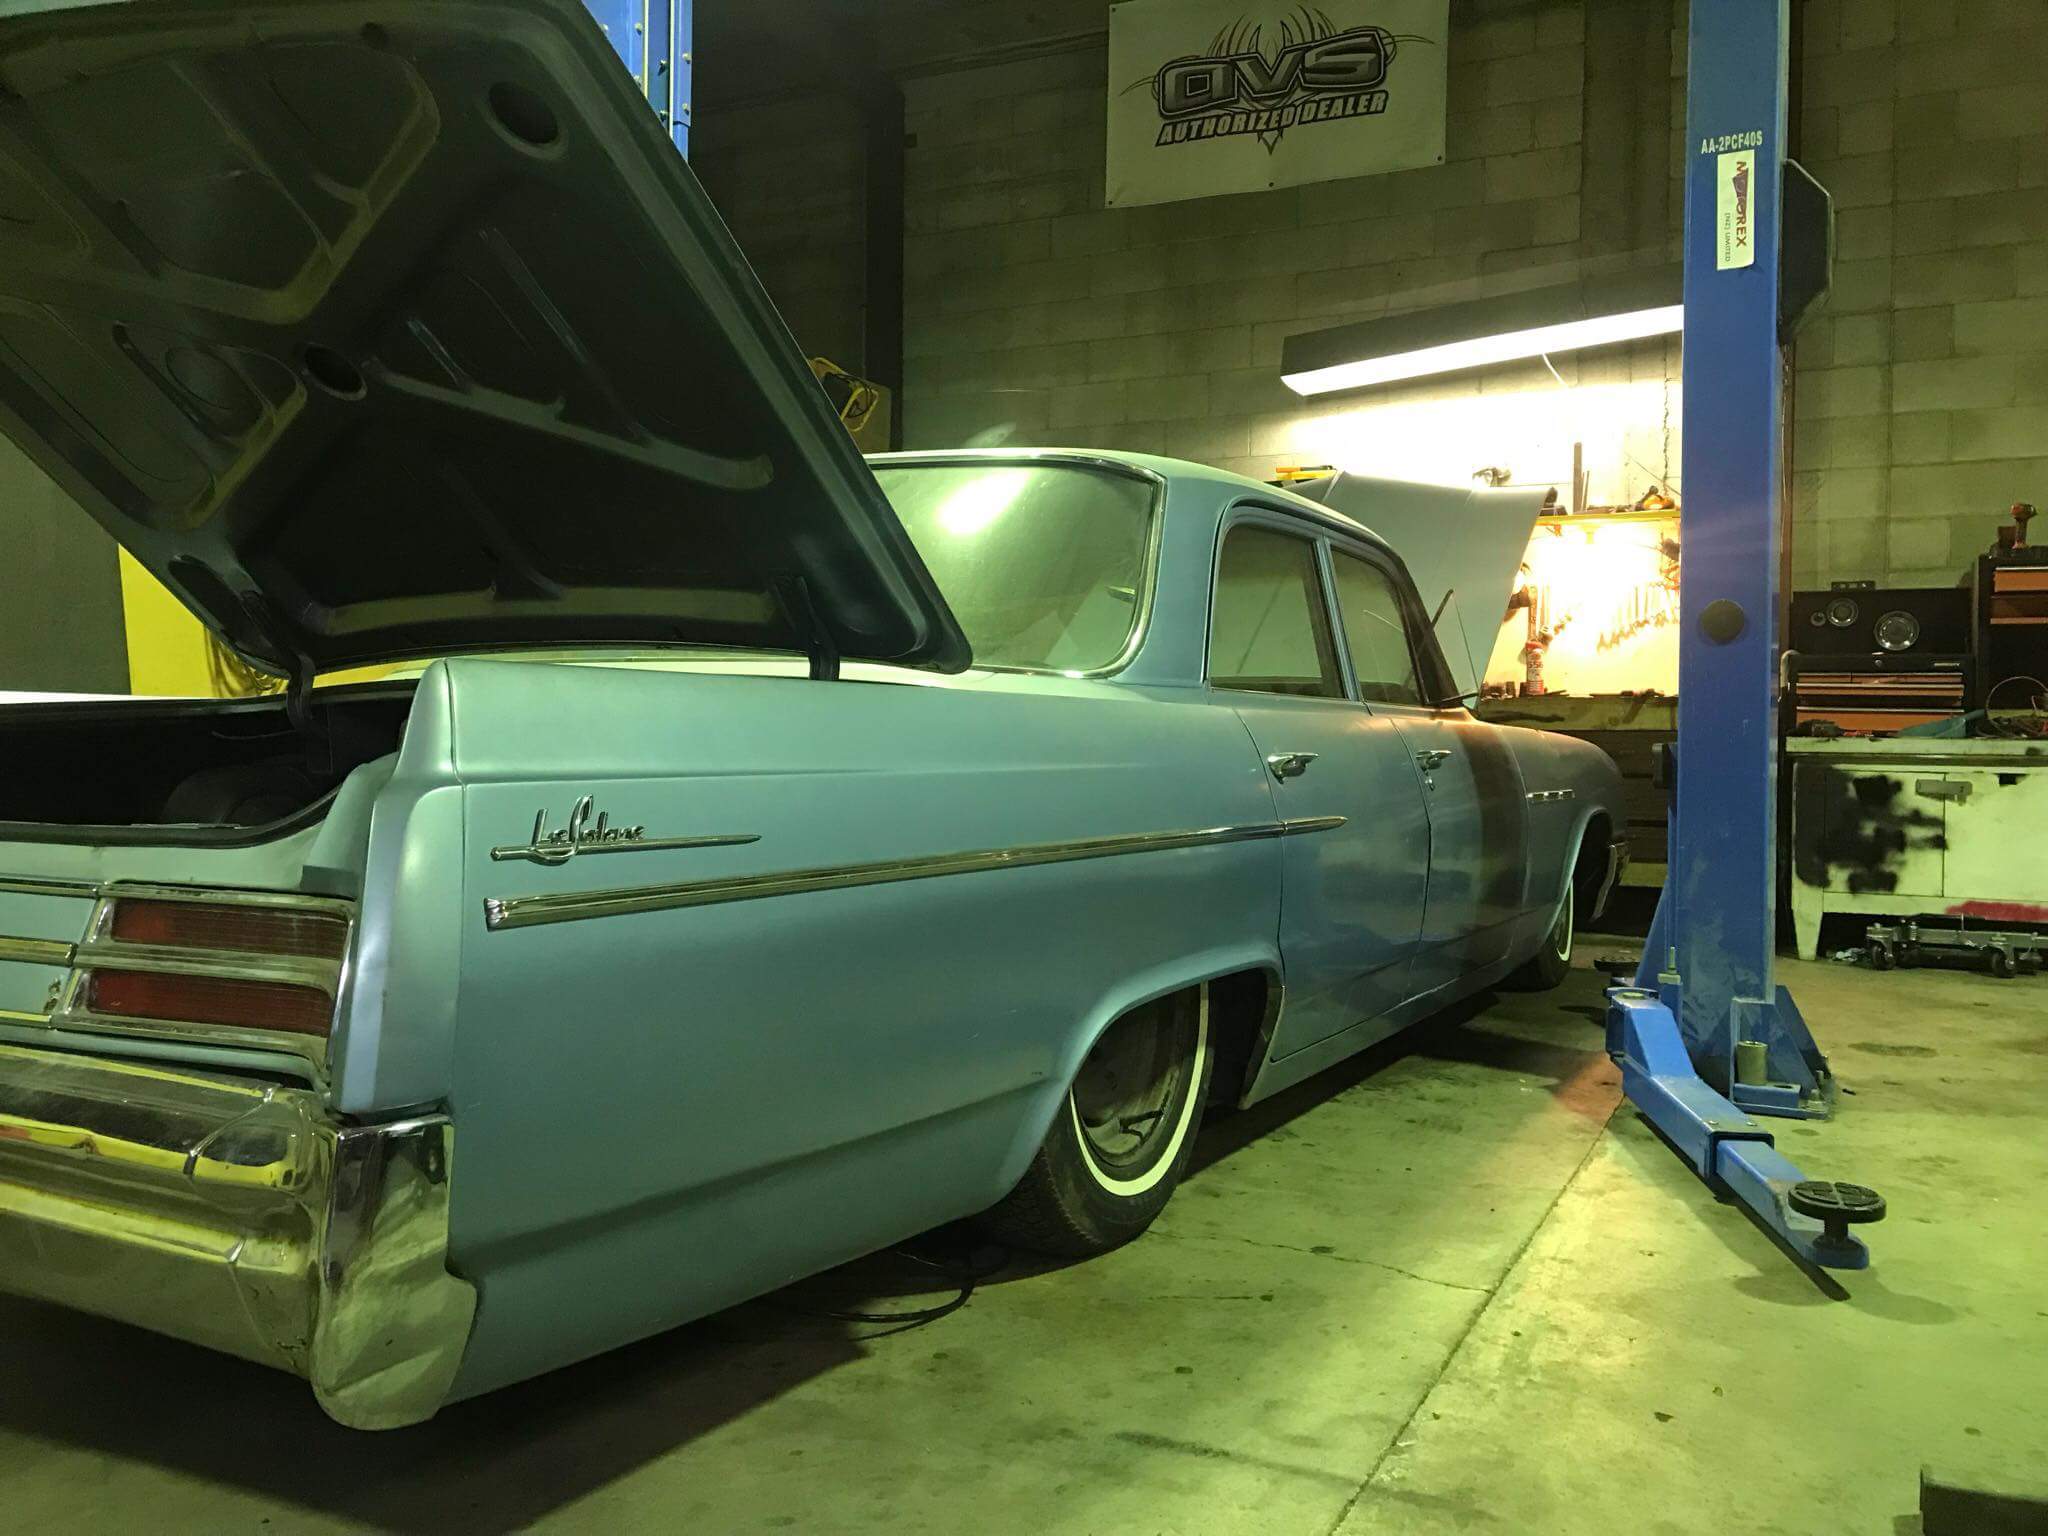
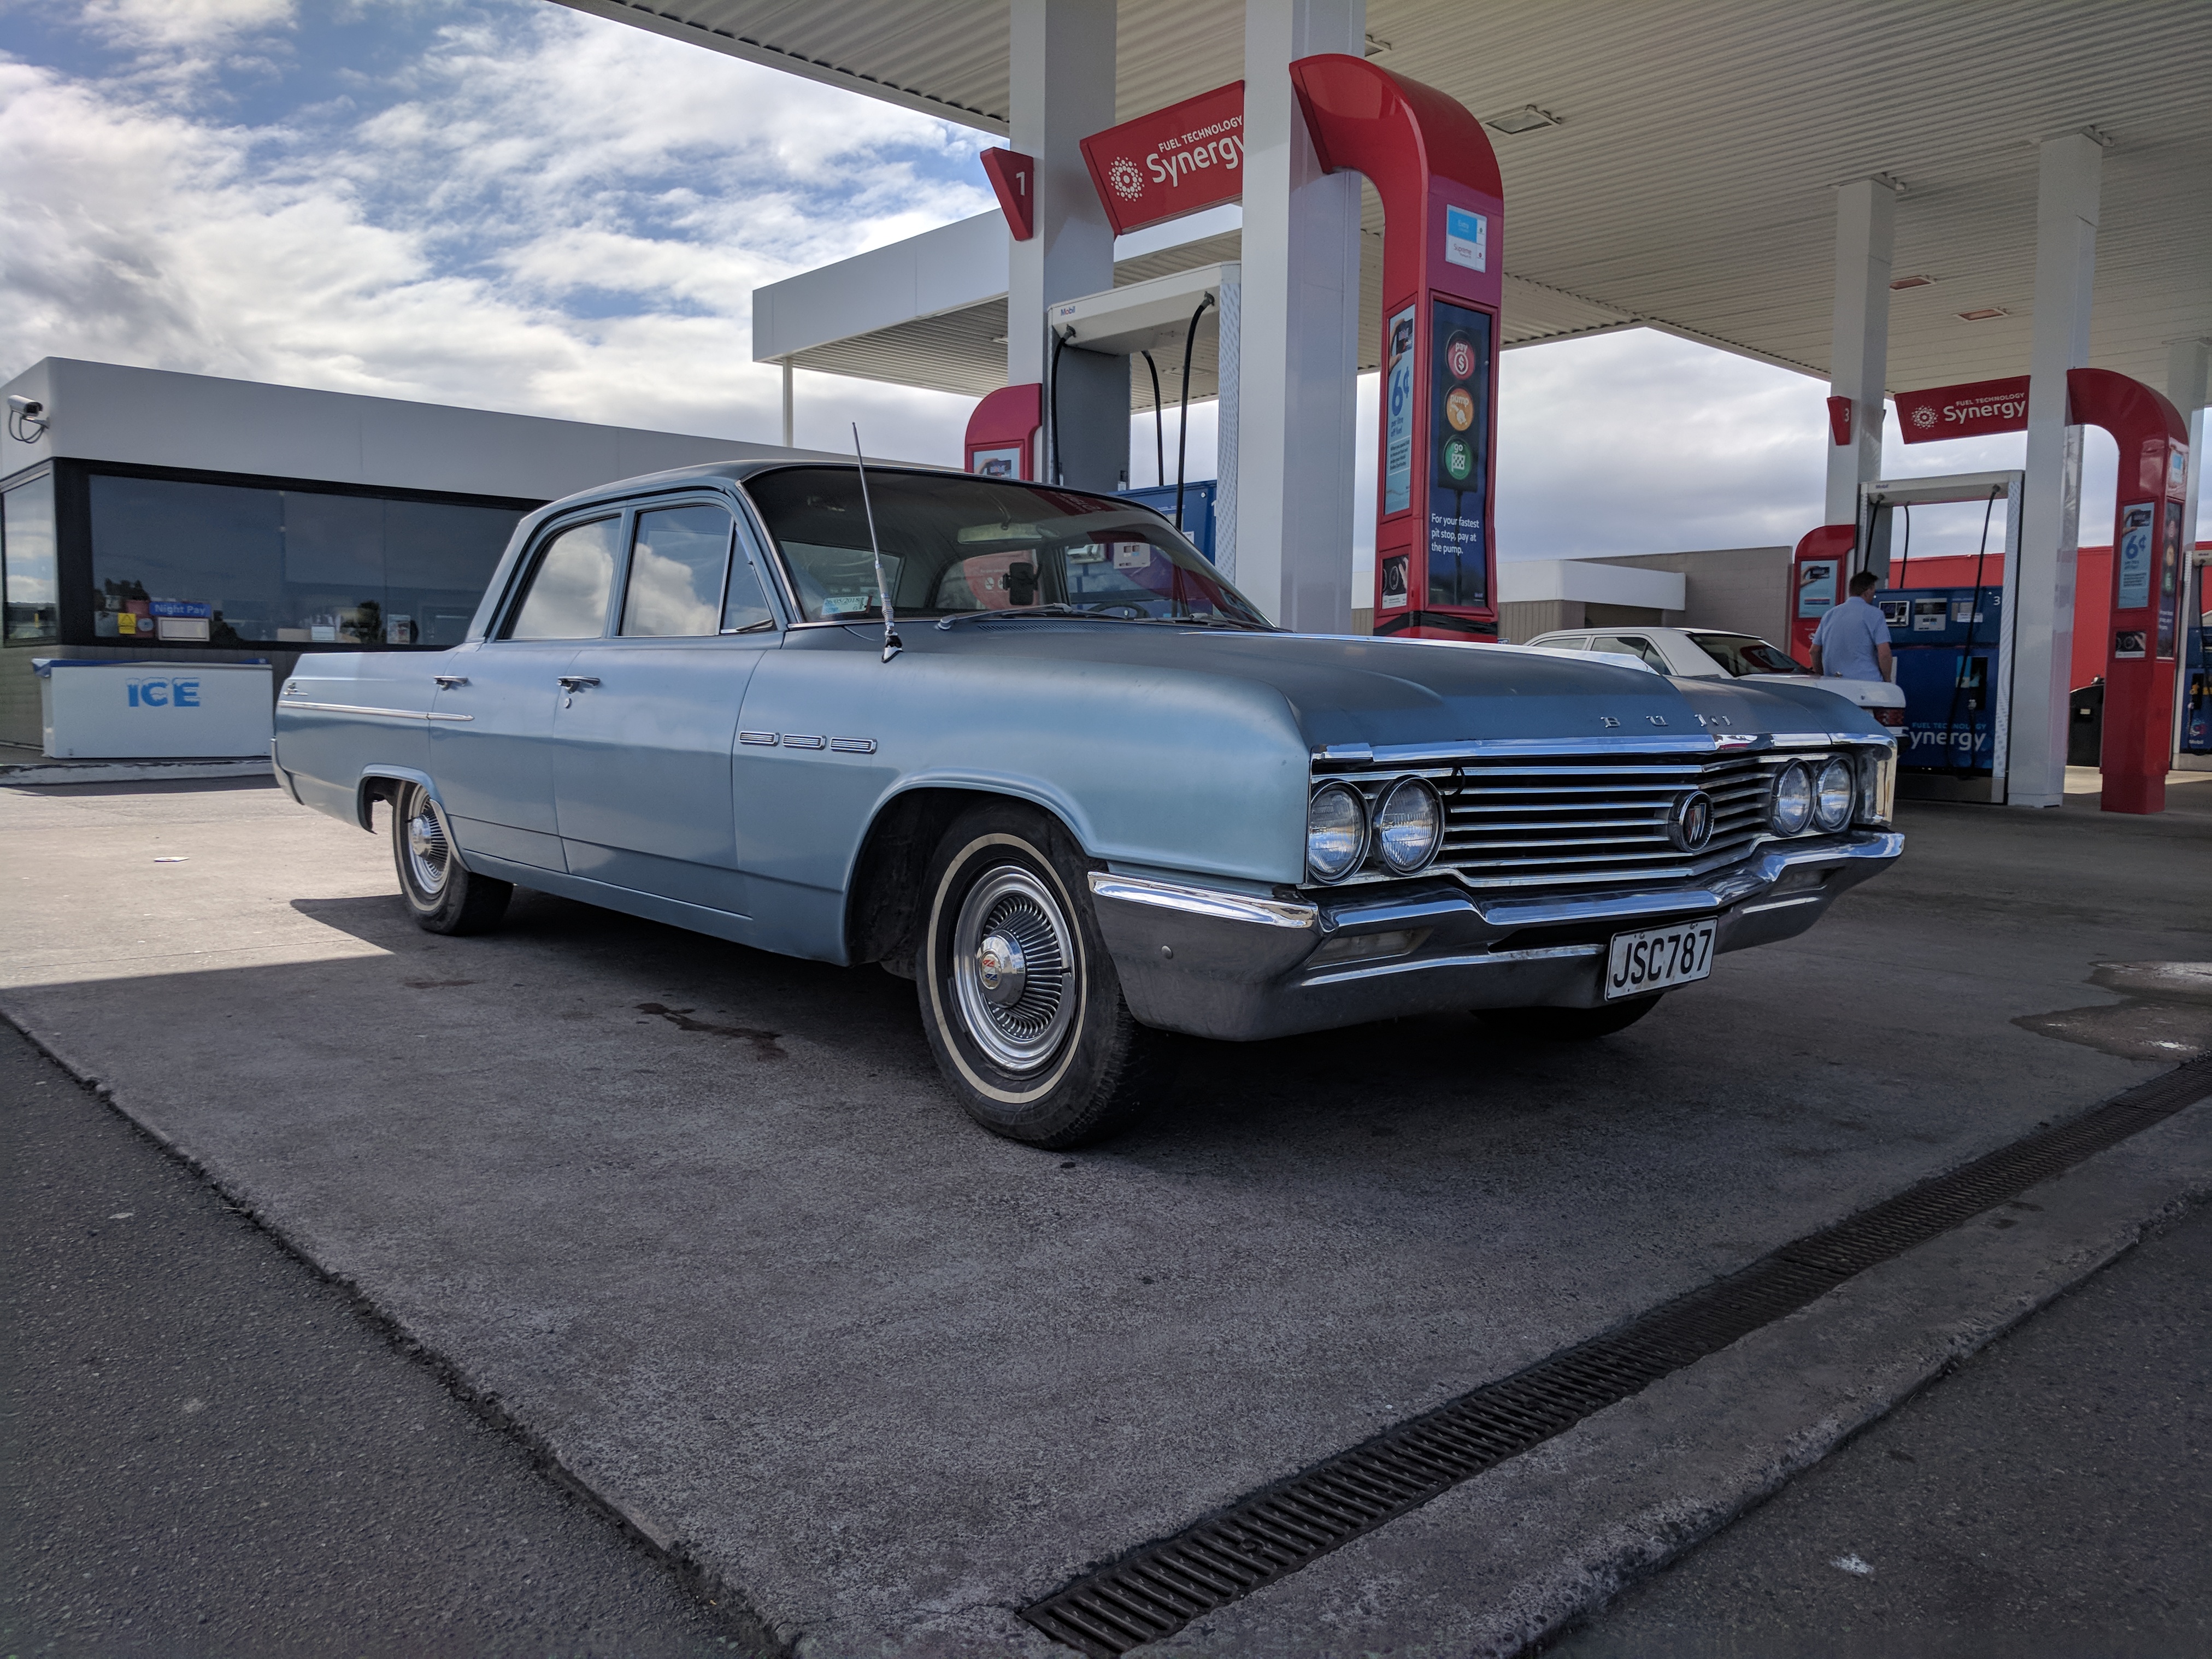
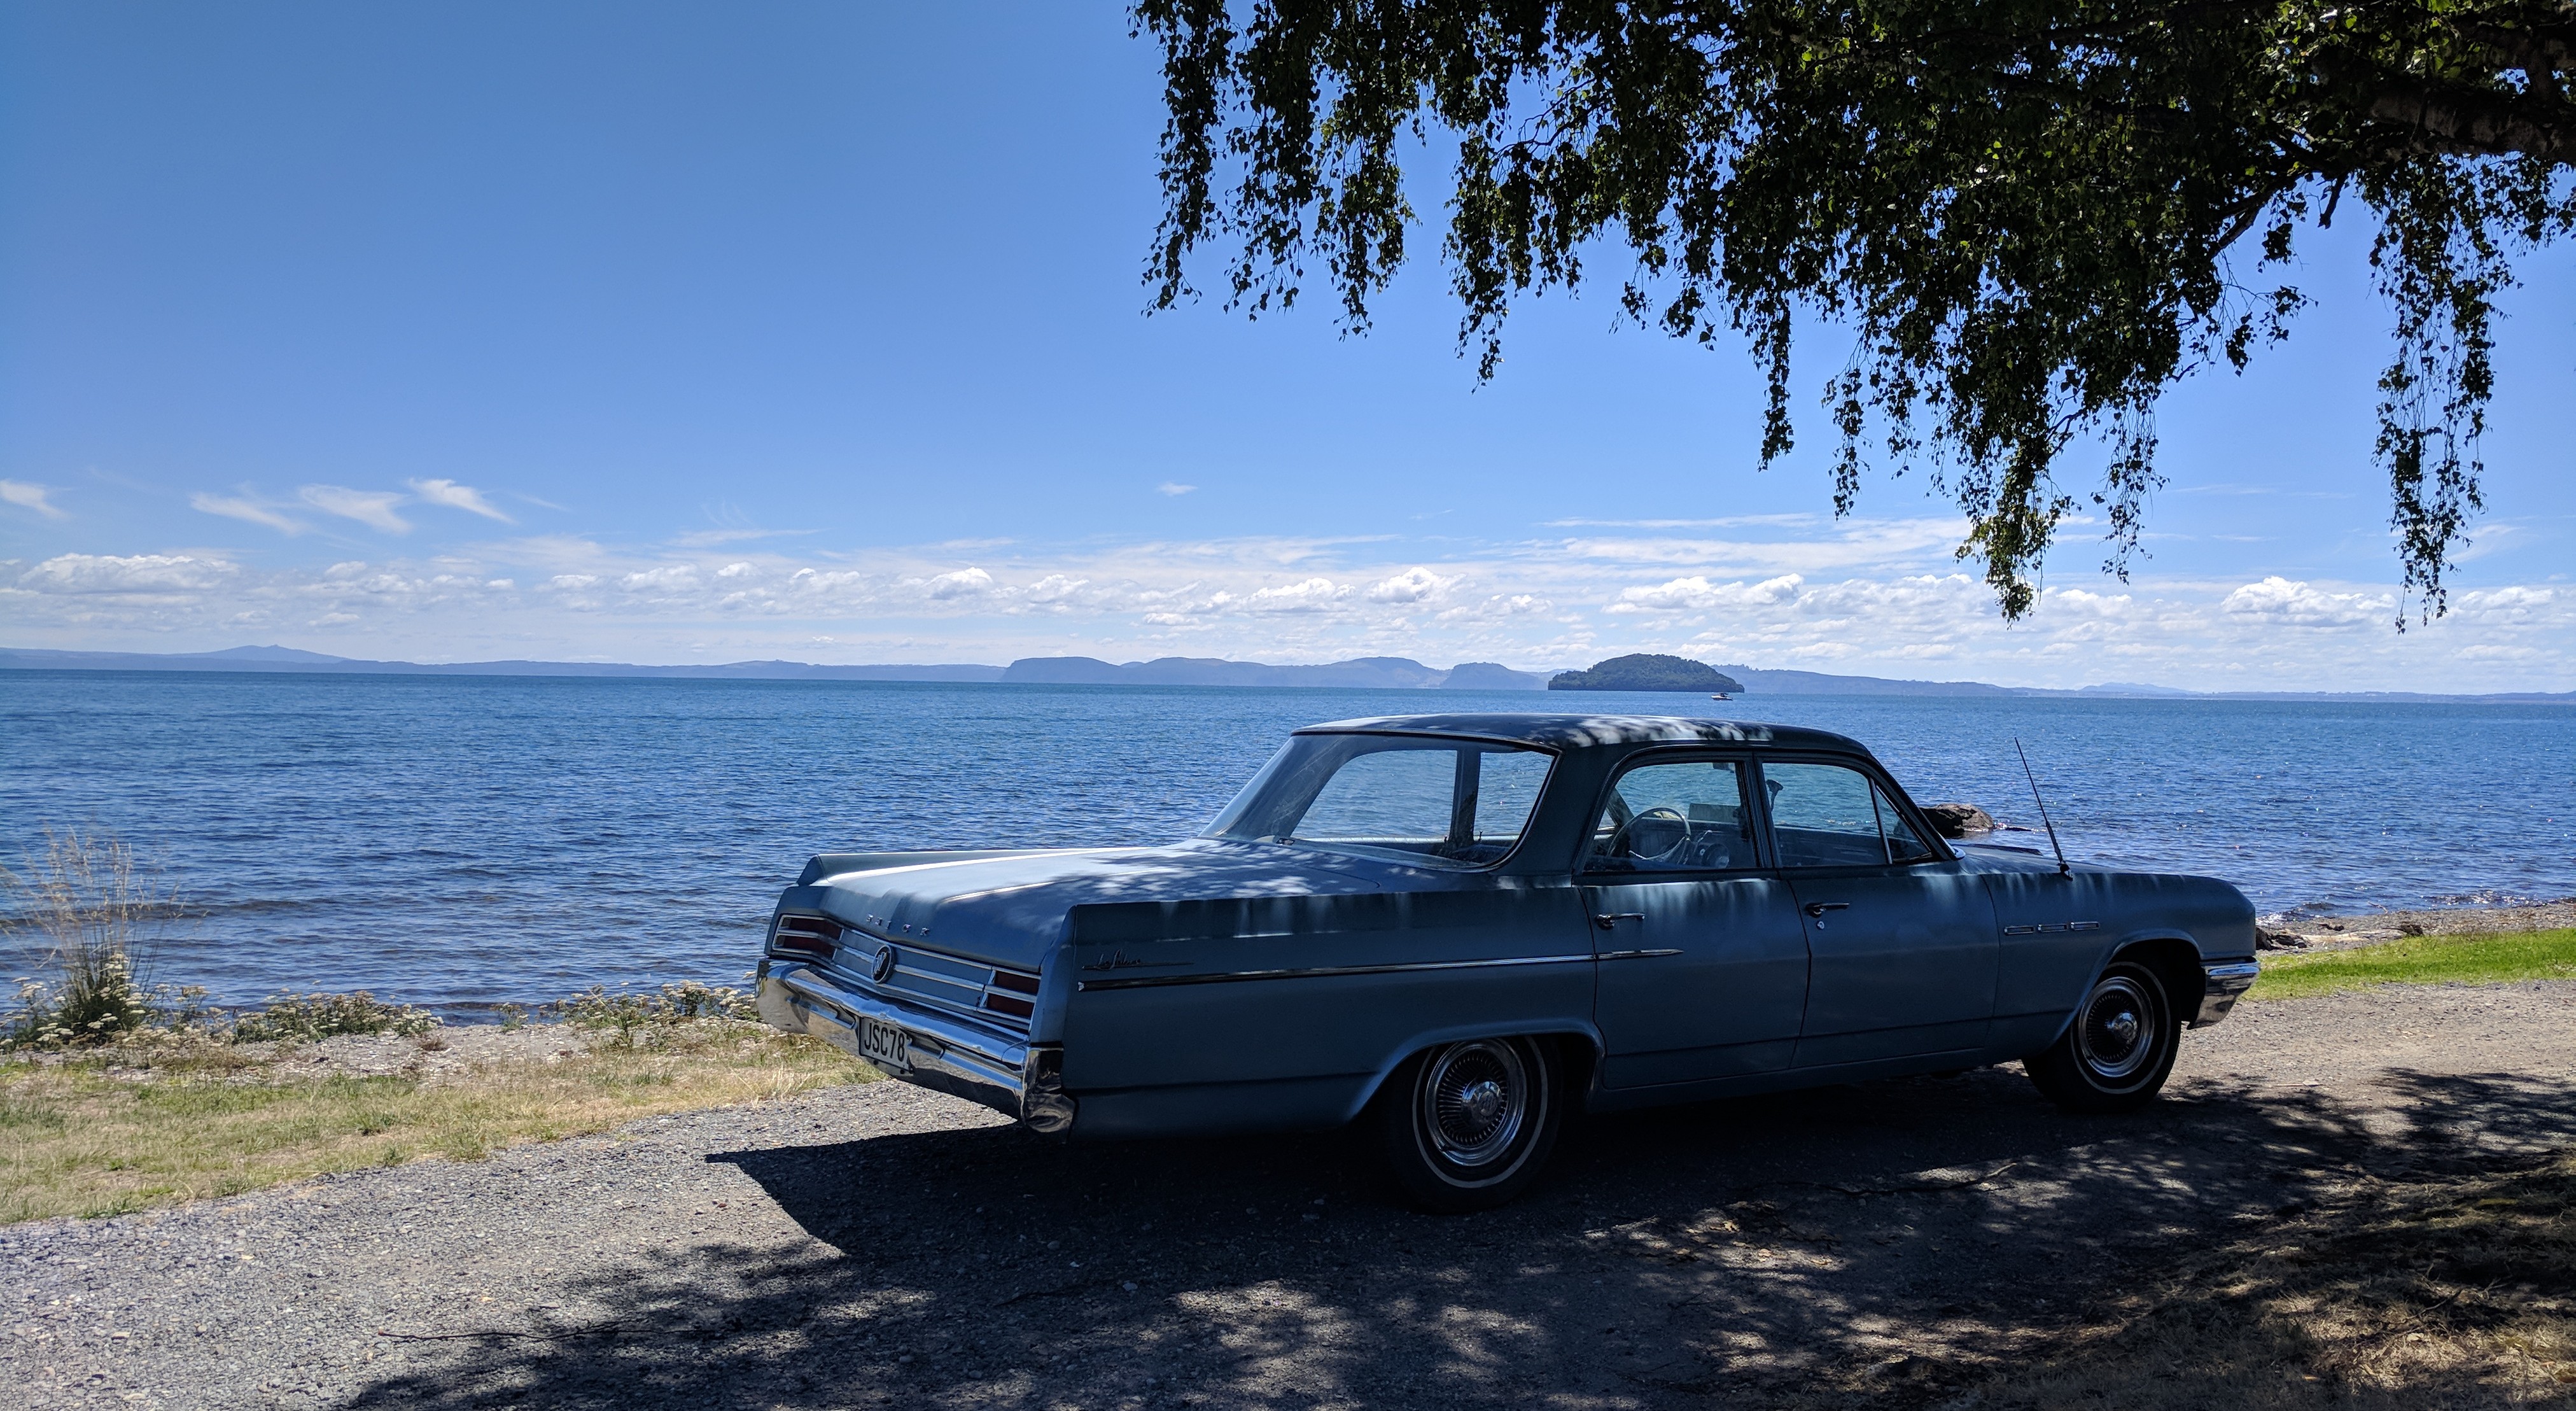
Had a blast in this so far, travelled many miles. Huntly Burnouts, WRCC Spring fling, Rocket open day, Tokoroa drags. Heading to Rebel Roundup this weekend Accuair is the business, Highly recommend. Get into it. I like the stock hubcaps but wanted options. A mate of mine had some Detroit's on an earlier Buick Super, but he didn't like them. So I chucked them on to see if they would suit. I think they look pretty cool, so deal was struck.
14 points
-
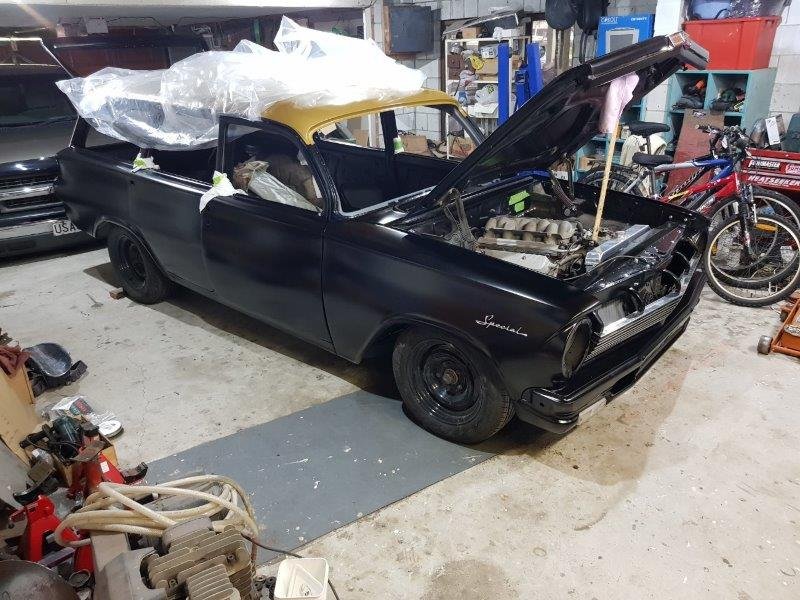
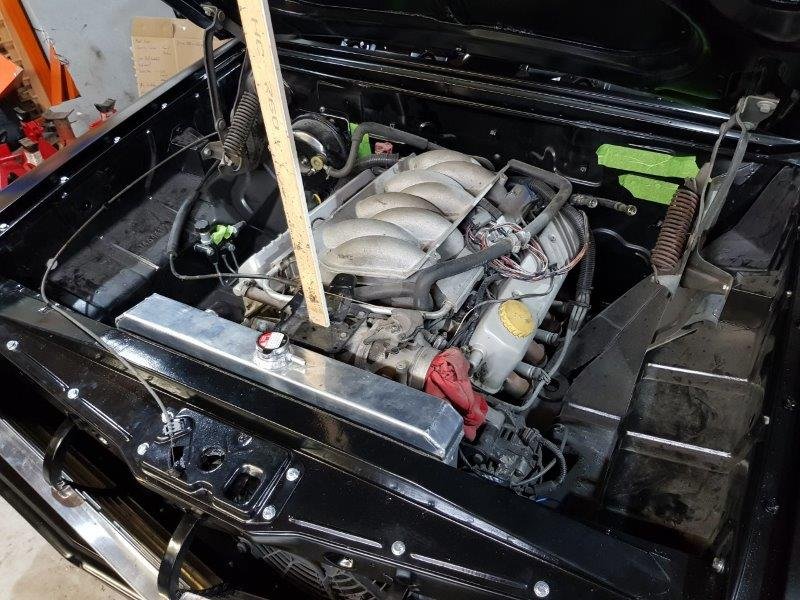
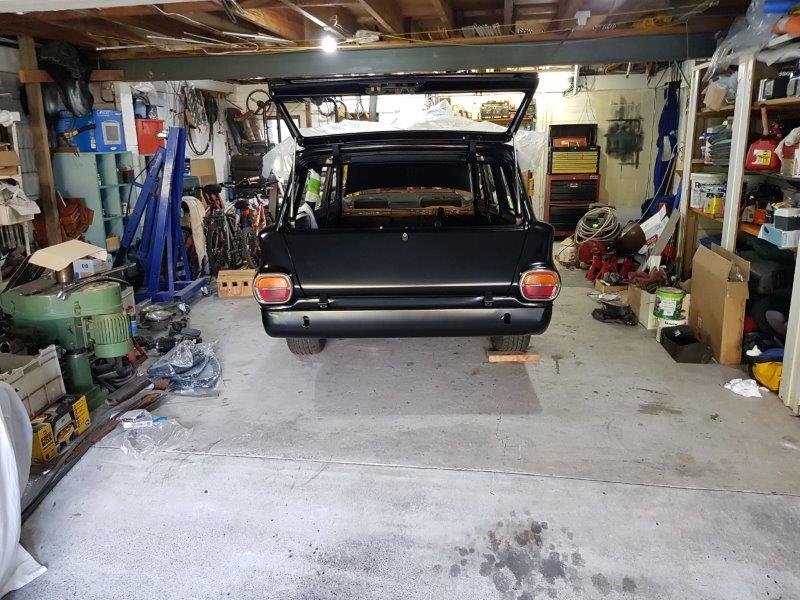
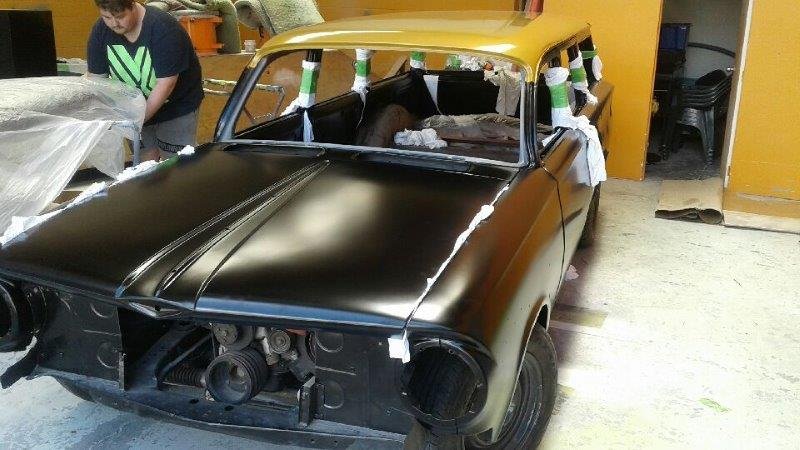
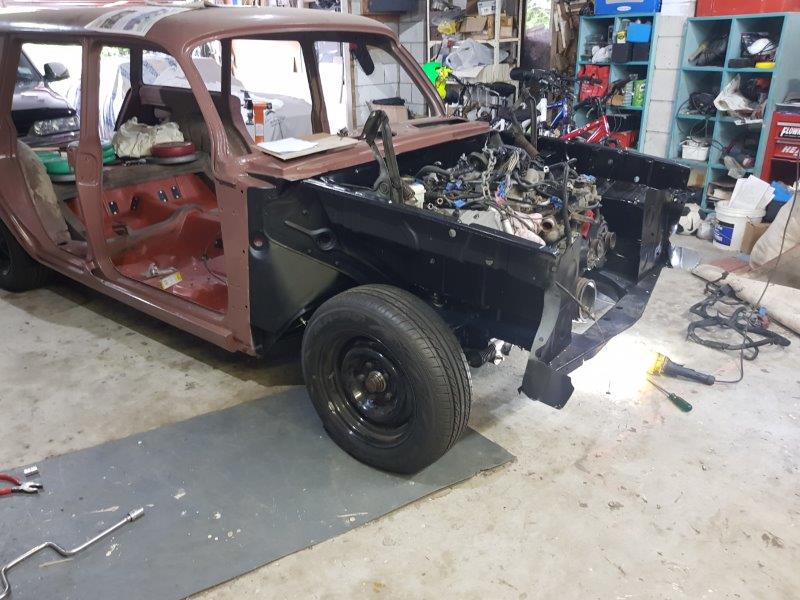
The satin black is a bastard to keep clean so its kept under the plastic sheet. I hit the car with a McGuires product that is for satin finishes. It took a whole day to fit the grill to the front panel, each slat had to be individually made straight then bent to line up. I got pretty good at it by the last one. The front panel got bolted on. Even though it had been together this is the first time all the bolts had been put in. I ran a tap through the threads which made life a lot easier, all the captured nuts were full of paint. The passengers side wasn't too bad, it was the original guard going back on, drivers side was a guard of another car so needed a bit of persuasion. Need the stick to hold up the bonnet. The extra weight of the die cast badge and bits of trim was enough for the bonnet to not stay up. I assembled the hatch and tail gate locks first after it was painted. The tail lights were some I bought about 6 months ago and are really good.
10 points
-
Lol fuck been well over a year since I updated this, and in saying that nothing has been done up until recently, I’ve got @JustHarry on the case of removing all the rust on it. And then I went and picked up this parts van from gore last week, so yeah 1000km round trip to pick up another rusty piece of shit, but, it’s worth it, it has good doors, an LSD (mines open diff rear) good carpet and linkages as mine are flogged to fuckery, hard to tell if it’s actually in gear. Where mine was completely fucked near the tailgate area, this van is mint so it’s got the perfect rust cut. Also in the back of it, it had a spare driveshaft, what looks to be a sigma gearbox and a decent set of extractors! So yeah I’ll class that as a fucking win! Red van is also rego on hold, but she’s pretty far gone rust-wise. So yeah, will have that back soon and will swap all the good bits over and take for a wof! En route back from gore. Sweet extractors that came with the parts van. Van 1 meet Van 2. How it sits on the 31s that are on it now.9 points
-
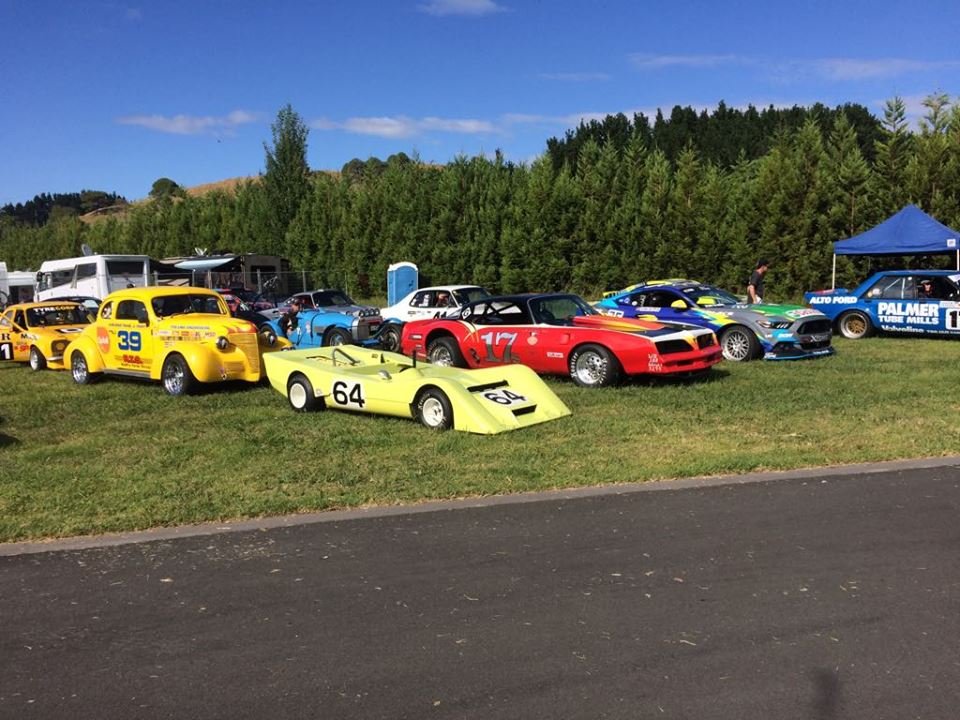
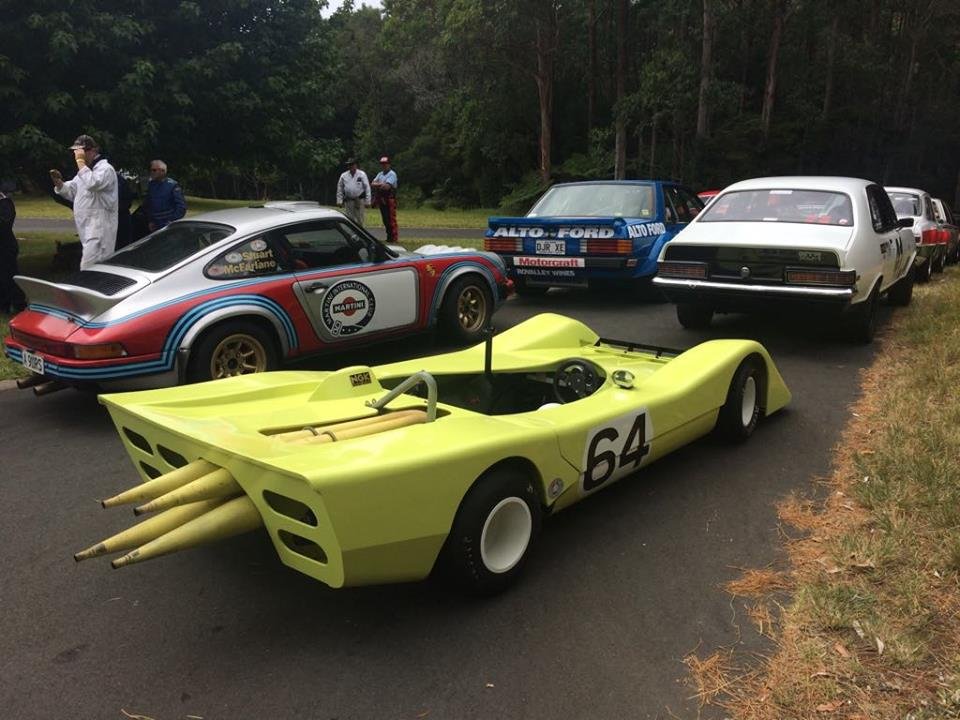
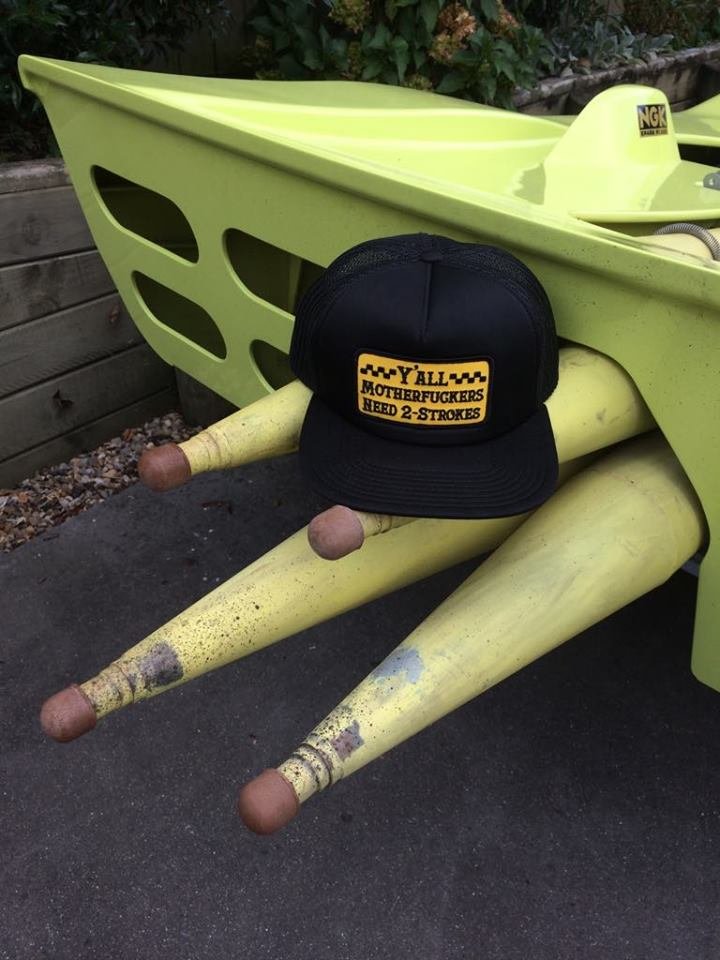
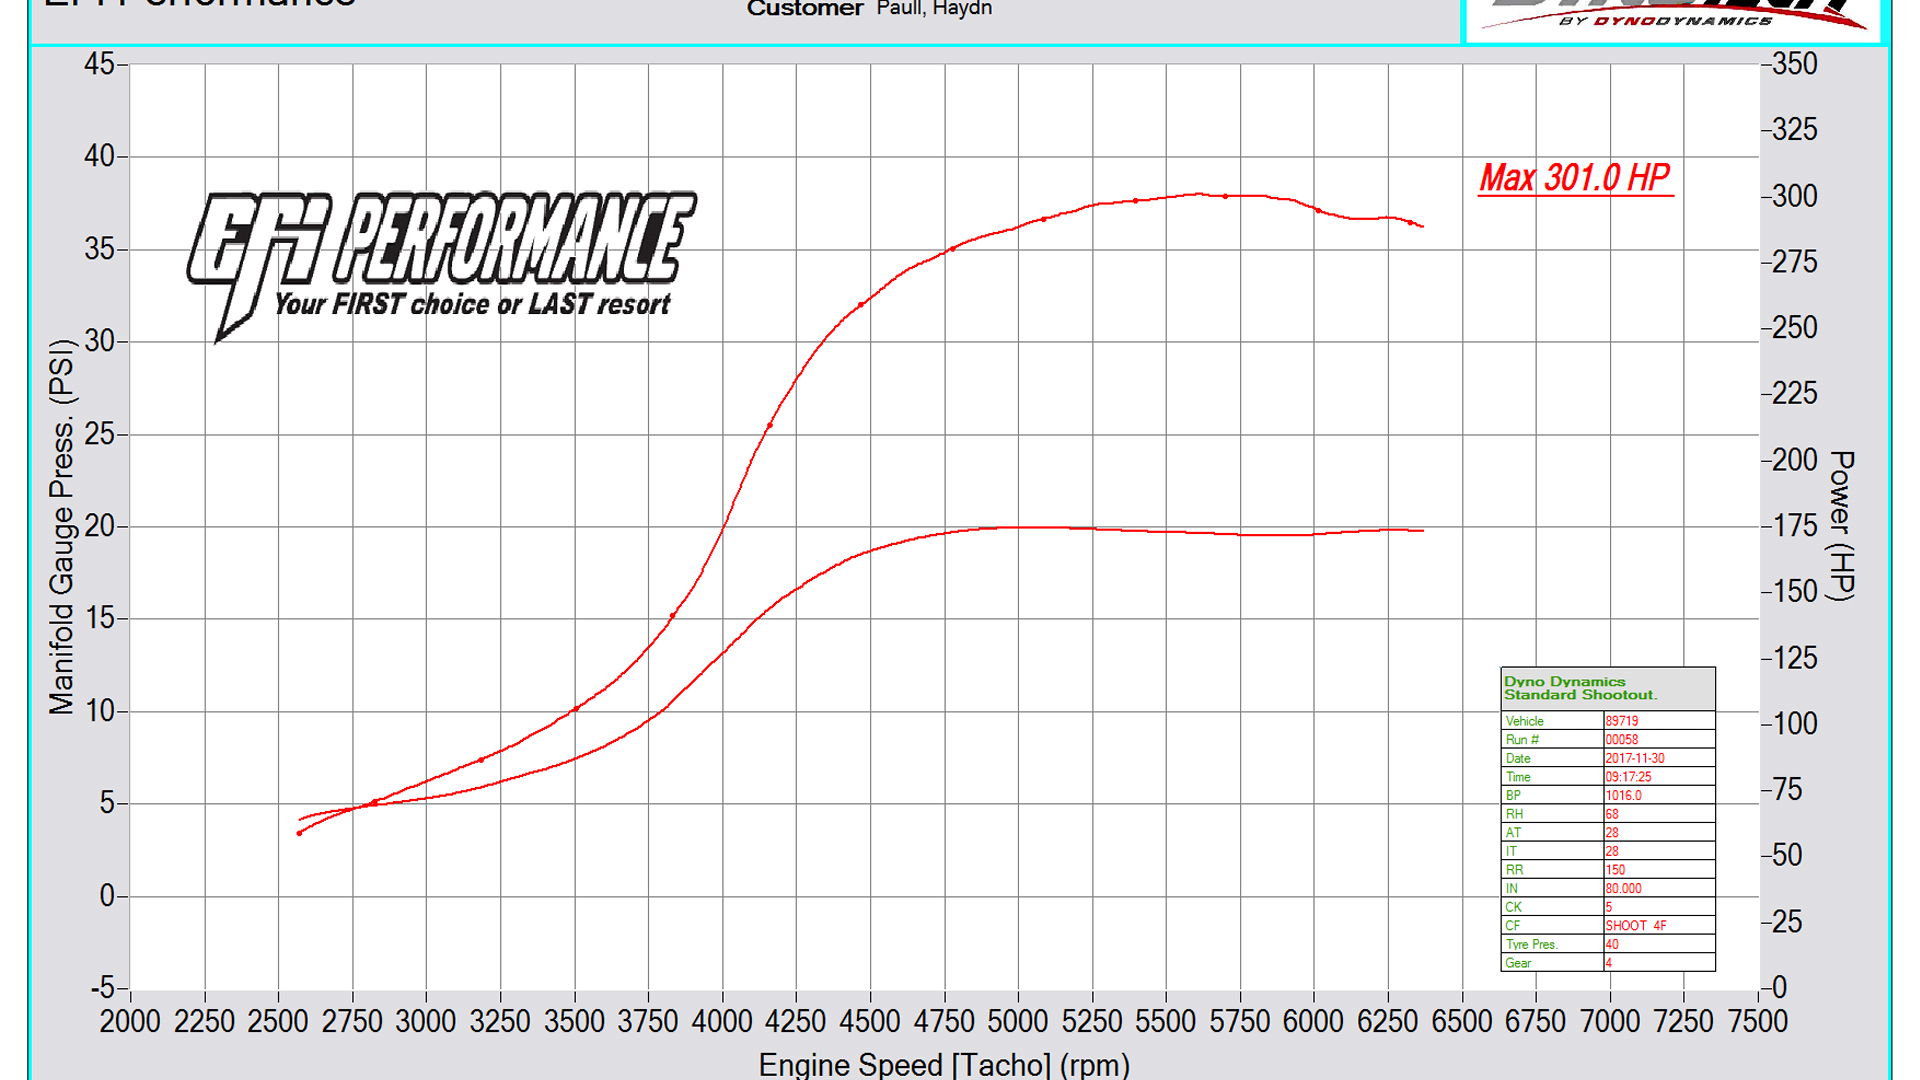
Cheers Truenotch. Had a great time at Leadfoot, so good to get the car to a motorsport event again. A few teething issues including the problem that i thought i fixed with the new diaphragms. I think the crankcase seals are toast and its lacking in crankcase compression. There was a lot of oily mess around the engine and i think the seals are the only place it could be coming from. Also missed one run after i failed to make it out to the start. Fired up the motor on the dummy grid ready to drive out to the start line, selected first gear let the clutch out and oh shit i'm going backwards........ Bit odd as it has no reverse gear. It was making some bad noises in the gearbox and i thought it had done some major damage somehow. Pushed it back to the pits, had a think about it and started it up again. Turns out it somehow backfired on startup and started running backwards, all of the noises from the gearbox was just the gear set spinning in reverse..... 2 strokes eh, Dennis had never had that happen to him. Yeah a few people made that comment about it not being as loud as they though it would of been. One of the theory's is that it was quite loud but nowhere near the level of some of the other cars going up the hill. A couple of those rotary's were extremely loud. Cheers man, Yeah i brought Dennis along for the event. He had an amazing time and was awesome for him to see it going up the hill, was probably the first motorsport event hes been to in 20 years. Yeah its miniature, all done to keep the weight down. Oh yeah got it on the scales, only 330kgs!!!!! I see a camera on the fire wall, you better post some videos young man! Also, where did you get that hat? I must have one. Unfortunately the camera didn't work VG so no hill vids. I was yarning to this young american dude at the event about the car and he was wearing the hat. Turns out hes super into 2 stroke dirt bikes in the states. Asked him where i could get myself of those epic hats and he took it off and gave it to me. Complete GC, said he had got it at a motorcross event somewhere along the line. Wise words to live by.
9 points
-
Yeah sorry @yoeddynz not much has been happening with this lately, been pouring all my money into this stupid v3000 and trying to finally get the green l300 legal. So yeah nothing to report sorry guys! It lives at home now though. Have a picture.7 points
-
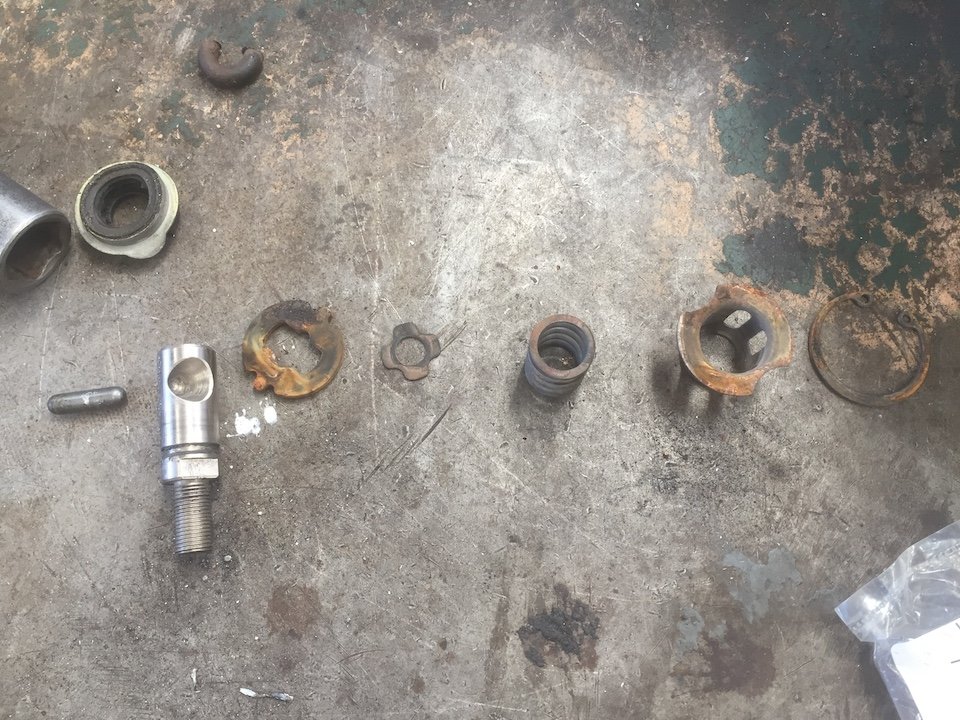
Yet another issue that was discovered on the car was that there were signs of oil leaking from the bottom of the vanos solenoid cover. This is a clear indicator that the solenoid seals are beyond their useful life. The other issue I noticed was that one of the bolt heads was missing from the cover, so that needed to be addressed. They are common for breaking over time, so I made sure to have some replacements on hand. I ordered a whole vanos rebuild kit, including new M5 seals (as per a very useful guide) but decided as I was limited on time, and the vanos appeared to be working OK now it was plugged in, I didn't want to take the time to rebuild the whole thing yet. It also didn't help that my fan clutch tool hasn't arrived, so I couldn't remove the fan to access the vanos unit. The solenoid seals are the most common point of failure anyway, and with mine leaking, it's a fairly easy thing to replace. First is to remove the solenoid cover. Its held on by 4 screws, with either a hex head (if original bolts) or torx (if replaced). The broken off bolt was still there, just with no head. I used some vice grips to slowly turn it until i could spin it out The cover was missing one half of the gasket, and had evidence of the bottom solenoid moving in the housing (the black circle on the cover is from the solenoid pressing against it). The bottom of the cover was caked in old oil The solenoids popped out easily, and as expected the seals were flat. The gauze filters were still fitted (usually removed when serviced), although most of the gauze was missing, like the last lot I serviced. Using a small screwdriver I broke off all the brown plastic for the filter, and removed it. I also used a scalpel to cut off the old seals. The old seals were hard as plastic, well overdue for replacement As with my last guide I used a 9v battery and brake cleaner to clean out the solenoids. They were surprisingly clean though, with nothing gross coming out of them like the ones I did on my old M3. Both give a nice solid click when powered. The new seals were fitted, and you can clearly see the improved shape of the M5 seals Everything was thoroughly cleaned, and the solenoids refitted to the vanos unit New gaskets were fitted to the cover, along with a thin smear of sealant to keep them in place The cover was then refitted, with one new bolt (I can't fit my Torx driver in the space with the fan fitted). I will fit all new bolts, and join the solder points on the solenoids, when I remove it all to refresh the vanos later. I noticed when I had the valve cover off that the intake cam sensor had a very big air gap. I know from INPA that it appears to read OK, but I wanted to look further into this. It turns out, looking at the sensor, the previous owner had pinched and hulk smashed the O-Ring on the sensor so it was sitting out quite a bit. The screw was finger tight too. Yeah it shouldn't look like this It turns out you can order these seals separately, but I didn't know I needed them so dug through my viton O-Ring kit and found one that fit well. The one in the photo was too big, but I did eventually find one that sealed well The sensor now sits flush with the head. It probably isn't making any difference, but it bothered me as it was. One last test needed to be done before I could go give it a try, and that was to fire up the old beast and run the DIS vanos leak test. This test is used to see if the vanos solenoids can keep the cam at a certain degree over a certain period of time or if the seals leak, resulting the cam angle slipping. There is some allowance for variation, up to about 5 degrees off target over 10 seconds if I recall correctly. I didn't test beforehand, I should have but I forgot, but after the seals my solenoids can hold the cam at about 3-5 degrees off target for as long as you want. That's pretty good in my books, for a vanos unit that has done almost 300,000km and never been rebuilt. I'll be interested to see if there is as much variation after rebuilding the vanos unit. So, after all this work, there was only one thing left to do. Hoon. The car runs and drives very well, with plenty of power. It feels much more like my old one, pushing you into your seat when you put your foot down. There are still some issues, like the misfire at idle, but overall it's significantly better than when I got it. Not to mention, it looks better! Loving the Style 24s and new Pirelli Dragon Sport tires.6 points
-
They gave me another WOF, can't believe it has been a year since the last one already. Still plenty of things to fix though, too many cars and too little time..
6 points
-
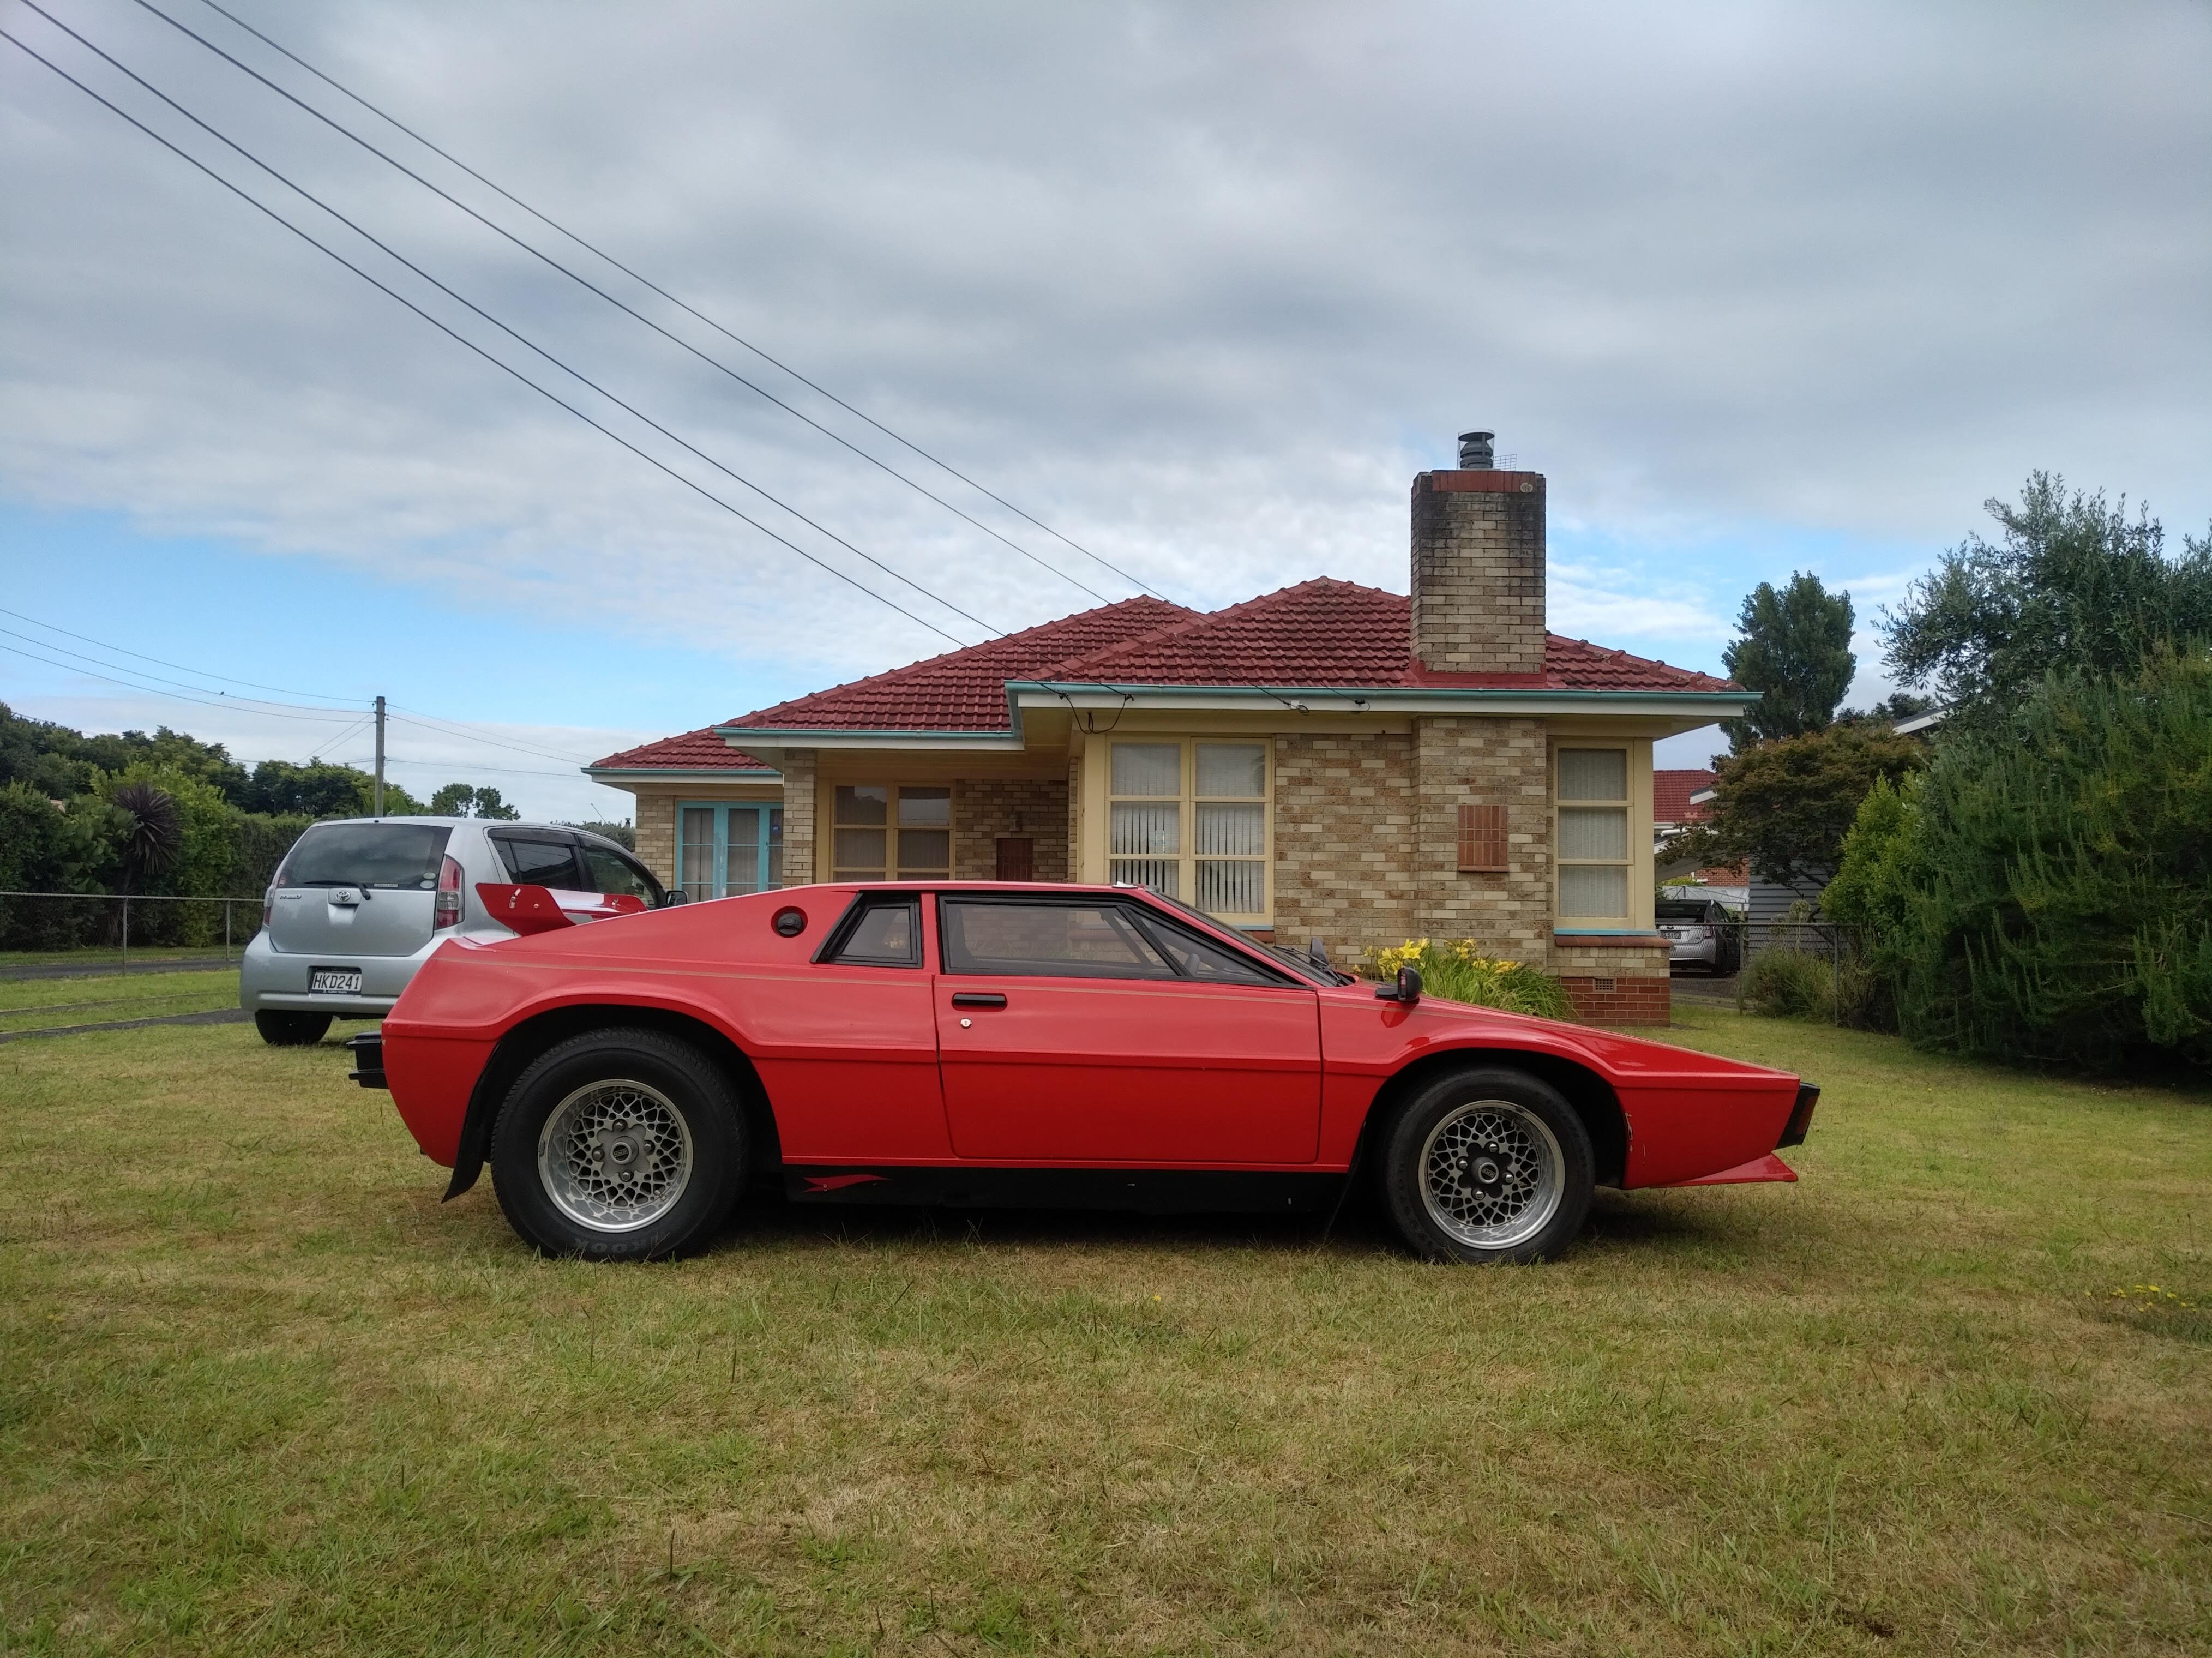
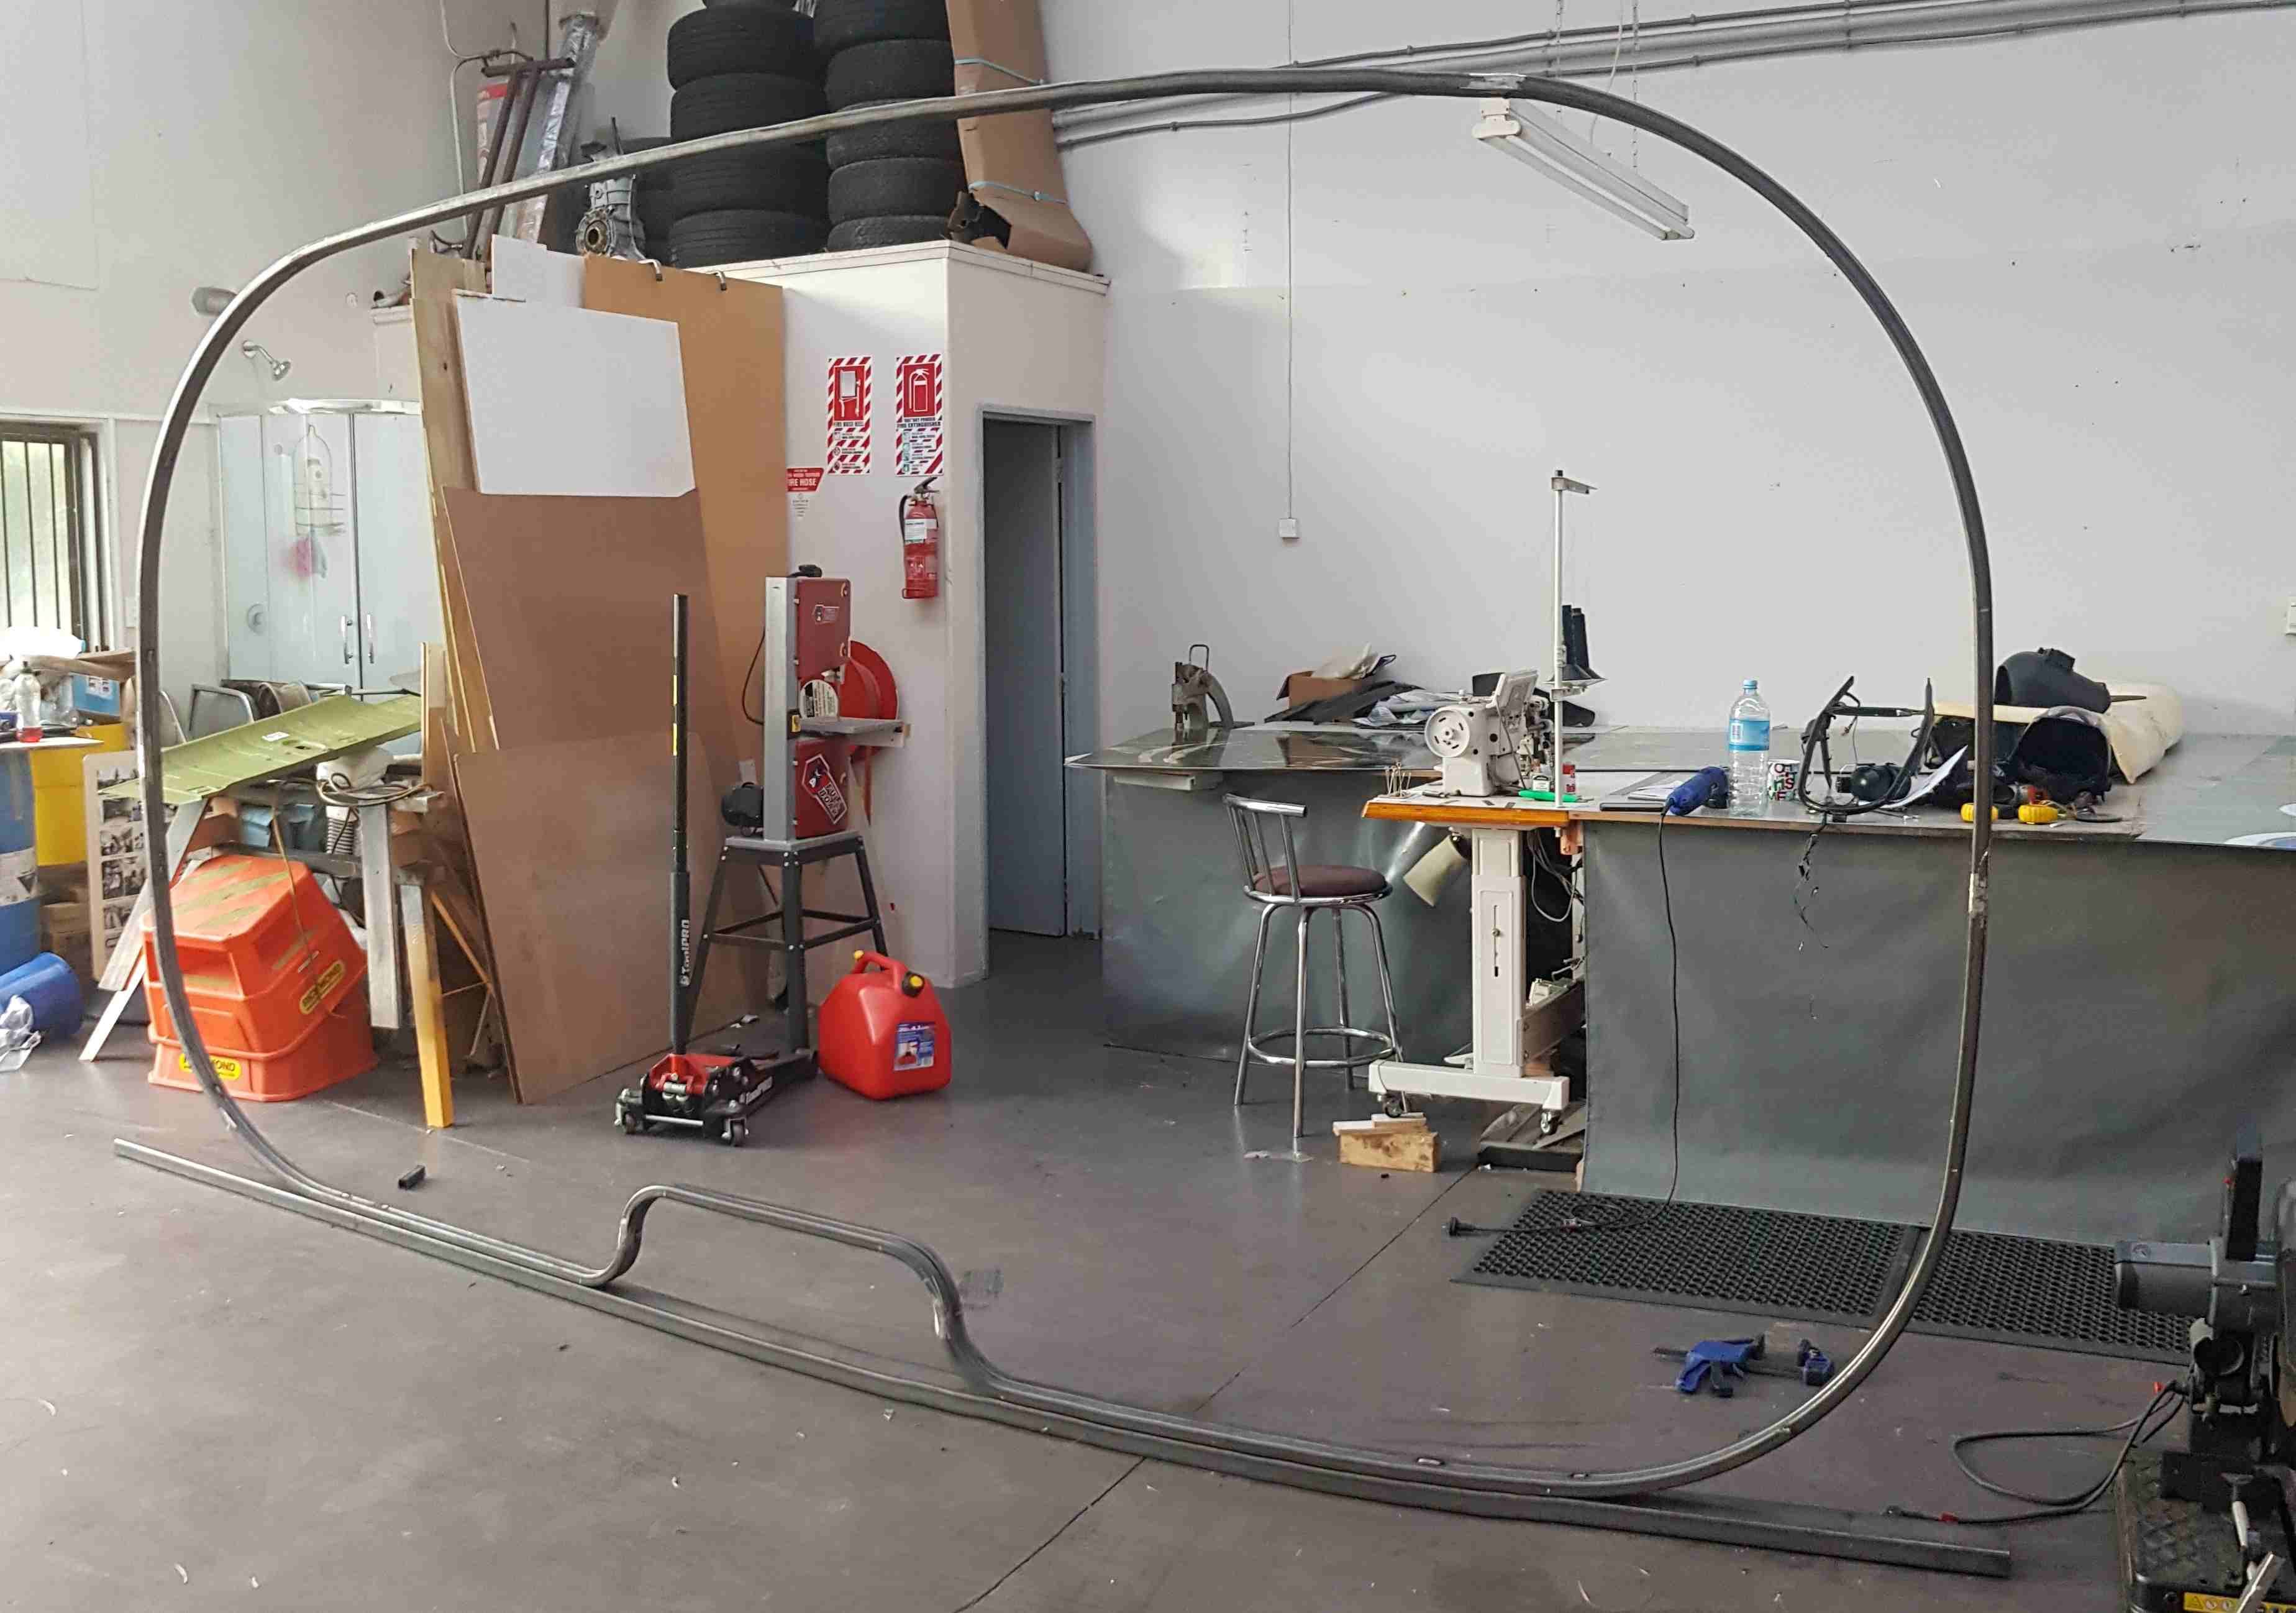
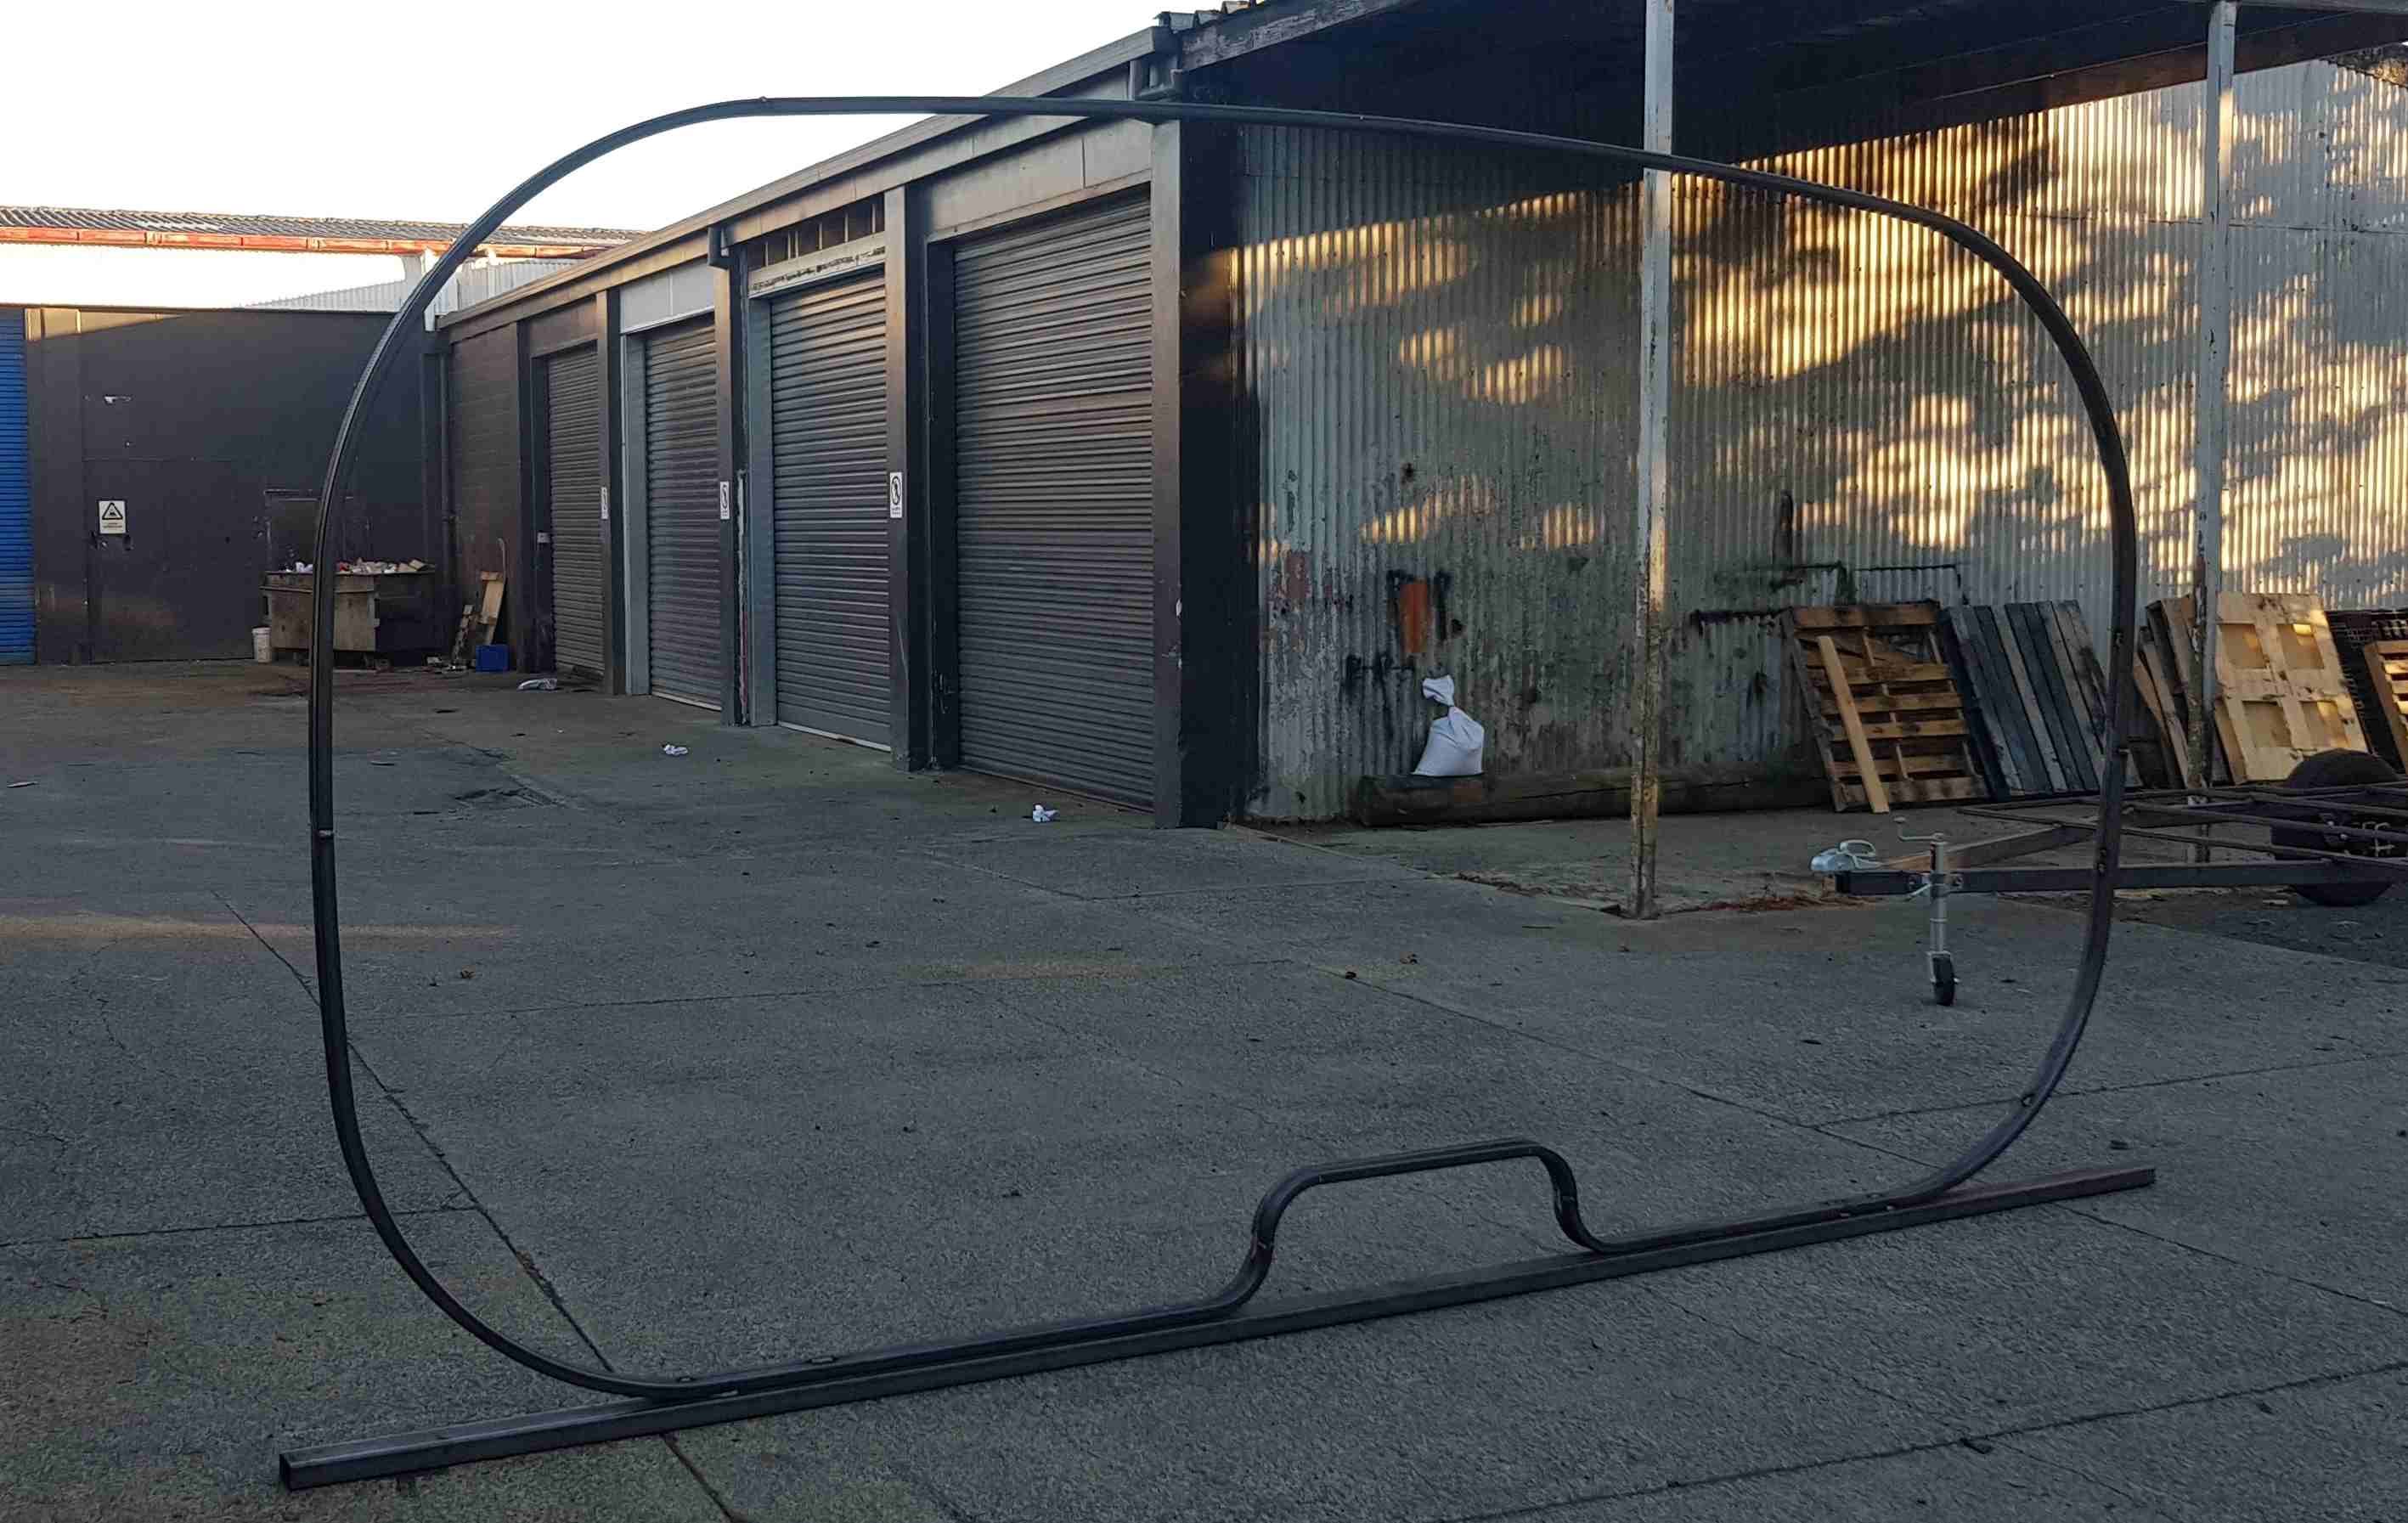
Oh shit yeah. Main hoops all done. Had to cut about 250mm out of the height but fuck yeah. This is the two hoops welded together, ready for some structure.
5 points
-
I hope you’re keeping the templates to make more for a new race class for surprise Chelsea sugar factory hill climbs haha4 points
-
4 points
-
Fuuuuu so much want for a hillbilly 2 stroke trucker cap3 points
-
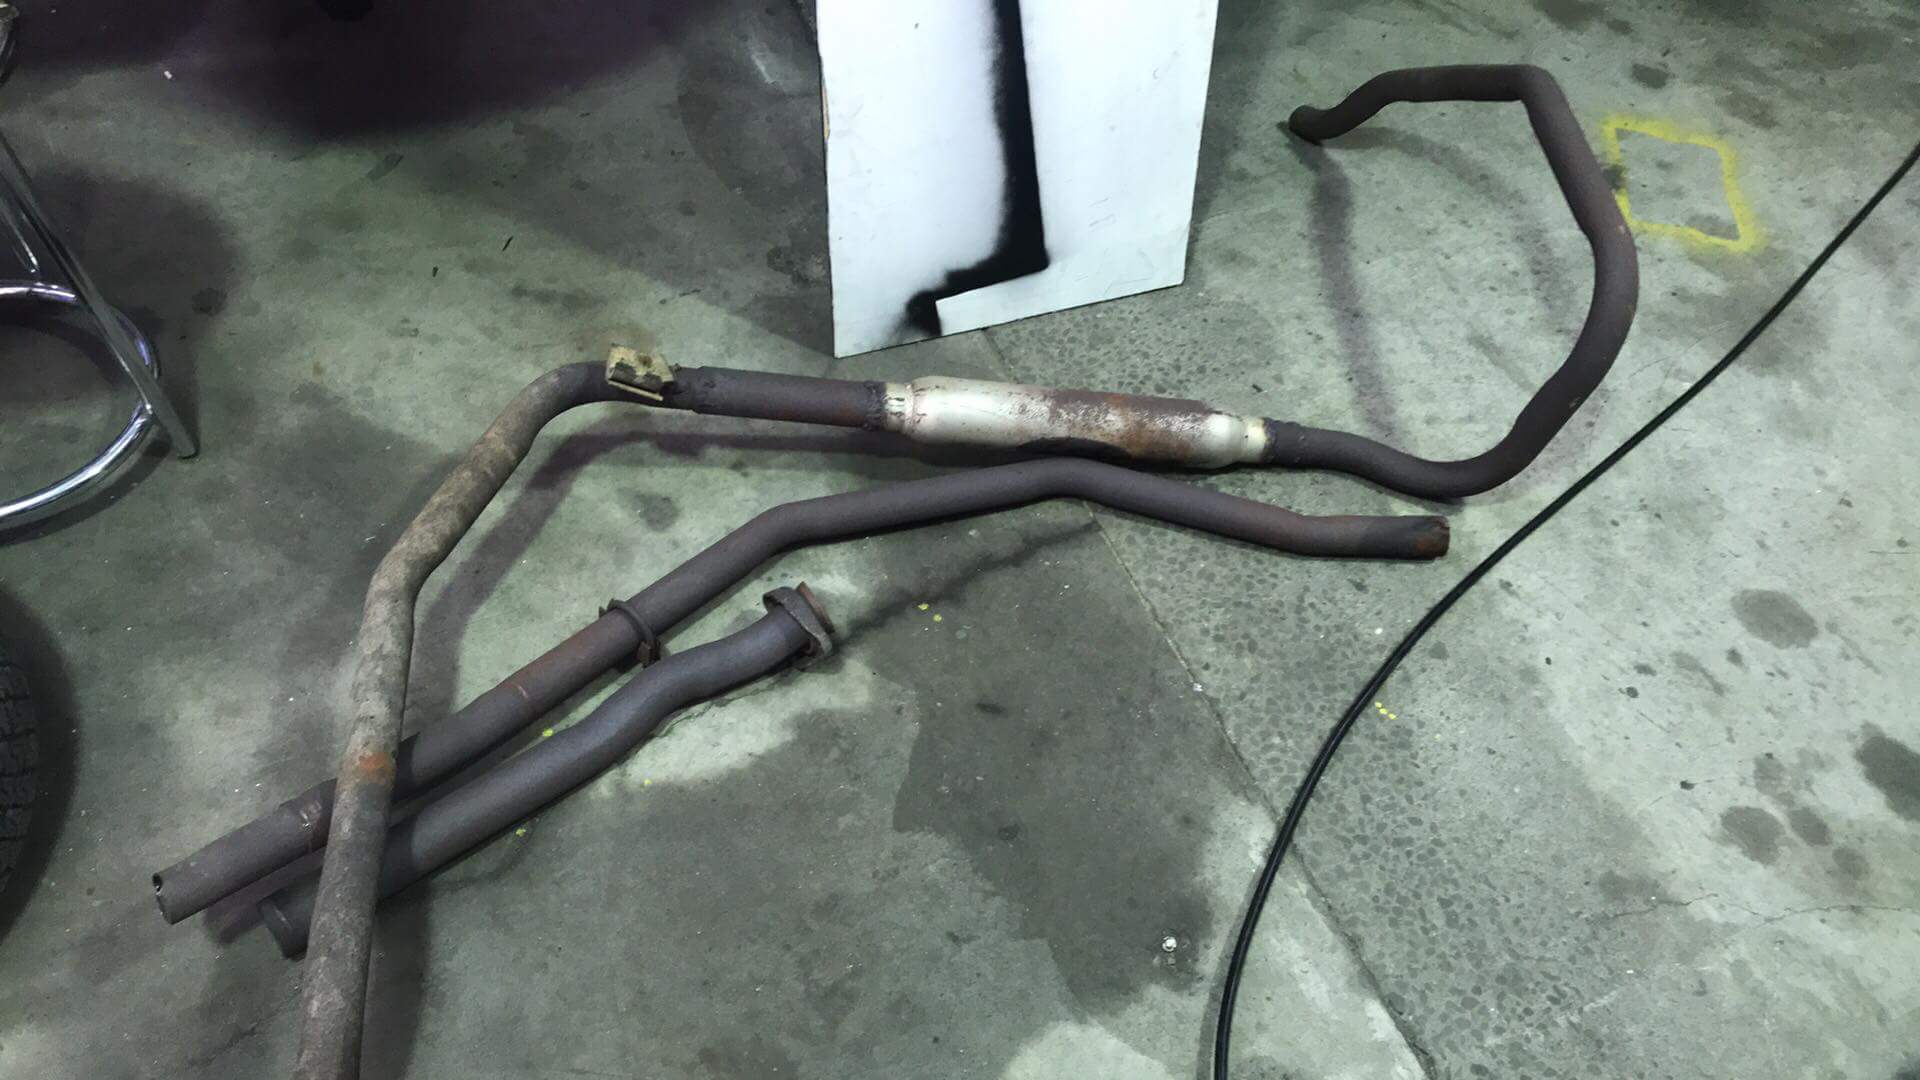
Okay, it's been a while since my last post, but the car has still been progressing. I left off with the exhaust on the ground waiting for exhaust gaskets, and needing to replace the valve cover gasket. The parts arrived, so I got on with it. With the arrival of the exhaust gaskets for the manifold to center section flanges, I could refit the exhaust. This thing is a damn beast, but with some carefully juggling, wiggling and bolting, I got it back into place. Just as a quick side note, when cleaning up under the car I noted that two of the nuts I removed from the giubo were completely wrong. That wouldn't have helped the balance of the drive shaft. They all got replaced, as they are Distorted Thread locking nuts. The top of them is basically squished and distorted, so when you put new nuts on, they bind on the threads and wont come loose. Reusing them is a no-no, because they will no longer bind like they should. Similar concept to Nyloc nuts, but can handle higher heat. With the underside work done, I could finally refit the wheels with new rubber on them and lower the car down a bit and finish the work inside the car. I needed to refit the clutch pedal, as I had removed it to replace the bushes. I tried some flashy delrin bushes, but unless I removed the whole pedal box and fitted them on the bench, there was no way I could press the bushes on in the car, they were just too tight. Instead I went with a pair of new OEM bushes, slathered in grease. Thanks to the bolt I fitted that was missing from the pedal box, and the new bushes, the clutch pedal feels much better now; it doesn't move off the side, and I don't hit the dead pedal now. The other thing I wanted to do whilst under there was to replace the throttle cable, as my original one was well munted and made the throttle sticky. It was also ugly, and I don't like ugly. Removing the cable was easy enough, once you get the plastic clip out of the firewall (have fun one that one), it was just a case of pulling it through the engine bay and disassembling where it attached to the linkage. This is where it all kinda went wrong, all over one tiny little stupid (but crucial) bit of plastic. As I was attaching the white plastic clip back on the end of the cable so it could attach to the linkage, I dropped it. Of all the places, and things to drop, it was a plastic clip, between the 5th and 6th intake runners. It didn't come out the bottom, and I couldn't go magnet fishing because it was plastic. I tried moving and jiggling things in the area to see if it would drop down, and even lifted the car up and tried to fish around with my hand from underneath to find it. It didn't work, I had only one option left. The whole intake had to come off. Thankfully removing one isn't too hard, and it's something I had done before on my old M3, it's just bit of a prick to get at some of the hoses and bolts. Oh there it is, sitting on the starter motor... This little bastard. I then proceeded to immediately drop it again; onto the floor this time, so until it was ready to go back on, it went into my pocket. Having the intake off did give me a chance to have a quick look around, and give the throttles a quick clean, so it wasn't all bad. Back together it went, and on went the new throttle cable (assembling over a large rag, so I wouldn't drop it again. See, I learn from my mistakes!). Whilst setting up the new cable I encountered two things that made me facepalm. One, the throttle return stop had been mangled, and bent back. This stop is what stops the throttle pedal linkage going back too far when you take your foot off the pedal. If it goes back too far, there will be too much slack in the cable and you will never adjust it out. No prizes for guessing how I found this issue. I bent it back as flat as I could, which made the pedal sit better, and allowed me to correctly adjust the cable. Being bent back was no accident; it took a lot of work to bend it forward again, so I can only suspect it was done intentionally to compensate for the stuffed cable. The second issue, was that the throttle stop was badly adjusted. On my car because the shell was originally auto, instead of a normal solid "stop" under the pedal, I have the kickdown button still. The throttle stop/kickdown button sits behind the pedal and is what stops you putting pedal to the metal, or more accurately, damaging the throttle cable by trying to pull it further than the throttle plate will allow. On the flip side, if it's not adjusted enough, it will stop you getting to Wide Open Throttle (WOT). The whole thing is on a thread and screws into the floor, but does have a locking nut that stops it goes in too far. On my car that locking nut was wound way out, which meant that the stop couldn't be wound in as far as it needed to be, which means by the time the throttle pedal stopped, I was only seeing about 3/4" opening, not WOT. No wonder this car felt slow! I wound the locking nut down, and wound the stop in enough that when the kickdown button (which now does nothing but offer some nice physical feedback through my foot when pressed) is pressed, the throttle is 100% open. With that mess cleared up, I moved out of the interior and into the engine bay for one last job for the day. The valve cover gasket. I noticed it was BADLY leaking down the back corner, so ordered a replacement a while back. I had intended to rebuild the vanos whilst the cover was off, but decided to postpone that (for reasons I will explain in a later post) and just stop it leaking. Replacement is easy; Remove the coils, a whole bunch of bolts, and then the cover itself. When removing the coils, you also need to move the loom out of the way, so I rest that on the strut tower. I didn't notice, or remember, that the coil connectors are actually numbered via a small brown plastic tag on each wire (as seen in the photo), so instead I put a small dot for each coil it went to (1 dot for coil 1, 6 for the 6th coil) with a paint pen. This is the connector for coil 2. The dots are covered by the locking clip when assembled. It never hurts to over mark things before disassembly. And off comes the cover. It takes a lot of wiggling to get the back to clear the cable holder and the rear cam cap, but it does fit. This is the corner that was leaking. The gasket wasnt that old, it must have been replaced when they did the head work, but for whatever reason it just didn't seal here The other leak I had was a bad one into a couple of the spark plug tubes, via the rubber washer on the bolts. I ordered a bunch of these (you need 20x btw, I came up two short). The old ones were hard as rocks and shorter than the new ones I cut them all off the bolts, and pressed the new ones on. I slathered them in red rubber grease, and used a socket and a hammer to press them on. Much quick and easier than doing it by hand. Pop the new rubber washer over the threads, hold the socket on top, and give it a few good whacks with a hammer until it pops over the shoulder. The new gasket was then fitted to the head, with a small amount of sealant in the corners of where it goes over the cam bridge in the front, and then back on the cover went. The bolts were then refitted with the new washers. Now, with the bolts be VERY careful refitting them. They are too easy to pull the threads out of the head if you over torque them. In this case I did them to 8NM working from the middle outwards and all was well On went some new coils, and it looked like an engine again. Some testing shows no signs of leaking anymore, which is good. The clutch pedal and throttle feel much better, with less slack and more immediate response. Unfortunately despite replacing the bushes in the shifter, there is still too much play (although FAR less than before), and it appears to be coming from the joint at the bottom of the shift lever itself, so that will need to be replaced, maybe with a short shifter? The biggest disappointment is that despite replacing the coils and checking the spark plugs, there is still a very noticeable misfire at idle. It sounds like the old girl has some wild lumpy cams. I'm working on this now, so hopefully I can nail it soon.3 points
-
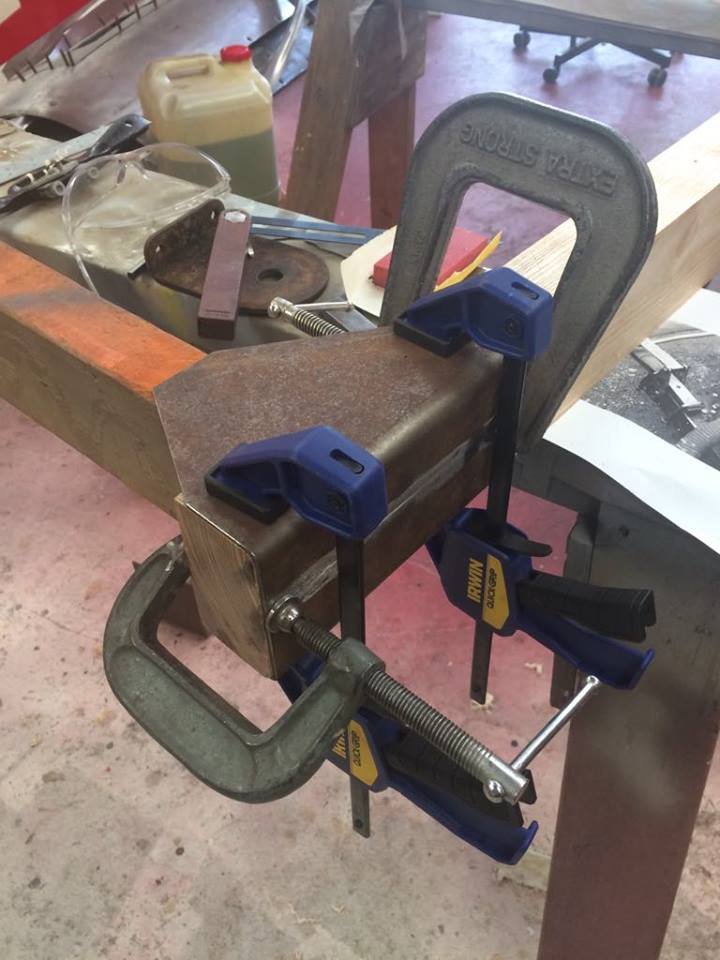
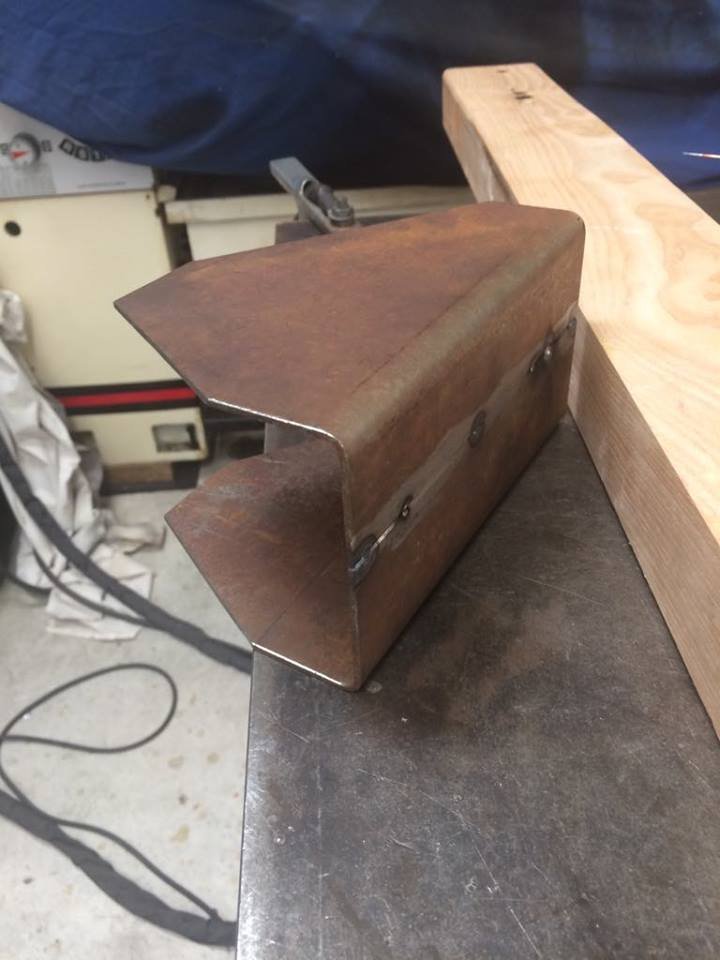
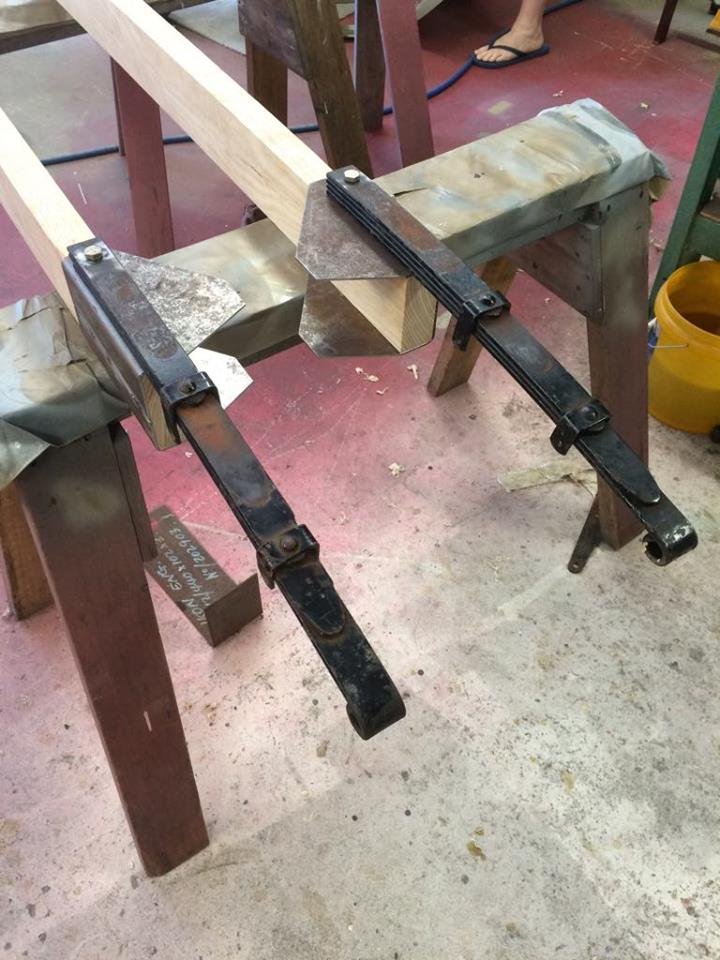
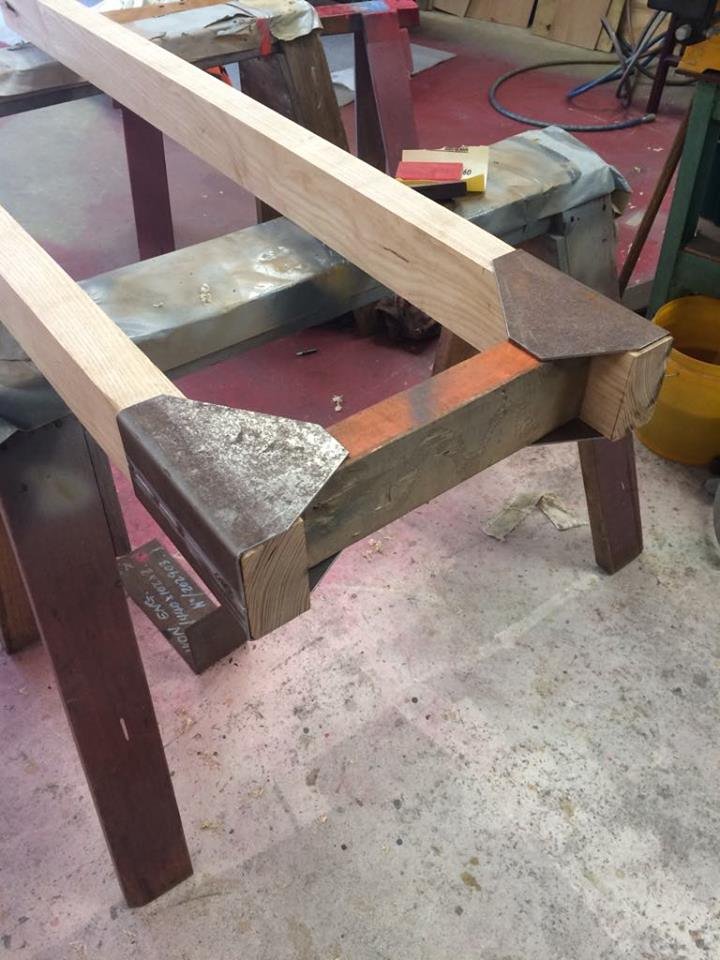
No but a mate has one and wants to chuck it in a Austin 7 chassis. Its a pretty cool rotary hoe when its powered by a v twin! luckily someone has already made JAP casting patterns...... Made a start on the chassis brackets. Did them in two half's so could clamp them to chassis rail and get a nice tight fit before welding. Have also thinned down the rails from 2" to 1 1/2''. Looked a bit bulky and heavy before. Much better now Drilled a hole through it all and mounted the springs. Will need some form of U bolt to hold them down at the front.
3 points
-
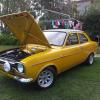
Since my last update there has been a bit of progress. The car went to the paint shop in July for a 3 -4 week turn around. It sat.......and sat....... and then one day out of the blue I got the call, come and get it, its painted. That was December. Out in the sun it just blew me away.
3 points
-
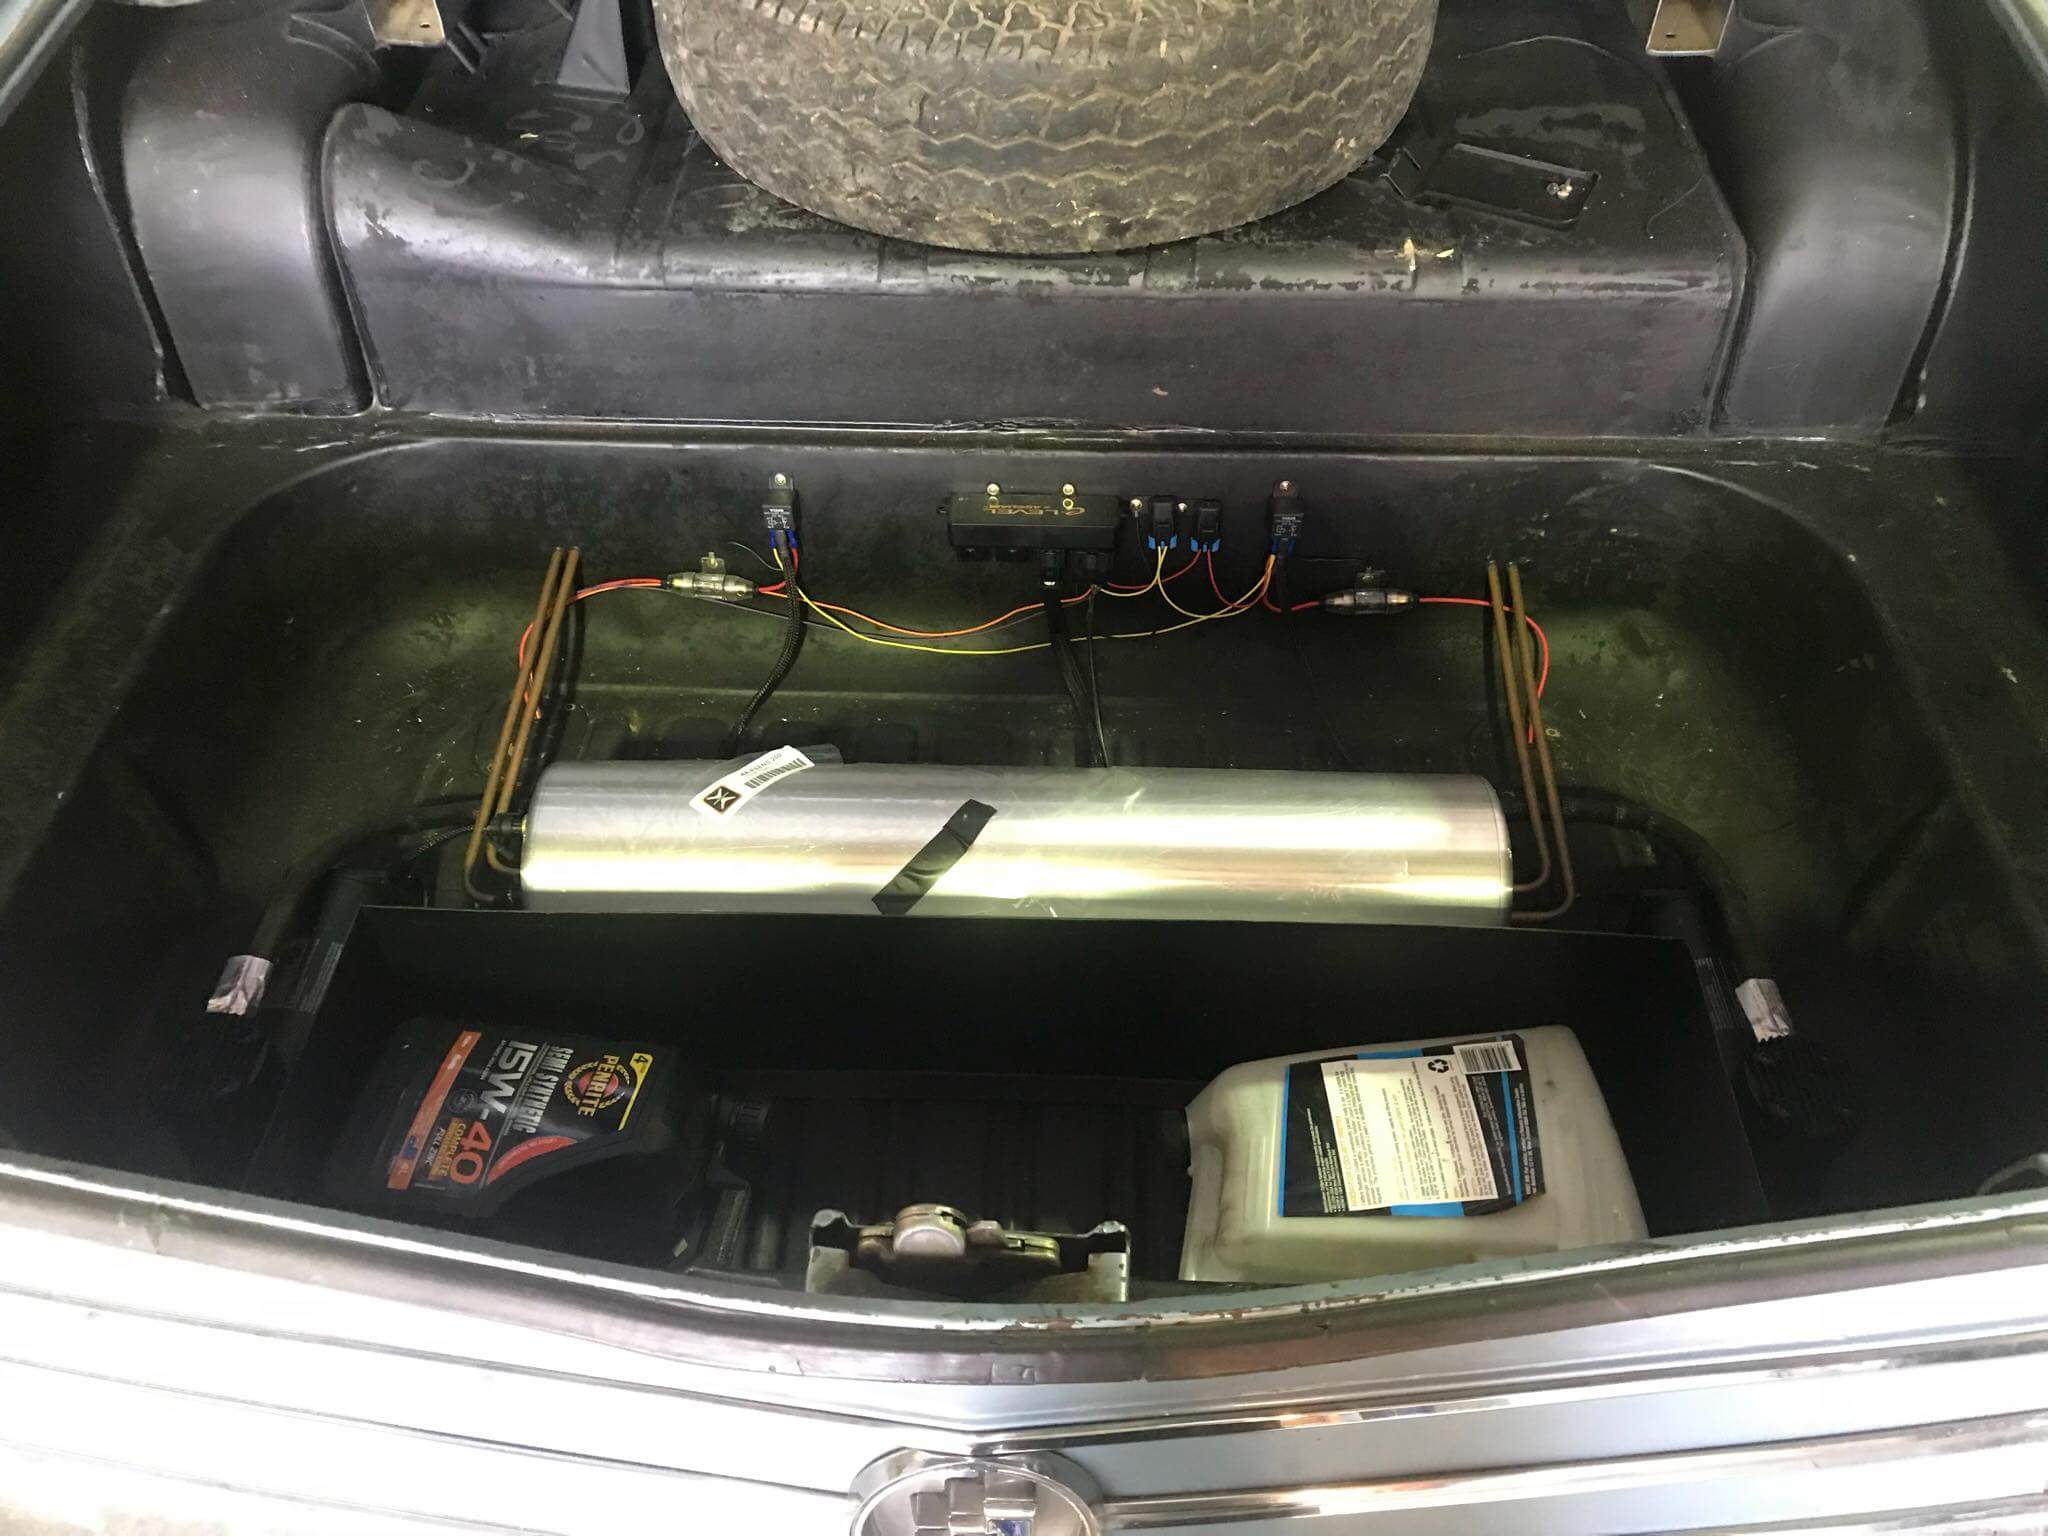
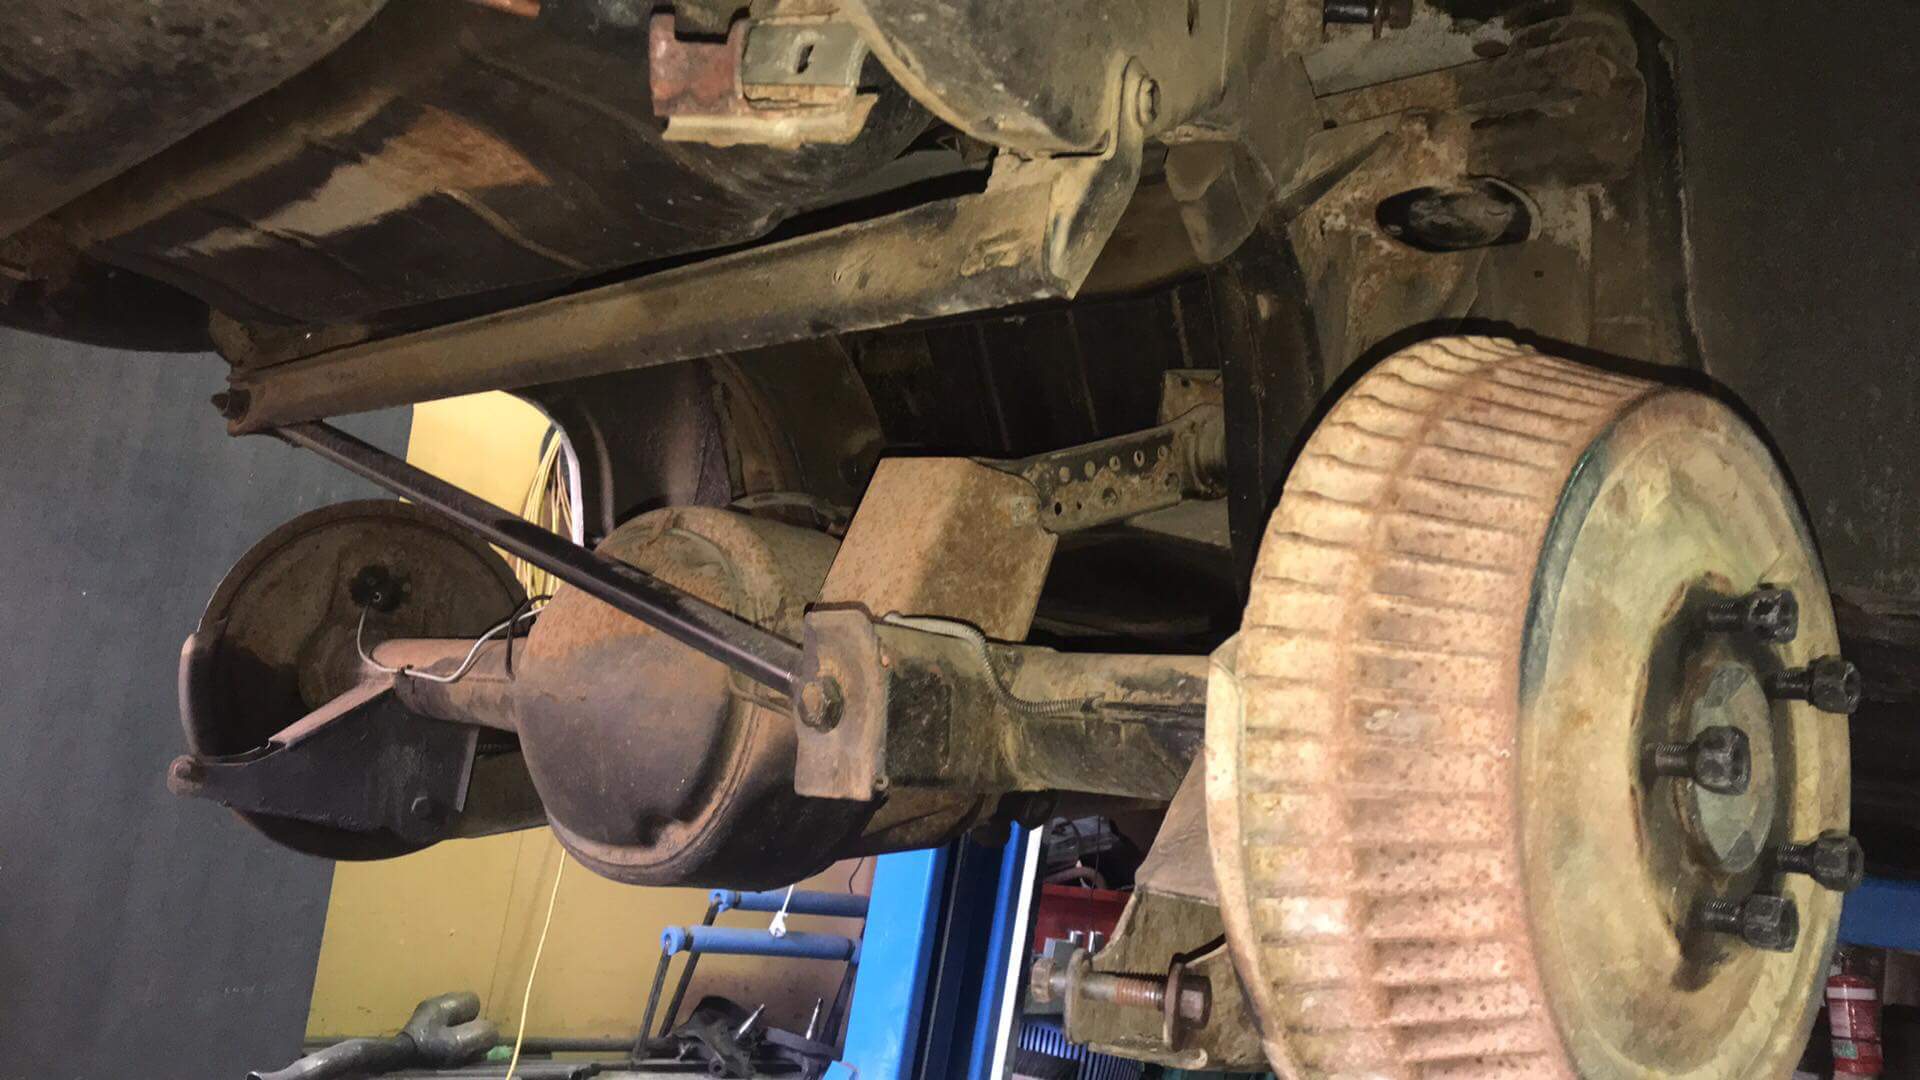
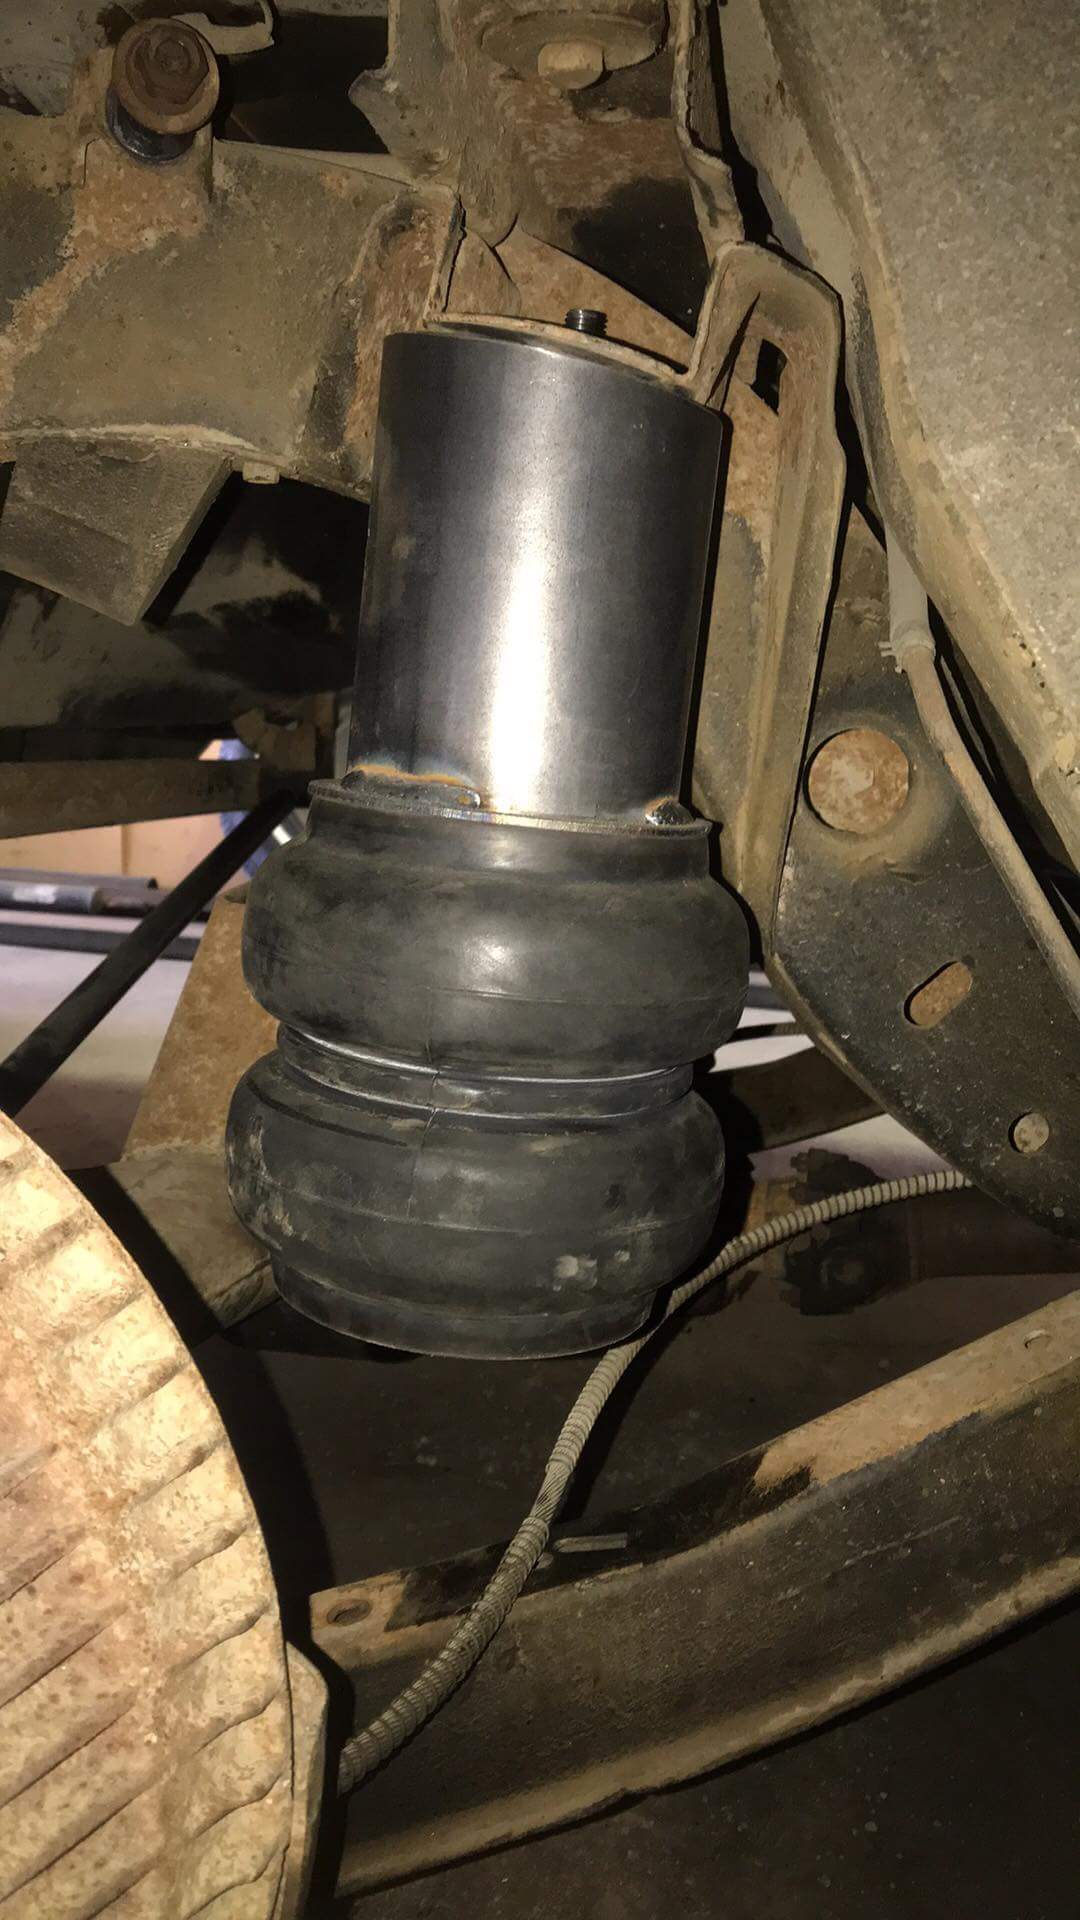
Exhaust out, Airride in, height sensors still to be installed. Remote shock mounts for front suspension also needs doing. Tank and pumps under False floor in boot.
3 points
-
Looking good - I like your detailed explanations of the fixes.2 points
-
So the Starlet had sat for just over ten years not moving at all. I turned the motor over to make sure it wasn't seized up. It moved so were good to go! The reason it sat for so long was the water pump had froze up. So first thing to replace was the water pump Old Teq vs New pump Next was going through the entire fuel system. It was badly clogged from ten years of sitting. i had to drop the fuel tank and clean the out and return lines. Then got a new fuel pump which wasnt big enough and had to go for a bigger one. I also slapped in a new fuel filter. Next were the injectors which were pretty much falling apart as i took them off the fuel line. After getting the fuel system all redone the car still wouldn't fire up. So i started looking at the other wires and found a couple things. One of the plug wires had a nice chunk taken out of it from a mouse. I'm sure that tasted really good. Then i found the O2 sensor was just barley hanging on. After replacing those things i found the dizzy cap had mold growing inside of it. So got me a new distributor cap from Thailand. The car still wouldn't start up. So last thing to check was the timing. And of course the timing chain tensioner was gone. So replaced that and she finally runs!!!!! Parts list so far Fuel pump redone twice Water pump Injectors Fuel filter Cleaned clogged fuel tank O2 sensor Spark plugs & wires Distributor cap Timing chain tensioner Battery All new fluids Front brake pads2 points
-
OK so I was thinking I was not far from painting the shell when I realised my repairs to the rear guard behind the drivers door had a slight bulge, maybe 5mm outwards in relation to the edge of the door shuts. A classic case of working up close and not standing back to look at the complete picture. It showed up worse when I sat the door in place. I thought I had taken a photo but alas no- trust me when I say it would have done my head in noting it each time I looked down the flank. This panel had been badly bashed in at some point we had popped it out. But obviously too far sadly I never realised until now. I tried beating it back in but no luck. It had been previously repaired by someone else and was full of lots of sharp dents. So this happened... Following that I did a super careful replacement of the steel, butt welded in, with very slow careful welding so not to warp anything. In pictures... It turned out great. I still needed a skim of filler to get it spot on but considering what it was like prior I'm happy with it now. It lines up really well with the door... I then gave this and most of the rest of the shell another coat in primer, smoothed it all back with 400. Oh yawn. Helps having beer and loud Reggae playing. Hannah just loved sanding... With the sanding done I then preceded to turn the workshop into something resembling a Smurf murder house. If there was a song to be played afterwards it would have been this... https://www.youtube.com/watch?v=68ugkg9RePc We masked it all up and I painted the door jams, door backs, engine bay, interior, frunk, door bins etc. Next day, re- masked the shell and painted the rest. On the first days painting it was so hot at 34 degrees... The following day time I started as early as I could but it was still about 28. Luckily a very dry heat. Not fun in all the gear... I never really considered how far the blue mist would travel. It covered everything. Great fun. Now we have a blue floor which luckily is slowly going to wear off I think. I hope. After it was finished I shut the doors and let it bake in the oven that was the shed, drank a cold beer and went to the beach for a long swim. Here is a blue Imp. Its very similar to an original Imp colour I like so I went with this. Not sure of the name of the colour. Its very bright and changes from a mint blue to a aqua blue in different light. I'm so relieved to have finished the painting. It'll need a flat back to get rid of the orange peel and shine so it looks more like a original paint job. But I'm going to ignore that job until after the car is road legal. Enough body work and painting!!!! Its time to bring the other Imps inside and play musical chairs with all the various parts. Pick the nicest bits and reassemble one car from them all... It certainly is a fair bit better then when we first looked at this shell a year ago and I'm pretty stoked to be at this point in the restoration2 points
-
Pumped up the 32s today and they hold air which will be sweet to keep it rolling, they're bald though so I've got a set of 31s to go on. Looking pretty boss though!2 points
-
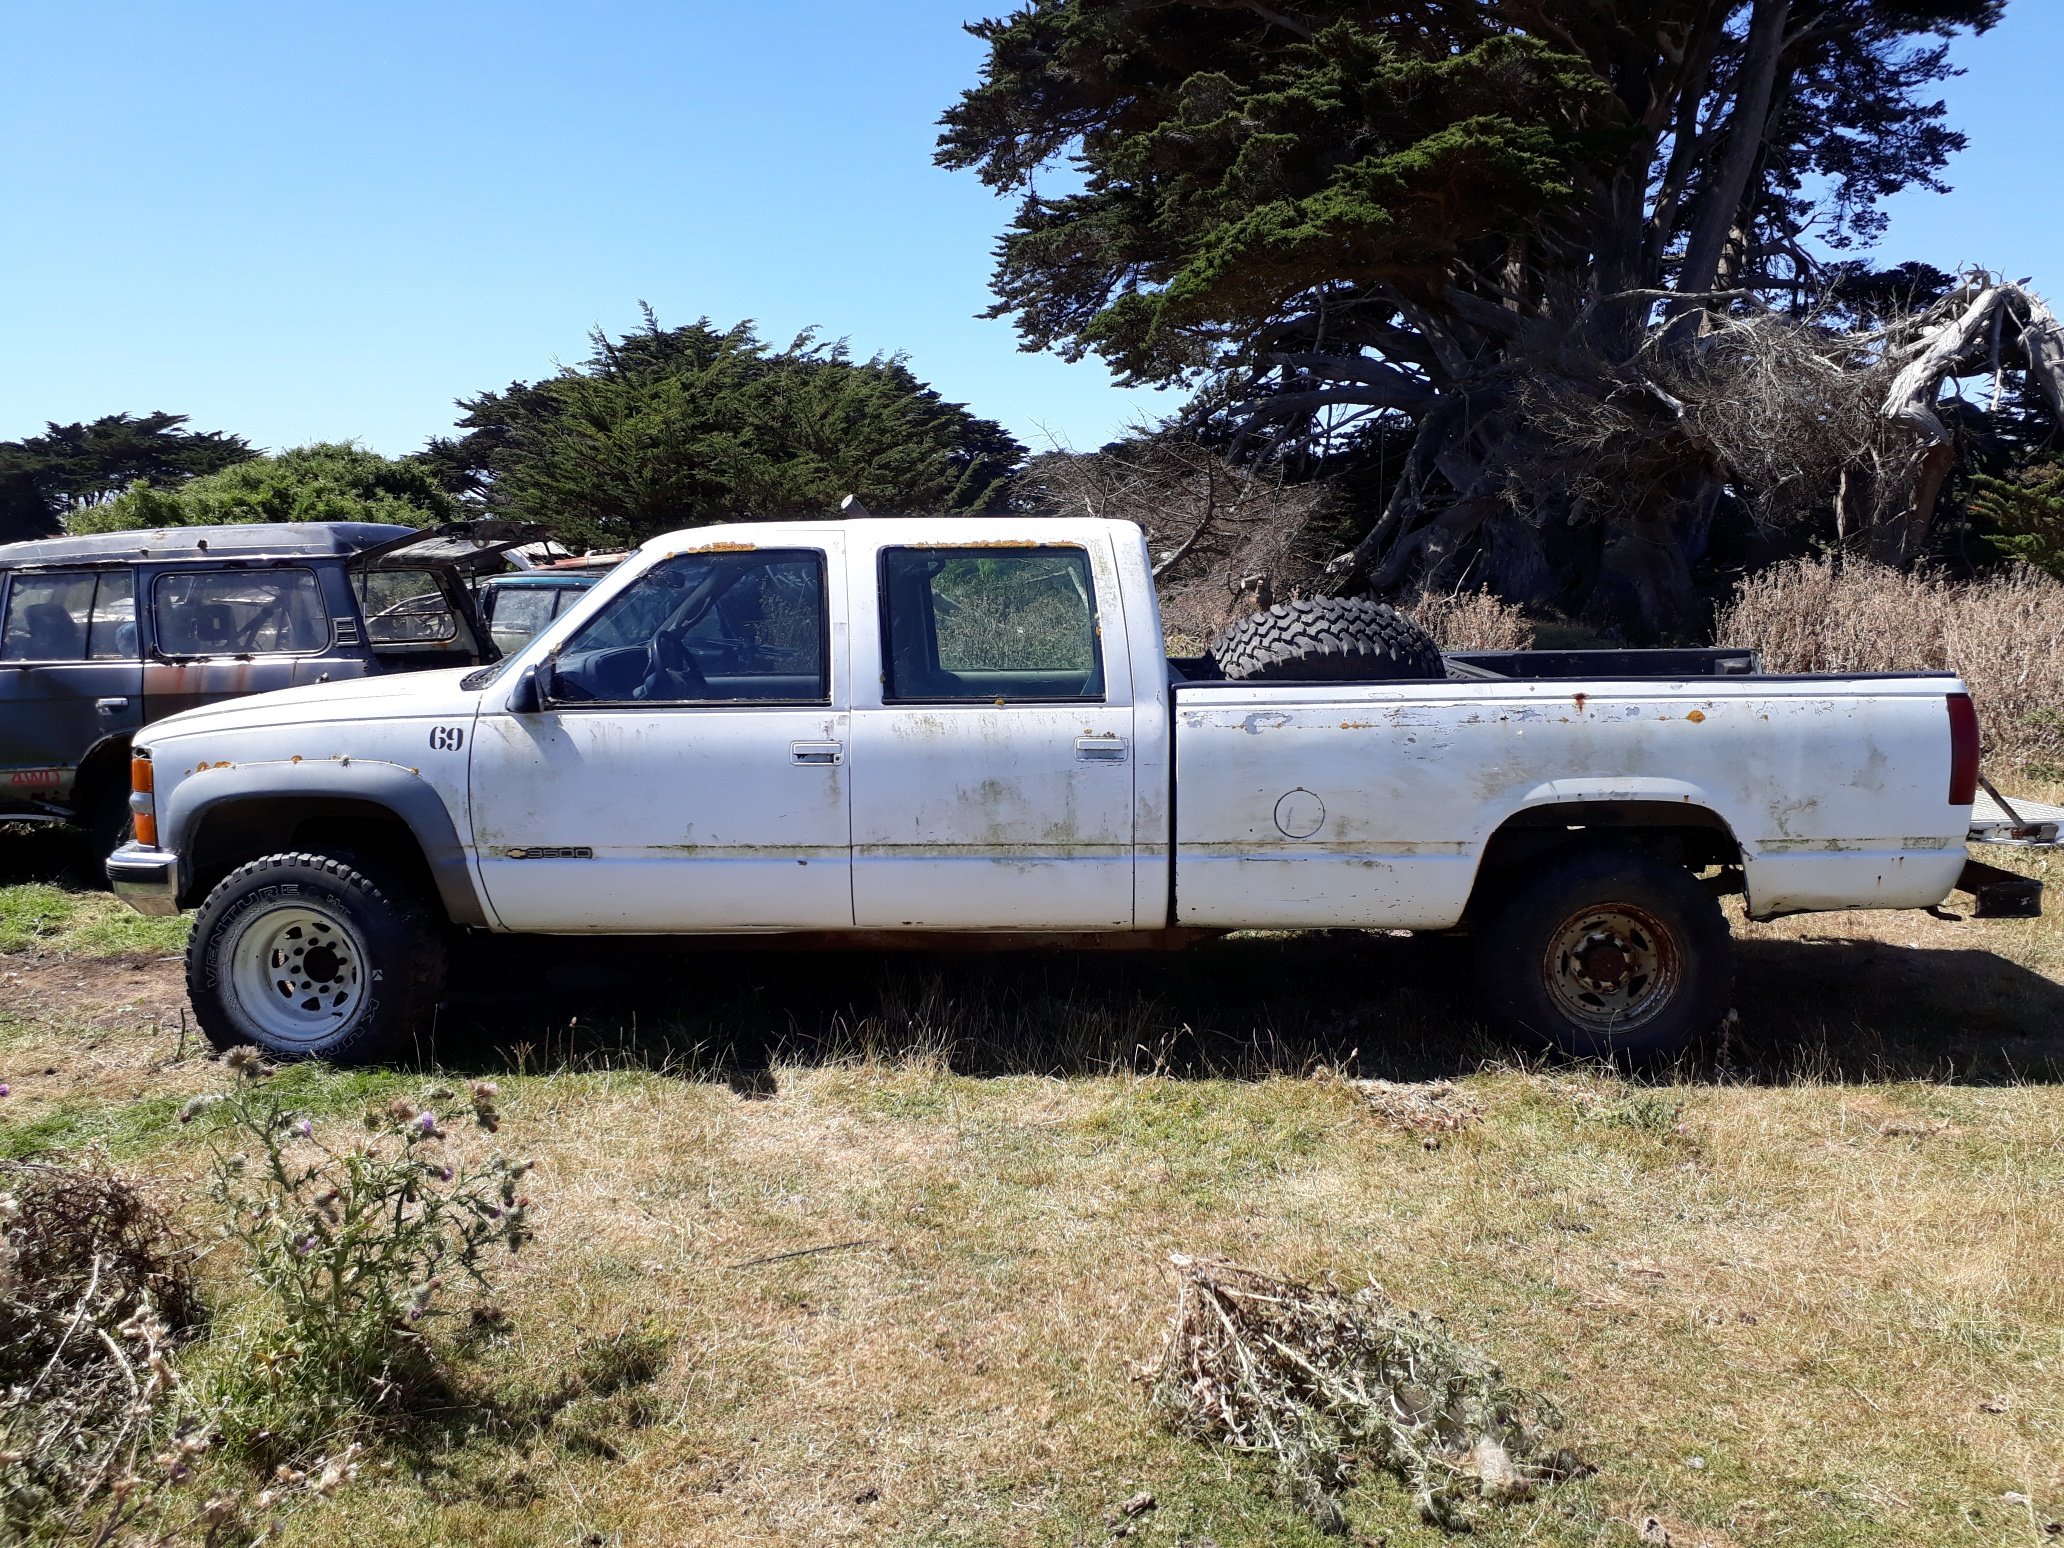
If all goes to plan I'll pay for this heap in a few days. The current owner is a good mate who gave up on the truck some time ago. He's offered it to me at a very fair price so I hacked it out of waist high thistles a couple of days ago, found enough wheels to get it in the air, and got the brakes un-seized enough to get it rolling...in a straight line. Hopefully I'll get an ignition key this week which will mean I can unlock the steering. I'll get some batteries and see if she'll run. I know little about diesel engines so this could be fun. She's a 6.5 turbo V8, and despite looking pretty haggard is quite sound in the body and chassis. One of the worst things is the wheel size - they're 16.5 inch. Those are 33x12.5x16.5 tyres on both the wheels you see. The truck makes otherwise big tyres seem small. I'm on an island where WoFs aren't a thing, but I have no tools except my carpentry gear with me so I will be at the mercy of others. So far people have all said I'm mad (the truck has a reputation as a bit of a lemon around here), but they've all offered me gear too. Nice.
1 point
-
Yep all of the tiny weight savings Dennis did seemed to of added up. The body alone only weighs 30kgs. For sure, it did fell like it was a lean issue. Will pull the motor out and chuck a new set in.1 point
-
I've just picked up this boat from Blenheim. Currently waiting in Picton for the ferry. Goes good so far, for the 20 minutes I've driven it... 300ci small block buick Plan is to throw an Accuair system in it for Max levels of Aceness.
1 point
-
You can borrow mine when you need it. I'll get some new filters for it via a... ..source...1 point
-
Updates updates please!1 point
-
Fishing sinkers, solder, any lead. It flexes takes the worst of the shock loading.1 point
-
I am very happy with finally having a front end back on the Starlet. It looks a lot more like a rally car now. And it is road legal so i can drive it around town. Now that the front end is all together and it has a little sound from the muffler, It is time to get this soggy old suspension taken care of. Parts pile going on next: Replacement Front Control Arms Tie Rod Ends Front Sway Bar Bushings Rubber Strut Tower Tops Replacement Strut Inserts Camaro Rear Shocks Cut the coils a bit and see how she rides. I would love to do all AE86 suspension but I want to see what is possible with the stock suspension. I'm just replacing all the bushings that I can and putting slightly shorter shocks in it. Cut one coil out and see how it rides. It won't be perfect, but it will be far better than what it is now.1 point
-
The bumper is all done and turned out fantastic!! Also slapped on this muffler I had sitting around Video of making the bumper, welding the diff and a little exhaust rumble for you!!1 point
-
Found a great deal on some fenders from Malaysia. Just had to go with it and hope they showed up unharmed to the USA. Threw on the fenders with some ebay fender mirrors. Then painted the headlight surrounds and grill so they match. installed the new front end with some Ebay LED lights. The ebay LED are so darn bright and a million times better than those old H4 lights. SHOP TIME!! After sliding the car around on some snow I realized I need the rear end locked up. It was too hard to predict when the rear end would break loose with the open diff. So I took the little starlet to my friends shop to weld up the rear diff. Locking up the tiny little diff. Now having a custom front bash bar made. Gotta be legal and have a front bumper.1 point
-
Took the Starlet to my Mechanics shop for the rear brakes and spark plugs. As you can see below the rear brakes were caked with nasty old fluid from leaky cylinders.1 point
-
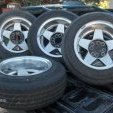
I had seen online that the old Celica/Supra wheels fit perfectly. So after some searching around MT i had a set of them. Man do they look good I may have a problem with rare and cool old school parts. I was digging through local craigslist and found this really cool old 5 star wheels. After getting them home i had to test fit them with the 175/70/15 tires Going to need some flares for sure. Lower the car about 2-3in, add some flares and these would be perfect. I couldn't help myself. I had to stack some drinks.1 point
-
Current manifold lengths as follows: Valves to end of adapter: 205mm Throttle body height: 74mm Trumpet length: 83mm Giving a total current length from valve to bellmouth of 362mm Which is surprising! A lot longer than I expected. The standard intake manifold is approx 40-50mm longer than this (with a bend) Can easily go another ~70mm longer if I put about a 30 deg bend in the runners to avoid the bonnet. So will give this a hoon.1 point
-
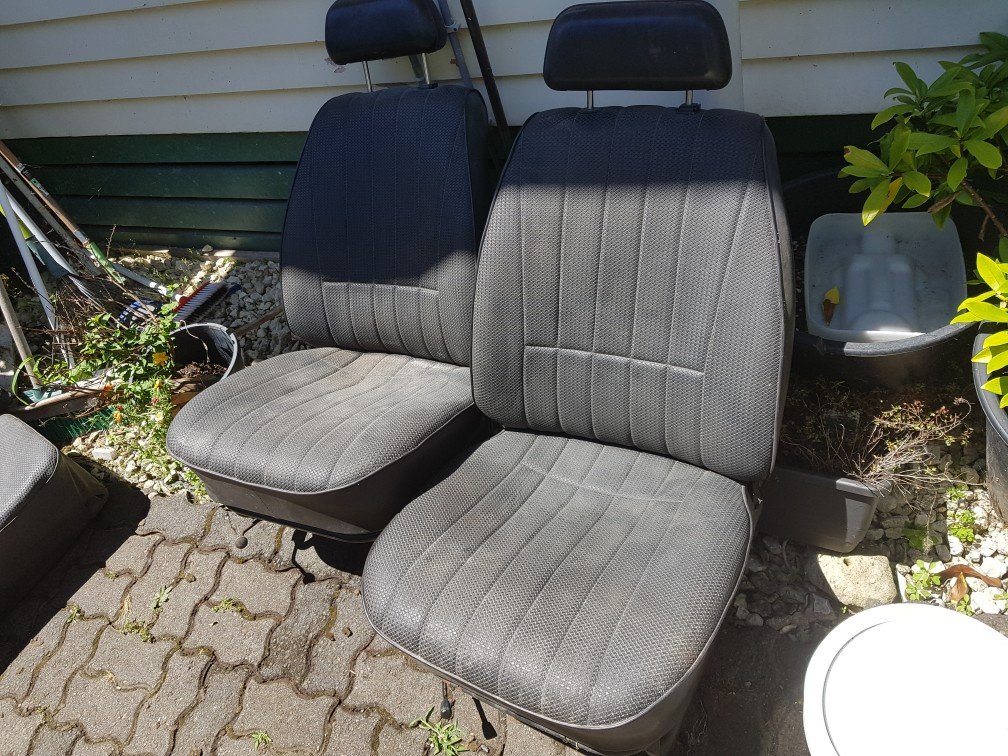
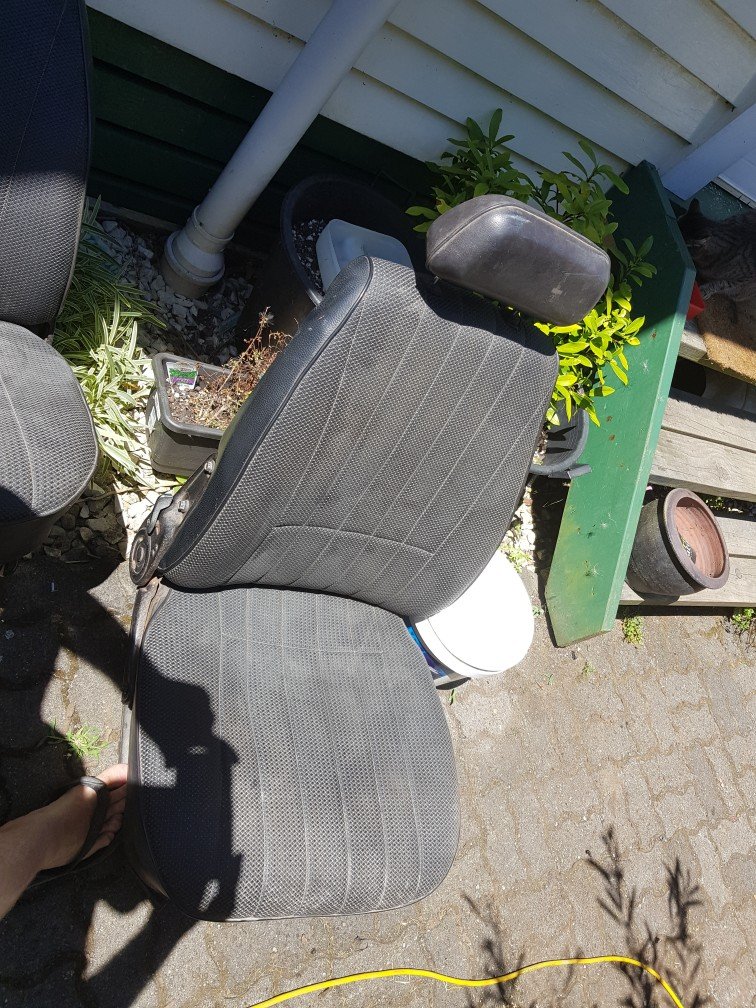
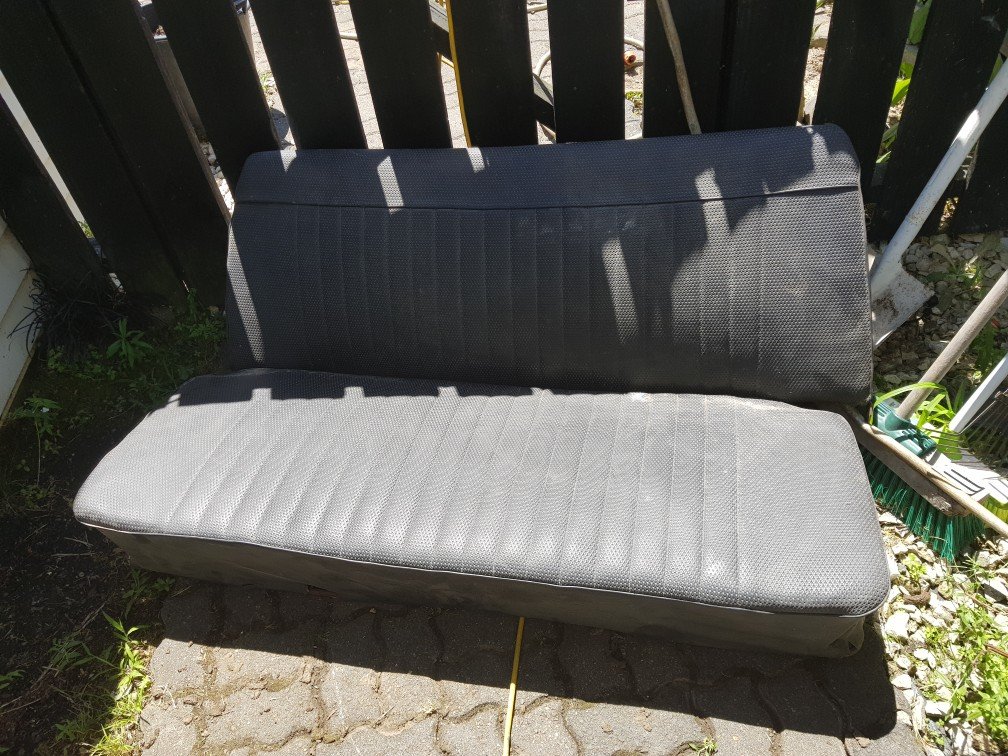
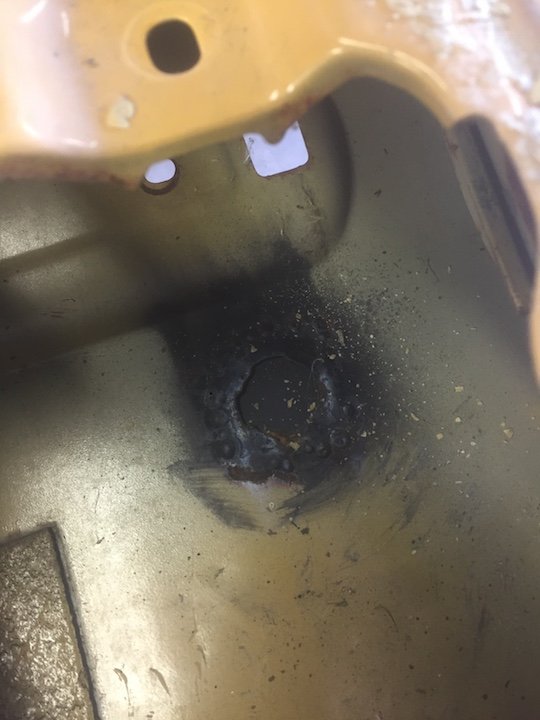
Had a few minutes so visited the lockup and wifey helped me pull the seats out. The seat mounting brackets that are welded to the seat bases are weird. They look kinda factory but also super unprofessional-10mm thick flat bar, with extremely tight bolt/frame clearance. Does anyone know if this seat fabric is factory? And check out the before and after cleaning pics. They got a soapy scrub (brown water, yuck) and then an actual waterblast.. the vinyl has a very deep texture which was FULL of human filth.
1 point
-
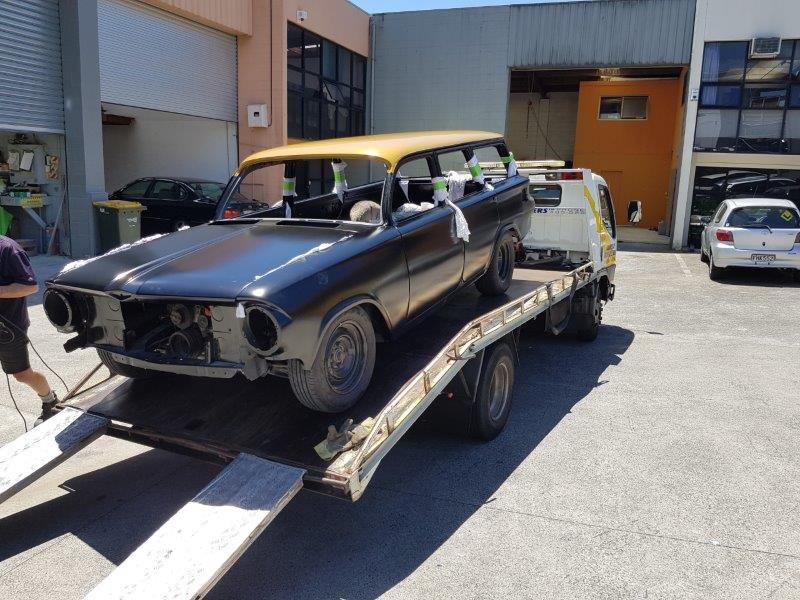
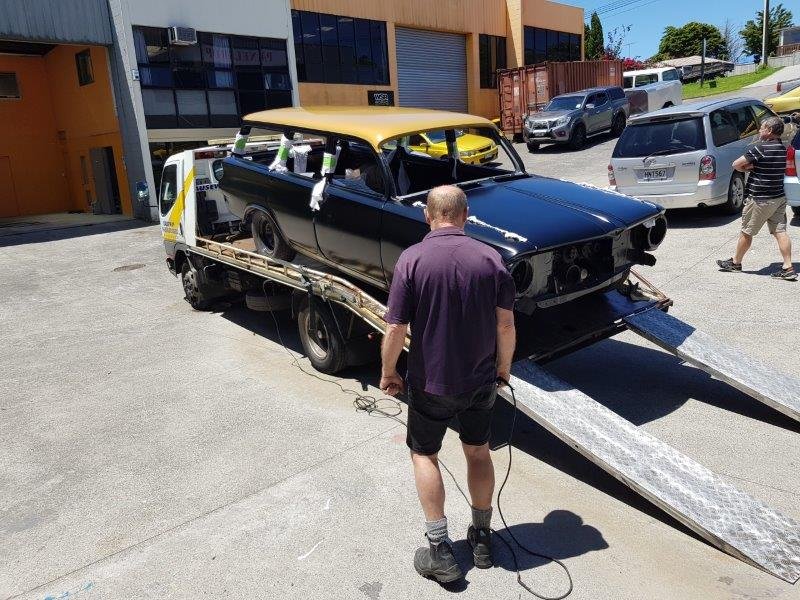
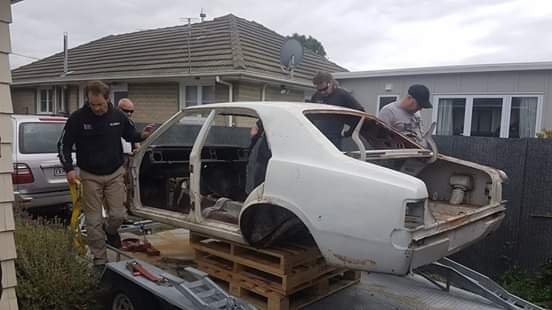
well now it's a new year and the girls have gone back to school .........it's time. so the old girl is off to blasting... hopefully we can lift it off the trailer once it's done and not sweet it off.
1 point
-
agree on about 50mm. maybe a little smaller will work on stock cams. length im gonna say 380mm from valve to bellmouth1 point
-
well then, 3 years has flashed by. in that time the 51 has been in storage a bit and ive driven it a bit. done a few things to it but nothing major. it continues to run well despite it having a 4M for an engine. things done to it are, re-valved the shocks to give a better ride (was a bit "bouncy" before) rebuilt the driveshaft uni's because they were fucked replaced the front tire that had a lump in it and caused a vibration on the motorway. new set of plugs coolant flush the standard oil and filter changes new battery and thats it. drove it to leadfoot over the weekend and it went perfectly. here are some pix of the adventure. last minute warrant, 2019-02-05_07-29-27 by sheepers, on Flickr played chicken with a truck, 2019-02-05_07-29-36 by sheepers, on Flickr 2019-02-05_07-30-00 by sheepers, on Flickr 2019-02-05_07-30-16 by sheepers, on Flickr 2019-02-05_07-30-28 by sheepers, on Flickr 2019-02-05_07-30-58 by sheepers, on Flickr1 point
-
I just couldn't help myself but take this photo... Having fun stripping remaining bits from the other two Imps, cleaning and painting bits and generally playing about with what is a big model car. Proper update soon.1 point
-
Made more progress this weekend, car is basically mechanically stripped now Made a cradle out of 6x2 building timber, literally slapped it together on some little caster wheels (woefully underrated with a loadrating of 30kg each) disconnected the last of the wiring, the last of the shift linkage, removed the PS box and it was time to lower the car onto the cradle unbolted the trans x-member, unbolted the K frame and pushed the up button, such an easy way to remove an engine and trans. Video: Carefully wheeled engine and trans to side of the garage, Pulled a rocker cover to see what the inside of the motor looks like, not the greatest, but that’s not a huge surprise Plans have somewhat evolved (read snowballed) will be taking a bit more time and instead of just doing the minimum to get it complied, plans have stretched to minitubs, move springs inboard so I can fit some nice fat wheels in the back engine will get alloy heads, flat top pistons, headers and a bigger carb than the 500cfm edelbrock that I already have. Cheers Ben1 point
-
Learnt a lot in the past month and a bit. Main thing being that you should probably lube your fuel injector o-rings when you go to put them back in. Got the engine running, was only running on half the cylinders. Discovered there was no fuel going to the rear half cylinders, so decided to pull out the injectors. Took them into town and put them on an injector tester and nothing happened. Was told they can gunk up after sitting for awhile. So went off back home and gave them a spray with some cleaner and smashed them on the ground until they started clicking freely again with power to them. Got them all sounding really good, so in they went (without any lube, thinking back it should of been something that should of come to mind, but I guess I was just in a rush to get it running!), as they went in they must of torn the o-rings. I got the intake and everything back on and together and we started it up again. Ran mint!! So turned it off to see how it would start again, flat battery. Chucked the charger on, and then decided we'd put the wheels on, piece it a bit more together and go for a drive up the driveway. By time we got it together and off the hoist, a few hours had past and so had a decent amount of fuel past the o-rings and into cylinder no.5. Cranked it over and it didn't want to start very easily, so gave it a few more attempts and finally started up with a lovely knocking noise! We thought maybe it was just something loose in the bellhousing, as when we first started it we quickly realised there were no bolts in the flex plate to the torque converter. Anyway drove it up and down the driveway and then back on to the hoist. Decided over Christmas we'd pull out the transmission to have a look in there, other than the weights on the flex plate being ripped off by the torque converter there was nothing that obvious. Started the engine without the trans in and it still had the knock, which was a disappointment. Our neighbours Tony and Jason, who are a bit more mechanically minded came over on Boxing day after hearing that it wasn't transmission related, and went over everything they could think of. Eventually after a good few hours we narrowed it down and decided to check how high each piston is coming up by sticking a threaded rod with a nut on it and turning the engine over by hand. Got around to cylinder no.5 and it was about 5-6mm lower than the rest. Was obvious at this stage that we had a bent rod that was caused by hydraulicing the engine with fuel. Out came the engine, onto a stand, flipped over and then pulled the sump off. It was pretty bent! The crank smashed up the bottom of the piston, but other than the rod and piston everything else looked good. The engine is now at the rebuilders and injectors have been professionally cleaned with new o-rings. The buggered o-rings on the injectors. Since I had awhile off work over Christmas and the engine debacle halted progress a bit, we decided it was a good time to sand out all the runs in the clearcoat and give it another couple of coats with some flatter clear since I wasn't quite happy with the last stuff I used. Used some PPG autothane clear with flattening base in it this time. Was way easier to spray, looks waaaaay better, a lot smoother and a more consistent flatness. Also the extra coats covered the rust up a bit more, as before it didn't seem to be covered well in the rusty areas. With the engine out it was a good time to go through and tidy up a few things. Made up some stainless heatshields that cover the wiring on one side and the fuel and brake lines on the other. Also wrapped some of the exhaust in heat wrap to try and help keep some heat away. Ignore the plastic cable ties, the ones that came with the wrap were too short, and I'll change them soon. After trying to drain the coolant I decided it'd much easier if there was a drain plug, rather than having to disconnect a hose and having it run straight onto a crossmember. Next thing to do was sort out the fuel filler. Turned out the u-bends I bought for the headers were the correct size I needed, so took one of them, cut it to fit and welded a breather pipe on the side. Made a stainless pipe that goes from the 1 5/8" u-bend to 2" on the tank. Also added some gas struts to the rear bed lift up part. Whilst under the rear end noticed the rear airbags were only mounted on the bottom with bolts and no washers. This was mostly because the mount was so close to the diff tube and the airbag mounting holes had quite a small PCD, you couldn't fit much else in there. Came up with these plates that mount to the airbags with a countersunk screw and then have the studs stick through the outer of the slotted hole in the diff mount. Heaps of room to get a nyloc nut and washer now. Was running out of stuff that I could think of to do, so my Dad made a start planing and fitting the Matai wood planks that I bought quite a while ago. Fitted in they looked a bit weird being natural, too bright or something. Had some Japanese stain lying around that we tried and I quite liked it. So went and wiped that all over it once it was fitting well. Then wiped over some Scandinavian oil and came it out really nice. Got the windows installed, he still needs to come back and finish them off. The front window stainless trim doesn't fit as well as I'd hope it would, sorta sticks out a bit, but we're sure it's in there properly. Probably a combination of the crappy re-pro rubber and trim not being 100% right to start with, as I've heard of a heap of people having troubles with windscreen rubbers not fitting nicely on these. Supposed to be taking this to Nats in less than 6 weeks hahaha1 point
-
No, It was the way the Grandad did it. I will only be using the finest selection of Whitworth and British Standard Fine hardware to......
1 point
-
Thanks for all of the suggestions thus far. Okay, so time for me to come clean on what this setup will be going into:
1 point
-
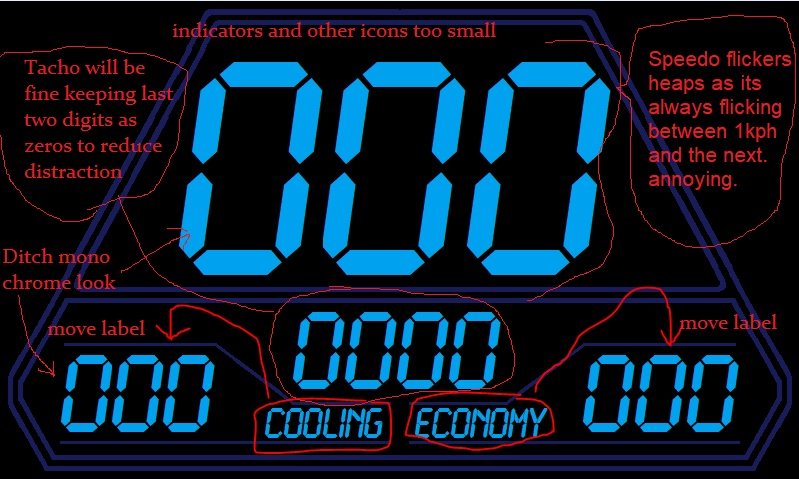
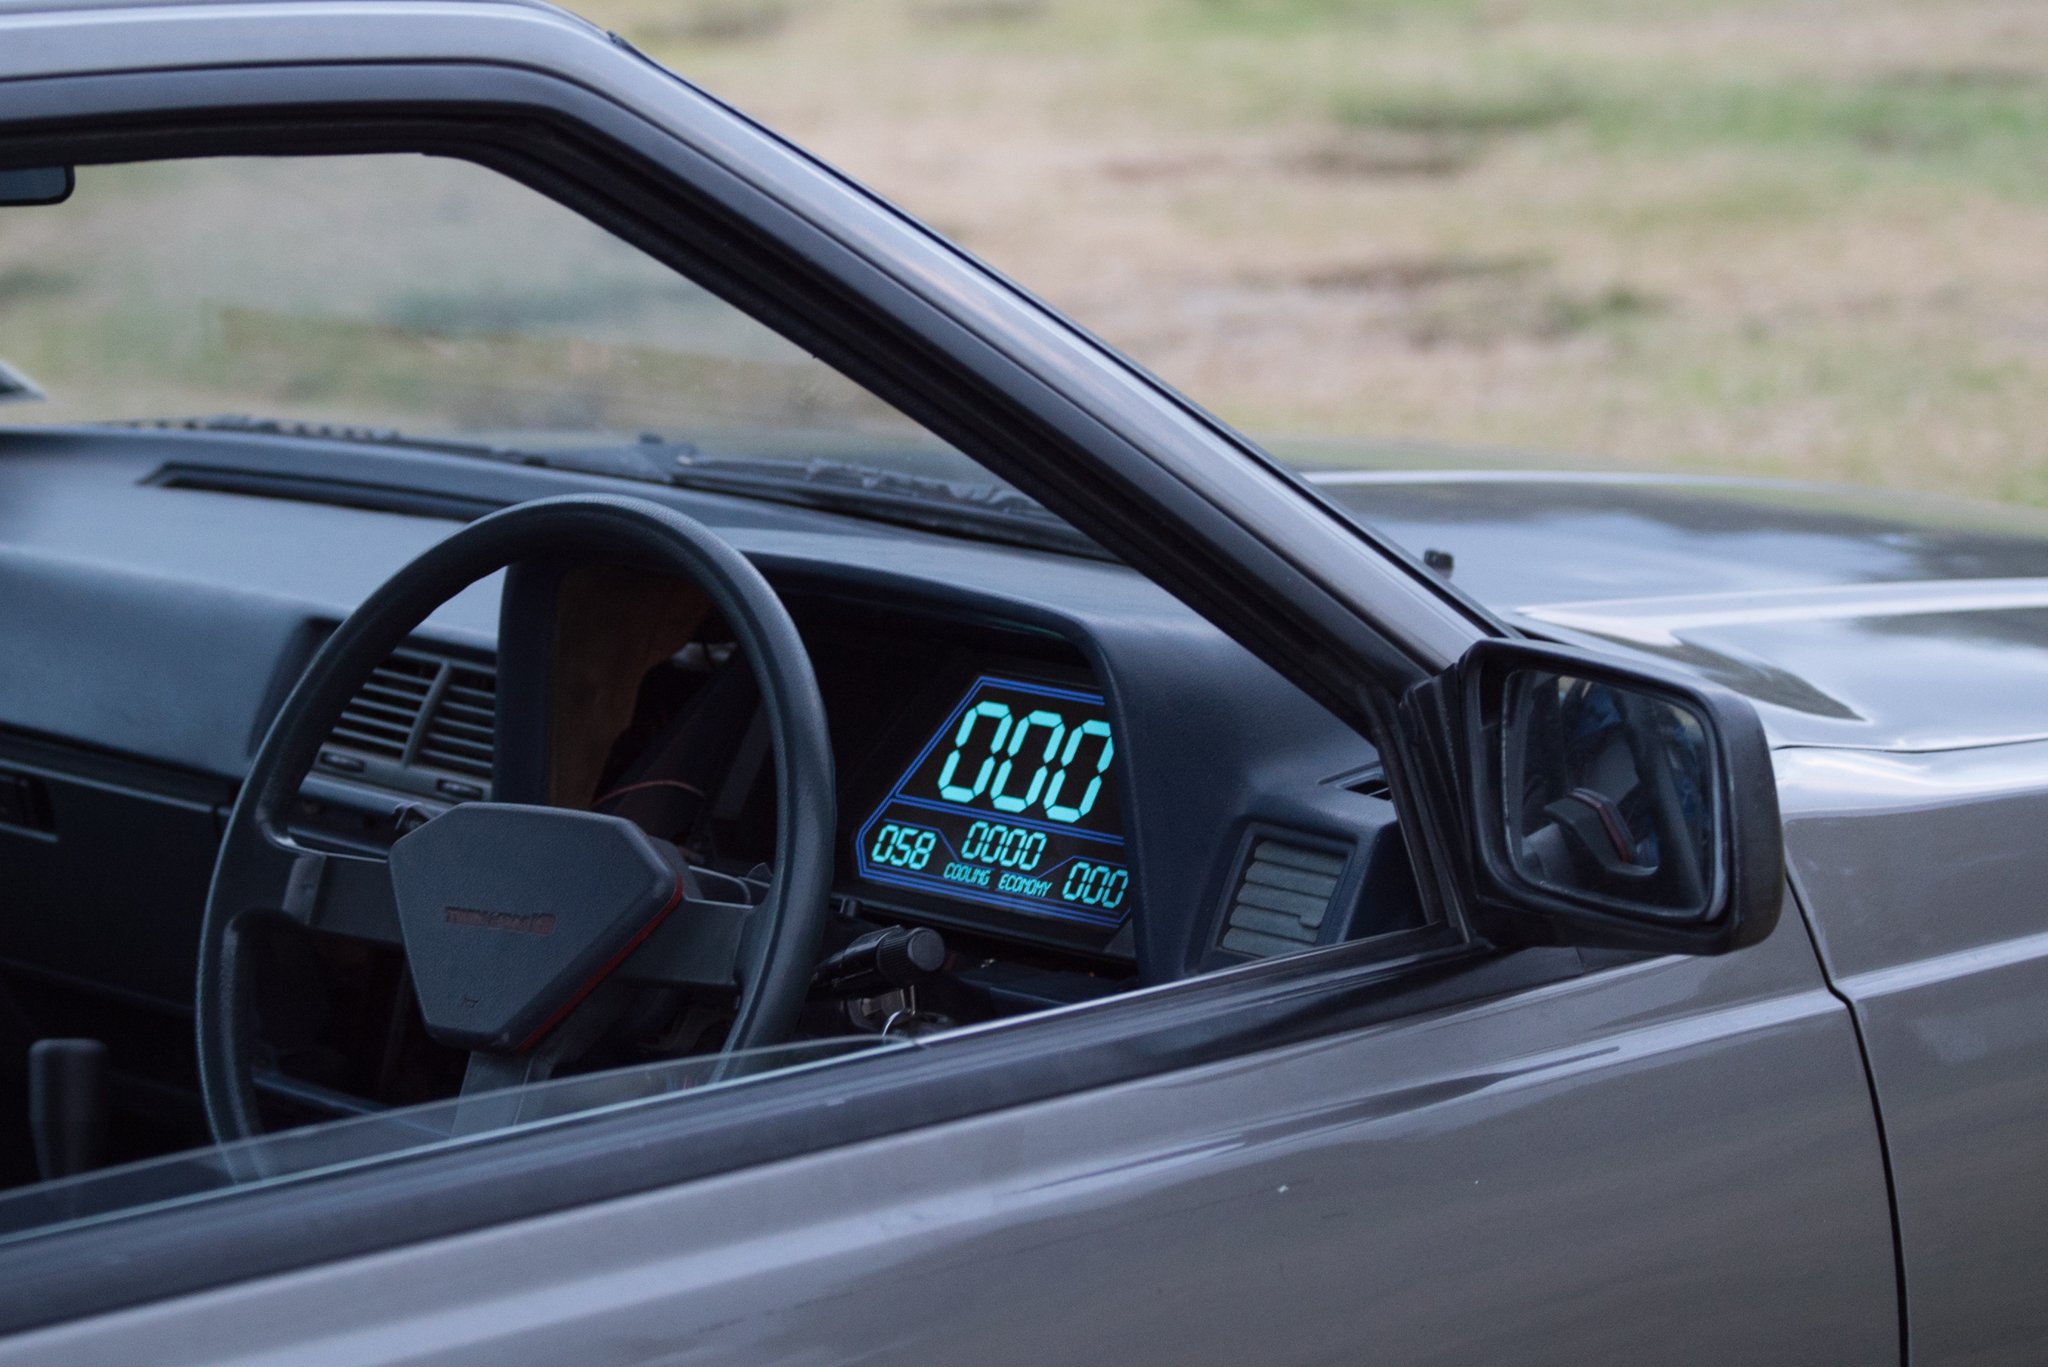
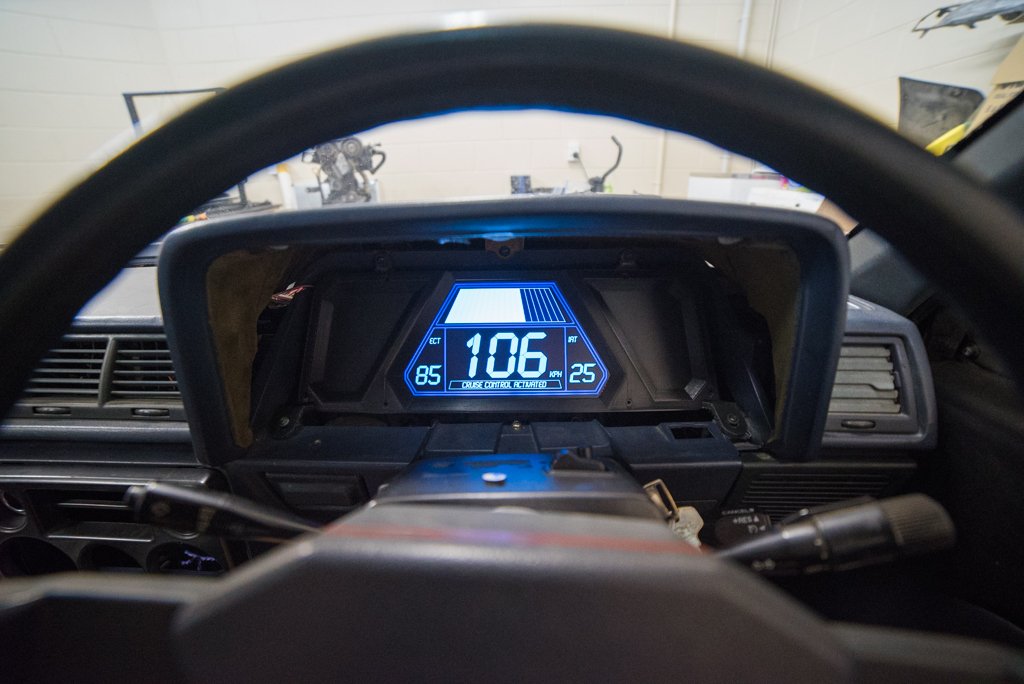
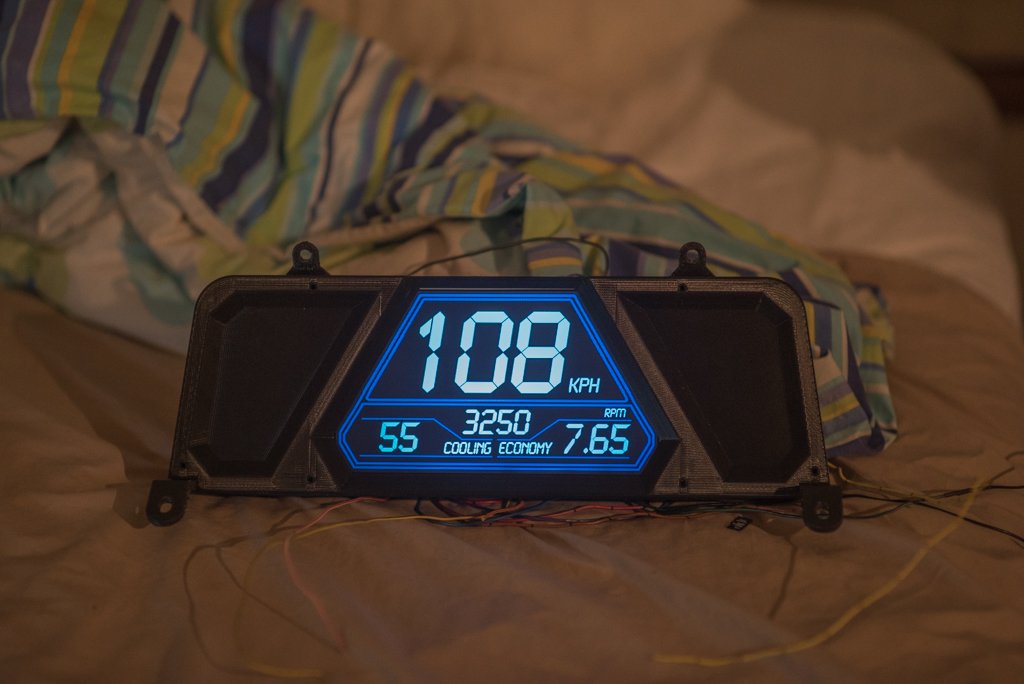
Got a driveshaft sorted until I can get something made up, so went on a roady to test out the dash. Drive up to Uretiti was good! As expected I really need to put some KMs on it and get a feel for what's good or whats annoying or so on. Very quickly a few things became apparent that they are fecken annoying! Also this thread has been severely lacking MSpaint so here we are: So on the plus side, the ~250? Nit screen seemed decent enough even with backlit conditions. I've got a 1000 Nit screen here to try too if I need to burn my eyeballs out! Most of the annoyance came from values flickering. Because you might be hovering on say 89.9kph and then 90.1kph... So it will flicker between 89 and 90. Options here are either that I take a rolling average of the last XYZ amount of speed results and smooth it. Or maybe only change the speedo value if the number goes up or down by 2kph or more. With the tacho, this was annoying for similar reasons in that it can read from the ECU down to a single RPM, so its a constantly moving number which is distracting. I'm thinking that I'll filter it so it only updates the screen in 100rpm increments, so will go 2400rpm, 2500rpm, etc. Because again, does it really matter, do you really need to know that the engine is doing 2451rpm? Not really. Maybe I could make it read in 50rpm increments below 2000rpm or something like that. Also when it was bright you cant actually see any of the outline lines, only the numbers and labels. So will make more sense to move labels closer to the values. I also realised that although a monochrome sort of look is nice. I setup some cruise control displays so that one button goes Red when you've activated CC, and then goes green when CC is turned on. With the colour differentiation you could instantly tell what status the cruise control was in. So I think more colours will make things easier to read. In fairness though this is essentially a low contrast colour scheme that is probably better for night time. Using a white or yellow or whatever text and it's blazingly brigher even with the same backlight settings. I'm also starting to question the merits of having the triangulated sort of face over the screen, when you're driving and it's bright you cant see any of it. Just the values on screen. So may as well just use the extra screen real estate. Good to be making some progress anyway! I'm looking forward to designing some of the more contextually aware screen functions now that the basics are sorted. First on the menu is a secondary screen for when Cruise Control is turned on. Then I'll look at some trackday related stuff and a few diagnostic pages to make life easier. It's cool having all of the standard dash info coming into this, because I can set it so (for example) if you flash the high beams, or push the brake, or whatever, in certain conditions (like while the car is stationary without engine running) you can use those car controls to navigate through menus or switch screens or whatever. Pretty chuffed to have reached that milestone of driving it with a fairly "finished" prototype though.
1 point
-
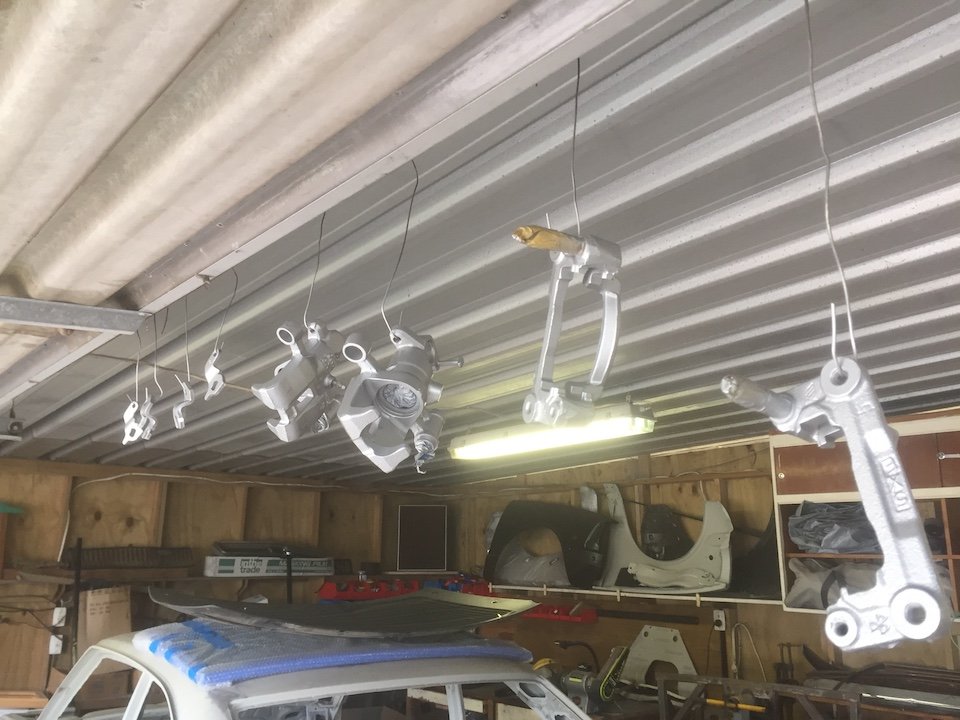
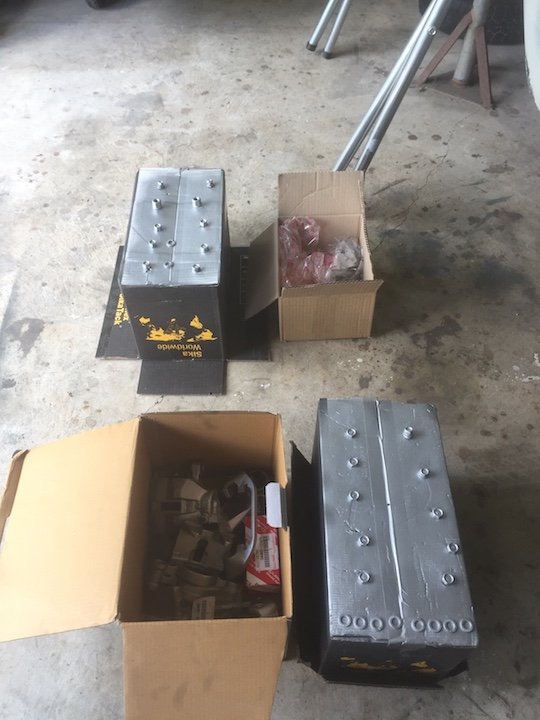
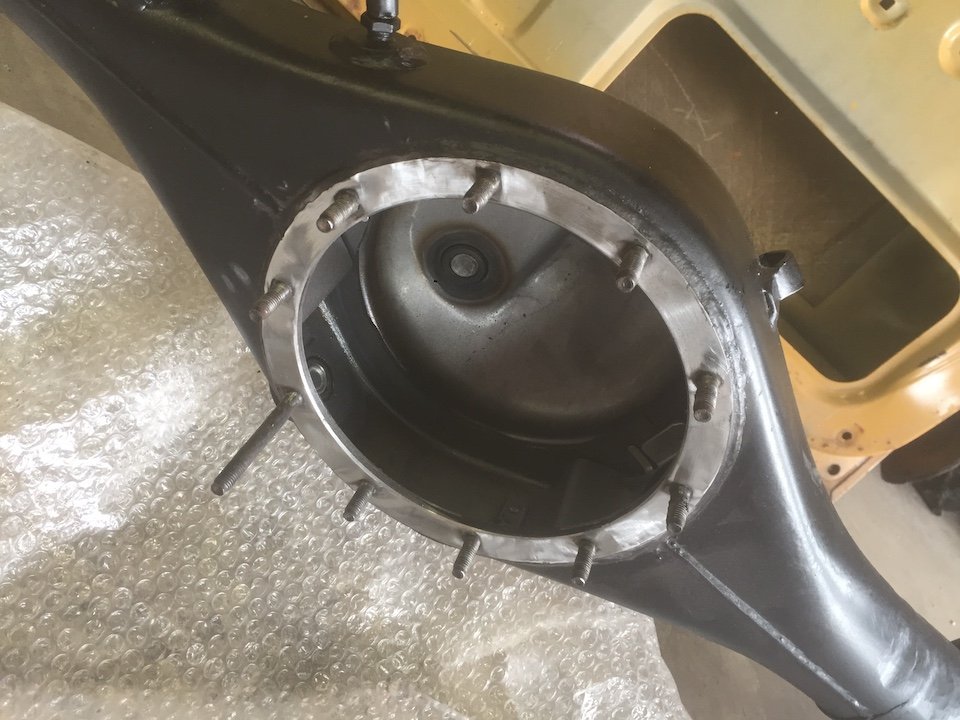
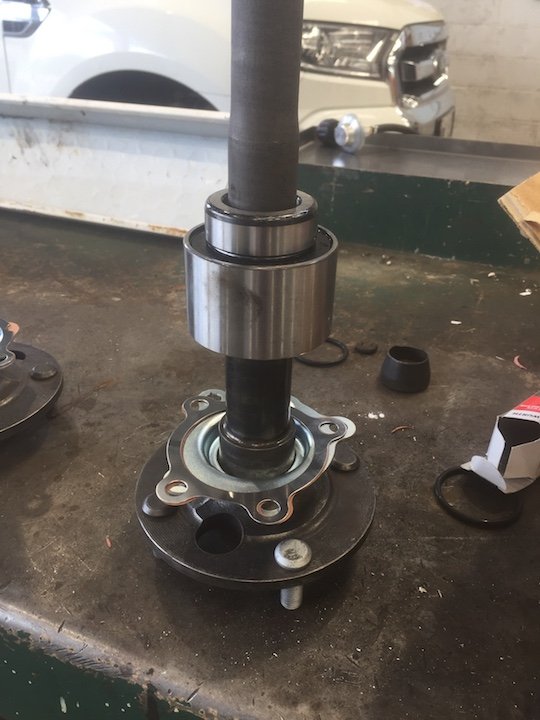
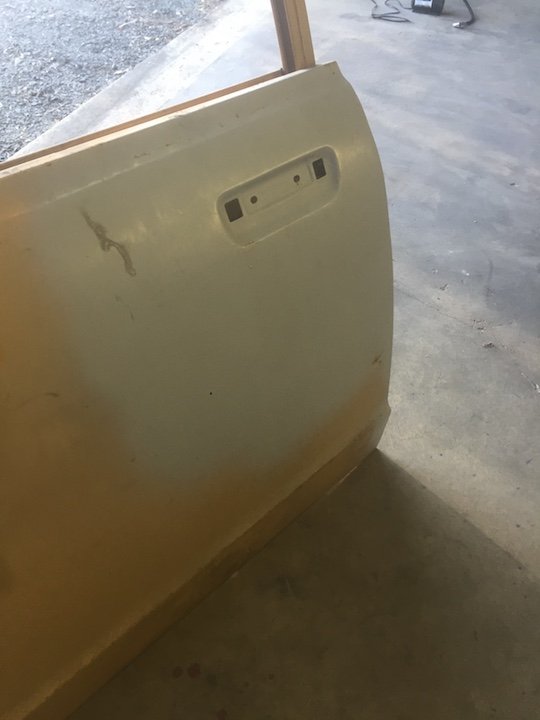
Ok, so it took 4 months, but I finally got some time in the shed again over the last week. Between three kids and business being really busy.......and a stupid set of bunks I refurbished instead of buying new ones (such a time suck!) .....I finally got there and stripped out the doors and only found the slightest rust and the lock holes smoothed over. Will take these back to metal soon. A mate is a diesel mechanic and was doing some odd jobs at the workshop and helped me out with a few things. Rear bearings pressed Front hubs bearings replaced and new discs fitted Rear callipers completely pulled apart (and then painted along with a few other bits) Diff housing seals fitted and cleaned up ready to be assembled So now all 4 callipers are ready to be fully assembled (again - minus shit paint), along with the diff and the entire front subframe - all ready to go in the car once the shell is at the panel shop. I just need a half day to pull the last few things out of the shell to get it blasted and then it's off to the panel beater for some major progress.
1 point
-
Digidash is coming along slowly too. Just need to figure out what to put on the sides. Waiting on some parts so my circuit board can interface with the 12v stuff from the loom plugs like lights, indicators etc. Still might change the design around a bit but I want to look 80s obnoxious / look like it belongs in the car / still be nice and readable. Currently only receives canbus info from ECU, and has an internal bulb to make the alternator work haha. Getting there but a fair bit of work left to do. Excuse the yuck graphics, work in progress:
1 point
-
Right, so it’s been 2 weeks since this came into my possession. Have done clutch master and slave cylinder, rear wheel cylinders, got good parts off of the other ladas, polished all the chrome (which has come up amazing! Fitted brake master off of yellow lada which was good but doesn’t seem to want to bleed up, fitted the good fuel pump from the yellow lada too so it now runs and drives under its own power! Have also polished paintwork, it’s pretty crap really but did shine up ok! Took it to the chachacha auto fiesta meet up today, bit dodgey only having handbrake but all went well! Does get pretty hot though, never went into the red but did get close. Drives really bloody well actually! Oil cap was pretty milky when I checked but hoping it was just some condensation as oil is still golden and coolant is still green. Ohyeah I also gave her the much needed slam treatment today too! Looks much better. Here it is in all its low glory.1 point
-
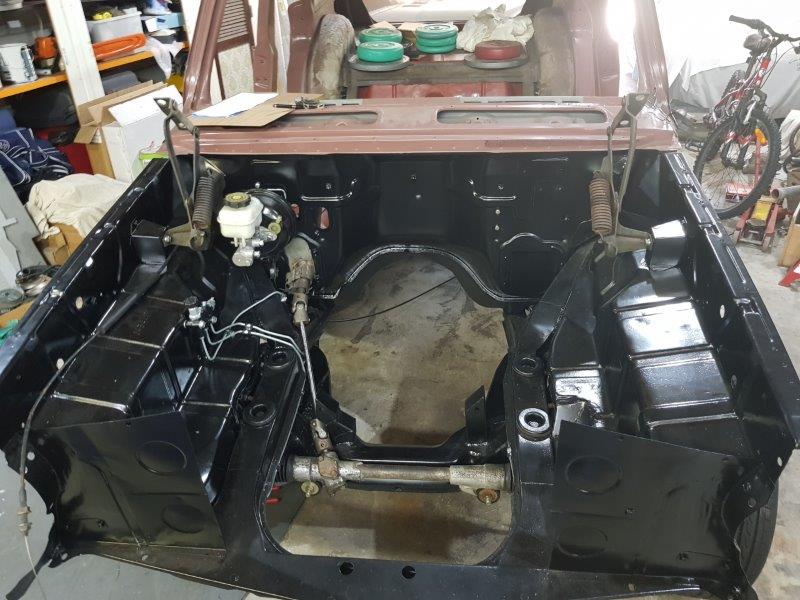
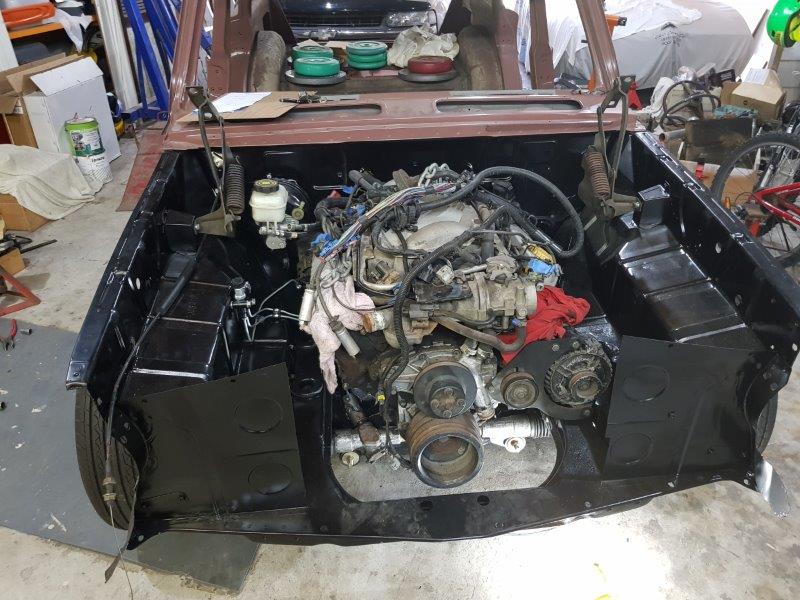
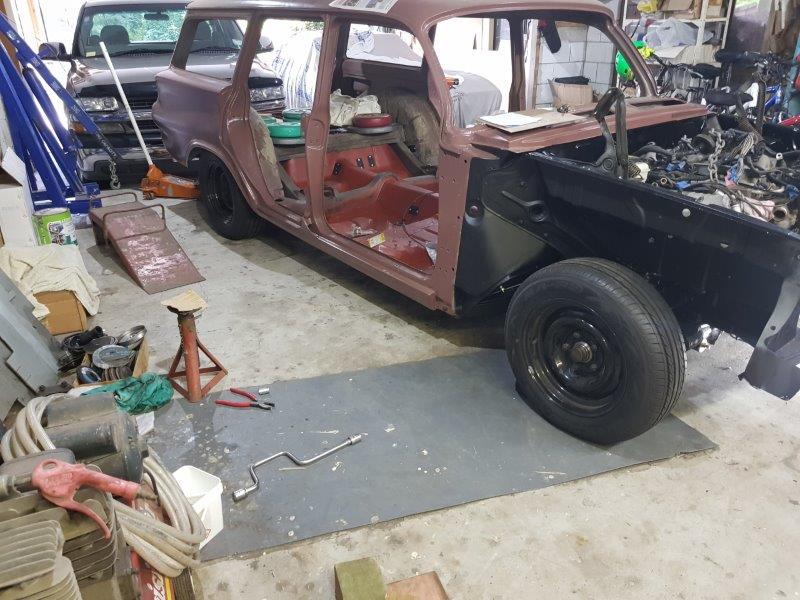
Here are the photos Engine ready to go in Hole for engine Engine in Hole Stance of car, should be about right. And another one just to be sure.
1 point
-
Lake Boat
1 point
-
Then within an hour off having it off the trailer I had the front torsions wound up and test fitted one of the wheeeeeels The grub approves too.1 point
-
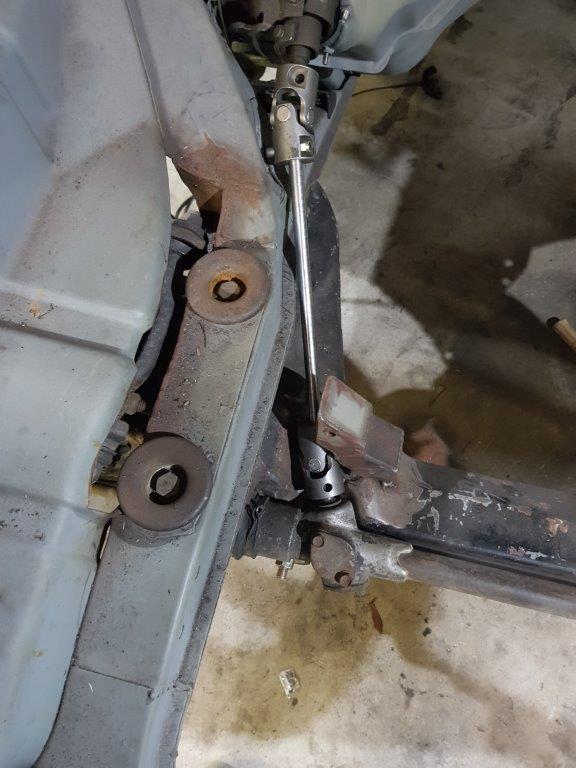
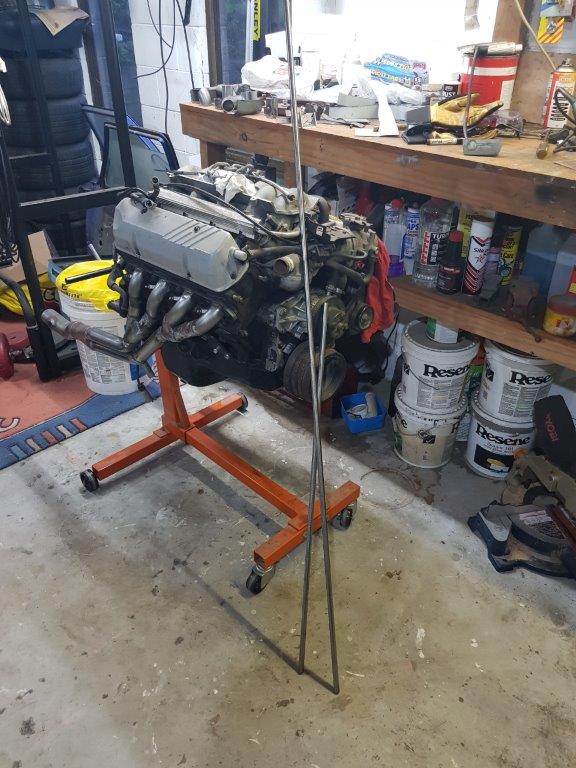
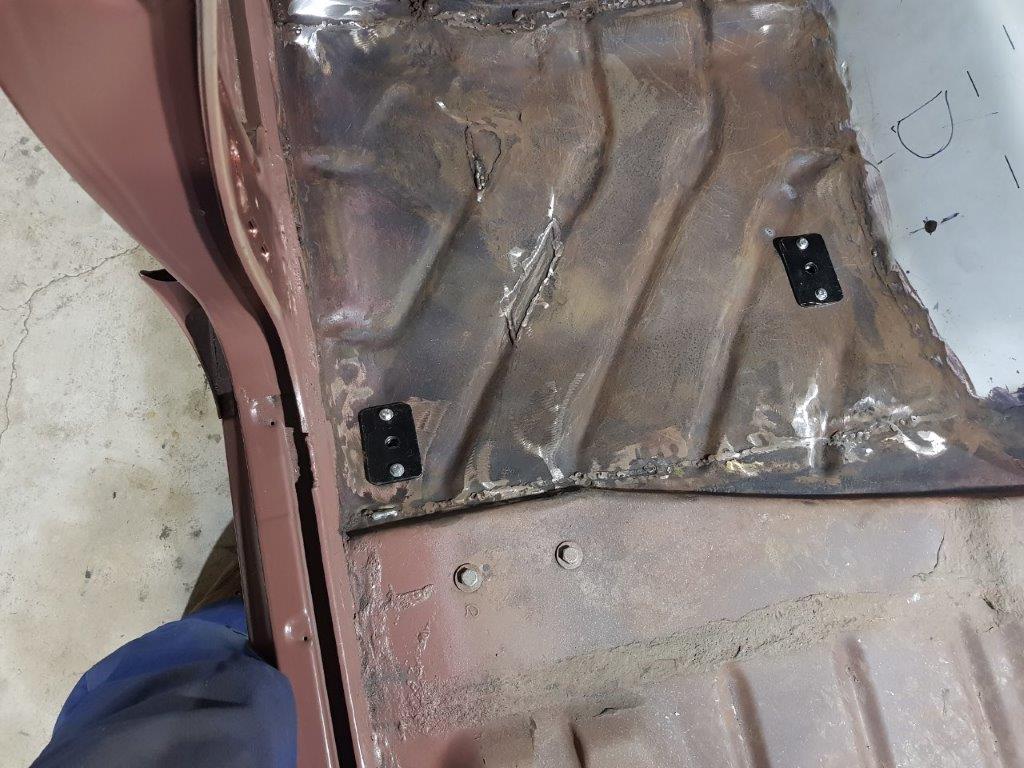
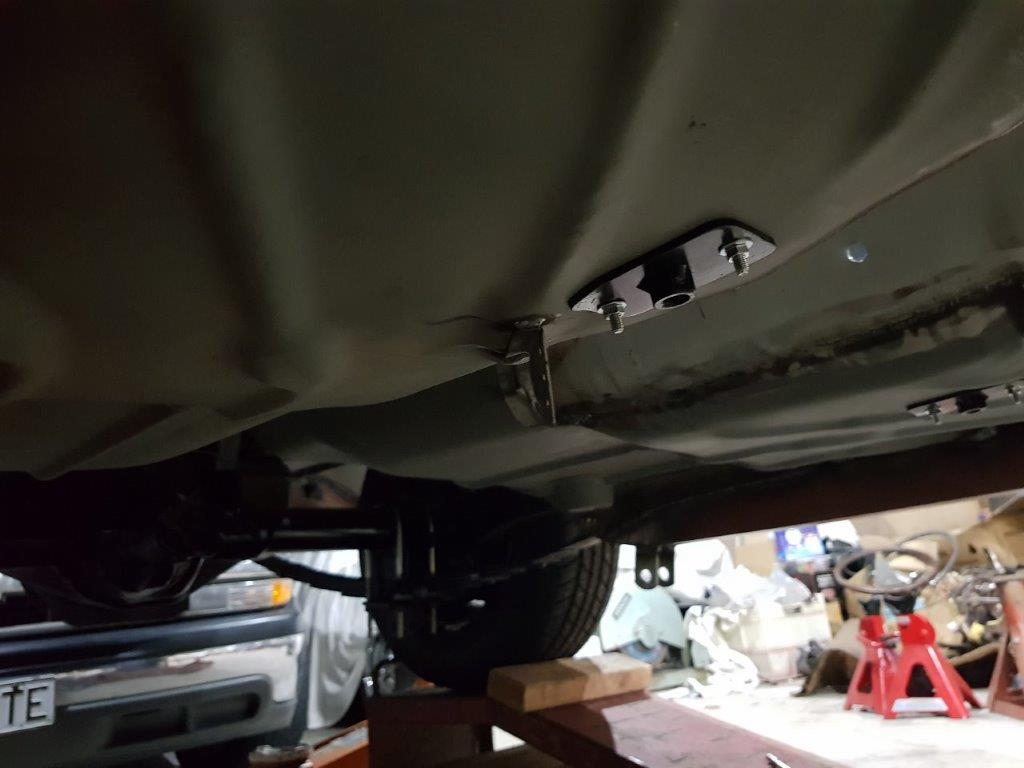
Here is another view of the steering shaft A photo of my extra length of 9/16 bar if anyone needs some. Engine is back on the stand waiting for wiring, sorting out fuel lines, dip stick......... First seatbelt mounts installed. The one by the door way and the hole in the trans tunnel are in the original places, The plate on the floor is for the centre belt. And the other side. I used bolts on the plates as per the lvvta manual and they pulled up nice and tight to the floor. The thing that looks like a a shark fin is the mount for the handbrake return spring. Originally it was a tab off the floor. I'm worried about drive shaft clearance to mad it longer Another job ticked of the list was welding the pad to the brake pedal. Comments and ideas welcome as always
1 point


This leaderboard is set to Auckland/GMT+12:00