
Leaderboard


Popular Content
Showing content with the highest reputation on 02/05/19 in all areas
-
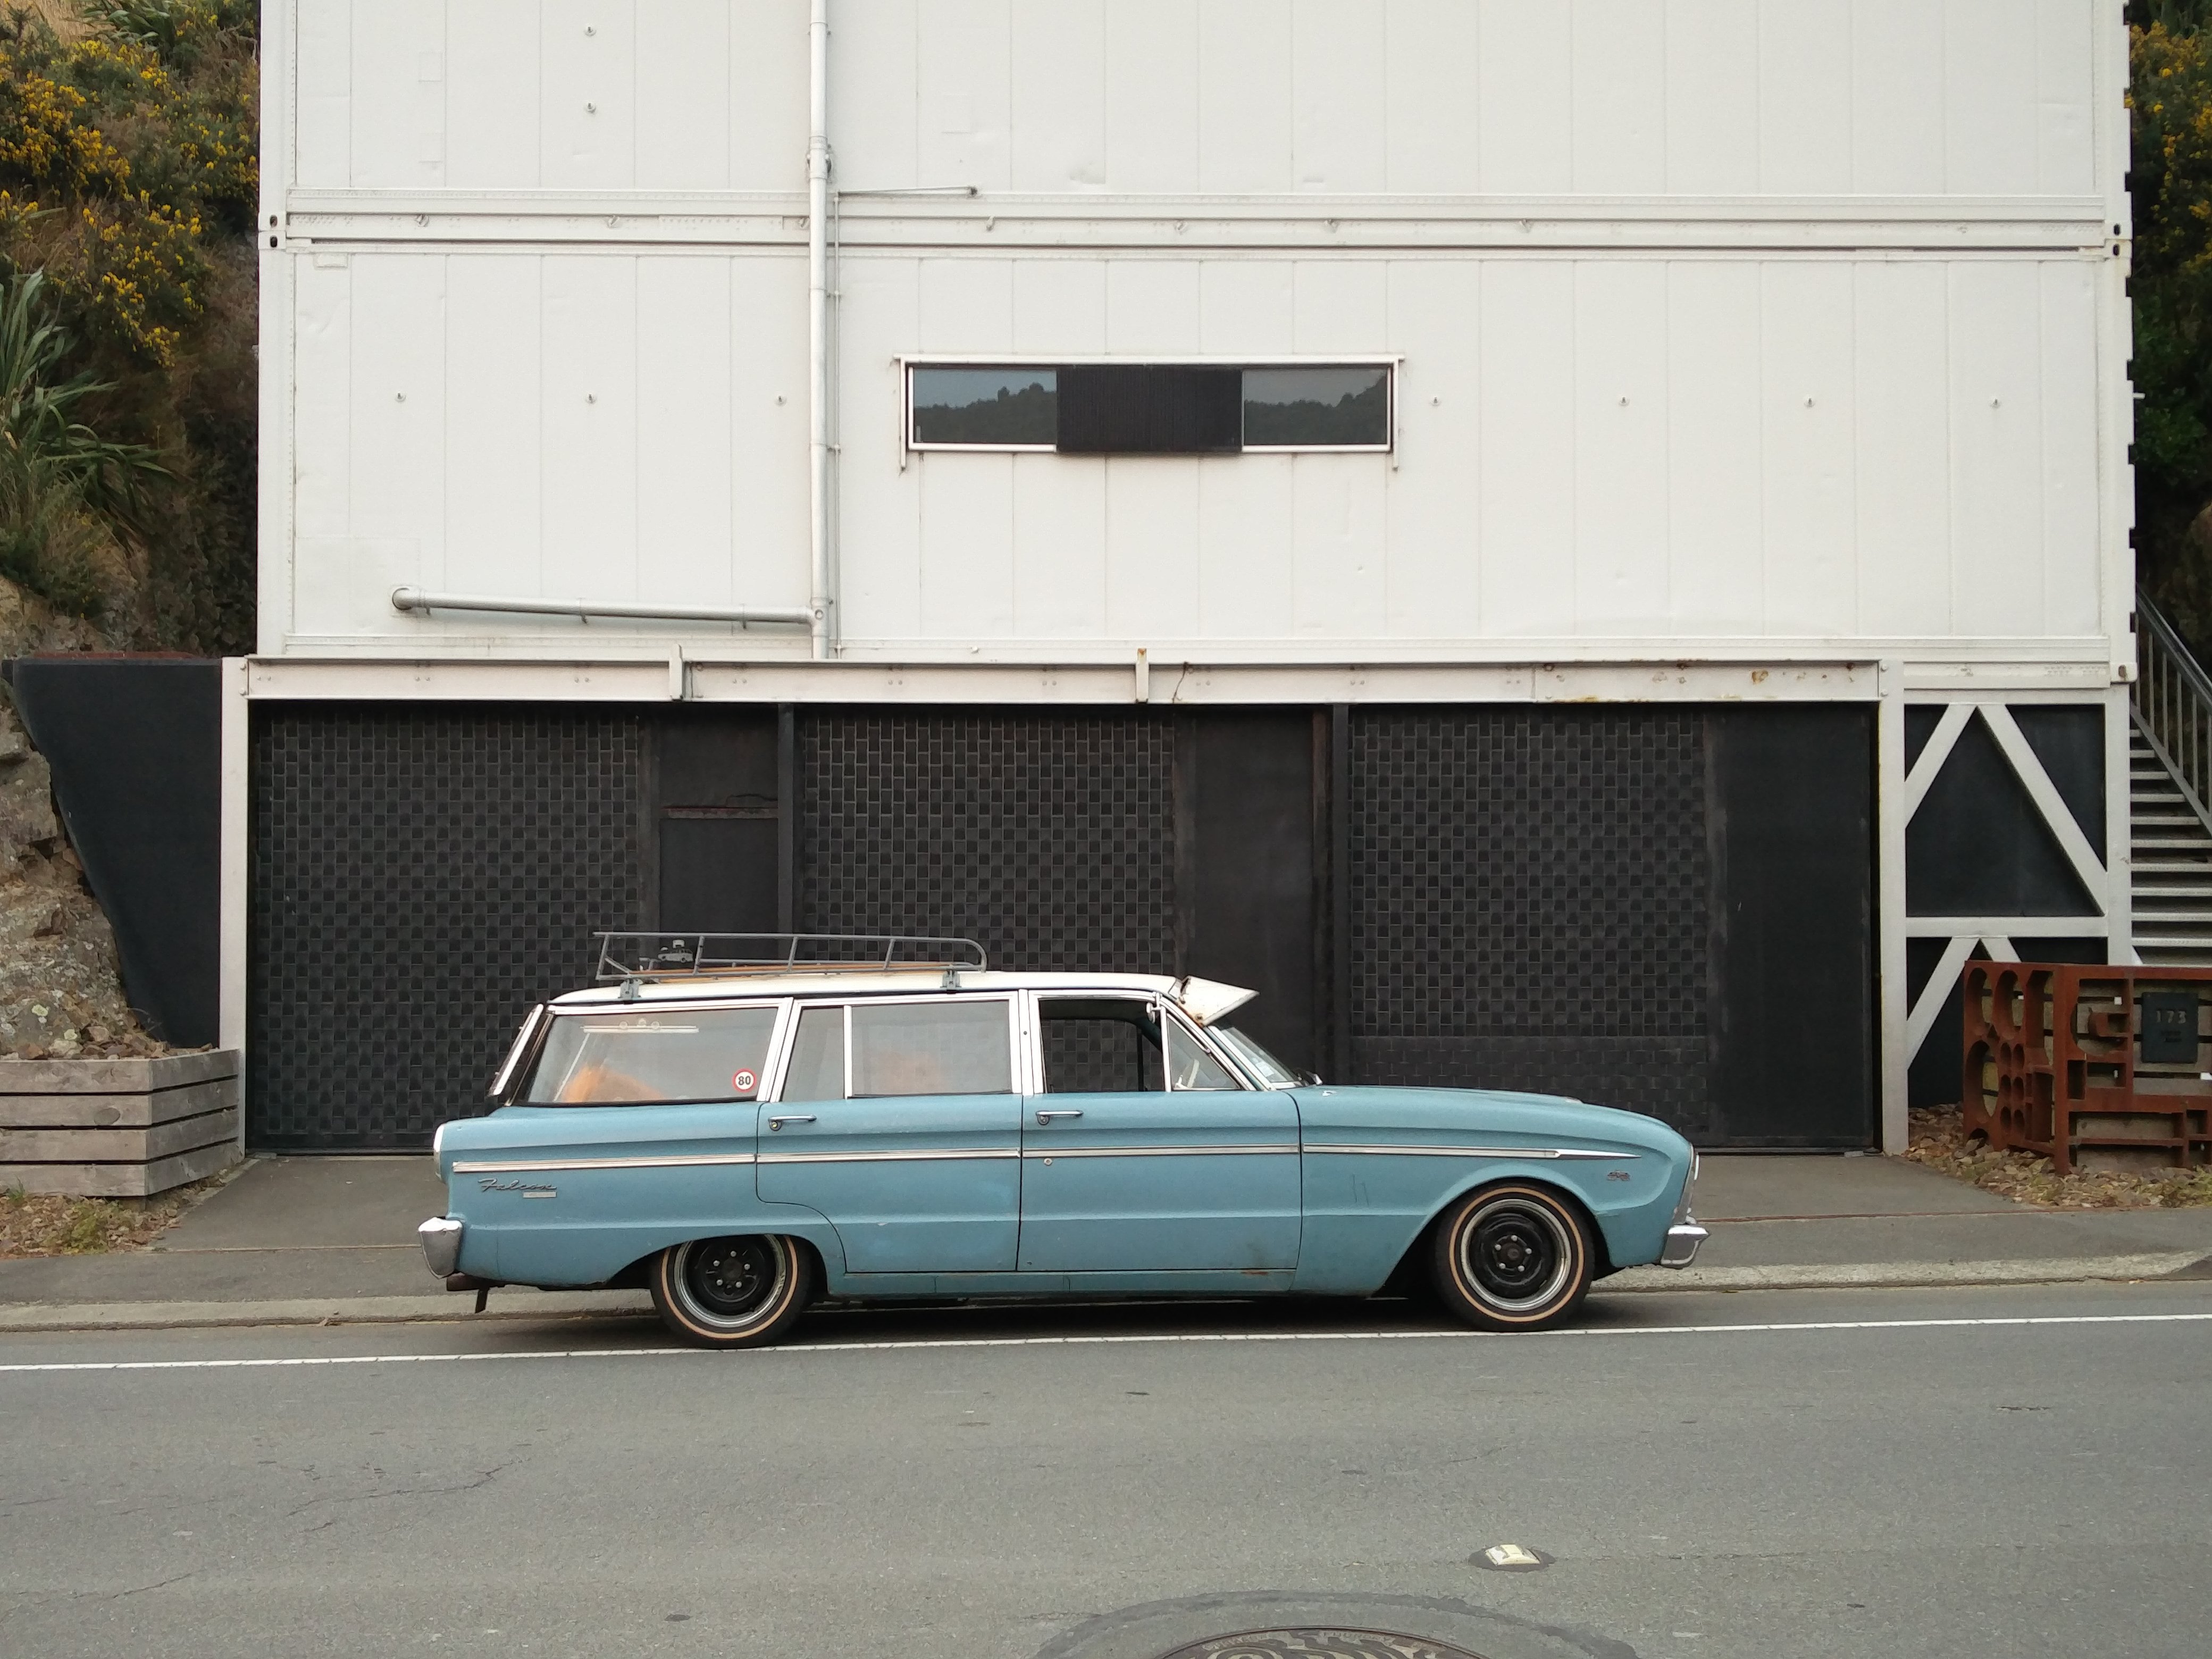
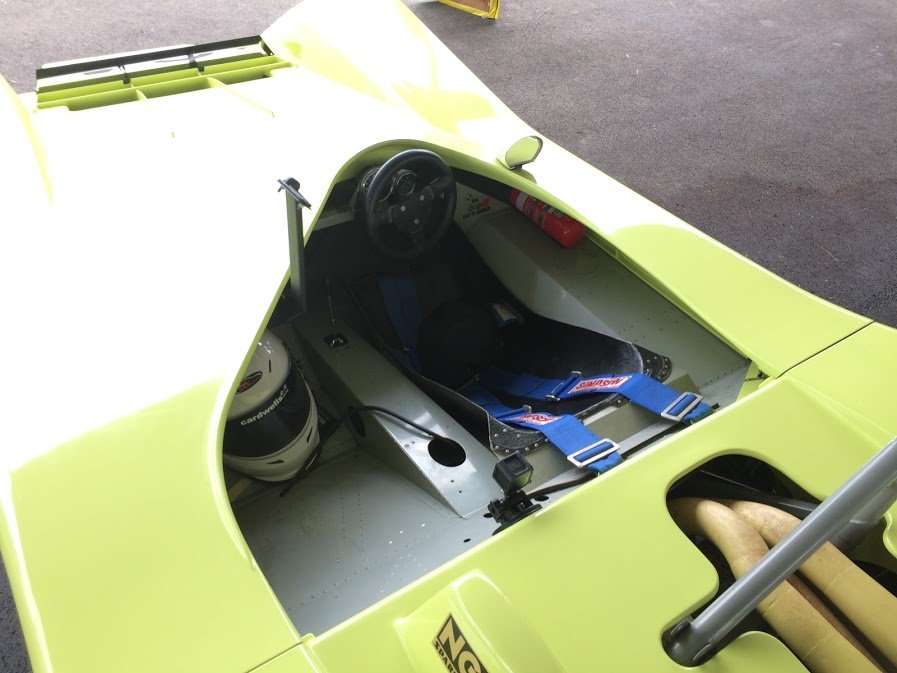
well then, 3 years has flashed by. in that time the 51 has been in storage a bit and ive driven it a bit. done a few things to it but nothing major. it continues to run well despite it having a 4M for an engine. things done to it are, re-valved the shocks to give a better ride (was a bit "bouncy" before) rebuilt the driveshaft uni's because they were fucked replaced the front tire that had a lump in it and caused a vibration on the motorway. new set of plugs coolant flush the standard oil and filter changes new battery and thats it. drove it to leadfoot over the weekend and it went perfectly. here are some pix of the adventure. last minute warrant, 2019-02-05_07-29-27 by sheepers, on Flickr played chicken with a truck, 2019-02-05_07-29-36 by sheepers, on Flickr 2019-02-05_07-30-00 by sheepers, on Flickr 2019-02-05_07-30-16 by sheepers, on Flickr 2019-02-05_07-30-28 by sheepers, on Flickr 2019-02-05_07-30-58 by sheepers, on Flickr27 points
-
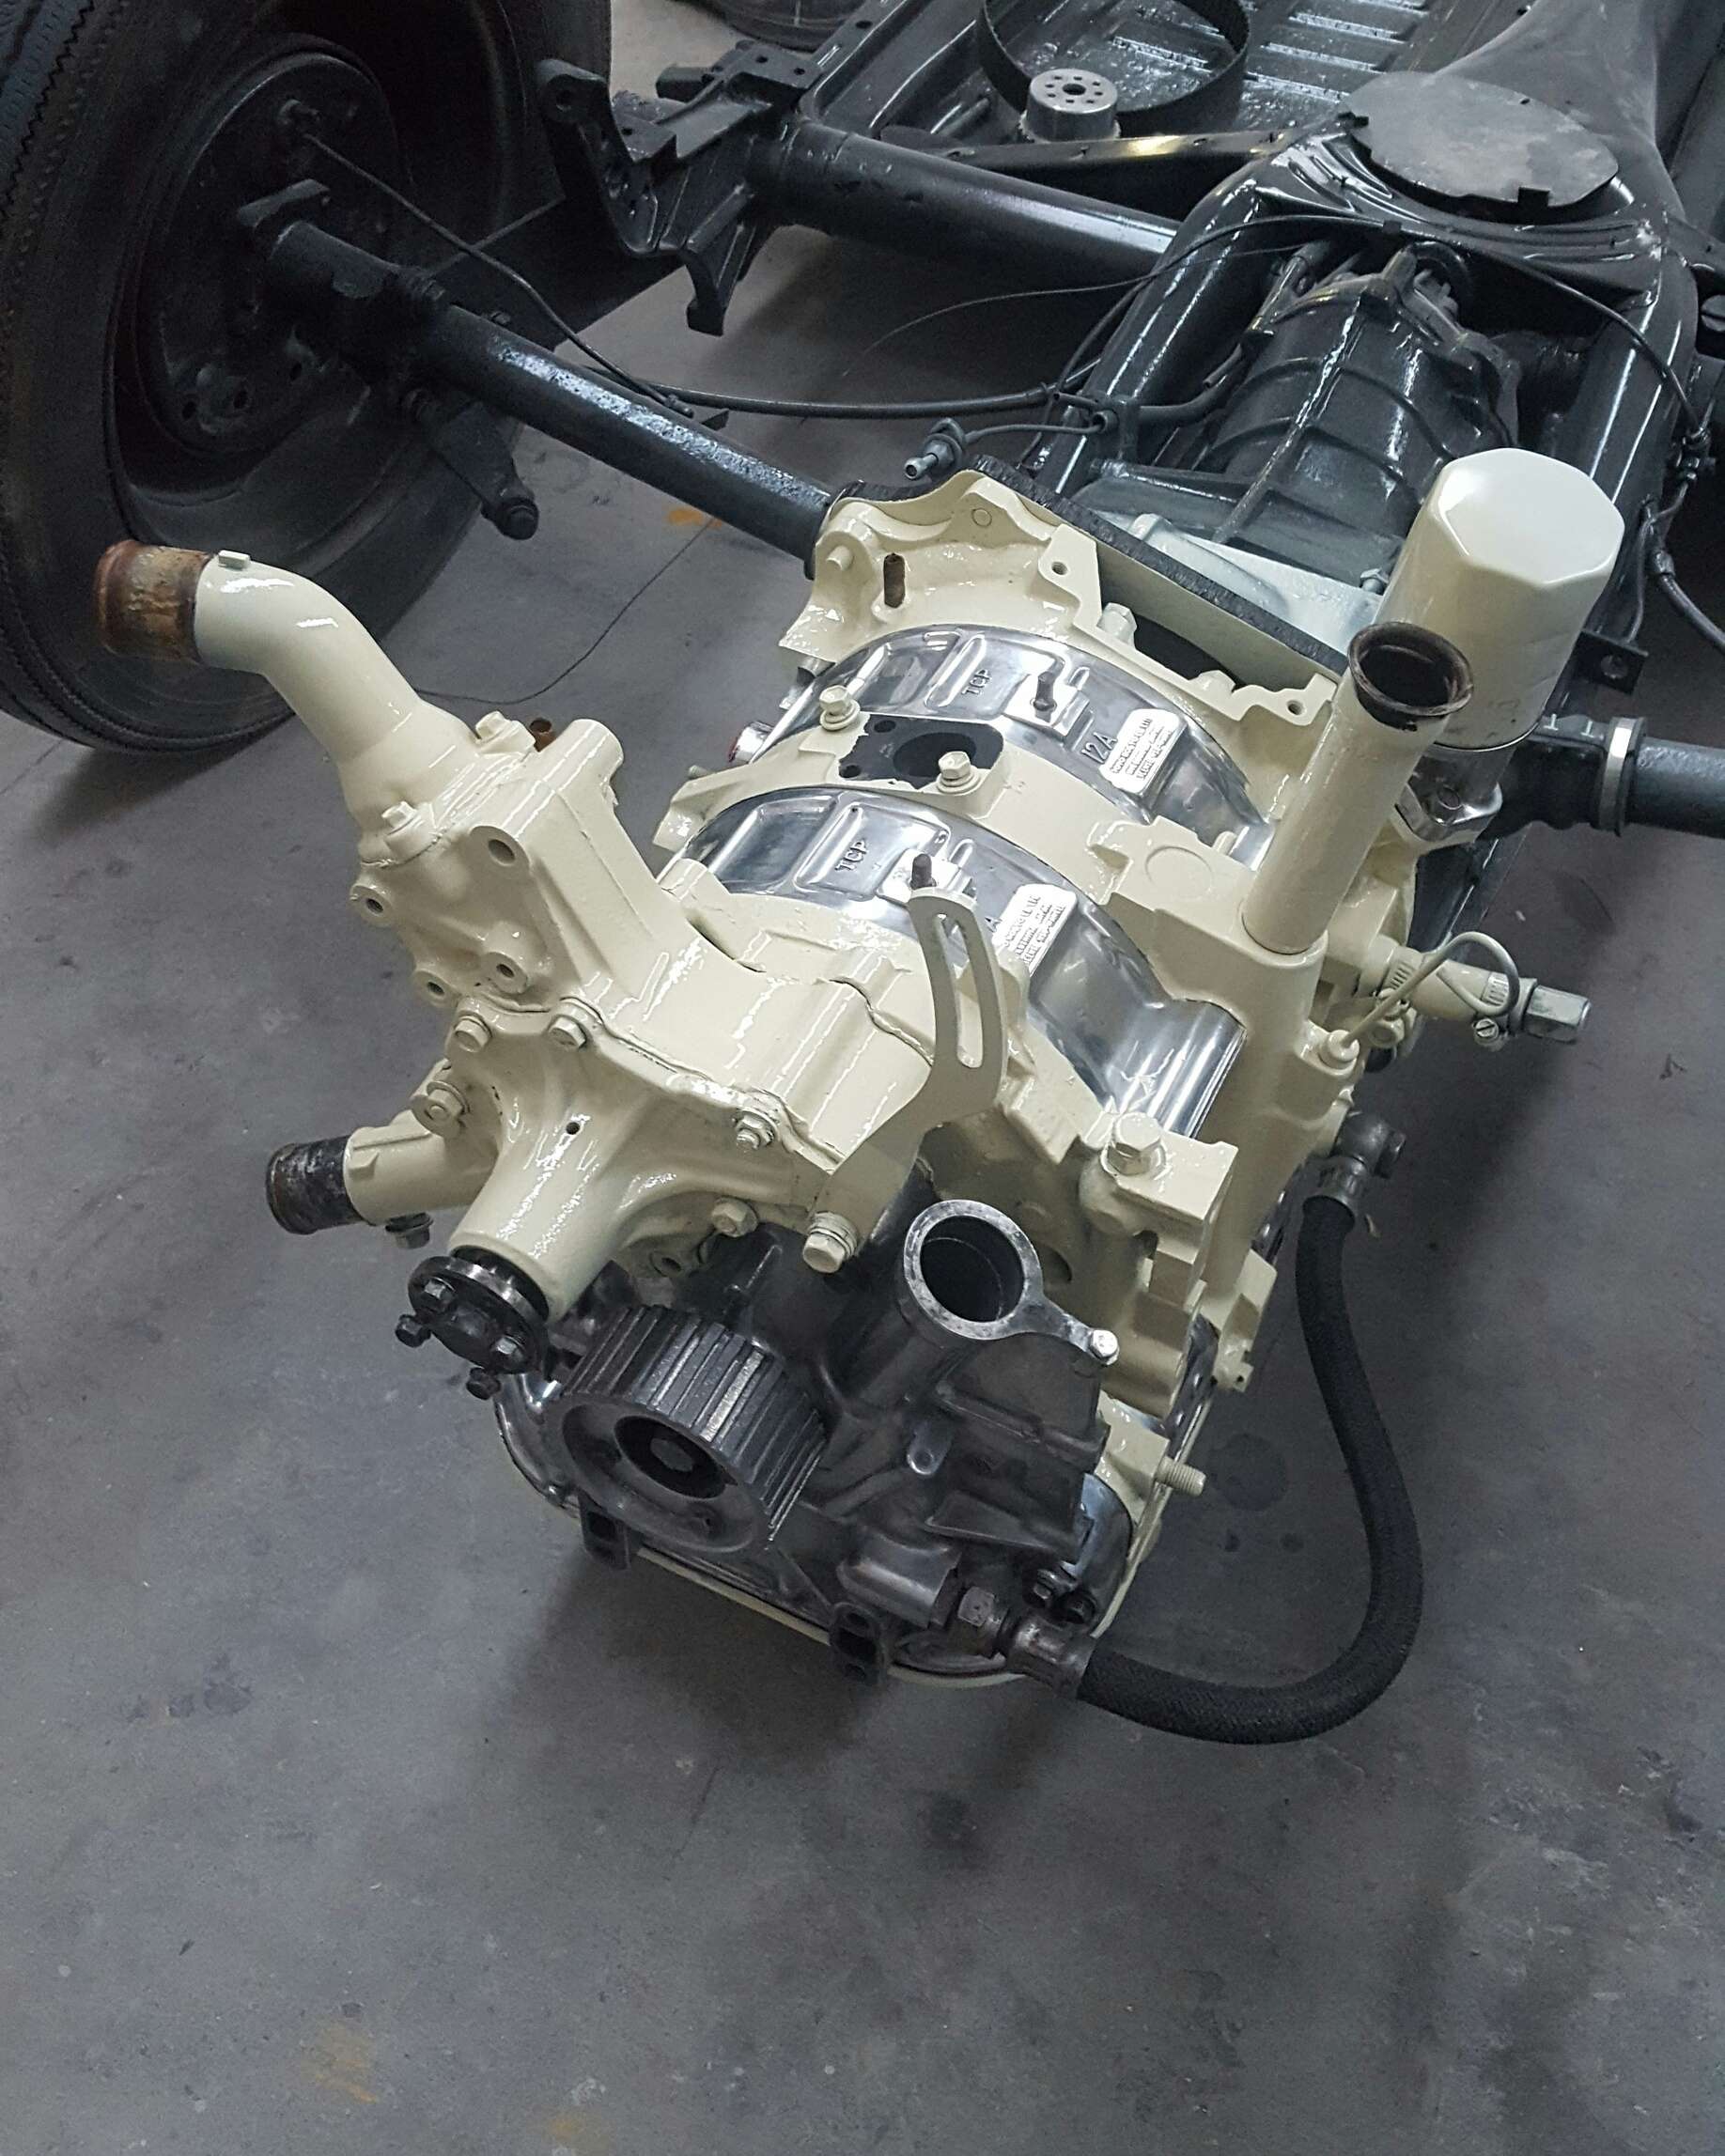
Not been on here much at all for a few months, mostly cos an unnamed mod changed one of my posts to make me look like even more of a cunt than I actually am without indicating that they had done so, this gave me a complete sense of humour failure so I lost quite a lot of interest. I guess I am over it now but we will see how things go.... Anyway I have been up to a bit of stuff in the absent months, I will let the pics mostly do the talking. Cost 3x boxes of beer White dust is from fingerprinting, was stolen and recovered.. Fitted pretty nice with minimal sheetmetal cutting Engine is seized, need to find another, but will use this to set up the mounts. Made a removable subframe for the rear and mid body mounts Later model safari steering box, this might be a sticking point but i have a plan that has been agreed with the cert man in principle. The box is rotated forward from the original position, the tie rod position is exactly the same though Front body mounts and steering box mount are all tied in. I have a design for this in CAD which looks pretty good. Fitted the Safari clutch booster in there with relative ease Engine is just propped there, I have moved it back 570mm to help with weight distribution/radiator clearance/etc. It also means I can use a SWB rear driveshaft. Gear linkage might be fun, although apparently the gearbox in a Condor/Atlas with the FD42 has the same box housing, the top plate and gearshift mech should respectively bolt on/be able to be modded to fit. Took it to a weighbridge to check axle loadings, 1755kg all up, 1130kg on the front. Axle ratings are 1500kg front and 1800 rear so should be good to go. The weighbridge was reading 65kg heavier by the time we were done so this is probably worst case. GVM of the Safari was 2505kg, so will be racecar. There is a lot to do yet, as I said the engine is seized so need to find another + turbo to put on it. Build the front cab mount and steering mount, engine and gearbox mounts Need to think how to build the front driveshaft, probably a shorty shaft to a frame mounted carrier, then use the standard front axle. Need to find FD42 gearbox linkage Probably needs new tyres and at least one more rim for a spare Need adjustable panhards and adjustable rear lower trailing arms to get the axles in a better position. It had a 2" lift that translates to about a 3.5" lift with the current weight, so axles are a bit off to one side and the rear will need rotating so the driveshaft flanges are parallel. Need to airbag the rear for load leveling. Need to convert the AC pump to continuous air for the airbags and whatever else Will need to build a deck with big ass drawers underneath for my tools. Will probably will have a budget hoist of some variety, maybe just an arm with a chain block. Electrical will be a nightmare as the cab is 12v and the chassis is 24v, need to talk to an auto sparky to discuss my ideas. Still need to 100% make sure that my cert guy will be able to take it on, there is no one in Nelson with 1D unfortunately. Piece of piss really.16 points
-
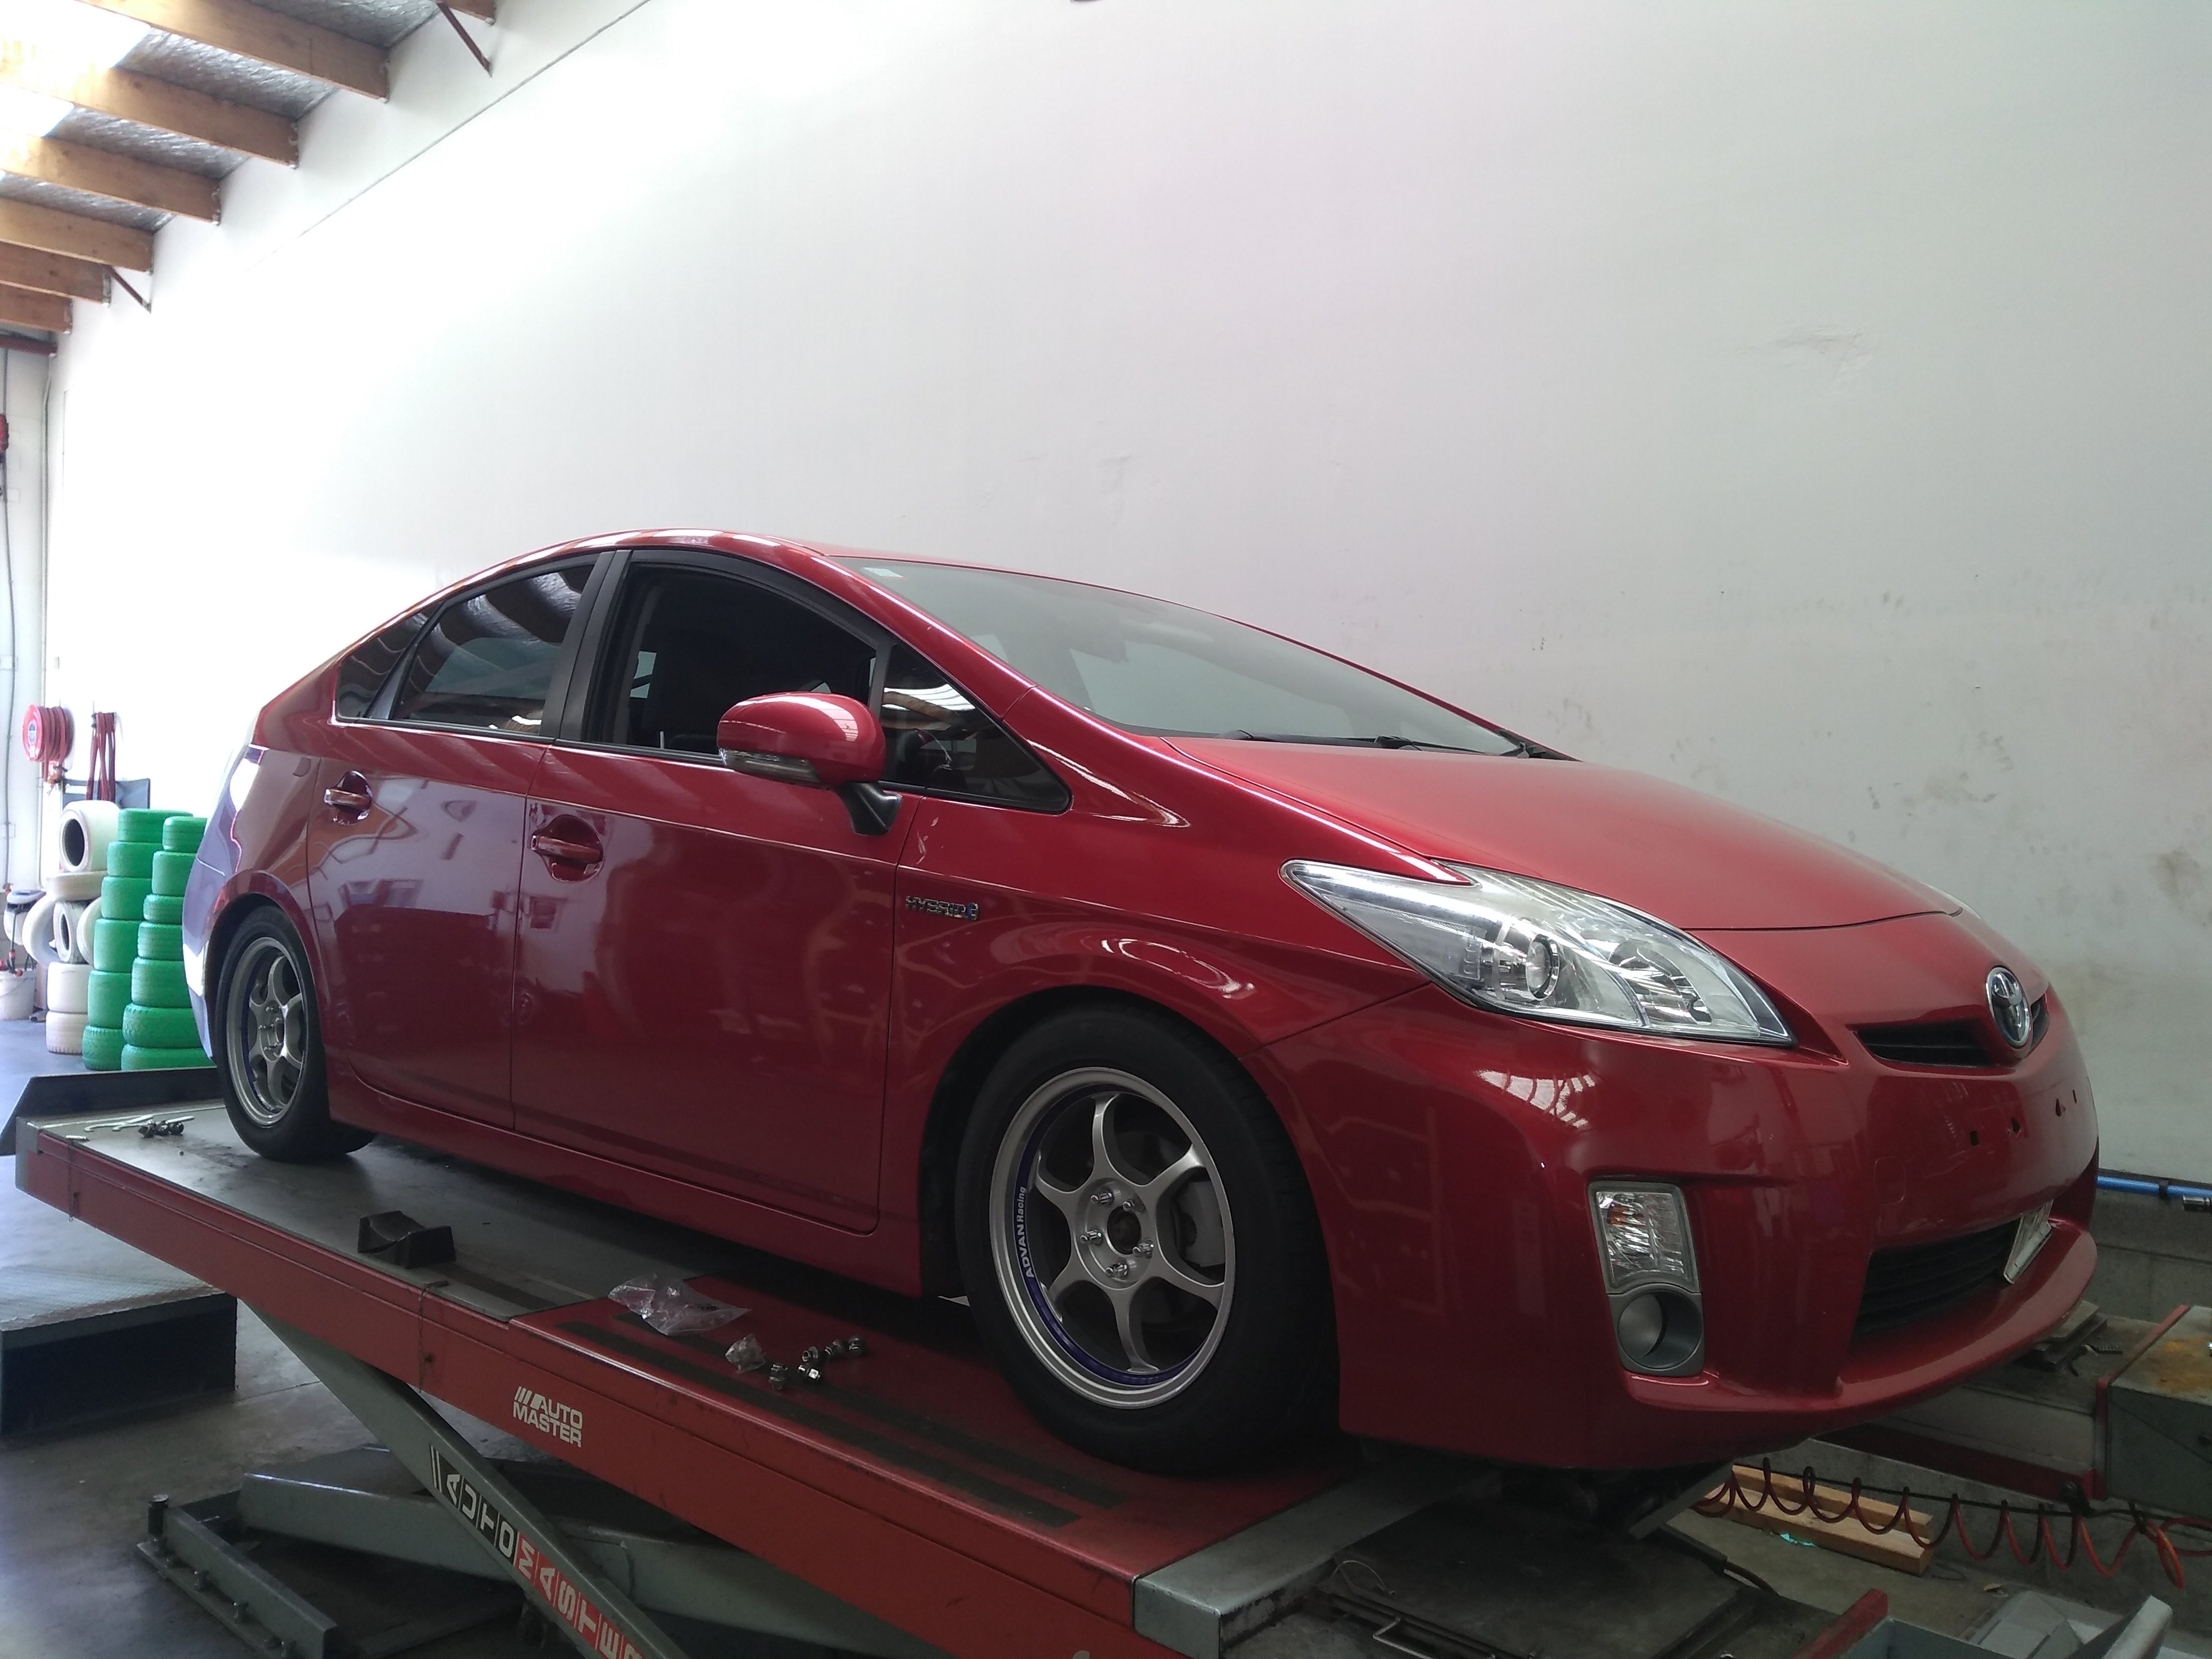
Turd polished. Now to start preparing for Wagnats. edit - oops - somehow I deleted my previous post.
 16 points
 -
Wof'ed up! Wagnats time. Pretty sure somethings touching something so there are some/many vibes but yeah, wagnats.
8 points
-
Nah m9, 3" or go home If it's unnecessary, you haven't wound the boost up enough.5 points
-
FUCK YEAH!!!!4 points
-
4 points
-
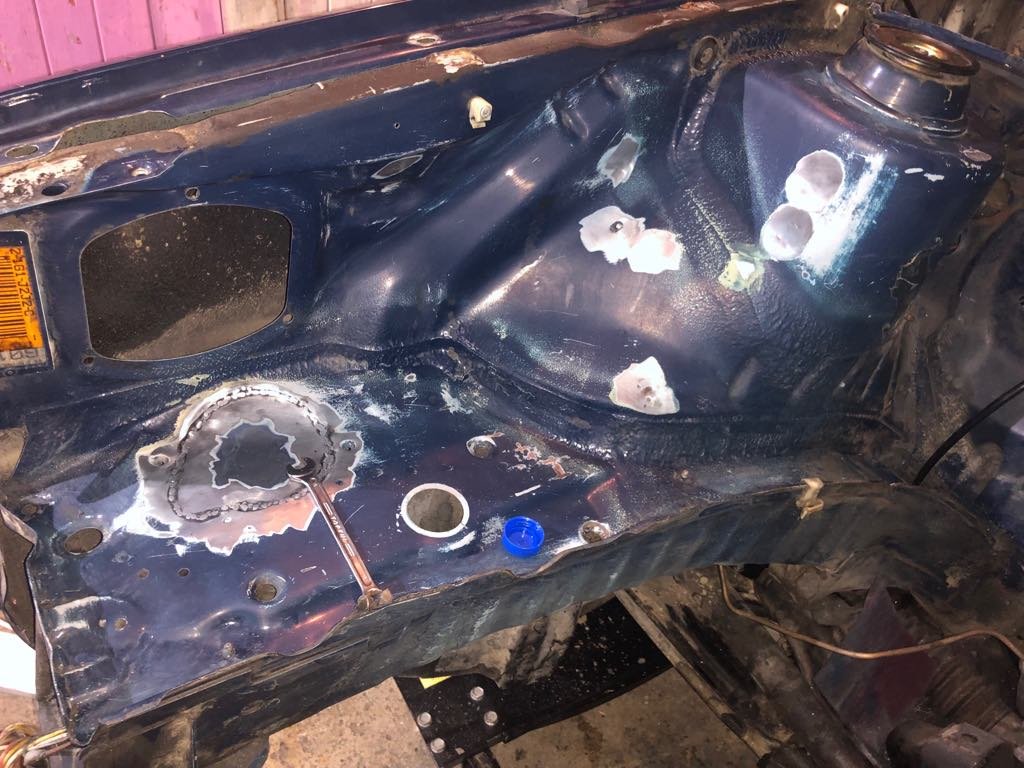
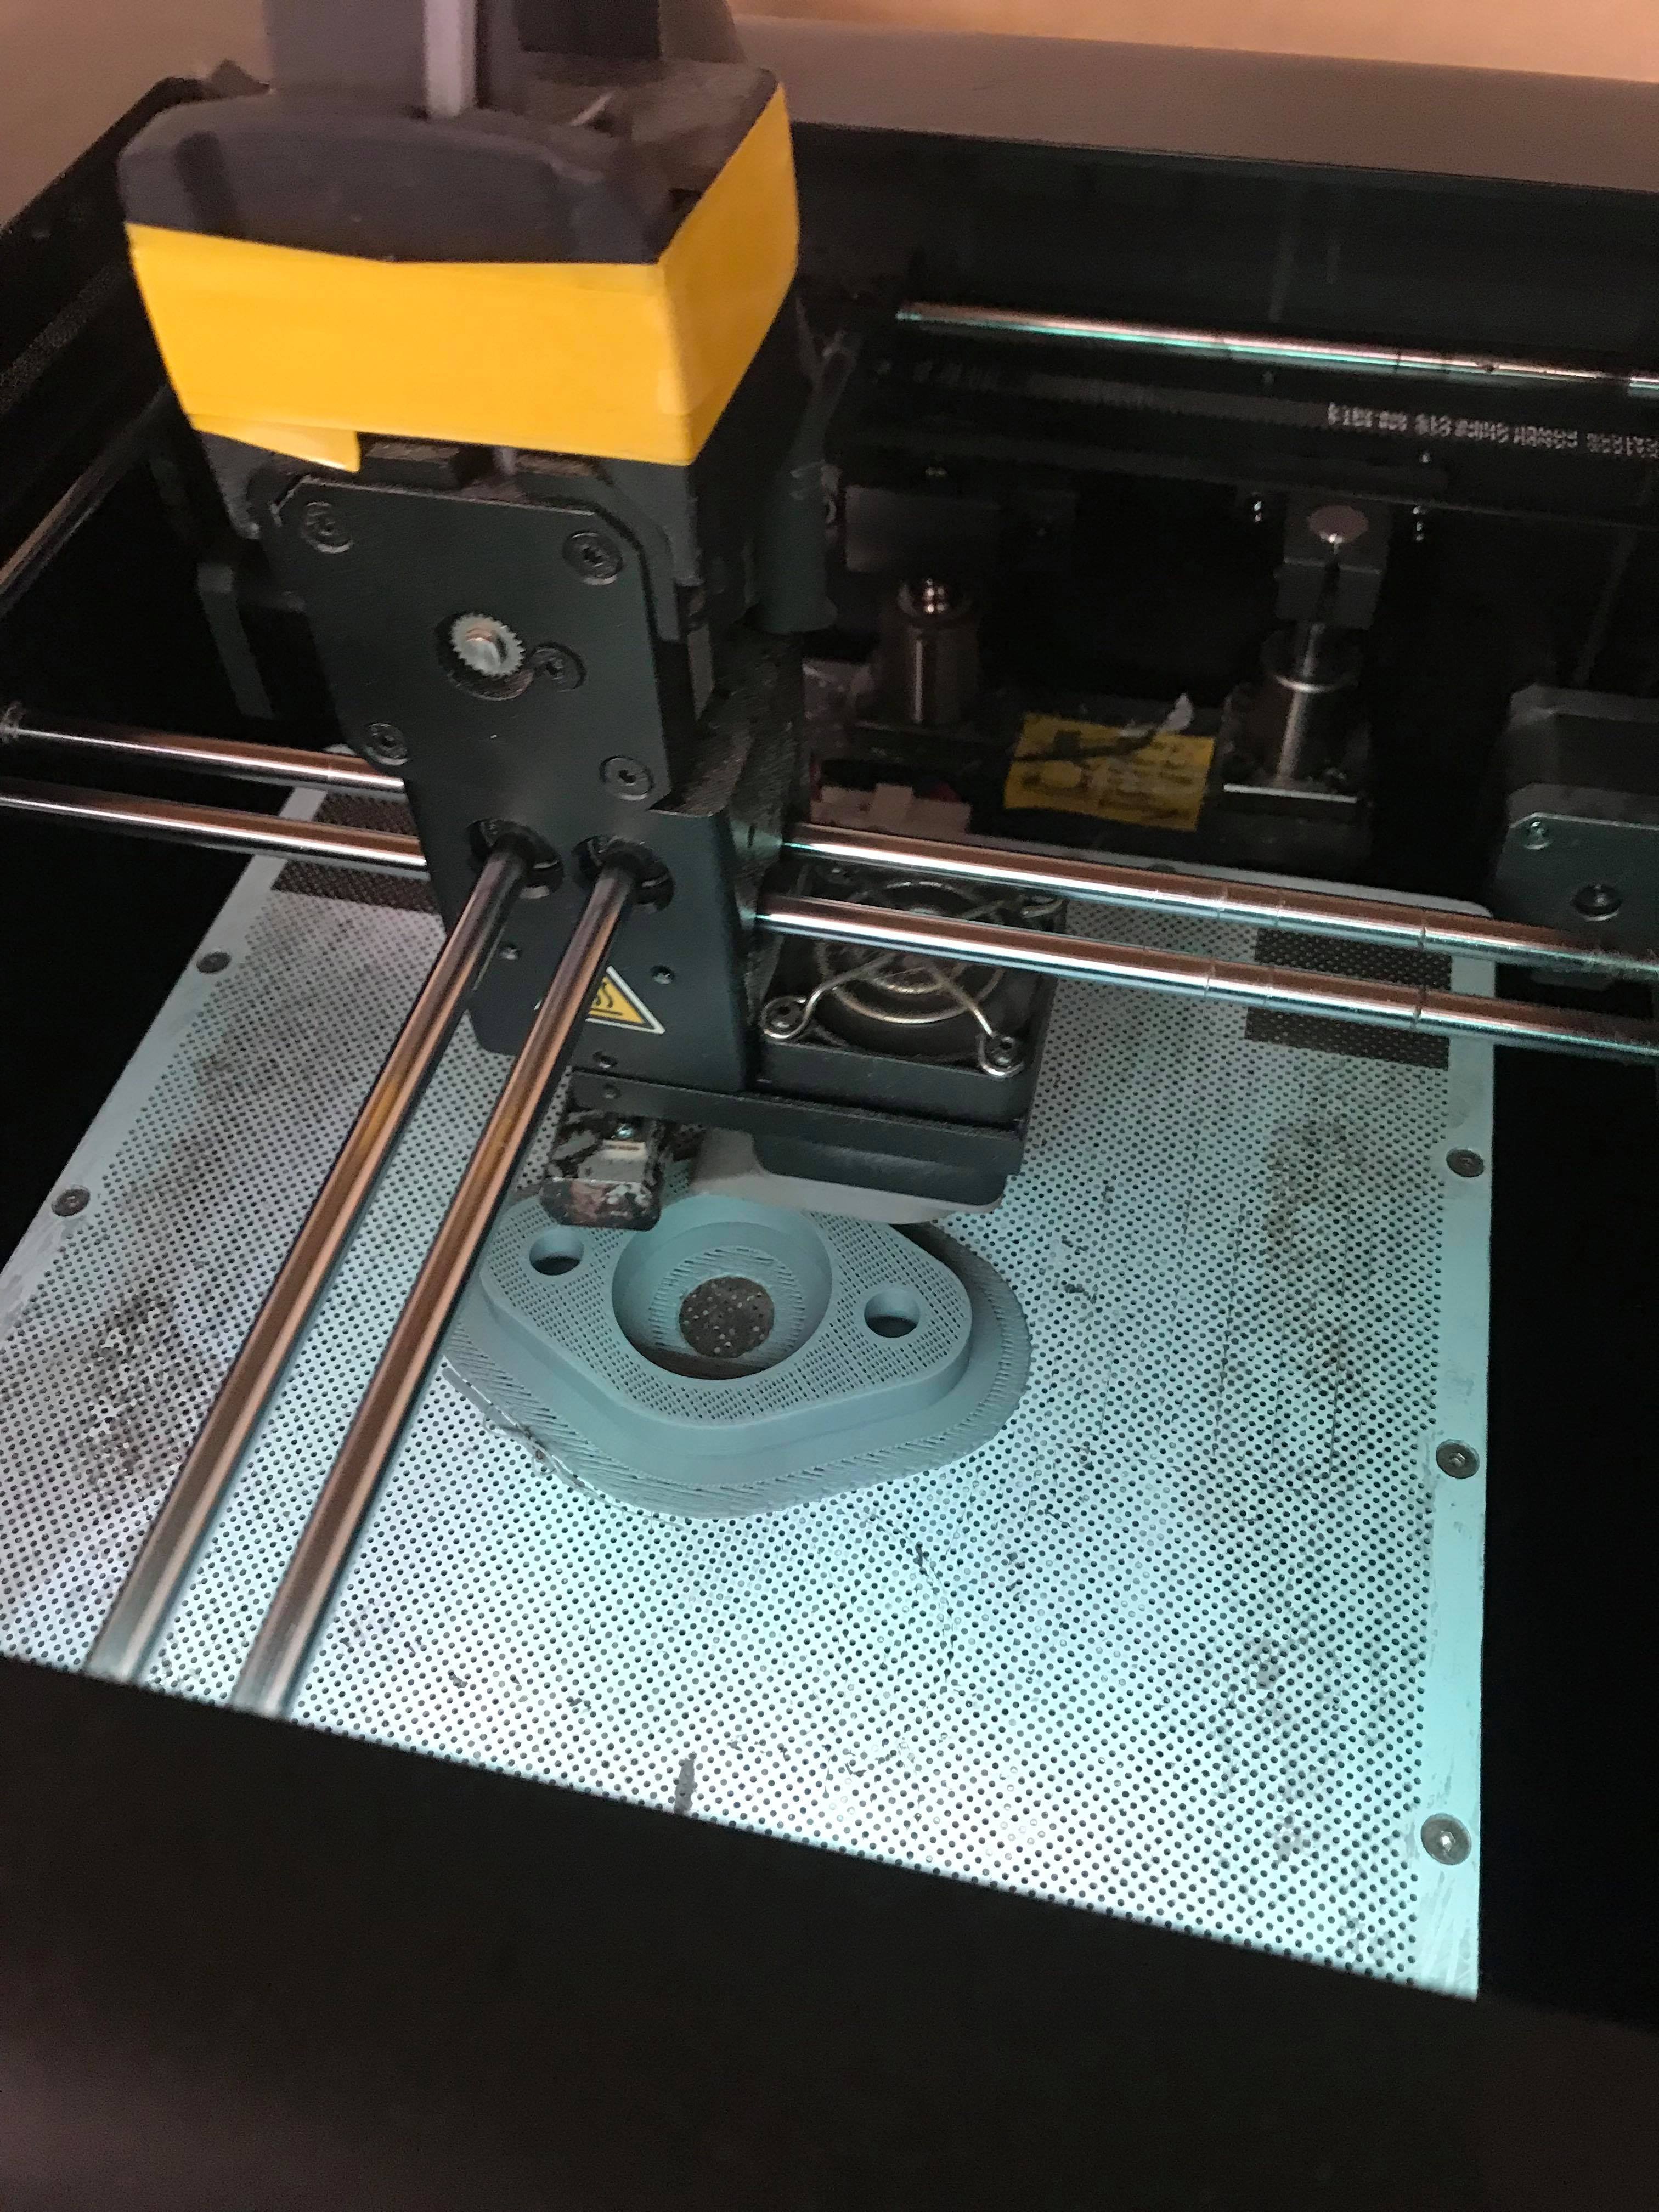
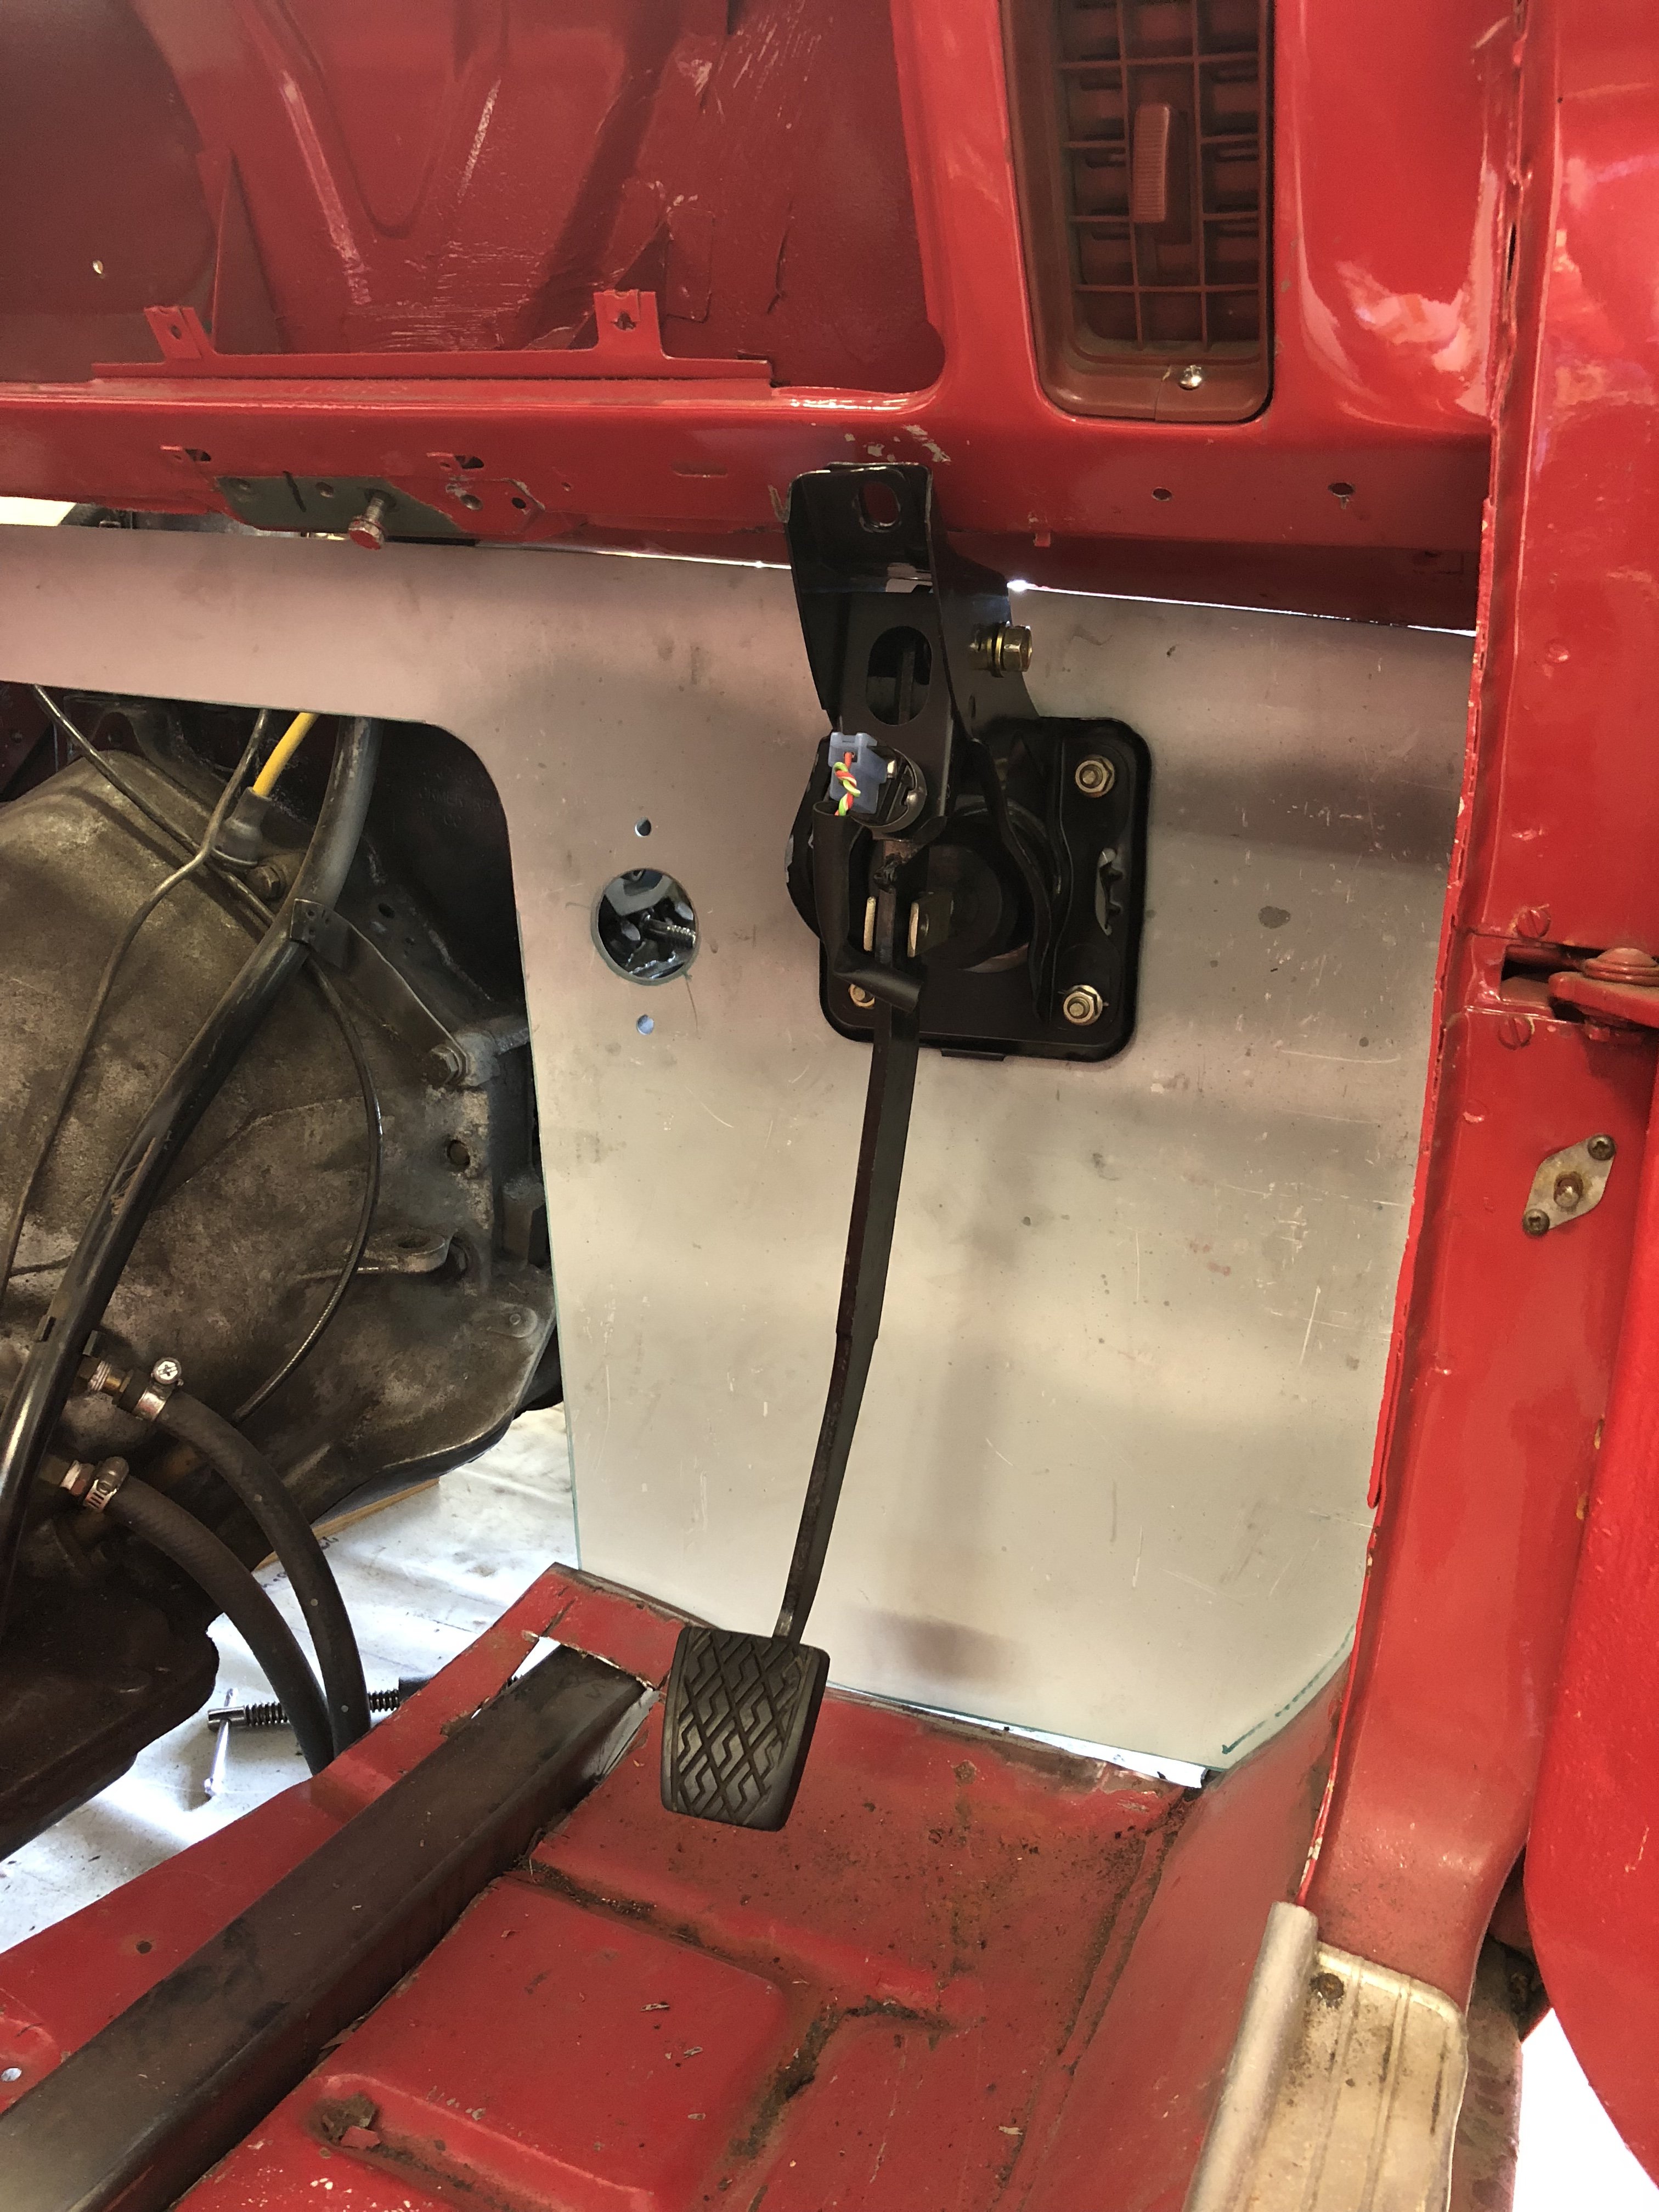
Started retro fitting a Pajero clutch MC to my firewall so we can convert the car to hydro clutch as the new gearbox requires in. 3D printed a spacer to make the distance between the clutch pedal and MC correct Also began filling any unused holes, and bits and pieces that weren't needed. Got to learn to mig weld during this which is something ive not really done before.
4 points
-
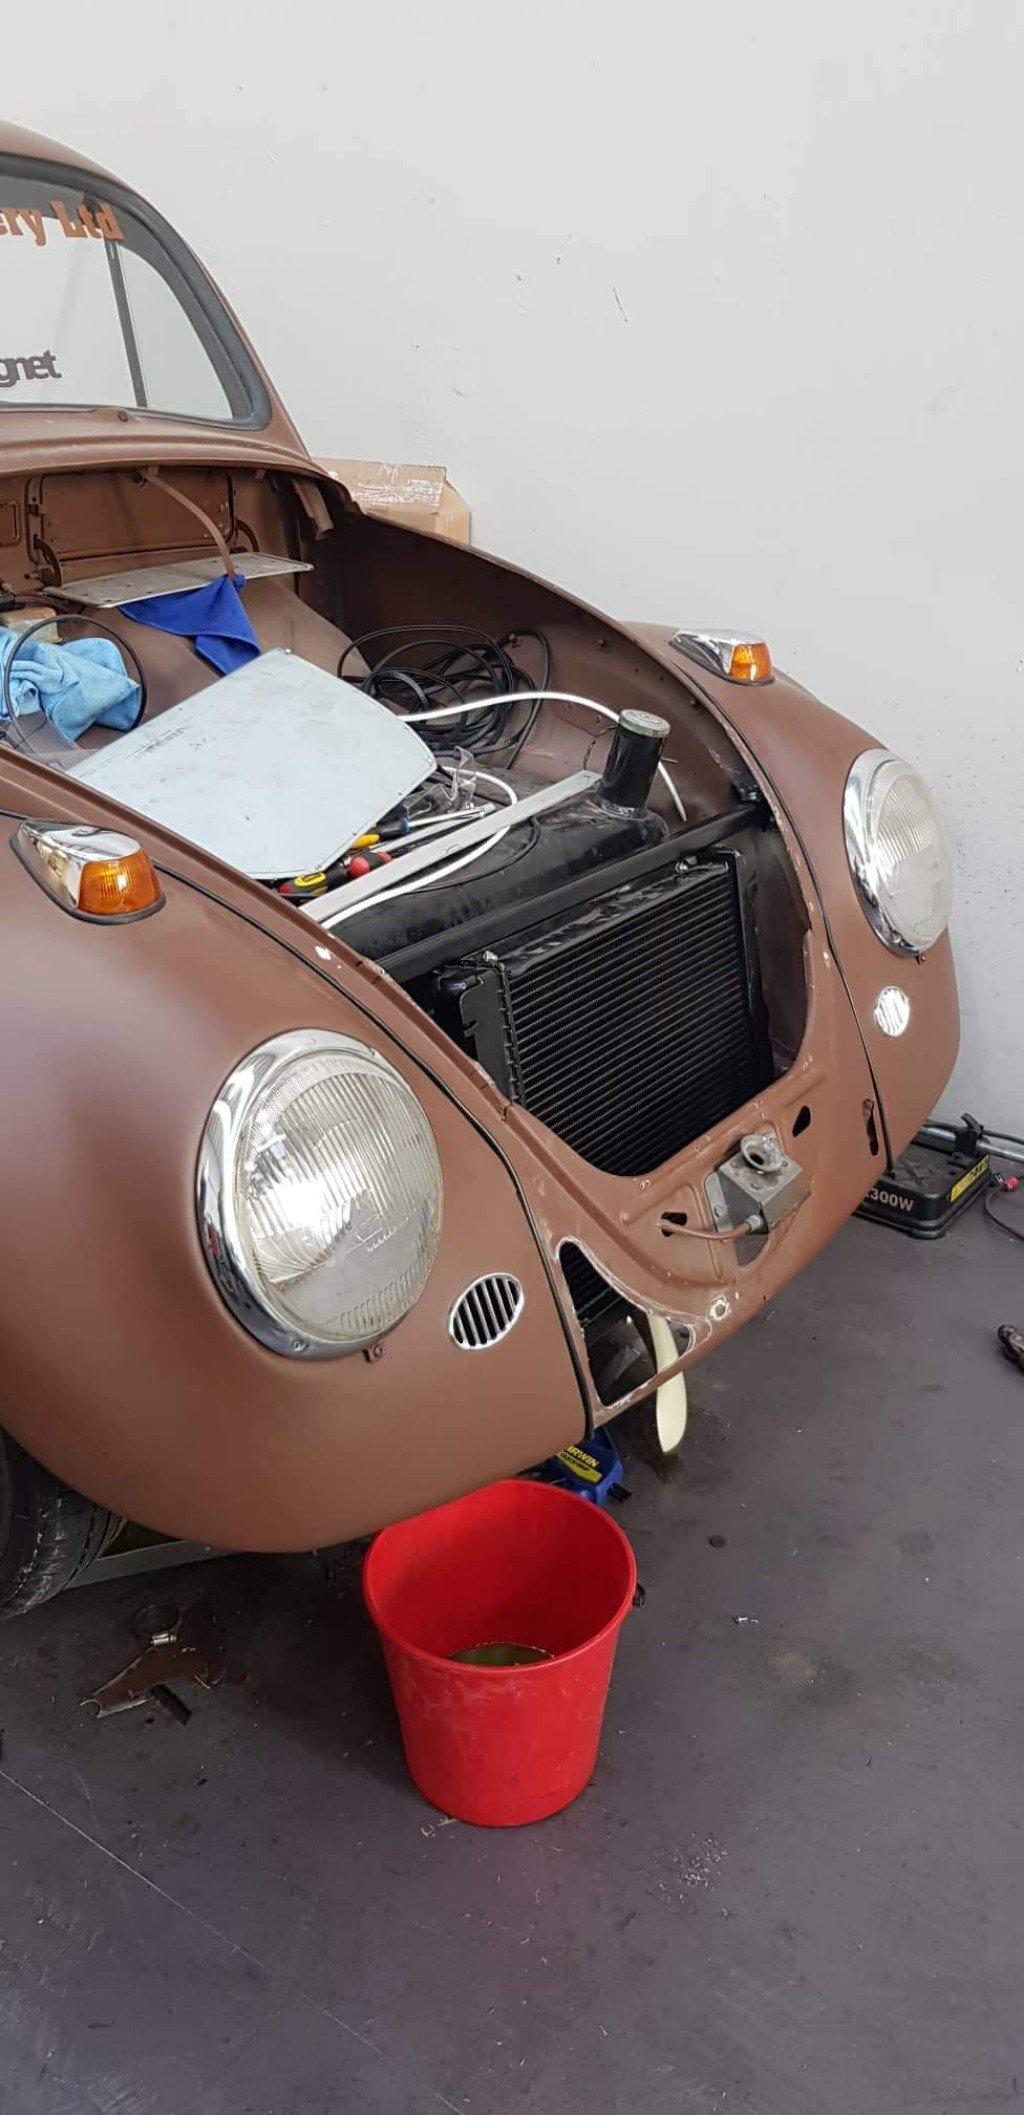
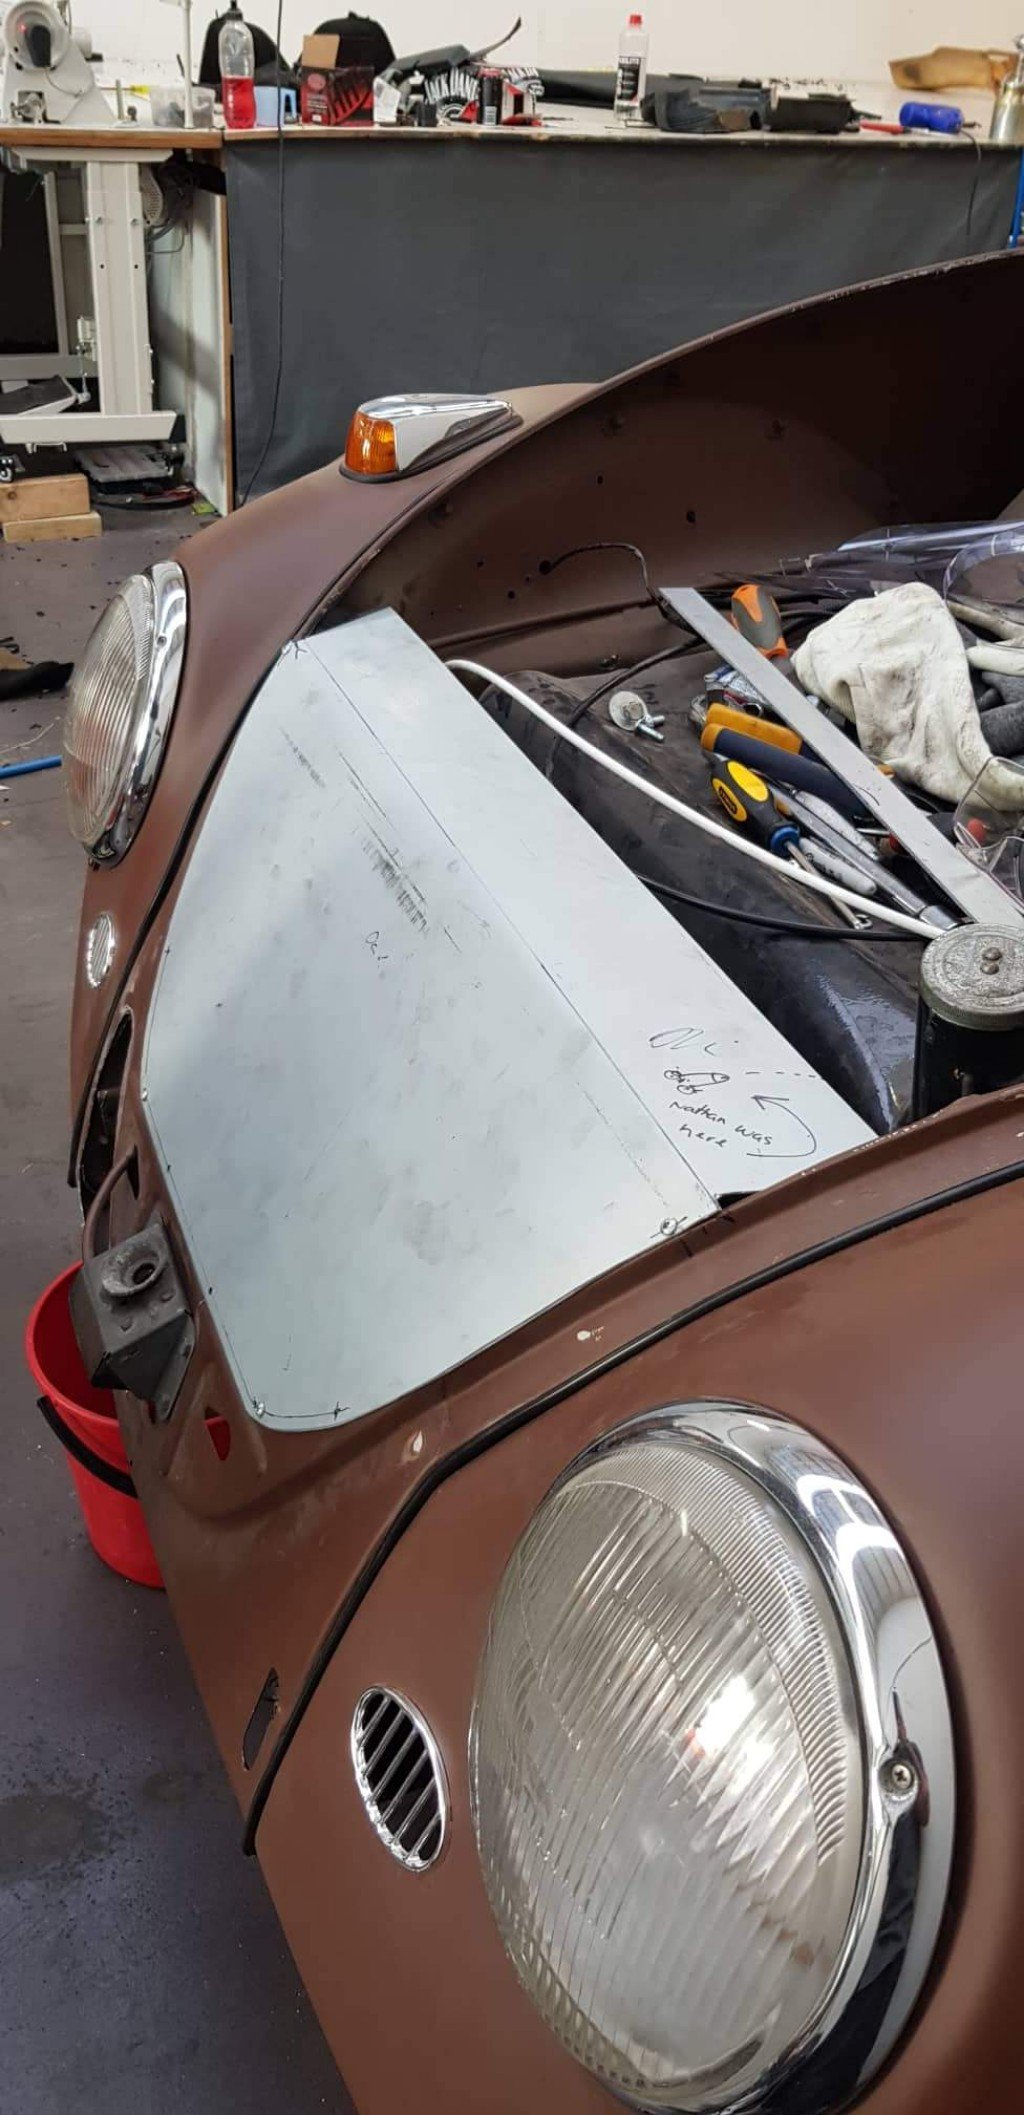
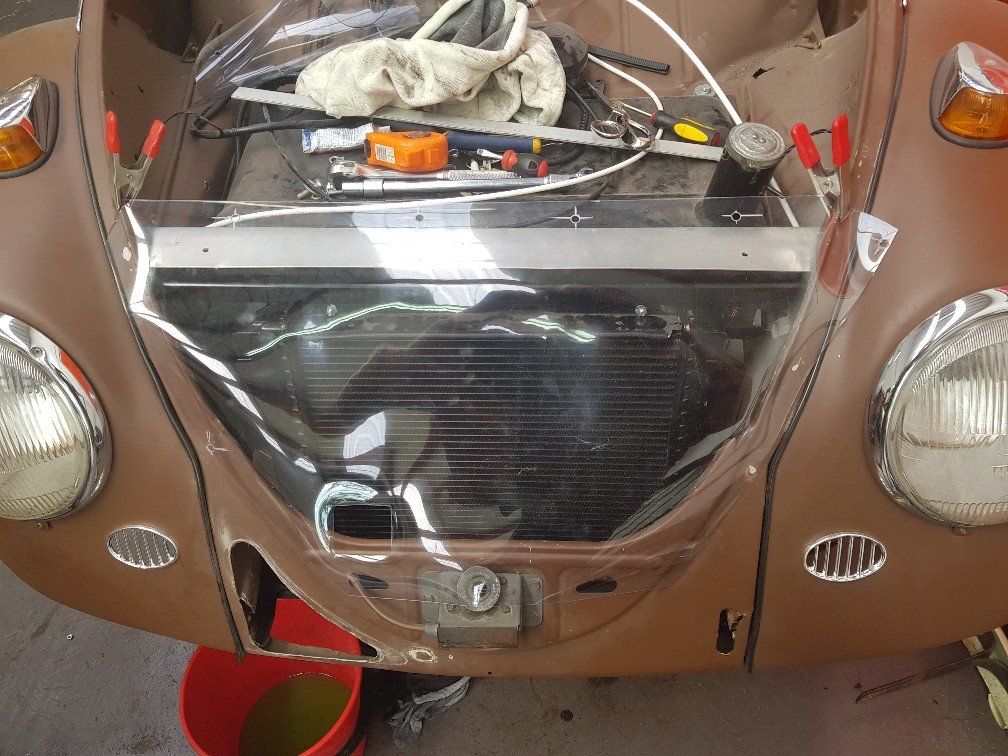
Right so i did around 8 hours of relaxed work on this thing today. Mounted the radiator properly and made a front shround thing. The clear plastic was used for template making. Greg did an epic job of the shrouds fold- he did it with his knee and his jandled foot.
3 points
-
3 points
-
3 points
-
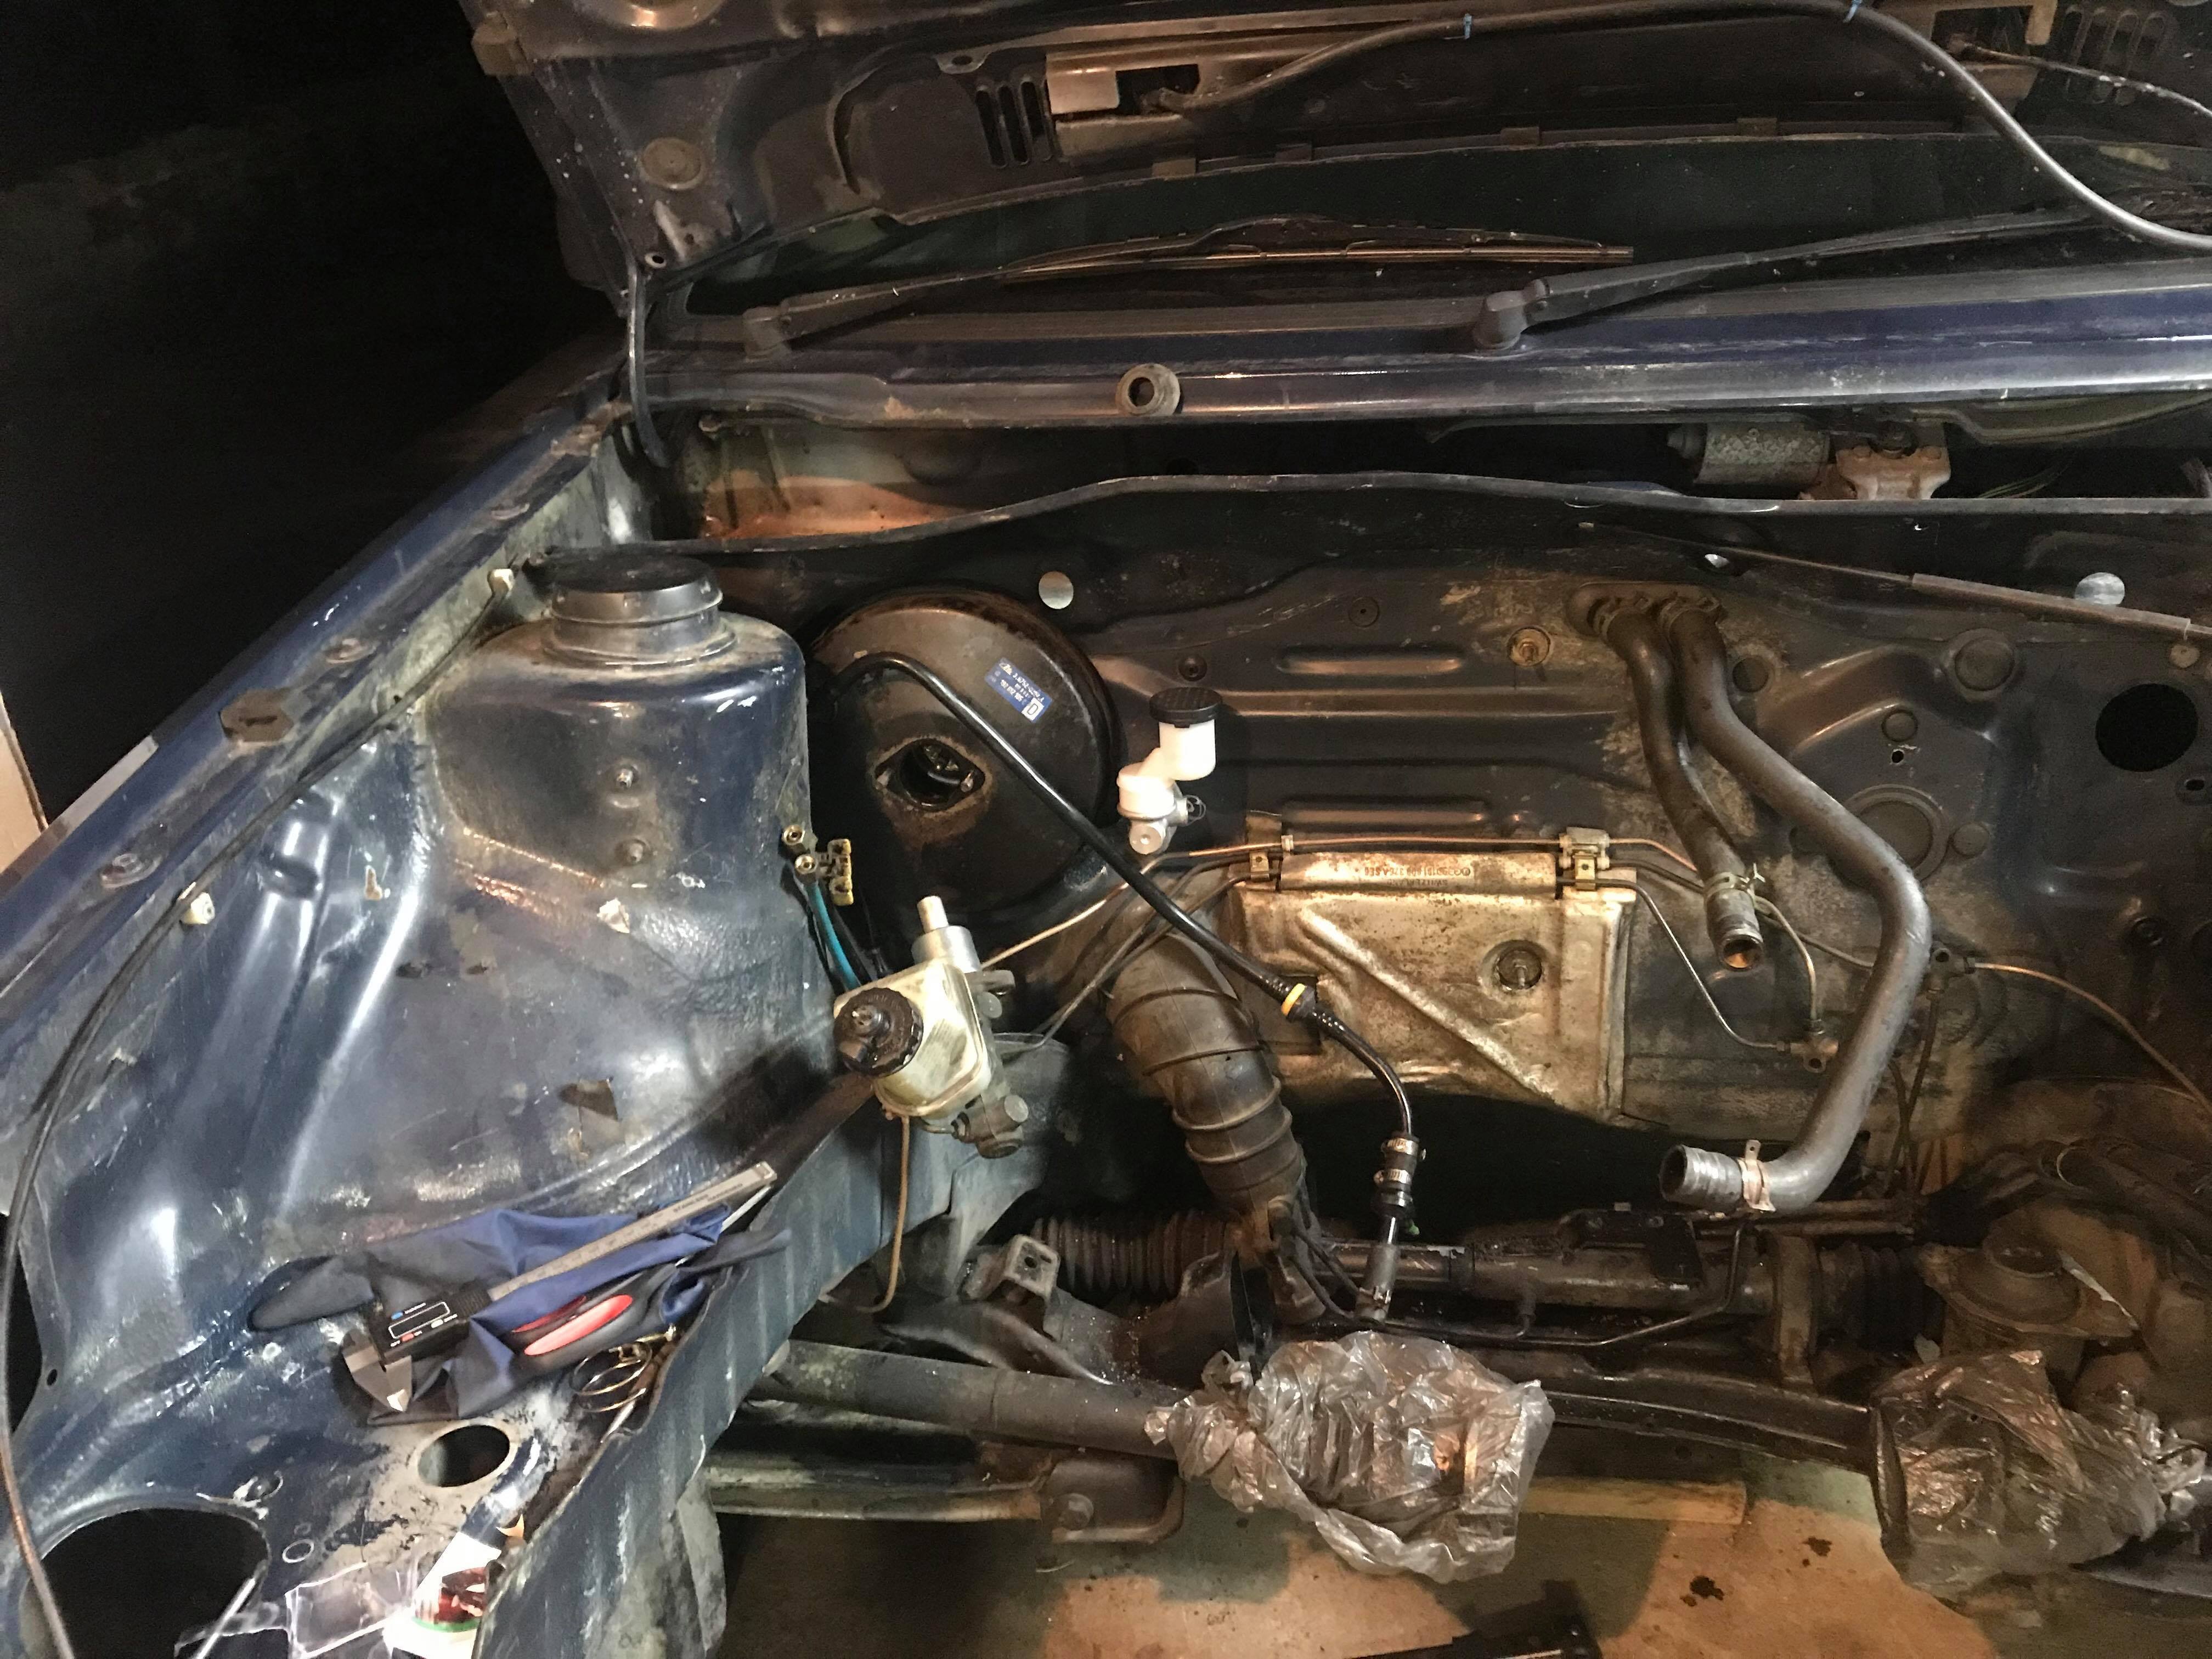
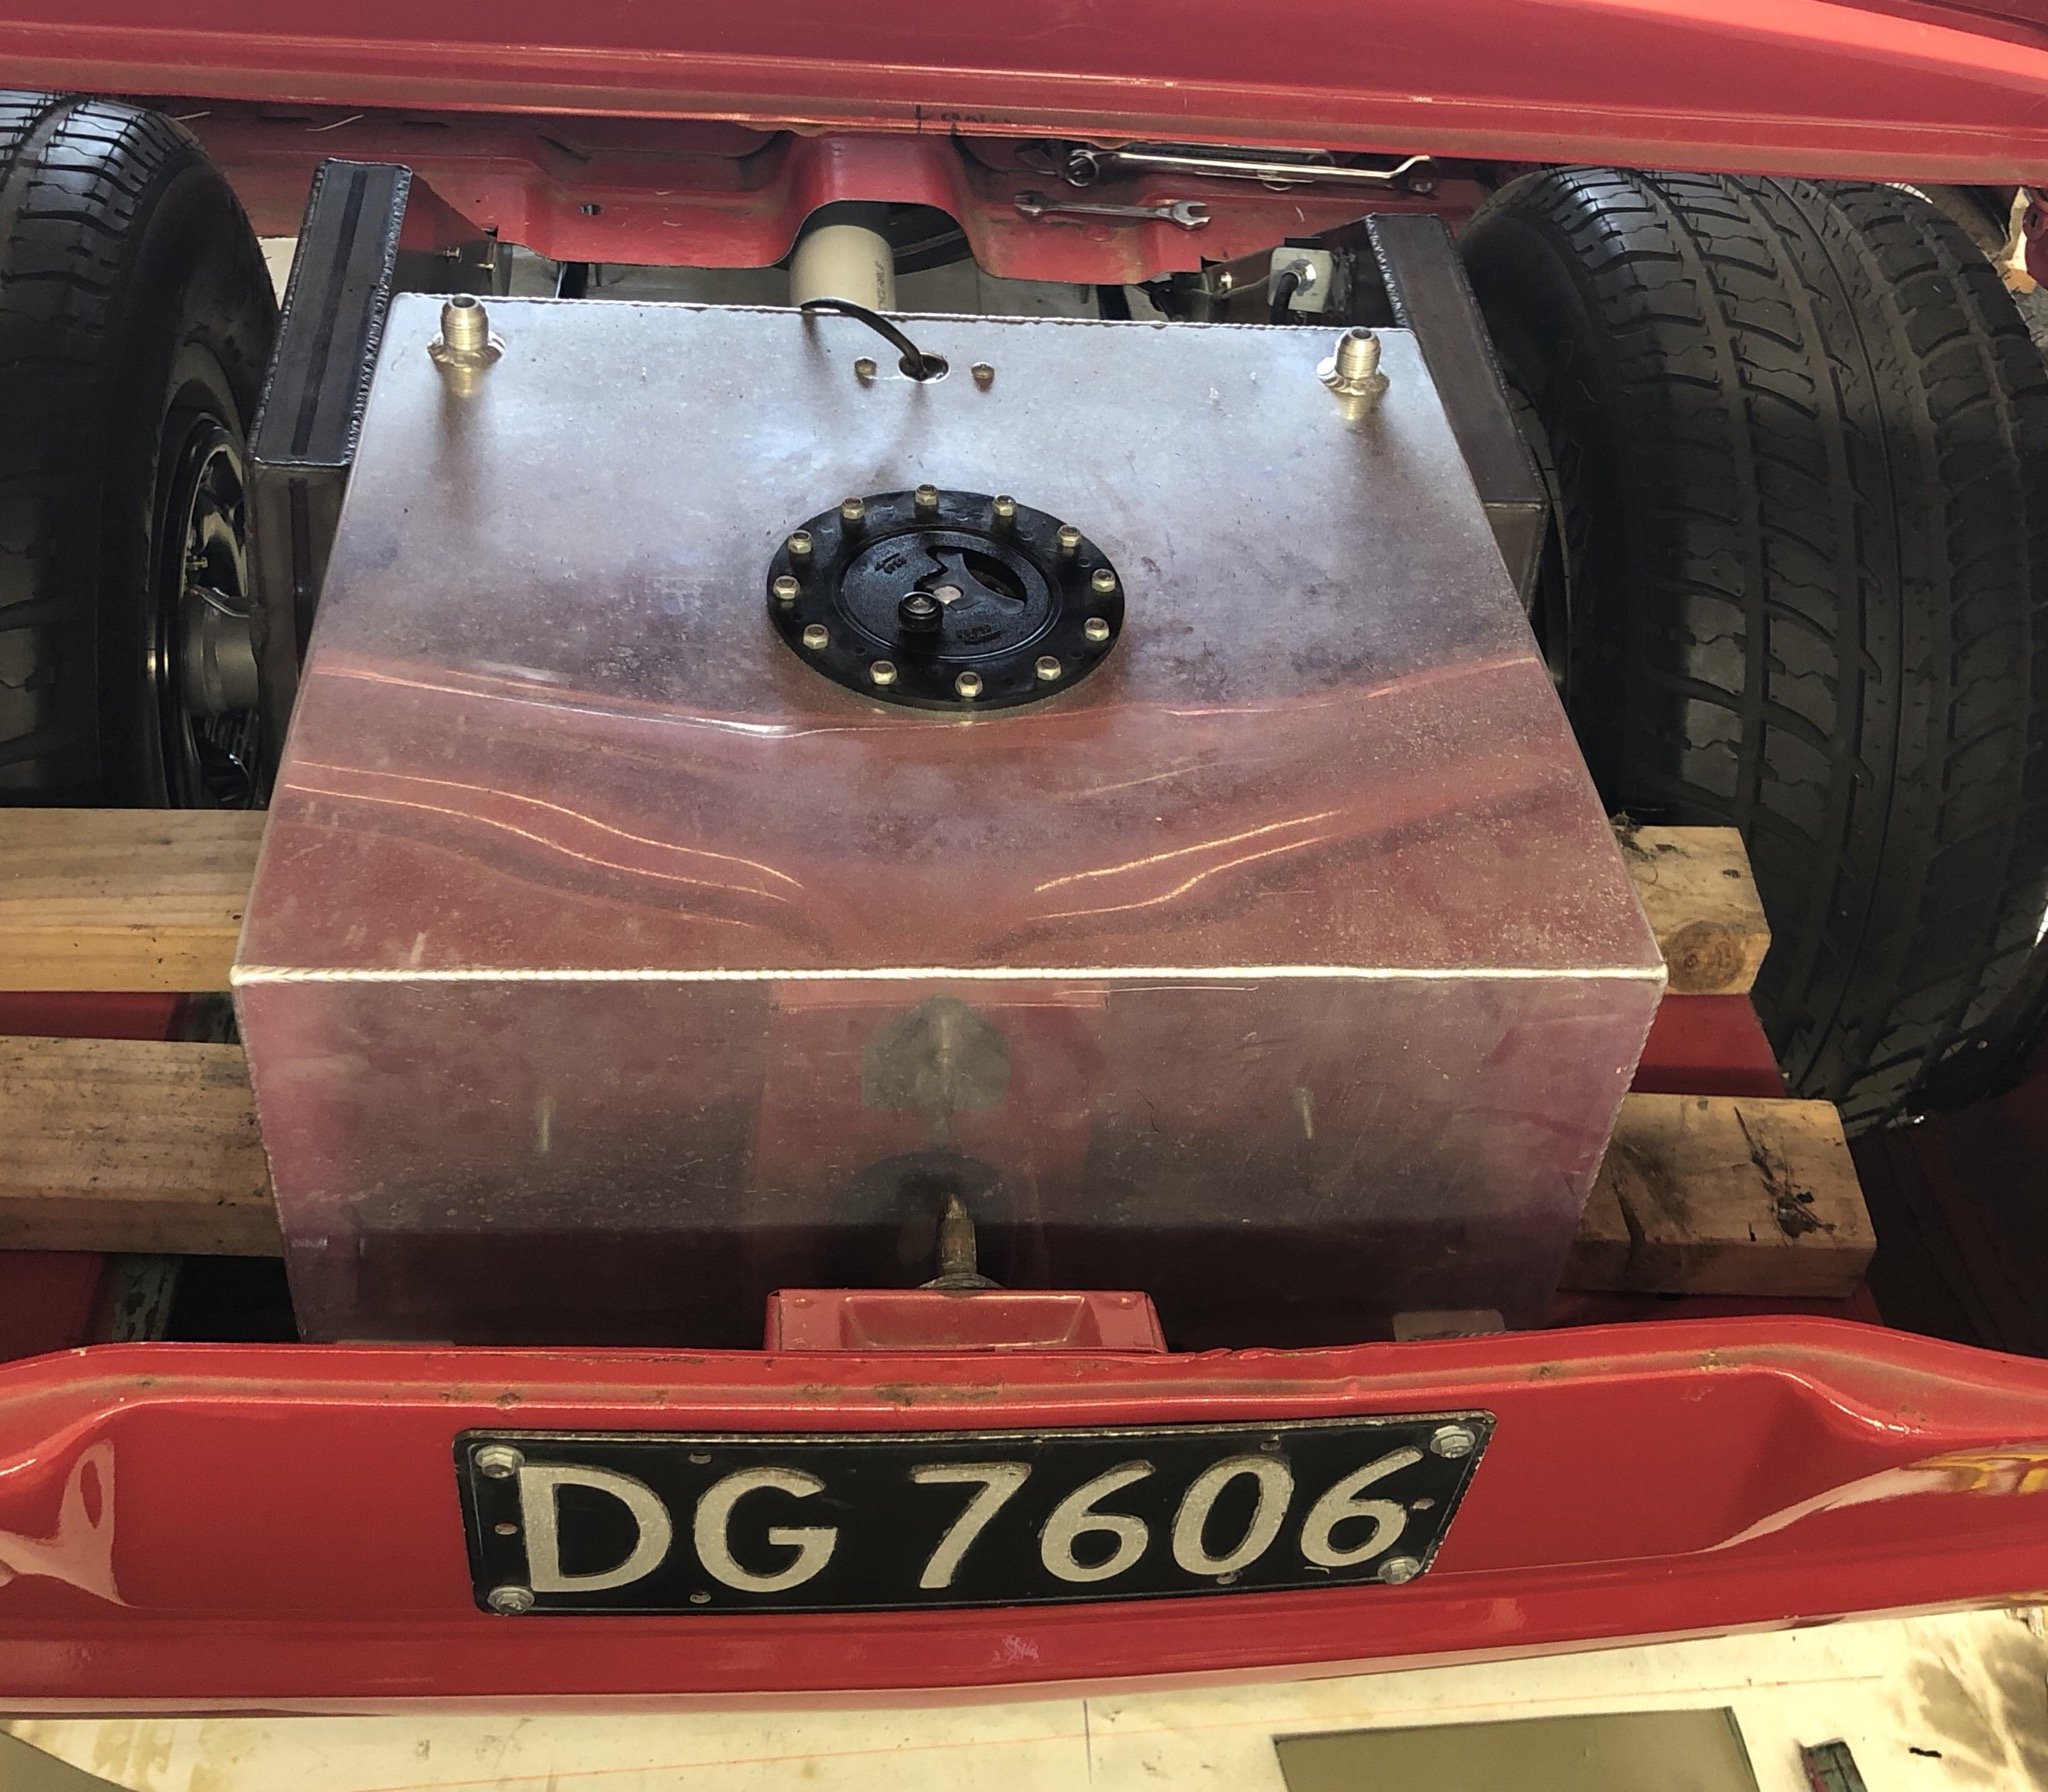
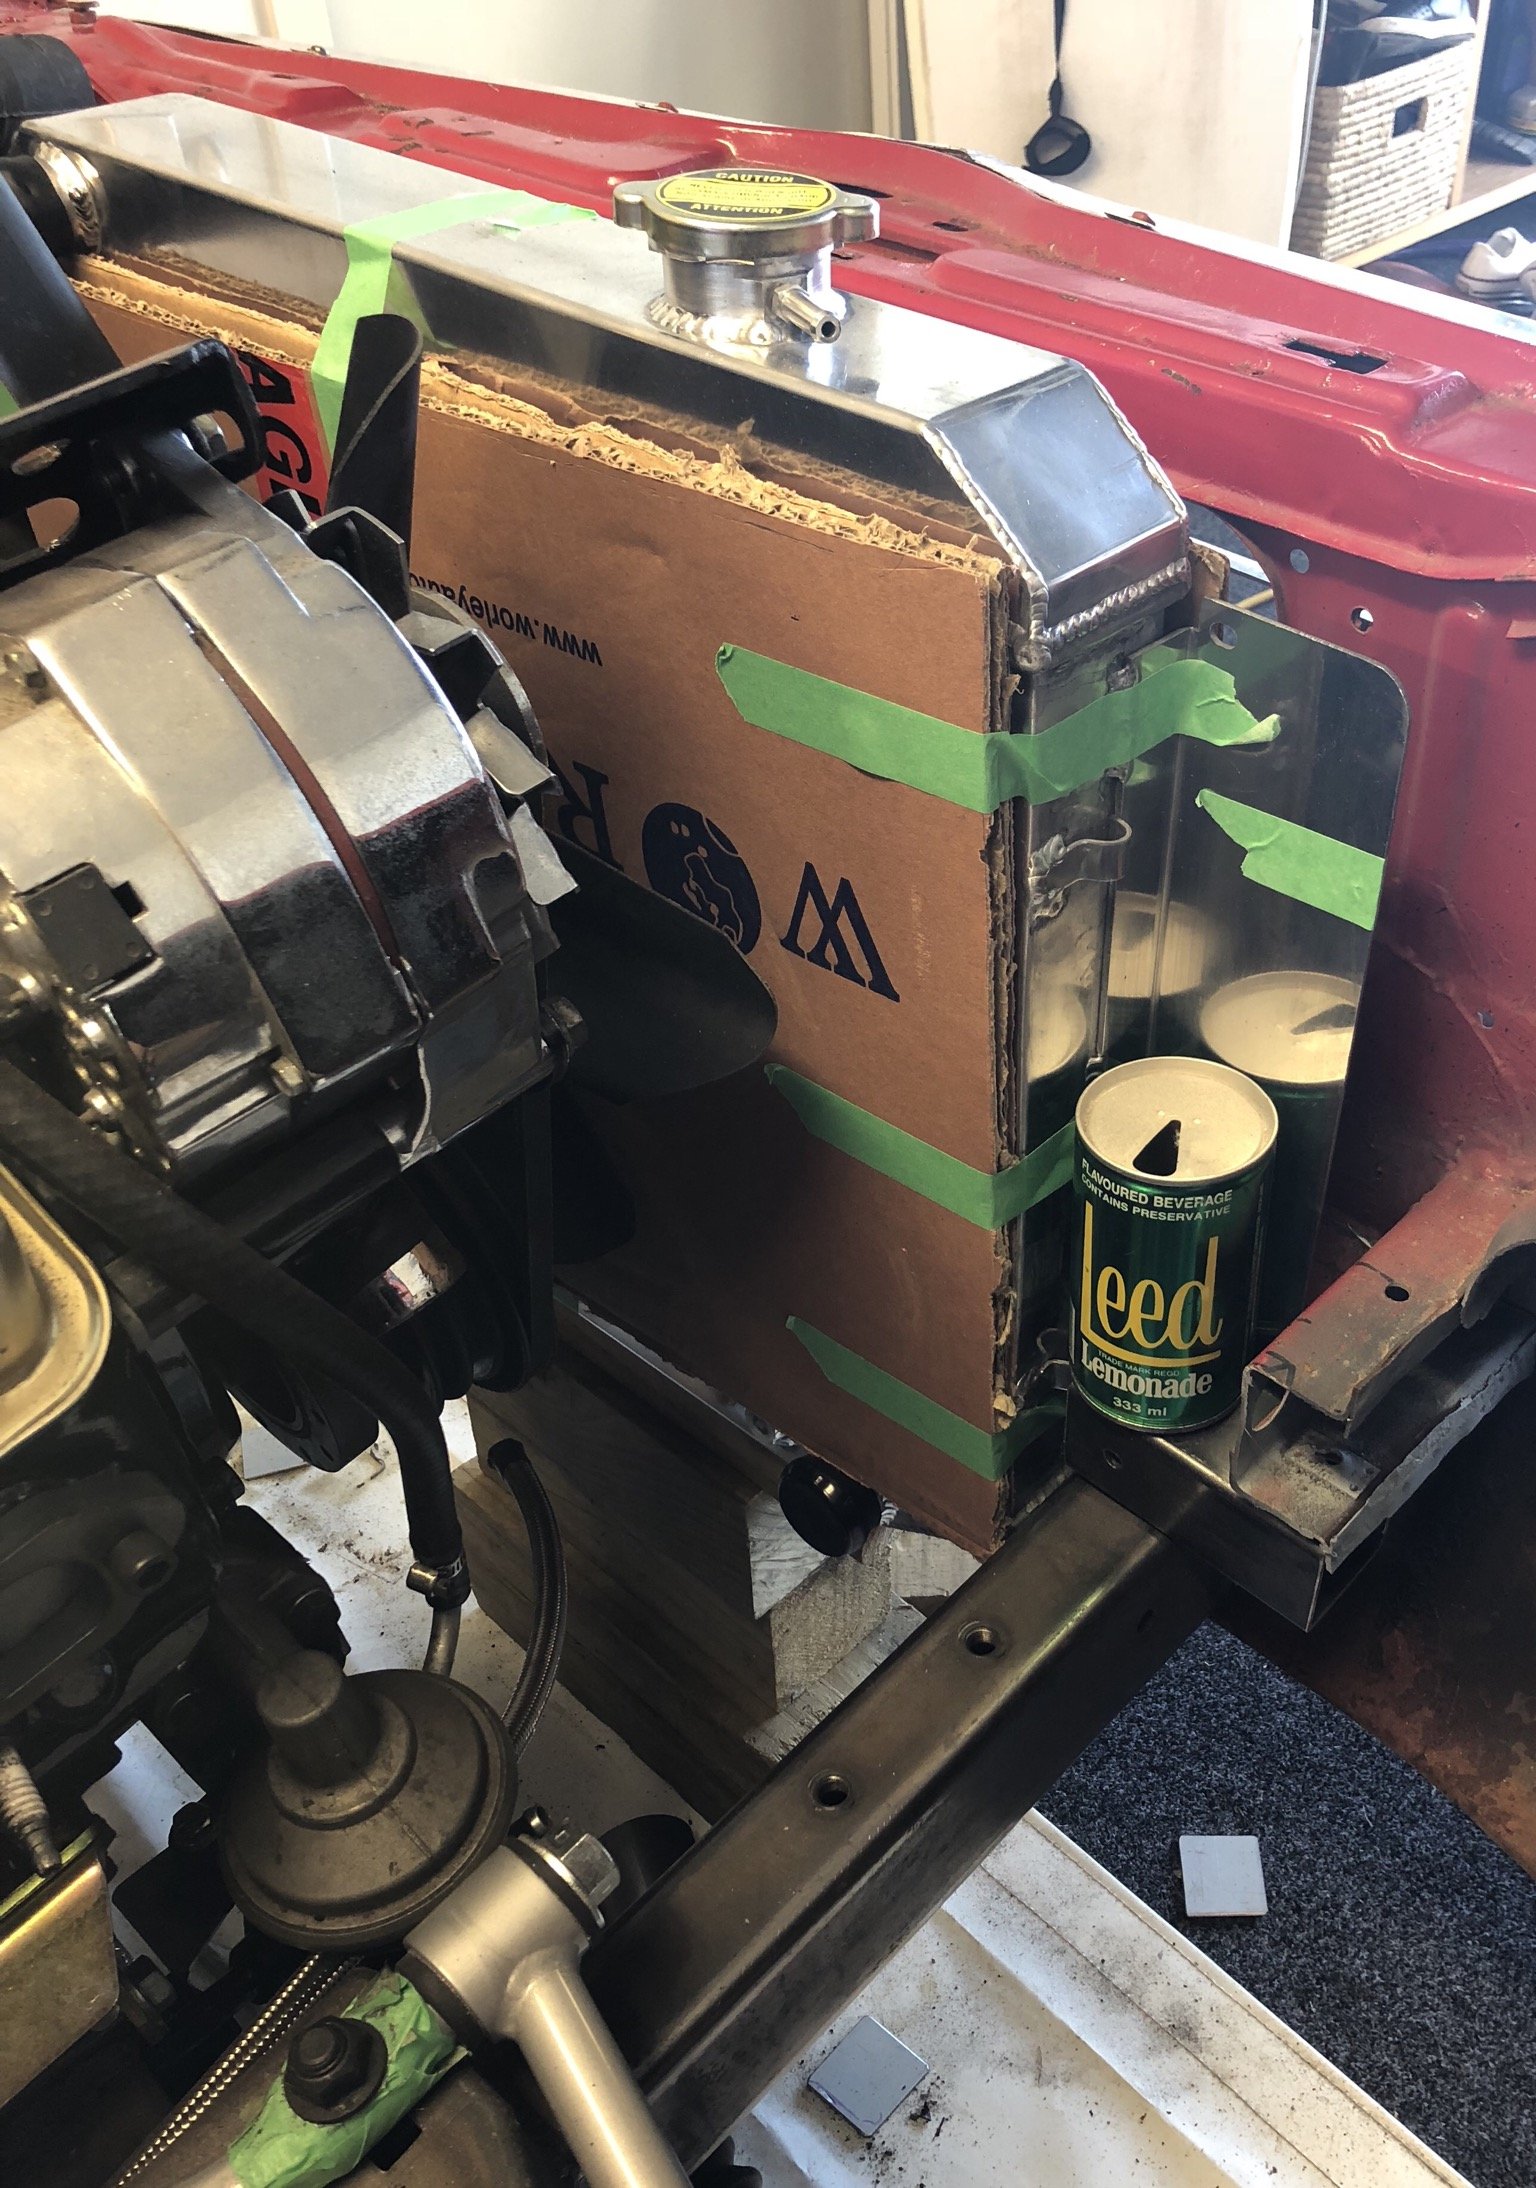
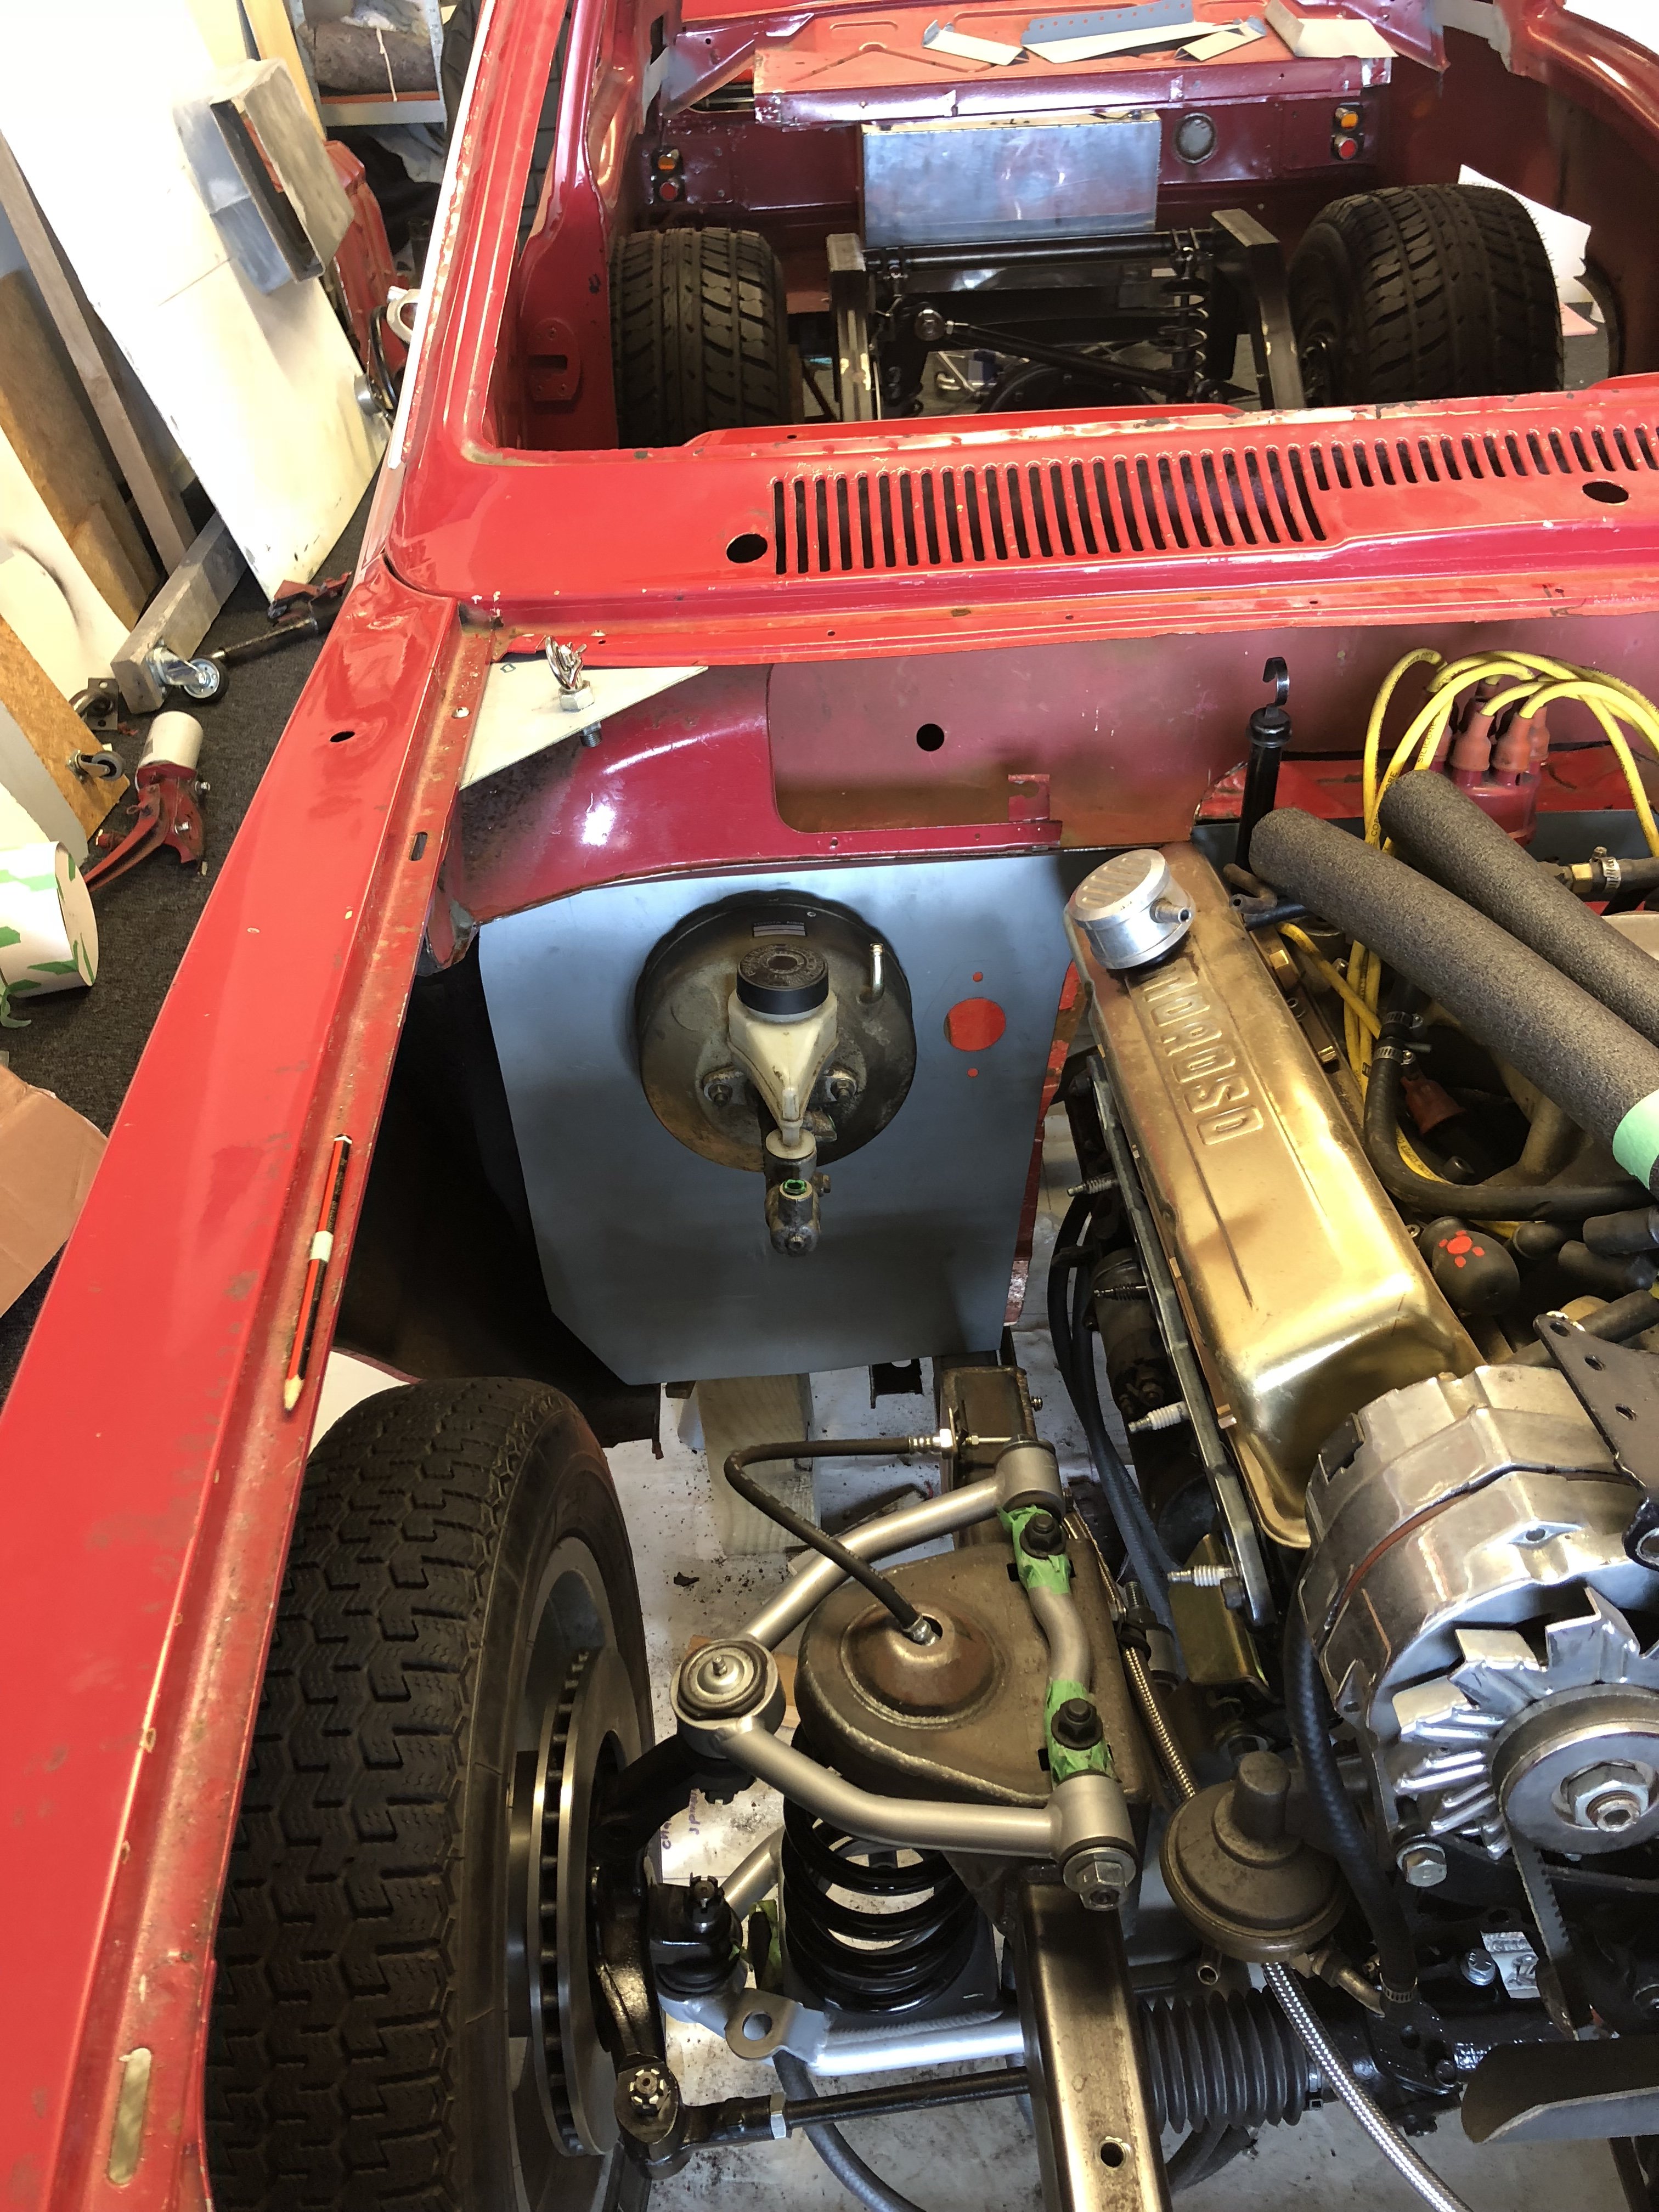
Haven’t posted for awhile but finally got the firewall all cut out. went to pick a part and found a 82 corolla booster and pedal assembly..couldn’t believe how compact it was..should give me enough clearance for the headers.I was going to run it un boosted but definately is a bonus. my girls bought me an alloy radiator for a v8 hk holden and it fits perfect in there. mate I sold my Chevy nova to gave me a free gas tank as he had three laying around the garage( he said he’s a collector but horder is probably more like it.) any way was a great gift..will weld 2x2 alloy box under it to lift it up to clear rear chassis rails.
3 points
-
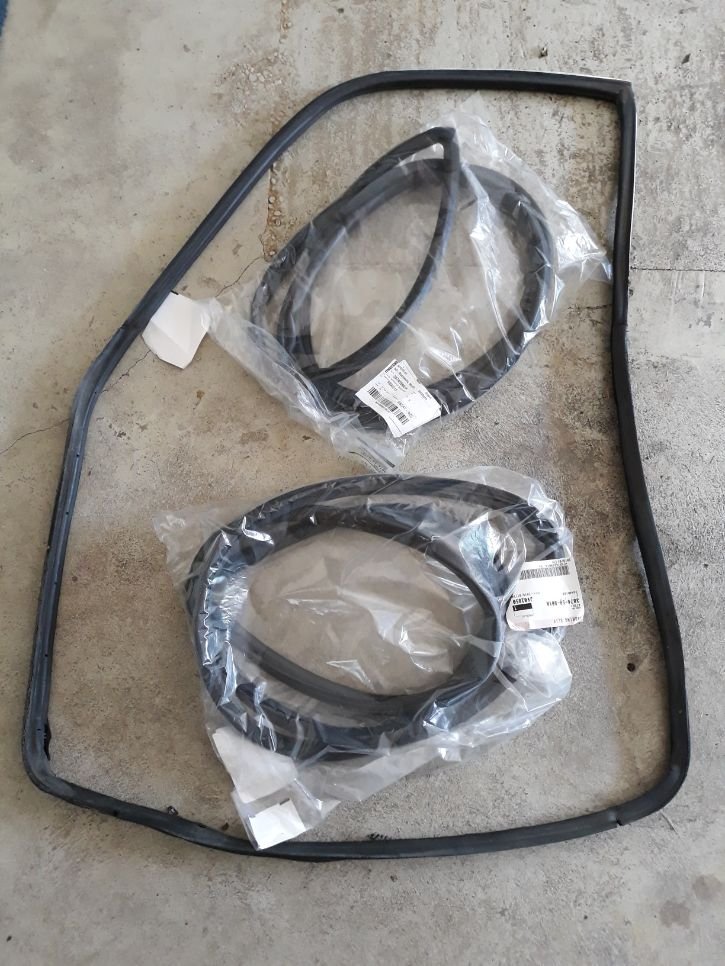
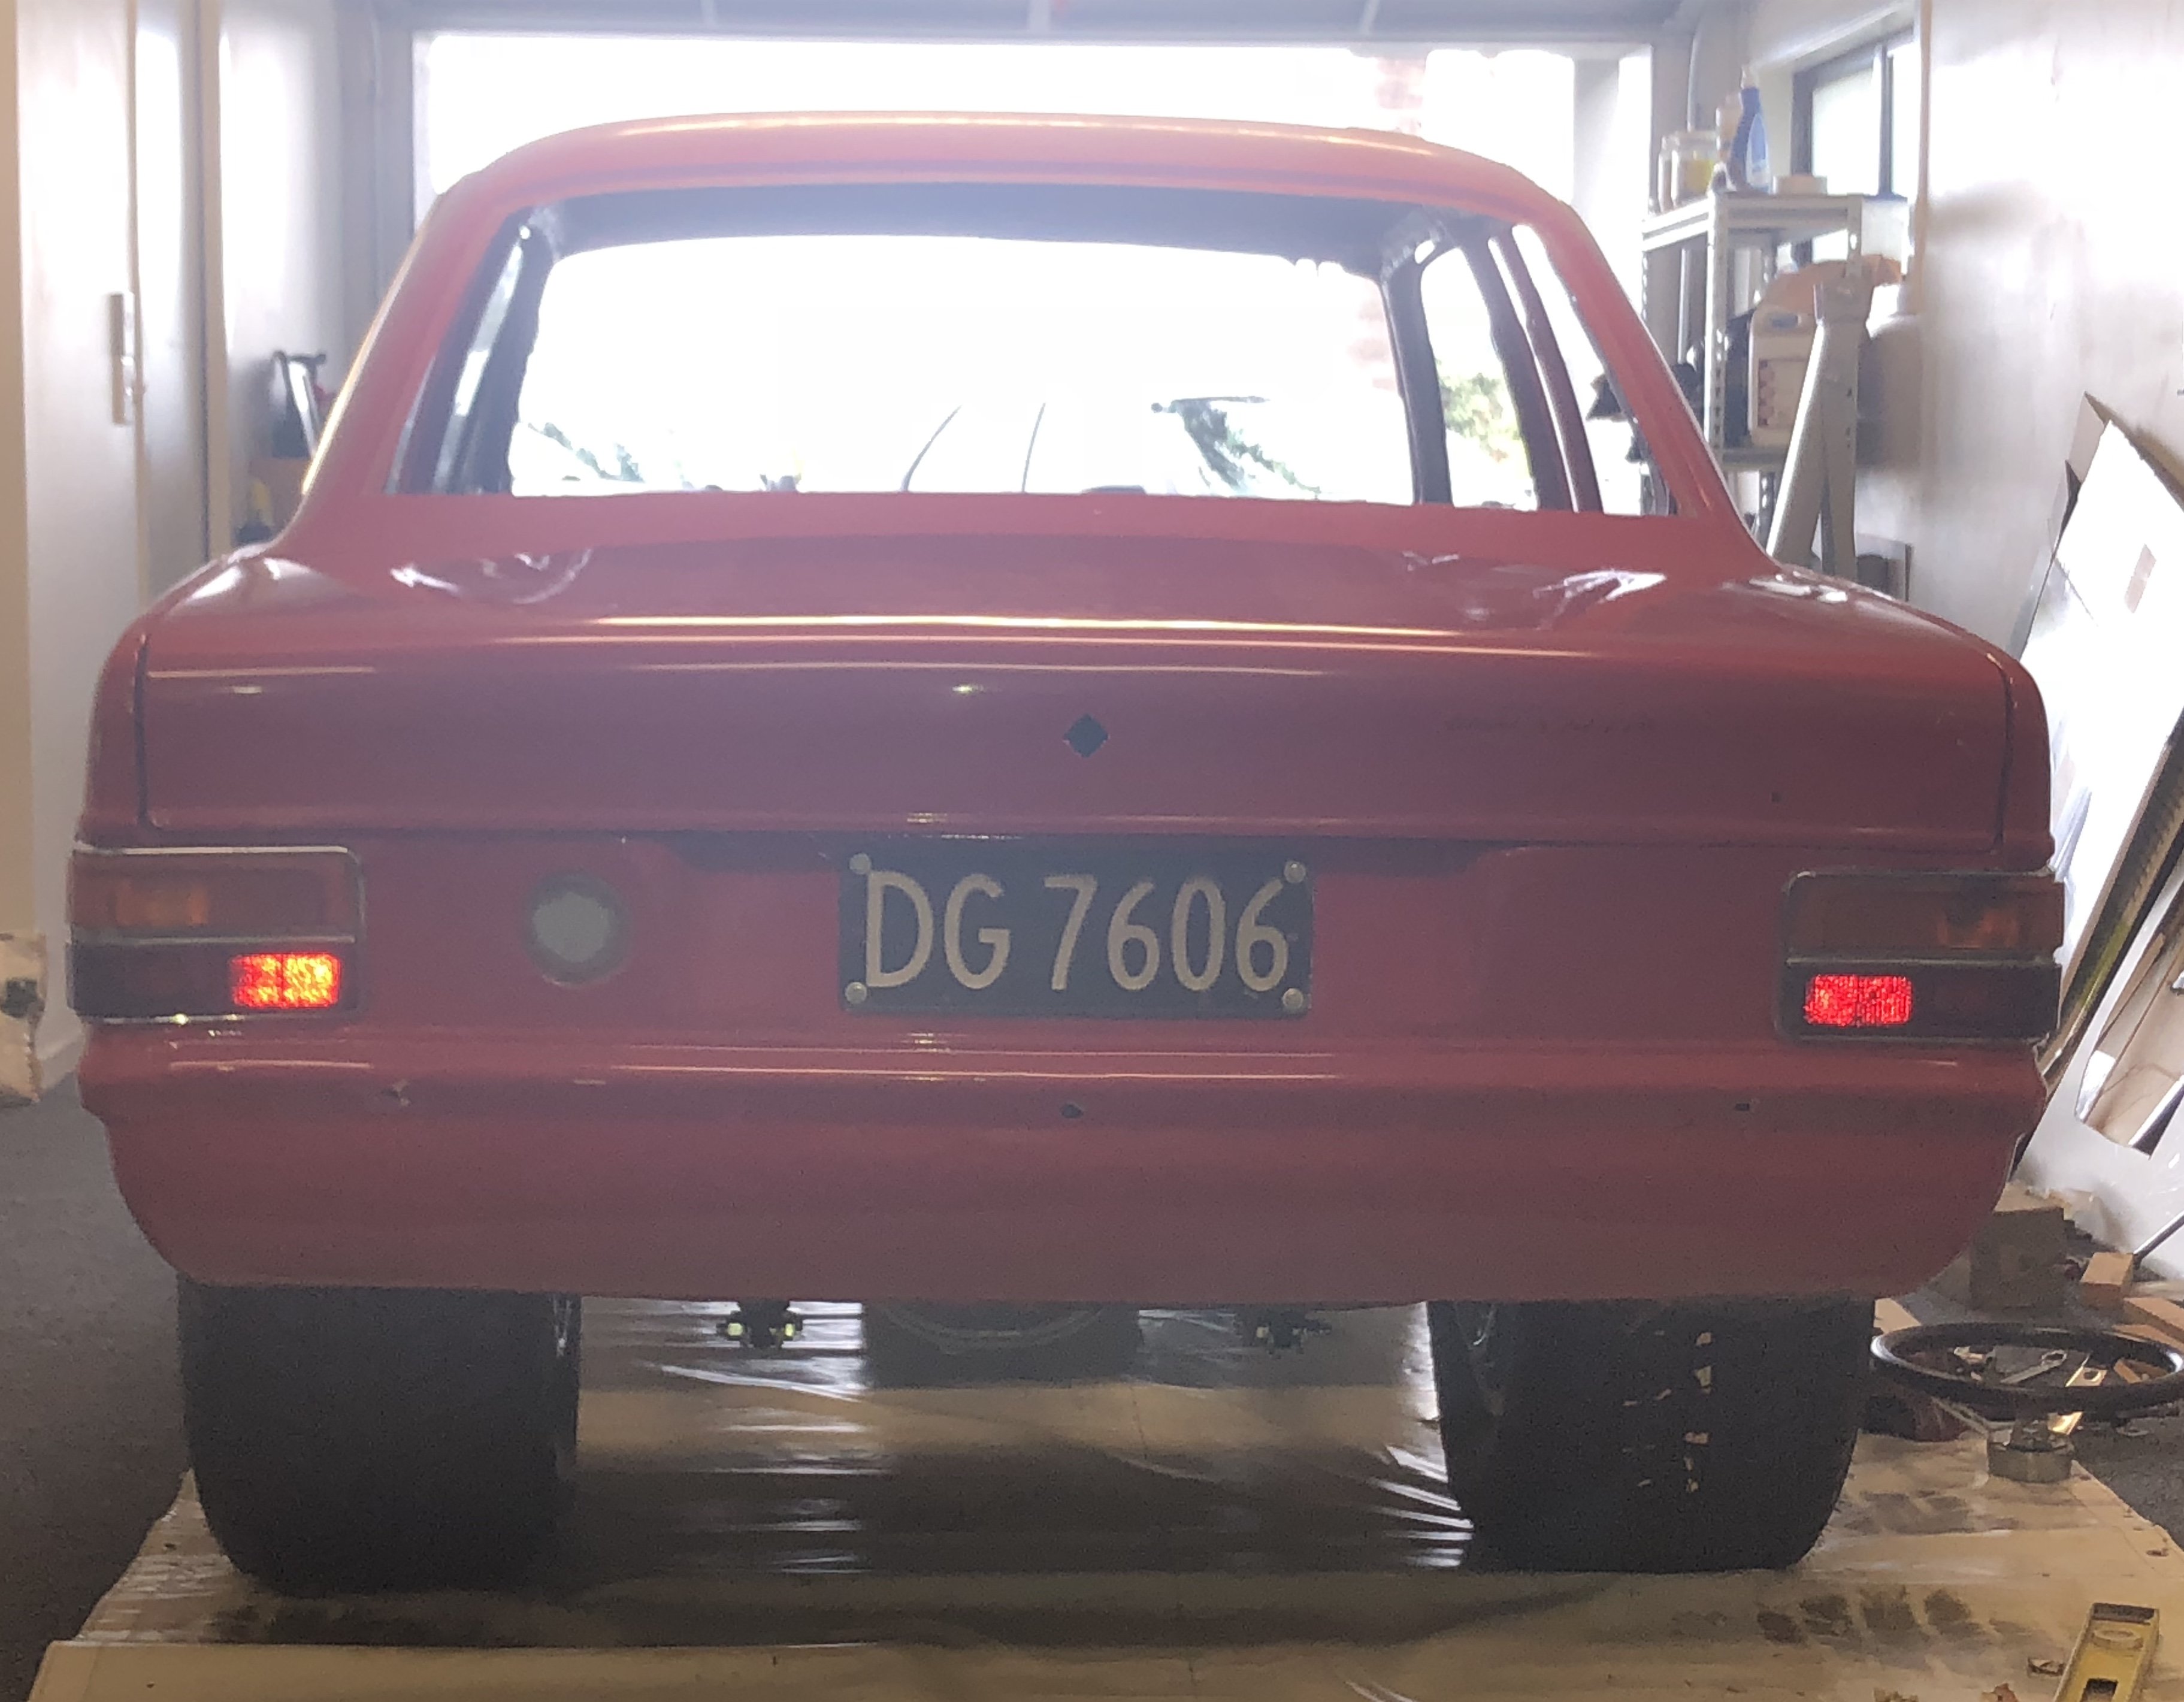
It is so amazing what a big difference such a small thing can make to a car. new rubbers make it a different beast Also, still stoked to have a Mazda that you can get new parts for.
3 points
-
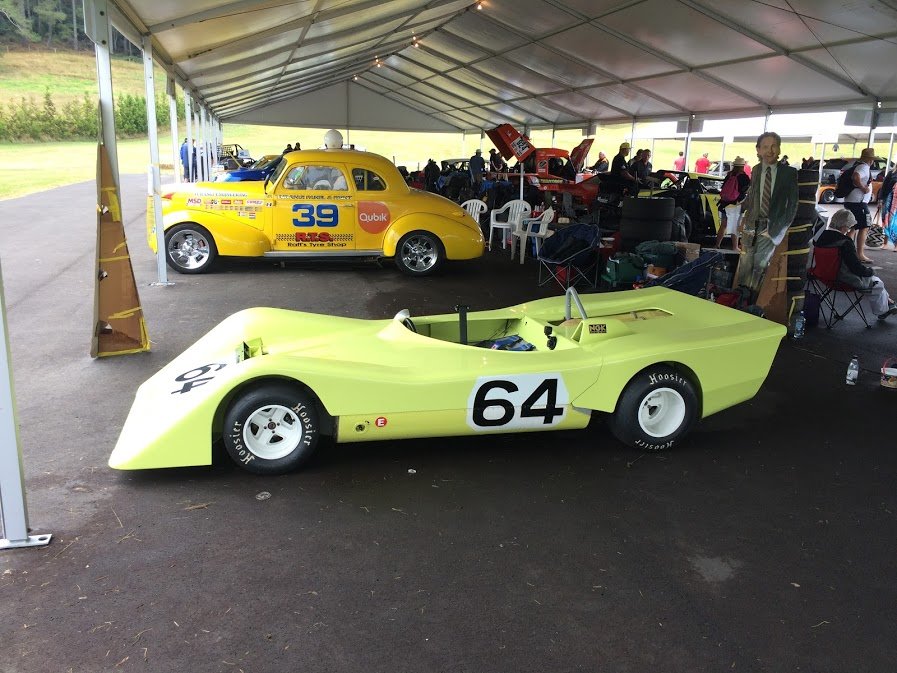
It was great to see this at Leadfoot on Sunday! You've done a great job bringing it back! How did it run? I only saw you head up the hill once and was surprised that it wasn't crazily loud with non-muffled exhaust setup.
3 points
-
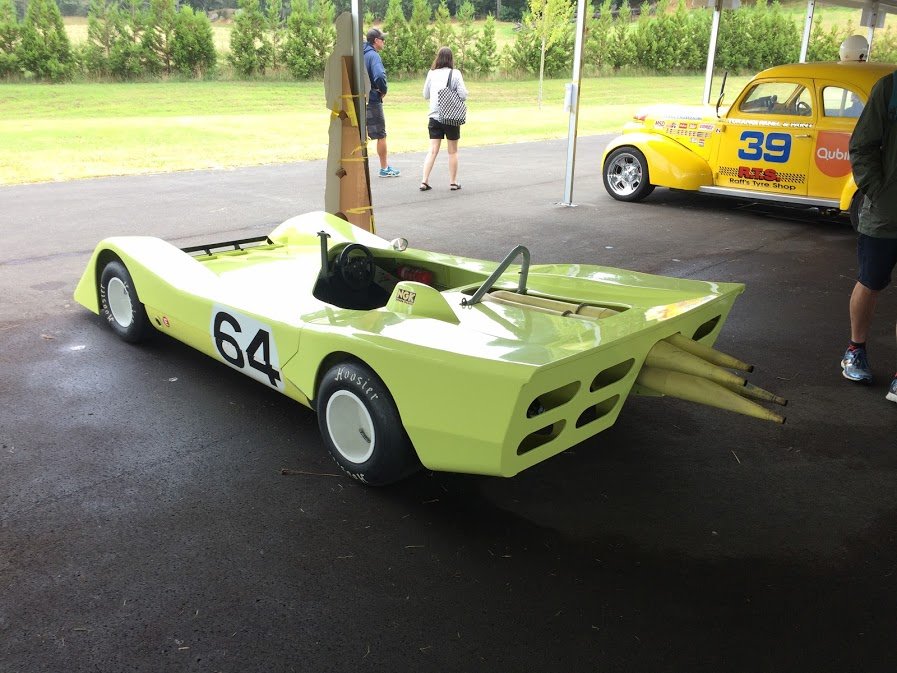
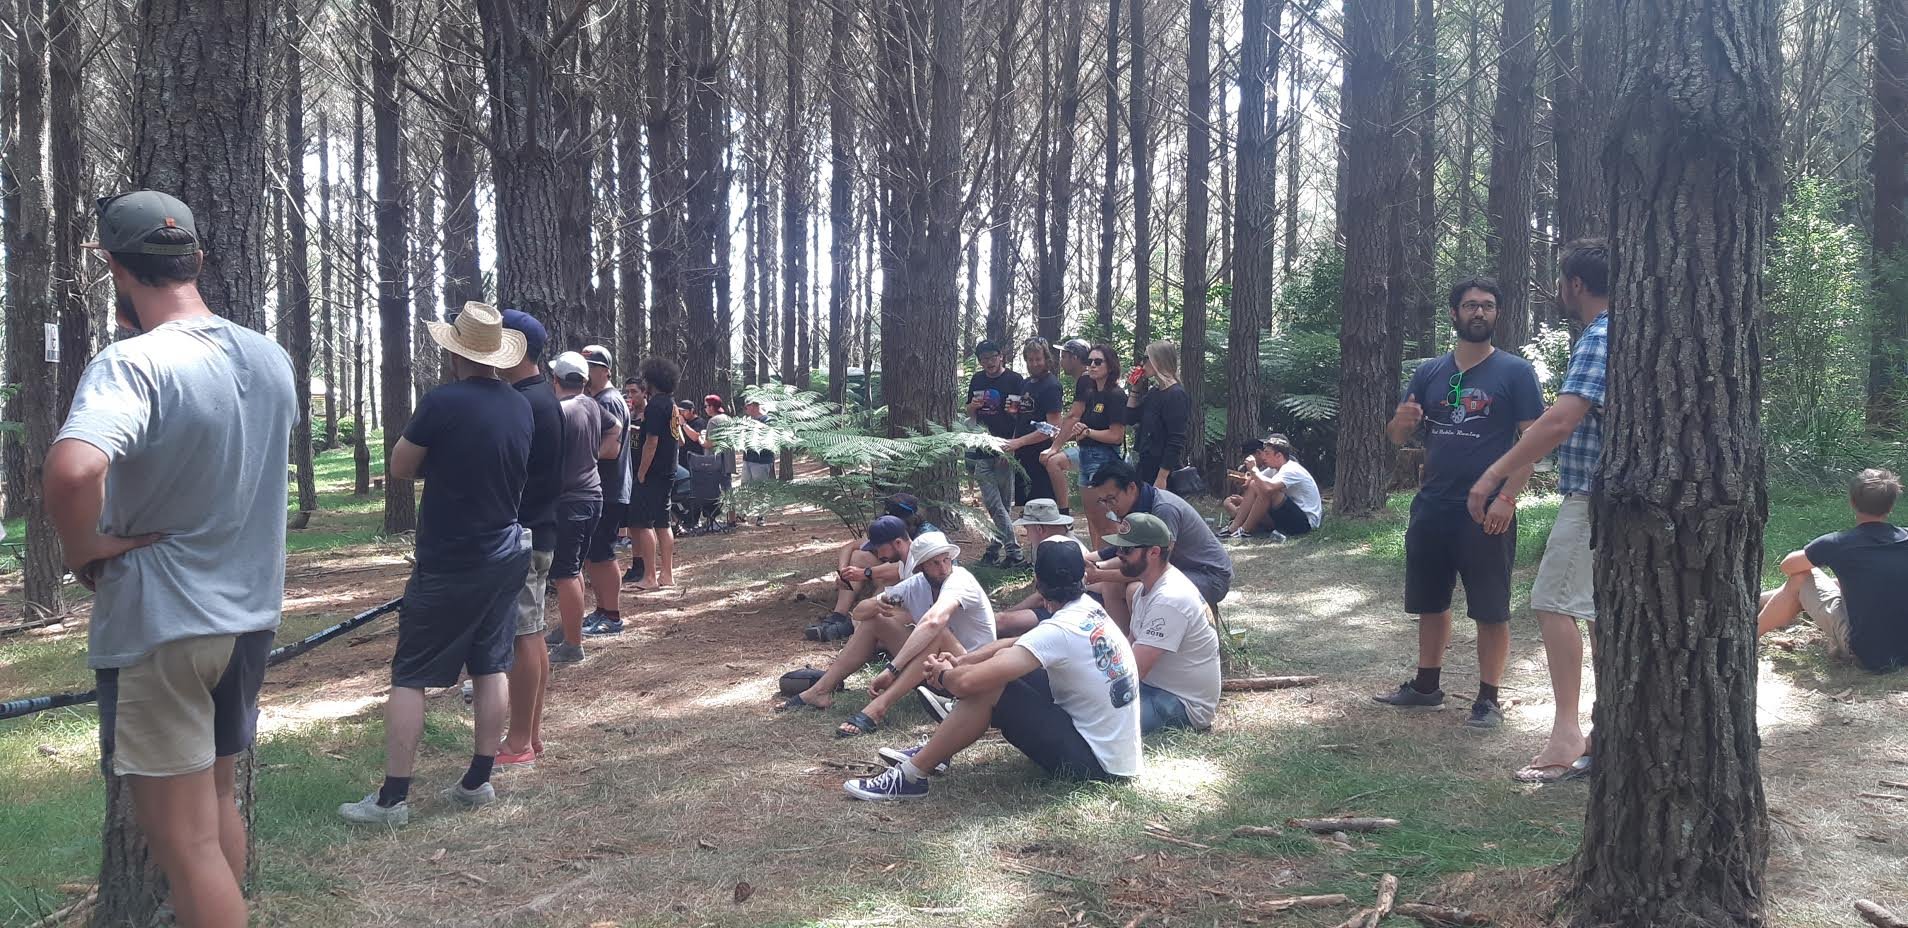
“It seems to me that the natural world is the greatest source of excitement; the greatest source of visual beauty, the greatest source of intellectual interest. It is the greatest source of so much in life that makes life worth living.” David Attenborough Here we have an omniscience of oldschool GC's gathered in nature to observe oil burning jalopies
3 points
-
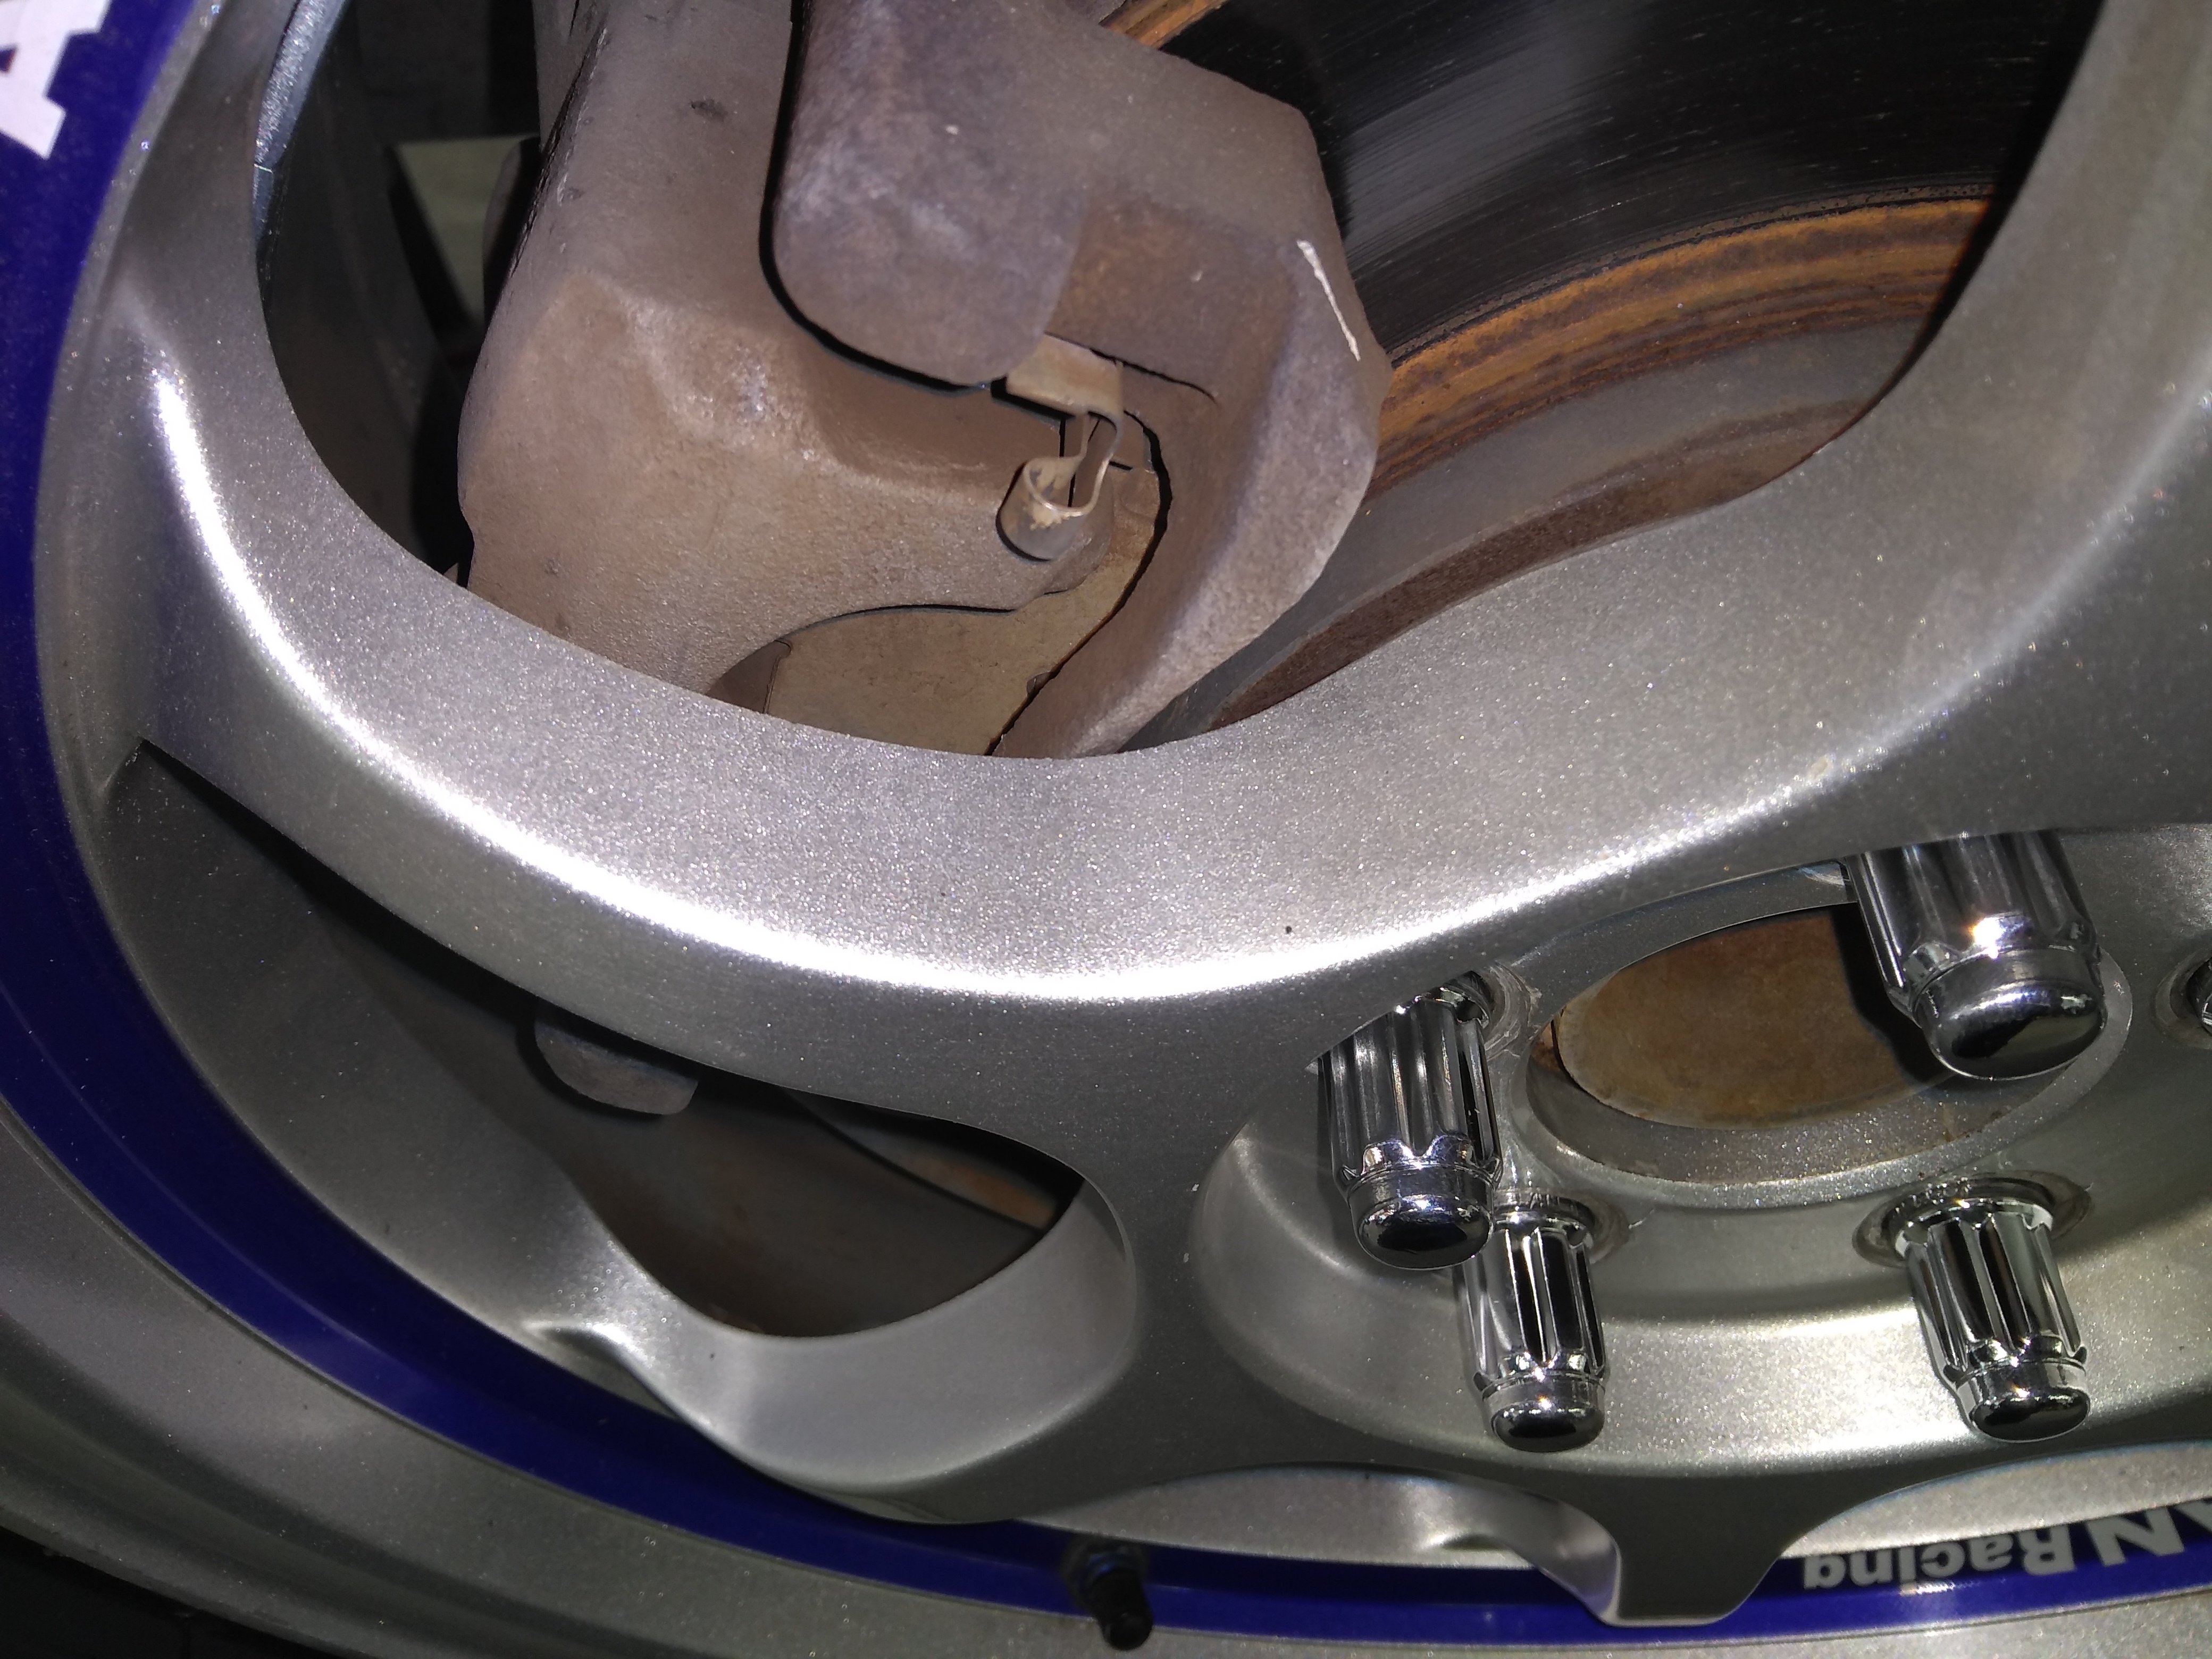
Fitted wheels and tyres today. But the wheels rub marginally on the callipers on both left hand side wheels. It is literally a zig-zag paper thickness clearance. So am ordering a set of 5mm spacers and will be good to go. It'll sit a little lower after I roll it back and forth a couple of times but this is a good idea of how it will look for now.
3 points
-
oh hello. long time no posting we finally got the profile of the caravan cnc bent. borrowed old bad pennys work horse to get it done. pretty excited about the weeks to come now. just need reunion to be over with and get this thing rolling again. EXCITED!2 points
-
https://www.facebook.com/KustomTinting/ He did my XE and the Prius, will get him to do the BA too, and the Commy when that is back on the road. He is mobile or you can drop it to his house, he came to work and did it the workshop there. On time and no hassle. Cost $300 for the Prius (and $350 for the XE from memory)2 points
-
2 points
-
2 points
-
I see a camera on the fire wall, you better post some videos young man! Also, where did you get that hat? I must have one.2 points
-
I just couldn't help myself but take this photo... Having fun stripping remaining bits from the other two Imps, cleaning and painting bits and generally playing about with what is a big model car. Proper update soon.2 points
-
Richie done good. http://www.speedhunters.com/2016/03/crowning-around-slammed-1960s-toyota/2 points
-
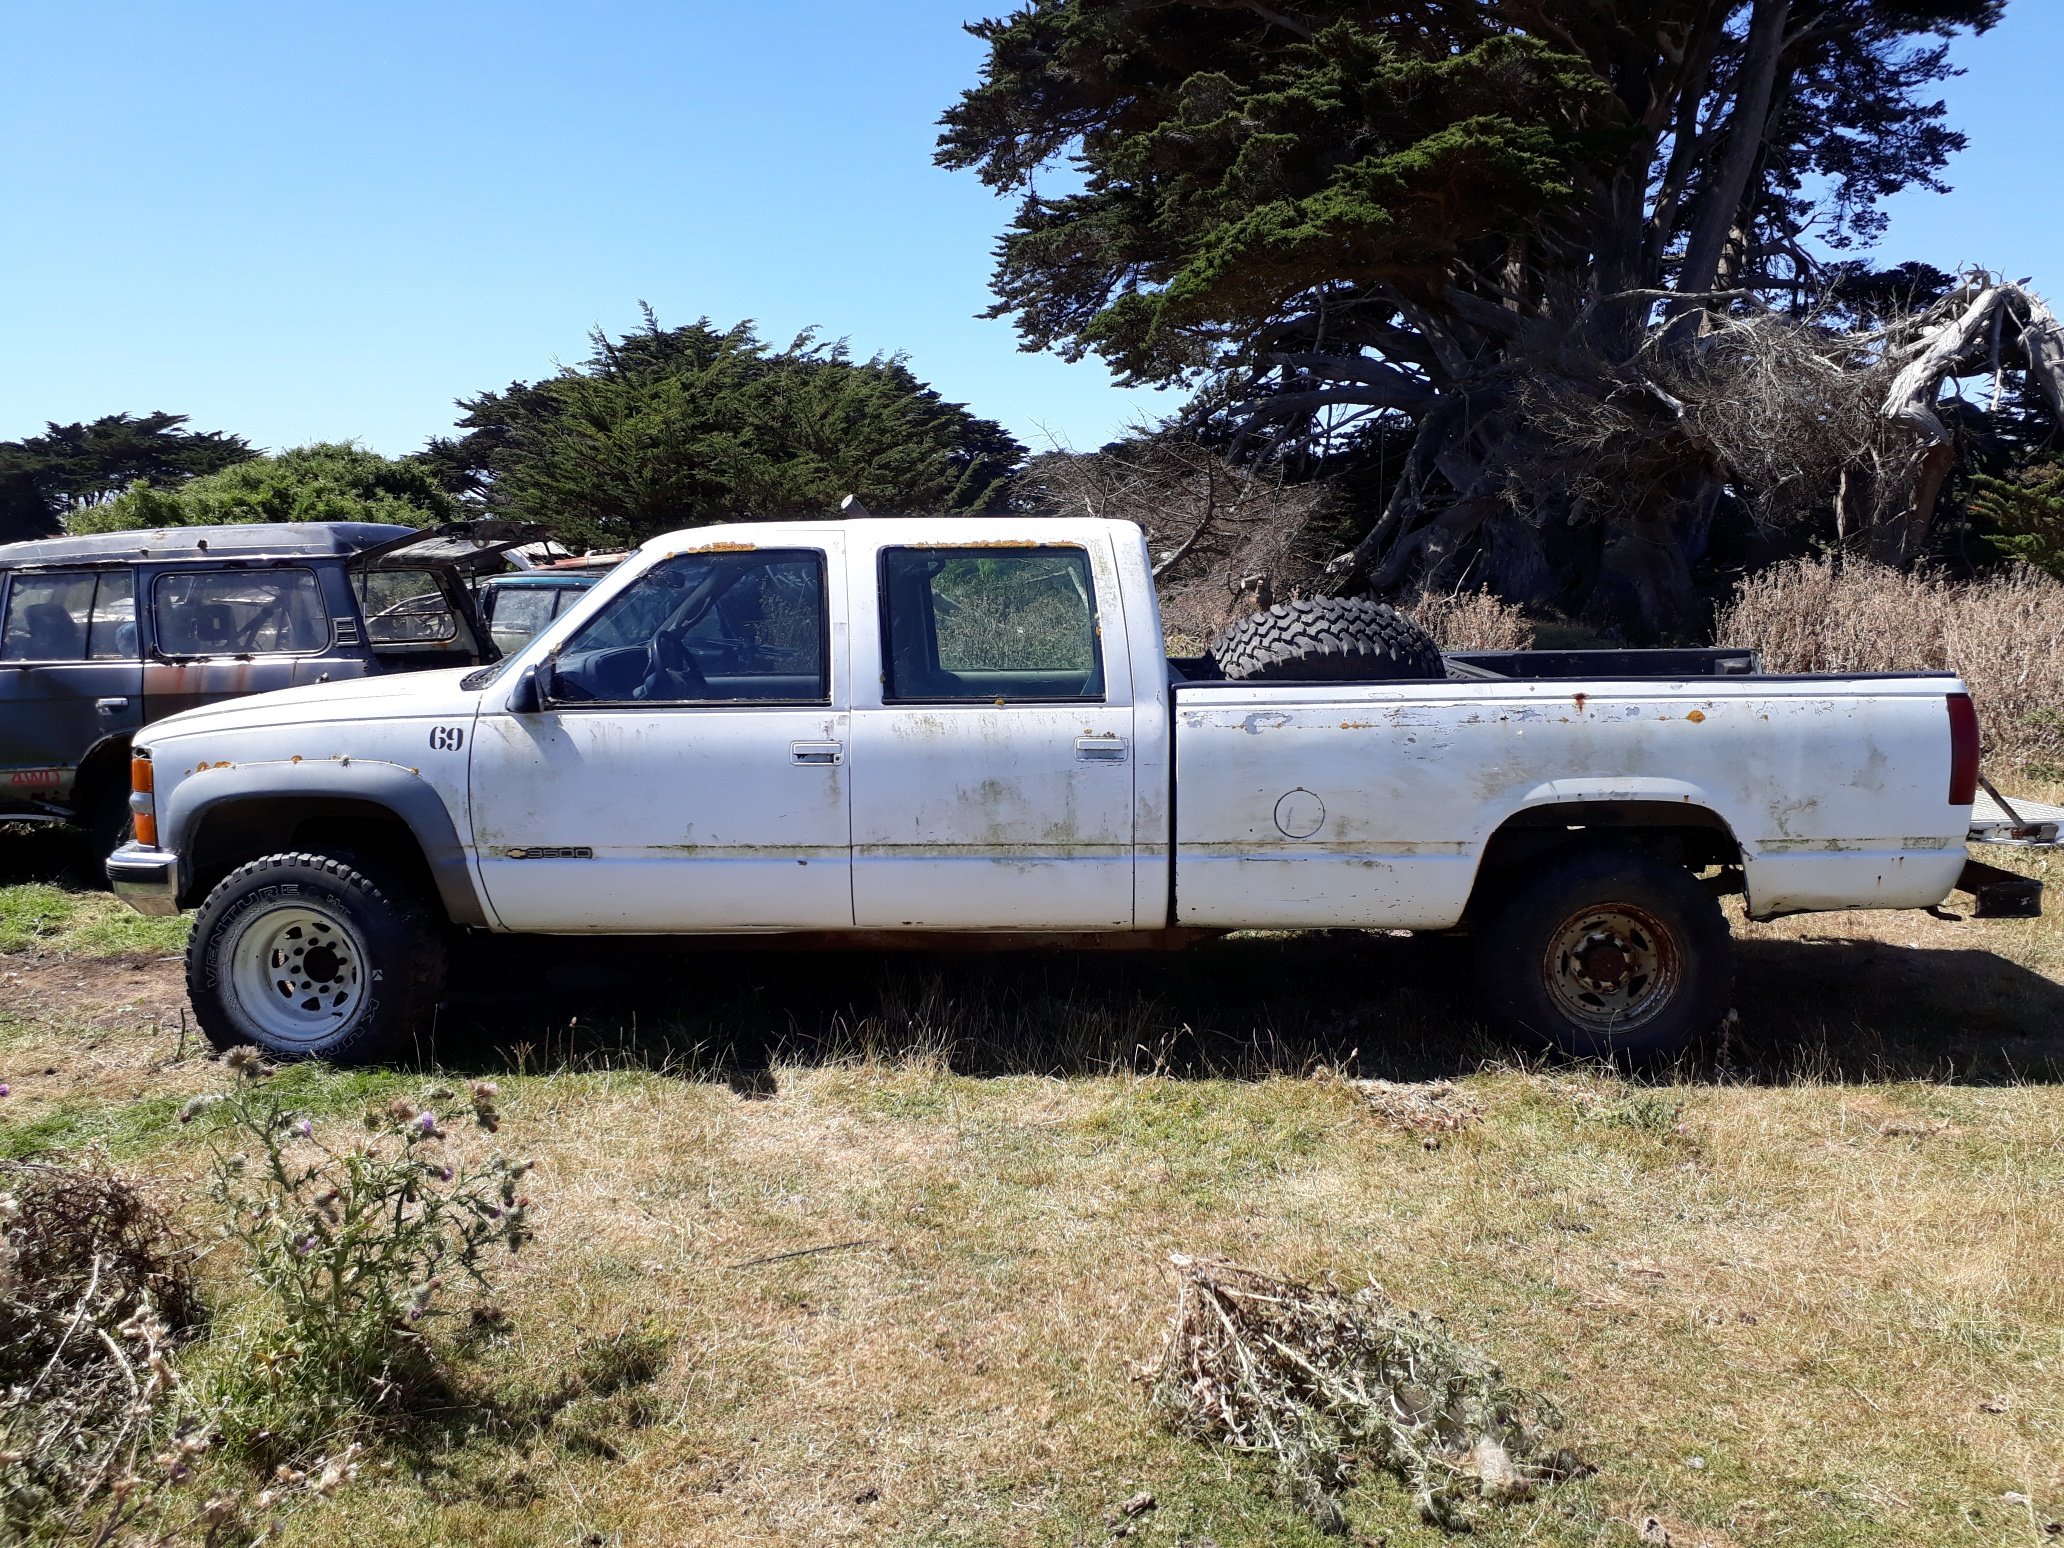
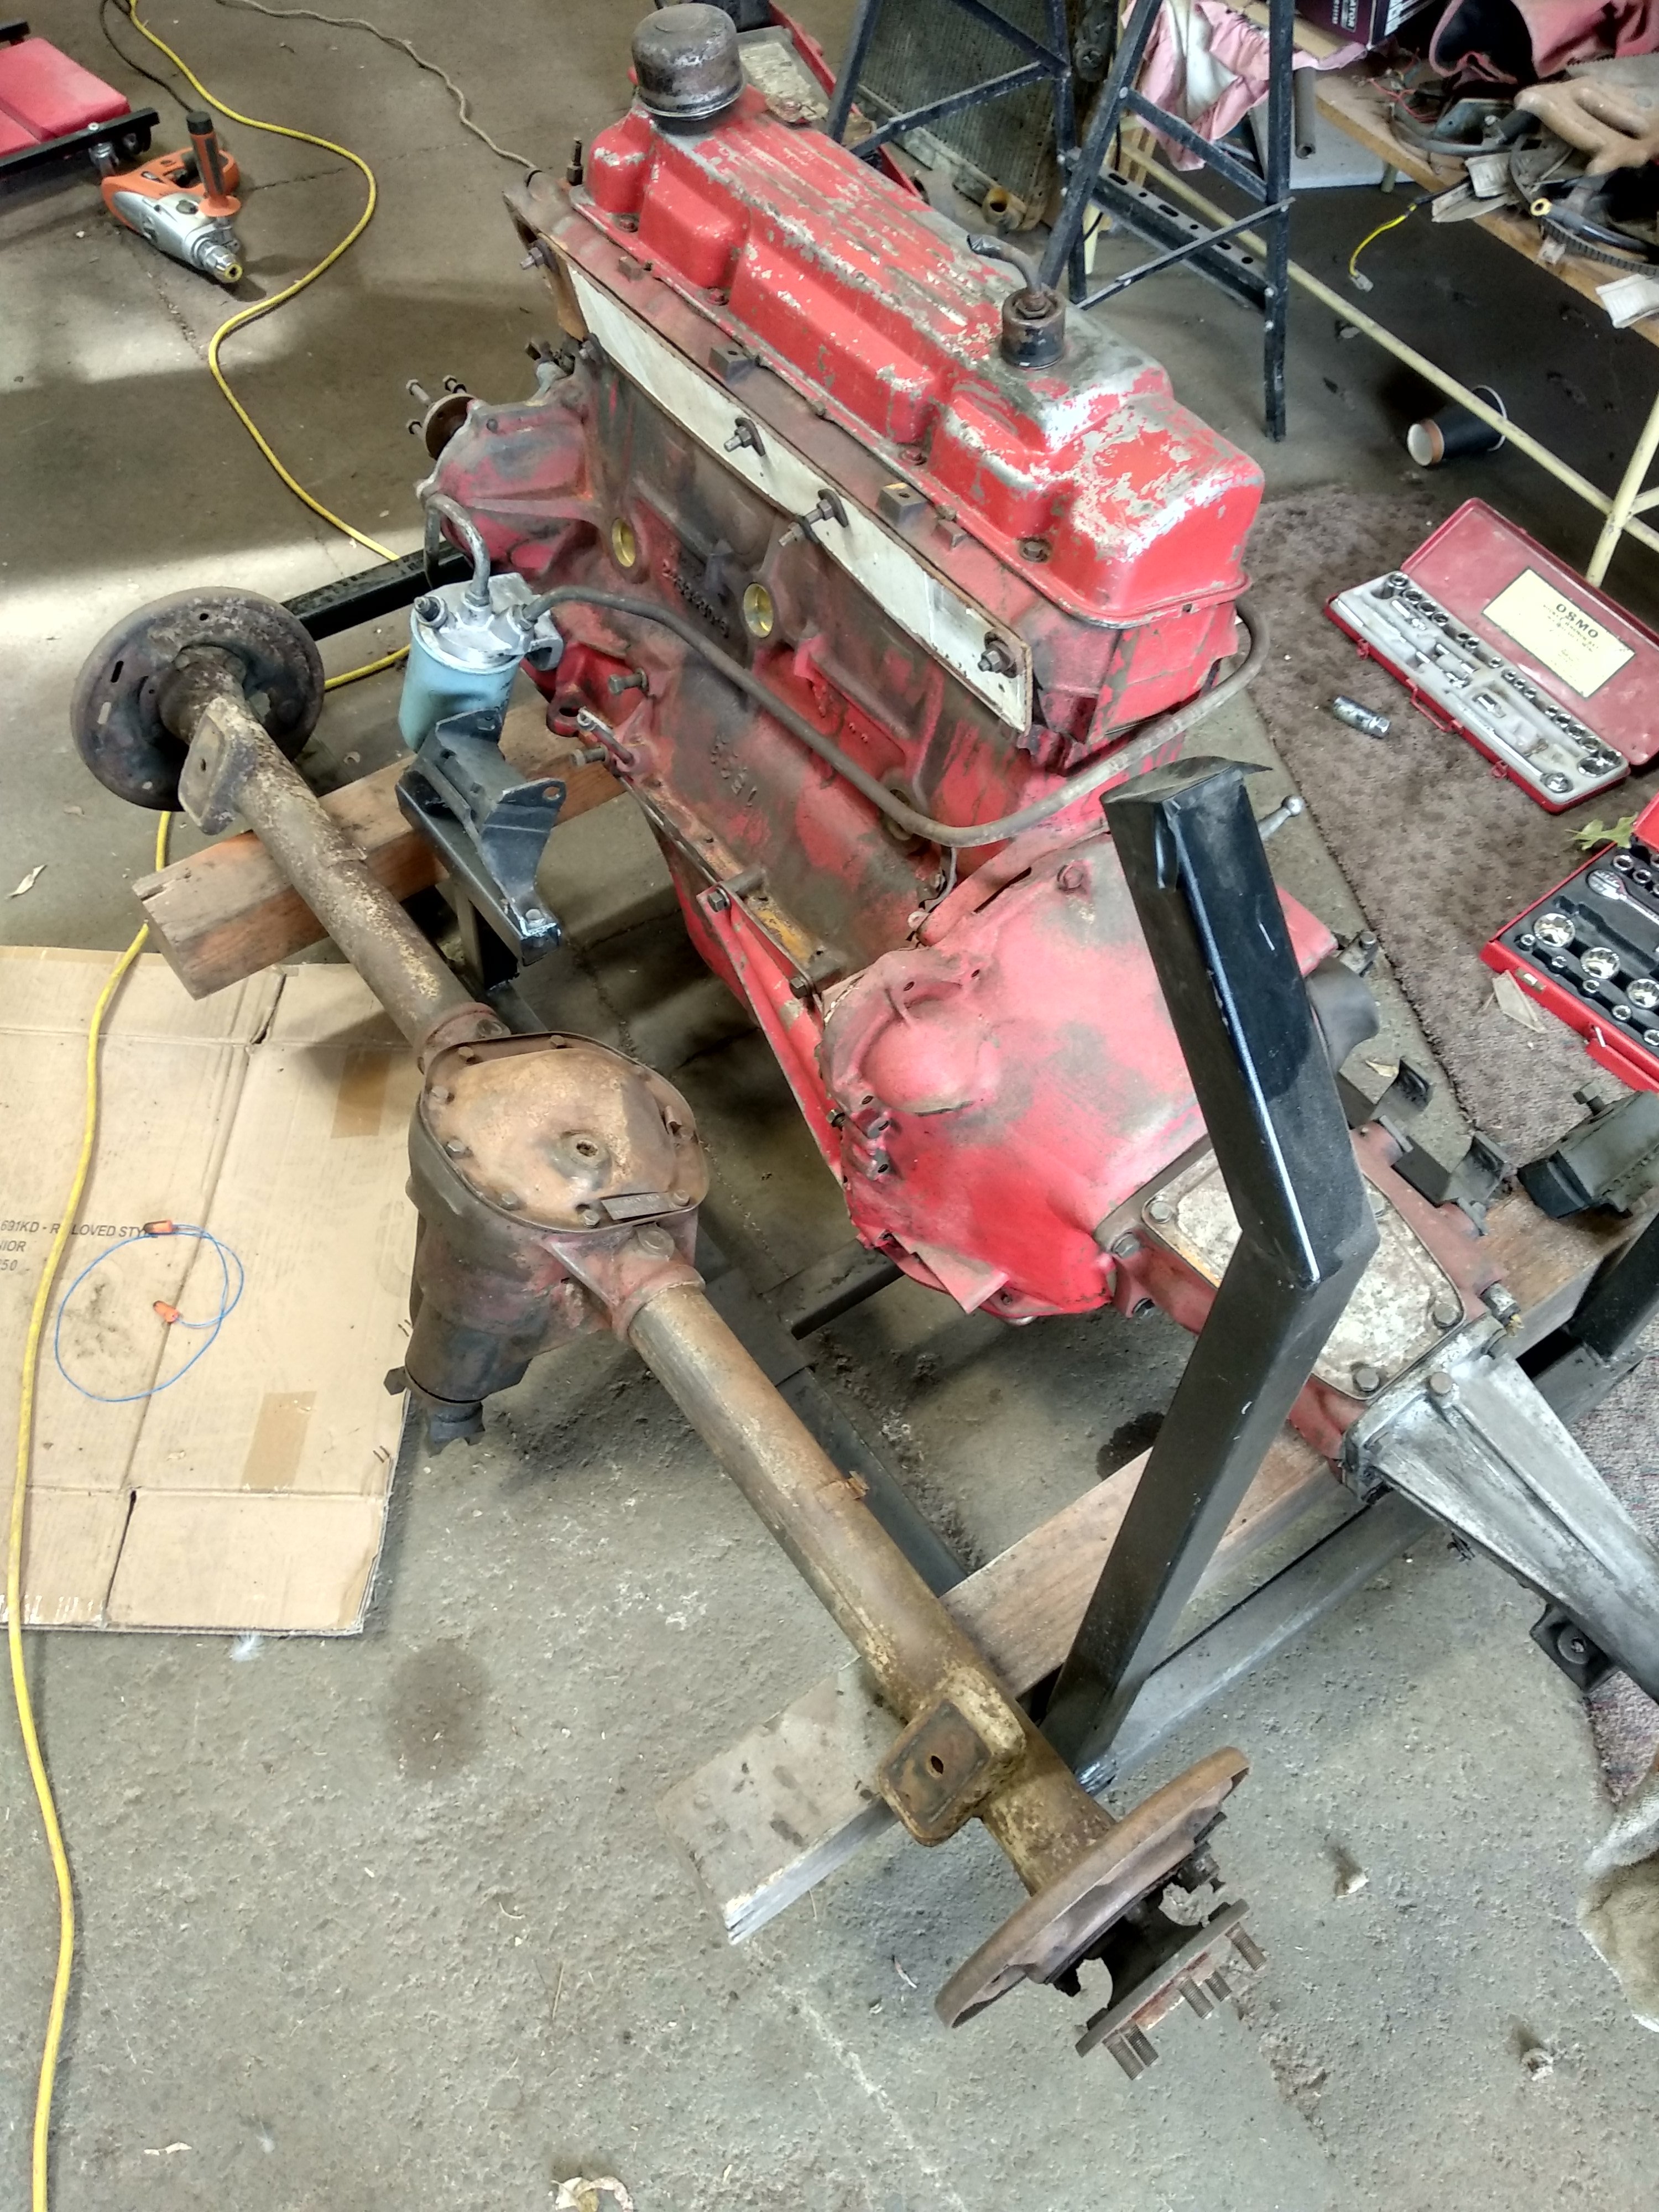
If all goes to plan I'll pay for this heap in a few days. The current owner is a good mate who gave up on the truck some time ago. He's offered it to me at a very fair price so I hacked it out of waist high thistles a couple of days ago, found enough wheels to get it in the air, and got the brakes un-seized enough to get it rolling...in a straight line. Hopefully I'll get an ignition key this week which will mean I can unlock the steering. I'll get some batteries and see if she'll run. I know little about diesel engines so this could be fun. She's a 6.5 turbo V8, and despite looking pretty haggard is quite sound in the body and chassis. One of the worst things is the wheel size - they're 16.5 inch. Those are 33x12.5x16.5 tyres on both the wheels you see. The truck makes otherwise big tyres seem small. I'm on an island where WoFs aren't a thing, but I have no tools except my carpentry gear with me so I will be at the mercy of others. So far people have all said I'm mad (the truck has a reputation as a bit of a lemon around here), but they've all offered me gear too. Nice.
1 point
-
Hi All Anyone planning to go to the British Car Day at Trentham this coming weekend ?? Cheers
1 point
-
Alex was telling me about this project when we called through over Christmas, stoked to see it and hopefully a few more progress updates to come! With a to do list that big, adding the cummins will only take an afternoon at best......1 point
-
In the next Moonlight Racing container. It's due in a month or so.1 point
-
Nice Also Prius looks lush, well done1 point
-
Yea I have some pics of that. I did wonder about a 1uz, but as this is intended to work after the zombie apocalypse/mass coronal ejection I preferred a donk with no real electrical requirements. Edit; reply was to the one above. I have been fantasizing about a big Cummins, but I figured the td42 was plentiful and relatively cheap.1 point
-
Fuck thats looking awesome mate !1 point
-
Id take a ride in that fake taxi. 5 stars. Proves that anything can look cool with the right rims and some lows1 point
-
any problem can be legitimately solved with slotting holes or adding washers.1 point
-
My Innovate cables turned up, and I plugged my lappy in and after faffing with the usb/serial driver stuff my 1960s designed ute talks to a computer. Turns out the gauge and sensor is fine... just needed the main plug jiggled so it fully clicked together and then re calibrated, so yay, but also, good one dick (me). Anyway with it now working I could see what the carb was doing and make changes in an infomed manner instead of flailing. THATS SCIENCE! Turns out the poor idle and bog off idle was a lean condition which is the opposite of what i thought, based on the plugs and exhaust smell, but it runs way better now, so looking forward to using it a bit more. Jetting is now: Primary: Idle 60, main 132, air 150 Secondary: Idle 70, Main 160, air 150 Weber DMS twin choke downdraft on a smokey 1582cc TC. Here is the worlds most boring video, in portrait model of the gauge in action on a cold start just before. Still a bit wobbly on idle but the carb is pretty worn Will do untill i fit my sideys Here is a shot of my two wheelbarrows1 point
-
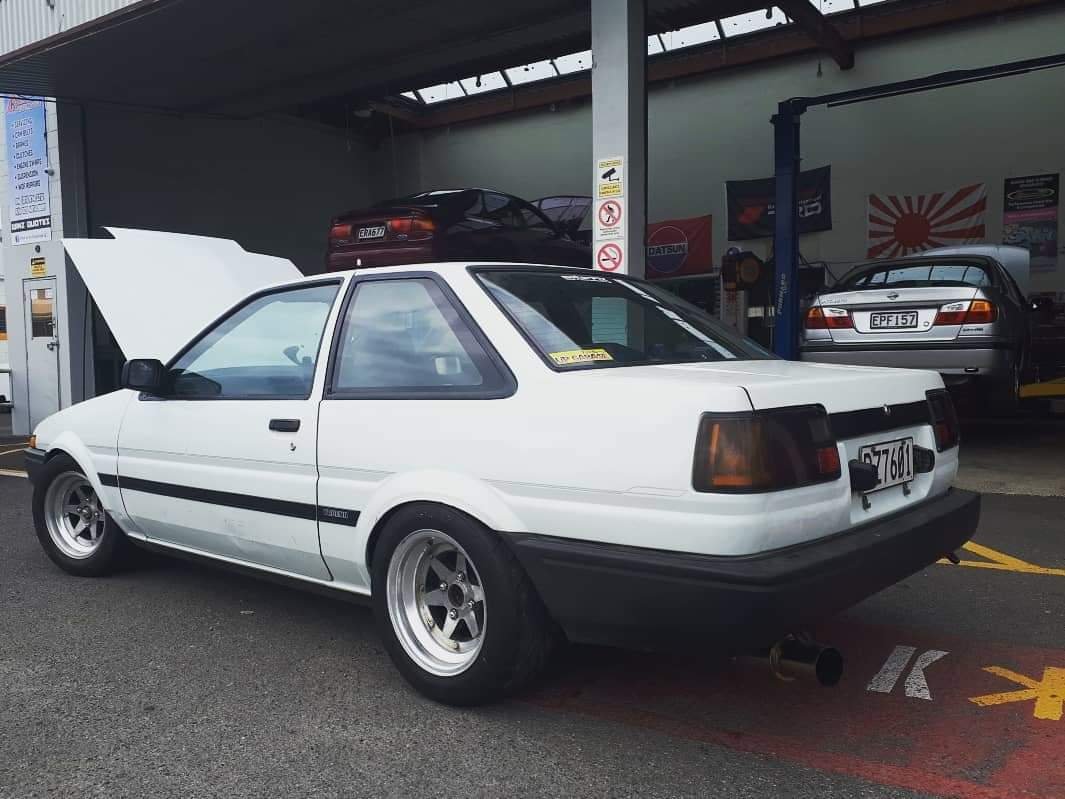
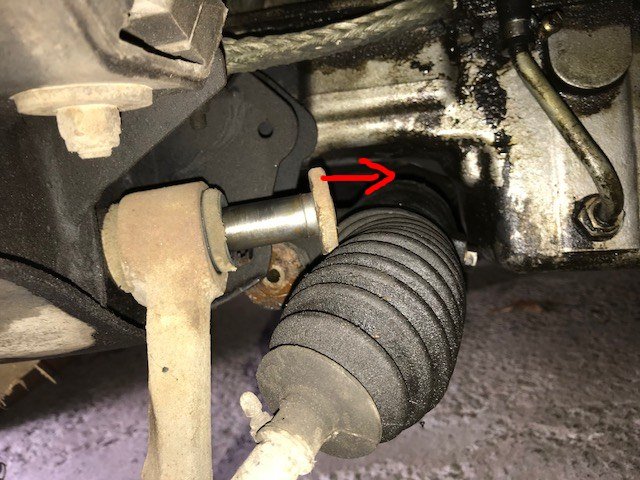
Long time no post. Been working away trying to get this thing legal, work and kids with a splash of house renno really make the time fly. So as it currently stands everything is ticked off for Cert in 2 days. Got my cousin to assist with welding up the last rust holes in the doors and fixed up the hole in the exhaust. Also fitted new seat belts for compliance purposes as the old ones didn't retract well and were god knows how old. Finally took the car to K-Tech and got the rack ends all sorted out and a cert wheel alignment done. I had to raise it up about 10mm to accommodate the 205/55/14s which are the legal tyre on a 7.5inch wide rim. I even pulled it out this afternoon and gave it a clean and polish so it looks tidy for the Cert man. Finger crossed that it doesn't come back with a 3 page list of things to fix!
1 point
-
So, ain't used this much in the last year and a half, infact it's been sat in the shed the last seven months. Thought I better start using it, so I charged the battery, gave it a quick clean, and obtained a WOF. This morning I felt semi motivated, so set about fixing a few things that have annoyed me for ages. Since I got it back on the road about six years ago, the fuel gauge hasn't read correctly/won't show over 2/3rds full. I whipped out the sender (luckily it has an inspection hatch for the sender) and held the float lever against it's full stop, it still wouldn't show over 2/3rds full. I then opened the little box on the sender, and it seemed the wire coil is wearing out, and the little arm that rubs against it wasn't contacting properly, so I gave the little arm a tweak. I teasted it and it now reads darn bloody close to full, not perfect, but much closerer. Next I pissed around with the hatch latch, as the hatch has never sat down on it's stoppers properly, and kinda sits on the latch mechanism. Managed to free the latch and adjust it, and by hoki, it now shuts nice and toight, which has the awesome side effects of not letting exhaust stank in, and has banished about 78% of the rattles in the car, huzzah! The other thing I did a while back was modify my catch can, it used to be empty, so did a shit job at taking oil mist out of the air, so it's now full of steel wool and fancy shapes, and let's no oil mist out at all, rippa. I have some fittings to connect it to the back of the filter plate, so next time the plates out, I'll slap that in. Next on the list, is to give it a rangi tune up, as it runs ridiculously rich, so I'll have to acquire the bro in law, so he can muck round with that. I still haven't sent the rims away to be fixed, fucks sake VG. P.S. I really like driving this car.1 point
-
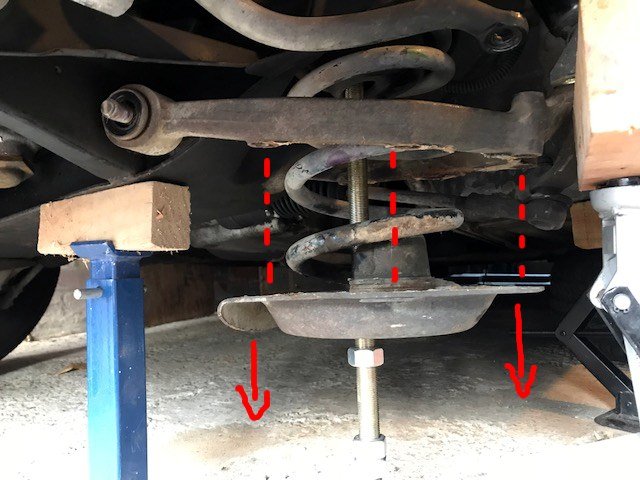
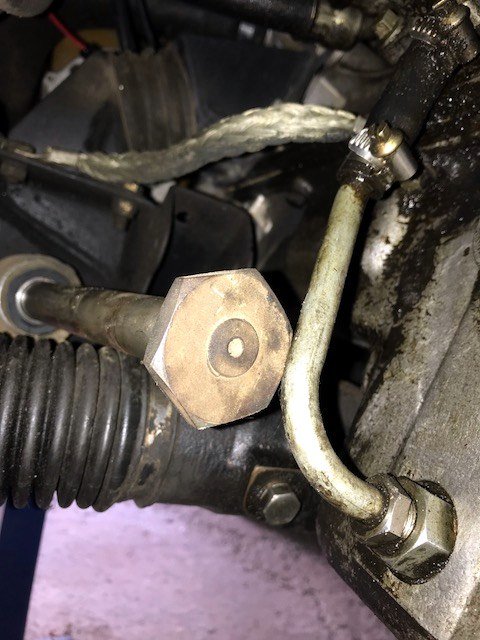
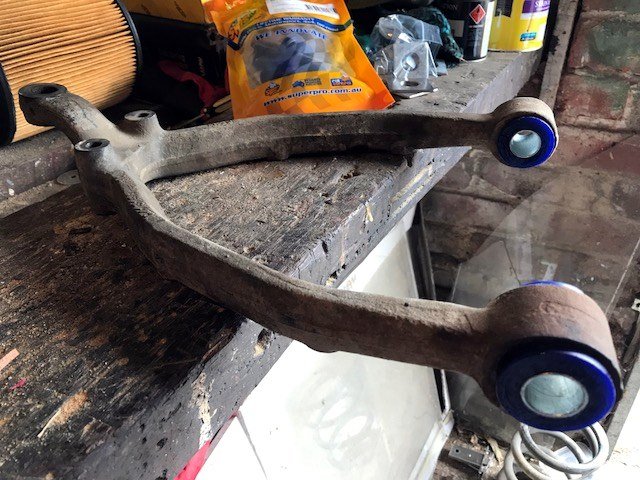
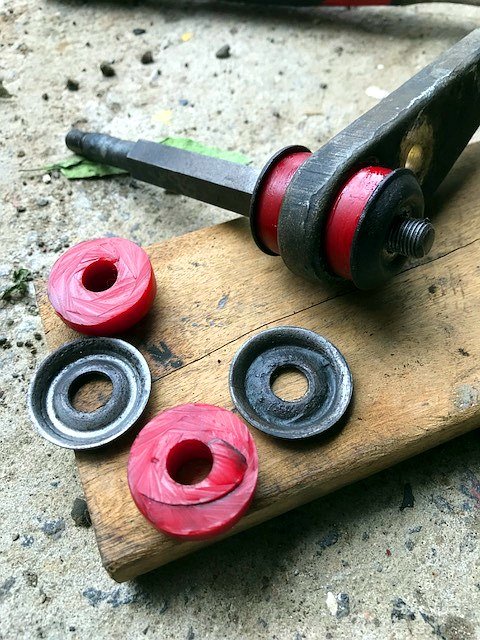
Go go gadget homemade spring compressor! If you're also a Kiwi nutjob, you too can get high tensile fine threaded rod by bolting on down to Steelmasters. It takes all year to raise and lower the spring pan, but it works. =\ Next, remove the fulcrum shaft to get the lower wishbone off. It hits the steering rack (already lowered a bit in this photo): That's kind of understandable / forgiveable, but this (below) is a bit retarded: That pipe is in the way by just a few mm. Haynes would probably tell me to take the engine out to resolve it, but I just used violence. I finally had the lower wishbone out, and the bushes were better than they had initially looked. It was only the upper control arm bushes which had definite wear. Oh well. Replace anyway. When reassembling the suspension, you've got to try to align the spring pan with this wishbone (while it's under twisting force from the compressed spring) so you can bolt them back together. This is not a fun game, so you think "I'll go out and buy some long bolts to use as guide studs while compressing the spring." Unfortunately: Stupid imperial car. I did not realise the implications of this prior to purchase. While putting everything back together, I had a look at these red sway bar end link bushes which were fitted to the car when I bought it. I think they're the wrong part which has just been hacked to size. The flat cut surface facing upwards in this photo sits against the cupped washer, which looks like it's designed to accept a specially contoured bush and to hold it in place as the suspension moves. The result is that the bushes get pushed out of position. I shall order new ones and hope for a better fit. Meantime I reinstalled them and took the Jag camping up north, a 470km round trip (via SH16 because corners). Using the A/C and the loud pedal I averaged 12l/100km. I believe I could feel the improvement to the front end on occasion, but the feel of the rear still reminds me of old timey race car footage. I'm trying to practice different approaches to cornering than I used to use in my light FWD Alfa 33, because there's a good chance I am the problem. =) At the campground the Jag was parked right in view of our gazebo and I confess to admiring it all day. What silly thread pitches? What total loss cooling system? I even got a thumbs up from a farmer as I wooshed home in my conspicuous consumptionmobile.
1 point
-
1 point
-
got the beetle started up last night. pretty happy with it all. but taken a few little steps backwards but shes still pretty darn good.1 point
-
Runner system prints completed.1 point
-
Rear windows got removed today so we will be able to start welding the C pillar. Current situation is we are starting to weld up the holes and cutting out patches and wielding them up.
1 point
-
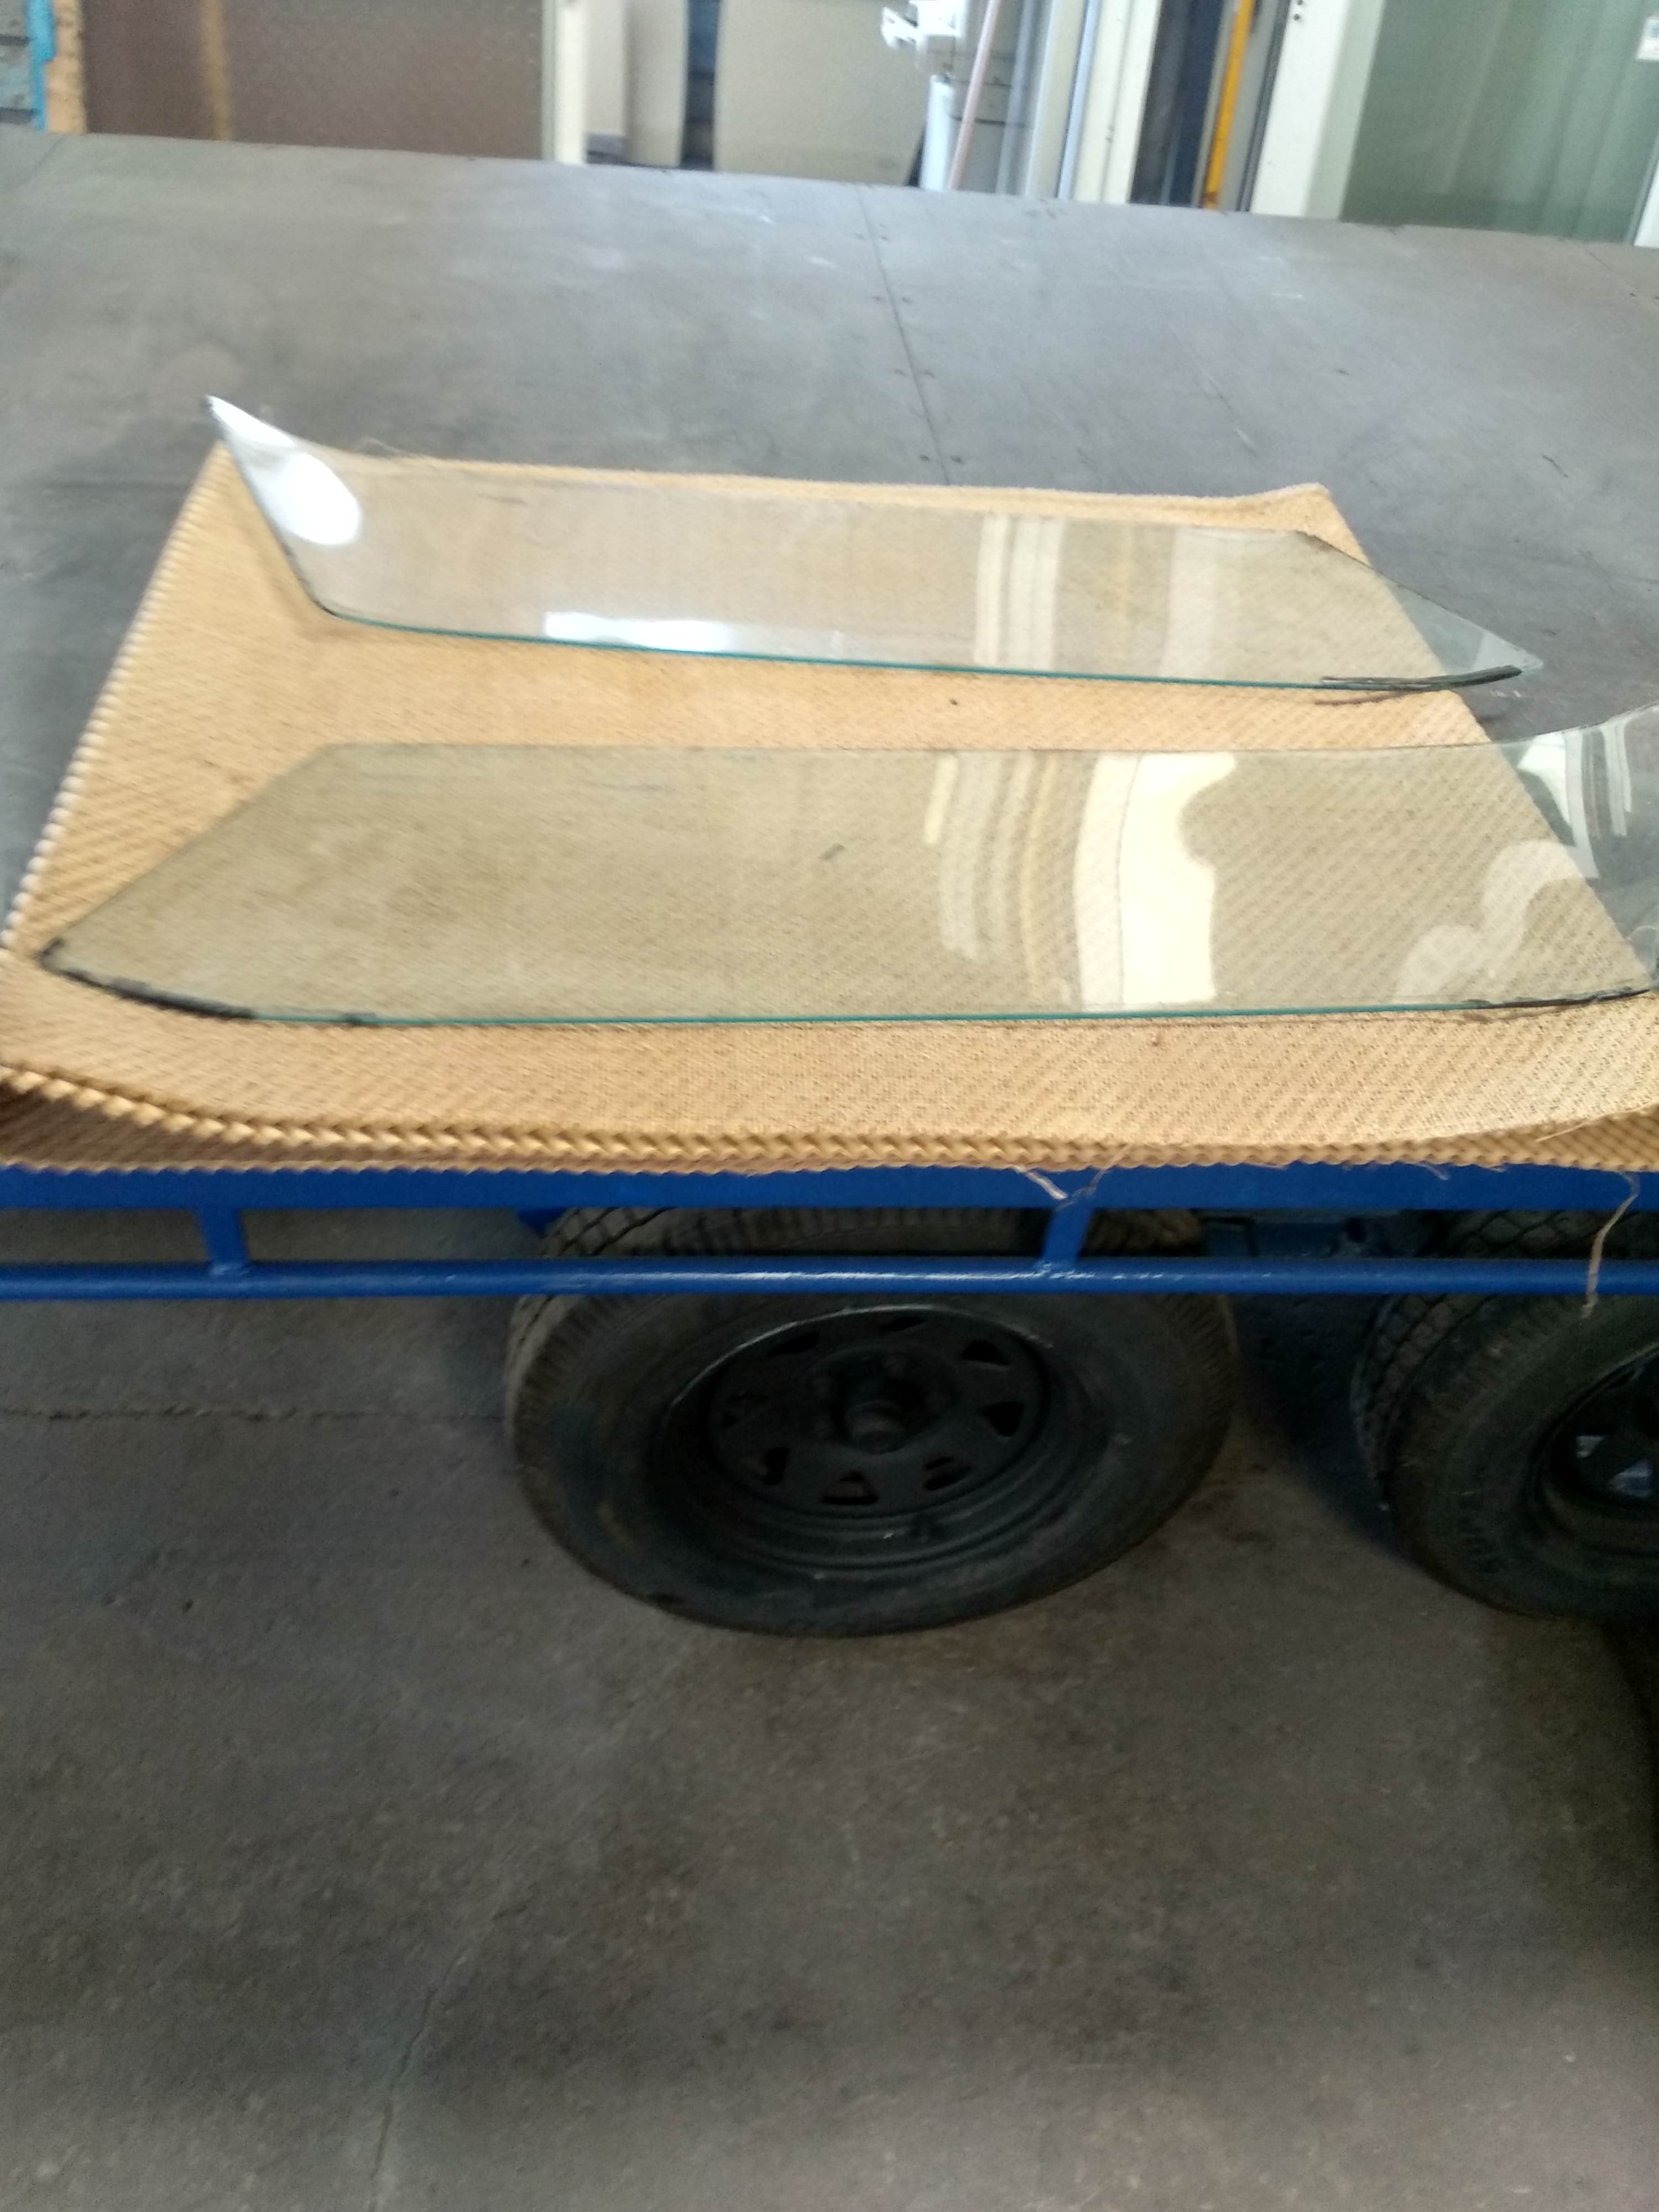
Learnt a lot in the past month and a bit. Main thing being that you should probably lube your fuel injector o-rings when you go to put them back in. Got the engine running, was only running on half the cylinders. Discovered there was no fuel going to the rear half cylinders, so decided to pull out the injectors. Took them into town and put them on an injector tester and nothing happened. Was told they can gunk up after sitting for awhile. So went off back home and gave them a spray with some cleaner and smashed them on the ground until they started clicking freely again with power to them. Got them all sounding really good, so in they went (without any lube, thinking back it should of been something that should of come to mind, but I guess I was just in a rush to get it running!), as they went in they must of torn the o-rings. I got the intake and everything back on and together and we started it up again. Ran mint!! So turned it off to see how it would start again, flat battery. Chucked the charger on, and then decided we'd put the wheels on, piece it a bit more together and go for a drive up the driveway. By time we got it together and off the hoist, a few hours had past and so had a decent amount of fuel past the o-rings and into cylinder no.5. Cranked it over and it didn't want to start very easily, so gave it a few more attempts and finally started up with a lovely knocking noise! We thought maybe it was just something loose in the bellhousing, as when we first started it we quickly realised there were no bolts in the flex plate to the torque converter. Anyway drove it up and down the driveway and then back on to the hoist. Decided over Christmas we'd pull out the transmission to have a look in there, other than the weights on the flex plate being ripped off by the torque converter there was nothing that obvious. Started the engine without the trans in and it still had the knock, which was a disappointment. Our neighbours Tony and Jason, who are a bit more mechanically minded came over on Boxing day after hearing that it wasn't transmission related, and went over everything they could think of. Eventually after a good few hours we narrowed it down and decided to check how high each piston is coming up by sticking a threaded rod with a nut on it and turning the engine over by hand. Got around to cylinder no.5 and it was about 5-6mm lower than the rest. Was obvious at this stage that we had a bent rod that was caused by hydraulicing the engine with fuel. Out came the engine, onto a stand, flipped over and then pulled the sump off. It was pretty bent! The crank smashed up the bottom of the piston, but other than the rod and piston everything else looked good. The engine is now at the rebuilders and injectors have been professionally cleaned with new o-rings. The buggered o-rings on the injectors. Since I had awhile off work over Christmas and the engine debacle halted progress a bit, we decided it was a good time to sand out all the runs in the clearcoat and give it another couple of coats with some flatter clear since I wasn't quite happy with the last stuff I used. Used some PPG autothane clear with flattening base in it this time. Was way easier to spray, looks waaaaay better, a lot smoother and a more consistent flatness. Also the extra coats covered the rust up a bit more, as before it didn't seem to be covered well in the rusty areas. With the engine out it was a good time to go through and tidy up a few things. Made up some stainless heatshields that cover the wiring on one side and the fuel and brake lines on the other. Also wrapped some of the exhaust in heat wrap to try and help keep some heat away. Ignore the plastic cable ties, the ones that came with the wrap were too short, and I'll change them soon. After trying to drain the coolant I decided it'd much easier if there was a drain plug, rather than having to disconnect a hose and having it run straight onto a crossmember. Next thing to do was sort out the fuel filler. Turned out the u-bends I bought for the headers were the correct size I needed, so took one of them, cut it to fit and welded a breather pipe on the side. Made a stainless pipe that goes from the 1 5/8" u-bend to 2" on the tank. Also added some gas struts to the rear bed lift up part. Whilst under the rear end noticed the rear airbags were only mounted on the bottom with bolts and no washers. This was mostly because the mount was so close to the diff tube and the airbag mounting holes had quite a small PCD, you couldn't fit much else in there. Came up with these plates that mount to the airbags with a countersunk screw and then have the studs stick through the outer of the slotted hole in the diff mount. Heaps of room to get a nyloc nut and washer now. Was running out of stuff that I could think of to do, so my Dad made a start planing and fitting the Matai wood planks that I bought quite a while ago. Fitted in they looked a bit weird being natural, too bright or something. Had some Japanese stain lying around that we tried and I quite liked it. So went and wiped that all over it once it was fitting well. Then wiped over some Scandinavian oil and came it out really nice. Got the windows installed, he still needs to come back and finish them off. The front window stainless trim doesn't fit as well as I'd hope it would, sorta sticks out a bit, but we're sure it's in there properly. Probably a combination of the crappy re-pro rubber and trim not being 100% right to start with, as I've heard of a heap of people having troubles with windscreen rubbers not fitting nicely on these. Supposed to be taking this to Nats in less than 6 weeks hahaha1 point
-
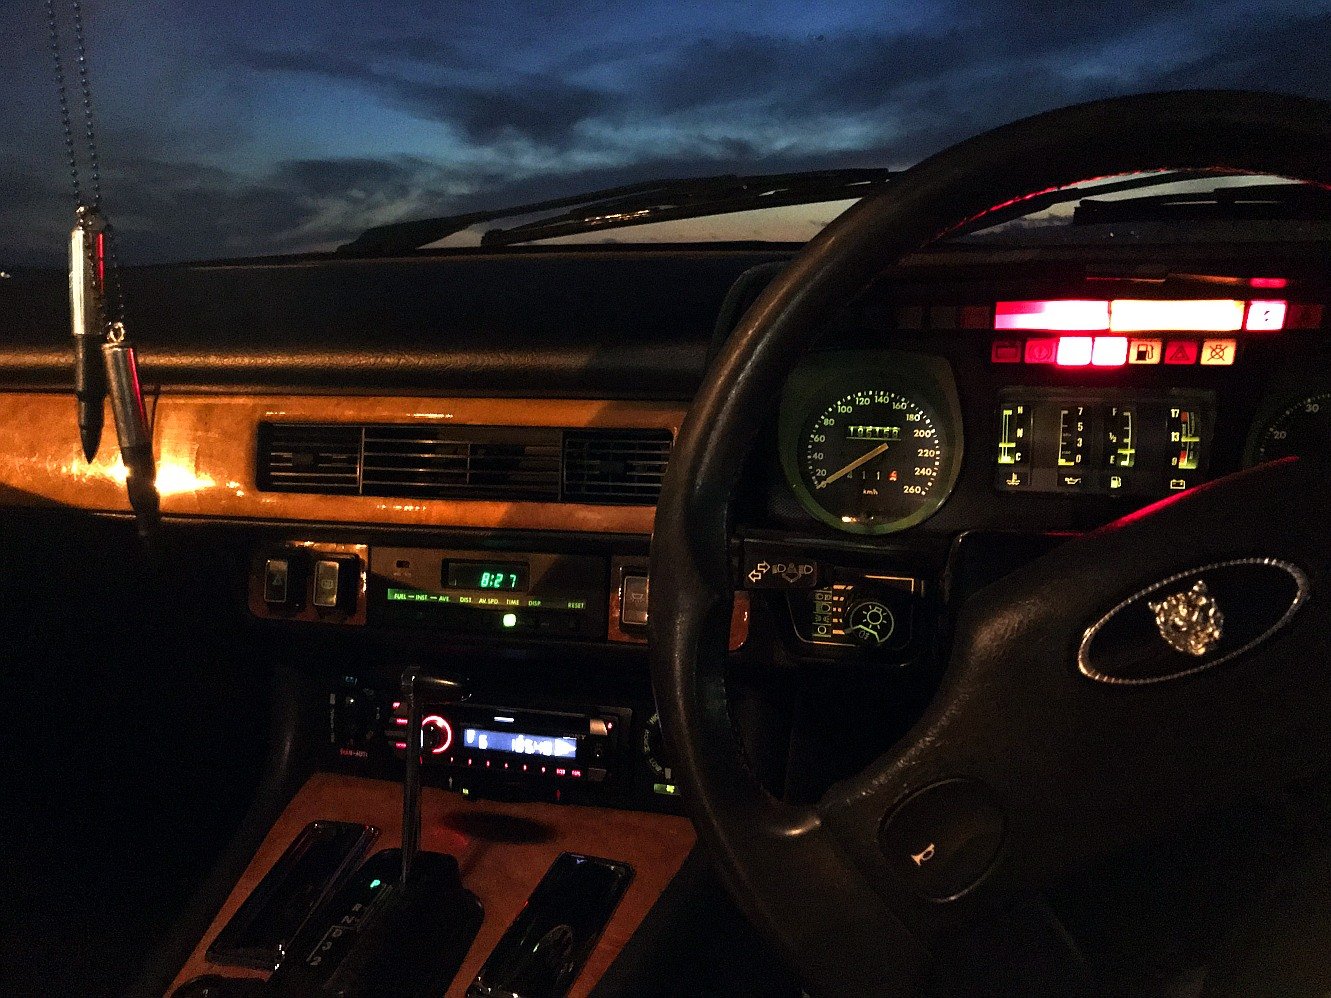
I'm trying to split these posts up a bit more. Have a photo: It's a nice place to be, despite the number of warning lights. =) Wheel balancing didn't completely cure the vibration the car has, and it also feels a bit oversteery when I start to push it hard. Some of the bushes looked a bit tired, so I ordered some new ones. First on the list is the front lower wishbone inner mounts. I thought this would be easy until I went to start the job today. Haynes recommends compressing the spring as the first step, but straight away this requires a special tool that inserts through a hole in the middle of the spring pan. Then he goes on to get you to take the front suspension basically to bits, removing the caliper and disc and separating ball joints. Lastly you have to knock the lower fulcrum shaft back through both bushings to get the wishbone off. The trouble (well, one of the troubles) is that on the XJS, the power steering rack is in the way of removing the fulcrum shaft. There has to be a dodgy way of doing it.. I think I'll have to lower the steering rack (and change its mounting bushes too at the same time). The fulcrum shafts apparently can get really stuck in place (as in, people have dropped the whole front crossmember to saw the shafts in half!). Because of that, I don't know that there's much hope of violently removing them with the suspension otherwise still together and the spring force countered by a jack. They'd probably still have some amount of load on them, and the suspension might come off the jack and fly apart etc. Has anyone done this before? Discuss: https://oldschool.co.nz/index.php?/topic/58671-thousand-dollar-supercars-1988-jaguar-xj-s-36
1 point
-
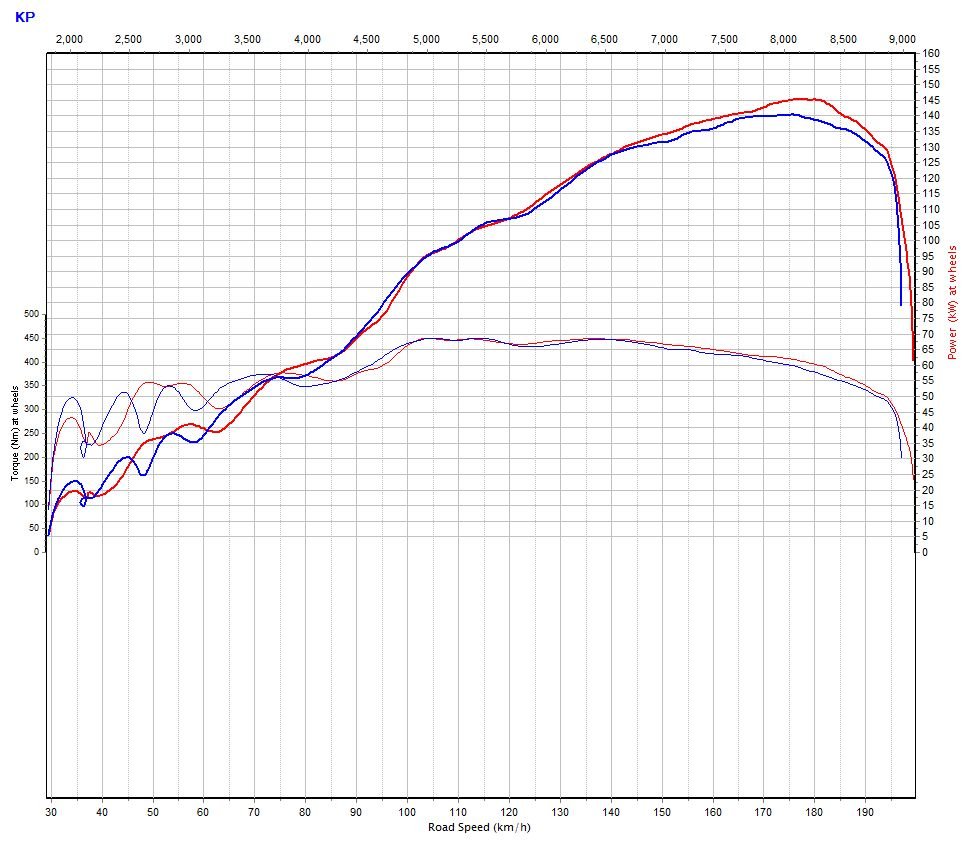
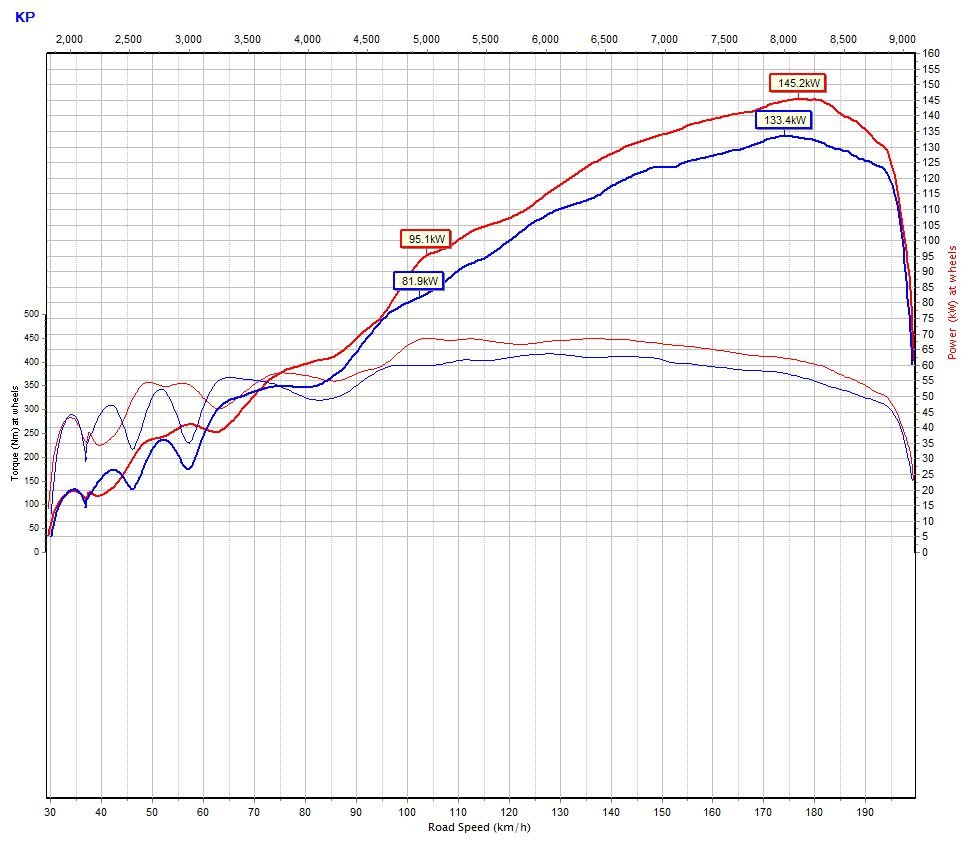
more dyno stuff.... Had to finish the tune after swapping to the small headers. Tried a few things while it was on there. First up; some time ago read something on the internet, that throttles may flow better/make more power just under 100% open rather than 100% open. Yeh nar; blue: 96% open, tried 98% as well same deal just a bit closer to red (100%) line. Maybe it needs even bigger throttles? they are 47mm Next is with the trumpets removed. the below removed all together was expecting some big losses, but not quite like this! over 10kw through the whole powerband.
1 point
-
day one of making this caravan. i had been meaning to make one for the shop for a while but 1st things 1st.1 point
-
You're a lost cause, Phil.1 point
-
Ok I lied. A few more photos. Rear T57 spring mounts. You can see them in this photo1 point
-
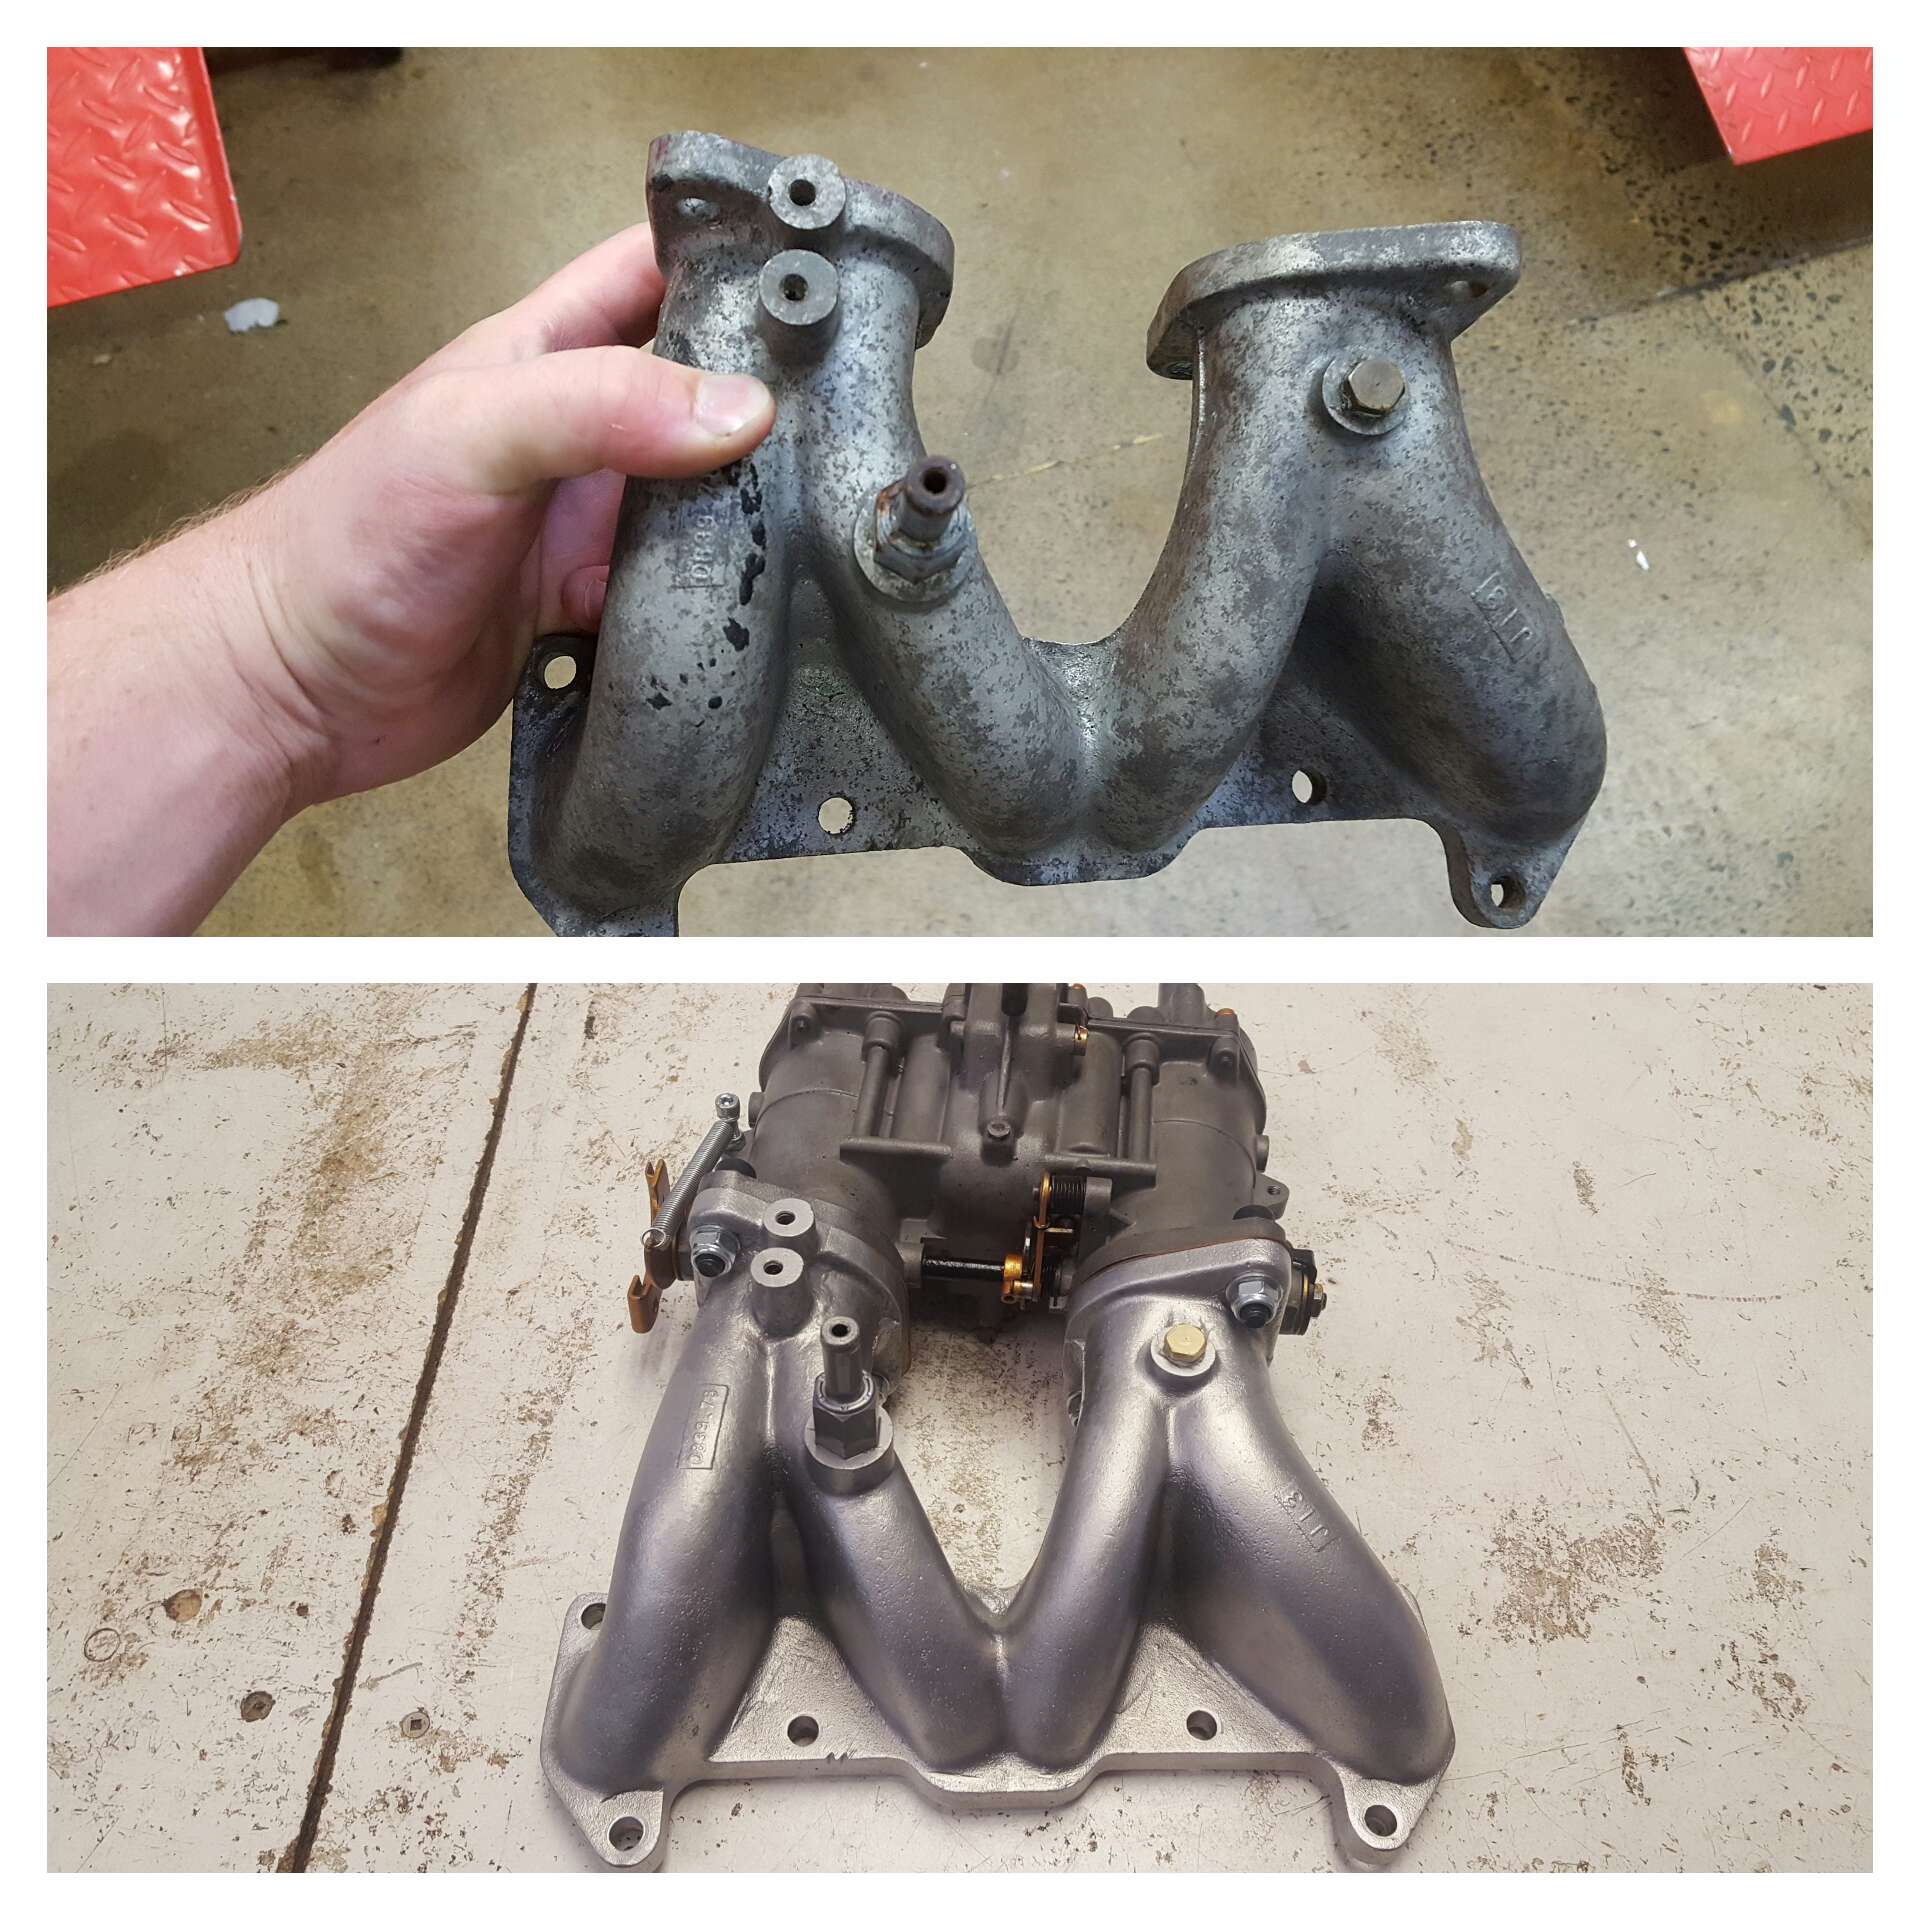
Oh and this. And geophys bos sorted me out and ida and I thought since the guys next door have a vaper blaster I'd do the nice thing and clean it up for him while I use it Nice before and after. Also some one tells me I've got 1500 axles in the rear of my vw which makes things 25 mm wider either side..... Someone wona clarify this for me. Cheers haha.
1 point
-
put the rest of the shit back together. couldn't find the third zaust manny gasket so i just used one of the old ones. drove it round the block and got it up to temp, got the bubbles out of the system and its didn't shit itself so I'm calling it done. 2015-11-14_04-37-01 by sheepers, on Flickr\\\\\ place your bets for how long it lasts.1 point
-
got the head back tonight on my way home from work. it has the big three going for it, its bent, its got soft spots in it and its been welded around number 6 exactly where the gasket let go last time. its a winning combo for an M head. so i chucked another gasket in it and put it back together. i think the gasket set only came with two exhaust manny gaskets because I'm fucked if i can find the third. so I've got to try and find one of those somewhere. cool. 2015-11-13_09-18-14 by sheepers, on Flickr 2015-11-13_09-18-06 by sheepers, on Flickr1 point
-
yep so she's back on the road, little bit of an update eh. - a bunch of rust needed doing, plenty more to go. sills etc. - front short shocks, Ultima, from online auto parts aussie site - had some standard KYBs floating around for the rear. glad i didnt cut the original shock mounts out during the hydro process! - whiteline swaybar and bushes, as above - new spring packs care of Archers springs, Rotorua. - thermostat, first time in years - fan shroud, first time ever - went back to the muzzy rims with some maxxis 175/70 14 biccies - new rear brake lines - super-drone side exit exhaust managed to stay, yeah! it drags round left handers under the right circumstances - stoked. - cleaned all the paint off the front end trim. fuck it drives so sweet now (for what it is), best it ever has. still a bunch of niggles but pretty happy with it. the new springs are great but came down a whole bunch during the trip to Wagnats. a little unusual for new ones. anyway, just got them back from HG Inghams blacksmiths in the Hutt. i dropped off the springs and my old main leaves on monday, by tuesday's end i had them back in the car with the old main leaf added to the pack, and all reset to suit. will get it out for a drive tonight but from standing on the towbar the car is noticeably stiffer, and only sits a half inch higher at the back, unloaded. loading up a bunch of shit and a Hemi2doz in the front and driving it for a week/nats should be a good test!1 point


.thumb.jpg.a2db281d9c23049231ffe92932a2a4af.jpg.82856884f74f9f19661bab062dfdc1be.jpg)


.thumb.jpeg.384ff72c8d2b0ee0d34a7bdedb55bdcf.jpeg)


This leaderboard is set to Auckland/GMT+12:00