
Leaderboard


Popular Content
Showing content with the highest reputation on 01/31/19 in all areas
-
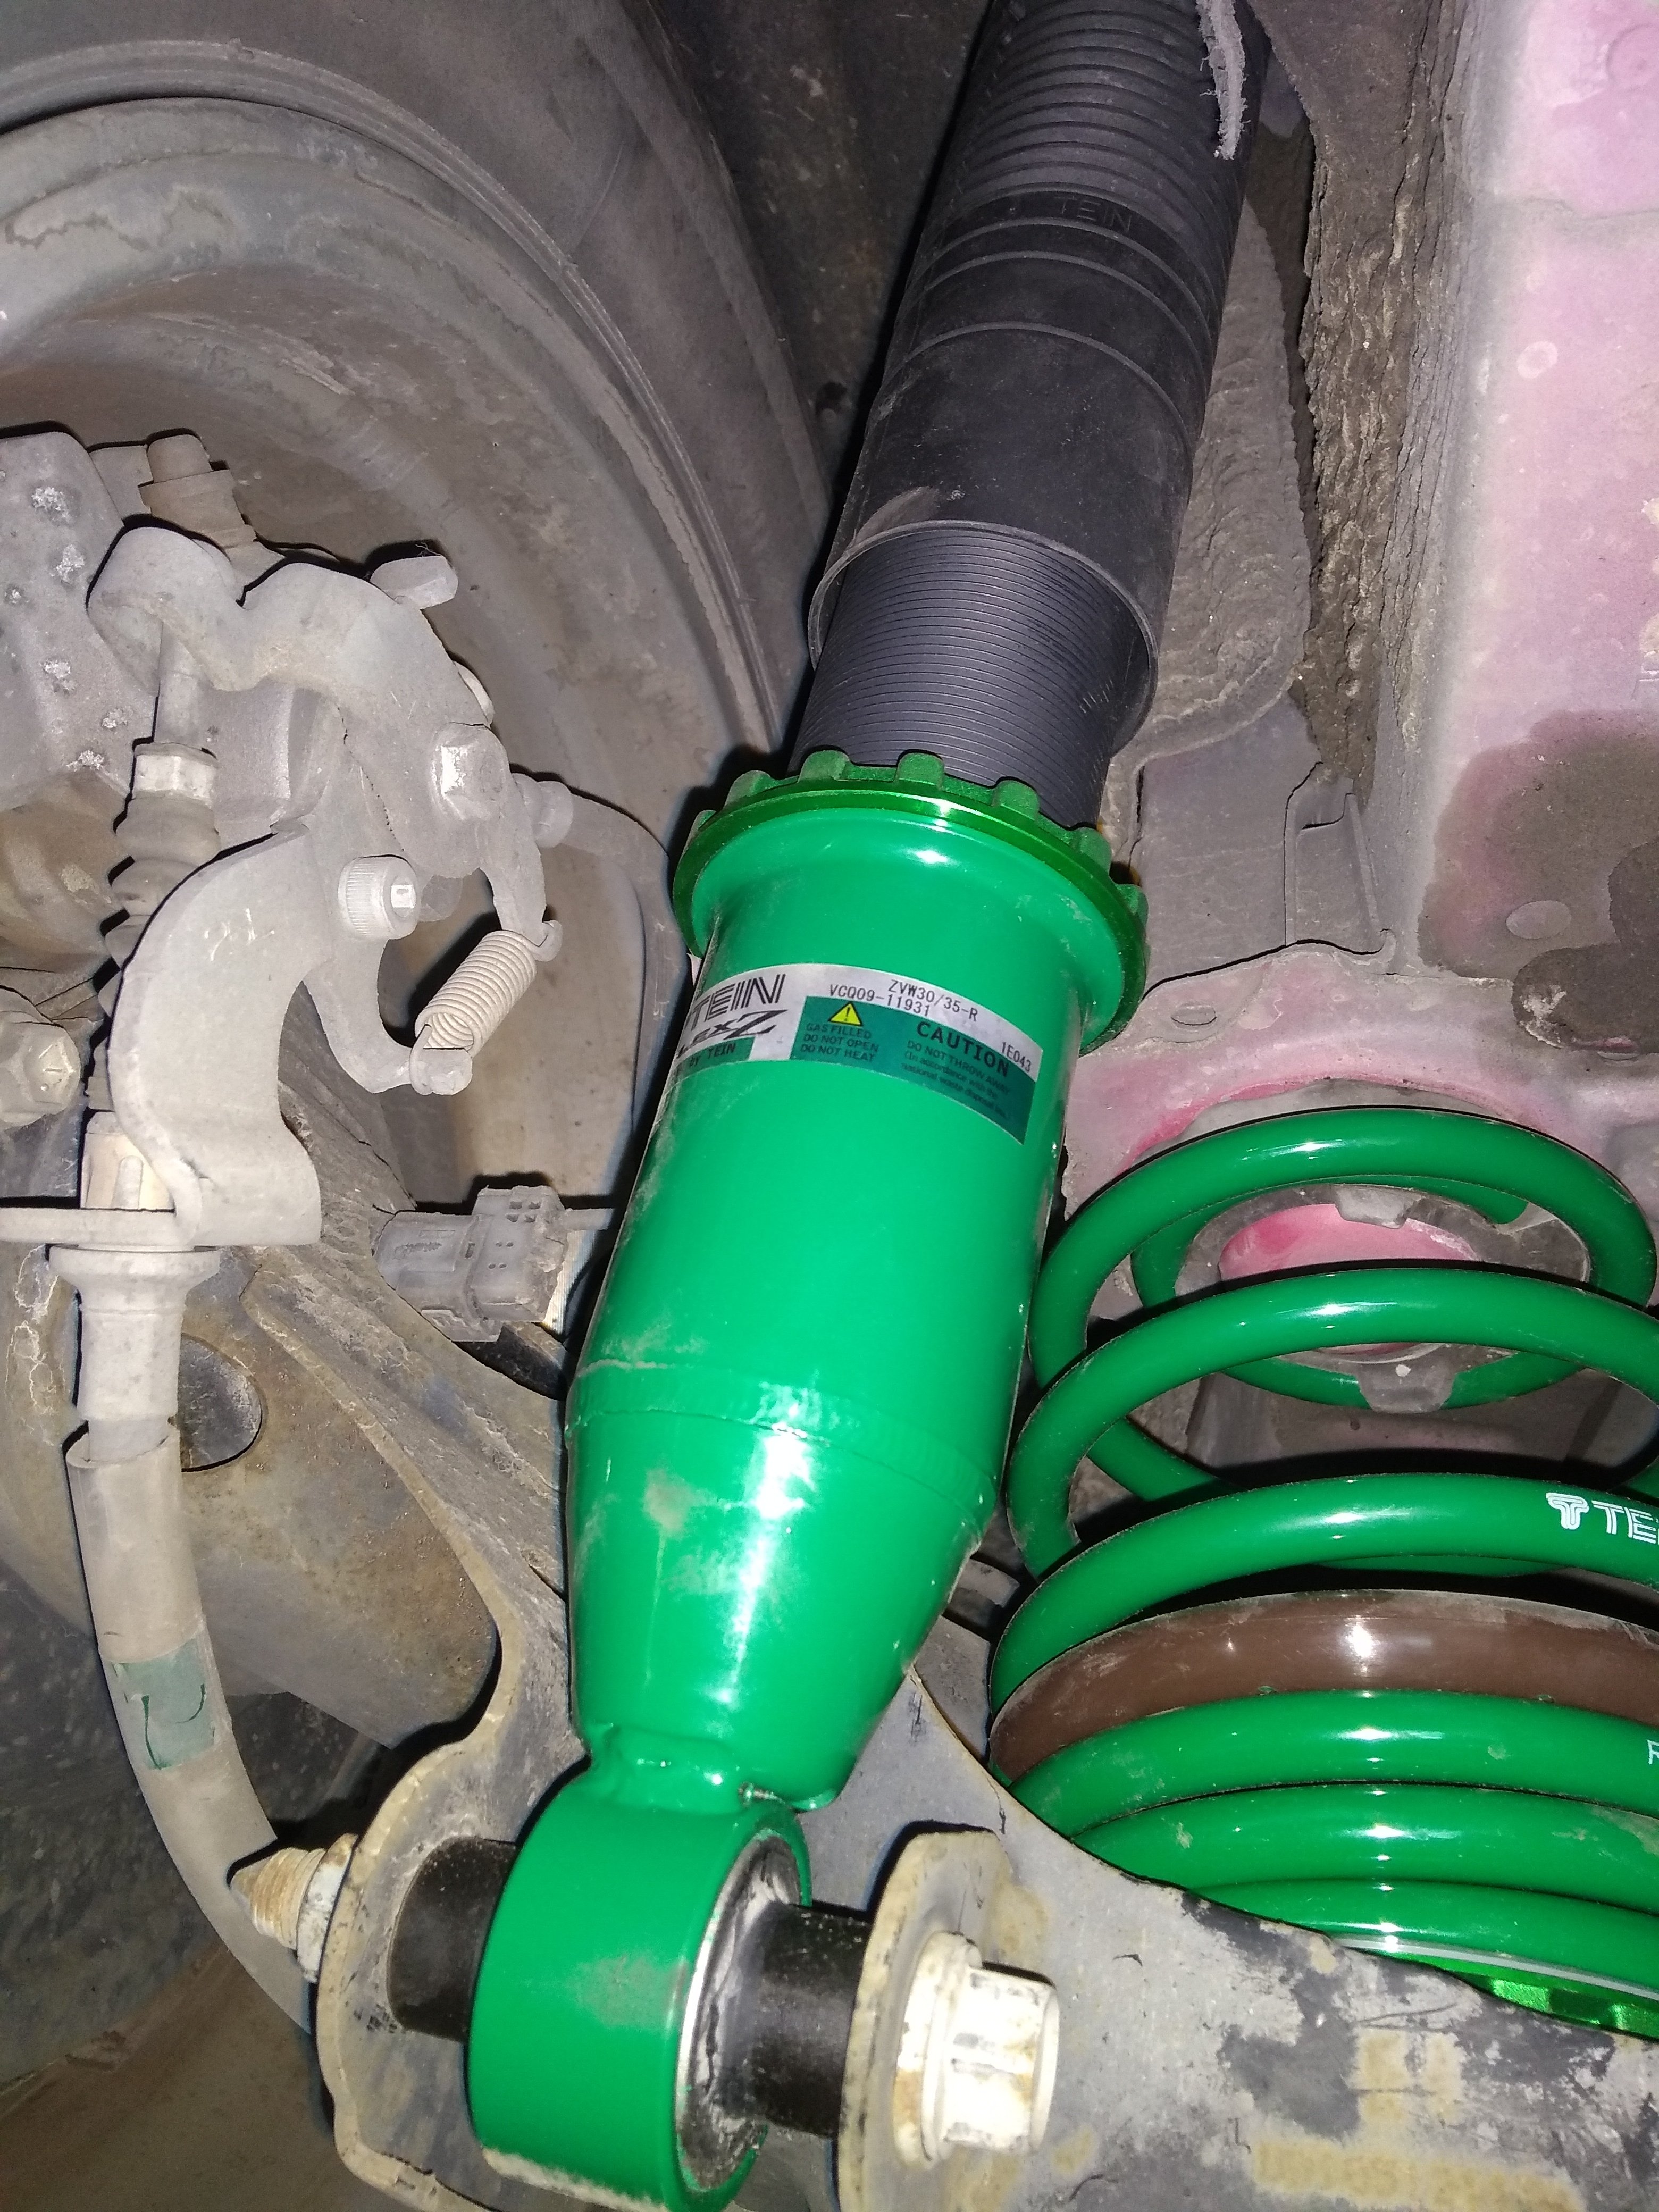
So tonight, I physically ran out of downwards adjustment. Could barely drive it off the hoist, well actually I couldn't with the front so had to put it on blocks of wood. Obviously that means its still not low enough in the rear - damn it. Next step is remove one or both of the adjuster rings and just roll the threaded locater. I'm kinda hoping it sags a little more. But thats as low as she goes in the front folks. Behaved OK going home and no rubbing or scraping I could detect.. Maybe need to get someone who knows what they are doing with stiffness adjustments to help because it feels a bit pogo like, though I';m not sure if its the front or rear causing it... Check out my photoshop skills.
 11 points
 -
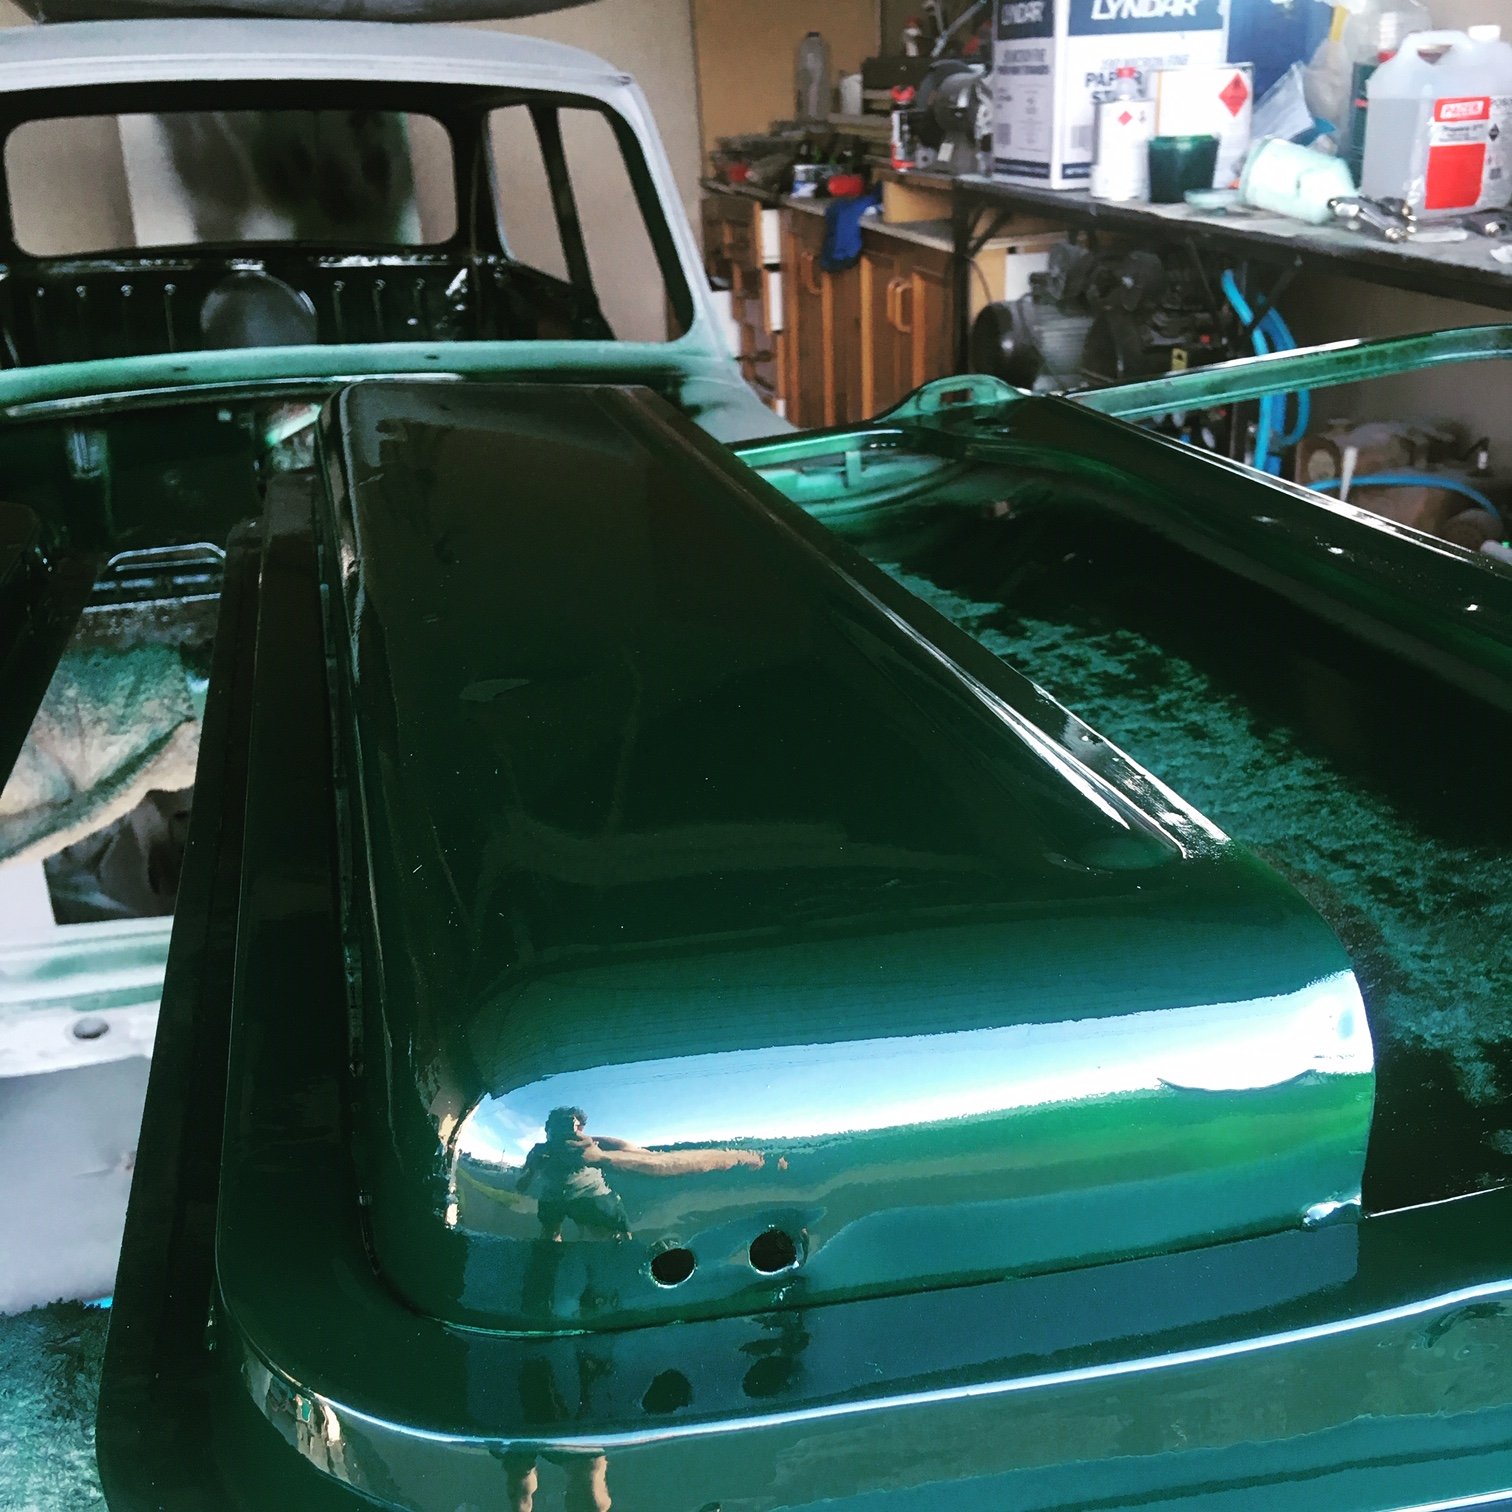
Finally some colour....
10 points
-
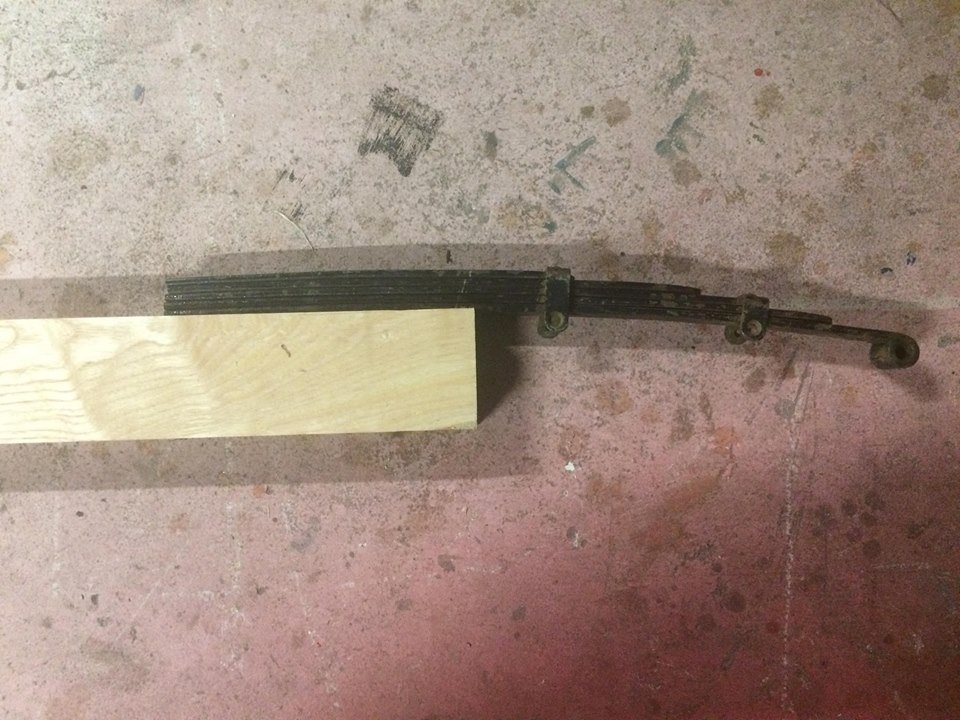
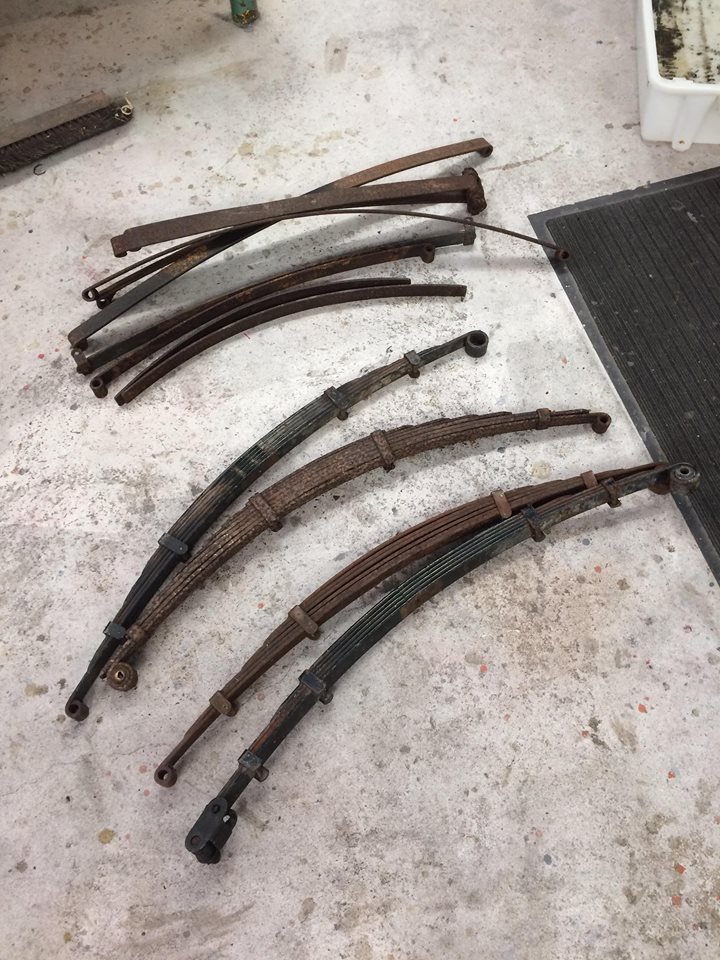
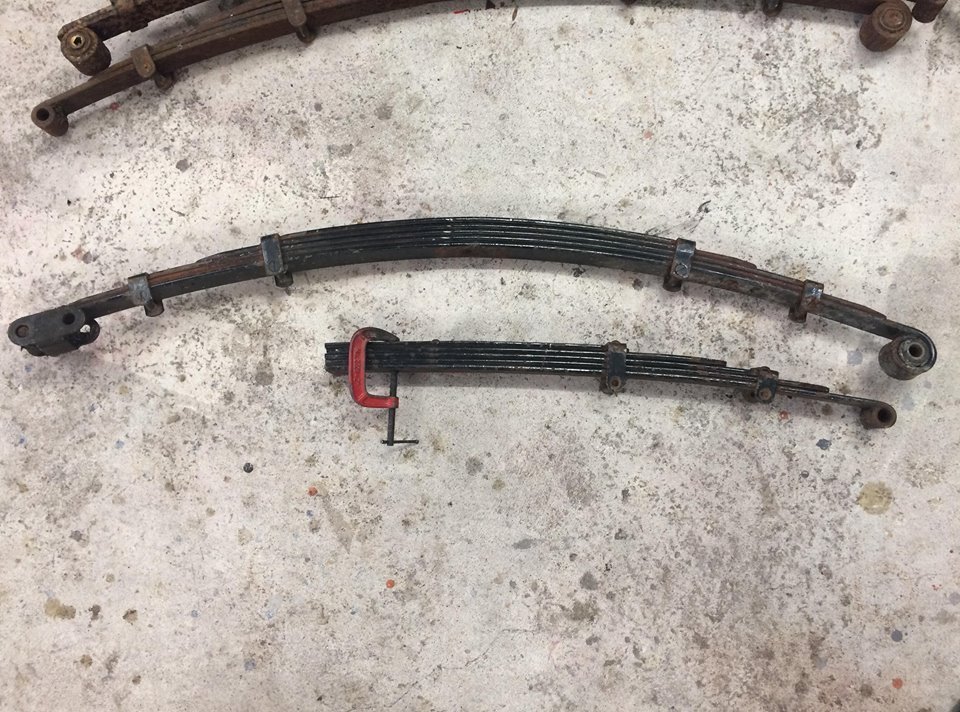
Made a start on the springs today. GNs used 1 1/4'' wide 1/4 elliptic springs on the front and rear. A mate had some Morris 8 springs spare which are the correct width and a good start. Pile of springs The setup for resetting them Before and after. i have left one leaf out for now, might still need to take another out yet. And where it will sit on the chassis rail. Need to make up some brackets to bolt it to.
5 points
-
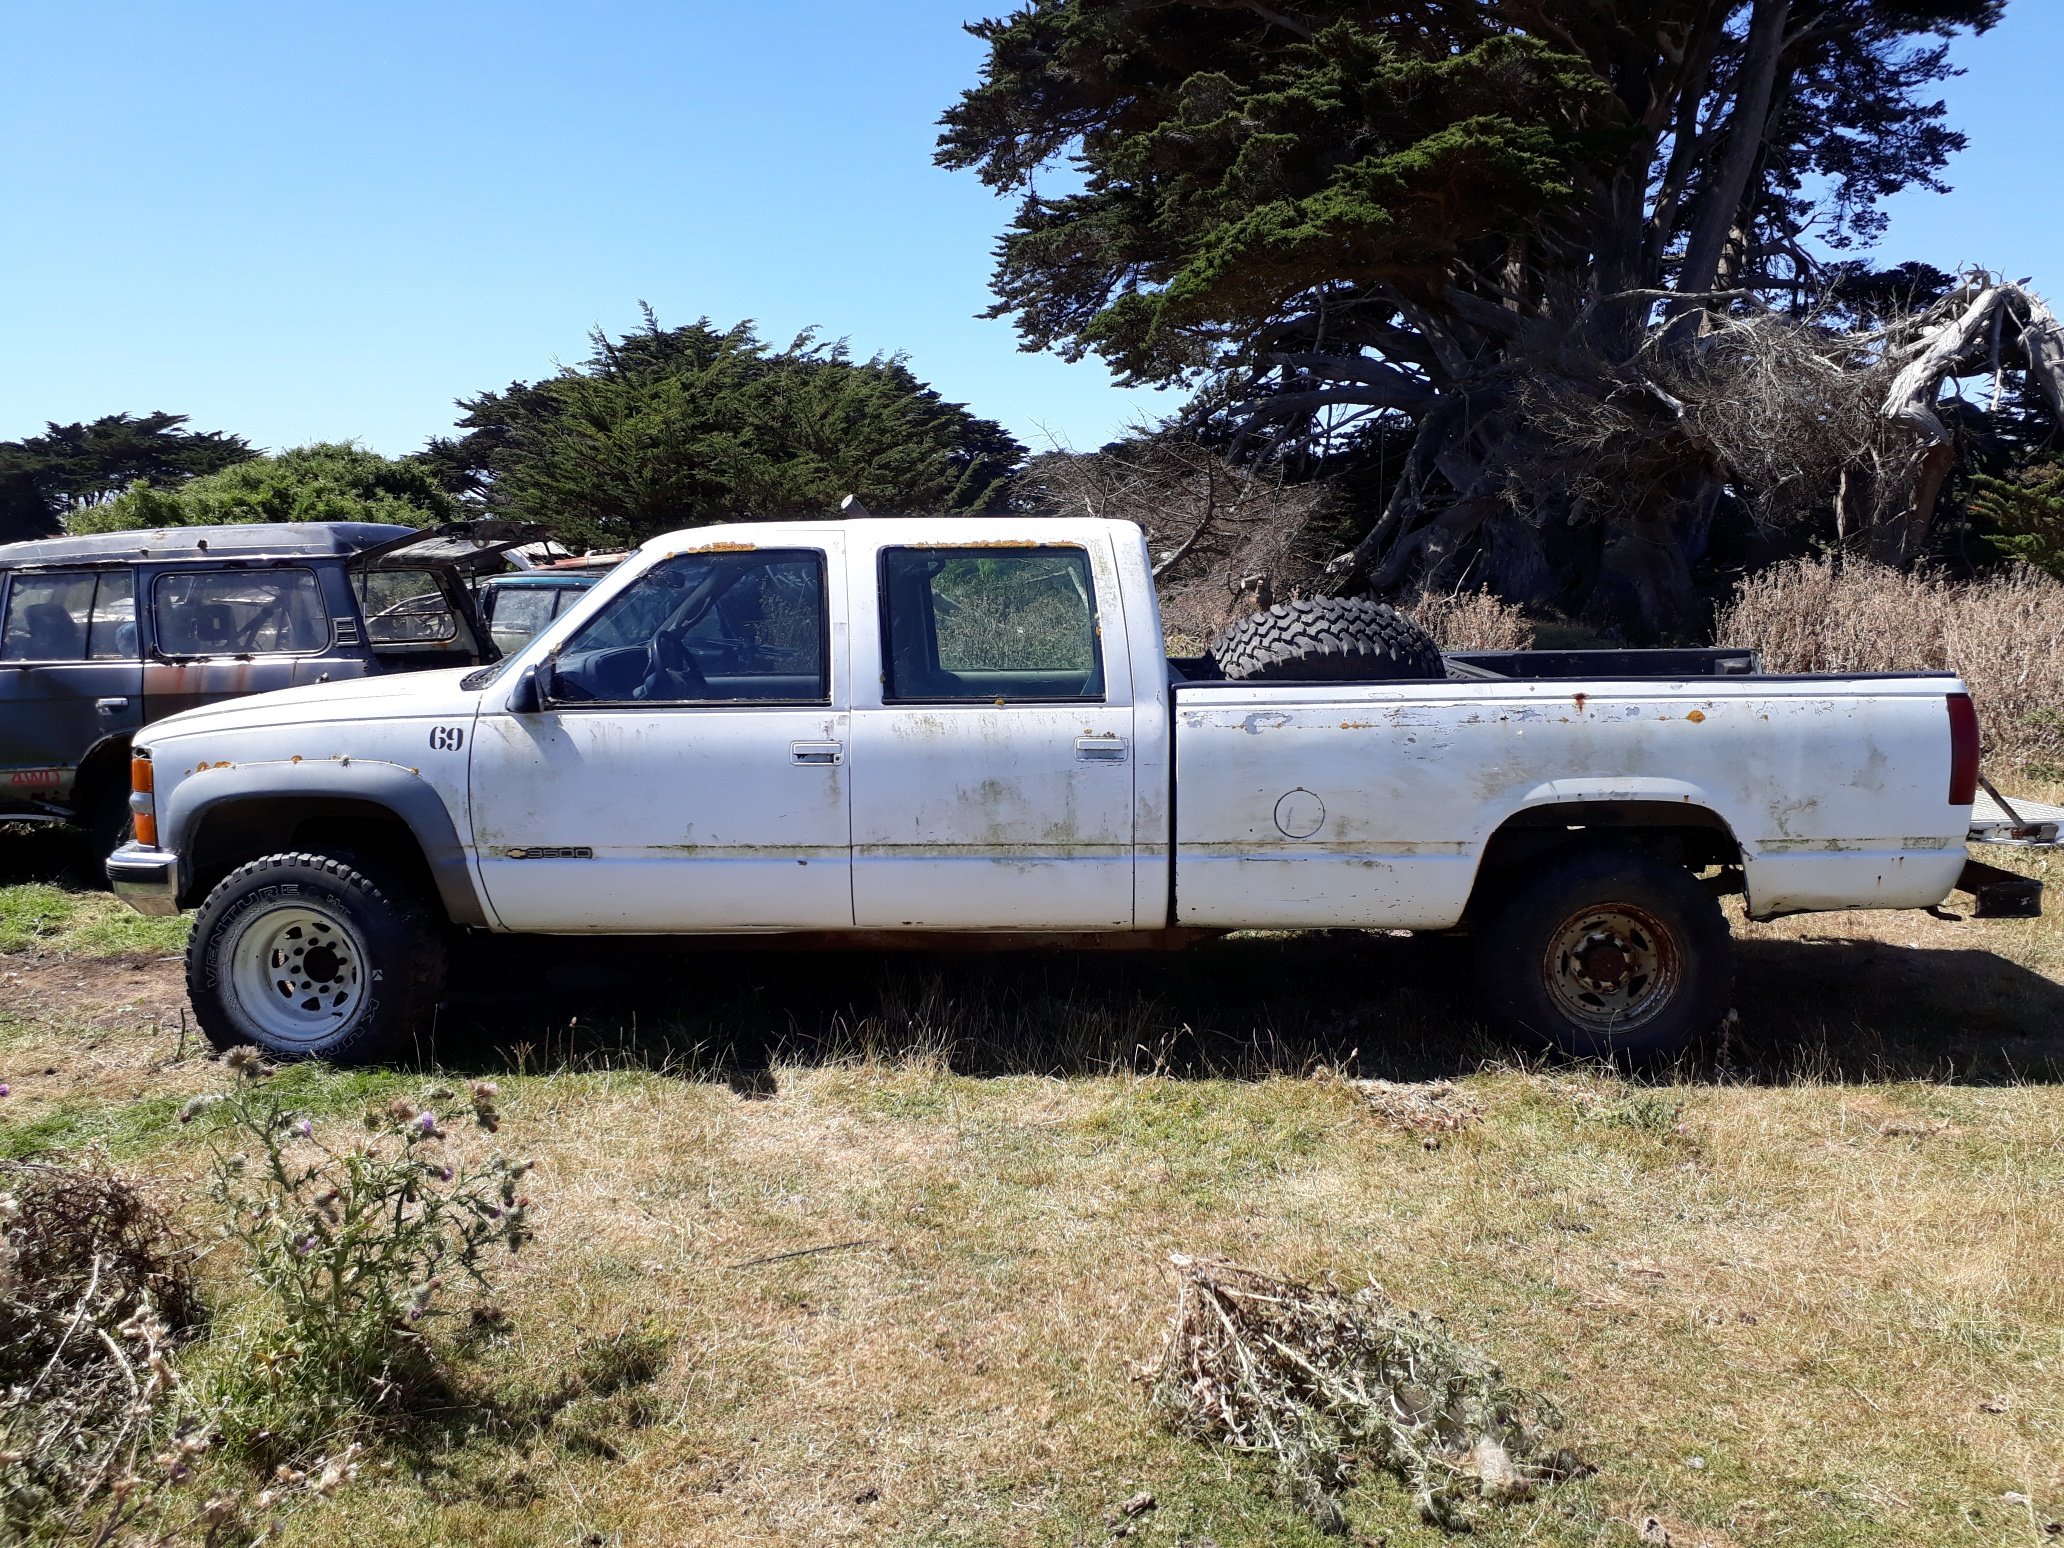
If all goes to plan I'll pay for this heap in a few days. The current owner is a good mate who gave up on the truck some time ago. He's offered it to me at a very fair price so I hacked it out of waist high thistles a couple of days ago, found enough wheels to get it in the air, and got the brakes un-seized enough to get it rolling...in a straight line. Hopefully I'll get an ignition key this week which will mean I can unlock the steering. I'll get some batteries and see if she'll run. I know little about diesel engines so this could be fun. She's a 6.5 turbo V8, and despite looking pretty haggard is quite sound in the body and chassis. One of the worst things is the wheel size - they're 16.5 inch. Those are 33x12.5x16.5 tyres on both the wheels you see. The truck makes otherwise big tyres seem small. I'm on an island where WoFs aren't a thing, but I have no tools except my carpentry gear with me so I will be at the mercy of others. So far people have all said I'm mad (the truck has a reputation as a bit of a lemon around here), but they've all offered me gear too. Nice.
4 points
-
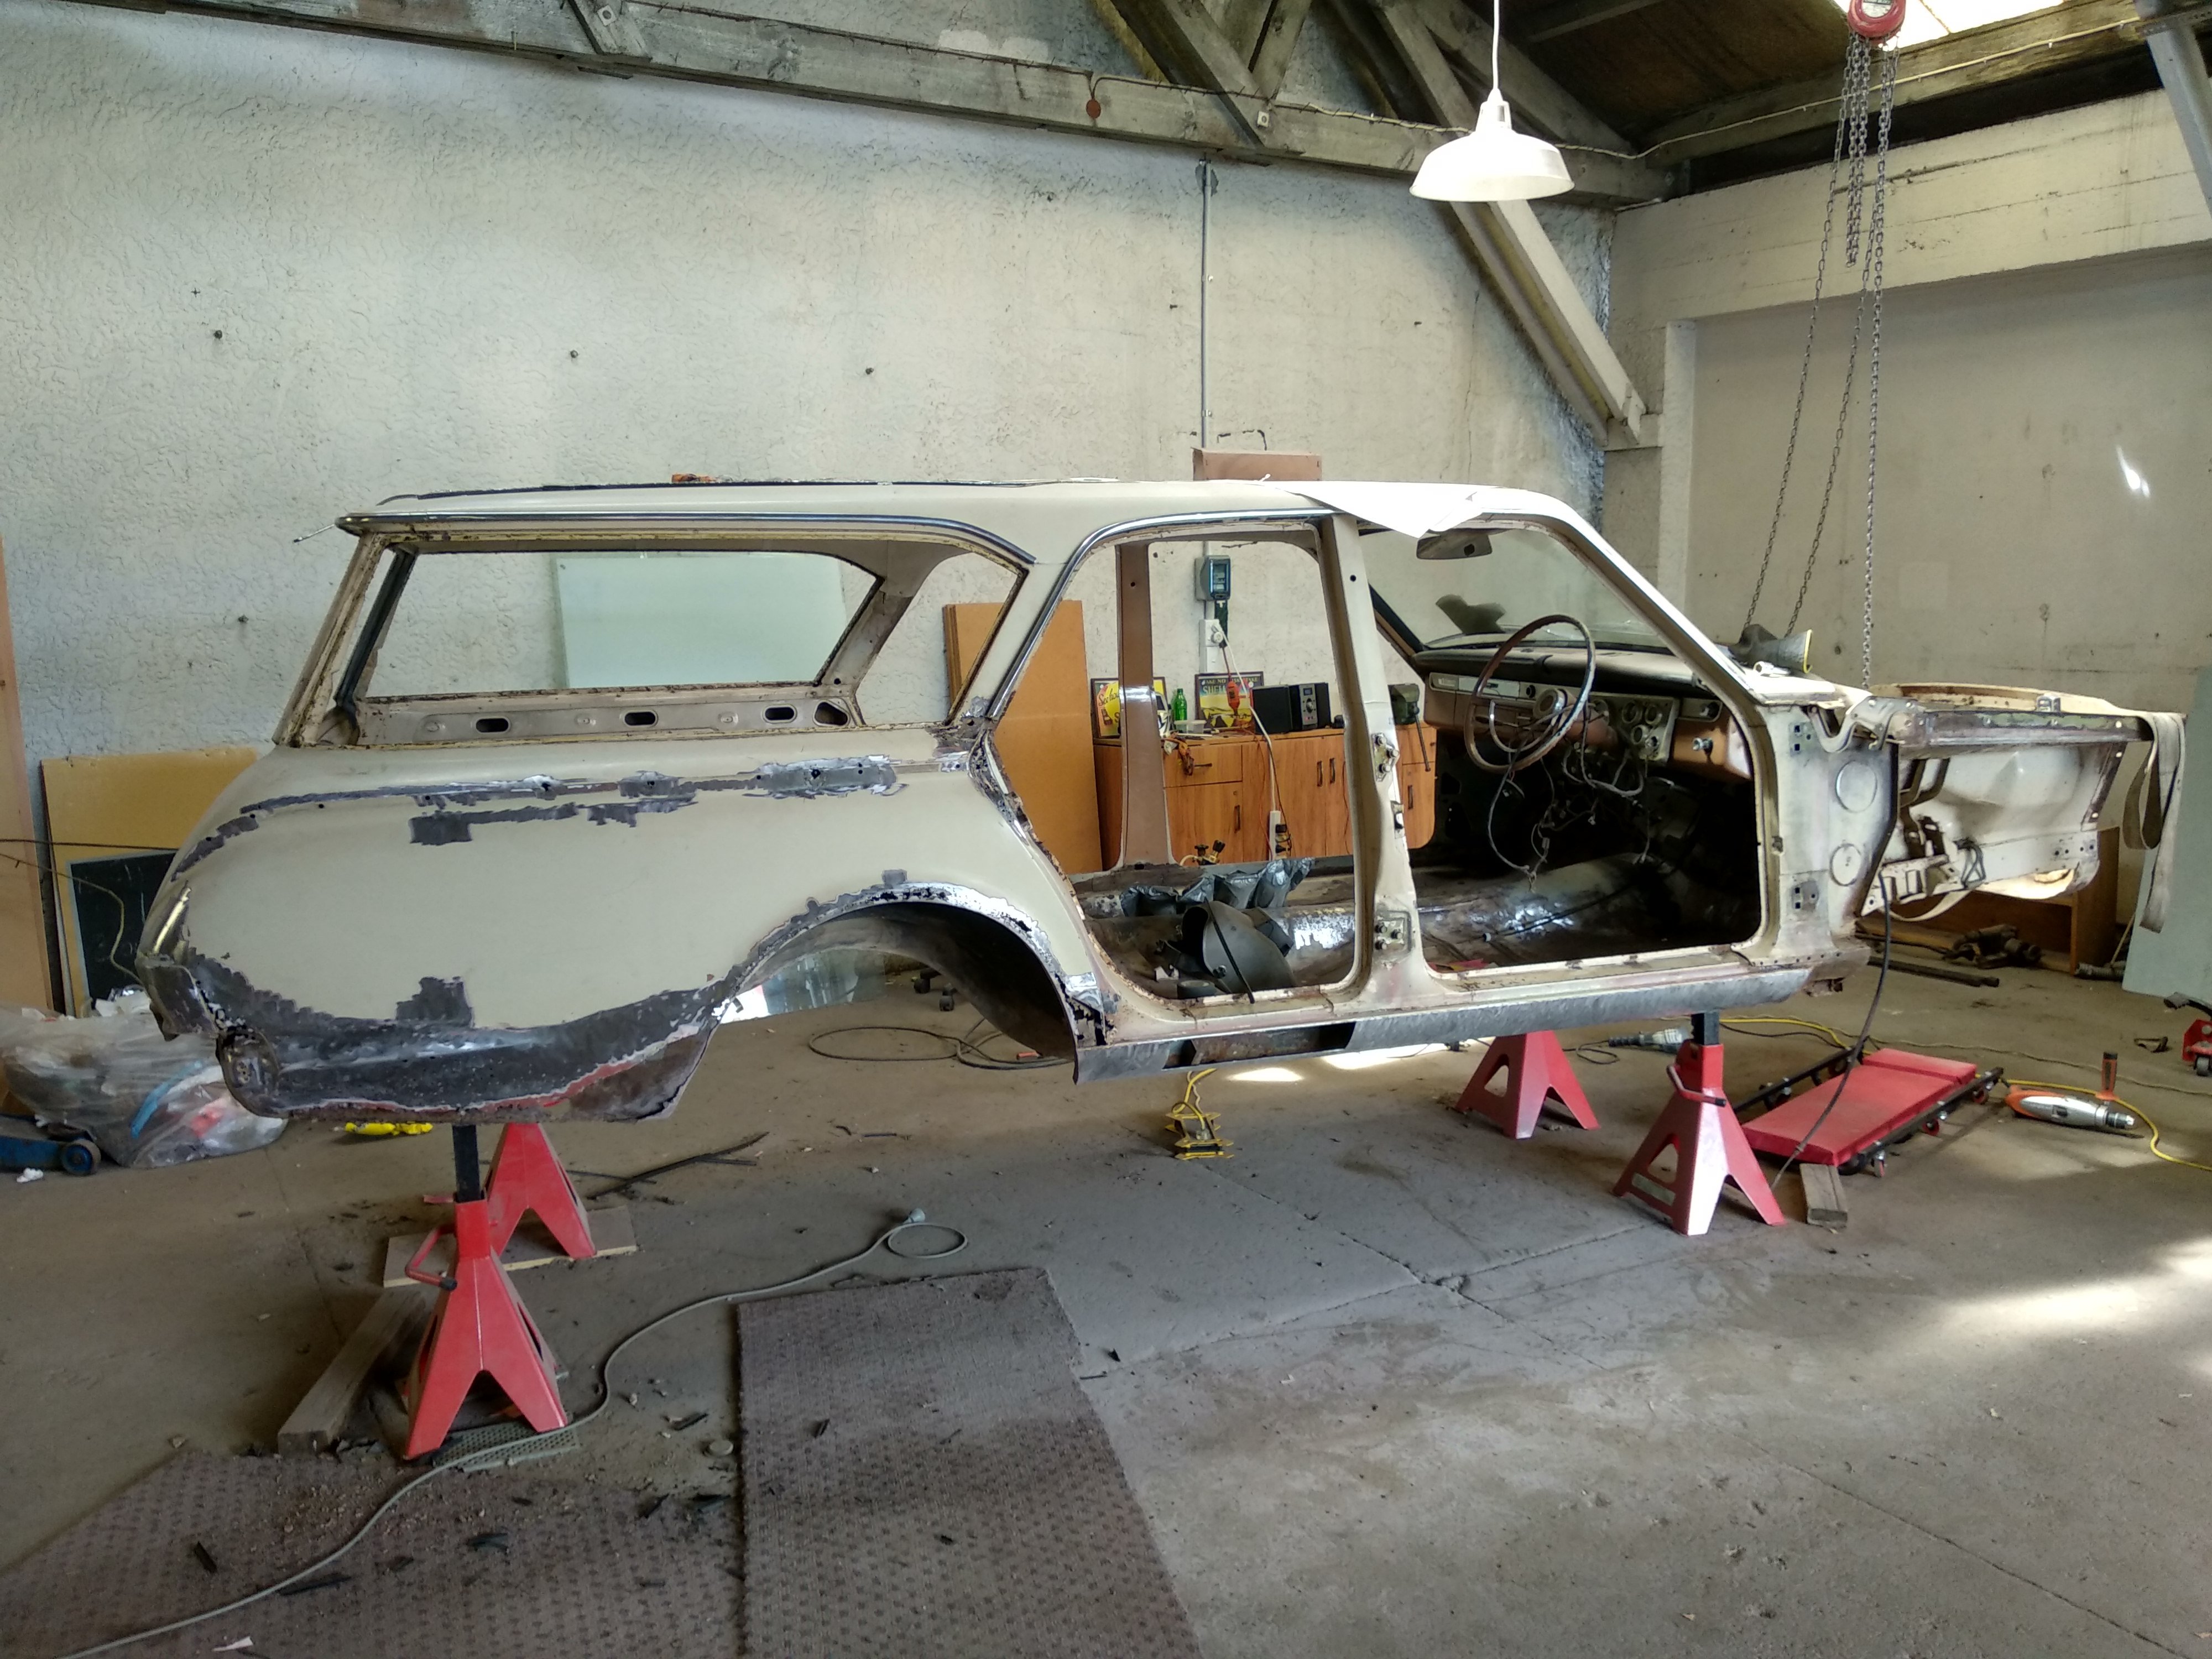
OK so I was thinking I was not far from painting the shell when I realised my repairs to the rear guard behind the drivers door had a slight bulge, maybe 5mm outwards in relation to the edge of the door shuts. A classic case of working up close and not standing back to look at the complete picture. It showed up worse when I sat the door in place. I thought I had taken a photo but alas no- trust me when I say it would have done my head in noting it each time I looked down the flank. This panel had been badly bashed in at some point we had popped it out. But obviously too far sadly I never realised until now. I tried beating it back in but no luck. It had been previously repaired by someone else and was full of lots of sharp dents. So this happened... Following that I did a super careful replacement of the steel, butt welded in, with very slow careful welding so not to warp anything. In pictures... It turned out great. I still needed a skim of filler to get it spot on but considering what it was like prior I'm happy with it now. It lines up really well with the door... I then gave this and most of the rest of the shell another coat in primer, smoothed it all back with 400. Oh yawn. Helps having beer and loud Reggae playing. Hannah just loved sanding... With the sanding done I then preceded to turn the workshop into something resembling a Smurf murder house. If there was a song to be played afterwards it would have been this... https://www.youtube.com/watch?v=68ugkg9RePc We masked it all up and I painted the door jams, door backs, engine bay, interior, frunk, door bins etc. Next day, re- masked the shell and painted the rest. On the first days painting it was so hot at 34 degrees... The following day time I started as early as I could but it was still about 28. Luckily a very dry heat. Not fun in all the gear... I never really considered how far the blue mist would travel. It covered everything. Great fun. Now we have a blue floor which luckily is slowly going to wear off I think. I hope. After it was finished I shut the doors and let it bake in the oven that was the shed, drank a cold beer and went to the beach for a long swim. Here is a blue Imp. Its very similar to an original Imp colour I like so I went with this. Not sure of the name of the colour. Its very bright and changes from a mint blue to a aqua blue in different light. I'm so relieved to have finished the painting. It'll need a flat back to get rid of the orange peel and shine so it looks more like a original paint job. But I'm going to ignore that job until after the car is road legal. Enough body work and painting!!!! Its time to bring the other Imps inside and play musical chairs with all the various parts. Pick the nicest bits and reassemble one car from them all... It certainly is a fair bit better then when we first looked at this shell a year ago and I'm pretty stoked to be at this point in the restoration4 points
-
Or a crx3 points
-
Learnt a lot in the past month and a bit. Main thing being that you should probably lube your fuel injector o-rings when you go to put them back in. Got the engine running, was only running on half the cylinders. Discovered there was no fuel going to the rear half cylinders, so decided to pull out the injectors. Took them into town and put them on an injector tester and nothing happened. Was told they can gunk up after sitting for awhile. So went off back home and gave them a spray with some cleaner and smashed them on the ground until they started clicking freely again with power to them. Got them all sounding really good, so in they went (without any lube, thinking back it should of been something that should of come to mind, but I guess I was just in a rush to get it running!), as they went in they must of torn the o-rings. I got the intake and everything back on and together and we started it up again. Ran mint!! So turned it off to see how it would start again, flat battery. Chucked the charger on, and then decided we'd put the wheels on, piece it a bit more together and go for a drive up the driveway. By time we got it together and off the hoist, a few hours had past and so had a decent amount of fuel past the o-rings and into cylinder no.5. Cranked it over and it didn't want to start very easily, so gave it a few more attempts and finally started up with a lovely knocking noise! We thought maybe it was just something loose in the bellhousing, as when we first started it we quickly realised there were no bolts in the flex plate to the torque converter. Anyway drove it up and down the driveway and then back on to the hoist. Decided over Christmas we'd pull out the transmission to have a look in there, other than the weights on the flex plate being ripped off by the torque converter there was nothing that obvious. Started the engine without the trans in and it still had the knock, which was a disappointment. Our neighbours Tony and Jason, who are a bit more mechanically minded came over on Boxing day after hearing that it wasn't transmission related, and went over everything they could think of. Eventually after a good few hours we narrowed it down and decided to check how high each piston is coming up by sticking a threaded rod with a nut on it and turning the engine over by hand. Got around to cylinder no.5 and it was about 5-6mm lower than the rest. Was obvious at this stage that we had a bent rod that was caused by hydraulicing the engine with fuel. Out came the engine, onto a stand, flipped over and then pulled the sump off. It was pretty bent! The crank smashed up the bottom of the piston, but other than the rod and piston everything else looked good. The engine is now at the rebuilders and injectors have been professionally cleaned with new o-rings. The buggered o-rings on the injectors. Since I had awhile off work over Christmas and the engine debacle halted progress a bit, we decided it was a good time to sand out all the runs in the clearcoat and give it another couple of coats with some flatter clear since I wasn't quite happy with the last stuff I used. Used some PPG autothane clear with flattening base in it this time. Was way easier to spray, looks waaaaay better, a lot smoother and a more consistent flatness. Also the extra coats covered the rust up a bit more, as before it didn't seem to be covered well in the rusty areas. With the engine out it was a good time to go through and tidy up a few things. Made up some stainless heatshields that cover the wiring on one side and the fuel and brake lines on the other. Also wrapped some of the exhaust in heat wrap to try and help keep some heat away. Ignore the plastic cable ties, the ones that came with the wrap were too short, and I'll change them soon. After trying to drain the coolant I decided it'd much easier if there was a drain plug, rather than having to disconnect a hose and having it run straight onto a crossmember. Next thing to do was sort out the fuel filler. Turned out the u-bends I bought for the headers were the correct size I needed, so took one of them, cut it to fit and welded a breather pipe on the side. Made a stainless pipe that goes from the 1 5/8" u-bend to 2" on the tank. Also added some gas struts to the rear bed lift up part. Whilst under the rear end noticed the rear airbags were only mounted on the bottom with bolts and no washers. This was mostly because the mount was so close to the diff tube and the airbag mounting holes had quite a small PCD, you couldn't fit much else in there. Came up with these plates that mount to the airbags with a countersunk screw and then have the studs stick through the outer of the slotted hole in the diff mount. Heaps of room to get a nyloc nut and washer now. Was running out of stuff that I could think of to do, so my Dad made a start planing and fitting the Matai wood planks that I bought quite a while ago. Fitted in they looked a bit weird being natural, too bright or something. Had some Japanese stain lying around that we tried and I quite liked it. So went and wiped that all over it once it was fitting well. Then wiped over some Scandinavian oil and came it out really nice. Got the windows installed, he still needs to come back and finish them off. The front window stainless trim doesn't fit as well as I'd hope it would, sorta sticks out a bit, but we're sure it's in there properly. Probably a combination of the crappy re-pro rubber and trim not being 100% right to start with, as I've heard of a heap of people having troubles with windscreen rubbers not fitting nicely on these. Supposed to be taking this to Nats in less than 6 weeks hahaha3 points
-
Guybrush1 plz
3 points
-
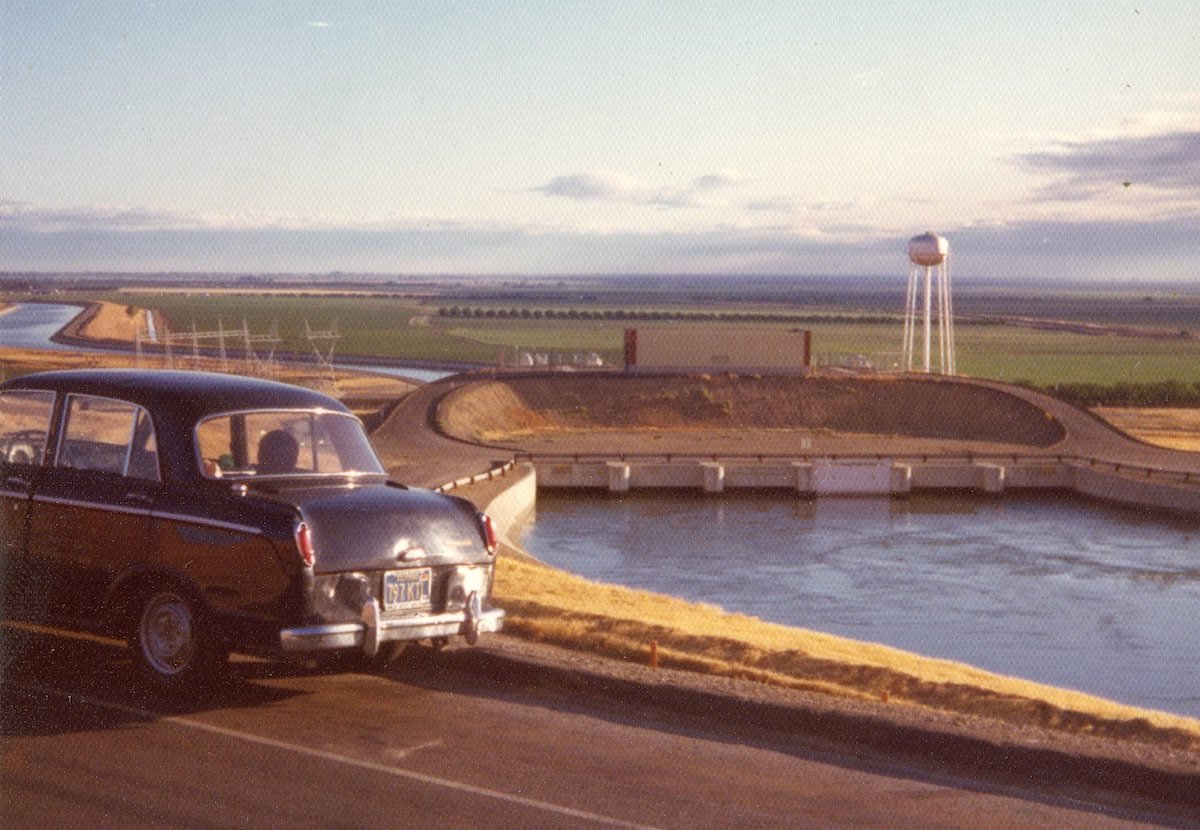
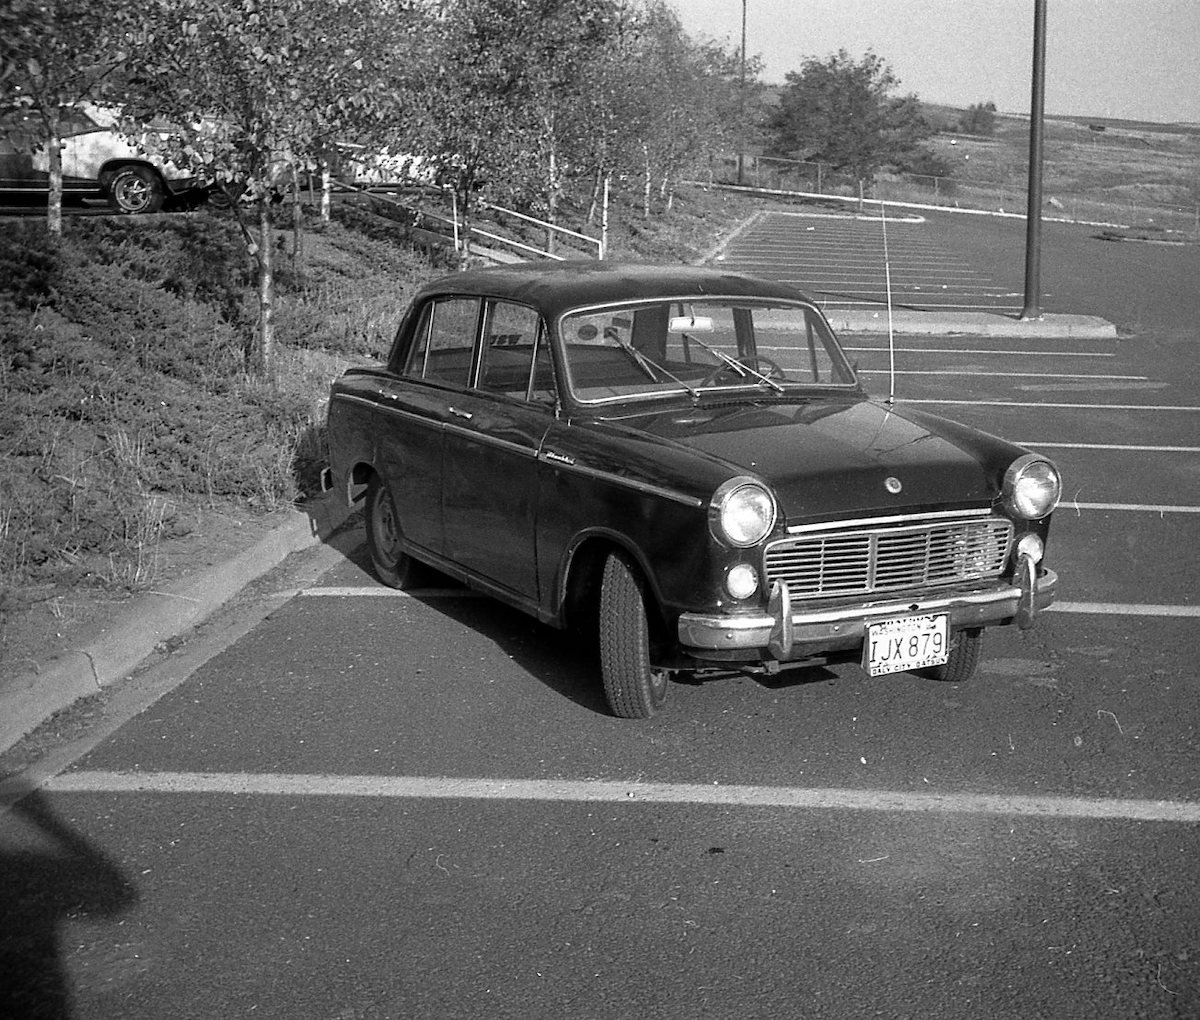
This is my Datsun Bluebird "de-rustification" project. This Bluebird is a U.S. specification 48 HP left hand drive 1961 PL310. It is the same as 1959 and 1960 310s. It is much different with respect to the drivetrain than late '61 through '64 models with the 60 hp engine, all synchro transmission and beefier rear axle components. I've swapped in most of the later model drivetrain though. The overall project been on and off again for years, decades actually. I have 44 years of my ownership history that I can present separately in a discussion thread along with this build activity. Previous historical "major" repairs included bumping out the roof panel in the late 70s due to a prior owner rollover accident. The rust work however is relatively new since early 2018. Photos. My earliest photo of the car is alongside the aqueduct in the California San Joaquin Valley in June 1975 and then Pullman, WA October 1975 . The latter photos are current covering the inner and outer sill panels fabrication, fit and weld work currently in progress. As time permits, I'll go back a year and begin describing the work and discoveries along the way to date and continue from there. https://oldschool.co.nz/index.php?/topic/60267-marts-pl310-61-datsun-bluebird-sedan/
2 points
-
Have you loosened the control arm bolts to relax the bushes at the new ride height? It can help with the pogoness.2 points
-
The BBQ cook off is a fucking load of shit and is basically nothing to do with the car show2 points
-
^^^Thats pretty much everything you need! Just need to know which byte of the can frame is the ID, probably 7 if 0 is already info. In other news, read a really good tip to stop those infuriating situations where you use = instead of == If you mean to write: if (engineSpeed == 7) But you accidentally write: if (engineSpeed = 7) Then you're in the shit because it makes the Engine Speed 7. But if you swap the order of your variable and the constant: if (7 == engineSpeed) Then if you accidentally use if (7 = engineSpeed) 7 can never become your variable so the code doesnt show a positive result 100% of the time. I have screwed myself over with this one, multiple times hahhaa.2 points
-
I was following one of these the other day and noticed the rear windscreen piece below the boot spoiler thing, that pretty much makes it a Lamborghini Espada2 points
-
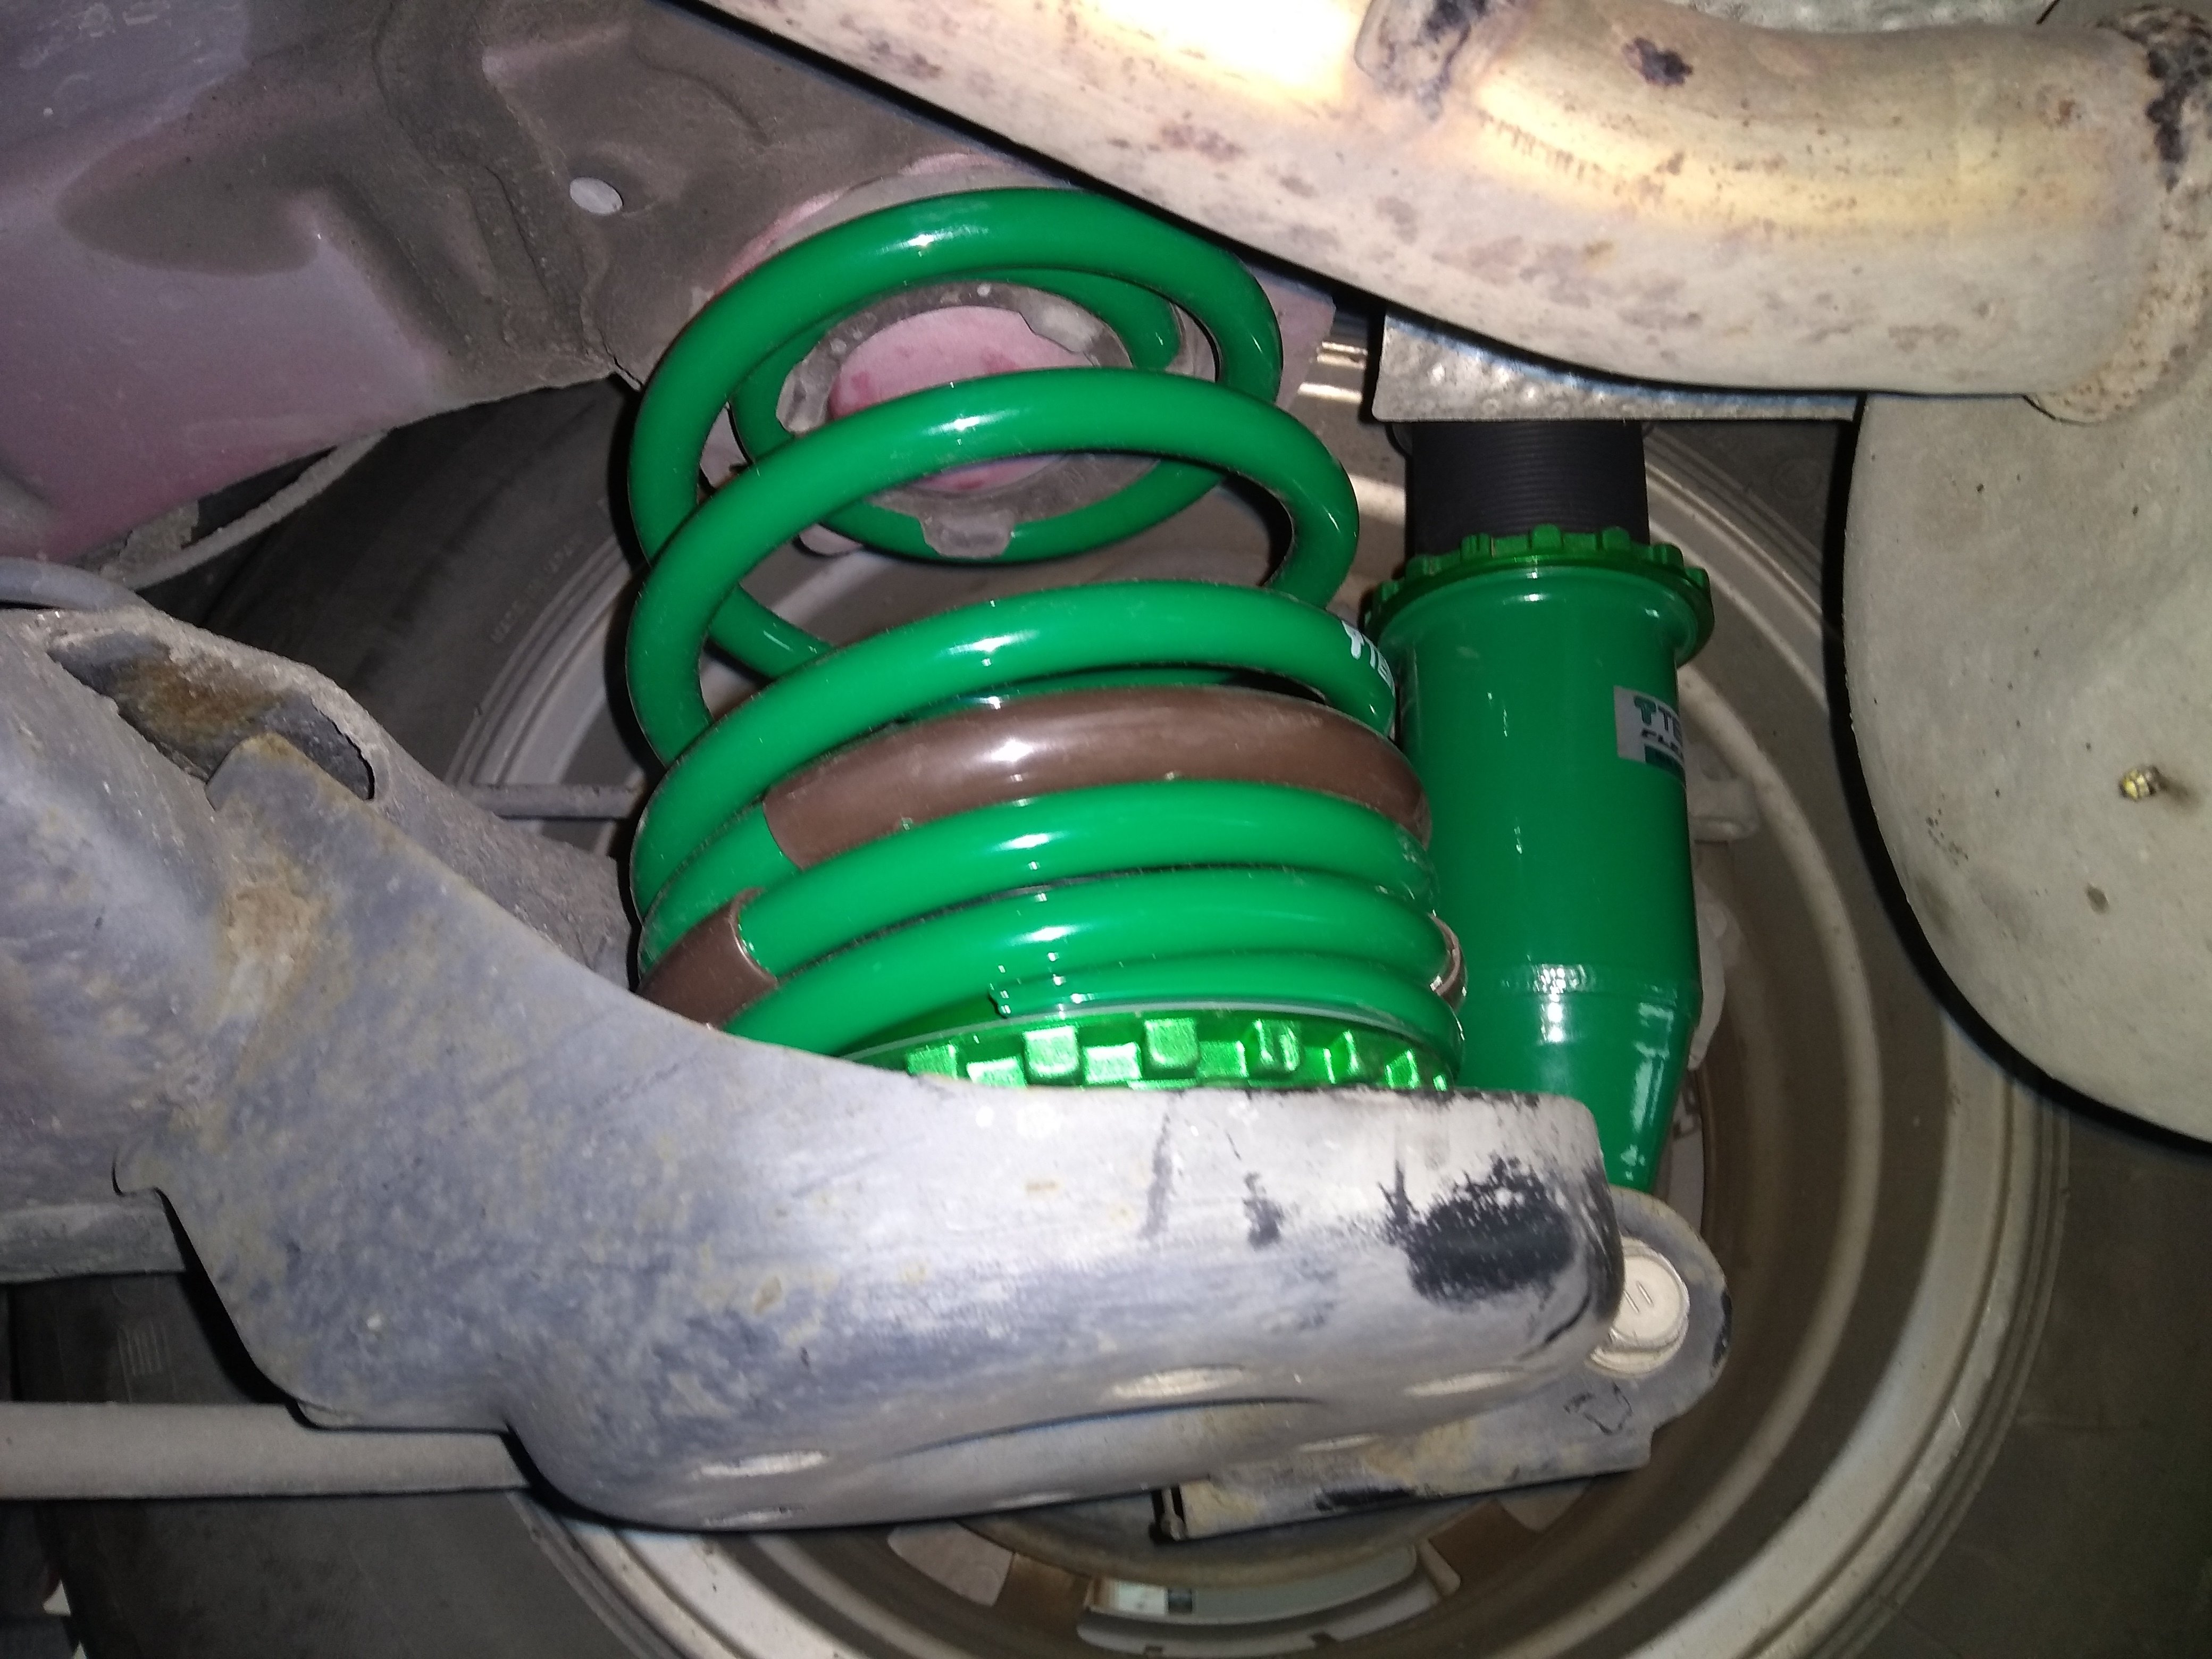
Put in some green lowering springs tonight after work. Spent about 3 hours to chuck them in, probably have half an hour worth of reinstalling the last bits of trim and shit. Need to spend a couple hours tuning the heights and shock stiffness. But for slapping them in it is already about perfect in the bum (maybe 5-10mm more) but needs to come down probably 30-40mm in the front and stiffen it up all around a smidge (it's currently on max soft) Will upload picture of slammage once I'm happy with it...
2 points
-
Time to change your bio "Regenerative brakes not jakes"2 points
-
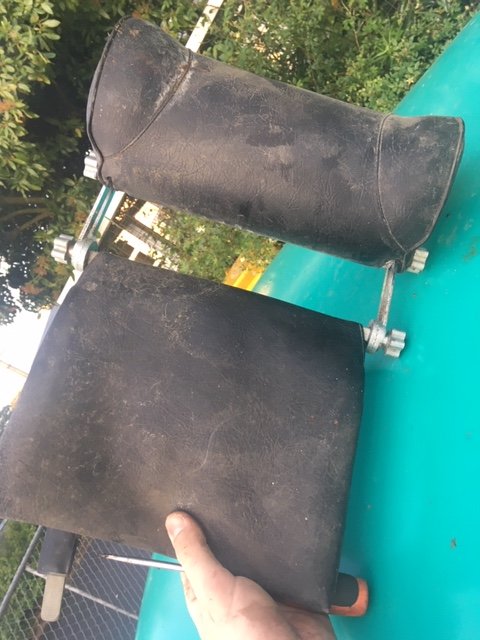
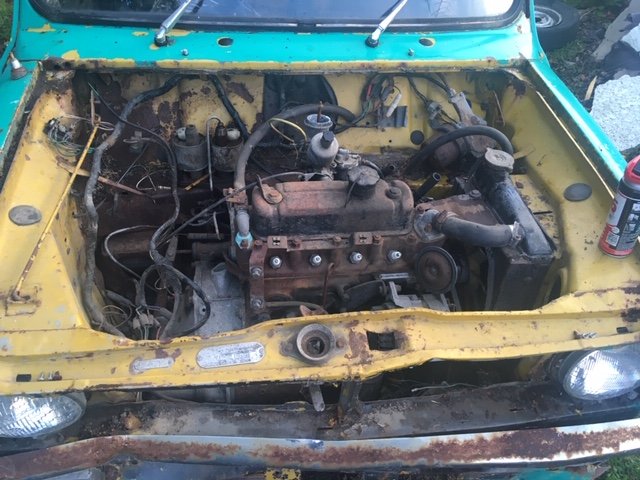
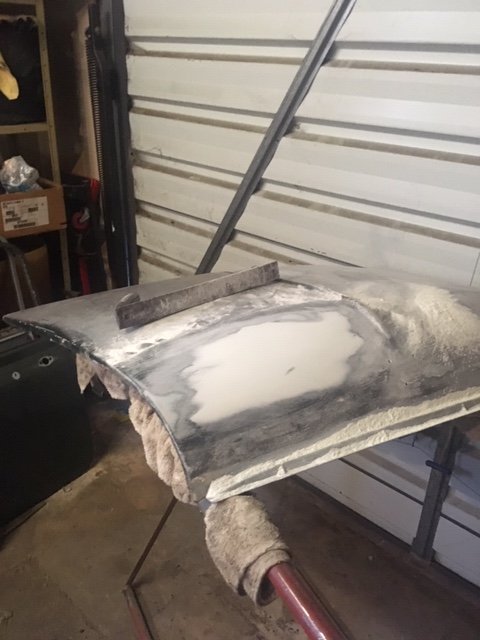
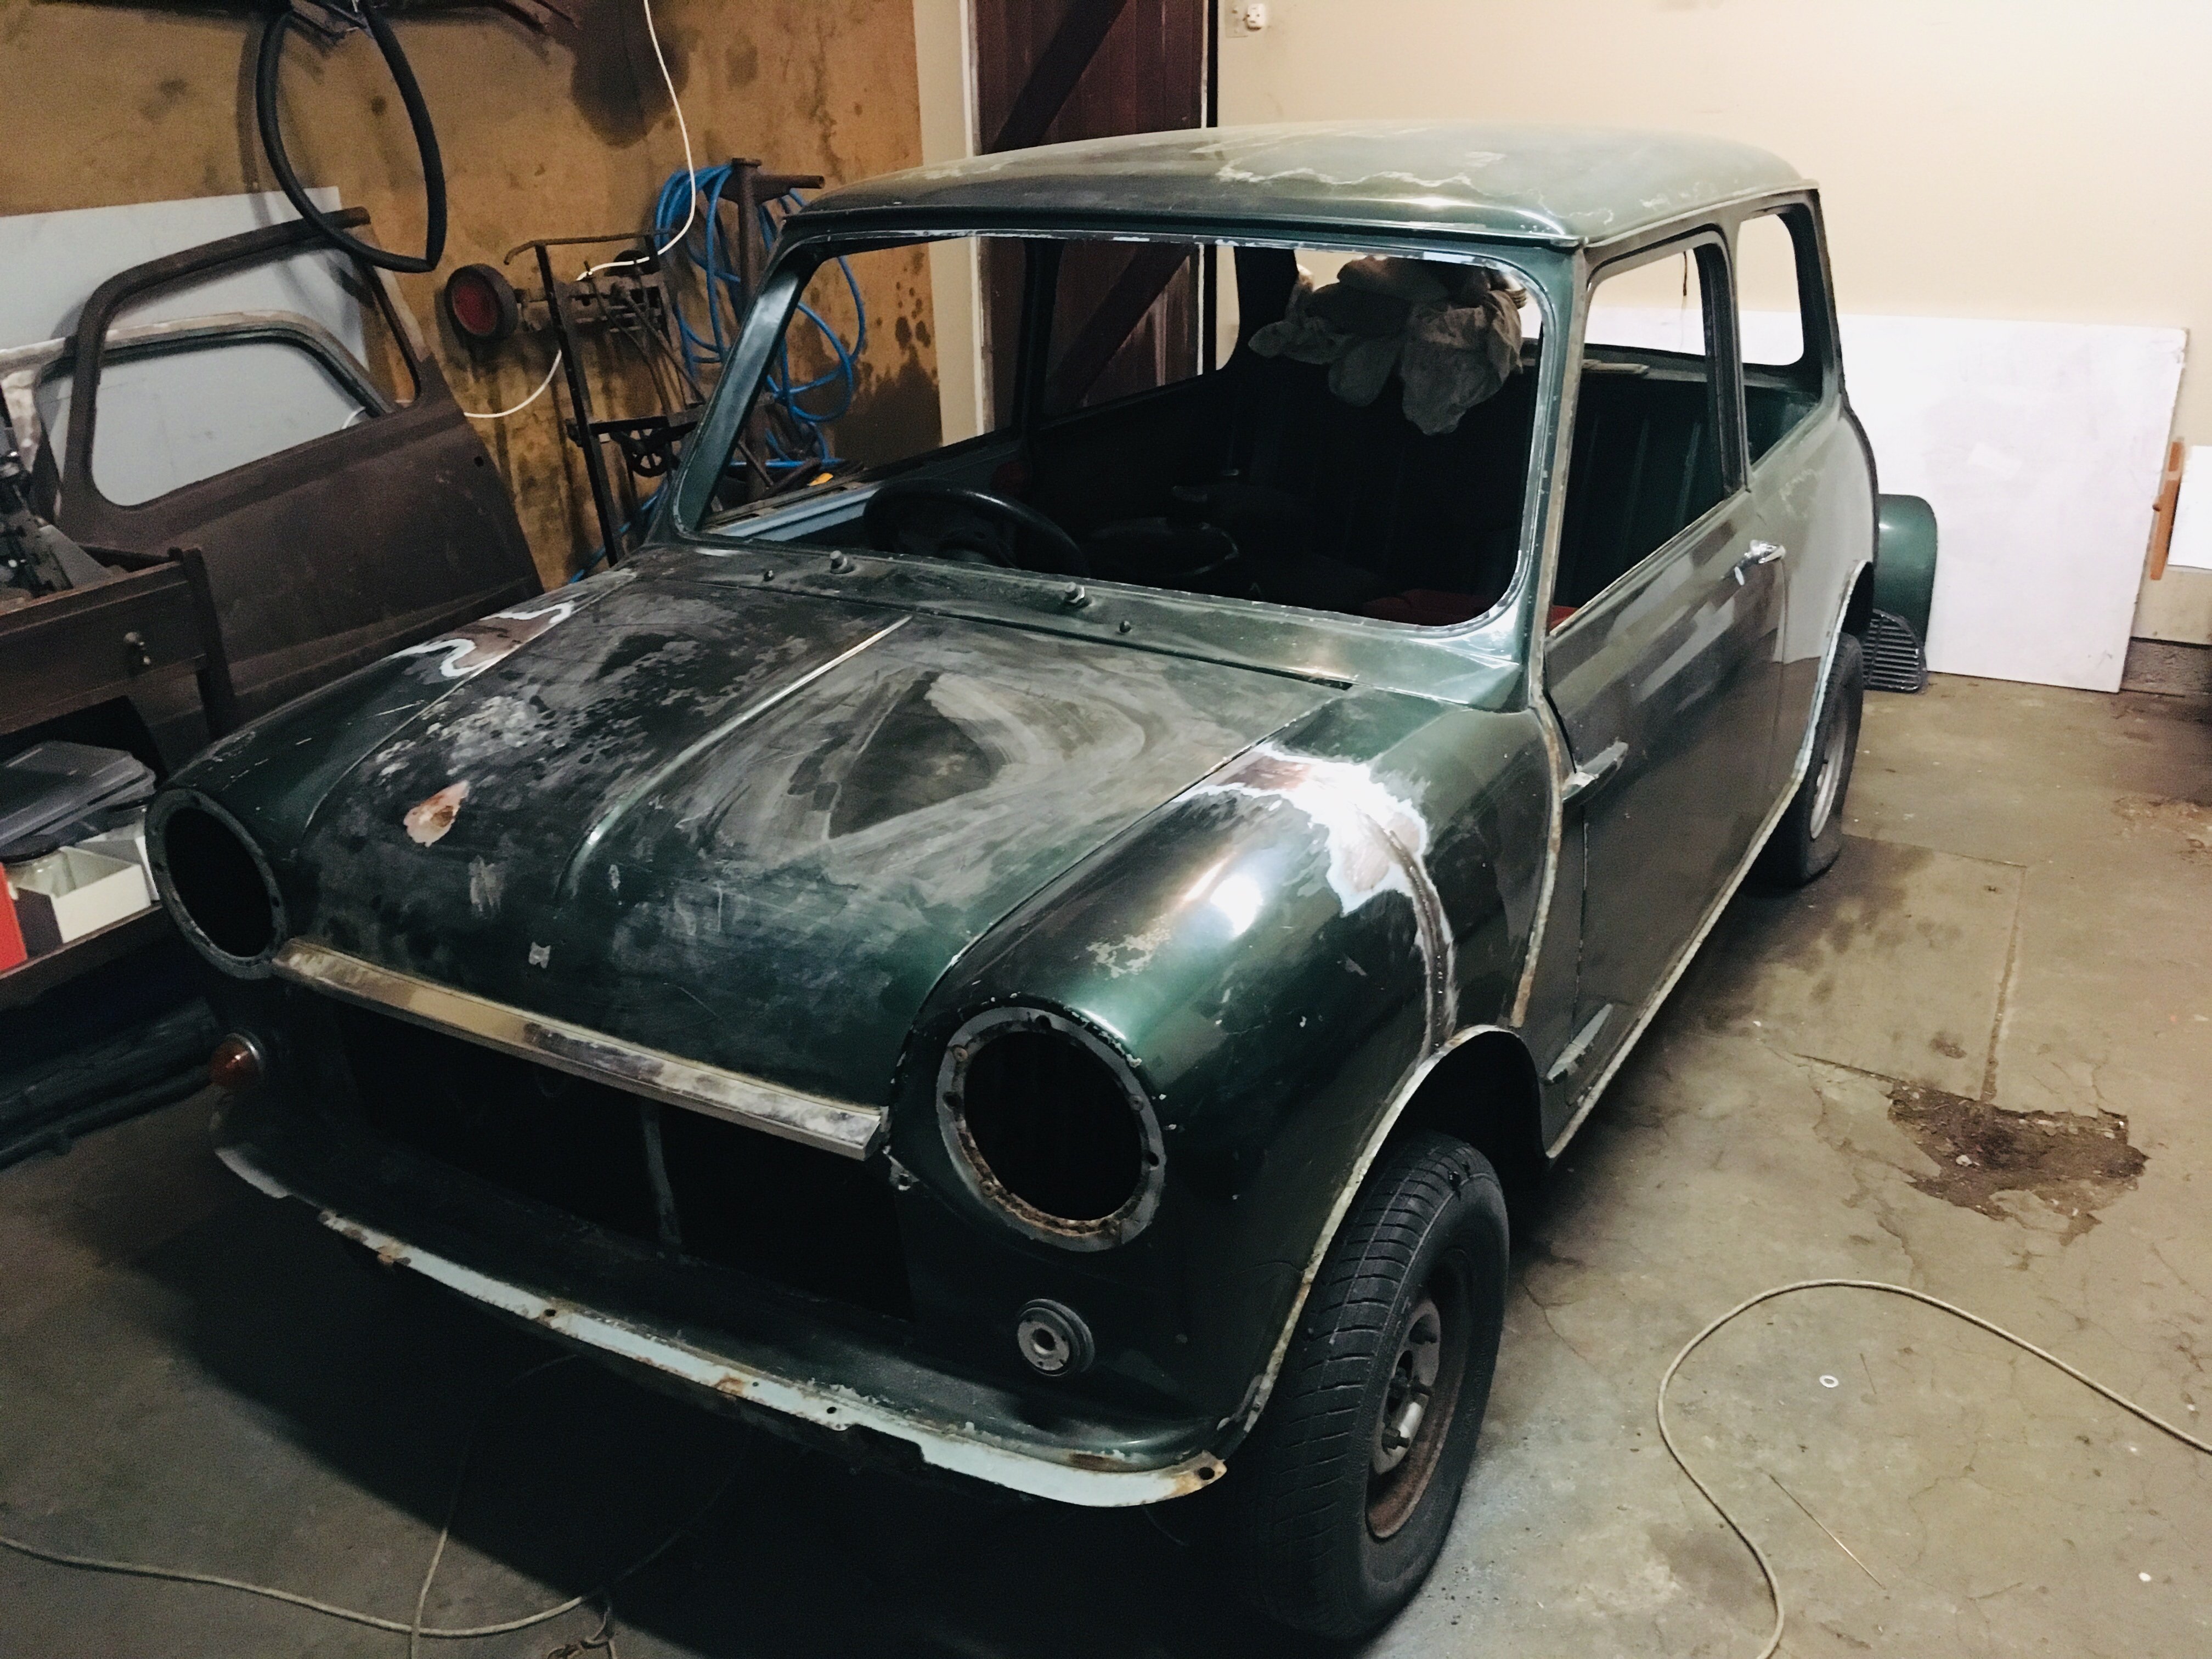
So I'm still rolling around here... I still have an A35 in the shed and my AE92 GT which needs work one day (plus other things, but really need a decent sized workshop to do it) but I was browsing TM one evening and saw a mini shell for CHEAP which I thought could be a good basis for a project. I've always liked the early minis, so it was chance more than anything as to why I ended up with this one. Now the reason it was cheap is that someone had cut the front of it off (very cleanly though) to make a flip front. Other than that the shell had virtually no rust, is very clean and has been dry stored since the early 90s.... A quick trip up to Cantebury and it was home.... It came with enough bits to make it a roller but very little else. Luck would have it that a very rusty (but mostly complete) one turned up locally on TM a week later, so I made it mine also. So I'm about halfway through aligning this front end to TIG back on..... Plan is to give it a quick scotch n' spray in the British Racing Green it has on it, then start transfering the bits from the yellow and rebuilding along the way. Should be fun, feels great to get into another project like this one.1 point
-
No I haven't. I shall do so when it is on the 4 poster next.1 point
-
Havent done fuck all. Some cool shit turned up though! 5 days from china to nz how goods that on the new 5m carb! My pallet from the parts car matt n i stripped in chch has also arrived! It really is like Christmas Badges, facelift headlights, bezels and sweet grill, a much needed fuel tank. It appears the travels has bent the fuel fuller stem but hopefully i can straighten that out. Factory shroud although i still havent got a radiator.... all the chrome that was salvagble including complete sill chrome. A tow bar. Took the twin pot calipers. The GT verion of my rt104 corona had twin pot so ill eventually get around to checking that out. Rear qquarter vinyl panels with lights and the twin pully crank Also got the power steering smaller "T" bottom steering collumn piece, Power steering pump bracket out of a ms112 from will, the Power steering pump is in Hamilton when i get that ill send the power steering box and pump away for a rebuild. Any auckland suggestions? Thanks for looking1 point
-
This is amaze1 point
-
you might find it feels better once you get some lower profile tyres on it, stock balloon spec tyres and stiff suspension always feels a bit odd. like the tyres are doing the 'springing' what have you got the shock stiffness set at?1 point
-
What do you guys think of a Nissan VQ35DE or VQ30DET?1 point
-
I wouldnt put it past 98cc to cast his own engine parts like the bugatti guy has.1 point
-
That is an interesting idea. My thought though is that it is essentially the same as what I've already got, though a little more simplistic. I've done a bit more work on the cable today and I'm far more confident in the slotted bolt now I've seen it under tension; there's no way the cable would slip out. I think the added complication of the system I have is worth it, over making a whole system like you suggest, for the fact that it uses almost entirely factory consumable parts and can therefore be easily replaced when the time comes. The sheathed cables out of the Mondeo make it easier to route the cables round curved paths too without them binding up. Something for me to think about though so thanks.1 point
-
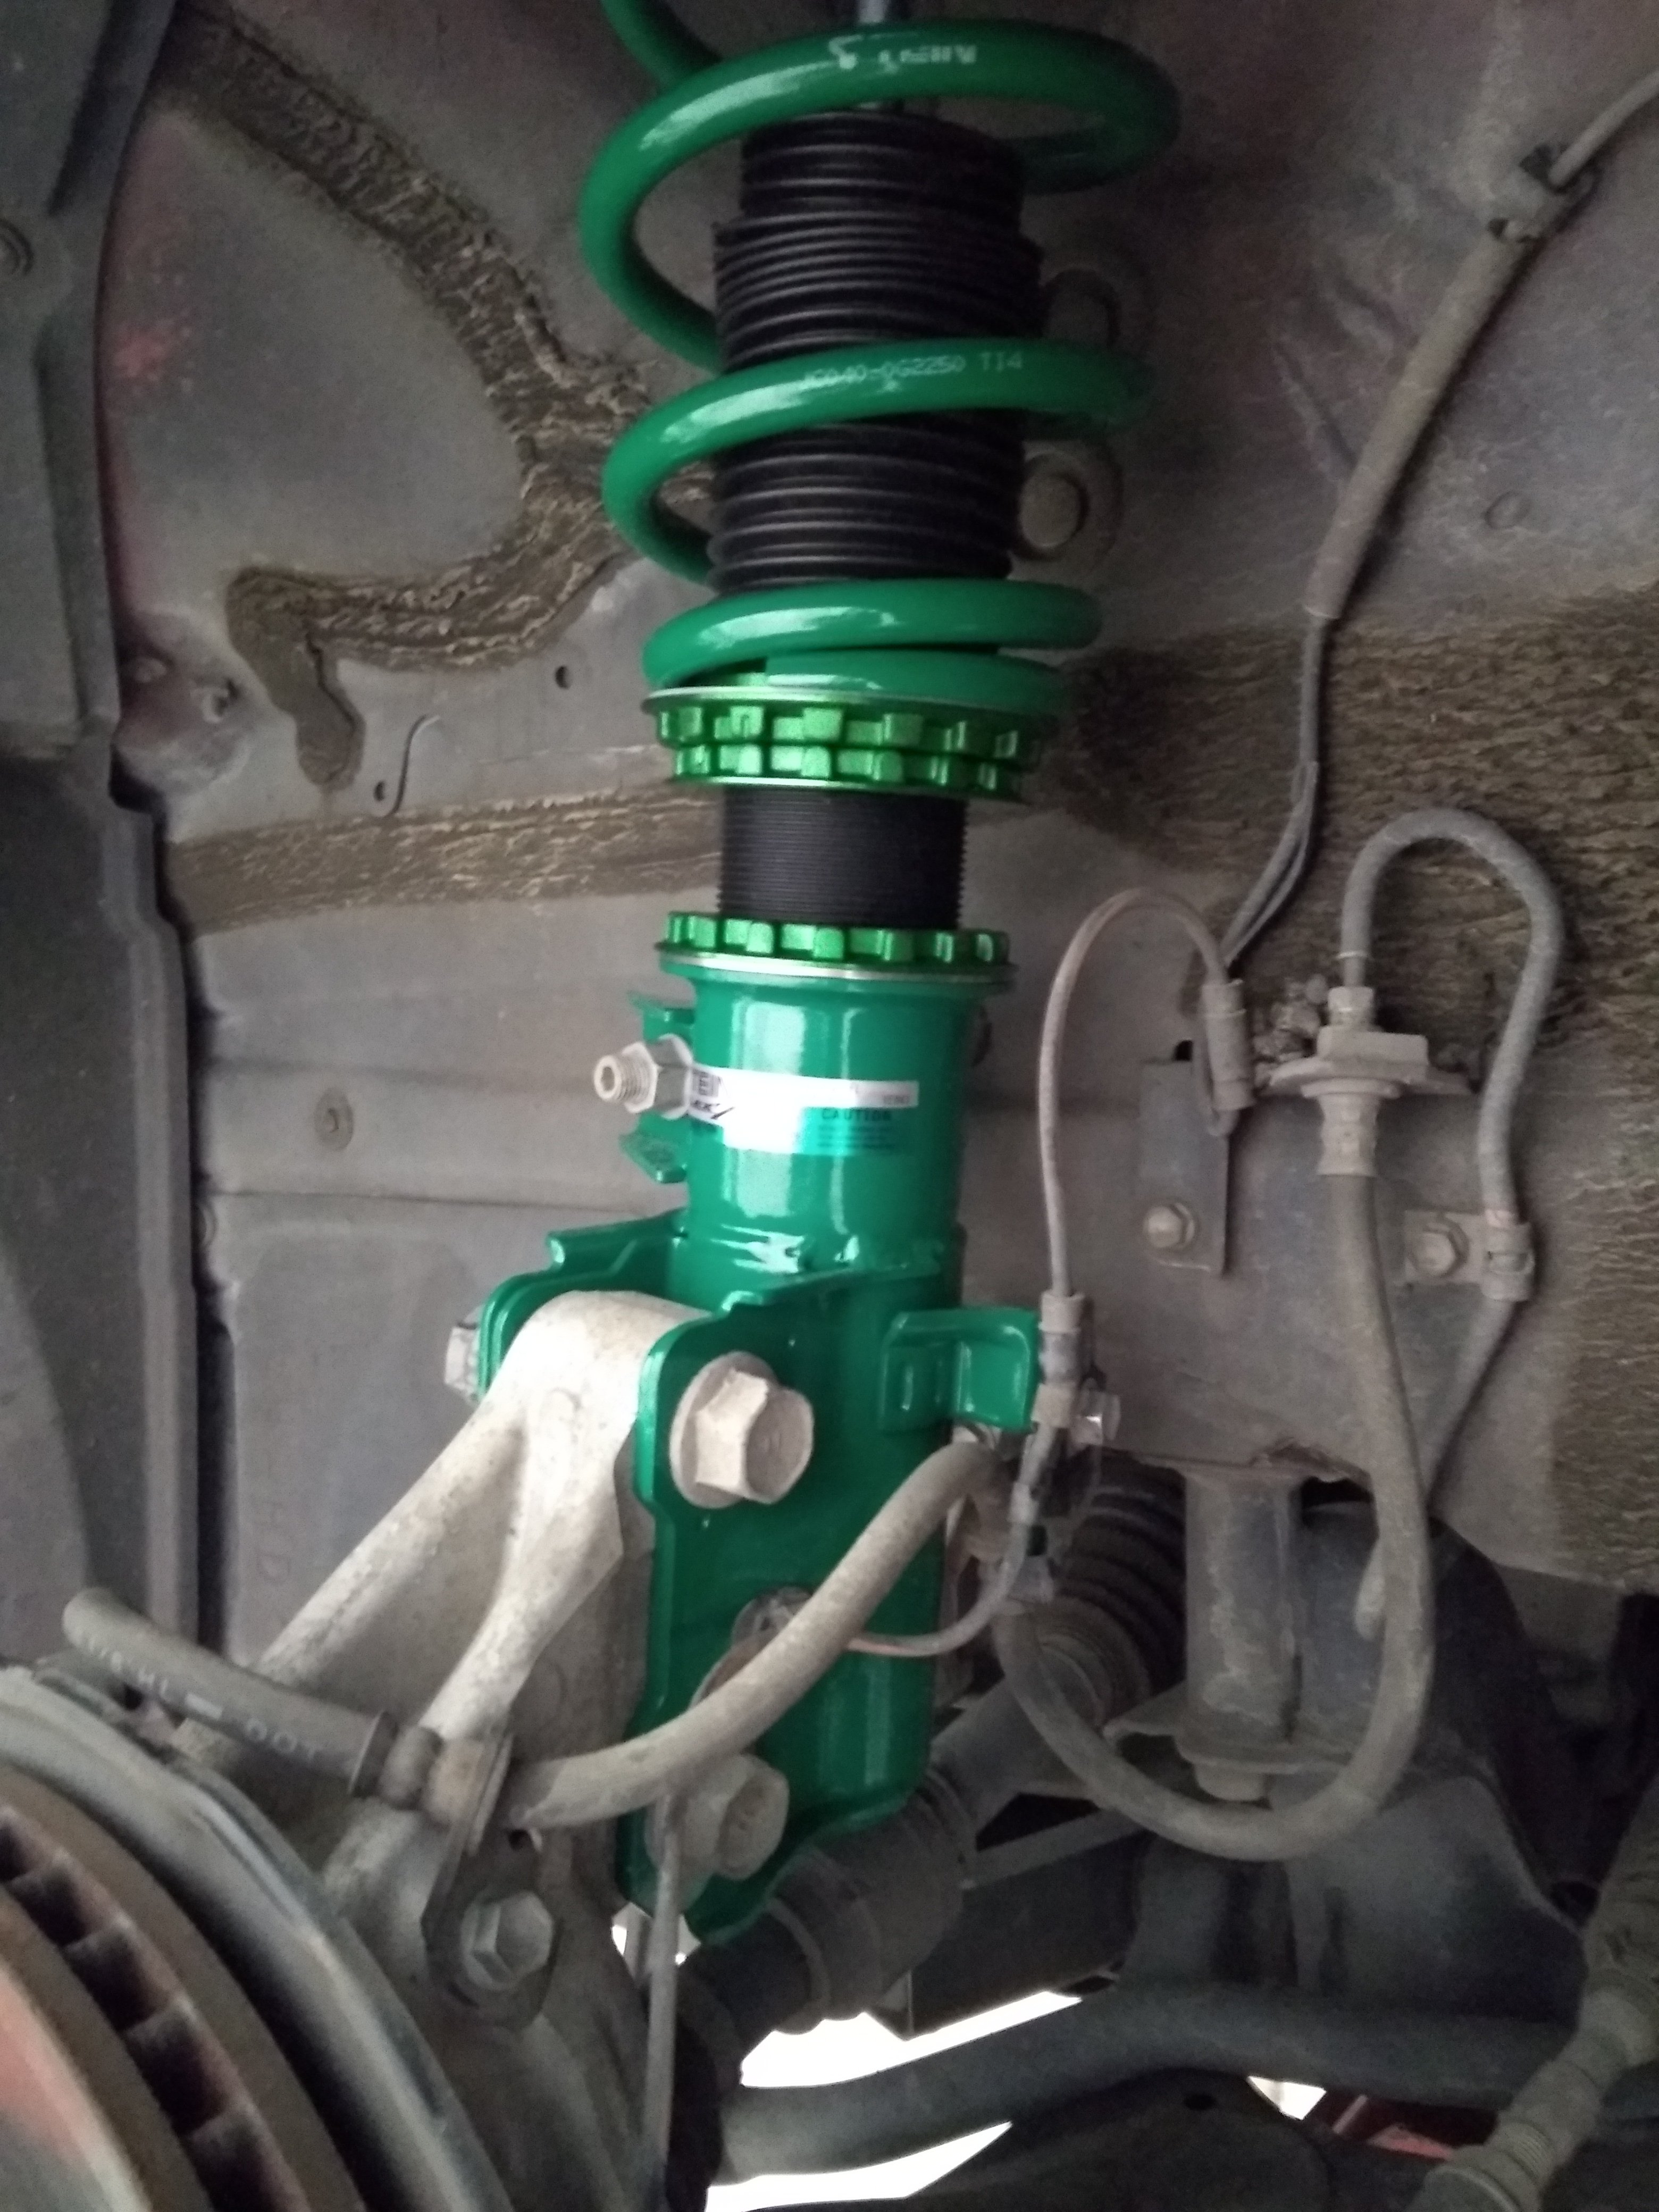
Didn't realise you could buy coil overs for these things. Shiny and new. You going to cert it, or just smash out a plate at work one day1 point
-
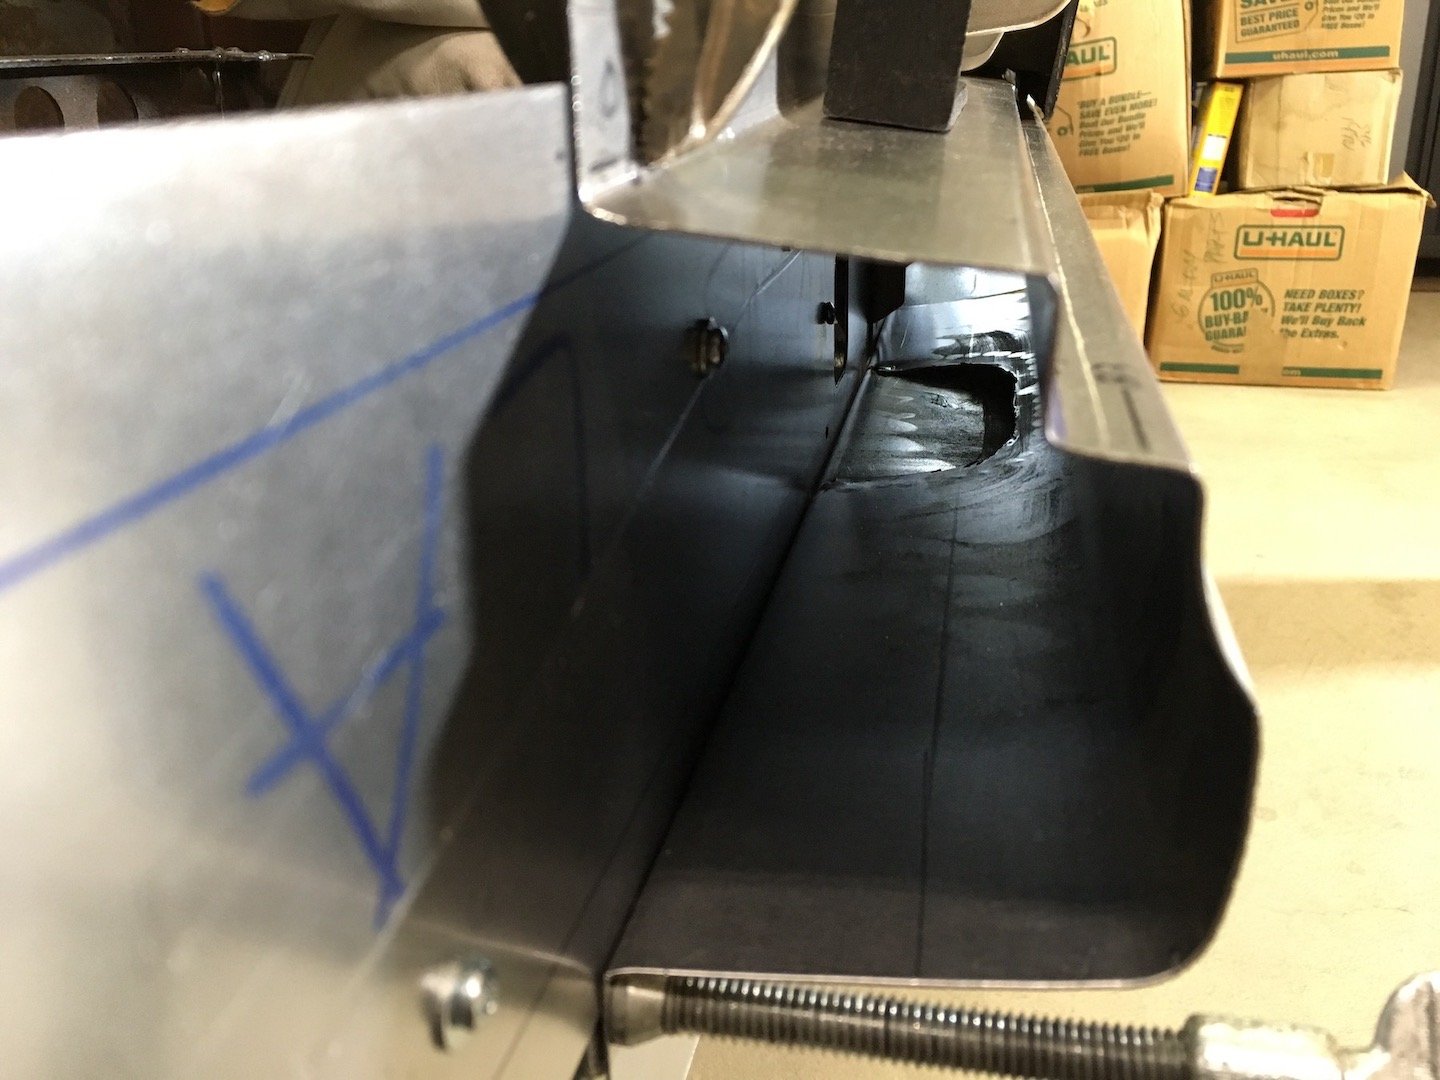
With the benefit of hindsight, of course, the front rotors would be totally different with a larger braking area so they would have been completely useless to use on the rear. In any case, I didn't bother with them and moved ahead with making up some wheel spacers. I started with some alloy plate and roughly cut it to shape before chucking it up and beginning the turning process. With the spigot sorted on the front, I bored a recess in the back to receive the spigot on the axle. Then it was as simple as drilling the holes for the wheel studs and countersunk holes for the mounting screws. Finally, I put a couple of tapped holes in the back side of two of the wheels and mounted them up. I ended up with a little over 9mm of spacing and still 12 or 13 turns on the wheel nuts, so plenty of thread engagement. I'm still a bit annoyed about the fact that I had to drill and tap the wheel for a wheel spacer but such is life. I mean, there's nothing holding the brake rotor itself on other than the wheel nuts, so why does the wheel spacer need to be "mechanically fixed" while the brake rotor doesn't? Moving on though, with the wheels fitting over the brakes properly, now I could continue with mounting the calipers in a more permanent fashion. I machined up eight bosses to replace the temporary wooden ones and slapped the whole lot together. The thing I learned about the Mondeo handbrake system is that it has an auto(read: crap)adjustment system built into the lever itself. Which means the cables themselves are neutral in the system and have no adjustment mechanism built in. If I want to use them, or a shortened version of them, I need to design my own adjustment system. So I did. It's not particularly complex but I think it should get the job done. On the bottom is the original Mondeo cable splitter that took the lever's action and turned it into a pull on both cables. I figured this would be the easiest place to make an adjuster since anything acting on this would affect each cable equally. On the top left is a piece of steel tube I squished into shape to fit the standard Escort handbrake lever clevis pin. This has a keyhole shape cut into it to allow the cable end to slide in. Next in line is a threaded boss with a similar slot cut to allow the cable to slide in which will be welded into the end of the tube. Then is a locking nut, and finally, the adjuster bolt itself. This has a hole drilled up the center and a slot cut to allow the cable to slip in. When assembled, the lock nut just needs to be loosened and the bolt wound into the housing to tighten the cable. The idea behind cutting slots in everything is to allow me to use a standard Mondeo part without modifying it, which should help keep the certifier happy. On the other hand, I'm not so sure about how easy it seems for the cable to slip out the side of the adjuster. I might cut the end off the cable and remake the adjuster bolt with a hole up the center only. Then I'd get a new end soldered on the end of the cable with the adjuster bolt made a permanent part of the cable. I'm not sure if this is legal or not though. Let me know your thoughts here:1 point
-
Oh boy! I have been super busy, going everywhere in my wagon so sorry for the lack of updates but here we go. So this last weekend I entered my car in the 4 and Rotary Nationals. I wasn't sure how well it would do because it is just my little Avenger wagon, up against all these wicked show cars. Going in to the event I thought maybe I had a shot at best V8, but that was all I was hoping for. At the prize giving they called out the best V8, which went to a V8 Silvia. So I figured I wasn't going to get any awards. Then they called out Best 1970-1989 in the Piston Class and it was my little wagon!!! Being super stoked with that I went up and got my trophy. Then they called out Best Piston Conversion and it was me again!! At this point my mind was well and truly blown because there was some seriously nice competition at the show. It was the first time I have entered any of my cars as a show car, and to win two awards was absolutely amazing. Here's a shot of the wagon at the show. I also went to Caffeine and Classics, and the Orewa beach show. So quite a busy weekend. Now jumping back in time a bit. Back in December I went to the Oldschool.co.nz drag day and had a total blast. I was doing 13.2 runs at 103.66MPH here is a onboard video Here is one of my time slips We had a nice little Avenger get together. My two Avengers and Billy was also drag his stock Avenger, sadly his diff did not like drag racing much and his spider gears broke Later in the day Hamish turned up in his Avenger Then we went and did some group photos For the dial your own racing I dialed in 13.2 but I missed a shift on the first run and didn't get through. Lots of rubber on the old back guard A few photos from Facebook at the drags. https://www.facebook.com/DCGPhotographyNZ/ And https://www.facebook.com/rotationals/ In other news, finally got round to Dynamatting the boot. And I'm going to Wagnats in a week so I will be camping in the back of the wagon so I tried out the "Bed Mode" it works really well. Tons of room for a twin airbed Went to the Kumeu hotrod show a couple of weeks ago and brought a sweet roof rack for when I go camping. I found it at the swap meet there, I went specifically looking for a roof rack and only found one and it was the perfect size!! So busy couple of weeks, off to leadfoot festival this weekend, then Wagnats camping in the wagon!! Discussion1 point
-
The Imp is finally all painted, after first sorting out a bulge in a panel. It looks great and I'm stoked with the colour. I'll do a proper update soon. But in the meantime here's a quick peek at the colour. But which one is it?...1 point
-
Checked the bolts on the engine and jack shaft today.... engine 3 out of 4 loose 1 missing eek replaced with high tensile ones. Jackshaft the same all loose but present at least, so replaced and stuck spring washers on the lot. Attempted burnout it coughed cleared and instantly filled the garage with thick smoke awesome! suspension helps the front bite instead of sliding alot.1 point
-
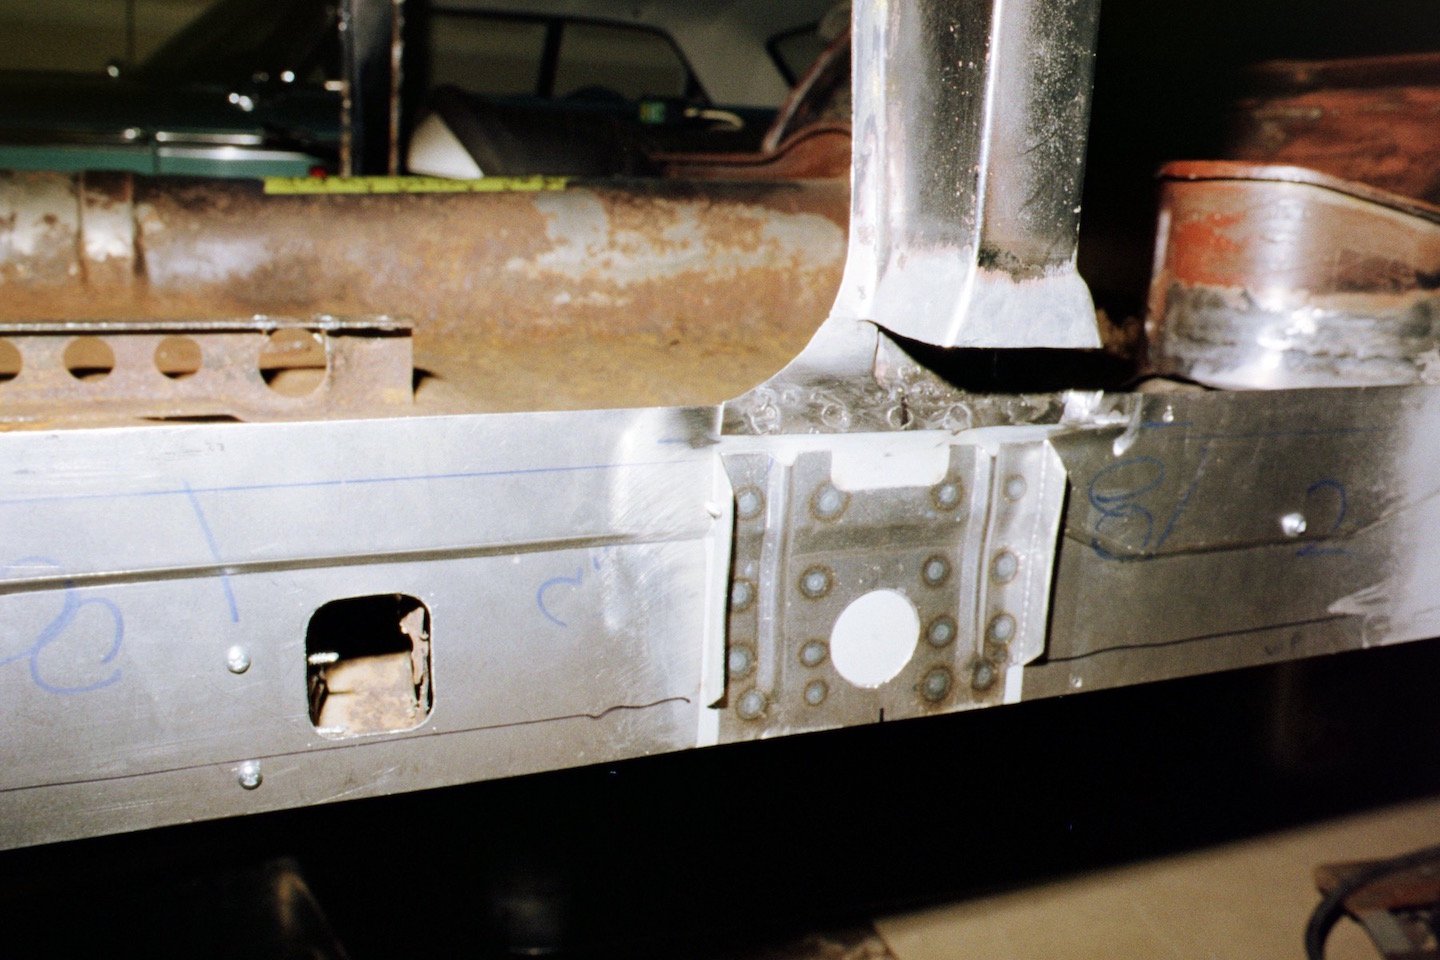
Rear windows got removed today so we will be able to start welding the C pillar. Current situation is we are starting to weld up the holes and cutting out patches and wielding them up.
1 point
-
PROGRESS!!1 point
-
1 point
-
This gives you an idea of how the moulds/cores from these patterns will go together.1 point
-
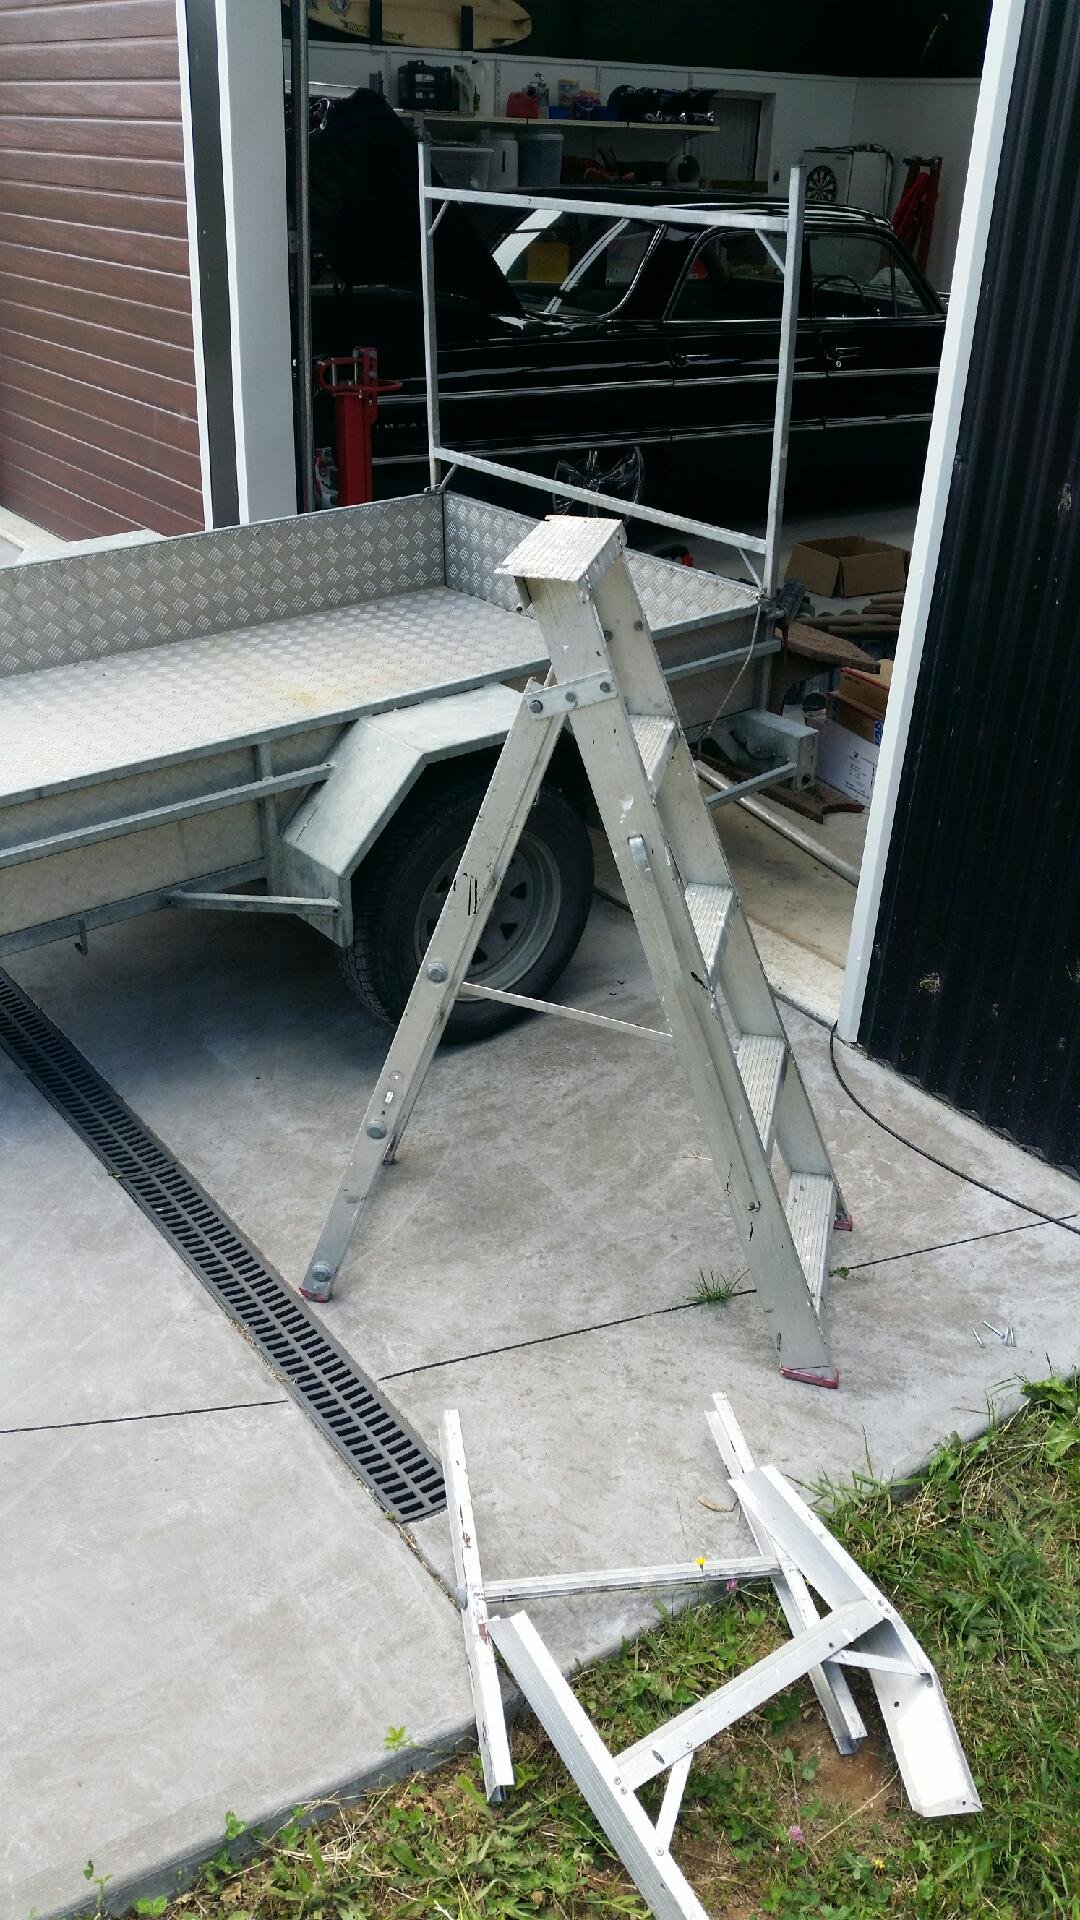
The old man is nearly 80 years old. Still tough as fuck and doing shit that half the 40 year olds have given up on. I was in his shed and noticed his ladder...hmmm????? He looked embarrassed, and said there's obviously a story that goes with it...but it can wait for another day. He asked if I could take it to the dump for him "no fucking way" was my reply! So: And problem solved. Plus it's not as far for him to fall off this time:)
1 point
-
No, It was the way the Grandad did it. I will only be using the finest selection of Whitworth and British Standard Fine hardware to......
1 point
-
Further proof everything looks better lowered.1 point
-
Let's face it. The writing is on the wall for for the mighty and venerable ICE. (Luckily I've only got about thirty ish years left. So it won't effect me) in the coming decades we'regoing to see more.and more hybrids/EV being modified. Old man KK can be the ultimate hipster and say yeah man, I was doing that before it was cool.1 point
-
Just lower before letting her see it. My mrs is all about the rough rides.1 point
-
Wouldn't you just put the gas in the car?1 point
-
Crikey its hot here! Perfect time to spend hours in a workshop filling and sanding then, with the occasional bike ride and swim to keep my sanity. I don't really get too excited about paintwork. In fact- really posh paint jobs, all shiny and bling just dont suit old cars imo. But I realise that if I want to sell this car down the line (to fund the Viva project etc) then its going to need to look nice. But going back a week from now I finished a few tiny welding jobs and added some much needed seatbelt mounting points. This car being a really early one only had diagonal belts and the positioning was horrible along with mounting points that were only holes through thin panel steel. I welded long sections of 20x10 fms inside the A pillars for the top mounts and then some plates to the floor and inner sill in all the appropriate size steel and nuts. I also cut and shut the rear seat base frame so it would clear the radiator pipe tunnel.. I then had to sort out the removable rear valance/cross member. I have three to use. The race car one was hacked about and rusty. A spare one I'd collected from the Christchurch Imp graveyard was rusty and dented. The original one from this shell was just rusty. I chose that one. I started by cutting out the unneeded and quite heavy original engine mount part. Then rebuilt it all, removing the rot, adding in a length folded steel along the width to support a small bit of box section. Why? Well because I like bicycles and I like to travel to places for nice bike rides and why would I choose to do such a thing in a boring modern car! Much more fun to go on road trips to biking places in a interesting old car... So, just like on my Rx3 and my previous Viva I added a mounting point for custom made bike racks to suit each car. For this Imp though I wanted something that will be hidden by the number plate when not in use. I'll make a basic rack to suit. Then together Hannah and I painted this and any other remaining bare steel with industrial 440 epoxy primer. It already started looking better... Now back to that filling and sanding. Its been a week of many 30 degree days here, often hotter at mid day. According to our thermometer yesterday was 34 ! Our place is like suntrap and we don't get the wind that even our neighbours over the road get. Great for winter but can get very hot in summer. Luckily the workshop faces directly north to the sun and with both doors open we get good light and a gentle enough breeze through to keep it from turning into too much of an intense oven. Plus it takes the filler dust out! Inside the 'not so hot' oven... Still a yucky job and to stop giving up I have to keep reminding myself that 'a good paint job is 95% preparation' etc etc. Yawn. pffff. I'll report back in a week or two, broken and covered in dust.1 point
-
I said I should post more often so they're smaller, but here we are, another big post. I didn't think I had much to post because the majority of it has been wiring and that's boring, so not many photos. Air horns are now fully plumbed up. Used one of my dads cast aluminium fuel logs and used it as the manifold which has the main inlet and then each individual line to each horn. Bought the biggest battery that would fit inside the box I made earlier. Then drew up a clamp for it, laser cut it from some ali and folded it up. Getting better at ali welding! Fitted back into the under floor hole. Bought some battery cables and hooked them up to the main engine power junction. Wanted a killswitch mounted somewhere, made up a bracket for it out of stainless steel. Decided under the seat was the best place that is still reasonably easy to access and hidden from sight. Made an aluminium glovebox since the original cardboard one had seen better days. As the dash is quite short, it would of been hard to tuck up the fuse box behind it and not have it being a eye sore. So designed the glove box to fit the fuse box inside out of sight, which also tucks the wiring up. Started with the air bag wiring as it was the easiest to do and I don't have very much experience with it, other than a couple of weeks work experience nearly 5 years ago. Once the airbags were all done and working, I made a start wiring the rest of it. Started at the rear and worked forward. Need to make a reflector of some sort for the licence plate light. Since the engine had already been rewired at some stage, it had it's own fuse box and relays ready to go. Decided to mount the fuses up under the dash, after extending the wires to reach. The relays stayed in the engine bay since they shouldn't need to be accessed as often. Had to rewire the starter relay as it had full power going through the inhibitor switch and apparently that wouldn't be good for the switch, so cut and swapped around some wires. Stole the power steering pump off of my parent's Mercury that also has a Nissan V8, since they won't be needing one for a while yet. Only just fits, the pulley is pretty close to the chassis rail and the tensioner bolt is very close to the crossmember. Got a new high pressure line made up by using the original fitting from the Nissan line and the rack end of the Jaguar line. Assembled the inner and outer fenders and then lifted them in place, to check everything still fits. The engine bay looks pretty nice (other than the ugly engine)! The accelerator cable needed a new bracket to hold it in place since the original didn't work that great anymore. Made up a V2 under dash panel for the ignition switch and other numerous switches. Looks better than the first one, it might end up black eventually I think, brushed stainless doesn't really match anything else. From left to right has the ignition, heater, fog lights, wipers and horn switch. Also charge and oil pressure lights. Made a stainless steel bracket to mount the tacho gauge under the dash. Also above it is the headlight switch. Had to make a bezel for it as the hole in the dash was 25mm and the switch was supposed to only fit in a 8mm hole. Park/indicators and headlights all wired up with some waterproof plugs. Managed to blow the 6v sealed beams in the fog lights, so got some new GE 12v ones from America. Made some stainless steel spacers for them to sit on. Need to get enough courage to drill some mounting holes in the front splash apron now. Noticed the transmission mount was broken, asked around and found Nengun.com had genuine new ones far cheaper than any where else I found. Bought some oil filter relocation sandwich plates, as the oil filter was nearly impossible to access with the inner fenders in place. Had to get a new adapter nut turned up since the supplied one was too short like they seem to be. Made a new mount for the oil filter plate since the one that came with it was pretty pathetic and weak. Then got some fittings and hose, cost way more than what I thought they would.1 point
-
I moved the shell onto the hoist and removed the last bits of rot, tiny bits around the front arch.. Work then continued on the cooling circuit. I need to get the pipes from the engine up to the front. Most people with Imps doing a front radiator conversion either run the pipes inside (too hot), under the gear change in the centre tunnel (I want to keep that easily accessible and to do it properly without having pipes below the floor line I'd still need to make some tunnels to close over) or they use the existing heater hoses (too small). The setup in the race car was like this... Fine for a race car but way too hot and in the way for a road car. I have had the intention of fabricating a separate tunnel to house the pipes ever since getting the race car. This is because if I was to run the pipes inside no matter what I try and do to insulate them there will be a fair bit of heat escaping into the cabin, plus they'll take up more room. With a tunnel the heat can instead radiate out into the airflow there should be very little transfer into the cabin. They'll take up less room and with a simple false floor above the tunnel in the front the passenger should not even know.... Plus any leaks go to the ground, the pipes can be easily attended to and the well.. it just seems a neat way to do it So I started by chopping down the removable cover (covers where the brake pedal mount would be on a l/h drive car) so I can weld it back in for a neater stiffer area. Then I marked out some lines and started cutting away... Then I cut and folded some tunnel sections up and welded them in. I have tried to keep the curves as gentle as possible without encroaching too far into the footwell. I had to make sure the pipes would be clear of the front suspension arc. Meanwhille Hannah kept busy stripping useful parts out of the racecar shell... I cut more bits out, formed more tunnel sections and ended up with a lovely clear tunnel front to back... I now need to fit the rear seat in and see how I can avoid passengers getting a hot bum. I'm not sure how close it sits to the metal base. I might just have to wrap the pipes and make some heat shields as i can box it lower due to the rear swing arm mounting point box section. I'll also add a bracing section near the front across the floor where the new pipe tunnel has potentially created a 'side impact crumple zone' or something.. Then its seat mounting time. Then paint prep!!!! That will be where things start to get very, very, very tricky! What colour? I have my mind on a on a few different light blues and even some light greens. Decisions...1 point
-
Ok so I bought just one more.... (was too cheap to pass up....) This is best described as rust held together by paint A lone fern had been able to propogate itself in the back seat. It does however have the subframe in it which I need, plus a rear bumper and a handful of other parts. The running gear might be marginally better to rebuild than the yellow one also. A bonus was finding this 1970s accessory goodness - clip on headrest Work on the green shell continues, time for filler and I have a kit of 2k primer ready to go
1 point
-
Front radiator time. The race car came with a radiator mounted in the front. Not sure what its from, I think the previous owner said it might be Toyota starlet. Anyway- it was loosely mounted and not sealed at all. I want to fit it into this shell neatly and so it has the very best chance at pulling off heat as well as possible. For those not familiar with Imps here's the front with its original little grill (off Imp number three because I couldn't find the other grill.. then discovered two hiding on the large self built onto the table)... Here's it with grill removed. Not much of an opening. Its filled up with whats called a horn box and also supplies the ventilation system via a fan... I cut that box out. Easier than I was expecting luckily. I made the hole bigger... Radiator plonked in place... I'll fabricate a box for it to fit to. Then add back in some strength now lacking from not having that box there- to support the mounting area for the front suspension wishbone pivot brackets. I'm also hoping that by the time all the rad cowling/shrouds are fitted it'll all be nice and strong around there. I'll have to try my best to impart some element of crumple zones within the structure but hey- I'd rather just not crash. Looking from the front to the left, I'll make another partitioned off box to gather air for the ventilation. The large vent pipe will have to locate further up the side or on top of that second box because it will effectively be moved left towards the chassis rail and drivers headlight area. I'll then cut a big hole in the spare wheel well and fabricate a shroud to guide the hot air out and under the car. I realise that some other Imp owners have vented the hot air out upwards and forwards into the low pressure zone in front of the bonnet gap. I really dont want a open gap. I'll go for down and under the car. I have a fan. Its good grunty wee fan off the old aircon setup we ripped out of a customers Toyota Hiace. I kept it when I spotted it was almost a perfect fit for the little radiator. Orginally I was planning to mount it right on the back of the rad... But then the non- fan covered areas would require a shroud so to keep fan effective. I didn't want to shroud this rad so closely and create a buffer that would hinder airflow through the rad. I then thought about mounting it facing down over the outlet hole and shrouding it there. Not sure on how this will still potentially create a resistance though by making the outlet hole effectively smaller... I had to do some thinking. I had a cup of tea and pondered the layout... Fitted the tank in place to double check on room and theres plenty of space. Spare wheel will have to go on top of the tank. I shall scheme ideas the fan situation overnight. I have an idea already but it its a bit more involved. Any ideas or airflow advice most welcome.1 point
-
Phew. Well that bonnet took a while. In between other jobs I whittled away at the rot on the bonnet. Some awkward shapes going on at the front. I did my best, without getting too carried away, at rebuilding the shape correctly in steel. It will have filler on top however I wanted to avoid having to use filler to get gaps between the bonnet and the car correct. I don't really like the idea of filler on edges that can get knocked. Not really a lot to explain in the process of rot removal on this. I think the photos do a better job. You'll see I started the main repair by fabricating a new front edge and welding it in stages so checking it lined up with the body and the gap remained correct. It was so rotten that I sort of guessed the gap just tried to make it look 'correct'... The front repairs puled up in welding slightly- enough that I wasnt happy with gap. Had to slice open and stretch it bac down. Lucky an easy rscue.. Then onto the underside repairs.. That's probably enough photos of a bonnet for you all. Next job is to modify the front panel and inside the frunk to accept a radiator.1 point
-
And now the front is reconnected.... amazed I still know how to TIG There are a few minor spots to deal with the body but this is a big step
1 point
-
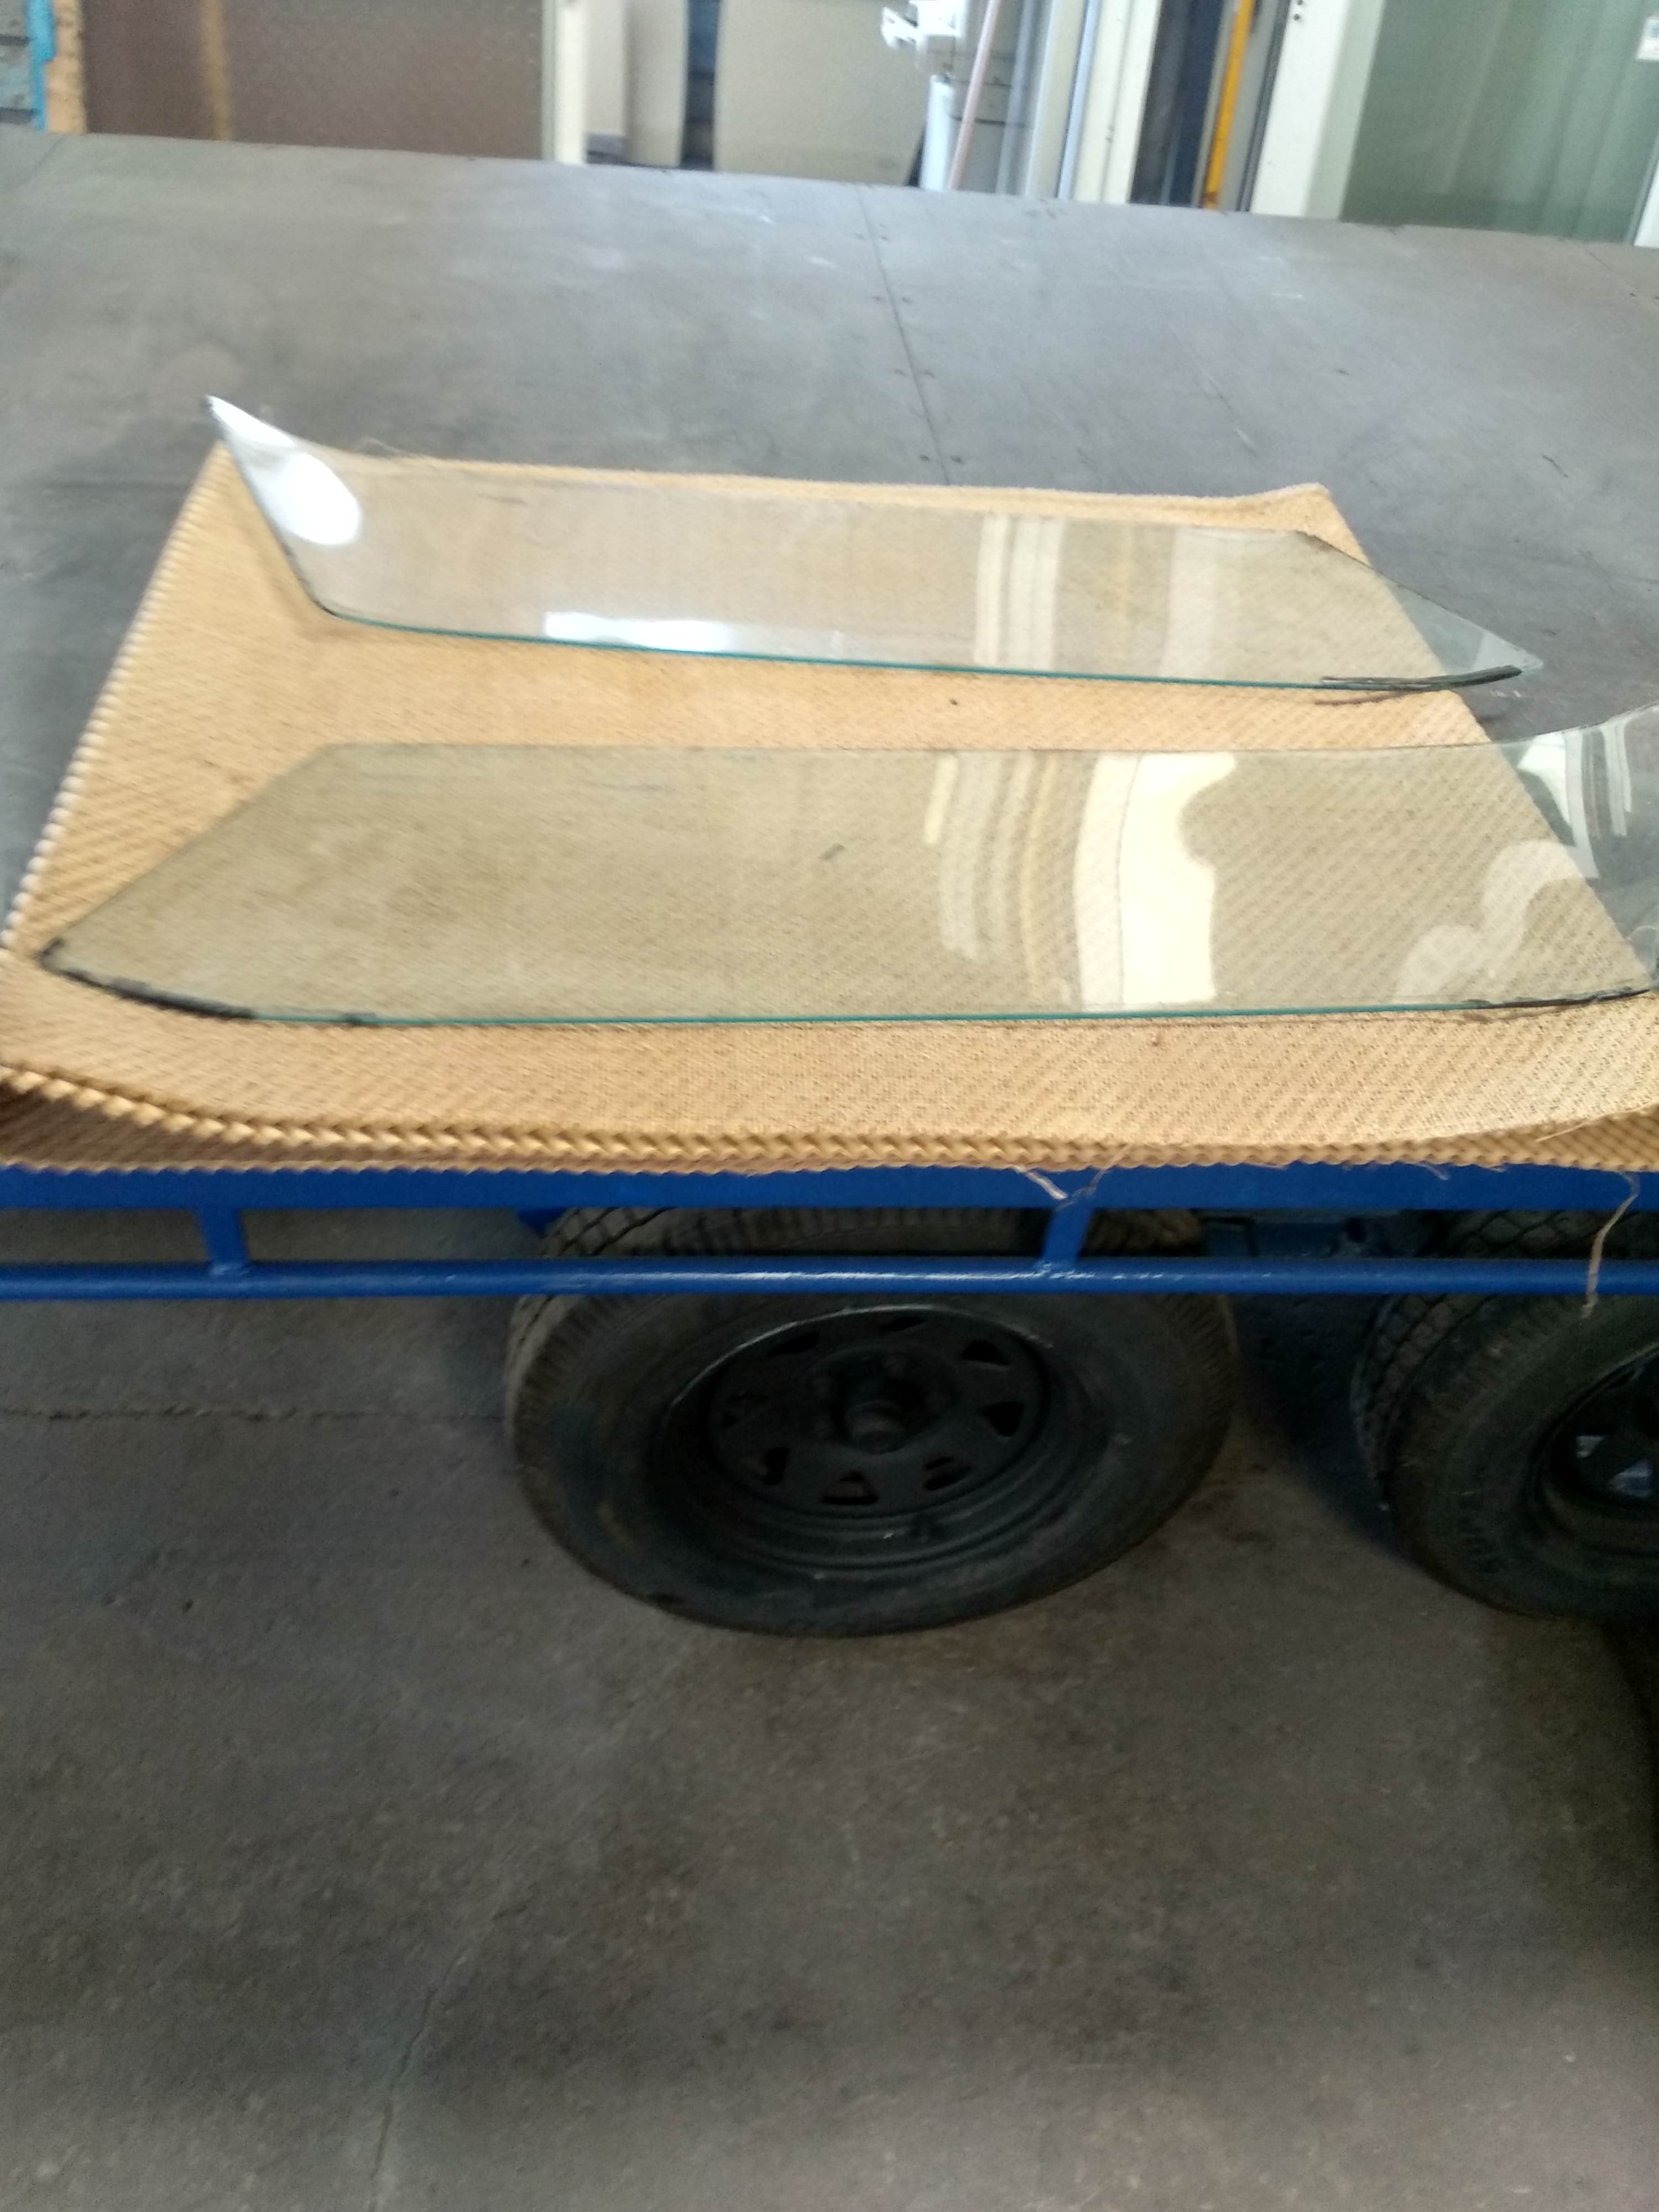
I'd have done this update earlier and was in fact in the middle of typing it when my laptop ran out of battery. It then wouldnt start again after plugging in the lead and to cut a long story short I ended up with the laptop in parts all over the dinner table and I'm now typing on a replacement given to us by our friend Will (of Willdat fame no less...) Thanks Will! So anyway..where was I?. The back seat area. There was a fair bit of surface rust and glue to tidy up. I used a brand new Bosch wire cup wheel on the angle grinder and created a dust storm. Hard to make out maybe but here's a shot.. And this is what happened to the wheel... Not that impressed. My ever long quest to find a wire wheel that lasts a decent amount of time continues. So after removing all the wire spikes from my overalls I checked out the back seat area. Oooh there's a little bit of rust and some small holes. That shouldn't take long to fix. (you know full well where this is heading) Next minute...(rolls eyes) Oh bug-ger. It just keeps going.. I folded up the edges on the bits where the heater hose comes out to avoid sharp edges. I may well not use heater hoses through the channels but best make it some the choice is there.. Phew. Done. Next up. That rotten parcel shelf. Since most of it was going to be removed in order for the top of the Datsun rocker cover to peak its head through I just did this... With all the floor finished Hannah set to work painting the floor top and bottom with Por15 and Resene industrial 440 epoxy paint. Oh man I love this bit. It always looks so much better. Then she finished off painting in the engine bay up to where I will be welding. This where its at for now. So many other paying jobs have come in and we want to get them sorted so we shall sneak in bits and pieces on this here and there. One thing I have done already is remove the brake and clutch master cylinders. I may well upgrade the brake master to a tandem item if I can locate one that will fit and have a workable bore size. I realy just don't like the idea of a hose blowing out and all the brakes disappearing. The stock M/C diameter is .625". The sport imps have a servo and use a .700" bore M/C. I need that larger bore size at least because this car has front disc brakes fitted. I really don't want a long of travel, mushy feeling brake pedal. There is a Lada Niva M/C that apparently bolts right in. I have looked them up and they have a .750" bore. It'll work but the pedal effort will be a bit harder. I don't mind that though.. the Viva wagon currently has a non operative servo so it has a hefty pedal. Ya'll just get used to it eh1 point
-
This little Imp has now got a nice solid floor I really needed to get some solid work done on the Imp so I can get it off the hoist. I also wanted to see the end of a rotten floor so yesterday I decided would be nothing but Imp day (in between important coffee, music listening and posting cat photos on social media of course) Oh and also reading the latest Impressions magazine that arrived ( I joined a club!...) I finished the last bit of rot on the side of the tunnel behind the drivers seat area. Then moved on to the passenger side. Not anywhere near as bad as the drivers side but bad in different places. I pondered for a while at which bits I should keep or chop out. Then I set to work.. Hannah kept busy with an ever so exciting ball joint replacement on a customers van so I could I fritter away on the Imp I remade the wheel well bottom... Then I wheeled over the magic machine and made a snake.. Snake thing goes here... Followed by the beginnings of the firewall heel... The heel bone connects to the floor bone... Before I knew it there was a nice new floor upon which I can mount the MX5 seats I have recently bought Next step while its on the hoist is to deal with the parcel shelf which is rotten. Luckily most of it gets chopped away to allow for the top of the Datsun engine to peek its little head through. I think I'll also be a lovely fella and gift the job of slapping Por15 on the underside to Hannah. Because I'm nice like that.1 point
-
I managed to do a bit more on this in between stripping a Datsun 120Y down and property jobs continuing on from the cyclone mess. So where was I up to? Ahhhhh that's right. The arches... No. Hang on. That's the wrong photo. Not them. This.. So there was some rust I had cut out. Made a little fill in and using Nanas favourite butter knife I was able to keep it lined up for butt welding.. Grind off and move on.. So onto the offside rear corner. It was messy.. This fell out.. And the rest was cut out.. I started a the rebuild with a tricky inner bottom piece connecting the outer guard bottom to the chassis rail. Luckily it looked like this section is a mirror image of the other side. You can see it has many curves, bends and folds, as pointed out by Mr troll... So I copied it using folder, hammers, shrinker, pliers, hands.. Welded in. Instant strength again I then rebuilt the inside and started building the outer skin.. I've finished off the entire rear end but need to get some more photos. There were some rust bubbles around the arch which I cut out in sections in order to not lose the shape. I'll get more photos. I need to cover all the repairs in Epoxy primer before it starts flashing off in surface rust. Then move on to the floor. Yay. Lots of rust. But I have a rough plan on how to tackle it. Feeling happy with it all now its a lot more solid1 point
-
On Thursday last week it dawned hot and sunny. This was good. The thought of trying to load an old car shell onto a trailer using a tractor and some pallets in the rain would be yuck. Instead.. we got blasted by sun. We got the shell onto the borrowed trailer, loaded the van up with more parts from another Imp (there's more to collect!) and made our way back home slowly along a now revised (thanks Cyclone Gita) very windy route. Once home this was our view as we sipped our lunchtime coffee... I moved it up to the workshop entrance. Viva wagon was banished downstairs.. Cleaned out a load of old interior carpet and insulation.. Sat inside it and made (little) engine noises.. It came with some patina attached.. Then the clean began.. It cleaned up nicely... Then we moved it inside. Lifting it off the trailer was a lot easier than putting it on.. I am now building a decent sized rolling table to lower it onto. More on that soon. Glad to have the shell here so I can crack on and cut out the rot. First job though is to clean all the mess out inside. Quite a fun job that. I might find some coins and so it can end up even cheaper1 point
-
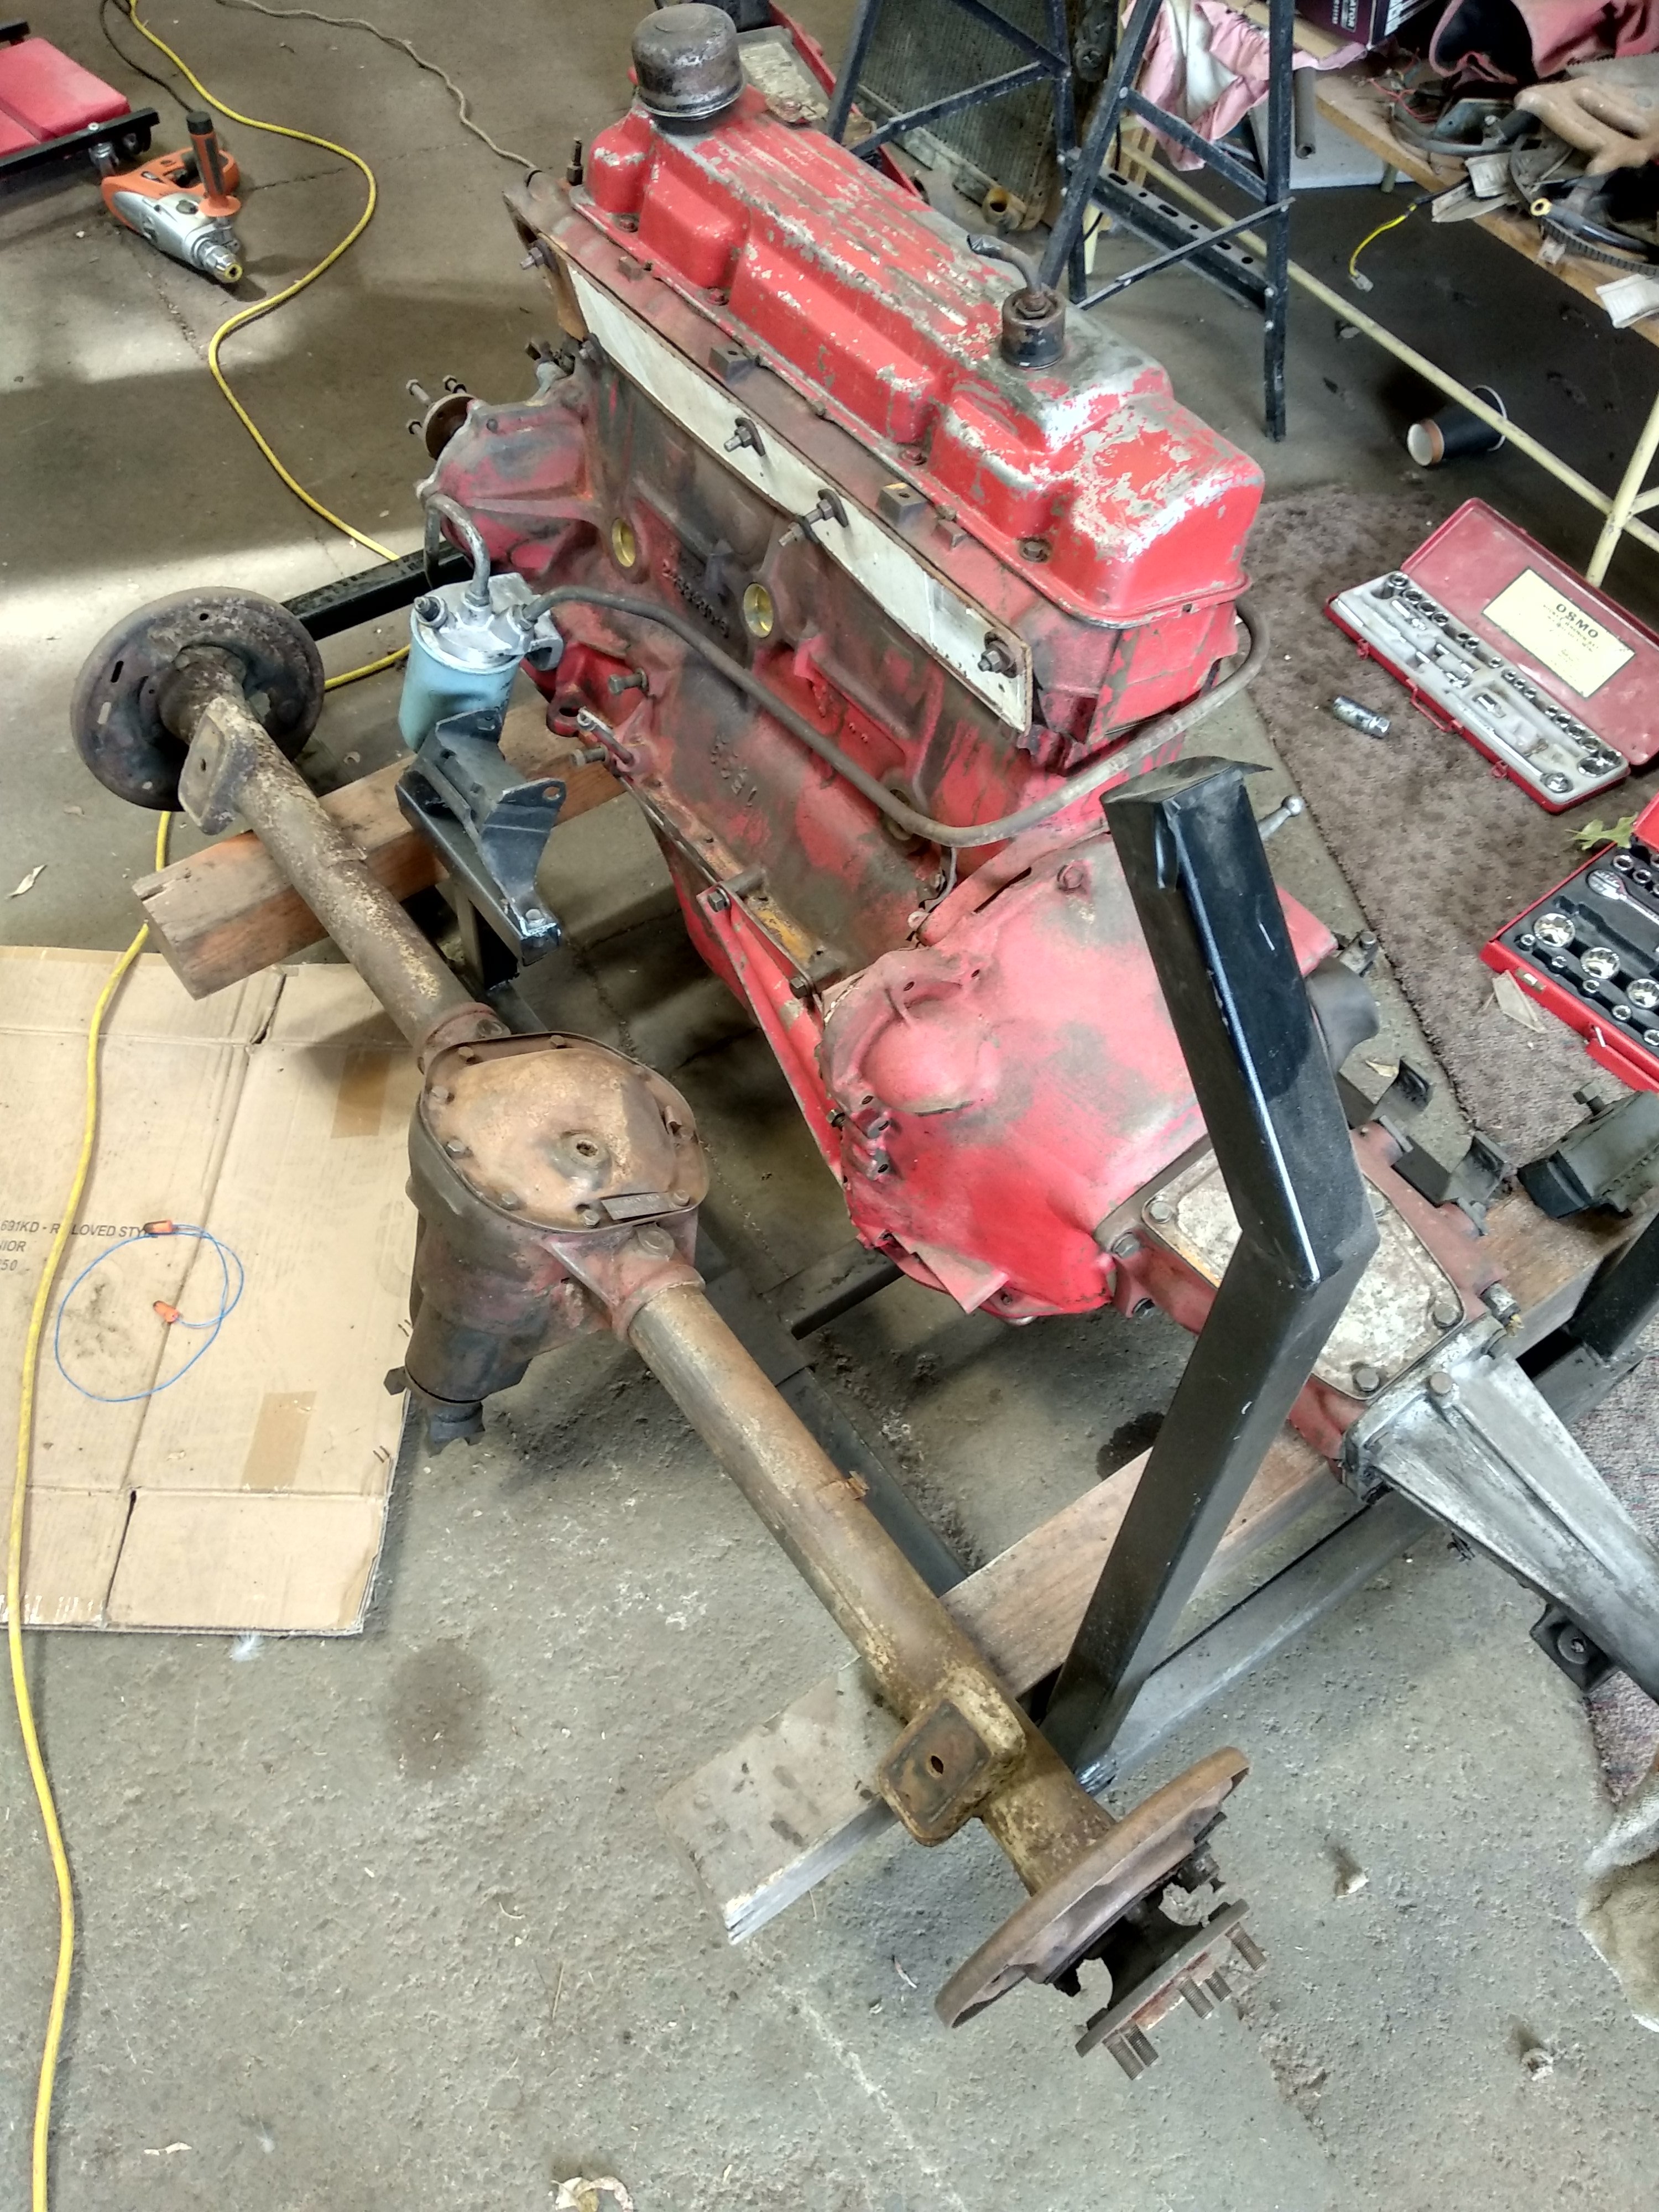
I went to the Nelson Vintage car club swap meet on Saturday morning. I was chatting to a mate and taling about the Imp project. Some fella behind me said "Do ya need any bits? I've got heaps of parts!" I turned and it was a fella I had met a few years ago when Hannah and I were looking at Bush block for sale over the road from his place. We had turned up in the Viva and parked it outside. This guy came out to look over the car, we started chatting and he mentioned his Hillman Imps. He then showed us about his workshop. Now I had been intending on going back to his place (handy too because we are mates with the lady who ended up buying the land...bloody hippies ) so it was good to bump into him again. I told him about how the Imp race car, which he knows well, was still quite rough from having been pulled straight after the accident. He mentioned the spare shell he had sitting there and said we should pop up for a look. We went up there yesterday and....well.. I have now got three Imps. This shell has some rust, the worst being the drivers floor but very easy to fix. Main thing is that its straight. I would say the worst aspect is the dent behind the drivers door. It will pop out but I don't really like having to use lots of filler, especially on large panels. Oh well. I can only try my best. The front slam panel has a dent but there is a good panel on the other , completely chopped up shell in there. The windows need a clean.. 1971? Mk2? The car is a nice light blue, not too different to the blue I was thinking of painting the car. All for the princely sum of $50 How could I refuse! So my plans are changing (everyday) and I will now use this shell as a base. The Blue car in Chch will be used for parts but I will keep its shell as a future car project (old cars lining up the upper driveway amuses Hannah no end I can tell you... but at least Imps are little cars) thus making the caged race car shell spare (I already know someone who might just want it...) In other news I went hunting with my large spanner and caught a Datsun engine sneaking around the back of my Imp... Then I had a BBQ, drank beer and stripped it down. Hows that for hardcore Saturday night antics eh?! Here's the little transaxle.. Fits on to a quite nicely constructed 'bellhousing' adaptor. The flywheel and clutch remain Datsun. Uses a modified release for with a typical release bearing rather than the carbon Imp type. I'd love to know more about who built this adaptor because a few Imps were converted to Datsun engines here in NZ? Clutch has a sprung centre which is needed because I reckon the custom Nolathane driveshaft couplings don't have the required amount of give to take up shock loads like the original rotoflex couplings do.. That is all for now. I must finish the truck cab swap so I can create some space for more Imps. In the meantime.. you can discuss whether I am starting to get an Imp problem here...1 point


.thumb.jpeg.384ff72c8d2b0ee0d34a7bdedb55bdcf.jpeg)
This leaderboard is set to Auckland/GMT+12:00