
Leaderboard


Popular Content
Showing content with the highest reputation on 12/05/18 in all areas
-
I moved the shell onto the hoist and removed the last bits of rot, tiny bits around the front arch.. Work then continued on the cooling circuit. I need to get the pipes from the engine up to the front. Most people with Imps doing a front radiator conversion either run the pipes inside (too hot), under the gear change in the centre tunnel (I want to keep that easily accessible and to do it properly without having pipes below the floor line I'd still need to make some tunnels to close over) or they use the existing heater hoses (too small). The setup in the race car was like this... Fine for a race car but way too hot and in the way for a road car. I have had the intention of fabricating a separate tunnel to house the pipes ever since getting the race car. This is because if I was to run the pipes inside no matter what I try and do to insulate them there will be a fair bit of heat escaping into the cabin, plus they'll take up more room. With a tunnel the heat can instead radiate out into the airflow there should be very little transfer into the cabin. They'll take up less room and with a simple false floor above the tunnel in the front the passenger should not even know.... Plus any leaks go to the ground, the pipes can be easily attended to and the well.. it just seems a neat way to do it So I started by chopping down the removable cover (covers where the brake pedal mount would be on a l/h drive car) so I can weld it back in for a neater stiffer area. Then I marked out some lines and started cutting away... Then I cut and folded some tunnel sections up and welded them in. I have tried to keep the curves as gentle as possible without encroaching too far into the footwell. I had to make sure the pipes would be clear of the front suspension arc. Meanwhille Hannah kept busy stripping useful parts out of the racecar shell... I cut more bits out, formed more tunnel sections and ended up with a lovely clear tunnel front to back... I now need to fit the rear seat in and see how I can avoid passengers getting a hot bum. I'm not sure how close it sits to the metal base. I might just have to wrap the pipes and make some heat shields as i can box it lower due to the rear swing arm mounting point box section. I'll also add a bracing section near the front across the floor where the new pipe tunnel has potentially created a 'side impact crumple zone' or something.. Then its seat mounting time. Then paint prep!!!! That will be where things start to get very, very, very tricky! What colour? I have my mind on a on a few different light blues and even some light greens. Decisions...16 points
-
Moving to the Throttle bodies, I decided I'd start with the idle air control circuit. Originally I planned to drill and tap some brass fittings into each intake runner and join them all with push on vacuum line to a central ICV somewhere hidden away. That would then require me to plug the BMW injector ports (I'm going to use the standard Mazda V6 injectors) since they are on the vacuum side of the butterflies and would pose a significant vacuum leak. Then I had an idea. Well @d.p.n.s had an idea and it was pretty smart so I thought I'd take the credit. If the BMW injector ports are going to create a significant vacuum leak, then why not use it to control the idle? Dan got lucky with a set of throttle bodies that already had a ICV setup on them and all he had to do was cut and shut it to fit. Unfortunately, for whatever reason, the V10 style of throttle bodies (Which I am using) don't have one built in. So I'd make my own using the unused ports. I started by machining up some "false injectors" out of mild steel. I considered stainless for the bling factor but the extra pain in the butt I'd have with the machining made me reject that idea. As you can see, they use the standard O-rings and are shaped essentially identically other than the long injector nozzle. Here they are in place: Then I crossdresseddrilled each one and ground them out to shape to fit a common balance tube. Which they were all then welded to. I put a cheeky little cap on the front of each one at a jaunty angle to make them look a bit faster. Next was a couple of little brackets to hold each new false fuel rail using two of the throttle body mounting bolts. So now I have two separate balanced banks of throttle bodies. Next I need to connect each side together to balance the whole lot together and hook the whole lot up to an idle air control valve of some description. Again, Dan's throttle bodies came with their original IACV but mine didn't. So I did a little research and found that there are an awful lot of BMW engines that use the same model of IACV, including a couple of six cylinders that were down at the local wreckers. So $30 later I was back with a nicely gummed up and seized valve. A bit of brake clean soon had it cleaned up and freed and I started looking at options for hooking it into the system. The first thing I did was try a random brand new filter I found in the empire of dirt. What do you know? It fits over the intake perfectly! Magic! Then I wrapped it in a strip of sound insulating sticky backed foam which you can see above. This is a little too thick for the final fit but I carved it up to fit for now. Then I found a random ignition coil mounting strap and again, it fits perfectly! A study in serendipity this is turning out to be! With the mounting sorted, I continued by machining a few different fittings to assemble into this T-piece, among others. I intentionally made all these custom pieces the same dimensions as the output side of the valve to keep all the hose runs easy and not have to worry about diameter changes along the way. That then gets welded onto the passenger side false fuel rail. (I suppose balance tube is a better name actually) With everything bolted up, you can see the short run for a piece of vacuum rated tube to connect the valve to the balance tube. I also welded a fitting to the other balance tube to connect them up. I intentionally made this one the same length as the T-piece to give me the option of welding another tube on underneath for a brake booster vacuum source later on if I decide I want one. Finally, I connected everything up with a piece of hose I had lying around. I don't think it is vacuum rated at all, (it's pretty easy to squash by hand) but it looks good for now and I've got some proper silicone hose on order from the parts shop in town. I'm going to start on my eccentric throttle wheel next but I'm struggling to figure out the maths behind the radius, versus center offset and so on and so forth. At the moment my thinking is that a throttle butterfly only opens by 90 degrees or a quarter turn, give or take, from closed to full throttle. Therefore, if I find the full travel distance of my cable and multiply by 4, that should give me the circumference of the wheel. Then I was going to decide on how far to offset the centers by looking at pictures online, but of the ones I've been able to find, none of them seem to have the cable pulling the wheel through 90 degrees. Most look more like 120 degrees and I mean, @yoeddynz's one on the old Viva looks like it wants to pull through almost 180 degrees and that doesn't make a lot of sense to me. If anyone can help me out with any advice in this case then I'm all ears. Please share any ideas or advice here: Also I just realised, I never properly showcased the finished intake runners with their flash professional welds. Hopefully these photos do enough to show off how pretty they are.9 points
-
I have been working on a tail light license plate mount recently, the first version looked a bit average and left a large space between the light and fender. So I decided to chop up the original mount, looks better. I think I'll still chop the rear fender off one day but it'll stay for now.6 points
-
Havnt updated for a while. Been in the US living up the Freedoms. Ive been working on a lot of CAD over the last 1-2years and have just recently bought a massive 3D printer to make casting patterns. The plan is to stock pile patterns and then hit it hard when Im back in NZ Currently doing patterns for the crankcase. I'll update more on Instagram. @Barlow.Jobs4 points
-
Rinse and repeat mk3 Now with added head3 points
-
Test fit the intake grill pretty happh with it. I'd like to send it off for galv but might leave that until next year. Was hoping to throw top coat on tonight but it needed a second primer coat die to pin holes all over would of looked shit on final paint.
 3 points
 -
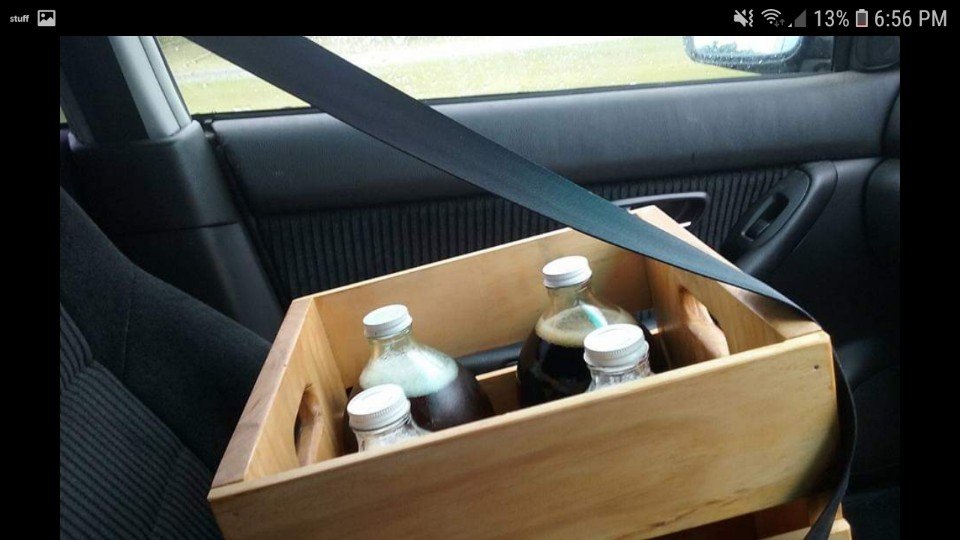
Talk of crate day in Spam reminded me of the flagon crate I made...
3 points
-
The park brake turns on when you put the car in park. Fancy3 points
-
Second side into primer. Will attempt a sand and top coat tonight weather dependent on if I can push my cars out of garage or not.
3 points
-
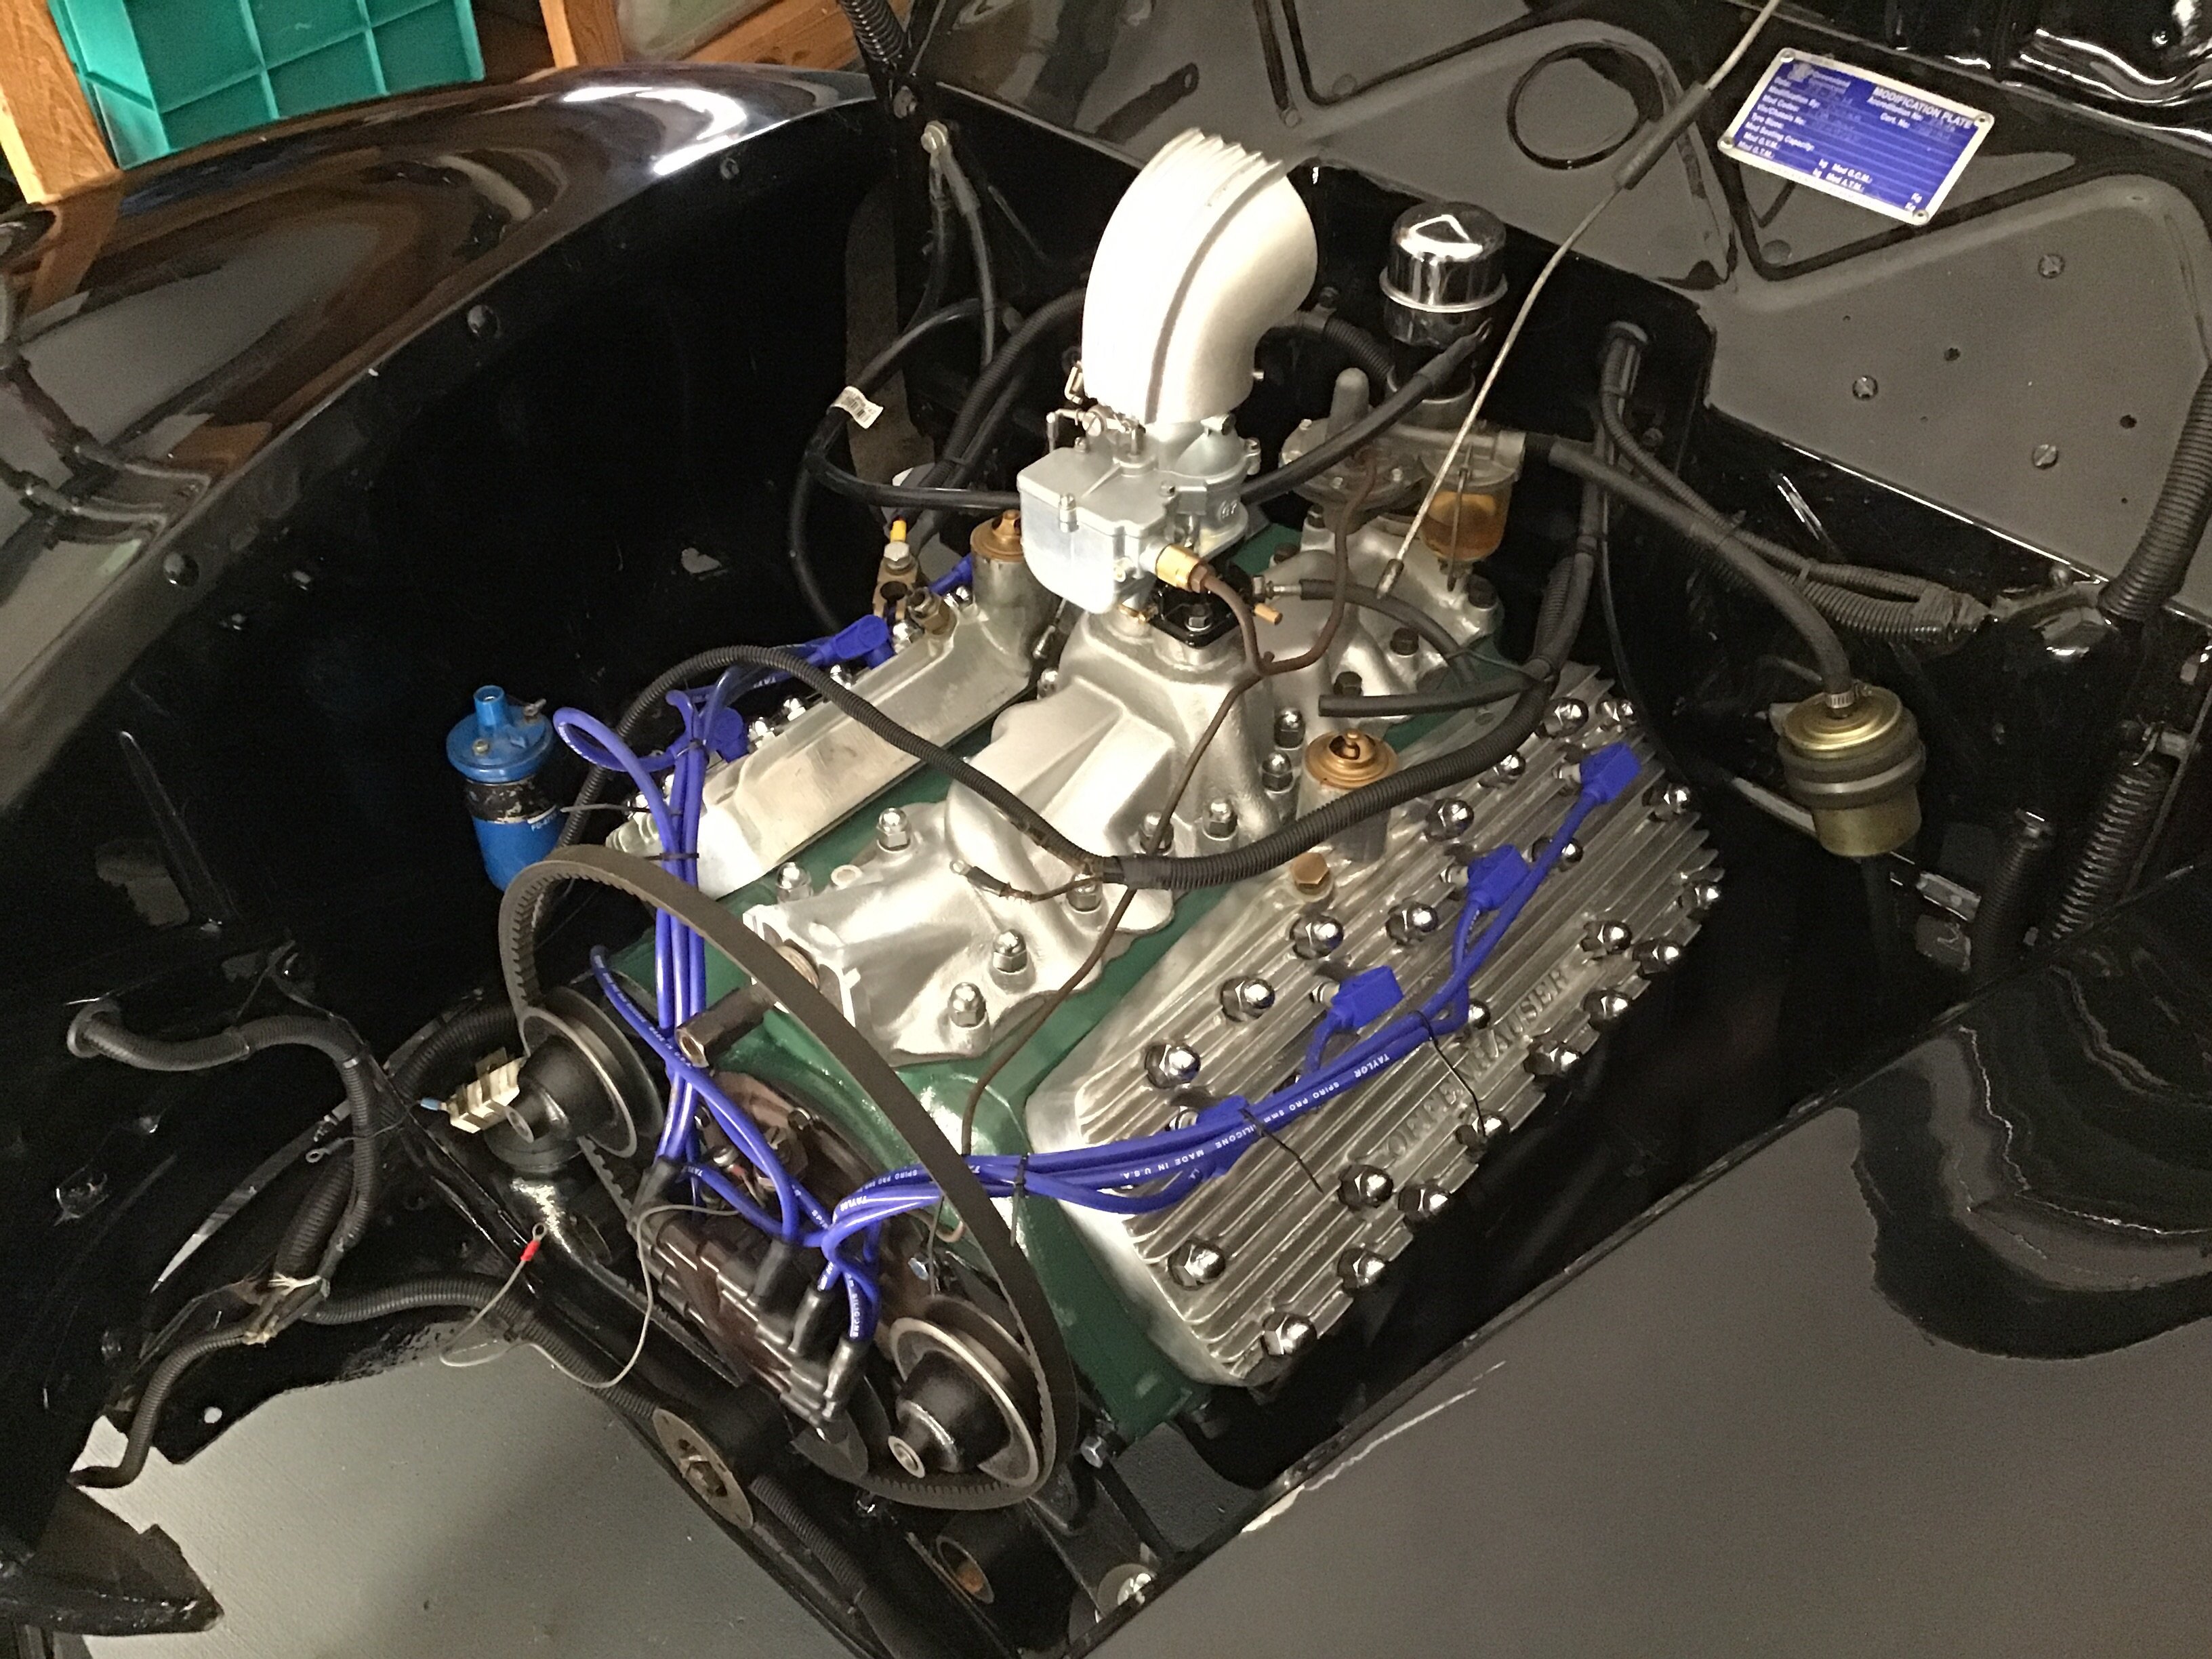
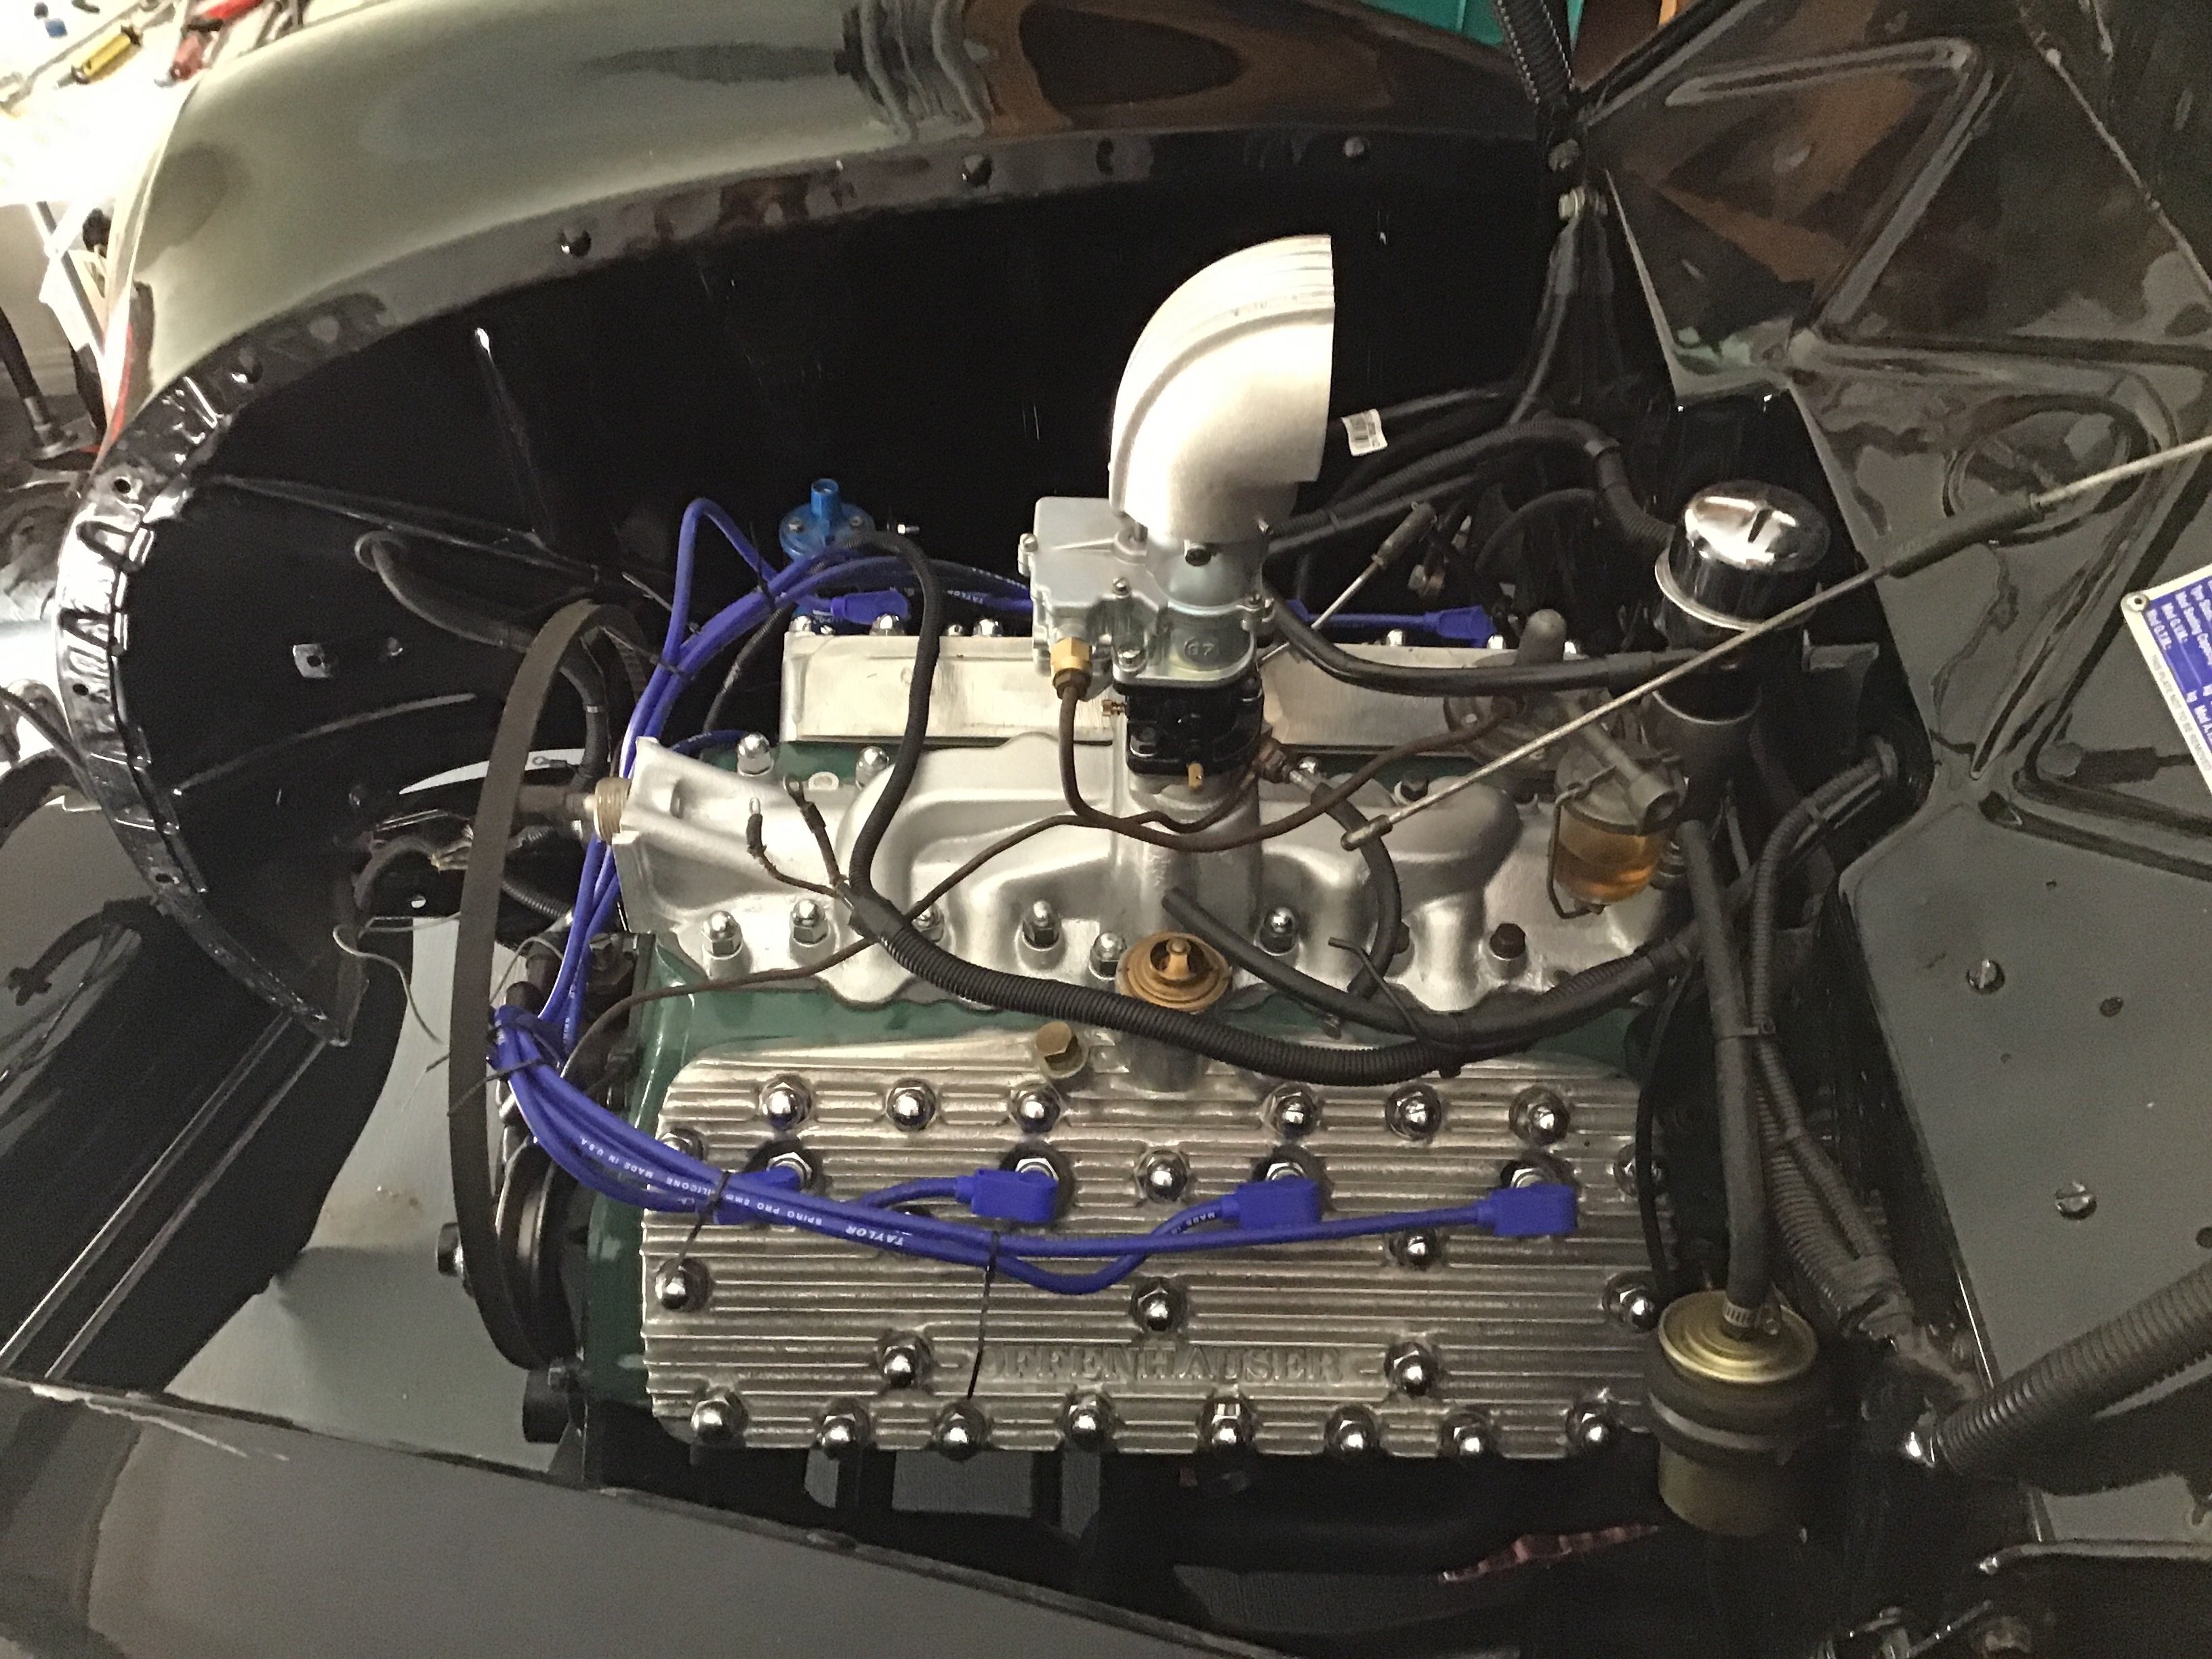
Intake came up ok as did the rest of the engine.Im happy with how it’s going to look but the blue leads will have to go.
3 points
-
Gonna use this guy The fist part is a similar size to what is left of the mount, gonna weld a plate in there and tap some holes to screw the light to, might even use some glue as the screws are pretty small, m3/4 I think. What kinda trouble are your lights having?2 points
-
Wish your bike was what??2 points
-
I should prob sign my self up for this.2 points
-
Also done the cutting shaft / thread etc. Didn't consider it being hardened just sent a die down it haha. Works well, need to do it to my Yamaha now. It has the massive droop from just cut springs - so many fingers caught under the guard when lifting the bike onto the trailer haha.2 points
-
Yeah ive pulled them apart and shortened the shock shaft then run a die nut down and rethreaded the shaft .2 points
-
Just gave it a try on our loan car. Don't need to hold the button down, a quick push will do, and it'll apply it at any speed. The dash starts flashing at you telling you to release it again, but it doesn't override it.2 points
-
RE; the throttle cable pulley. I worked back from my pedal. I worked out how much cable that pulled, after having extended its arm to pull as much as possible. I think it was something like 40mm. Then I machined a round pulley the appropriate diameter which opened 90 degrees with 40mm of pull. But as you know from the thread it was too linear. So I just offset the centre and set it so roughly the first 25mm of pull only opened the throttle 1/3rd or what ever. It was pretty simple ruler, compass and 3.14 stuff really. Worked a treat. Damn I'm still so tempted to put a V6 in my wagon...especially after listening to my mates car here....2 points
-
I had one of those IAC valves retro fitted to my CA18ET with the link Storm, because the factory setup was weird and complicated. But it had trouble controlling the idle. It was not responsive enough, so when you got off the gas, the idle would go too low then too high then too low until it stabilised. I ended making an adapter to fit a later model nissan IAC from the 90's. It fixed the response problem and was also much smaller.2 points
-
@doozi I cant remember his actual handle name lol and @Truenotch sent me the renderings for the stickers on Friday. Stoked
2 points
-
People can't even fit wheel nuts correctly. Requiring a cert for a pedal swap is completely justifiable IMO2 points
-
I'ma try ride over for this, via Rotorua, hopefully my future classic doesn't upset anyone.1 point
-
One place I don’t recommend is the start venue (Classic Flyers) or the local Bunnings. We’re pretty keen to not piss them off. Aerodrome road is a big U shape with the start location at one end of the loop next to Bunnings and the airport at the end of the U. There is tonnes of parking on the side of the road at the other exit of Aerodrome road. If you follow around past the start venue, go past the airport; there should be plenty of parking there. Alternatively there is side road off the other end of Aerodrome road. Unload and park where shown in the photo below. Meet us at the start point!
1 point
-
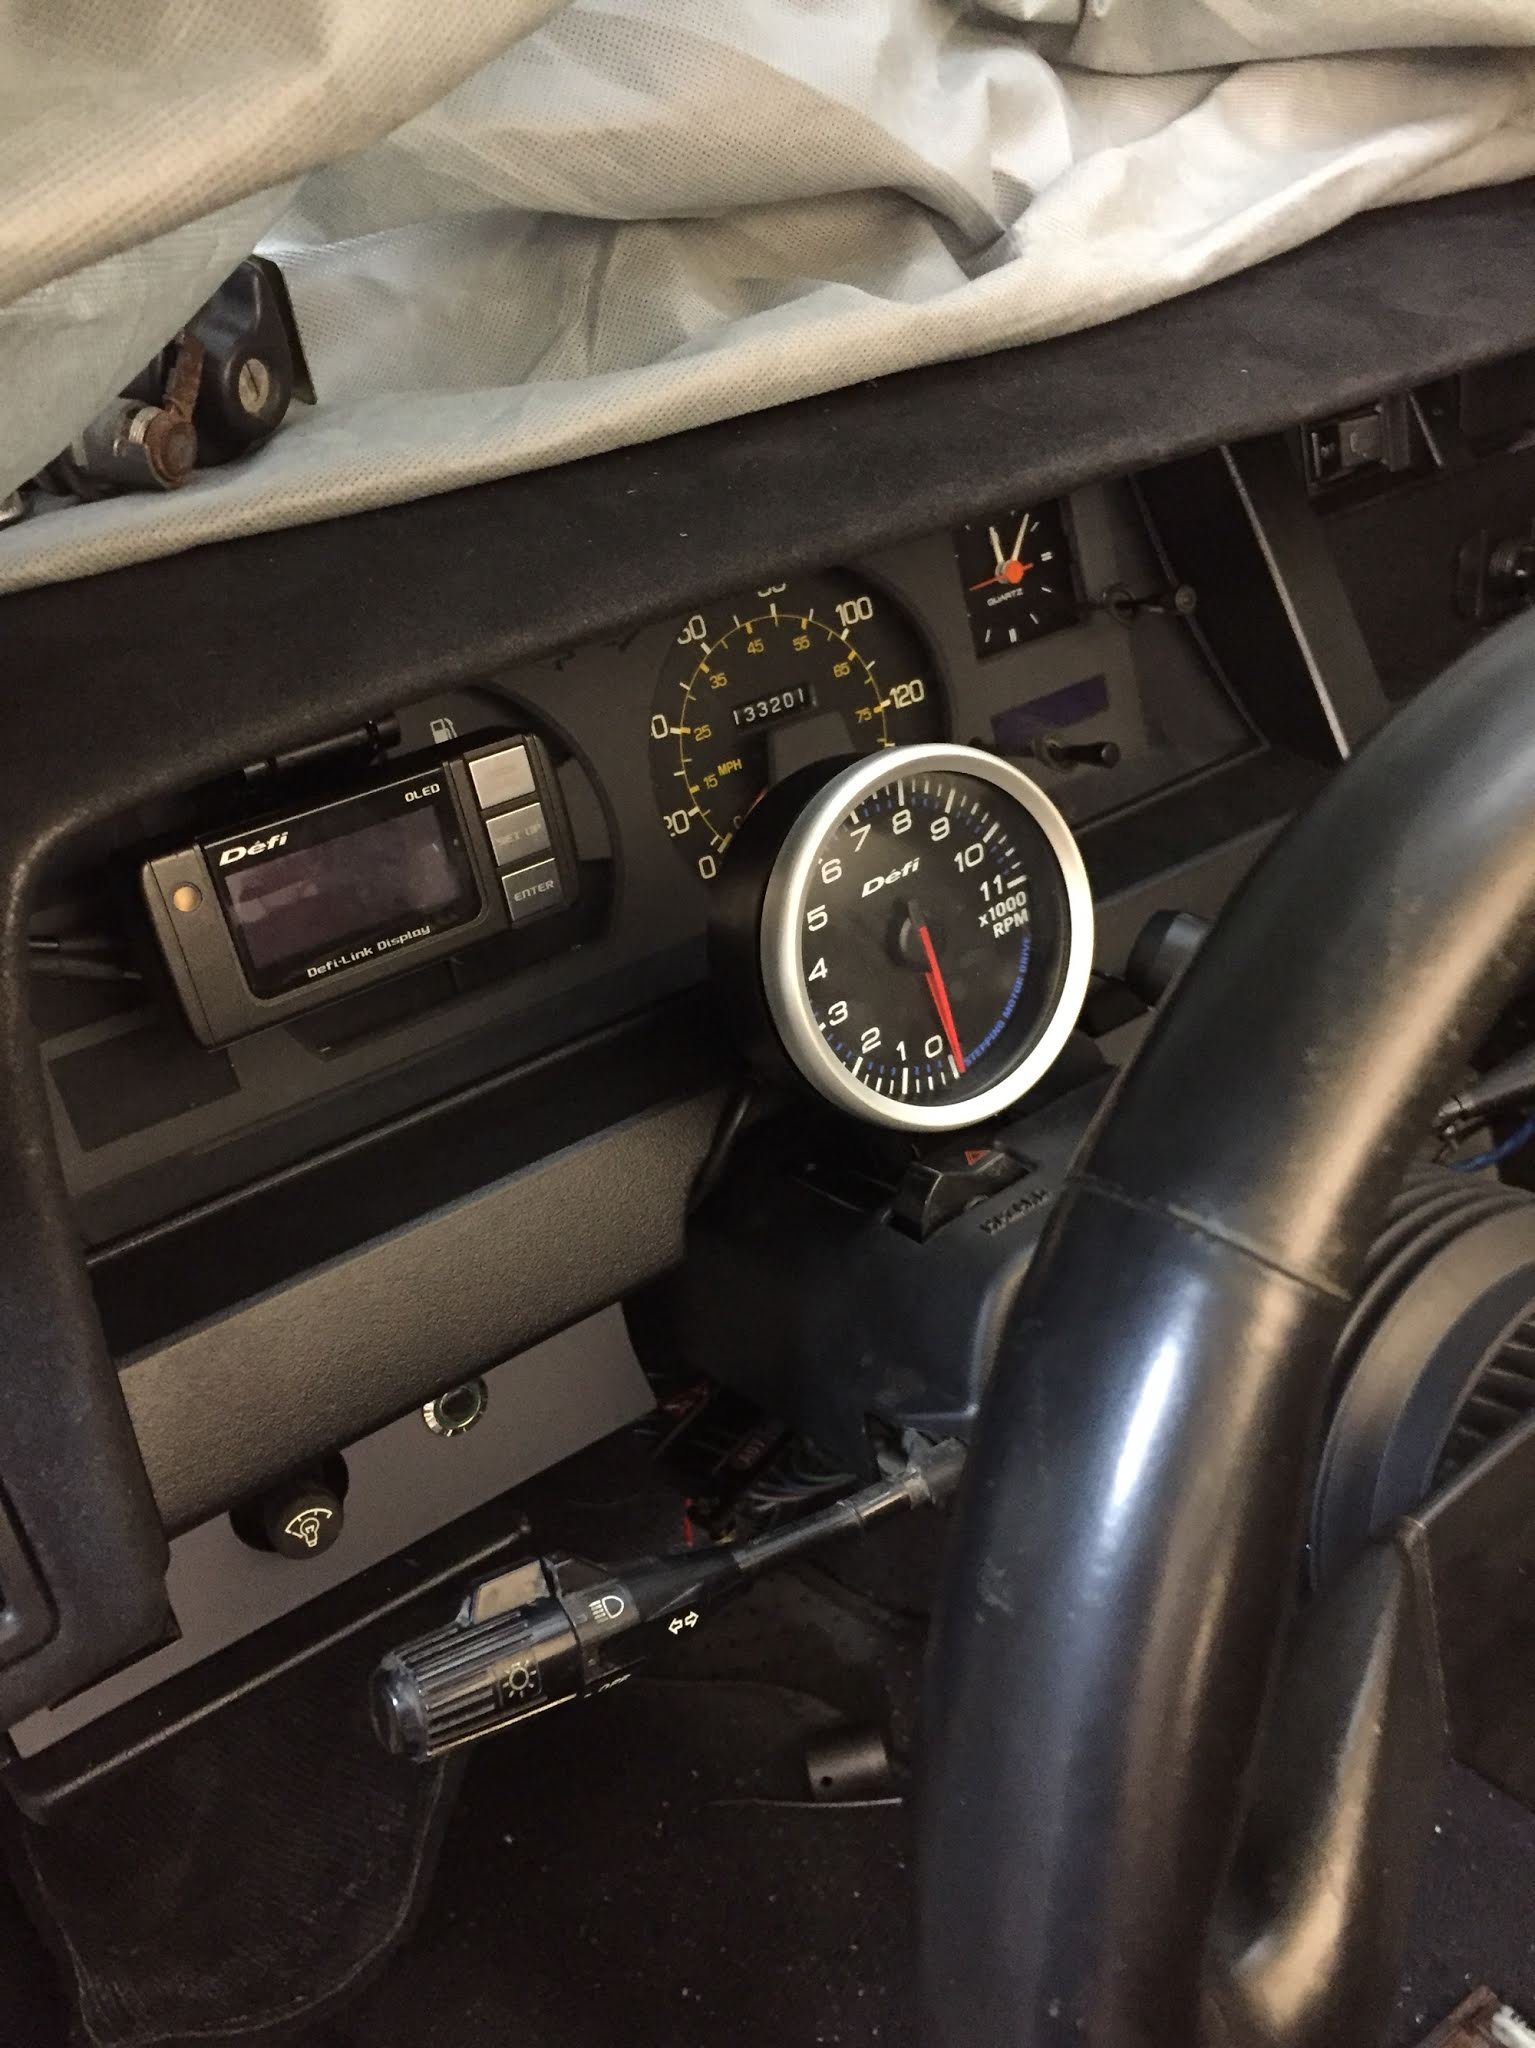
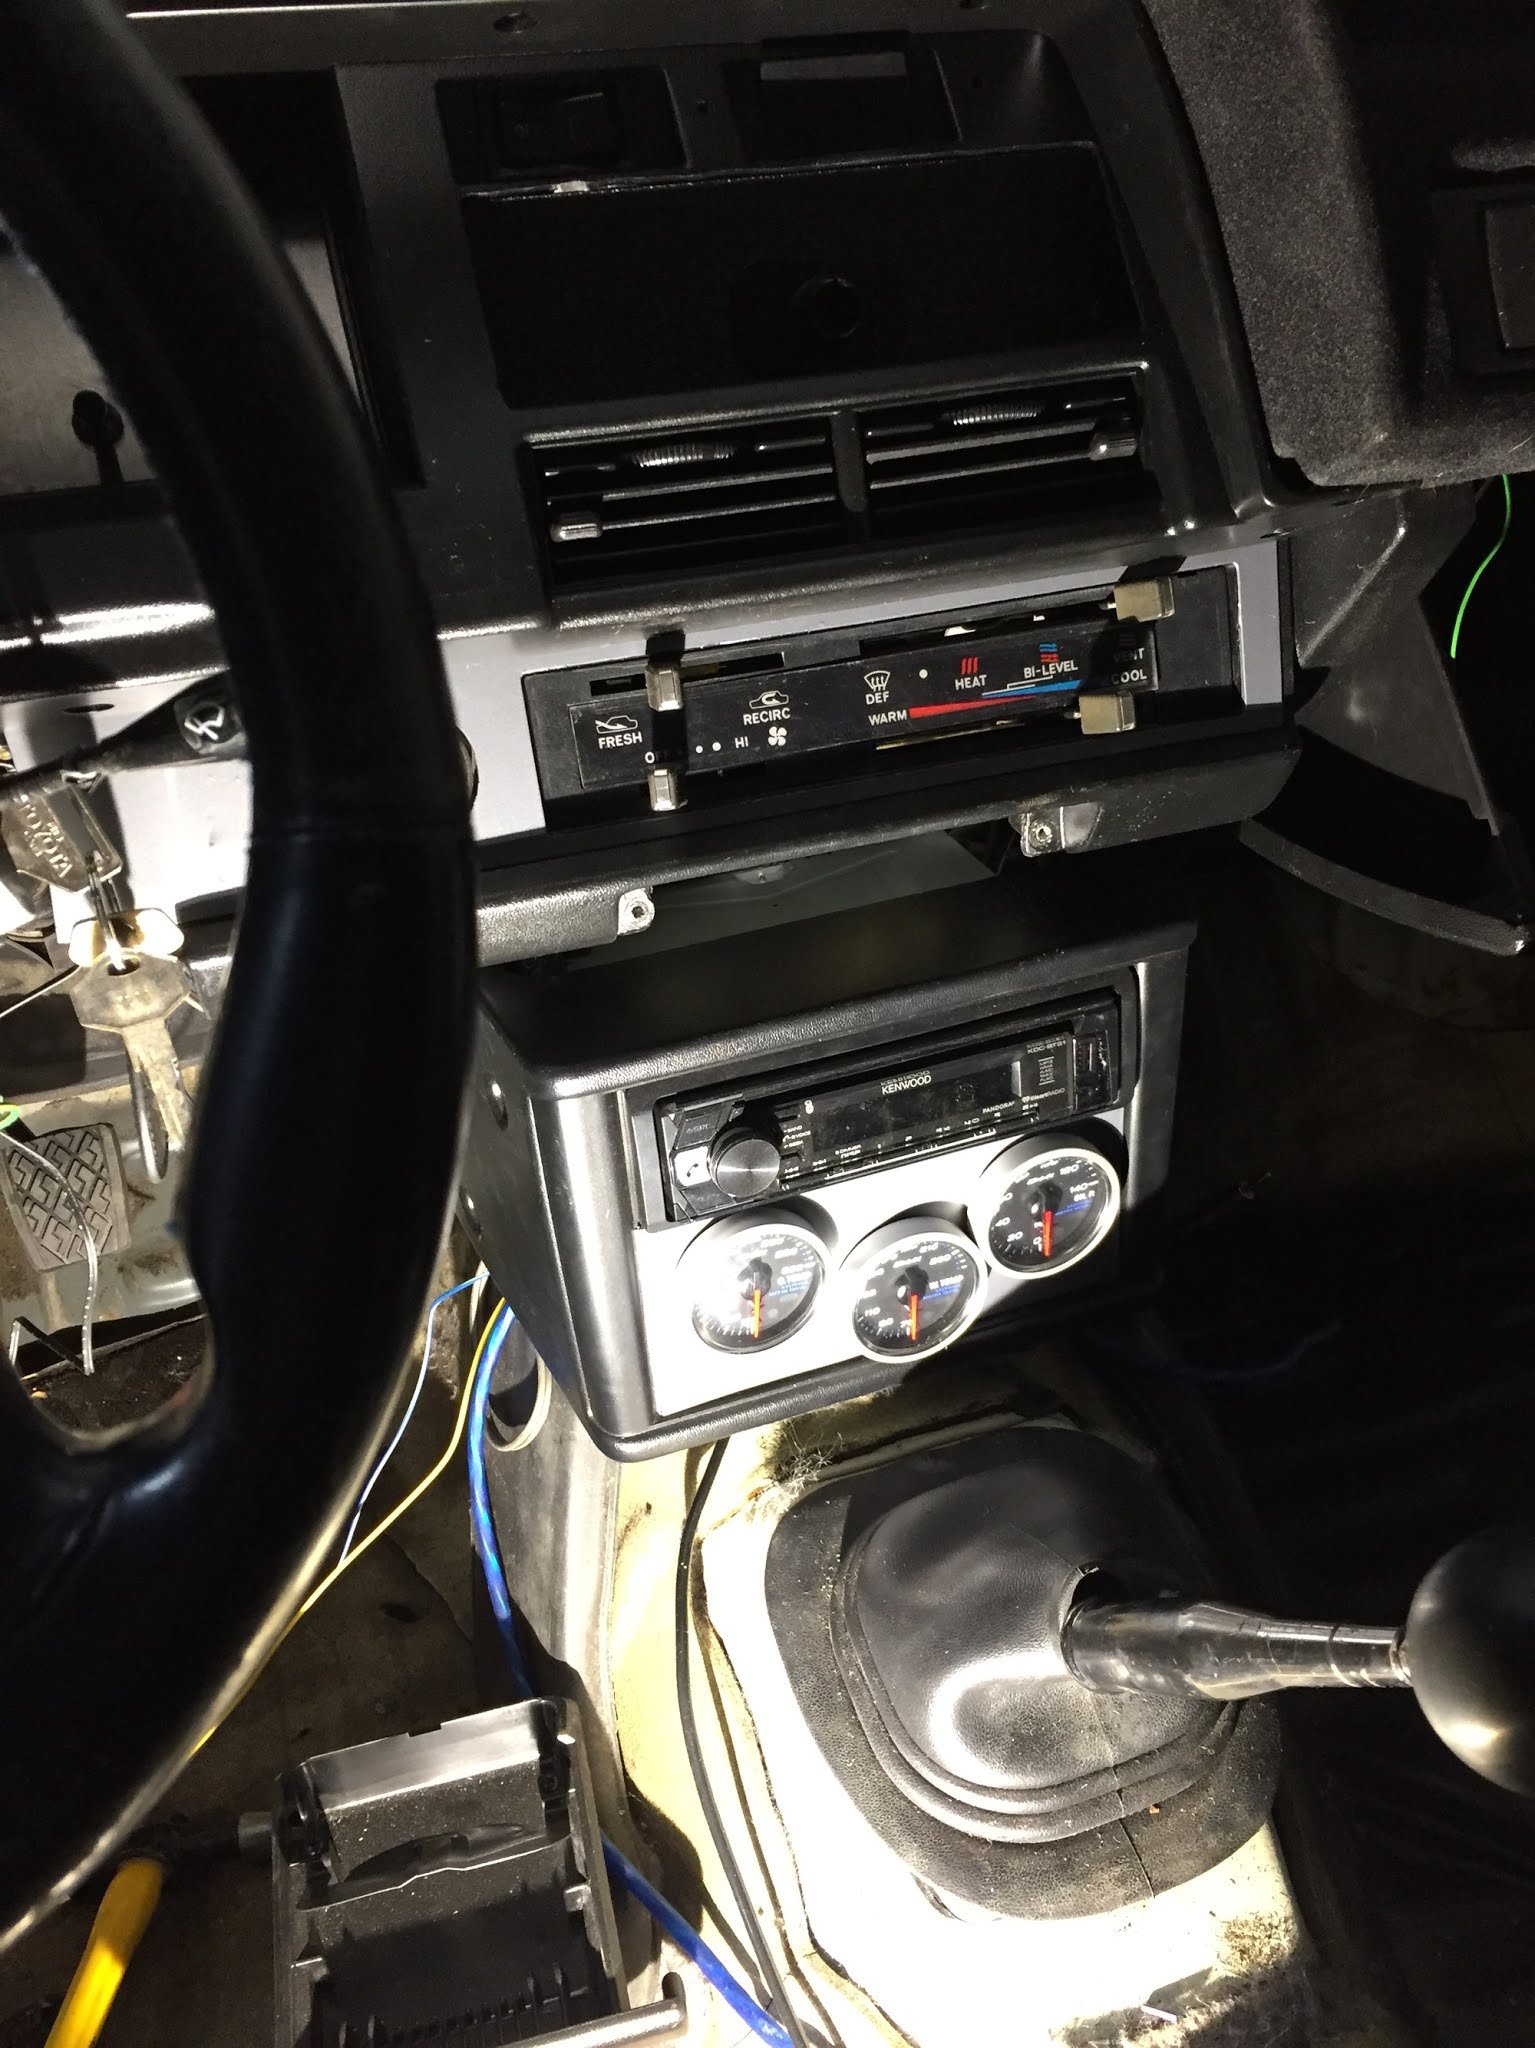
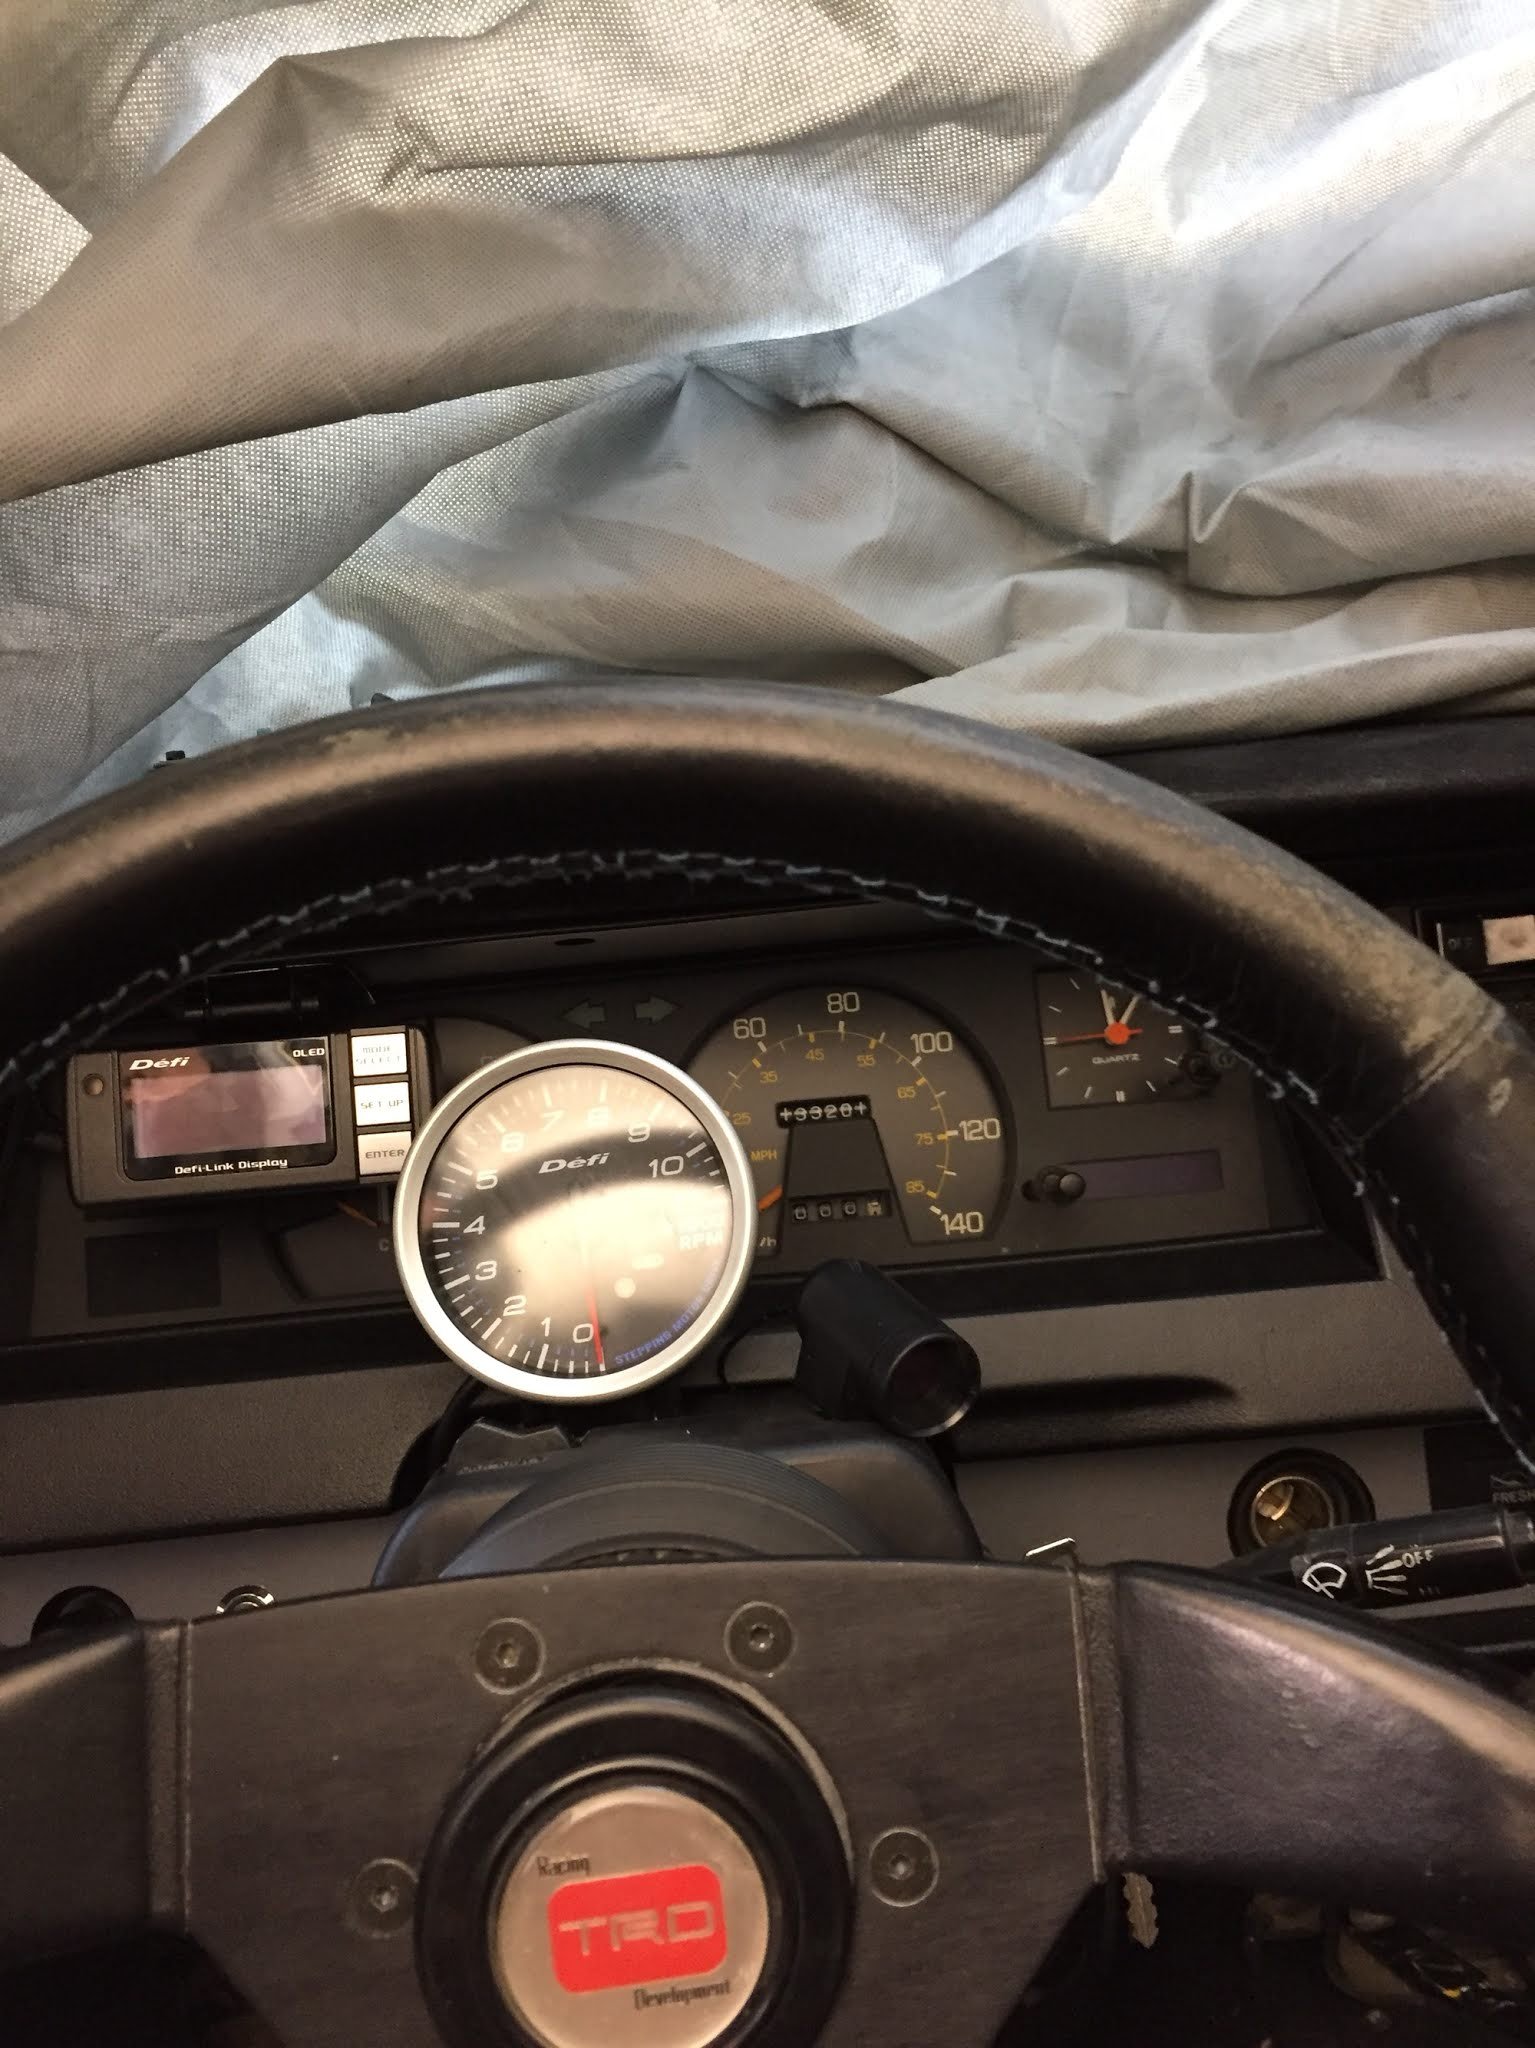
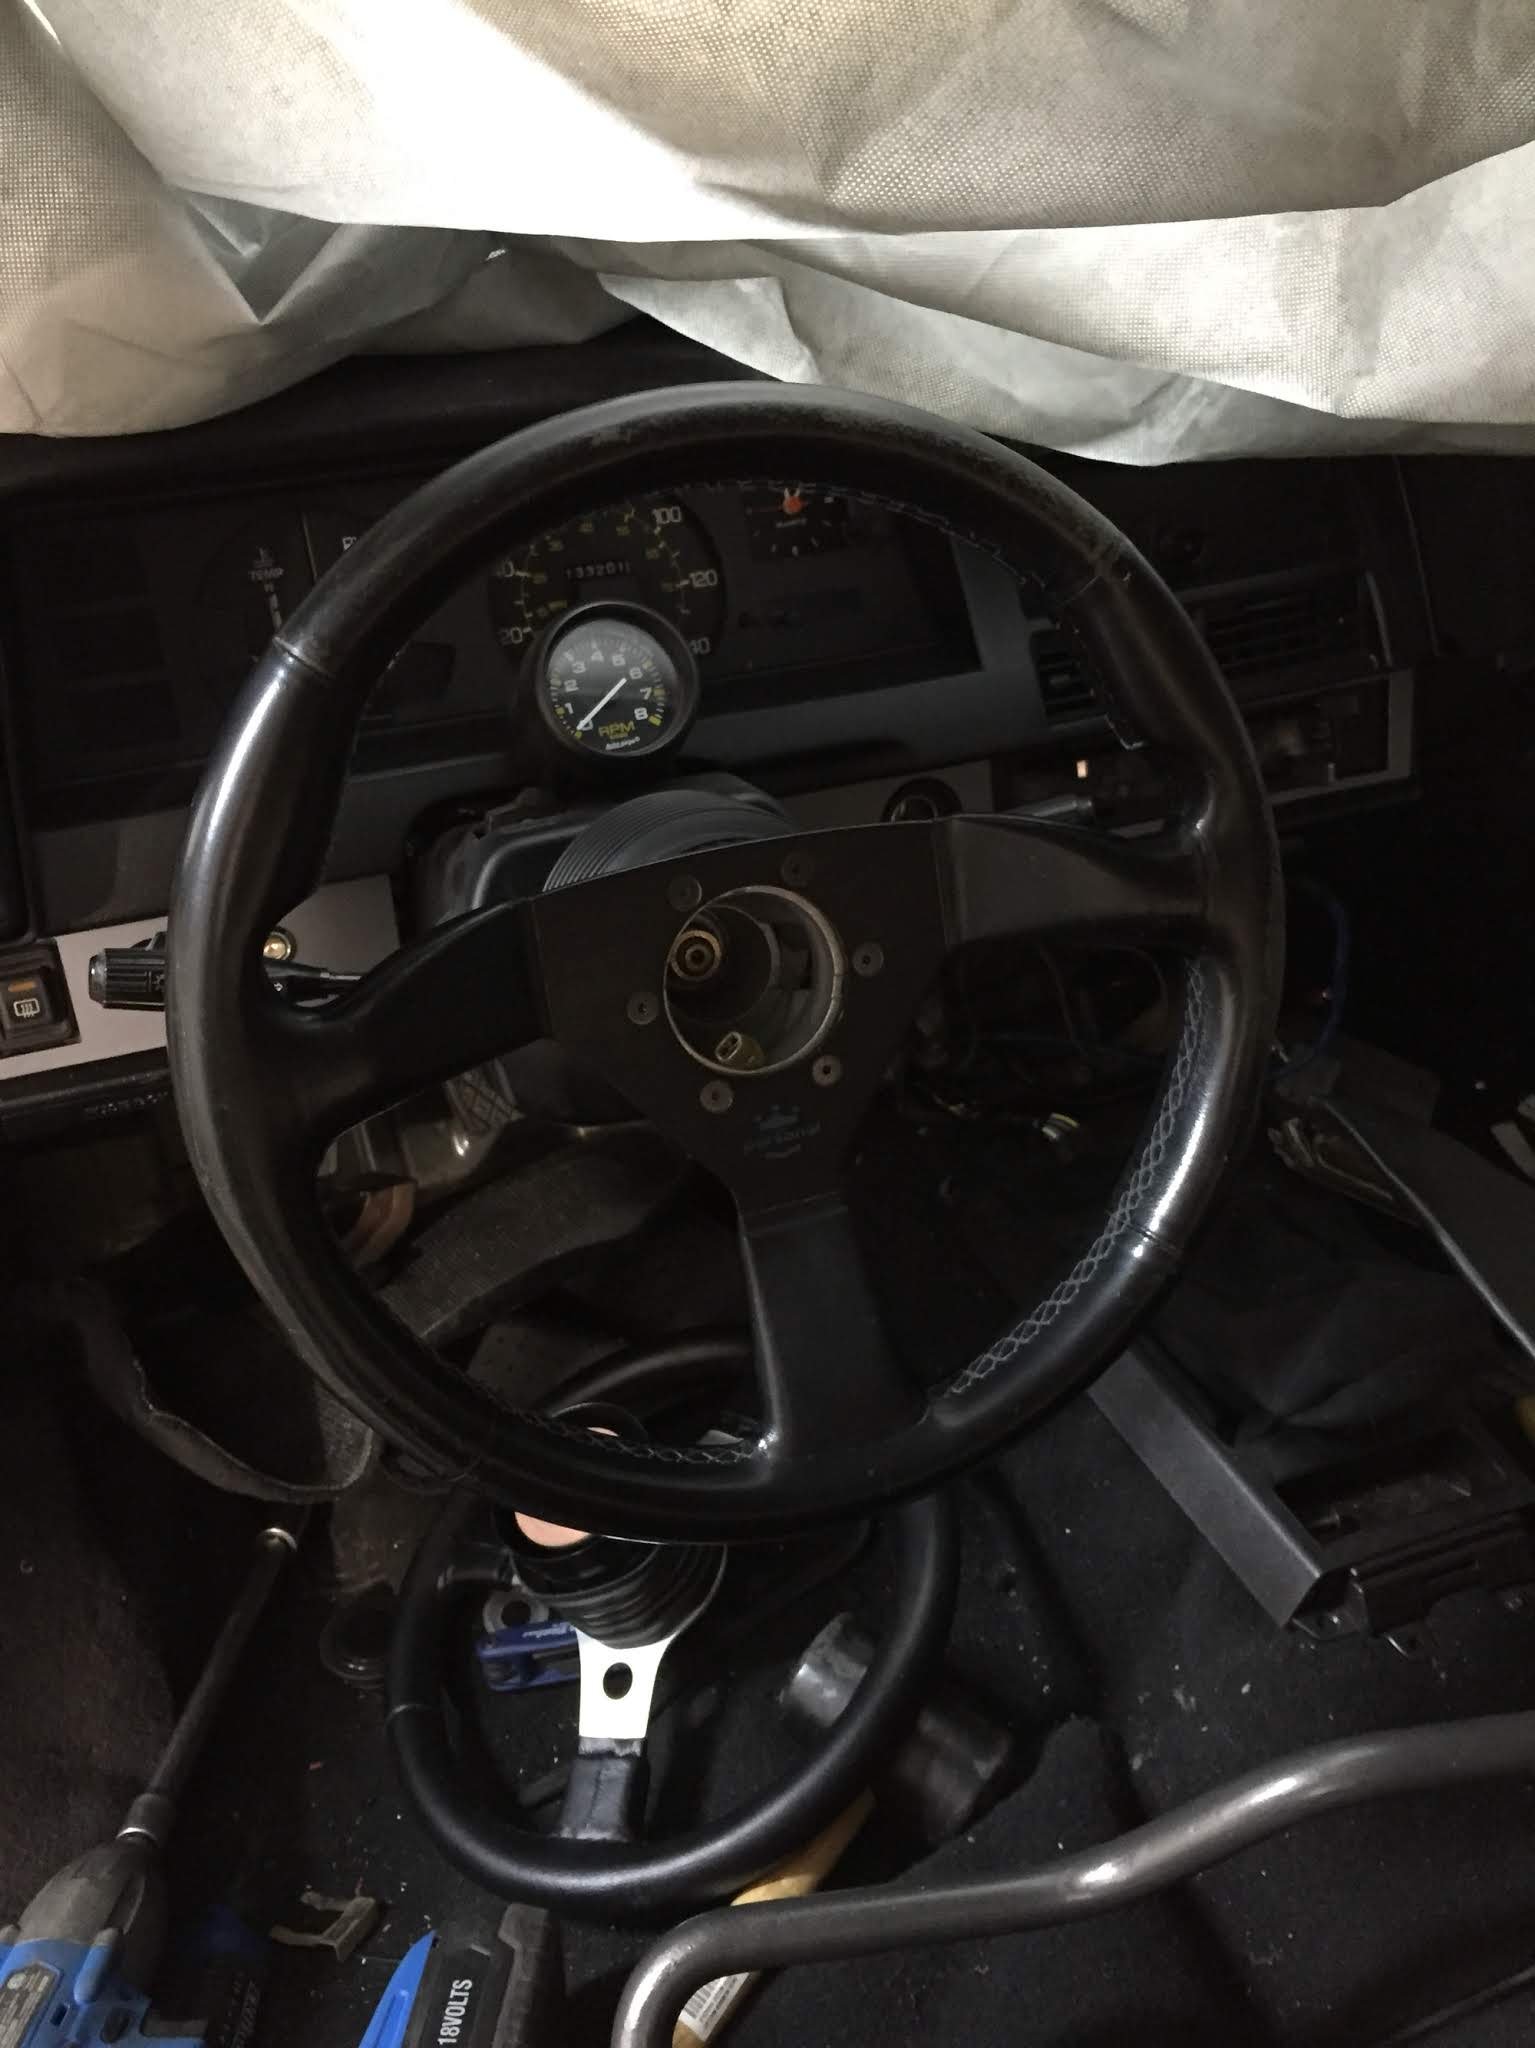
The in-laws are in town for the next little bit, which means I get out of daddy duty a bit more, so I actually had some time to work on the car this past week. Didn't do too much, but what I did made a big difference. My new steering wheel hub came in, so I decided to install it along with the Personal wheel. The hub is for an AE86, so it did fit, but the contact for the horn didn't line up properly. I had to bend the contact a bit, but she works now. I also still need to order a horn button retaining ring for the wheel. I added it to my christmas present list for my wife. I also thought with the new wheel in, it would be fitting to start installing my Defi Gauges too. The old Autogauge tach was alright, but it wasn't very bright. The 11K RPM Defi tach and the link display where the first two to be installed. From the drivers seat...area. I did a loose fit of the shift lamp there. I'm not sure if I'm going to run it or not, but just wanted to see if it would work or not. Also fitted up the rest of the gauges under the radio. I used some 15lb double sided tape to hold the plate in place. I was originally going to mount the controller in the glove box, but the harnesses I had for the gauges are just a bit too short, so I modified the ash tray mount to fit the controller. Right after I did that, my friend said he had a 1meter long harness I could have to help install it in the glove box. Still not sure where I want to mount it. I did find a picture of someone who did mount their controller in the ash tray location and it worked nicely. I also got the controller all wired up too, so just need to run the cables for the sensors when I go to install the new engine. I also found that the original owner of the gauges shortened the oil temp sensor wiring by about 4 feet, so I'm going to need to cut and extend the wiring to fit properly. And last update, I got the 14" tires I bought for $40 mounted onto my mesh wheels so now I actually have some decent looking rollers. The wheels still need some more work, but they'll do for the time being. My stuff from TechnoToyTuning should be here on Thursday, so I'll get around to the transmission shifter bushing install around then. Still need to do some cleaning on the 4AGE before the injector plugs go in. Hopefully I'll have some more updates coming down the line in the next few weeks.
1 point
-
Have cut the springs but not shortened the shock shaft so they are a wee bit (massively) uncaptive on droop. I saw a dude on instagram shorten his by running the shaft thread down further then lopping the end off so thought I'd give the same a go. I assume these would be hard chromed so grinding that off first would make it easier?1 point
-
You know, I knew all of that already but I never put the fact that you could wrap the throttle cable around the pulley as much as you like and it's still only going to pull it through 90 degrees if you've got the radius of the wheel right. The fact that yours was wrapped almost half way round was really messing with my head. Thanks for explaining it so well.1 point
-
Slamming the electronic brake on in a golf at 120 just slows you down in a controlled manner Also yeah you could easily set it up to only activate below a certain speed like bag controllers1 point
-
You'll definitely have yours done before me so it'll be interesting to see what you find.1 point
-
They have had the same problem with them when turboing a bmw .. ( something to do with the air from the turbo still beibg present when shutting of the gas ). Should be fine for a NA motor. .....time will tell we are both using them on NA motors that's are totally different and not bmw haha1 point
-
It's a shame they didn't make them for the superior cylinder arrangement really! Would have made my life a little easier. I'll have to send a strongly worded letter to Berlin next time the pony express comes through.1 point
-
Just be sure not to spend anything on the electrical side of things until you decide if you are staying 6v with an old engine or going 12v with a lifan1 point
-
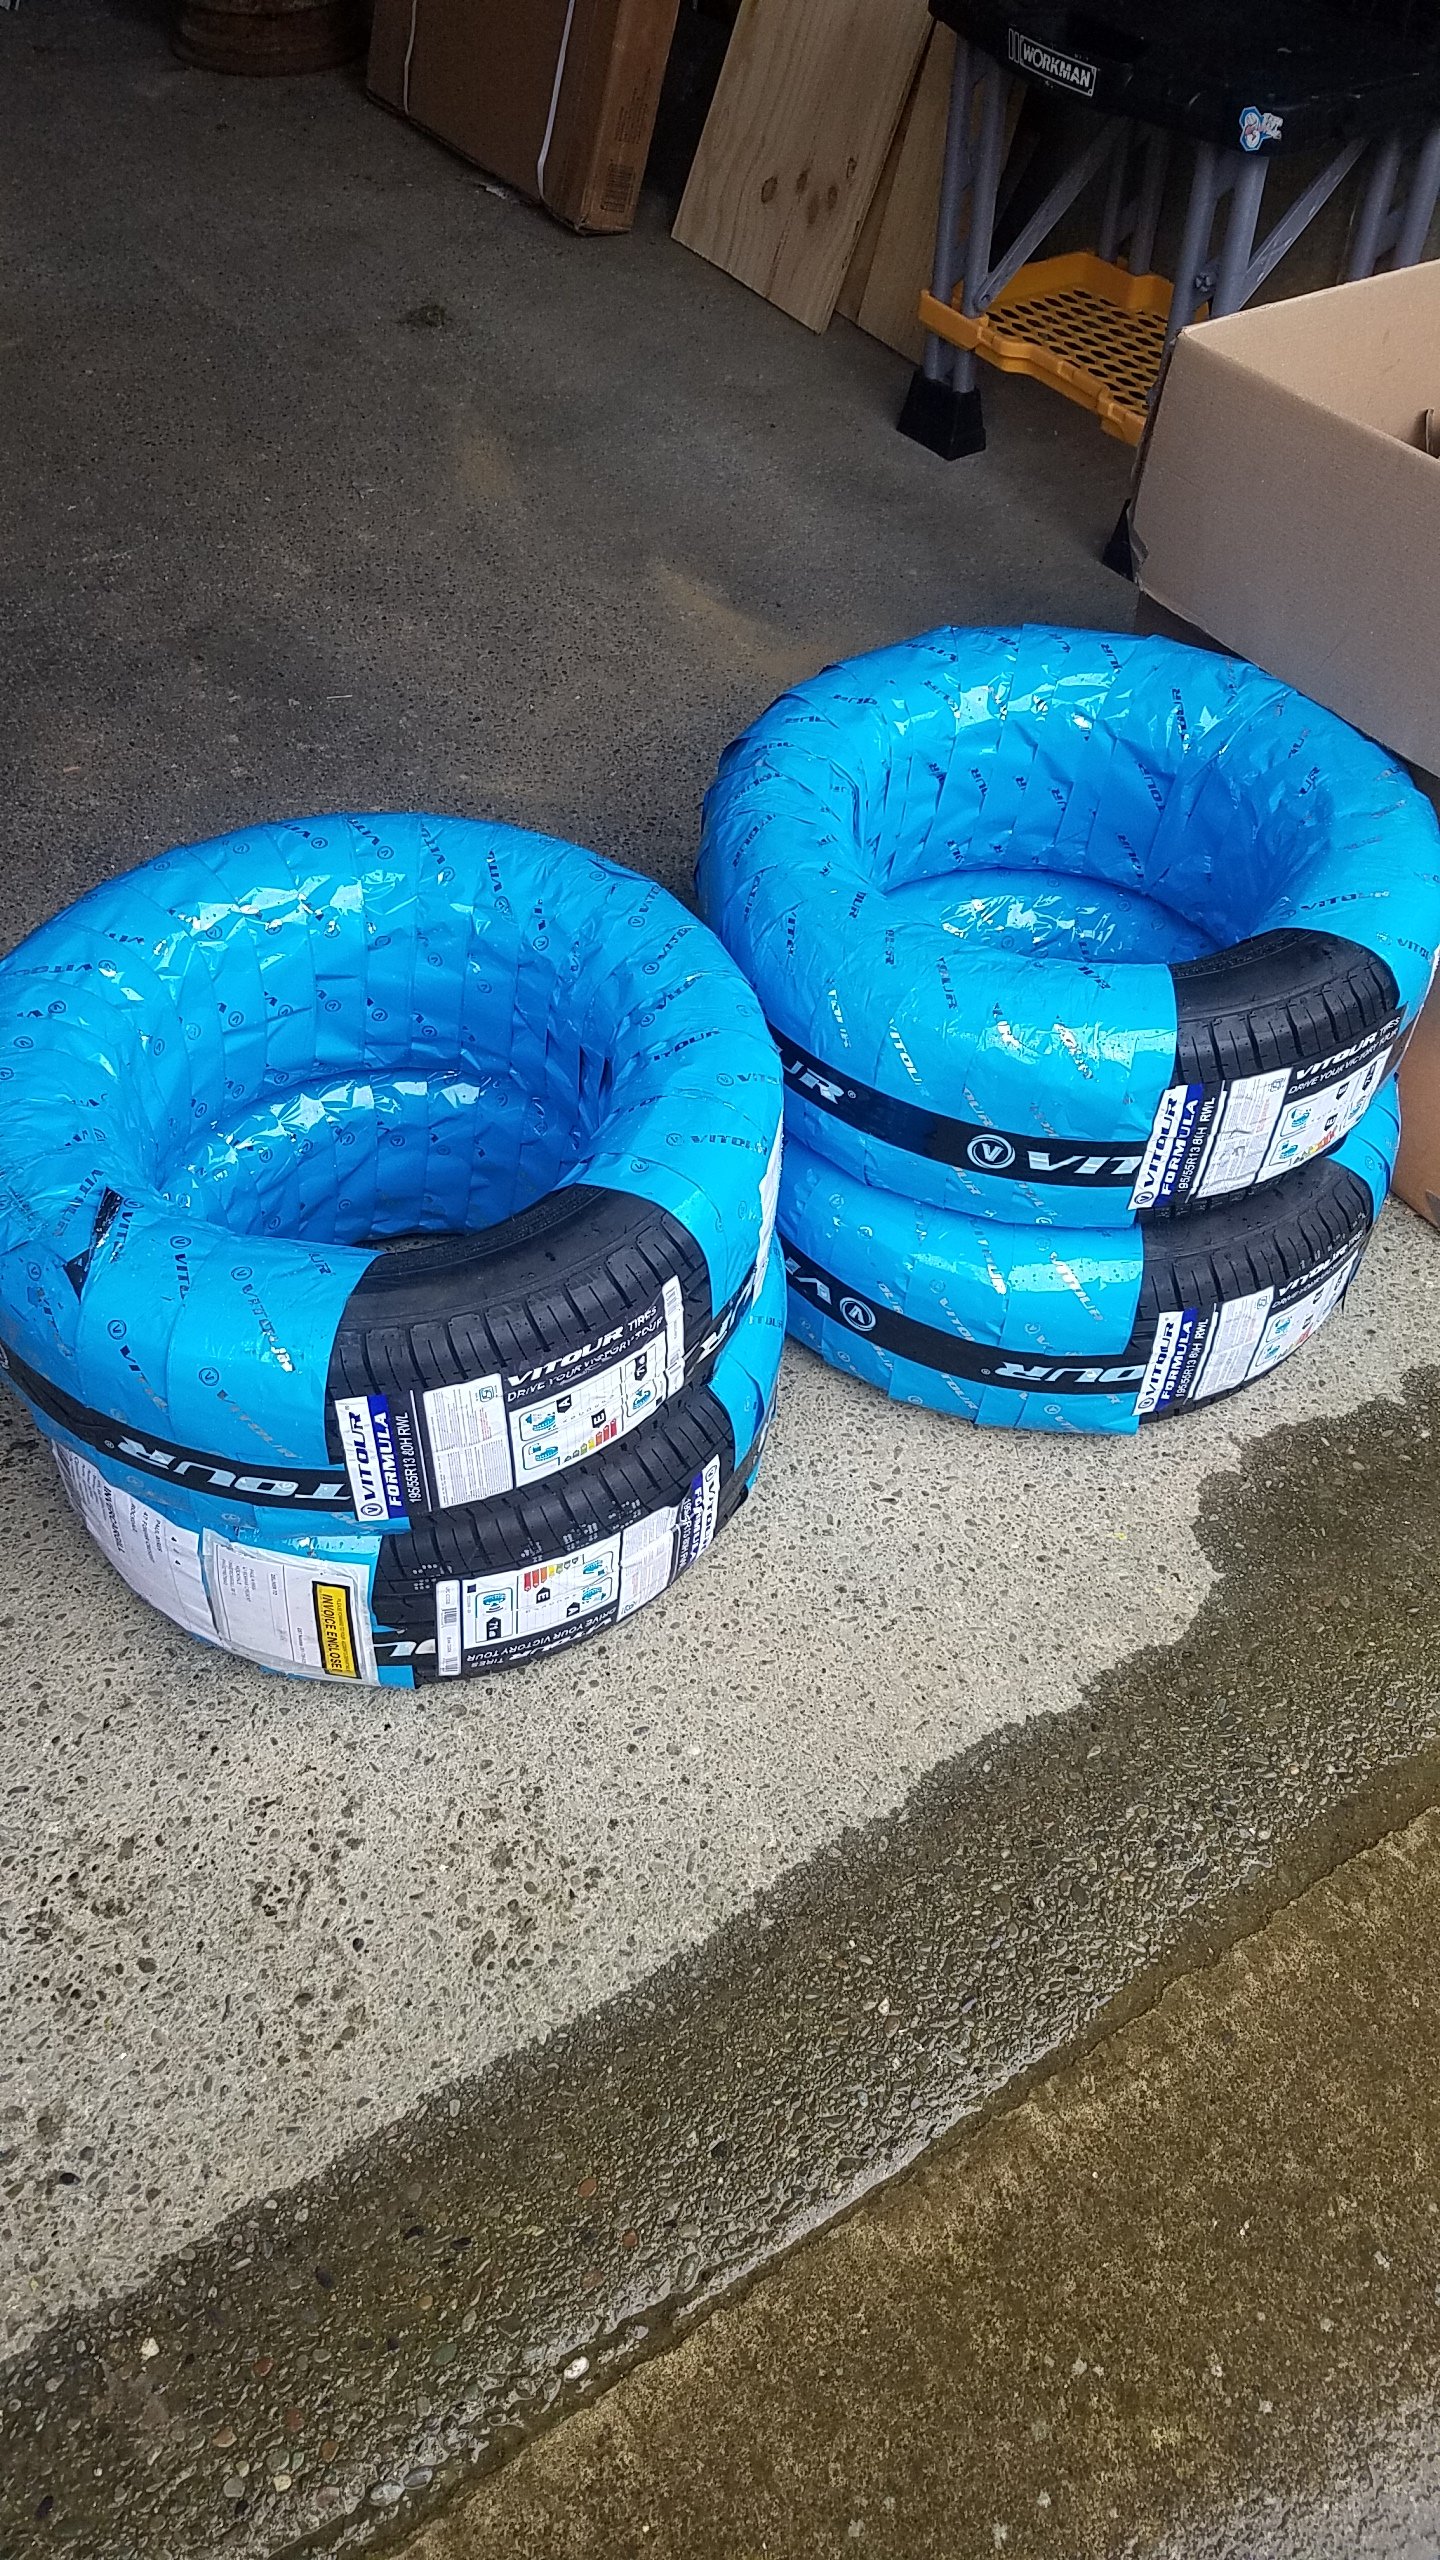
I like deliveries... Got some El cheapo tyres for it. 195/55/13 for the rostyles. All 4 $340 delivered Just need to get a wire wheel to de-fuckface the rostyles, will either paint (spray can) or powdercoat them. Probably just in a dark grey...undecided, thoughts???
1 point
-
Yep, see you on Saturday!
1 point
-
Ok this is the thread I was ment to drop it in. Supercharged 12a rotary. Pretty cool.1 point
-
Rusty/crusty old intake.Will give it a quick clean and paint.
1 point
-
Few things sold and couple acquired. Another late '50s Mobylette. AND a Motoconfort MobyX.1 point
-
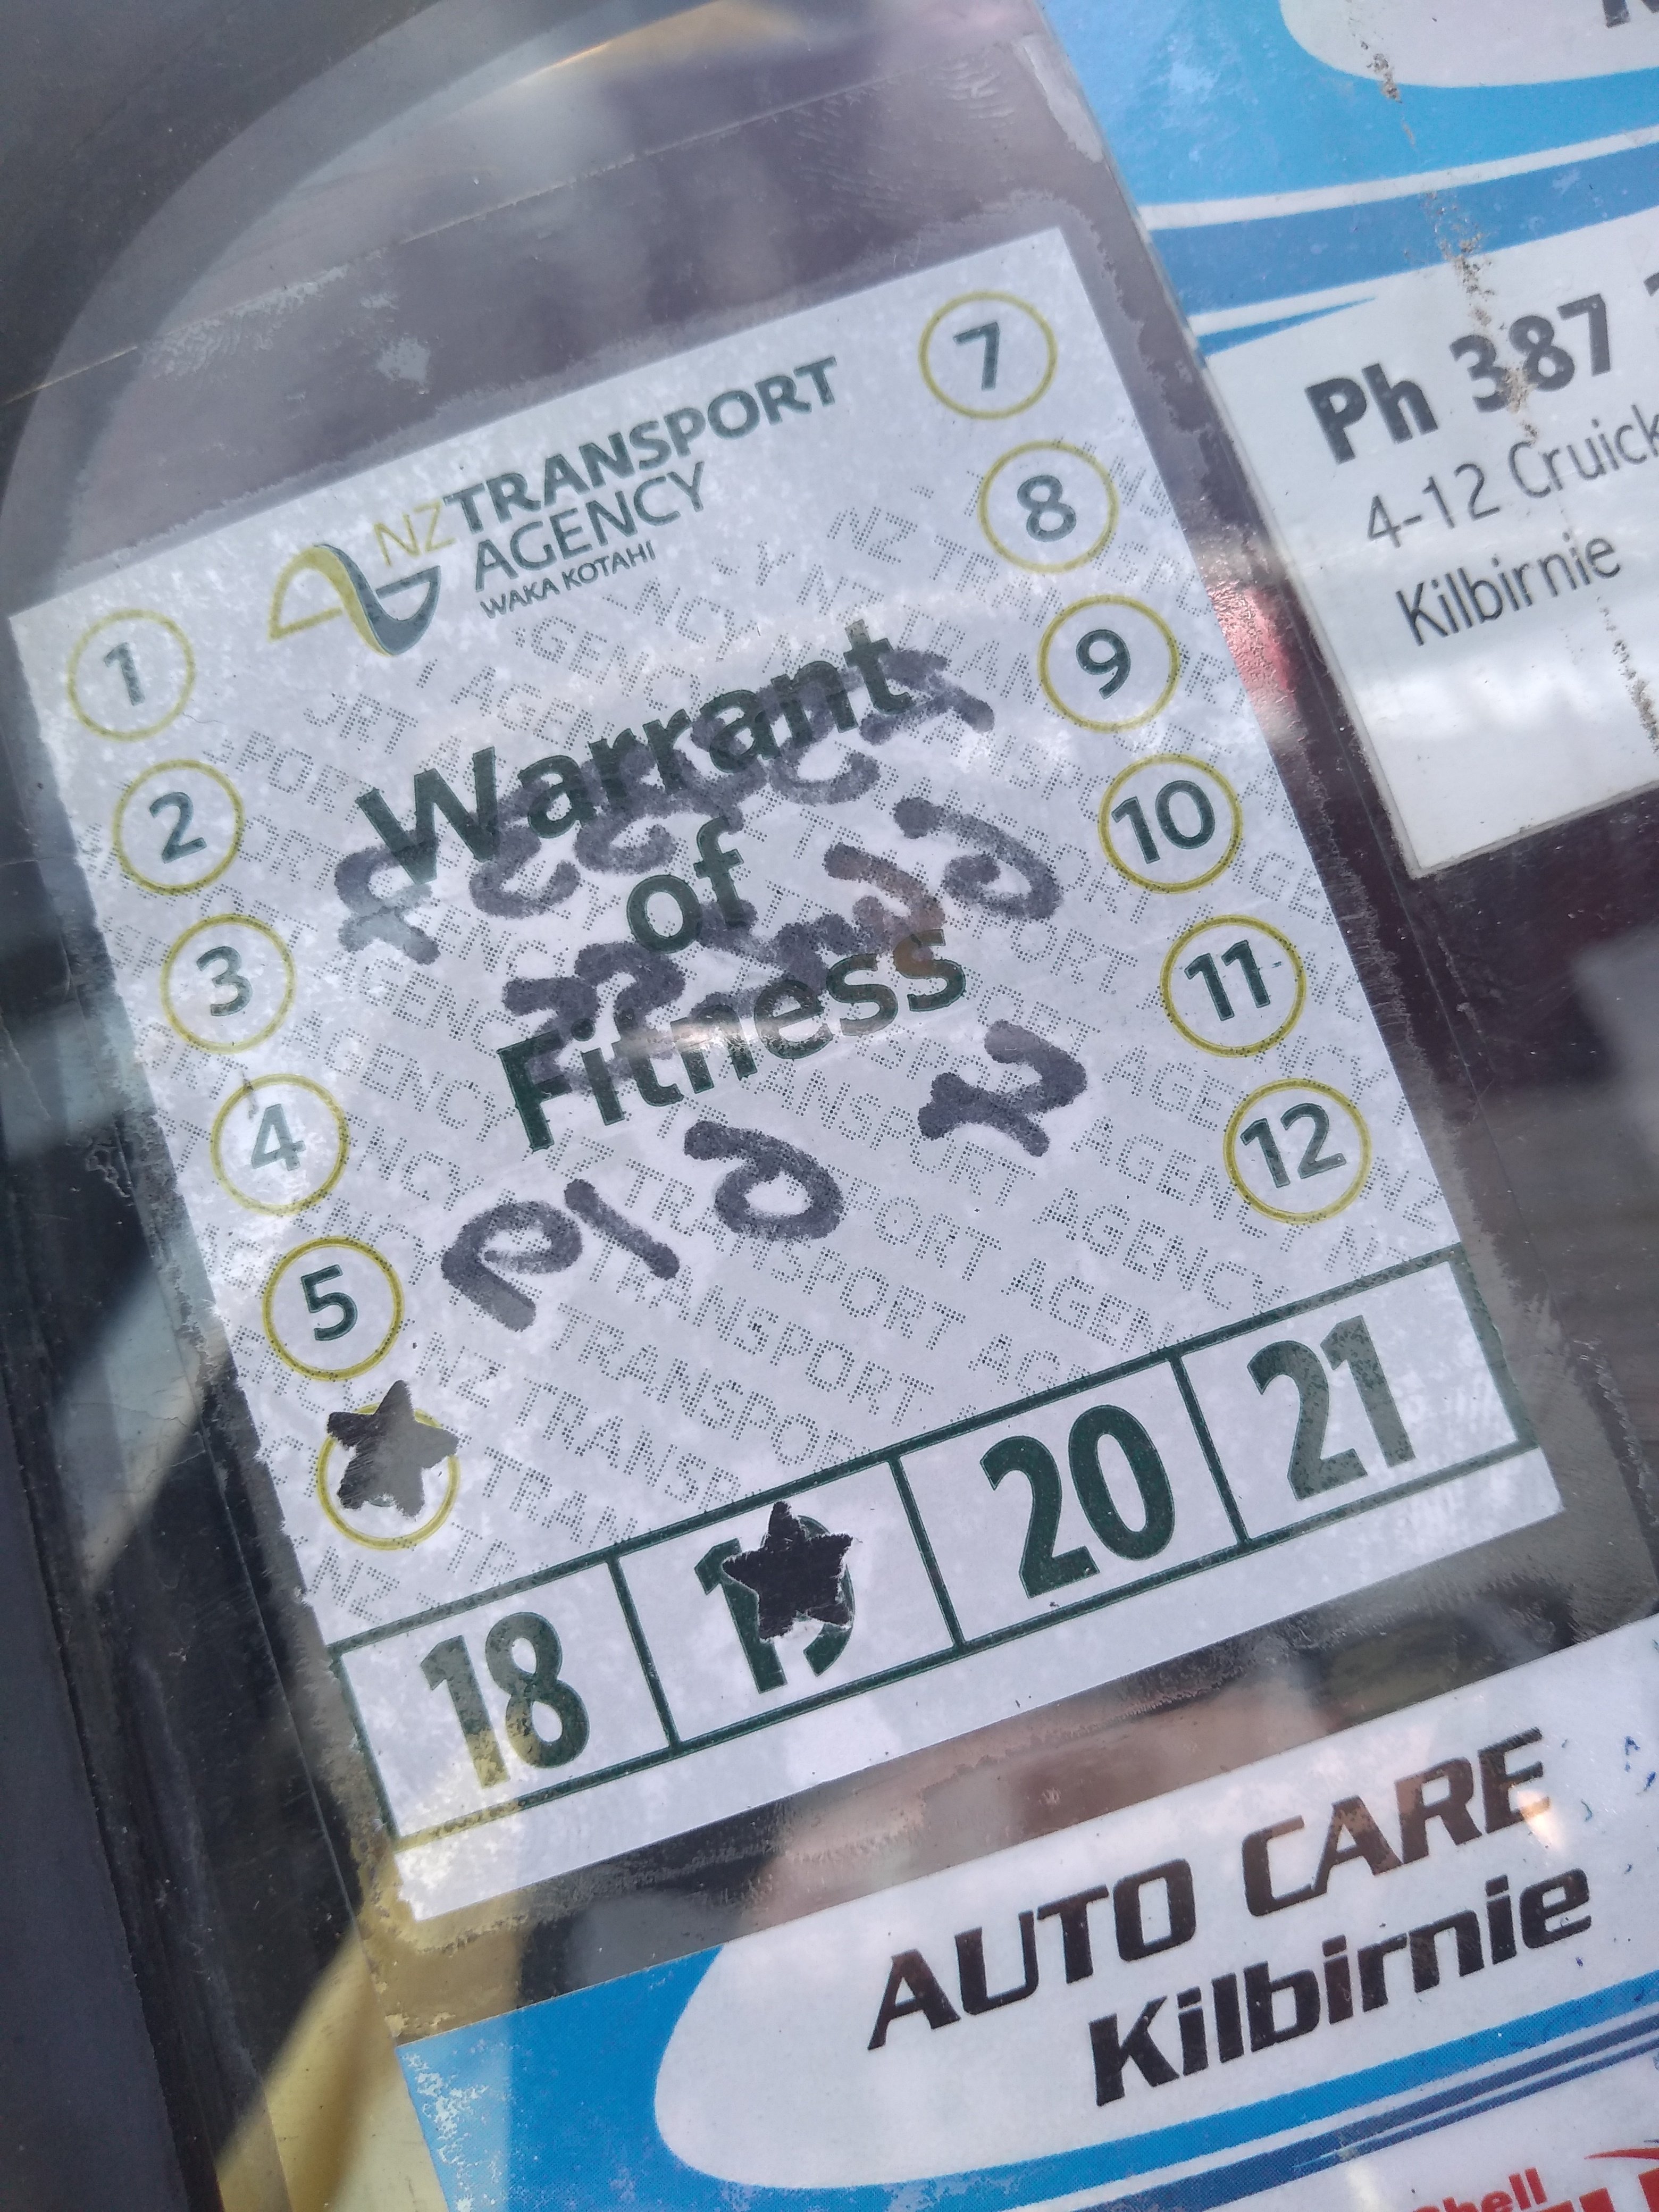
Being that it was quite cold last night the resin qasnt fully hard this morning was clogging the sanding disks I decided to crack onto the trailer and give it a birthday. Axle out will re bearing this week Heavy wire wheel on the grinder and a lock of paint. Looks reasonable for a warrent still yet to fix the wiring.
1 point
-
Got this all buttoned up and took it for test run #1 up the culdesac, good news and bad news,, engine runs good and the turning 'noise' is now gone! wooot. Must have been those old inner tie rod ends and/or probably the stiff steering rod ends. But bad news is it made an all new suspension related clunky noise! Oh, that will be it then. Uhhhgghh. I guess the straight 124/Lada ones dont work on a 125p, To be fair, It did have plenty of clearance on the stands... So, back up on the stands to replace more parts I just replaced. Got some bent 125 ones from my new favourite shop, Euro-Italian on the shore, and much cheaper than i expected - should have got them to start with. test road test run #2, a week later demonstrates great success. So today i piled the engine crane, engine stand, spare 5 speed gearbox i installed and removed, the old head, and various other clutch bits and pieces, spares and other shit to to lock up a 30 km drive away and also to collect the xmas tree. Good way to bed in the clutch and as a bonus it dropped the ass nicely. Needs another wheel eyelignment, adjust the cluch cable a bit, and a few other little things that ill sort tomorrow, but otherwise im pretty confident it will make it to drag day under its own power and not only that but it feels like it should run better times than last year too. Mrs even noticed how much smoother and "less shit" it feels to drive around in now.1 point
-
A little update, the gearbox and new clutch are in the car! The gear lever retaining clip got damaged on removal so a new one is on its way to me. Also the clutch pedal spring disappeard, so a replacement is on the way also. I need a phenolic spacer for the carb, the accelerator lever hits the manifold. There was one fitted to the old setup, but it was all cut about to make it work. If anybody knows of somewhere I can get one please let me know, I don't really want to wait for one to arrive from the UK. I have some bits and pieces I can carry on with until these parts arrive but I just wanna get the engine running! Brakes and front wheel arch rubbing issues are the next big things! A pair of black two door reclining seats popped up on a Vauxhall Facebook page, waiting on more pics but hopefully they will be mine! No real progress photos so here is just a general pic!
1 point
-
I'm really glad I'm not a perfectionist
1 point
-
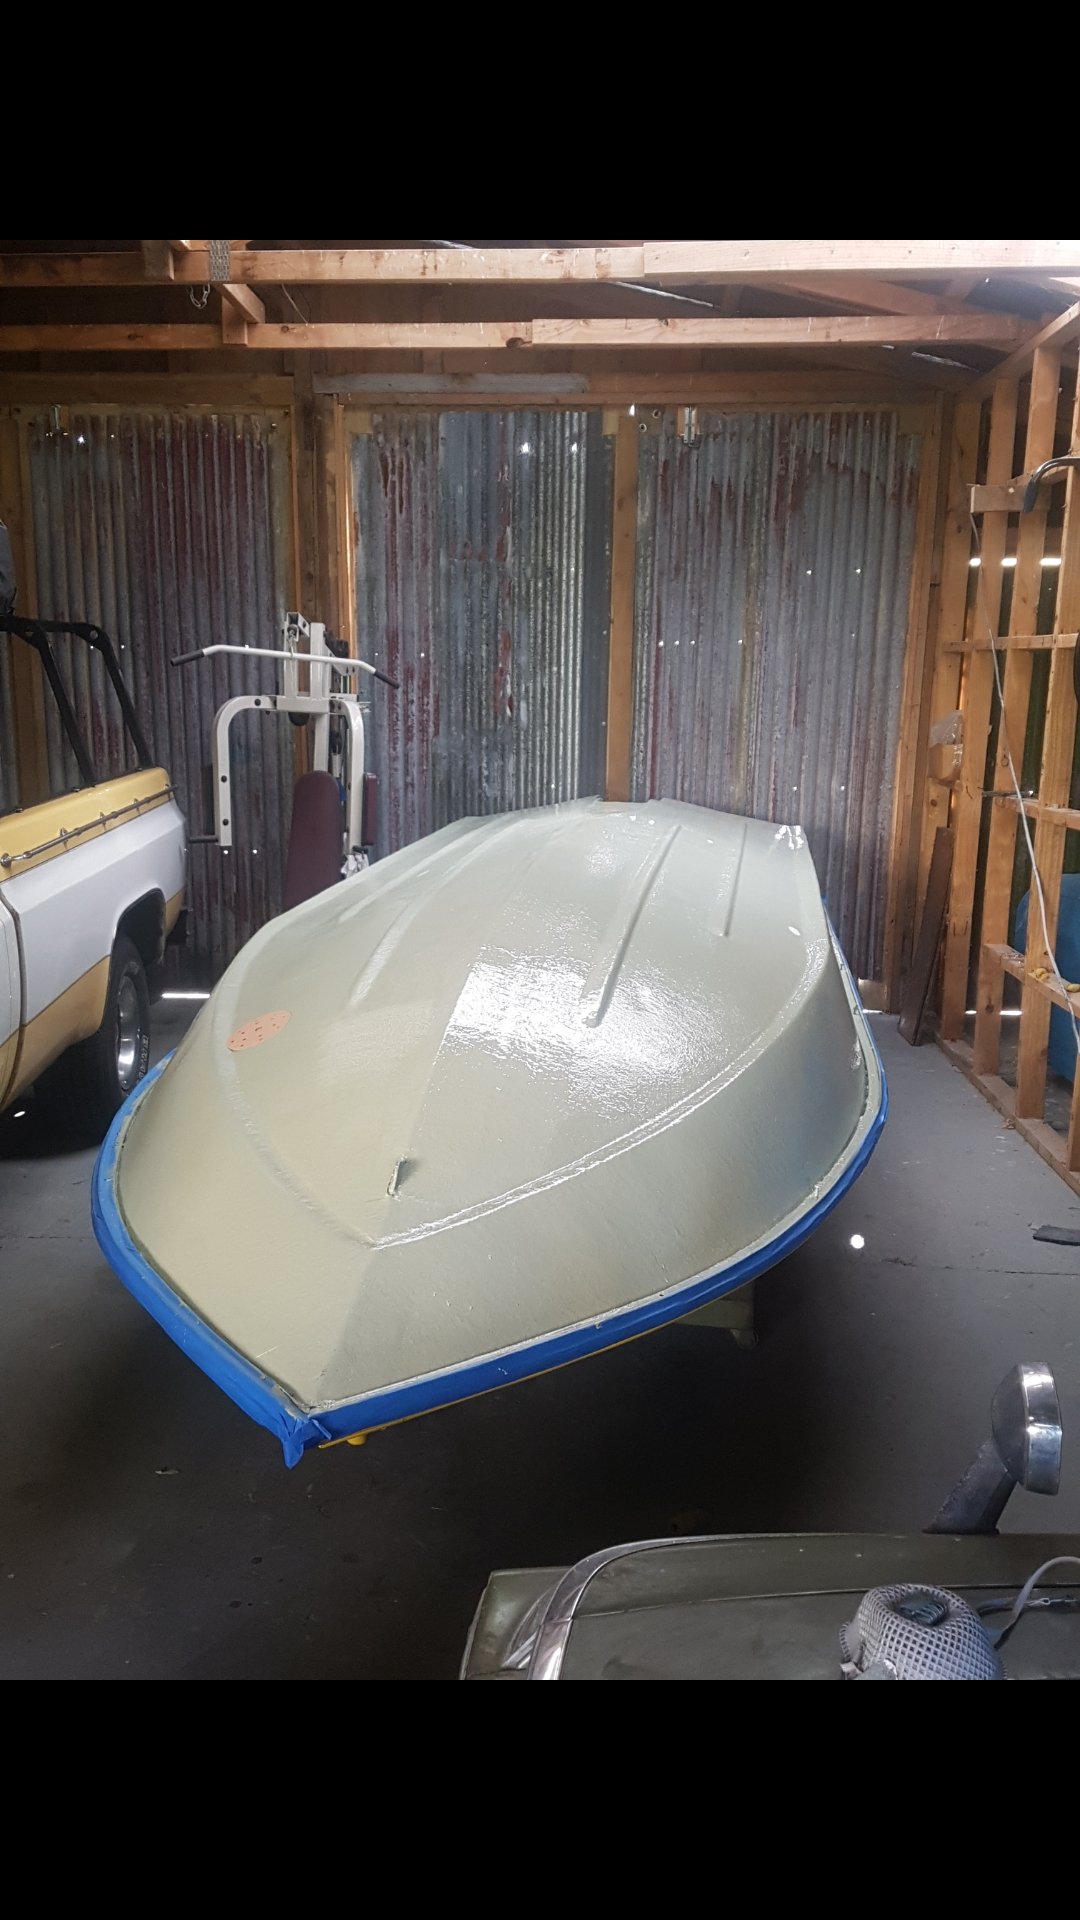
So got one side done this morning but unfortunately ran shy on resin for the other side this was 1.15pm today. Called the fibre glass place in mt Wellington to see if open yes they were till 3pm. It's now 430pm and I'm back at home with more resin and about to crack back into it. I live about 1 hour 15 from fiberglass shop. I also bought some white marine paint whilst I was there.
1 point
-
Survived East Cape on this thing. What a laugh that was, having never ridden gravel, wet or clay shit before. Was much slower than most, and had a handful of 'oh shit' moments, but it was rad. Couple photos to prove the bike and I survived;1 point
-
In between working on a very sweet little Chevette with a Mazda 12A I have I have been whittling away on the Imp radiator placement, fan mounting and shrouding. What started off as simple ideas turned into more complex shapes as I wanted to make it all easy to take apart for servicing, plus be super strong. Its now very beefy up front and those mount points aint gonna move a bit. The radiator mounts, fan mount and exit point and shroud have so many folded over edges that its all really nice and stiff. To start with I lobbed a hefty chunk of RHS connecting the front rails and welded to the front suspension bracket points... Then I did some CAD work and started building up a radiator support panel.. This was made so much easier by our new tool- a guillotine we bought and picked up from my Uncle when we got our new lathe from him. I will never miss making long cuts with a cutting disc and all the associated dust mask, googles, ear protectors etc. Its made in England by Pictorex, is originally for paper but good enough to do 1.2mm steel so ideal for most car work.. Once the radiator mount was made I had to sort out where the ventilation system was going to get it air from. I had cut the hole in the front large enough to allow for an extra pick up. I built a tapered box behind it and angled it take the original hose ducting, making sure it was ot going to foul either the headlight or the fan shroud later on... I went to the local radiator place for a bleed nipple and drain tap that I was going to solder in myself. He said he could fit them while I was shopping and so he did, then cleaning it and pressure testing it all for only $30. Awesome. I'll go back there once I worked out pipe placement. I had cut a hole in the support panel so I can drain the coolant out the front.. Then onto into the fan and shroud. I wanted it to flow air through well when the fan was not on so made side supports with holes and little stainless hinge bars... These were welded to the fan frame like so... Mounted in place with alloy flaps hung on those bars. I tested them by blocking the radiator intake with a well fitting piece of hardboard and firing up the fan in reverse... Works really well. Happy with that. So I started framing the outlet hole. I added a new Lada Niva tandem master cylinder in position so to make sure I would build around it to suit. The M/C was given to me by good 'ol @NickJ ( I owes ya!) and he gave me the newspaper that the box came wrapped in which had these two likely looking Russian characters on it... Framing the hole.. Then I had a point to mount the shroud to. I welded the shroud on the inside of the joins so it cleaned up nicely. I made it as swoopy/smooth flowing as possible to make the air flow out cleanly (again... most likely getting a bit carried away a bit.. but its is fun this ). It can be removed easily, two screws, without moving the tank and then the fan with its shroud can come out, two screws. Then the radiator. So to finish this lot I need to swap the top inlet position on the radiator to the other side and add a baffle on the opposite side. Given how cheap and friendly that 'Rad' fella was I'll go back there... I reckon if I touch it with my current unsuitable gas torch I'll probably end up melting all the solder away from everything! With that done I can add the channel I am planning to run the pipes under the car but out of harms way. Then I'll make some seat mounting points for the MX5 seats now spare from the Viva.1 point
-
Rims and hubs painted and built up with new spokes, new tyres on, rear susp lowered a bit, tail light mount and other brackets cut off. Still mocking things up, still need to paint headlight bucket and brakes but this is where we are at.1 point
-
Can’t make this one unfortunately. Someone turn off @MopedNZ and @GuyWithAviators bikes at the traffic lights for me. thanks1 point
-
So lame needing a cert for fitting a factory brake pedal1 point
-
I have been working on my handlebars lately, decided I wanted something narrow. These bars from aliexpress arrived a while back Too wide, so cut up and tacked onto one of the TM adapter plates. The idea was to have the engine as the widest part of the bike (not counting footpegs) so the new bars are about 28cm, this might decrease too if I decide to shorten the ends a bit. Then @Steelies engineering tig'd them up nice for me A bit of paint Noice1 point
-
Phew. Well that bonnet took a while. In between other jobs I whittled away at the rot on the bonnet. Some awkward shapes going on at the front. I did my best, without getting too carried away, at rebuilding the shape correctly in steel. It will have filler on top however I wanted to avoid having to use filler to get gaps between the bonnet and the car correct. I don't really like the idea of filler on edges that can get knocked. Not really a lot to explain in the process of rot removal on this. I think the photos do a better job. You'll see I started the main repair by fabricating a new front edge and welding it in stages so checking it lined up with the body and the gap remained correct. It was so rotten that I sort of guessed the gap just tried to make it look 'correct'... The front repairs puled up in welding slightly- enough that I wasnt happy with gap. Had to slice open and stretch it bac down. Lucky an easy rscue.. Then onto the underside repairs.. That's probably enough photos of a bonnet for you all. Next job is to modify the front panel and inside the frunk to accept a radiator.1 point
-
The black ones work ace..1 point
-
This mornings effort. I shouldn't have watched Mad Max the other night...it's a bad influence! I'd call that a success:)
1 point
-
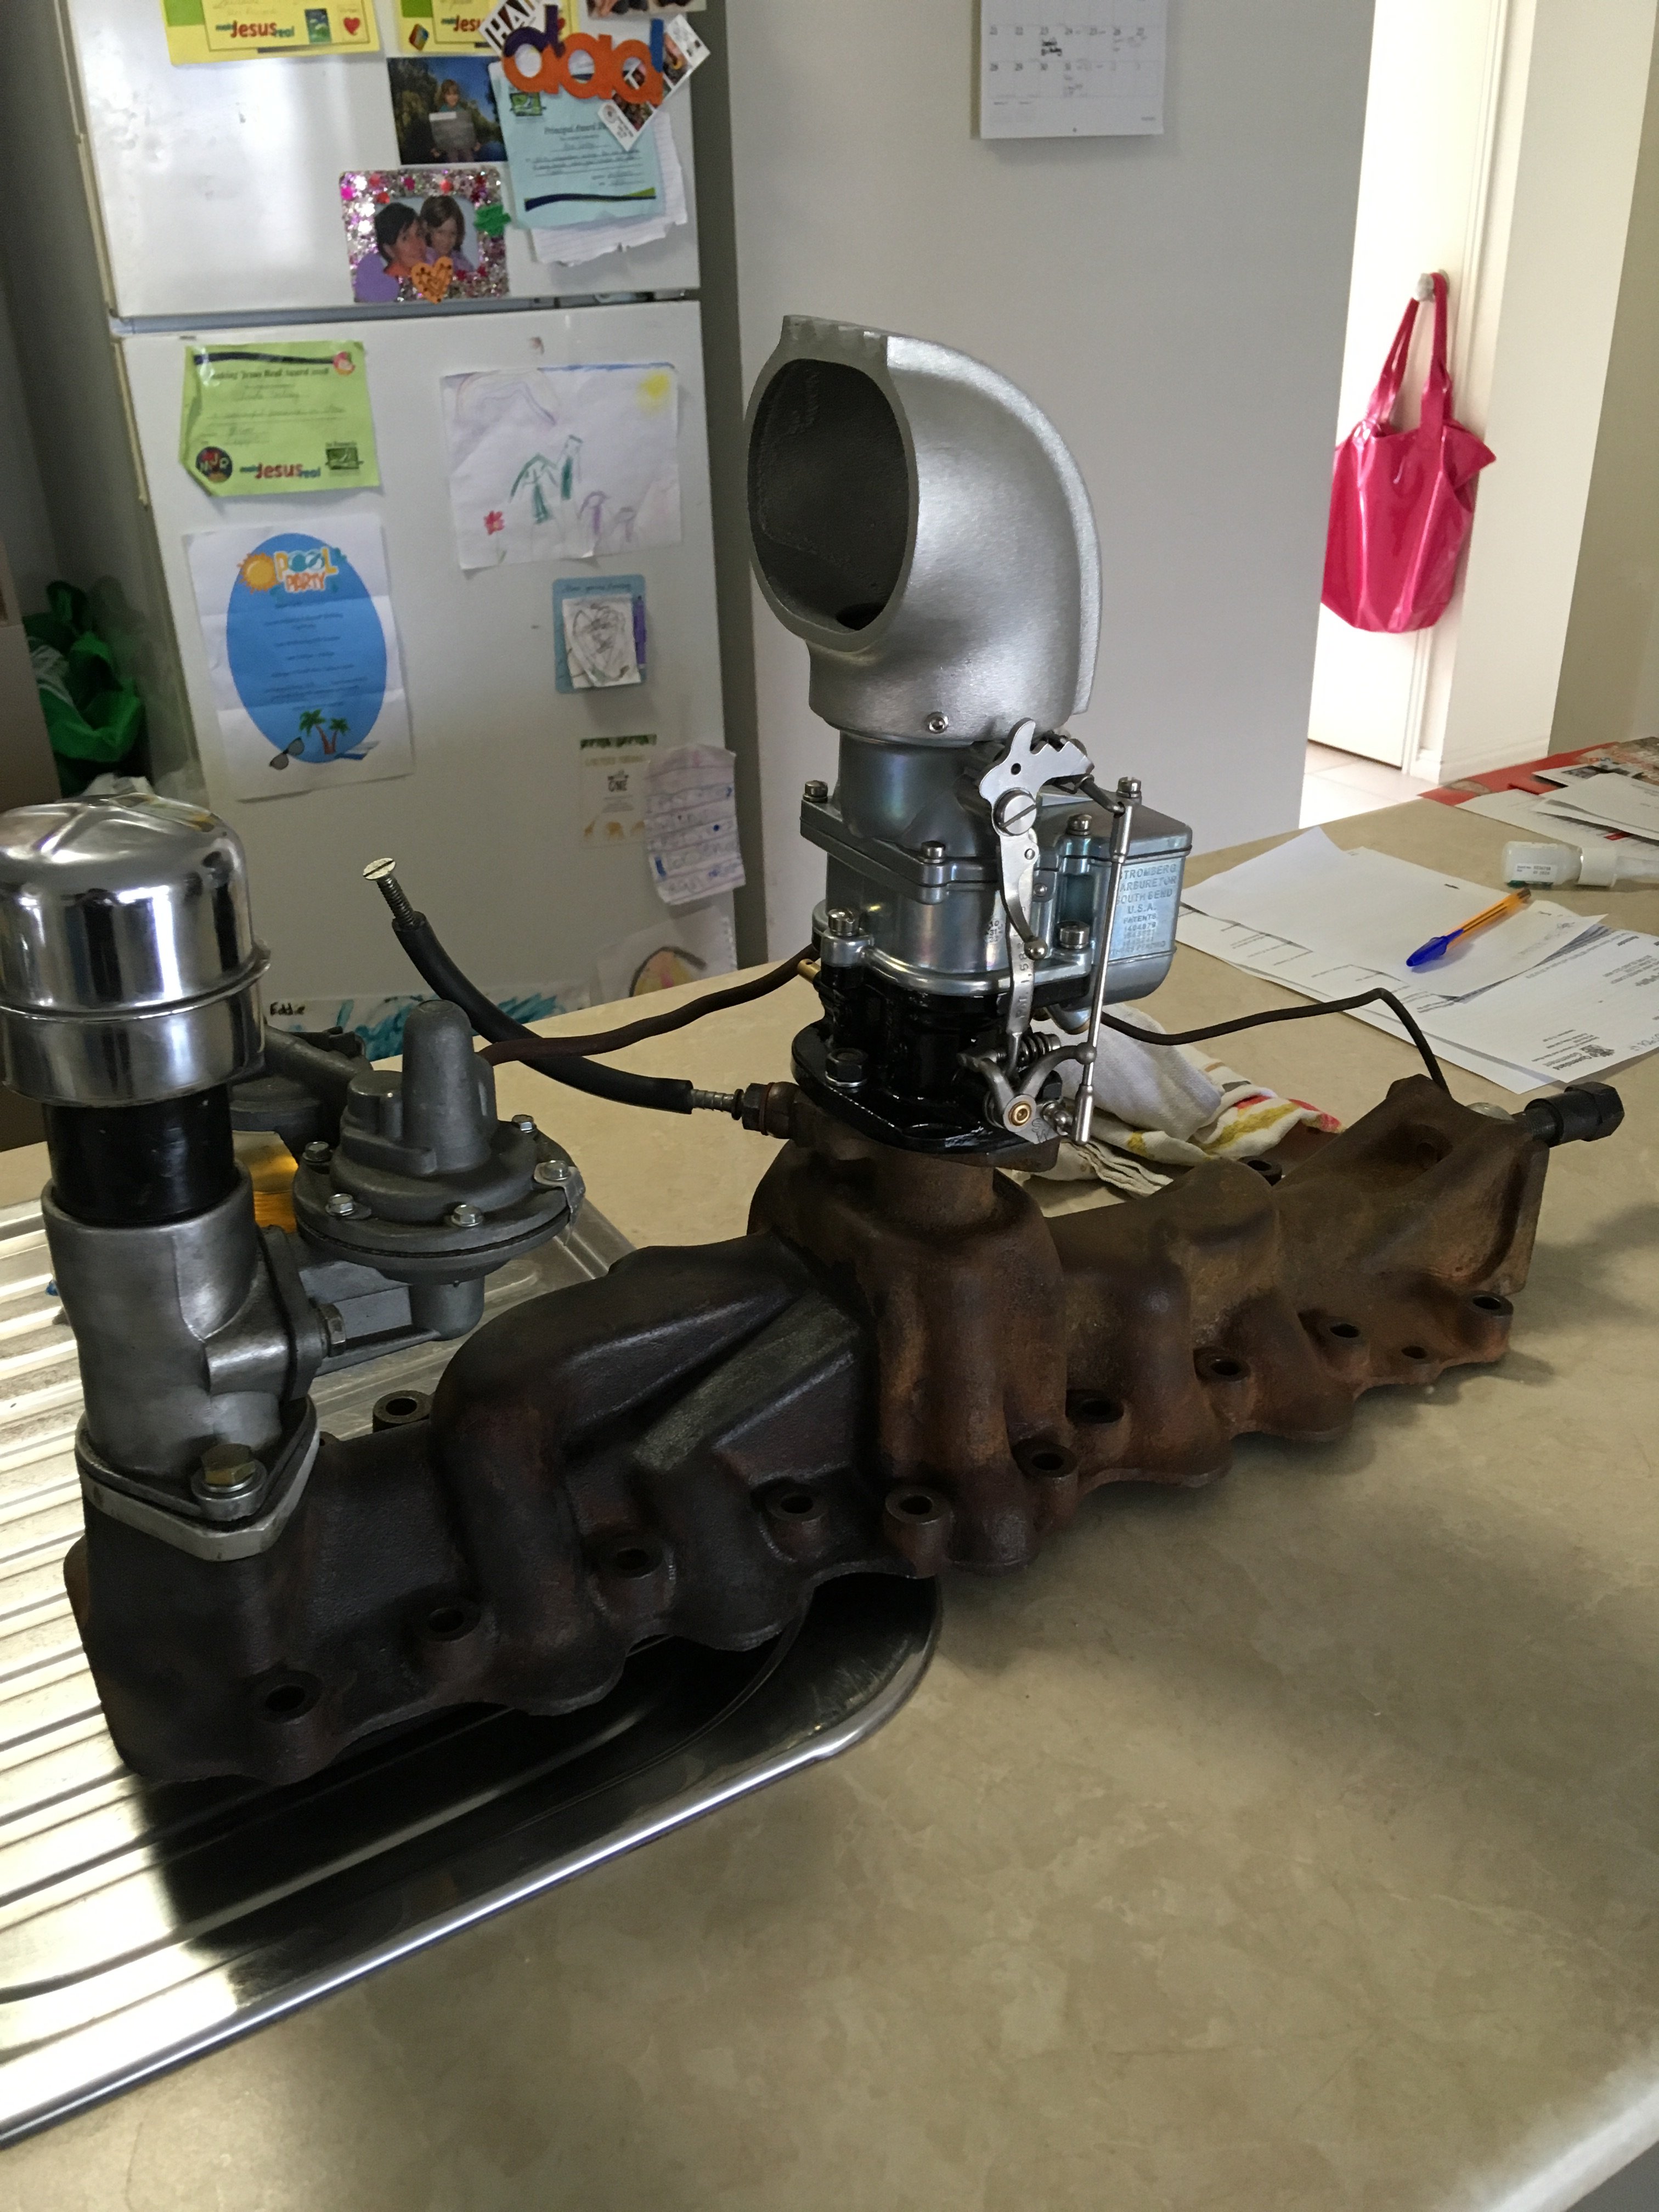
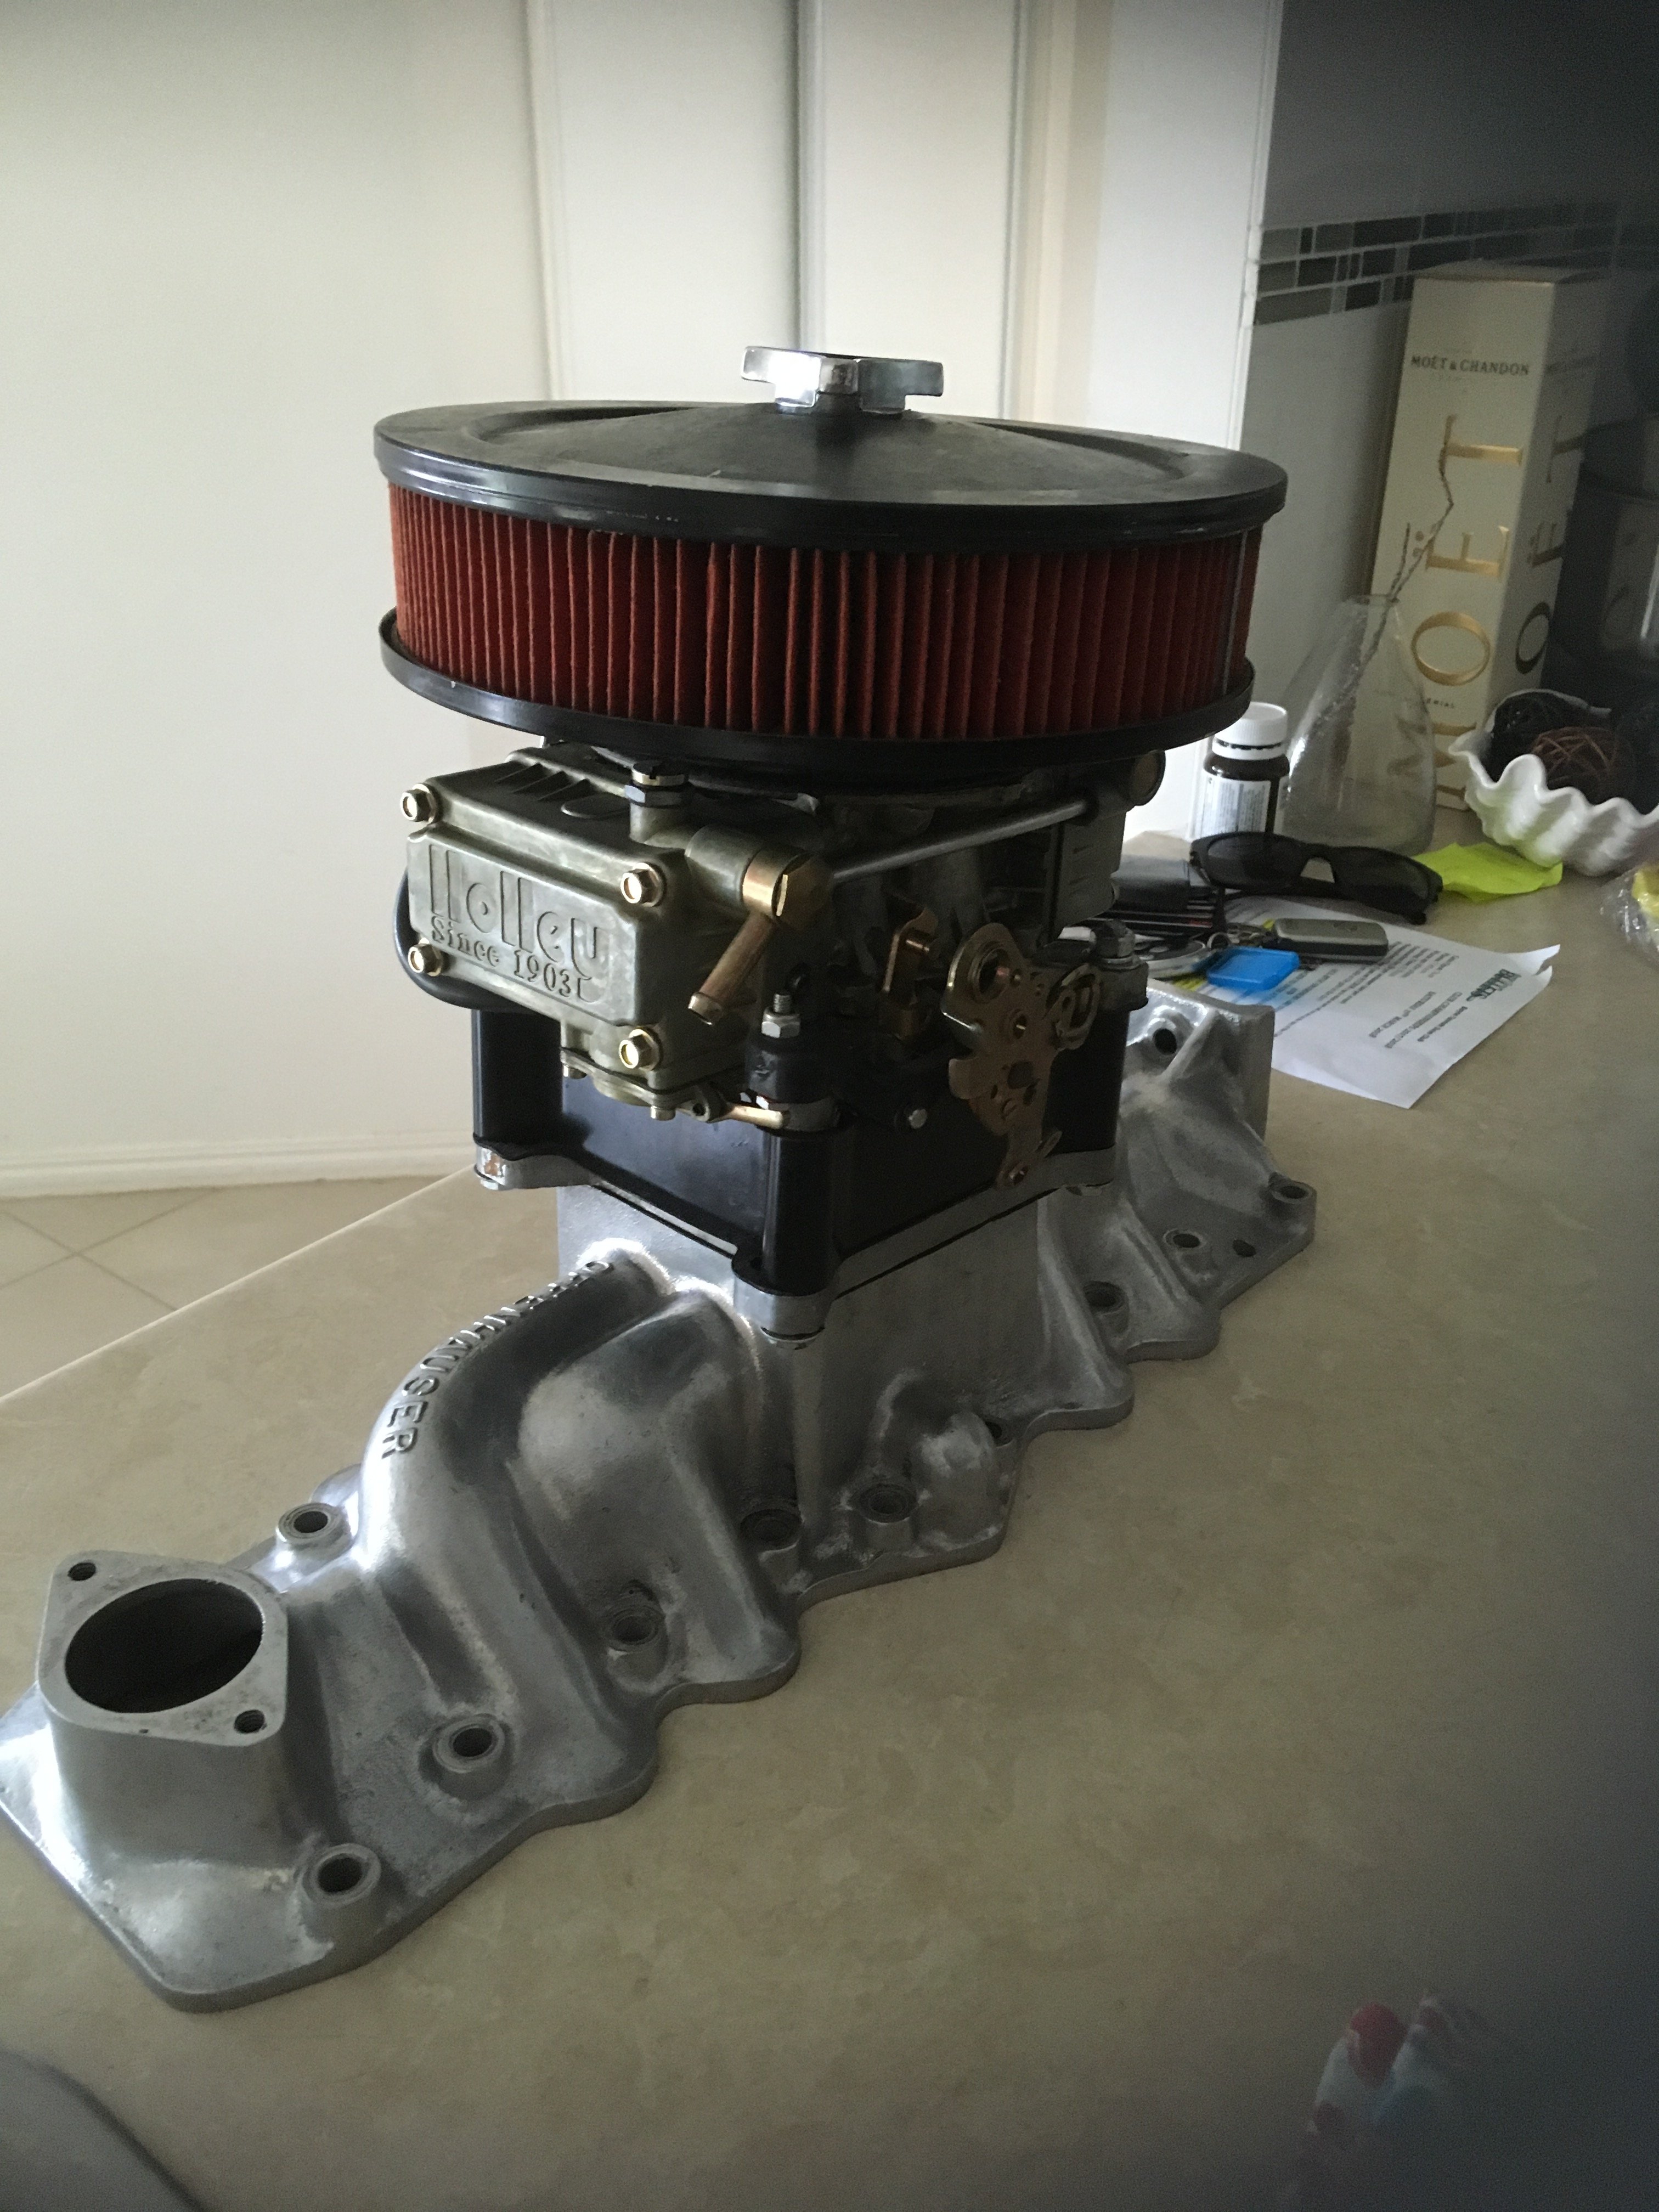
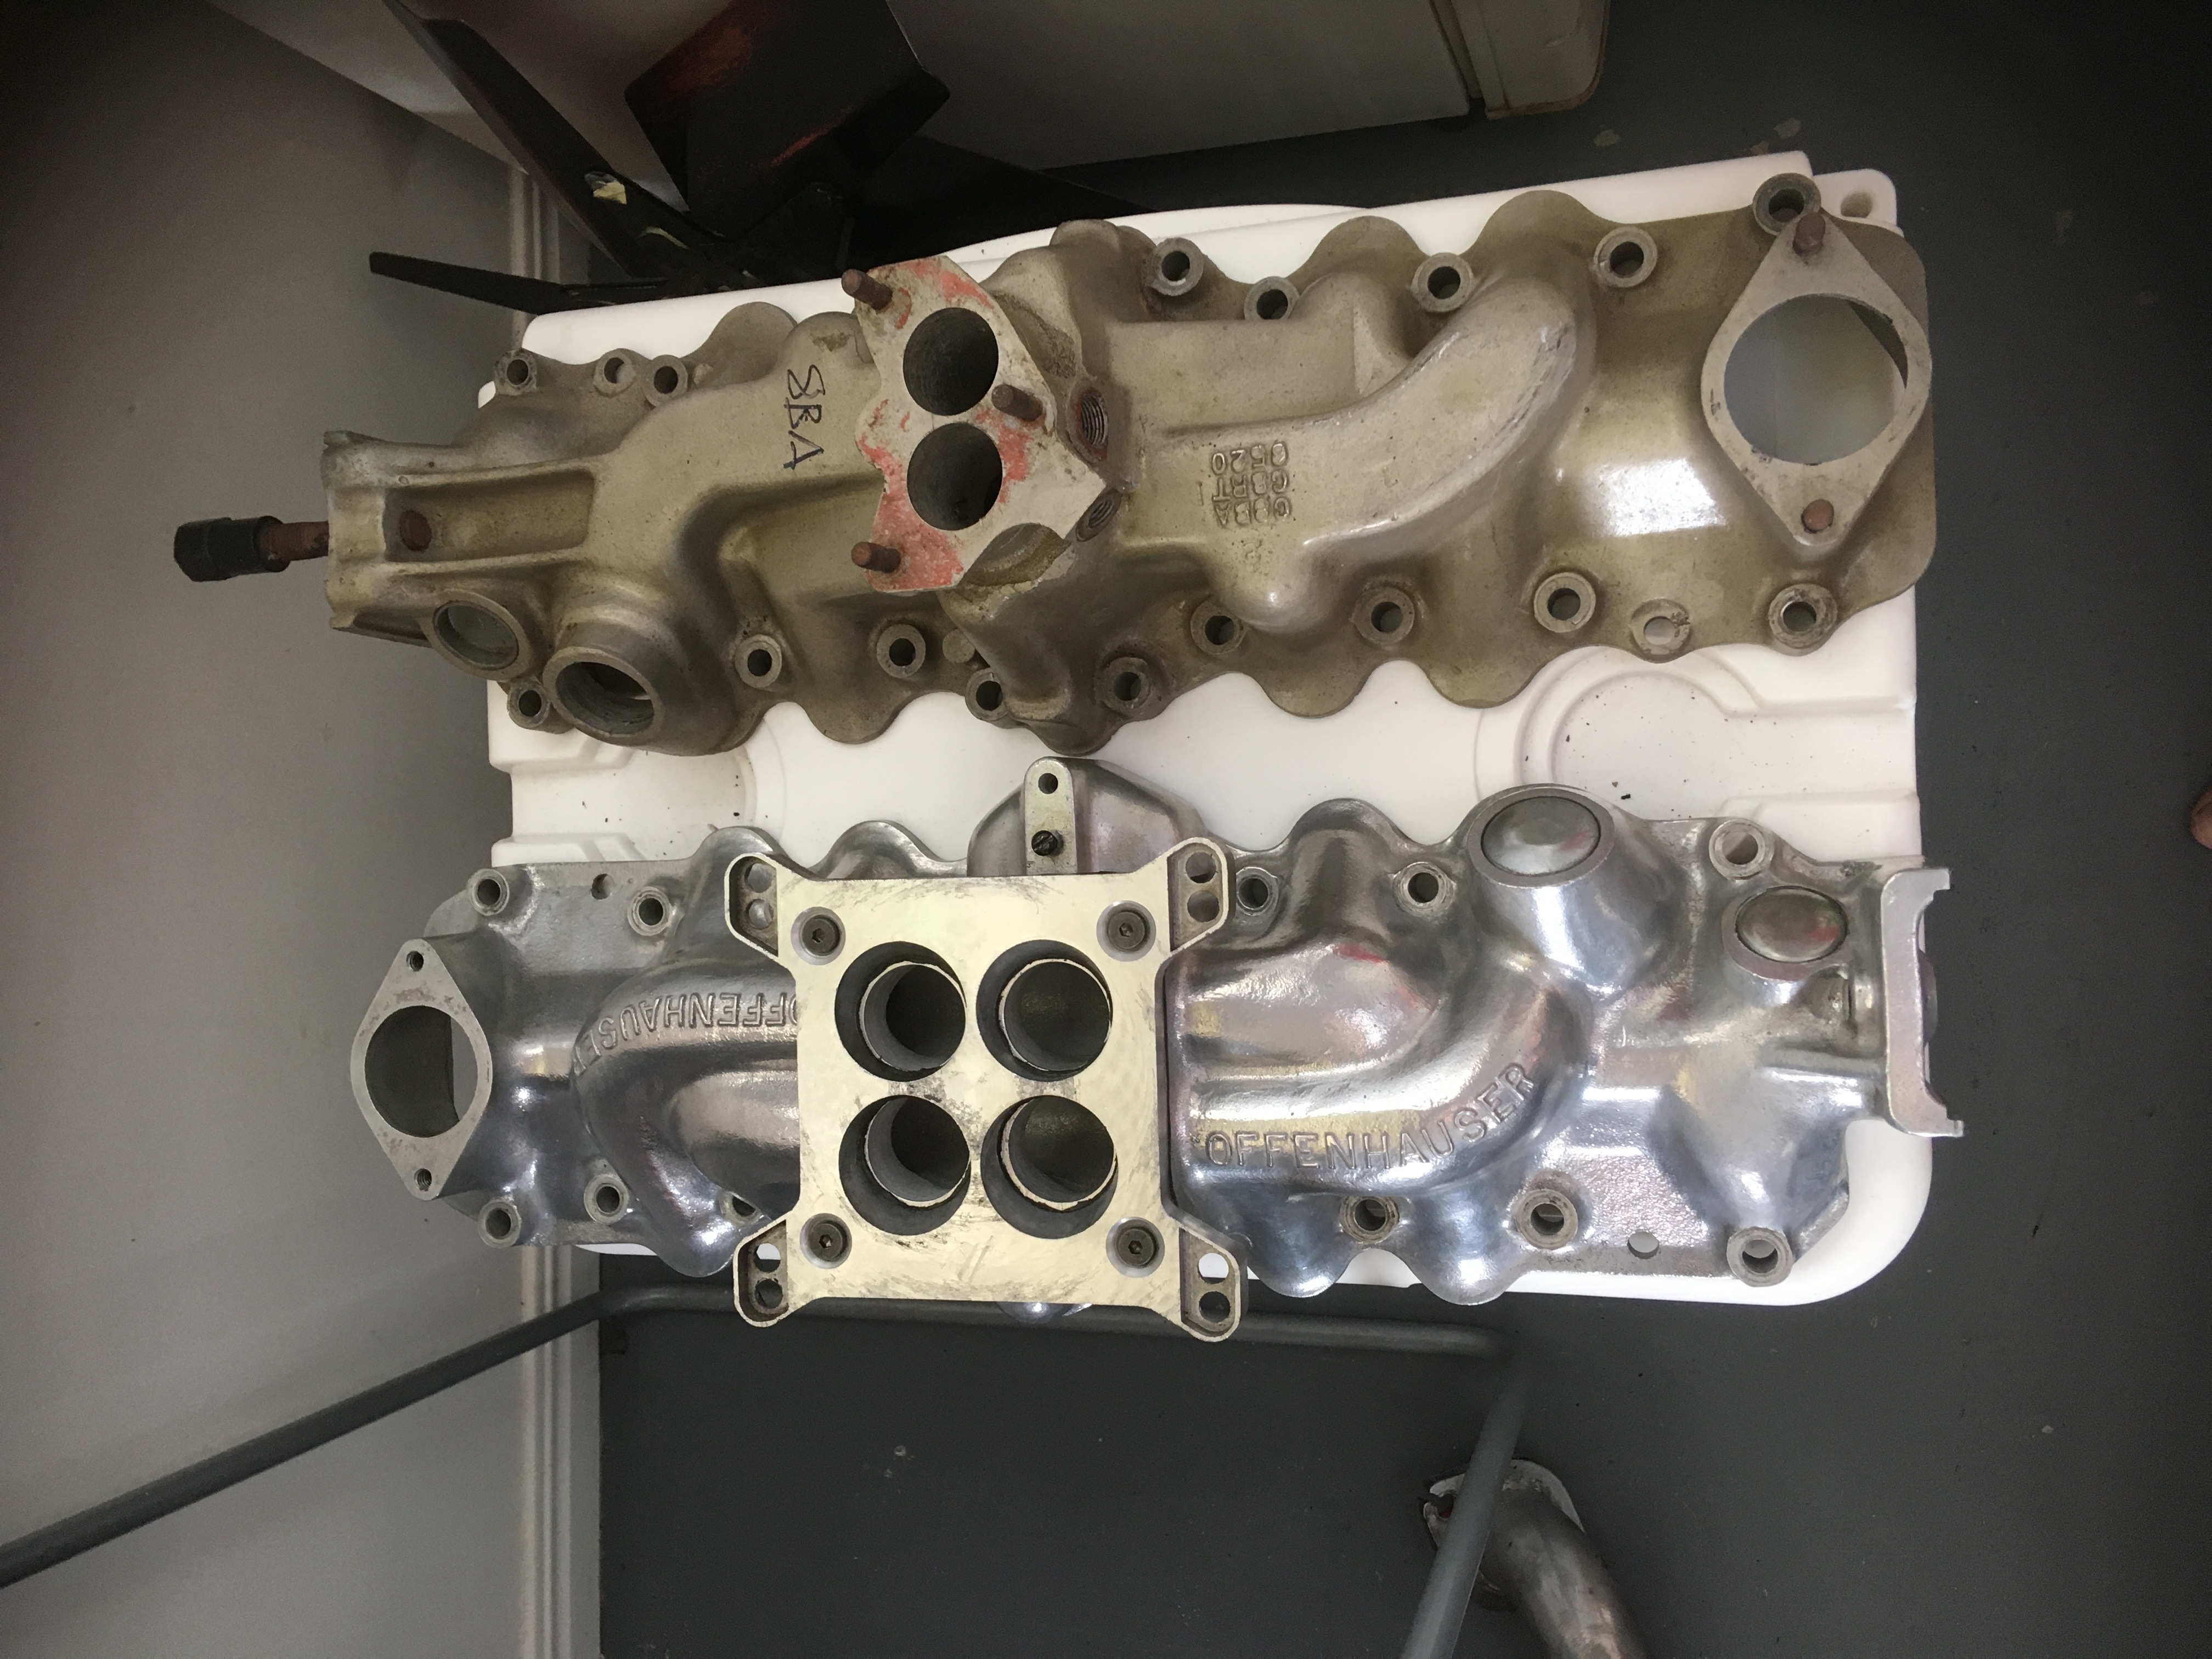
So I decided to sell the holley and intake and buy a stromberg 97. This way it will look more period correct and later on when I get some spare cash I can go for a twin carb setup. Not sure if i mentioned it but we have done away with the 8ba dizzy and gone back to the crab style. Also I needed new water pumps but it was fitted with truck pumps to clear the dizzy.These will have to be rebuilt. If I was to get the correct water pumps it would mean finding a new crank pully etc.
1 point


.thumb.jpeg.384ff72c8d2b0ee0d34a7bdedb55bdcf.jpeg)


_sedan_(23230030334)(1).thumb.jpg.34d765361d66c78db614bae6ea2c156a.jpg)


This leaderboard is set to Auckland/GMT+12:00