
Leaderboard


Popular Content
Showing content with the highest reputation on 10/28/18 in all areas
-
Need to do updates more often so they're smaller! Put the tray on as I needed to see where I could run the fuel and brake lines. Also borrowed a pair of wheels off one of my parent's cars, to test the tire sizing. Bought a fuel filter and made a stainless steel bracket to hold it. Made some mounts for the rear bumper to bed brackets, as they were welded on before. Got out the LED tail lights that I've had for ages and made up some stainless brackets and polished them. Started running the brake line out of copper-nickel tube. Also got some 5/16" lines for the fuel lines. Made some stainless clamps to hold them all together and to the firewall and chassis. Made some bits for the column change linkage. Top middle piece mounts on the firewall around the column and has some little stoppers that make it so the gear stick needs to be pulled out to change from certain gears. Left bit is what goes over the stoppers and pivots with the gear stick to push the rod bit down, which then pushes the right piece down and change gear. Thought at first it would have to be some super complex system with cables and stuff but this way was actually pretty simple to make work. Then I needed to make up a indicator on the column to show which gear it was in. Drew on up in Solidworks and laser cut it out. The accelerator cable needed some modifying to work, it's wasn't quite long enough to reach the pedal, so made a new bracket that moved the housing closer to the throttle, which allowed for more cable out the pedal end. Then all it needed was a plate with a lot in it that bolted to the pedal to hold the little ball on the end. Have had some big train air horns for ages. Couldn't find anyway with enough space to fit them, as they were originally mounted together in a triangle shape. So pulled them apart, made some new brackets and bolted them up under the cab to the chassis. Need to just run some lines to them. Some boxes of stuff finally arrived from America. They included some front windscreen stainless trim, door panels and the surrounding trim. Might replace the door panels one day as they weren't as good as I thought they'd be for the "deluxe" spec ones. Also arrived were some wheels. 15x8 Artillery steel wheels with baby moons and beauty rings. Spent ages trying to figure out what colour to paint them, didn't really want to go red (what everyone does) or black (spent too much money on them for them to be hidden). Decided a bronze colour would look good and hopefully not too out of place. Then spent more time trying to find a nice bronze.12 points
-
Well as per usual the best laid plans came undone in regards to getting the brakes on the Belair, however it’s definitely for the better the guy who is installing the hoist came around last week, worked out where the hoist could go, and that he was available this weekend, or sometime in December, so instead of doing the brakes I was on a demo mission to make a bit more space in the garage, yesterday was D-day and I now have a hoist in my garage, it’s like all my Christmas’ have come at once, I’ve dreamed of this for many years but never figured it would happen. It’s not yet wired properly, so I’ve rigged a ghetto 10a connection up, today I will start on the brakes. Once that’s done I can get the scamp on the hoist and get into that.9 points
-
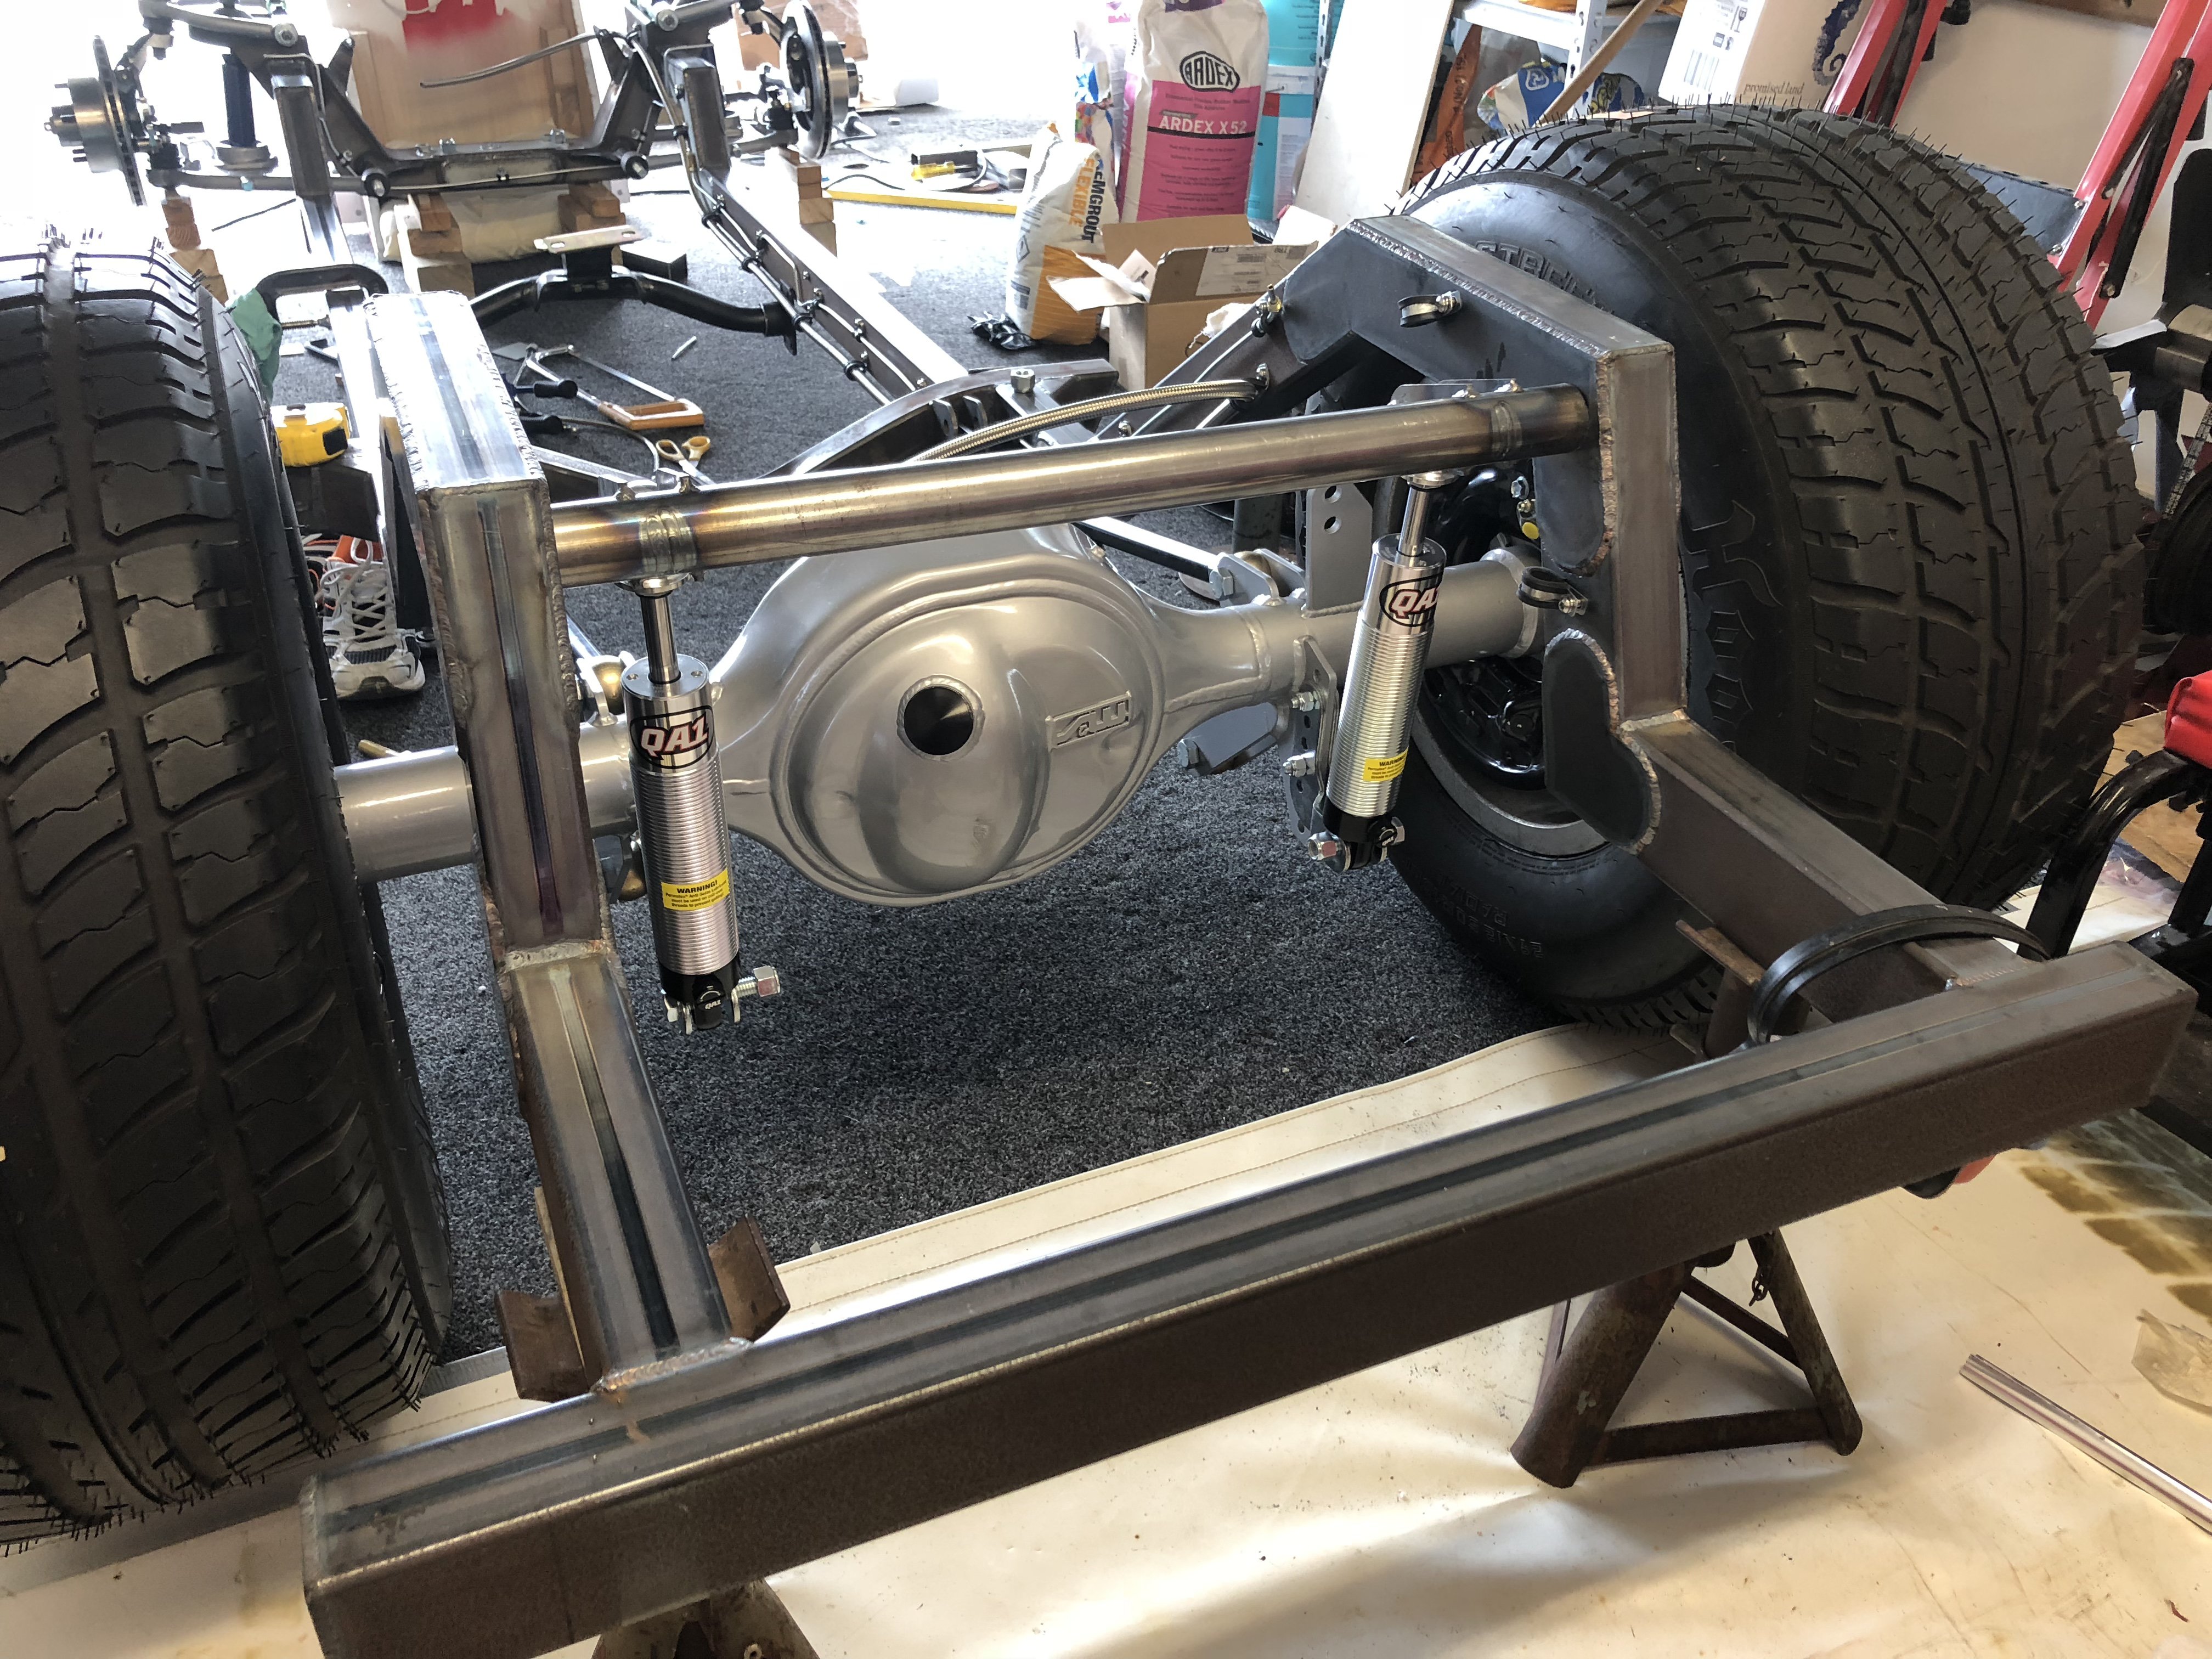
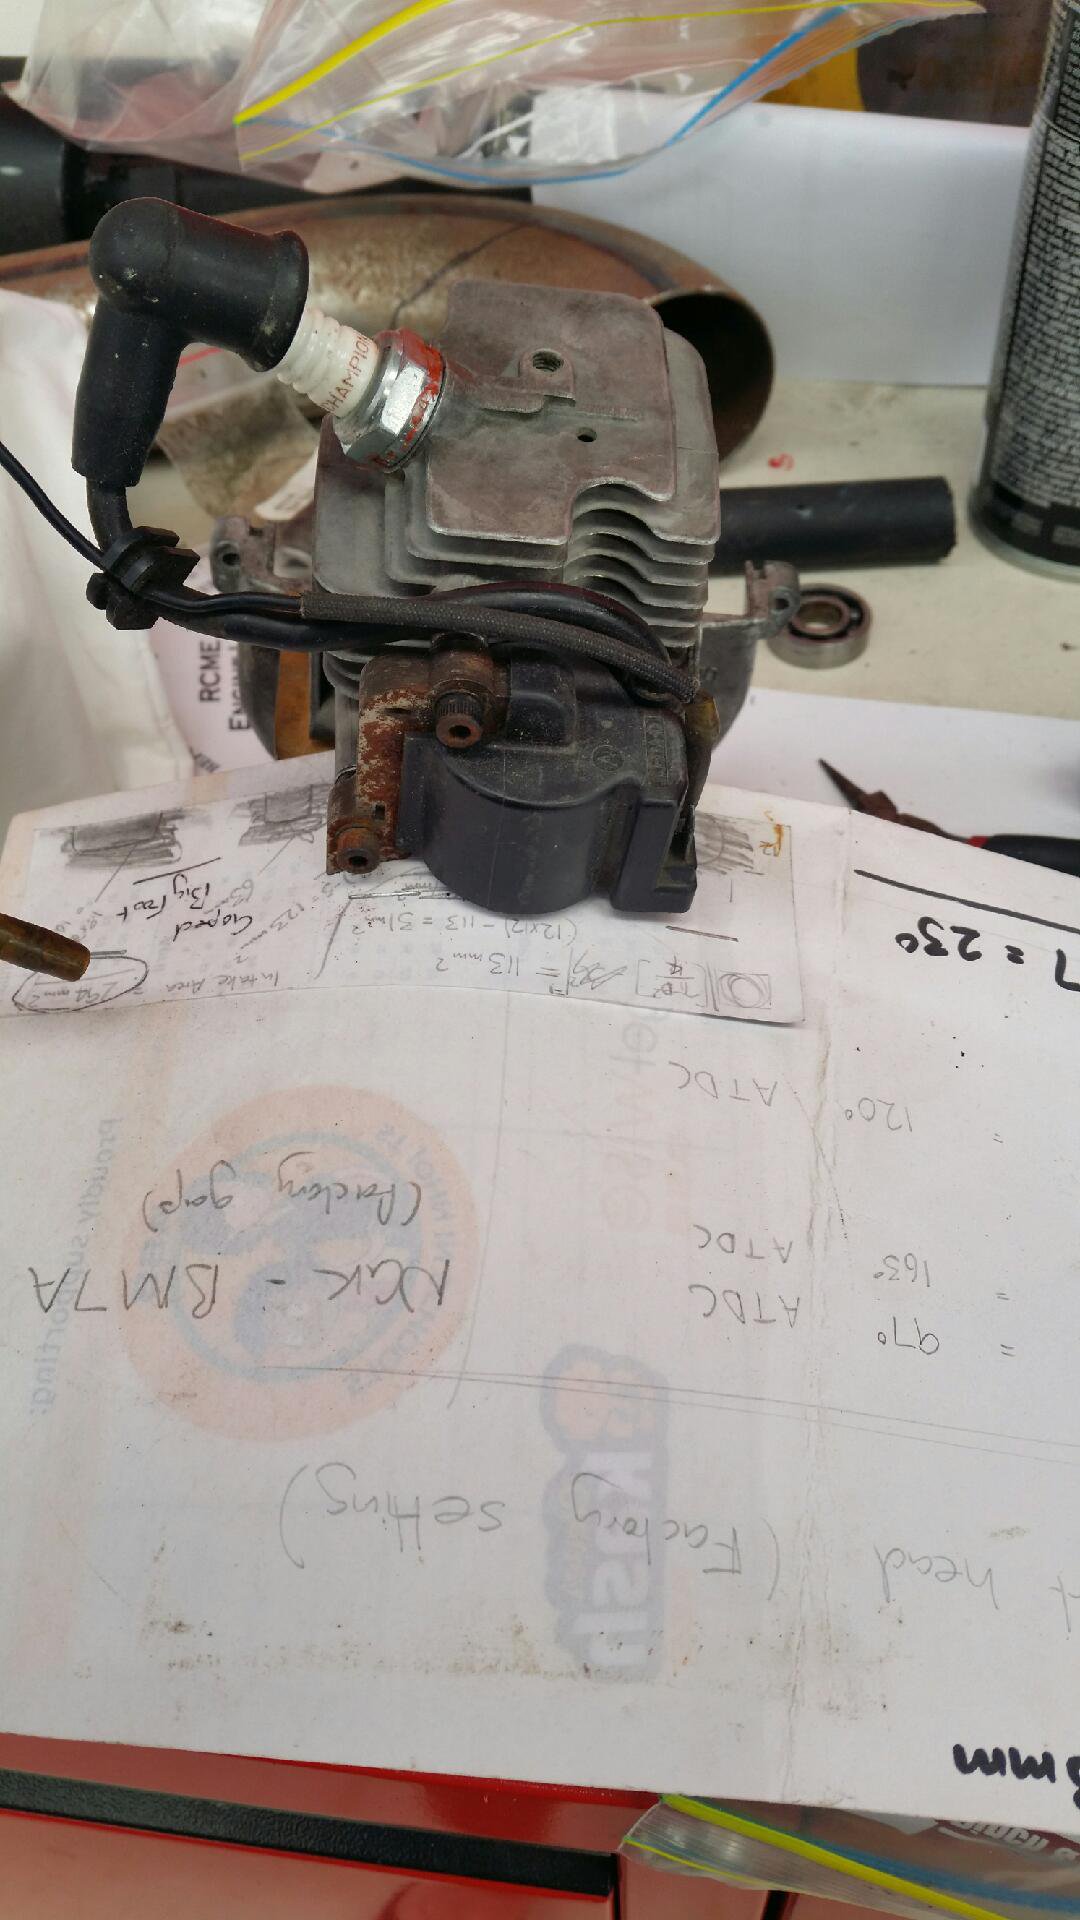
I got this diff from Dan for less than labeled after deciding the hilux diff was too heavy, the caliper conversion situation, handbrake creation and it wasn’t lsd. this is! easily available, inboard handbrake and disc brake already. The GT2871r I had was pronounced dead due to cost of repair. Then a mate popped up with this, got it for a song and will be a nice wee upgrade whizzer. Heres another escort with CA. The angled engine bugs me, it’s factory but I can’t handle it so I’m going to upright mine. I’ll have to change mounts anyway, tweak the shifter to suit. I have a brand new genuine oil pump as well. If she blows up we’ll try again. its well documented these days how to do this head drain mod so will do that. Today I sorted out lots of nuts/bolts/screws and put them into an organiser case for the first time in my life, reorganised the boxes, tore the front and rear ends out, front off, bumper off ready for the spit this week. Had a scotch with the dog while sitting in the back seat. She was more interested in the reflections7 points
-
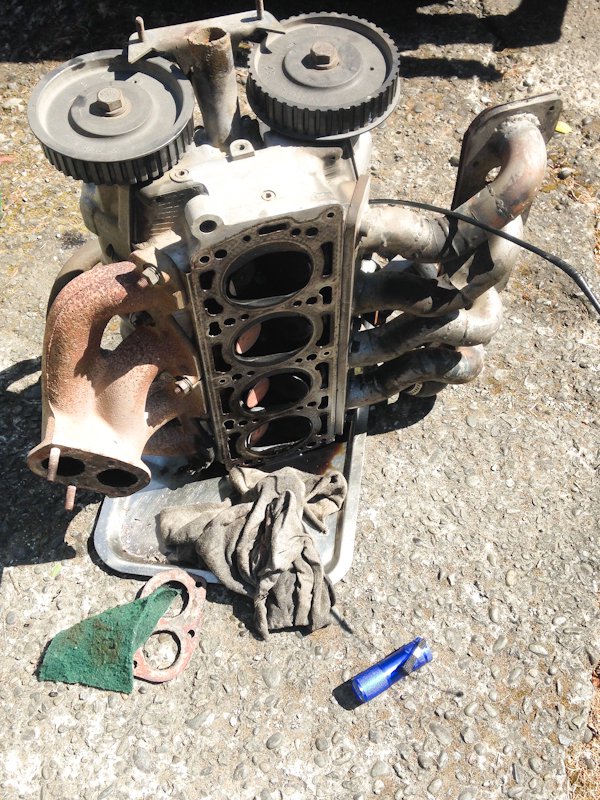
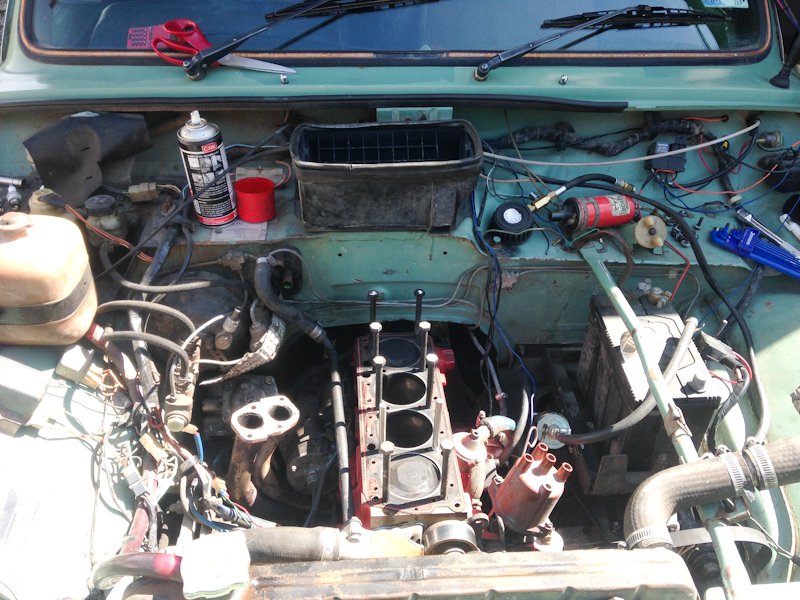
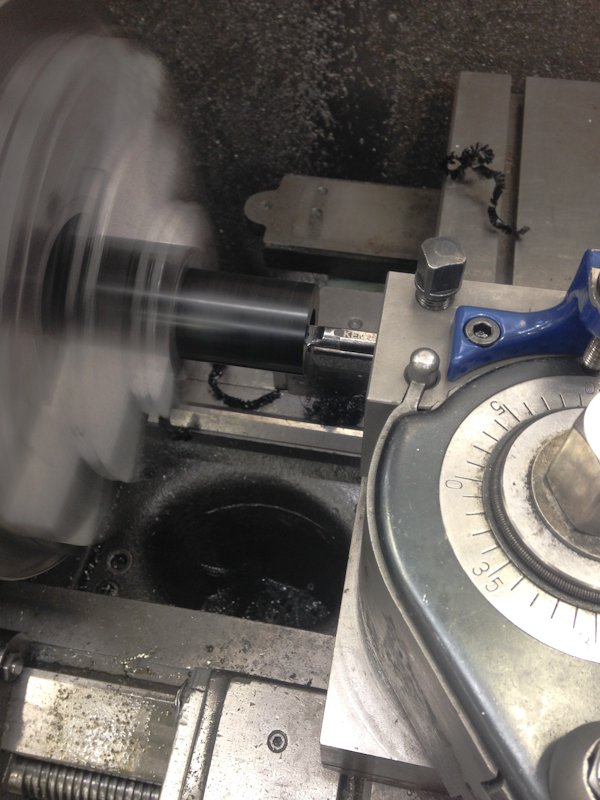
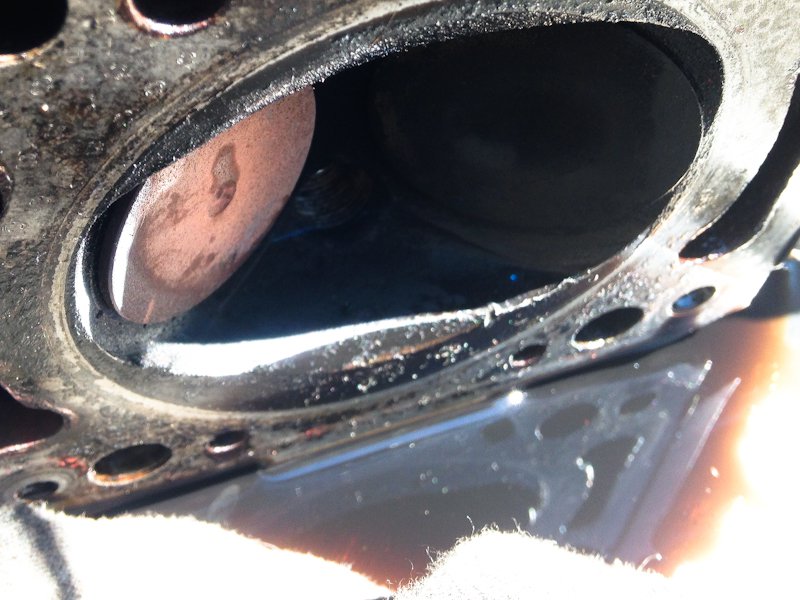
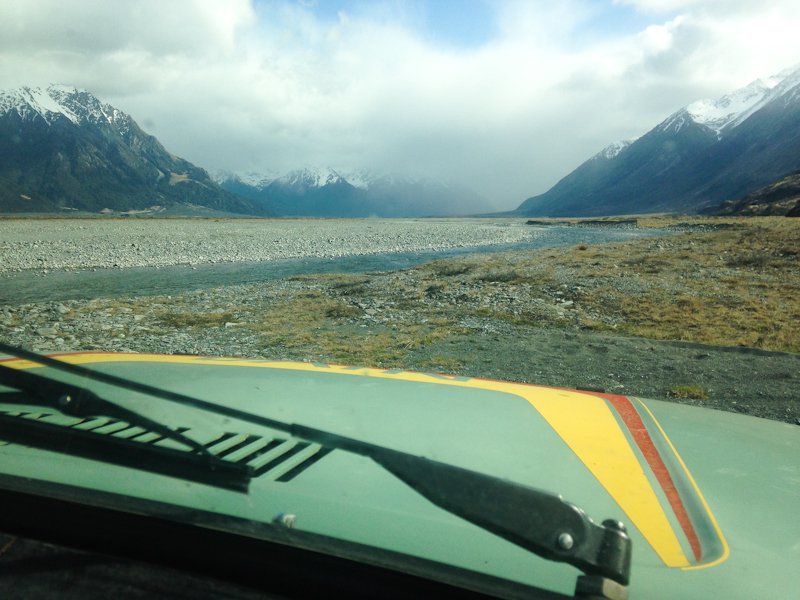
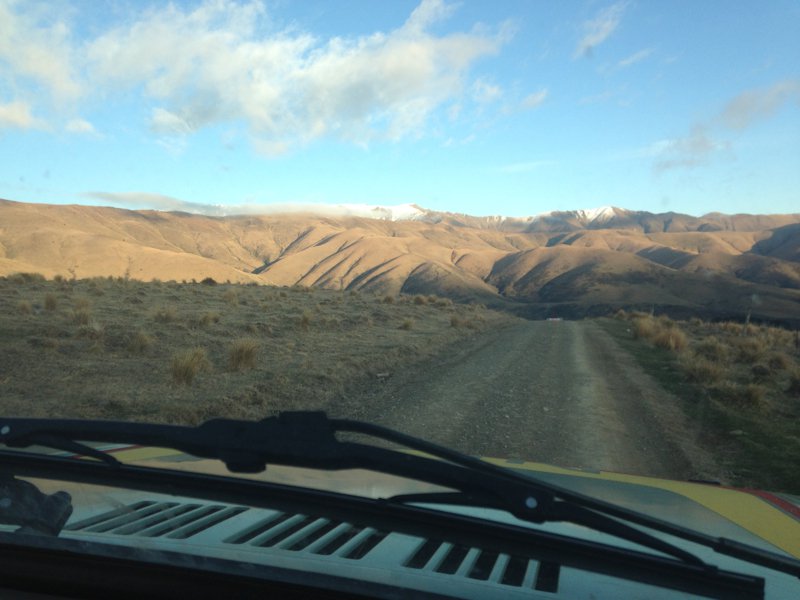
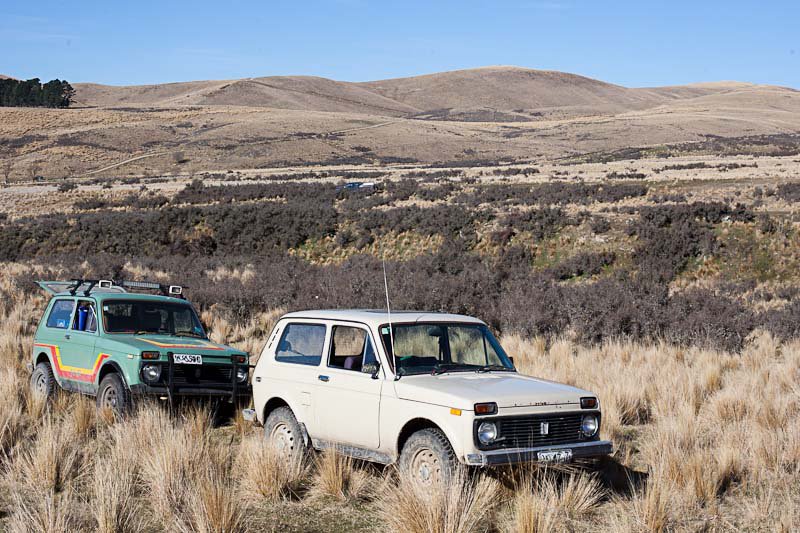
Had a generally good run out of the Niva recently, not that it really does much work, spends most of its life in the shed and then gets rolled out for weekends away. Went for a drive down south Canterbury way and found another Niva hiding away in daily use. Also had a look around a few of the high country valleys over winter: After this trip on rough river stones the steering idler once again slogged out, upon measure up I found the shaft is slightly undersize, that explains years of rapidly wearing out bushes! A quick call to a supplier and I had some nylatron through the lathe with much less clearance. And of course something big had to happen, on checking the car over before a trip I found a missing washer and screw in the intake, the screw was caught in the carb throat, the washer no where to be seen..... After trying the obvious, I made the call to strip the head in expectation of a gouged bore, but no, nothing seen but a few divots in the head and piston, it appears the washer made it to freedom via a brief beating in #4, once again, the gods seem to smile on me! Moving forward the Niva will keep hanging out in the shed with occasional weekends out, but come christmas improvements will slow...... This weekend I picked up part A of my legit black plated new project (cheers Greg!) while a few OS'ers know about my excitement, i'll wait till I pick it up to start the build thread, for now here's a teaser: And for those that don't identify as a drivetrain Barry....
 6 points
 -
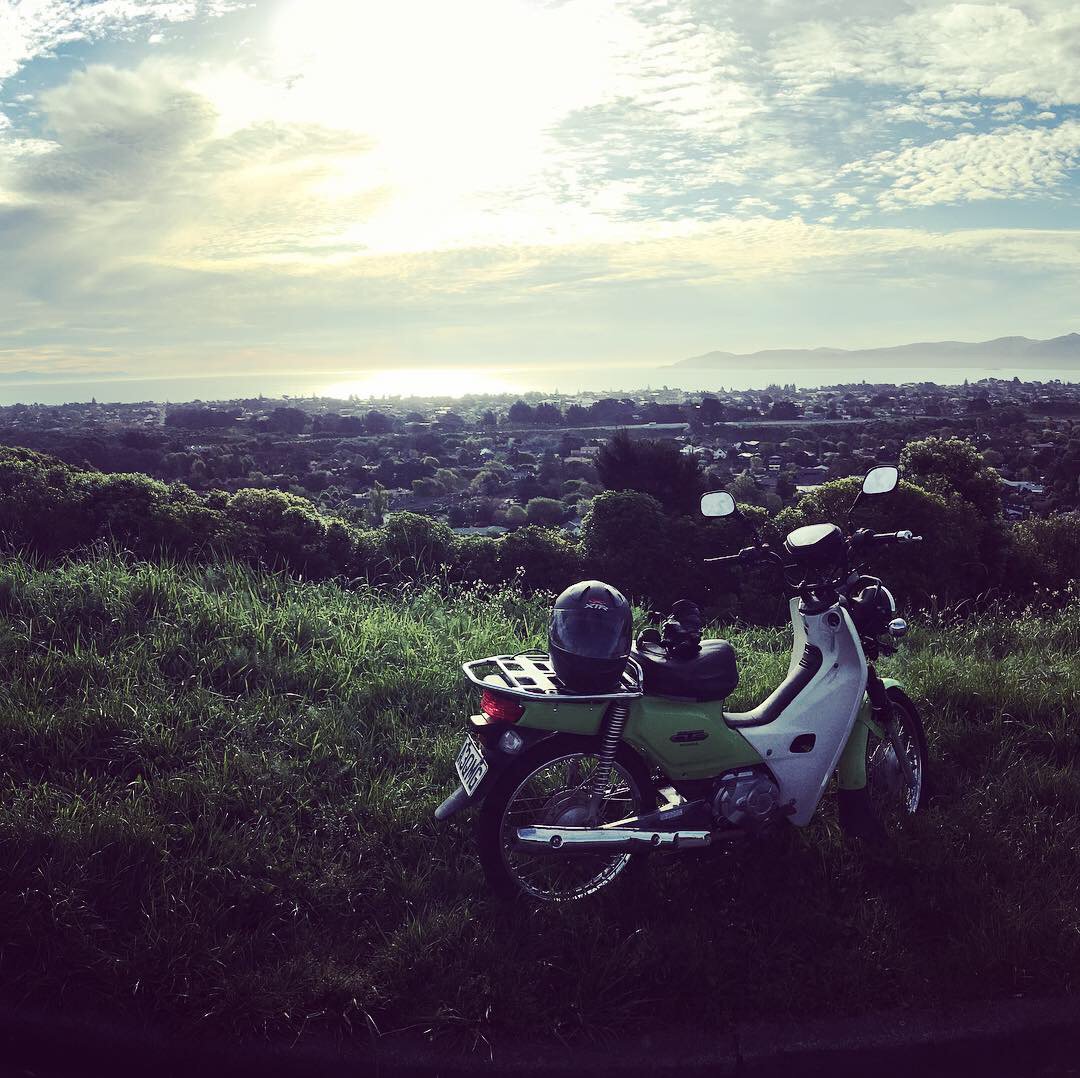
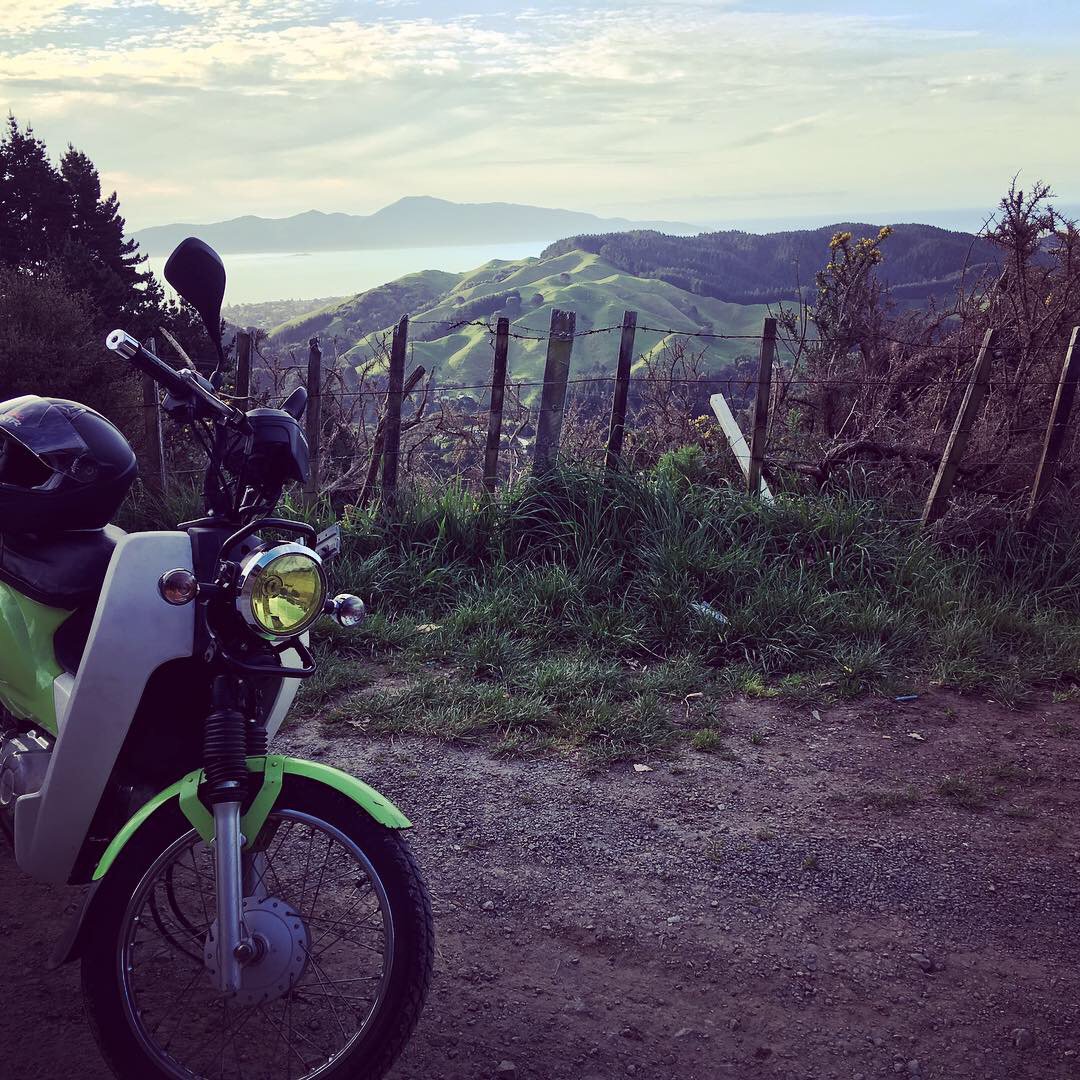
On top of the Port Hills earlier today
5 points
-
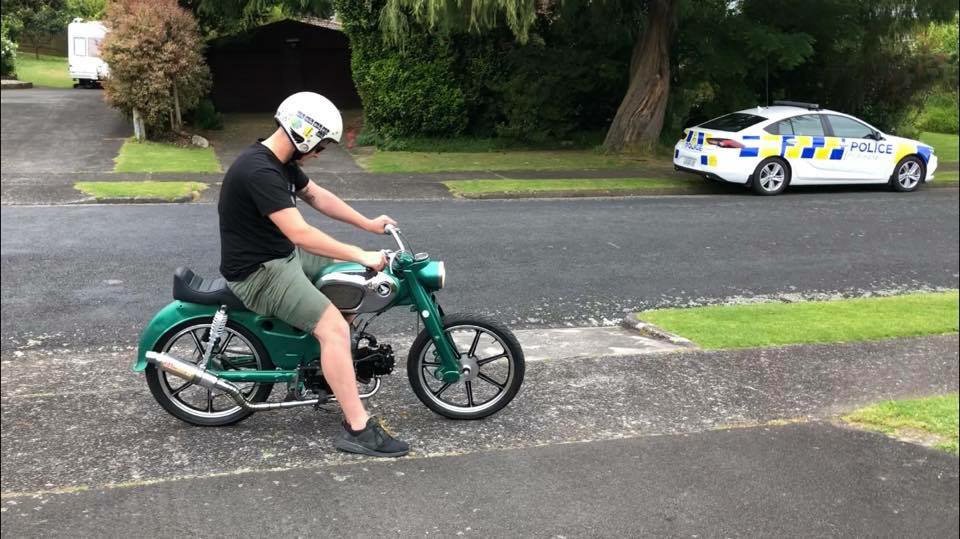
Just took my weapon for a gentle speed run. 88Kph before I caught up to the car in front of me. Should be 90+ tucked and happy to sit on 80 all day on the flat. Tank fuel cap leaks a bit sadly. Will have to repaint this tank after Eastcape with a better clear. @GuyWithAviators and I still have a decent amount of fettling to go. Probably gotta work on the bikes a bit more too.
5 points
-
500km of Shakedown riding in the last 3 days has been great success. Nothing has rattled loose and everything is working as it should. Picking up my new seat on Wednesday then got the Smash Palace Bike show on Saturday then loading up on Sunday. Aiming to ride 50-60 km a day between now and Sunday. Massive shout out to @BLIZZO for the carb of my dreams ! Such smooth power delivery now. Bring on the Cape guys !5 points
-
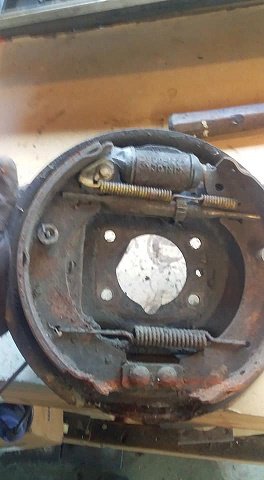
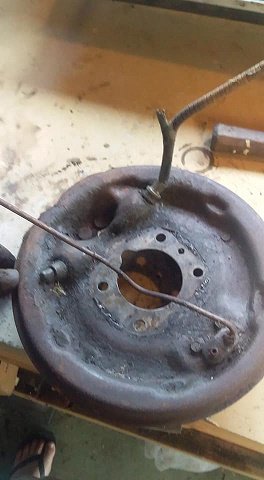
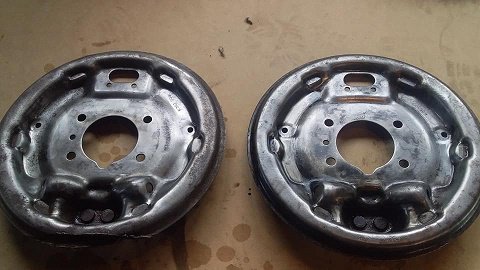
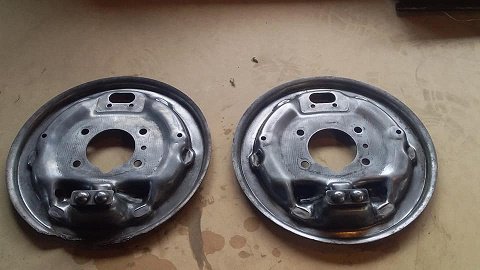
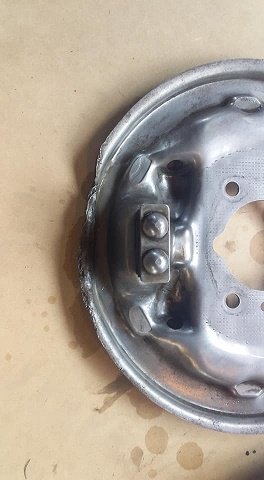
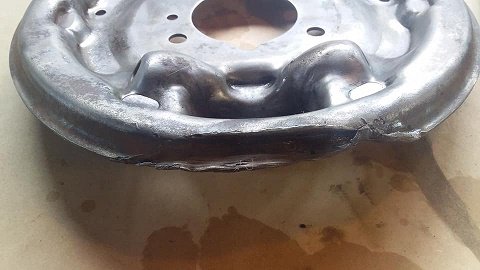
i was thinking about rear brakes and doing a disc conversion as i didnt have any rear brakes for it. but i then thought the easiest way would be to use factory aussie drums...they came on a 6 cylinder cortina soooooooooo must work well on a cortina with a 6 in it. (keep cert man happy aswell) and its not going to have a million hp. so thanks to @J-W-G igot my hands on a set of factory aussie assembled rear drums..seen better days but nothing a rebuild wont fix.......and the best price. so here they are. and after a few hours i got the backing plates all cleaned up ready to have the backs painted in POR15. 1 of them had some damage (looks like someone lost a wheel at some point) i managed to straighten it so the drum wont rub
5 points
-
rode 100km today, used 5L of gas, many things rattled loose, but now should be more secure. And after riding 20km without a muffler, I can confirm its really loud and not advisable, people on the sidewalk were blocking their ears. Got up to 97kph on a big downhill, but can cruise along at 60-70kph all good on the flat. I think I get some weird issues in my transmission when it gets hot, so I have put a breather hole in the housing, and put the heavier rollers in so it doesnt have such great acceleration but doesnt load up the trans so much. I dont think I need spare gas at this point, so bag will just be lots of tools, undies, socks, wet weather gear and a couple other nick nacks, no problem for a few days on my back3 points
-
Rim Nice new bearings, rim and spokes all ready to go, how hard can it be...? Fucking hard, forgot how tricky this can be. Had a few goes at getting the under/overs right... But got there in the end. Only loosely fitted, I've gotta lube the spoke threads before truing it up yet (cos I was doing it inside didn't want to get messy anti-seize everywhere)... Actually did it twice, first time looked right, but the spokes were going a different direction to original, Good pics of original wheel helped get it right...3 points
-
Back to the TT. Steering stem lower bearing was a bastard to get off, came pretty close to giving up and getting another one. Tried gentle heat first cos I wanted to save the lower seal, no go... Then welded some blobs on, usually the heat loosens it and some decent whacks on the weld will shift them, still no go. Actually bashed the welds off, fractured the bearing metal beneath... So out with the Ali diamond cutting disc and dremel... This worked, cut a decent slot then smacked a large screwdriver into it and it cracked loose. What a lot of effort for a small job...3 points
-
Unfortunately work really picked up in the last month so i havent had alot of spare time to work on this! This had previously been taken back to metal but was covered in surface rust so smashed it back again mayte Pick up the compressor this week! Went down to chch over the weekend and butchered the parts car i bought. Beaut. Graveyard Managed to grab most pieces of chrome, all 4 door glass. Some interior pieces, a pillar metal bits, boot automatic unlocker, radiator surround, boot and rear quarter deluxe lettering badges, grille and headlight buckets, fuel tank in good condition and gas axed out the factory engine mounts! Pallet being sent up within next month but i took the engine mounts on the plane with me so i can trim to size. Ill bolt the motor and gearbox to the gearbox cross member and get it all lined up n get my mate to weld it in as hes a comptent welder n not a noob like me Also brought some deluxe boot badges Cheers3 points
-
Have reached the max tyre size, Shinko 460 rear & 300 front. Really need some longer front forks and long rear3 points
-
I rode mine to the bottom of the street and back today success3 points
-
3 points
-
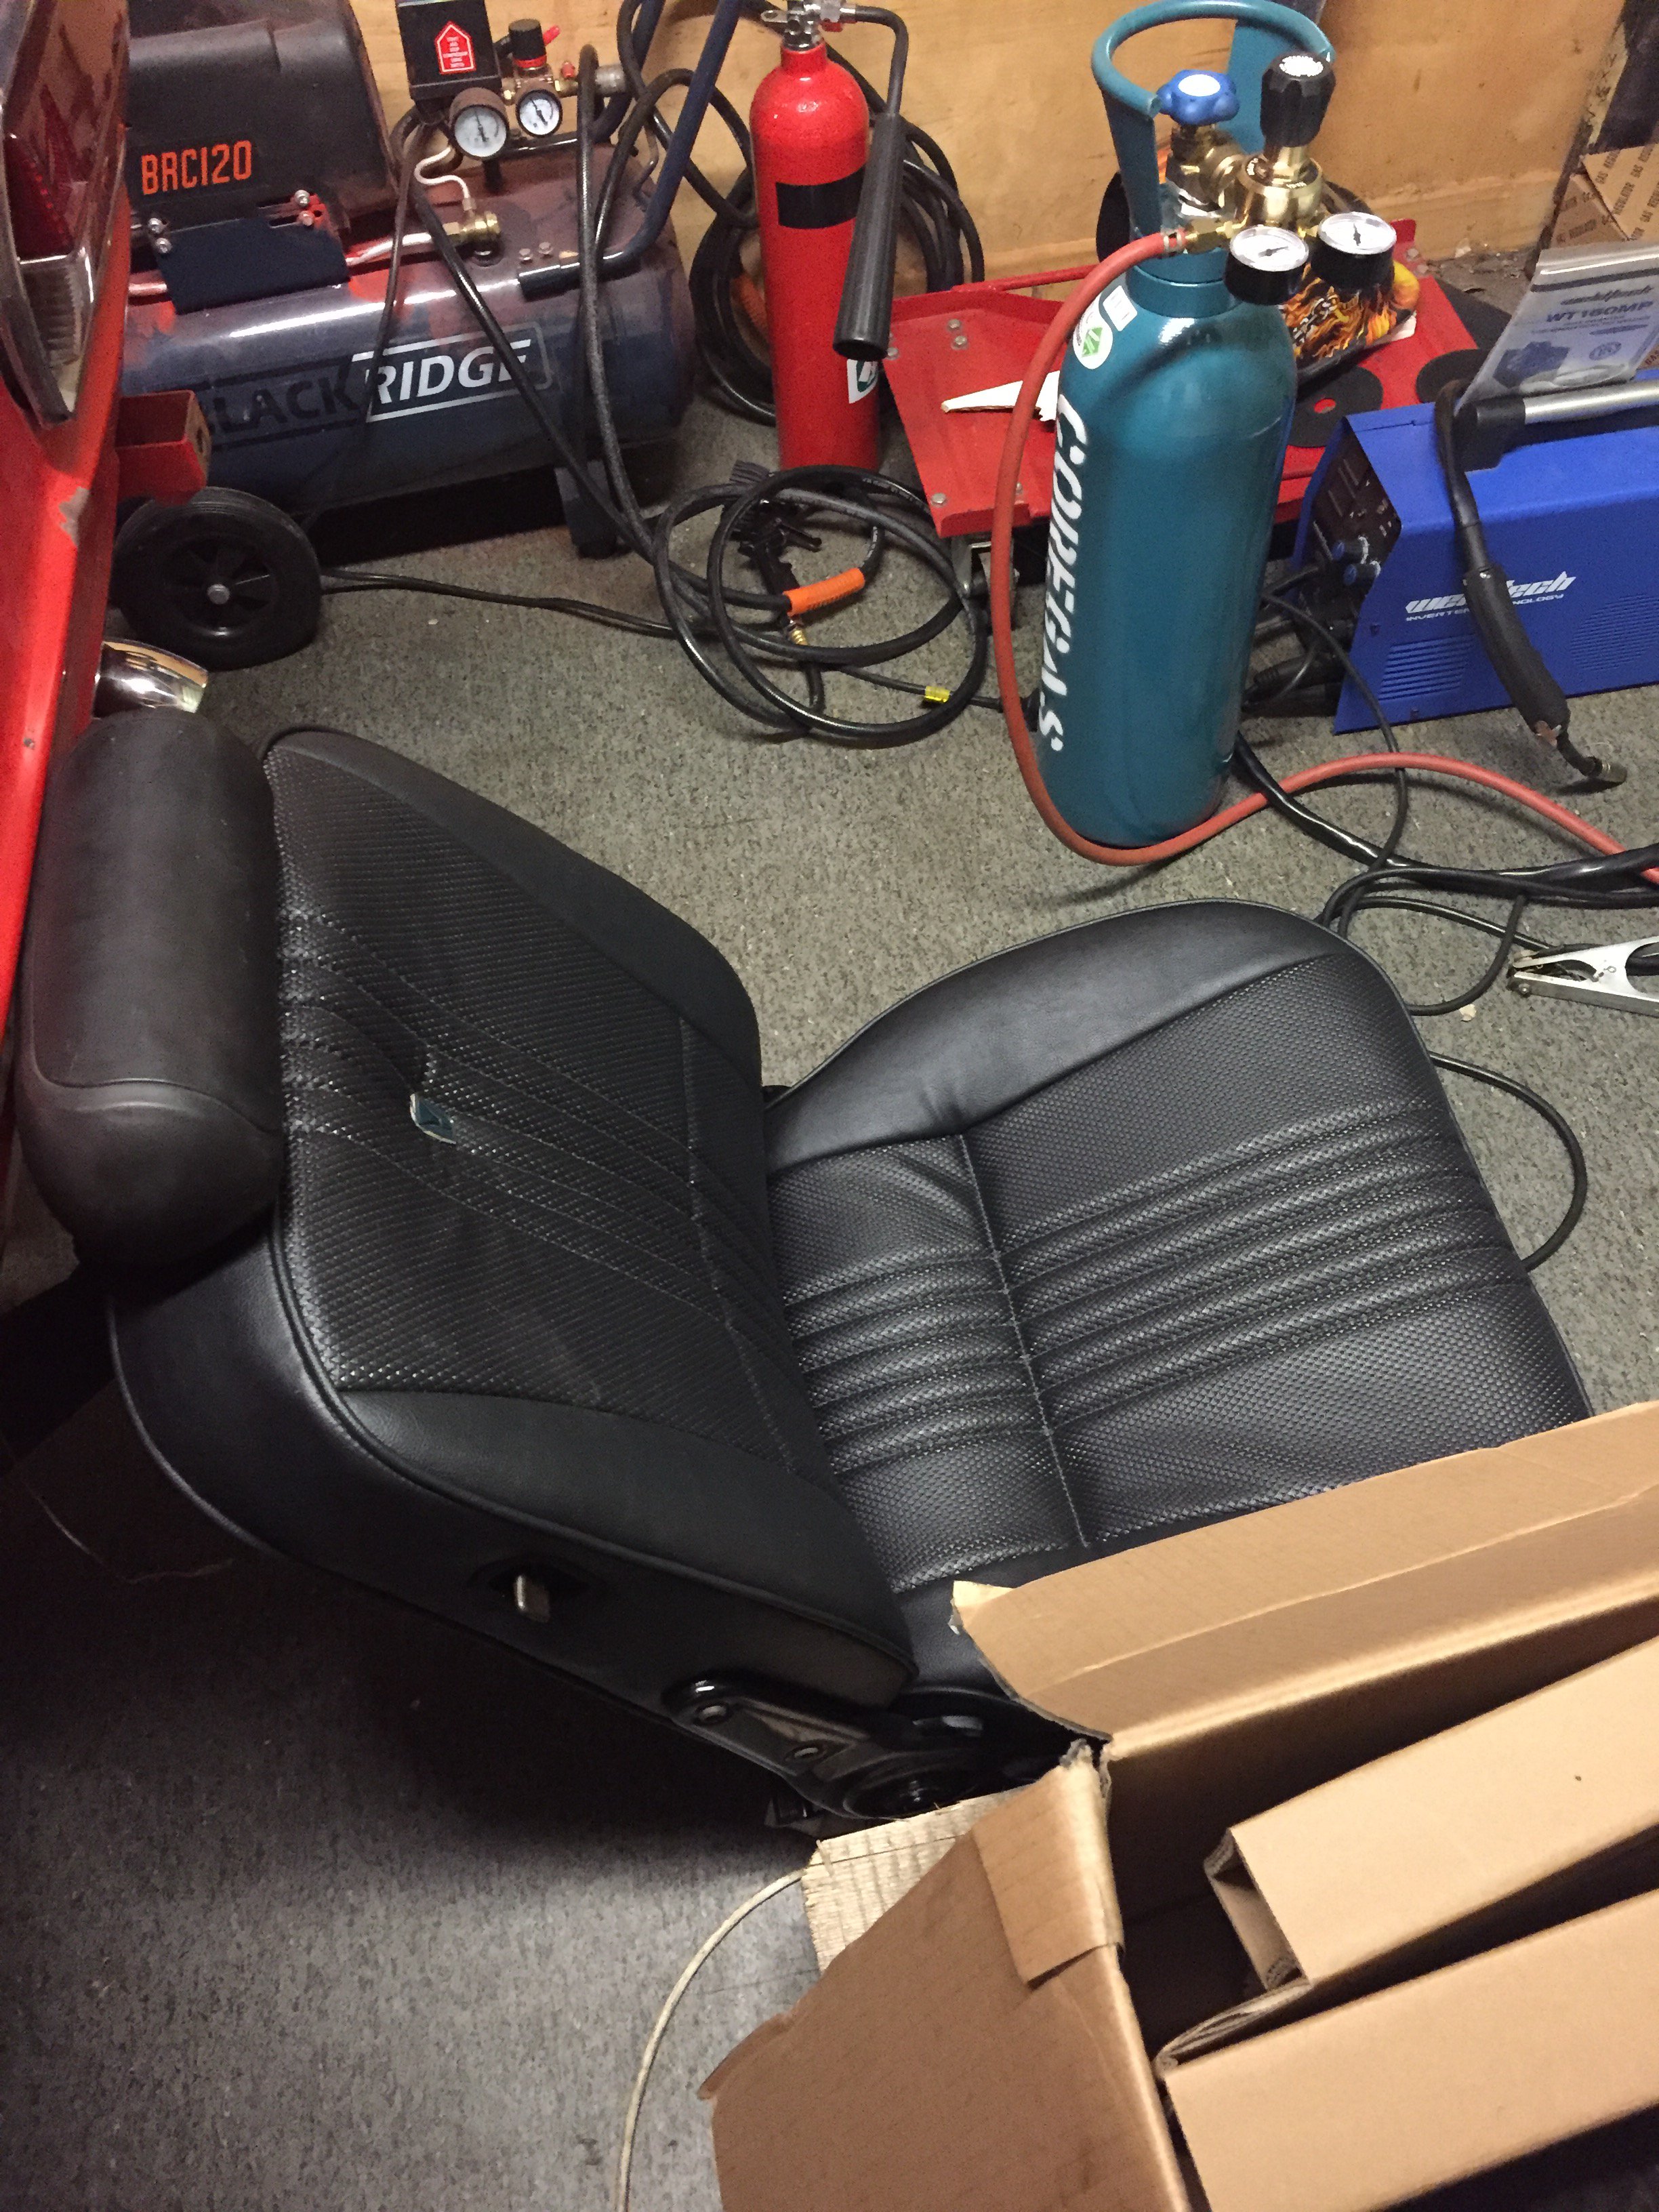
Exhaust completed and painted. Gagging to hear it now but that’s going to have to wait another few days. Awaiting d shaft loop weld up then in she goes once and for all (unless I have to take it out haha). Next is spanner check the suspension and rattle up tie rods etc I want to check the pre load on the new front bearings is spot on also therefore thanks on my week to so list. drivers seat is rebuilt and the runners are all greased up ready for use. Most likely I will plonk them in less the carpet so it makes the VIN and Cert check easier, as the d shaft loop brackets/bolts are easily visible etc. Cert check is next on my agenda once it’s all buttoned up then VIN. Beer o’clock
3 points
-
I saw a oil leak last night and realised I'd cracked the epoxy on the oil tank. After re gluing and re cracking it I figured the battery tray was hitting it. A quick go with the file and it's sorted Longer test ride went good until I ran out of fuel and got to walk it home. Filled it up and with some helpful tips from our resident scooter gc @Raizer it's running better than ever. Now to finish off the headlight stuff3 points
-
I always start quick. Completion rate not great however... Anyway, spent this morning on the TC. Thought I'd check the front brakes as there was bugger all there on my high speed runs. Pads looked like they were varnished. Luckily I had a new set in my box of random bits, so thought it'd be a 10 minute job to swap out... But drum was full of oil. Scratched my head where it was coming from then discovered fork oil leaking from the bottom allen head screw and tracking into the drum. Bugger, meant I had to open forks up, I wanted to avoid that as they seemed to go up and down semi-ok. The muddy state of the remaining oil meant it prob wasn't a bad idea anyway... And disassembled. I just take pics so I can remember how it goes back together, thinking it would be a few days till I get some seals... The old ones were fairly well stuck, (45 odd years in there) but came out ok with a tyre lever... And bugger me, local Suzuki shop had seals in stock. Grabbed some oil too, spec says 5W but I went 10W cos it's a wee bike and I'm a wee fatty... And all assembled again, a good day's work, and they do feel much better. Can't put brakes back in unfortunately cos need new oil seal, ordered one in bike shop while I was there... Good practice for checking the TT forks anyway...3 points
-
Okay I’m finally ready! Took the bike for a wicked hoon. Had an absolute blast. All works well!
3 points
-
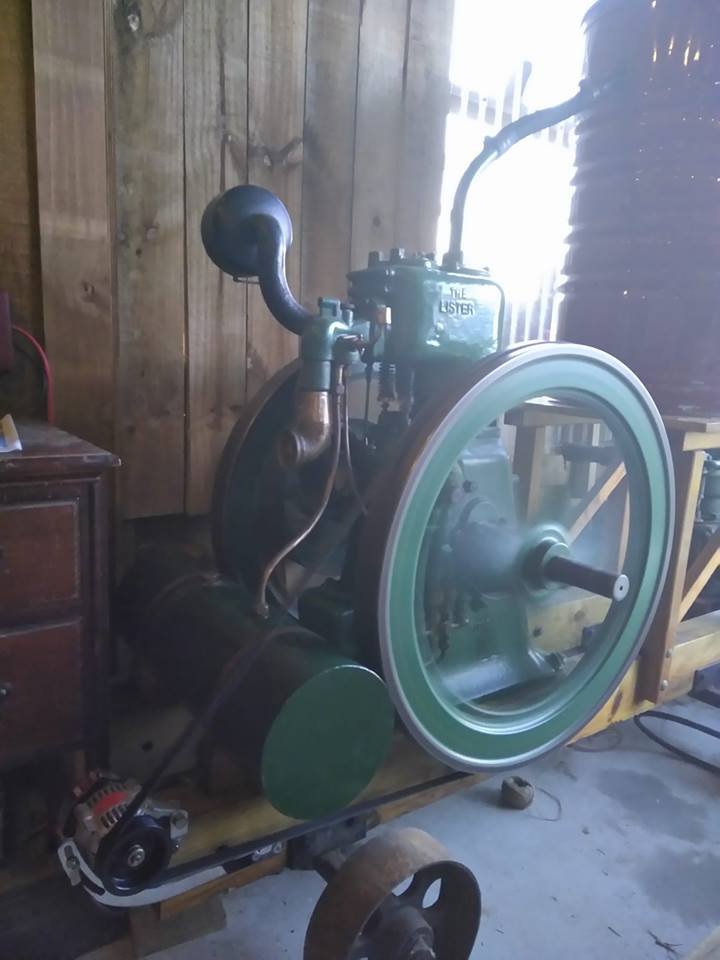
This 1912 Lister powers my off grid house in winter. I've since plumbed in a 10 meter exhaust to outside which means I only hear the rhythmic clanking of the valve train and flywheels. It runs a tractor/drag racing alternator then goes through a sterling 3 stage charge regulator to my house batteries. Runs on 850ml of fuel an hour and the longest I have had it run was 24 hours straight with zero dramas.
3 points
-
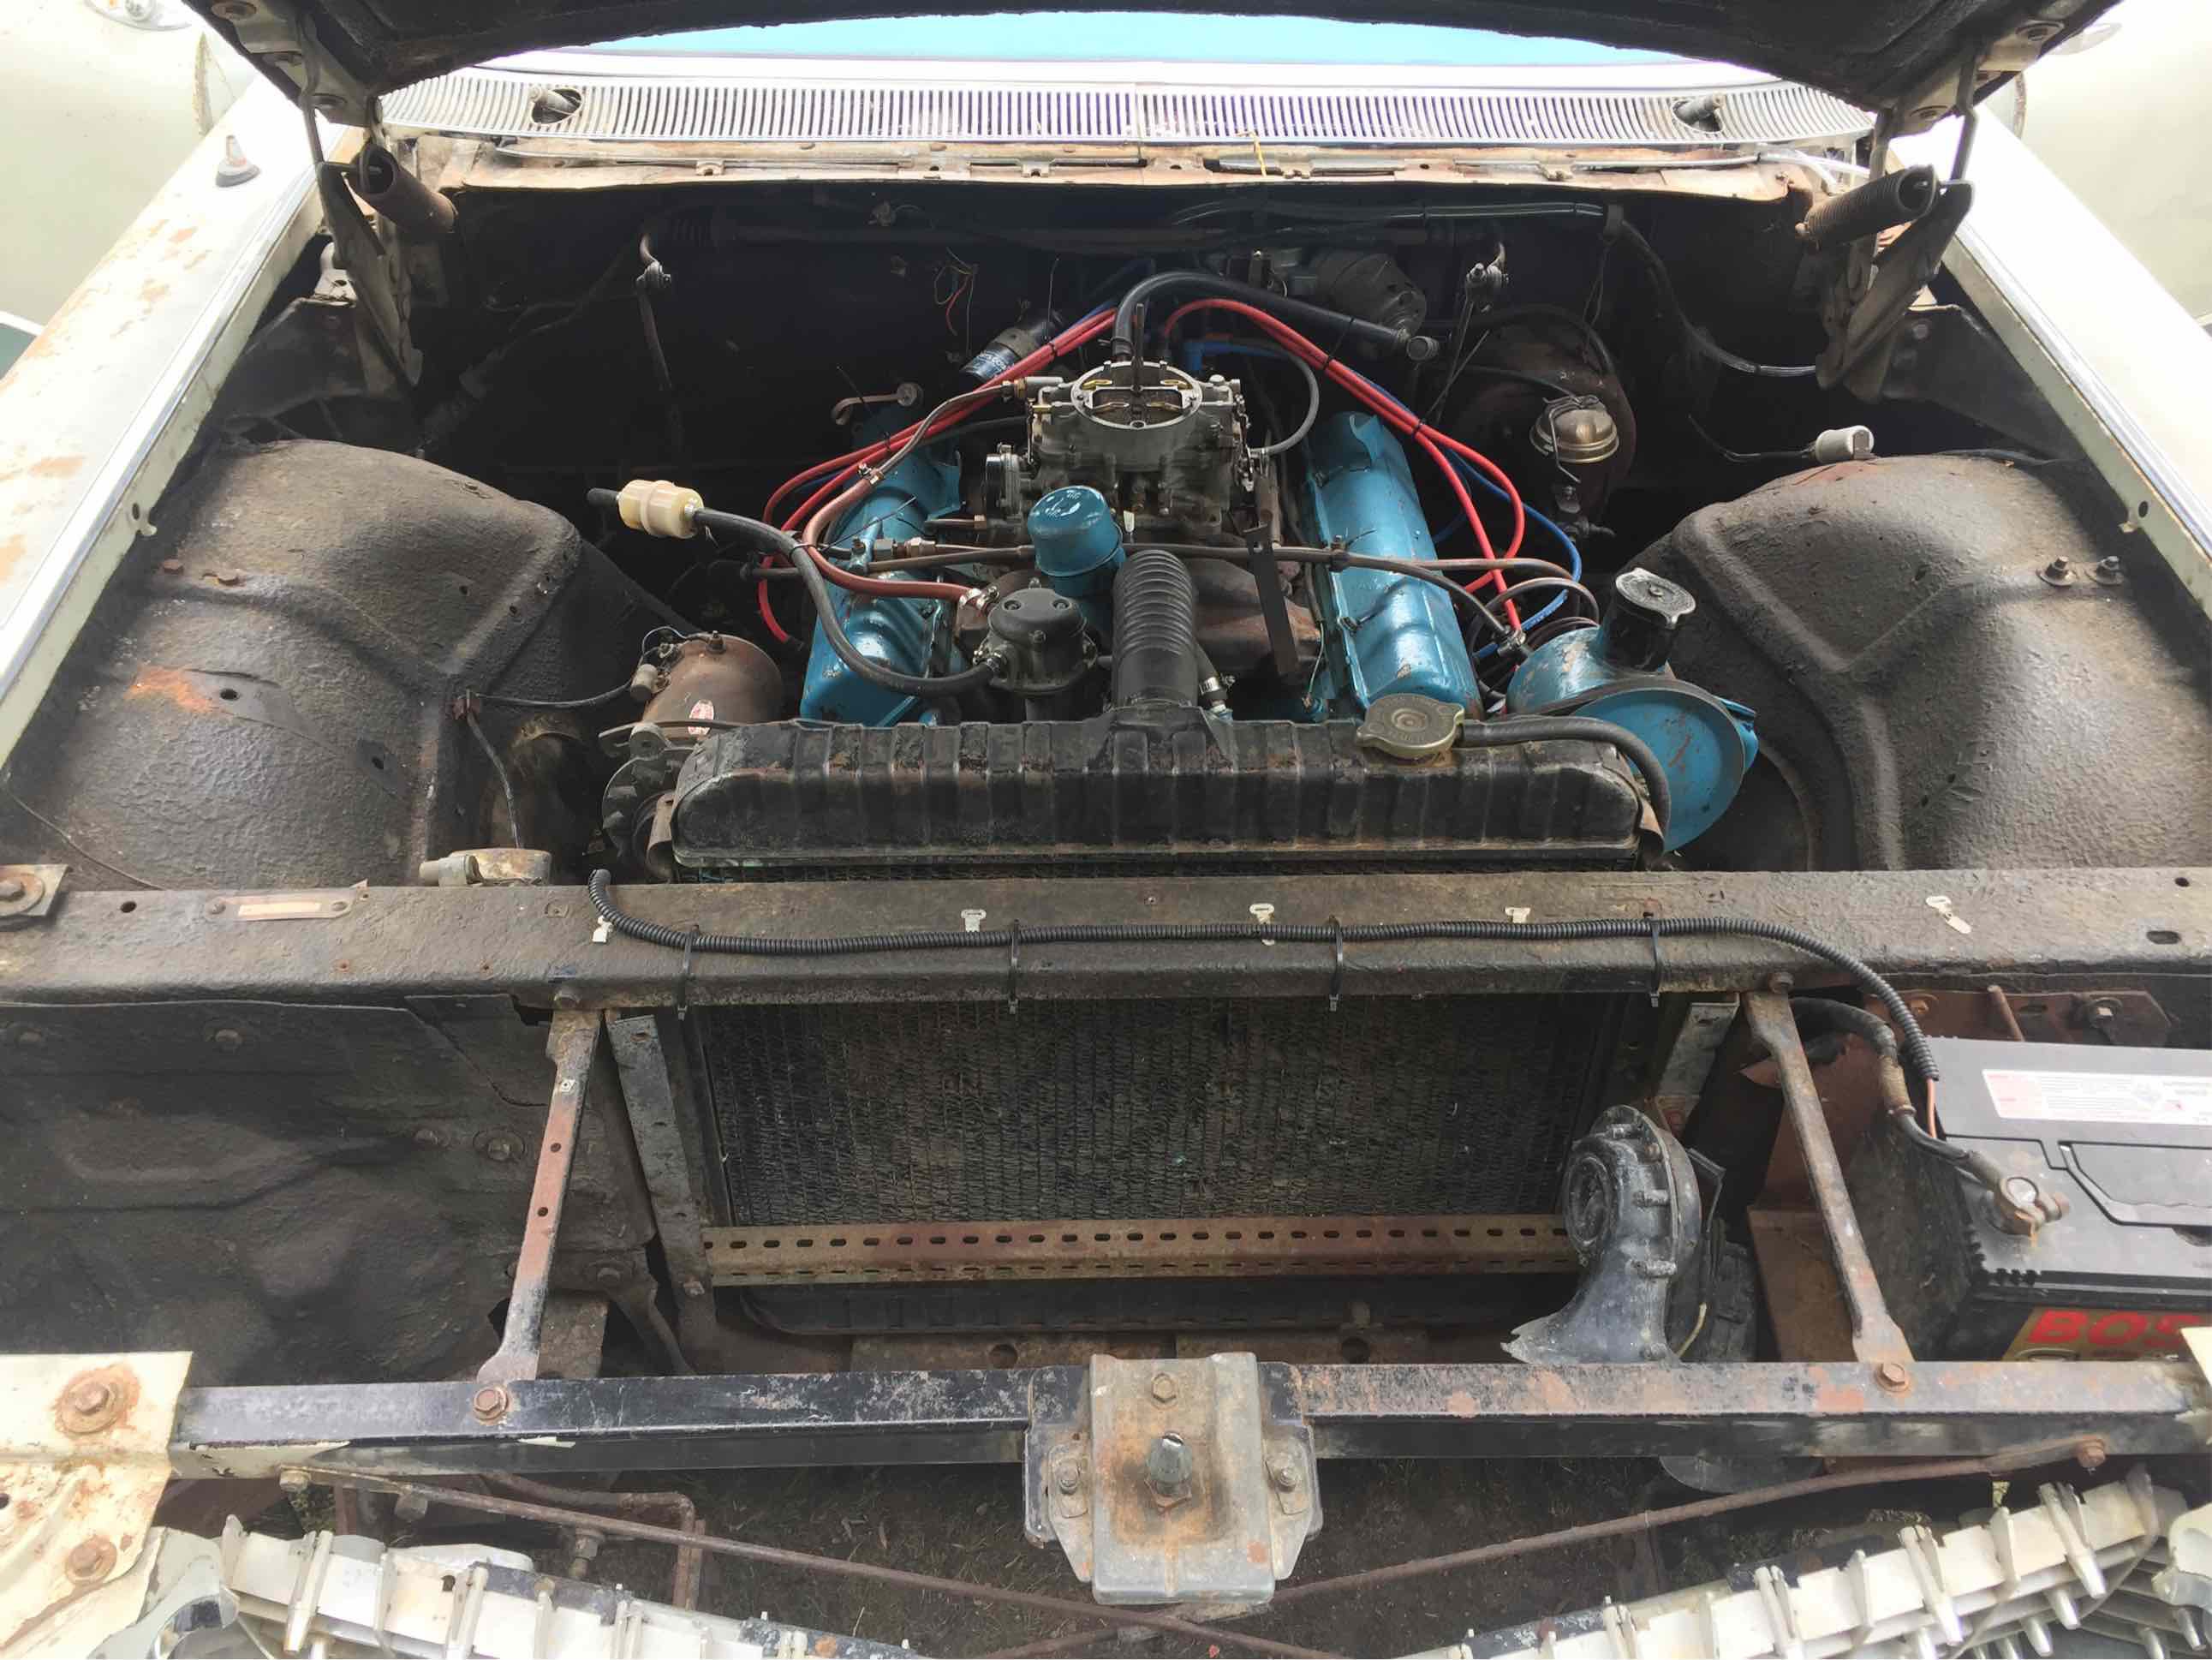
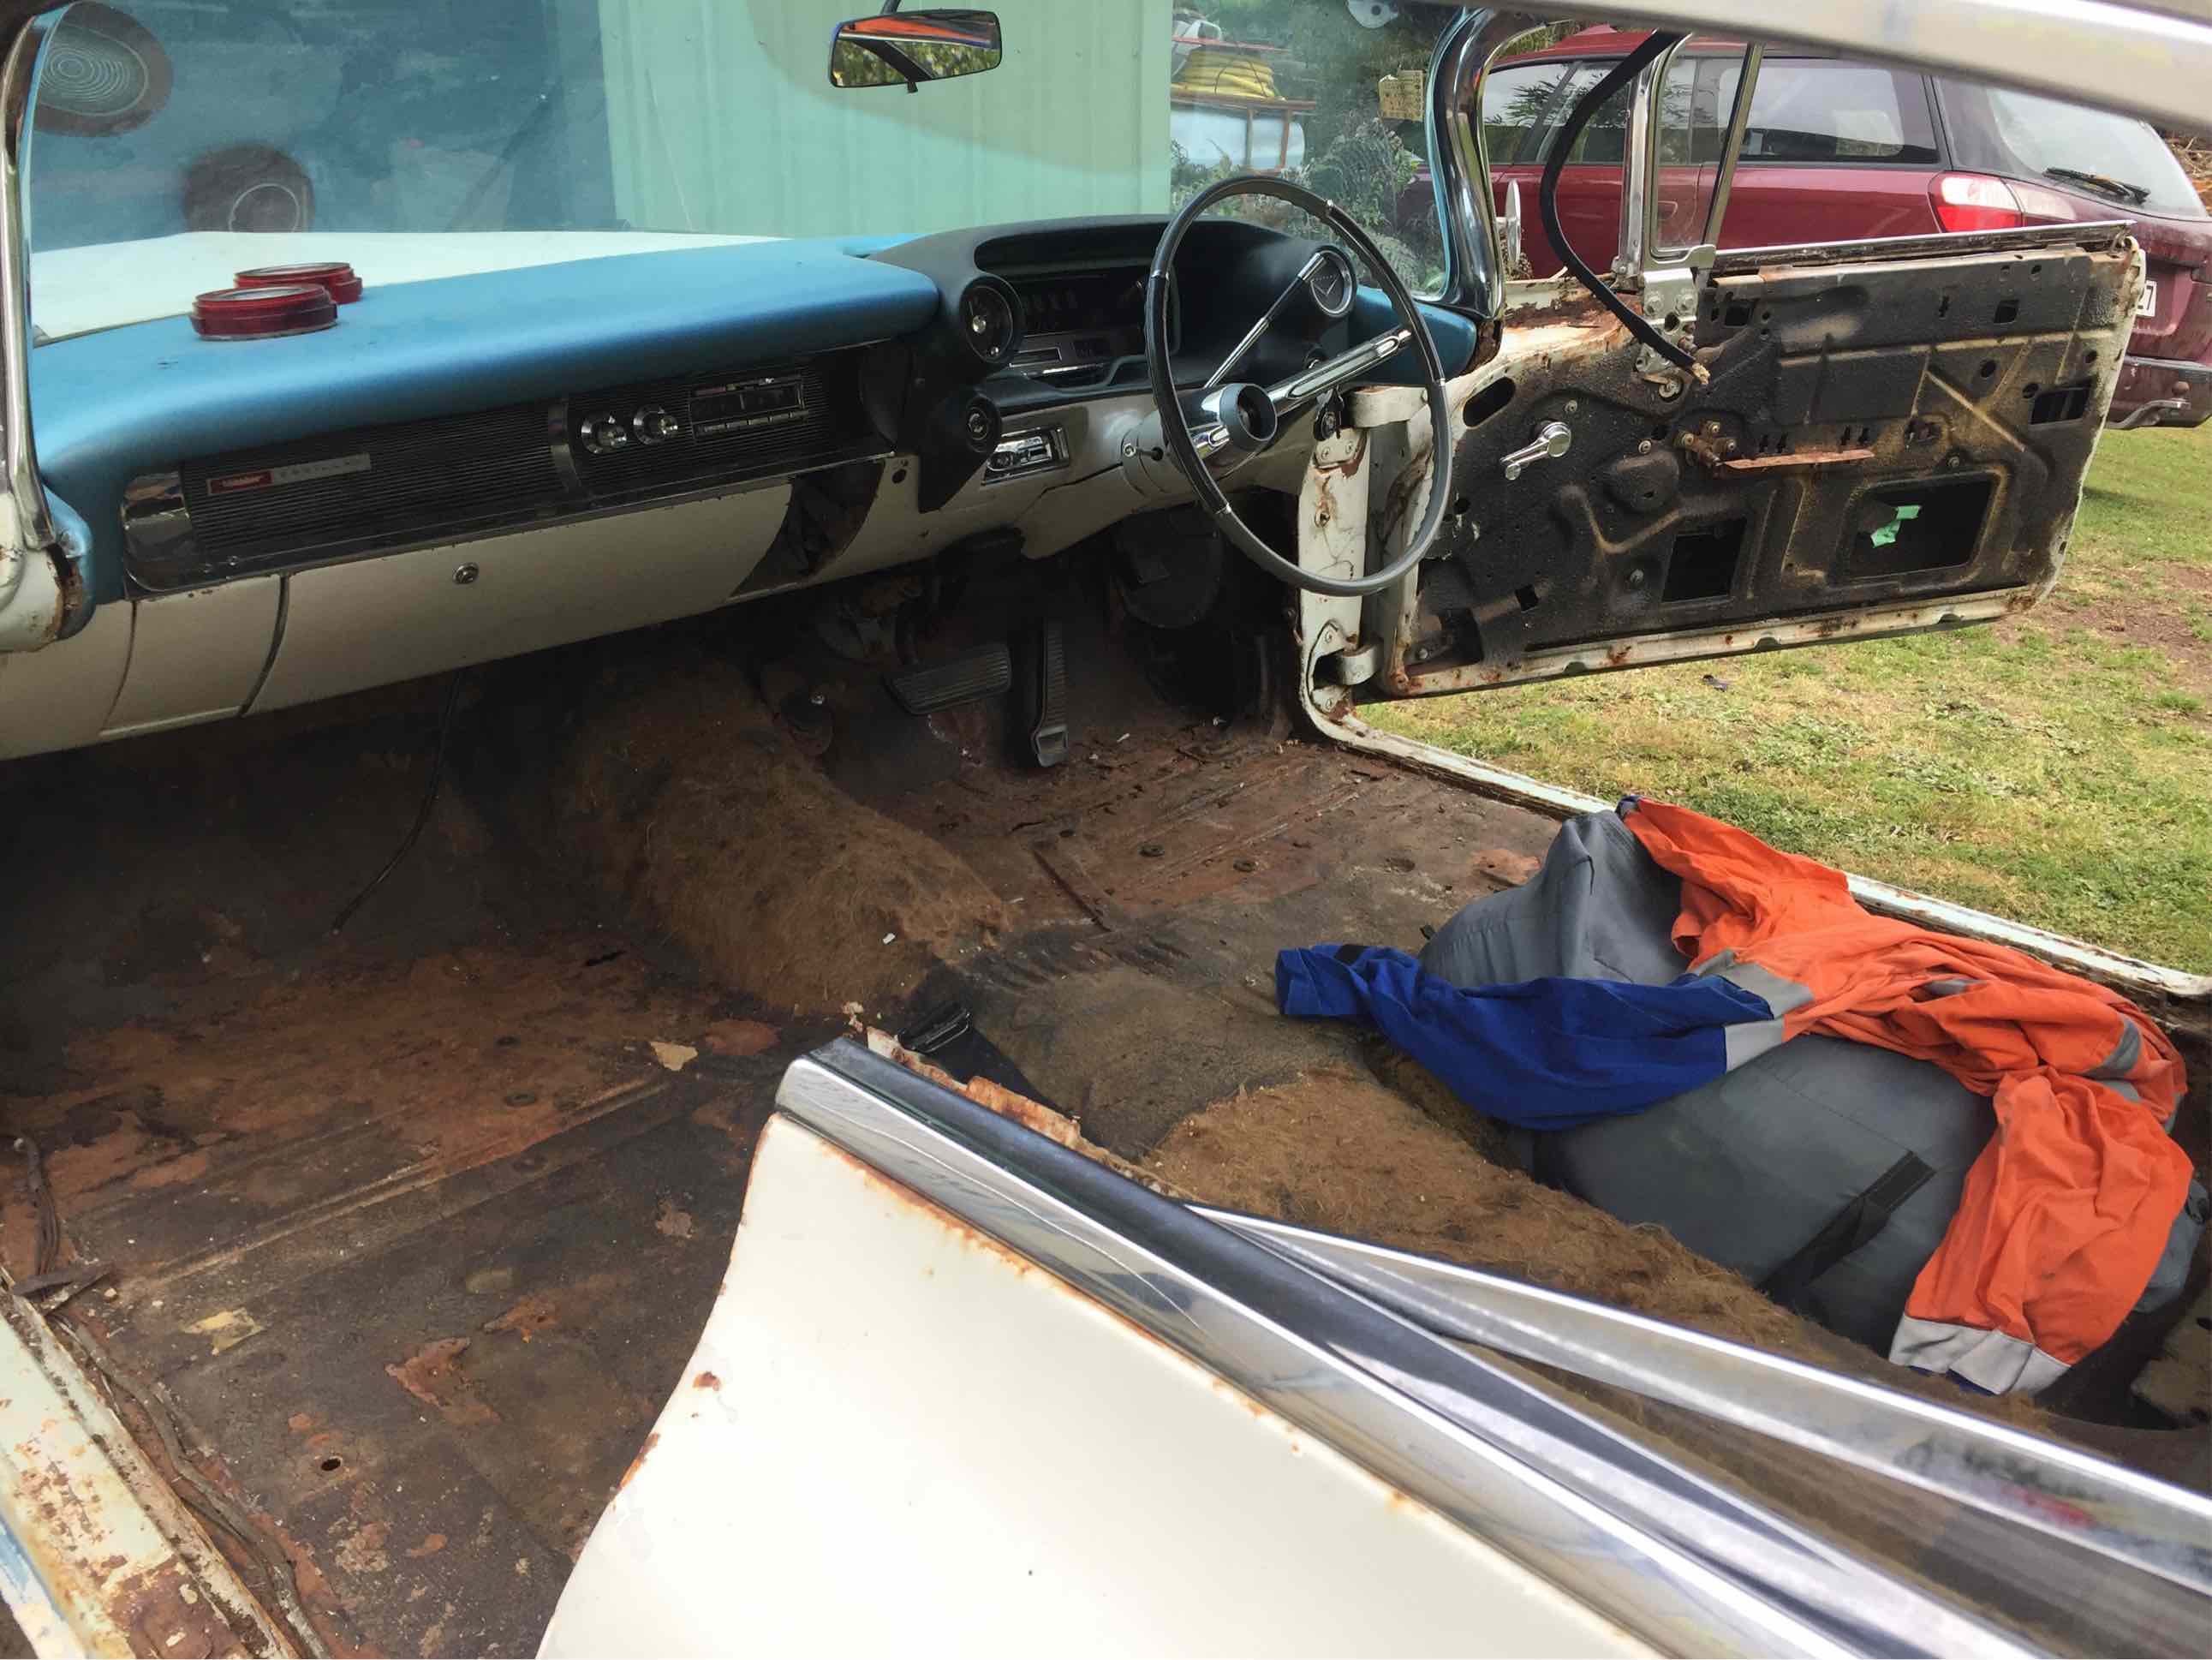
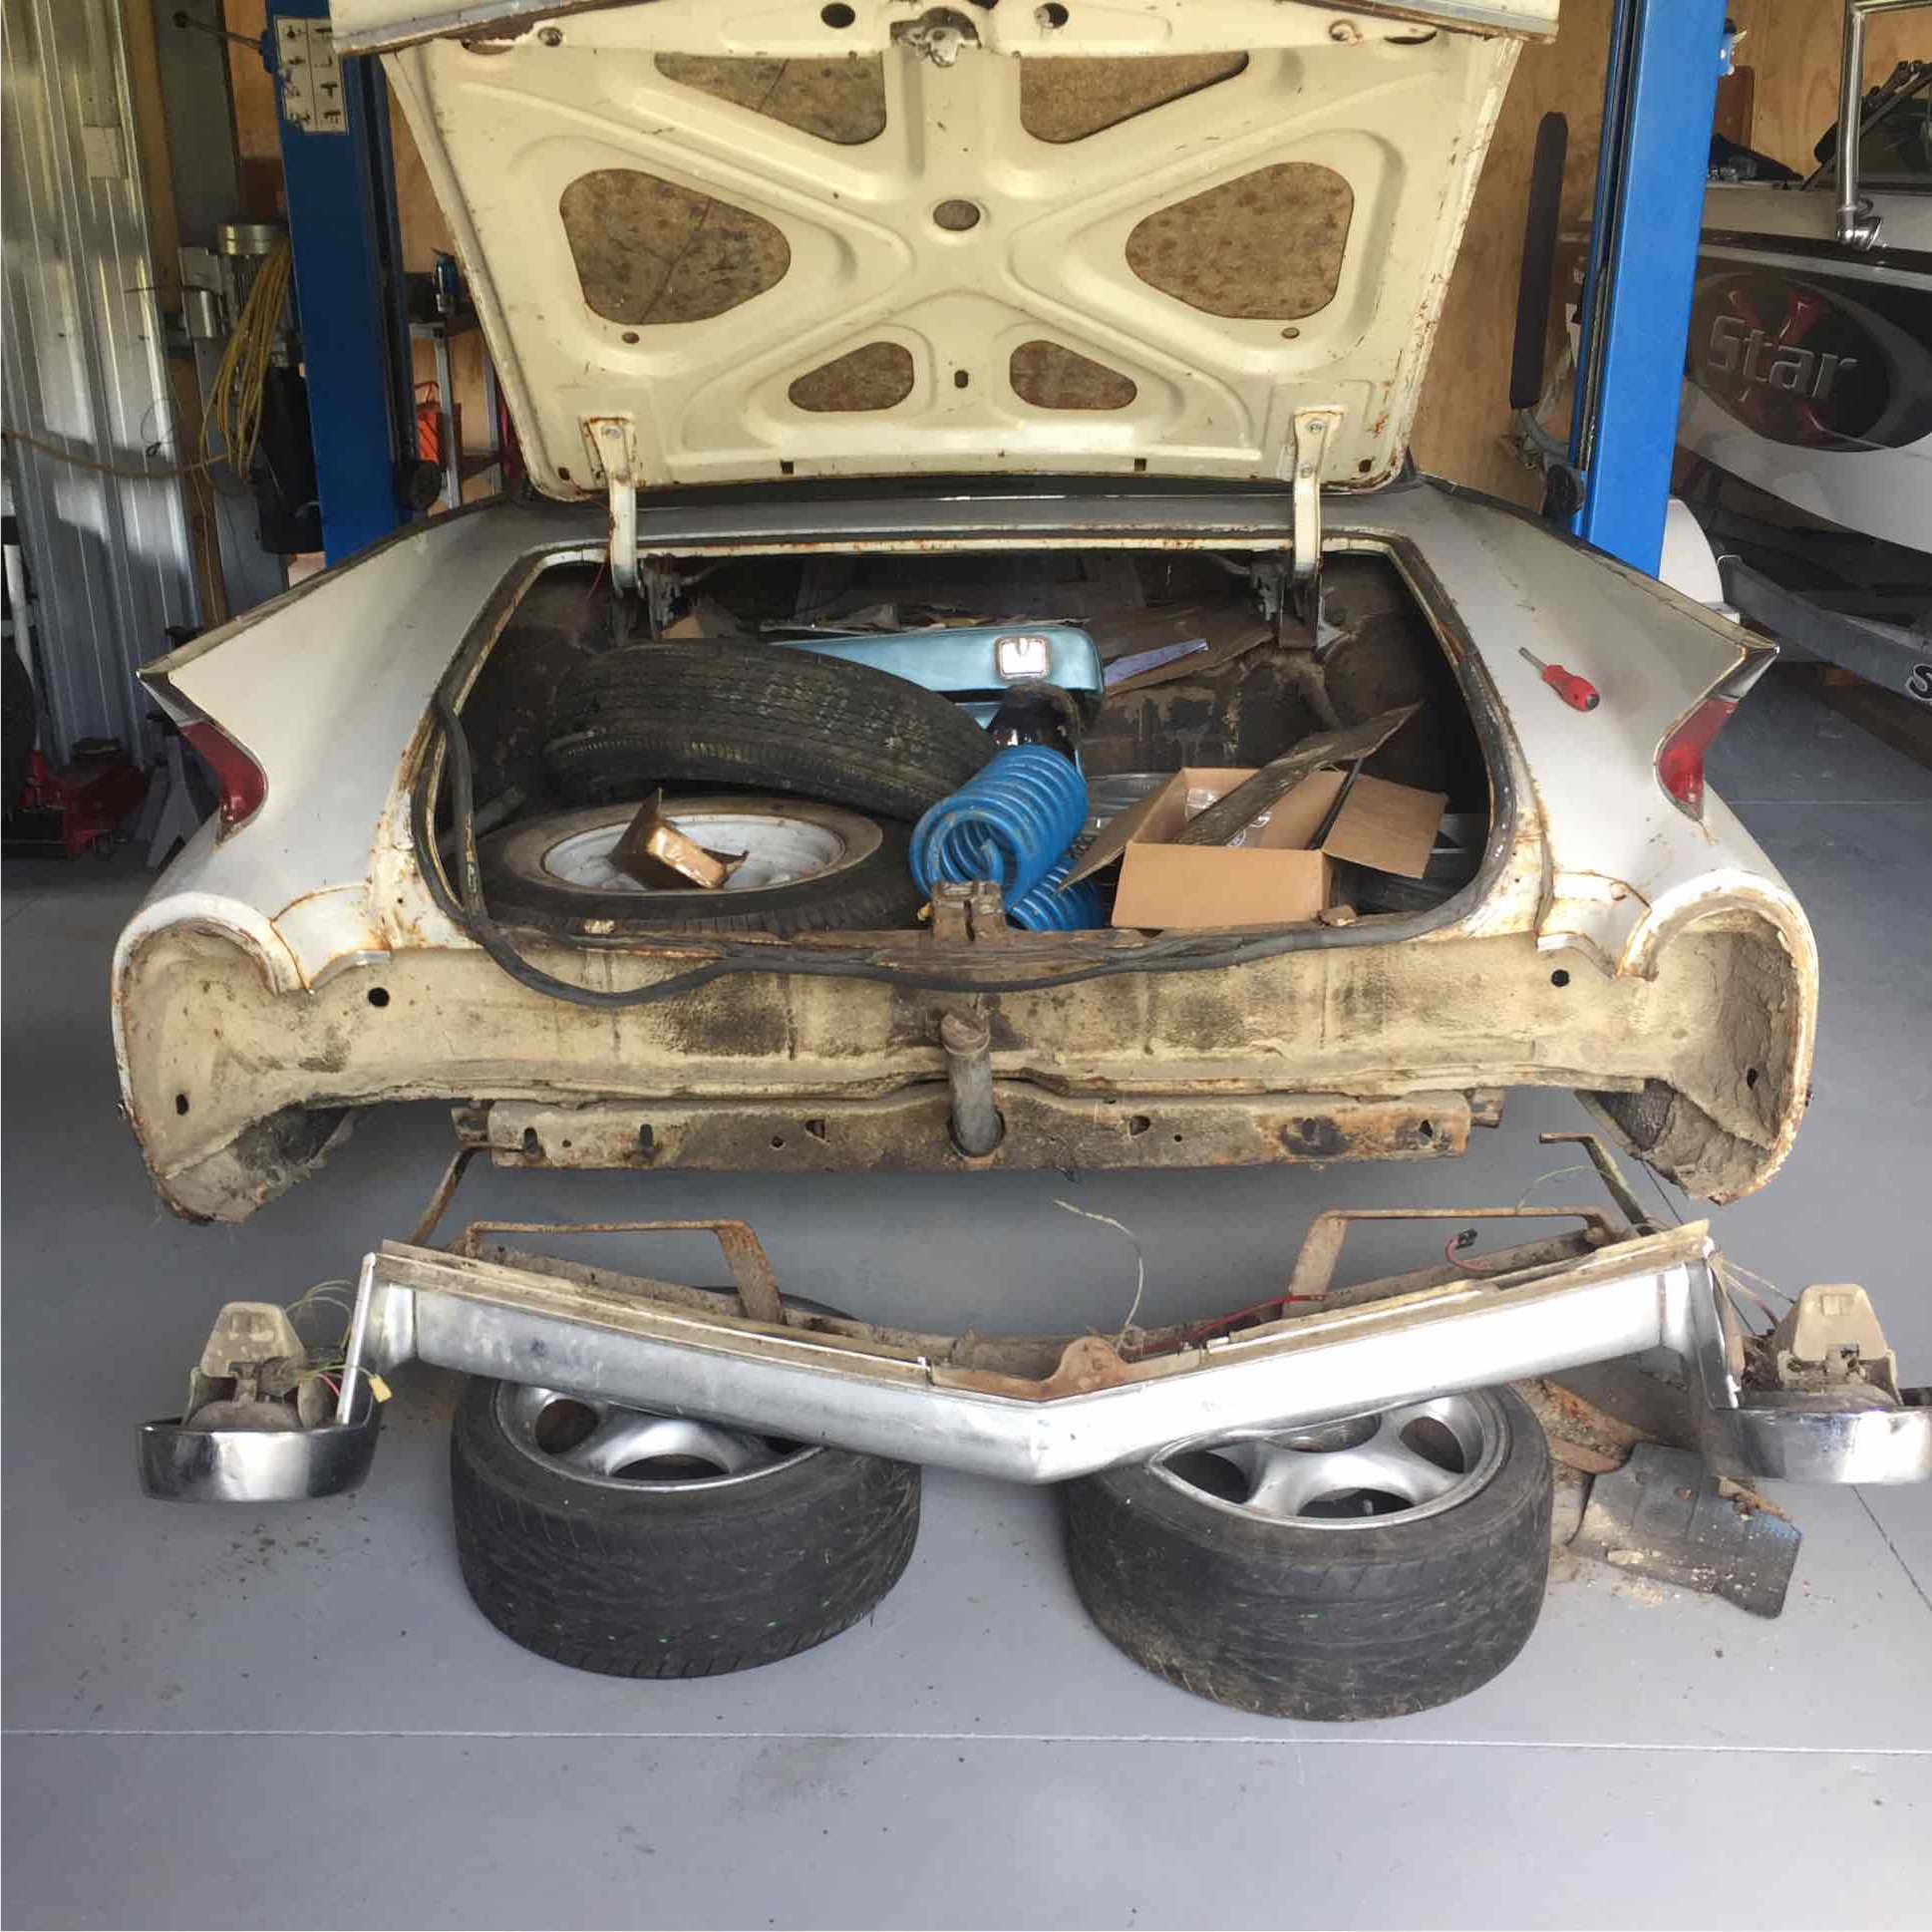
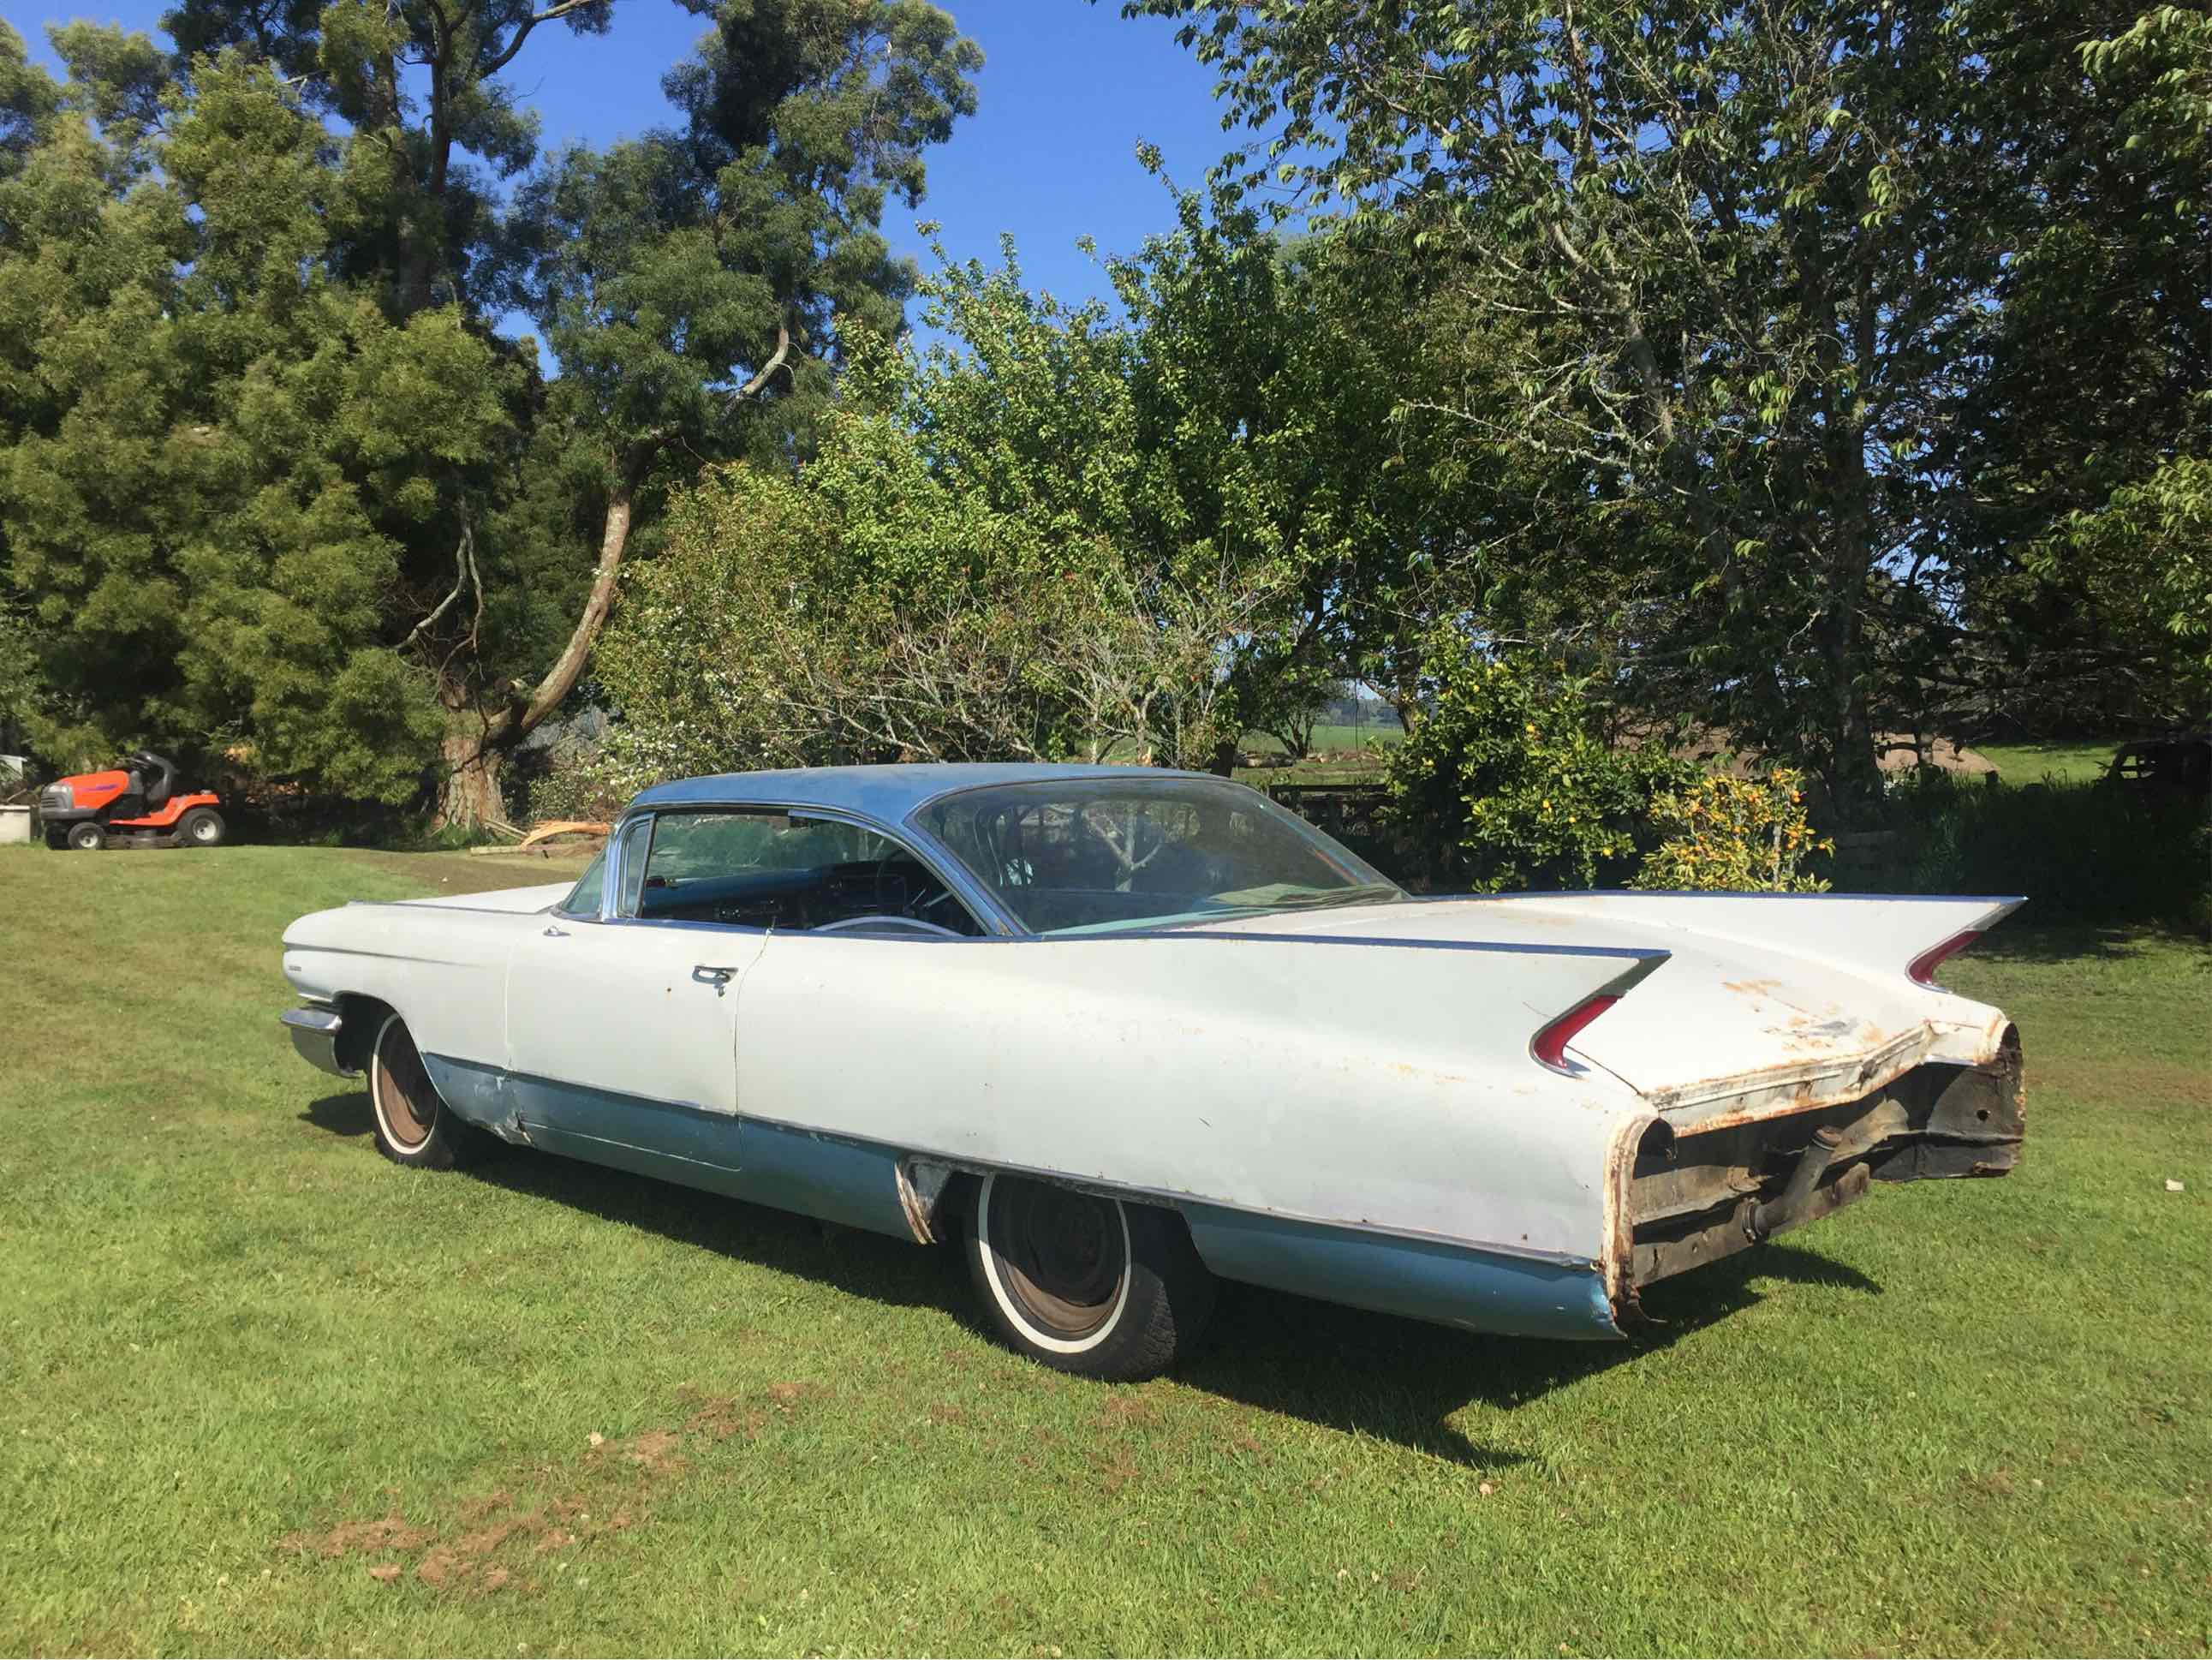
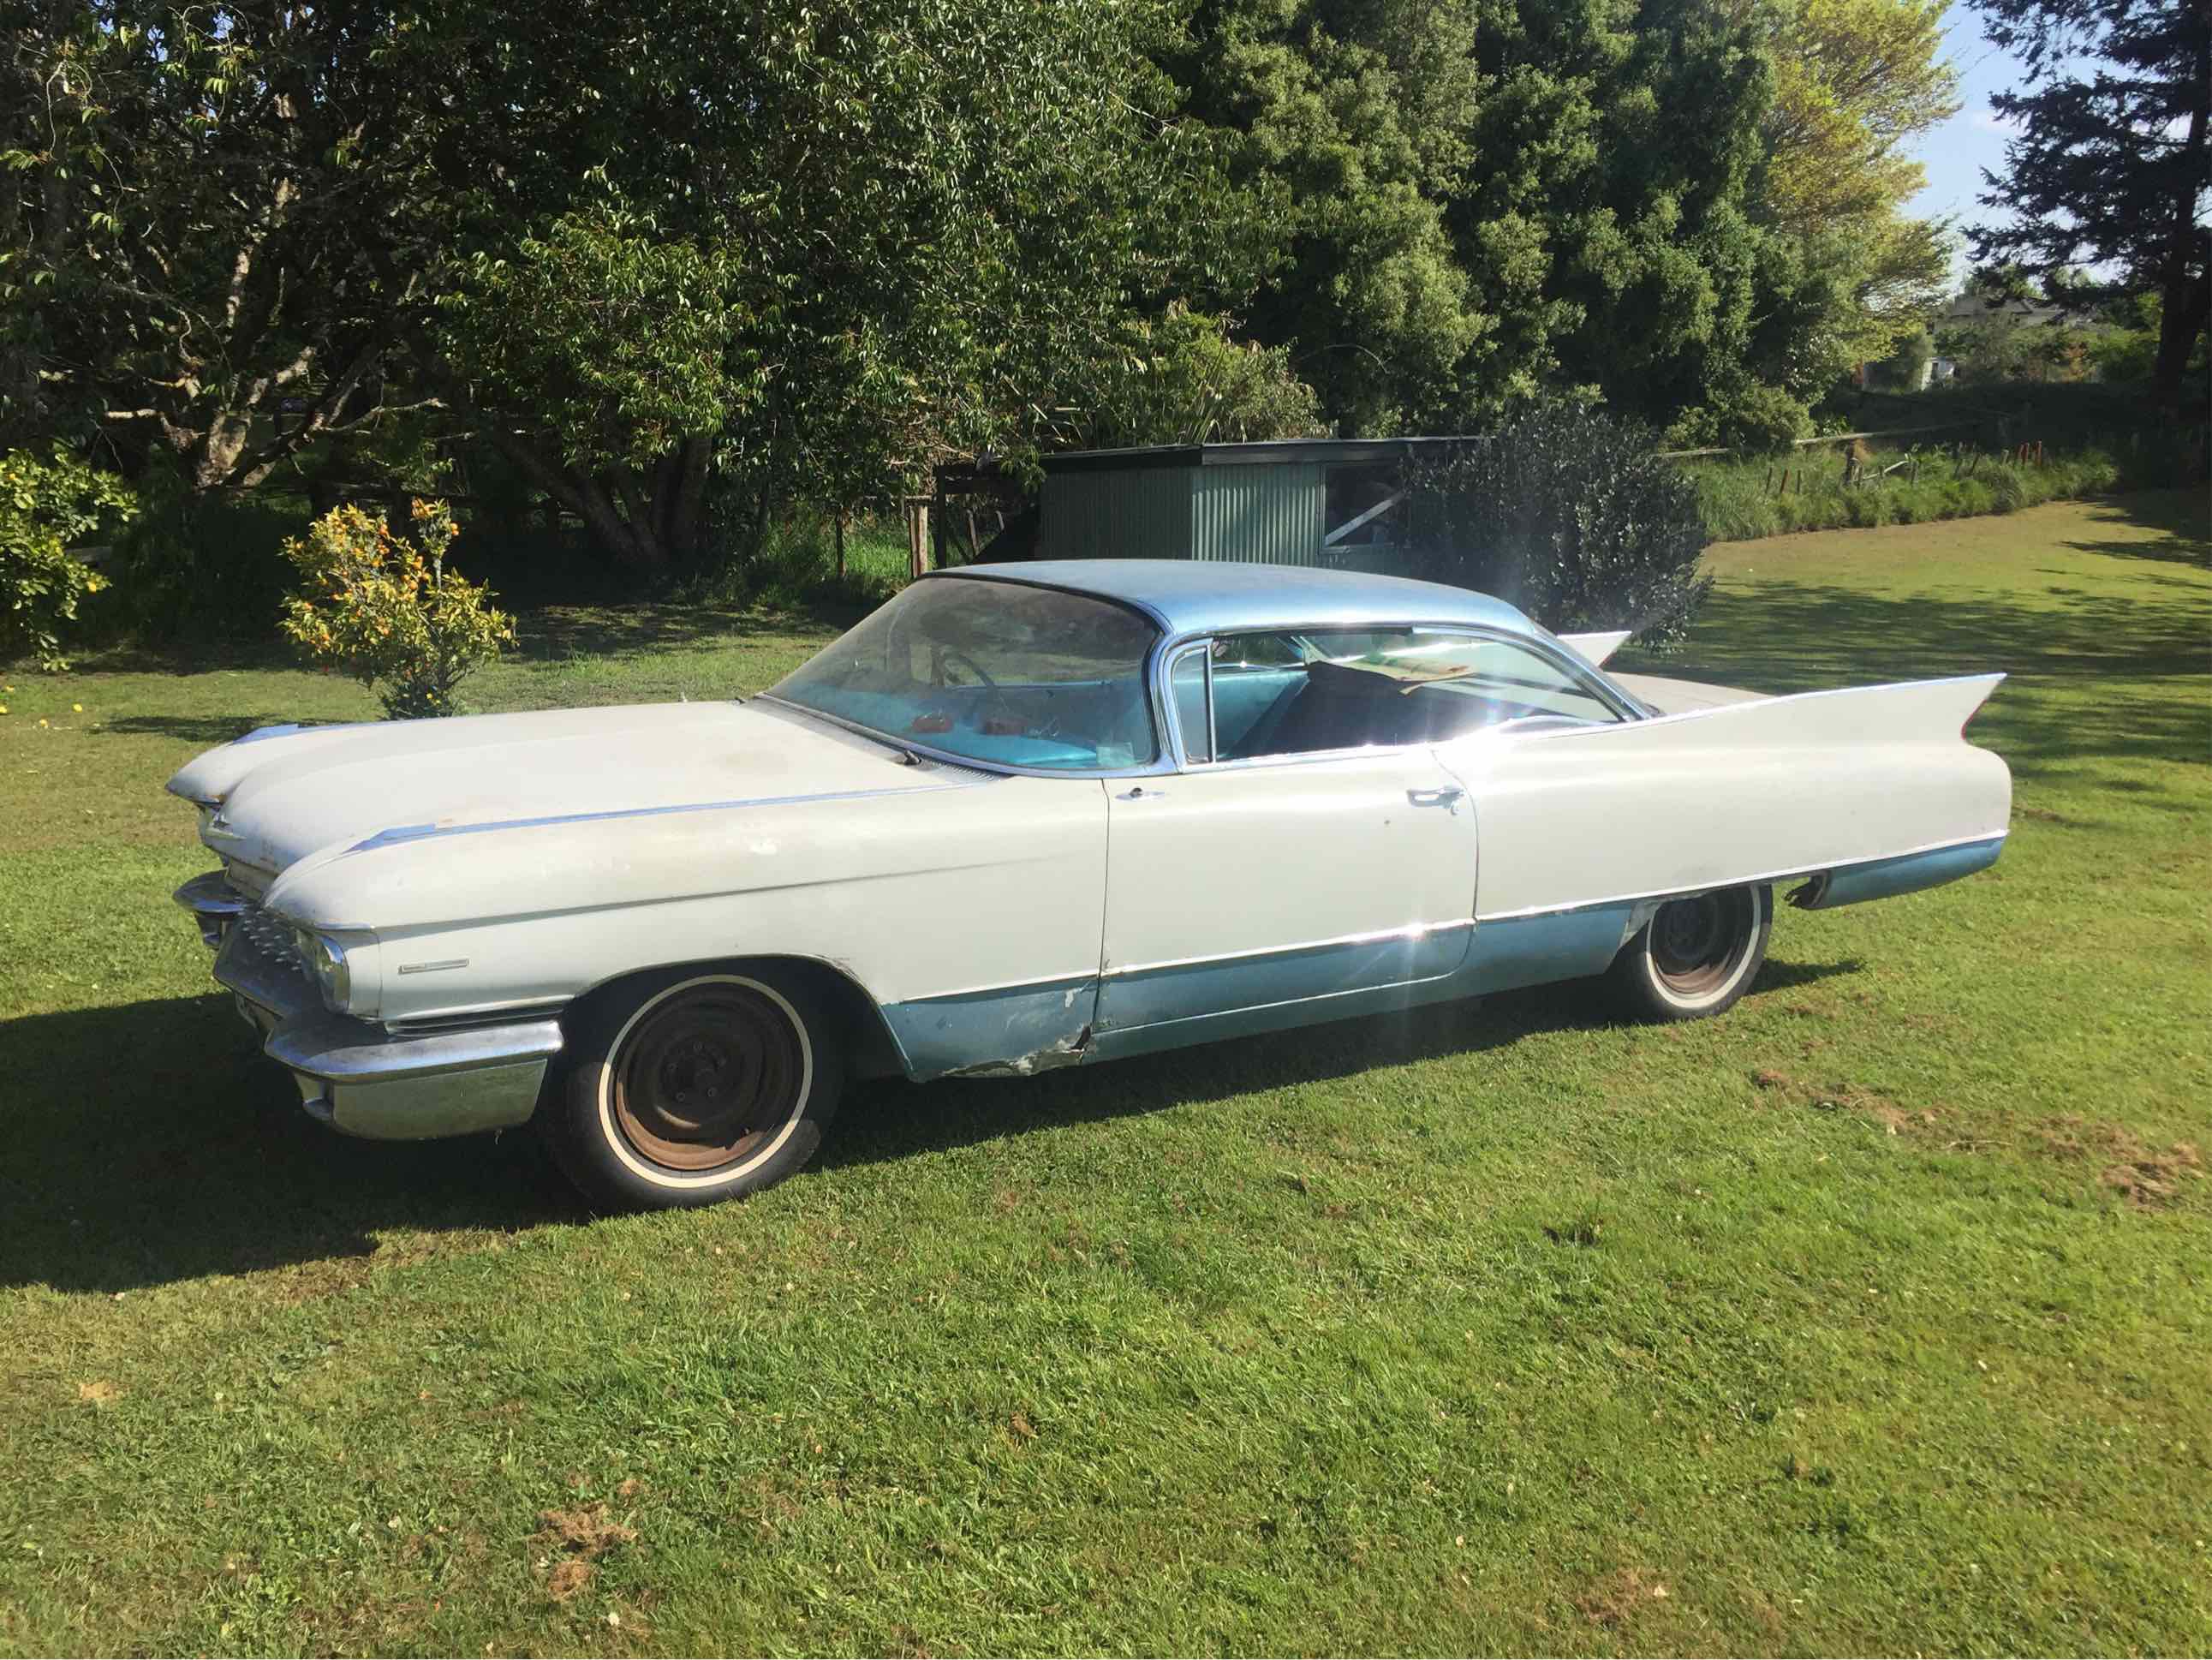
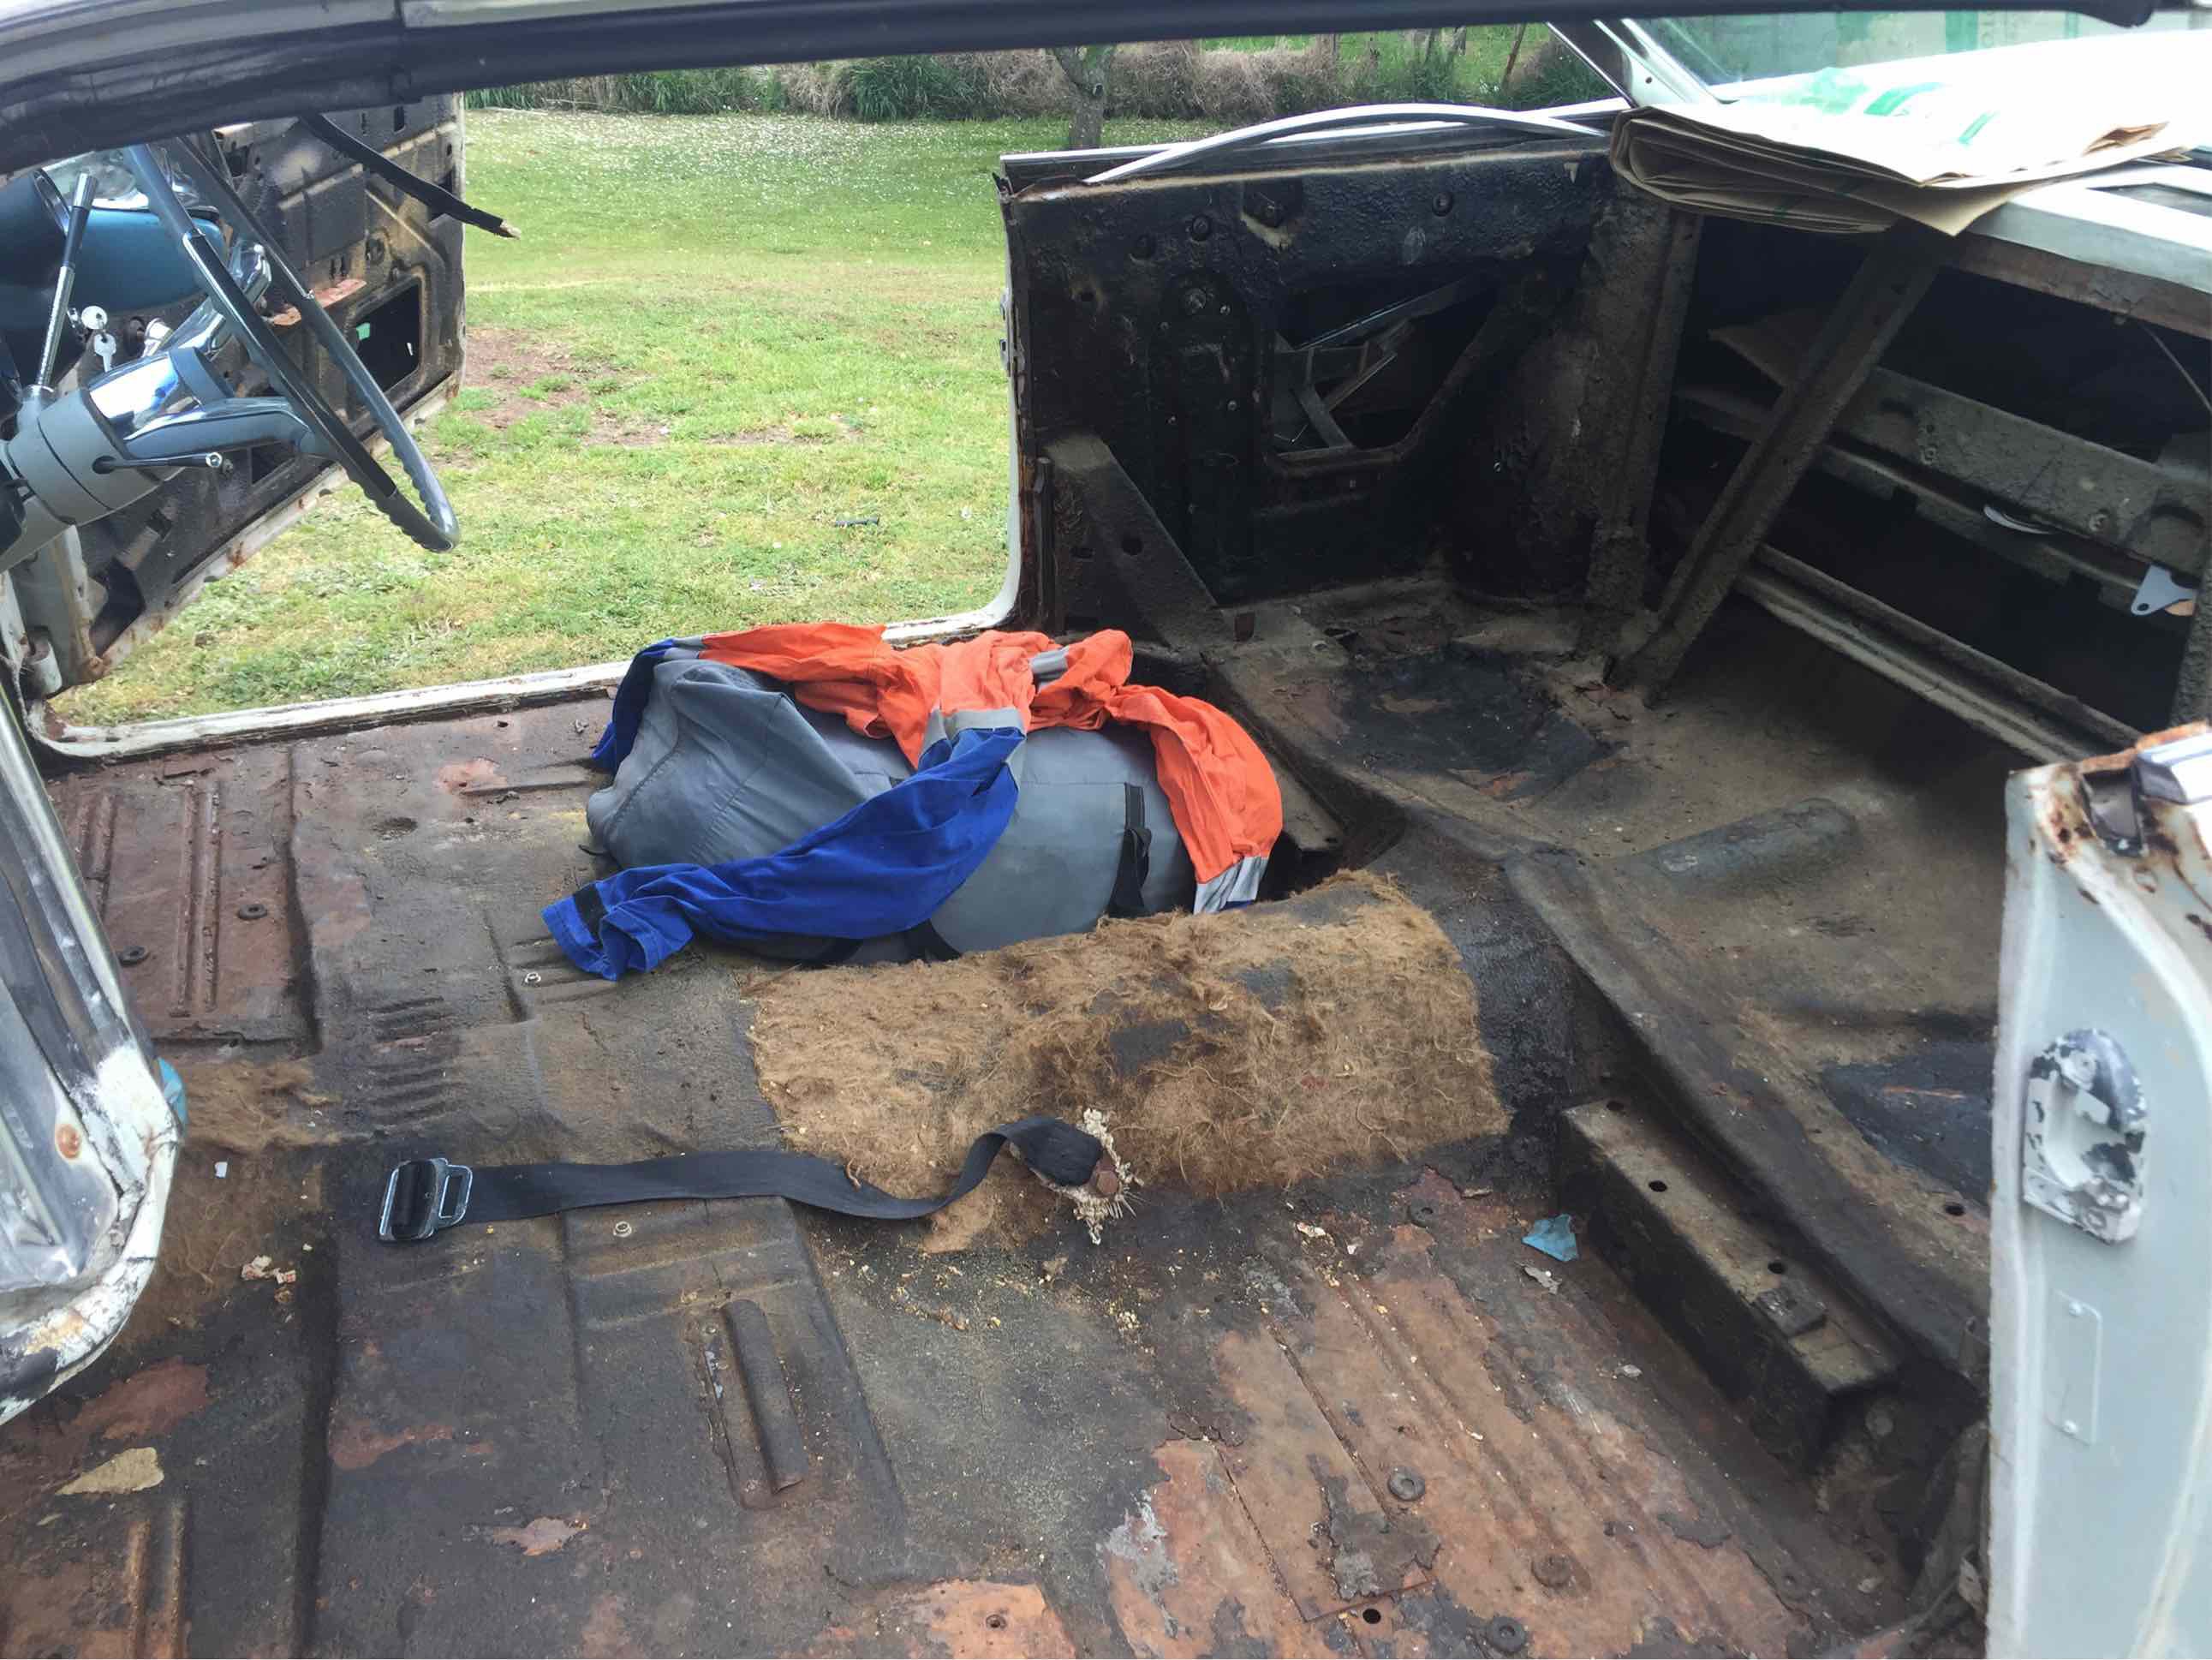
Alright, starting to see what we’re dealing with now. There’s some misery involved but nothing a washed up sparky can’t tackle? I hope Some recent pics; dropped (literally) the rear bumper, shit weighs so much the car actually raised about 2” when I removed it The old 390 under the hood seems to run alright (once I corrected the last owners attempt at getting the firing order right) it does breathe a bit but hey, it’ll work for booze trips The RHD “conversion” is pretty NZ-in-the-60s spec. Custom dash pad, fascia has just been turned upside down, brake booster is still on the left hand side etc, looks good from 10 feet though There’s 4 patches to be done in the floor. The whole body has thick textured sealant on it and for the most part it’s worked and probably the only reason this car still exists. She lived in Cambridge for 40 years or so and was daily driven a lot from what I’m told. Isn’t exactly Arizona in the Waikato So yeah anyway floor repairs are up first, then some rear quarter work....in the next episode
3 points
-
Break in time after a dyno. Came in at 21hp with a solid amount of toque. Pretty happy with that. Scooter rally in 2015 and first run on the new build. Left from Wellington with a loop around the central north island. Day 1, 50kms from start line and team mate had a good seize. Team down to 3. Came across this shop, and this old legend ( I think his name was Bill?) let us use a bunch of his tools and talked for hours. Some amazing bikes stashed in side, well worth a look if you are in Upper Hutt. Open carbs and gravel roads... Great pub though. Late night re builds. Buddy crashed on the way into Waiouru, went on to fix his bike and continue. Gentle Annie road from Waiouru to Naiper was awesome, such a fun road. Finish line in Wellington. Very exhausted after the 1600km. Stoked on how well the untested bike went! Took a while to clean all the grim off it! Fresh coat of tyre paint too More to come if you are still following...3 points
-
Now for the expensive part! All happening around 2 months before the next scooter rally. Nothing like a deadline to get stuff done... Frame stripped, some extra support welded on known weak points and then off to HPC This was the start of a lot of online shopping and spending money at HPCoatings... Also sleepless nights trying to decided on colour ways for it. I went for a strange old Alfa Romeo GTV colour called Yellow Ochre or AR112. Still a bit unsure as to why I chose this colour after all, oh well it is certainly different. Pretty sure the paint shop also tinted it a bit differently... Panels stripped ready for the paint to go down Expensive bits coming in thick and fast, new big block engine casings, fancy front shocks, digital speedo with fuel sensor, rev counter and cylinder head temp sensor, 30mm Mikuni TMX carb. Time for the engine build. I couldn't have done this with out the help of my mates. A mate Ben spent many late nights helping me out with this build and has an amazing attention to detail when it comes to building anything, especially 2strokes! Great workshop too... I went a bit overboard on this but aim was to make a fast reliable scoot. I went with a kit AFrayspeed TS1 225 kit, mild porting, high comp cylinder head, larger crank, clubman exhaust, AF touring clutch with race springs etc. Side casing going together New 52mm crank installed Parts coming back from the painter in my interesting new colour... To top off my indecisive paint choice I went with this slate blue colour for the rest of the components... Front end going together, disc brake and the new shocks Engine closed up and in the frame Glove box, long range tank, carb and rear guard going on All new cabling and electrics BGM clubman exhaust fitted Rob's bike also getting a TS1 kit and a bunch of go fast bits at the same time. I think all four from the team had their bikes in pieces at this stage First ride! Jetting not 100% but it went awesome! Off to get dyno'd shortly. Scooter rally was only a few days away. What better way to break in a new 2-stroke than 1600km at full throttle? To be continued...3 points
-
Hey Team, dug out a heap of photos of my old Lambretta project. Warning - a lot of photos and wofting on from the last 4 years or so up to present day so I will split it up into a couple of posts. First off, much like my Range Rover project I blame my parents. Dad used to have a 180SS Vespa and travel all over the South Island on it. They then got me a brand spanking new Vespa PX200 for my 21st birthday which I still own. Any how, all their fault and then my mate Rob's - who let me have a hoon on his Lambretta one lunch time. I was sold, I needed one! So much more fun to ride than the fat bottom Vespa. The hunt was one! It took me a while to find an Italian built Lambretta, most for sale are the Indian ones from the 80s. I got this 1963 Lambretta LI125 Special from a chap on the shore who built it many years ago and really liked matt black spray paint... It had a few trick bits on it and went pretty well. It had a pretty spicy Ralph Saxelby RS175 small block kit on it, ported barrel, suzi piston, snazzy AF crank, 30mm Delorto carb and a clubman exhaust. It was dyno'd around 15.5hp and a lot of fun around town but only really made power high in the rev range, not so good for long distance hoons. Any way, time for some photos. Chronological order up until present day. As I got it, naff GT badge and a lot of mat black paint. Nice Yamaha R1 shock on the rear and the old RS small block. It used a lot of gas but made a great sound. The small tank was soon swapped out for a larger long range tank in preparation for a 4 day 1600km scooter rally (race). Looking back, kind of dug this look. Tyre paint helped! Scoot all prepped for rally. We road from Auckland up to Cape Reinga in back over 4 days. Around 20ish scoots in teams of four and averaged 400kms a day. A few road side repairs and tunes along the way. Clutch cable change at the Cape Reinga 90mile beach run with open carbs... Side panels not wanting to stay on at 100clicks... Any way scoot went great over the four days. Used a heap of 2stroke oil at 4%... My first DGR ride, good fun but a really heavy race clutch and slow a ride was hard work! Next years scooter Rally on my mind. Time for face lift and the need to be faster! Time for a re build that ended up getting really out of hand and still in the process today... To be continued tomorrow...2 points
-
Cheers man yeah figured for 337.33 even if it was toast I could use it for parts for my c50 but seems to be running mint, just need to seal a few oil leaks went for a night ride and discovered the speedo didn’t light up figured since I had the cluster apart and the handle bar loose I’d chuck my old cx500 straight bars on, also remembered I had a speedo too so on that went
2 points
-
At least then you can literally put it anywhere you want in your shed.2 points
-
haven’t had to change the head on any of my rx motors once2 points
-
2 points
-
2 points
-
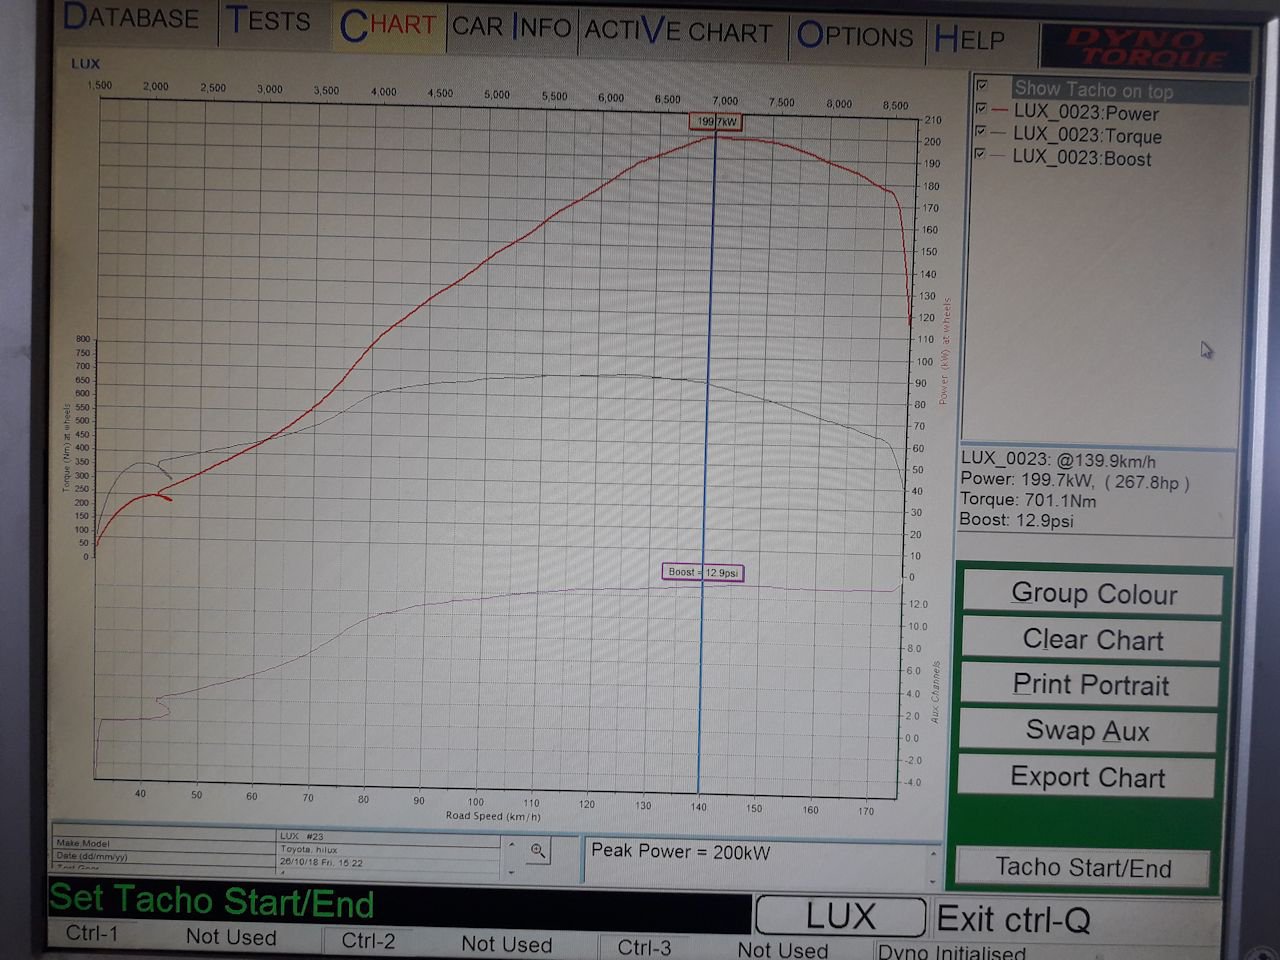
Sorted a few little issues, and played with ignition timing. Looking better now. 200kw on only 13psi
2 points
-
I took fuel and distance notes at each fuel stop and I was getting around 12 L/100KM average. On the long motorway sections I got as low as 10.5 L/100KM but then on the windy fun stuff it went up to 14 L/100KM. Note bad considering that the best I can get out of my 1500 Avenger is 13 L/100KM on the motorway and tons more on windy stuff so I am actually saving gas by putting in a V8. There you go! Doing my part for the environment "Want to save gas? Put in a V8!" Auckland to Taupo 310km 37.5l 12.1 L/100KM Taupo to levin 288km 30.39l 10.55 L/100KM Levin to Wellington 108km 16.08l 14.89 L/100KM Wellington to Nelson 152km 21.41l 14.09 L/100KM Nelson to Nelson 156km 20l 12.82 L/100KM Nelson to Nelson 146km 18l 12.33 L/100KM Nelson to levin 289km 35.42l 12.26 L/100KM Levin to taihape 143km 17.78l 12.43 L/100KM Taihape 265km 39l 14.72 L/100KM2 points
-
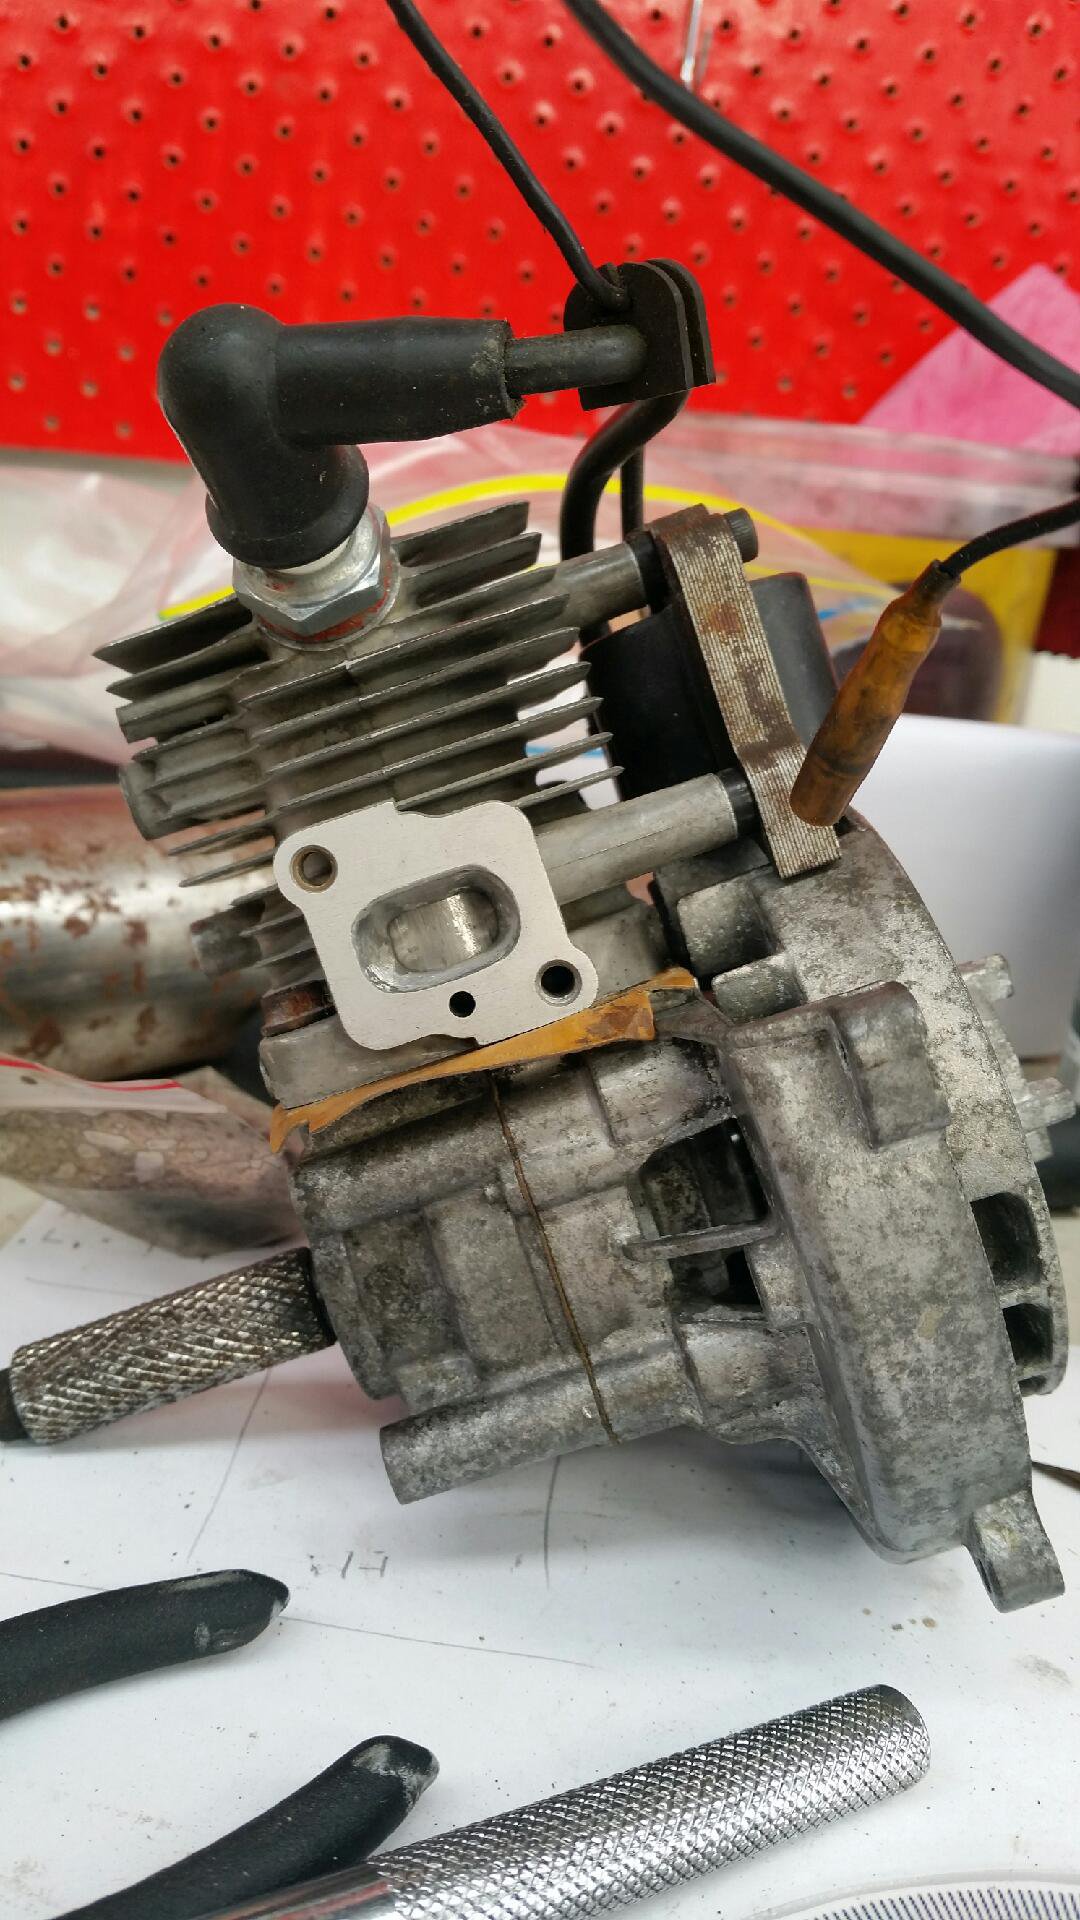
Setting the coil gap is easy. A business card provides the ideal gap...or about three sheets of thick paper. And assembled Fuck yeah! Happy as...all the maths check out with ports opening when they should, so this thing should absolutely rip!
2 points
-
Just clocked up 50 trouble free ks such modern reliable efficiency fuel needles still on full (was overful after I put a whopping 2.5L in) oh and slapped some yellow lens tint on, I think it’s growing on me
2 points
-
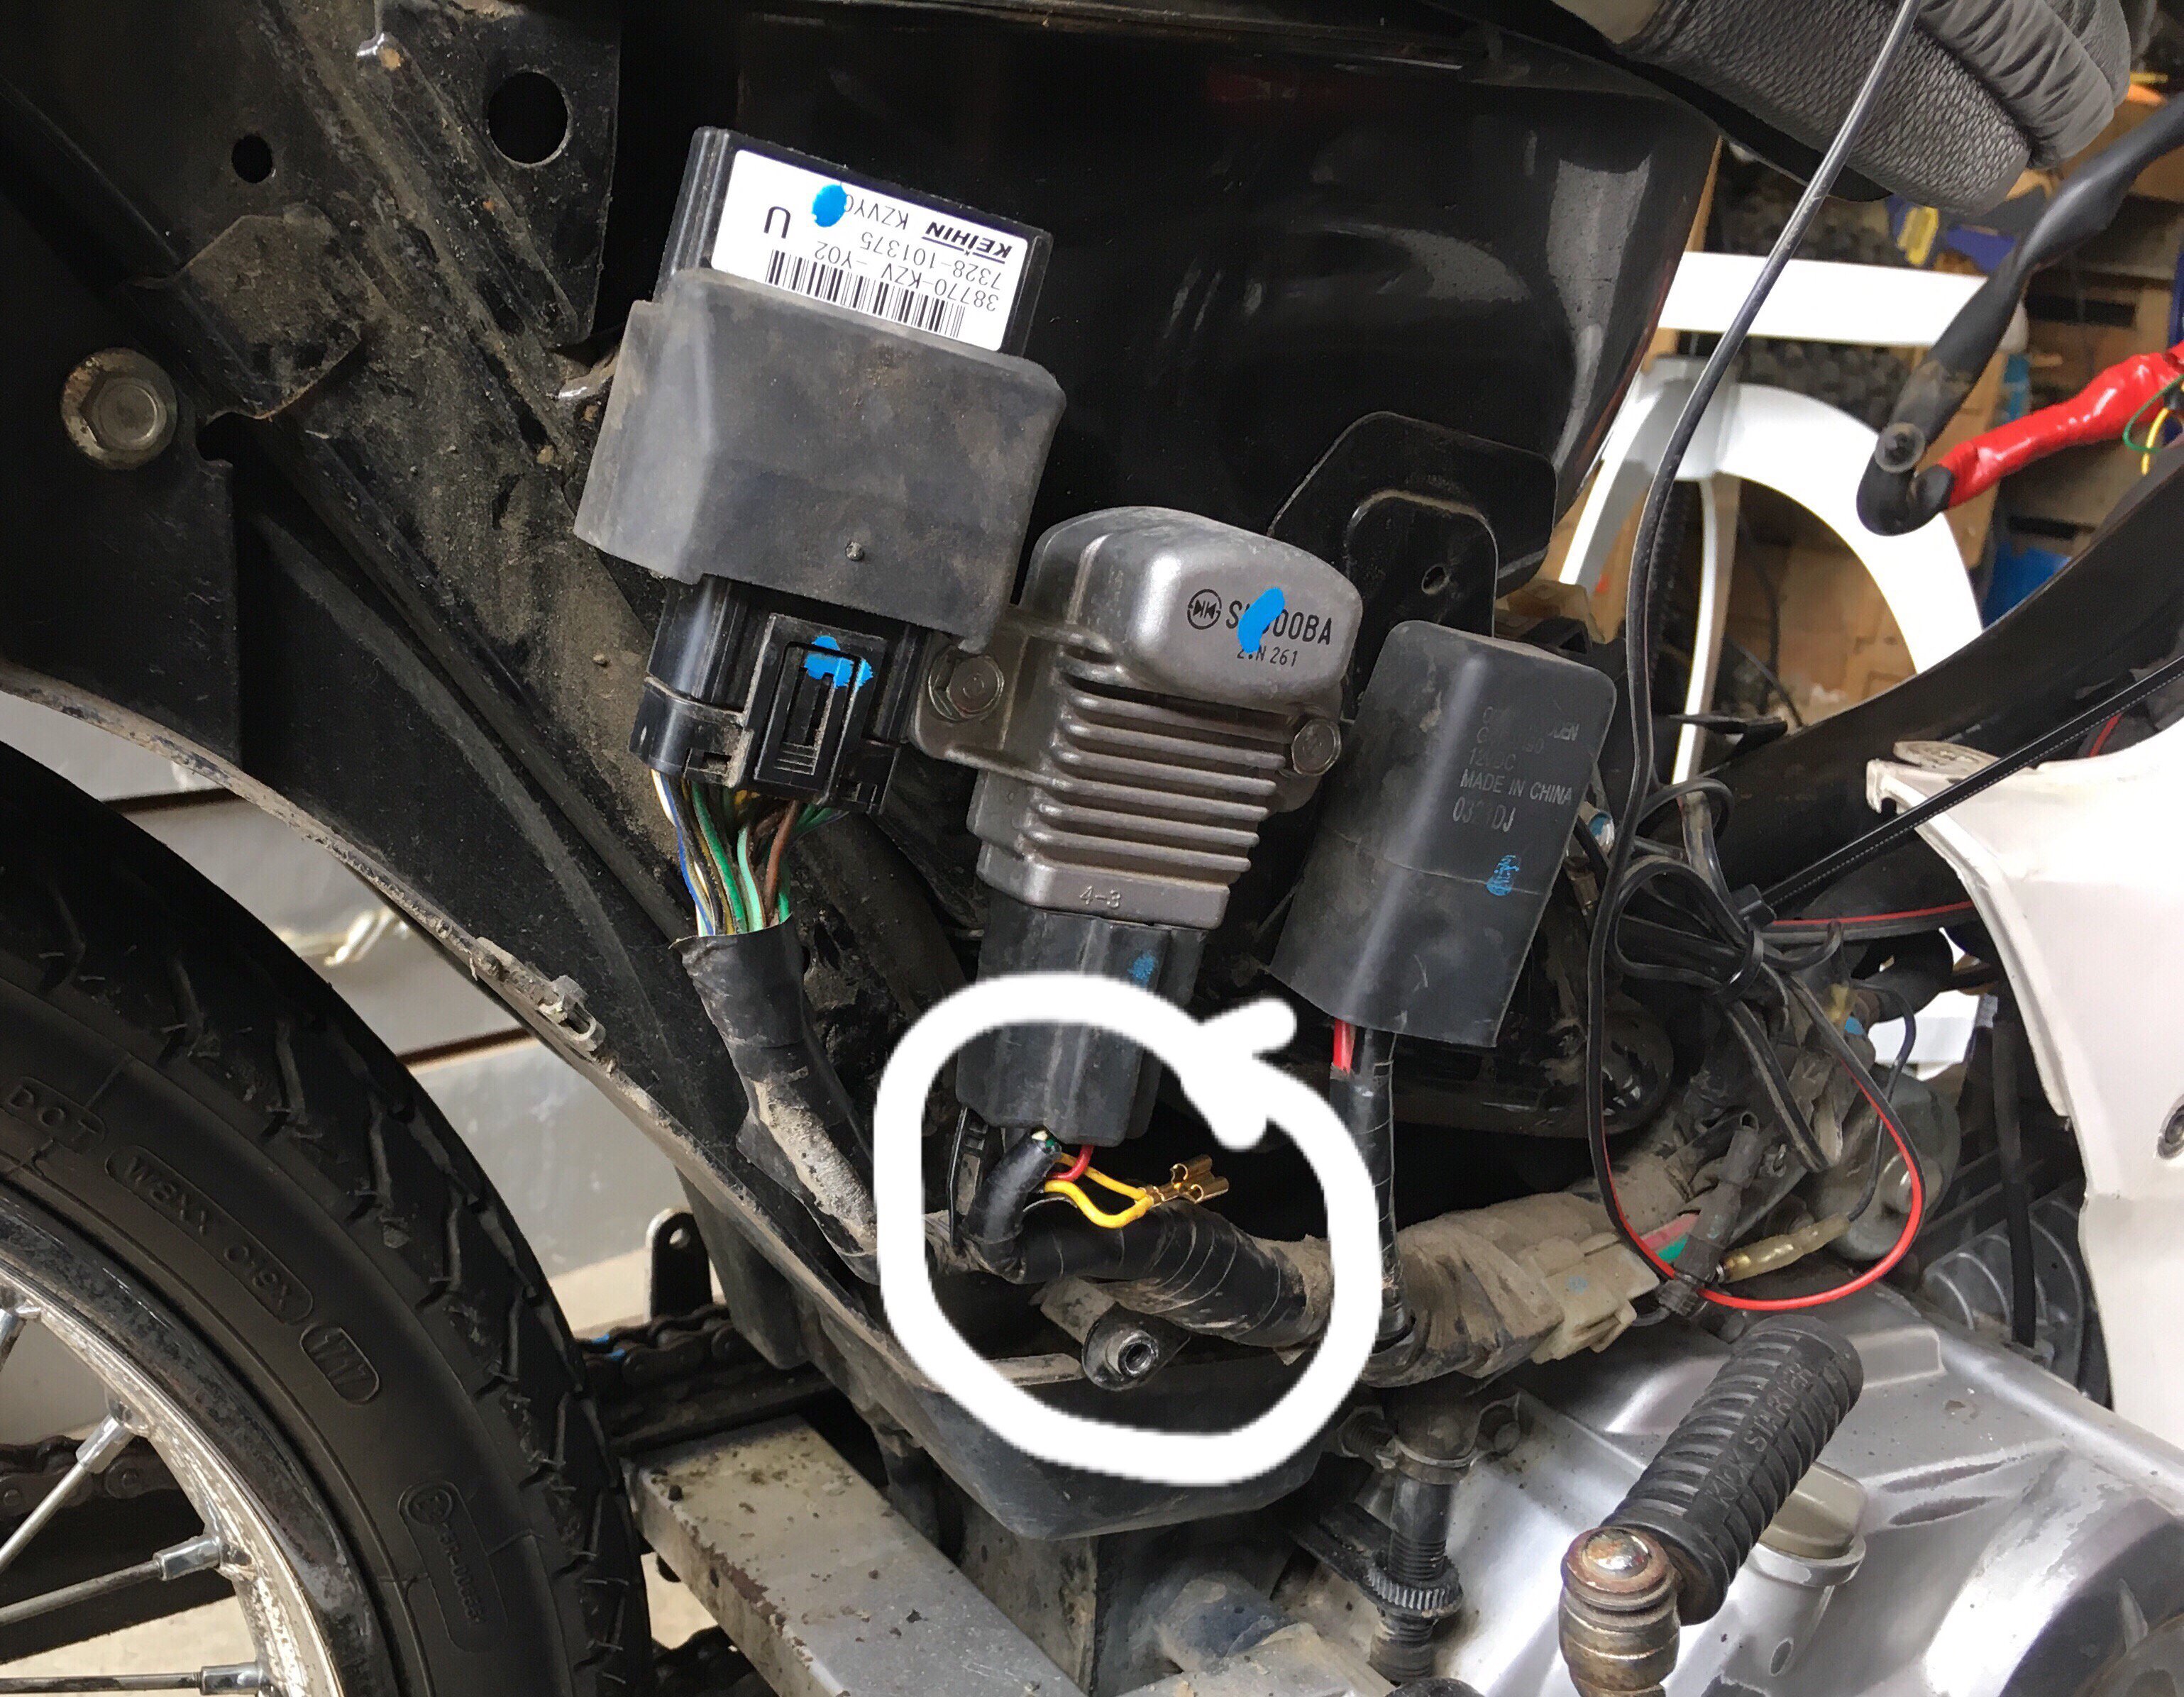
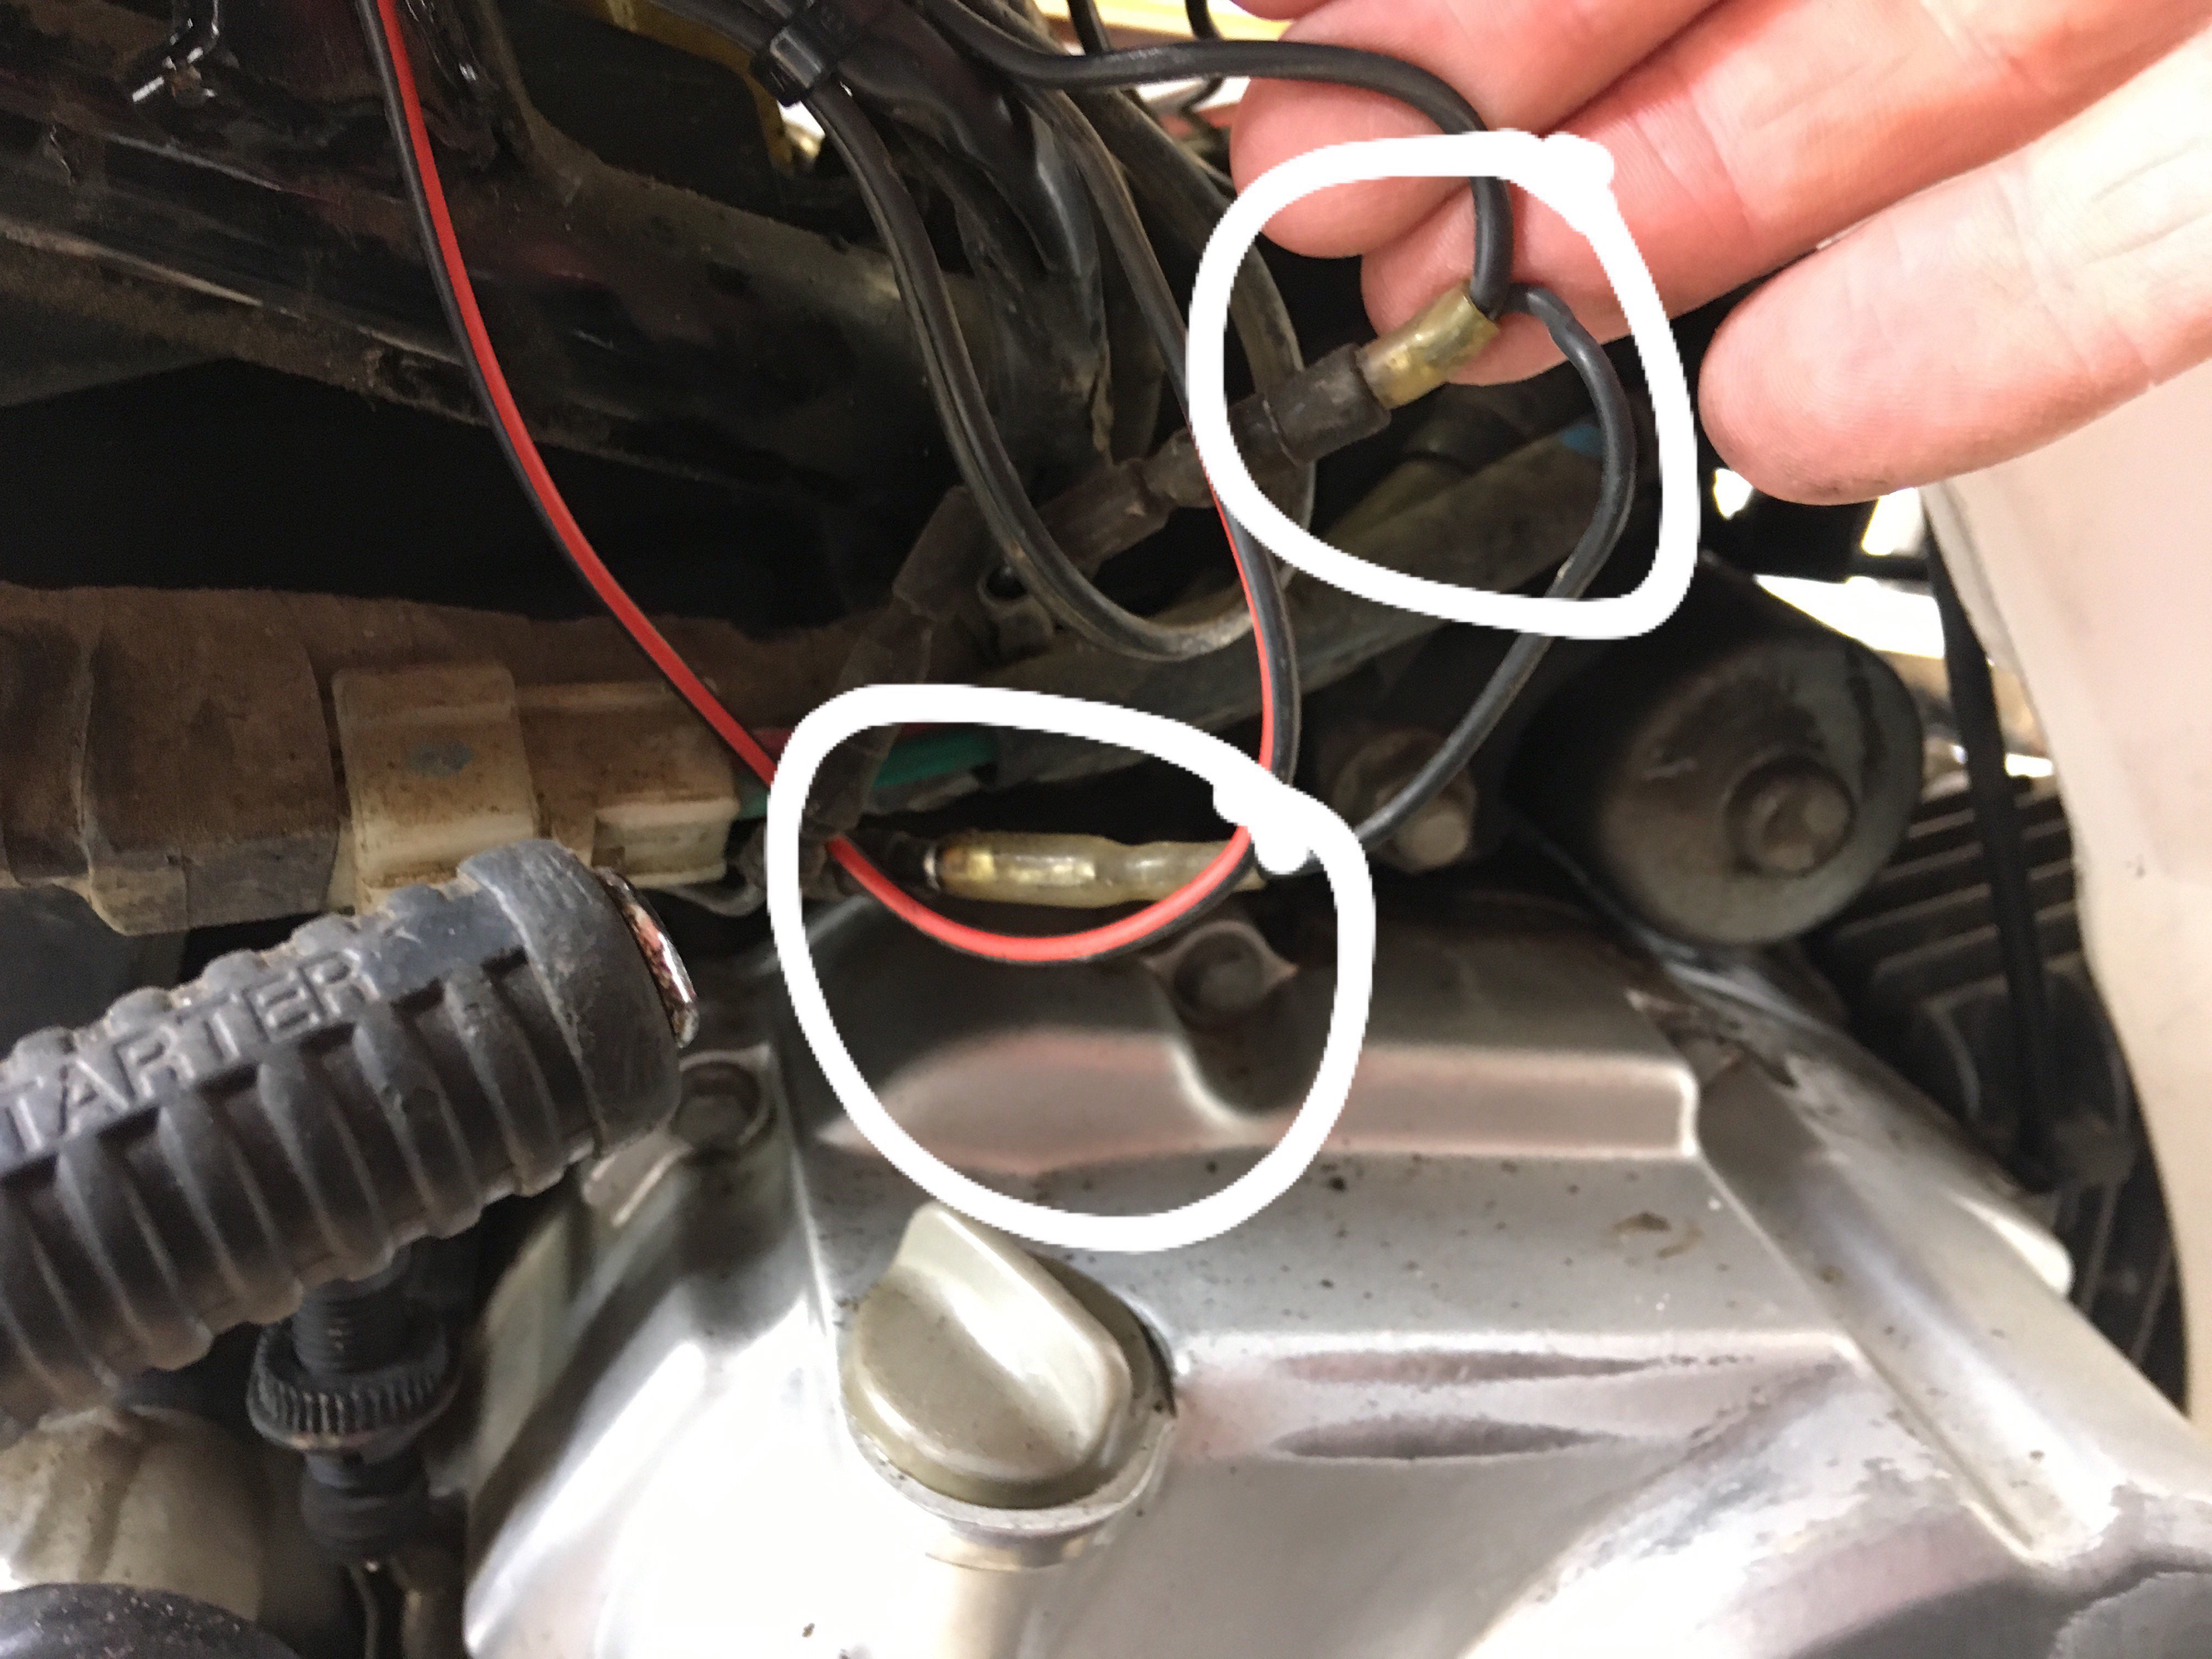
So yeah that happened, whilst looking for a wiring diagram (figured should be similar to a grom which is popular in USA and lots of english sites) found you could buy a rectifier that just puts out dc for the lights so can also run led lights I stumbled across this http://tripageled.com/store/index.php?route=product/product&product_id=182 so just need a jumper wire to the DC brake circuit seems easy and free there was a aux switch already wired into the brake circuit for a extra taillight that I assume they used on the post bag that would of been on the back so chopped that and put into the headlight wire from the rectifier hey presto I now have switchable headlights and working led display
1 point
-
Yep. Take the top off and have a look. If your gonna do that may as well give it a brakleen rebuild. Get an exloded diagram. Watch a carb dissembly video. Take notes/photos and be clean and organised. No extra parts on reassembly = win1 point
-
Soooo I bought an Exciting Daily! A 1996 Gravel Express I didnt go shopping for it just came up in a group at the right price at the right time November is FLAT NATS 18' NZ's Subby Nationals (like OS Nats but single make) so bought it for that & intend to sell in December Girls car most its life, Auto & lots little things to tidy up / improve on Full trackday @ manfeild (like out the extension) which I've never done on the 24th & other events on the 25th Looking forward to it! plus it does wagon duties too, not bad for a Sport hatch1 point
-
Toyota ILAM were adamant that our CVT contains a magic lifetime fluid. I guess the lifetime of a typical vehicle is 10 years, before they want you to buy a new one. So correct in that respect.1 point
-
I'm pretty sure they are interchangeable. What's the jetting in the 32/36 because they were used on much larger engines. I ran a 28/36 DCD with too large jets and it was terrible but tune it down smaller and it was fine. You can also take a SPI injection unit off a Falcon and it pretty much bolts up too (with some slight slotting) In case you want to run EFI with massive injectors at 0.05% duty cycle1 point
-
Today is going fantastic. Squash is now registered which is great. Inspector just had a look at it/found chassis number and we had van sharns. I threw together the wiring on the melody and chucked the biggest jets in the carb and it fired up. Took it for a squirt up the drive and it goes well mega rich but that's easy to fix. Time for a nap and some lunch and I can smash everything else out.1 point
-
Lord of the flies rules will reign surpreme1 point
-
[Now with added two stroke] So was trying really hard not to get distracted, but heard of a bike run coming up and since the TT won't be ready, dragged this old girl out of the shed, a '74 TC100. Had it for years, just been sitting there unused and thought it'd be a hoot to ride. Bloody thing burst into life on third kick... And a test run round the block indicated some issues, wouldn't get past 72kph, and was hesitant on acceleration, so ripped into a cleanup/service. Plug was wrong type but was a good colour... Pulled oil tank and carb. Discovered original tool bag and spare fuses all there... Drained watery old trans oil and put fresh stuff in... Carb looked bloody clean, but disassembled, cleaned and blew out passages anyway. Discovered there was no spring on the pilot screw and the whole carb was a bit loose on the intake. Bodged a spring, set float level and reassembled/installed... And also cleaned/lubed the throttle and choke cables, and cleaned old oil tank. Hope to take for another run this weekend to see if it goes any better...1 point
-
My dad had a 4 door 59 Cadillac Fleetwood. It was dark blue with a bit of patina (before patina was cool) and everyone always asked him when he was going to paint it pink. Also those 390 motors when rebuilt put out some serious torque. And sound lush with the right exhaust. I have fond memories of sitting at 100km and hour on the motorway and some young guys over took us in a FXGT on the motor way doing a bout 120km. Dad just floored it and flew past them at 100 miles an hour. They fucking lol’d and looked a bit surprised. Ah, the memories.1 point
-
In the meantime, I've been working on the repairs to the driver's door. You may remember this mess: While I'm all for the sleek look of no mirrors, perhaps this wasn't the best way to go about it. I started with a rough cut out from a paper template. Using a series of small folds in the brake, I formed it to match the shape on my dad's untouched MkI before trimming to fit. I got it tacked in place with minimal warping. Then very slowly I fully welded it. I'm no panel beater but I gave it a tickle up as best I could and I'm fairly happy with where I've got it. It's quite clearly miles better than where it was. There's still one or two patches that I want to make up but I'm happy with the progress. I'm working on something totally different at the moment but I'll wait until I get a bit more done before I show anything. Cheers.1 point
-
talk about going from bad to much, much, much, much worse........................1 point
-
It was only a matter of time...
1 point
-
If only there was a motor choice that didn’t have valves. Or Pistons....1 point
-
1 point
-
I “accidentally” bid on this whoops, on the upside I now have a working bike turners description stated frontal damage once I got it OS Gc freighted from Auckland I put the handle bars back to the correct position soldered/plastic melted the damaged fairing took it for a hoon (started first pop! Pretty good for 69 thousand kms on the clock) took for wof and surprisingly got a clean sheet! Stoked
1 point
-
@lowlife this thing eats bump stop, am on the third set already, with new bump stops the chassis sits about 20mm off the ground, when they fuck out it lays the front of the chassis on the ground Cheers @Dirty_Safari, yeah I love the little things on this shape aye. Like the little rear duckbill spoiler thing, saw a pillar less 4 door impala a while back and the pillar less doesn’t have it, so it’s like a bonus point for going post sedan haha1 point
-
Nah mate it's a v6 buck the trend and Chuck Buick badges on it.
1 point


This leaderboard is set to Auckland/GMT+12:00