
Leaderboard


Popular Content
Showing content with the highest reputation on 05/16/18 in all areas
-
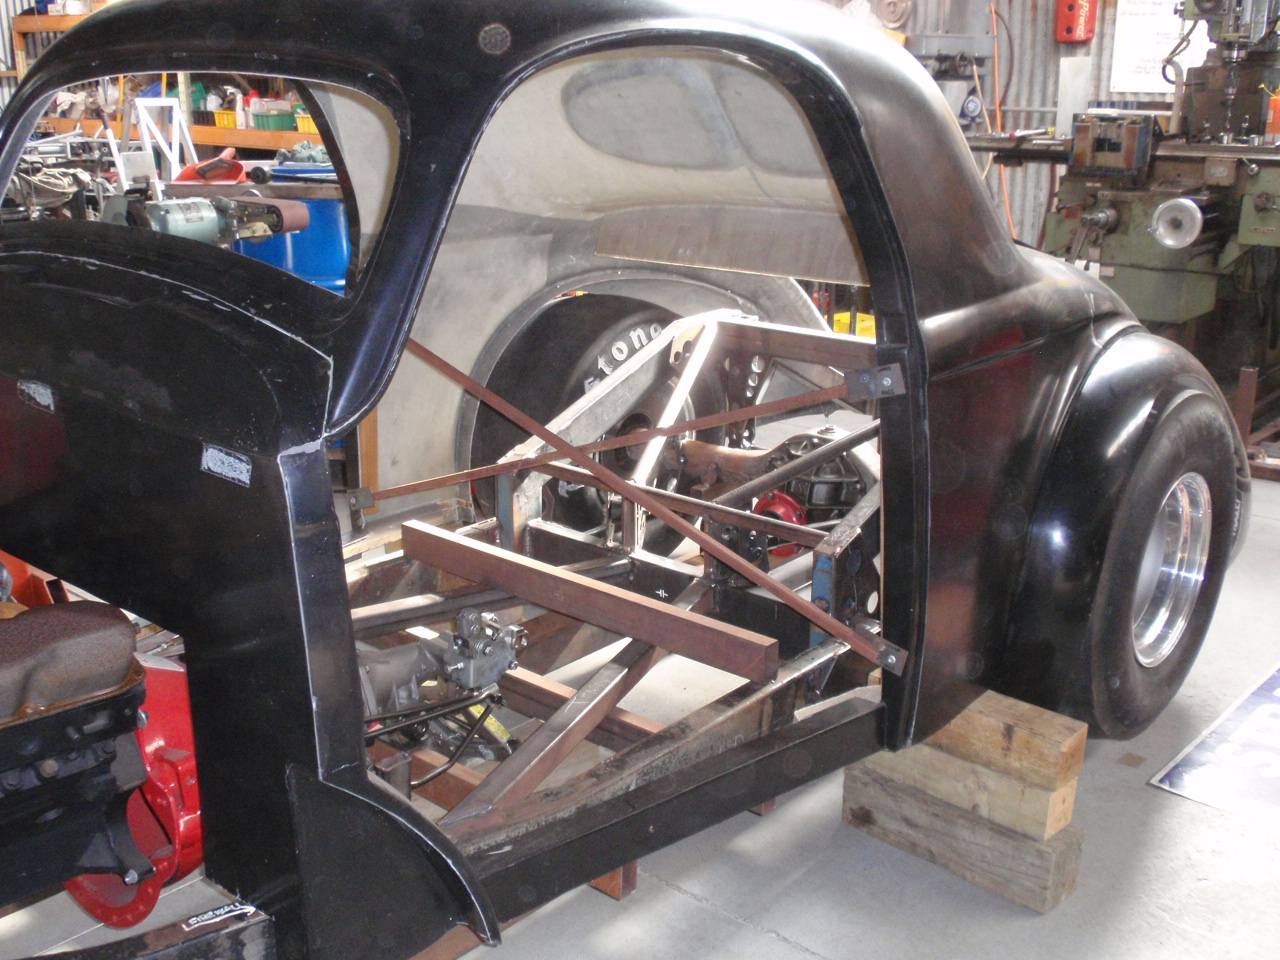
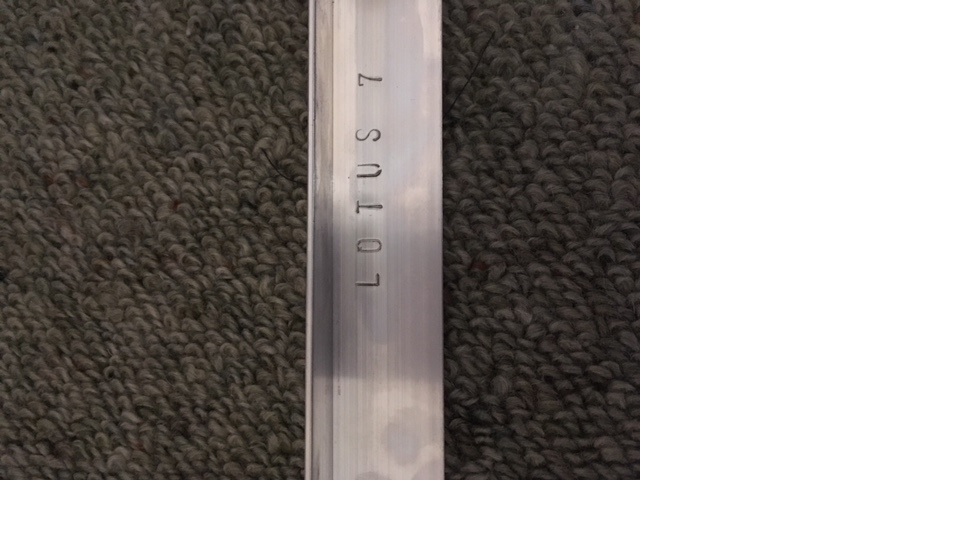
Part 1 of the Smith Spider story.... In 1964 Dennis Smith started building a single seat race car. It created lots of interest in the race car community at the time as it was powered by a 1.5l 2 stroke outboard motor. He finished it in 1966 and it had its first outing in October. He hadn't completed the gearshift mechanism yet so put it in third and bump started it, the session went well and he was quite surprised by the wheel spin in top gear! On the third outing, Guy Fawkes day 1966, the car was all finished and running well. He was timed at 130mph down the main straight at Pukekohe. The car was very light and only weighed 220kgs. Unfortunately a strong cross wind picked up and Dennis lost it down the straight a few laps later. 2 years of building and 1 month finished and 3 outings before the accident. He spent the next 6 months in hospital recovering from the crash and when he got out started building the Spider mk2 sports car. He used the engine and gearbox from the single seater and started fresh with the rest of it. A couple of pics I have found of the single seater The car looking very smart at Pukekohe 1966 It was named the Spider because of the narrow body with suspension parts sticking out looking like Spiders legs... A great pic of Dennis building the car in 1965 Last weeked I went around to vist Dennis. He said he had the remains of the single seater and a few other bits I would be interested in under his house, this is what we pulled out.... Had to lay it out I gave the tub a good scrub, it's quite bent! Dennis's legs were not in a good way after this The original wheels are in very good condition and survived the crash unscathed. The wheels and the tub are all that's left from Mk1, as well as the engine and gearbox in the sports car. We also found the box full of all the wooden patterns he made for the cars including the full set of wheel patterns. Laid all out to have a good look at them, They are all beautifully made just like the rest of the car Rear upright pattern for the sports car Front upright for the single seater Brake caliper pattern And the collection of wheel patterns Very happy to get this stuff, its great to keep it all together for the history of the car Update on the sports car this weekend14 points
-
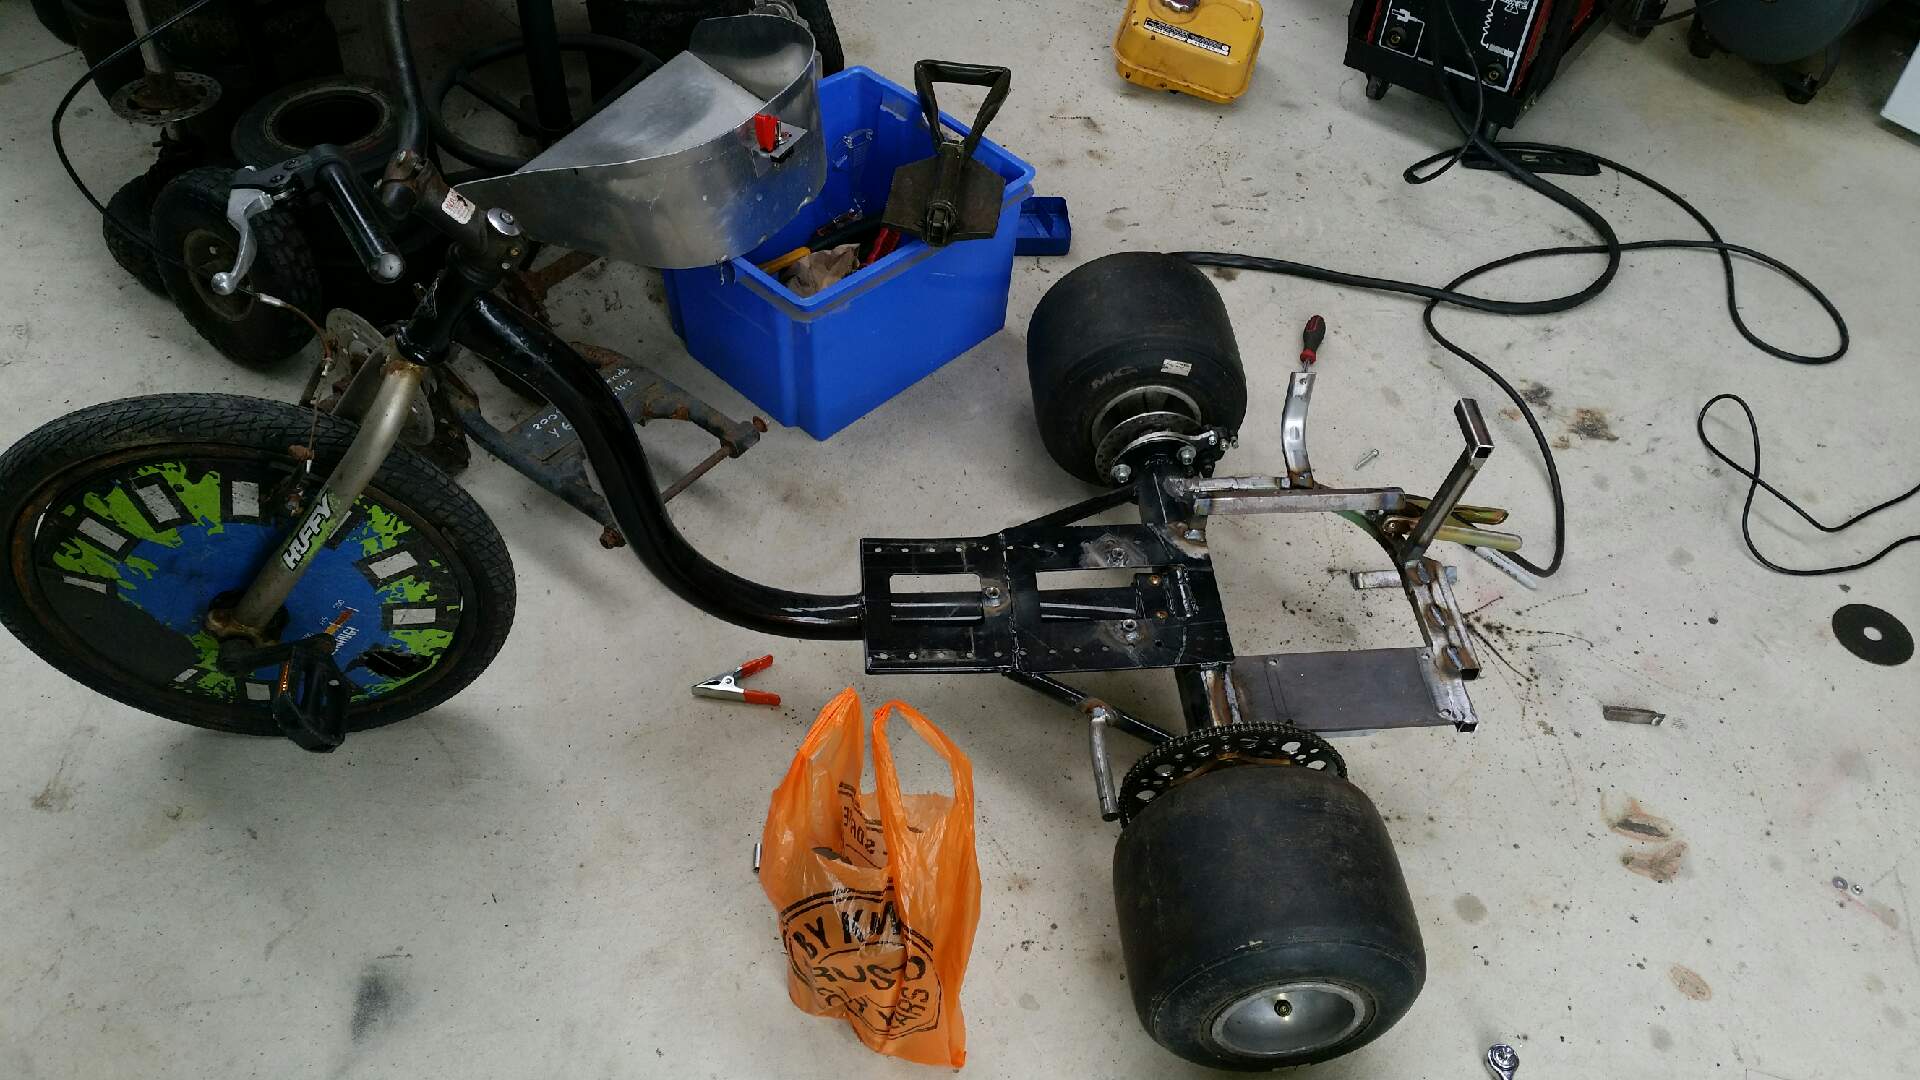
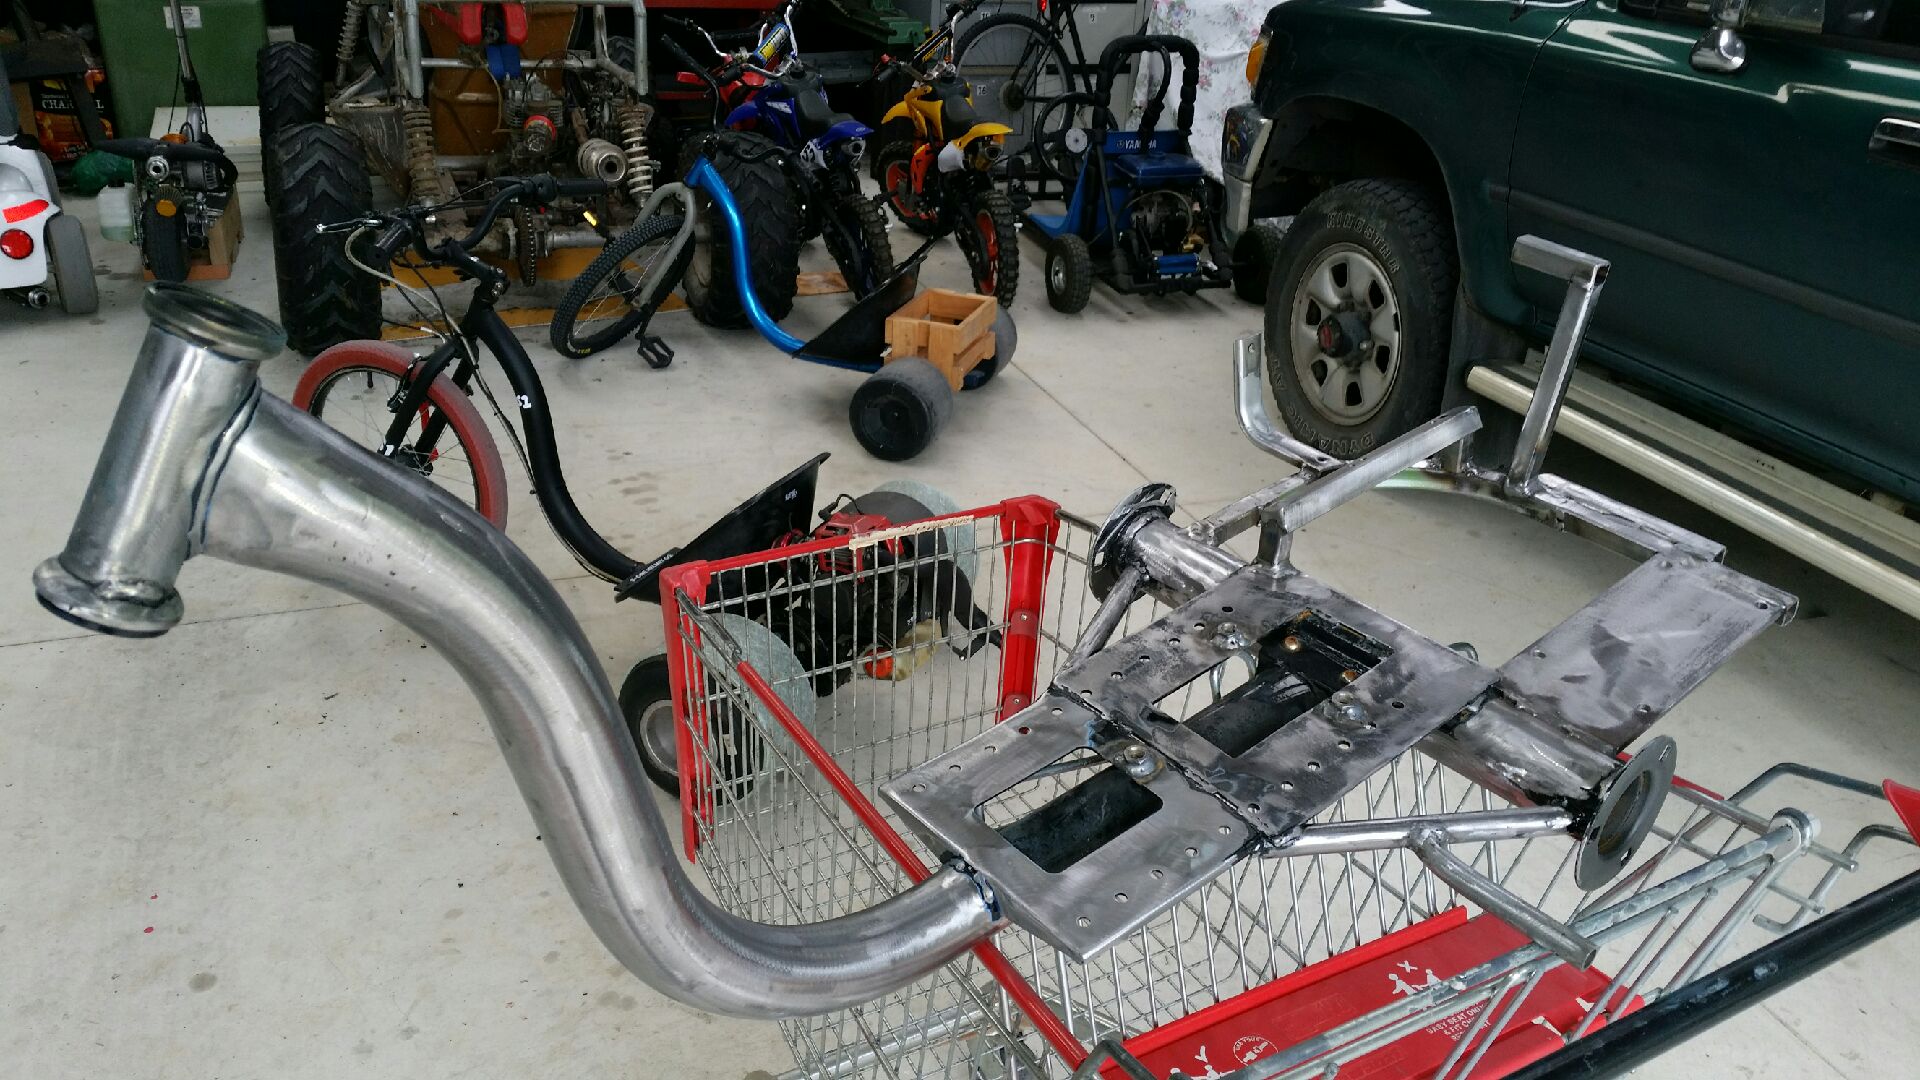
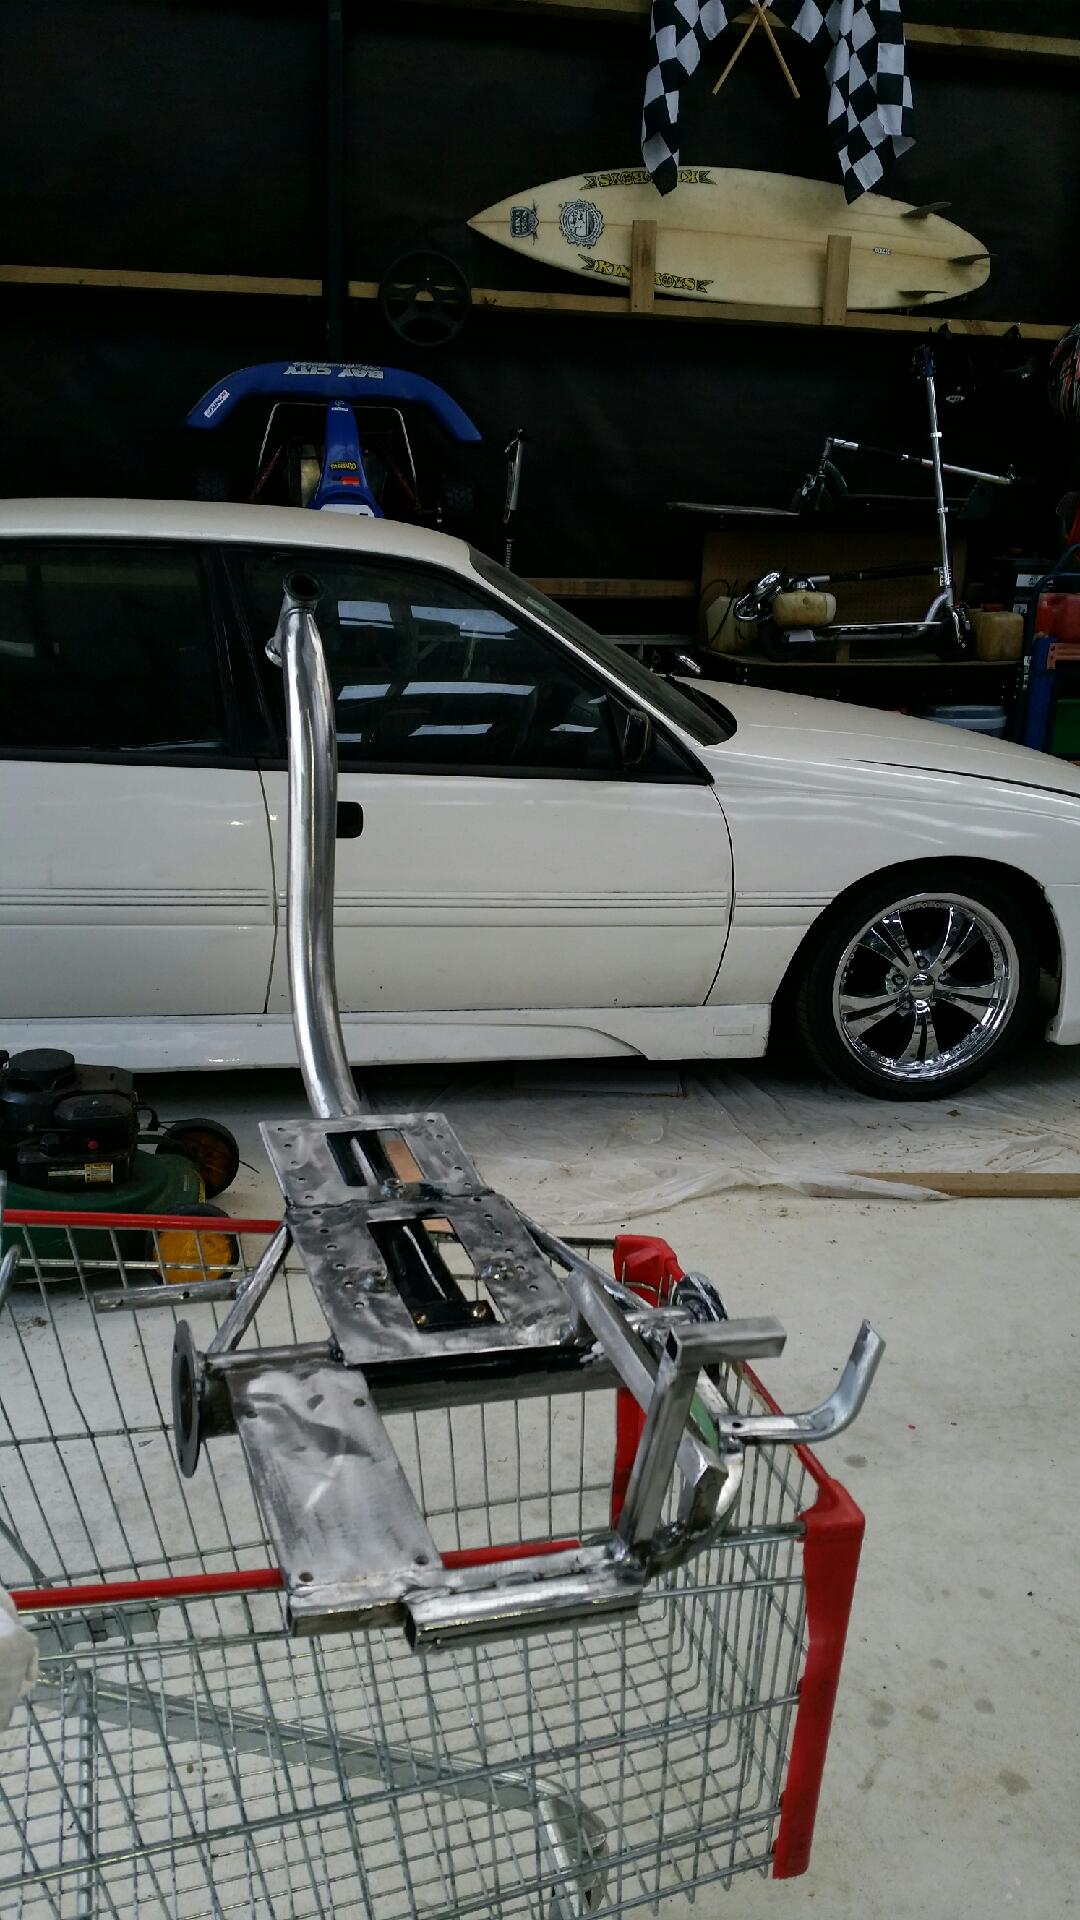
Praying Mantis Finished these. Hope those AE92 Calipers fit without hitting the top arm. Initial look/see indicates it might be close. Big bum. Everything seems to fit ok but its early daze, lol! Fuck, I hope I don't come across something that fucking daze's me out, haha! Ride the Serpent Reached milestone. Now need to do some measuring, visualizing and planning re how to go about future stages. Happy with stuff though.
 6 points
 -
The first thing on the list of tidy ups, was to fix the gash in the left side skirt. I wipped it off, plastic welded it back together, applied a tiny bit of bog, and had it painted. The paint actually came out pretty good, amazingly. Only a little thang, but makes Larry much less self conscious. I also did an oil + filter change, nice and easy to do, and I'm glad I get oil cheap, because 10 litres of full synthetic 5w30 ain't cheap. I changed the plugs too, also not cheap, and took awhile, not a ton of room around the side of the engine. Next I need to fix a door card issue which annoys my OCD. Thanks for dropping in. Regards, VG.5 points
-
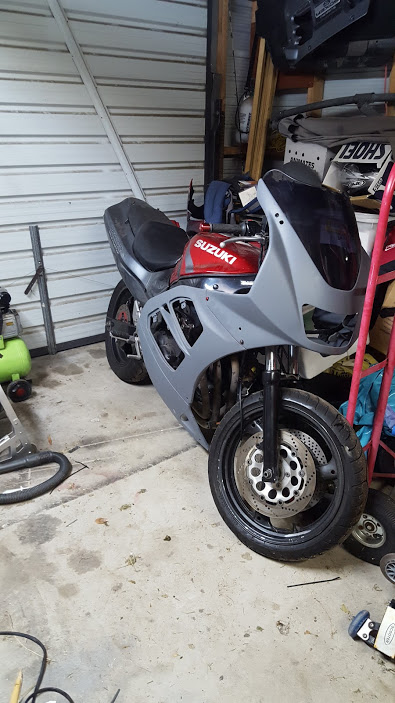
I bodged up some removable baffling today, just need something to get through a revin. I found an old towbar bike rack offcut was a perfect fit in the exhaust so I cut off a couple slices, welded a cap and a nut on then drilled some holes. After that it just needed a hole in each muffler for the bolt that holds them in but not before jamming some mesh and stainless pot scrubbers in Sounds good After that I sorted something I also had to do on my first RS. One sunny Saturday afternoon in mid to late 90's Totara Park I caught up with some mates at the fish and chip shop. We were talking shit and having a feed when one guys older brother turned up, straight away he was all "can I have a hoon on your bike", I said na but he kept on and eventually I relented cos he was pretty cool and would buy us beer. He hopped on and eventually got it started, then the fucking dweeb immediately loses control after dumping the clutch and bins it on a patch of grass. The bike was ok, the only damage was a bent rear brake lever which I got straightened. The lever on the new bike was also bent but nowhere as bad, just a tweak that meant it was touching the engine sidecover. A bit of heat with the torch and good as gold, not perfect but more importantly, not touching.3 points
-
Now with added straightness! Being winter and all I think this is how things are going to progress for the next few months. Spend sunny weekends ripping things out, then dank, dark weeknights fixing them up inside beside the fire.
3 points
-
Hey hey. So off the back of last years successful, inaugural event, lets start some discussion around who's up for round 2. I'll update this 1st post as more details eventuate. Looking at the 9th-10th-11th of November 2018 Approx 600km spread over 3 days. Laid back and casual trundle about some sparsely populated, scenic parts of our country. Route shouldn't have much traffic for 90% of it. All welcome, small and silly bikes welcomer, welcomest? I would strongly recommend something that can do maybe >60 on the flat and pull up hills OK, there are a few climbs, the guys on 50's were fine, but couldn't stop moving for long or would fall behind. Please keep in mind, the areas we're heading aren't prepared for a hoard of hungry people wanting prompt service, so hold off on ordering any complex meals during the day, or carry some light snacks if possible. Please ensure your bike is as dialed in as you can achieve, 200km from nowhere is not the place to be experimenting. Please carry a spare tube in your size and some basic tools/sparkplugs etc, or share with someone that has the same. This year we are going to ask $20 from each rider, to cover fuel for the ute, lunch for the driver, anything weird that might pop up and hopefully some snags or something. Last year I think we had 14 riders which exceeded all expectations. Sing out with any queries and so on. Friday 9th - Whakatane-Gisborne ~220km - Aim for 8am leaving by 9. Starting from Whakatane/Ohope-ish and heading through Opotiki before heading inland on the ex WRC Motu stage. A few hours of windy gravel climb in the morning as you leave the Bay of Plenty coastline, and climb from sea level to (I think) close to 800m at its highest. If time allows (20-30min return) a short side trip to the Motu falls. Matawai near midday, then starting the decent towards Gisborne and the coast again, including another hour or so of gravel and the Rere rockslide and falls. Swim etc. Onto Gisborne mid afternoon, perhaps a group ride up a scenic hill and group fine dining. You need to organise your own accommodation on Friday night. Many of us are staying at the Waikanae Beach Motel, book solo, or bunk up with others, this is up to you. Sat 10th - Gisborne-Hicks Bay ~180km - Gas station pie to leave town and head north up the coast, likely a stop at a long wharf in Tolaga Bay and hopefully lunch around Tokomaru Bay-ish. Flat-ish and sealed roads morning. From there we are inland somewhat with a few more climbs (max alt<300m) and all sealed roads for the afternoon. Past Ruatoria and onto Te Araroa and Hicks Bay for the evening. Time allowing a side trip to the East Cape lighthouse could happen in the afternoon, non-hilly side trip but rough gravel (probably allow >2hrs). Dinner likely at one of Te Araroa's fine dining establishments. Accommodation and socializing. Please ensure you have accommodation Saturday night. There is limited space available in a Bach on Saturday night, lots of space outside, and other accommodation around Hicks Bay and Te Araroa. Sun 11th - Hicks Bay-Whakatane ~190km - Pie and a Powerade sees us head away from the coast for about an hour, will be sticking to the coast for the rest of the day just about, with minimal climbs and all sealed roads. Not many places to stop for lunch before Opotiki aside from Te Kaha. Scenic Pacific Ocean vistas and derelict shit to look at. Back to Whakatane/Ohope-ish and everyone's vehicles etc hopefully by mid afternoon. Fuel stop info: Whakatane to Waiotahi = 31km Waiotahi to Opotiki = 14km Opotiki to Tirohanga Store = 7km Tirohanga to Waihau Bay = 96km Waihau Bay to Te Araroa = 56km Te Araroa to Te Puia Springs = 69km Te Puia Springs to Tokomaru Bay = 11km Tokomaru Bay to Tolaga Bay = 36km Tolaga Bay to Gisborne = 55km Gisborne to Matawai via Rere Falls = 96km Matawai to Tirohanga via Motu road = 71km Coast trip Total by John Bell, on Flickr See last years thread here. Pics from page 14 onwards. Entries&Payments: @ 16/10/18 Truenotch MopedNZ Johnnyfive chris.qcr Cletus guywithaviators maxpower shakotom blizzo 64valiant runamuck Aaron Card vintage grumble geophy tumeke Duncan McIntyre mynameisrussel datlow highlux James Hamilton zeubin jeffsoldman Steve Holden Shaun Brewer Lee Alison mark105 slacker.cam threeonthetree Sentra chris.r michaeljfox Andrew Swinton Richard Wendt Lee Warnock Kass Lance Dela Cruz thphantum Beaver Nick Ching Matt Nielsen Regen Boyle Raniera Arapuke peteretep2 points
-
You have no idea how much I'm fizzing over this thing. Saabs are so fricken cool. My first car was an 80's 99 4 door in Tabasco red. I wish it was still in the family.2 points
-
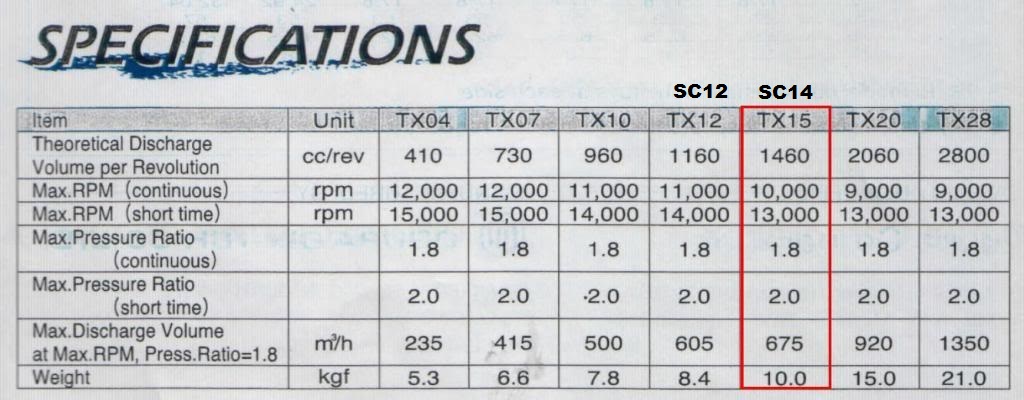
May be of some help. I believe the TX-04 is AMR500 but cannot confirm.
2 points
-
Just a friendly reminder the Nelson Car Club is running the Sandy Bay Hillclimb this Sunday. approx 30 cars running from fast 4WD to vintage cars. Een some pre 90's toyota,fiat, ford2 points
-
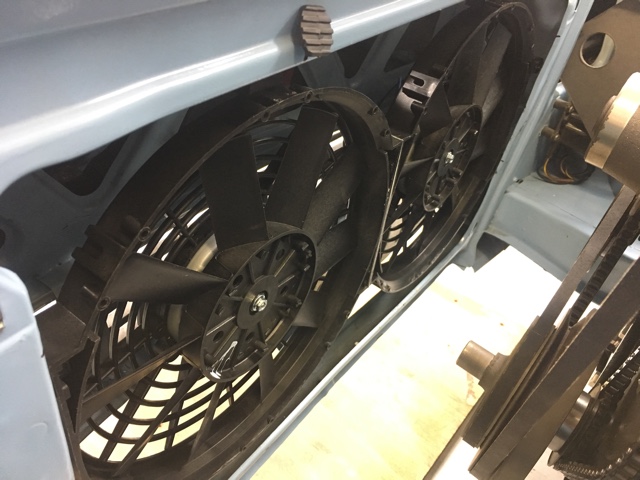
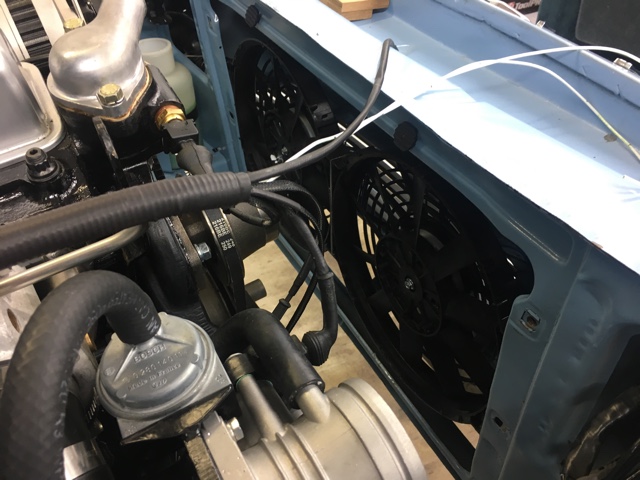
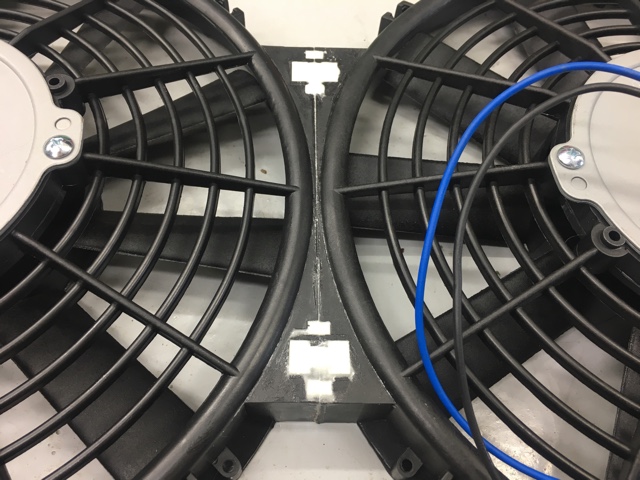
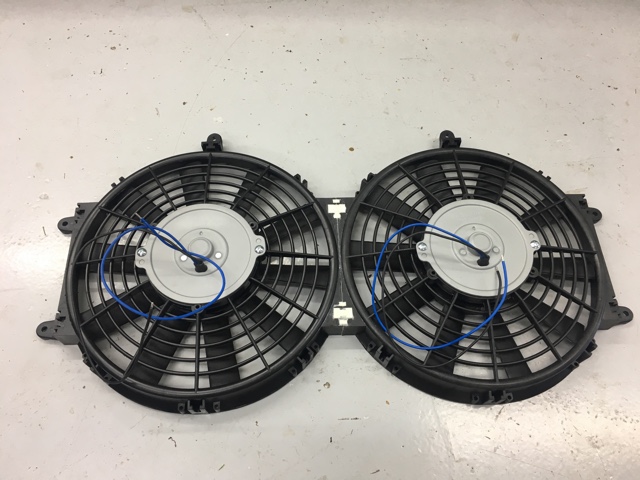
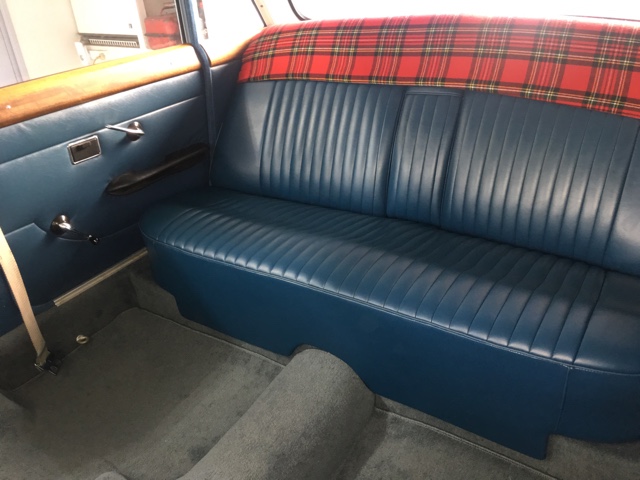
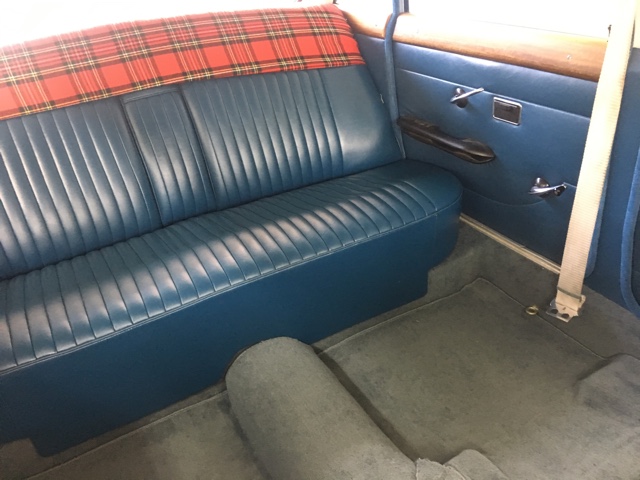
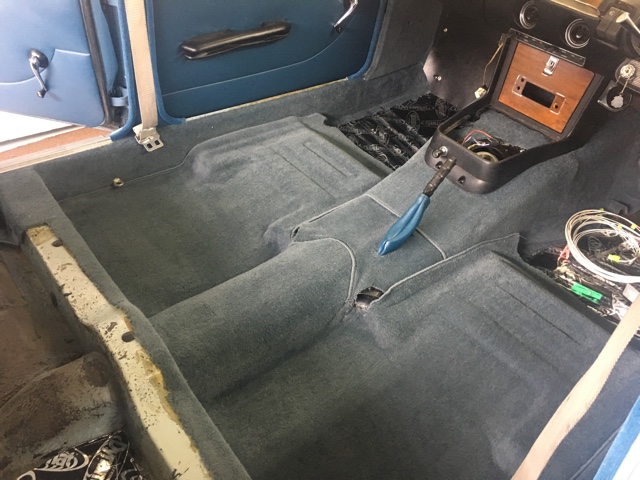
Made a bit more progress the last few days. Swore and cursed at the carpet kit I bought until the flat carpet had conformed to the shape of the floor. Instructions said to allow 4 hours lol. Got it pretty good in the end and any of the bits I'm not 100% happy with are hidden anyway so it'll look fine when the seats etc are back in. Then spent hours with some leather cleaner and a nail brush sorting out the rear bench. It was so grimy. Couple of hours on that and a couple of coats of conditioner on the thing and it looks like new again. Result Still need to do the front mats but will do that once I've finished all the computer stuff so I don't end up burning holes in it with the soldering iron. Had a bit of a luck in at supercheap today as well. I've been procrastinating over fitting an electric fan and saw a couple that looked like they'd fit the bill. Couple of trips back and forward measuring and I settled on two of the smallest ones they had. Little bit of fiddling around joining the two together and I had the perfect fit. They will stay attached to the car even if the radiator needs to be removed. result = beer o'clock
2 points
-
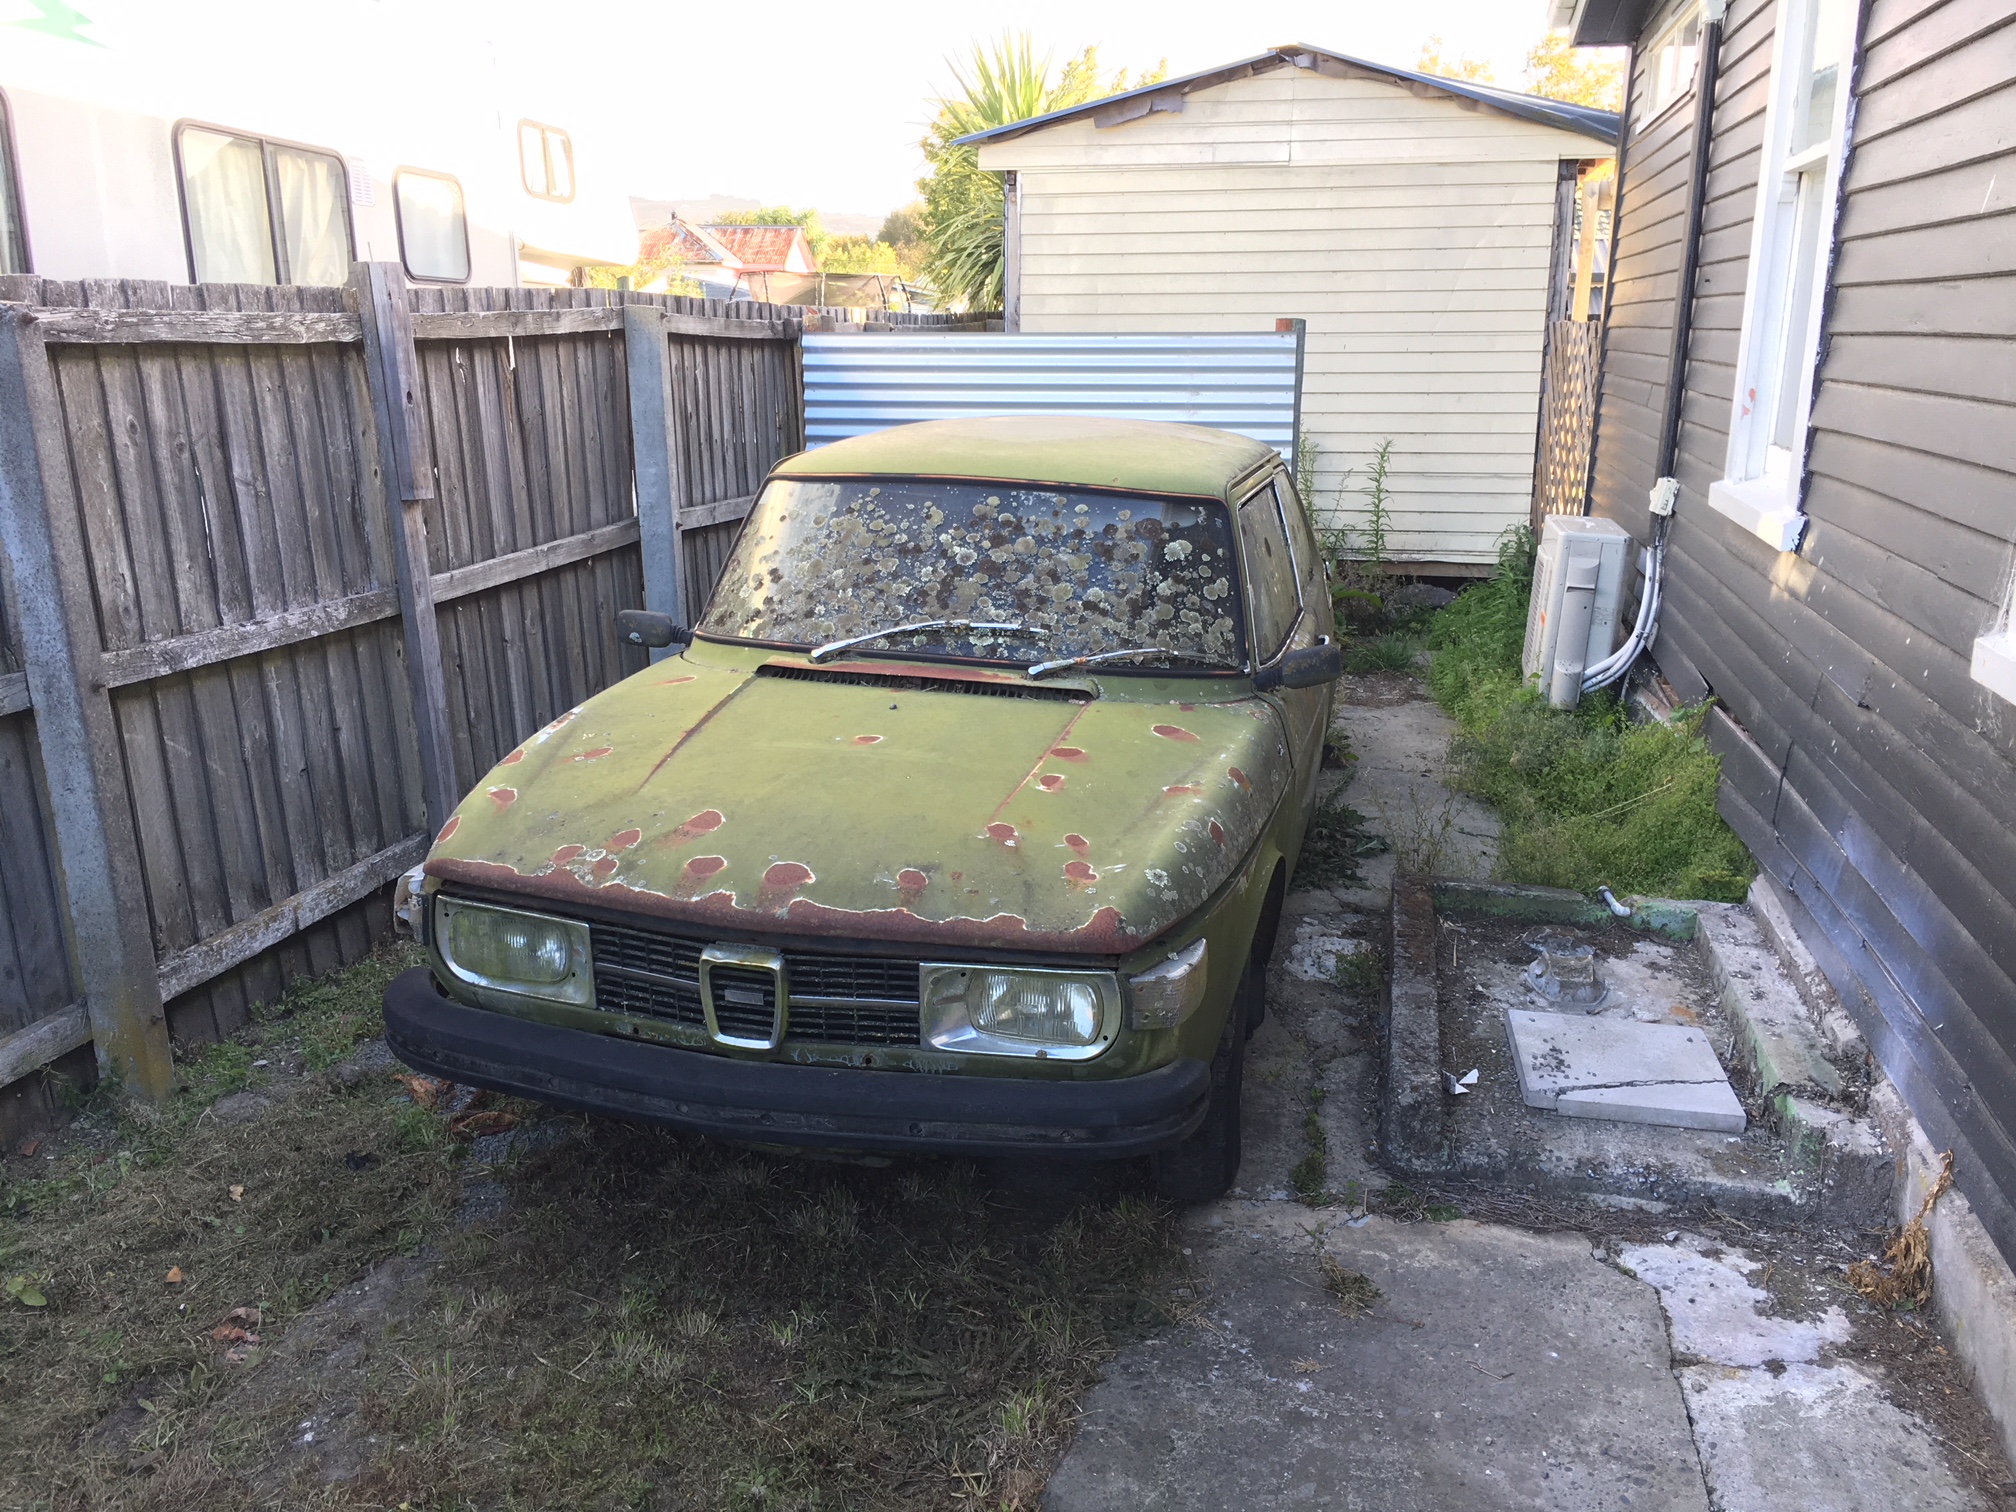
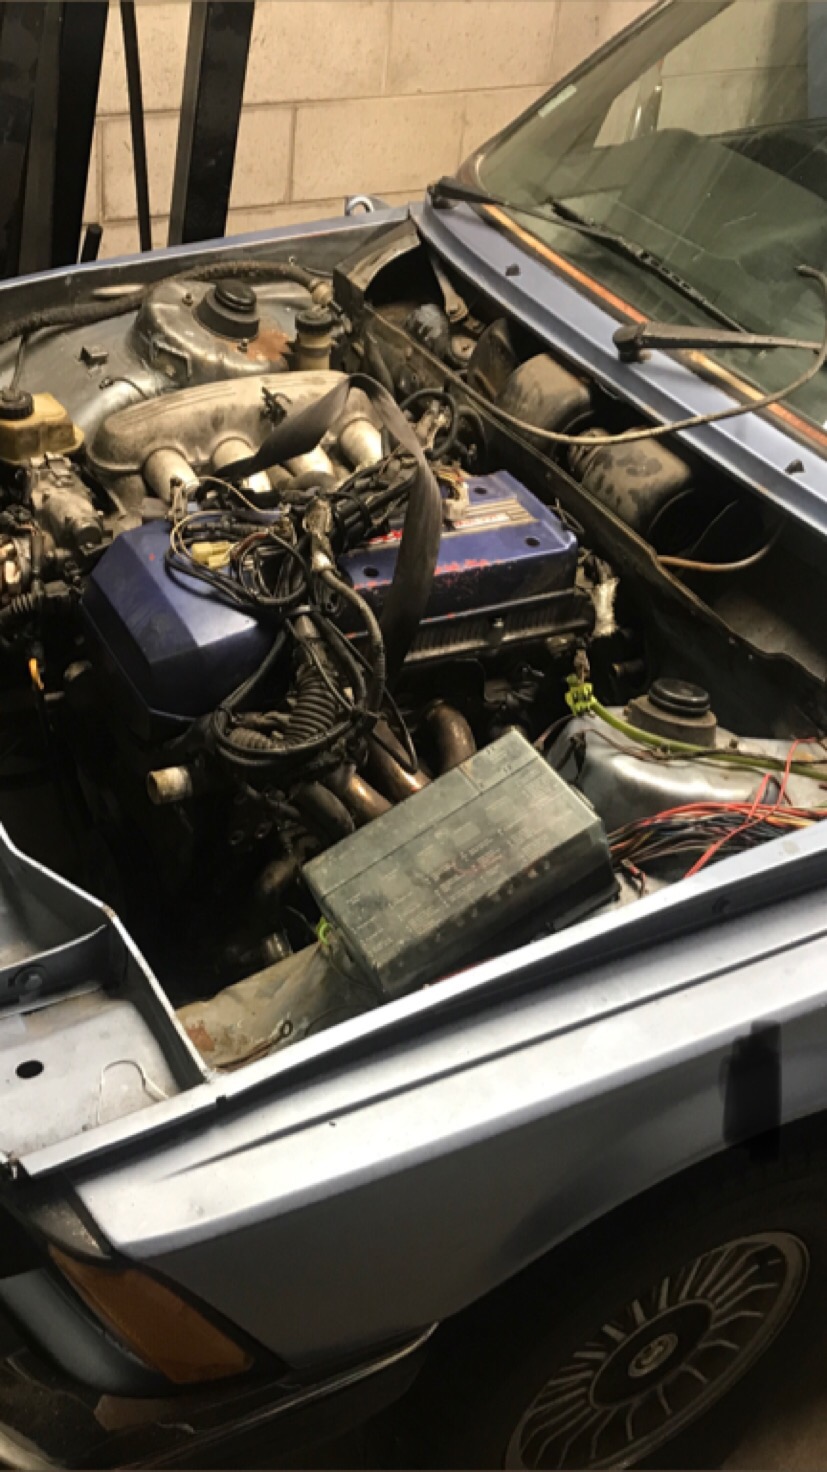
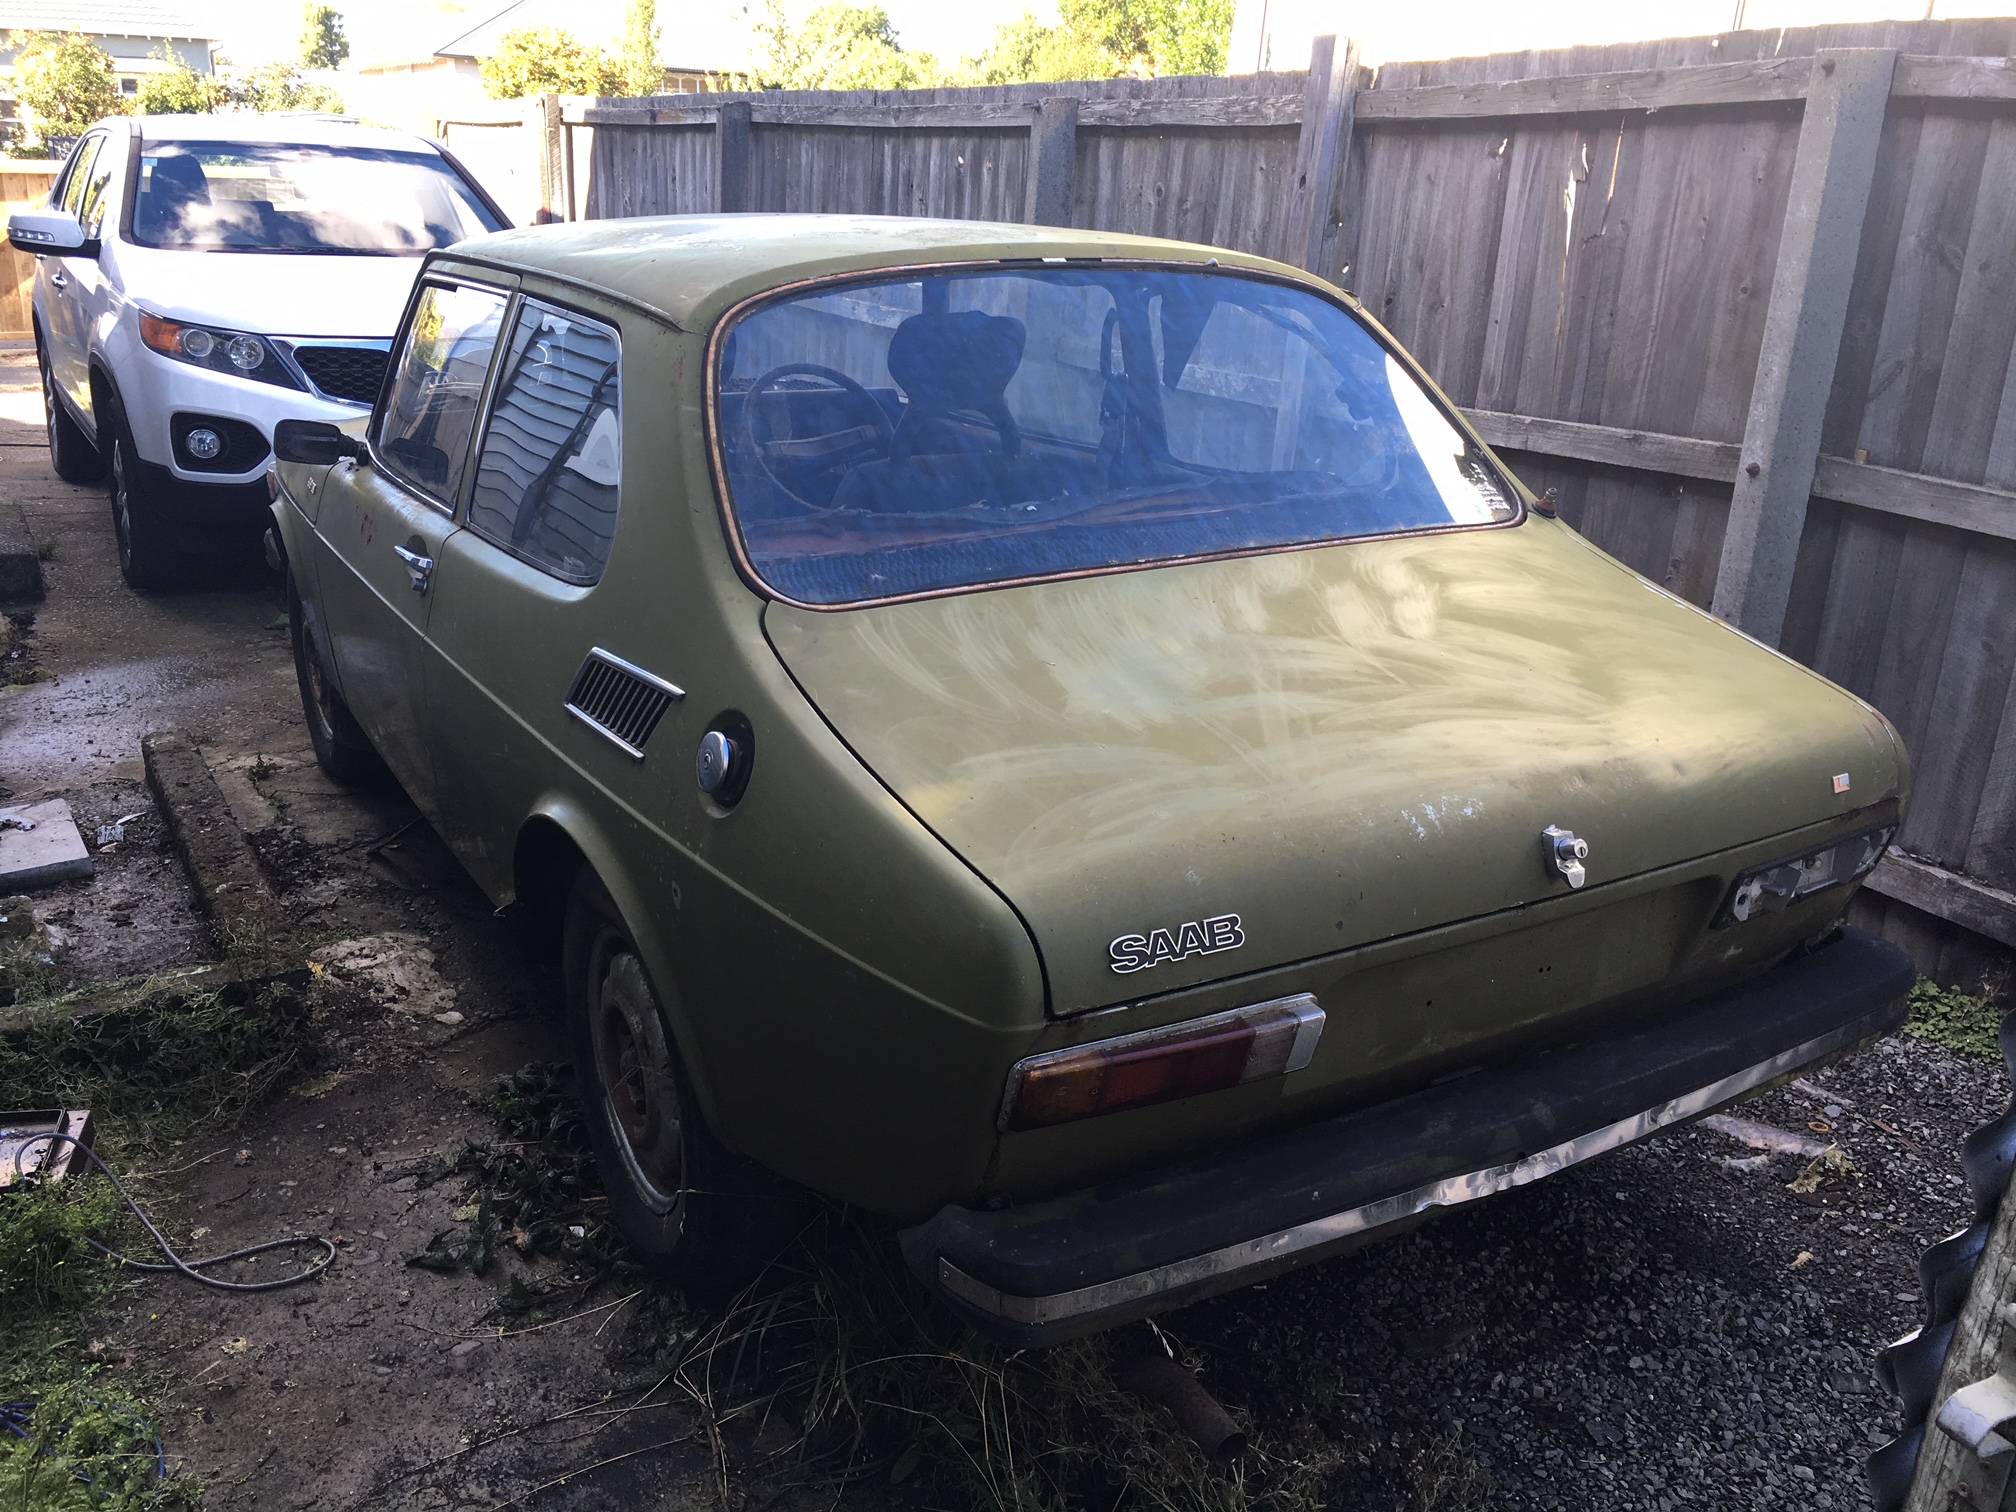
(Discussion thread here) Because I'm either having a midlife crisis or pregnant (results will confirm soon), I found I was missing have a pile of rust taking up my driveway..... So in return for Beer and cupcakes (2 for 1 deal), @Carsnz123 helped me grab this from the Marshlands Graveyard and dropped it in suburban Woolston. Of course, it was no were near that easy.....especially as every single item of mechanised shifting gear was declared "stuffed". So in reality the job involved lots of strops, winches, sore backs and swearing. As Trainee Saab Barry I failed at the critical moment in being able to recall obscure facts......it wasnt until @Carsnz123 said "It feels like its in gear" that I recalled the Saab will only allow the key to be removed when its left in reverse....at least we now know the clutch works! Initial plan is to have bit of a tidy up and find out what the tale of the tape is. I need to ascertain what the underside looks like as well as get someone to fix the locks so we can actually start the beast!
1 point
-
So, I recently purchased a car I've been boned up over, for 10 years. I've waited 10 years to purchase, because the car started out at $137k, and they are just getting down to what I was willing to pay recently. Its a bone stock, Jap import, 2008 Lexus ISF. As i'm now a Lexus wanker, i'm going to wank off some specs, as its the flashest thing I've ever owned. Its powered by the mighty 2UR-GSE, making 416hp and 503nm of talks. Its got a billion things in the engine, like 32 titanium valves, 16 injectors, 2 different kinds of valve timing, 2 stage intake somethingorather, everything's forged in there, and it sounds flipping sweet. Its got an 8 speed auto behind it, which actually works stupidly well, and can change in 0.1 of a sec apparently. Mine, being an early one, has an open diff, which is controlled by witchcraft, which they call an E diff, so it acts like an LSD, but has the added advantage of wearing the rear brake pads/discs out quite quickly. It can get to a hundy in 4.3 secs, do a 1/4 mile in 12.7, and is limited to 270kmh. I've just realized I don't have any pics of it, but will slap up some generic ones sometime. I hope to do a few simple mods to it in the future, such as headers, which apparently can open up 50hp ATW, as the log manifolds are so hideously grot. A nice intake pipe and filter also, and that will probably be about it. I also want to fix up a couple of other things that annoy my OCD, which I will show you soon. Apart from that I just want to keep it clean, and maintain it. I love my Larry, hes bloody great. Regards, VG.1 point
-
Chuuur. I was a bit wary of the vest/patch situation last year but it became pretty clear early on that no one was misinterpreting what we were about. I'd like to think the further you get from the big centres the better senses of humor gangs get. I can't think of one negative response from the public over the weekend. As long as no one is really acting out I'm sure we'll all have a good time.1 point
-
Keen, but like last year I may end up meating you guys up the coast somewhere on day 2.1 point
-
Two tone...paint should be done by tomorrow1 point
-
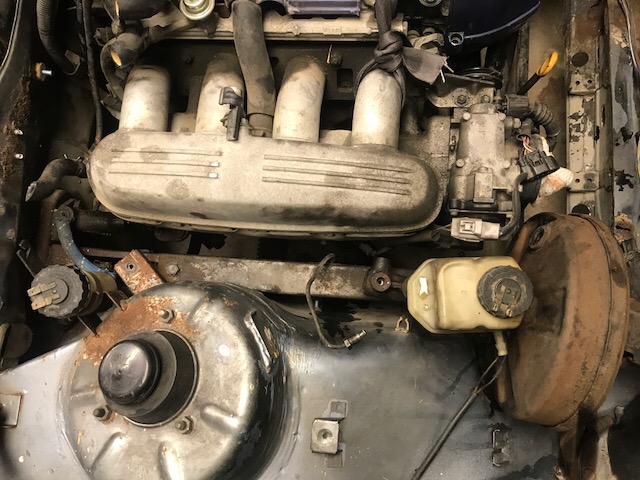
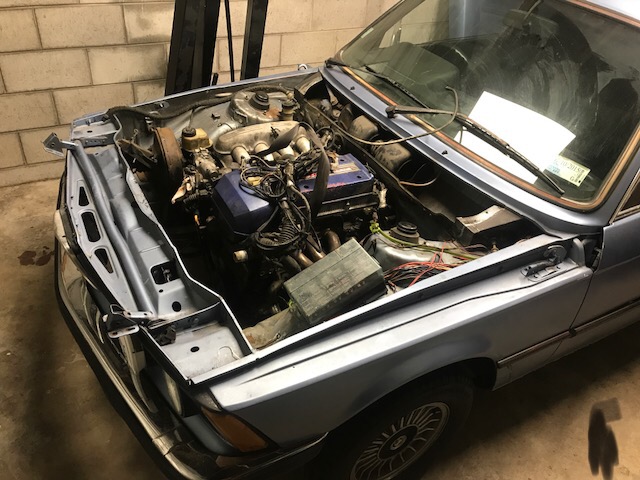
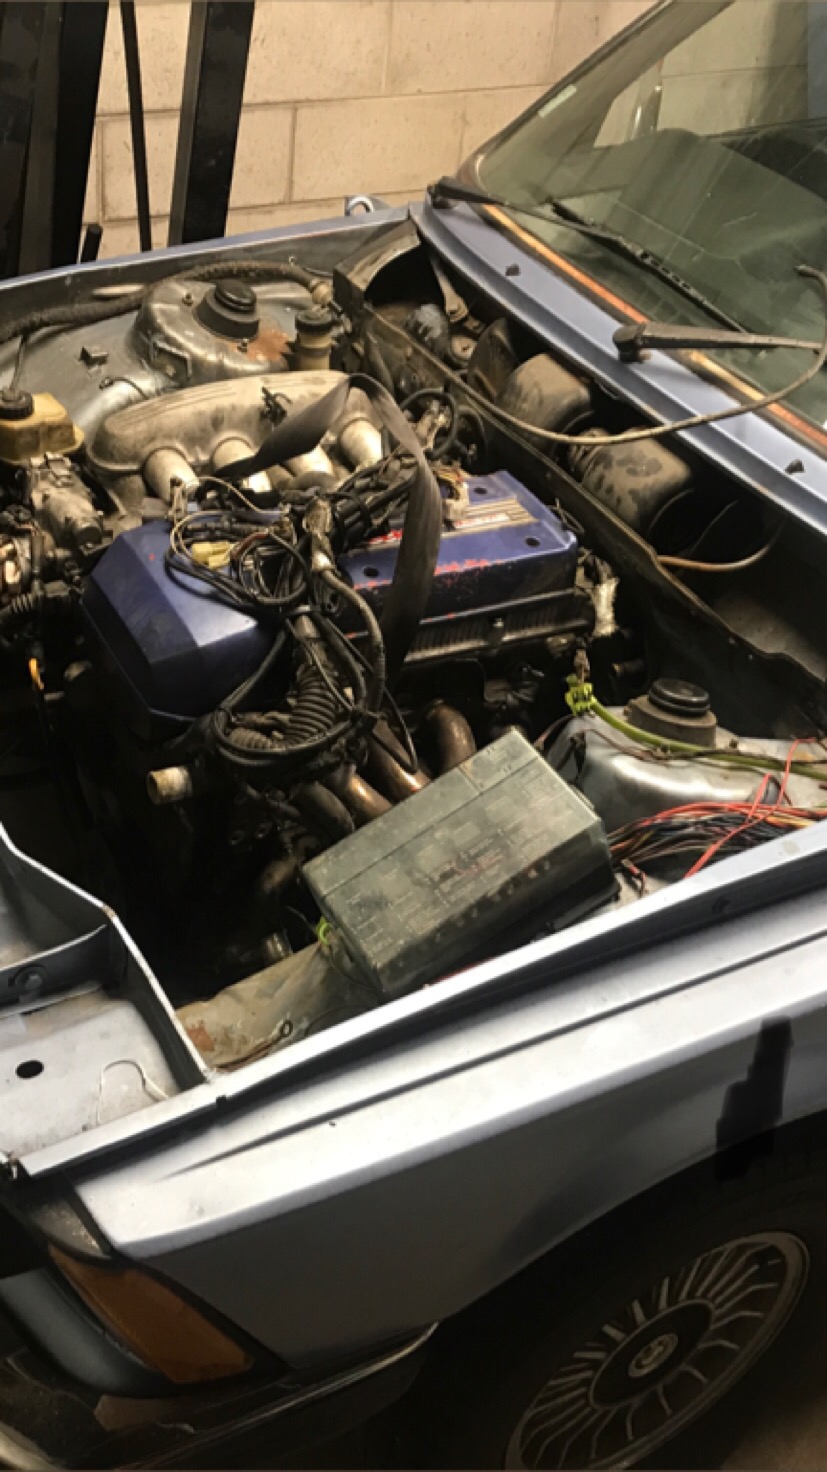
Im committed now reliable car sold I've got tomorrow off and and a boot full of new parts, opted to not fuck around with a CV joint fix and bought a whole brand new replacement half shaft. Hopefully this is the no grease muckaround avoidance choice I envisioned also replacing my engine bay fuse box as the old one isn't in amazing nick. Cue halfshaft through windshield photo around 1pm tomorrow....1 point
-
Righto did a shitload of work on this last night. This is what it now looks like: Mmmmm bare metal...tasty...sexy...delicious...mmmmm
1 point
-
Thats the kinda car I'd be proud of being run over by. Nice. NIIIIIICEEE.1 point
-
grrrr i note some of my pics are gone. will fix that up at some point. Anyway. as previously mentioned, i have this rolling now. The motor is in the frame, the front and rear ends are together and i've started running the loom. I have a fair amount of re-work to do now though: I scratched the shit out of the swingarm putting it in, i had a brake fluid leak over the top yolk which has destroyed the paint (not surprised) and my forks are leaking. Anyway, to motivate myself i'm carrying on with runnig the loom and plugging everything in. Next up is to torque down all the engine mounts and then plumb it. shouldn't take long. I have a plan for the top yolk and forks, and hope to sort the swingarm in situ. pic of it with bodywork mocked up to keep me motivated
1 point
-
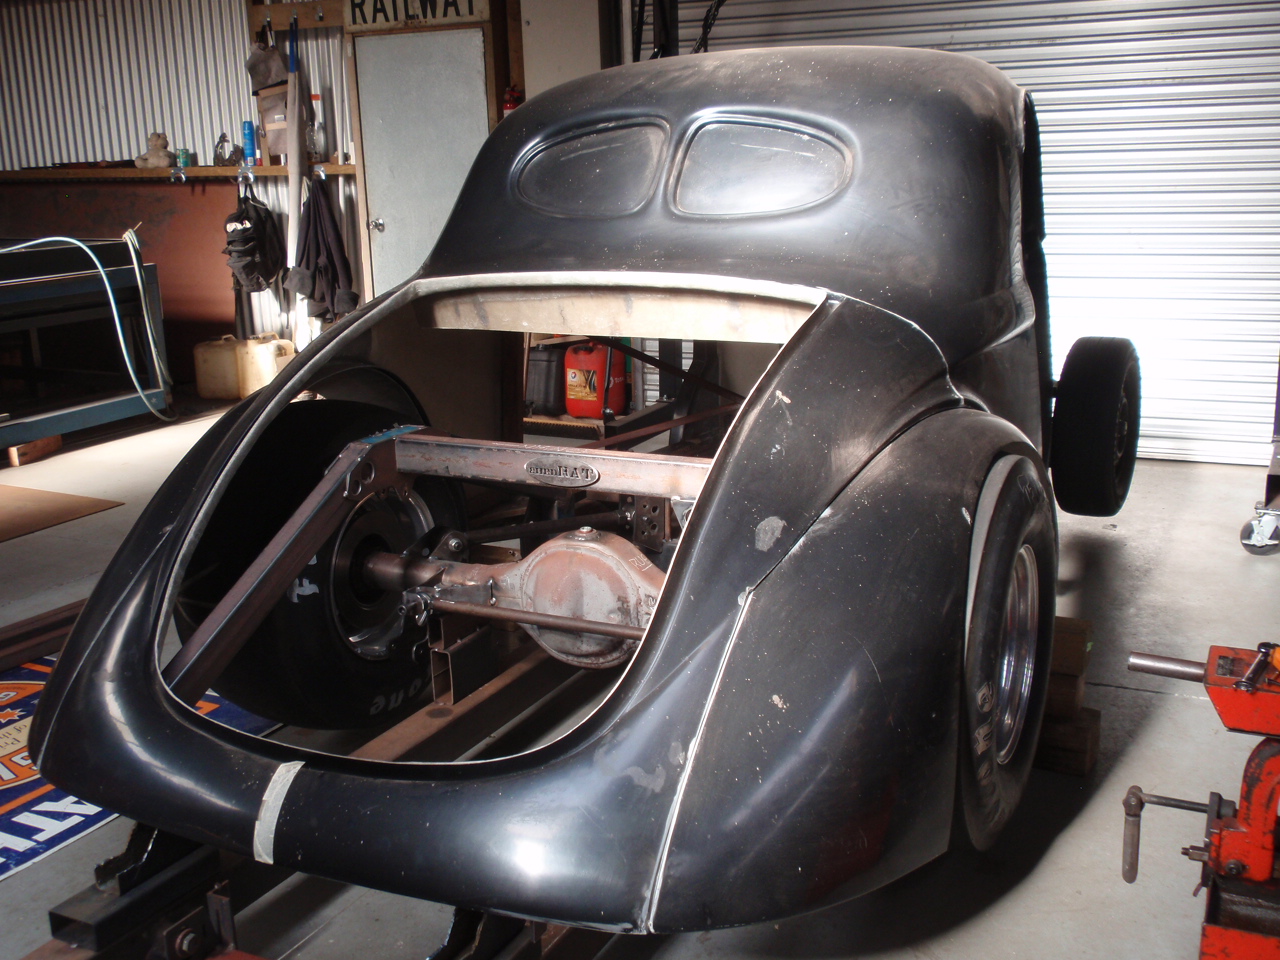
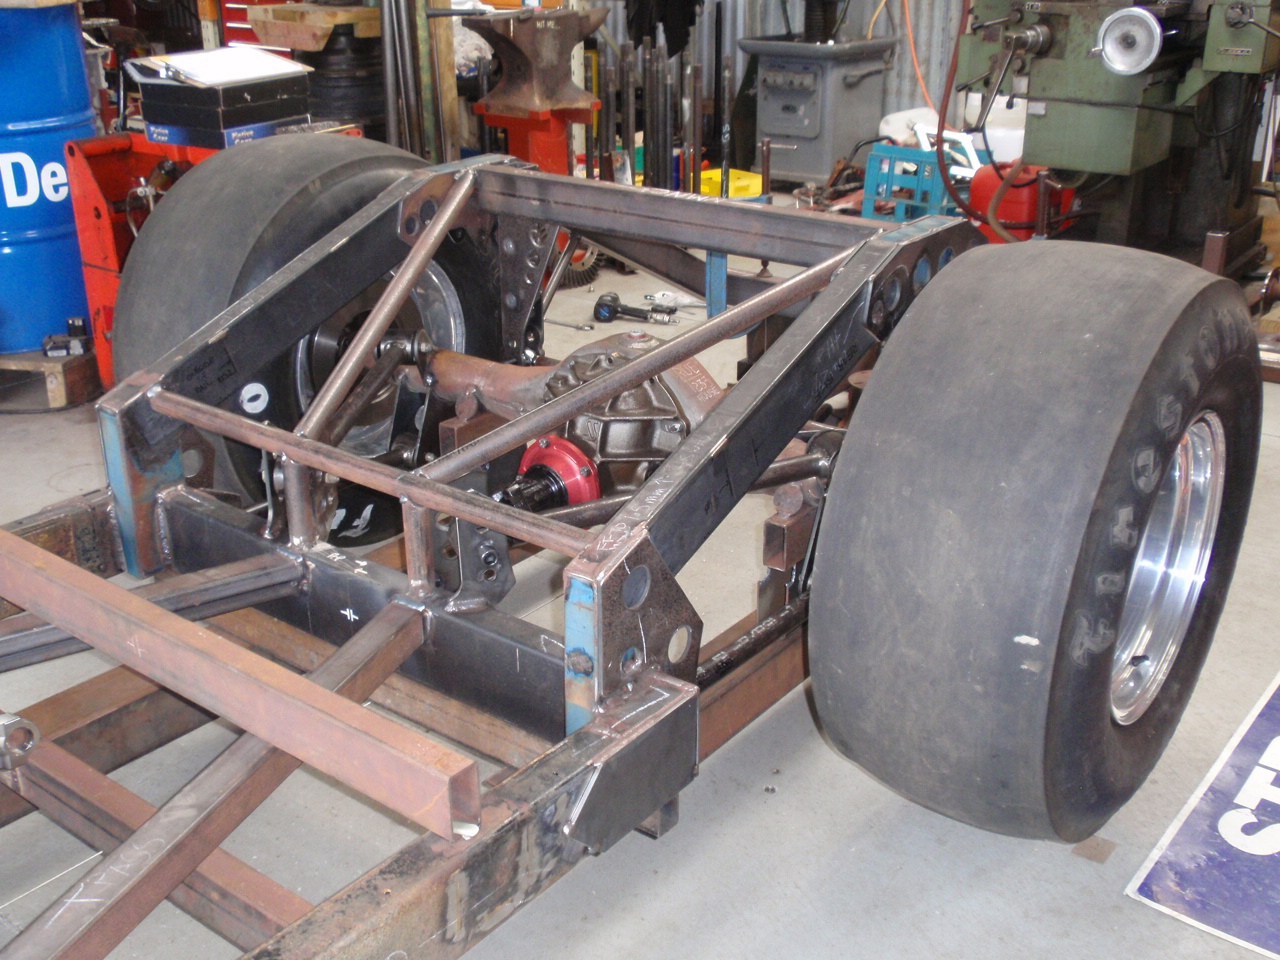
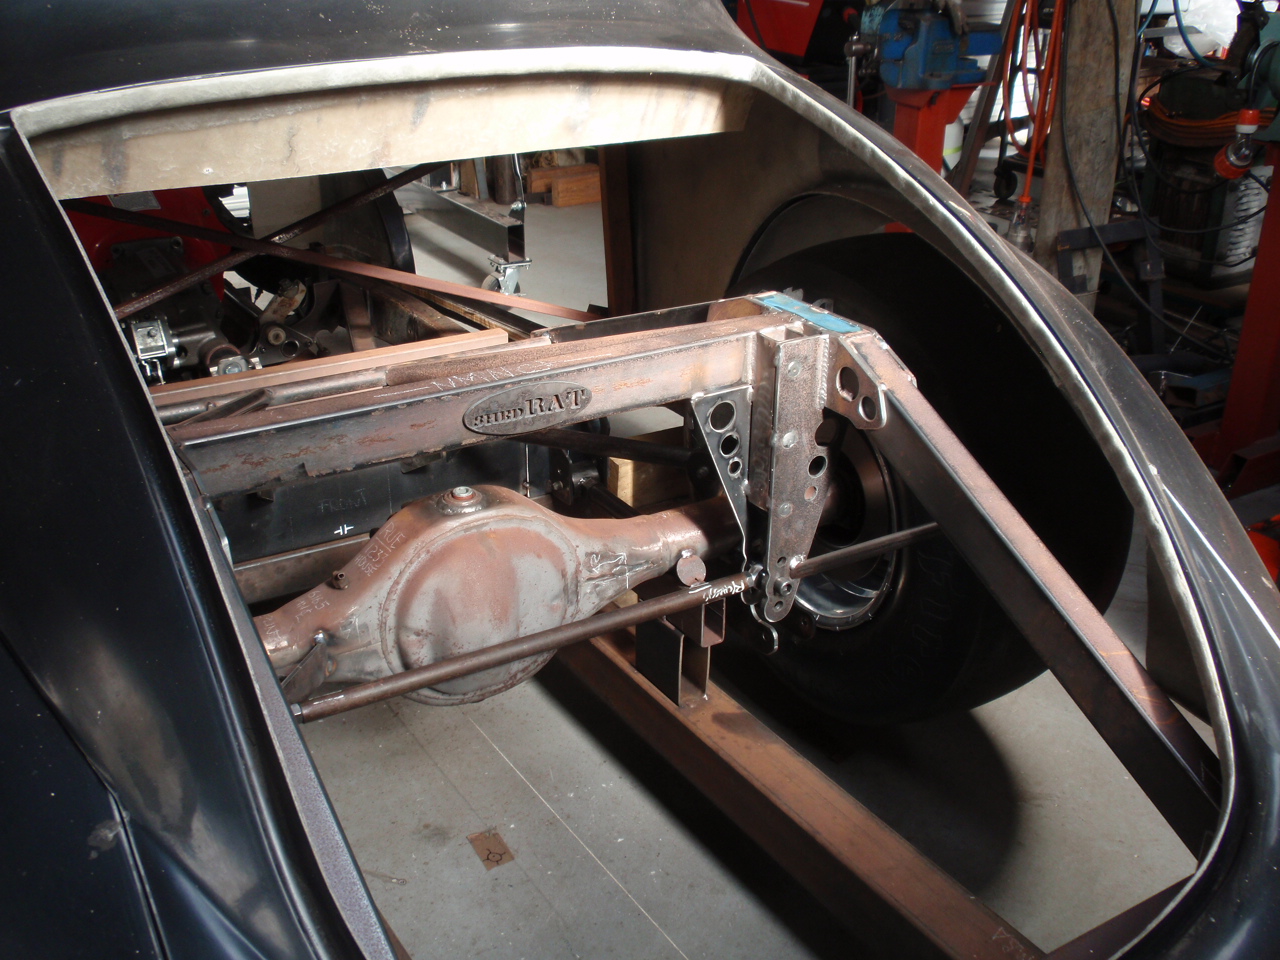
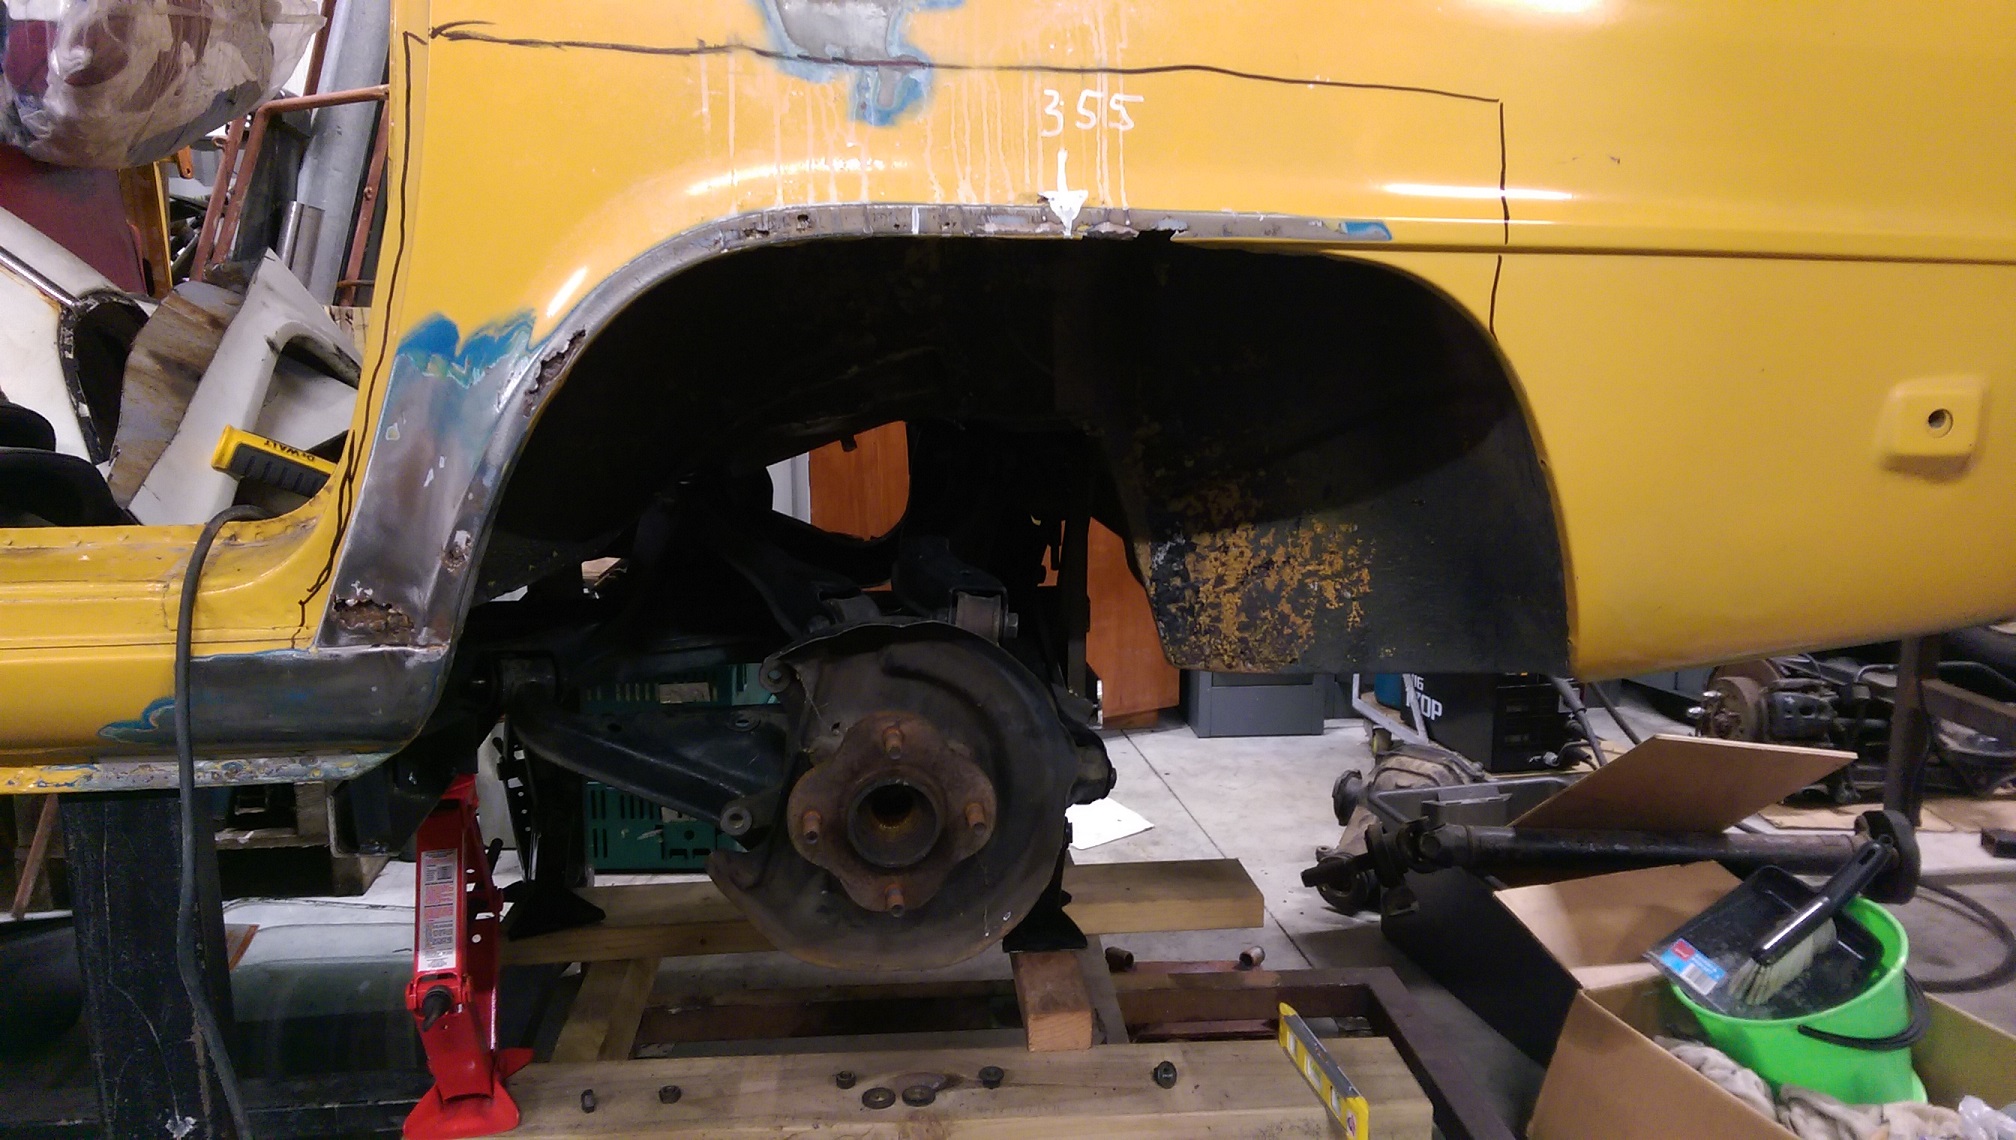
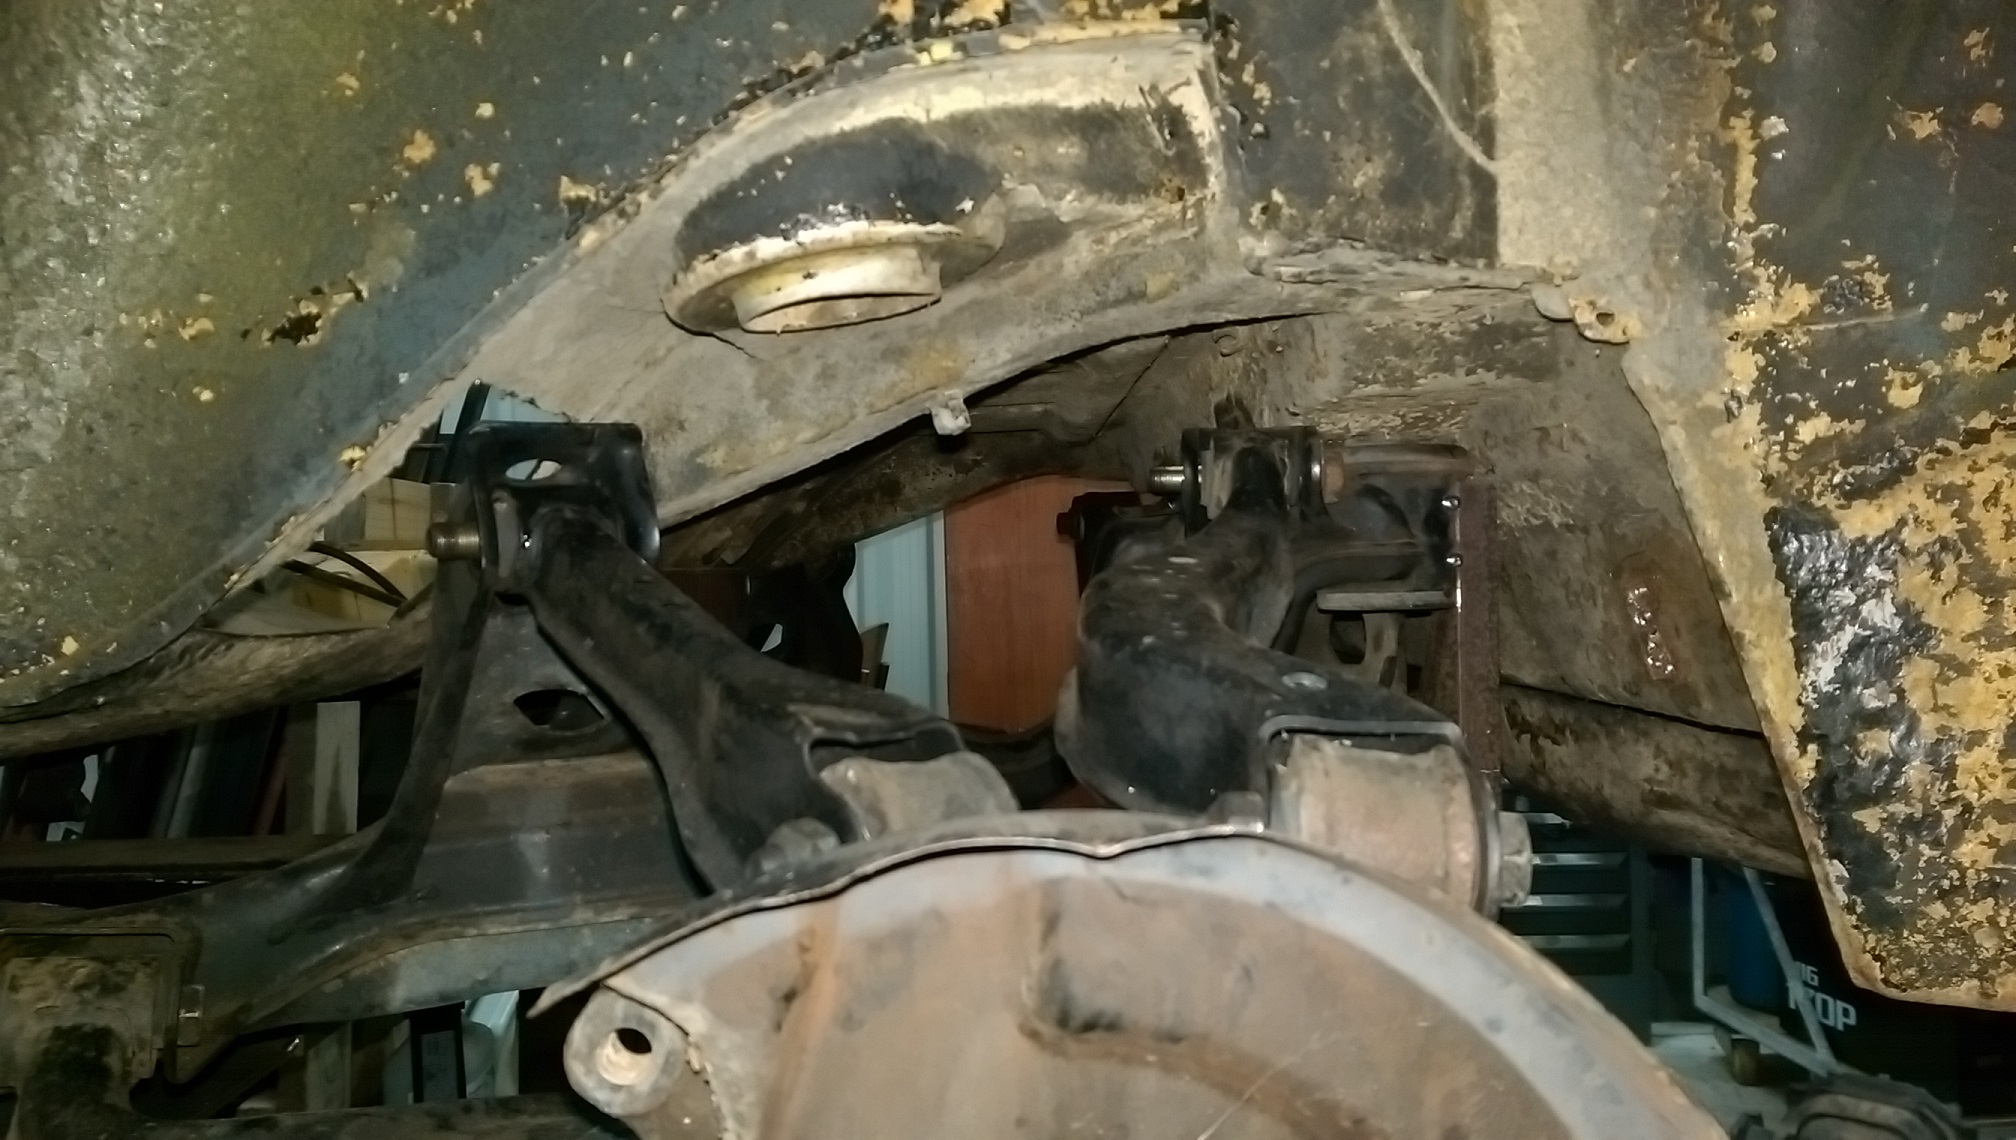
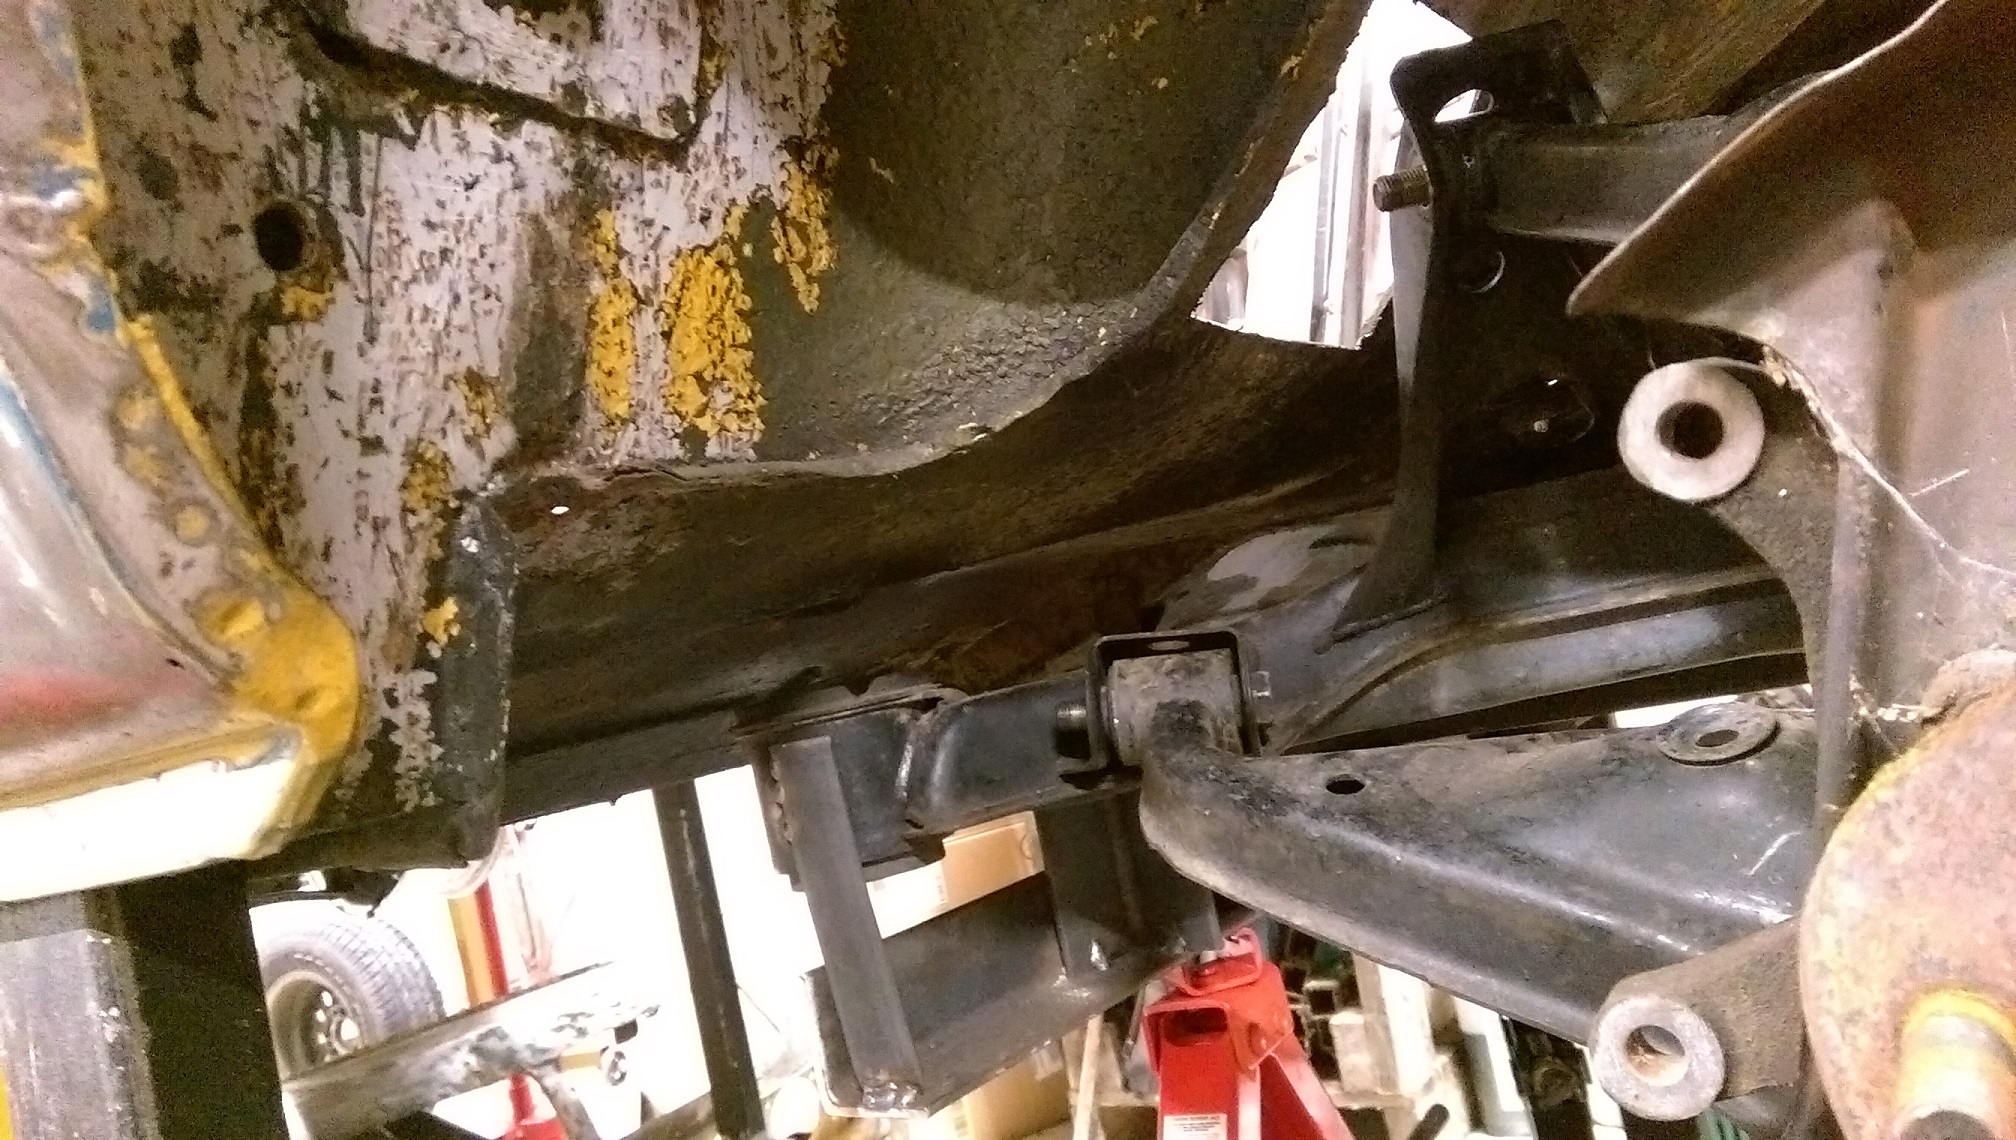
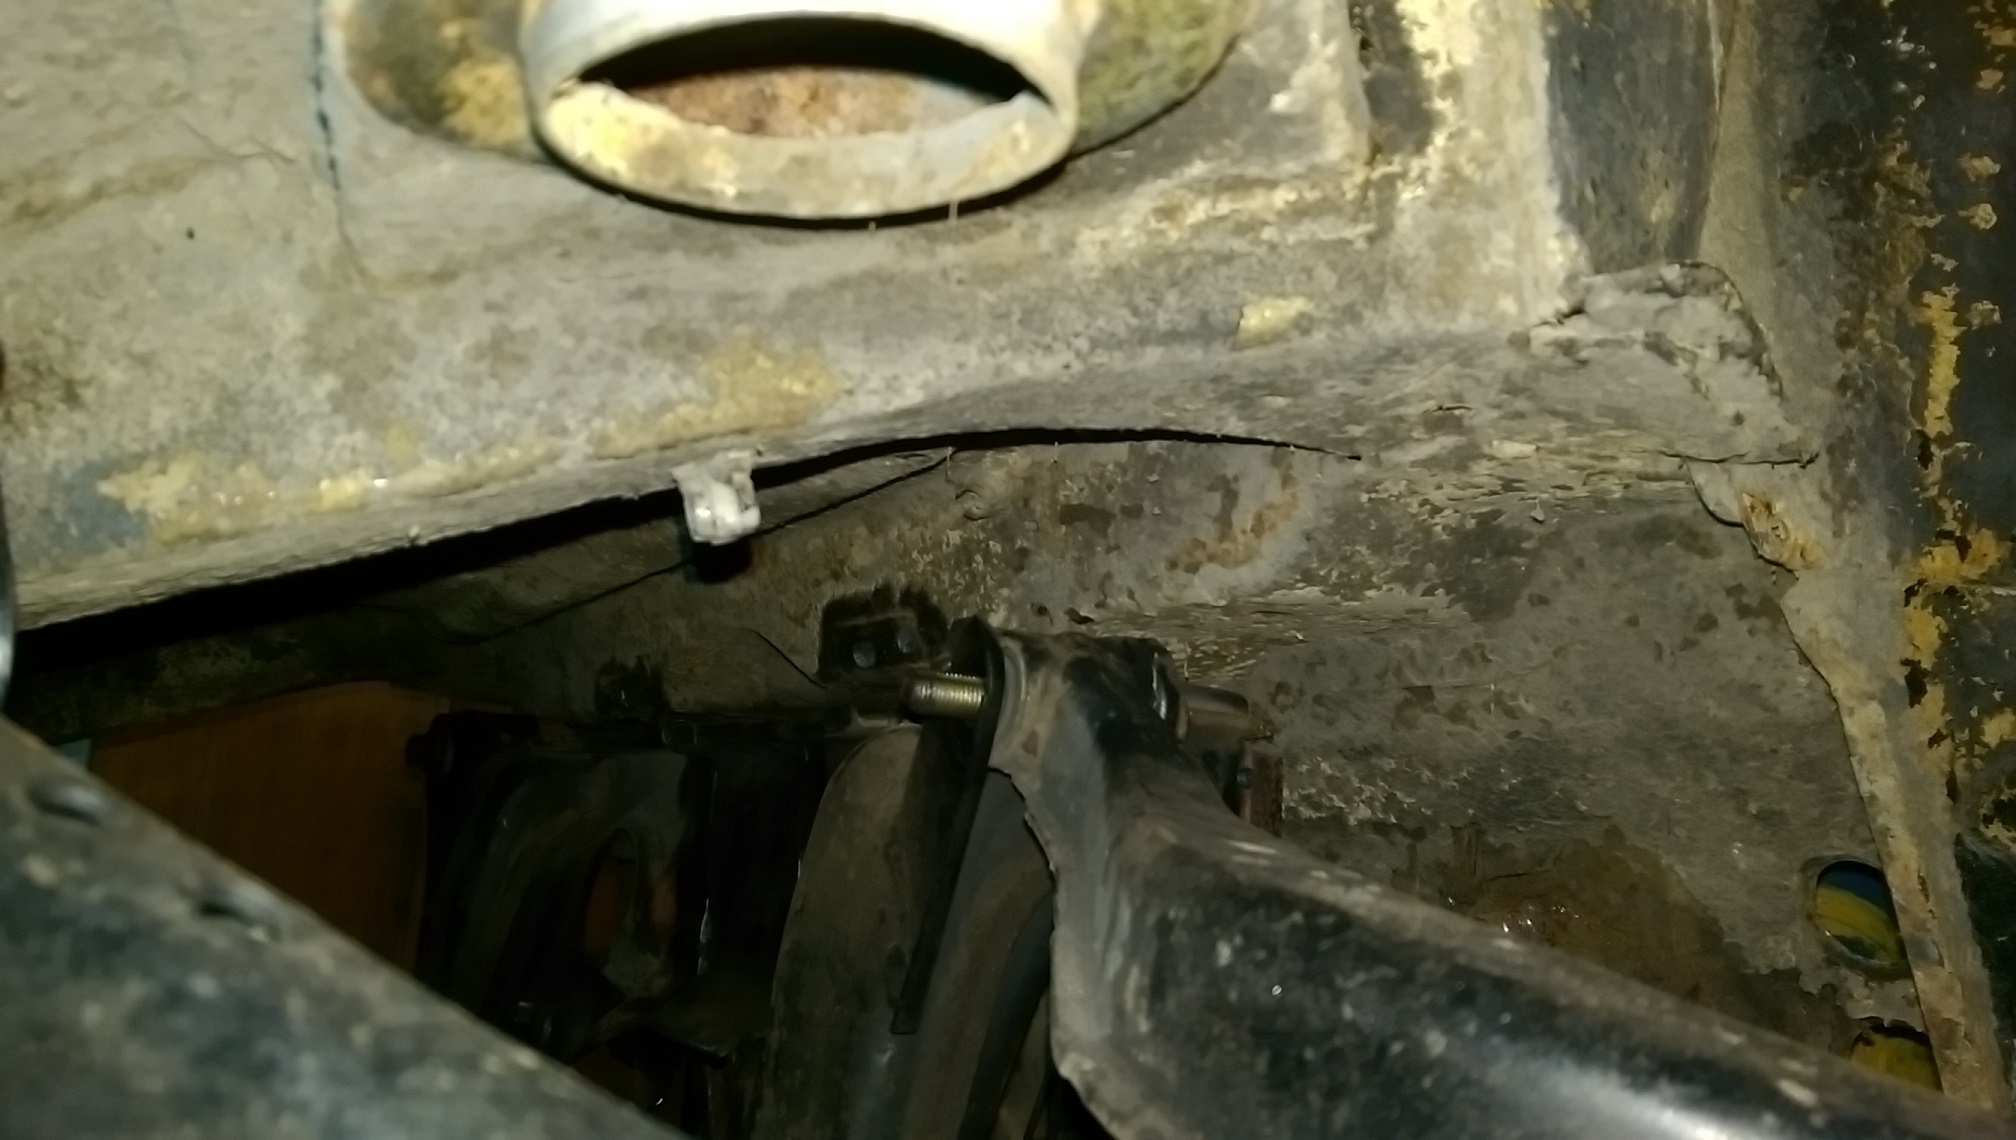
So I welded a temporary bit of metal for the front diff mount cross member, so I can trial fit and see how much space there is available for the cross member. I put some bits of wood on a wheeled dolly and 3 scissor jacks for raising and leveling the subframe under the car. As it is now, the subframe is wedged in there, and level, and I think the height is okay so I don't get crazy camber when the car is at ride height. But, it needs to move 90mm further back, which will give me lots of room at the front, I won't need the two holes I have already cut. But I will need to extend that existing box section further into the boot space. Fortunately, there doesn't appear to be anything stopping me from doing this. I may still even be able to fit the spare wheel! See I have marked where the wheel hub is on top of the arch, and where it needs to be. This isn't full suspension droop, one of the braces on my jig is in the way of a suspension arm moving any further. Aaaaaand with the subframe 90mm further back, the shock mount on the back of the hub is directly below the shock mount on the body. Hopefully I can find/make some coilovers that will fit in the available space. I'd like to avoid making the existing shock 'towers' larger because then I would have to also modify the fuel tank as it is a tight fit between the shock towers. The rear subframe mounts are hard up against the existing box section. I have already removed the original mounts/studs from the box section to get the subframe up this high. Once it moves 90mm further back, there will be plenty of clearance for that front/top arm mounts so the hole is not required. Not visible in the photo, but there will also be ample room for the diff mount cross member. Not sure how to make the mounting point for the front mount. Ideas so far are: strengthen the floor with plates and build a mount point down from the floor. Or make another box section/outrigger to support the subframe mounting point. Here's another picture of that existing box section. The red line is where the bottom of the existing box section is under the car. The blue box is where the 'new' rear part of the boot floor would be so the subframe can move 90mm further back. I need to think about how to best make 'whatever' that the subframe rear mounts will attach to.
1 point
-
Designed an Avenger Hydra logo and 3D printed a couple of different sizes and colours Tested them on the tailgate of the wagon. Not quite happy with the H so modified it a bit. Still not happy so gave it another tweak but I may go back to the drawing board. If any one know a font with a cool looking H then let me know Pulled out a collection of old badges sitting around to see if any of them suit the car. Ended up quite liking this pentastar on the front of the air cleaner. Here is a view from further back Also tried the Chrysler badge on the other rocker cover. Looks pretty cool. I might design and print something more in the same font as the other side. I will probably leave the Quad Cam V8 on the other rocker cover so it might look nice if they both match. Ordered the air cleaner. It is freaking massive. K&N RD-1450. 7 in (178 mm) Diameter, 6 in (152 mm) Height, 4 in (102 mm) Flange It is actually going to sit inside the cabin. Where the heater used to be.1 point
-
Such a heart throb. But I think last time I tried to offer you the coffee you declined. You bastard.1 point
-
So I cheated, this popped up on Facebook, scored it for $175, was gonna cost $160 for the parts to rebuild the old one plus another $40 to have the torque converter flushed (which I will still do as it’s an uprated 2400rpm stall, but it will wait until when I pull the engine later on to regasket it) for now it will get me on on the road and mean I’ll be able to actually use the car which will be a novelty as it’s spent more time broken than useable. Dipstick tube wouldn’t fit under the car, so I’ve improvised with the exhaust bung from my dirt bike haha1 point
-
Does need to be certed. But- Every vehicle I've seen so far has had issues with those fitted- I haven't done a Colorado but all the other common ones, Rangers, navaras, hilux, mitsi etc Usually at full droop the top arms hit the chassis, (all) tie rod ends bind ( hilux) tie rod ends foul on sway bar (ranger) top ball joint runs out of travel (ranger) bump steer (navara) Basically, dont lift a late model ifs truck because it will be a bag of dicks. I can see a drama brewing, as the hundreds of late model utes that have these lift kits installed, because they are a cheap easy way of doing it, and were told by the people selling the kits that they dont require certification, all come up for their 3 year wof and all need cert but cant get one for the reasons above...1 point
-
1 point
-
1 point
-
Here's the E21 rear trailing arms getting modified for future coilover goodness Before removing the old shock mount After removing the old shock mount Ground back the dodgy old welds Ready for adding the new coilover mounting tabs *Missing photo of endless cutting and grinding of the two tabs so they'll fit. Yawn Tacked on Here's another I prepared earlier Not a bad days effort. Will mount everything up and test fit it all before welding everything on properly. Then get all this pesky suspension stuff powdercoated! Yay progress yay1 point
-
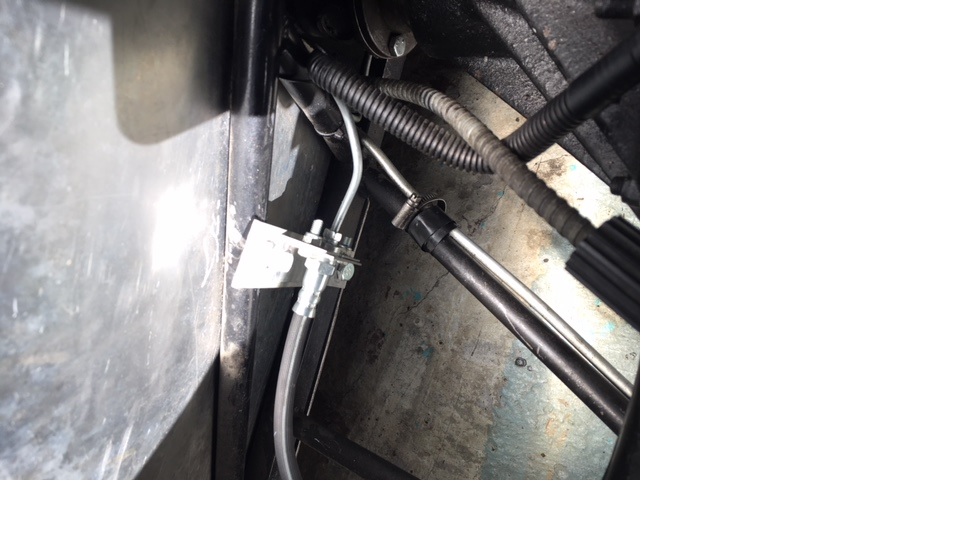
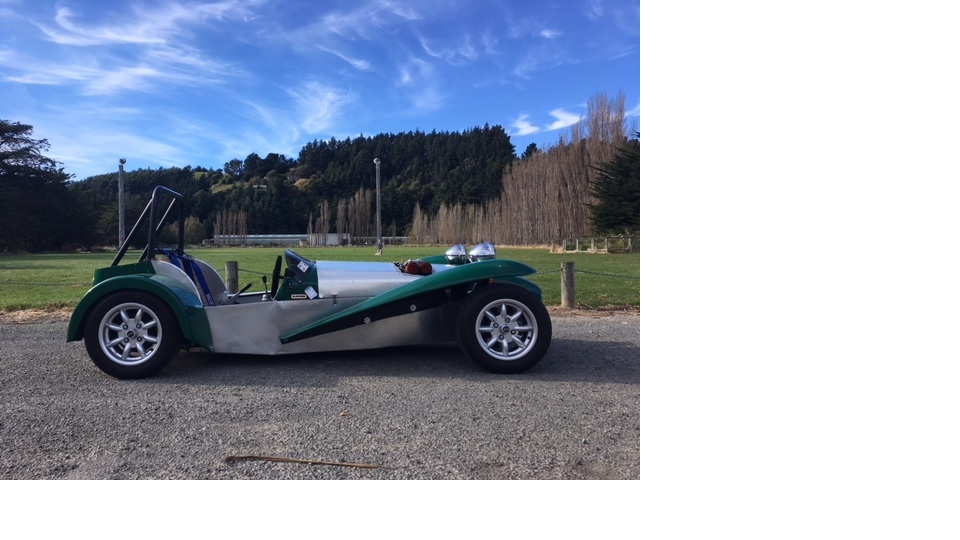
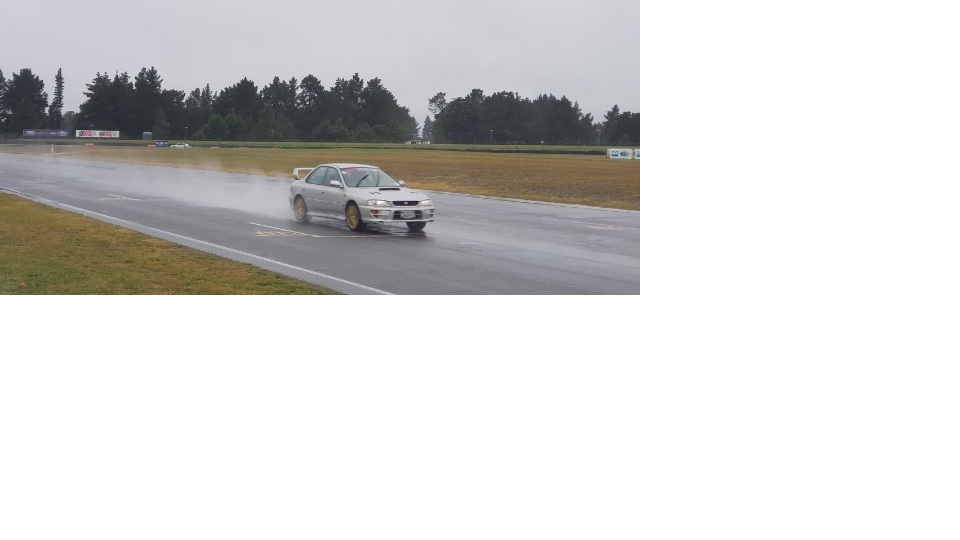
I tried to enter this on the most recent Saturday track day at Ruapuna, but my ambitious plans to get a WOF within a week were a bit too ambitious. Failed on a lacking bracket for the rear brake hose, and the front guards were not secured tightly enough- so I remedied this with some aluminium. Also failed on excessive movement in the steering rack end- lucky it is a shim type so replaced the shims and tightened everything up- no more play. Also made a new chassis plate- as it never actually had one As it happened the weather was terrible the day of the event anyway- so took the daily instead which turned out to be a good move- photo credit to Rowan Seymour. Hoping to get it to the track for the next event in late June- weather permitting of course. Still need to sort my tuning issue. And I am becoming tired of being hit in the face by large insects. A windscreen is needed soon- not sure who to contact though. Any suggestions on fabricators appreciated. Chairs
1 point
-
1 point
-
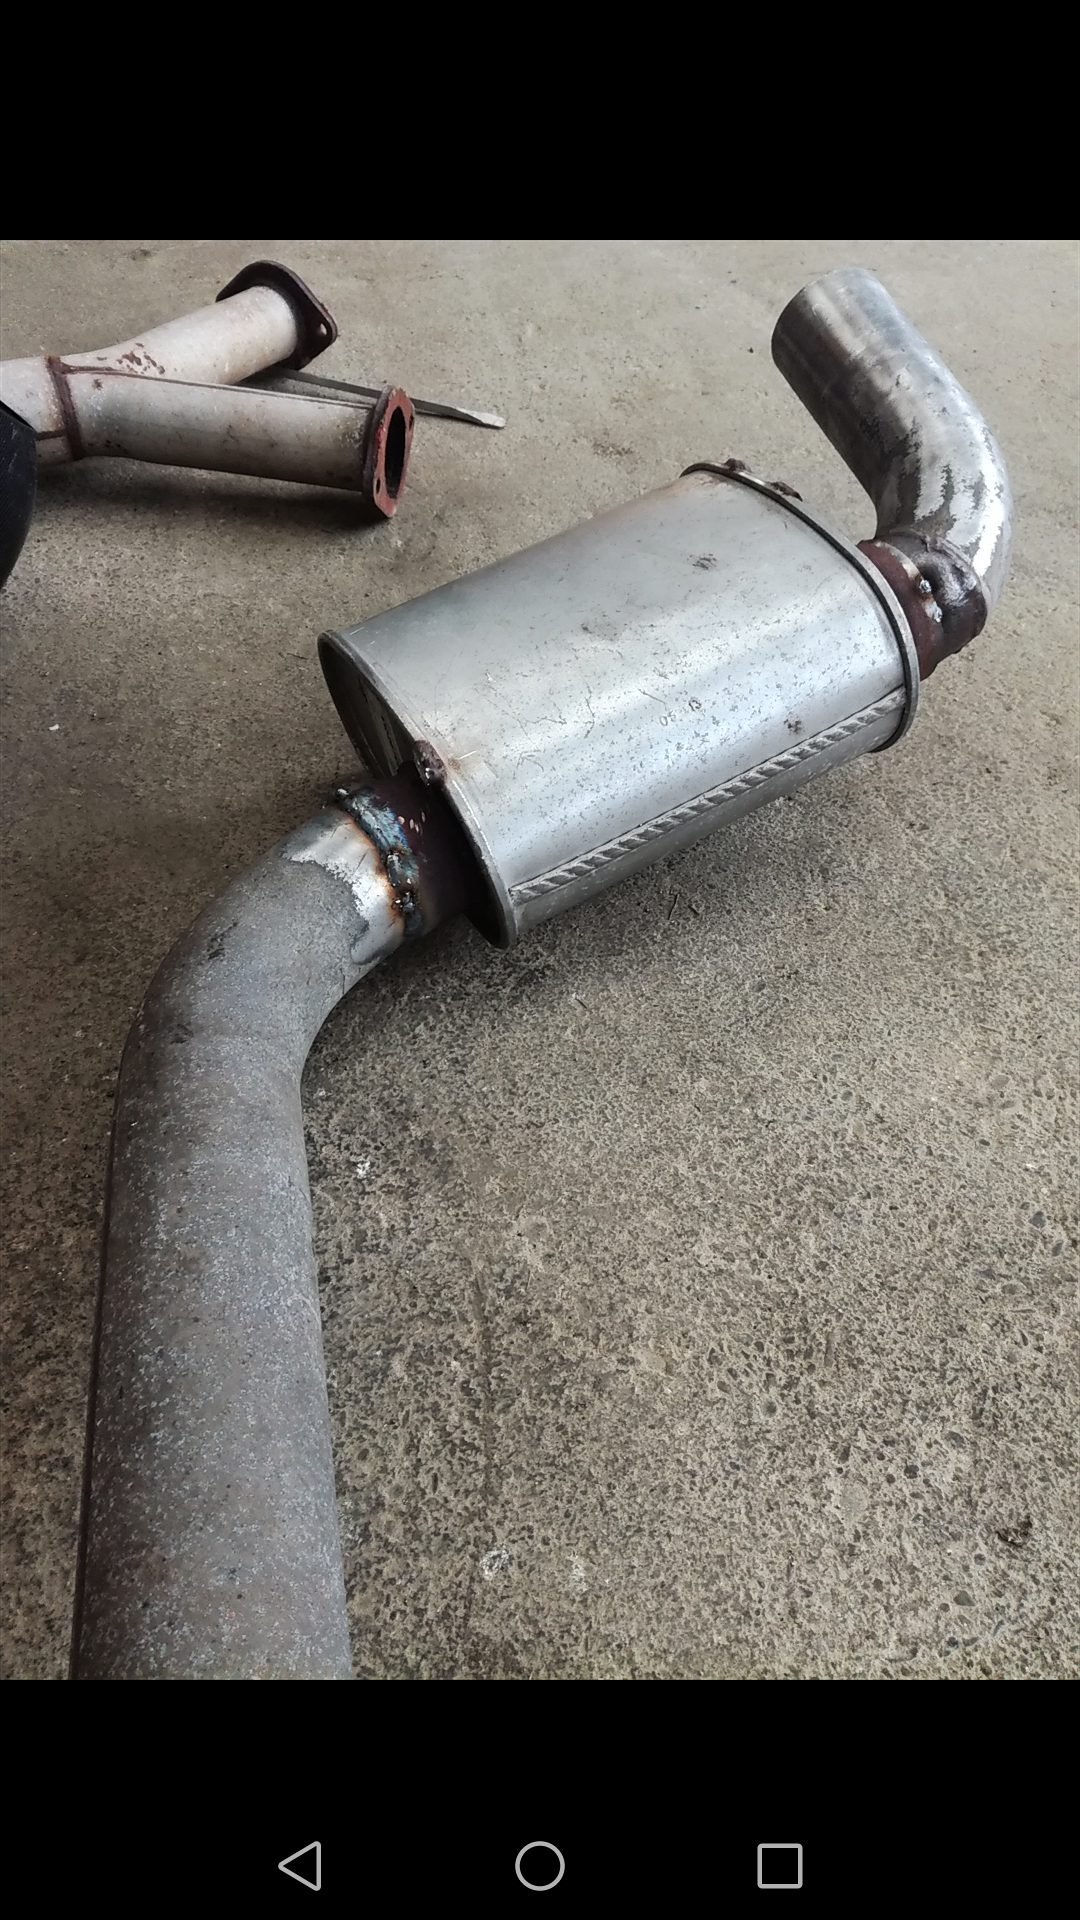
Re did the exhaust on the mr2 today to make it breath better, all 3inch piping with the smallest bit being 2.5inch at the flex joint. Kept the cost down by getting all the tubing and muffler from a wreckers. It's a fair bit louder but is pulling harder and all the way to redline which the old 1.75inch (at the tightest point) exhaust was restricting
1 point
-
This little Imp has now got a nice solid floor I really needed to get some solid work done on the Imp so I can get it off the hoist. I also wanted to see the end of a rotten floor so yesterday I decided would be nothing but Imp day (in between important coffee, music listening and posting cat photos on social media of course) Oh and also reading the latest Impressions magazine that arrived ( I joined a club!...) I finished the last bit of rot on the side of the tunnel behind the drivers seat area. Then moved on to the passenger side. Not anywhere near as bad as the drivers side but bad in different places. I pondered for a while at which bits I should keep or chop out. Then I set to work.. Hannah kept busy with an ever so exciting ball joint replacement on a customers van so I could I fritter away on the Imp I remade the wheel well bottom... Then I wheeled over the magic machine and made a snake.. Snake thing goes here... Followed by the beginnings of the firewall heel... The heel bone connects to the floor bone... Before I knew it there was a nice new floor upon which I can mount the MX5 seats I have recently bought Next step while its on the hoist is to deal with the parcel shelf which is rotten. Luckily most of it gets chopped away to allow for the top of the Datsun engine to peek its little head through. I think I'll also be a lovely fella and gift the job of slapping Por15 on the underside to Hannah. Because I'm nice like that.1 point
-
Went for a longer ride, brake still feels a bit weak so will definitely try new pads next. Also gonna make some removable baffles for the exhaust, it's pretty loud which isn't too bad but it reverberates around inside my helmet1 point
-
Haha, $12 undercut from Priddles in Upper Hutt, much centre part1 point
-
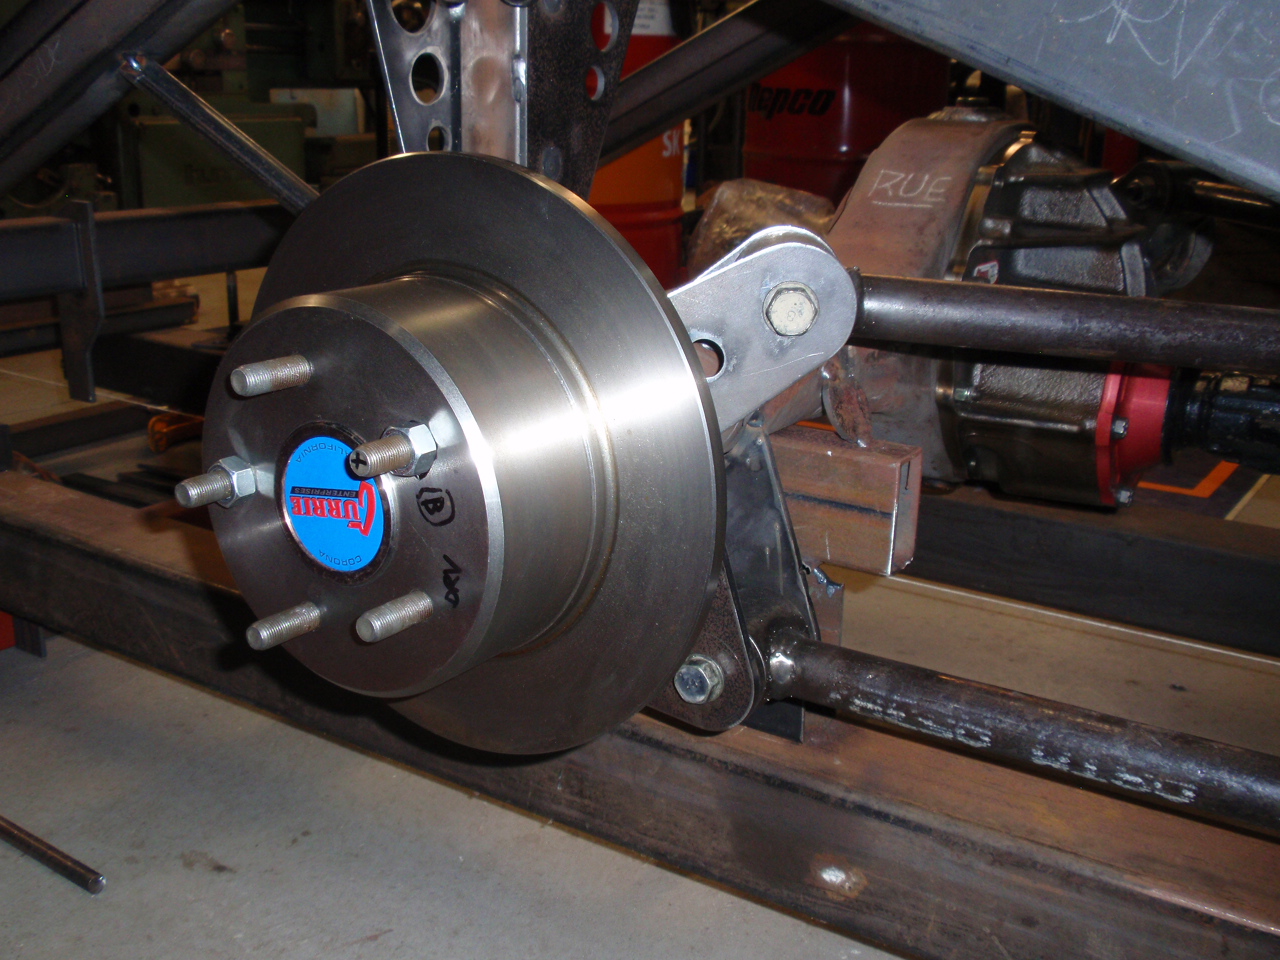
Structural work on the body is now done. Two layers of glass done on both of the inner guards. This was the first layer going into the RH side And another layer of glass over the front I gave all of the exposed plywood a couple of coats of Everdure, this is a marine product which is basically very thin epoxy that soaks into the wood and seals it off. One of the things that happened in the accident was the front wheel got a bit damaged, Dennis's homemade rims are very thin so it would of not taken much to do it Had it welded up by a place in Drury Made up and mandrel and remachined it. It took quite a bit of hand filing and sanding to blend it in after machining and make the repair disappear. Had lots of problems turning the OD and ended up having to glue a big wooden plug inside the rim as it was flexing so much each time the tool contacted. All done1 point
-
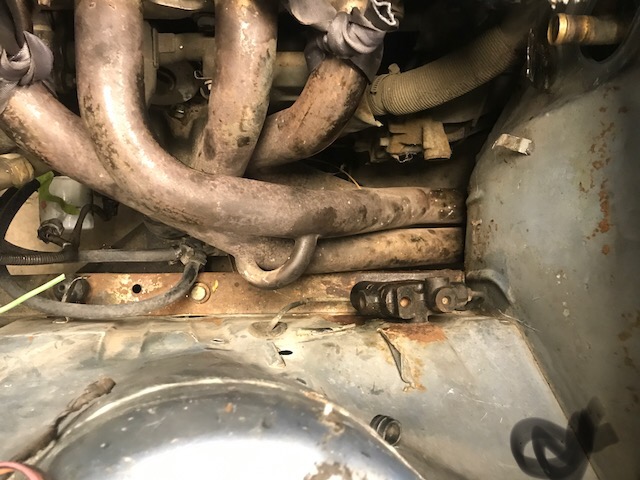
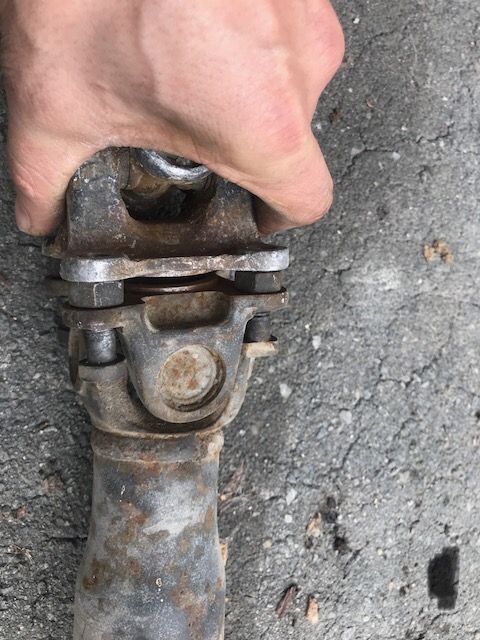
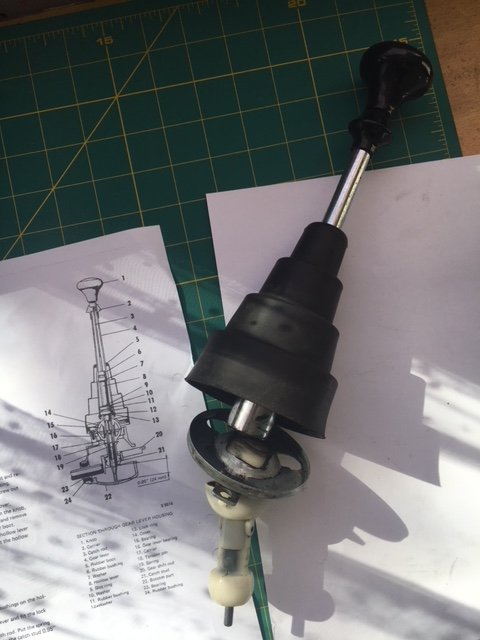
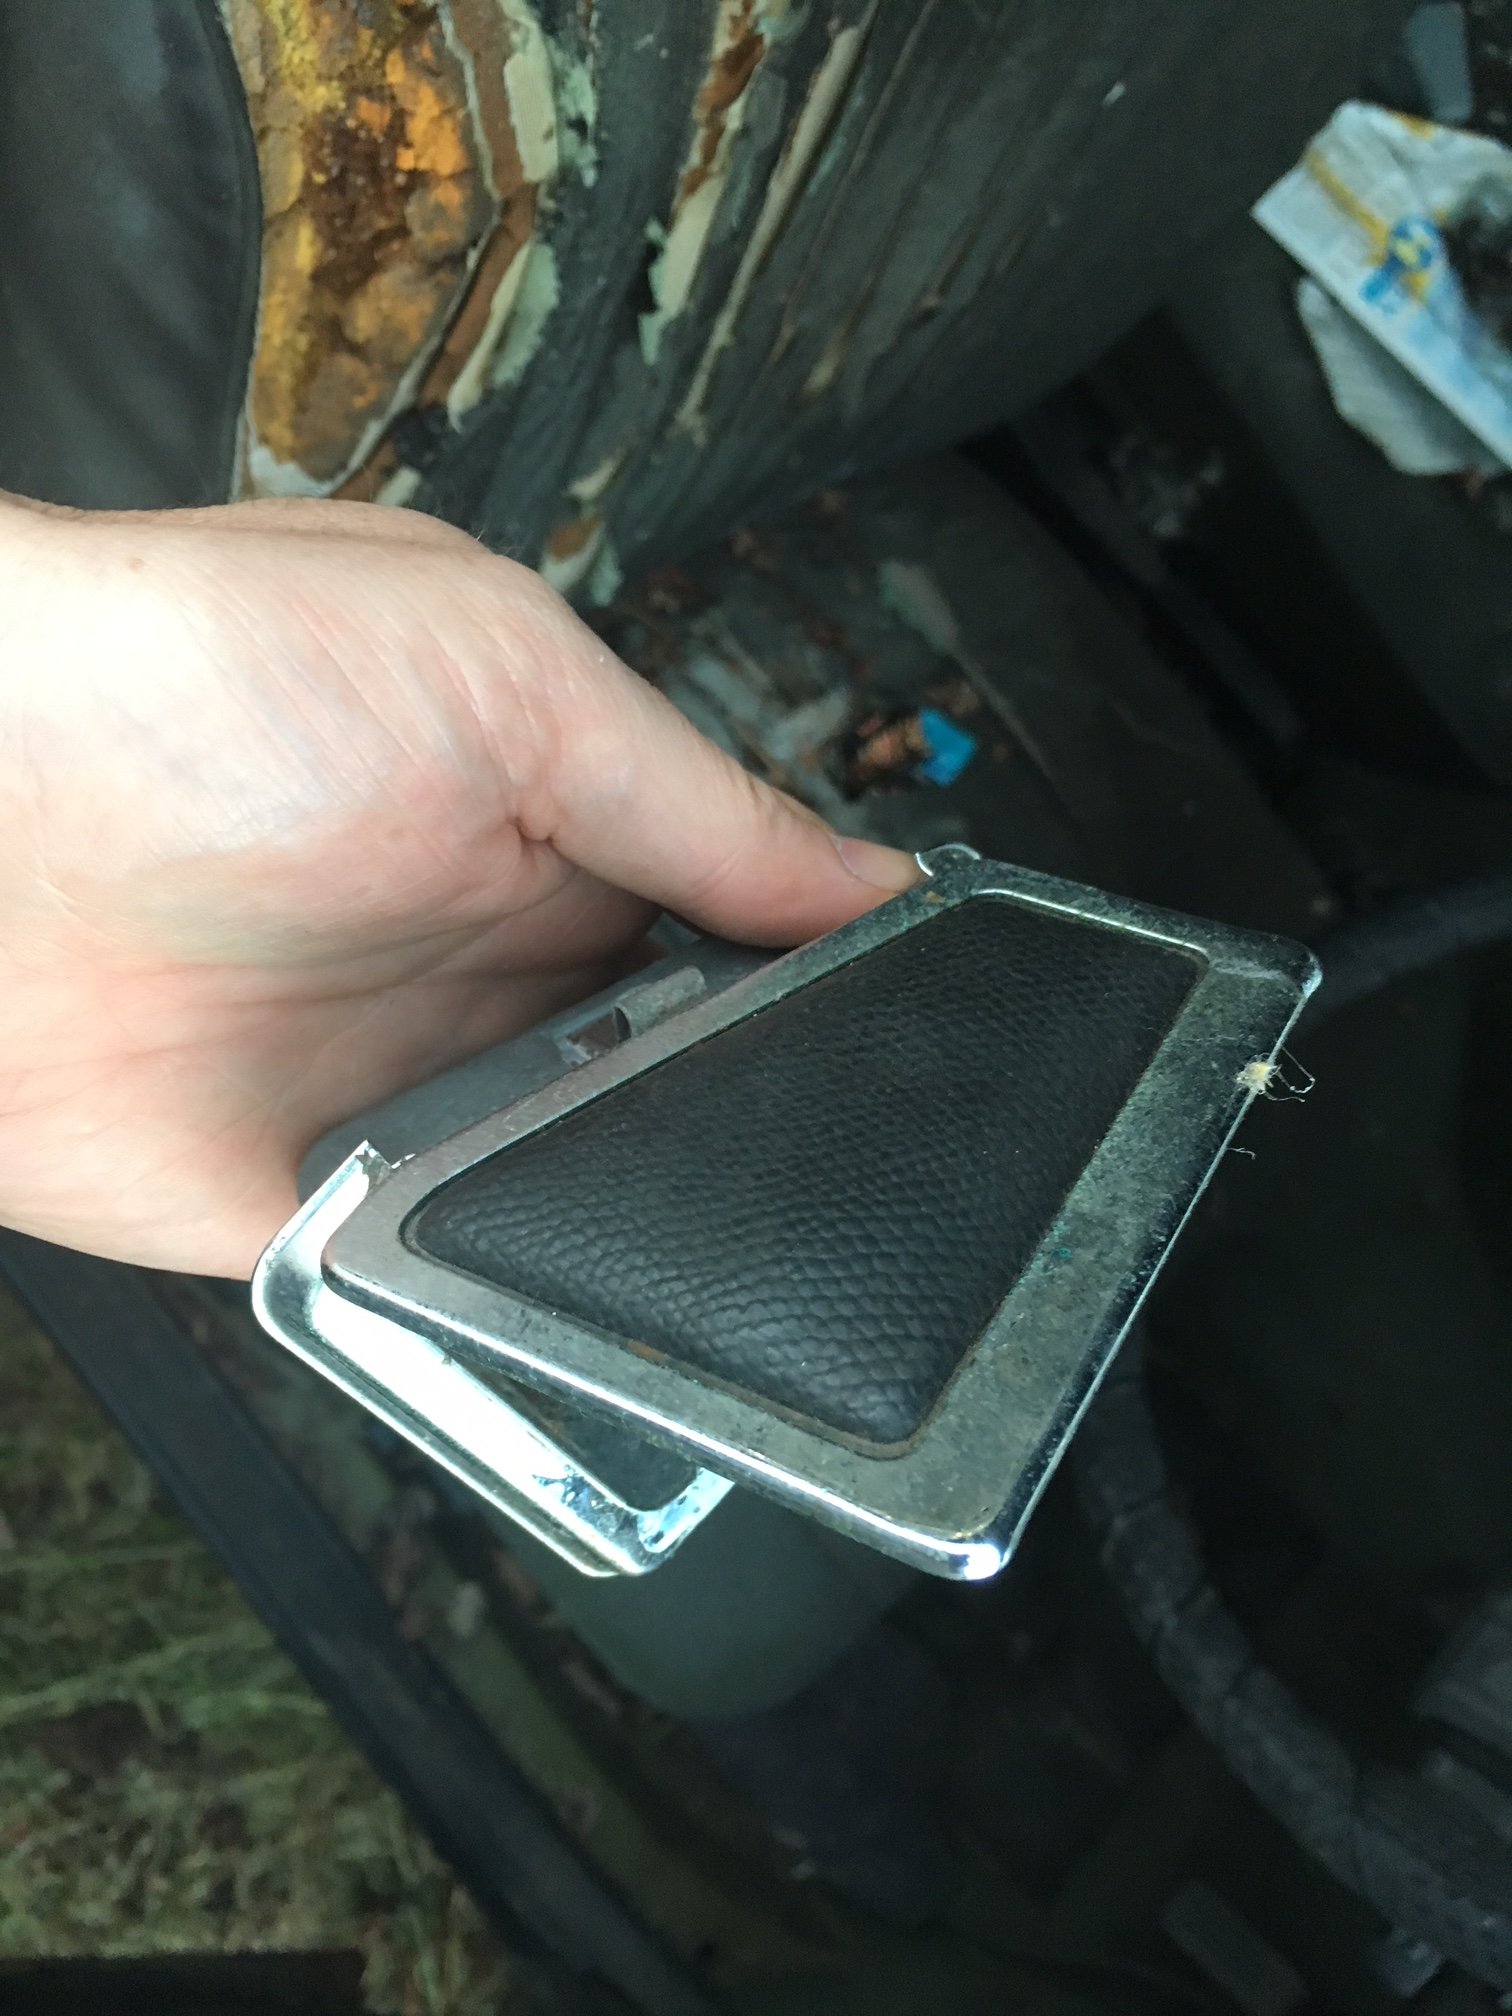
Hmmmm.......one of these things is not like the other.... It does make me think if this was one of the reasosn it was taken off the road. It looks at some stage like someone has tried to get it out of reverse and into neutrl without the use of the key which, as we all now know, is mechanically impossible when the key has been removed. Anyway, I'll have to come up with a cunning way of disassembling the assembly and either straightening or replacing the effected bits. In other news I took the 10 minutes between house and family stuff to finally get the key barrel moving, so we can now move it around to start.....so if I can talk the Sharners Apprentice ( @Carsnz123 ) into visiting and showing off his Lazarus skills we may even be able to produce some smoke!
1 point
-
Chur bo number two showed up - hopefully last big ticket item I have to buy And while Im poor am focusing on the cheap labour intensive bits - manifold #2 coming along... Any wastegate boffins out there? Cant decide whether I risk 2x 40mm Turbosmarts or go with the ~$100 per side extra 45mms... US guys seem to get away with twin 38s on LSx motors but many applications Ive seen have more room so better able to build ports that help with flow to the gates. Mine wont be quite 90deg turns but arent exactly setup for best flow...1 point
-
Obligatory wheel pic cos discussion.1 point
-
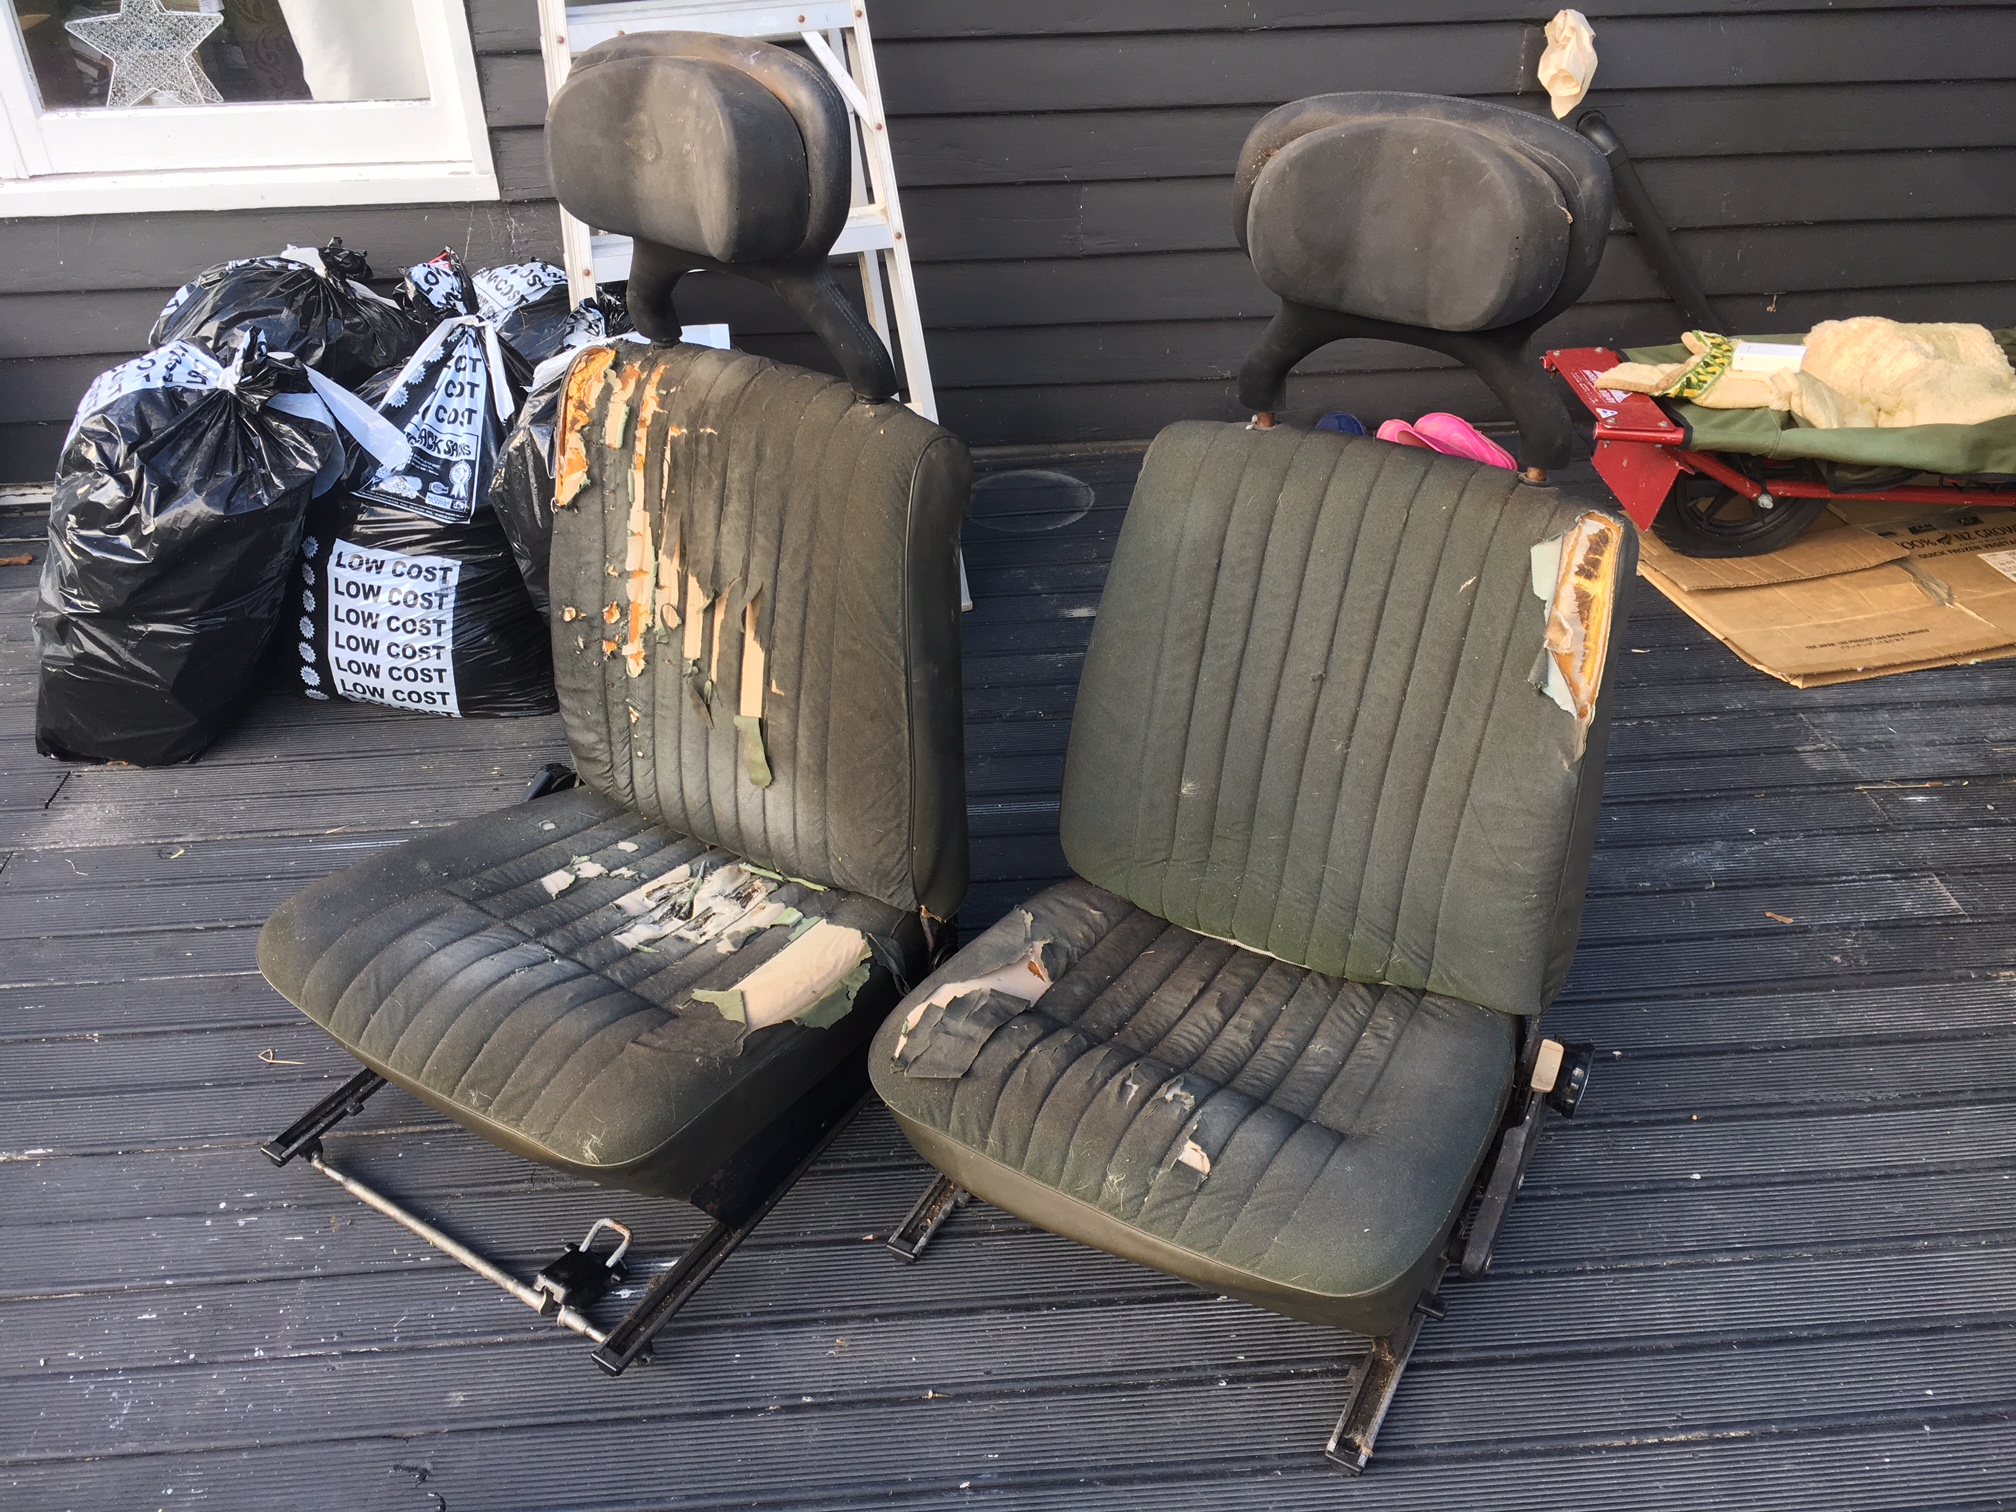
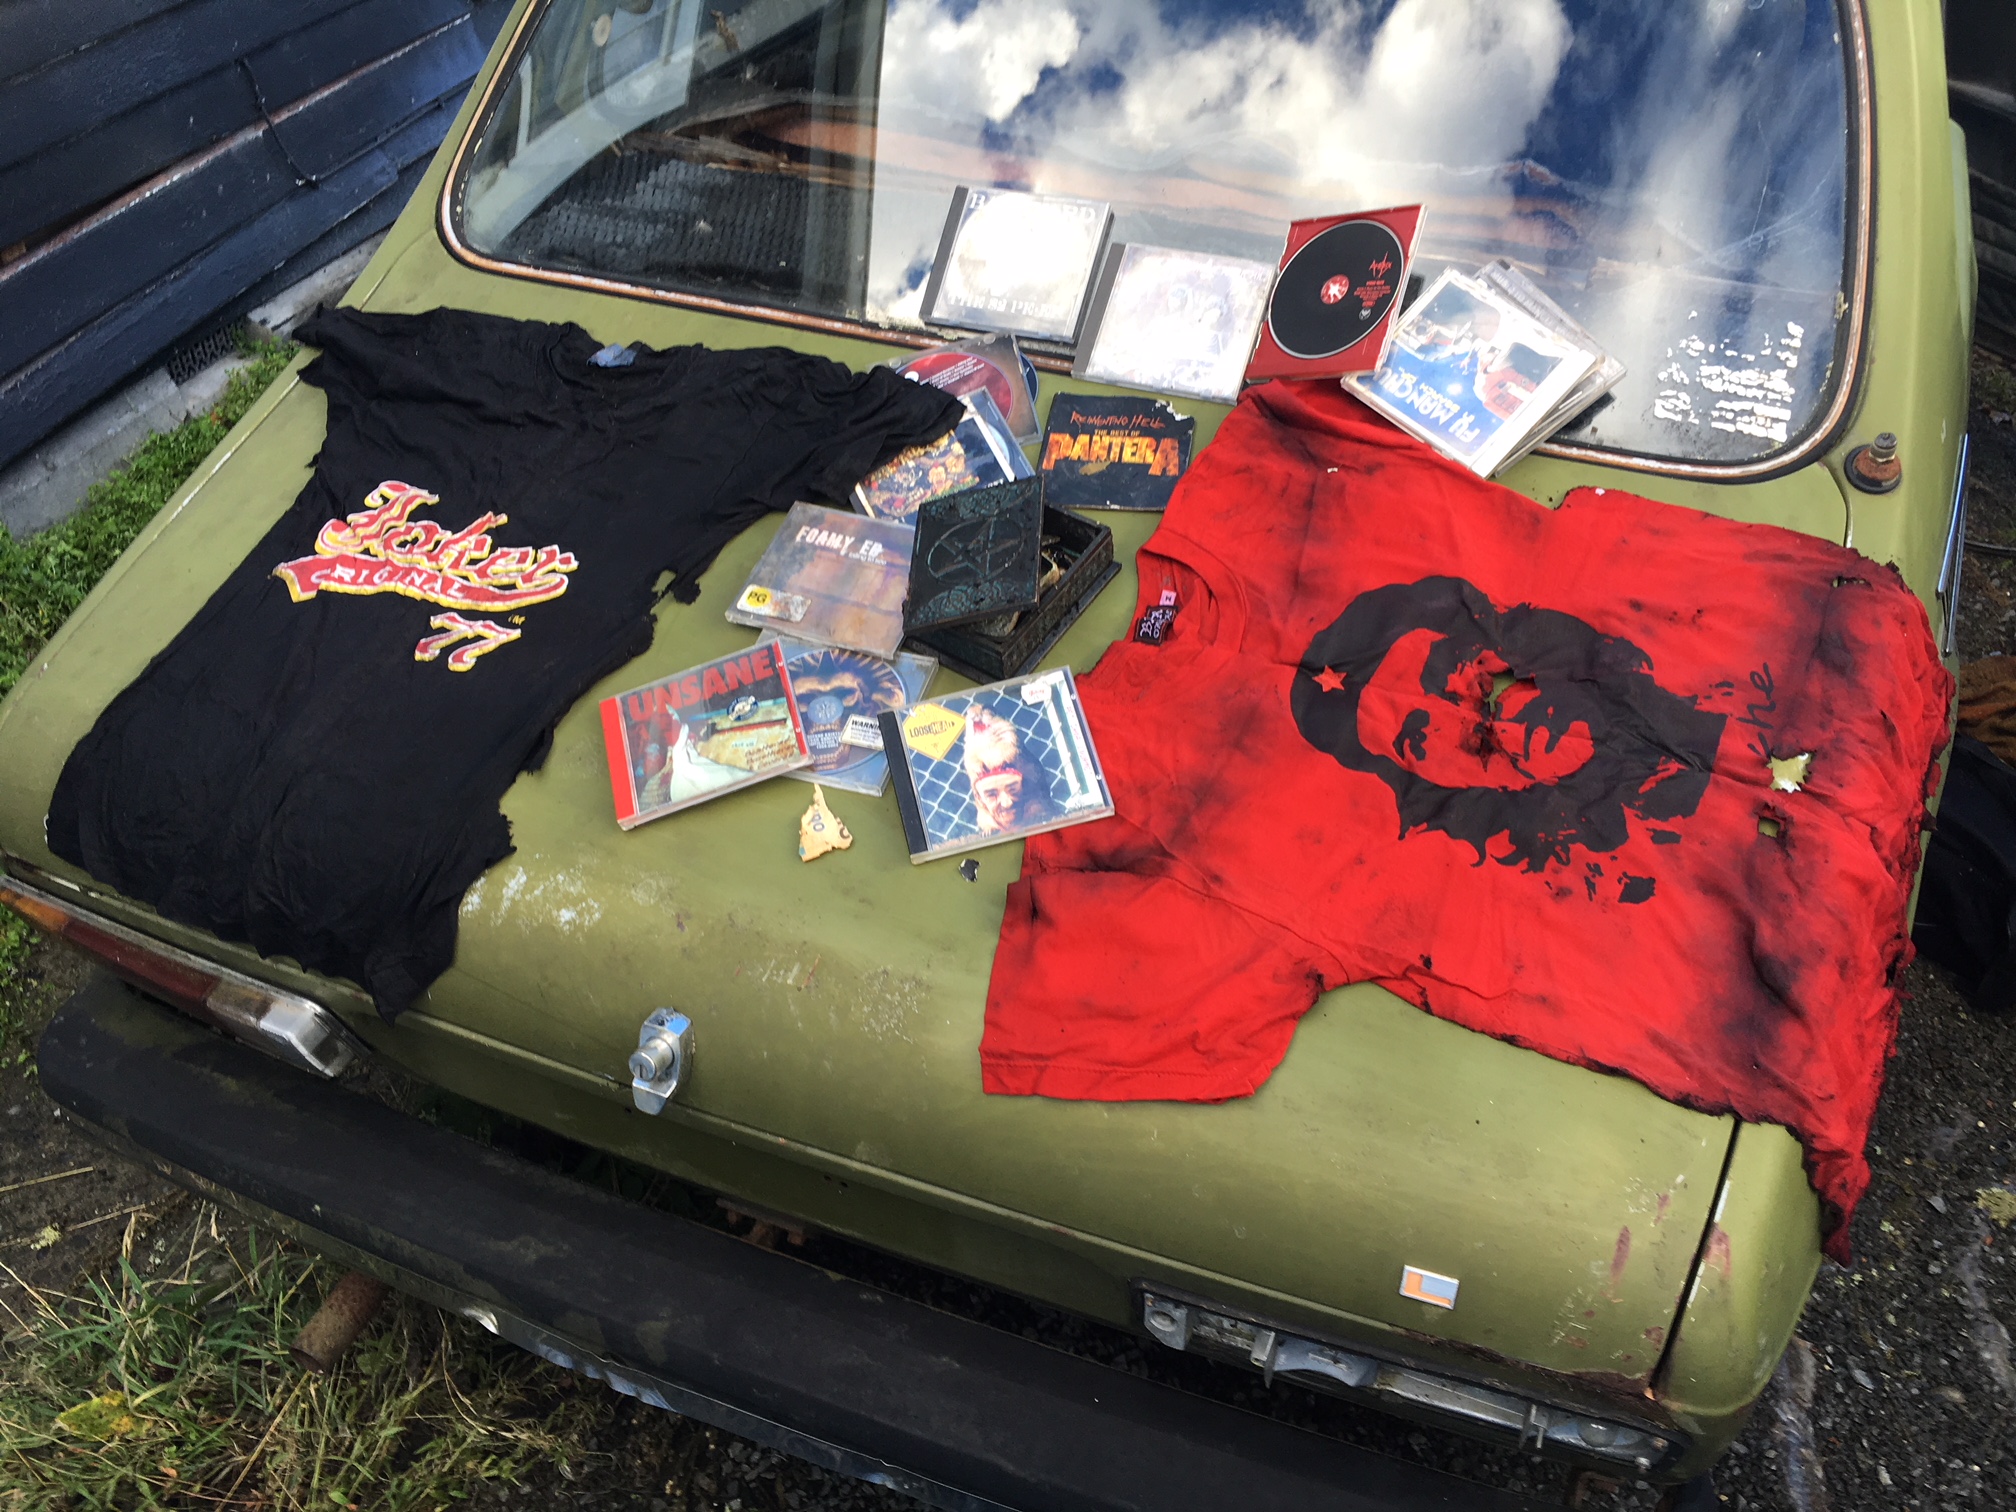
After a week of dodging hail showers in the evenings while working half in/half out of the Saab I finally found some good weather today.....so decided to take the seats out for shits and giggles. It has at least let me get eyes on some more of the floor but I'm not any closer to getting the key barrel out. Damn Scandinavians.... Seat mechanisms are all still good as are the frames, so hopefully it will be case of Motor Upholstery for Dummies and we will be good to go. Gotta love those headrests. Che Guevara tee shirt being gainfully employed to mop up water under the carpet....which is an excellent use as he was (to quote Eddie Izzard) a mass murdering fuck head.
1 point
-
Already had the 1UZ-FE engine from another project Avenger that I never got around to. Brand new R154 gearbox for it Independent throttle bodies And Hilux Limited Slip Diff Brought the clutch, flywheel and pressure plate. Got the hydraulic clutch release bearing This is a specially modified bearing from Manon Racing Products (MRP) The independent throttle bodies look so sexy on the V8! They ever so slightly overlap And they are a little bit staggered Installed the clutch. The kit I brought didn't come with a ring gear so I had to use the one off the old auto flex plate. Installed the clutch release bearing in to the gearbox I also decided on the ECU. I am going all out and getting a Link G4+ Storm. I am buying it from NZEFI and they do bundled easy wire kits for the 1UZ They also do a complete new set of connectors so I will be able to just crimp these on to the premade kit and it will be really tidy, I won't have to use any of the old Toyota loom, it will all be new and only the bits that I need. I have also decided on the dash. I am going for a AIM MXS Strada Digital Dash Display. It is pretty awesome. It has tons of different layouts and I can load 6 different ones to the switch between while driving. They are all customisation also. They have ones like the photo below, but also ones with your classic analog gauges for speed and RPM. It also has shift lights. It's not going to be cheap. It is about $6K just for all of the electronics but it will be worth it because it will all be new and all be top of the line stuff.1 point
-
Shit day at work today, concluding with a visit to my desk by the CEO. Immediate Boss (GC) stood up for me but still Cack. Got home and attacked the Passenger Door Doorcard to work at getting the lock barrel. Got this far before being driven inside by Mosquitos and thirst. Not as bad as it could be I suppose but something will have to happen to the bottom and the outer skin (one of the few places to have a hole in the body). Once I've arranged a weatherproof cover the door will come off for some work. Tomorrow nights job will be getting the barrel out (if I can work out how). Oh, and another win was finding the full Saab 99 Parts Manual on an Irish Saab site (I know, go figure). Time for beer.
1 point
-
Oh, and this emerged from under the lichen....
1 point
-
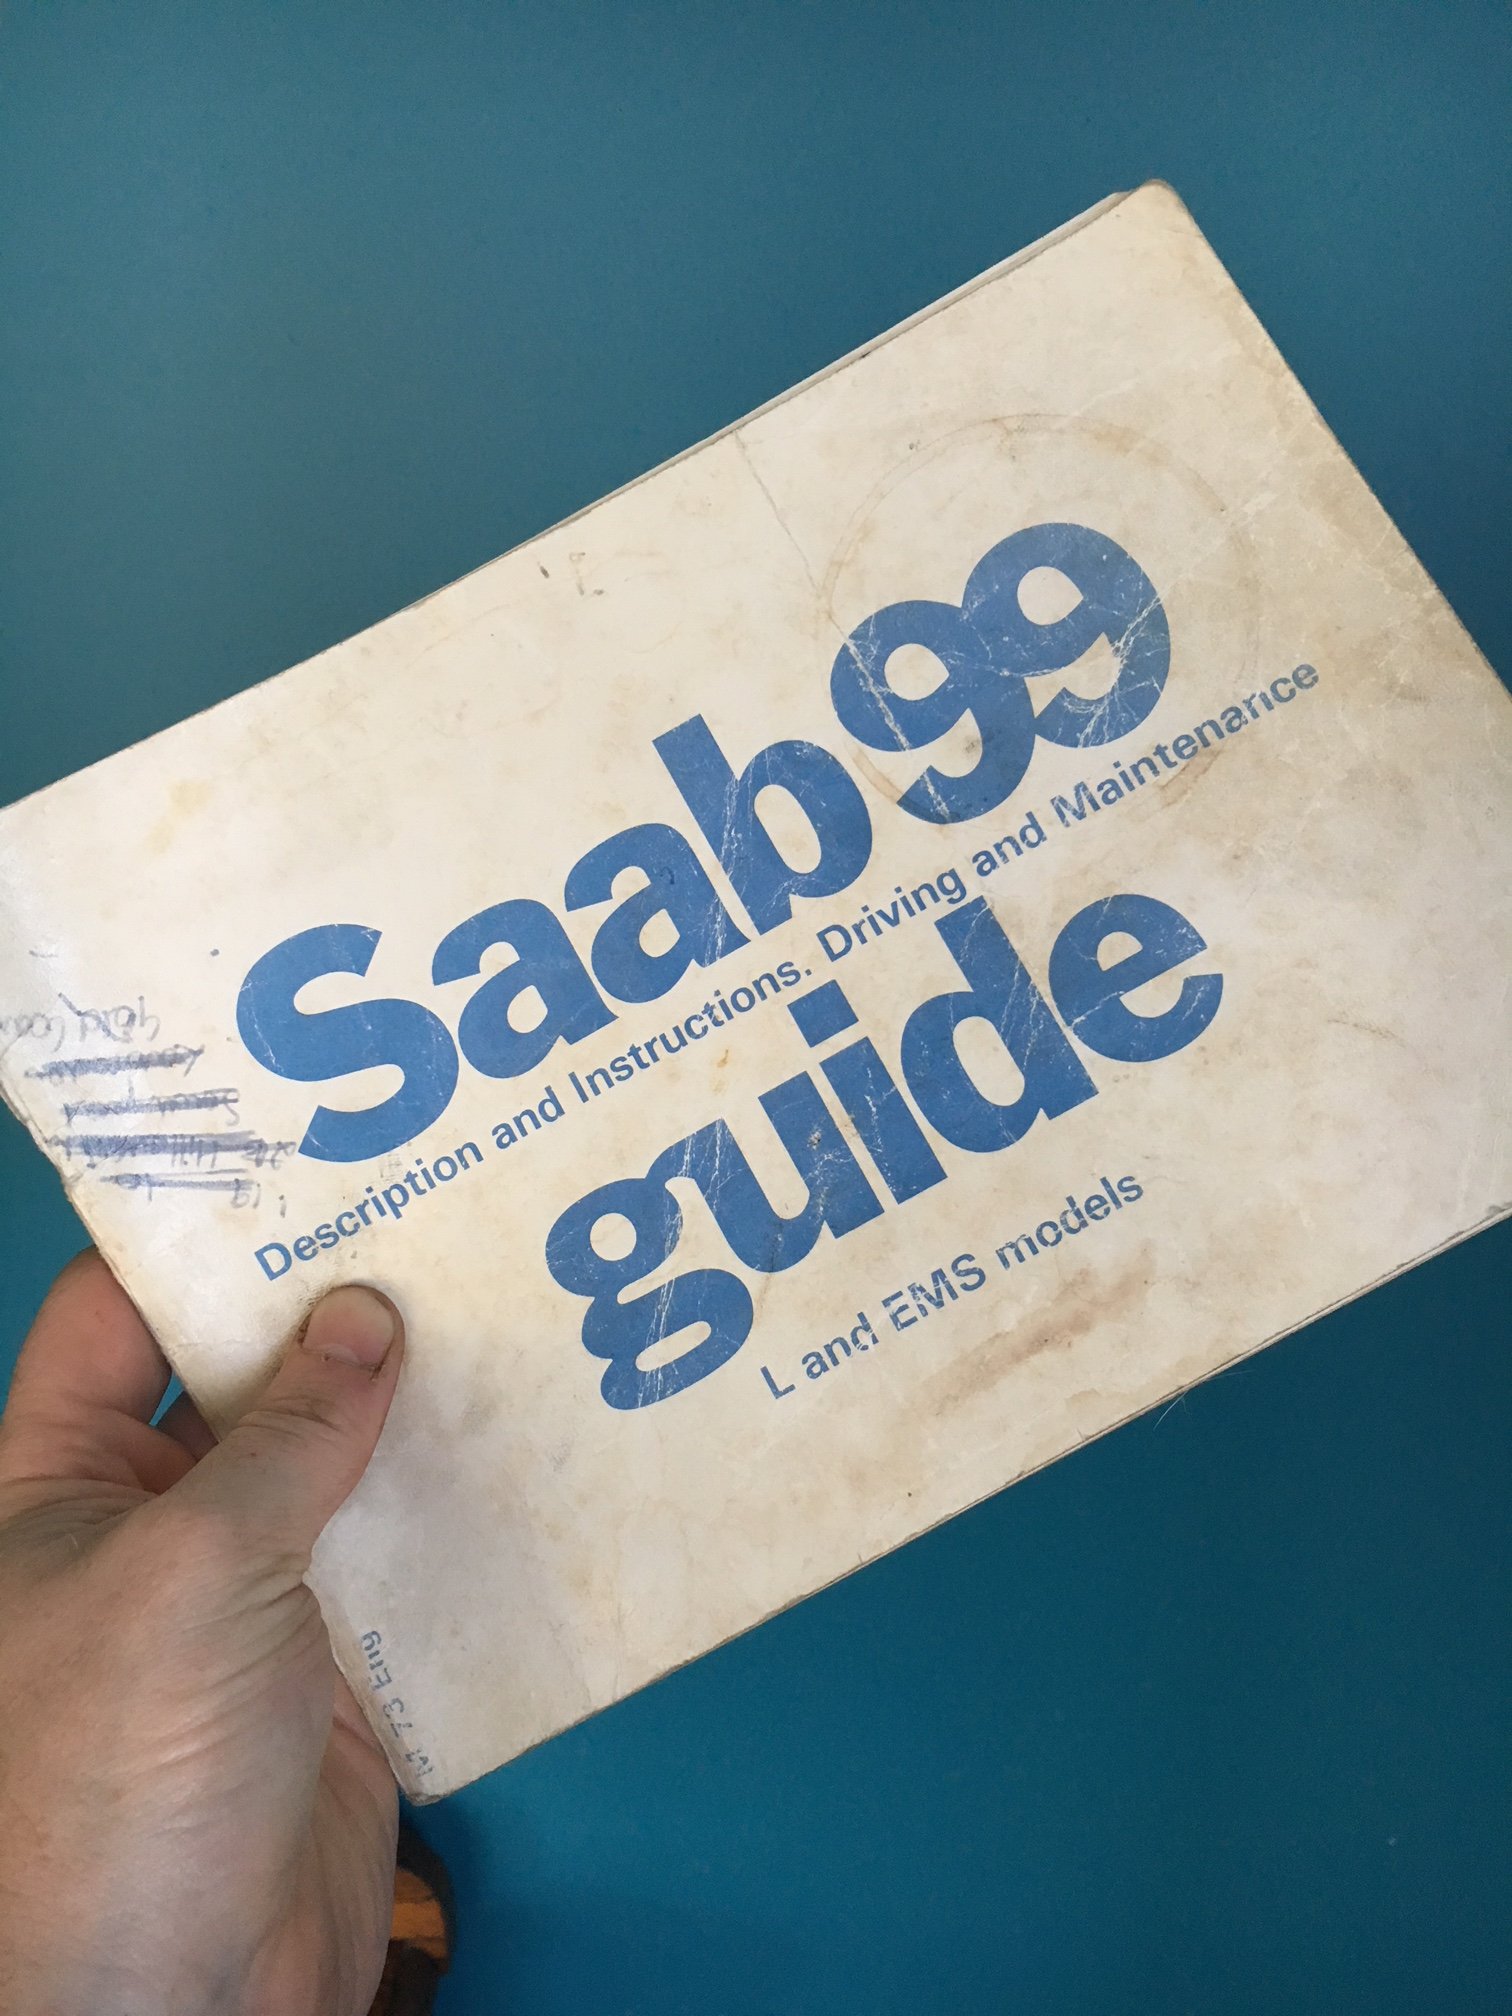
Waterblaster and scrubbing made short work of the lichen today and Agnetha now looks 76.2% better. Once the water drains out of her I'll attack the interior with the vacuum. In other news, the hypothesis that th elast owner was a 60yr old male with walk shorts, sock and roman sandels with the uncanny knack of being able to quote the Saab Owners Manual verbatim were disproved when I climbed into the boot from the cabin and did some archeology: And speaking of owners manuals......a chance find by @Carsnz123 at the Vintage Car Club. We are guessing it could well be for this very car, how many other 1973 99L's made it to Christchurch?
1 point
-
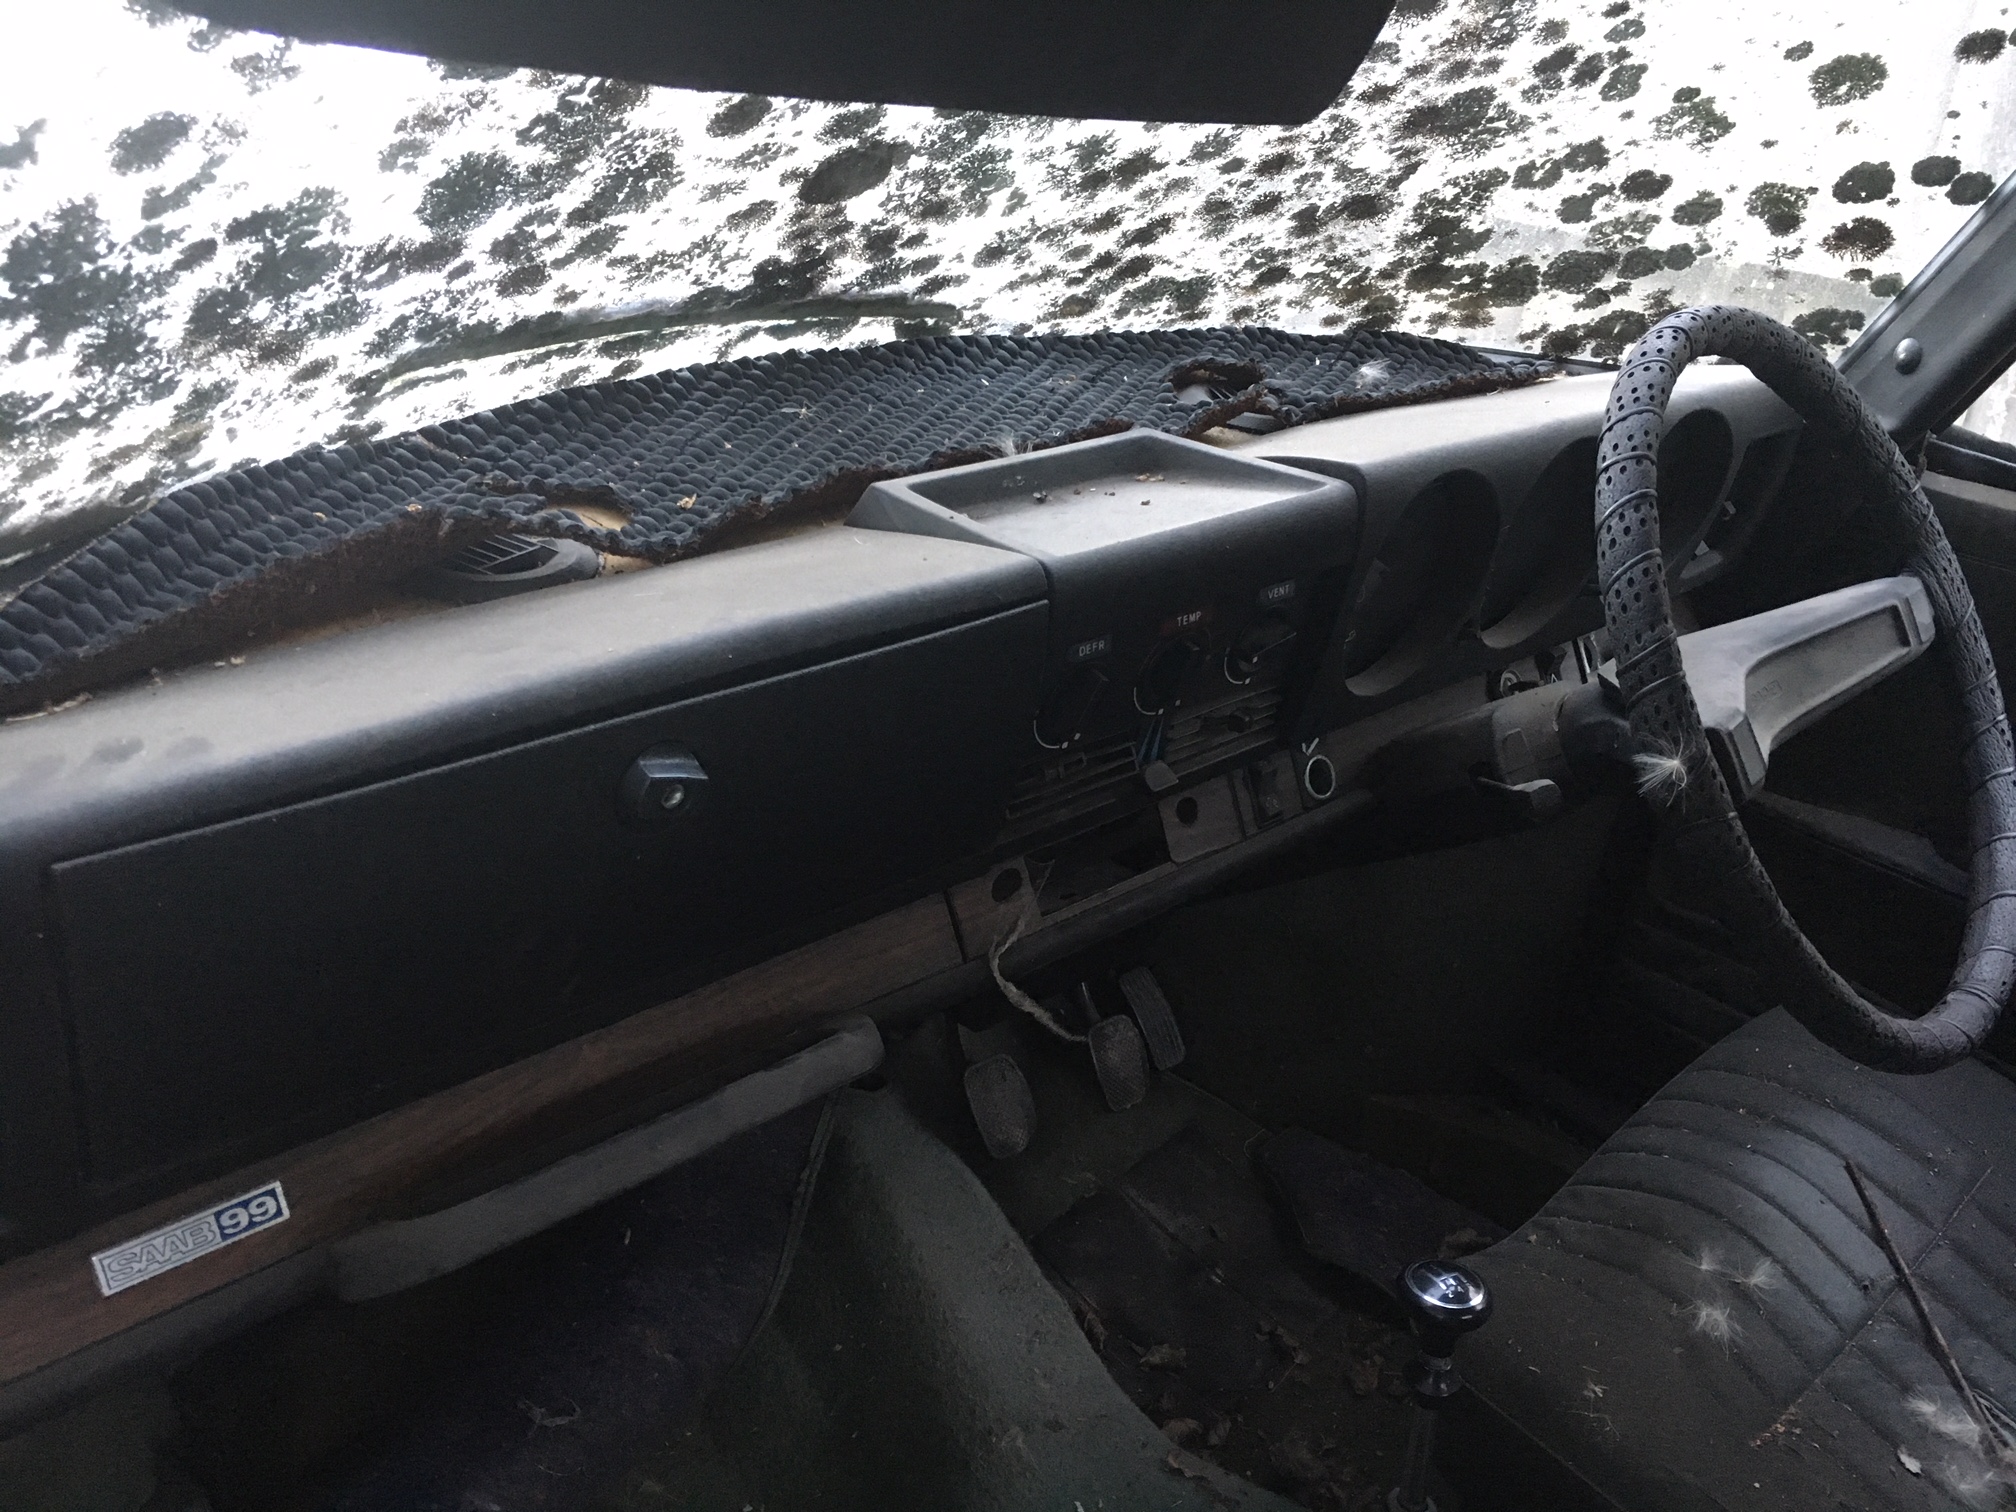
Digging around inside this evening before tea.....Dash is in really good condition As are the passengers ashtrays... I'll do a gif soon of how the swedish seatbelts work....totally arse about face.
1 point
-
I found a pic, taken just after picking Larry up, And last night on the way home from work, I went for a bit of a doort/pooed my pants. Stopped on the local dam for a pic, He's a handsome chap is Larry. Regards, VG.1 point
-
These things are mean. Well done. Also,1 point
-
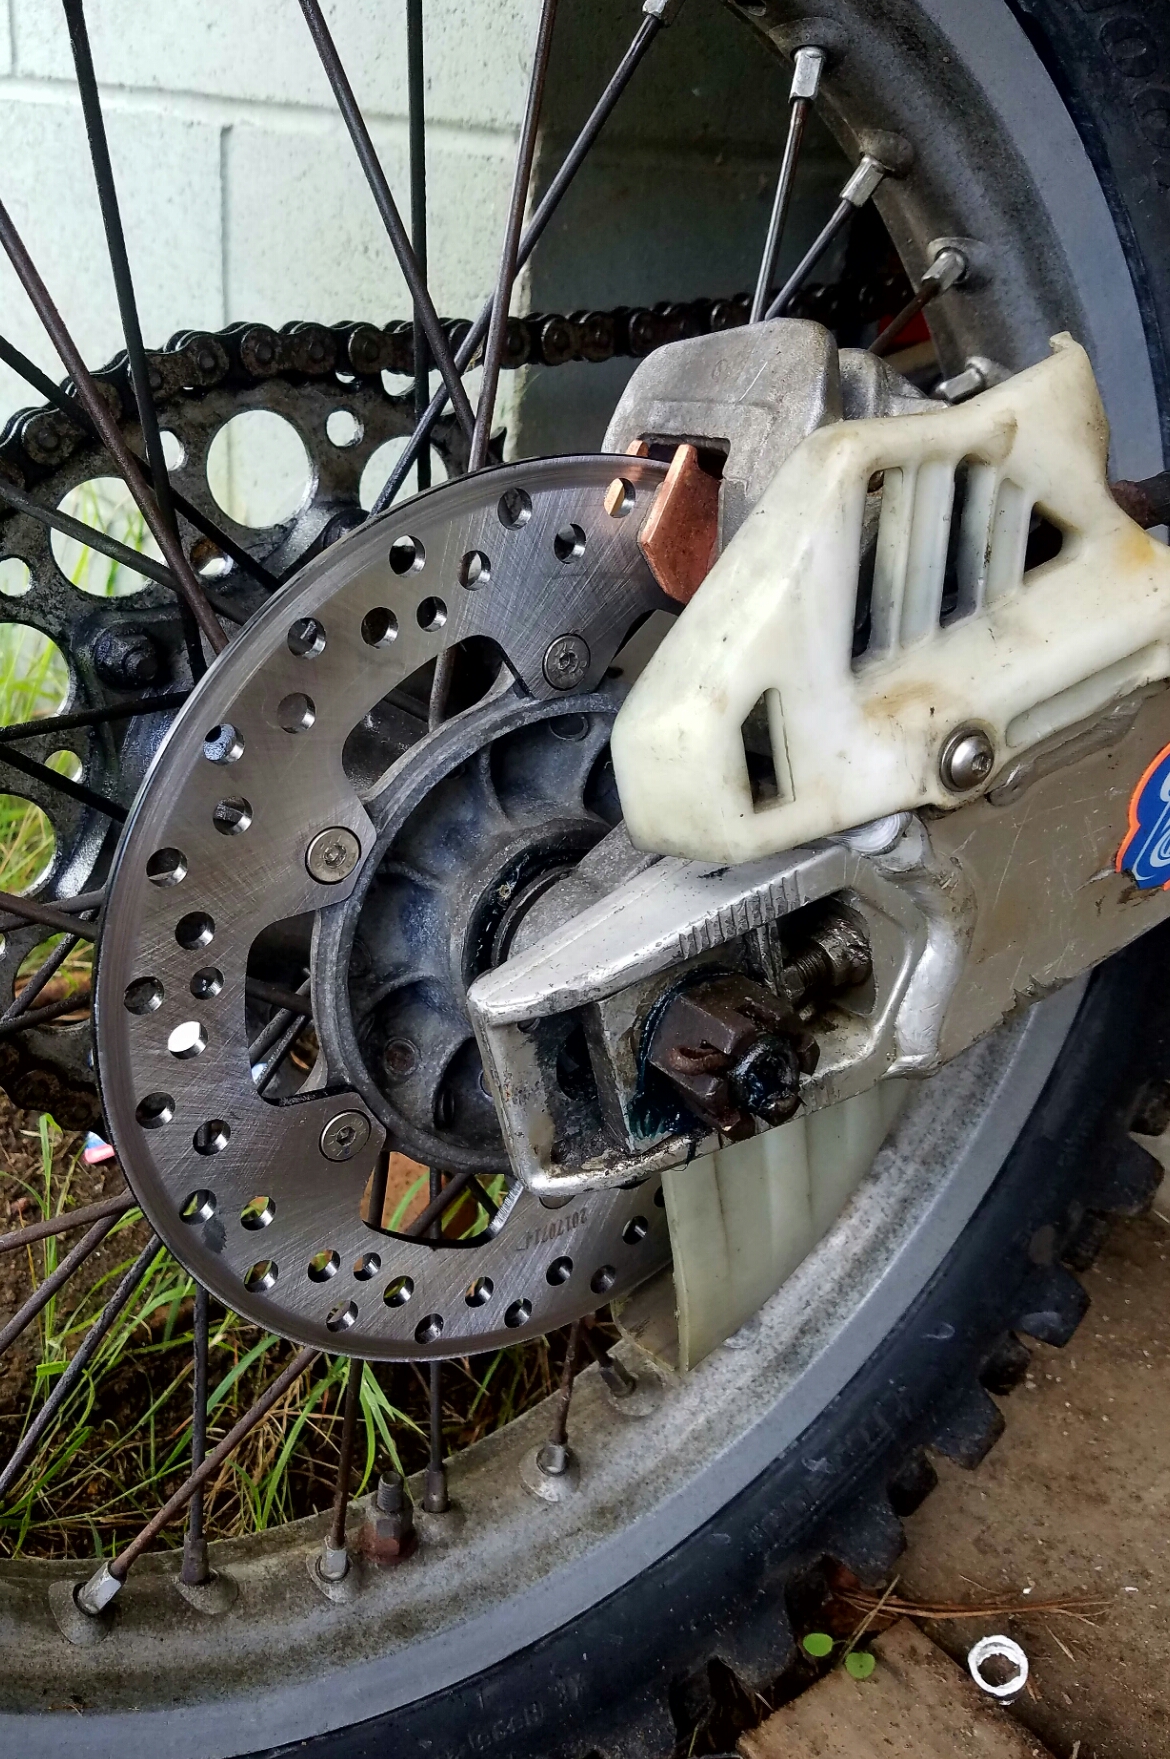
New brakes day on the 250... New rotor and pads
1 point
-
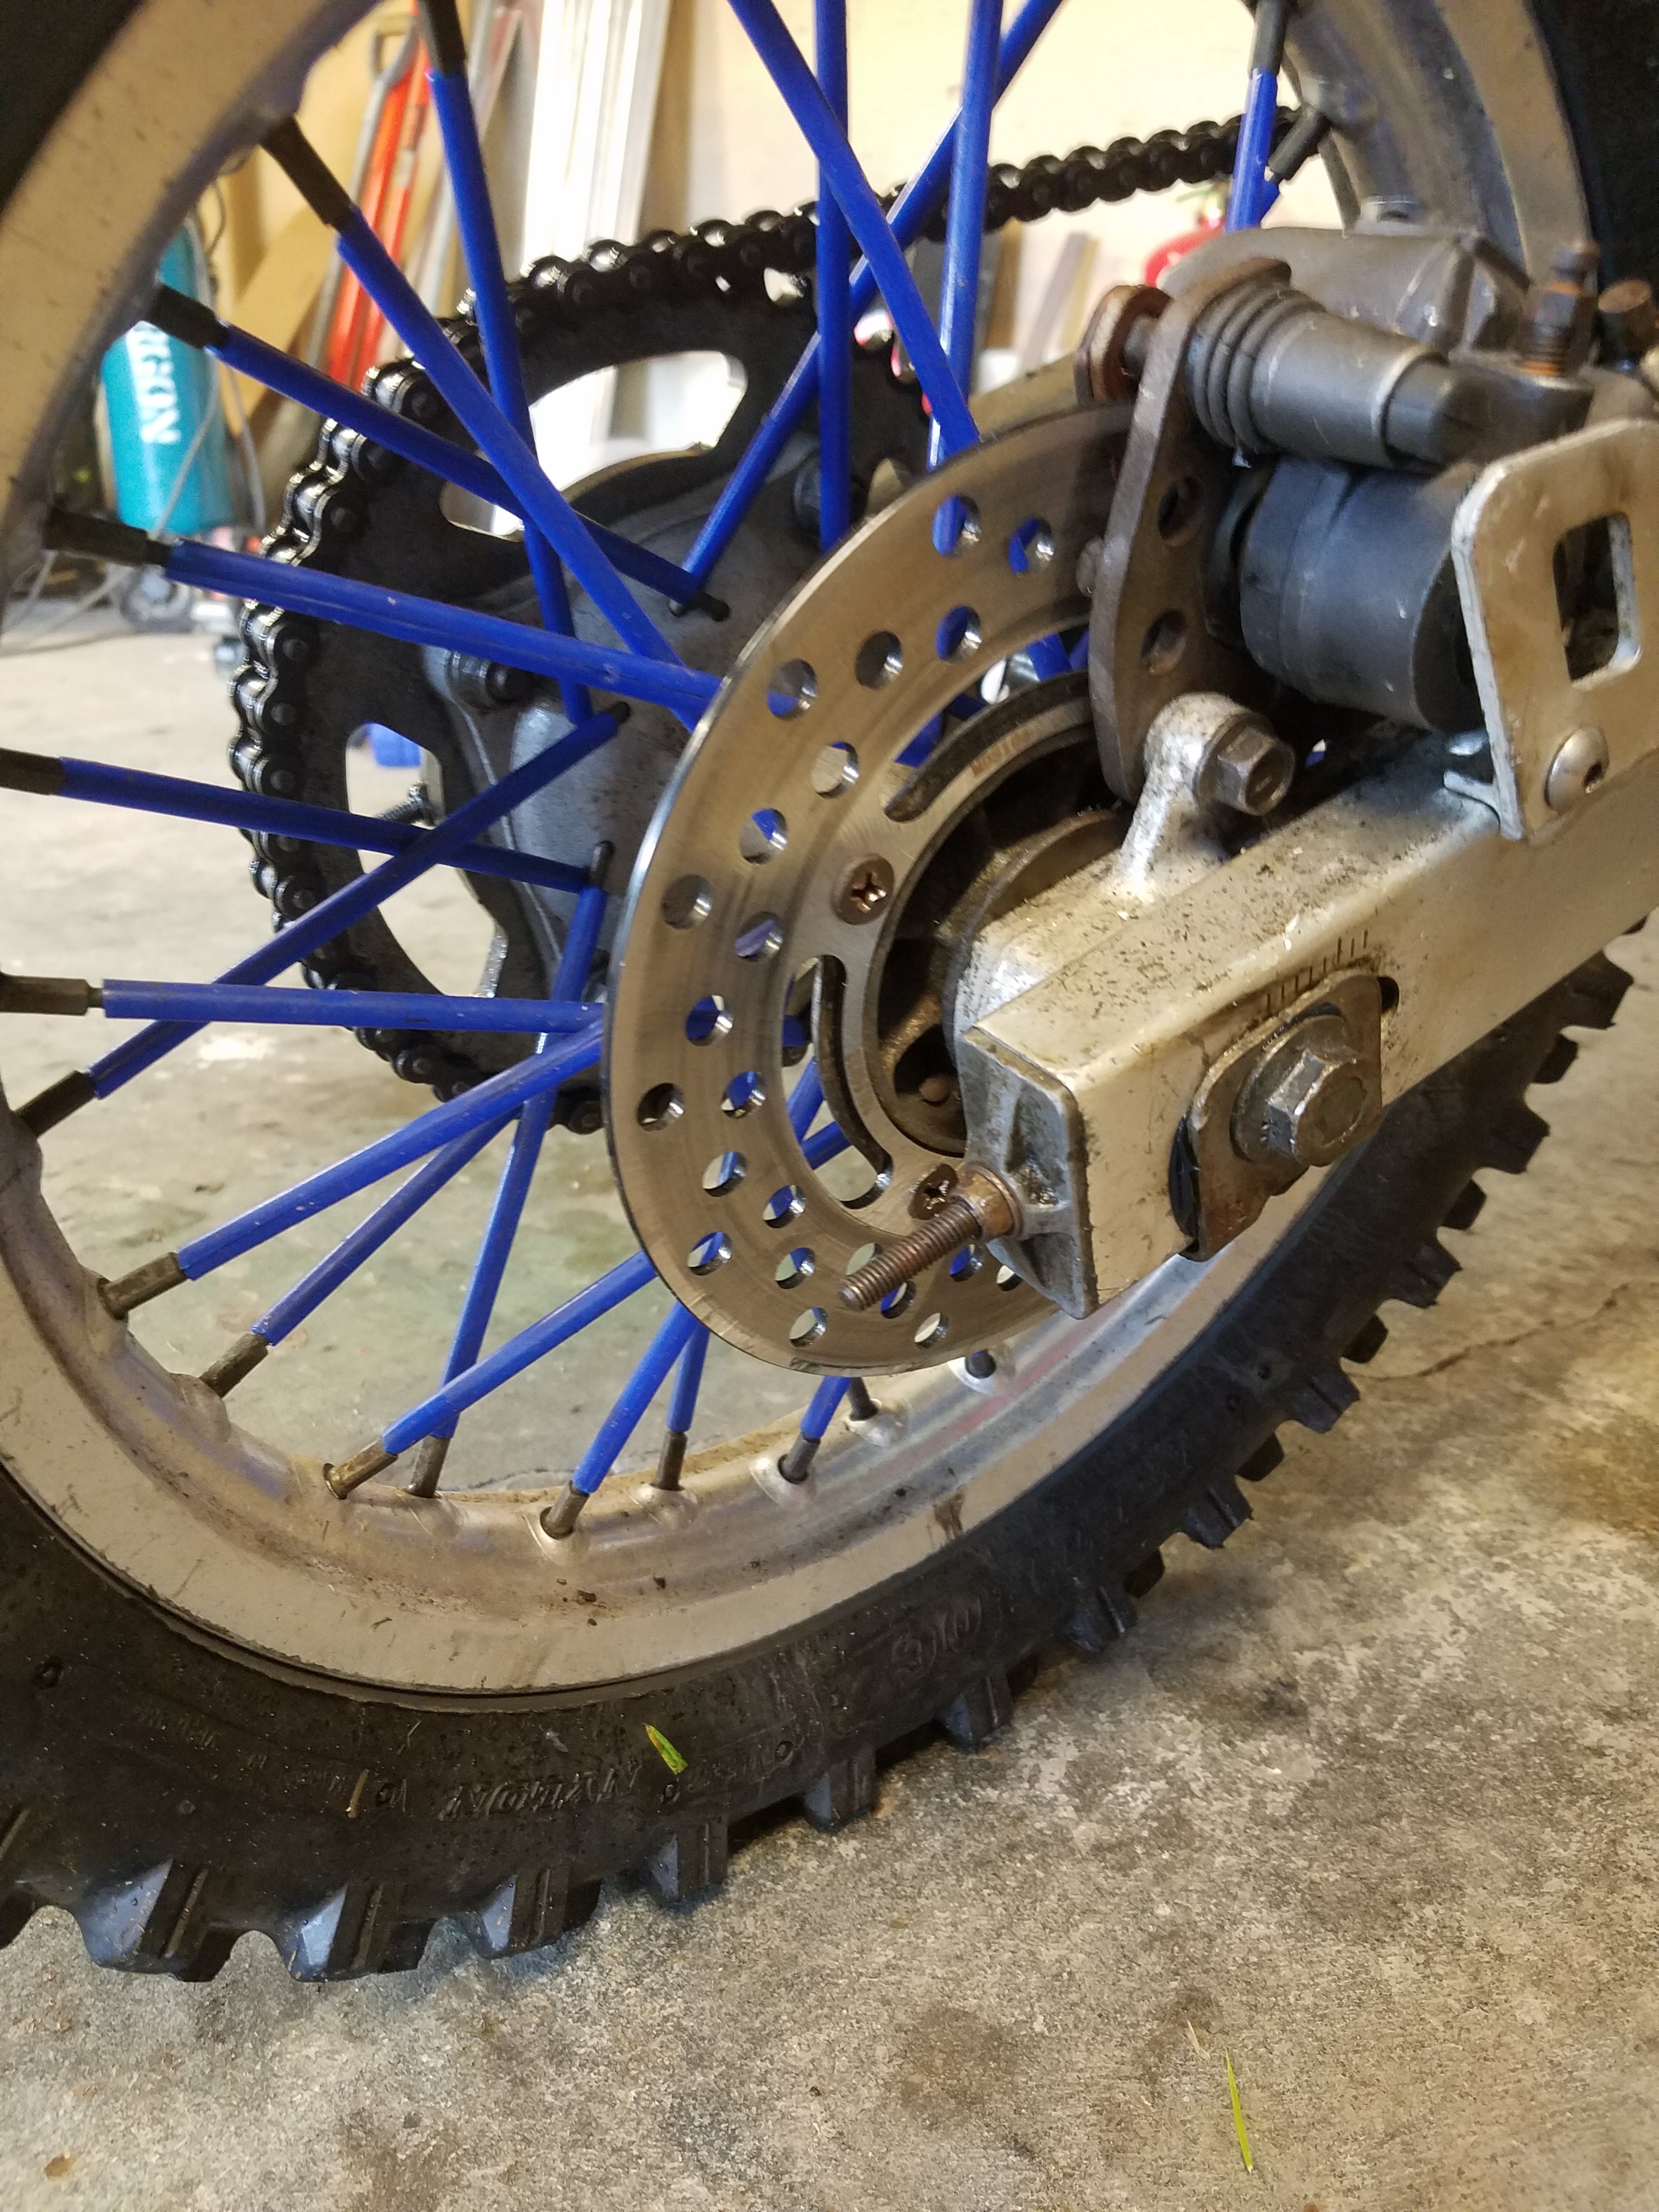
New brakes day.. The 85 with its new rotor and pads
1 point
-
Ok then! here we go. I'll do my best to explain this and hopefully it makes sense. I'm going to assume that the carb and Ignition system are in good working order and the quaddie is Jetted up correctly for your setup I set my mixture screws out 3.5 turns. My car wouldnt start on any less, Start engine, warm her up, Next get out your timing gun, Yep thats right set your base timing this is important in order get the right mixture at Idle. Advance your timing giving the odd blip of the throttle until the engine response is sharp and crisp ( for me this was at 12* BTDC , Depending on how modded your engine is this could be more like 14-16* BTDC.) also make sure your vac advance is disconnected Now... Get a vacuum gauge and connect it into an available vac port. start with enrichening one screw at a time, the vac gauge should react and read higher as you give it more juice. the engine speed will naturally increase you may need to wind the idle screw back abit to maintain your idle speed! when the vacuum gauge stops responding to more fuel dial it back slightly and move to the next mixture screw. once completed plug in your vacuum advance. your idle speed may go up a little . once again wind your idle spped screw back again to compensate . Idle speed should be around 650-800 rpm. Now your base timing and Idle mix are set. back to timing. being that you may have advanced your base timing to 12-16* or maybe even beyond depending on your level of 308 awesomeness. the Toatal timing is going to be too far advanced. What I did before I started the whole tune up is I set my Crank pulley to TDC :made a mark , Then I wound the Engine back 10* (anti clockwise) on the timing marks and made another mark at zero I countinued to do this until My mark was at 34* BTC . Most (not all) Modified pre VN headed Holdens. Like to be all in @32-34 Before TDC @ 3000rpm. anyways base time and mixture is now set so keep your timing light with you rev your motor up to 3000rpm check your timing @3000rpm if your are beyond the Magical 34 mark (eg if your firing at 40* BTDC) pull the dizzy and set the centrifugal advance stops earlier or better yet get a pro to set them or a dyno run they will pinpoint where the ignition timing makes the most power. I hope this helps mate Holler out if you need anymore advice. I'm not a pro but this is what I did and It worked for me! Also get an electronic choke setup off ebay. best investment out. on the right hand side of the carb is where the Choke/Fast idle adjustment screw is located wind this in when cold to desired choke RPM . now go do a sick skid in your 308 STRAYA CUNT!1 point
-
Sussed out my interior light tonight, and plugged in the heater blower switch. Flicked the switch and plenty of current draw but no go.. After staring at it thoughtfully for a bit, gave the heater box a judicious kick and with a Whrcrunchsqueaksqueakwhirrcrunchsqueakwhirrrrrrrrrrr It came back to life, meaning that at this point EVERYTHING WORKS. Place your bets on what will break first now
1 point
-
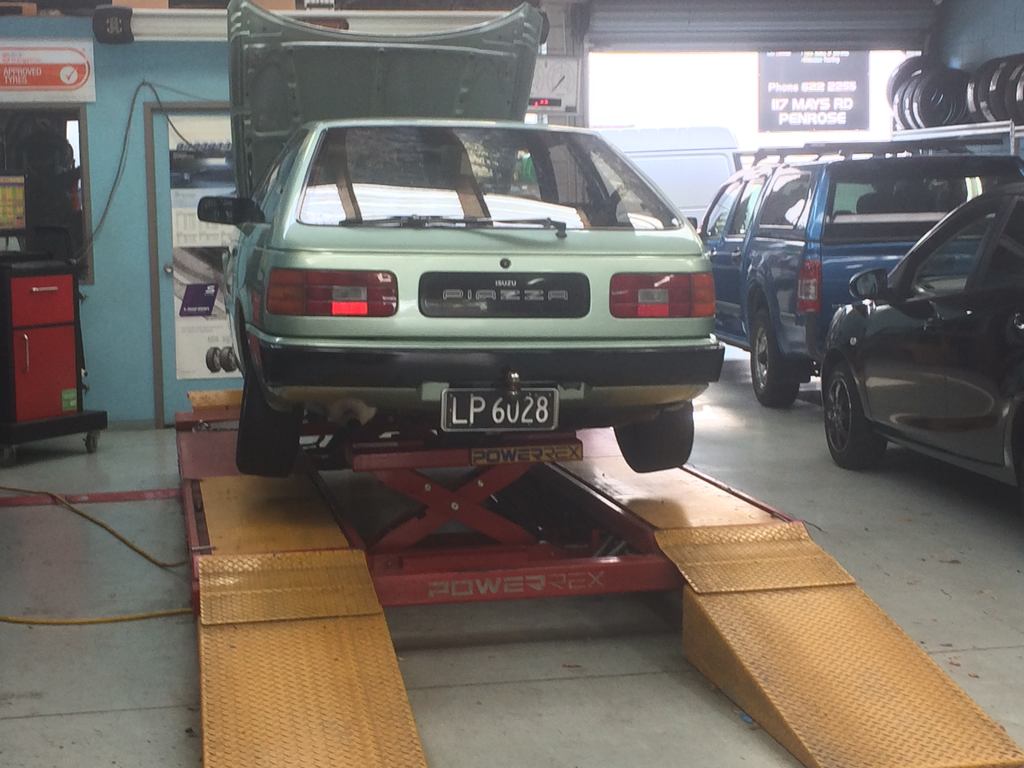
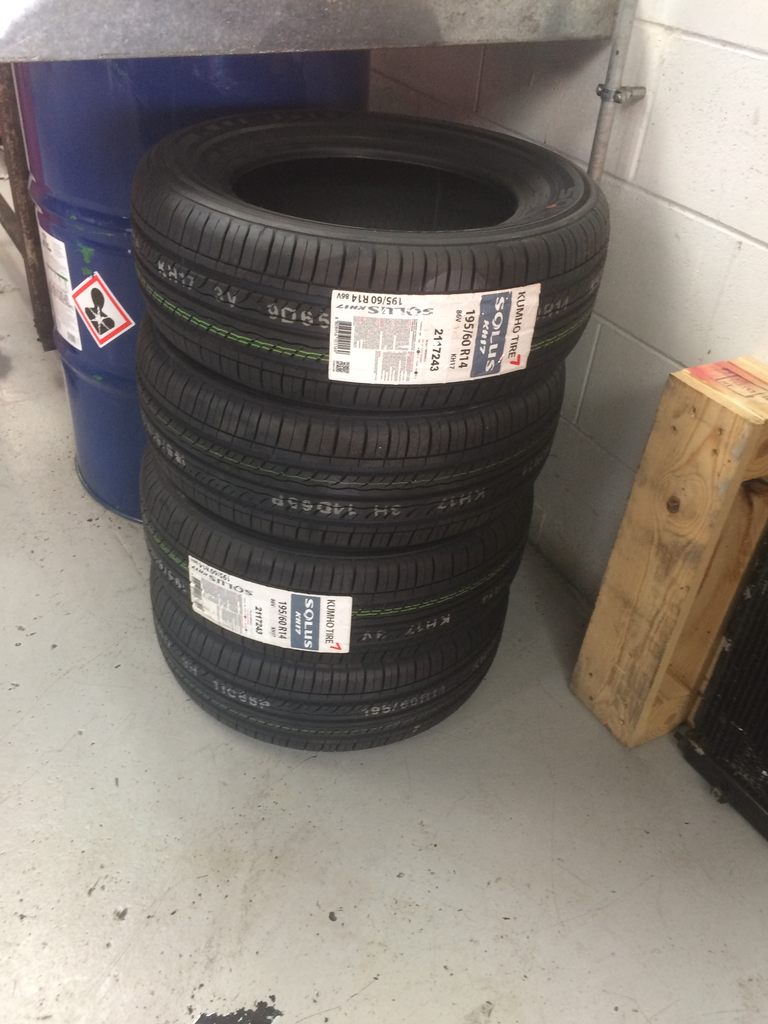
soo with the exhaust and rust done the next thing on the job was the tyres which started with 4 new kumho's got some mad camber going on And while i did the tires A magic wof inspection sheet and label appeared on my dash nothing was wrong i guess... so with a wof and rego now she gets used a bit Not just a show pony mayte 1 ton load of topsoil still pulls hard for what it is probably because the trailer is the same year as the car with the same color combo
1 point


.thumb.jpeg.384ff72c8d2b0ee0d34a7bdedb55bdcf.jpeg)


.thumb.jpeg.910c6632f6e66e8cba89476e83b41634.jpeg)


This leaderboard is set to Auckland/GMT+12:00