
Leaderboard


Popular Content
Showing content with the highest reputation on 03/14/18 in Posts
-
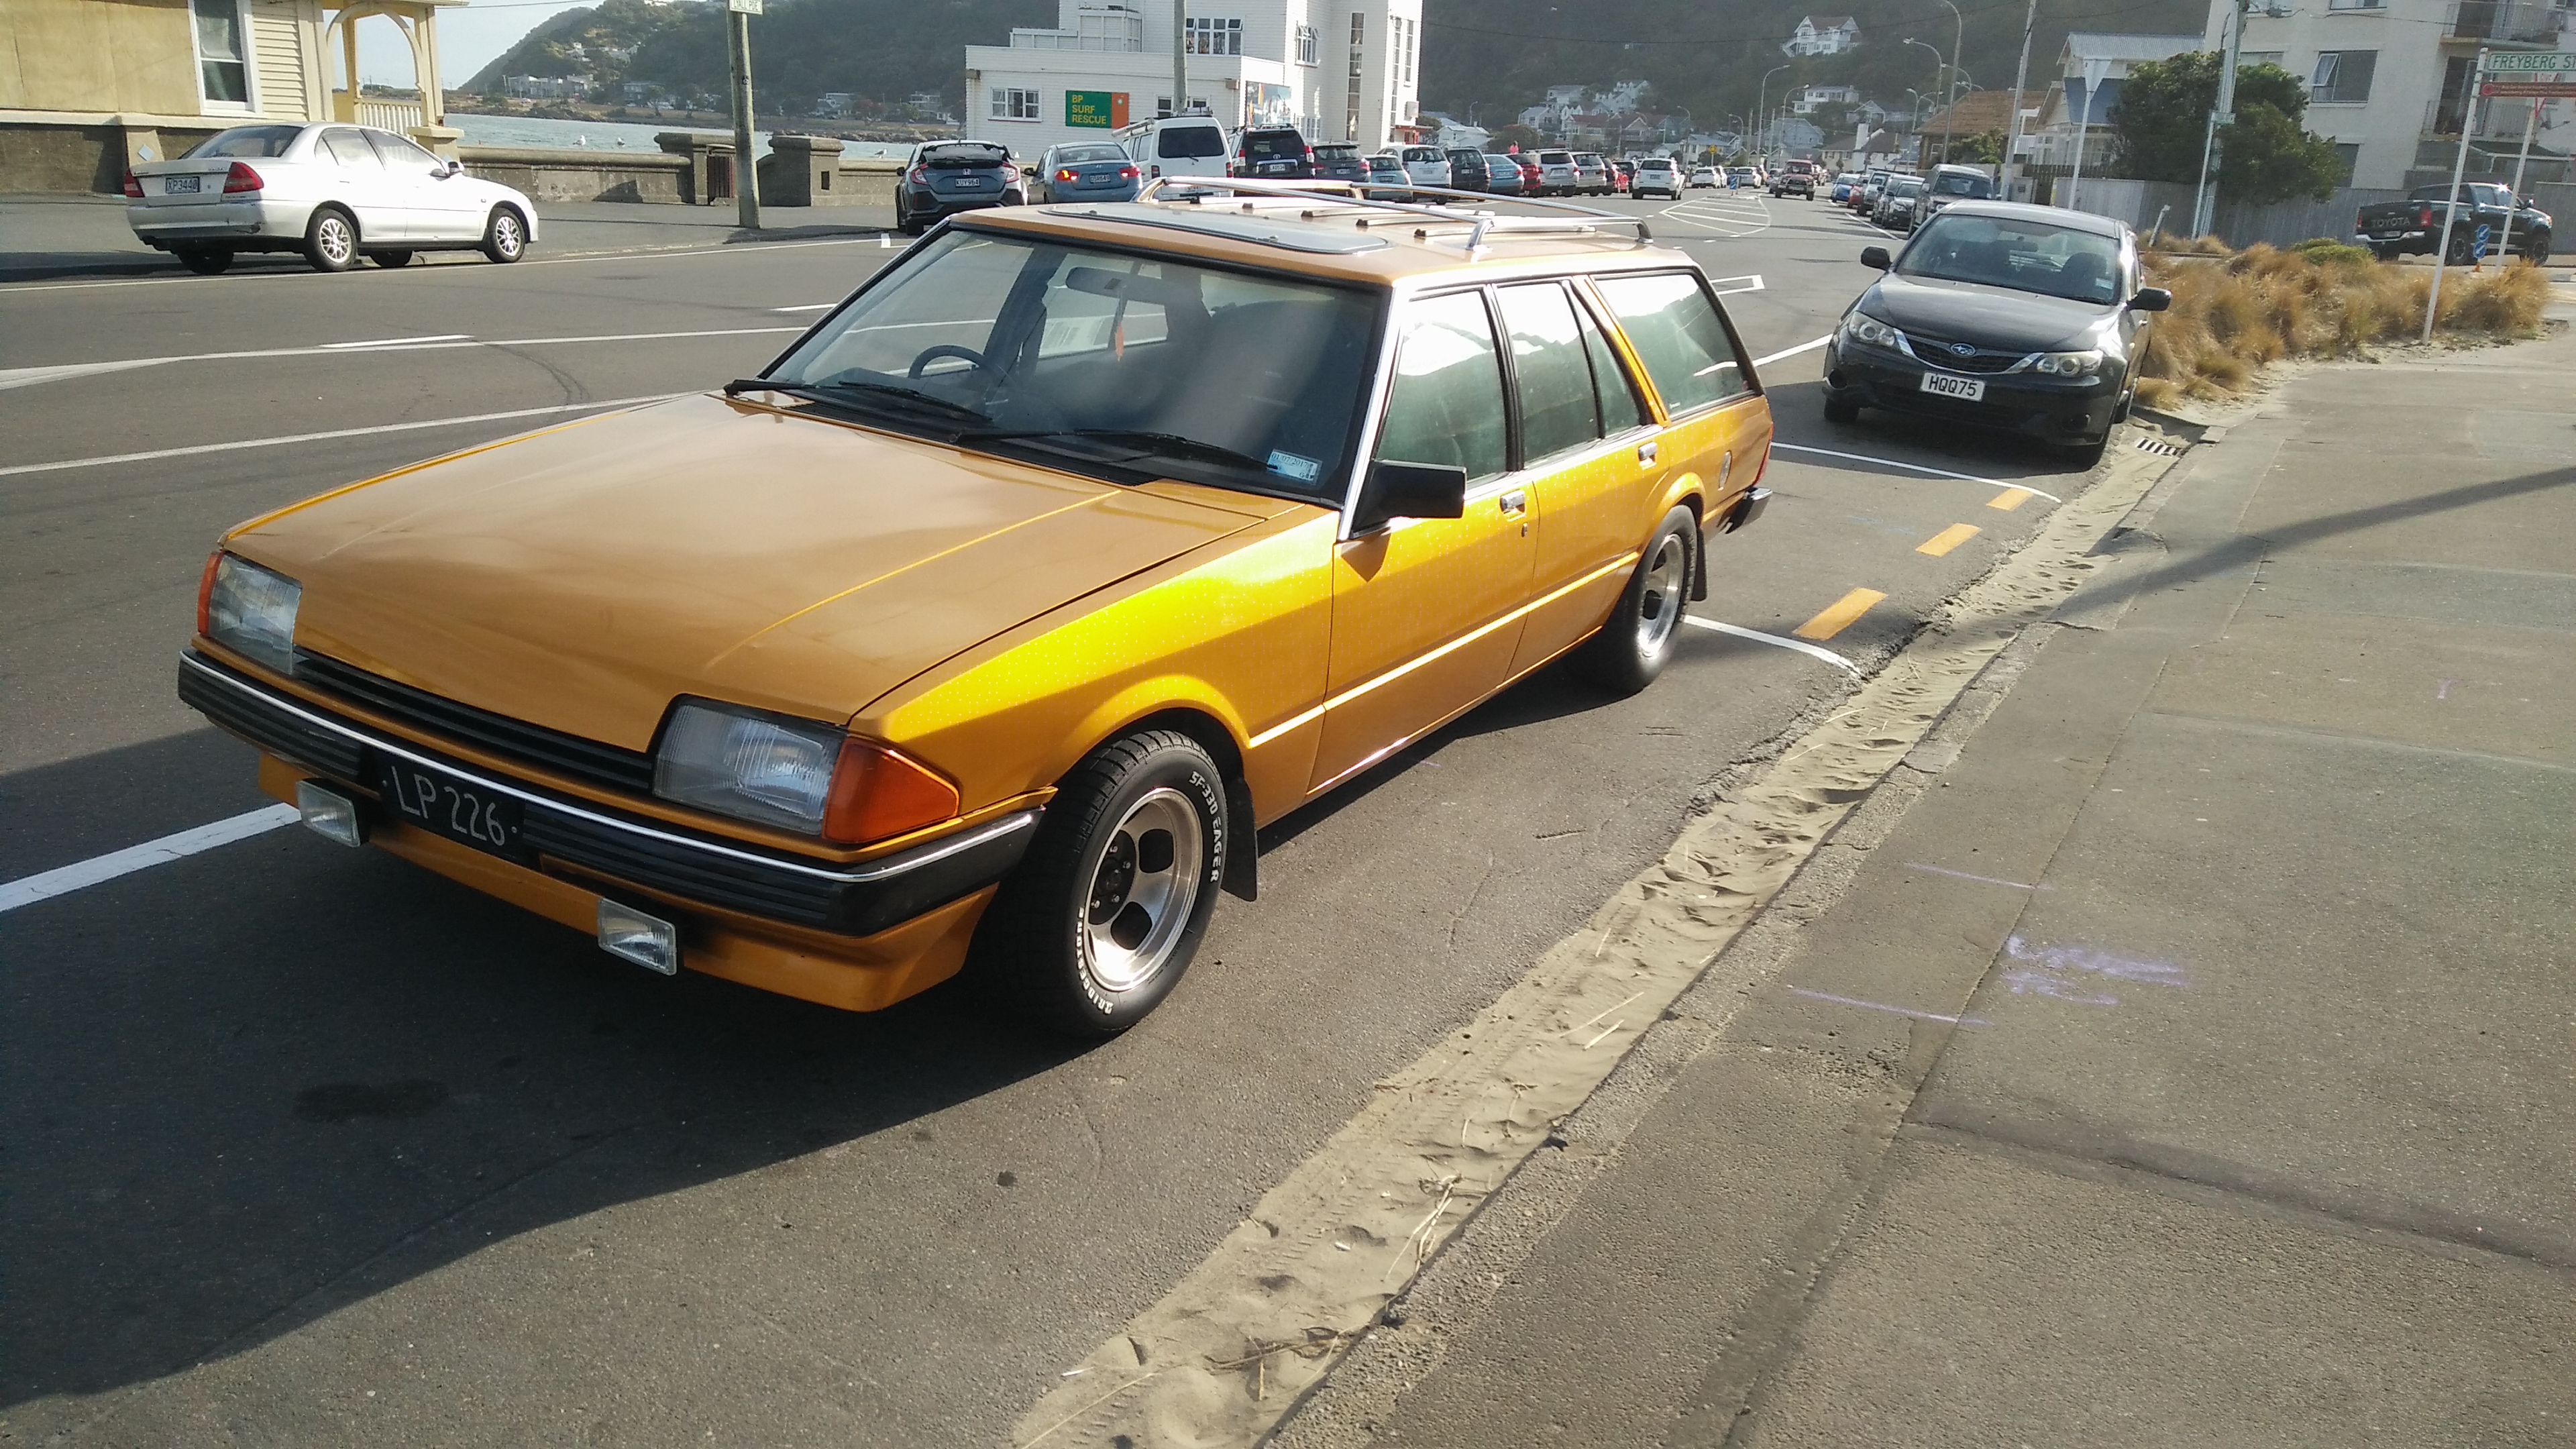
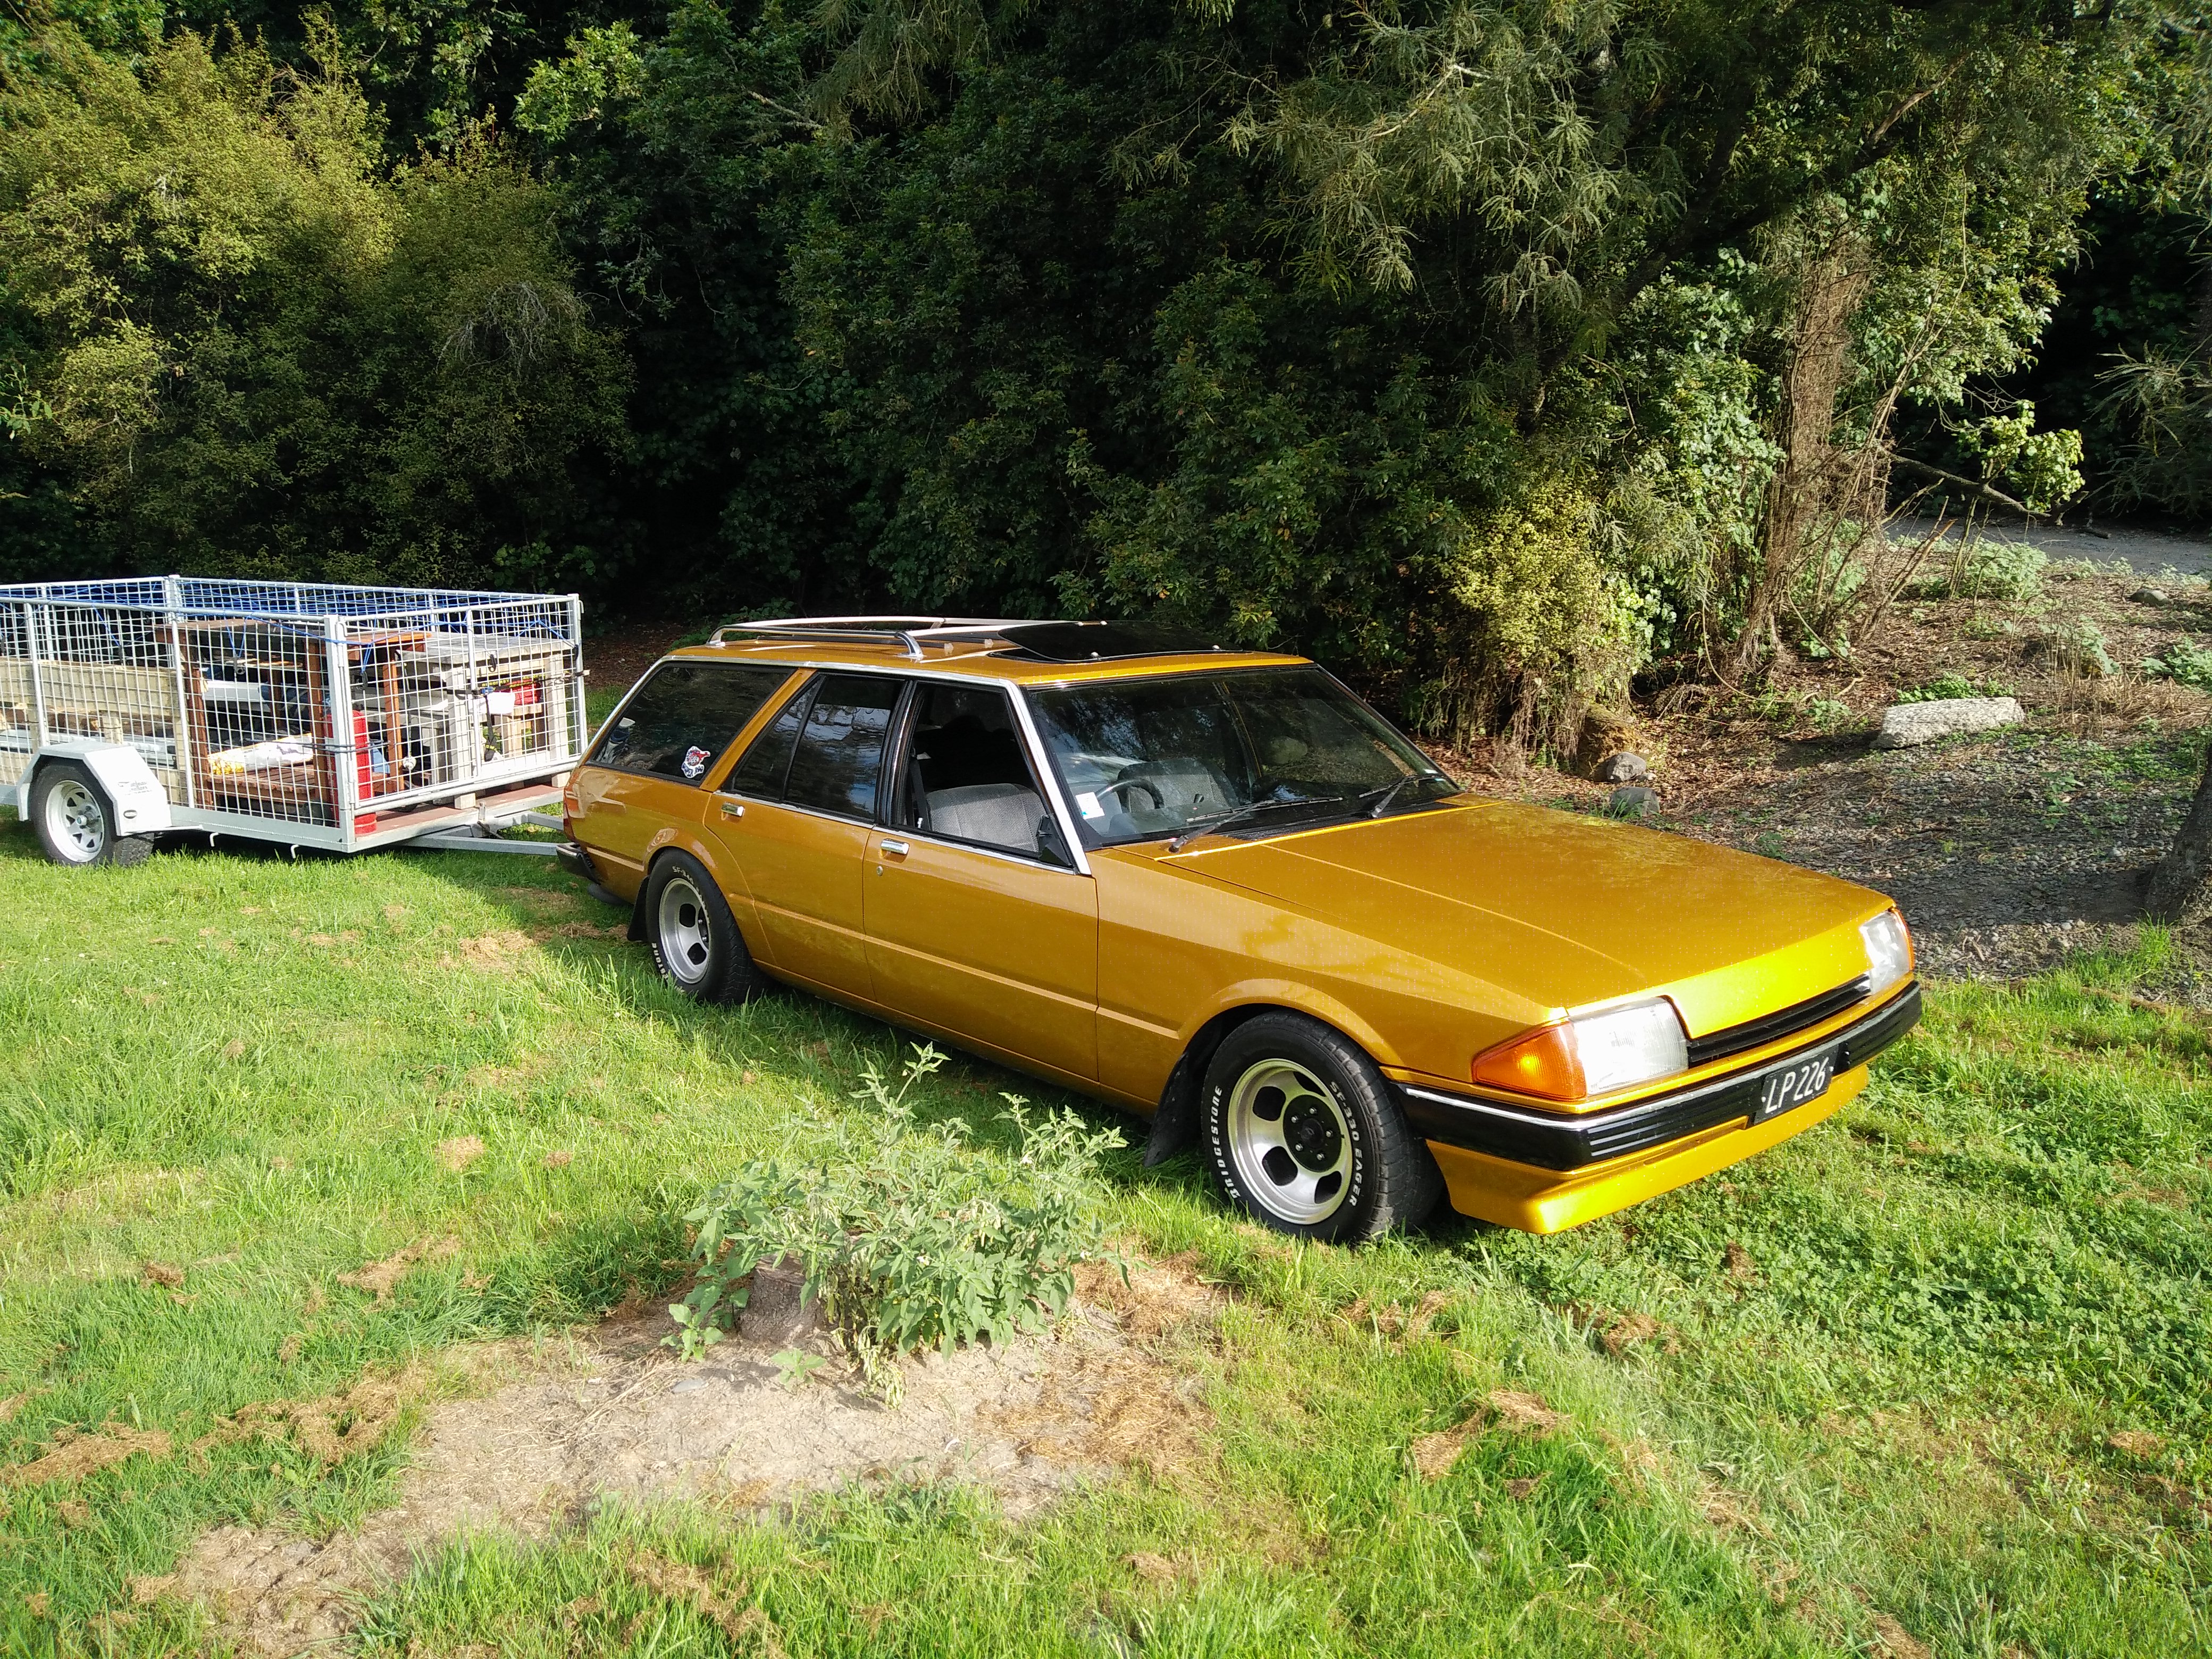
i found some photos of my old crowns. this car i bought out of the T&E in about 93ish. it was one of the few manual ones the were about. this isn't my first one, just out of shot to the right is my first one. 2018-03-13_05-25-28 by sheepers, on Flickr this was a really good car this one, this i had for a while and i sold it to a "mate" in 1999. he destroyed it in about 3 months and as far as im aware it got crushed. i fully rebuilt a 5MGE for it that ran an early link. for some reason i left it auto? 2018-03-13_05-25-55 by sheepers, on Flickr 2018-03-13_05-25-37 by sheepers, on Flickr 2018-03-13_05-24-59 by sheepers, on Flickr heres some various randoms featuring a parts car and doing an engine swap. lol, turd for turd. 2018-03-13_05-25-09 by sheepers, on Flickr 2018-03-13_05-25-19 by sheepers, on Flickr 2018-03-13_05-25-46 by sheepers, on Flickr looking back now its amazing to think how plentiful they were and what great condition most of the ones i came across were. only two of the many i had ended up getting crushed by me. one was that green one pictured above which was pretty fucked and my first one which i crashed into a ditch when i got lost coming back from Carterton in about 97. if i can find anymore pix of any of them ill post them up.23 points
-
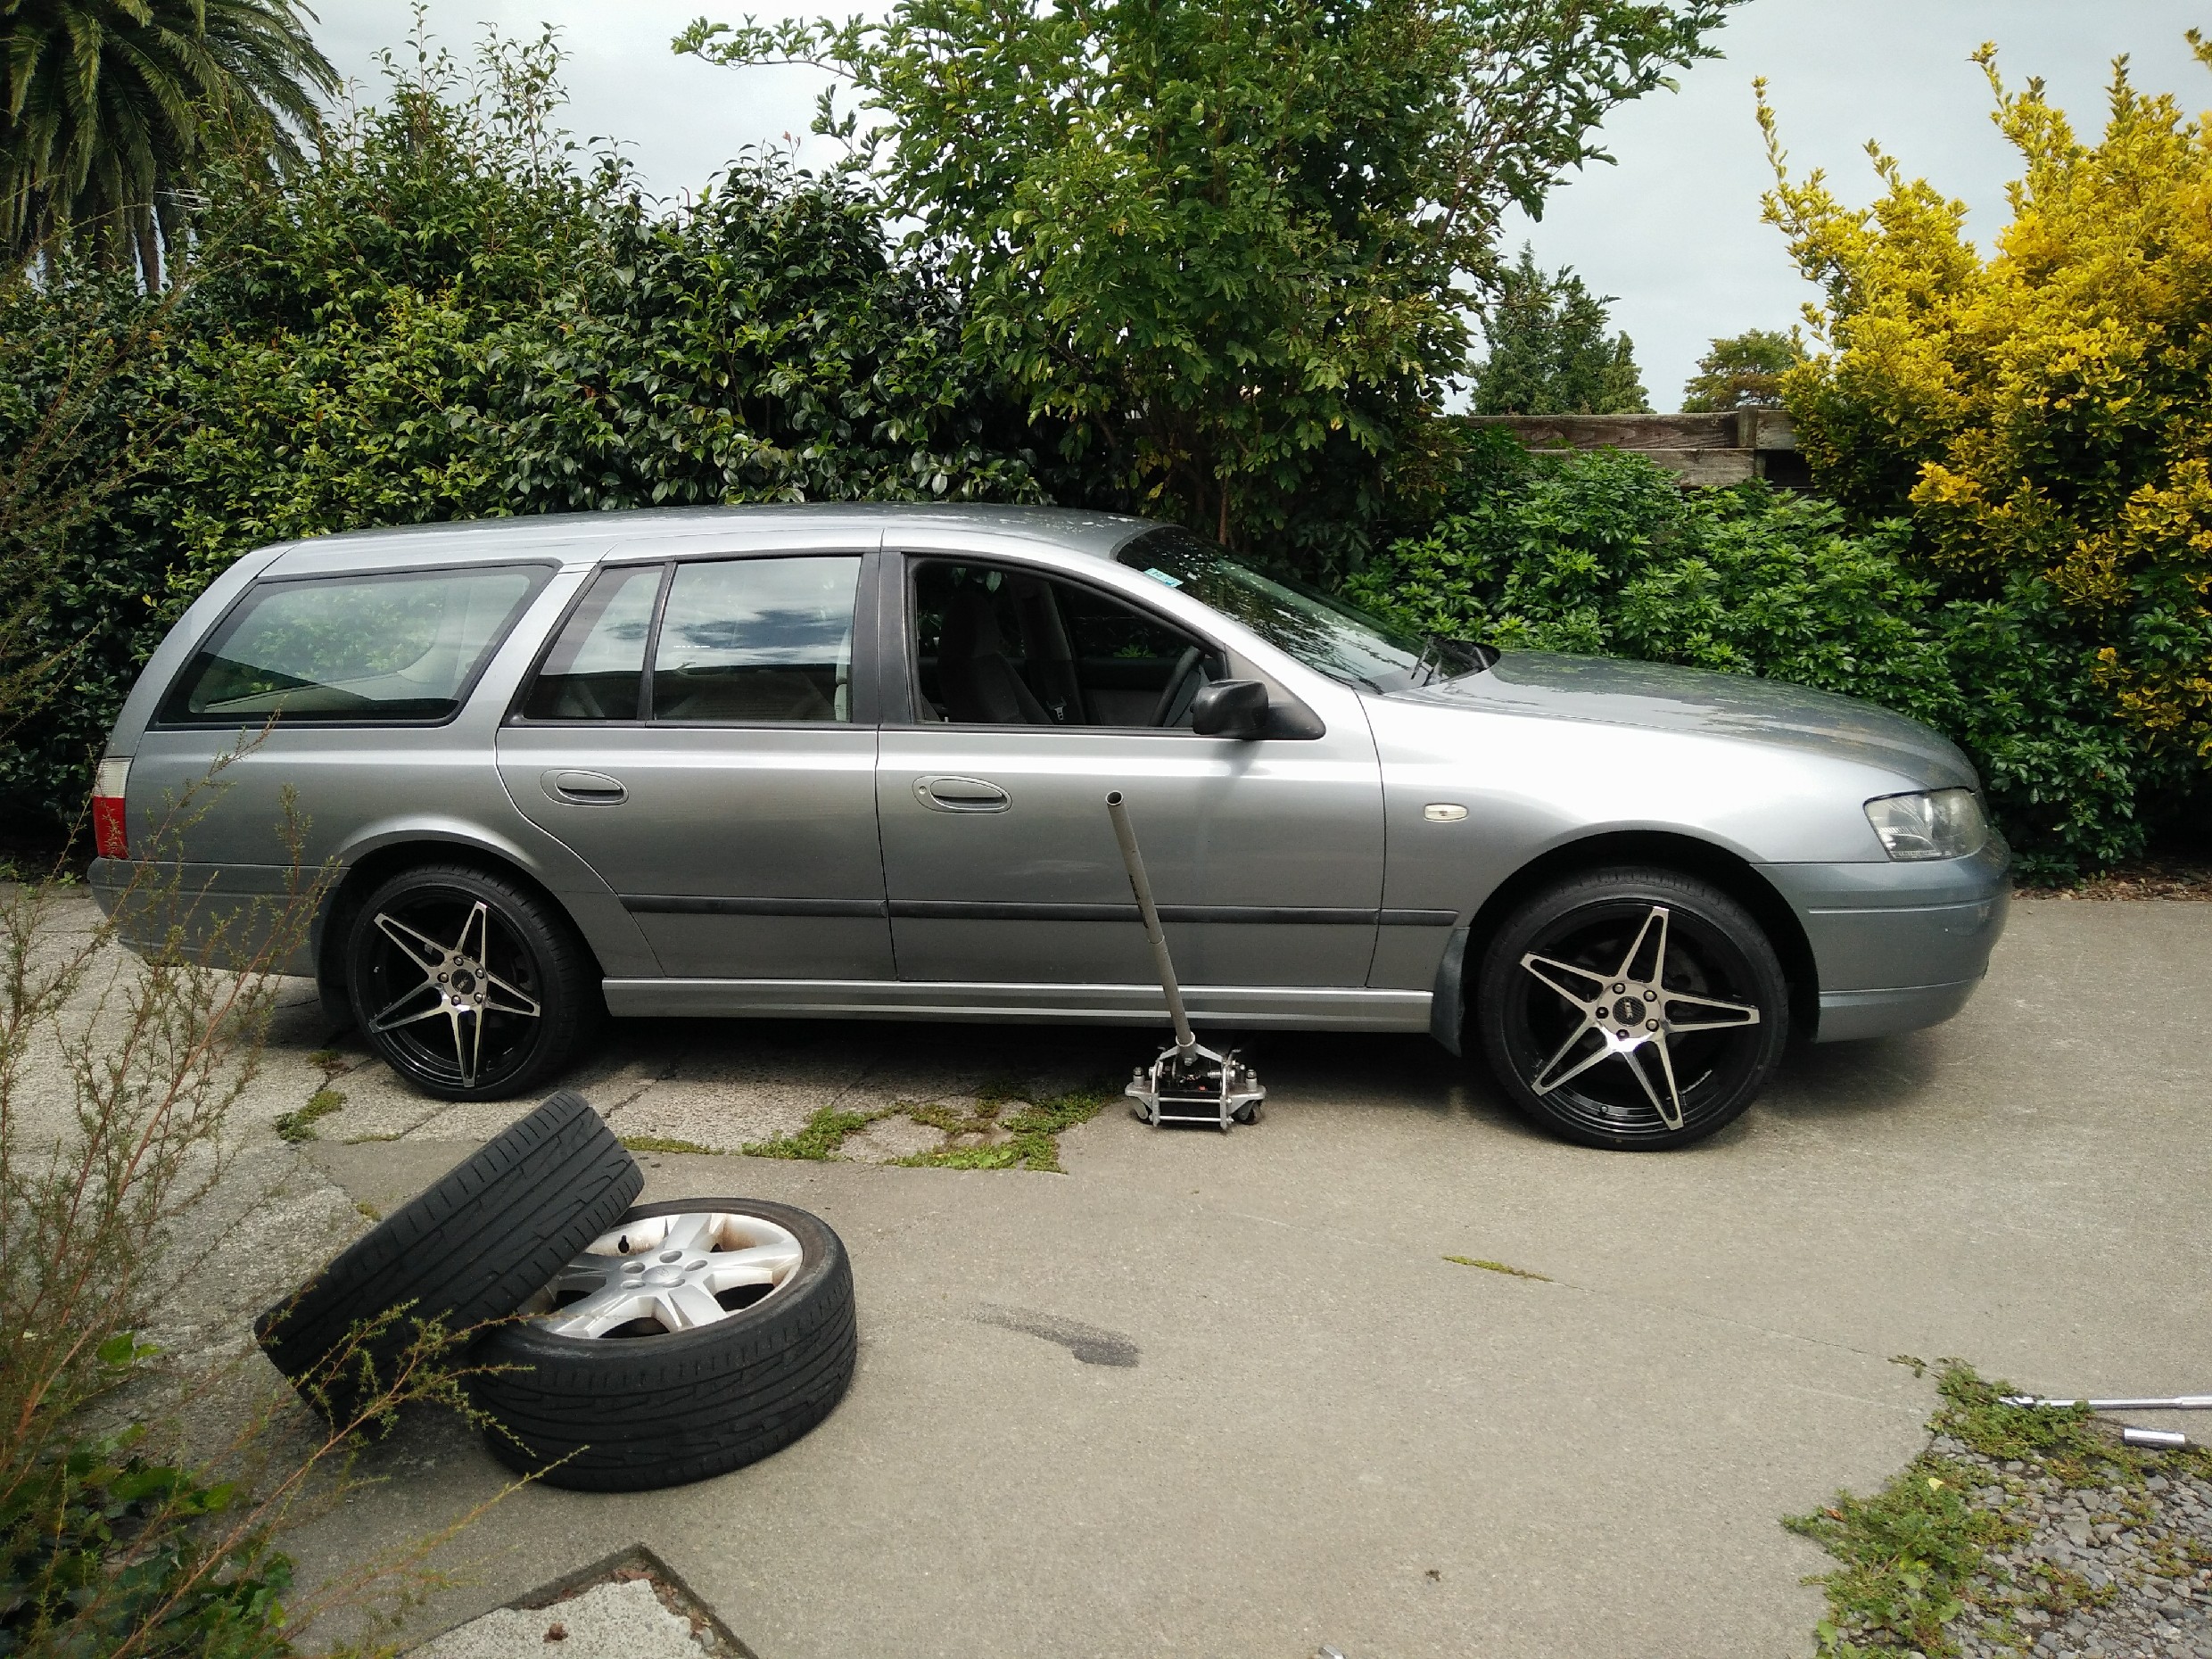
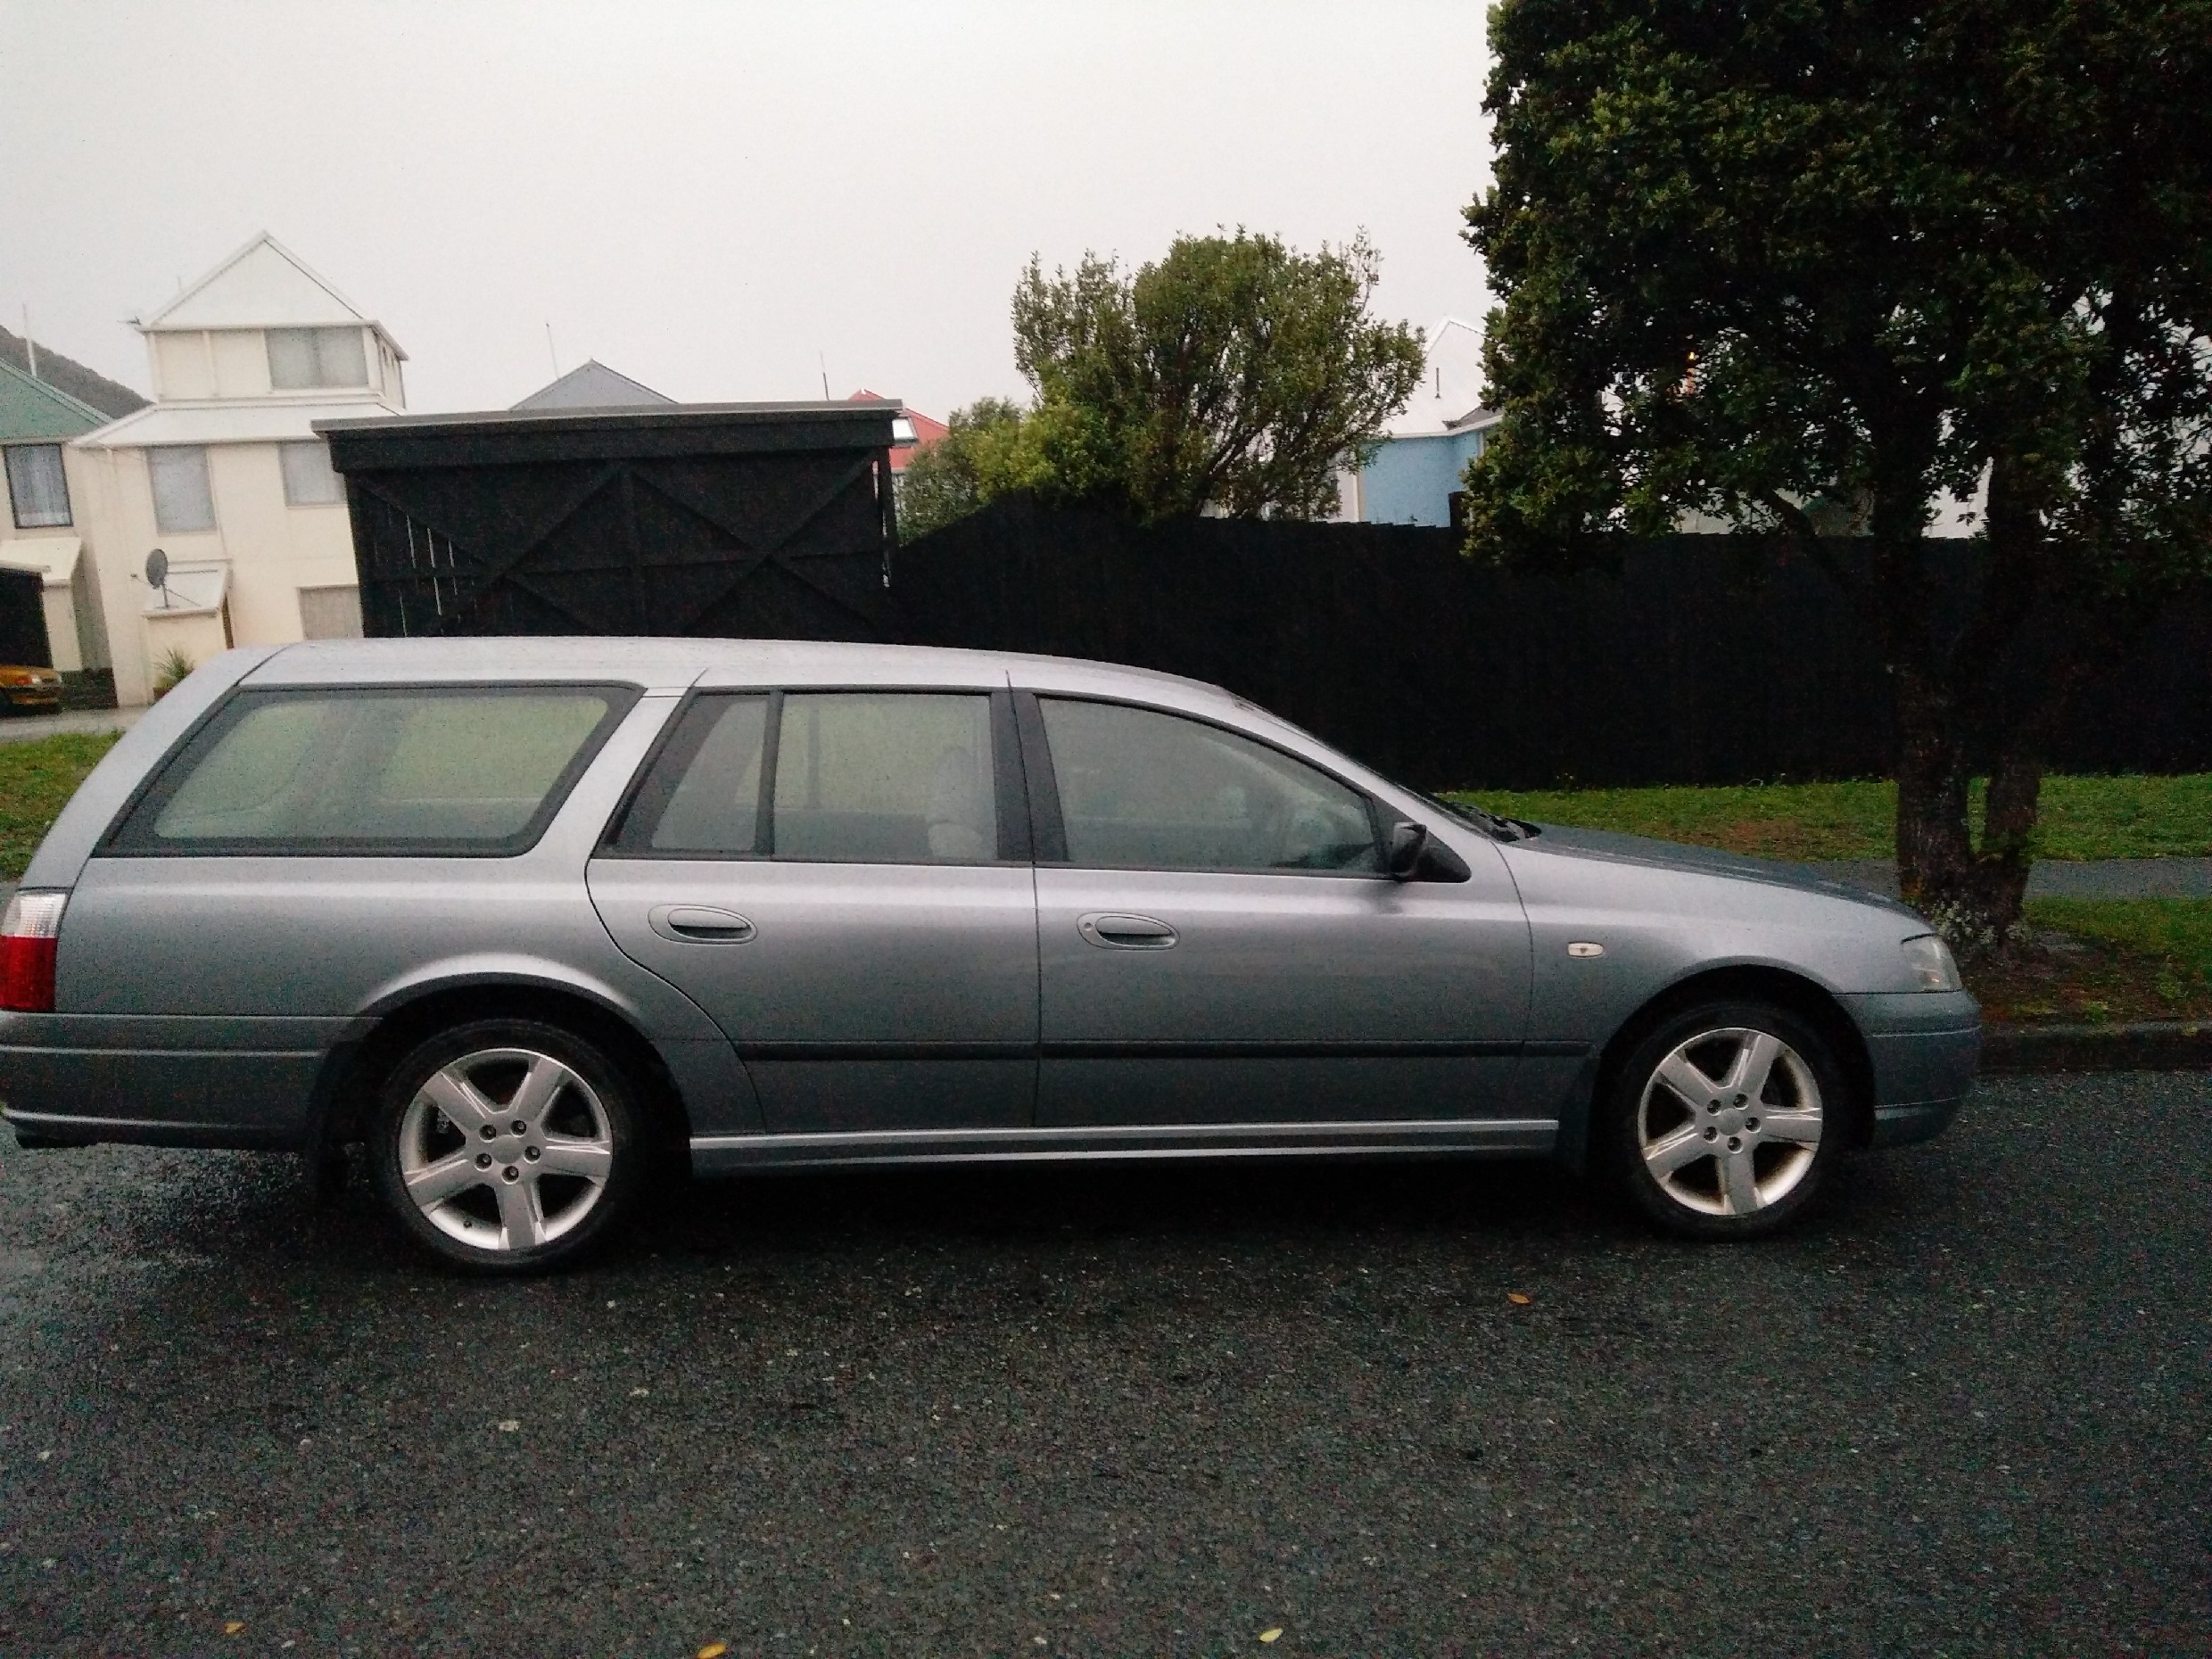
The mirrors arrived before Wagnats started, but I got the notification while I was driving to Wagnats... So today I spent about 2 hours installing it in the hot hot sun. Ford sure made that shit overly and unnecessarily complicated to install. The elusive fucking mirror that has taken me close on 9 months and a bunch of fucking money to get into my hands, is finally attached Now for a couple of pictures I've had in stock for a few weeks Arriving at Wagnats, here you can see I now have the Triden 8's up front and 9's in the rear. Also wagnats is serious enough to need to take a shit tonne of wagcessories... A wee photo from a camp at Otaki Forks before Wagnats - you can compare the before and after of the tinted windows for yourself. Finally a pic I took going out to get fish and chips one night for dinner which I thought was cool.
 13 points
 -
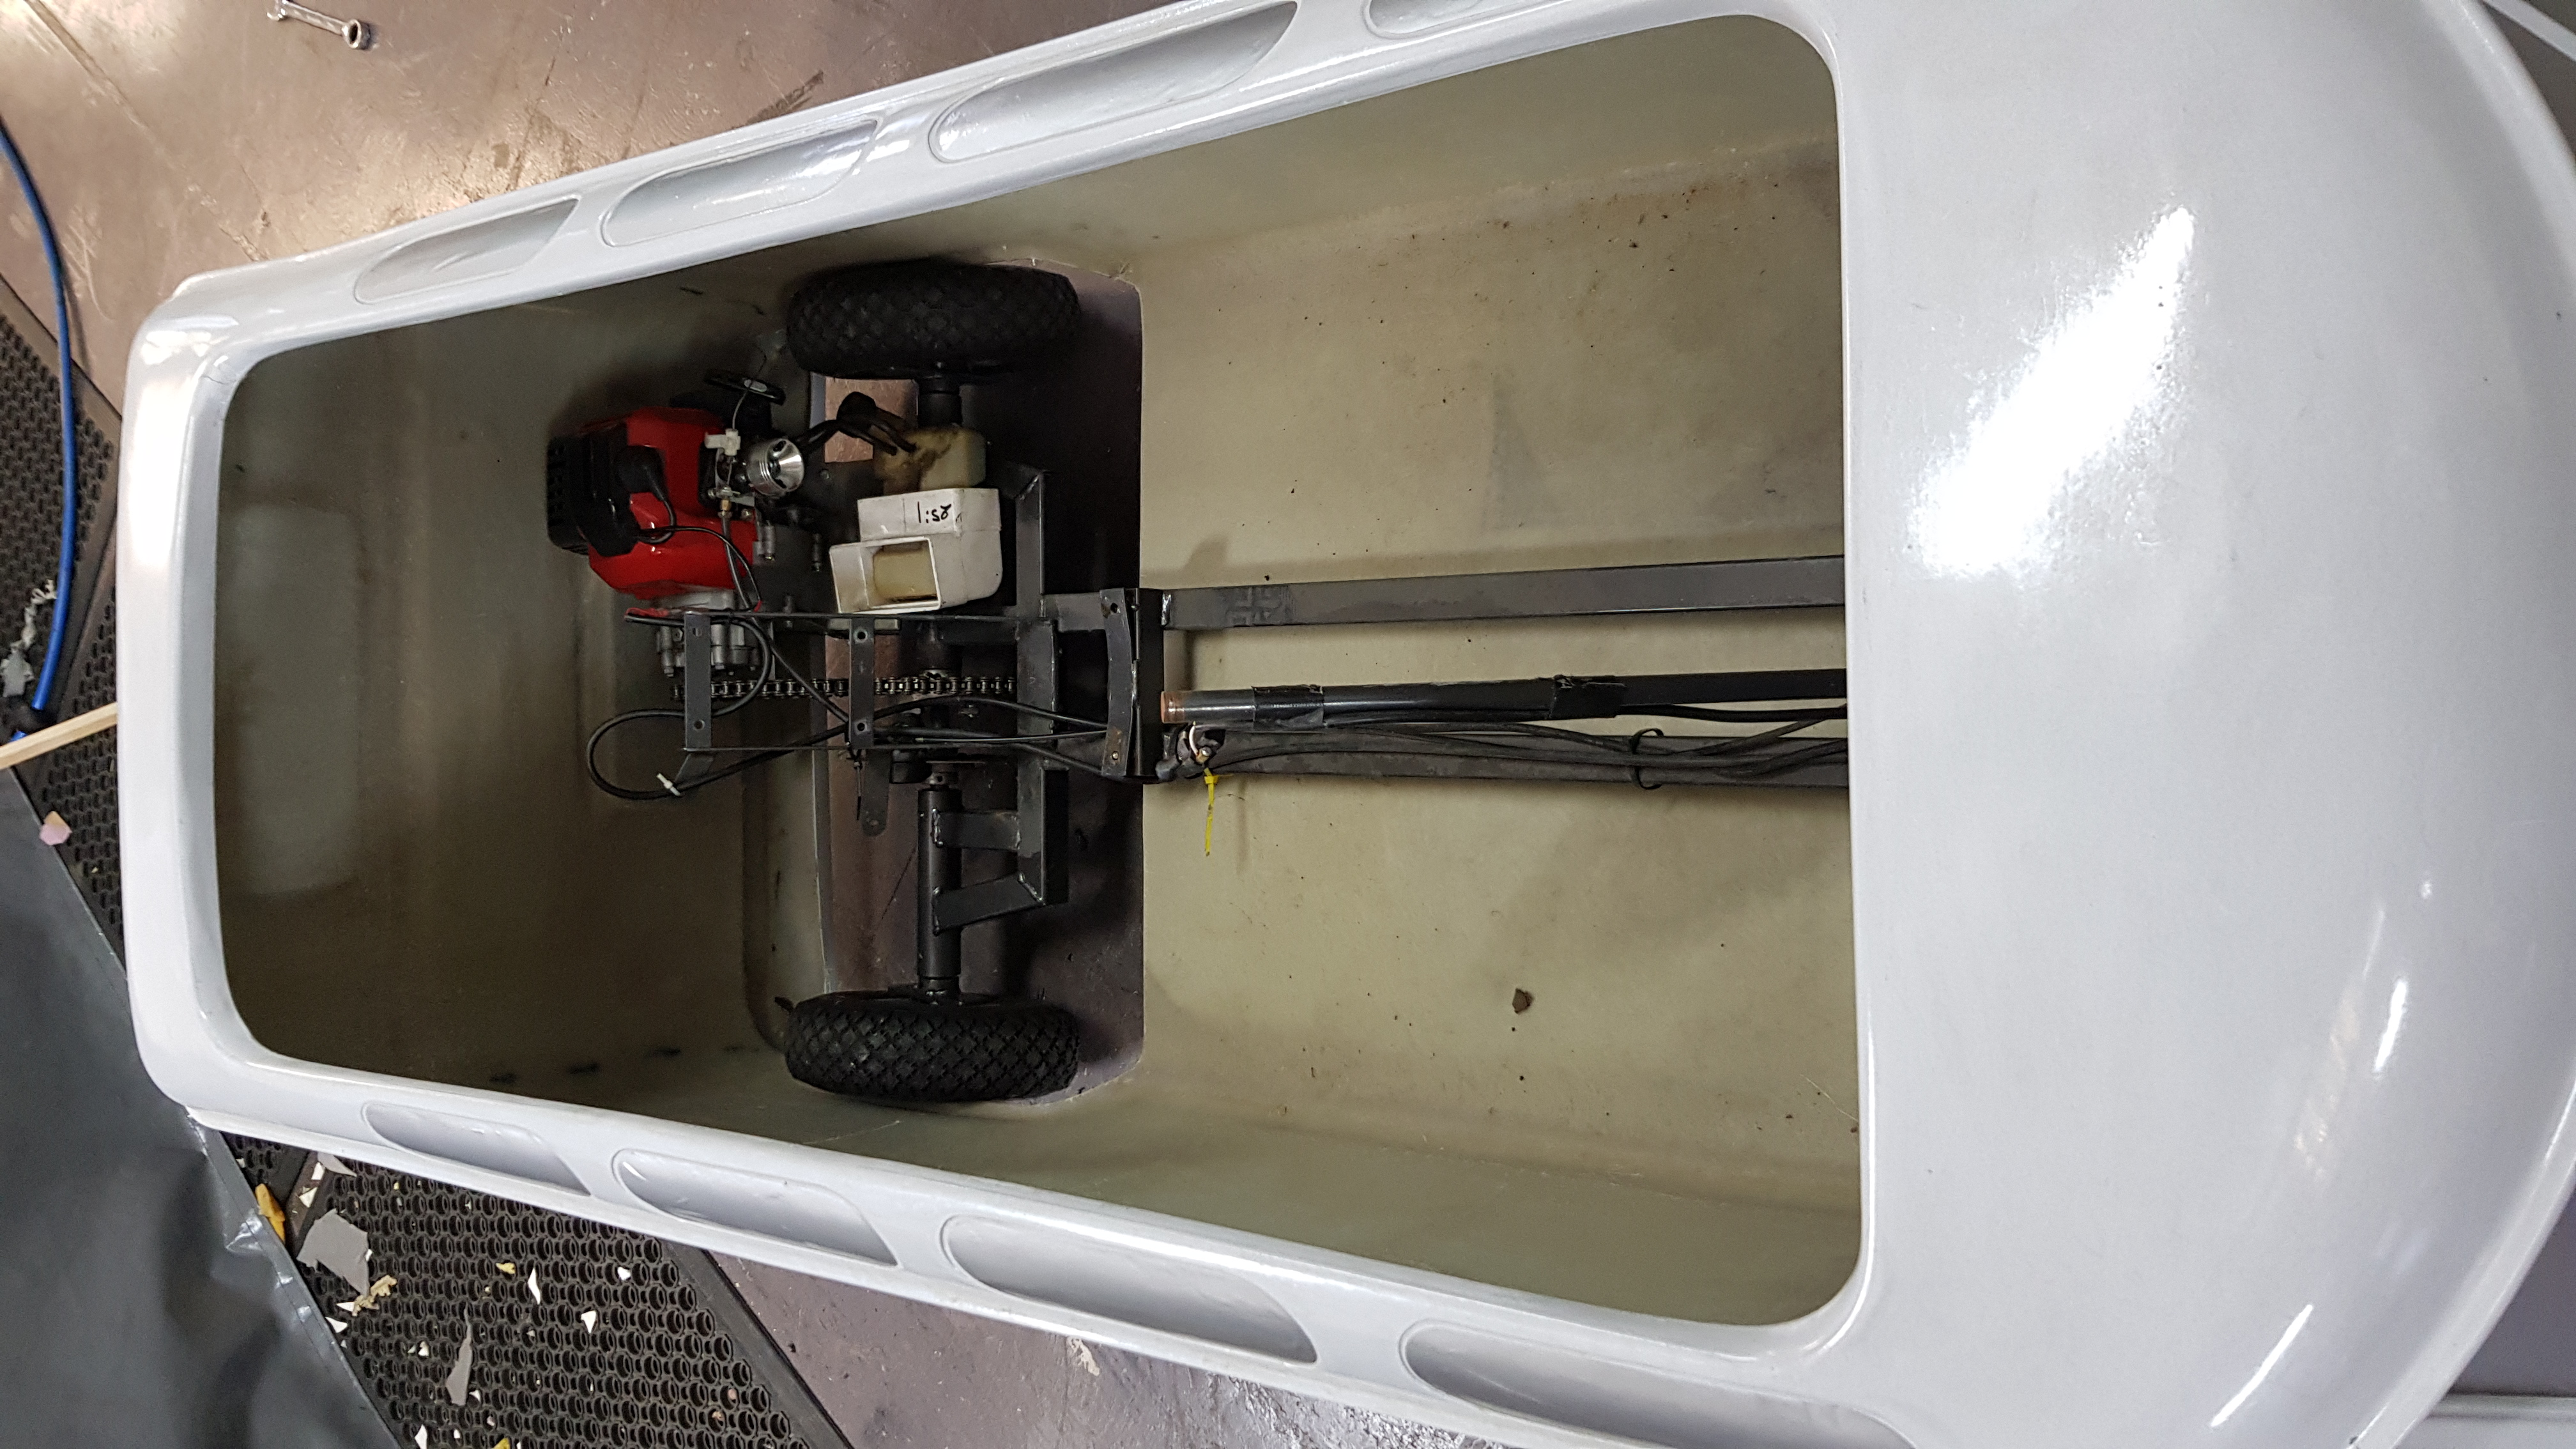
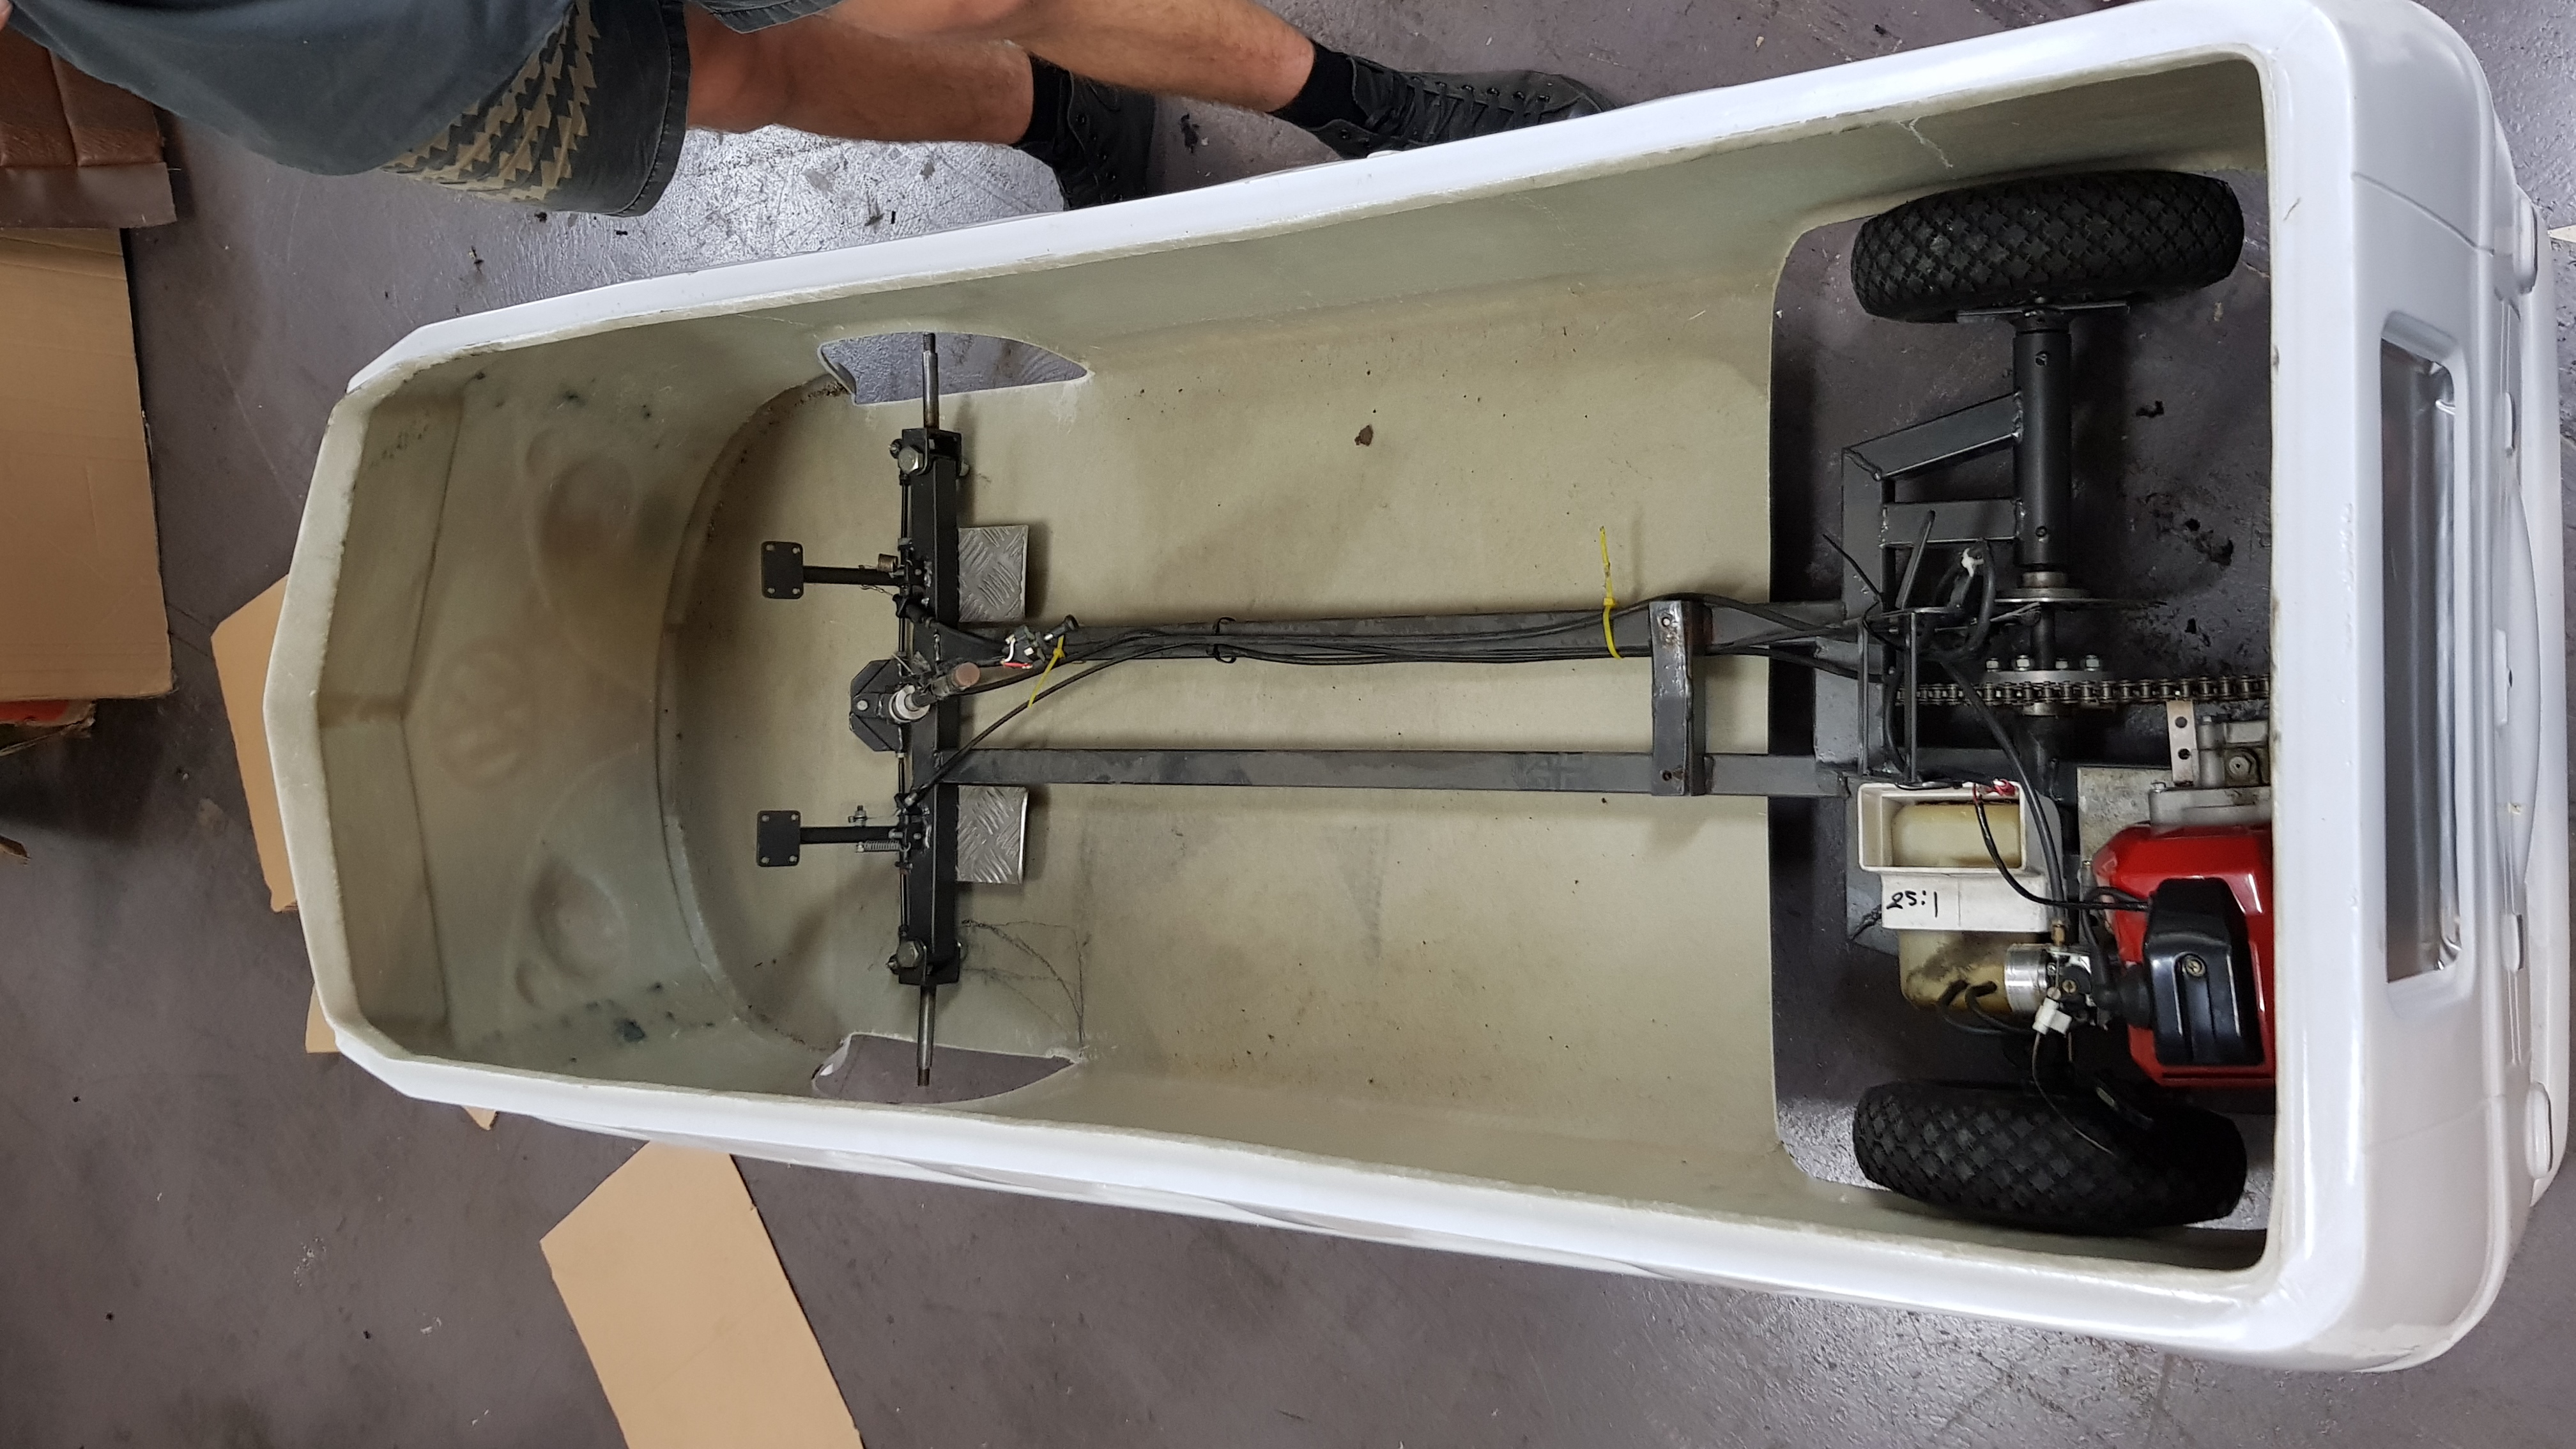
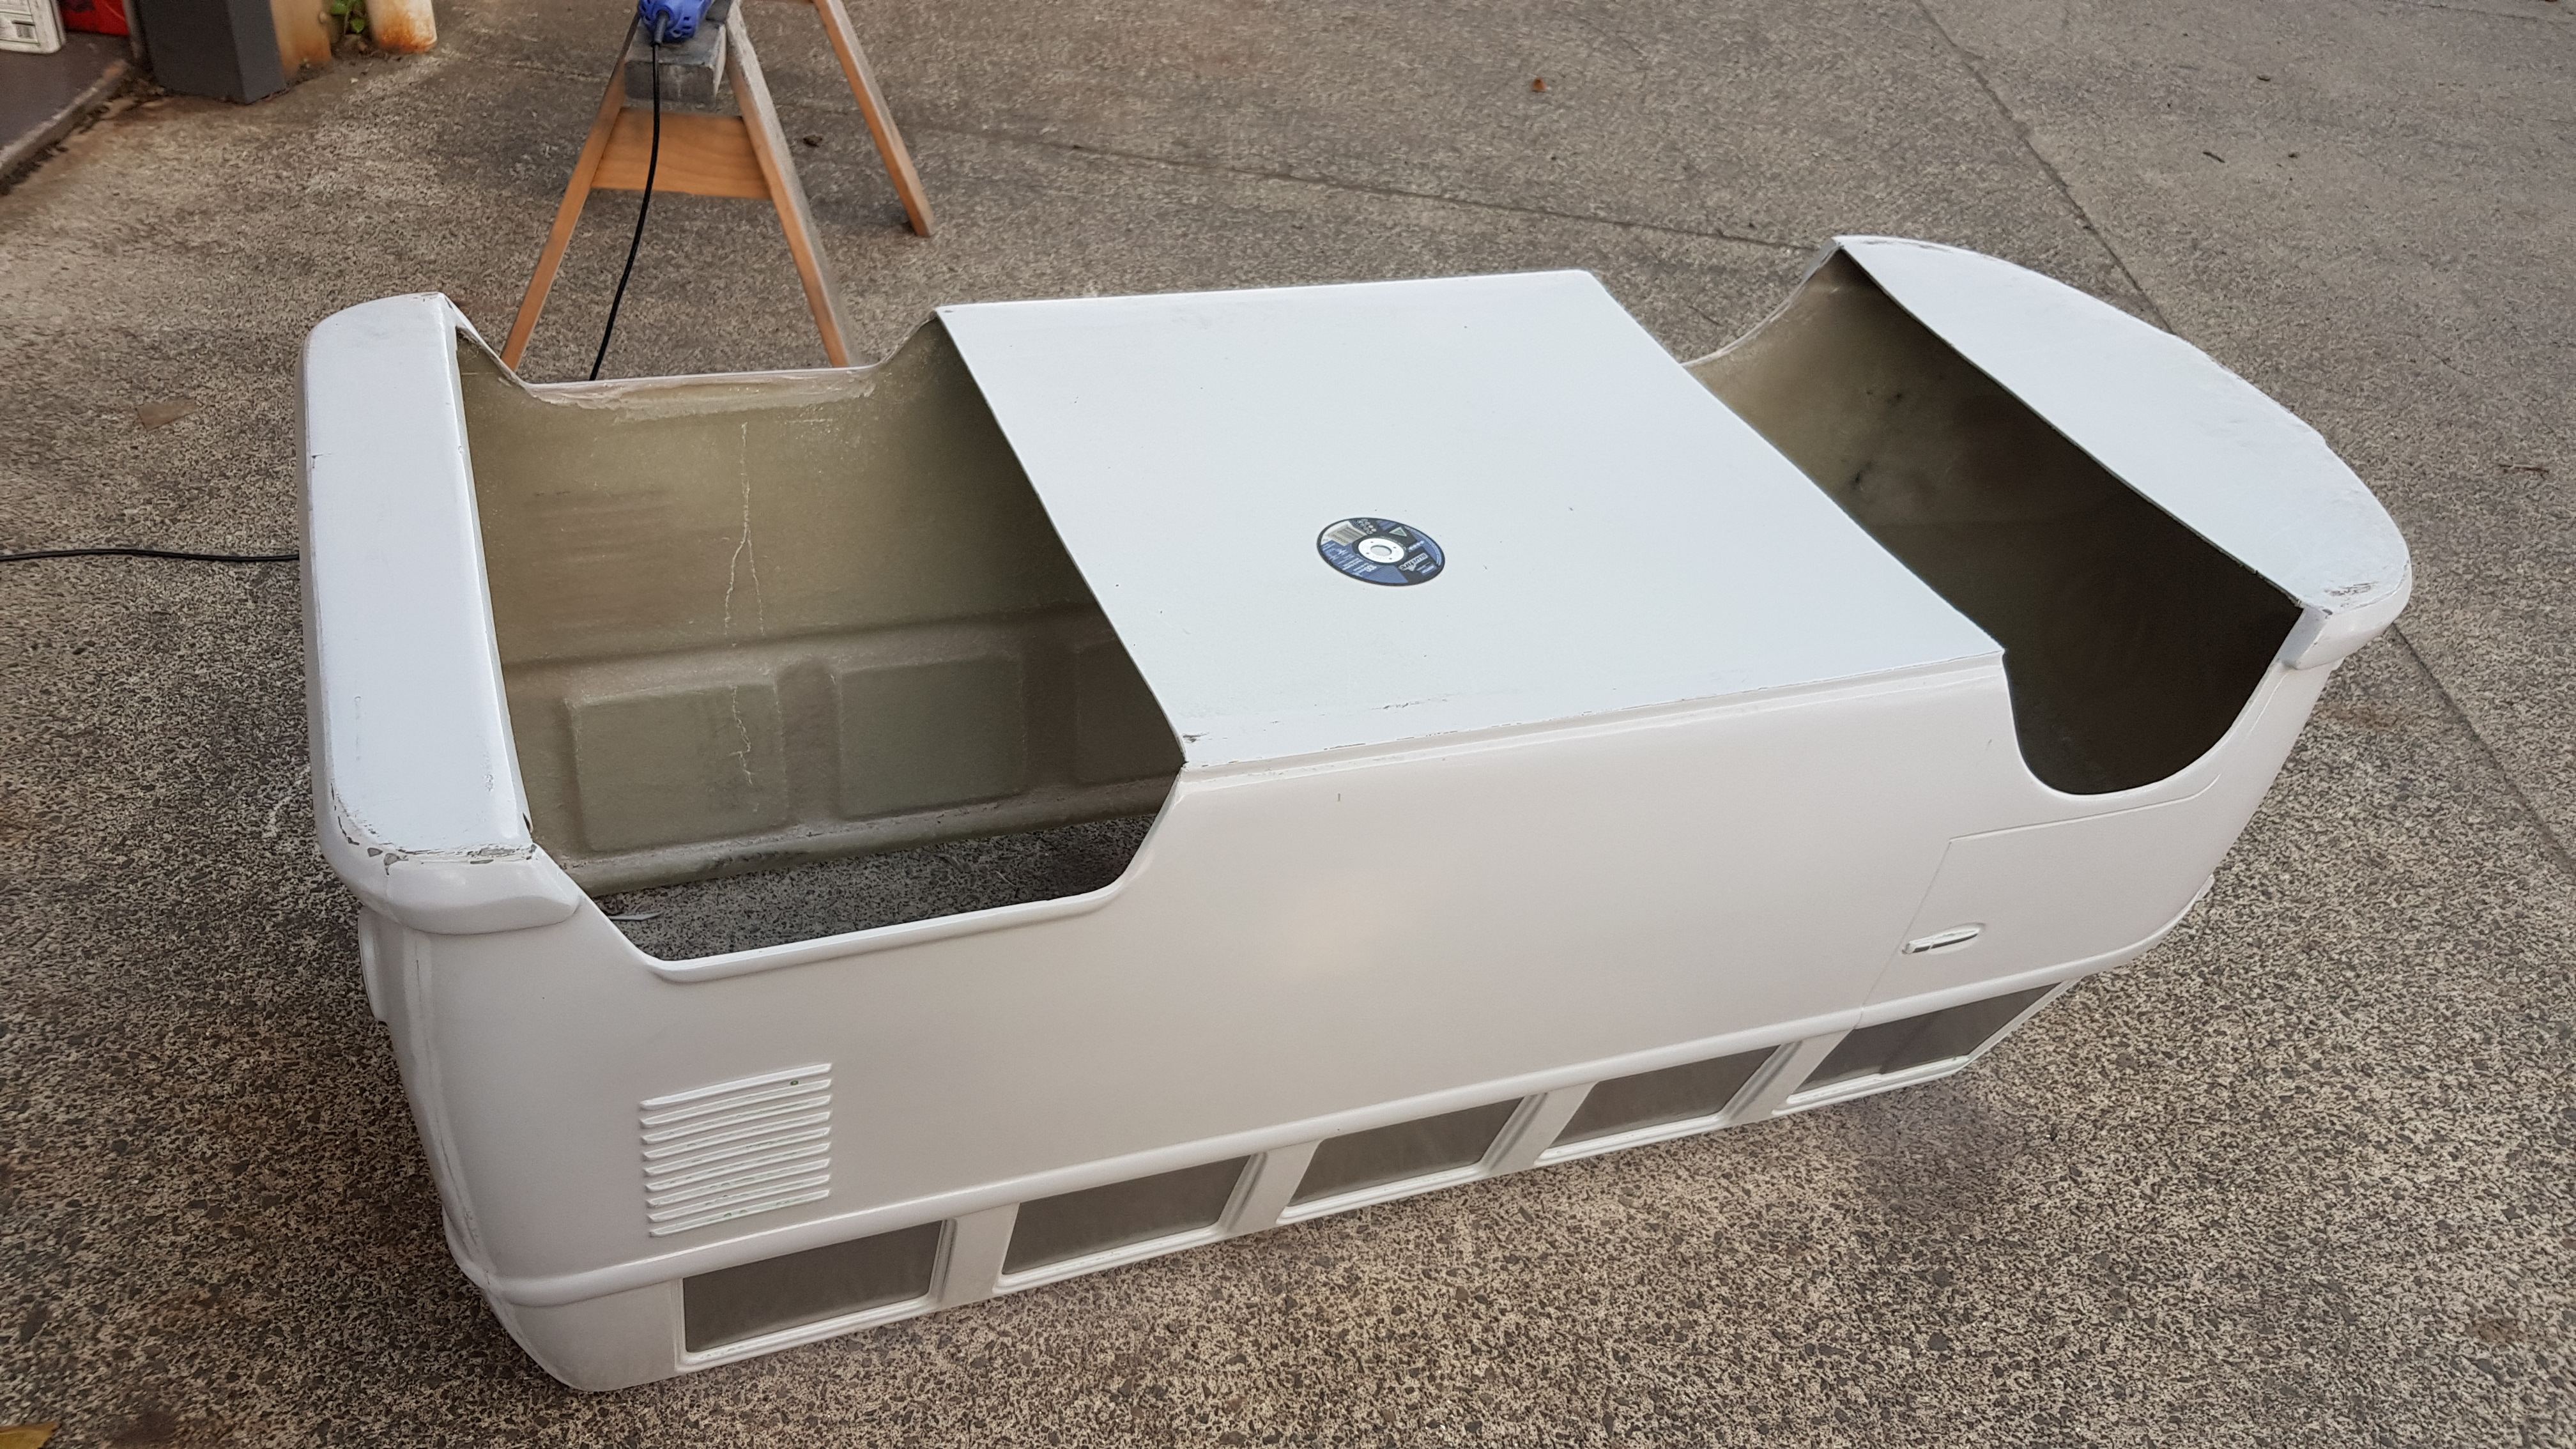
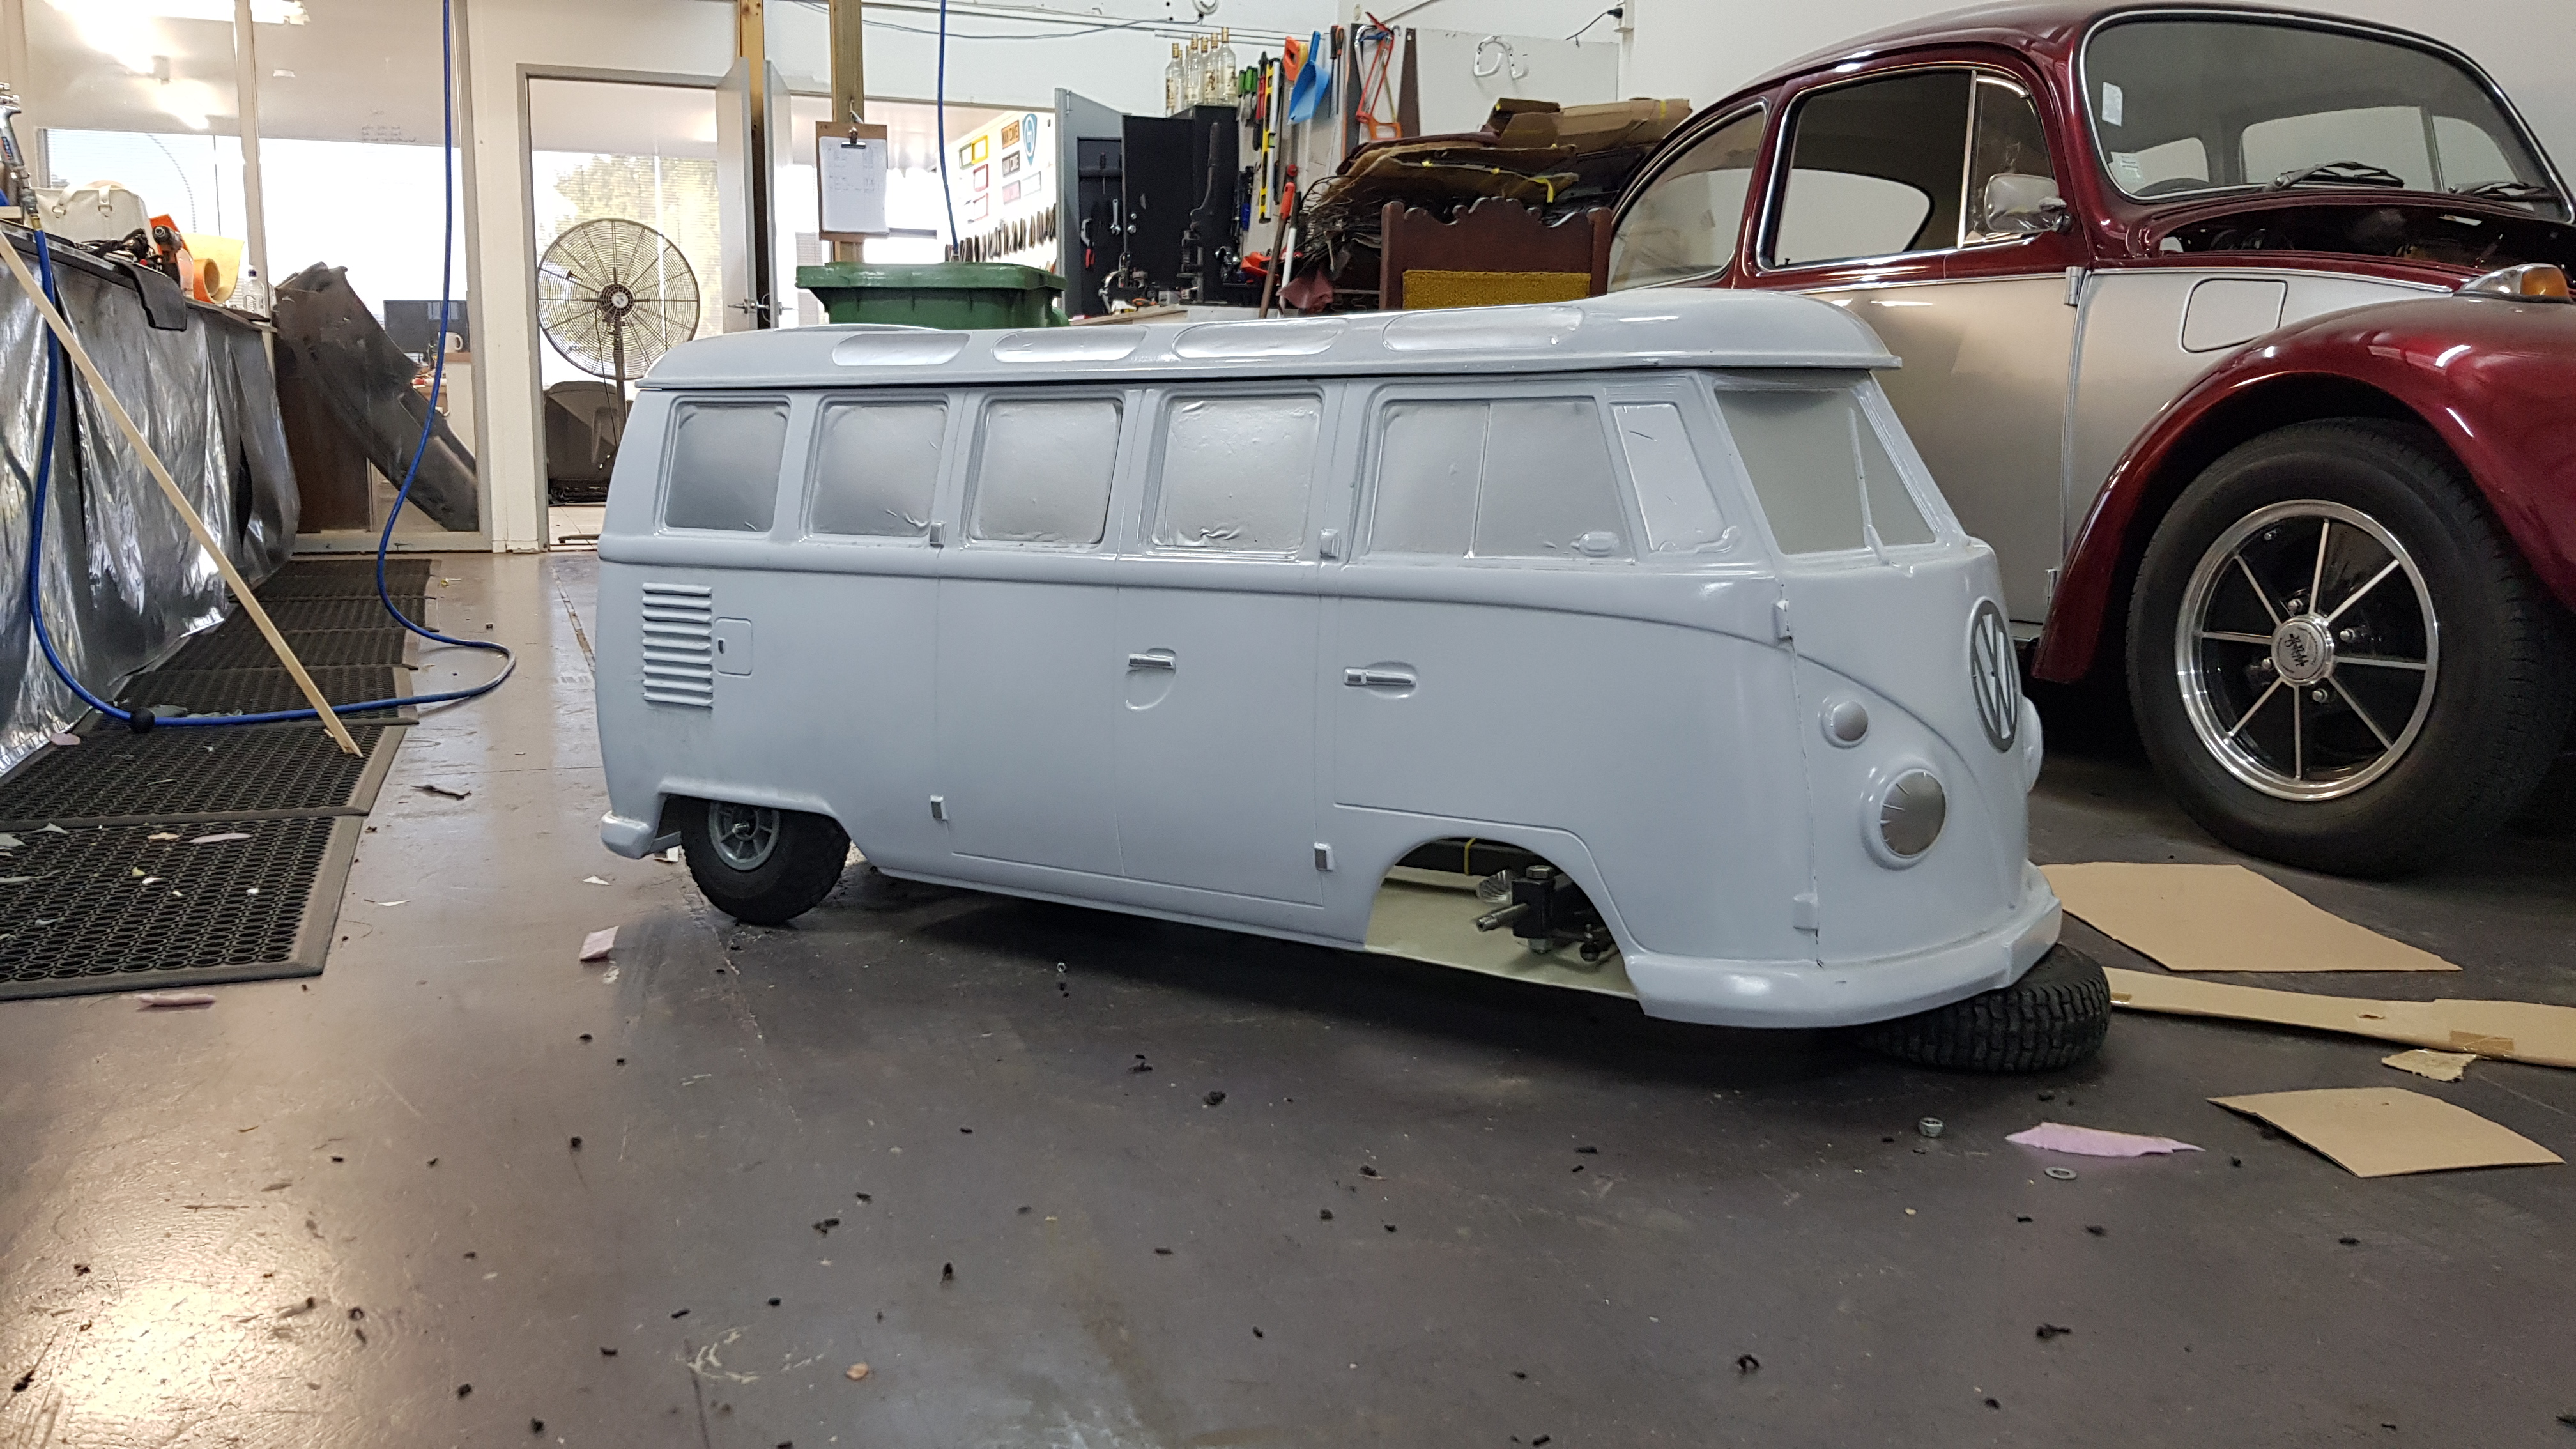
Right. Beach hop is close so I thought I better make a start. Remember that little go-kart Beth wasnt overly happy about me acquiring. Well it fits unbelievably well. Wheel base is 1meter long. Bang smack in the middle of the wheel arches. It's like it was made to fit. The only problem was with the front the steering hit the front part of the glass and the total width is a bit to wide. So I've trimmed the wheel arches as much as possible with retaining the max arch there for looks. And I also cut the front section out for wheels turning and the steering components. @Archetype has made up a sticker kit for the windows and lights ect ect so I'll mount this body and get it sorted and then kit it out for upholstery. I'm going to add some wings to the main chassis for strength when you step in and also add some stability to the structure itself. This is going to be cool.
11 points
-
Yes VG it has an open diff, as Raizer says with one axle effectively broken the wheels wont drive. As the gearbox is bolted directly to the engine the main shaft is always spinning. This means that there is no need to double clutch but the clutch is used for all gear changes. Dennis made a new gearset for the gearbox which is dog drive and added an extra gear to turn it into a 4 speed instead of 3. The last wof it had was 1994..... Dennis cant remember the weight but he thinks its about 400kgs, i will have to get it on the scales sometime. He also thinks that the engine is putting out about 150hp and there are still some things to be done to it, raising the compression being the main one. Yep spot on, he still has this in his garage! Posts without pictures etc etc... The rest of the structure glued into the front box And gluing the base piece on, various weights from around the shed helped with this task! Next job will be fitting this to the body8 points
-
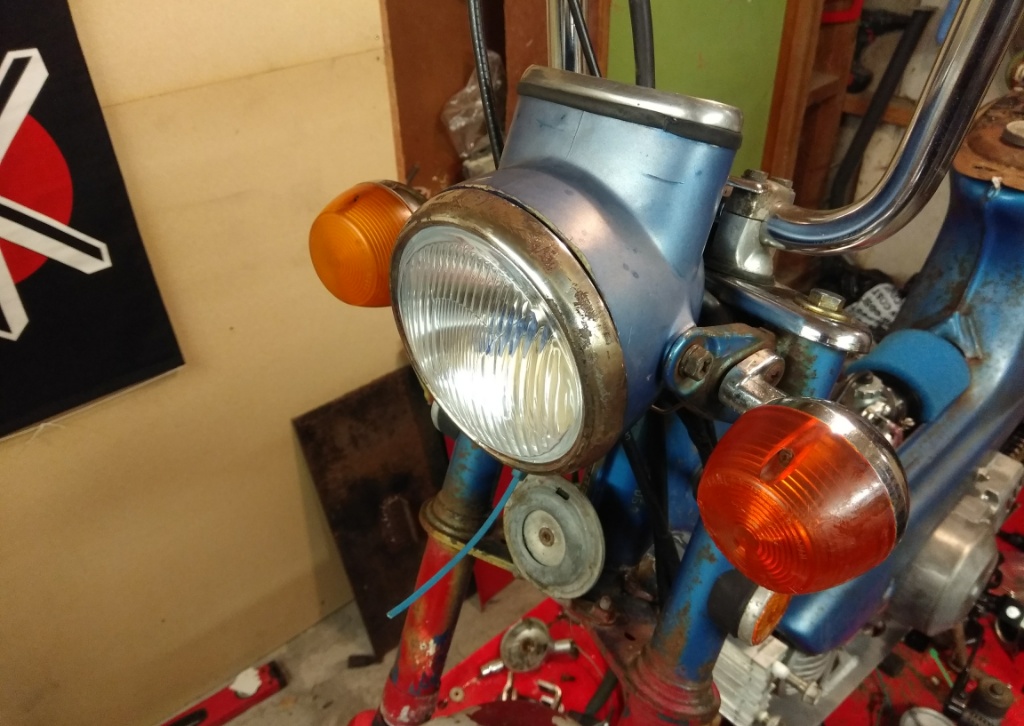
After a week of being mucked around by a locksmith that ended up not being able to cut a key for my ignition I got it sorted the other day, took a different locksmith 15 minutes to sort it out. I rebuilt the electrical end of it myself, added new springs and balls etc to the switch plate thing since the old balls were rusted and pretty much flat, now has a satisfying *click* when you turn the key. Also swapped the wires around and freshened up the solder to get it working how I want it. Soo much crap in the headlight bucket! Managed to age the new chrome ring a bit. Needed to test the headlight...
6 points
-
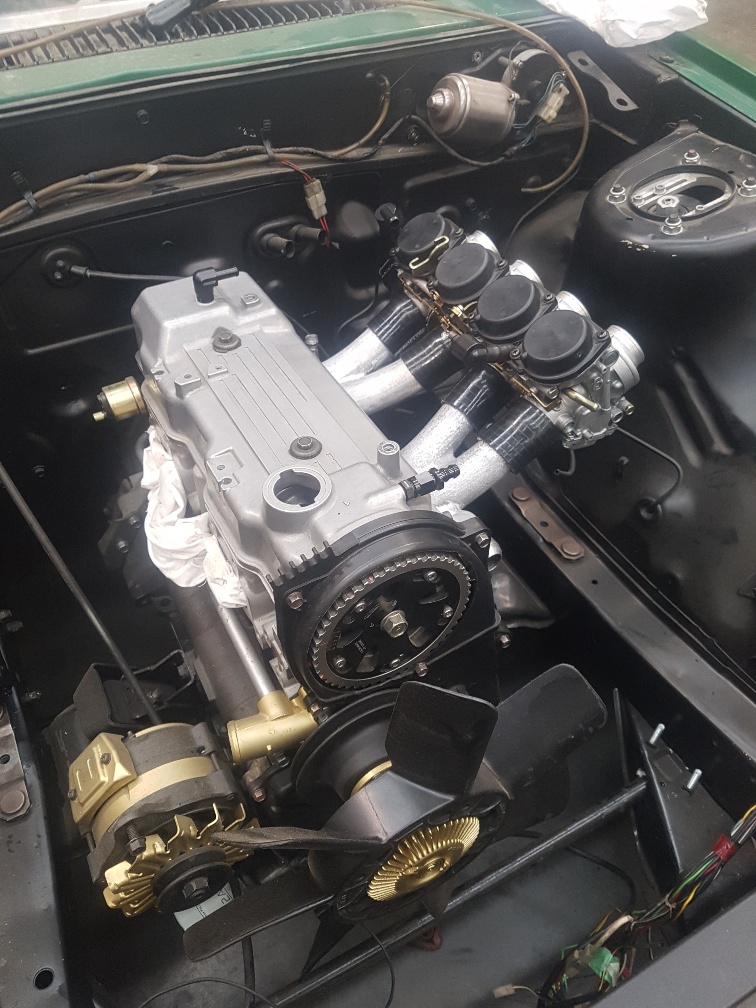
I have been extremely lucky and fortunate to have been at the right place at the right time to now own a very special piece of kiwi engineering. It was built by a very clever engineer called Dennis Smith in 1969 and is powered by a 1.5L Johnson V4 2 stroke outboard motor. Dennis built every part of this car apart from the basic engine block and gearbox casing. He made his own wheels, suspension uprights and components, brake calipers and discs, designed and built a mechanical fuel injection system, the list goes on.... About 25 years ago it had a slight accident on track which resulted in the front of the body being damaged and it has sat untouched since then. I brought it of Dennis last year and have set to work fixing the body. It is very important to me that it stays as original as possible and is preserved as an historic racing car. The car in Dennis's garage And back at home Got pipes? And the slightly damaged front. luckily we found a large box full of all the broken pieces under Dennis's house, these will make great patterns and will mean i can get the body exactly right. The body construction is plywood with foam glued on for shape and then a layer of fiberglass for the outer shell. The body is extremely lightly constructed and it would not of taken much impact to do this damage. Here are some pics of it back in the day Dennis on the left. If anyone has any pics or info from when it was active i would love to hear. There is so much info and technical detail to write about i will get to it all in the next posts.5 points
-
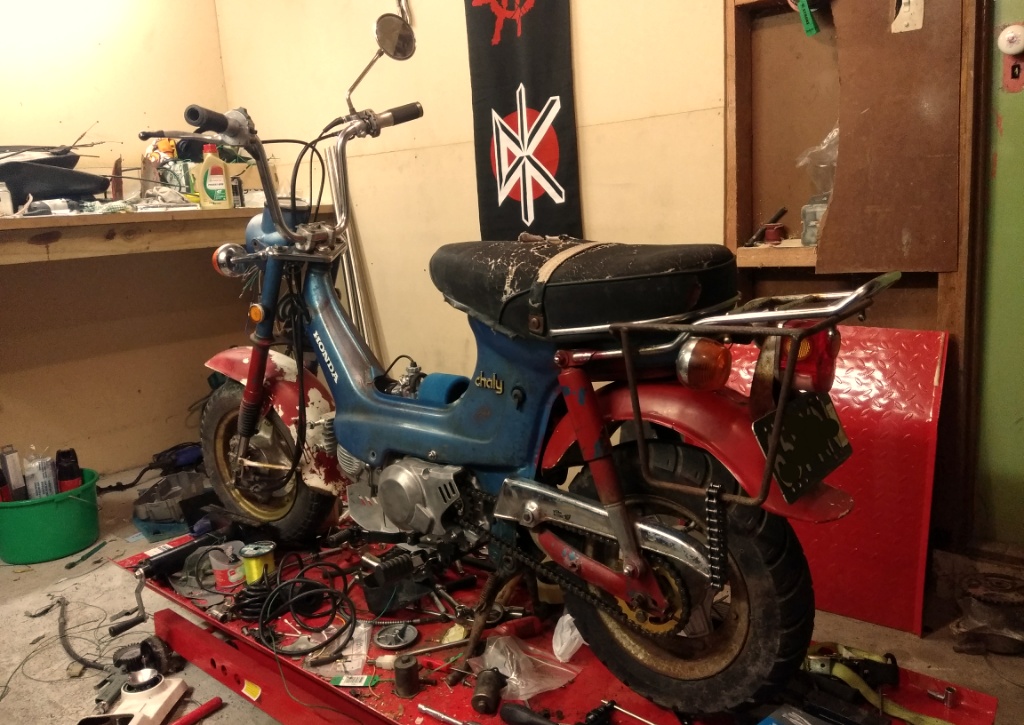
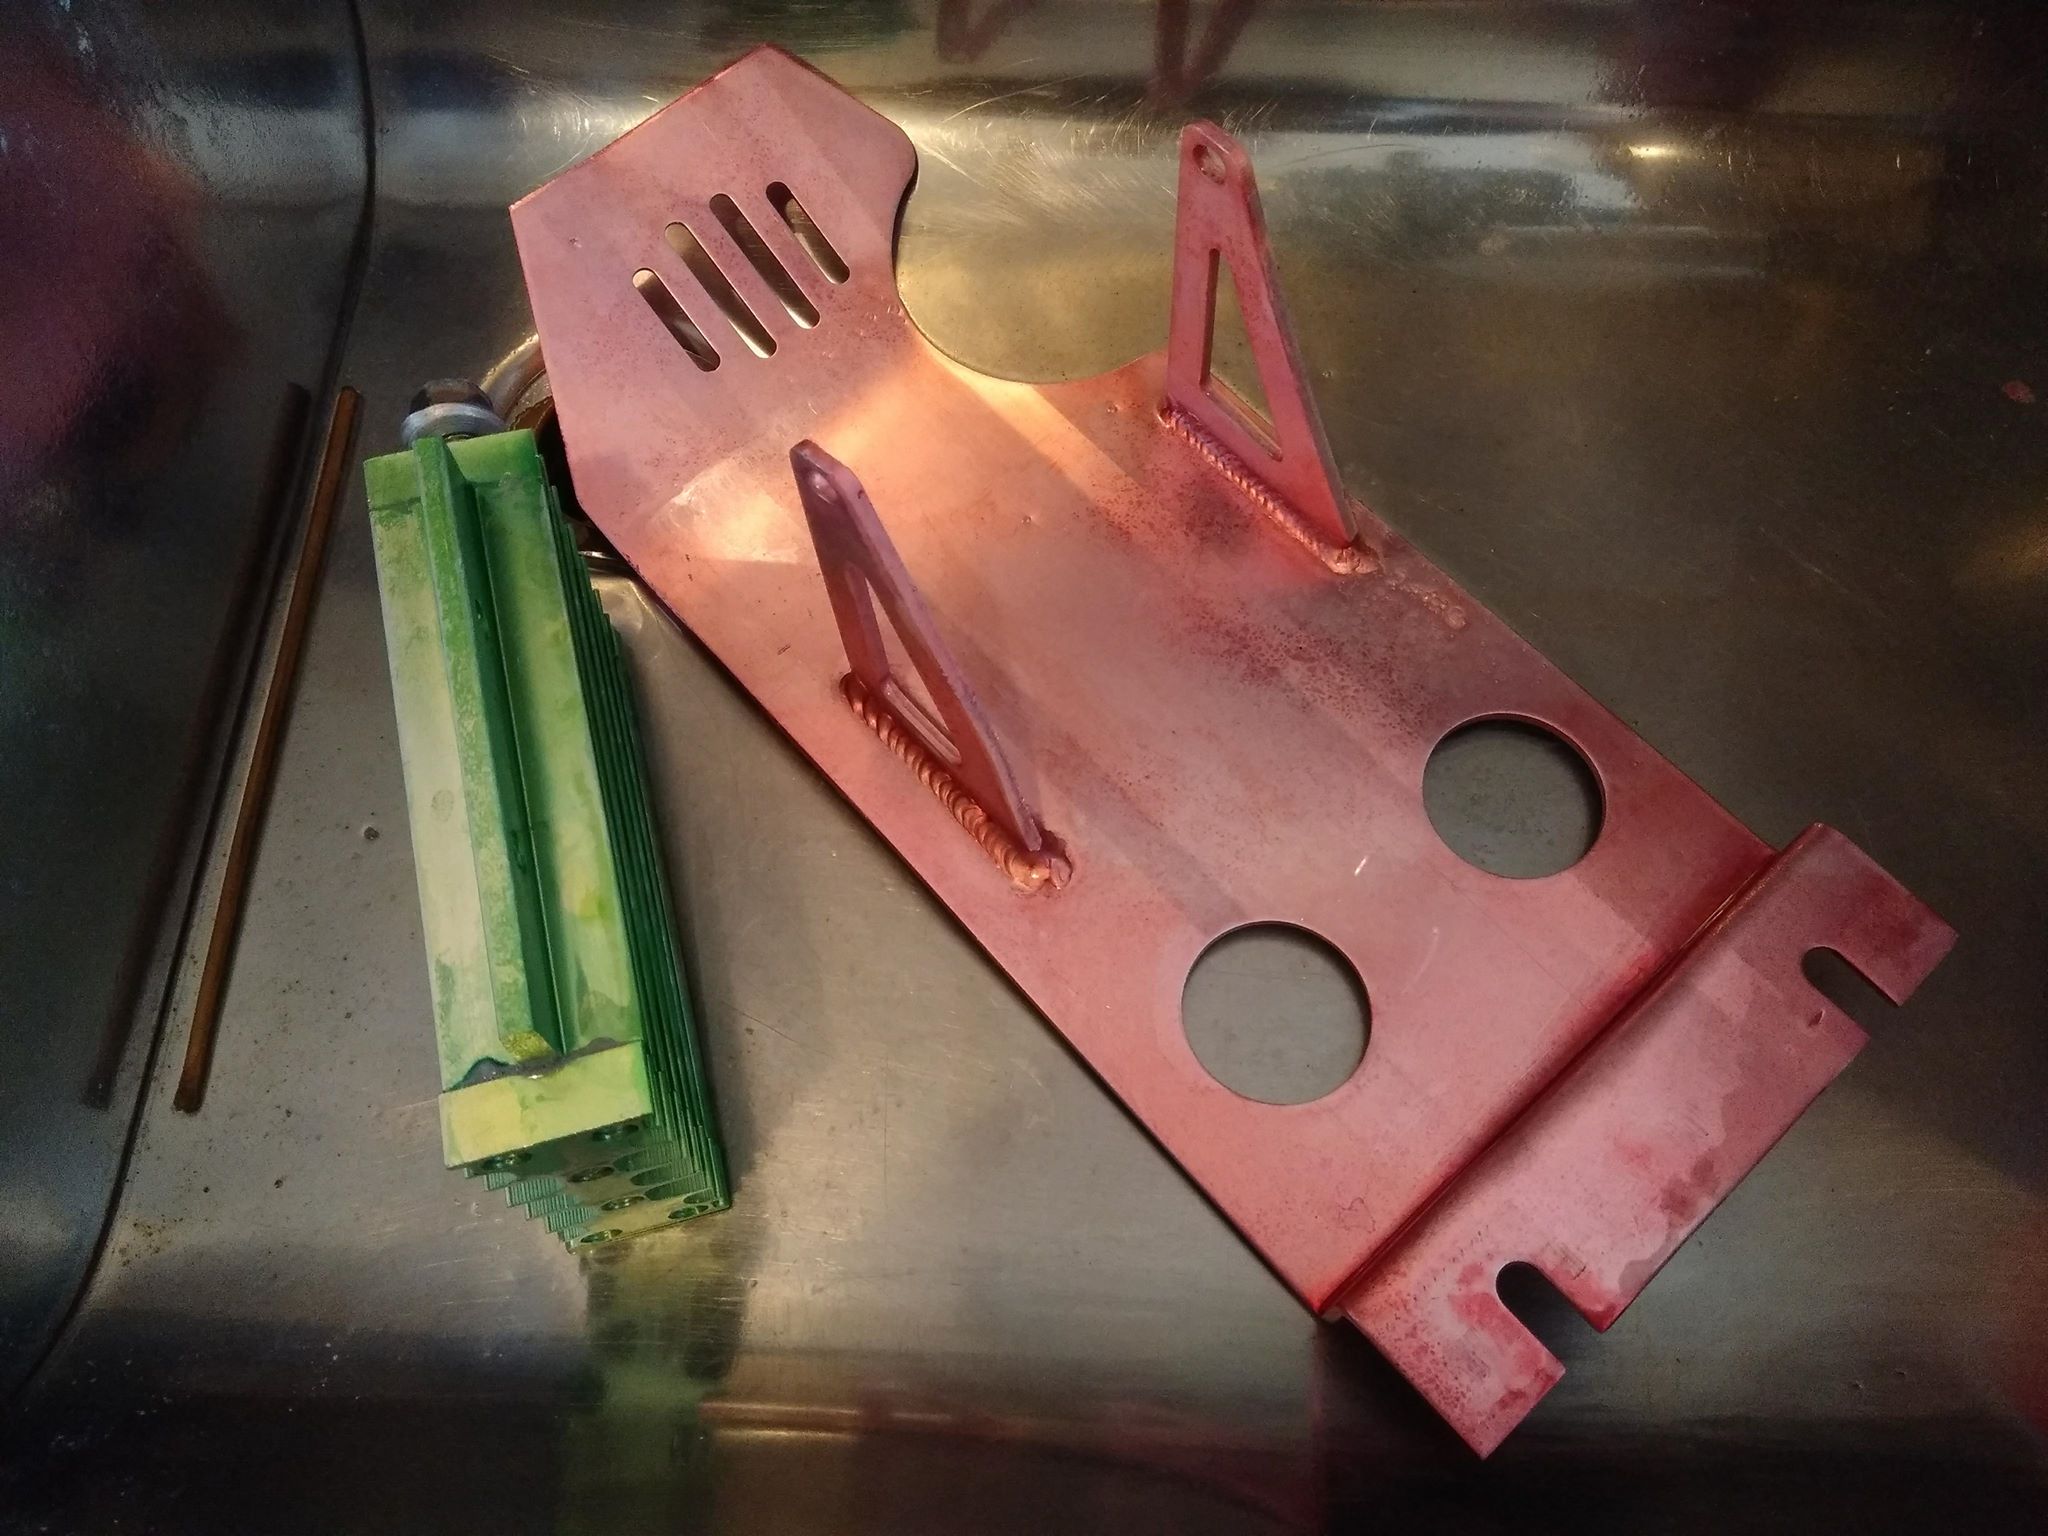
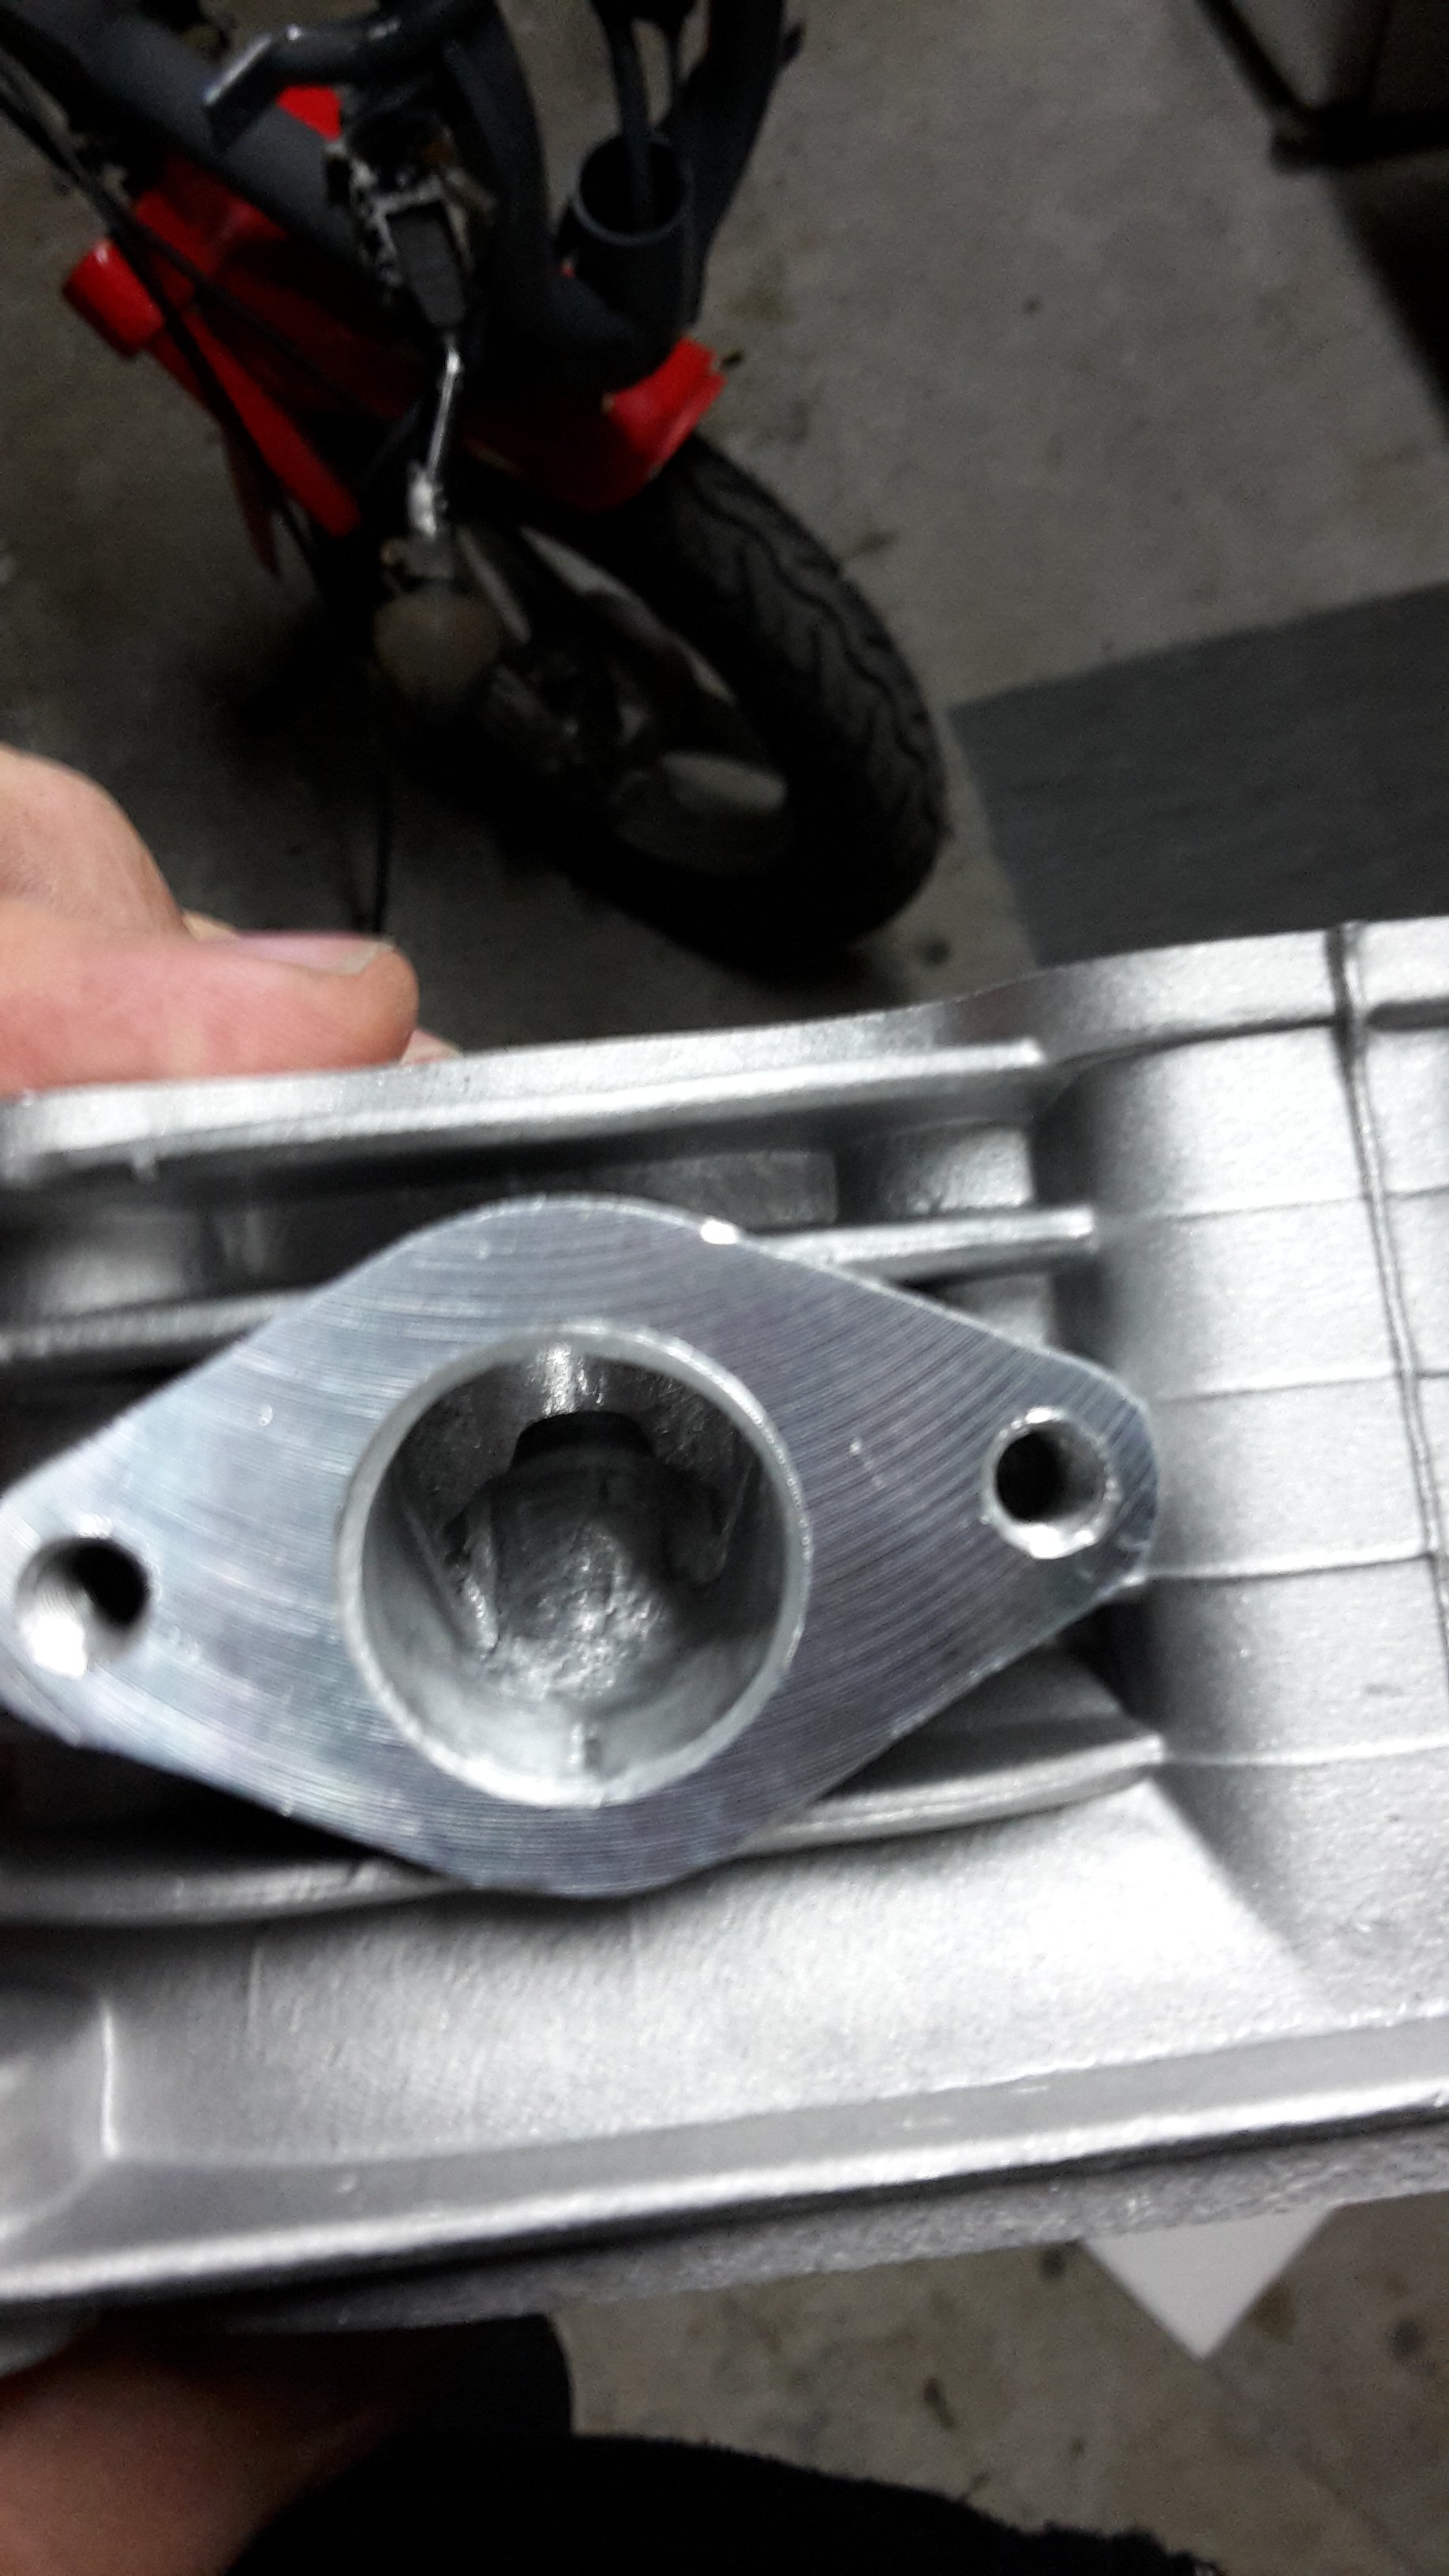
did a bit more. i decided the bottom of the B pillar needed more investigation so i cut the bottom out and cleaned it all up. then it all got a coat of two pac primer and i stitched it all back together. 2018-03-13_04-13-42 by sheepers, on Flickr 2018-03-13_04-13-55 by sheepers, on Flickr made a new lower quarter and stitched that in. its all epoxy primed inside. 2018-03-13_04-14-22 by sheepers, on Flickr while i was waiting for the paint to dry i started removing the rust from the rear quarter. need to make a few bits and that will be fixed. 2018-03-13_04-14-32 by sheepers, on Flickr5 points
-
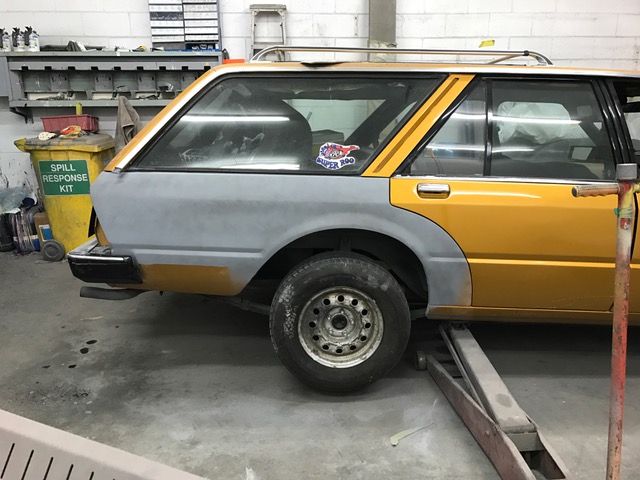
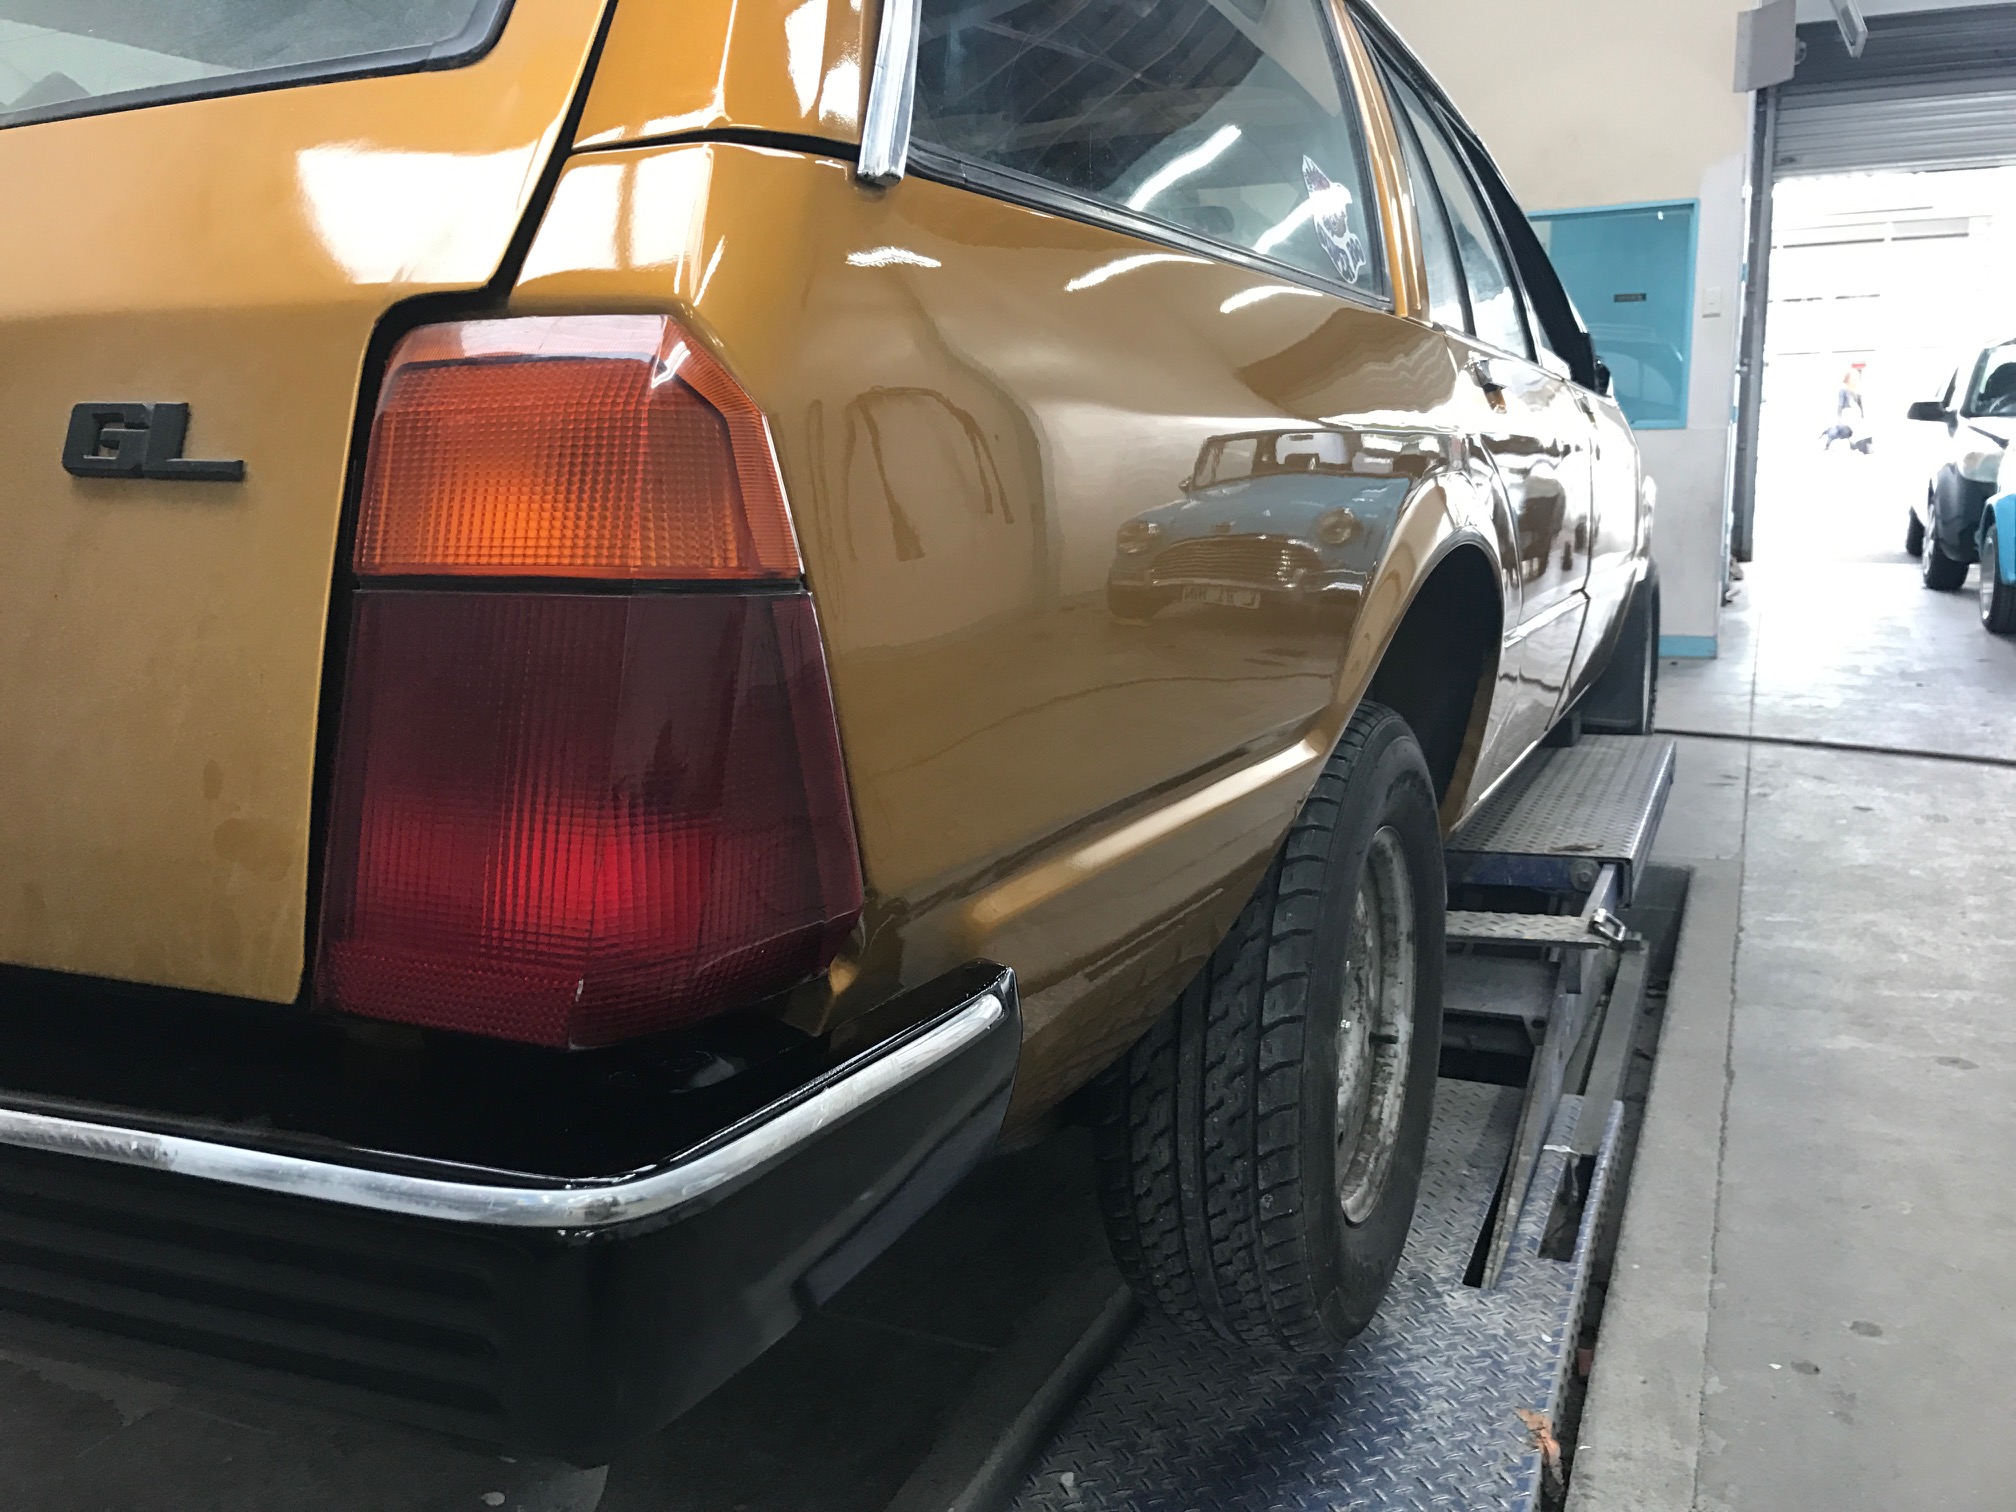
Discussion thread Also, just in case you didn't think I was depraved enough. My BA has been painted now too. Plus I've bought a set of lowering thingamees and also scored some 'teens yo. 19x 9.5's to be 'pacific. Painted etc Tried the wheels on, but still need to do a lowering jobee.
4 points
-
4 points
-
So, some over fortnight parts from Japan. Turned old crappy to new shiney. It's so nice having a Mazda that you can order new parts for, and not have to sell your soul for.
4 points
-
I really really like the sympathetic rebuild to preserve it's originality, I think it's a method more racecar restorers should consider instead of a concours level rebuild. I realise in a lot of cases this is difficult however, but there's something special about the battle worn aesthetic of an old racer. Look forward to following progress, it's a brilliant looking little car.4 points
-
3 points
-
The only way it could be any cooler is if he drove it to work on Fridays.3 points
-
did some exploratory surgery today. 2018-03-12_06-17-40 by sheepers, on Flickr 2018-03-12_06-17-31 by sheepers, on Flickr nothing too major in there. ive started making the repair parts and should have it buttoned up tomorrow.3 points
-
Fixed all the rust holes in the lower radiator panel. Forgot to take photos of the progress but nothing really exciting anyway. Bogged up all the pitting in it and gave it a couple coats of paint, along with the brackets that go behind the grill bars. Made up the air lines that go to the rear air bags. Made the left hand one with not too much trouble and then made the other side incorrect, as it had to go a different route because of the fuel tank fittings, and would of fouled on the deck frame. Got it right the next go though. Of course had to give it a test!3 points
-
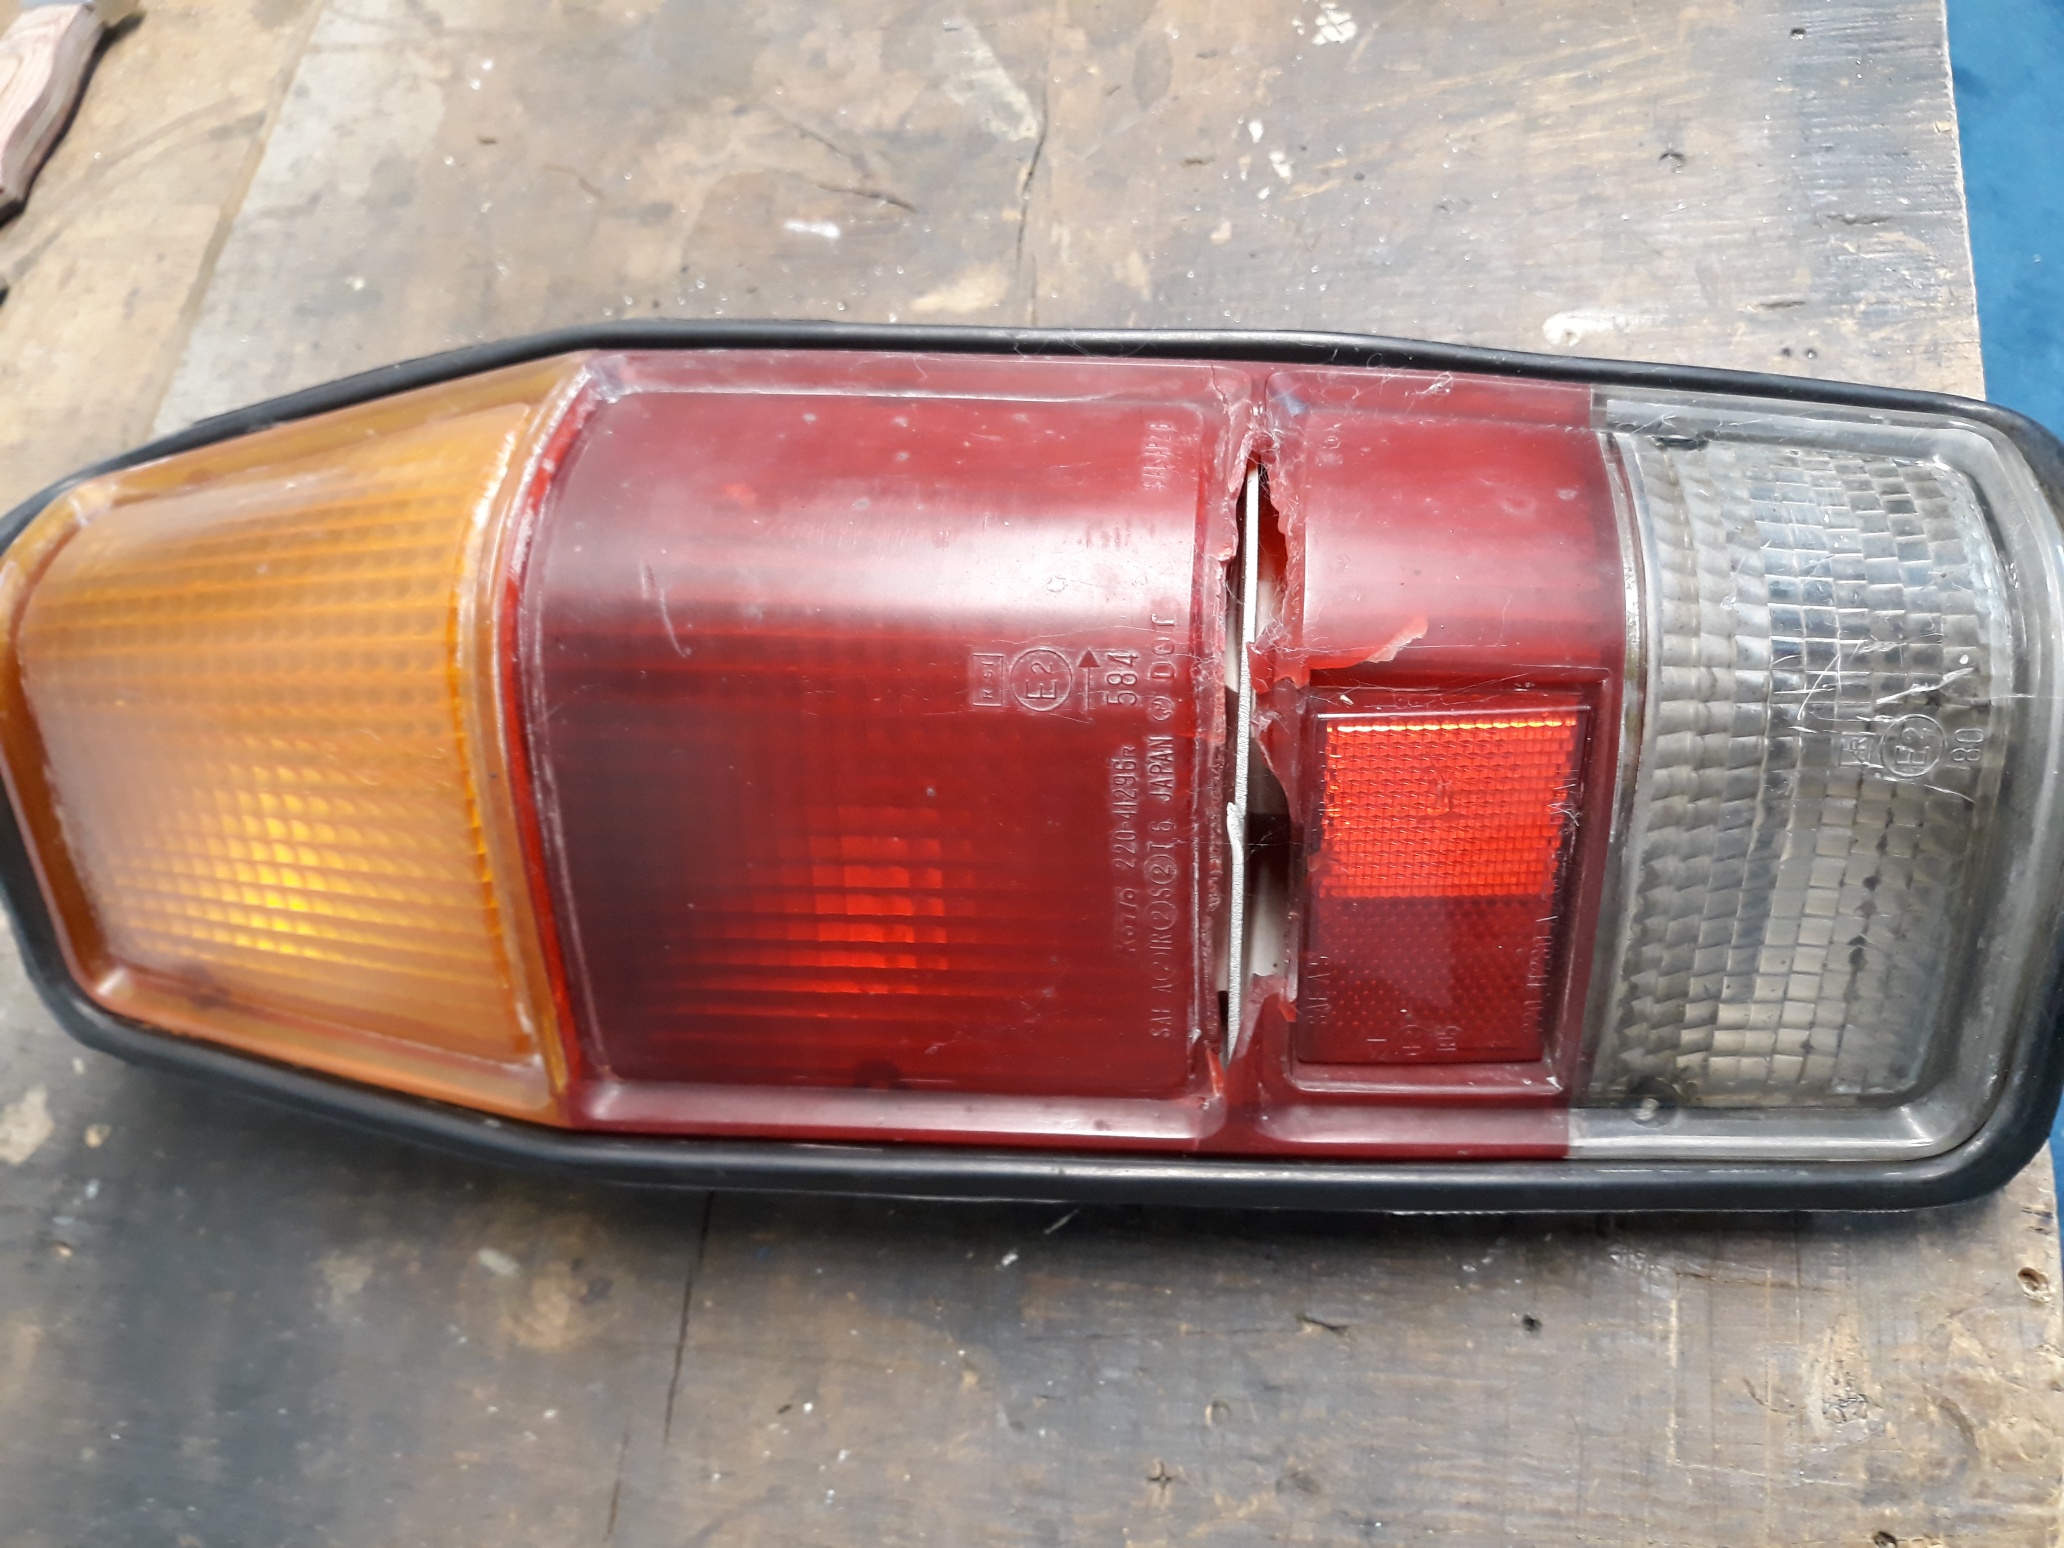
So I've been looking for an e30 manual 6 cyl coupe for a while. Finally found this one for sale in Havelock North, pretty much right next to home: I'd even seen the car around a couple times and taken pictures: The problem being that I don't live at home anymore. I moved to chch for uni. Luckily enough my parents were happy to view the car for me and potentially pick it up. And with my luck the day before they view (and only a day after the guy posted the car to facebook) I get the news that the guy fell asleep while driving home from work and had an unfortunate encounter with a lamp post: But I decided fuck it I'll go for it anyway, I've been looking for so long and how hard can it be to fix? Also it's got some nasty rot under one of the tail lights: And some on the sunroof too: Anyway I'm looking forwards to Easter when I actually fly back home and get a good proper look at the car.2 points
-
Installed my latest decorative item.
2 points
-
Put a rotary in it2 points
-
this is so great. if buying parts from scootercare funds this sort of carry-on then sign me up haha2 points
-
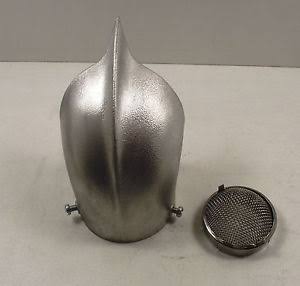
Pic of the stromberg 97 and air filter I was thinking I might get.
2 points
-
I legit get excited every-time this thing is updated. I wish I had one tenth of your skill dude, keep killing it as this may be one of the best trucks on NZ roads once its done.2 points
-
im leaving the 1st and doing the tour of love2 points
-
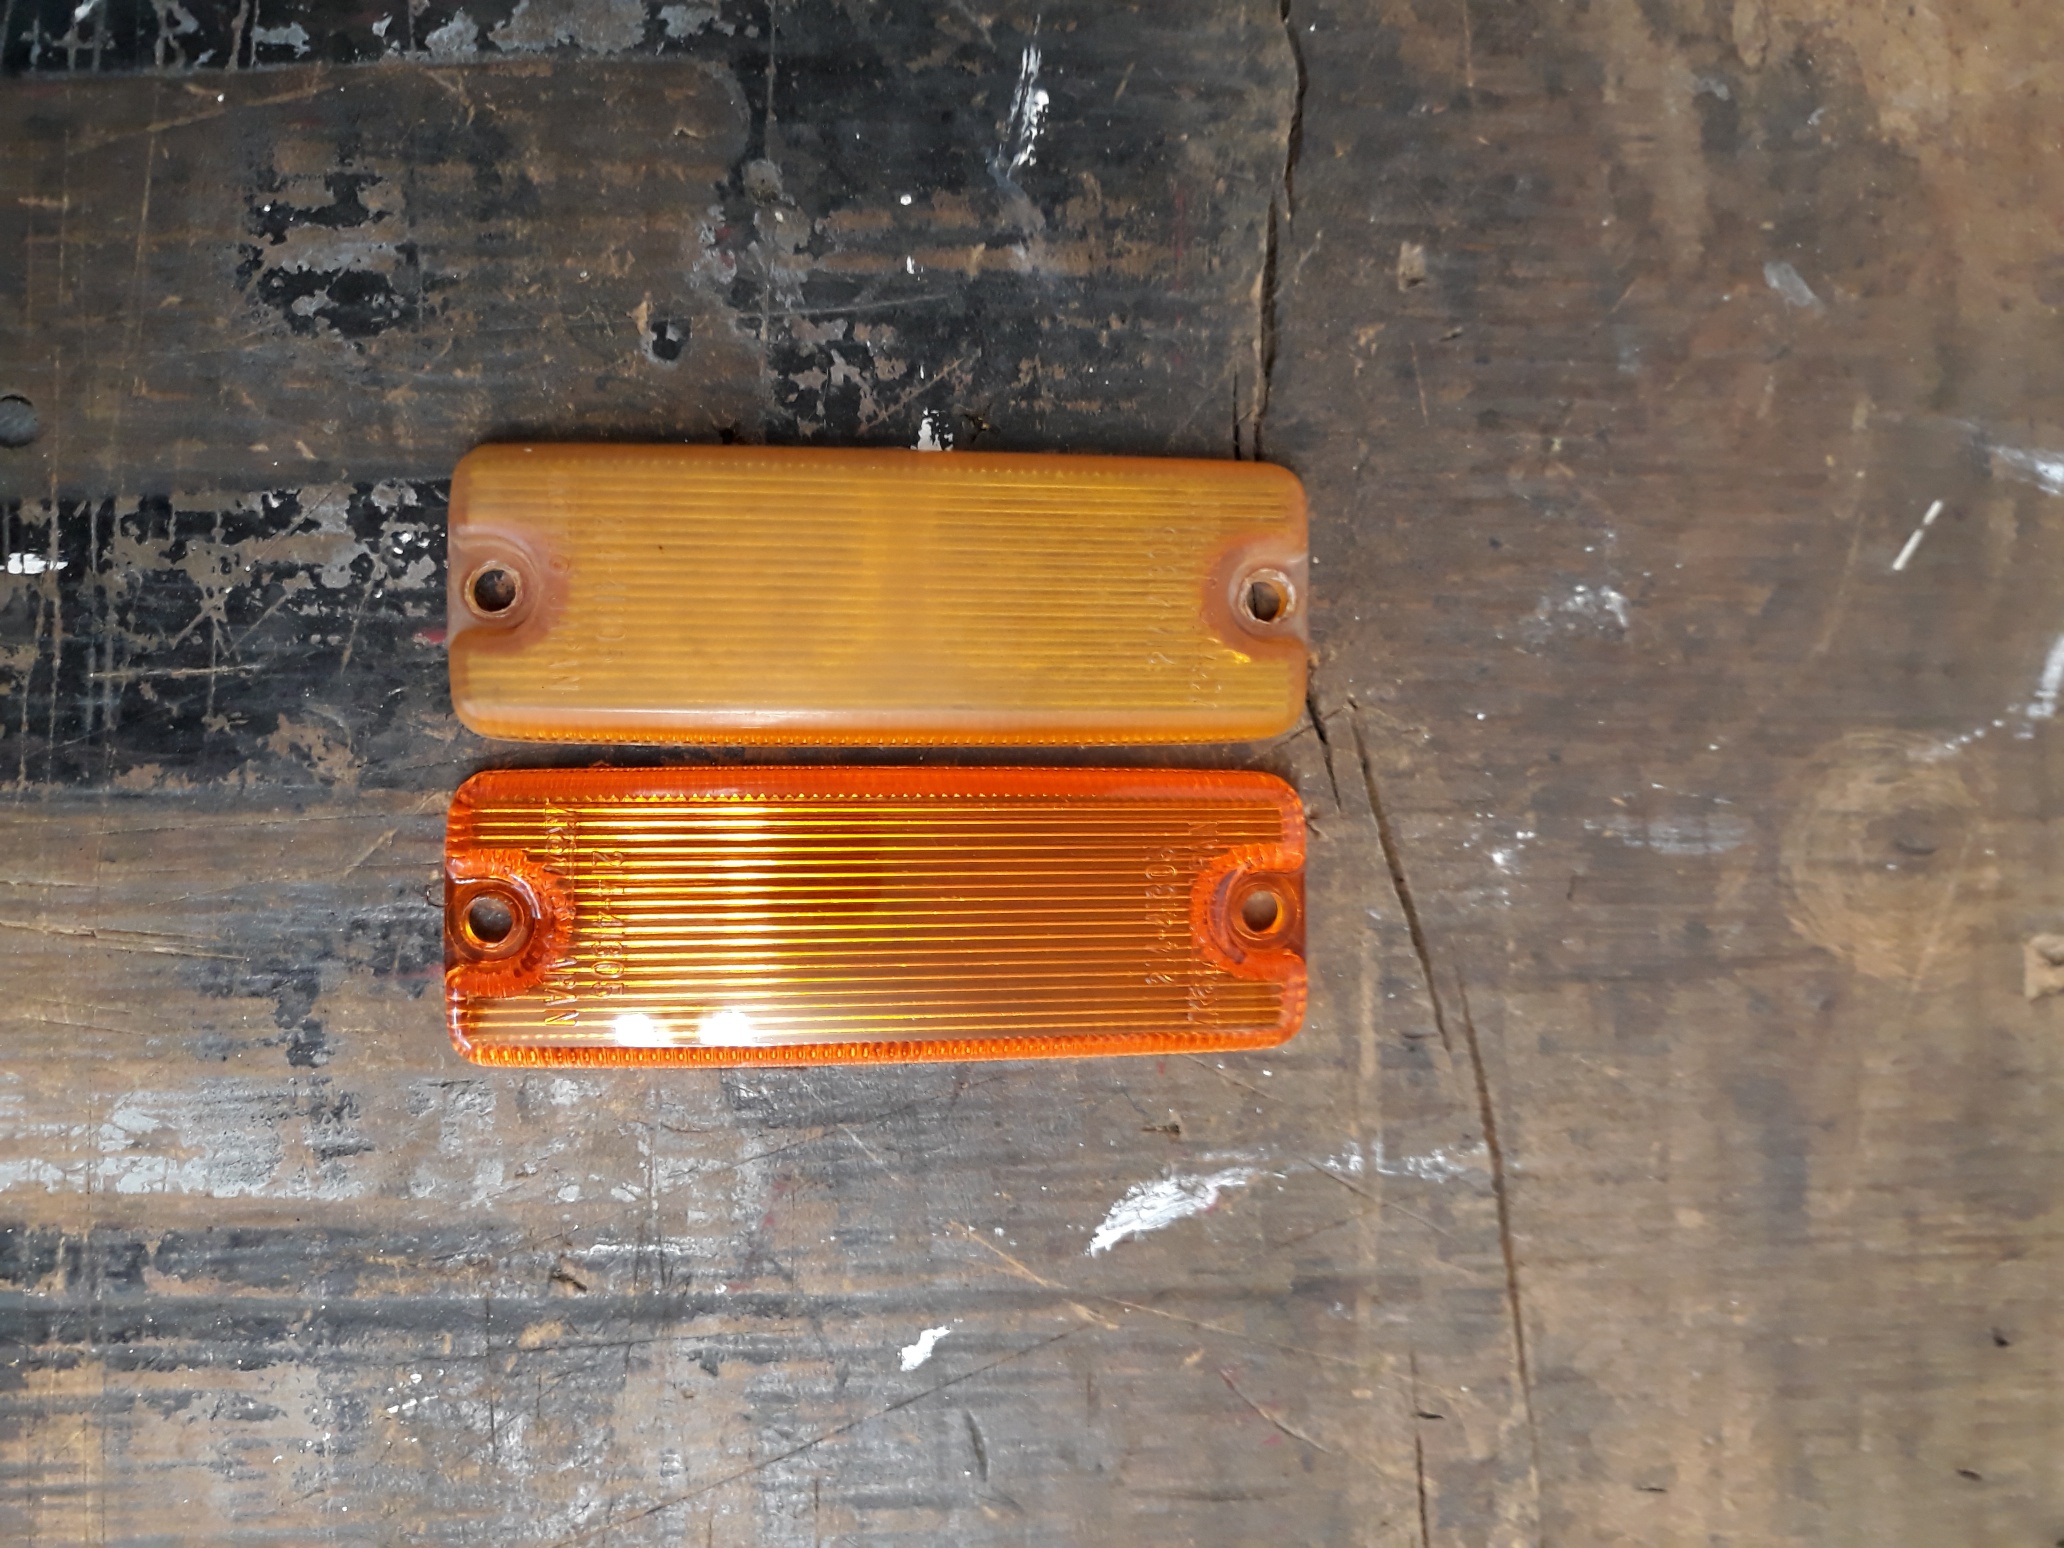
Got the guard indicator lenses as well.
2 points
-
Engine went in on Saturday. I attached the wiring loom to the trans and draped the rest of it over the motor. The engine went in ok. I was using an engine crane and really needed an extra set of hands. Rang a few people but no one wad around. Decided to go for it and all went well. After fitting the engine i decided that the drivers side exhaust should go on. Used a block of wood on the jack to lift the engine. The jack decided to move which kicked the block of wood out. That jammed my ring finger against the chassis and mage a nice mess of my finger. Many bad words yelled and blood on the floor. I have photos that i will put up once my pc has finished updating.2 points
-
Here are a couple, Its quite hard to get pics of it as its very tightly packed in. No only one small radiator at the front. The gearbox is a Renault 3 spd trans axle that Dennis made a new gearset and crown wheel/pinion for. One of the very interesting details is the clutch, it is on the RH side driveshaft. The transaxle is bolted direct to the engine which i think is pretty unique.2 points
-
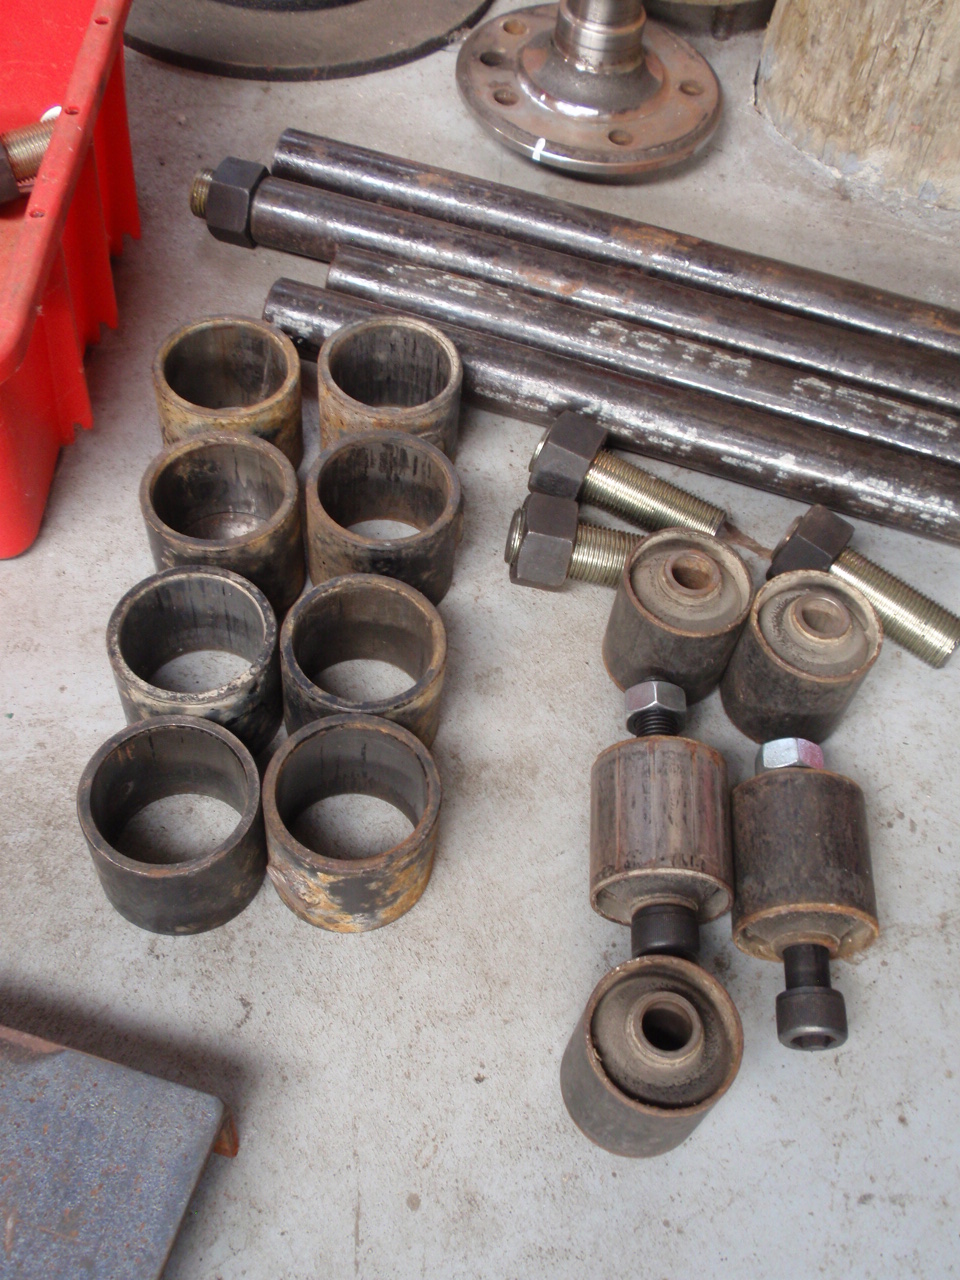
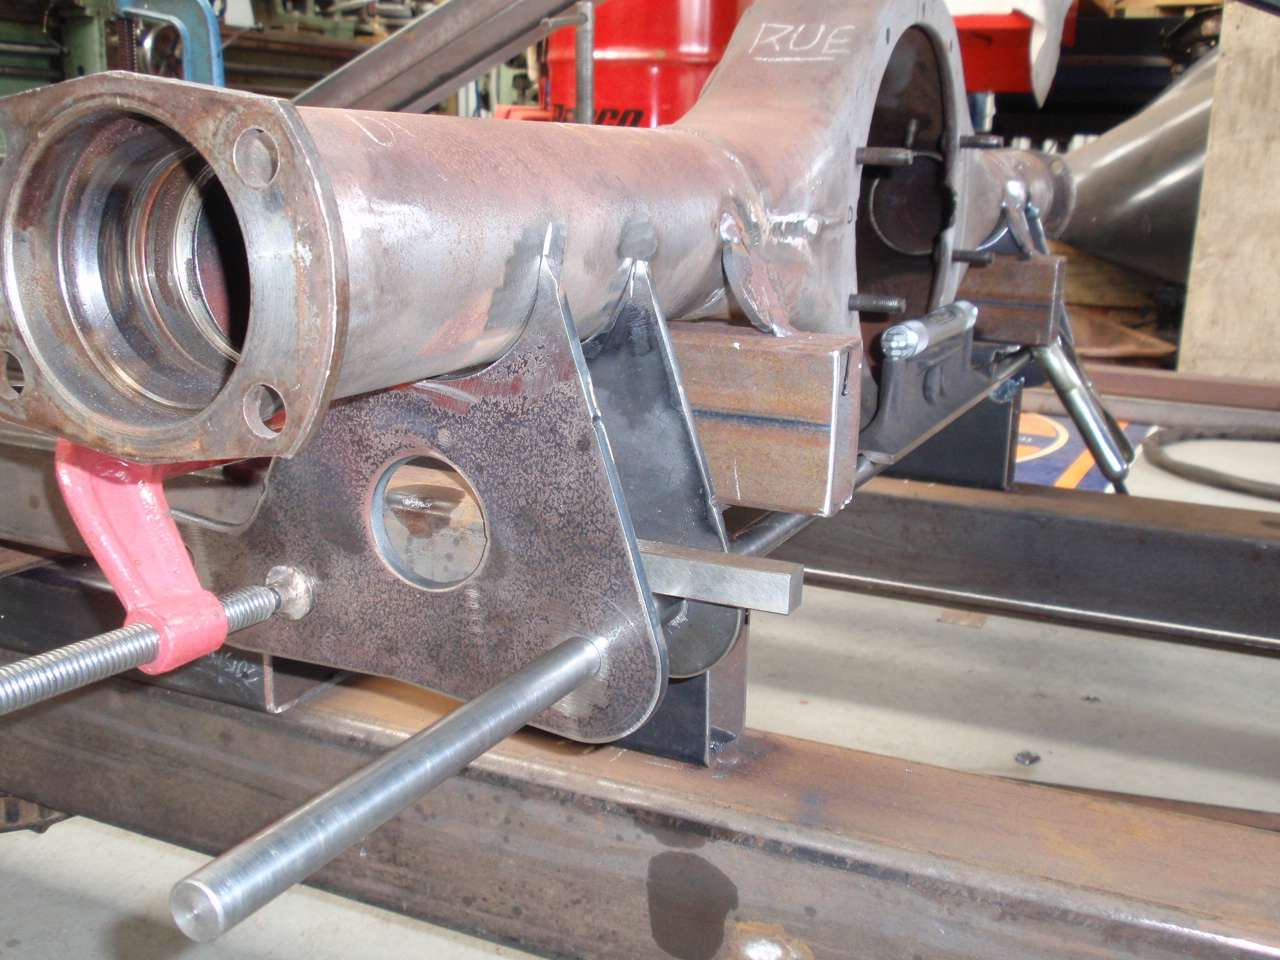
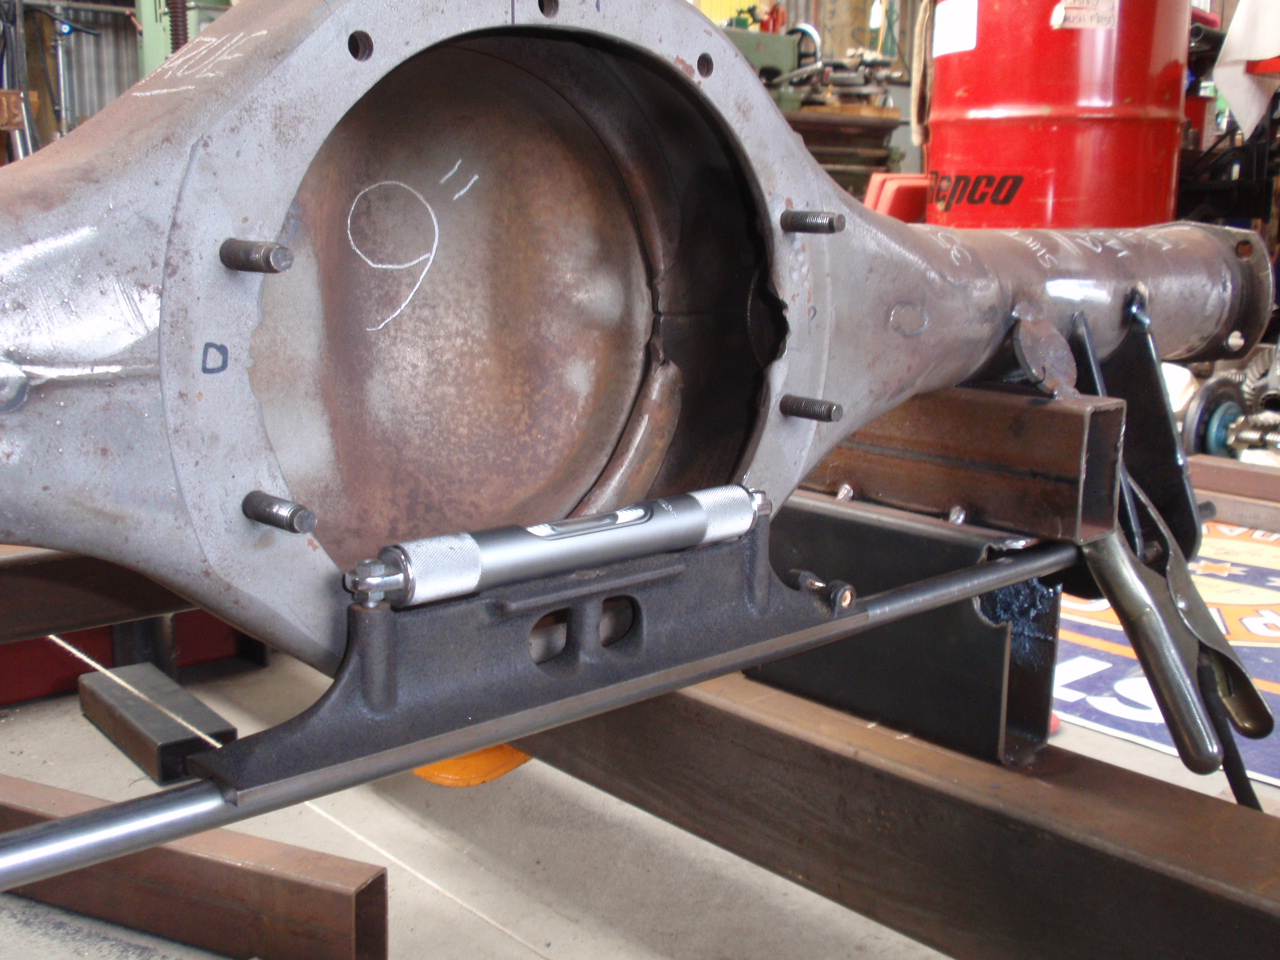
In a further effort to save dosh, I am using OEM Surf suspension bushes. A combination of line pipe, 1" threaded rod, the afore mentioned bushes and an accurate little jig will see it get done. Still tossing up on whether to go triangulated 4 link or try a 3 Link. Wanted to get this part right. Used a machinists level and some bright round, lol! Probably the only straight bit of engineering in the whole build, haha!
2 points
-
well then. where to start? my first car was a 75 and ive always regretted selling my red one back in 09 or whenever it was. ive had approx 9 of these over the years and now currently today i own two. yep, i bought another one. i still have the rusty one i bought a few months back and now i have this one as well. it came with a whole bunch of paperwork which tells me that its done 144,000 miles since new and the engine asd trans was majorly overhauled 40,000miles ago. it runs quite well and drives as well, the auto is smooth and feels really nice. as with all old toyotas all the electrics work and it still has the original radio with the floor mounted seek switch. the brakes are fucked so that's being addressed right now but nothing else as yet, christ, ive only had it one day. its got some rust around the rear arches and the boot floor is abit rusty but apart from that is legit as fuck. everything is there, and its not been fucked with to badly, hell, it still had the factory setting shims for the front brake calipers. what to do with it? well, eventually it'll get the full treatment but for now i might just get it legal and drive it. fuck knows. oh, and it came with a sedan which ill paint then sell. i guess ill start a seperate thread for that. if anyone wants a mint sedan hit me up. so to recap, i have two MS75s and two MS65s. one 65 is def a parts car although its pretty good really and fuck knows about the rest of them. time will tell i suppose. 2018-03-08_05-25-54 by sheepers, on Flickr 2018-03-08_05-25-45 by sheepers, on Flickr 2018-03-08_05-25-35 by sheepers, on Flickr and heres a picture of Richie foaming in his dream car 2018-03-04_05-41-57 by sheepers, on Flickr1 point
-
We can discuss in detail over a cold rum or 7 in approx 1 weeks time. (presume you are heading over Wednesday or Thursday?)1 point
-
Outstanding. Ling post but these wags are one of the many now old cars which I used to think were hideous but now quite like.1 point
-
Concur, still rad.1 point
-
yea rodgee ill be ditching all that gay stock shit. also anyone know of any 1.85" 17" 36 hole rims? can on the rear of all small capacity CBs, some XRs etc, i want for this but dont want to pay shipping for a new one from thailand. pleeeease and thankyous1 point
-
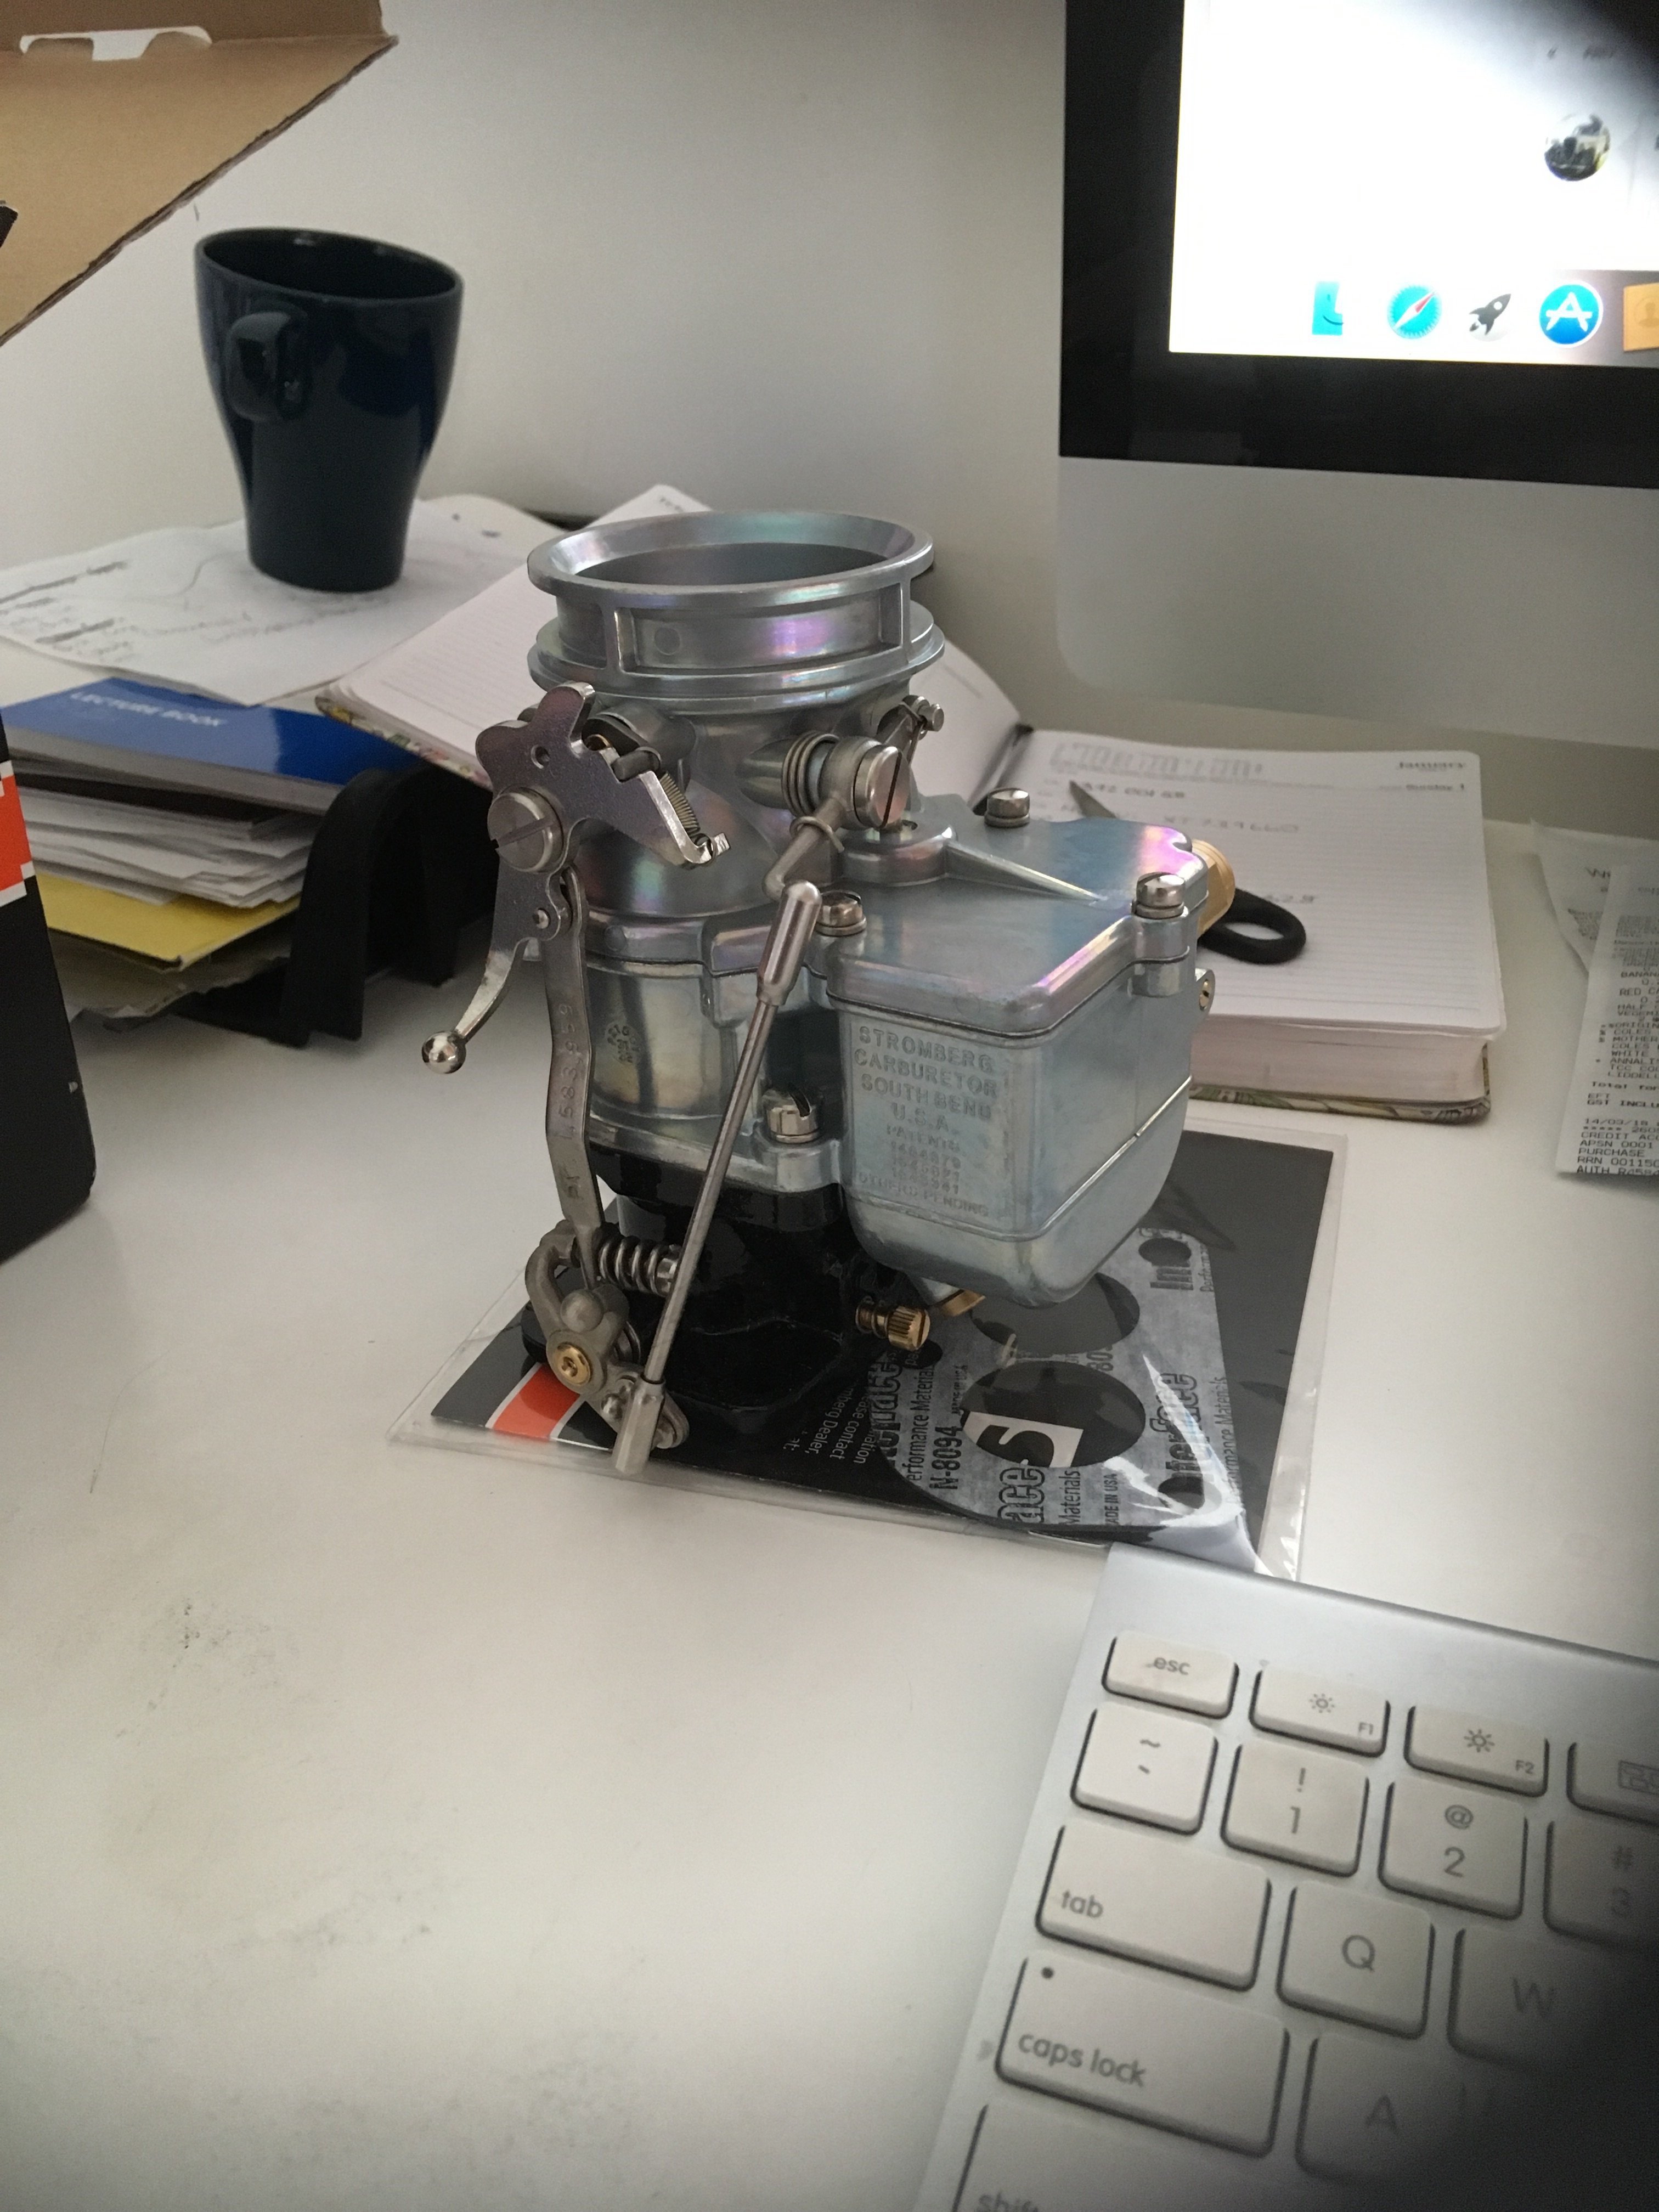
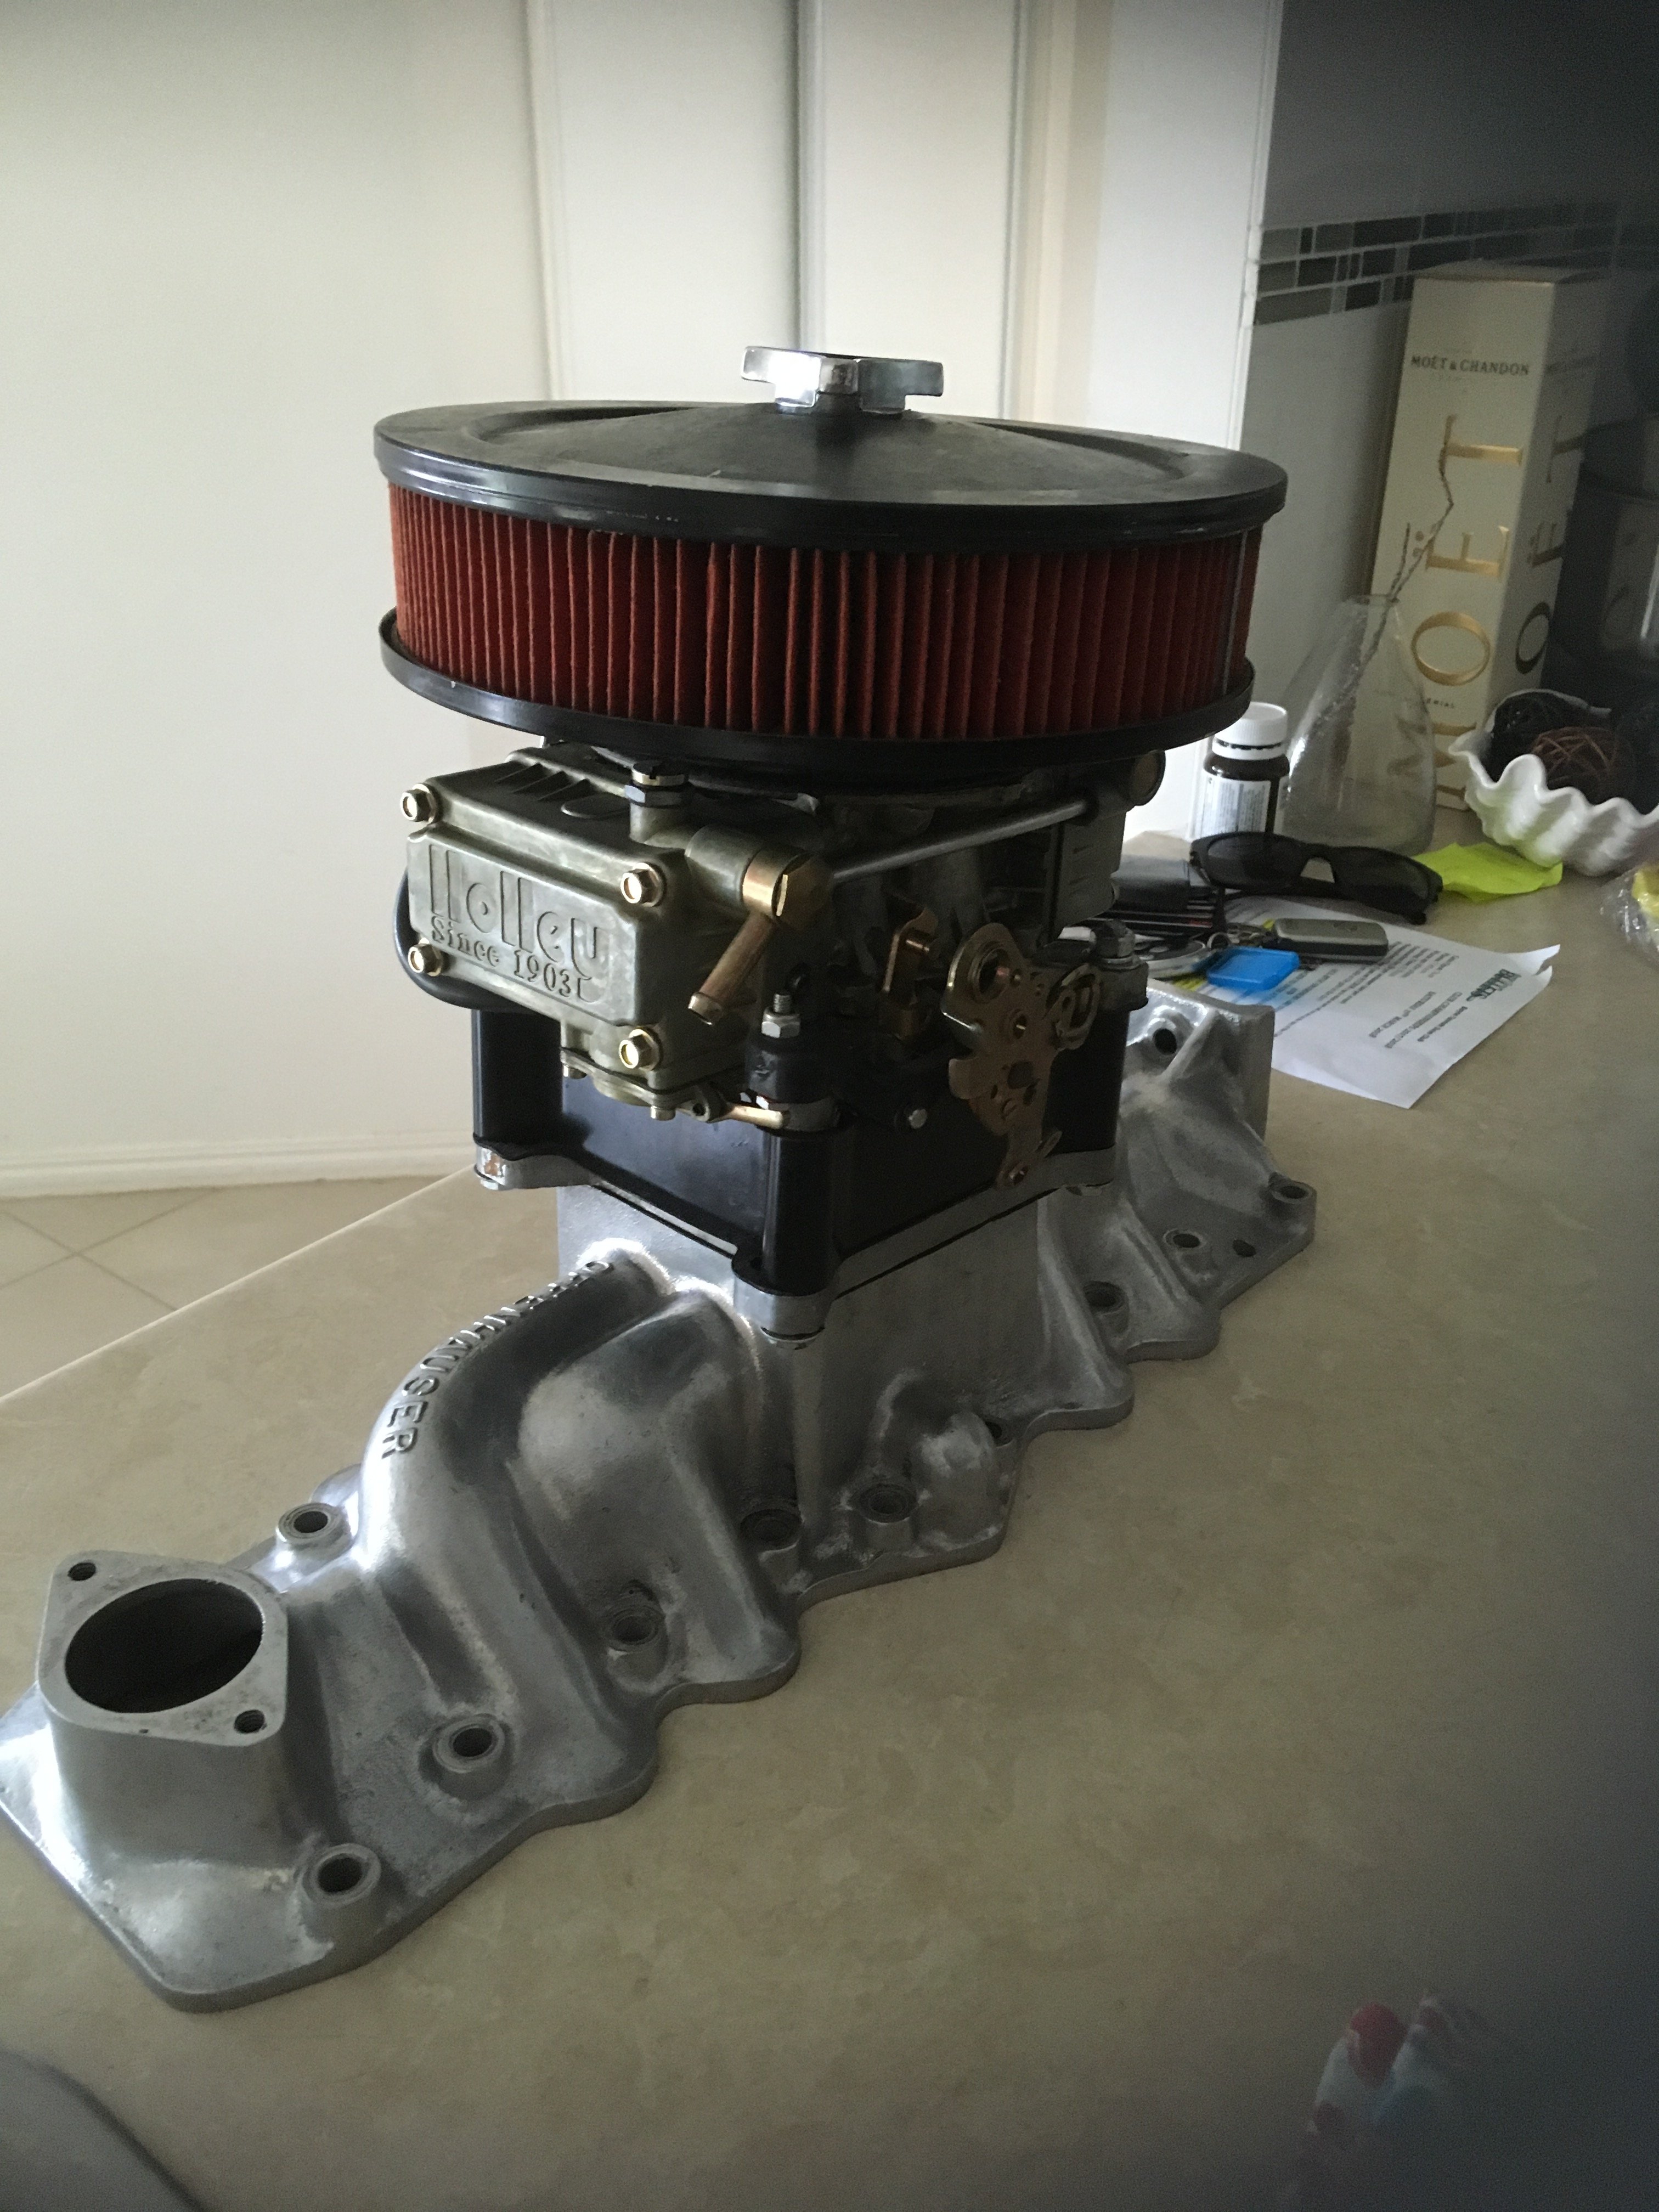
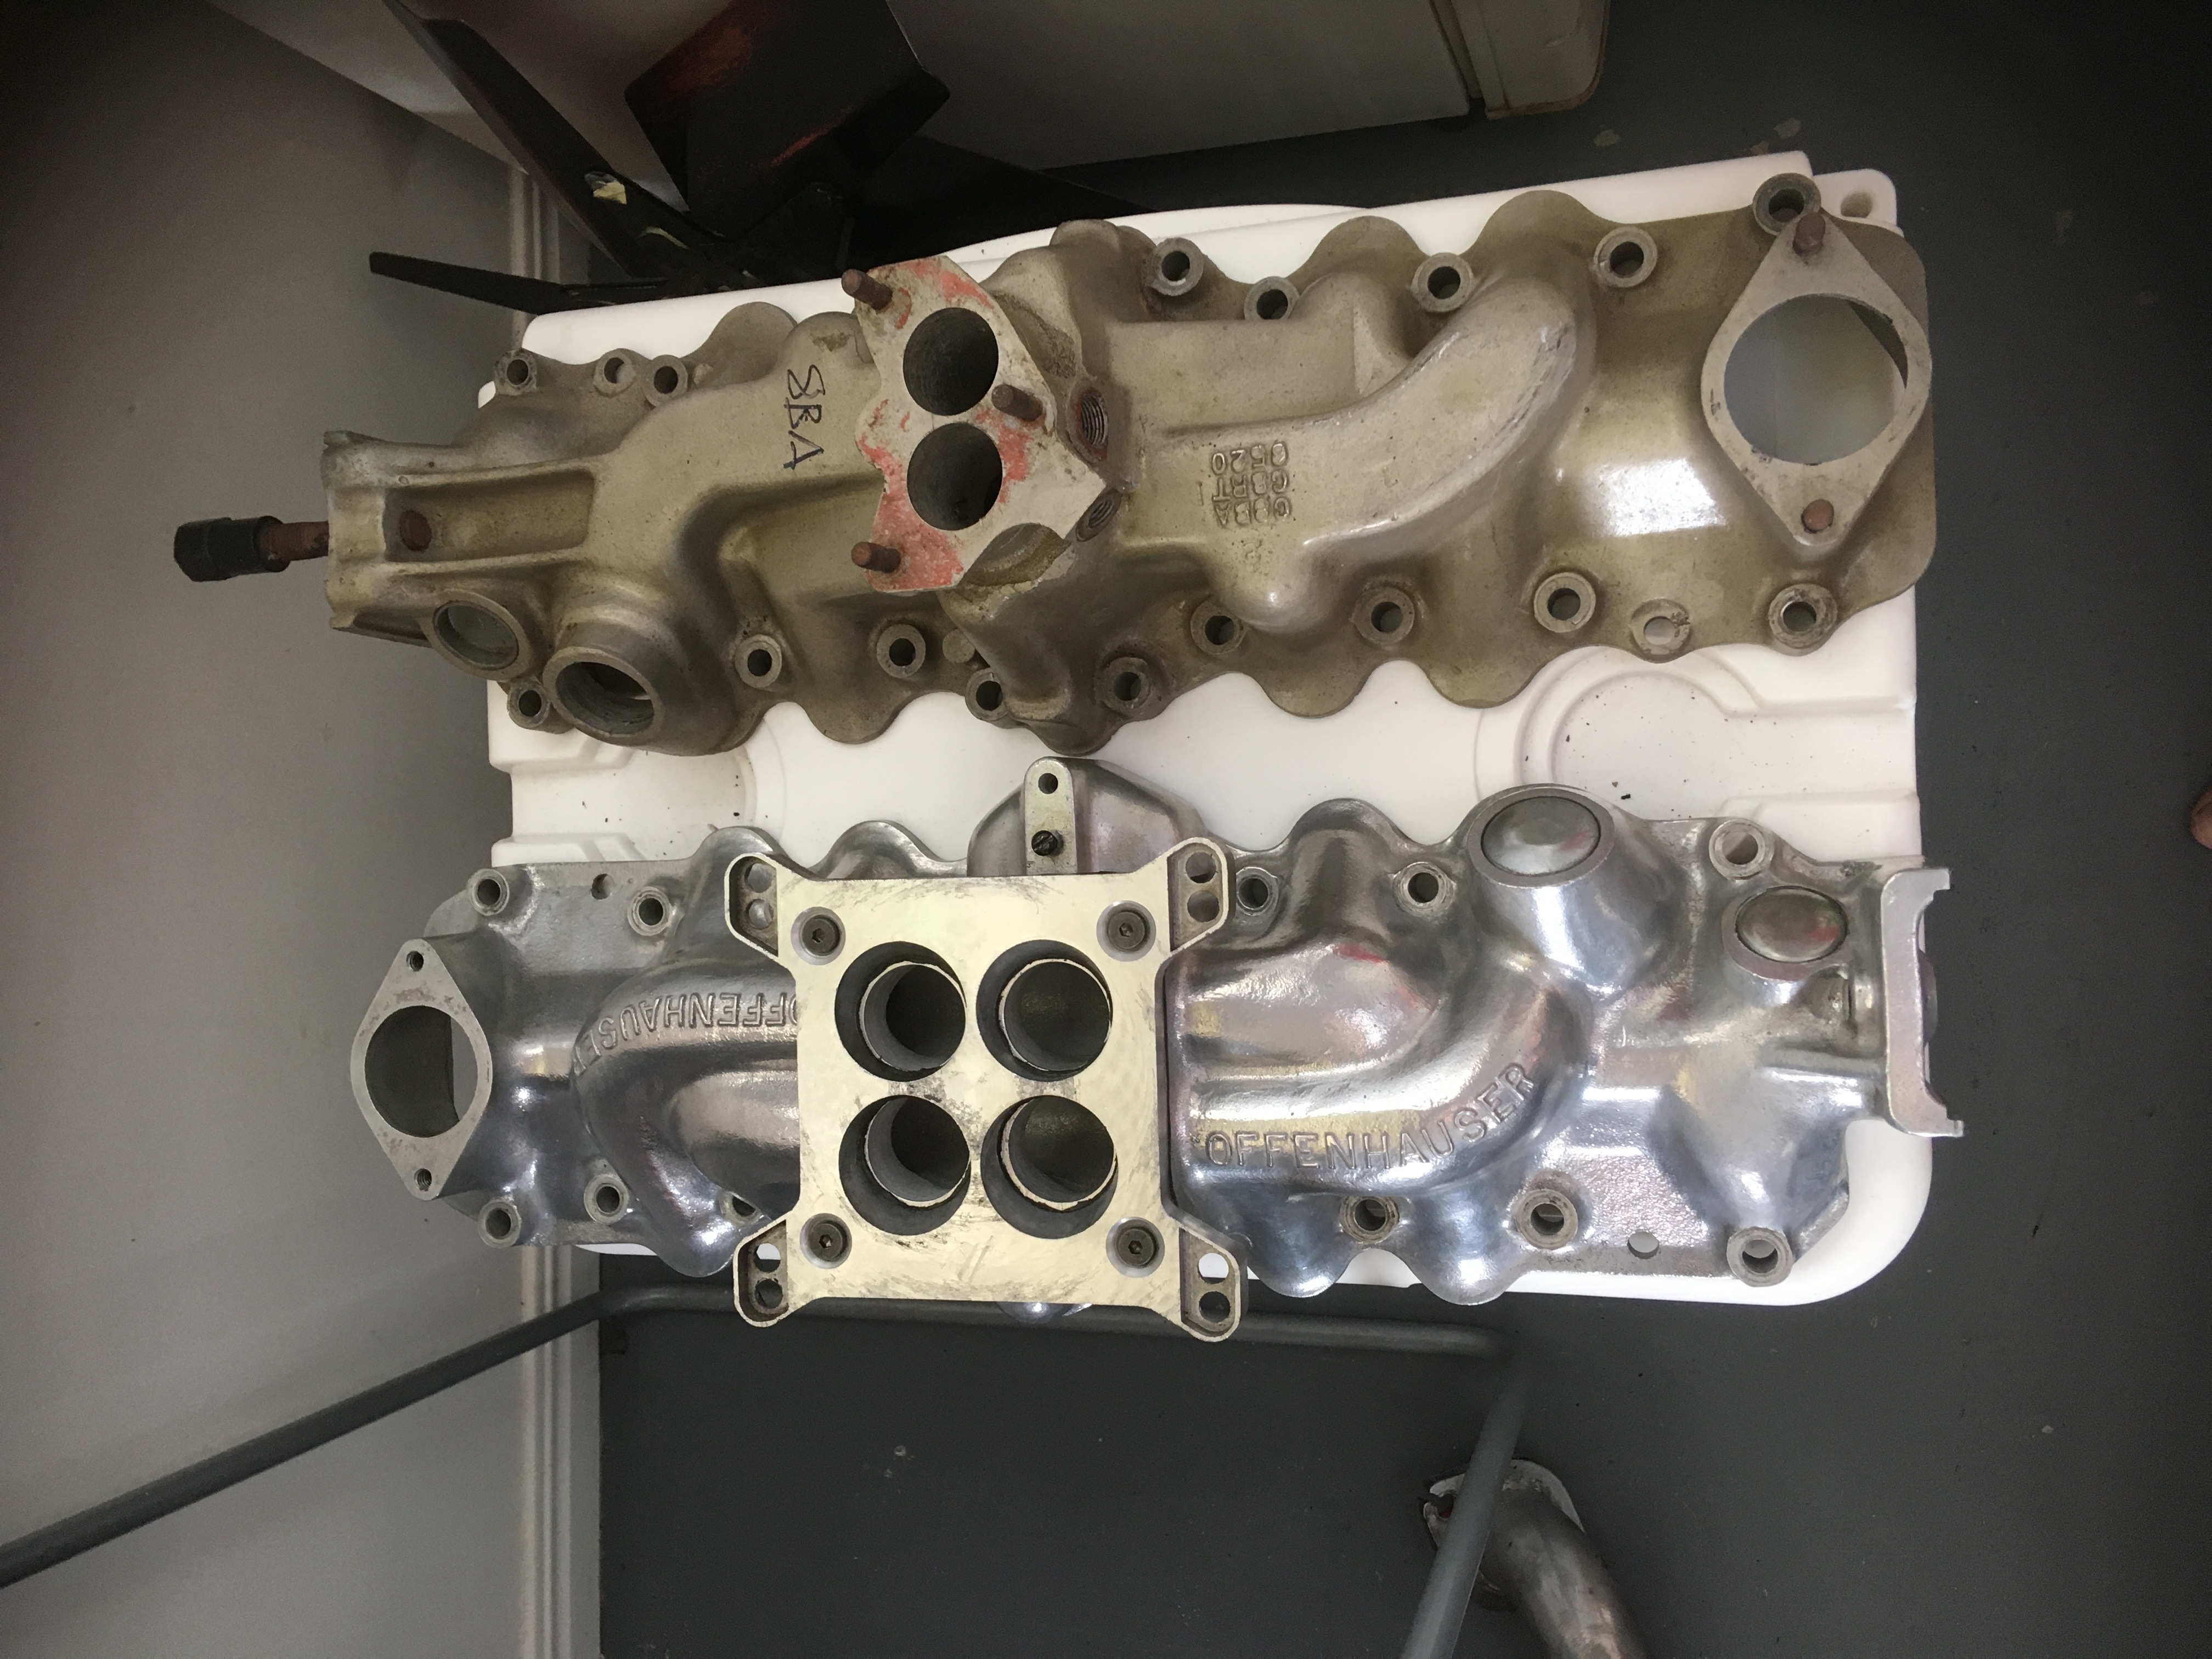
So I decided to sell the holley and intake and buy a stromberg 97. This way it will look more period correct and later on when I get some spare cash I can go for a twin carb setup. Not sure if i mentioned it but we have done away with the 8ba dizzy and gone back to the crab style. Also I needed new water pumps but it was fitted with truck pumps to clear the dizzy.These will have to be rebuilt. If I was to get the correct water pumps it would mean finding a new crank pully etc.
1 point
-
This thing looks so rad. Those pipes are going to sound amazing.1 point
-
Yep. No wof no worries GPS app on phone is handy for recording fastest speed
1 point
-
Damit! Mt.Vic hill climb, masterton drag way 50th plus this, and we're missing all of it for a bloody engagement party in Napier! Stinkface1 point
-
Must be a dog box then? Clutch to get started and then just bang shifting the rest of the way? This is such a cool project, look forward to seeing more of it.1 point
-
I'm guessing open diff, clutch just unloads one axle letting it slip? That doesn't seem right though lol1 point
-
Shit yeah! we will be needing a sound sample1 point
-
really need a pic of it loaded up now for the full effect pls1 point
-
Might have to do something with the sprockets etc!
1 point
-
Met some fellow watercooled Porsche owners on the weekend and we parked up together for a bit. 1989 Porsche 962 Brun-965-Edit by Richard Opie, on Flickr1 point
-
New seats. while the old ones were period correct, thats about all they had going for them. saved a little weight at the same time. welded some plates on the chassis, from the front suspension towers back to where the chassis is full height. so now when the chassis snaps in half doing jumps, i can say i attempted to make it stronger relocated the rear limit straps . when i done the new coilovers, reused the existing mounts, which didnt work too well. would only limit if the diff dropped straight down. so when getting hectic body roll or flex the shocks would top out. remounted them close to the coilovers, no more clunking. also put some longer 14" springs on the bottom of rear coilovers, so could get more adjustment out of the dual rate adjusters. have it switching to the 2nd rate a lot early like front, so body roll isnt so crazy now. Pretty happy how the suspension is working , possibly needs some more shock tuning. but just need to drive it more for now. springs should finally be good front have ended up with 150/200lb rear 80/110 lb1 point
-
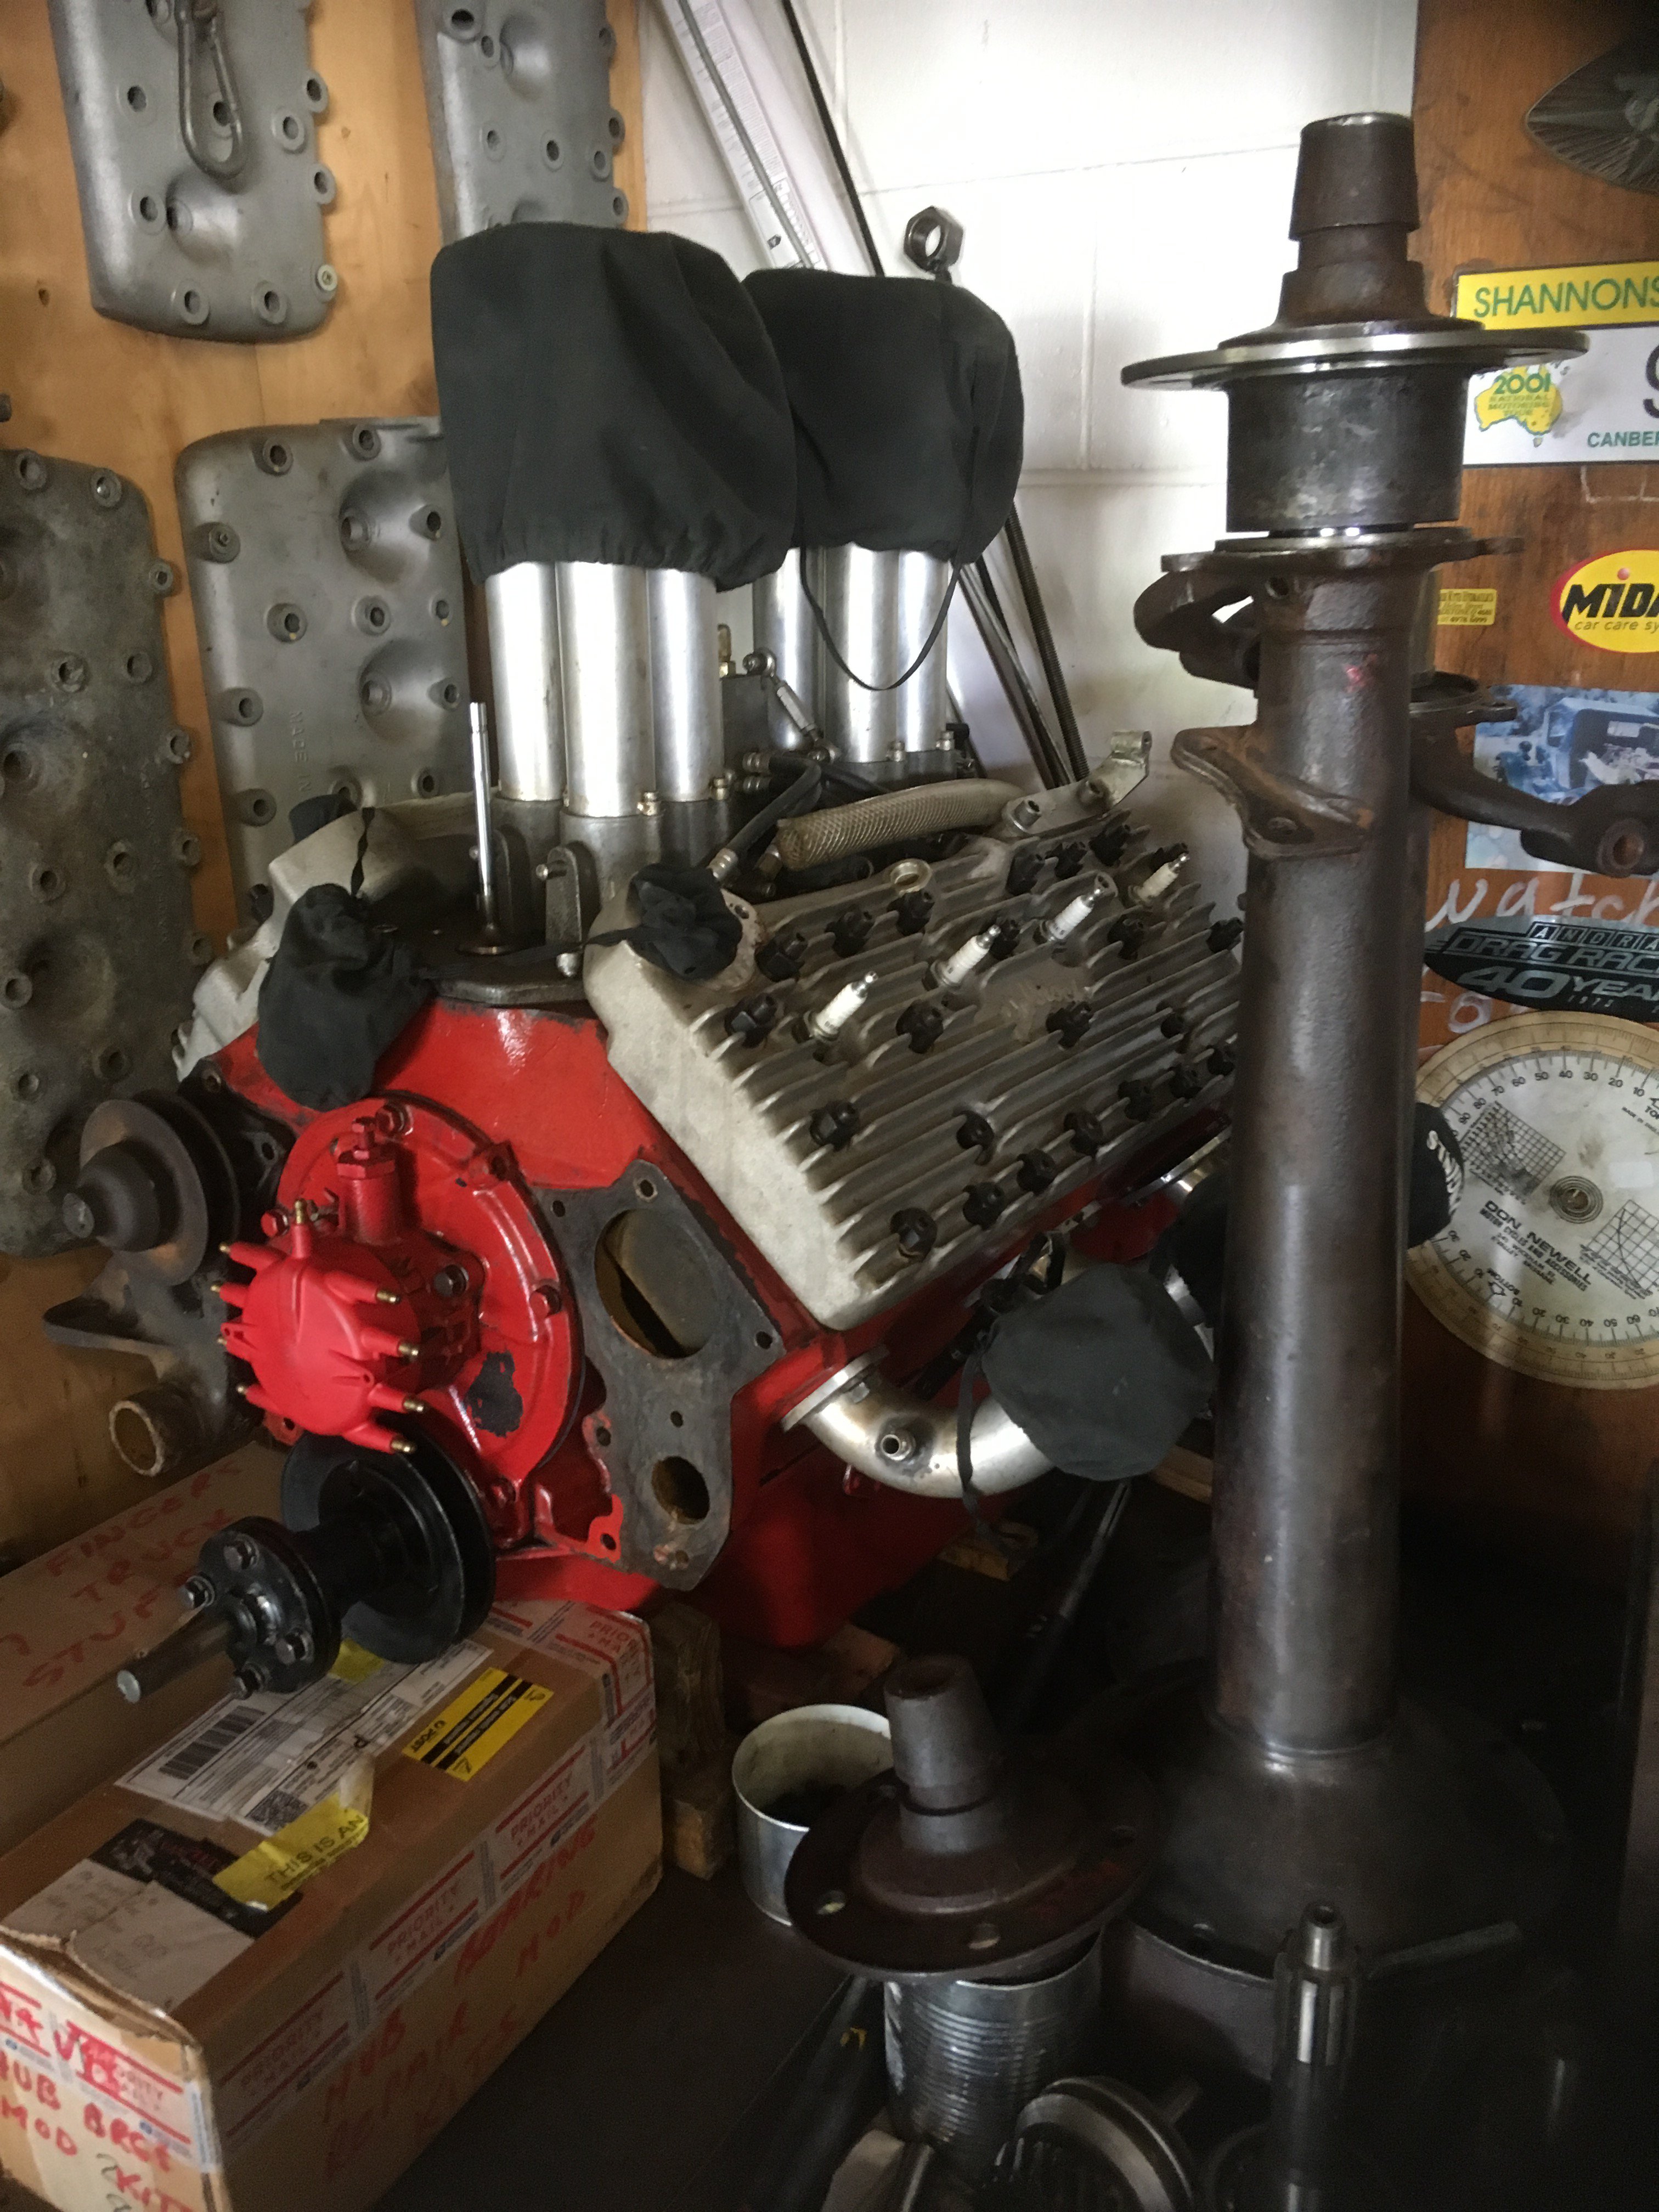
A few engines Lawrie has in his shed.The red one is the old set up in his drag car,now it has a supercharged flatty in it.
1 point
-
so i got a wee bit done to this thing over the holidays. completely stripped it down and gave the frame a cut and polish which has come up pretty good. decided against the clear coat, will just keep it well waxed. had some choice vintage style squishy grips turn up for my choice but unknow bars. i thought they were BMX at first but must be off something motorised as they had factory holes in them for wires to run from switchgear i stripped the lifan150 down to replace the top end, bead blasted the barrel and head and then lapped in new valves and rebuild the head with the new cam, rockers etc etc it was then i noticed the crank had about 1.5mm of side to side play, the bearings were moving in the case, an indication it had been hot / out of oil, which would explain why the top end was koozed. i went and spoke to a very highly regarded bike mechanic (ex uk husaberg MX team head mechanic and british 250cc MX champ) and he had a look at it and reckoned it use some loctite 620 high strength high temp oil resistant bearing retainer and it would be sweet as, so will go back together with a bit of that. so i split the case and pulled everything apart as i wanted to give it all a good clean, good thing i did cos there was a bit of yuck alloy paste / old oil in the oil pump and bottom of the cases. nothing a good dousing of brakekleen wont fix so yea just waiting for a couple of bits to arrive and ill throw the engine back together this weekend and paint it and get it mounted in the bike. then to start sorting the rest of it. i have a big box of bead blasted bits ready to paint, and have polished all the alloy bits so shouldn't take too long from here on. currently also hoping to track down a 14" pitbike front end, after @Shakotom showed me this photo below im kinda pining having lush front suspension and brakes1 point
-
Got some work done over the break. Painted up the diff, front legs and a few bits and pieces. Also brought a Quaife ATB from Palmside and installed that while everything was apart Up next will be trying to work out why the brakes are so horrible. Iv replaced the rear cylinders and shoes so Im guessing the front calipers are all seized up or the master cylinder is the wrong size. Or a combination of the two. Happy New Years all!!1 point
-
Shit, the amount of things that just about fall into your lap is amazing. Nice skinny tyres like that should make fitting/turning inside the body easier.1 point
-
did some sweet hoons on this thing couply weeks ago down at DGR welly. Had a good ride with Russ and the boys on saturday out to makara beach and she ran without fault, its pretty deafening / hilarious to ride and gets a good share of attention. So i can tick this project off as complete, on to the G/S paris dakar resto now1 point
-
Hah turns out it was already a 70cc and the new piston makes it 84cc, not 100 cc as advertised I see why people mess around with scooters, had it stripped in 30 min. Found some grey paint that matched ok so painted the bits of frame that were modified The variator rollers were worn with big flat spots so hopefully the new ones make that work better .
1 point
-
It's on the mend - yay insurance!
1 point


.JPG.0a0e13e46133c9cdbdaf431ccd6339ac.JPG)

This leaderboard is set to Auckland/GMT+12:00