
Leaderboard


Popular Content
Showing content with the highest reputation on 01/18/18 in all areas
-
I think there's a pill for that7 points
-
Finished the squab tonight. I was waiting on my wife to return from camping so I could cut up the foam mattress she was using
 7 points
 -
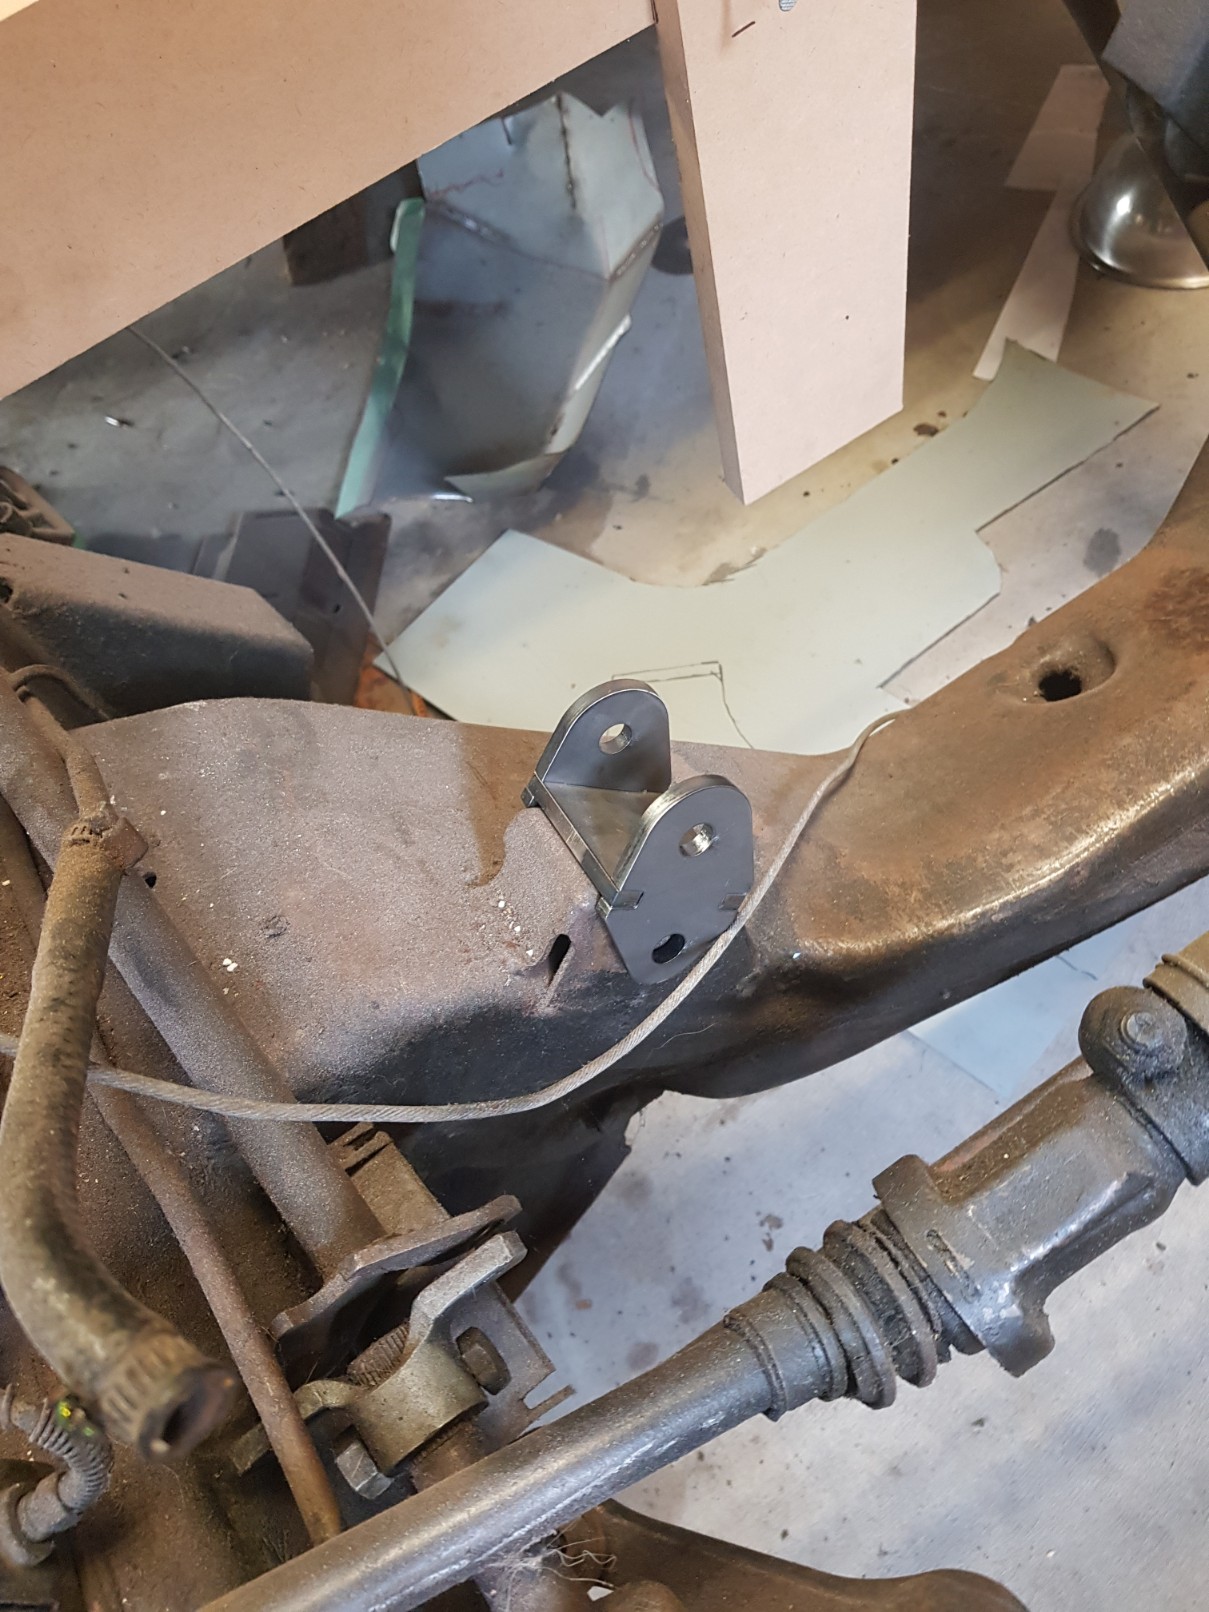
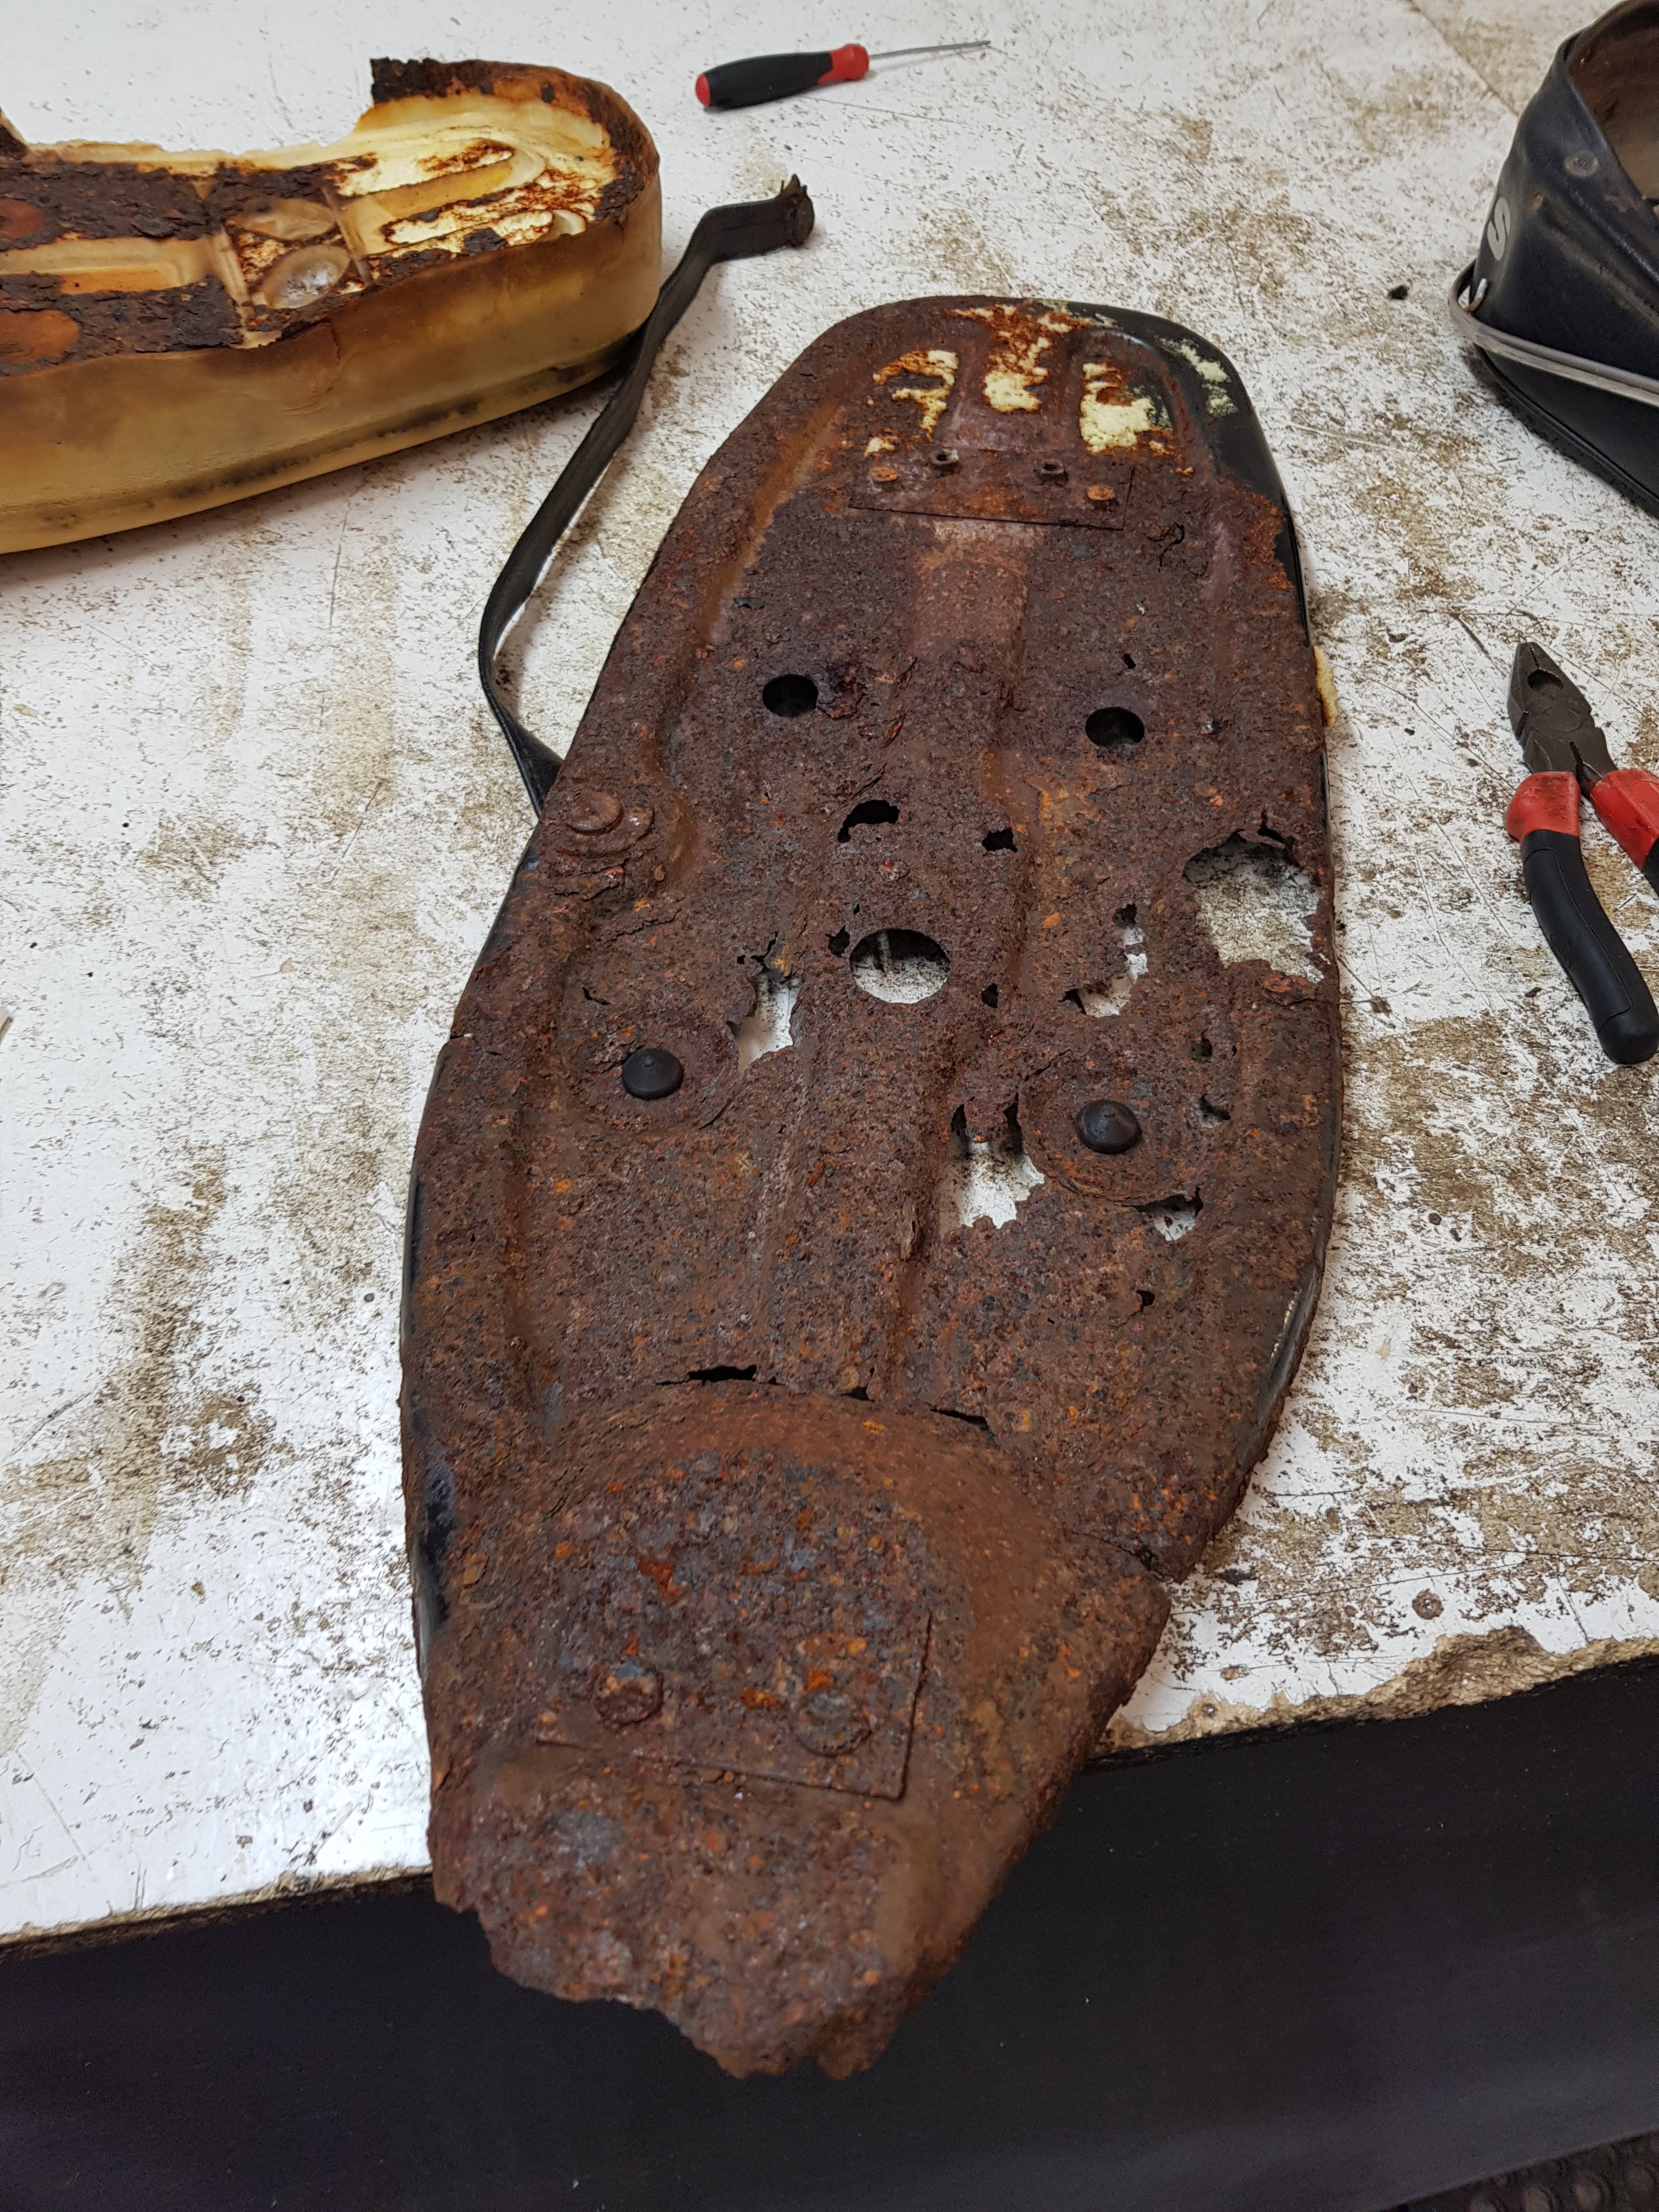
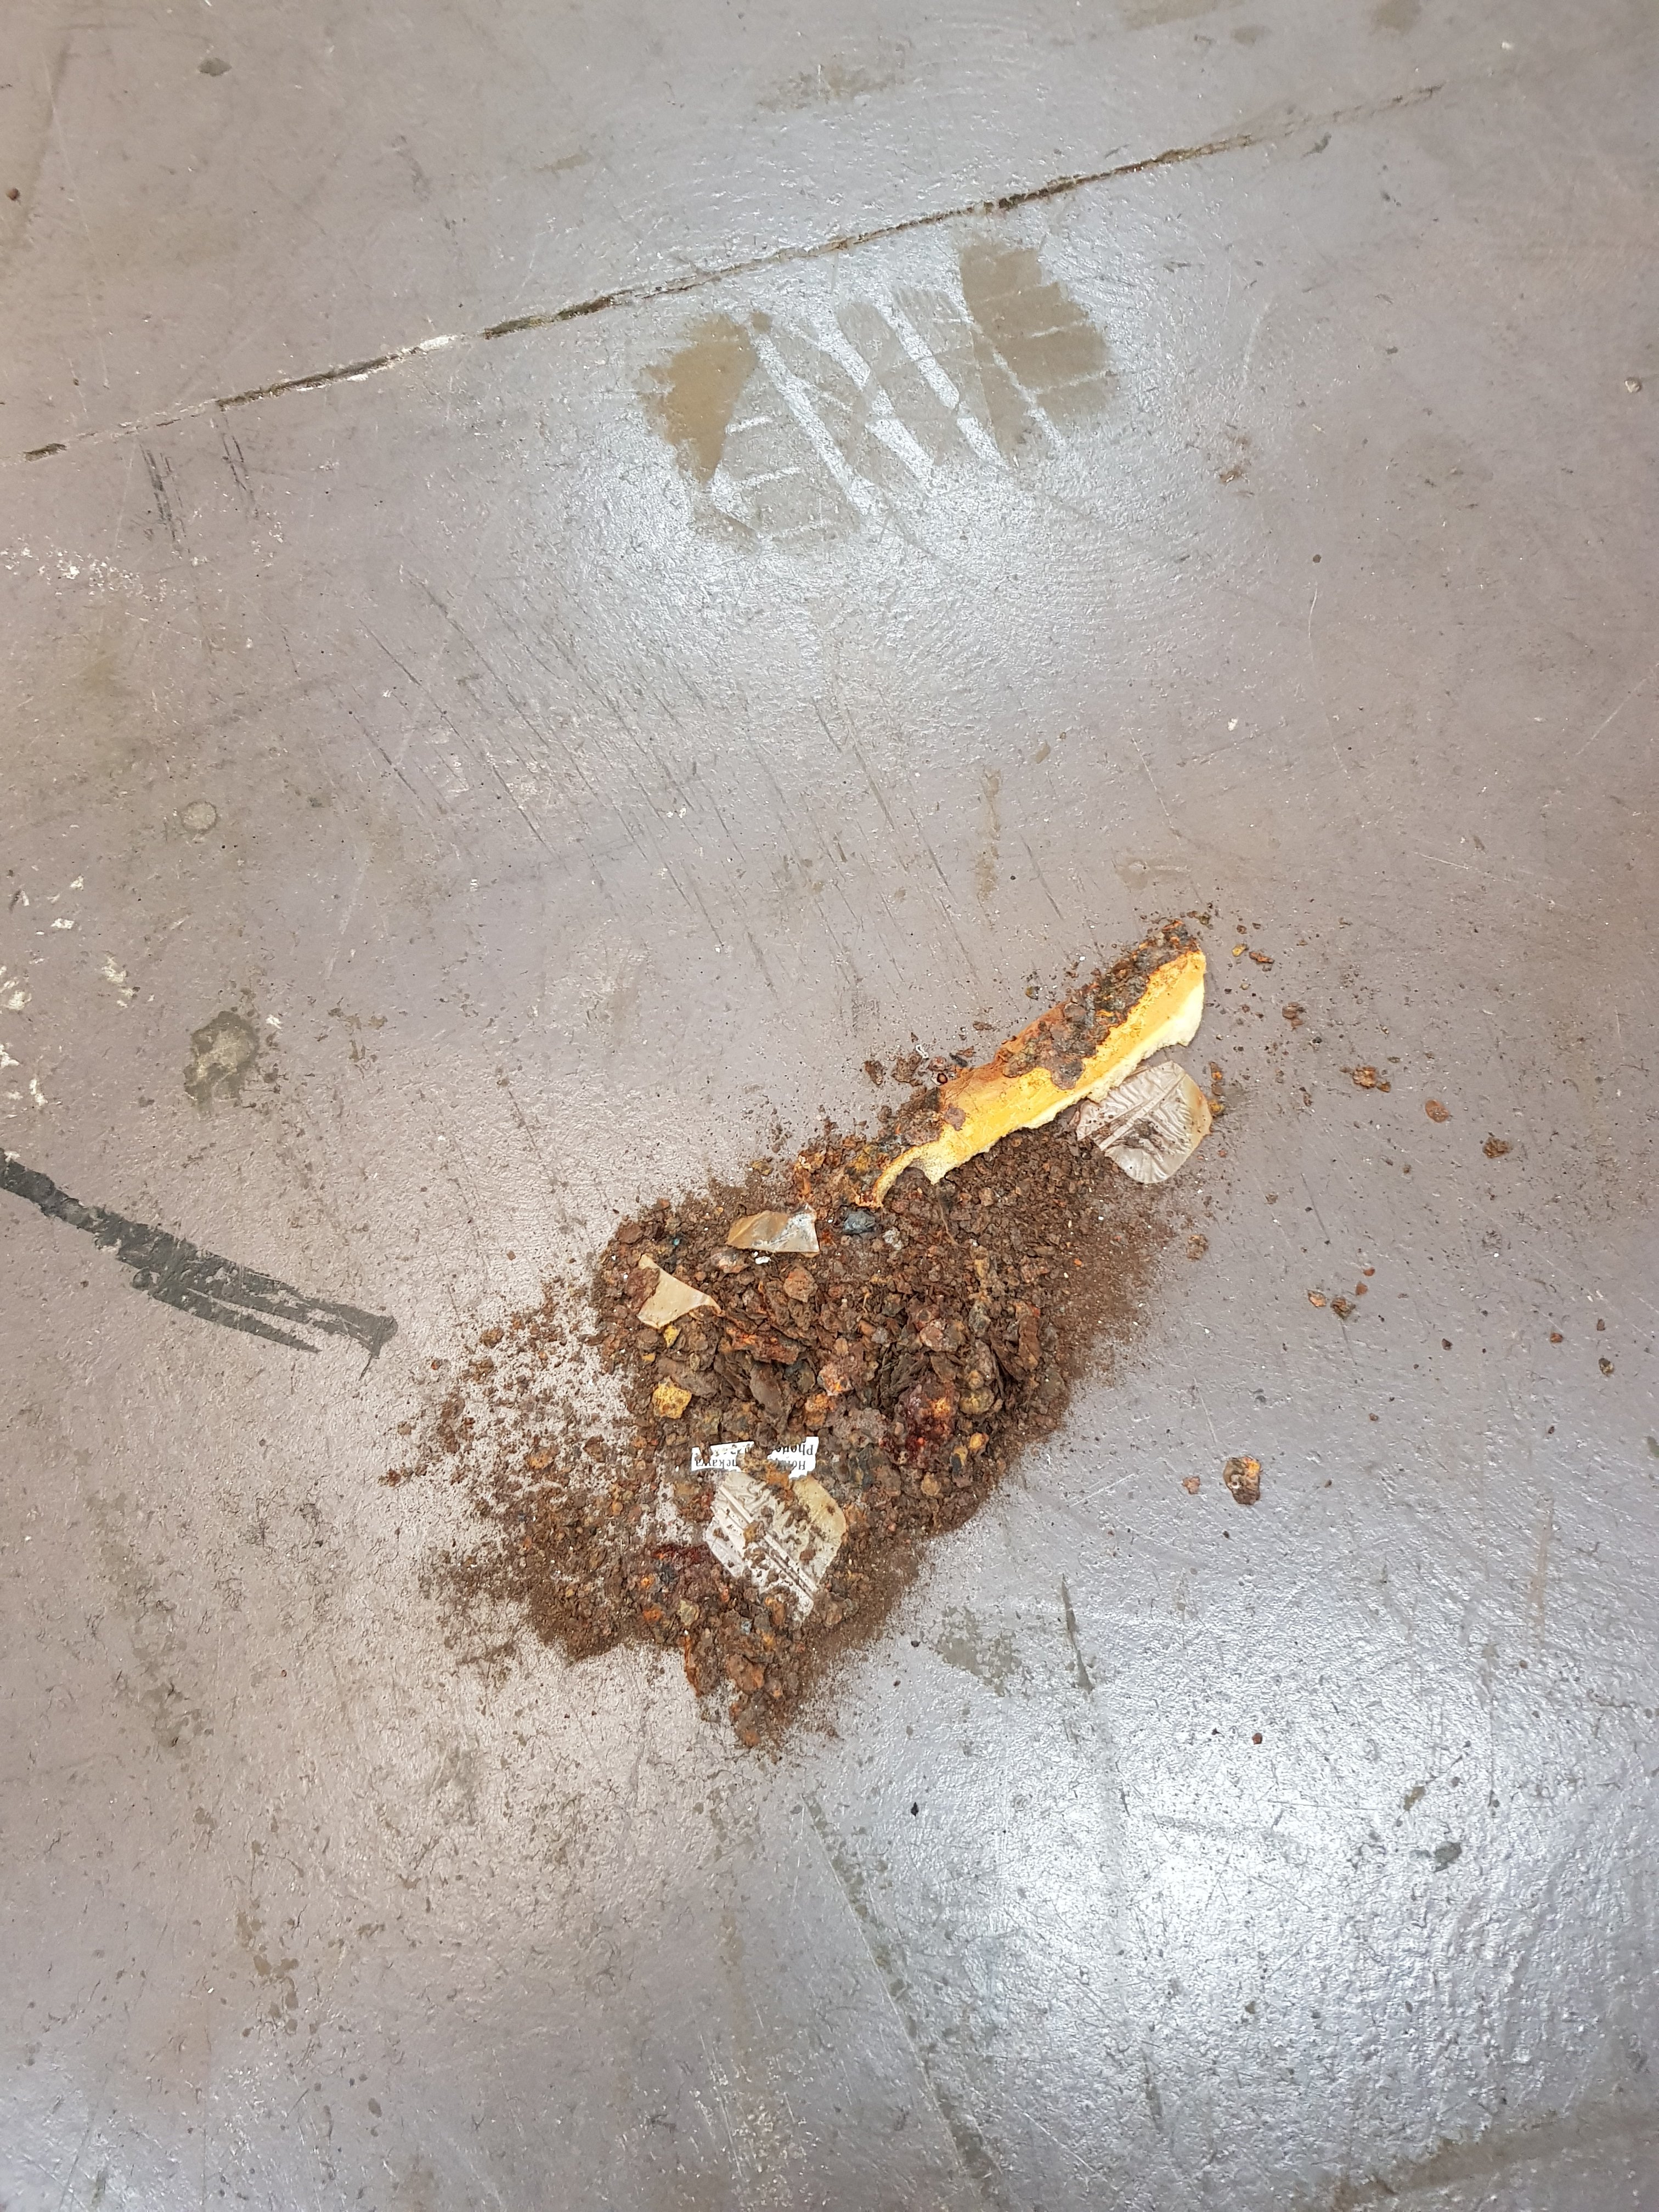
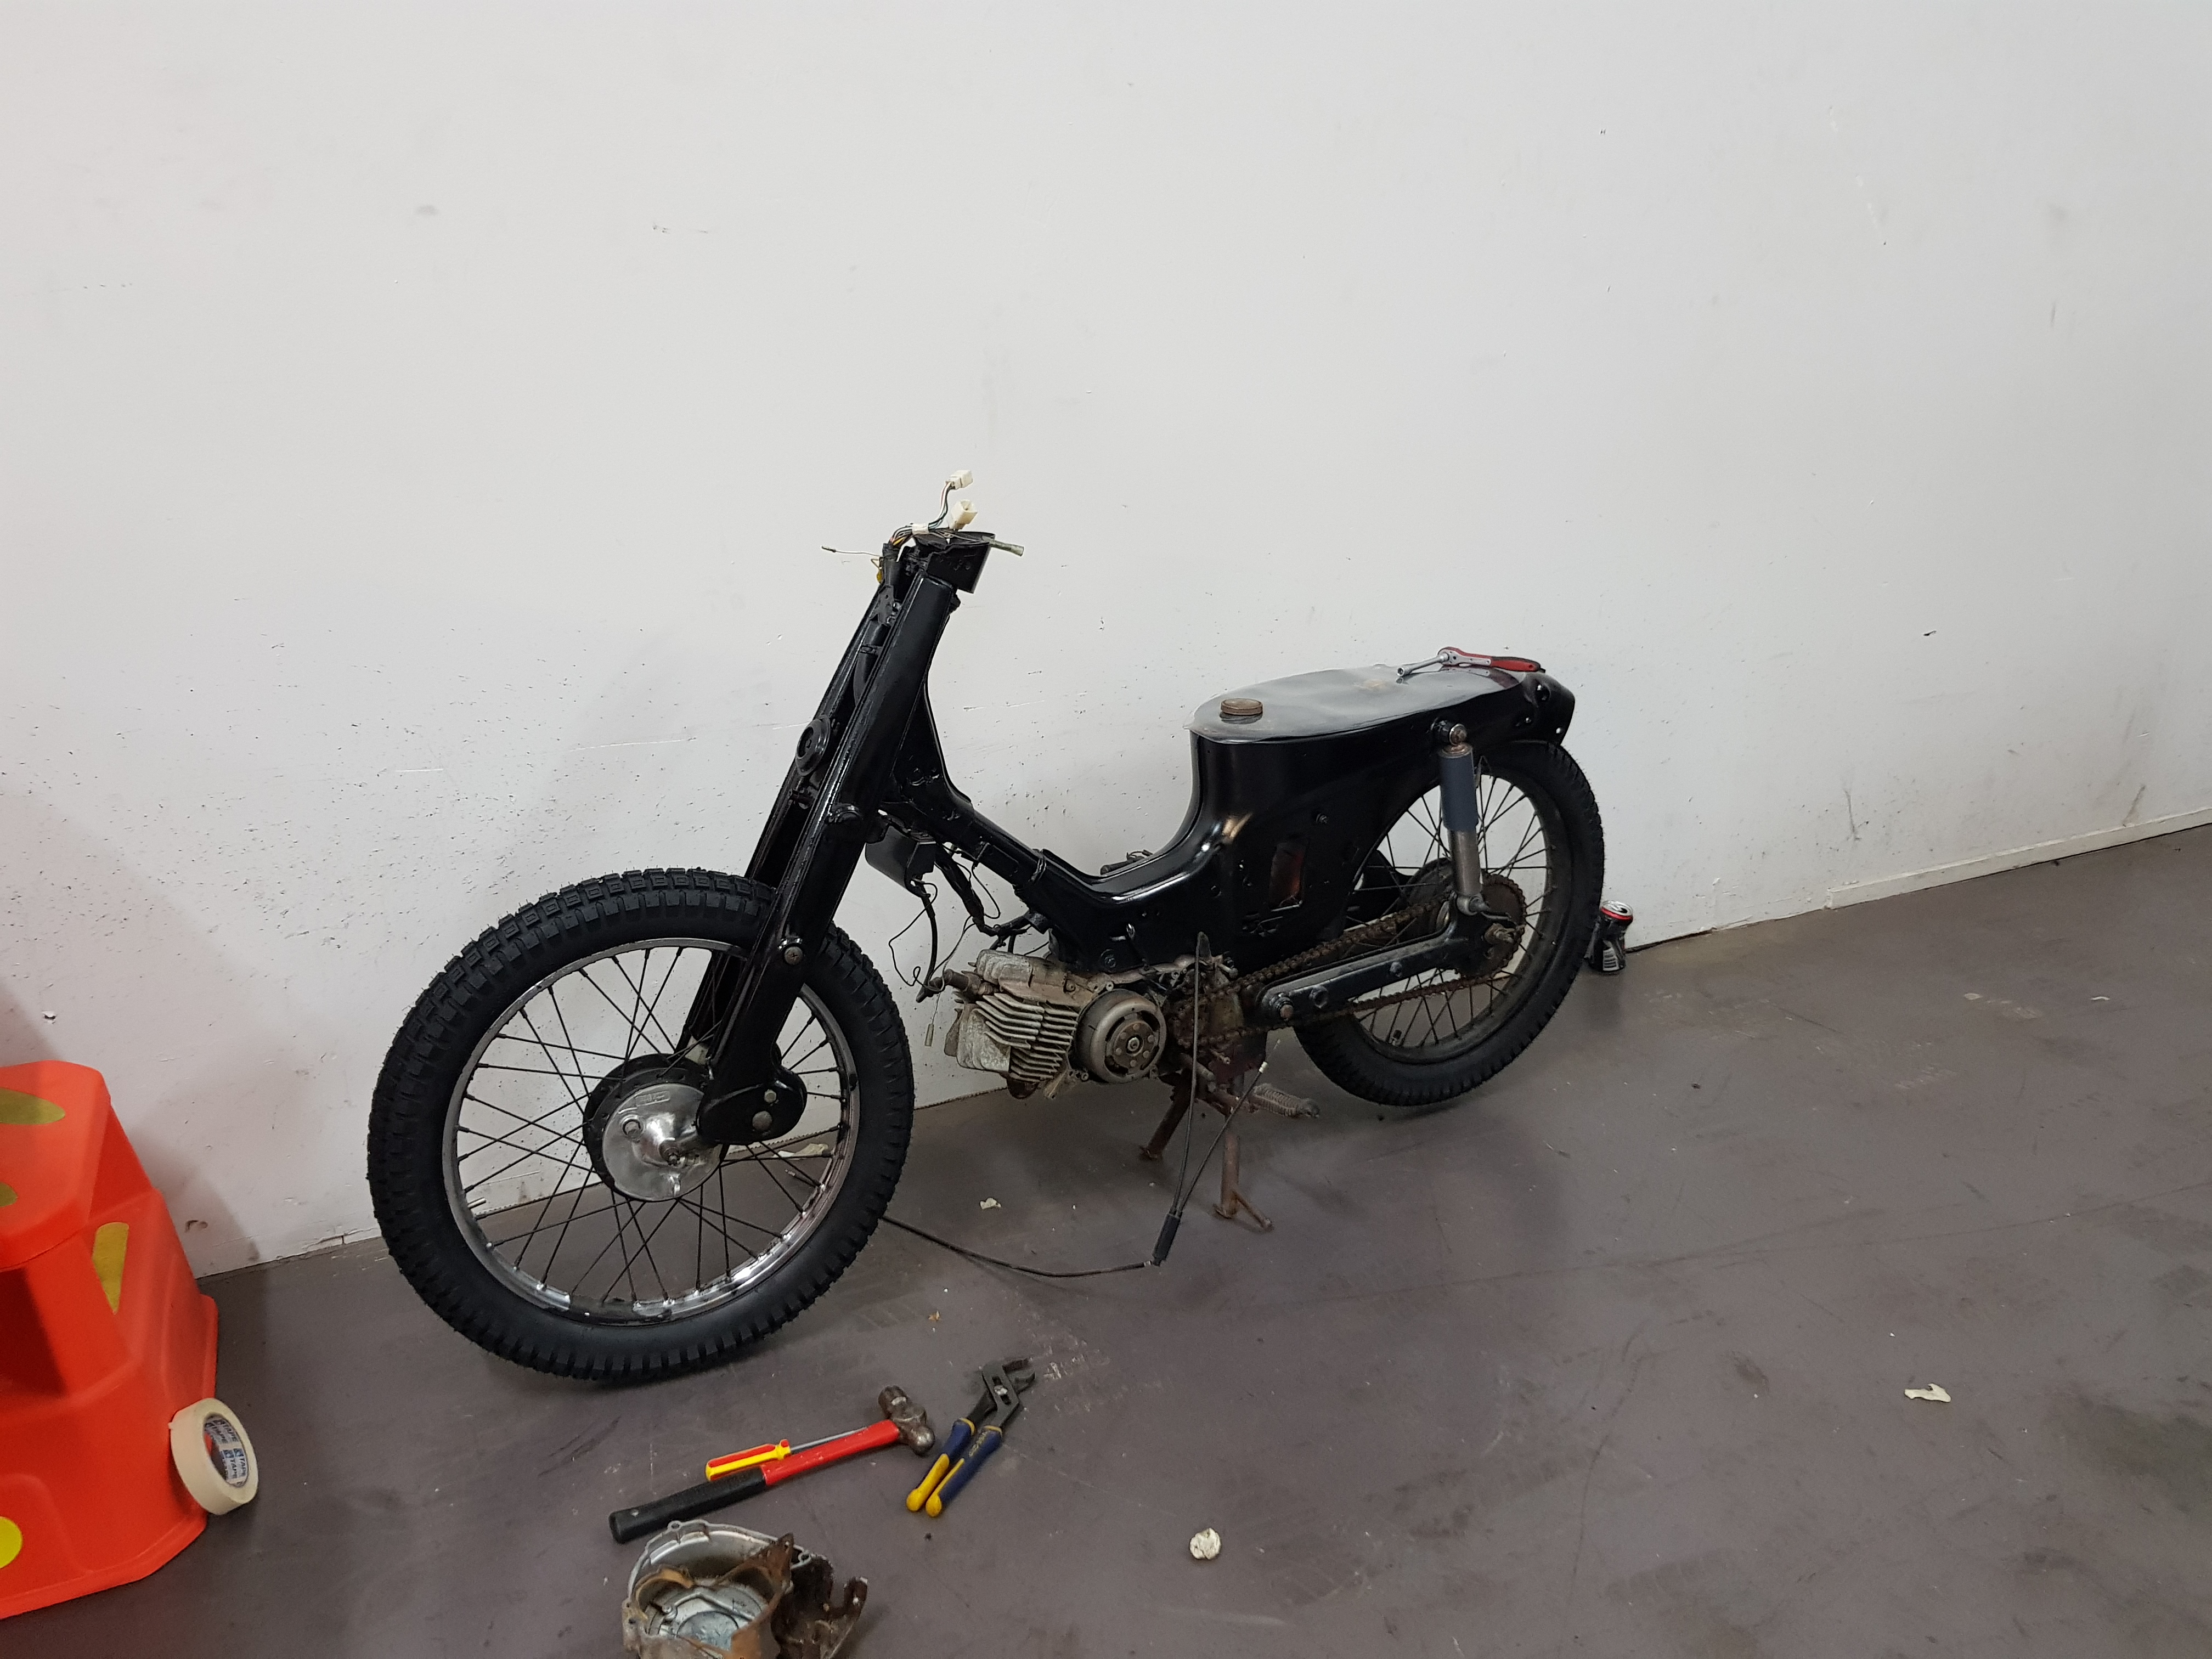
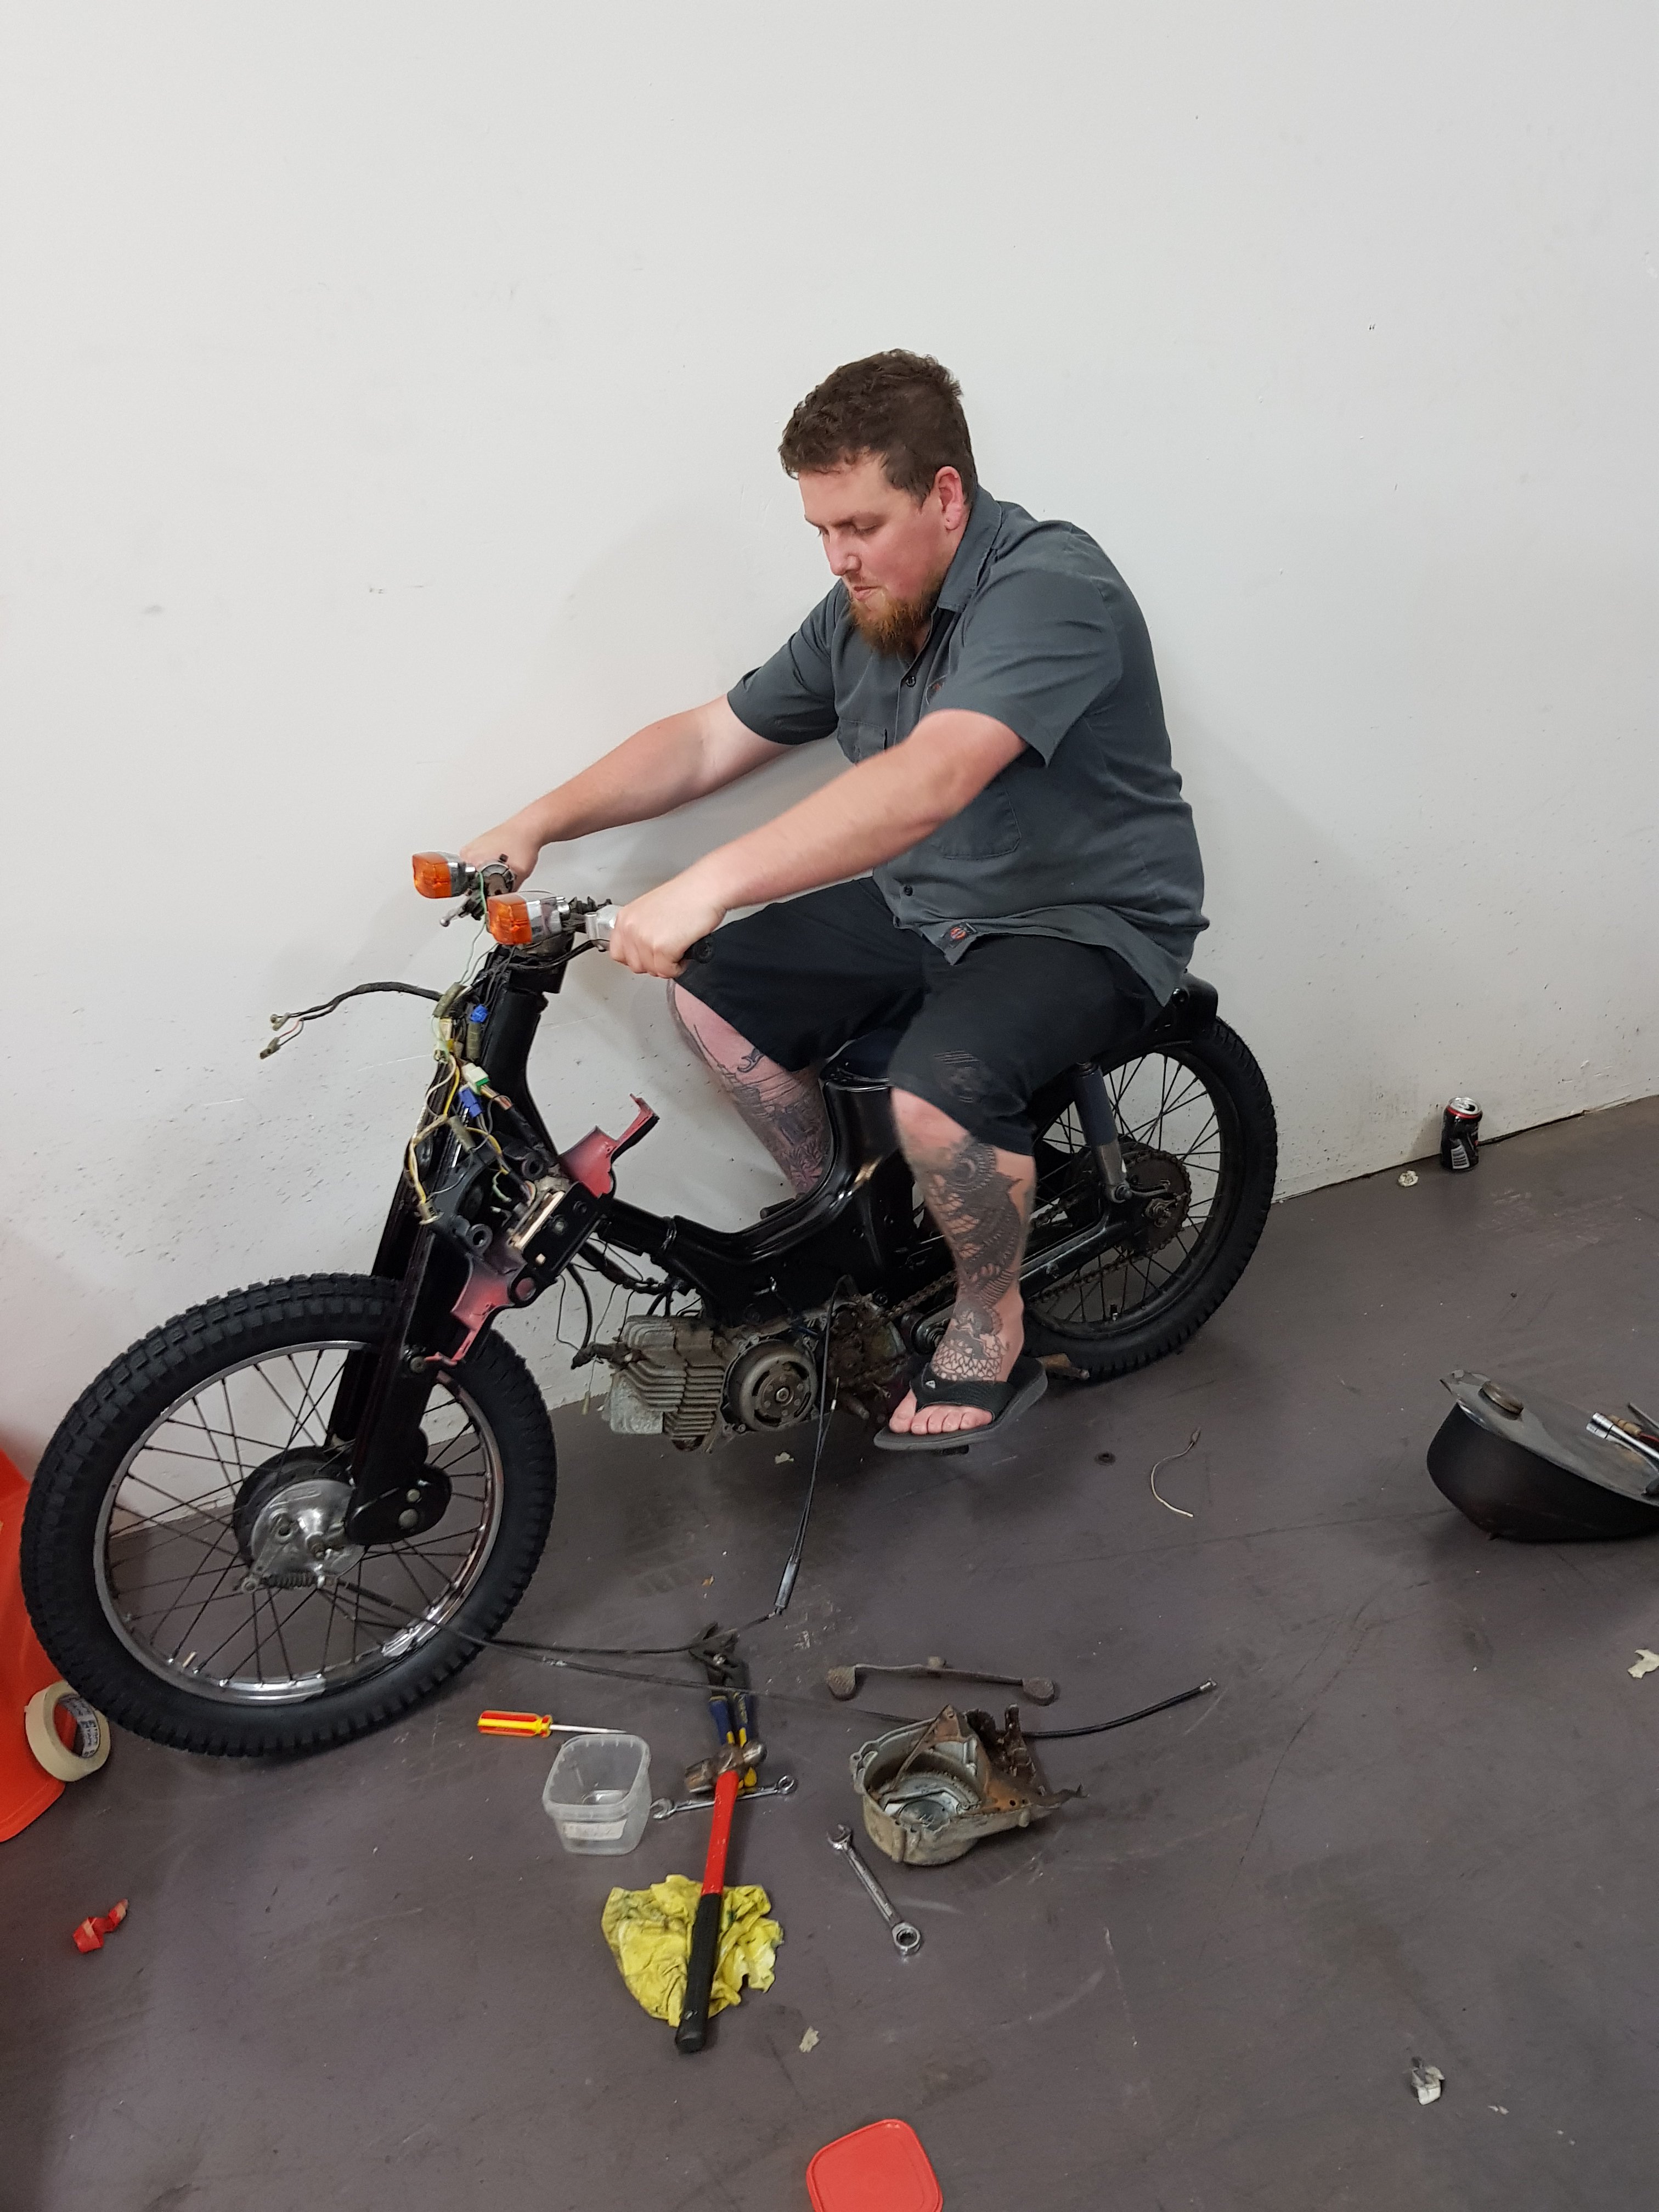
Ok, into that patch how do these cabs rust out here idk, still have a feeling this thing has been either on its roof or had a new roof, theres some weird seams and double brackets at least it wasn't bog over rust this time eh not much left of this bracket. cant see this one on any of the body diagrams, fortunately the one on the otherside was complete so I had a rough idea of how it should look. It was spot welded in crooked at the factory. Nice. cad it up if you don't have one of these, get one. so handy for around door frames and inside panels lucky the back of the cab needs repatching because I needed to make some more access for the welder because this section had rusted out where it joins the drip rail area two brackets to go in6 points
-
Let that be our little secret6 points
-
6 points
-
For the first time this year, Tess finally made an appearance out of the garage. Since replacing the rack a couple of weeks ago, and getting the wrong tie rod ends from Repco, I've been waiting patiently (hah!) for a pair of new ends to come from the motherland via Rimmers. It seems no one else in NZ has a listing, let alone the ability to supply them. When getting a Warrant of Fitness inspection on a car, if it fails you have 28 days to return for a free recheck without having to do another full inspection at your cost. Yesterday was 28 days from the initial inspection where the car failed.... So on Tuesday, with one day left, the new tie rod ends hadn't arrived yet and I was out of time. When I removed the old rack the RH tie rod end was seized into the knuckle and unfortunately the boot got torn to bits removing the joint. Finding a universal boot locally was a pain in the ass. Repco had nothing, Supercheap Auto thought I wanted a boot liner for my car, BNT said they had them on the phone but somehow magically lost all of them 20 mins later when I went in.... but a huge thanks to Autolign in Petone who not only had a decent range in stock, but actually managed to sort me out one that fit perfect. I really didn't want to reuse these joints but with no other options it's all I had. They were good enough to pass the initial warrant check, so they would still be OK to pass the recheck. I just didn't want to use old and worn parts on my lovely new rack. Anyway, I reassembled the steering, did a quick spanner check, and began to refit the wheels. One thing I wanted to do when refitting them was to replace the wheel nuts with some spares I have. The current ones are all pretty rusty, and although the replacements are old and used, they're far less rusty. Original on the left. Interestingly they are actually different, with the original ones having a shorter hex, and a bigger domed cap. They all went on, got torqued up and Tess was on the ground once again A quick test drive shows that the alignment is slightly out and the steering wheel is off to the right by a couple of degrees. Everything else is working properly, as it should, but the steering rack doesn't feel as smooth as the old 30+ year old one. Hopefully it'll wear in and get better. Yesterday I drove Tess in and went for the recheck. A few minutes later, after checking the rack had been replaced, this ugly thing was stuck to my windscreen So that's a great success, the first warrant since 2013. Getting Rego (road tax) was a bit more of a pain. I swung home after getting the WOF, and swapped my plates over to the personalised plates I will be running and went to VTNZ for the rego Unfortunately there was a nationwide system outage for the rego label printers, meaning no one could sell me rego, take the cars rego off hold, or swap the plates over. Eventually I managed to get the post shop to sell me rego without printing the label. This meant I could use the car last night, and the worst I could be ticketed for would be "Failure to display licence label in the correct manner". Better than driving an unregistered car, but this did mean I had to swap back to the original plates again. I'll change to MEH another day. One of the other things I needed to do yesterday was to change my oil again. Back when I did the shifter bushes I also changed the 4+ year old oil with some nice, expensive VR1 10W40 as used in Effie. Unfortunately Tess didn't take too kindly to this thin oil, and started smoking heavily when getting up the revs. She blew a little smoke before the change, but this was like a Bond smoke screen. The oil that the previous owner had been using was a 20W50, so I thought something along those lines would be a good start. I ended up picking up some Penrite HPR30 20W60 with "full" Zinc. I drained out the 5L of expensive 50KM old engine flush oil, and filled up with the Penrite. I didn't change the filter, there was no point as it was barely used. The oil came out a little darker, but still golden. With the HPR30 in her, the smoke has lessened a lot, and the oil pressure is still very good. It's thicker than I usually prefer, but every engine is different and this is what Tess likes. It's also cheaper than VR1 which is good (not to mention coming in 5L and 1L bottles, which is great when a drain and fill takes 5.5L. Two bottles of 5L VR1 isn't cheap) Driving her last night was great. Sure, it was pissing down, but gosh it drives god. The Falken ZE912 tires seem to be working well in the wet and dry. Compared to the Supercats on Effie, it's like comparing apples and chewing gum. I can still over power the Falkens, especially when it comes on cam in second gear, but otherwise it was nice and grippy. The new shifter bushes make a huge change in shifter feel, with far less movement, and much more accuracy. The gearbox is still very noisy, and has a great trick of sometimes popping out of 3rd when you let the clutch out (uncommon though). I will try Ramon's recommendation of flushing with white spirit, and then using an engine oil with Molyslip and see what happens. Worst case, I have that spare box in the garage. So that's where we are now. The car is fully road legal and usable. I need to swap the tie rod ends and get an alignment, and the damn boot still leaks like a sieve. One step at a time, but now I get to put some Miles on her.5 points
-
Someone here sed I must make a stack with a flap a wile ago. I spent about 2 hours making a rain flap then found they are only $11.00 but I gess I would spend 2 hours going to get it, I bet it will just fume me wile I am driving?5 points
-
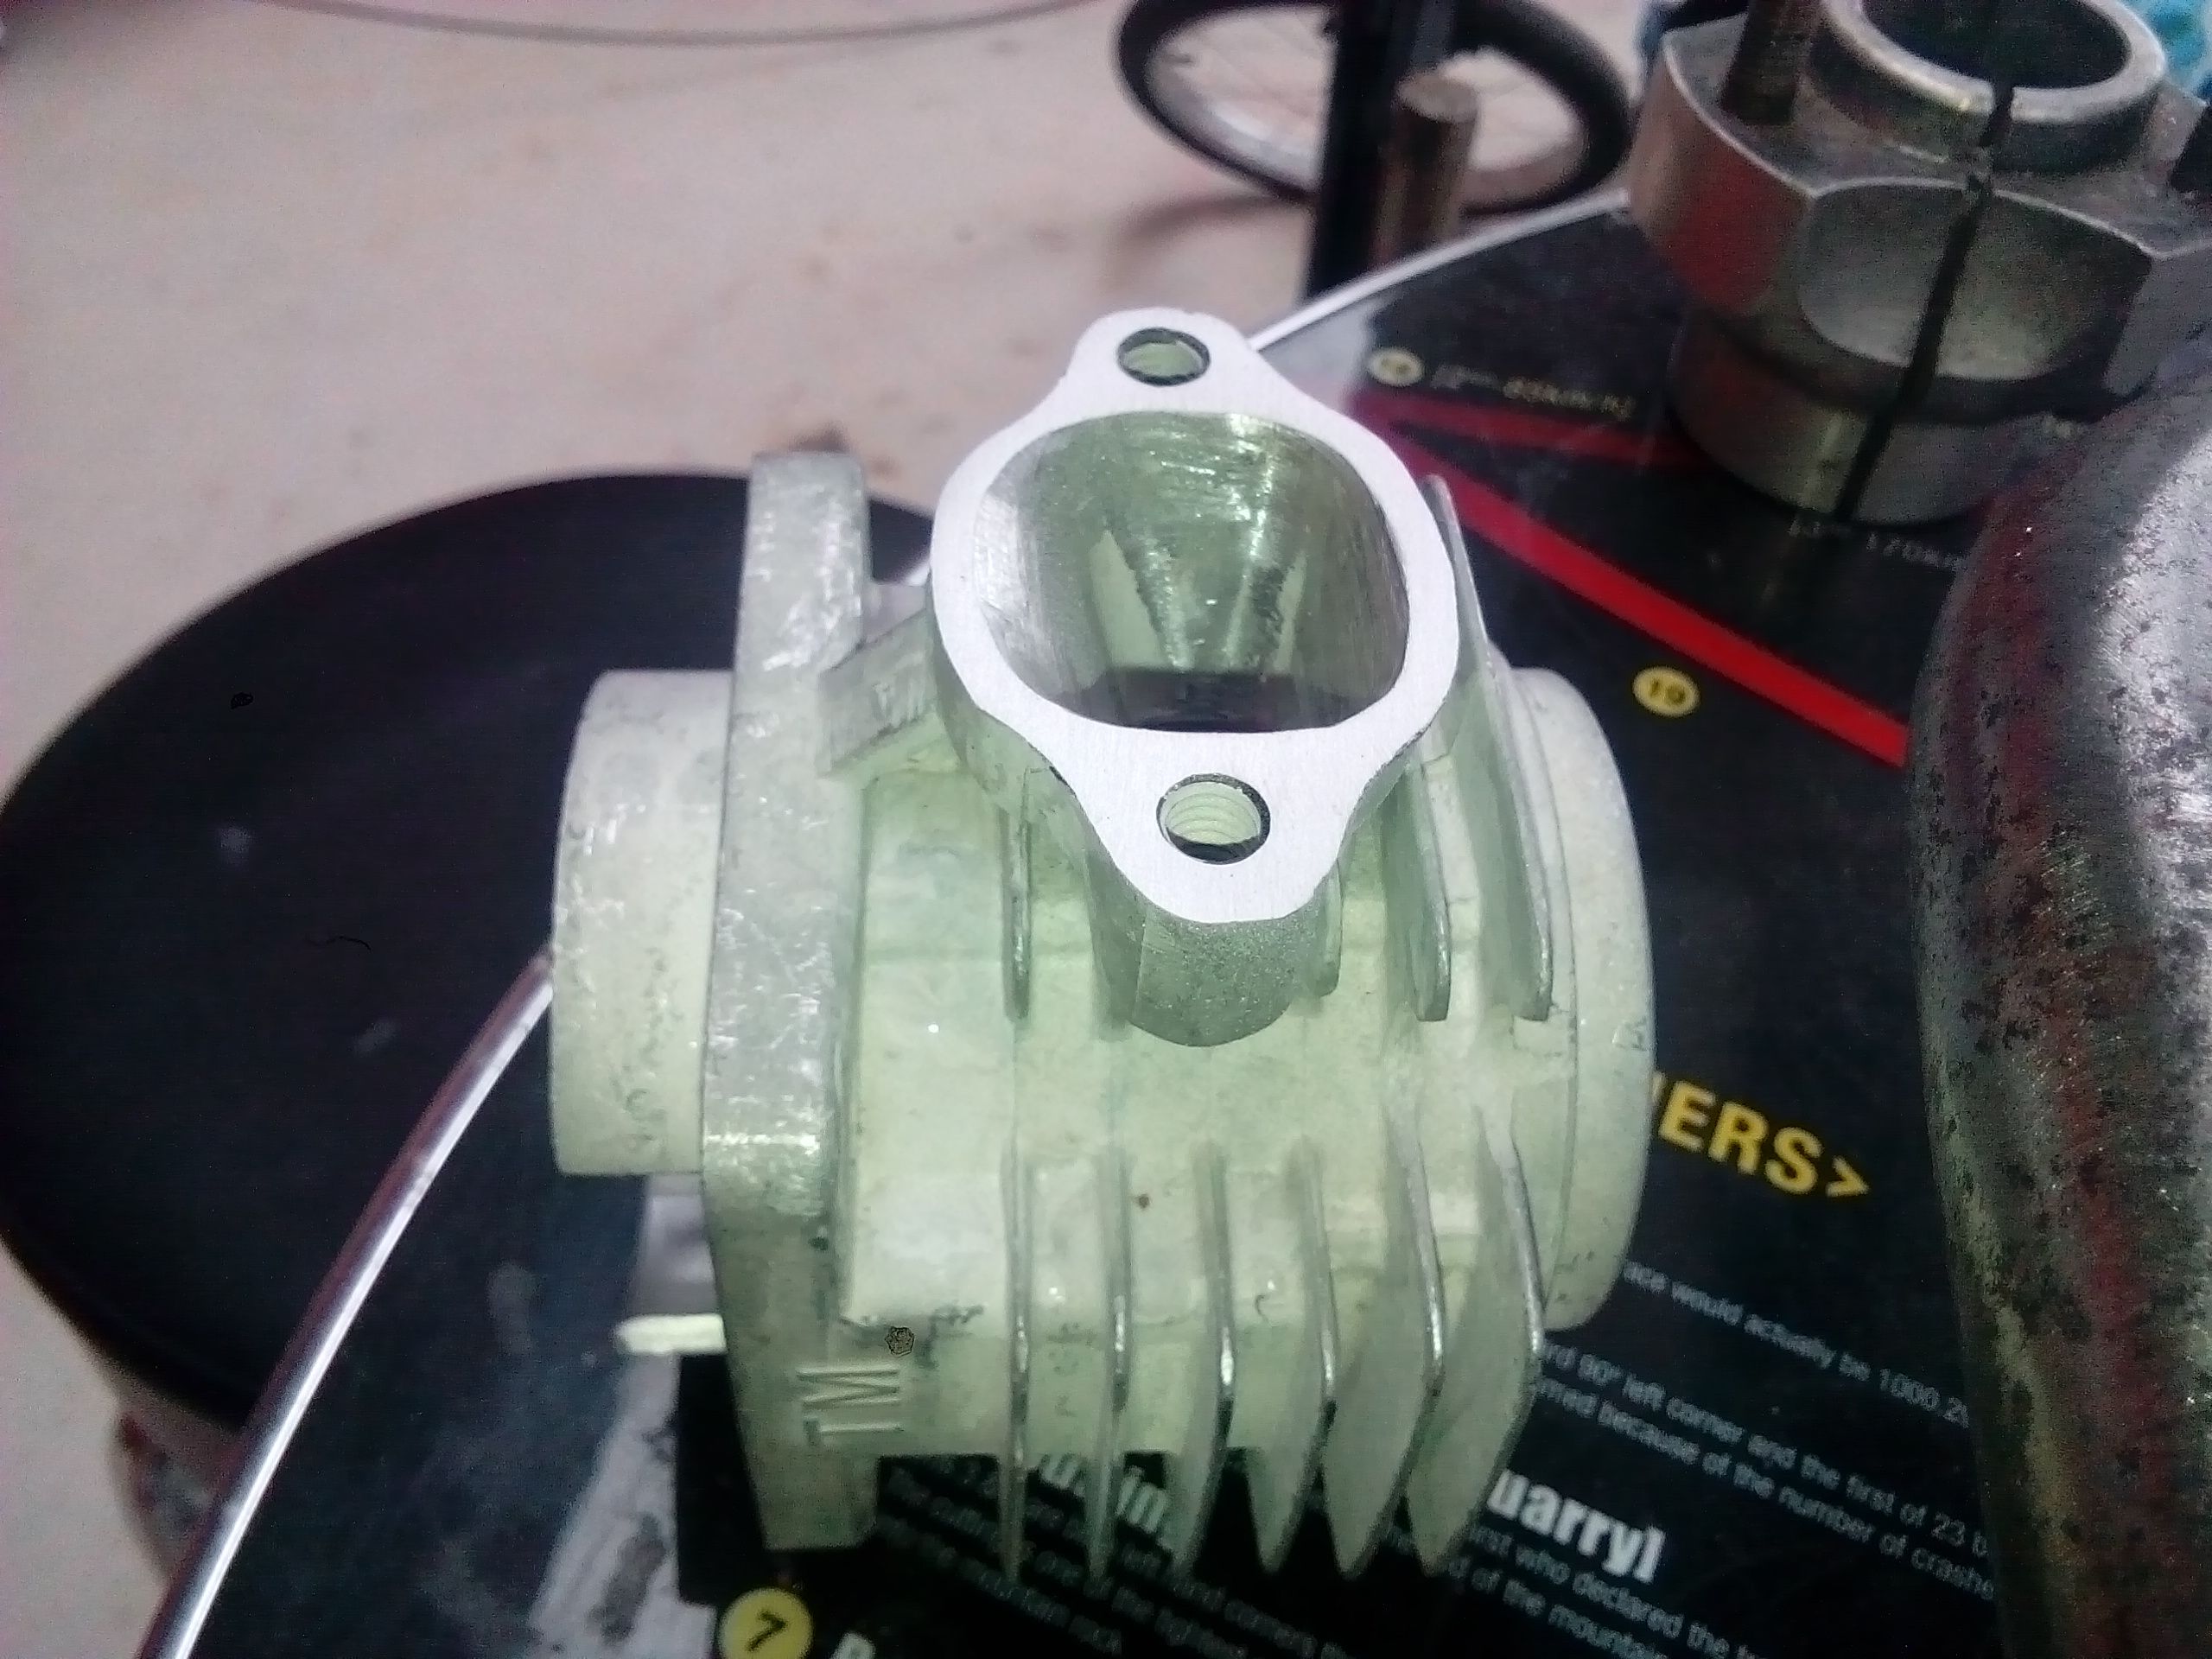
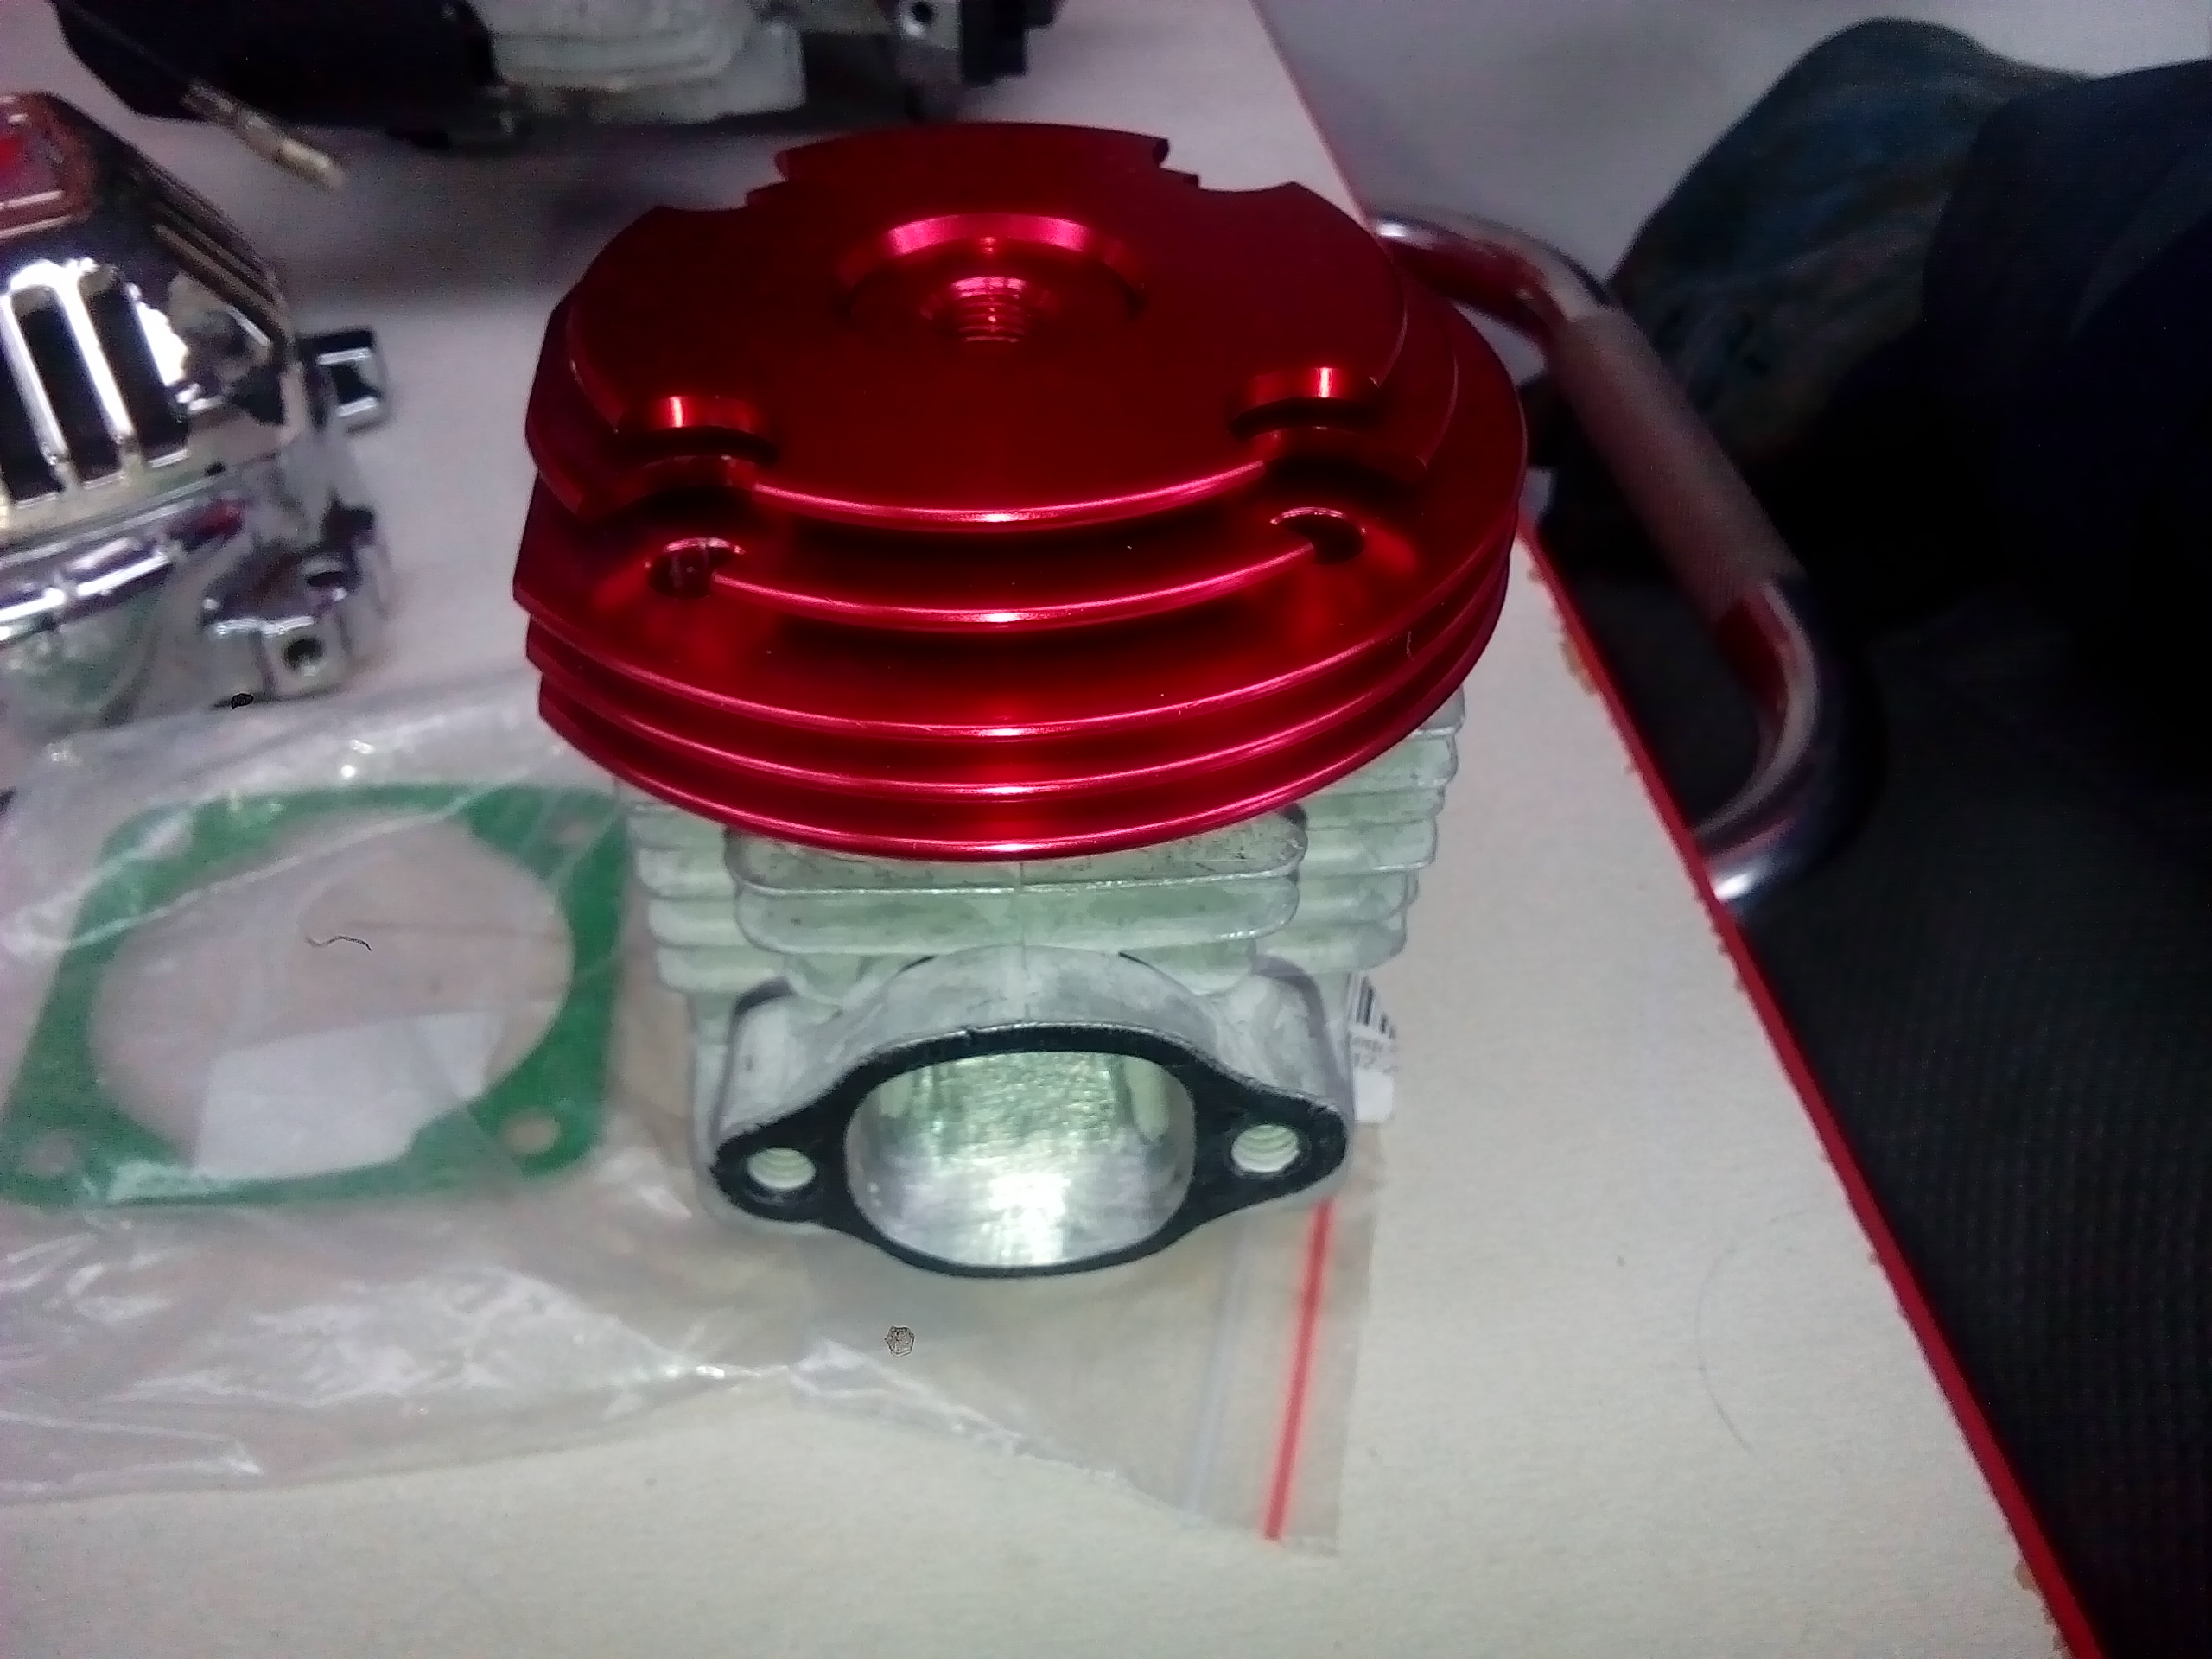
Then I made sure what's left of the gasket contact surface was given the best chance of sealing by sanding it flat. Next I stuck the cylinder in the lathe and made sure the sealing surface was true by turning a minute skim off the face. Then test fit the head. All's going to plan so far. I'll attack the bottom end tomorrow where I'll make some big changes.
4 points
-
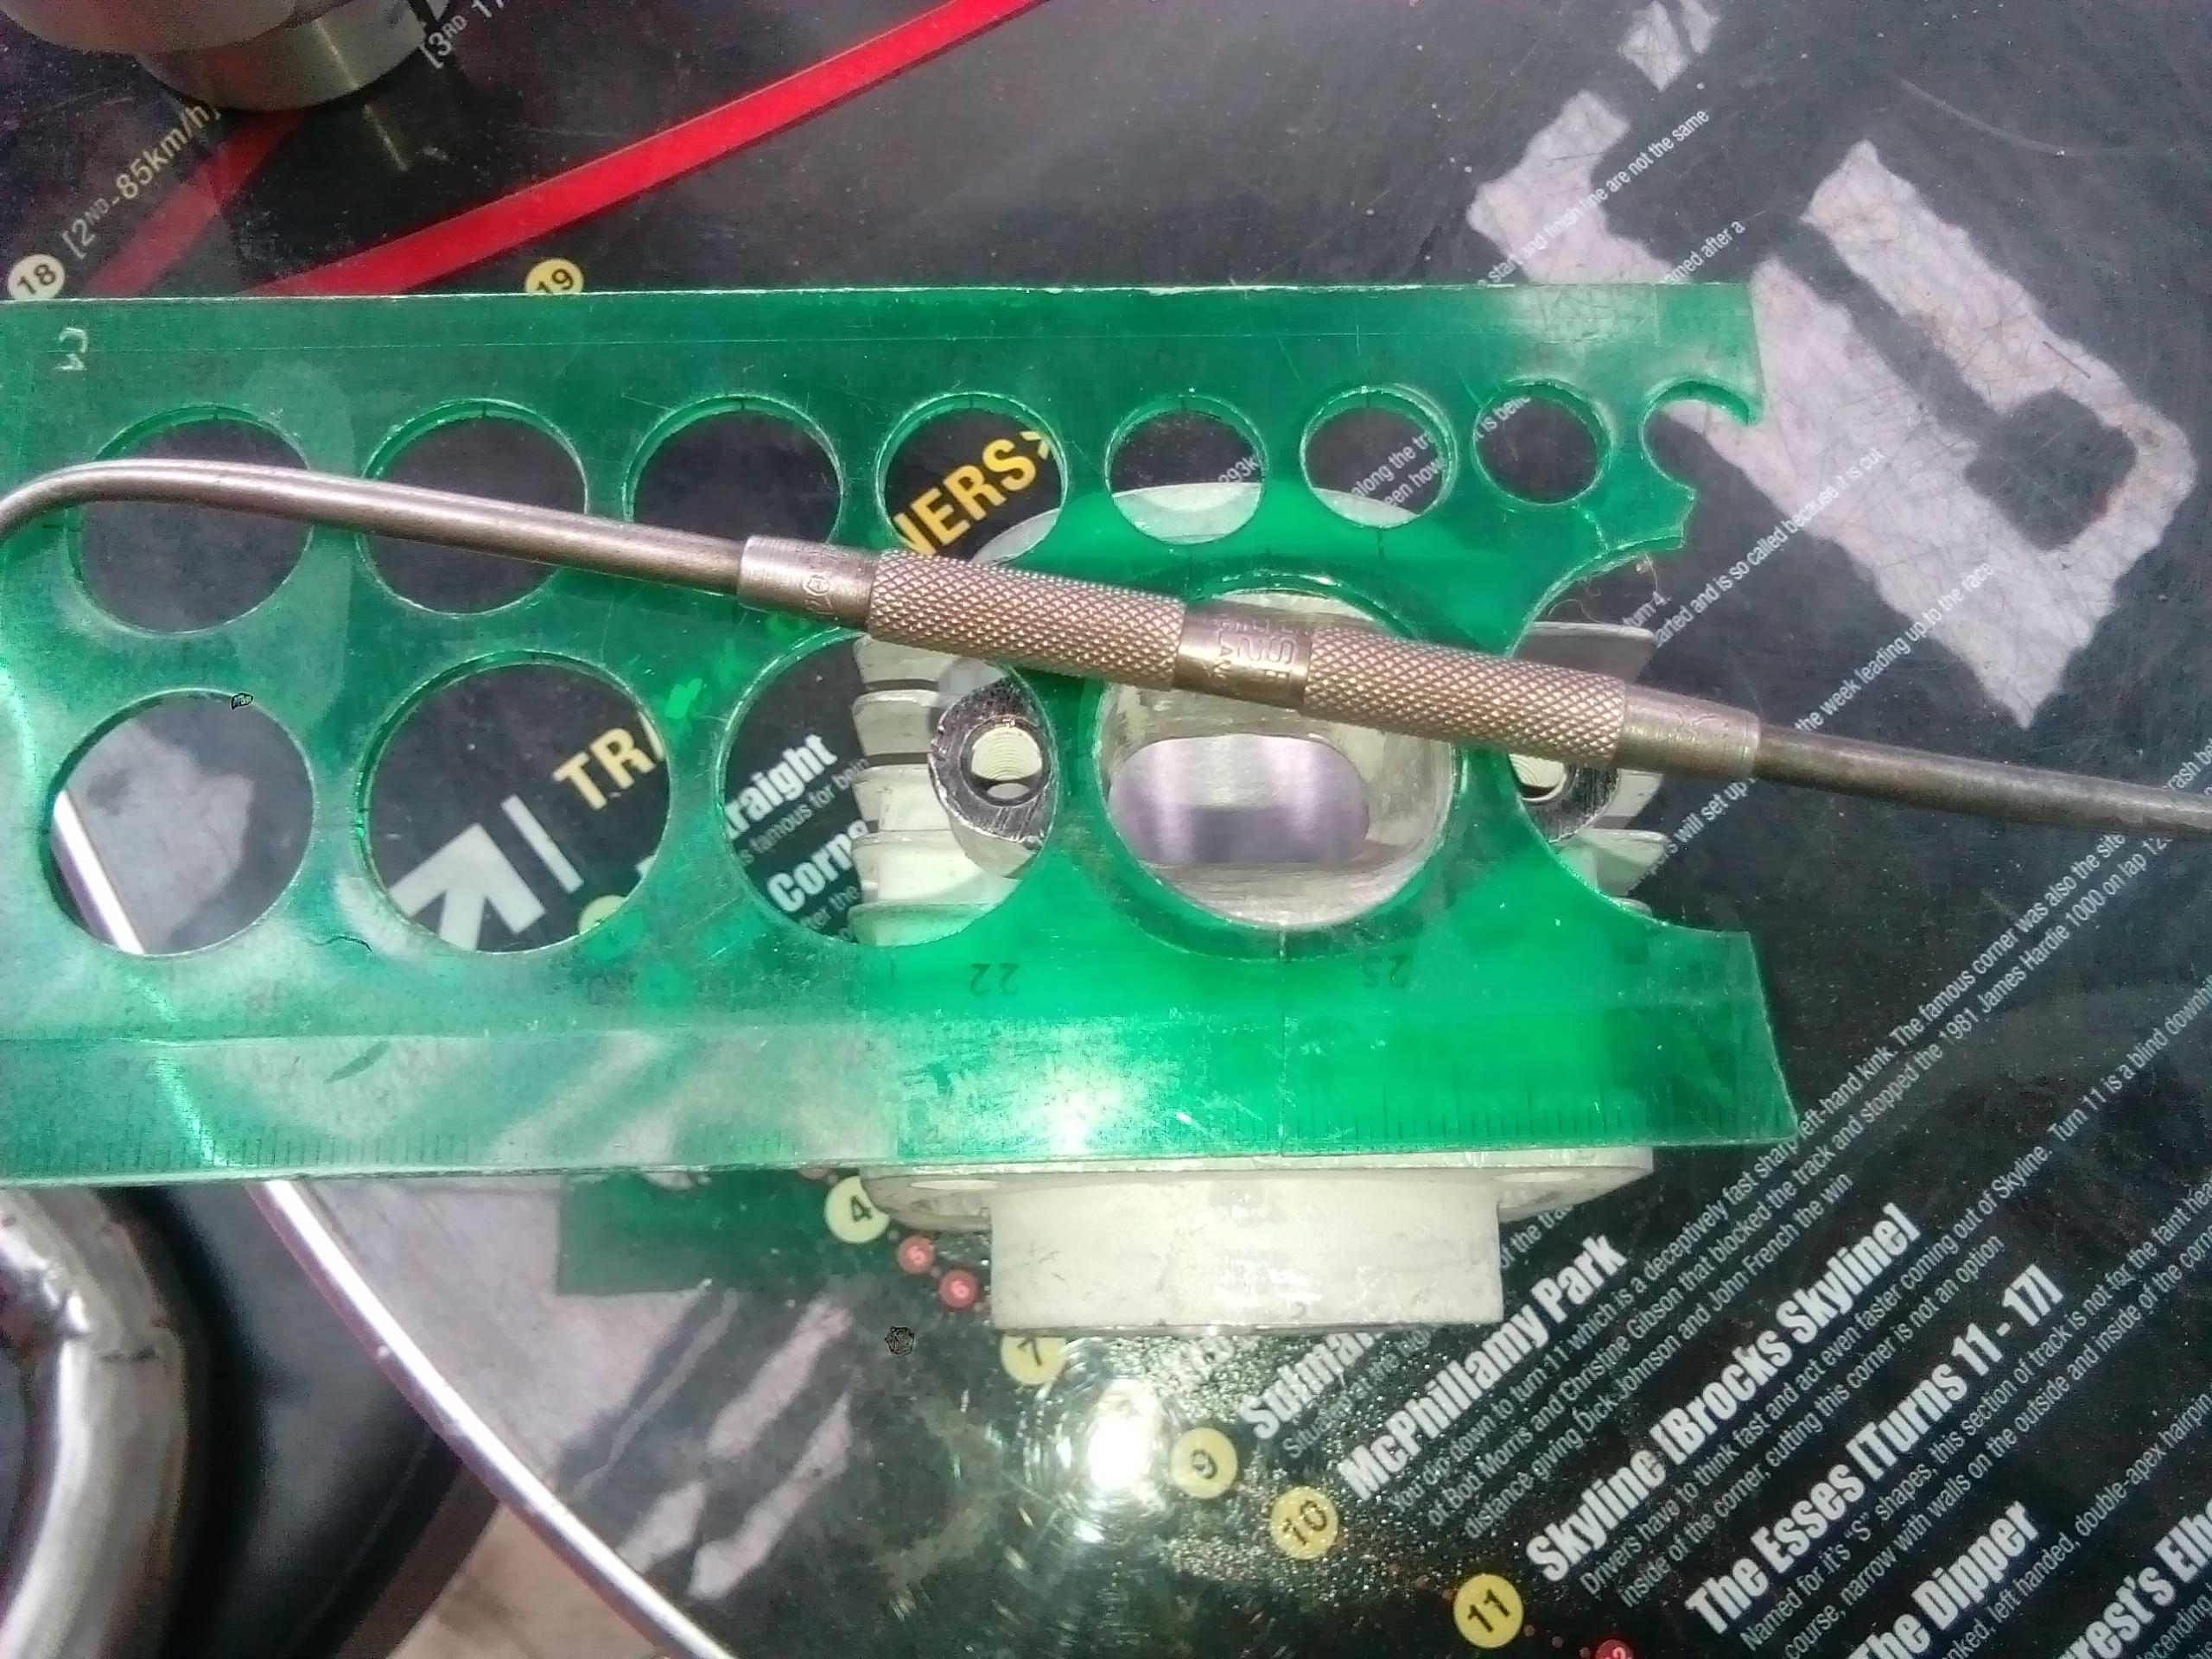
JOB 2: GORRAM CARBURETTOR Getting the correct mix of fuel and air into the hungry twin cam has been a pain in my ass since i got this. The DCD and DCHE carbs (slight updates on each other) are usually pretty good, (the DCD on my 2300 goes great), but for whatever reason i just couldnt get these ones to run right. I now have an even fuller 'big box of confirmed only good for spare parts' carbs and linkages. So i did what i should have in the first place I had grabbed the DMS from my old 1608cc engine that was in my 125 and ran well before i swapped to a 2 liter to try as well as a spare DMS body, but... They are quite different, linkages are the opposite, DMS is 2 inches shorter, and the air filter hole shape and bolt pattern is different Before xmas I ebayed a pack of lovely linkagey bits and pieces to complement my existing stock of carb bits and pieces, and used the same approach i used for my twin carbs setup. All thread and double nuts makes it easy to adjust the relative position of everything. A tack to join the salvaged ears to one bolt and having the lock nut on the 'tighten' side (so the applied force tightens the tab+nut against the lock nut) makes it permanent - my 125 setup was done the same way, meant to be temporary mock up but its been fine for years now. I do have a slightly nicer Lynx bar and arm setup on the way, so having it set up will make the swap over very easy. I also faffed around with this carb for flipping ages as well, thinking i wasted my time couldnt get it to idle nicely (rich as) swapping idle jets willy nilly, in the end turned out the primary idle jet holder i was using (nice all brass job, no o-ring needed, posh as!) was just a smidge too short and wasnt sealing the jet into its set letting unmetered fuel thought eh idle circuit, and using one of the oring ones sorted it out. A few trips up and down the road swapping jets around got me back to pretty much the same as what i started with, and now it runs really nicely, pulls well from low rpm without back firing, and revs out smoothly, and pugs chop is a nice browny grey . Very happy now, its much more relaxing and comfortable to drive, and noted a successful test hoon with a celebratory 1 wheel peel up the driveway (would hardly chirp the tyres before). The only air filter i had that will fit around the linkage, the cam cover and the carb is this custom job that came with my 2 liter engine, its better than nothing but id like to find/make/cobble something slightly better. Oh and also fitted some Lancia cam covers because i think they are flash as. 34DMS Jetting for future reference Calibrated Orifice: Primary/Secondary Main Jet: 132/160 Air Corrector: 170/170 Emulsion Tube: F61/F61 Idle Jet: 45*/60** *has been drilled out to 50/55ish?, actual 45 is too small, 60 and 70 too big **Factory settings suggest secondary idle should be 70 min, so could go up here, but mains are bigger (+5) and airs are smaller (-10) already, and revs didnt seem to be an issue?4 points
-
This was a super lush meet. Man I love that spot. And how about that lack of rain, and even some sun. Glorious. Good yarns. Thanks to everyone that came. Would trade again.
3 points
-
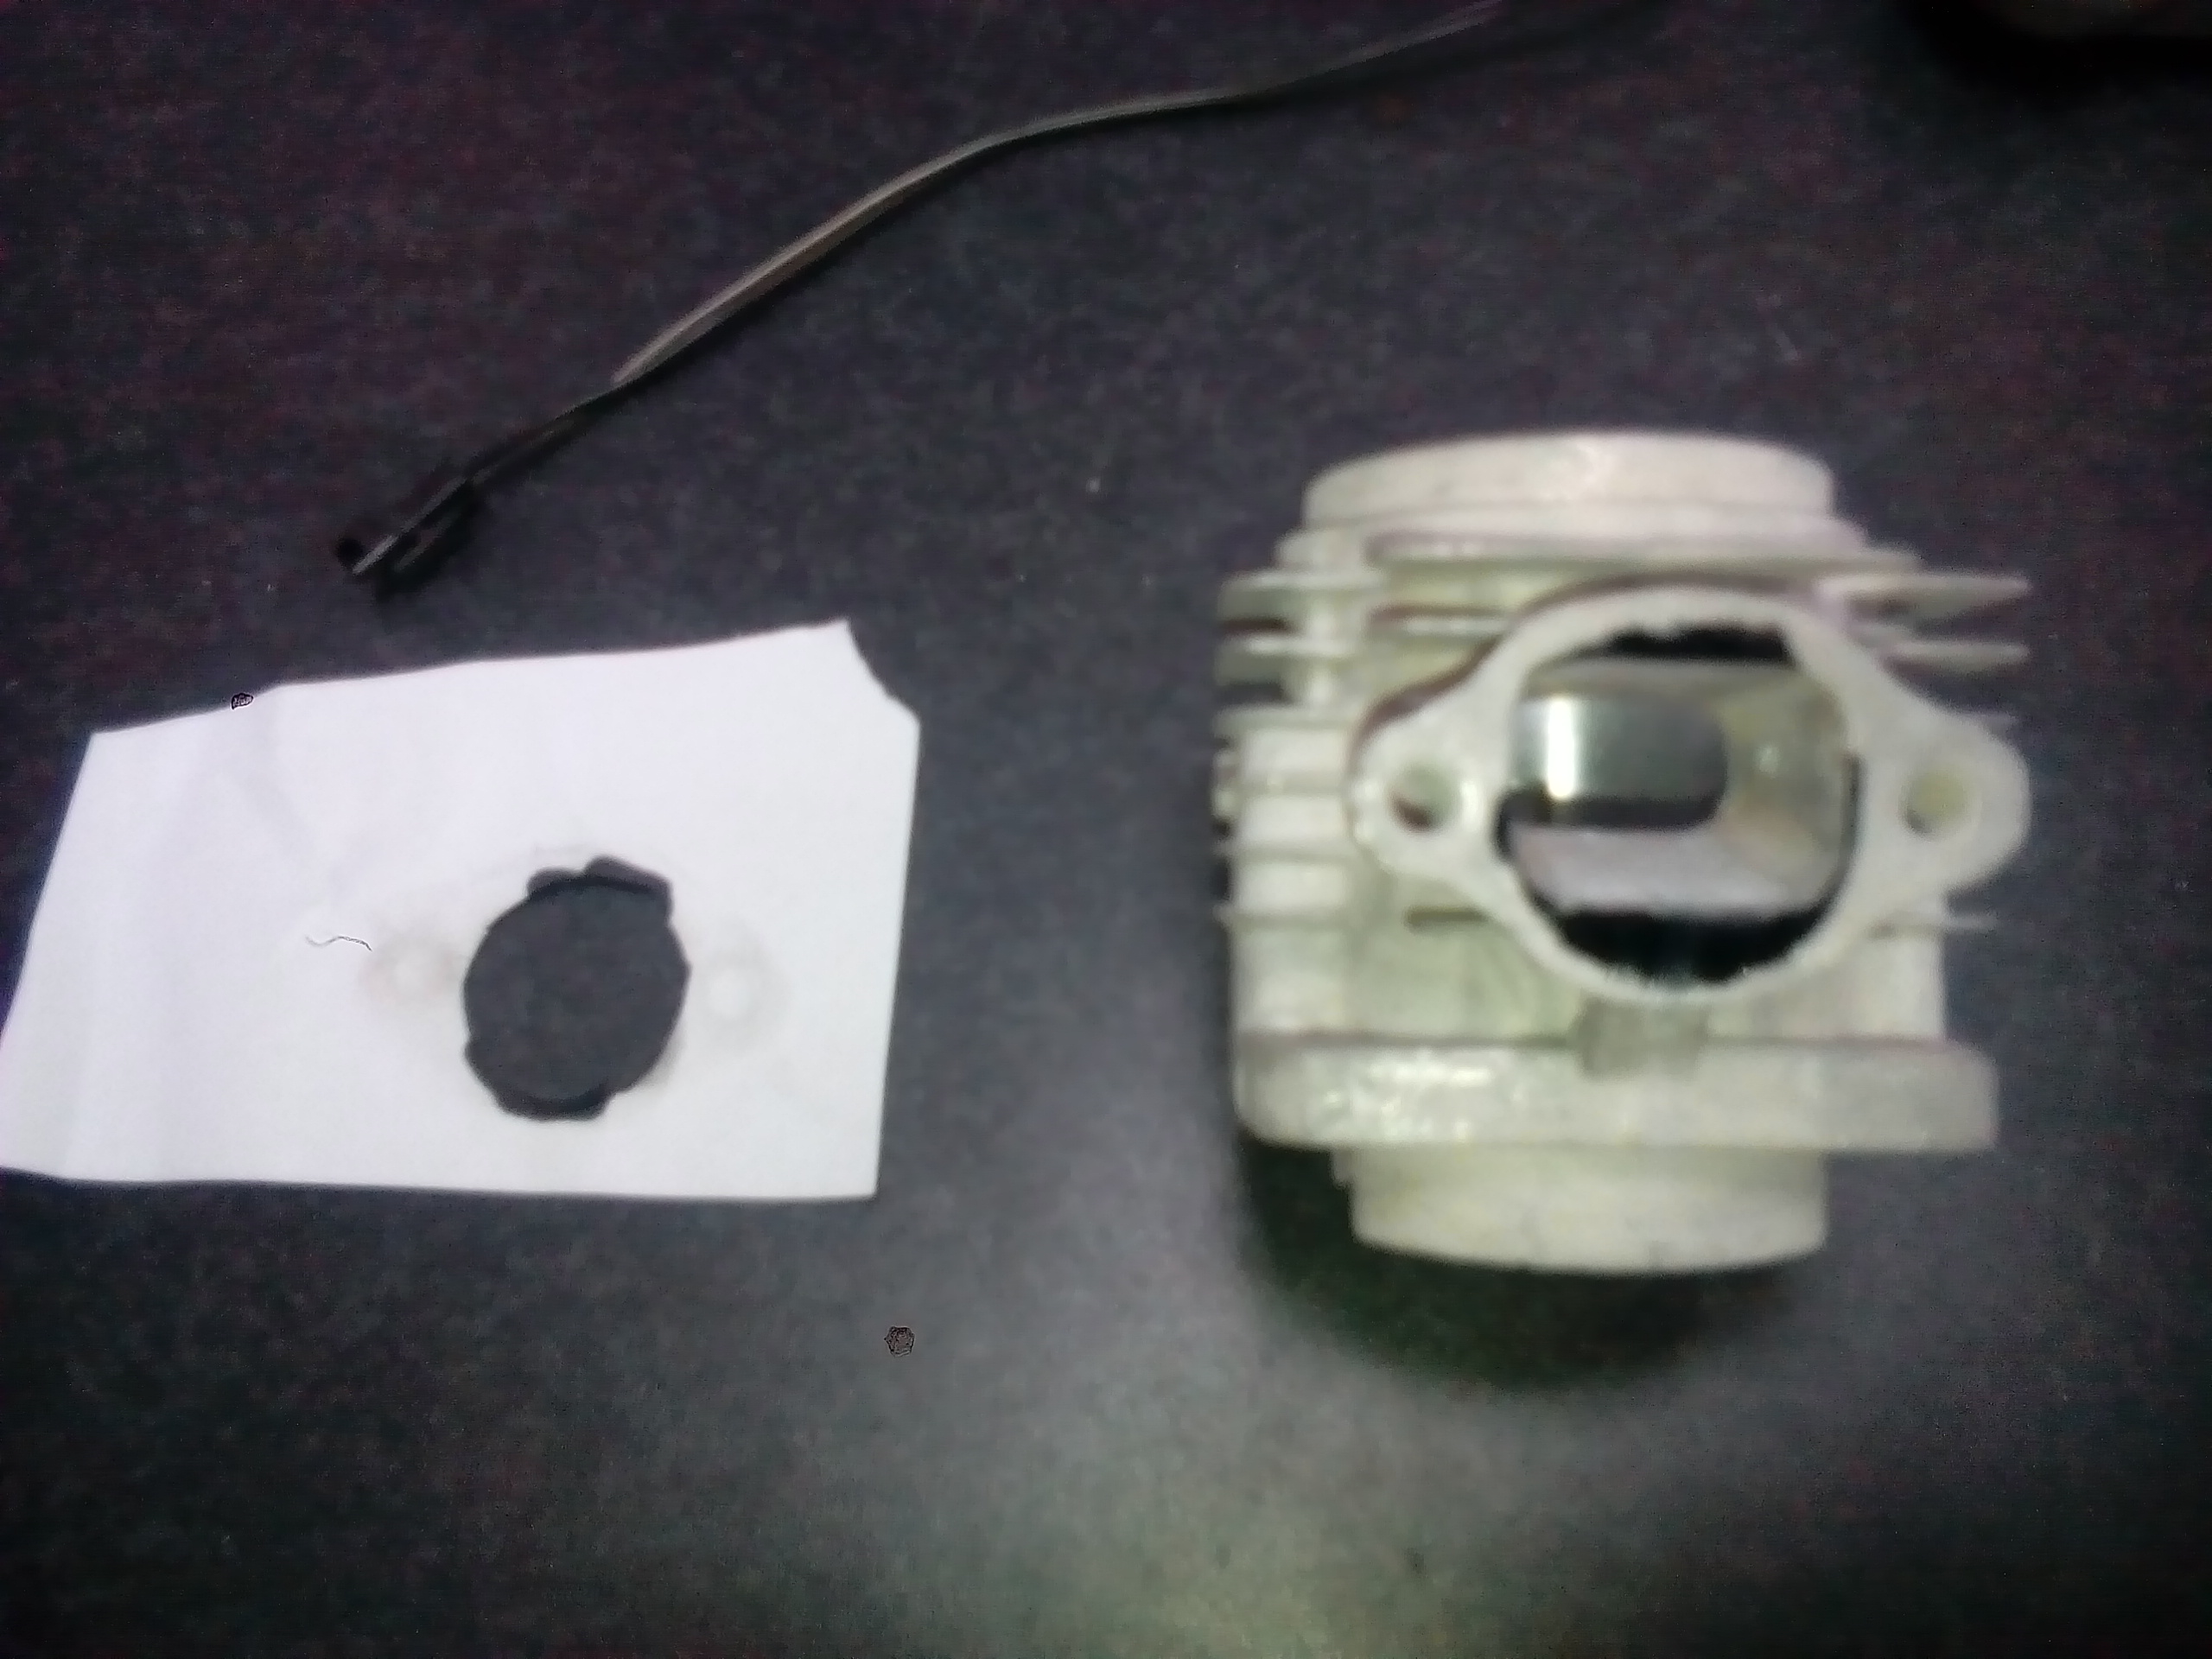
I made a paper gasket then marked out the port shape. Very much a case of trying to fit a square peg in a round hole! But the pulse back from the expansion chamber will love this smooth(er) transition, and make more power. Then realised that I could just use a circle template to do the same thing I ported, then kept checking with this template that all was good. Happy enough with this for now.
3 points
-
I think you need to add a "Better living with @Kimjon" thread.3 points
-
Enroute, Foaming hard! Wet and dry weather rides packed lol3 points
-
i go hard. yes i do. i went hard and did this today. 2018-01-17_03-07-01 by sheepers, on Flickr 2018-01-17_03-06-50 by sheepers, on Flickr fuck my shoulders are fucked, this timber is over 70 years old and its as hard as a fucking rock. whats left to do in the kitchen? well, the rest of the Rimu on the 8 folding doors obviously. the stainless steel bench tops need to be made and in order for that to happen i need to draw whats needed. stainless splash back above the sink needs making as well. some kick boards still need doing and a little bit of timber in the corner of the cupboards. oh, and i need to sand and oil the island top properly. probably other tings.3 points
-
We stripped the engine down and although there was no sign on the head gasket of blowby the head had a .010" warp. Banana shape, low in the middle. OK I thought.. Not too bad. Valves came up fine with a clean. Hannah put the camshafts back in place without valves to make sure the warping was not causing any binding and they came up sweet.. My mill is too short in travel to skim it in one hit and I thought I'd better get a second opinion anyway. Better check the bores we thought. Hannah cleaned them out and discovered this... Not sure but I think it's just corrosion from where the piston sat a while with water in the bore. Took it along to machine shop and yeah they think so too. But costs are now adding up. Having a re- think because the car is just so damn sweet even as it is. Hmm. Could avoid certification and added costs by just fitting a Chevette engine and playing with that instead. Or maybe a v6 again. Got all excited about the prospect because I have all the parts I need so I decided to weigh one again. All up, starter, alternator, manifolds, injection etc the v6 comes in at around 145kg. Really light for a complete v6 but still 40kg heavier than the stock standard viva 1159cc as it sits in the bay. (plus the mazda gearbox is 10kg heavier) So how can I save weight over the front to offset this?... Fibreglass bonnet could be a start. Hmmmm. No rush anyway. Cars projects are playing second fiddle right now. We've been given enough heaps of decking so itching to start on our cabin build up here...3 points
-
Honey i blew up the fridge. This was on the evening thursday 21st and I've already lent out the van and are overseas for 3 weeks leaving early morning sat 23rd and can't leave the housesitters without a fridge and the house is a fucking tip and the shops are total chaos and faaaark.....! Solution! UTELISE IT Old fridge off to the dump with a solid load of other carp. Hard parking waiting for a load of boulders to be dropped in the tray from a height like a real mans ute SMUG FACING AT THE DUMP Delivery mode engaged And so thats how Chrismo was saved. Happy Holidays from Straya, ya cunts.3 points
-
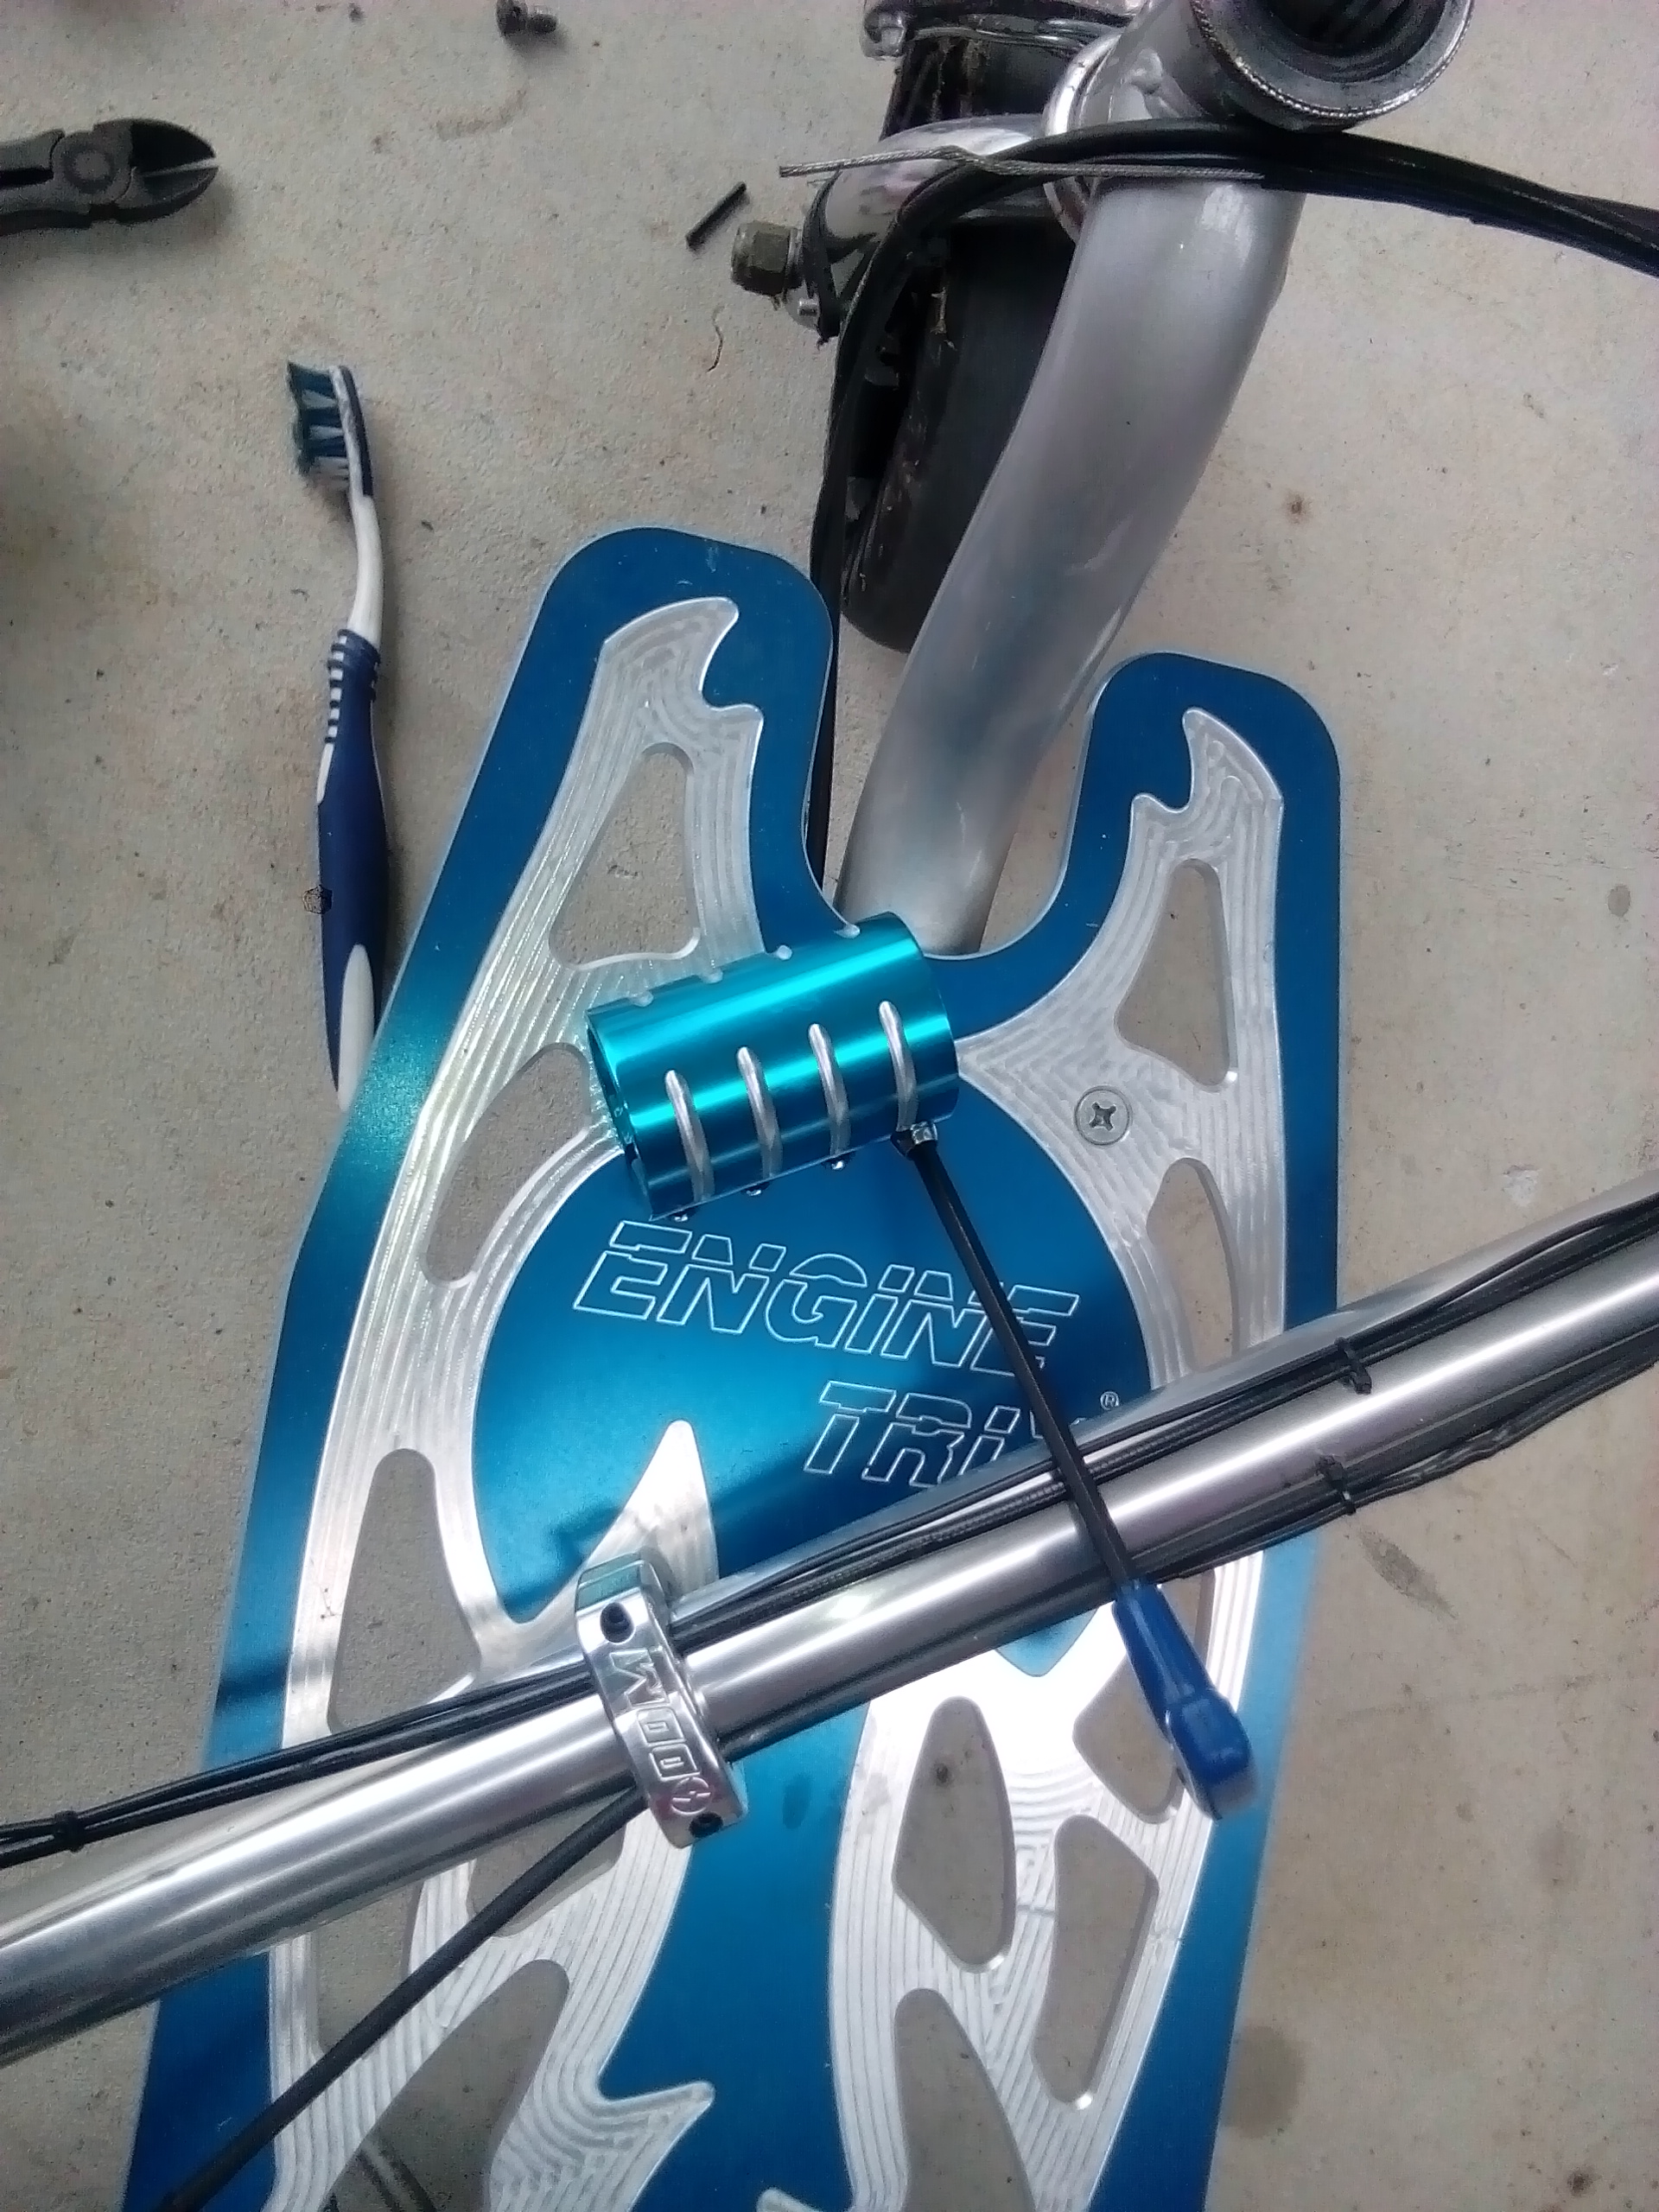
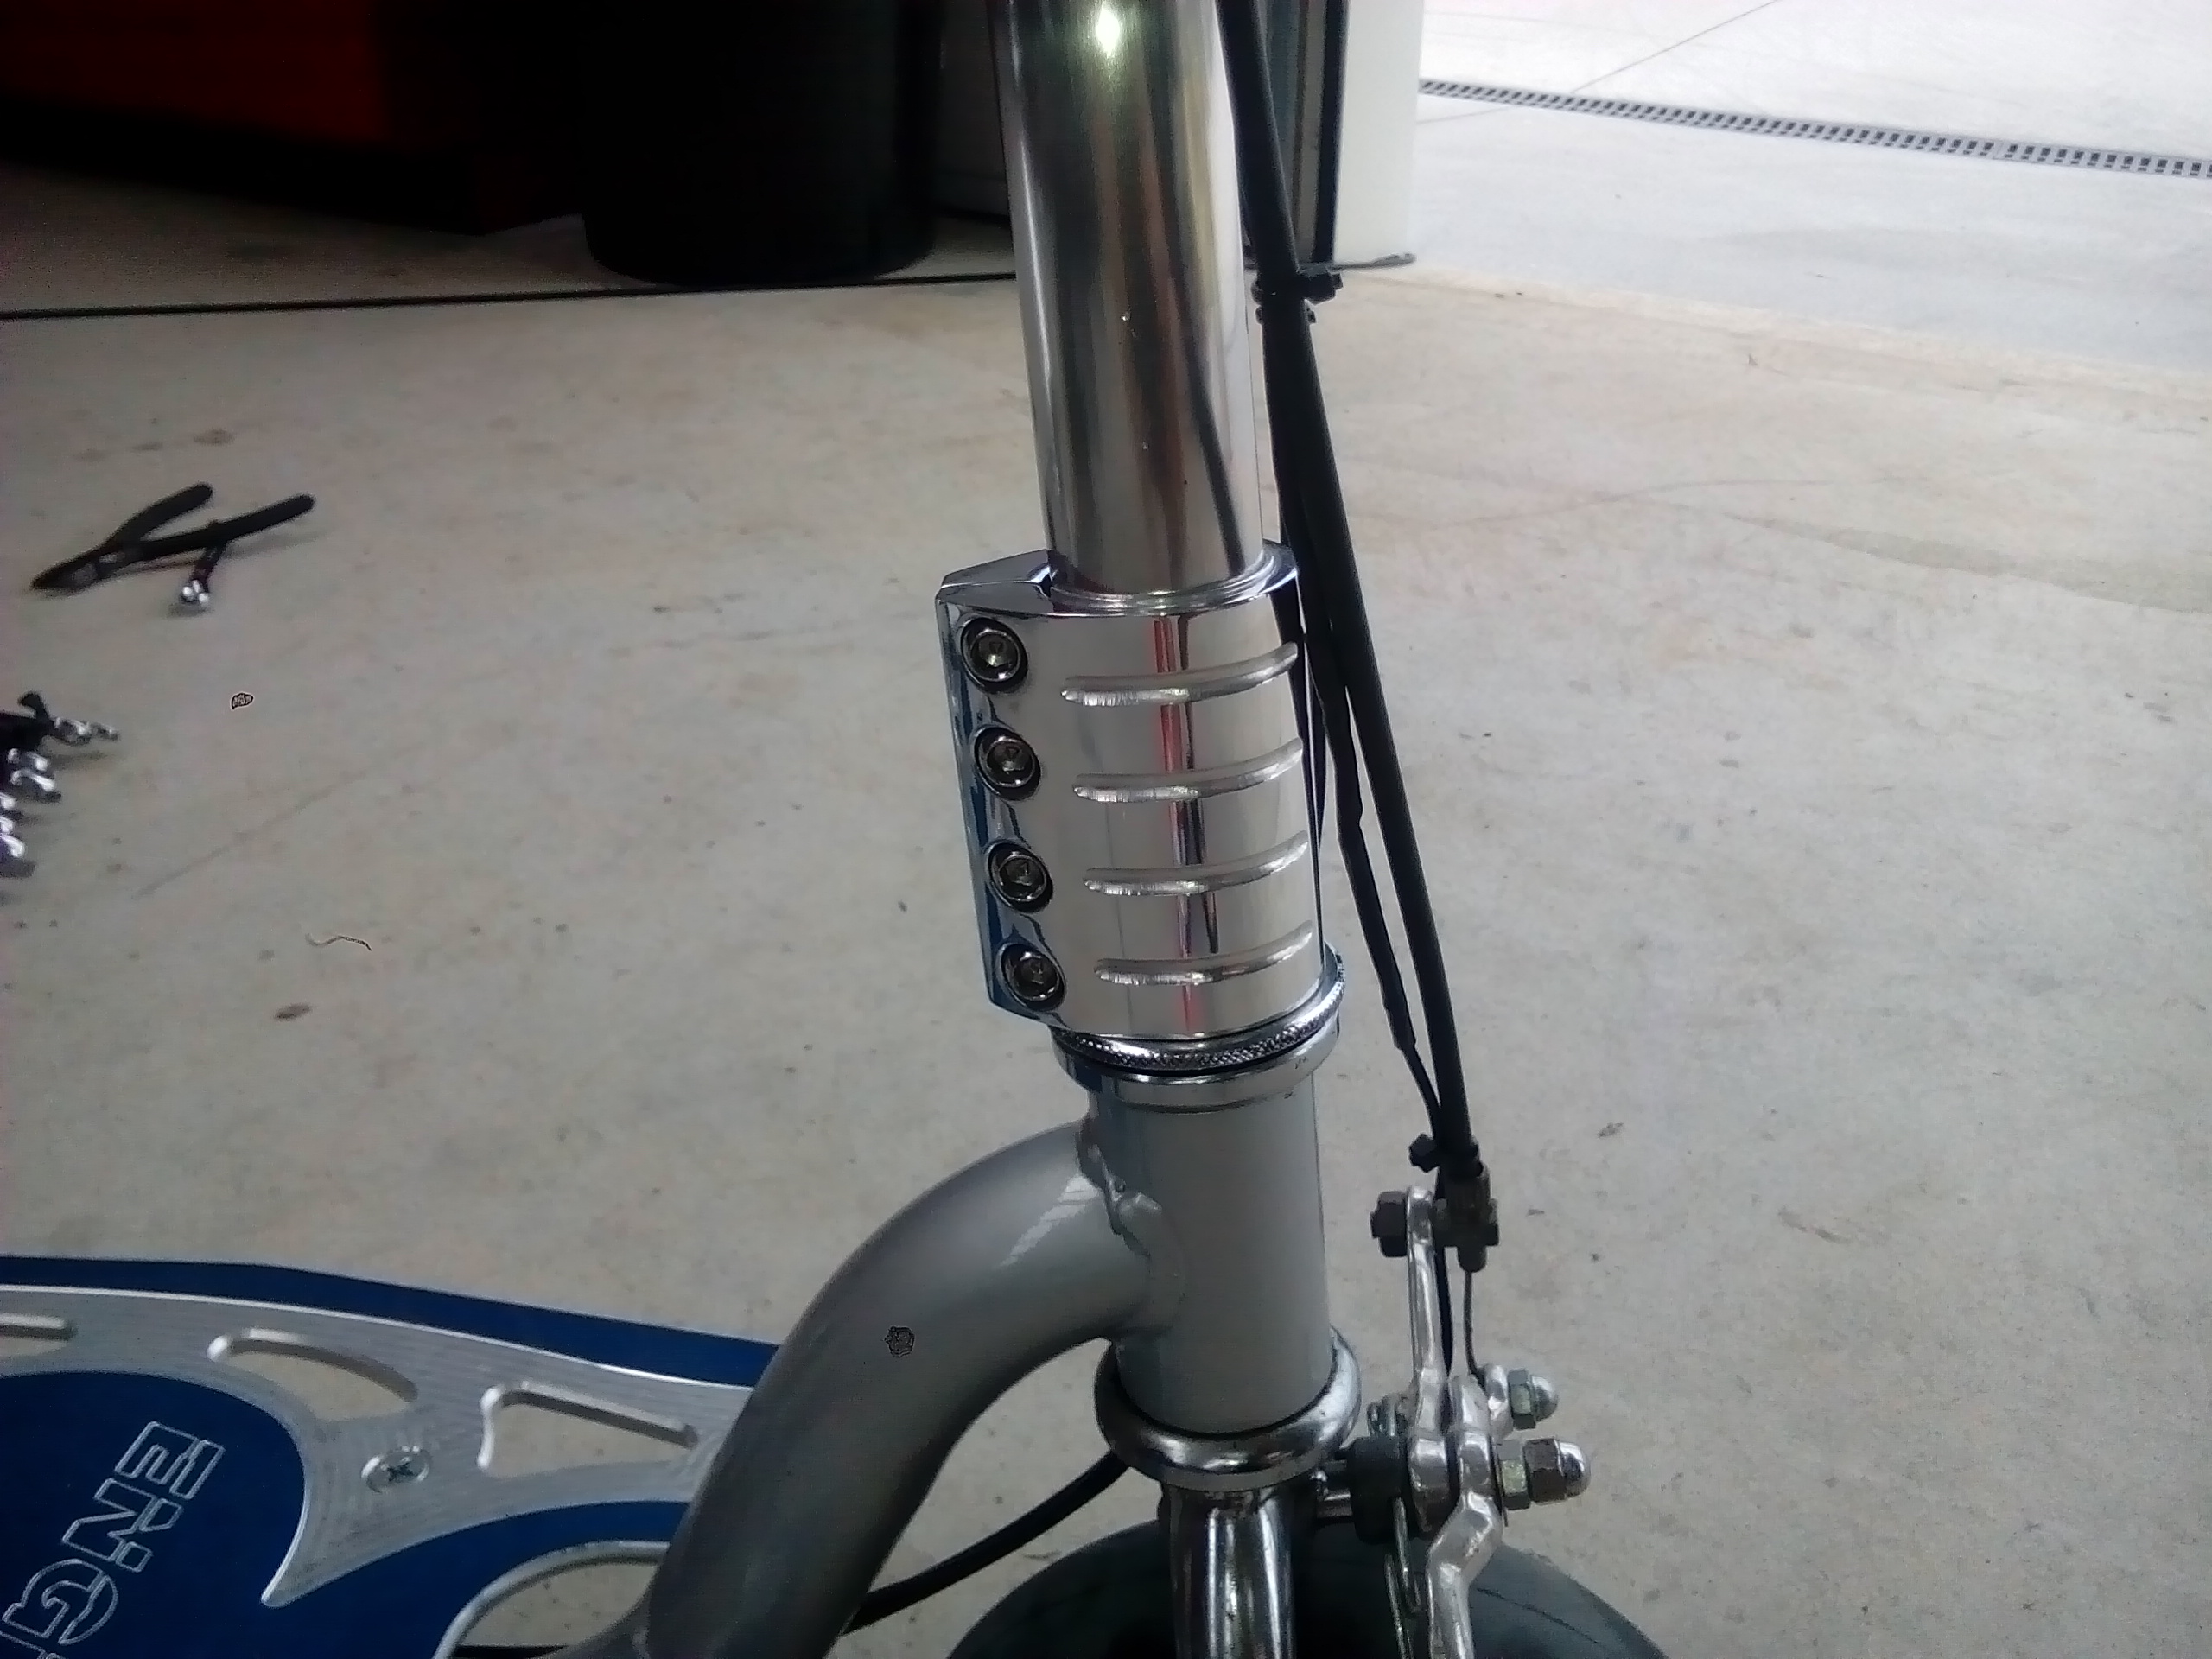
This was far more successful than I thought it would be. My stem clamp didn't match the colour of the deck. Normally I'd say "close enough" and leave it at that, however the two parts were so closely situated my eye kept getting drawn towards the mismatched blue's. Its been like this for 2 years until today, I thought fuck it...do something about it! Google revealed oven cleaner as a possible solution, truth be told I was willing it to work as the other methods were more involved. So here goes nothing: Offending colour mismatch above. Liberally apply oven cleaner, leave for about 5 minutes, then rinse off. Afterwards I scrubbed it with dish washing liquid to further insure it was clean. 100% removed all the colour...holly shit...it fucking worked(!) fully restoring my faith in the internet as a worthwhile place to find information. The oven cleaner leaves a natural finish, here it is installed back on the goped after a quick buff on the polishing wheel to shine it up. Total time start to finish less than 15 minutes...success!!!
2 points
-
The van is in primer and should be ready to collect tomorrow. Compliance centre can't do anything with it until Monday but I'll see if I can drop it off tomorrow and leave it with them. Haven't got the bill yet but I'm expecting it to be a few cars worth I've ordered some cream paint so wheels will come off and tyres will be getting flipped shortly2 points
-
SO it appears that photobucket is not being nice...great. Here is first start up2 points
-
Mrs doesn't let me do this
2 points
-
Lexus and some new Toyotas switch between Otto and Atkinson cycle by keeping the intake valve open until the piston is half way up on the compression stroke. They use a air flow meter that measures air going in and out. The have electronic VVT hubs for wider range of movement.2 points
-
I think MAF is the answer - if you can quantify the amount of air coming in then you can quantify the fuel, even if its not a traditional ratio I guess. But yeah god knows how you'd tell anything from a wideband. Maybe EGT would earn its keep here.2 points
-
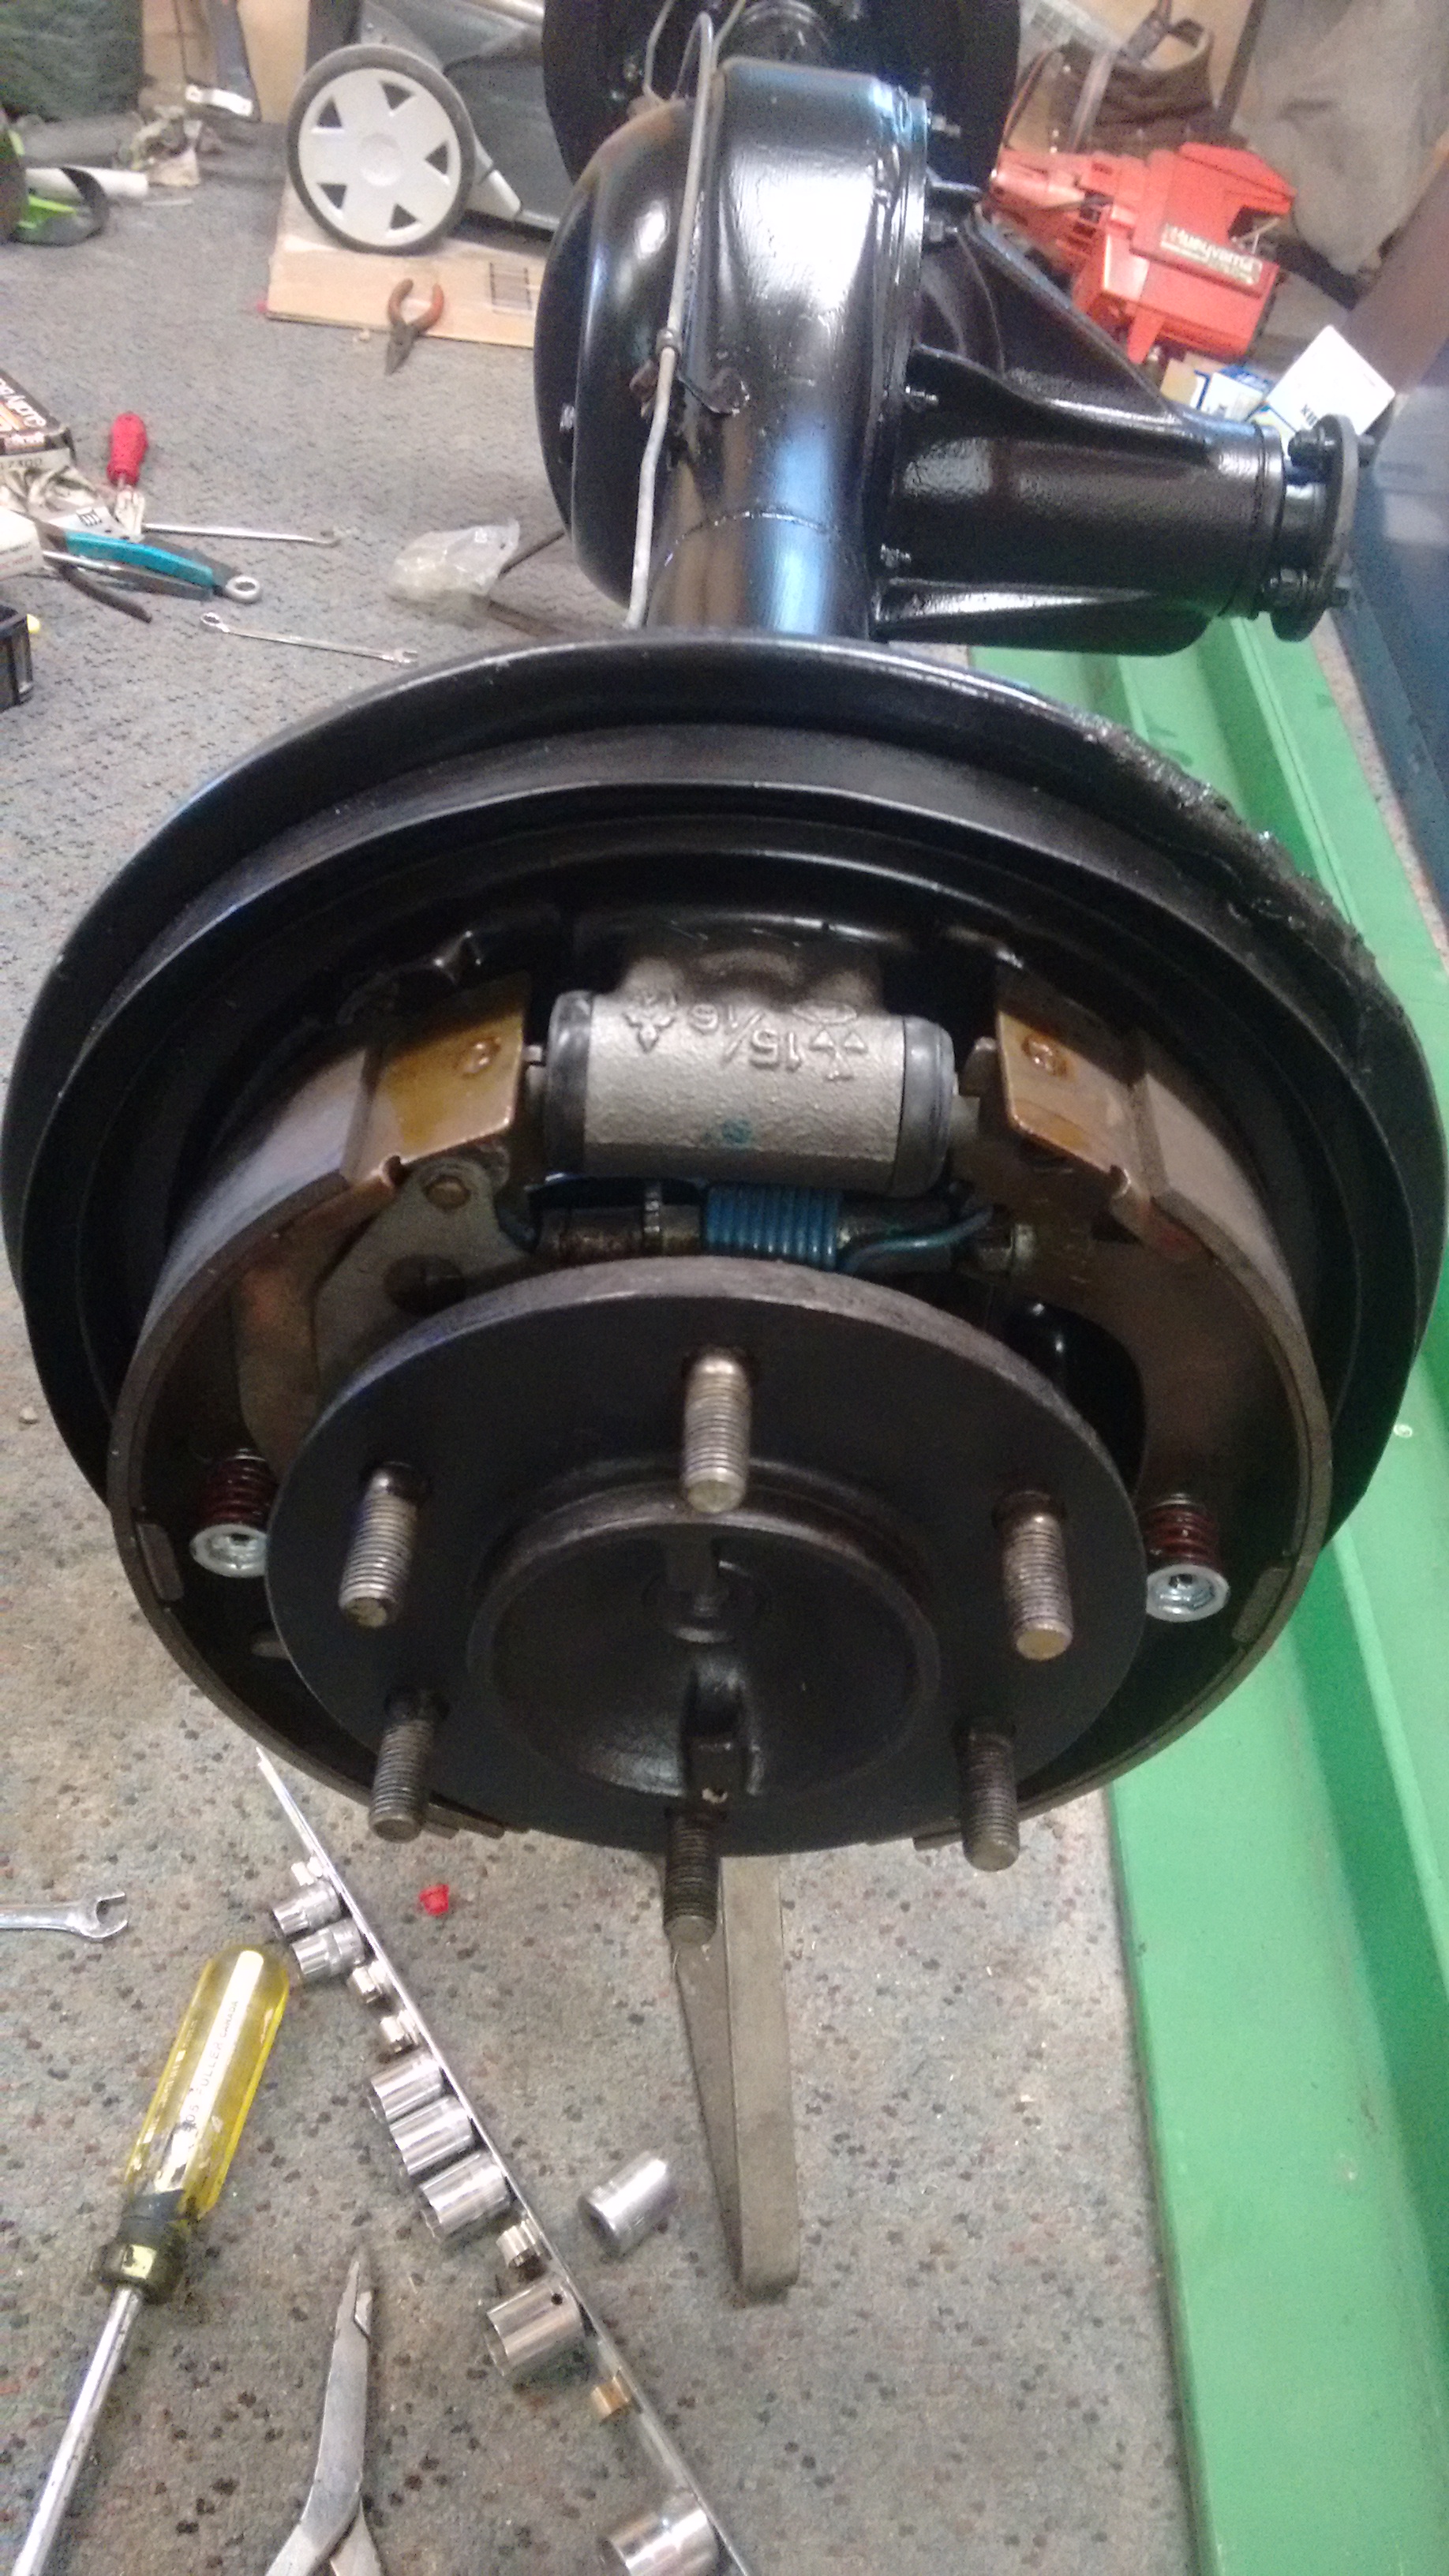
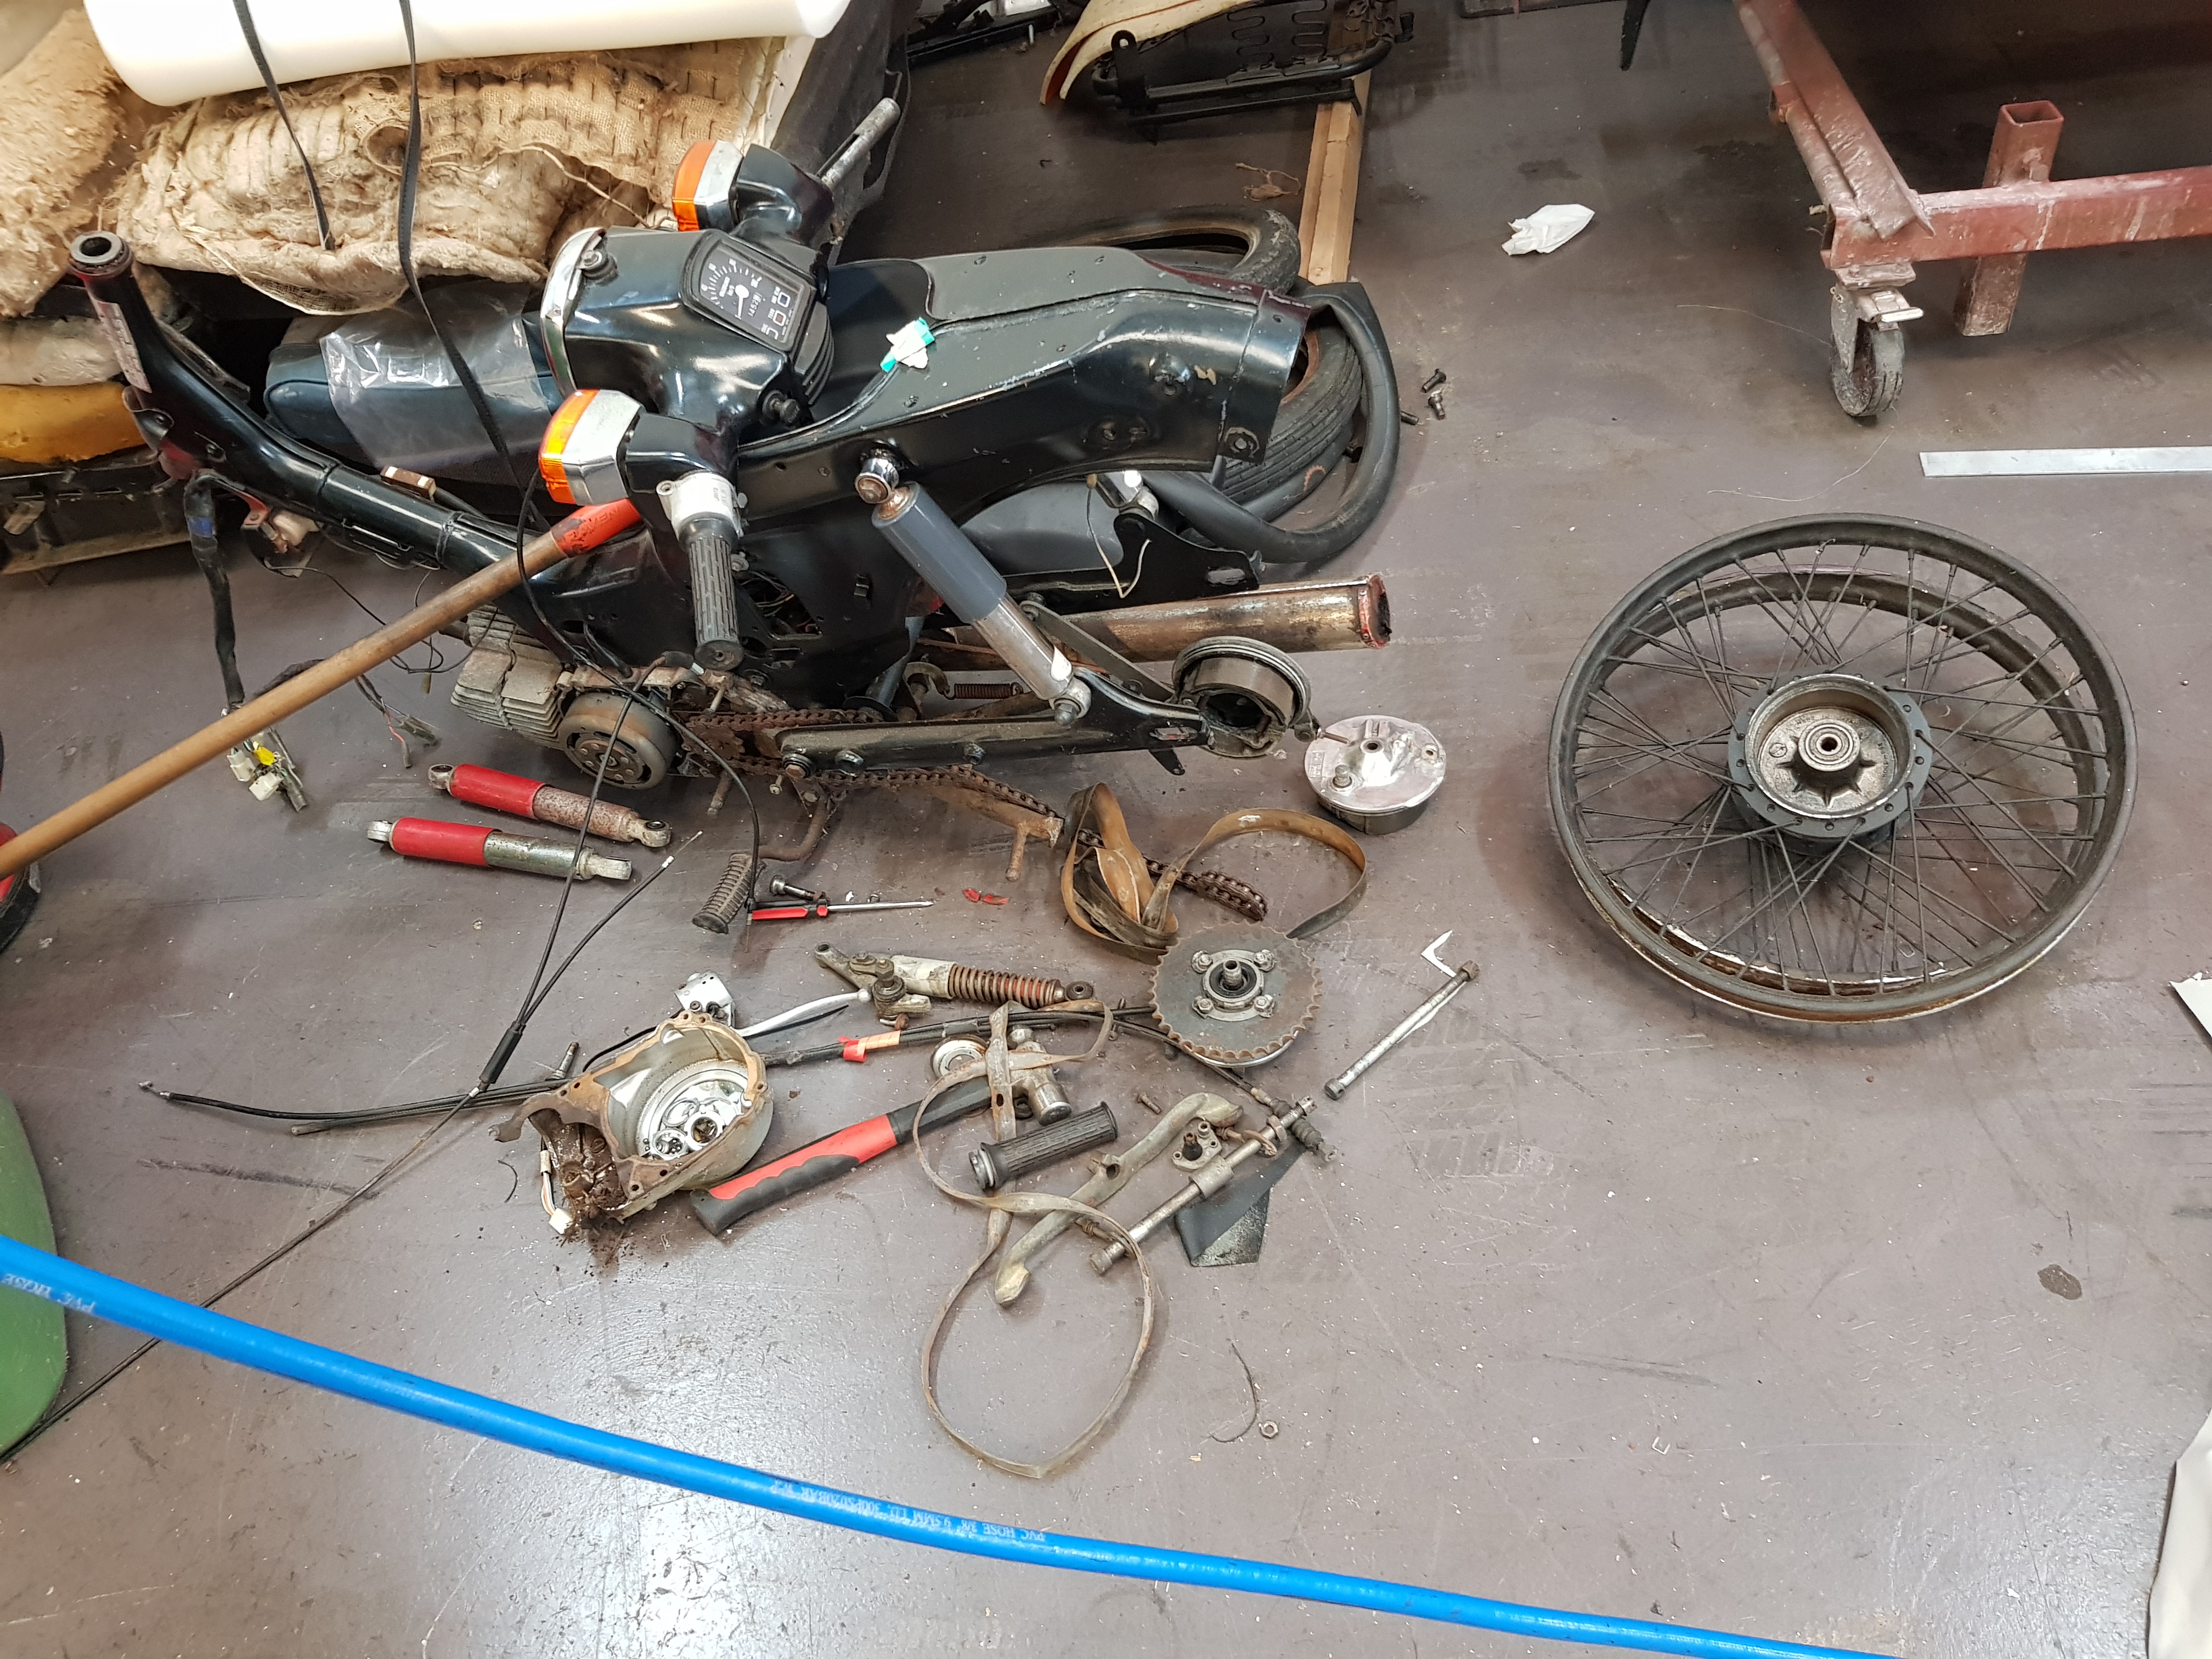
yeah, so aussie for 3 weeks was hot as balls, but also cool as an esky full of frosties. anywho, my shitty eurotrash ute has not fixed itself while i was away, so instead of looking at the grass growing up it i moved it from the spot on the lawn and got back into it. Before i left i took and collected a bunch of stuff from the lock up for a few niggly jobs JOB 1: BRAKES Brakes where a bit flat feeling, but the 125 and 2300 have great brakes (4 wheel discs) and this runs the same setup as the 125 so they aught to be good too. It has brand new Ferodo pads in the rear and pretty new ones in the front, discs seem fine (*reminder to swap the front right that is a bit warped, with the spare i collected) and they dont pull to any side. I swapped the one way valve (was blocked) and vacuum hose (small split - improved idling) and still the brake pedal did not drop when the engine started so i assumed the booster was toasted, so swapped in the nicest looking spare i had after painting the front half grey and the rusty standoff bracket with black zinc (love that stuff!). The old one was a polish one (Fermat?), the replacement is an italian made Bonaldi from a 125. Brakes are much better now, but it seems there is a slight difference between them as even though both the original master cylinder and bracket bolted up fine and it all works, the fluid reservoir now has a slight lean (5 deg or so) to the right. Solution would be to swap the 125 bracket over as well but that is a real ball ache as the clutch cable comes though it, and a couple of the bolts are accessed from under the dash, and i CBF. Reservoir has enough movement to tilt it back flat by hand, so if needed i can cable tie it to pull it level but that feels worse somehow.2 points
-
Oh man FUCK southern cross NEVER AGAIN! they didn't talk to the hopsital, took 2 weeks to approve a surgery I needed. (specialist said he could do it the day after consultation) and after all of that they send the debt collector my details.. Ness used westpac travel insurance and they ended up paying for ME to stay in a apartment over there so I highly recommend westpac2 points
-
yes, Scandinavian. i totally forgot to mention that the Rimu planks are the weather boards off the old house . i got them machined and thats what the facings are made of. i have a bit more Rimu framing and whatnot left from the old house and ill be making a table out of it in the near future.2 points
-
I also drew up and laser cut some mount adaptors. I coppied the basic idea from the few ausie hq- LS mounts available (but i aint spending nearly 300$). Mine all slotted together and were good enough for welding without a jig of any kind too.
2 points
-
pick it up on the last weekend of the month will put up a pic then1 point
-
And without the need to have a full valve de-coke every 100,000km. I'd been reading recently about how choked up some DI engines are getting from lack of fuel cleansing. Quite amazing how bad some get.1 point
-
FUCK IN LOL The slowest vehicle I own got away from me a bit, i took it for a quick tutu round the block to test a change getting ready for Saturday, left a wet intersection and as I took off it did a D1 and lowsided it The one bracket I didn't cut off, bit my ankle.1 point
-
Sounds good, real good.1 point
-
Sorry I'm hopeless. turns out both area reps are double booked this weekend. So non of them. however I am locking in a meet at the Scope Classic in 2 weeks.1 point
-
I'd love to know how you'd tune it in an aftermarket situation. Sounds like a good way of blowing out the top of the pistons.1 point
-
I'm liking this bit in particular, the grains/colouring have lined up nicely. Worked with a real os chippie for a while, used to lay real t&g native floors the old way. He taught me that you would pick the best boards for the middle of the hallway and living rooms and use the lesser quality ones to the outside. Kinda like you have done here. Very Nice!1 point
-
I think I used Southern Cross, haven't decided for the Japan trip yet. @chris r may be able to offer some advice as I believe he or one of the others involved in the accident got dickery doo'd around by an insurance firm.1 point
-
As long as it looks like a mirror when it’s off and it’s off at wof time it won’t be a problem.1 point
-
Cleaned the LSD up with new paint, spring hardware, cylinders, and oil. It can go in when the paint hardens off. Had a bald front tyre so got a couple of desert duelers put on, only 15*215s available today. Swapped the best one to use as the spare. Forgot how crusty the spare rim was, should have grabbed a good one from the shed. Came home and polished it up abit. Will remember for next time. So far so good, they might be a little less balloony so haven't rubbed yet, and no squeeling like the old baldies
1 point
-
Took the old girl in for a wof. Only needed the diff brake lines replaced. The tappets are getting worse so I'll replace them and the cam at some point to two days later the mechanic still has not replaced said diff brake lines... I Did say I needed it ready tonight. I ran the gauntlet as I had to pick some stuff up and get ready for the scooter ride. I needed some tie town points for the scoots and general stuff so really splashed out. @piazzanoobs gantry is fucking awesome She'll be right m8. perfect for a trip to waikato and back... They promised me it'll be ready tomorrow morning so heres hoping nothing else goes wrong1 point
-
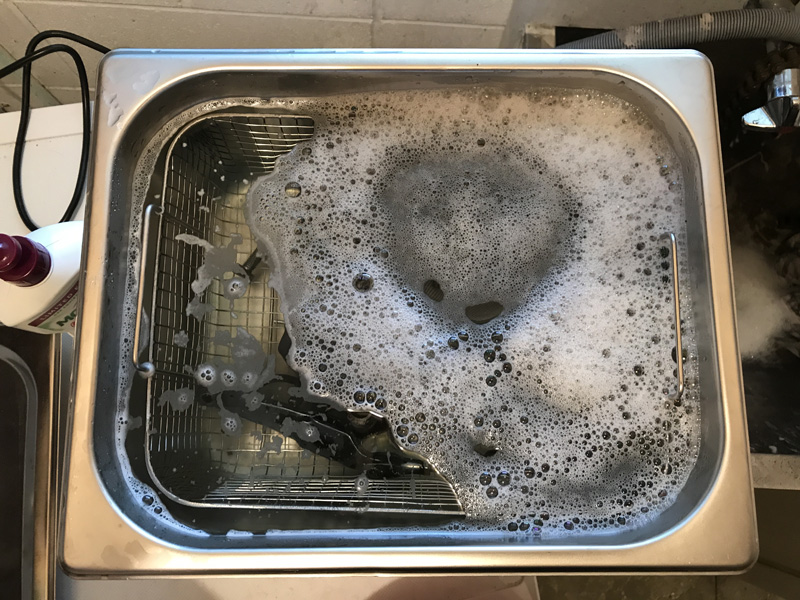
I'm lucky enough to have a friend who just purchased an ultrasonic cleaner. Cleaned a whole lot of small bits including the original carbs. I should've taken before & after shots, but it did a bloody good job of making everything look like new again.
1 point
-
1 point
-
Tons of travel left there! Swapped the 5.5g rollers out for the 7g ones that came with the variator kit, didn't test ride it beyond the driveway as I had 0 brakes lol. Paints still shit, @Bellicose we might need to have a chat about a spray job if your keen at some point?1 point
-
My nephew still has the car and the panels. He's dented the front guard and is after a guard/selling the wagon1 point
-
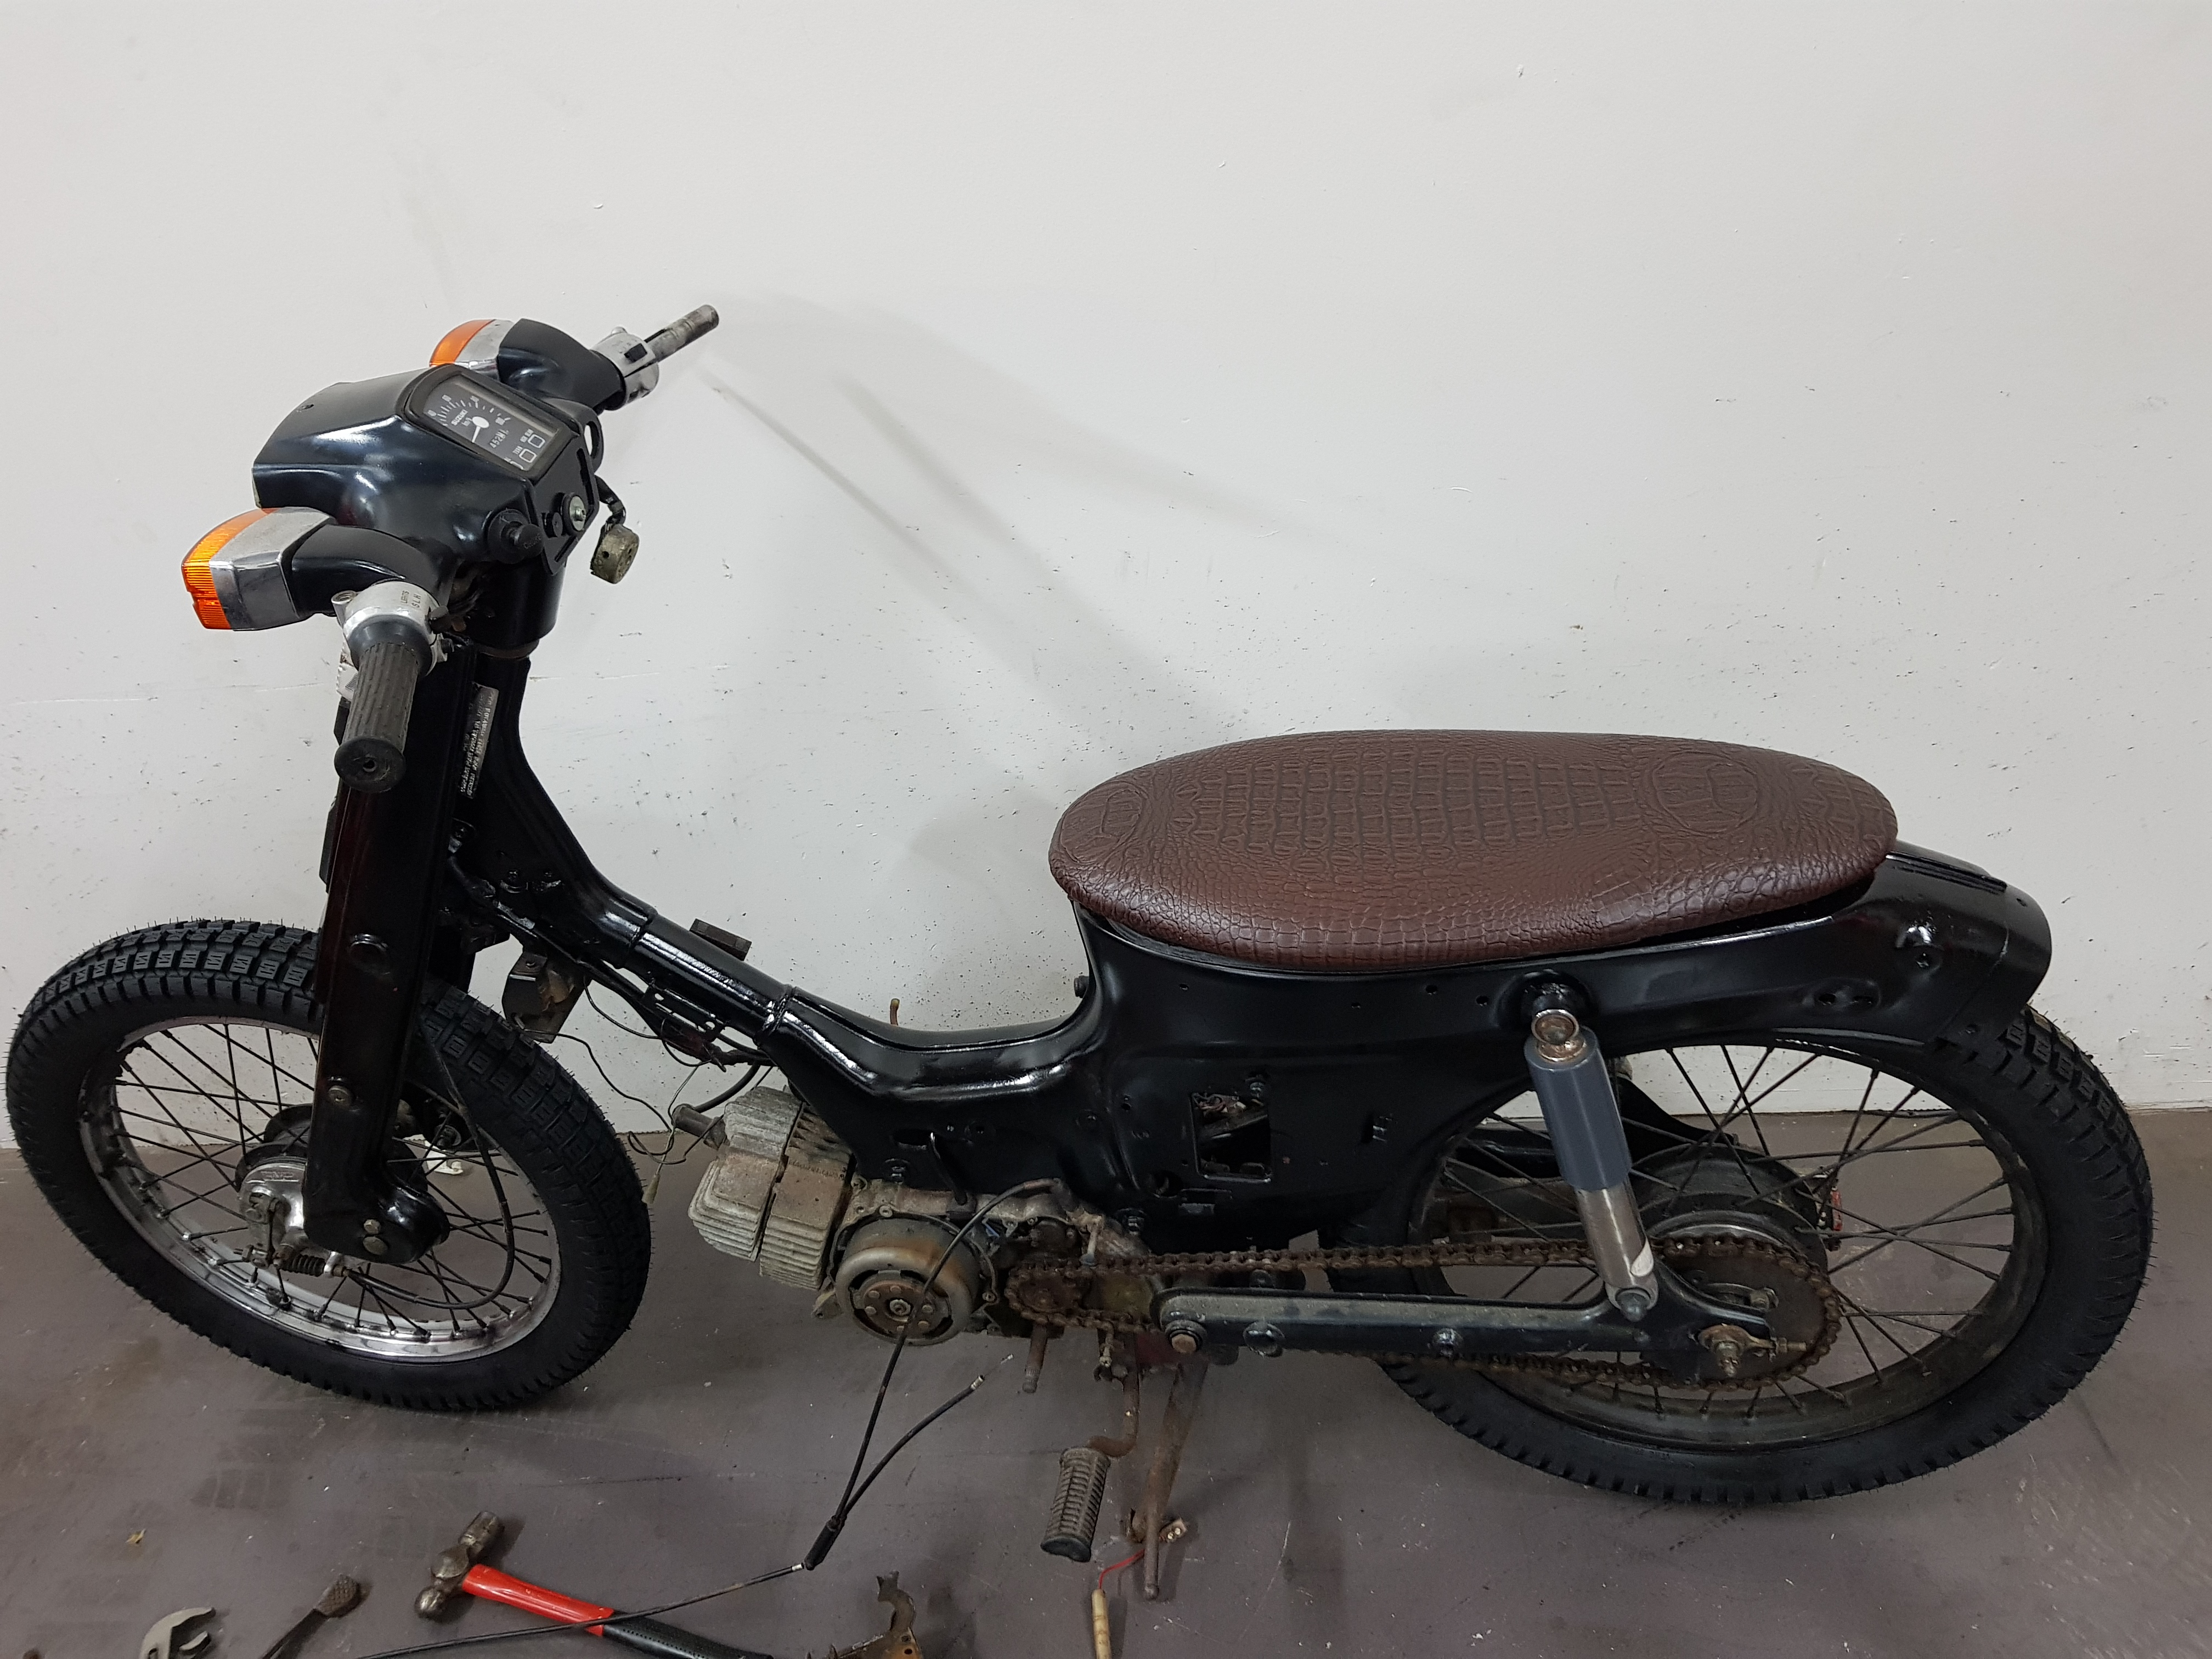
Done a few things on it recently. Pulled it apart some more and got tyres. Got a couple for kass new worker as well Brought some shocks off the Honda version of these they are about 15mm shorter which is great. I also gave it a once over in black again to hide the half assed job before hand. Semi together. The seat had some rust in it.... I drew a nice template and @flyingbrickcut some 6mm ply out. Now it looks like this. Fuel spark and the twist and go part and we should be go.
1 point
-
Ideally, 2 ish. Realistically, Wednesday next week.1 point
-
At least you can get recreational weed in LA now, worth the flight for some cheeba chews.1 point
-
spent a bit of time putting my bench back and tidying up the shed but theres still heaps to do out there. in the house ive started putting the Rimu facings on the cupboards in the kitchen. ive still got to true up the edges but its a start. 2018-01-15_06-27-39 by sheepers, on Flickr1 point
-
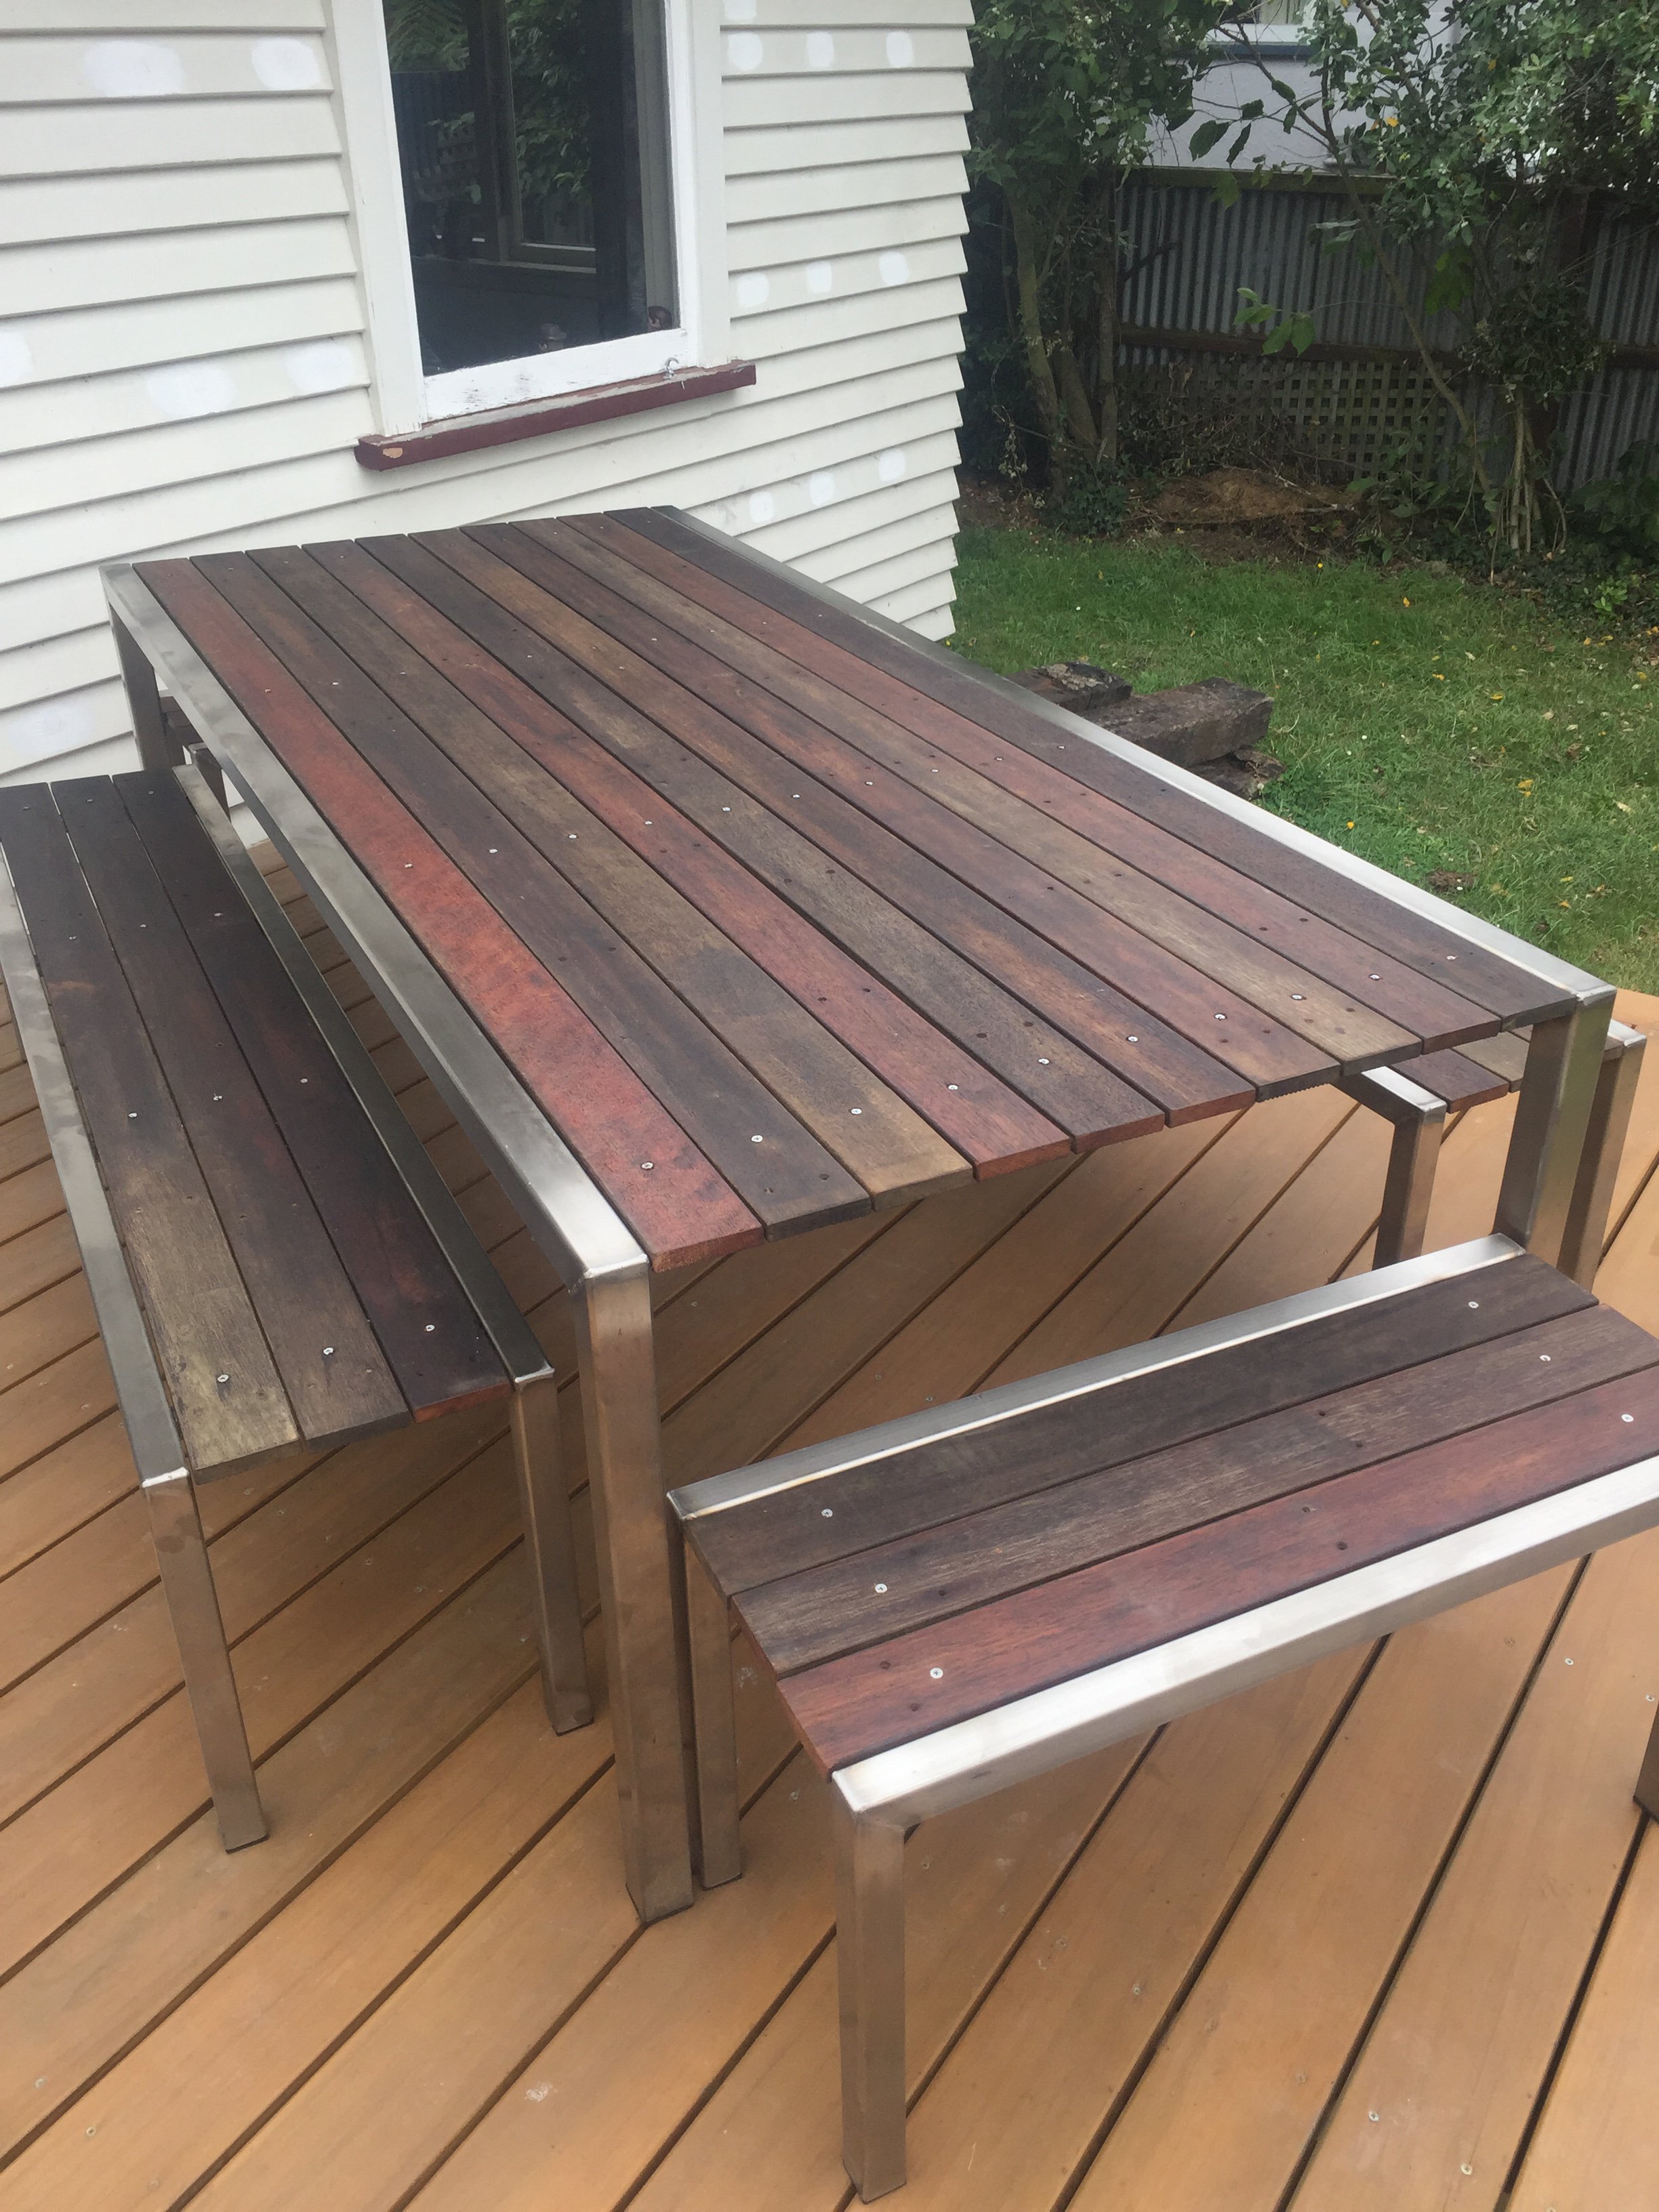
I made an outdoor table/chairs over the break.stainless frame with reused kiwla decking re oiled
1 point
-
The Nelson vintage car club is on Saturday 17th Feb. Shall we have our next meet then?1 point
-
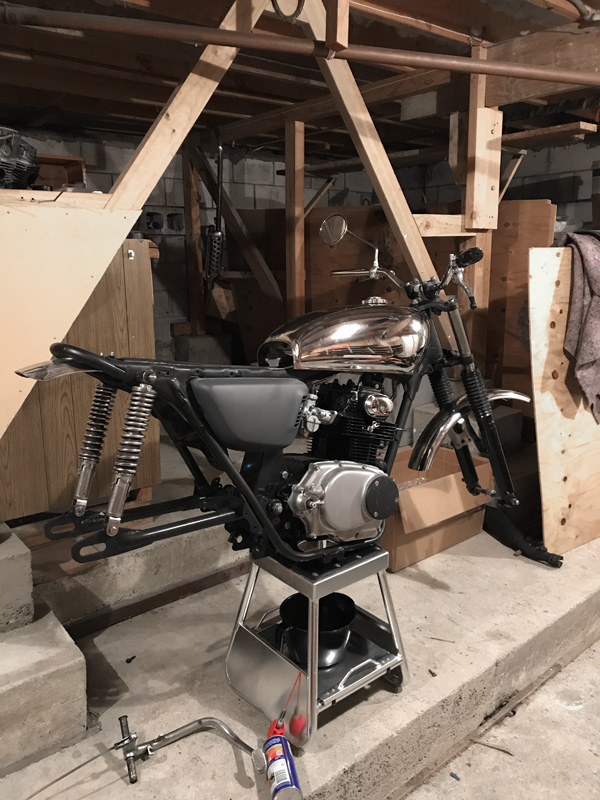
Been a little slow on the updates but I've been painting, polishing and reassembling while I procrastinate finishing the wiring. Pretty stoked with how she's looking.
1 point
-
SO ive been pesting around in this a bit, trying to get it sorted for drag day. Seat already taken, sorry ladeeze. Makes a good surf wagon The DCHE carb it came with is Is still a bit flakey, so i swapped to a DCD which is the type the original 1500 motor would have had, and is on the 2300 as well. I have a DMS too but the action is the reverse and the truck has slightly different linkage to the sedan as well, no pivot point on the firewall. DCD is way better but still sub optimal :/.1 point
-
https://www.motormag.com.au/features/1503/mid-engine-holden-rodeo-track-monster Stumbled across this. Didn't know where to post it.1 point


This leaderboard is set to Auckland/GMT+12:00