
Leaderboard


Popular Content
Showing content with the highest reputation on 08/21/17 in all areas
-
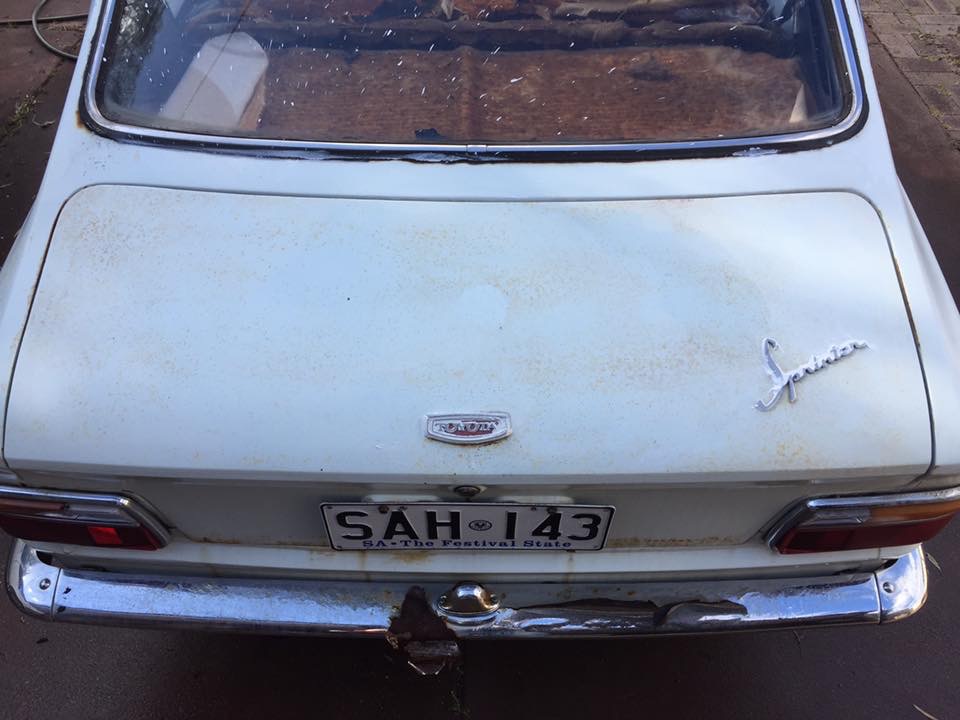
This weekend, @Alistair bowled around and helped me with a lush polishing effort on the painted surfaces of the 944. Here's a few shots of the result, taken under some neat skies on Sunday evening. 1991 Porsche 944 S2-179-Edit by Richard Opie, on Flickr 1991 Porsche 944 S2-96-Edit by Richard Opie, on Flickr 1991 Porsche 944 S2-172-Edit by Richard Opie, on Flickr 1991 Porsche 944 S2-141-Edit by Richard Opie, on Flickr 1991 Porsche 944 S2-170-Edit by Richard Opie, on Flickr Some of the S2 differences: 1991 Porsche 944 S2-129 by Richard Opie, on Flickr Turbo nosecone, a big upgrade over the old 924-style front my 8v car had on it. 1991 Porsche 944 S2-92-Edit by Richard Opie, on Flickr "Bridge" spoiler in place of the squishy rubber ducktail thing, and the under spoiler/bum flap thing. 1991 Porsche 944 S2-47 by Richard Opie, on Flickr 1991 Porsche 944 S2-106 by Richard Opie, on Flickr 16x7 and 8" "Design 90" wheels and Brembo 4-pot clappers on 300mm rotors at either end. 1991 Porsche 944 S2-116 by Richard Opie, on Flickr 1991 Porsche 944 S2-119 by Richard Opie, on Flickr 3-litre 16 valve 4-banger engine. A shade under 220hp, lol redline of 6500rpm but sooooo torquey. Actually a very smooth thing to drive, with twin balance shafts and all that jazz. 1991 Porsche 944 S2-189-Edit by Richard Opie, on Flickr Delicious pop-up headlights, I can watch these go up and down all day. 1991 Porsche 944 S2-108 by Richard Opie, on Flickr 1991 Porsche 944 S2-68 by Richard Opie, on Flickr 1991 Porsche 944 S2-80 by Richard Opie, on Flickr 1991 Porsche 944 S2-82 by Richard Opie, on Flickr 1991 Porsche 944 S2-112-Edit by Richard Opie, on Flickr Interior things and stuff. Headunit will be switched out shortly for something not silver, and Bluetooth capable.9 points
-
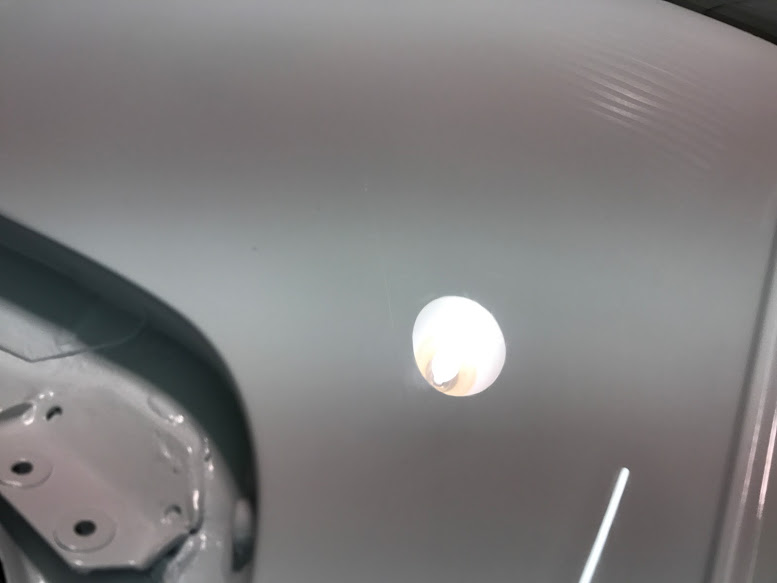
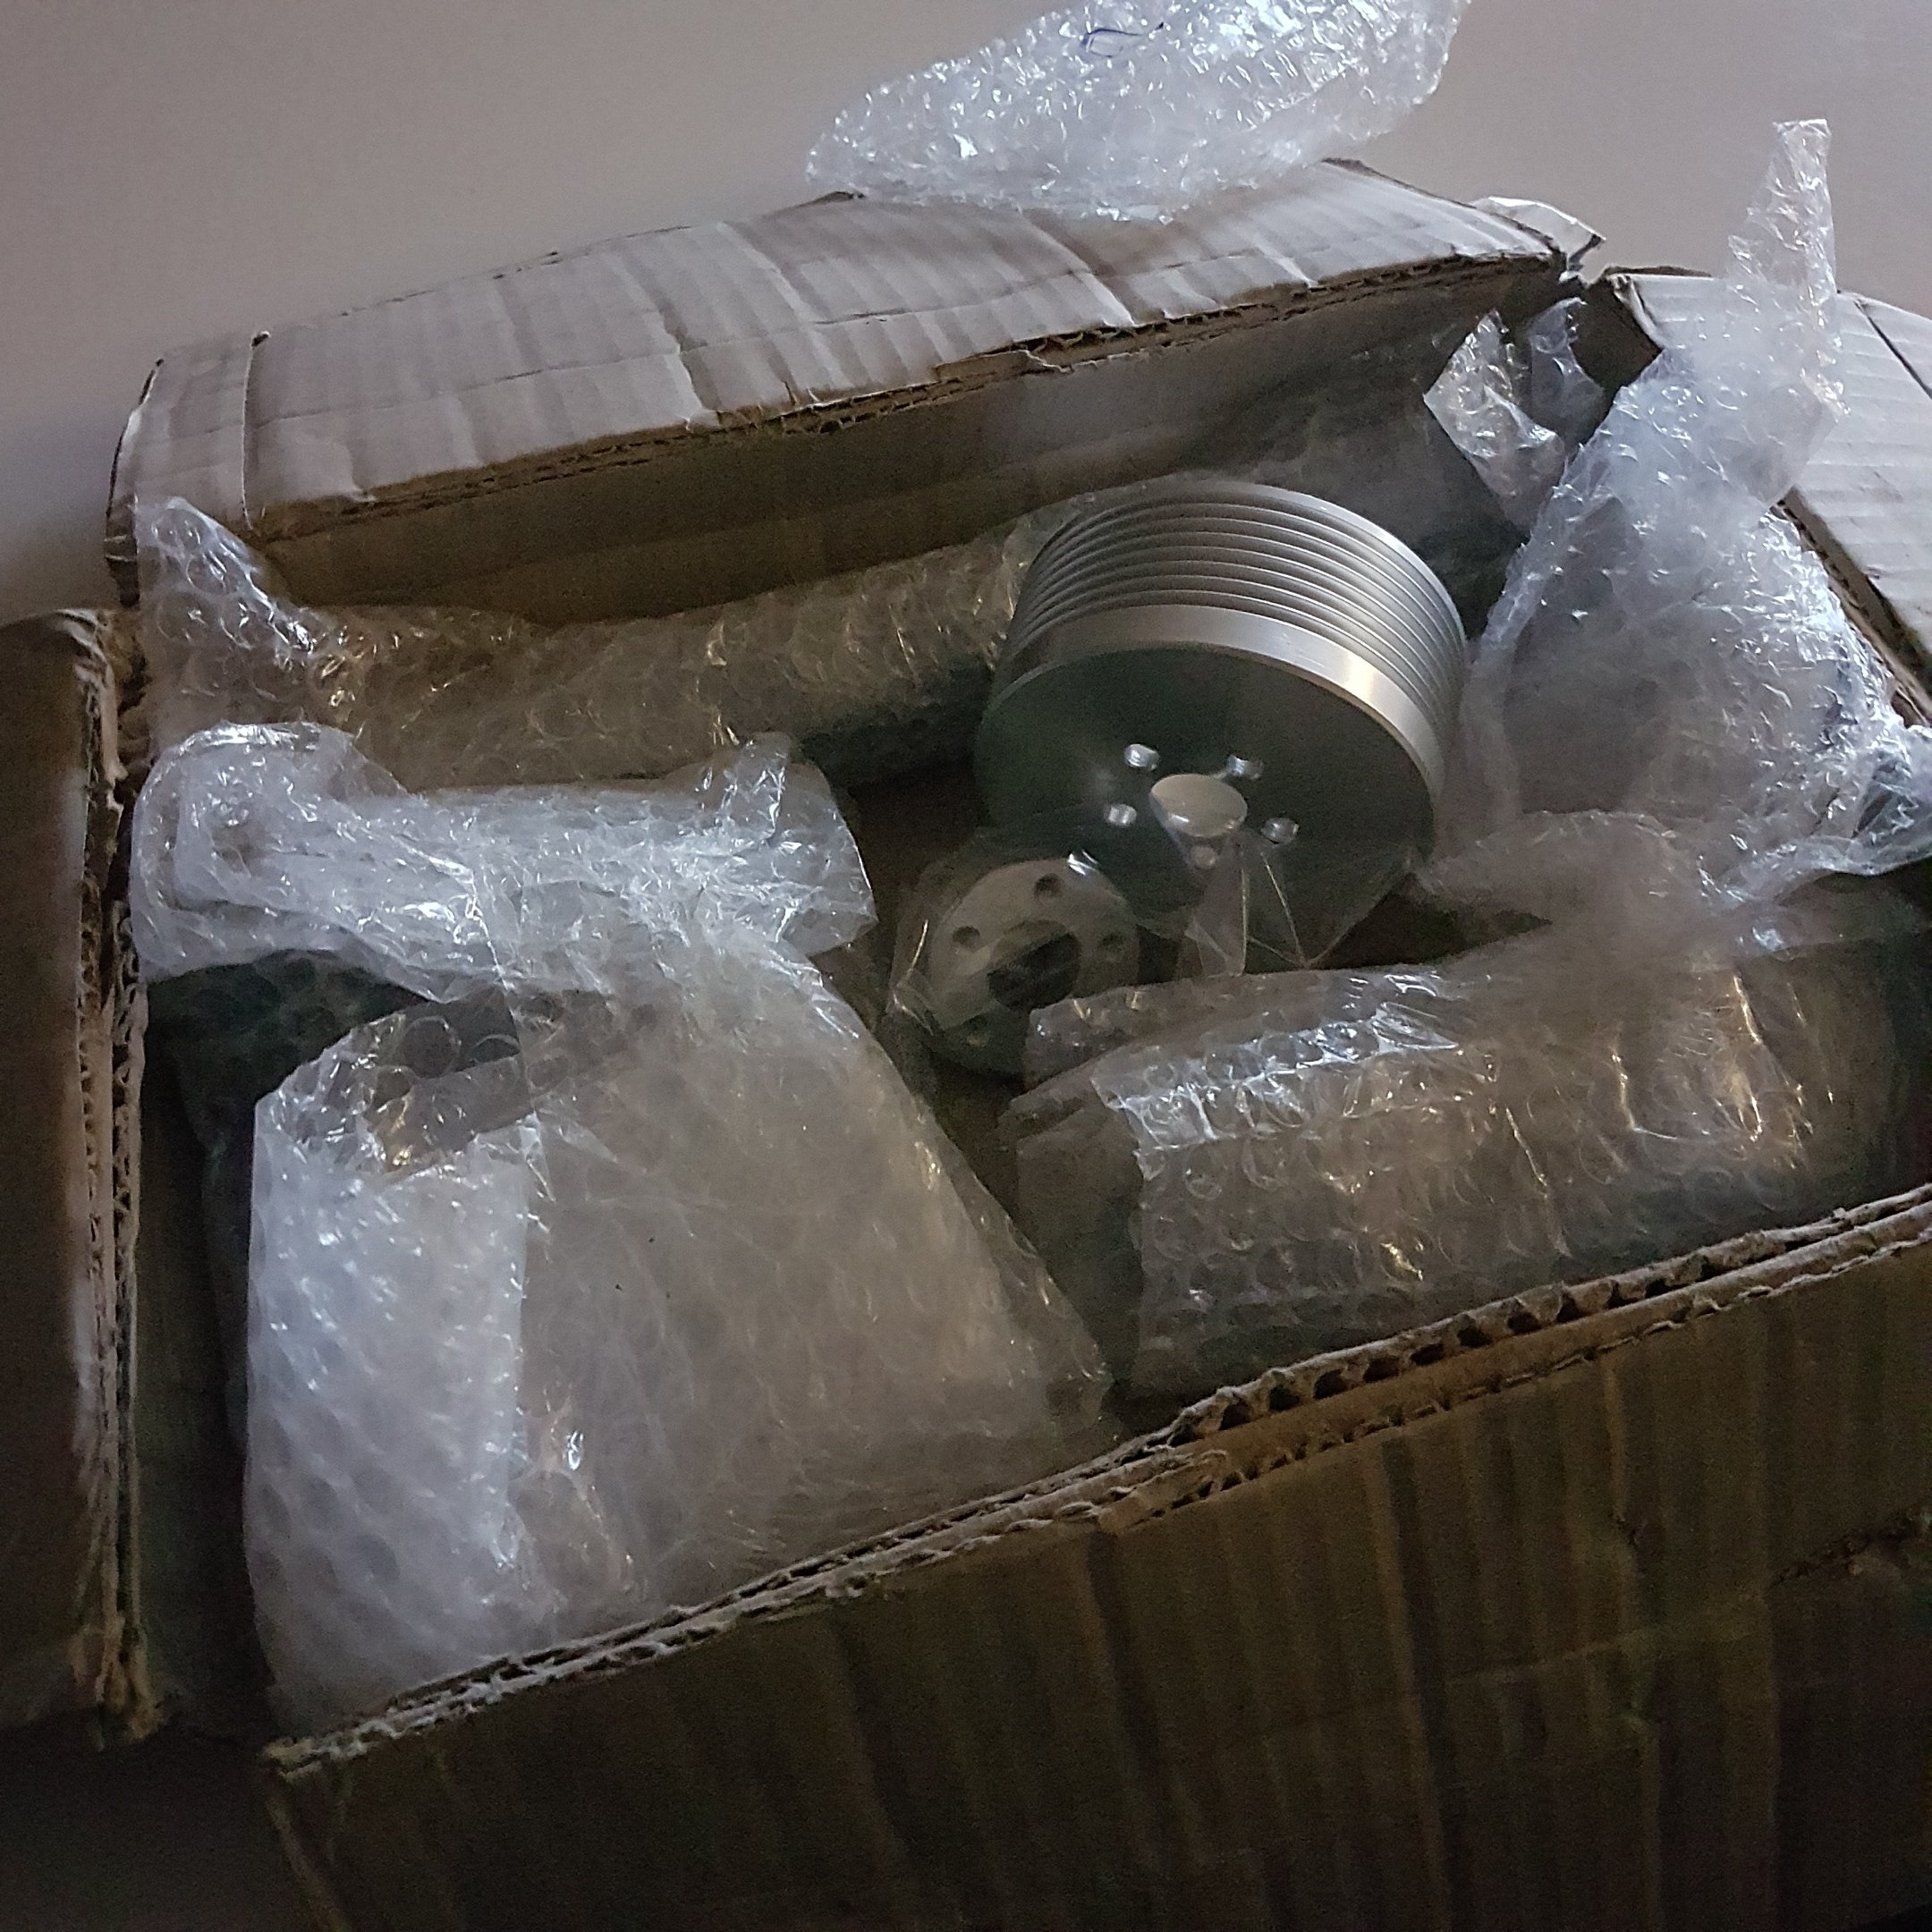
have hopefully fixed the worn out gas sender problem.I have no idea how much gas I have, but the old gauge don't work anyway, I can just look down the filler neck and at least I can full'er up now.And then as Sunday drew to a end...dells seem to fit. oh man those manifolds are right bastards! hooked up the throttle wire.made brumbrum noises.just need to finish wiring and install electric fuel pump, K&Ns should be here at the end of the month.So questions,1; I have a Red and a Blue wire coming from my 009 distributor, is one positive and one negative on the coil?2; loom has two large red wires in the engine bay, one goes to the Alternator?, and one goes to the starter?, and then I think one goes from the alt to the starter? my loom had no instructions, and because I've gone with alt from genny, this has changed a few things??Also how the hell do you keep the fusebox in place? I bought that little clip but I'm buggered if I can make that work!trying to avoid using a washer and wood screw like it use to have.7 points
-
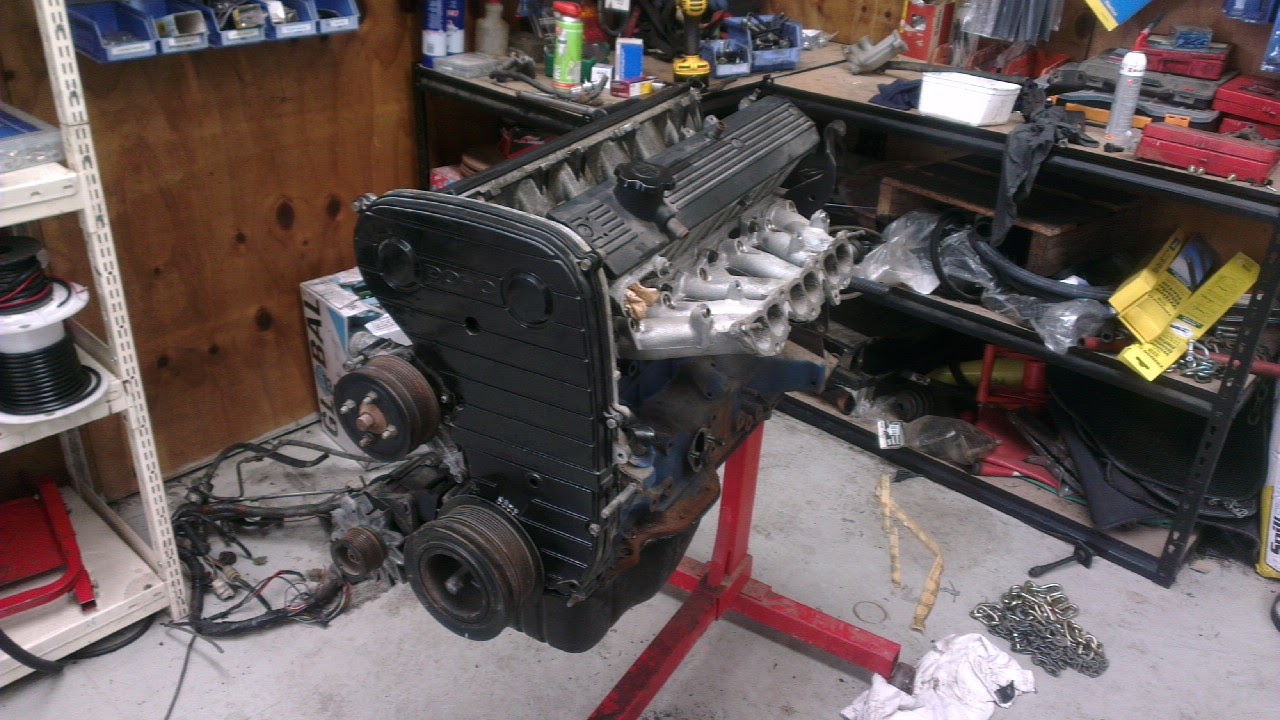
Been busy over the last few months A12 out and A14 in! Ended up building a fresh A14 9.8:1 Compression (pistons flycut) Cam with 2500rpm-6500rpm range 9.4kg Flywheel (2kg lighter than standard) Firmer Kelford valve springs Ported and polished head & manifold to my ability Twin 40mm dellortos & extractors New alloy radiator on its way, also have to install the e15 electronic dizzy at some point down the track. Here is a quick video of a small test start with single carb when I first installed the engine... Pics following Pistons flycut for clearance H89 head, water jackets tapped and grub screw inserted. Also drilled a small hole to locate a roll pin from the dellorto manifold to keep it alinged Discussion7 points
-
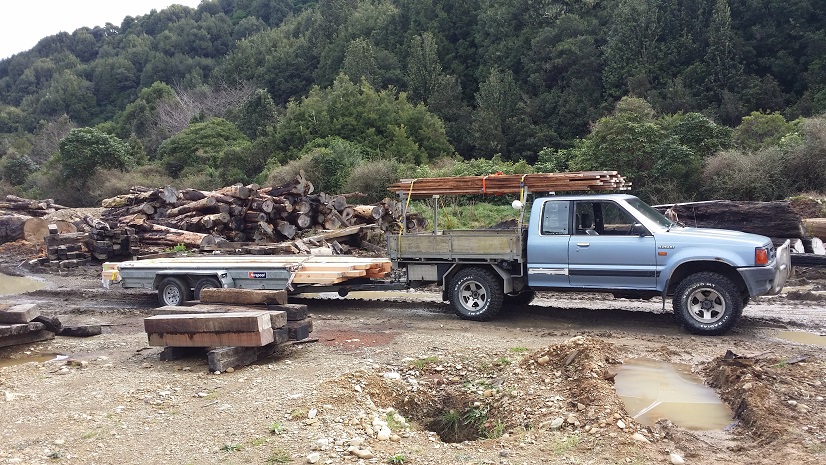
I've been collecting timber from a sawmill 'up north'. Is my ute OS? I reckon it are. It's also bloody awesome. It has self canceling indicators and power steering, but everything else you need to do yourself. The objects in the mirror are precisely their own size and I need to get out of the cab to engage the free-wheeling hubs. I love that ute. Sadly the generator died last weekend (as did a number of other things). It's a real challenge trying to keep tools dry enough to use up there, but after forking out a significant portion of the cabin budget on a replacement generator I managed to finish another frame today. I've gotten a bit better at calculating tangents... but of course there are mistakes aplenty. Sorry about blurry photo. It was almost dark
 6 points
 -
lemon party golden shower squirt munro, geyser wilhelm, donald pump, gush gush, gone fistin', dirty hose, pump in the trunk5 points
-
Top coat on, terrible phone pics but you can get the idea... Sat the engine in And all the bits have come back from the platers. Thanks to Phill at Electroless Coating Systems Next up is getting the front wheel sorted, Seat covered and the cream insert painted onto the tank. Then the fun part, bolting it all back together!!5 points
-
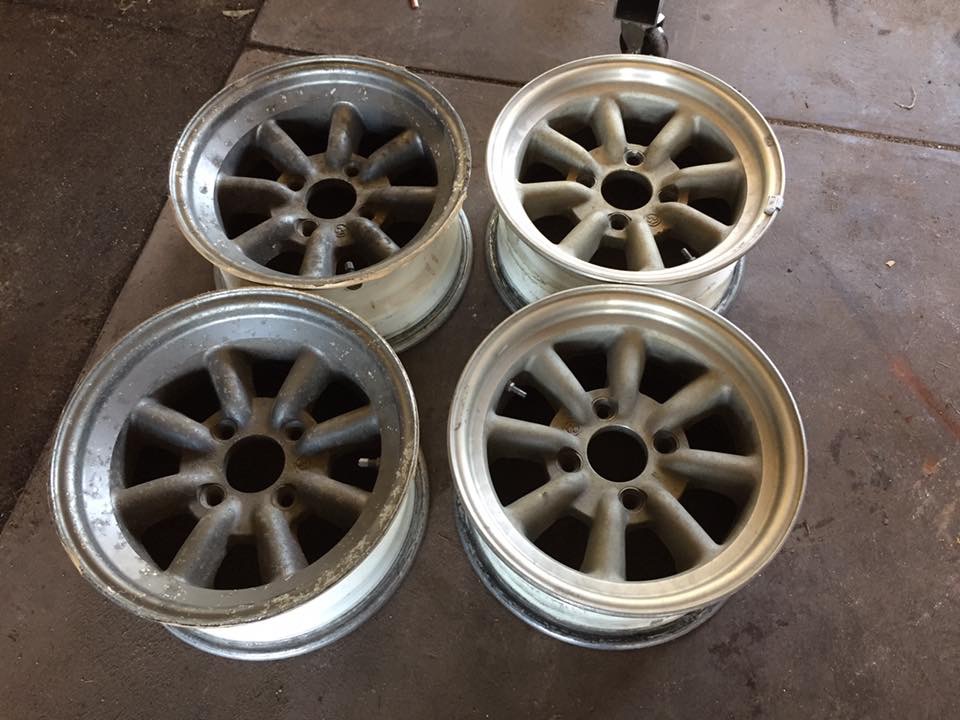
Who even are you. 5x200 is the only way of life. We got a set of these for the buss
4 points
-
Fitted rear quarter jobby tested wet sanding to clean up some of the orange peel. Wet sanded 2000 grit on the fibreglass and it came out nice without too much effort, but unfortunately sanded a bit too much in one spot so will need to spray that bit again. I haven't done the whole fibreglass quarter, only above the wheel and the upper rear bit to test, but it looks like this: Then I moved onto the roof and this turned out really nice! But again one small bit will need to be sprayed again... I guess that's all part of learning how to do stuff though. Trial and error. Shiny roof!
4 points
-
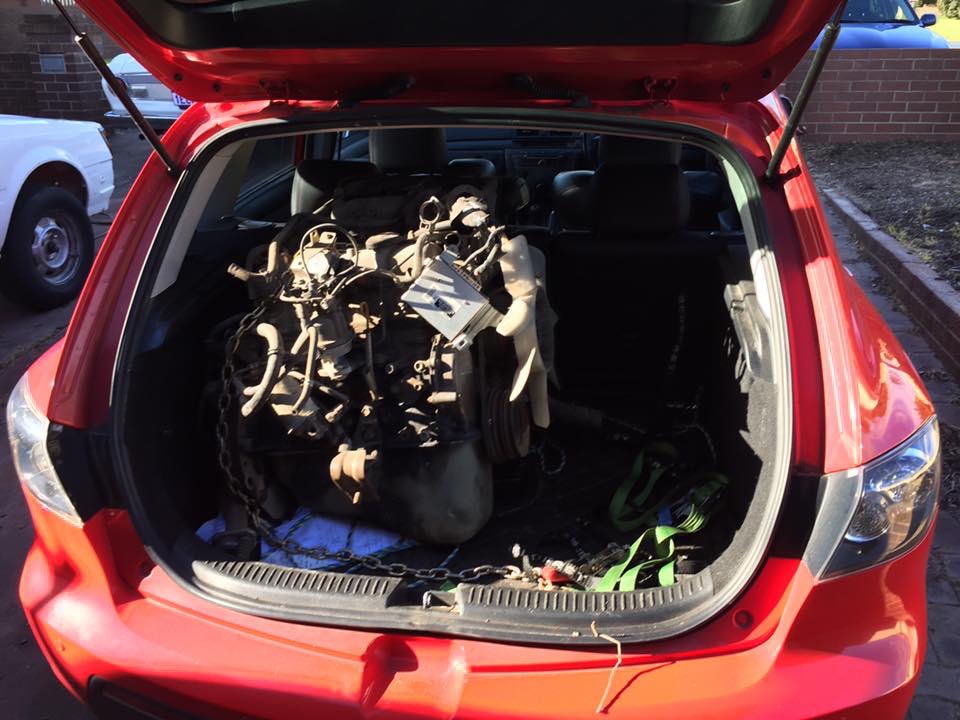
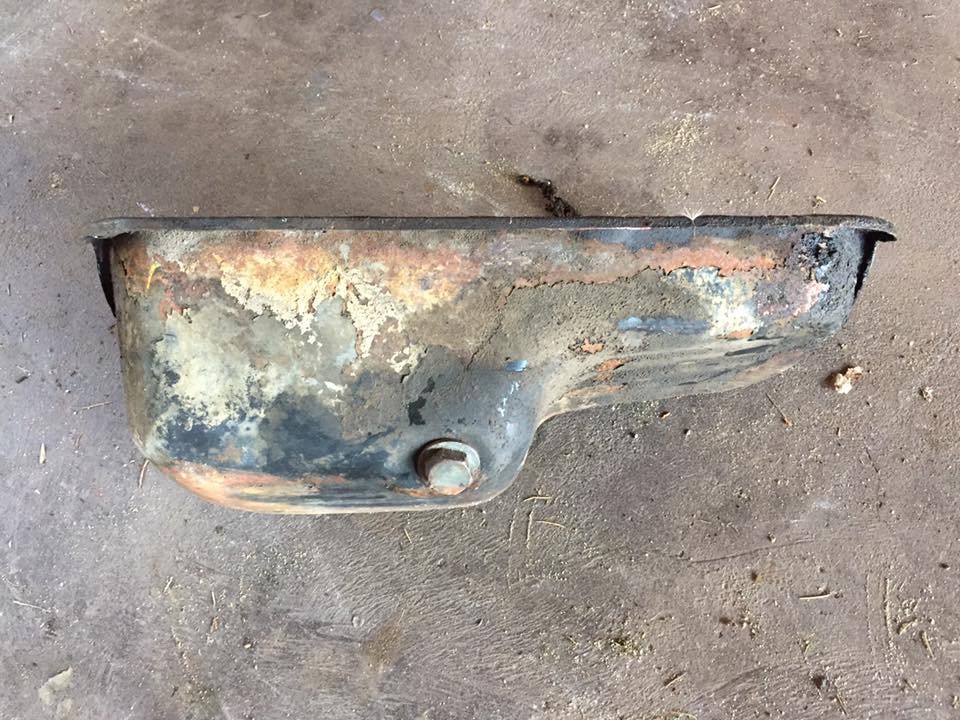
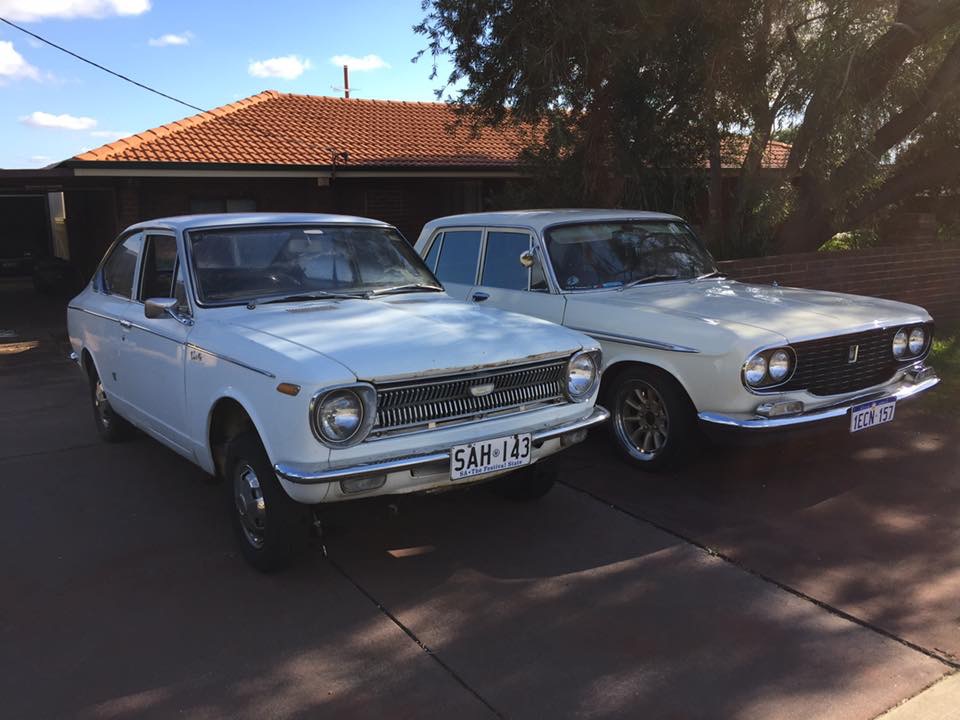
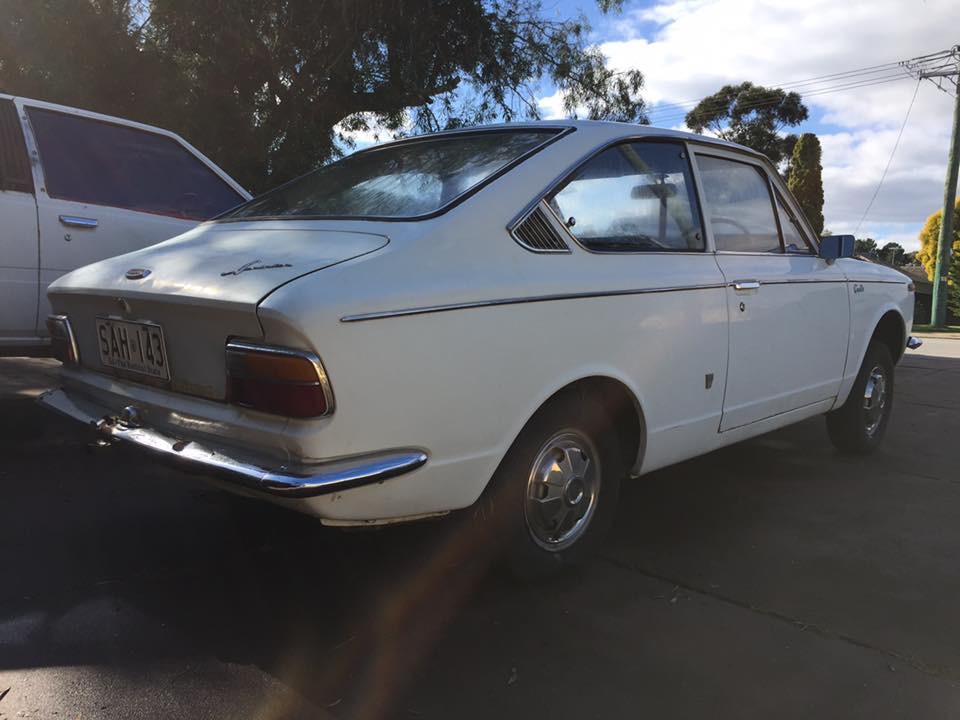
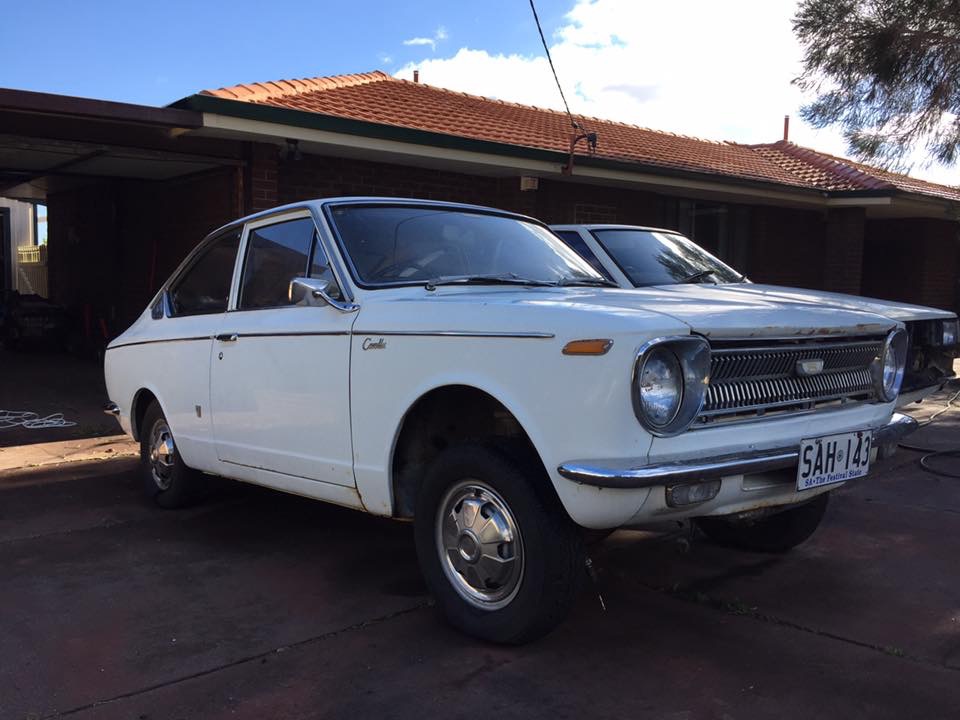
Pushed this out of the garage today to give it a wash and see what I'm actually dealing with, tried polishing the boot to get rid of the surface rust, it's better but still needs more work and I pushed it all the way up the driveway purely for a pic with the crown, GF was very unimpressed when I told her the actual reason I made her help. It's TINY compared to the crown also picked up the rest of the stuff that comes with it, except I've missed the struts I just realised. 7K-E and G52 box fit nicely in the back of the daily And I got the wheels, 14x7 and 14x6.5 watanabes, minor positive offsets, I'm pretty stoked with these! Although they require a stud pattern change to 4x114.3 can anybody ID K sumps by eye? I need a 4K one, this came with, no idea if it's the right one cheers Matt
4 points
-
3 points
-
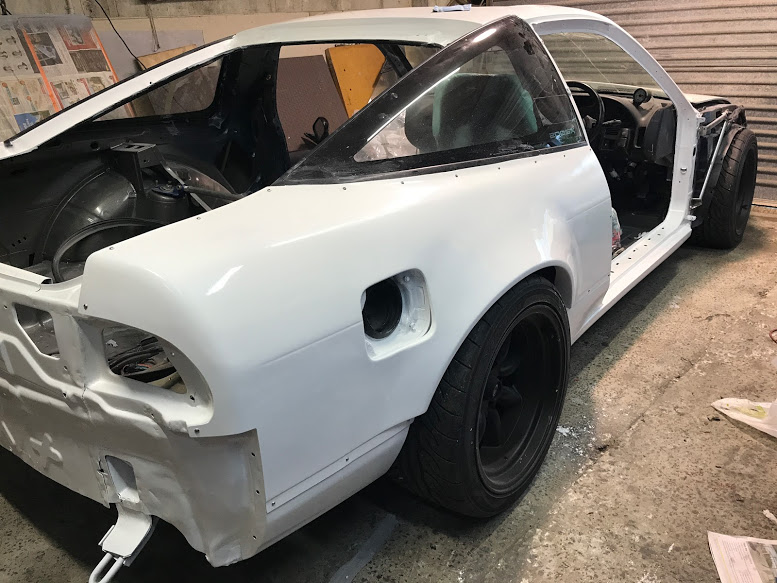
I had a closer look at the gauges of the skins that make up the rail and I found that the outer rail is 1mm, as is the panel I've made, but the inner skin is 2mm which I have none of to make a replacement. So I can't make any major structural additions today but I can work on making all the details on the outer skin right. I started by getting the sway bar mount in position. I measured the positions of the holes on the original and transferred them to the new panel. This is the mount mocked up in position. And here are the holes in position: I also went and added the "crumple zone" relief cutouts using a step drill, slitting disk, and flap wheel on the grinder. They came out looking really nice methinks. I then went ahead and put in the holes for the crush tubes in the bumper mount brace panel, as well as brand new M8 riv-nuts for the actuall bumper mounts. I measured it all and it should be in the right place but I'll soon find out. Next job was to turn up some crush tubes for the sway bar mounts. I found some round stock and started it in the lathe. The factory tubes are 45mm x 11mm ID x 15mm OD. If that was good enough for Uncle Henry then it's good enough for me. I got the whole length down to 15mm OD first Then cut off four sections slightly overlength Then got them faced to length and drilled one before I got kicked off the lathe. (this is just left on the drill bit to take the photo, it was clamped in properly while I drilled it out) I'll finish the other tubes off tomorrow. That's all for today. I'll try to get some stuff up Tuesday or Wednesday when the car turns up.3 points
-
weather boards and the butinol done on the veranda. 2017-08-20_05-37-46 by sheepers, on Flickr 2017-08-20_05-37-37 by sheepers, on Flickr 2017-08-20_05-37-29 by sheepers, on Flickr wires and shit. 2017-08-20_05-37-20 by sheepers, on Flickr2017-08-20_05-37-29 by sheepers, on Flickr rondo for attaching the ceiling 2017-08-20_05-37-11 by sheepers, on Flickr steps for getting up to the roof storage 2017-08-20_05-37-01 by sheepers, on Flickr3 points
-
@Mrs 64valiant was super excited about this build she even joined oldschool.co.nz. No covering up my tracks now..... Gotta be careful what I say in here haha.3 points
-
Can you turn up to cert someones car on this please Clint. Then can you post an account of their reactions for my amusement?2 points
-
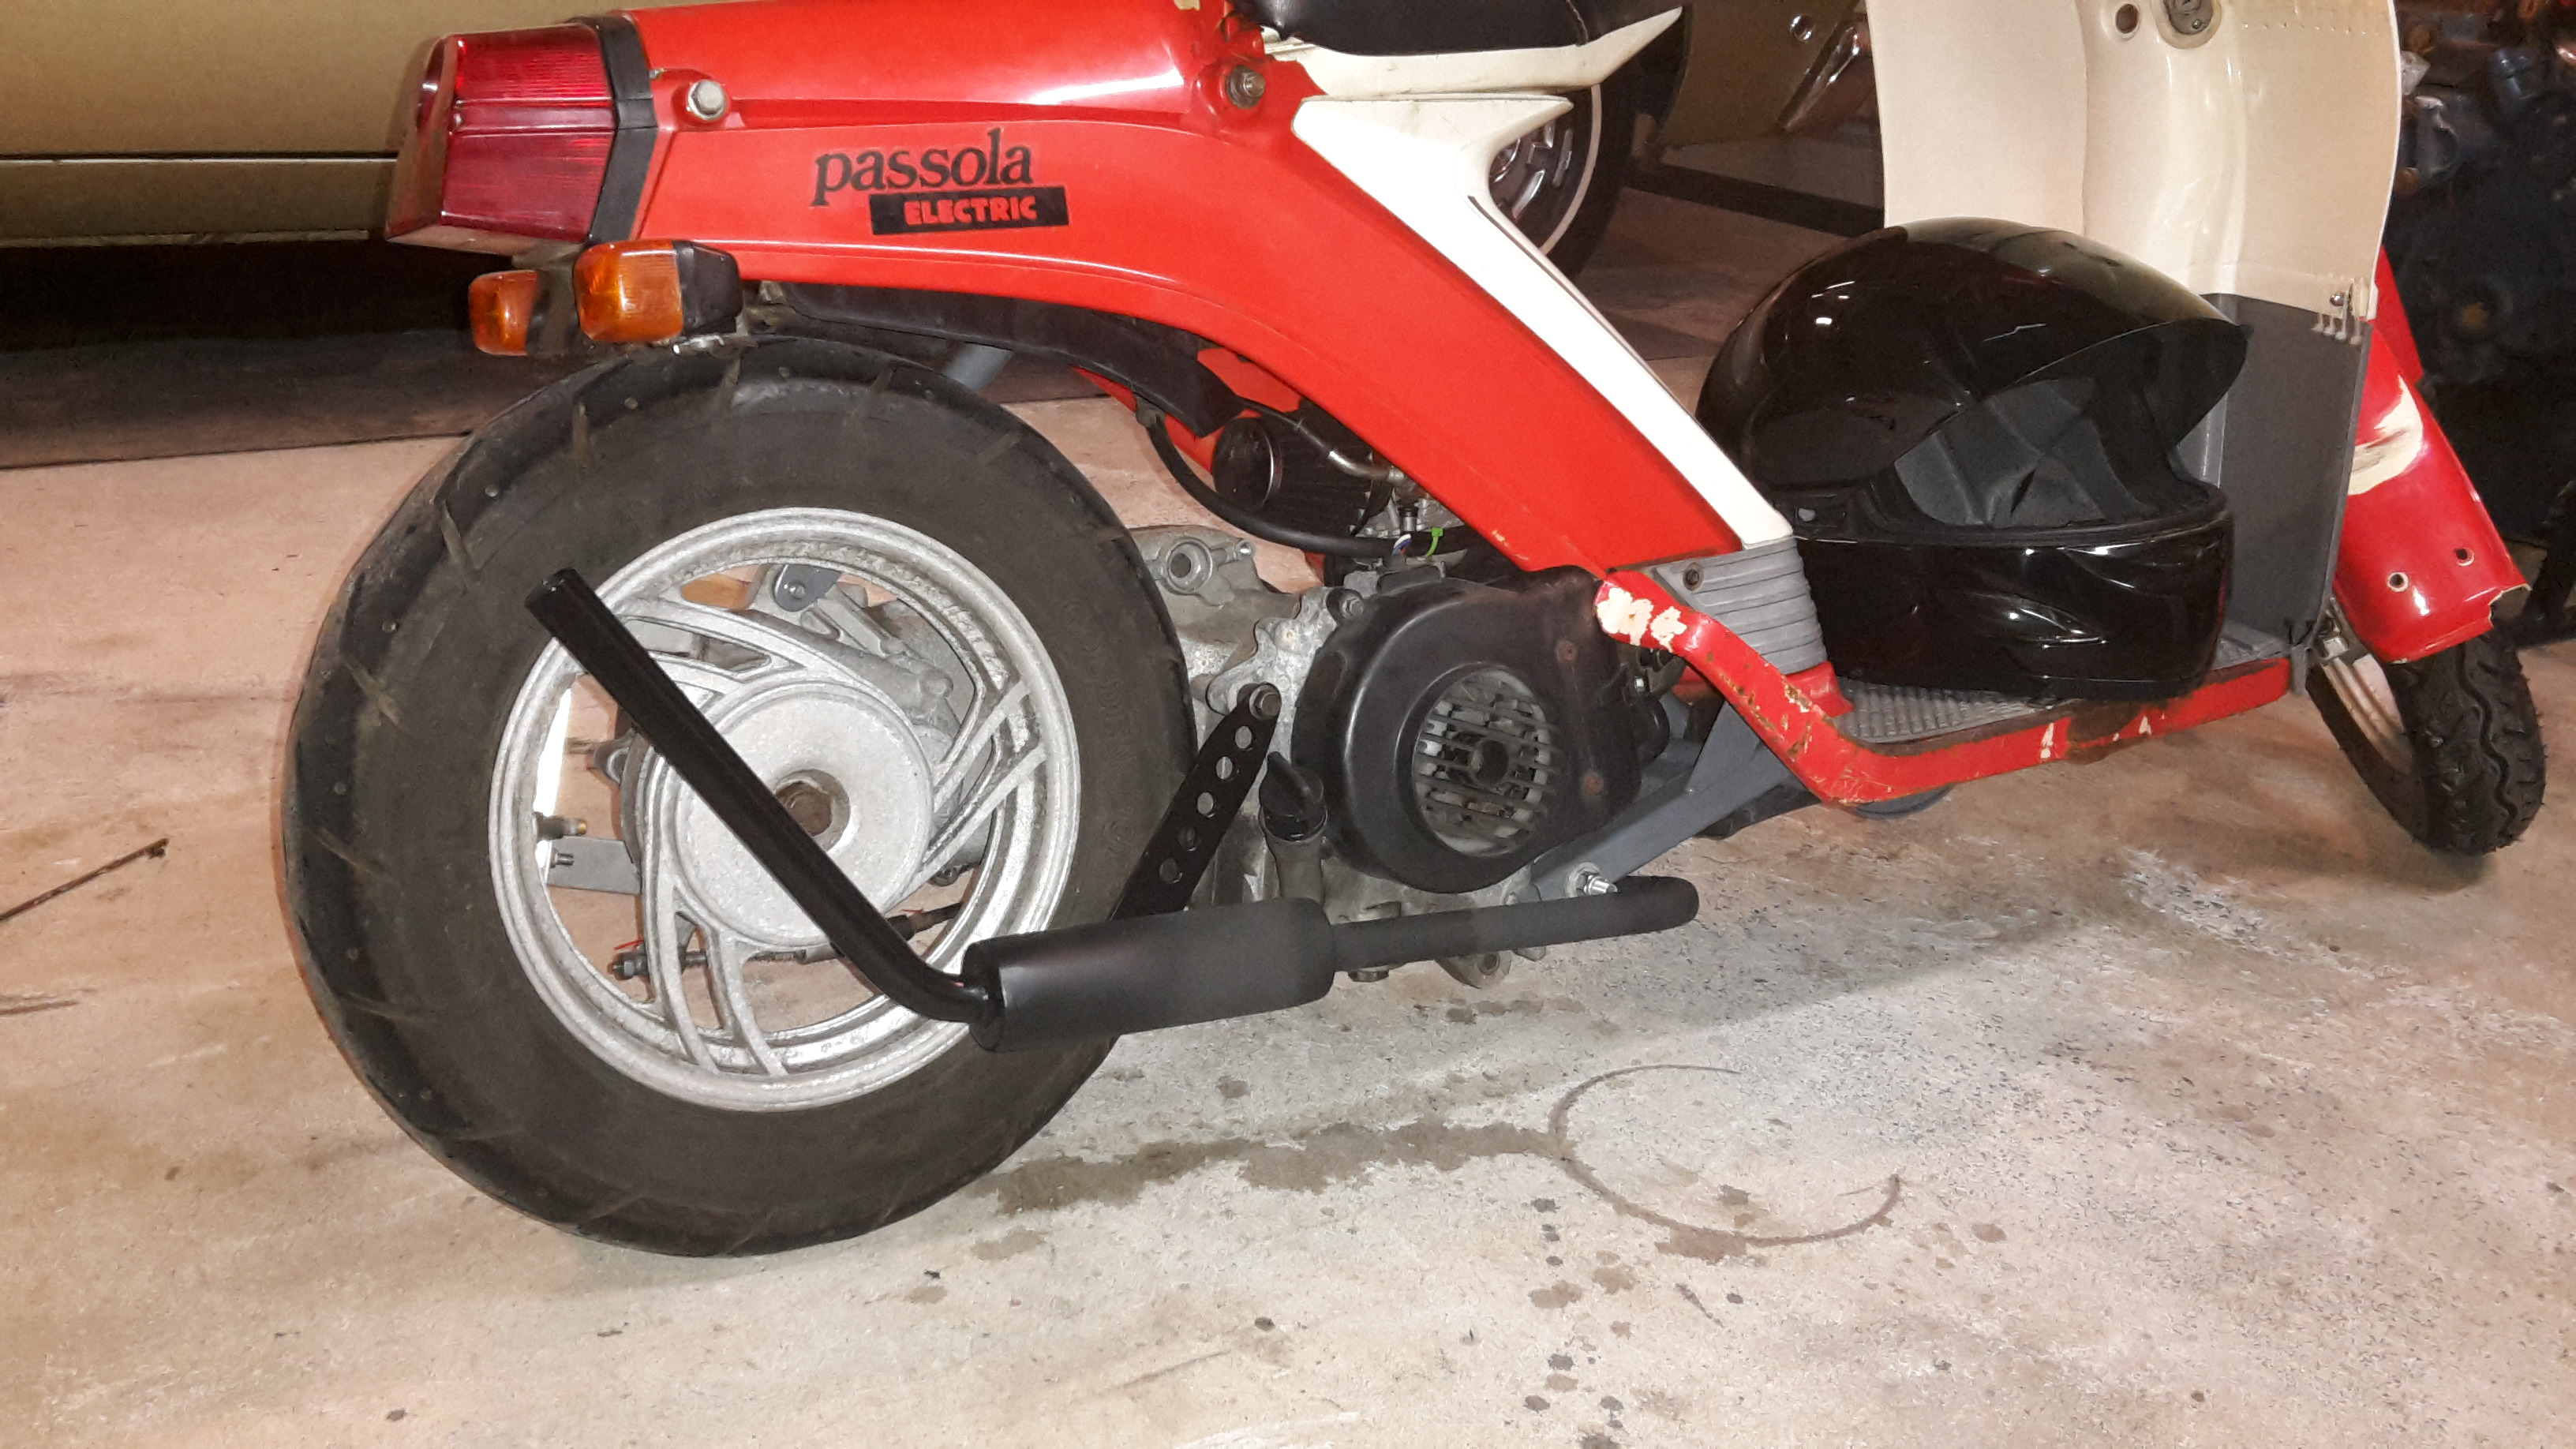
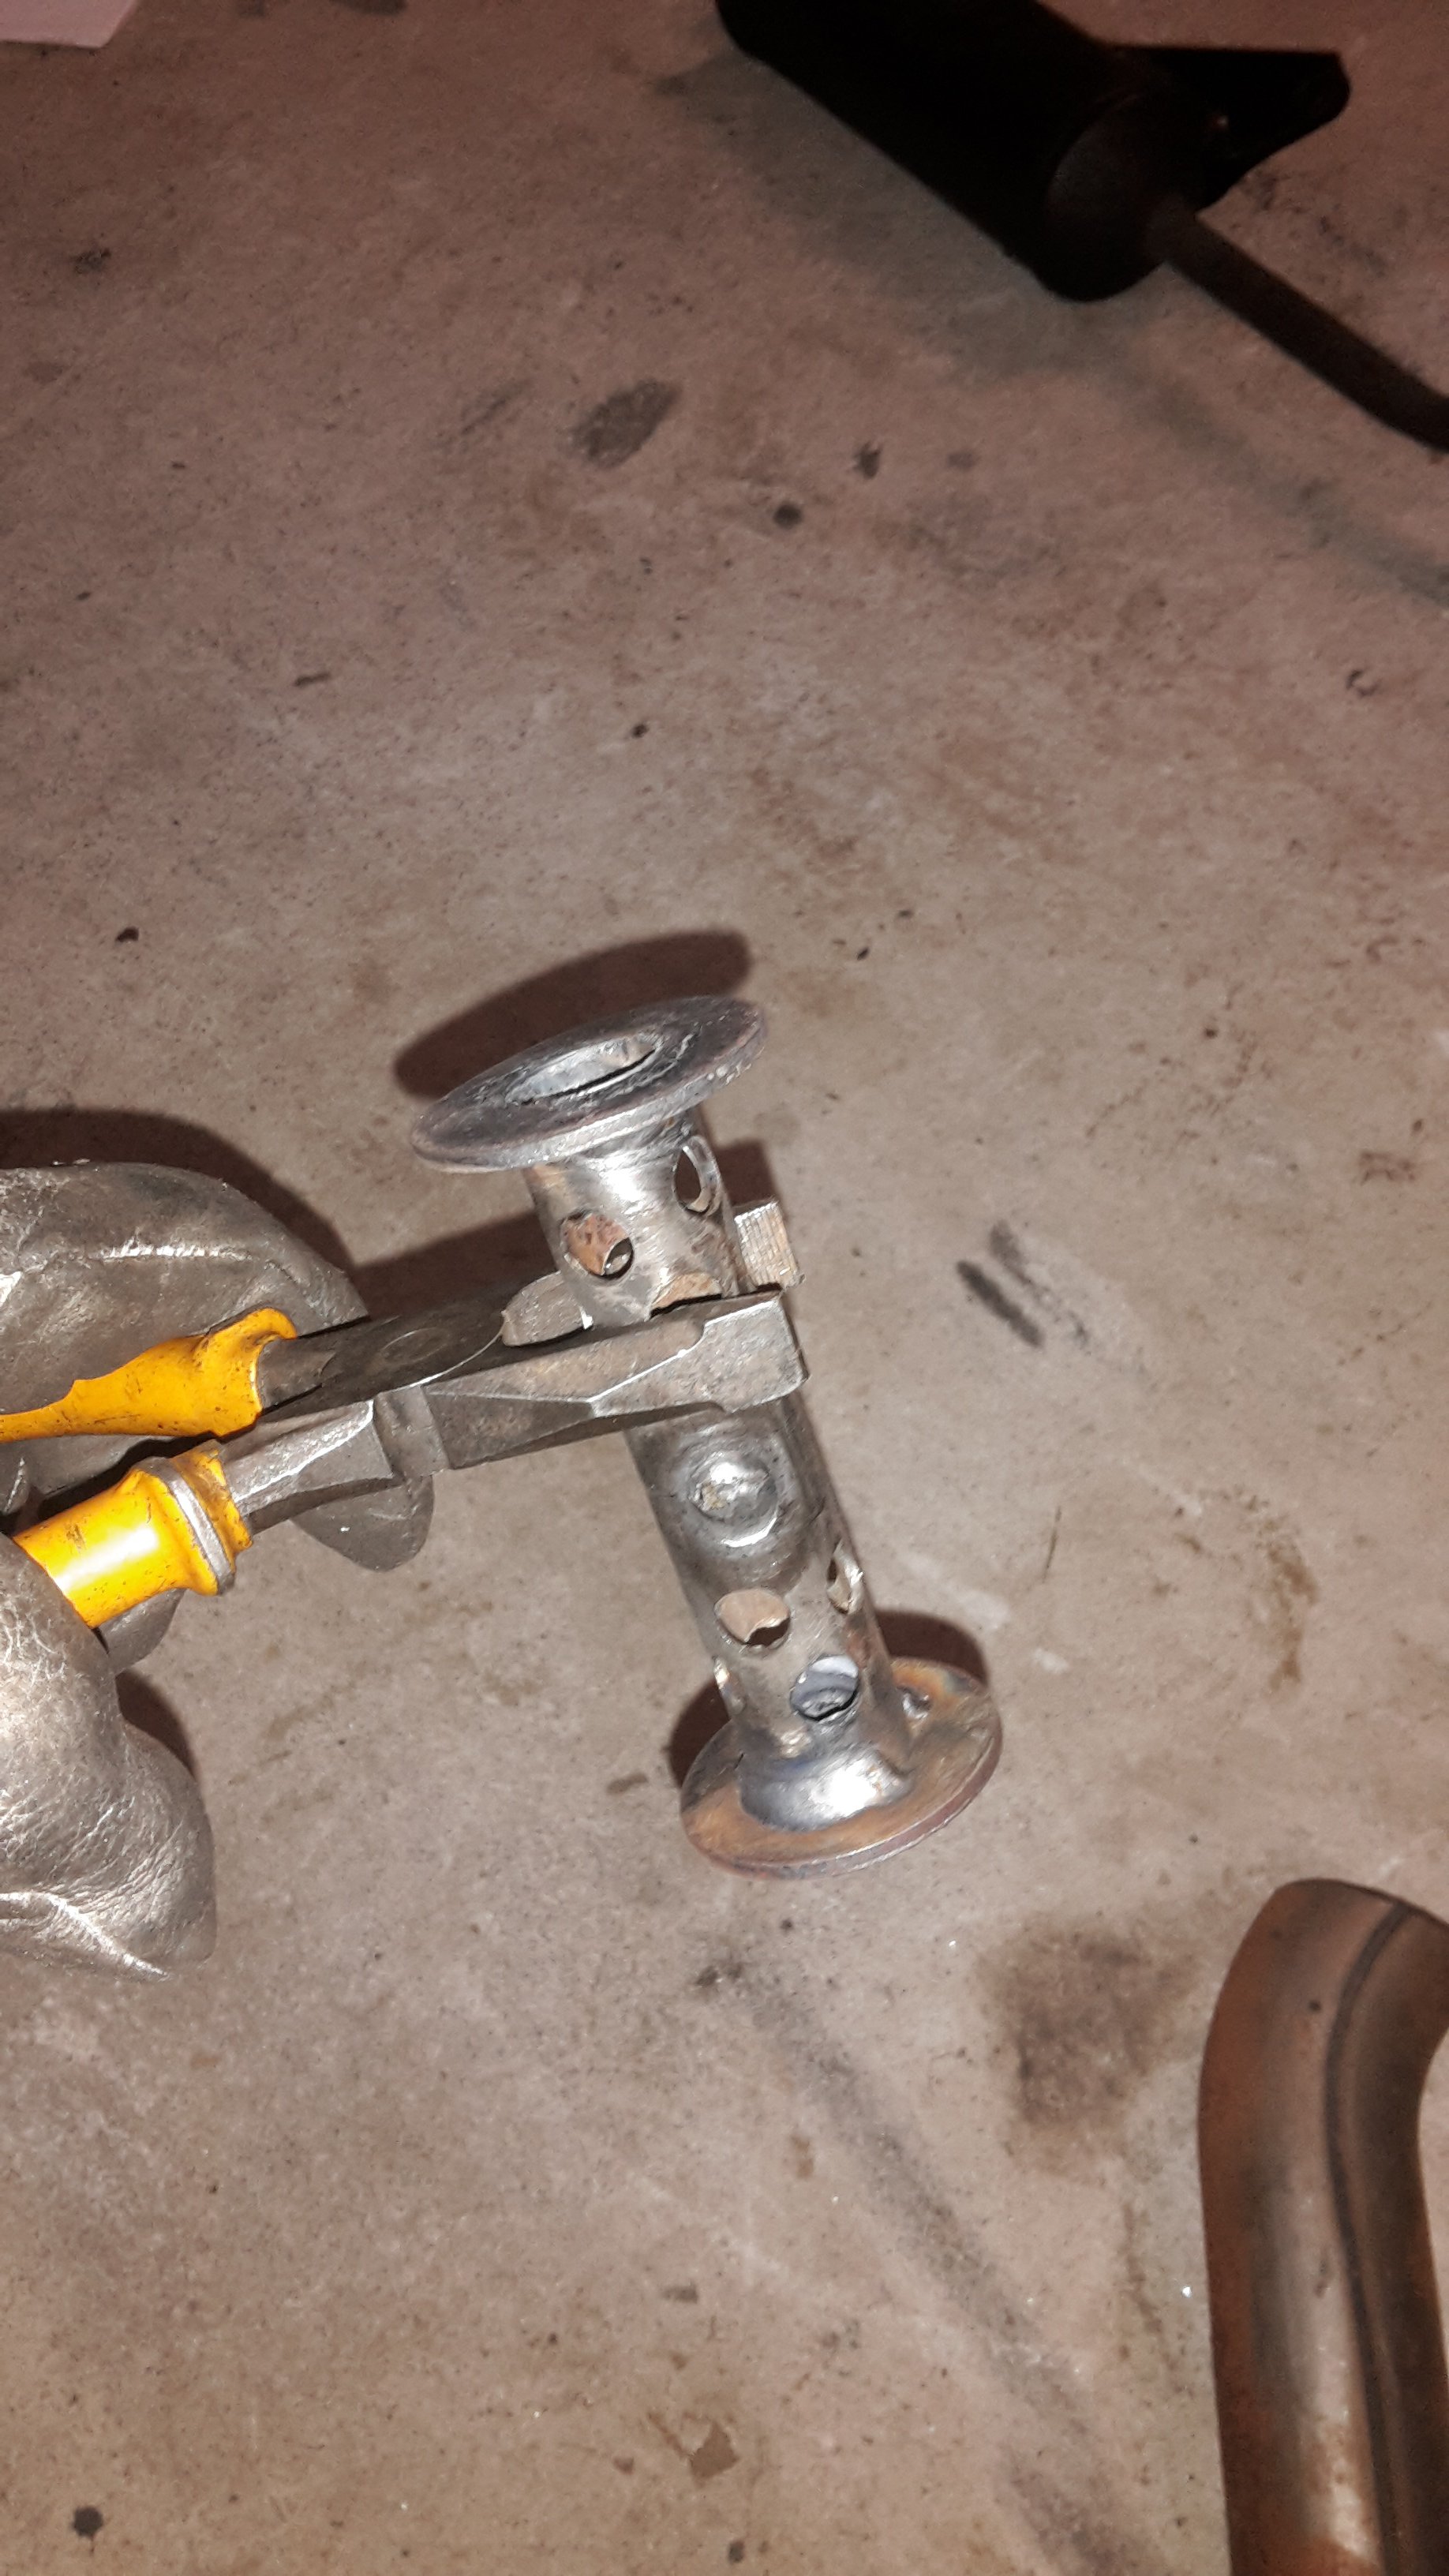
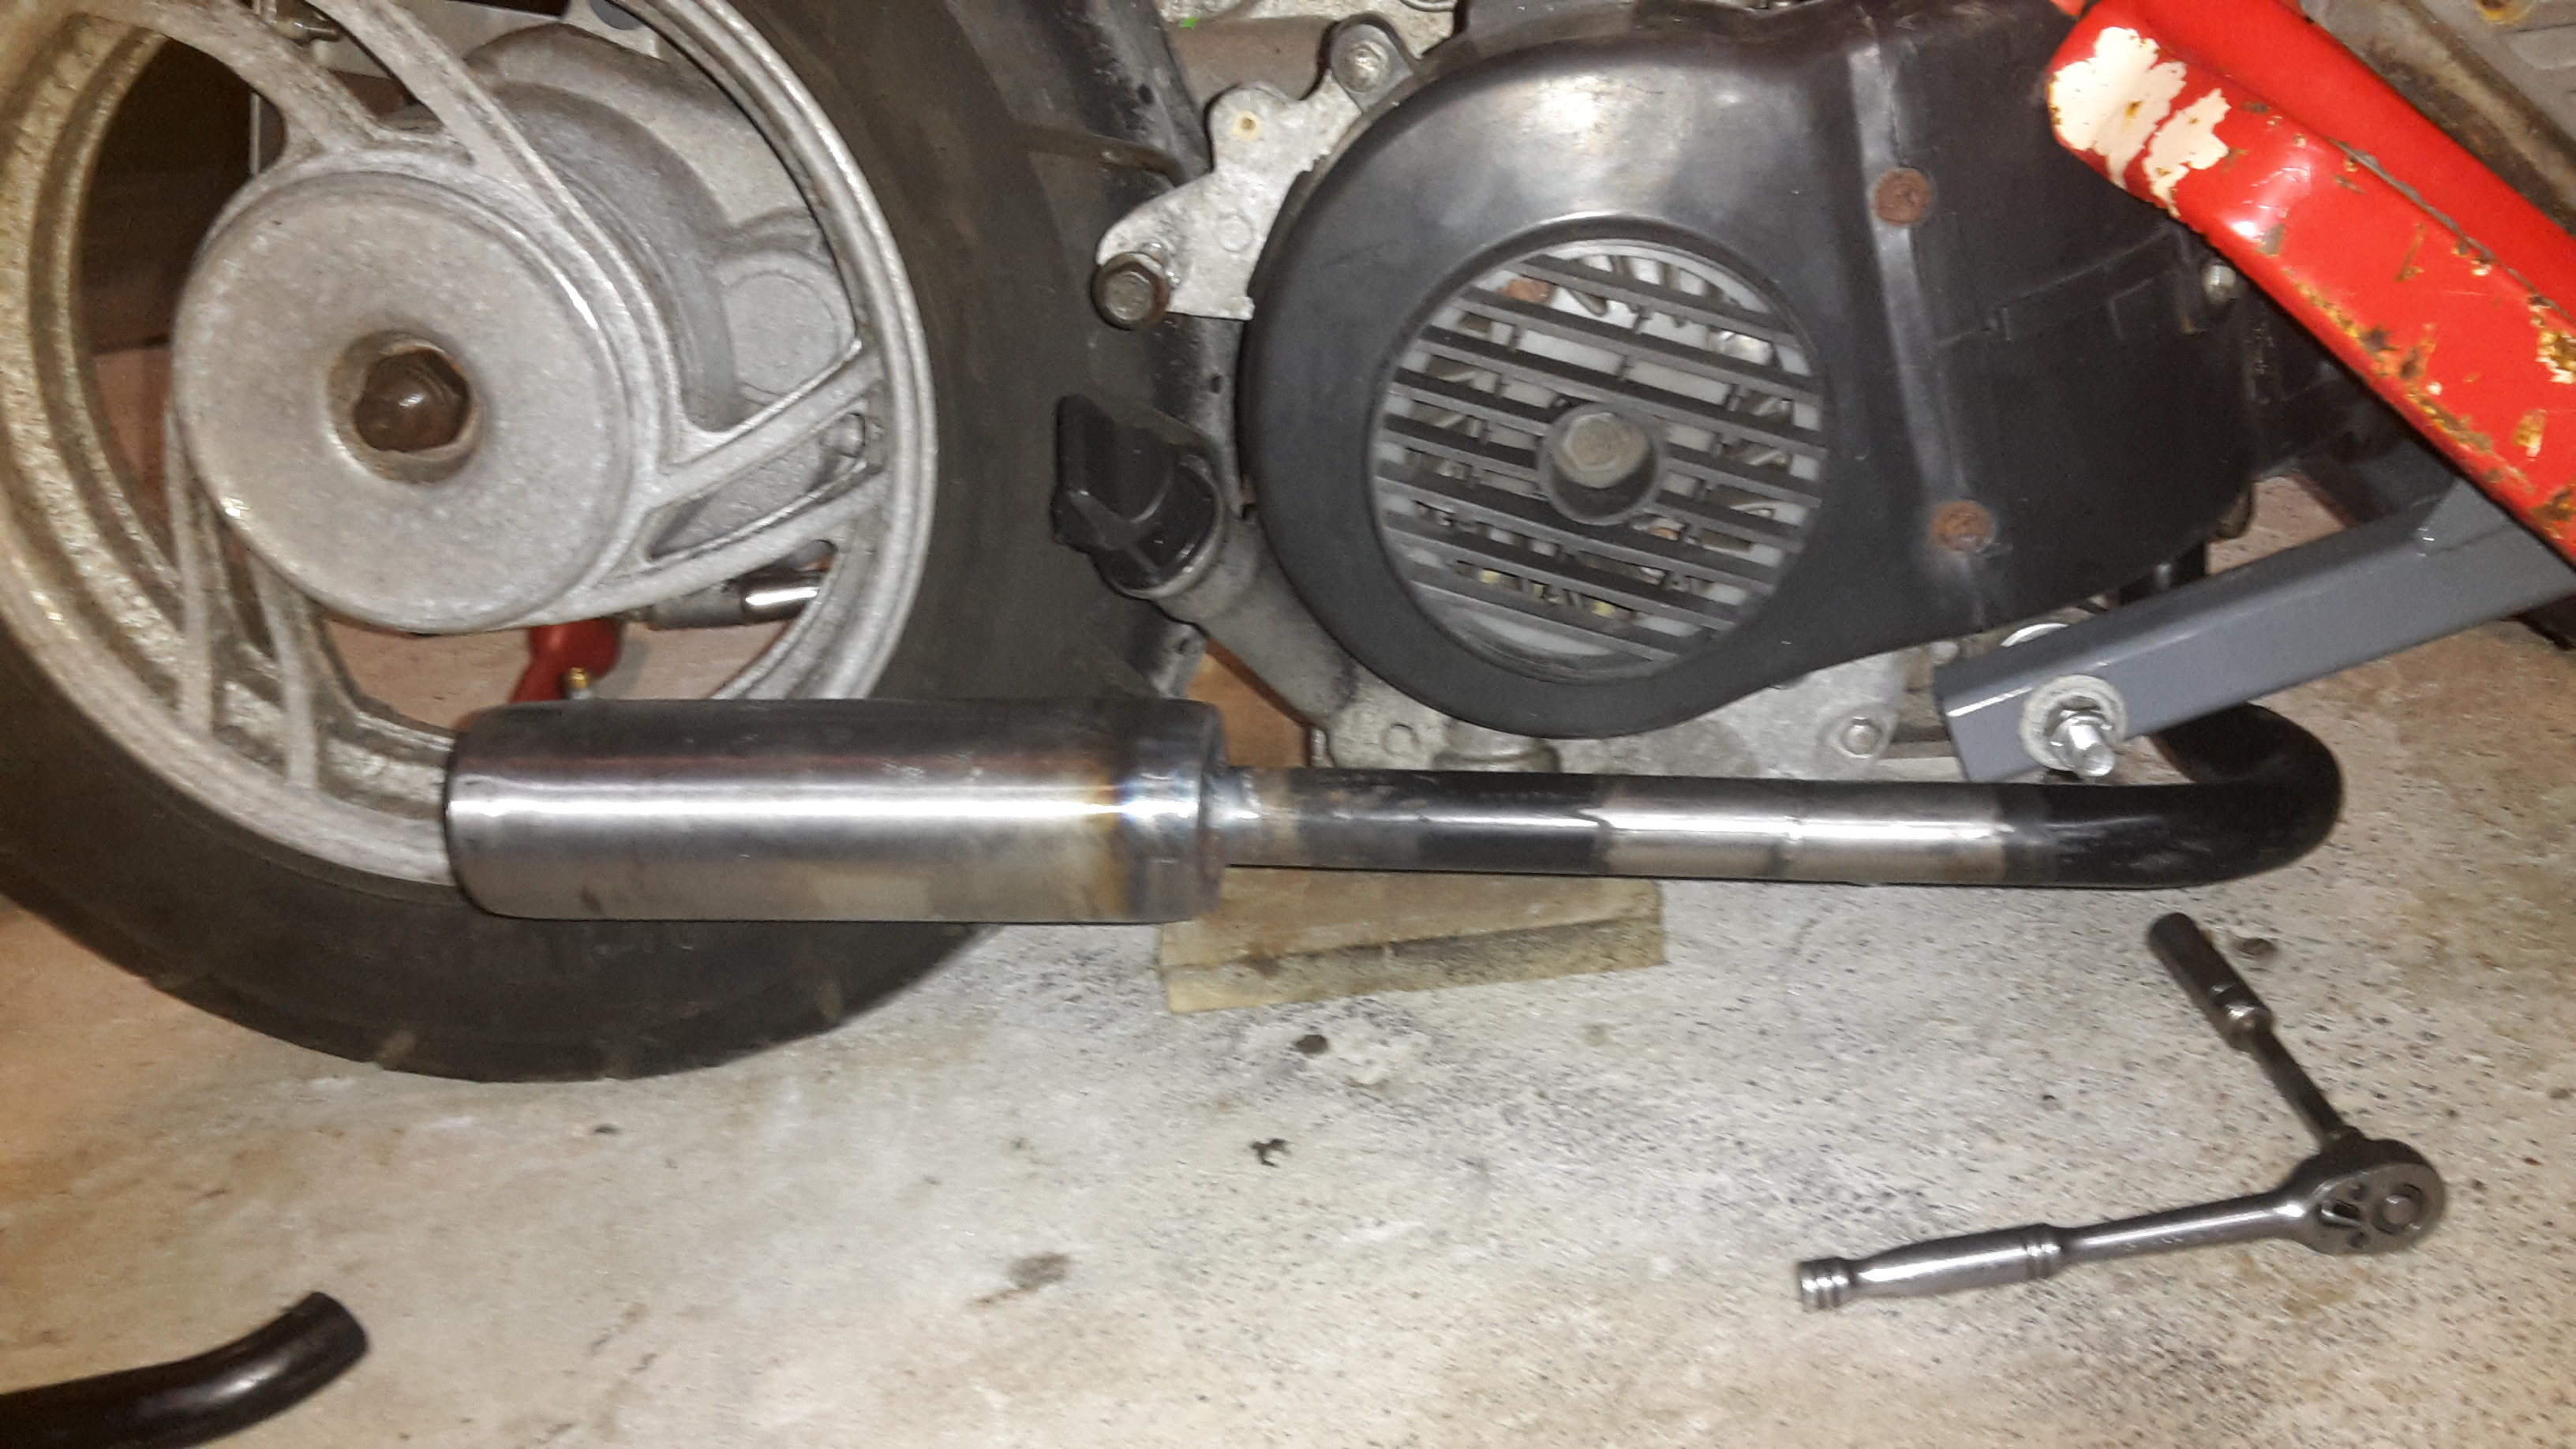
Needed more ground clearance, so made a new front pipe, too rowdy with no muffler at all so made one. Whole exhaust is made from an old lawnmower handle and a bit of 2" pipe and some big washers. Good chance to practice with tig welder, I haven't done much for ages It's probably still a bit louder than I'd like
2 points
-
Hot pink side stripes plz2 points
-
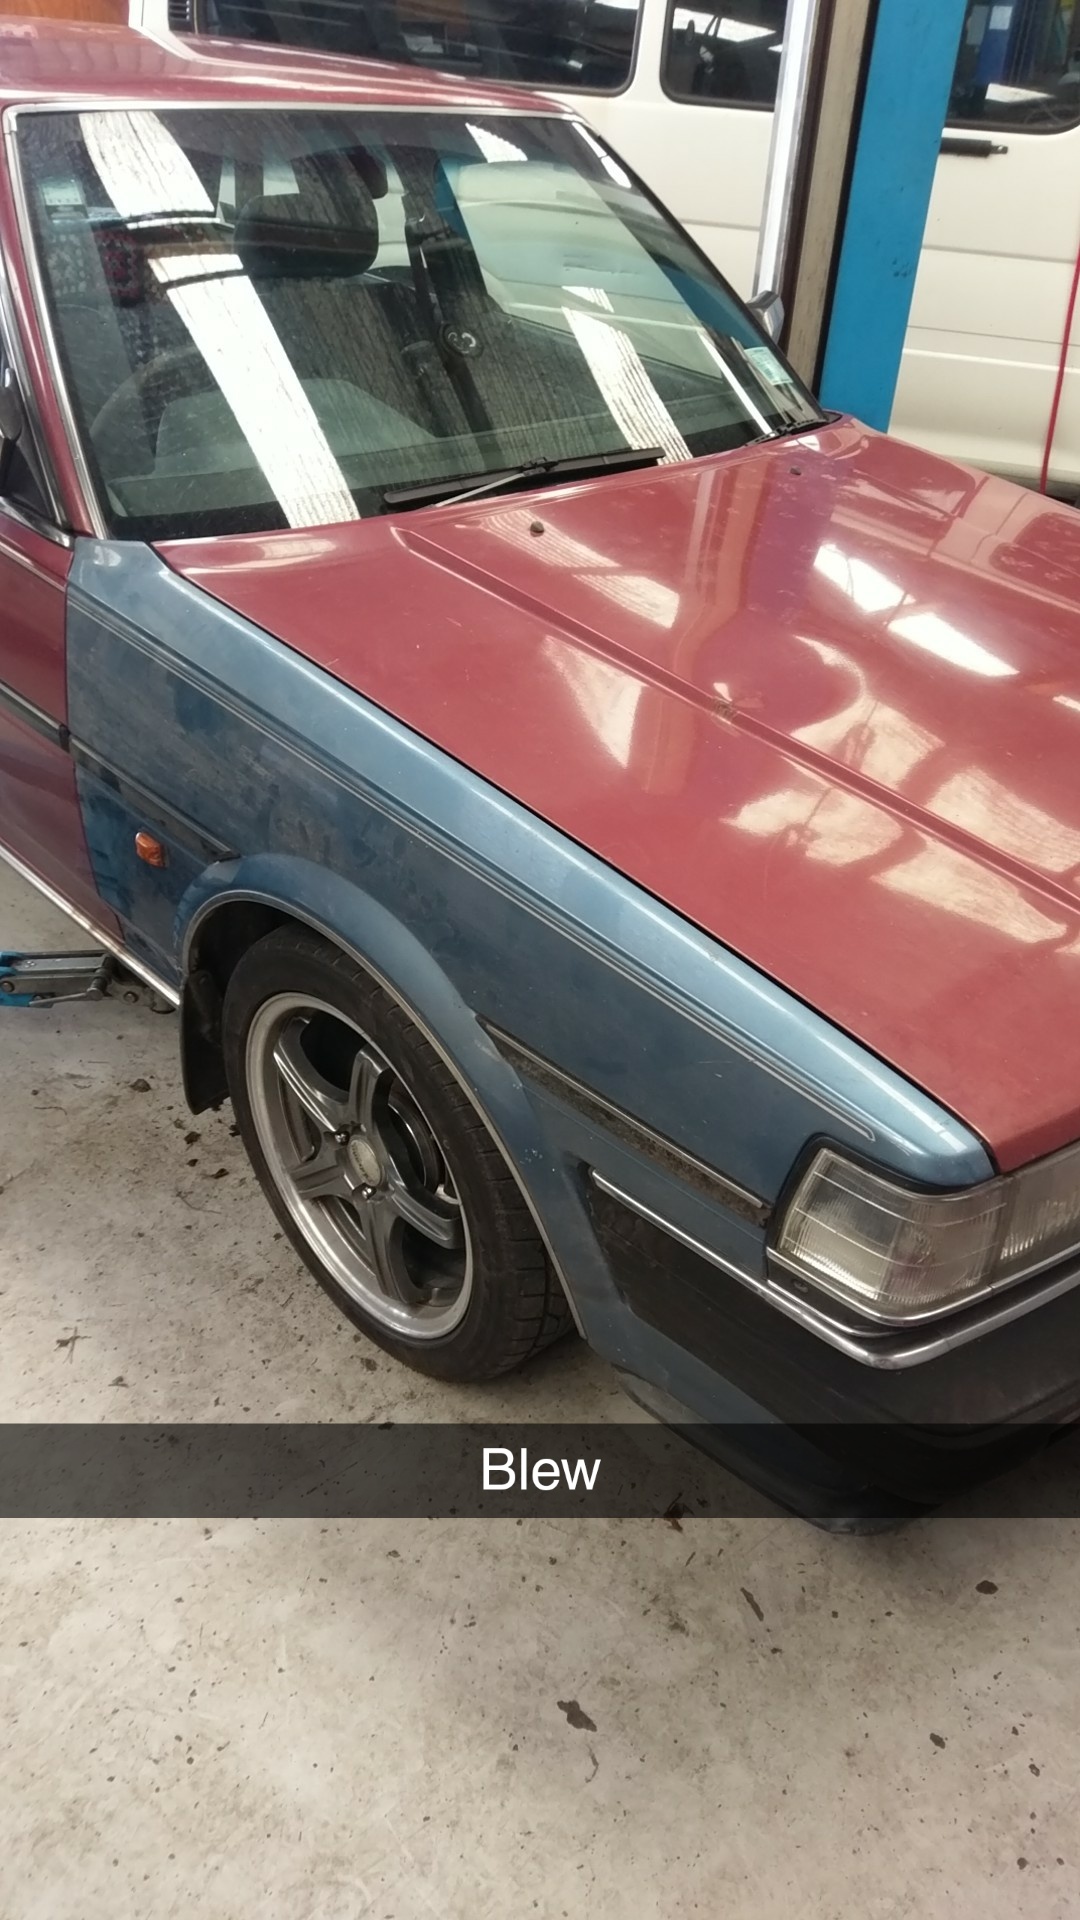
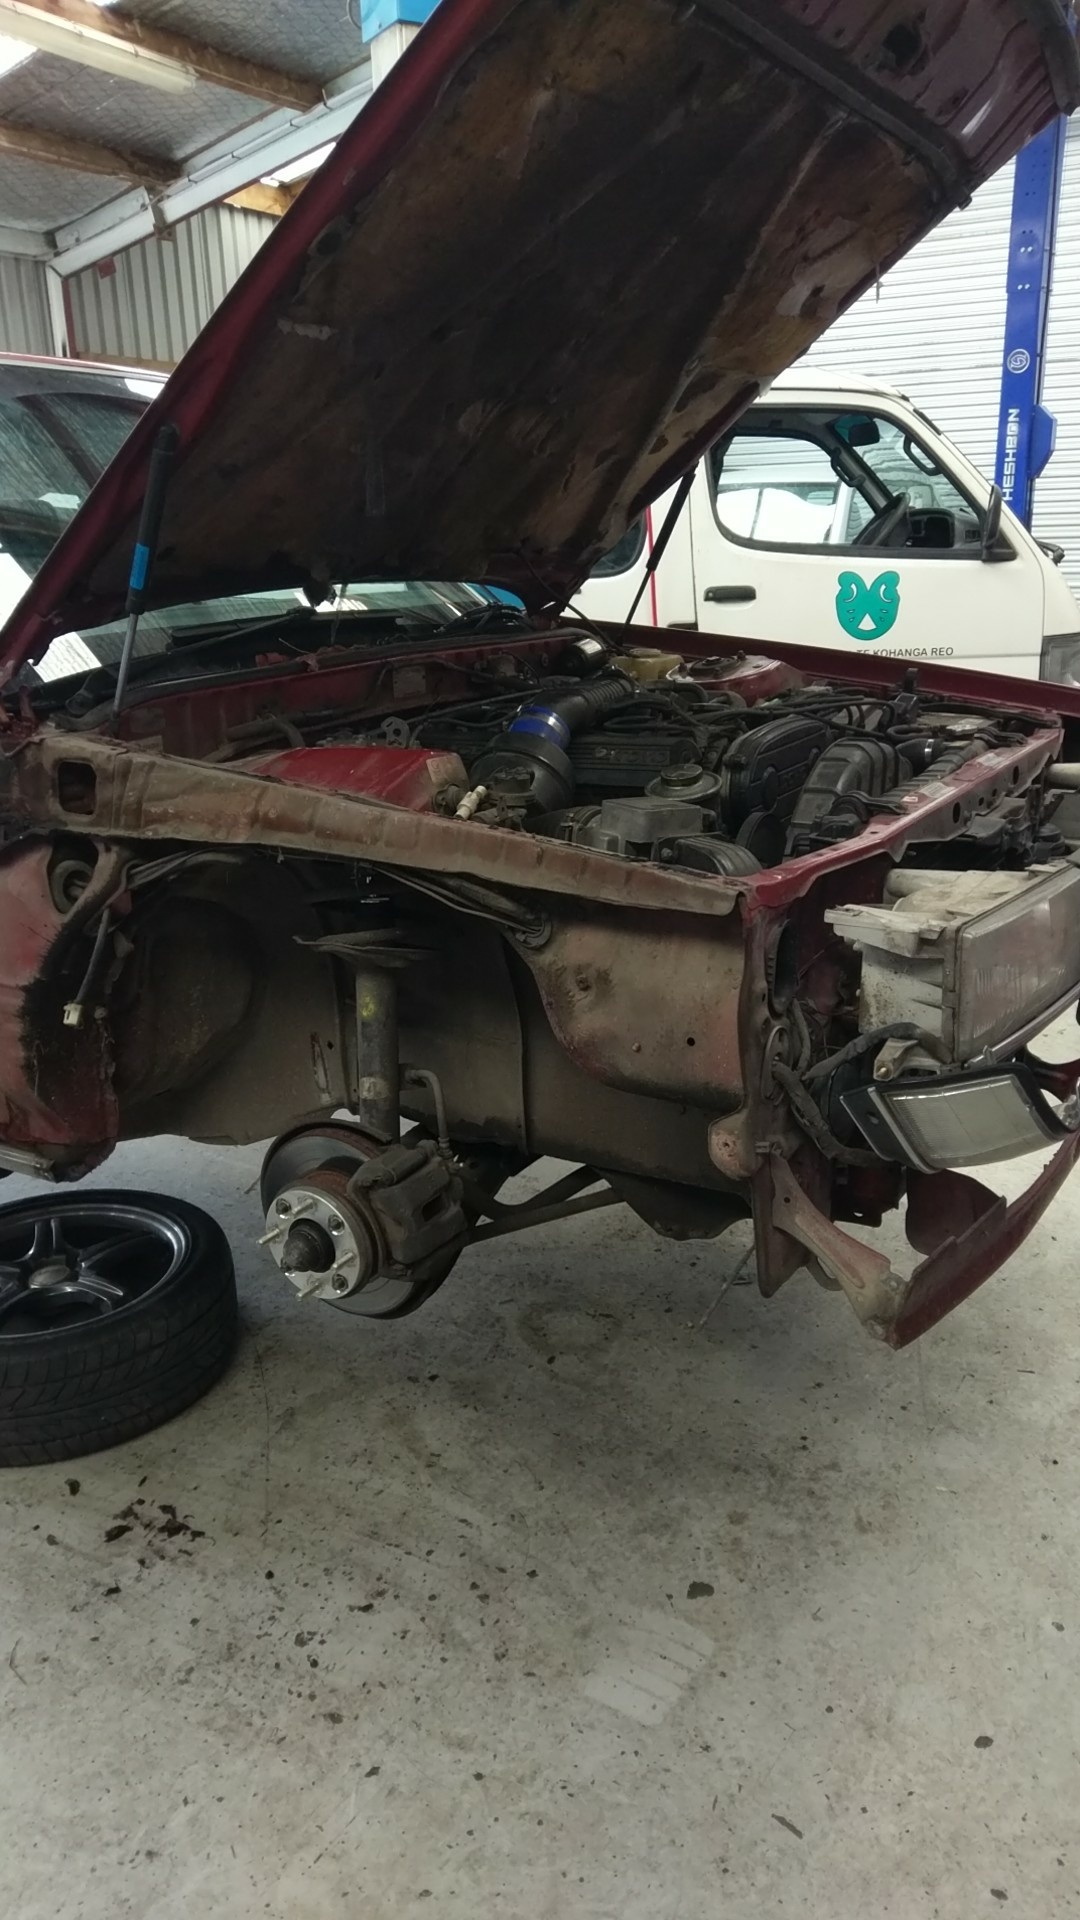
Let me remind you of my previous experiences with air cooled engines This is just an expensive cup holder now. Caved @Mrs 64valiant last night and brought some rims for the kombi. Will pick them up this weekend.
2 points
-
2 points
-
2 points
-
Yes...yes...hell yes!!!! Boom!!!2 points
-
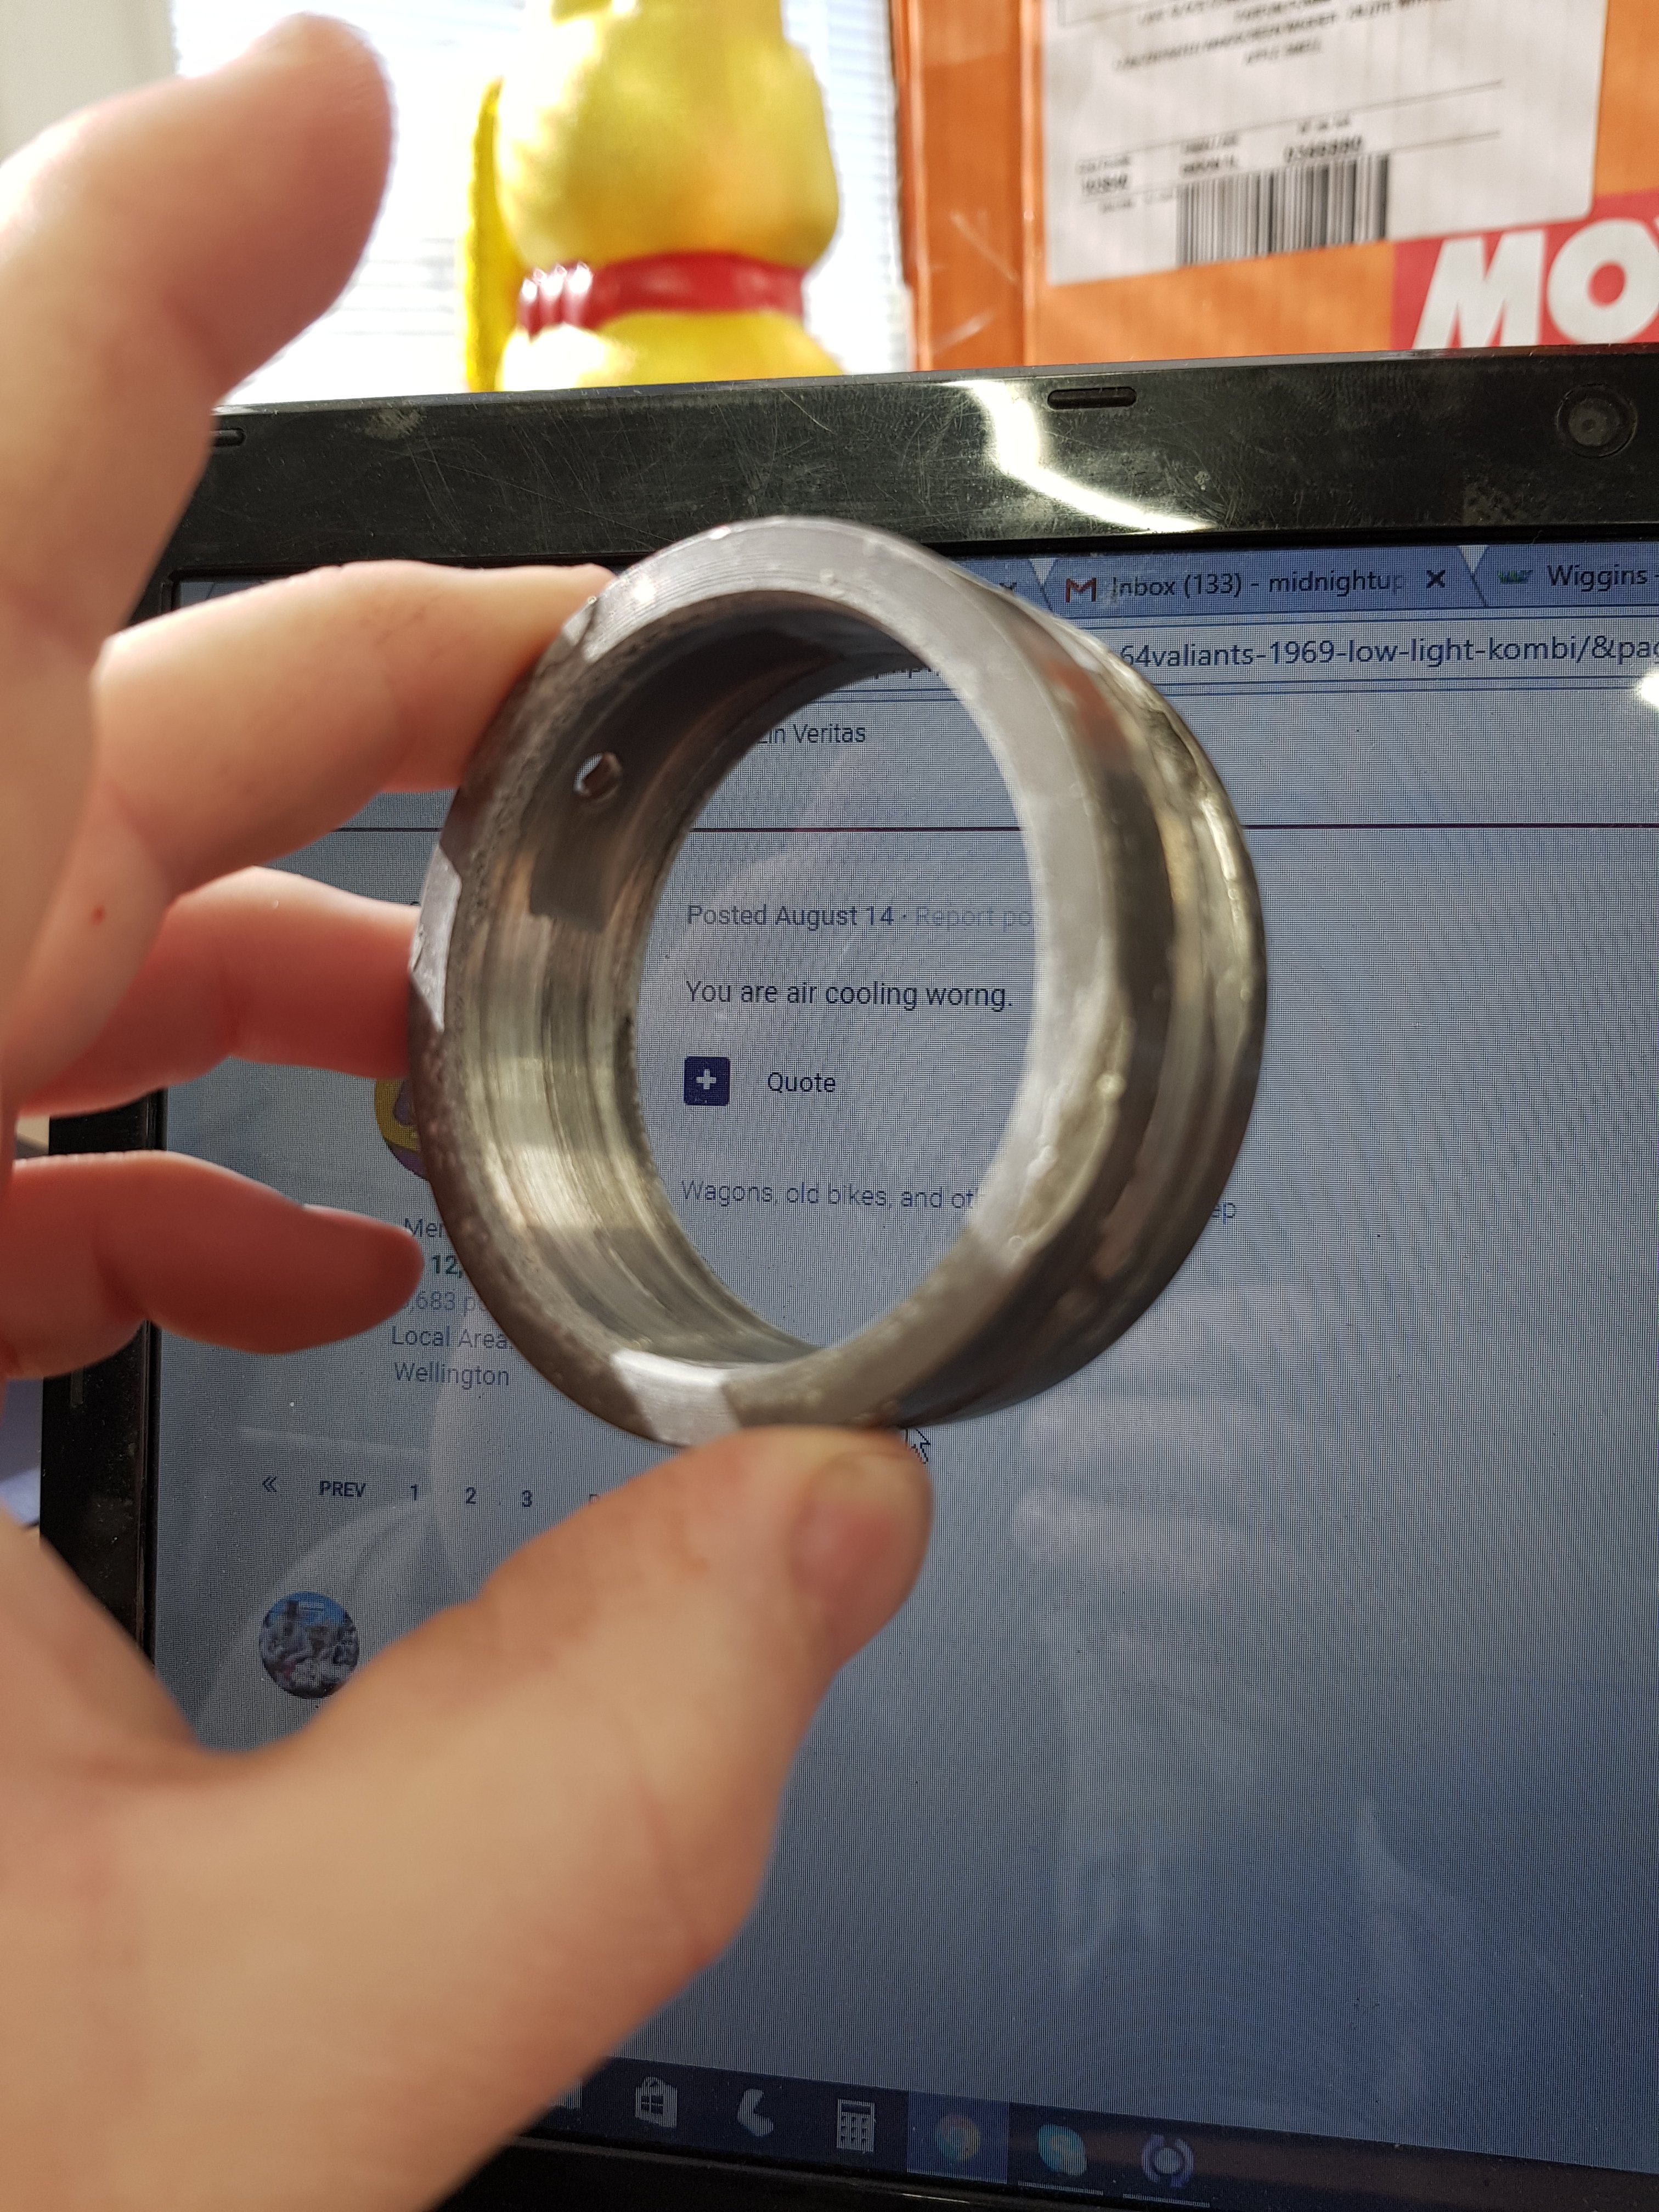
You are air cooling worng.2 points
-
I've been talking to Paul from vdub shoppe and he sells heaps of adapter kits for off roaders to suit ej20 for around the 1500 mark. If they can handle in an off roader I think this might be my best option for the van. It's never going to be a high hp van just a holiday home with better power and economy/reliability put into it. What's a Subaru gears set up worth atm.2 points
-
You missed a word2 points
-
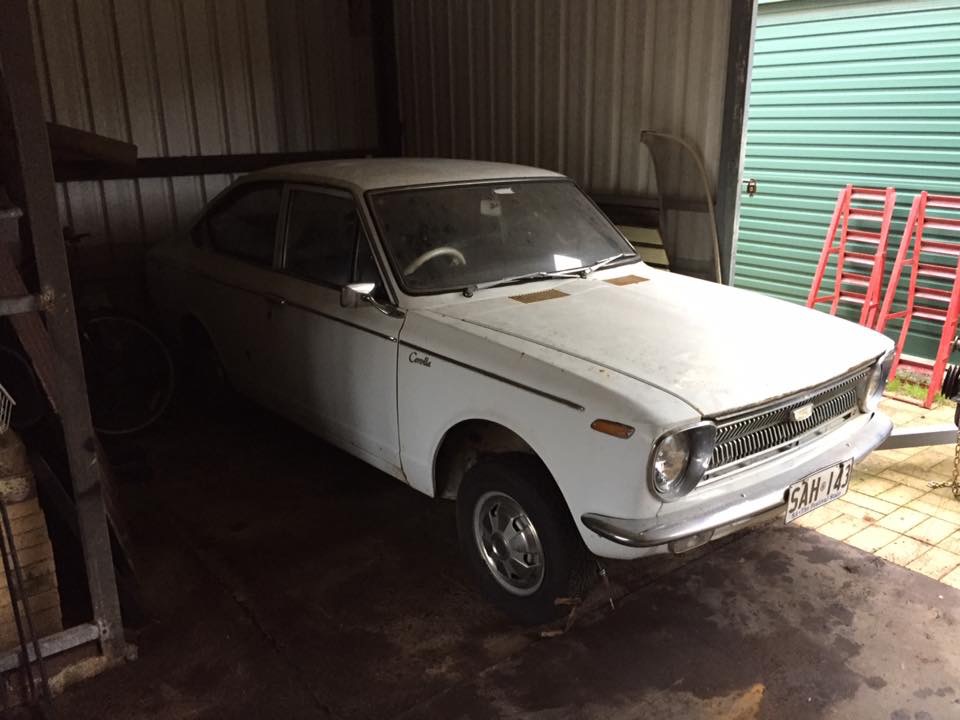
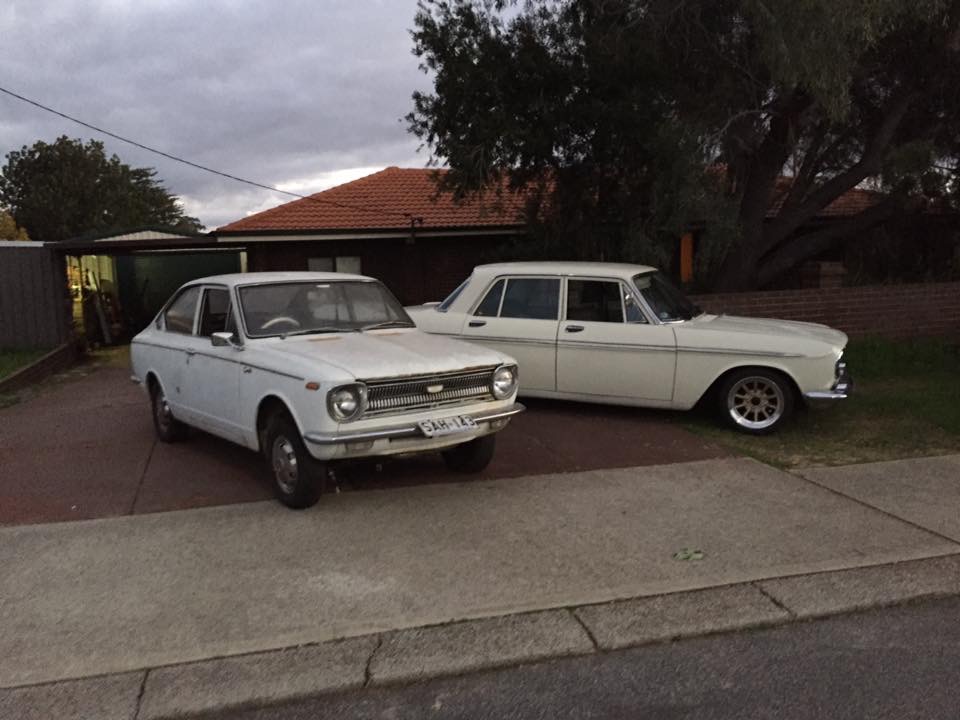
And here she is tucked away in until I've got some coin to throw at a motor and whatever else she needs for rego. Needs a good cut and polish, I know a guy who's pretty talented at bringing old paint back so I'll have a chat to him and see what he recommends. Hopefully the paint is savable, I like the thought of owning a 49 year old car with original paint
2 points
-
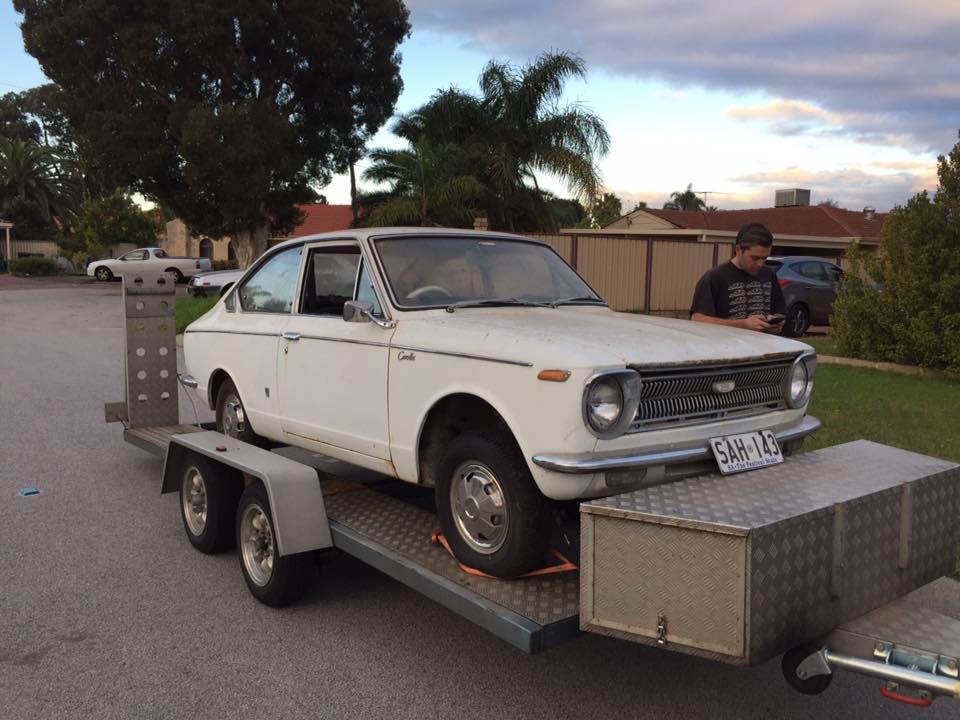
Took me a few days to get organised then I went and picked it up on Sunday, was helping my mate move out of his workshop too so it turned into an eleven hour day pretty quick. Was still mega stoked, I didn't really believe it was happening until we were unloading it at my place
2 points
-
2 points
-
So @Mrs 64valiant wrote of her golf the other day. So we now need to buy her a new car. Well why not her buy my subaru out back and I just get the kombi done. Can't be that hard right? Got the beetle driving in 21 days hahahahaha So I've been on trade me tonight found out ej20 engines are actually rather bloody cheap. https://trademe.co.nz/1386690002 Don't know which one I linked now but there where even ones for 300 dollars haha. A crap load cheaper than a rotary conversion. @Evan just said pick a part has engines for like 200. Sounds like I might be off to pick apart.....2 points
-
2 points
-
2 points
-
Well the new daily only set me back $1000 so the stonechip express is off the market and back to been a toy. Which now means.......
1 point
-
Also another set on another mates buss I still have my randar knock off rims also.
1 point
-
wide 5's or GTFO! haha1 point
-
I'll have an ask around for yah1 point
-
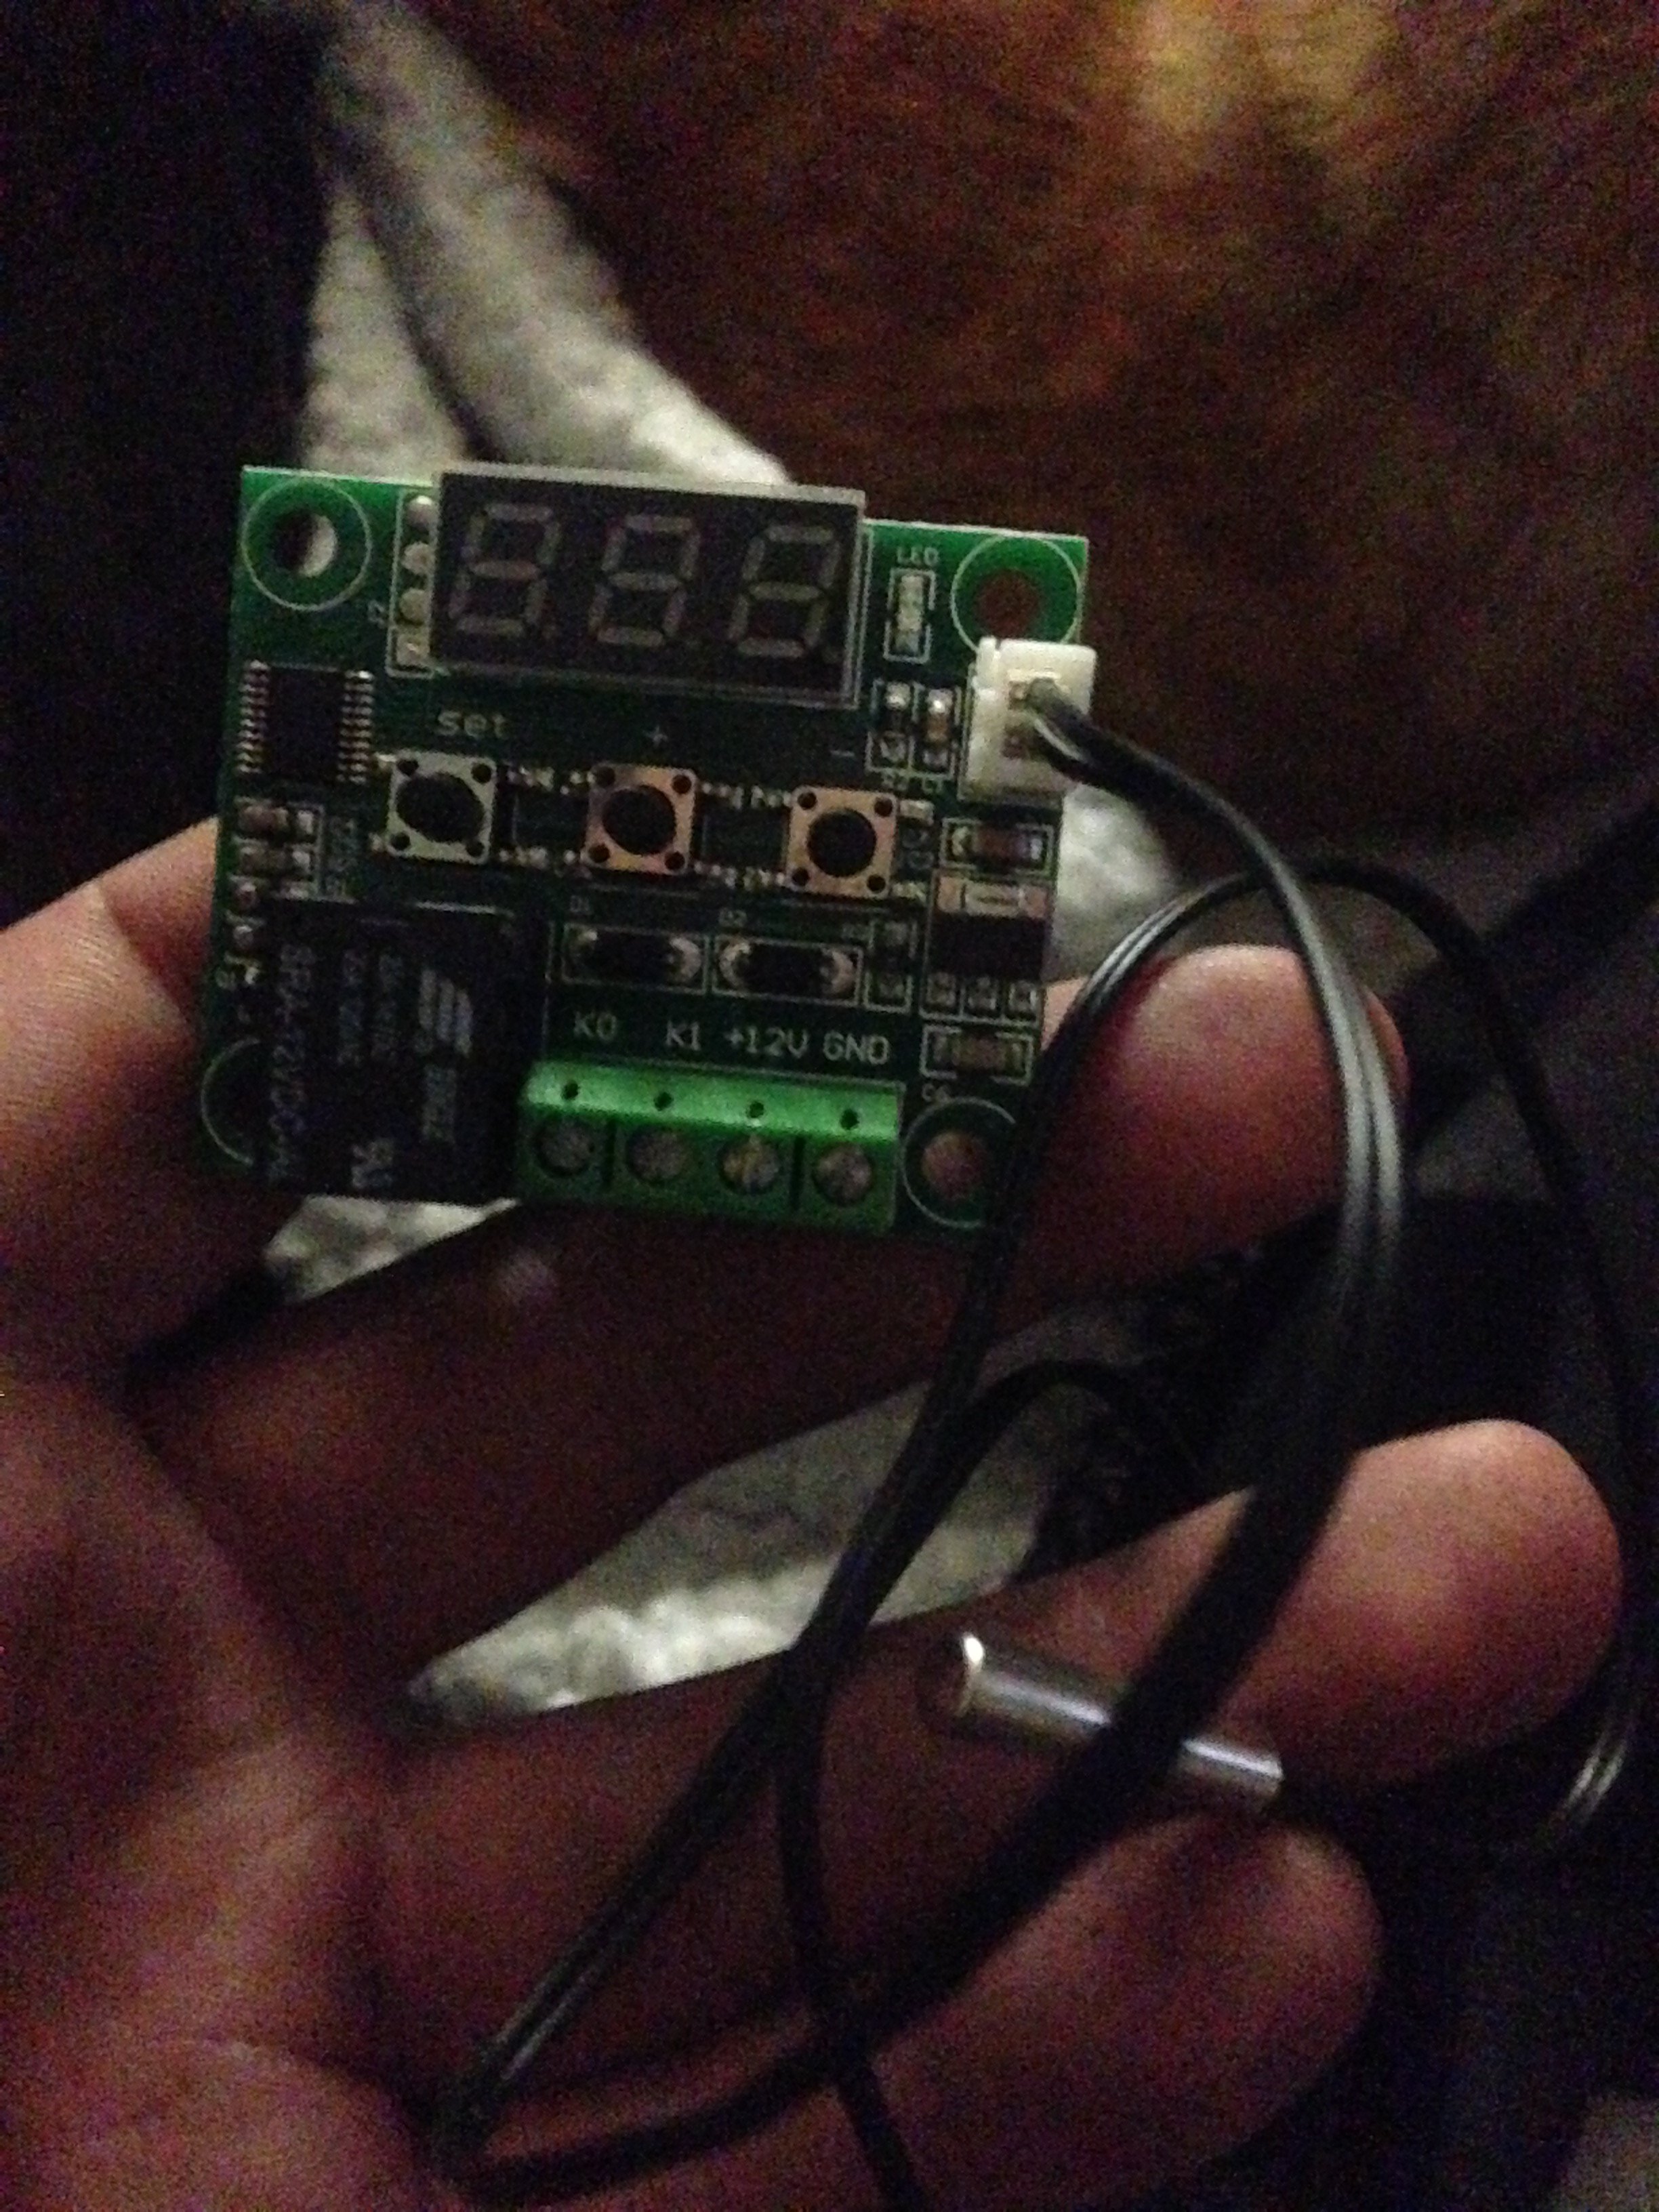
Picked up cool Adriano thermo switches for the fans. Means I can stage the fans at any temp. pulled the standard rad out of my old AW11 and tidied it up. Fans are pretty bad in spots so I'll see if I can get replacements or something to press in???? going for wof next week if I pull my finger out and drop it off stands. plans for respray next!!
1 point
-
Well how about that eh....1 point
-
Couple of Pics I took today Yeah I messed the numbers up didn't see them till I got home : must go back & get the '76 Until I get some trim this IS it's good side Gorge'eous ?
1 point
-
we had a roof shout and it was fucking great. approx 11 thousand people turned up and had great times. this is the last people standing. 2017-08-20_12-29-17 by sheepers, on Flickr1 point
-
Well it's been a while but I'm finally getting back into it now the weekend's come back. I made a start by cutting out the part of the inner guard that needs replacing. It took a bit of cutting and spot weld drilling but it came away easily enough. Before: And after: You can see a really dodgy "repair" that's been welded over the outside of the rail, probably something to do with the collision that caused all the buckling in the inner wing sometime in the past. I doubt it would have stood up to any sort of cert and it looks hideous so I'm going to cut it from just behind it and get rid of the whole lot. The replacement panel is all made up months ago before I realised how much of a mission the whole job was going to be. Everything you see here is going to be replaced. Before I can do that though, I have to cut out the bad stuff. I started by cutting the whole lot off just where I said. Now to stop all the stresses building up in the same place I'm not going to join both the inner and outer skins at the same point. So I'm going to carefully peel the outer skin back without damaging the inner skin and join the two in two different steps. So, here's the peeled rail. Came away pretty simply. This is the new outer rail mocked up to see how it will fit. Snaps on nicely so I must have made it pretty damn close to the right size. It's way too long currently but it'll be trimmed down to size later on. I learned a couple of things from cutting off the end of the rail. It's a little more complicated than a straight rail on the internal skin. There's a pressed kink, obviously some sort of rudimentary crumple zone. It sort of looks like a shadow in this photo but it goes between the two cut away parts. Now as much as the thought of a pristine front end and a steering column through my face in the event of a crash is appealing, I'd rather not screw up my pretty teeth. Therefore, I'm going to reproduce these features in my rails. I'll have to figure out a set of dies to press them in. On the Mazda motor front, I've got the car turning up on a truck either Tuesday or Wednesday so the next exciting chapter in that saga will begin soon. Until then, more cutting and head scratching today.1 point
-
1 point
-
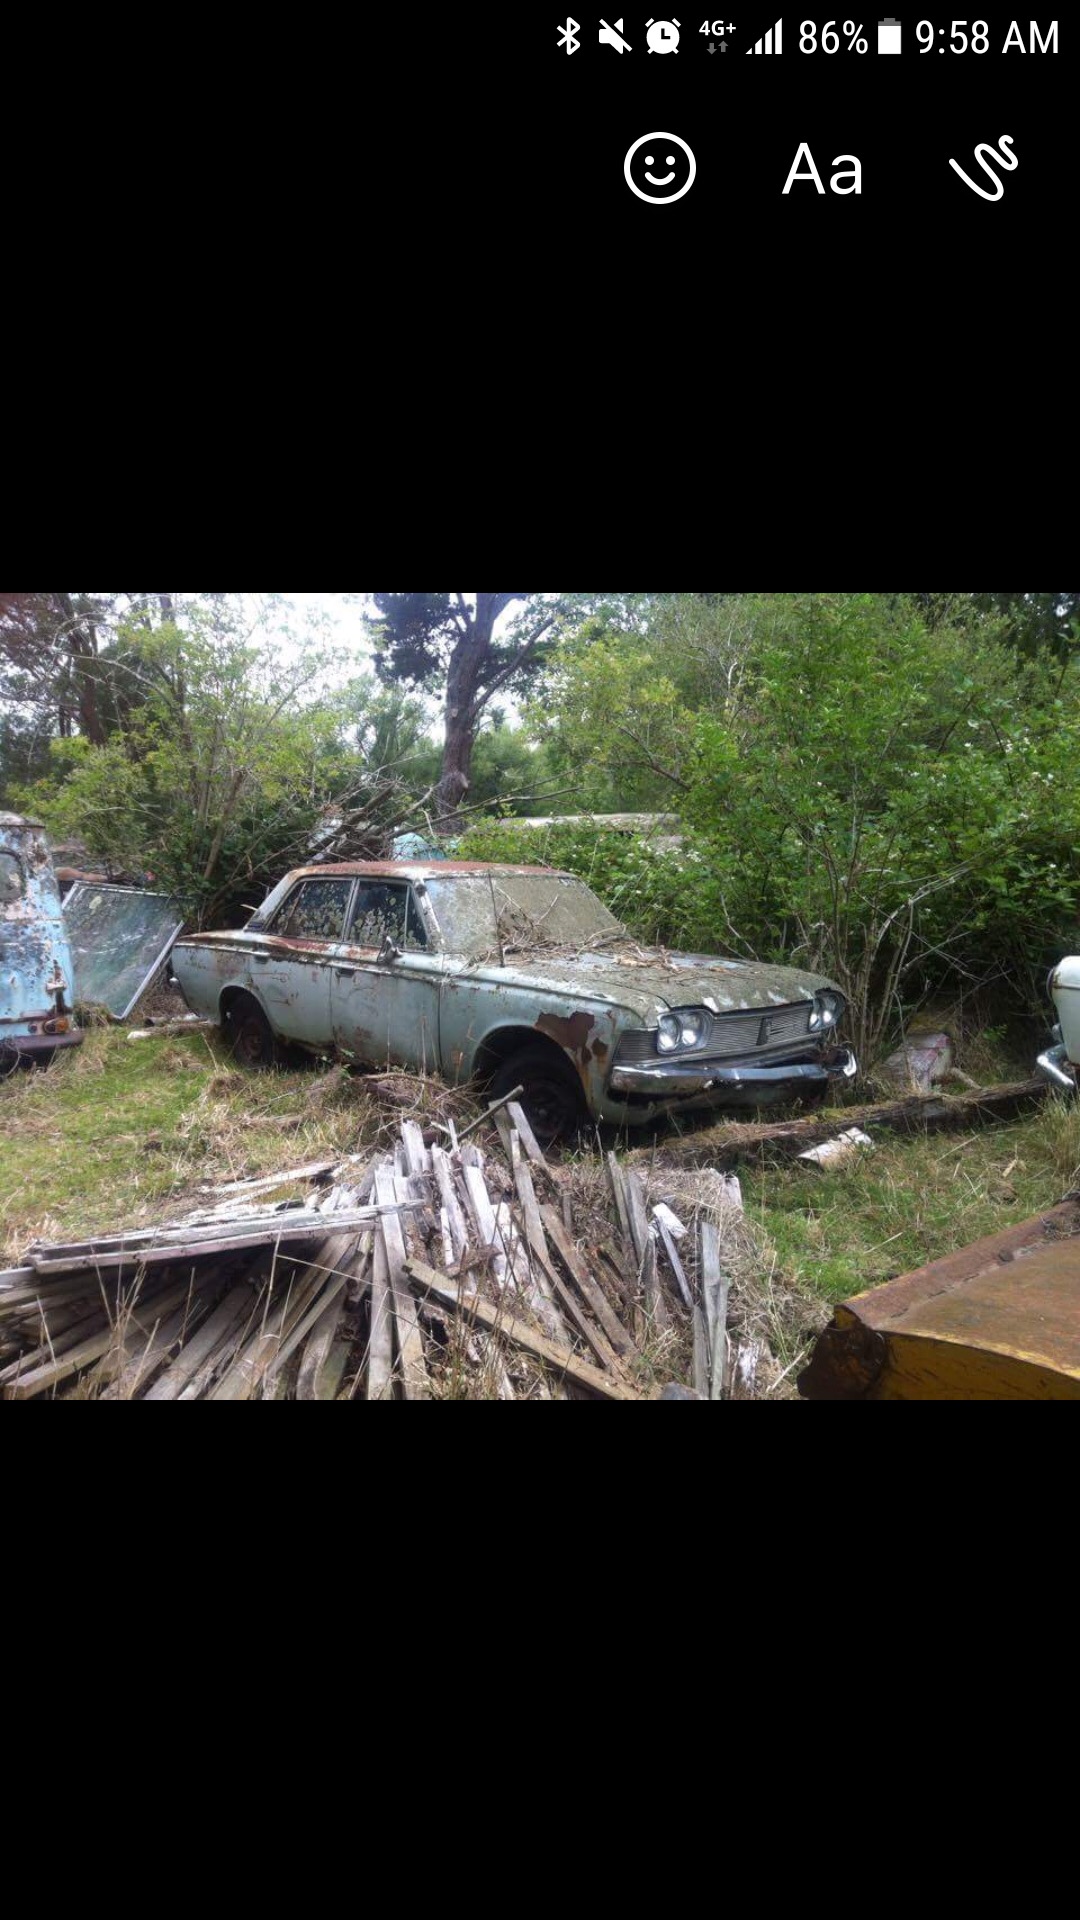
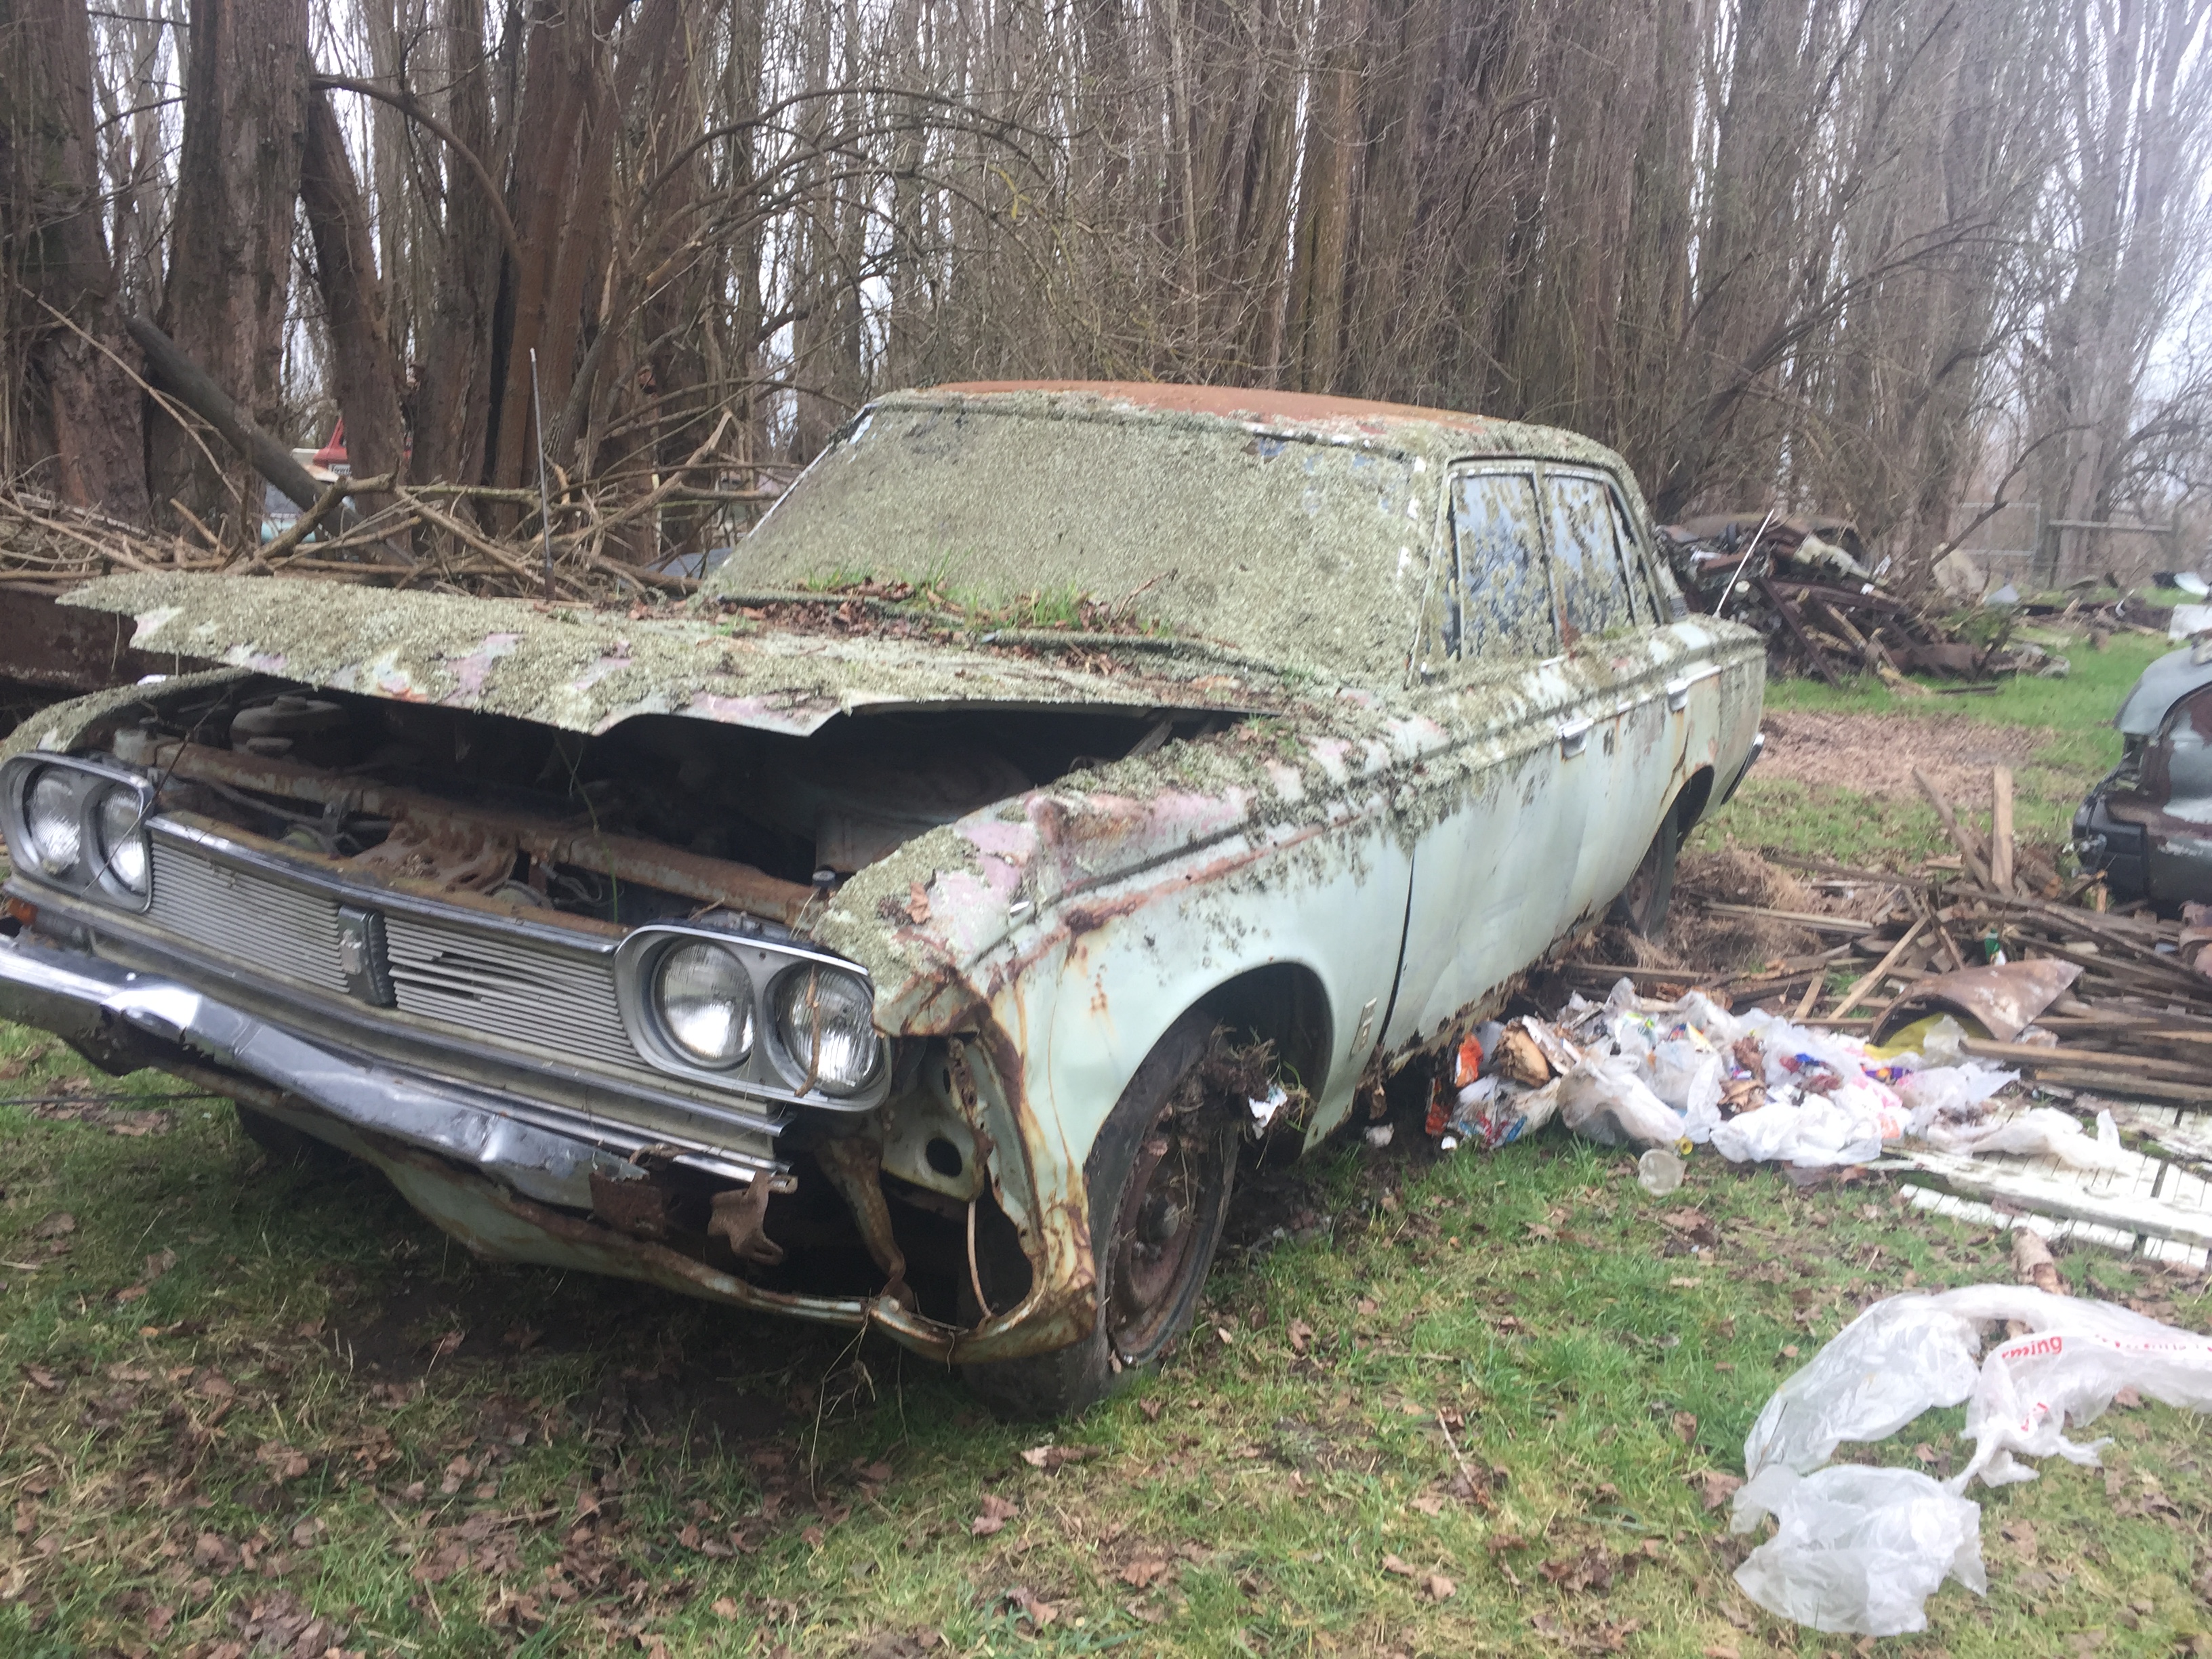
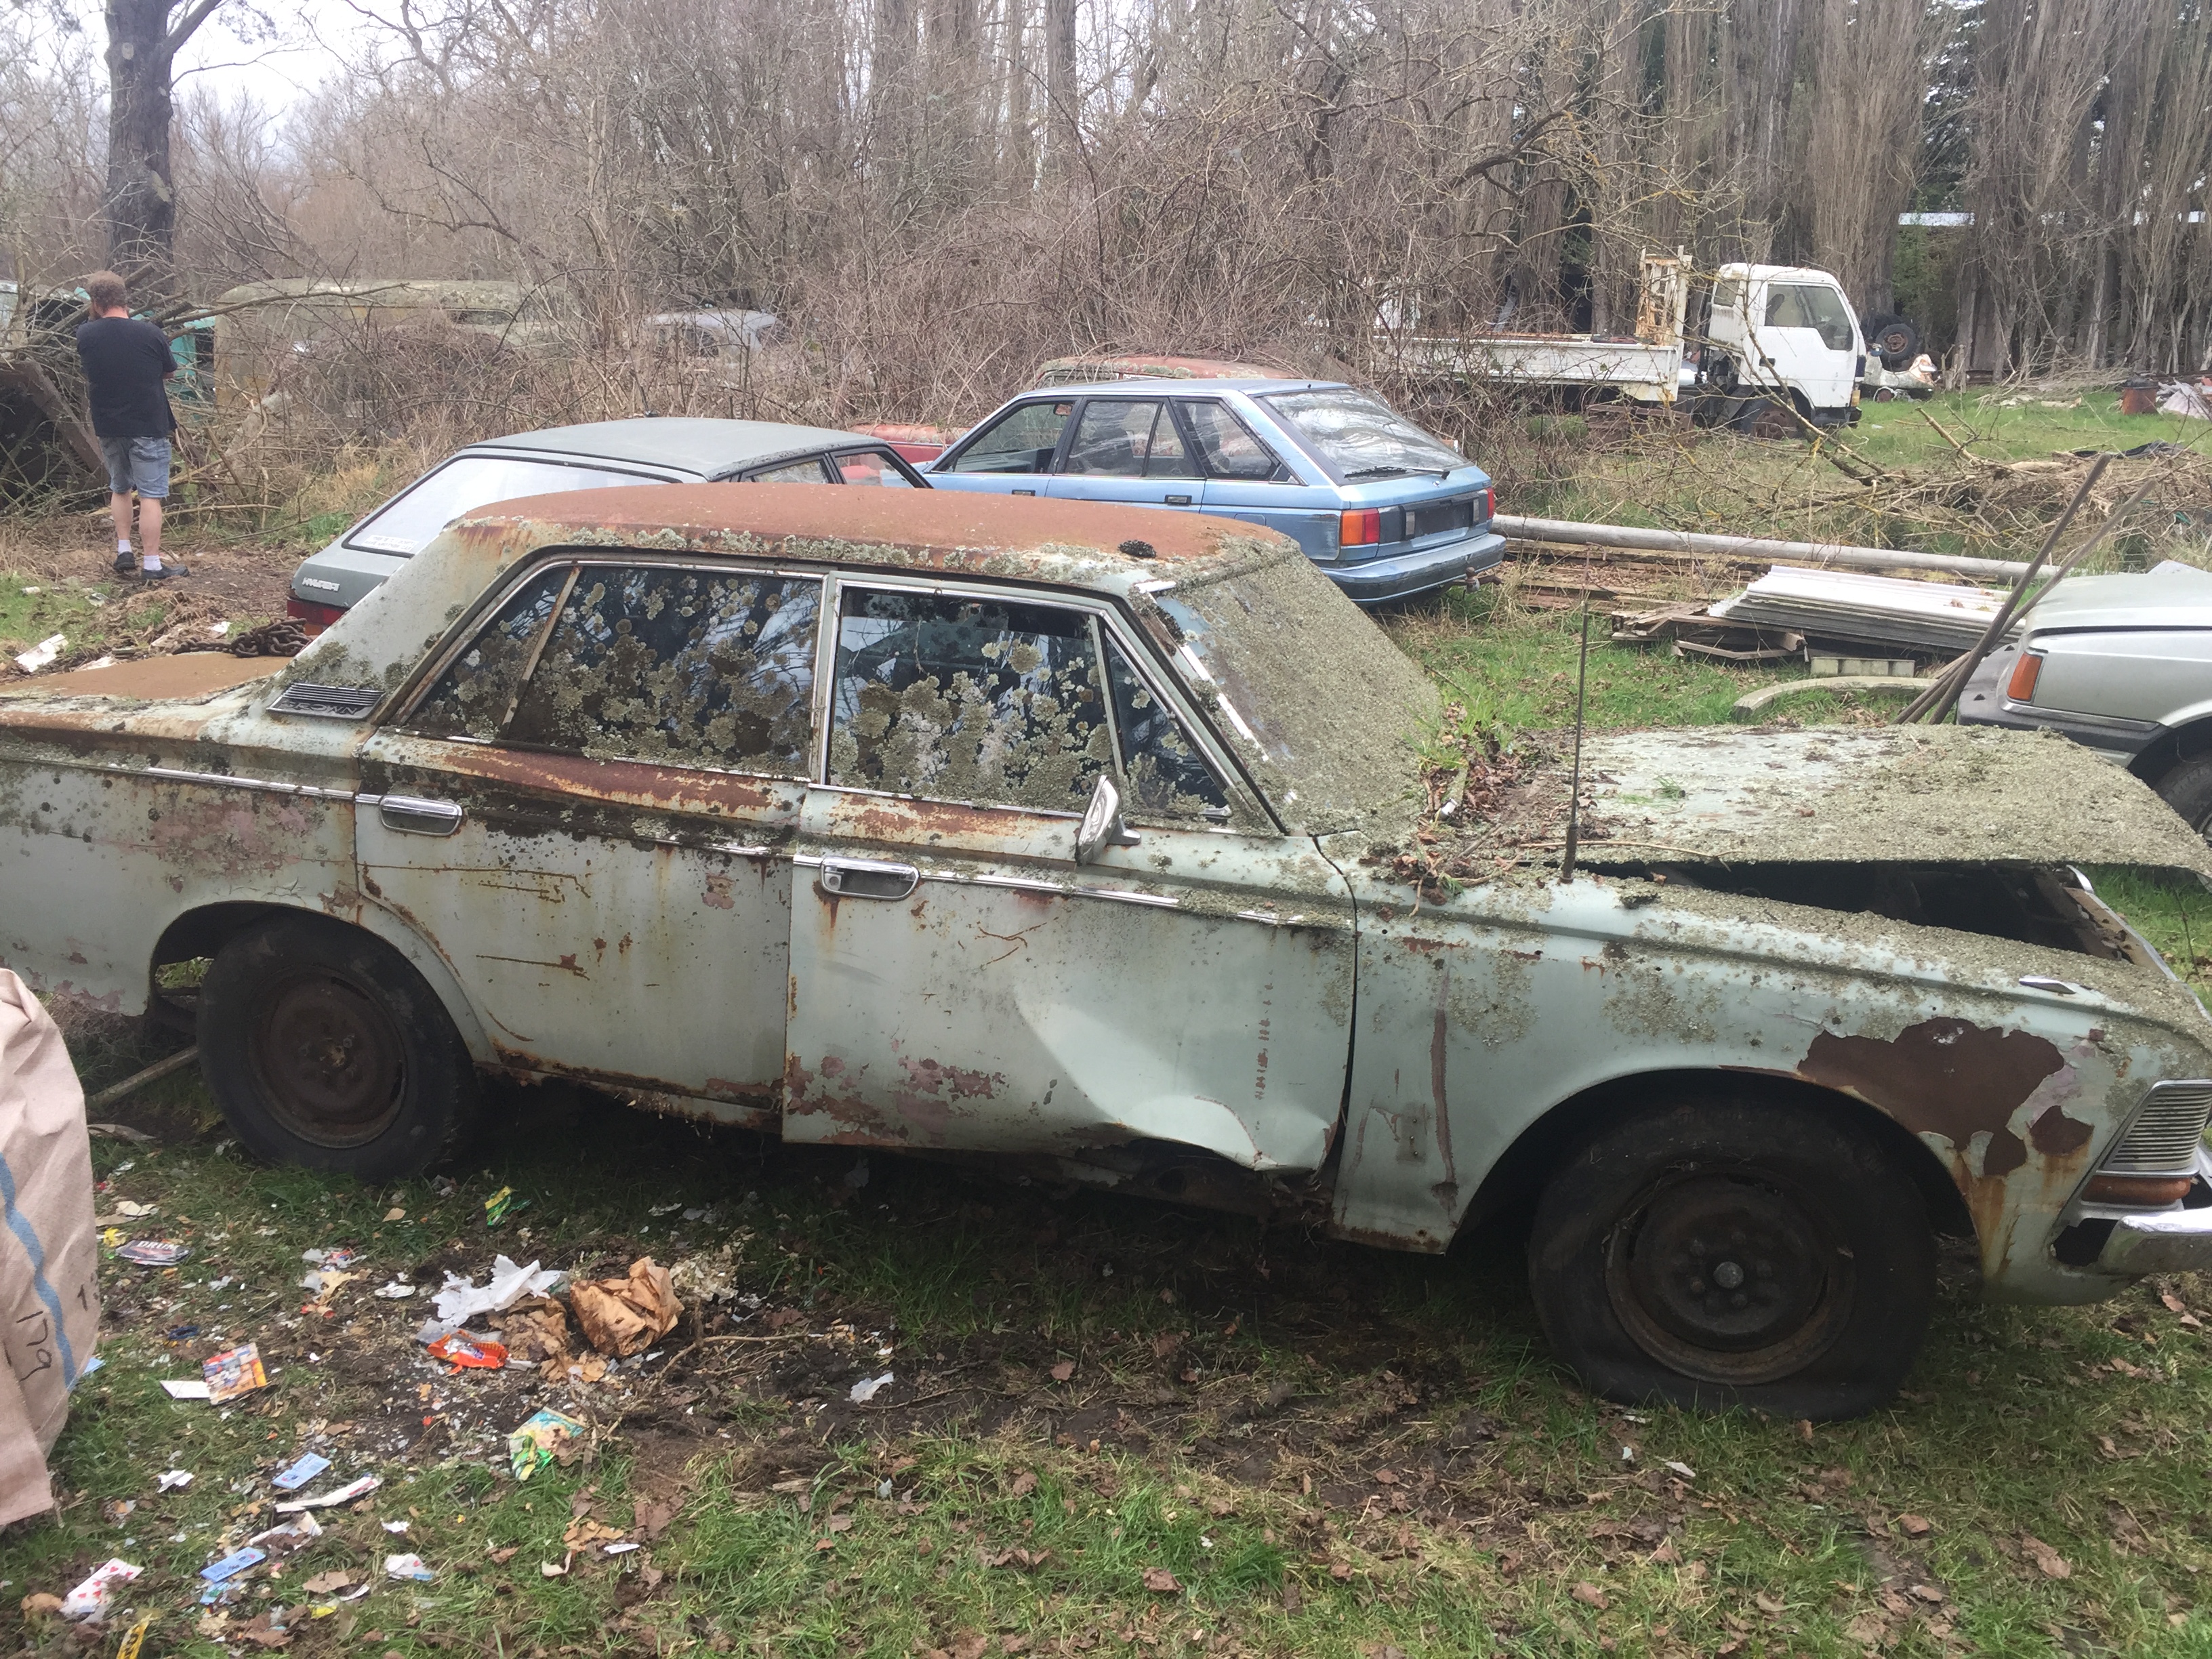
Scored a parts car for the wagon,a series 1 1968 ms55.the interior is in far better condition than the wagon so dash,front buckets and door cards will be going in the wagon,might keep some glass and the diff.sad sight ,always destined for the crusher but atleast i can save some bits
1 point
-
I hope it's got twin pipes for maximum grot holden v8 jandal slapper exhaust note. I'd like a jet boat they look like fun1 point
-
Sold the Meisters when I sold the old car, all went into the home fund. This likely won't be modified, I'm just more interested in getting it mint and driving it. It's so good in stock form, does everything I could want it too.1 point
-
Cheers team. I haven't had it out of the shed again since I got back to Auckland on Sunday night, it's still rocking a film of filth from front to back... Here's a couple of photos from the journey. The only ones I took. Was having way too much fun driving it! 1991 Porsche 944 S2-20 by Richard Opie, on Flickr 1991 Porsche 944 S2-22 by Richard Opie, on Flickr1 point
-
Watch this if you've got half an hour spare (you do). He explains the theory fairly well.1 point
-
The absolute cheapest option is about $1900AUD, obviously, you'll need a Subaru gearbox (my donor box cost me about $450), about 5hrs labour on top and also fabricate some mounts yourself. But at the end of that, you end up with a stronger box and 5 gears to choose from.1 point
-
roof finished. apart from the bit on the veranda which needs the butinol doing first before they can finish the last few tiles. 2017-08-10_02-46-56 by sheepers, on Flickr1 point
-
So as the story goes, Older army guy bought her brand new back in 76 in Singapore were he was posted in nz army Cars been well looked after body's rusty but honest,running gears all stock needs sills floor sections boot floor also Easy stuff really,she's done 78000 km, packing a mighty 2tb and a t40 4 speed box twin carbs even!!! Paints seen far better days but packs so much character it's fully staying Plans at this stage are get the major rust sorted get her running mint,plugs,points,condenser, water pump and radiator flush out/rodding out Fuel pumps shot same with clutch hydraulics as I go I'll wire wheel things back and coat with p0r15 Plus the mandatory slam and wheels Got to keep the longchamps off the datsun so they'll go on Never ever thought I'd have one in my possession and if it weren't for @OldNathan it'd still be a dream many thanks bro!!1 point
-
Report for spam.1 point
-
At the risk of sounding like a teenage girl, but OMG!has it been THAT long??!I guess so. this is a shit of a job.I did get one side window in, woo who.closer.you're next sucker!1 point
-
1 point


.jpg.27415e420274596778ffef5e9c8290c7.jpg)


This leaderboard is set to Auckland/GMT+12:00