
Leaderboard


Popular Content
Showing content with the highest reputation on 06/24/17 in all areas
-
Got the thing assembled...mostly Heres the cut and shut manifold we made, came out wicked, thanks nick! Was choked by the gasket set missing 2 sump parts and a rocker cover gasket... ACL set had lots of spare Manifold and hotbox gaskets and missing the vital ones. Permaseal has EVERYTHING! the set was left over from when engine builder supplied gasket set for wife's A14. And I too had permaseal from work. That and no crank pulley bolt. Pinched the wife's one while assembling and luckily remembered to give it back.
 7 points
 -
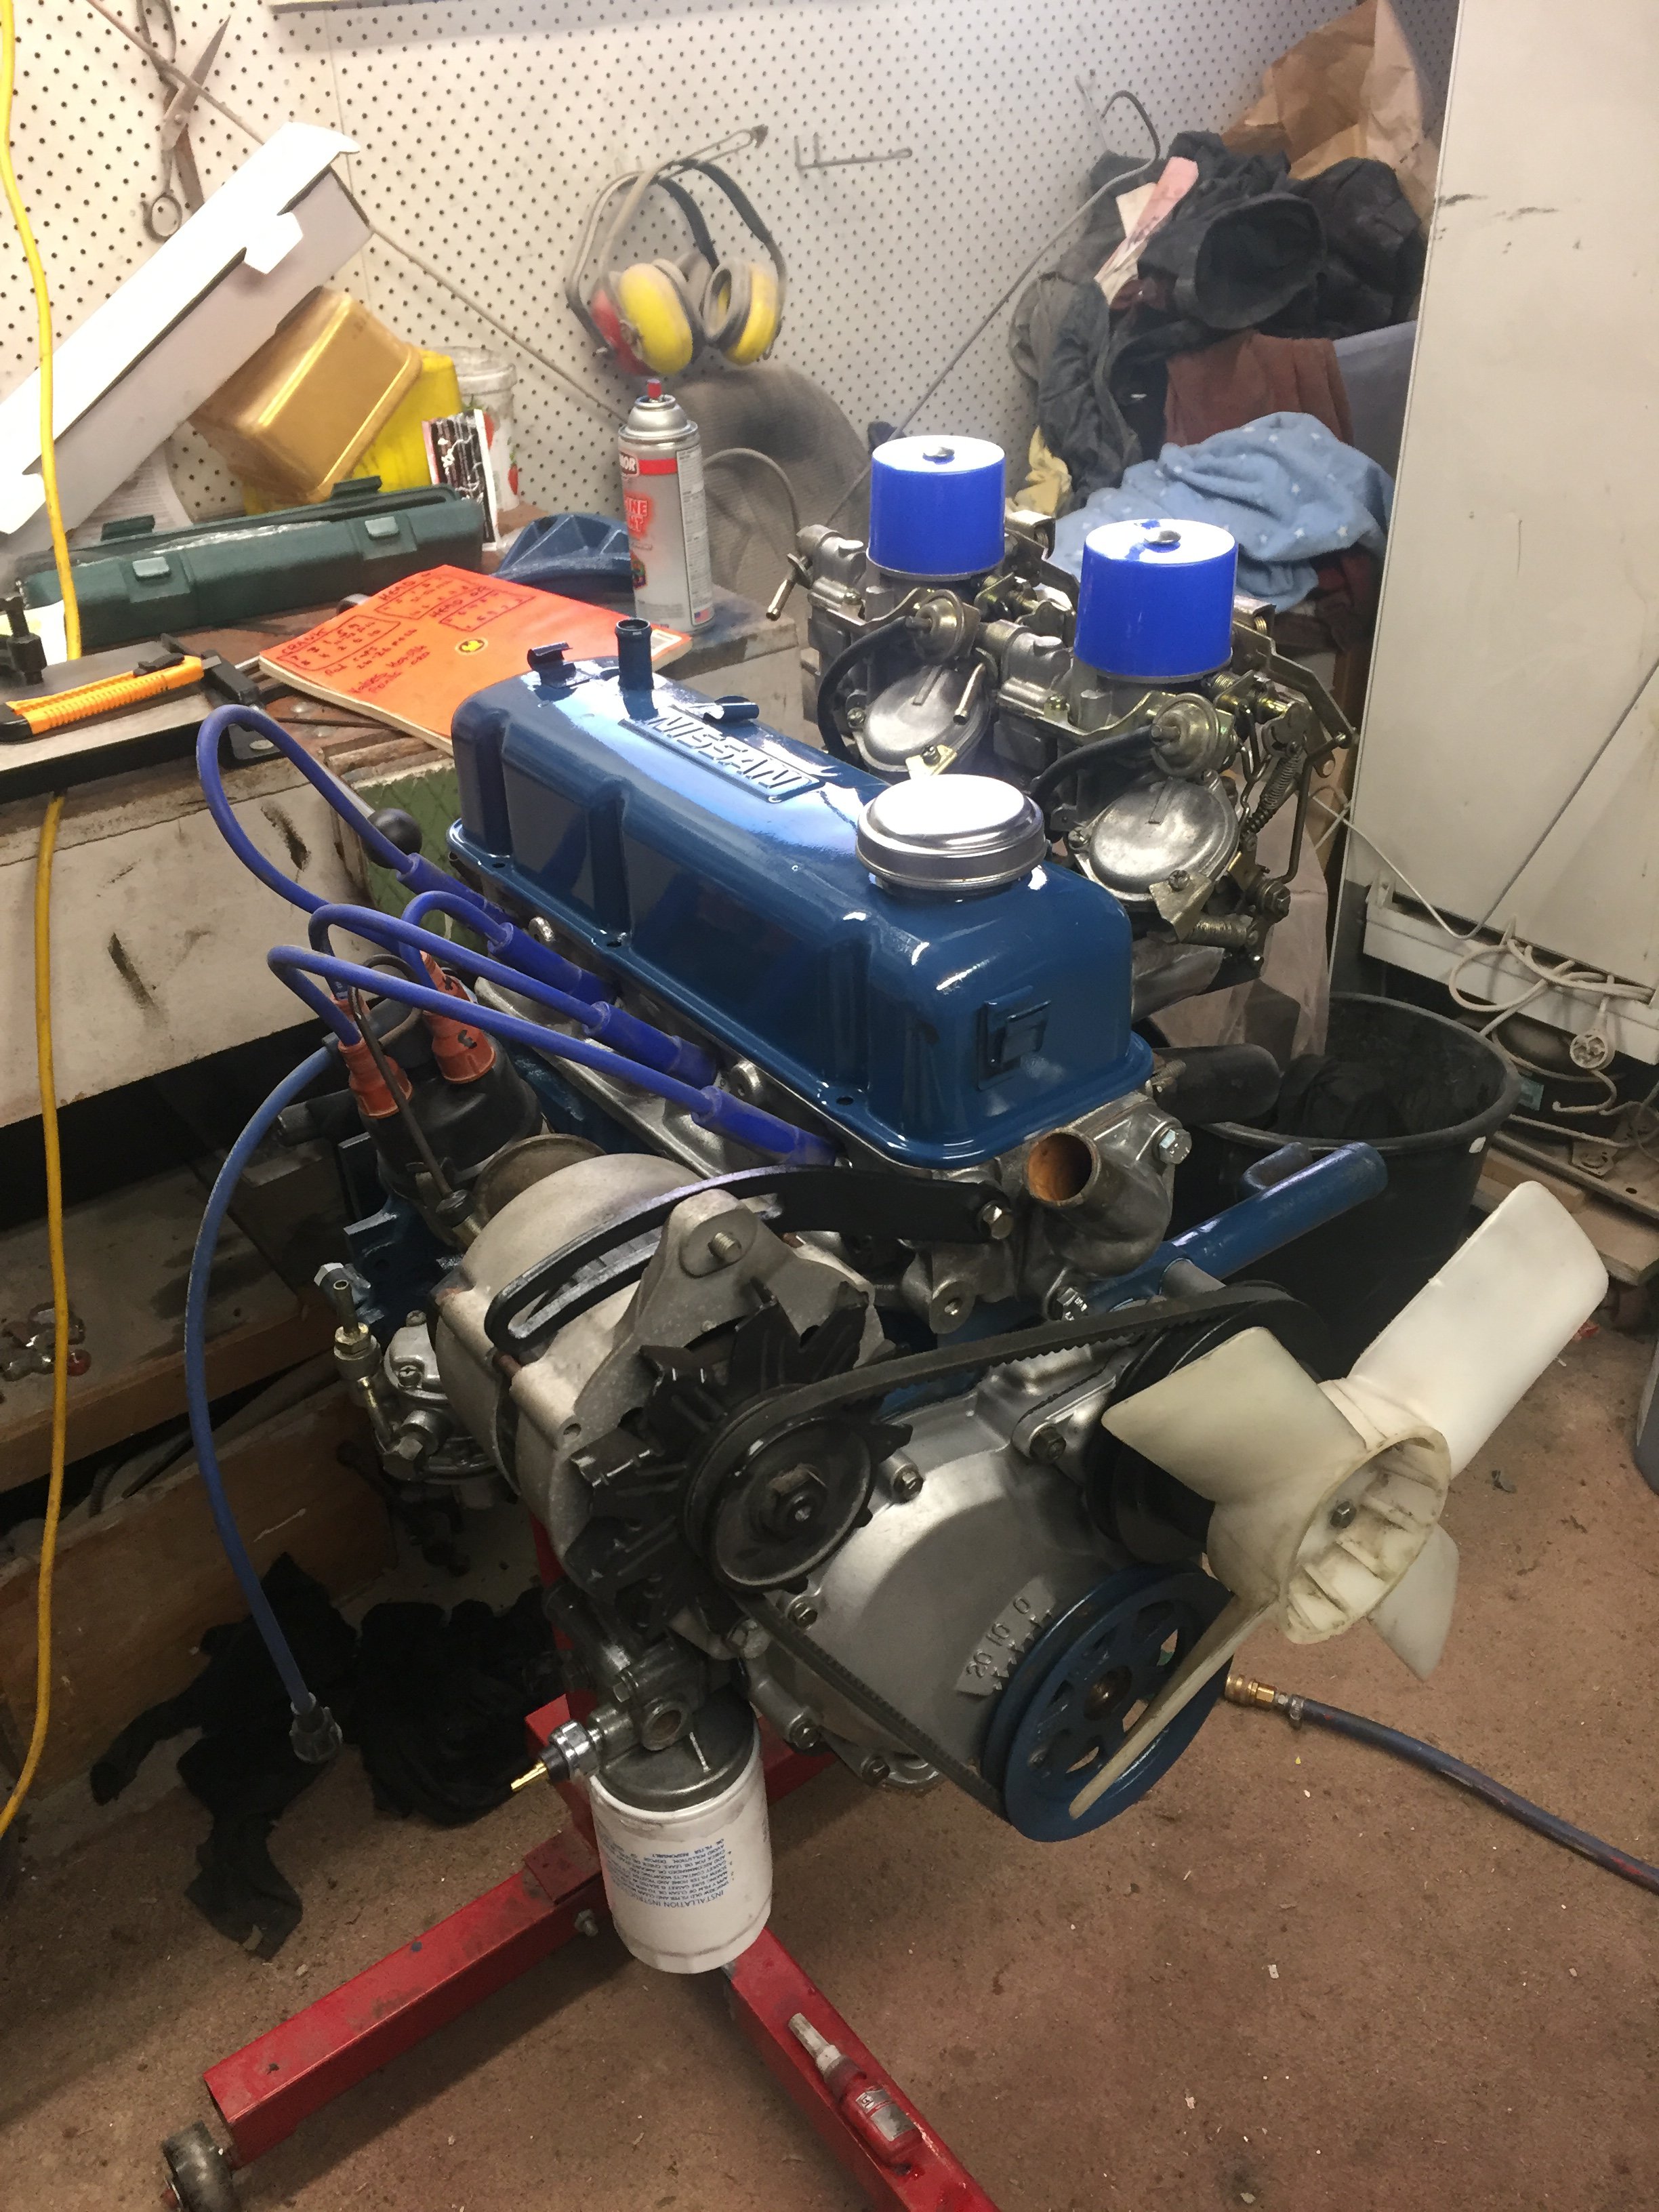
Ahh. So i made a bit of a large cock up. The cams were far too big for the original pistons, the valve reliefs were to small and when I was dialing in the cams the lobe was hitting the piston by a long shot. Instead of crying about it, I ordered some 82mm (2mm oversized) 12.5:1 compression pistons from Barry at MRP. Took my spare 7-rib block in to the machinists and got that block bored, cleaned and decked also. All is not lost with the other block, I will be using that in my AE86. I put some new frost plugs in the new block and gave it a blase of semi-gloss paint Whipped the head off of the old block Removed everything as it was instead of dismantling it (take pulley -> timing sprocket -> oil pump off, all to put it back on again) Went over to the NEW block, gapped the rings and dumped the goods in. Much better I set about to degree the cams, this time. No fowling on anything! Reconned alternator which is an 80A one It's nice to work on an engine and still have clean hands at the end of it. new bits e'ry where. So that's that for now, I will be installing the clutch and then putting it into the car next. Excited So, lesson. Do more research before completing an engine rebuild so you don't have to take all apart again. Talky talky. //oldschool.co.nz/index.php?/topic/52401-pbaines-1971-toyota-corolla-ke25/#comment-16793497 points
-
4 points
-
Got to my sister's house in Wisconsin and took the opportunity to wash and wax the van. Really trying to protect the paint and get the dirt off the roof. Also took everything out and vacuumed it. If you live in an area with trees, especially pine trees, it's good to take the black plastic trim around the rear door off and de gunk it every once in awhile, otherwise the lip on the roof under it rusts away. She didn't have a ladder so washing/waxing the roof was fun... Also added in a propane detector. I carry an 11lb bottle inside the van and this was recommended to me. Apparently it's illegal to have a commercial RV with propane without one in the USA. Seemed like a good idea. It's behind my fridge and wired directly to the aux fuse panel so it's away on.4 points
-
Being honest i bought it for 3 and have spent about a grand on it. so id be happy with $4000 or 3.5ish. And i totally agree. Just trying to cut my loss's. To many projects and to little time3 points
-
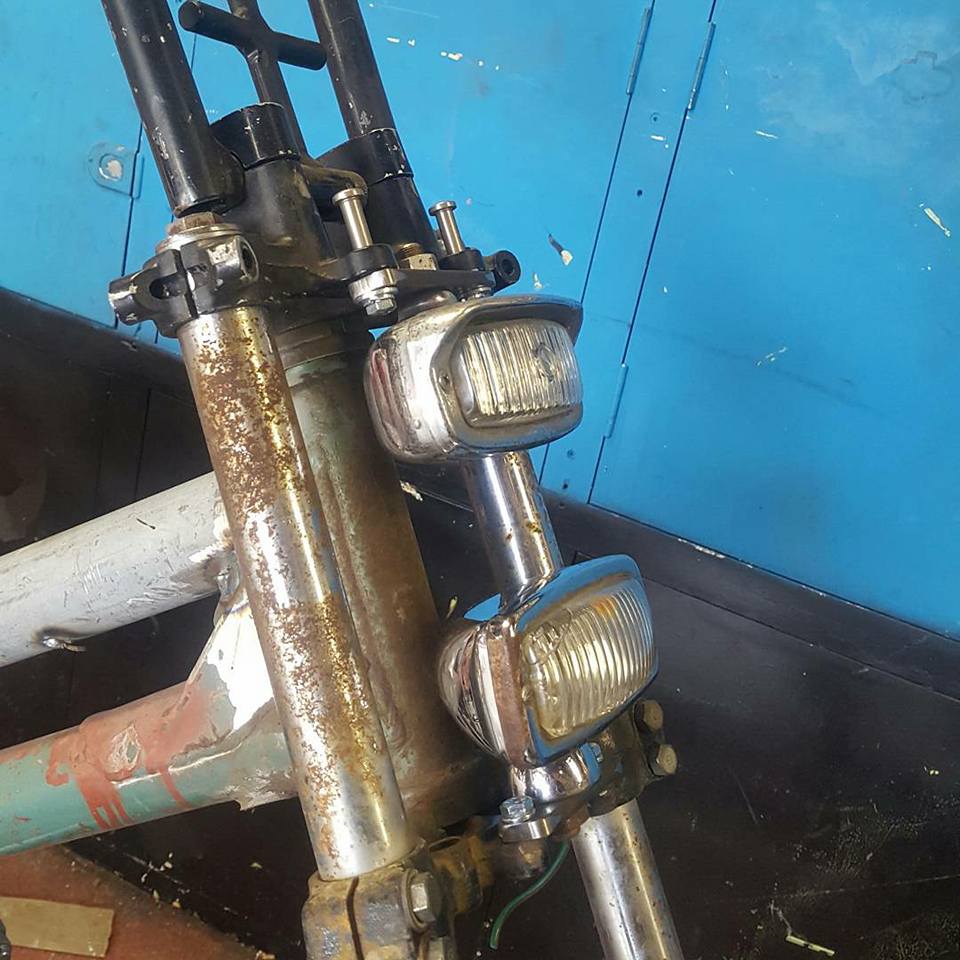
parts arrived yesterday, so spent the morning chucking them on. new tracker bars sit much lower, took way more effort than swapping handlebars ever should, powdercoat is super thick and none of the switch blocks or levers would slide on so spent a bit of time sanding and persuading them to fit. sadly snapped the right indicator switch that goes into the block, but was already held together with gaffa tape so it was expected. new megaphone muffler fitted straight over the header, no shims needed. sounds so good!! a lot less sewing machine sounding now. has removable baffle also for max wannabe harley spec. sadly the hanger doesnt fit so will have to make one up, but other than that pretty stoked at how easy this bike has been to modify so far. ebay seat is not gonna fit nicely without chopping the rear end off and starting again, which for a $80 seat i dont think will be worth it. there's a company that makes a custom seat that fits over the factory frame, only needing a few tabs and brackets grinded off. its expenny but looks so lush. pix3 points
-
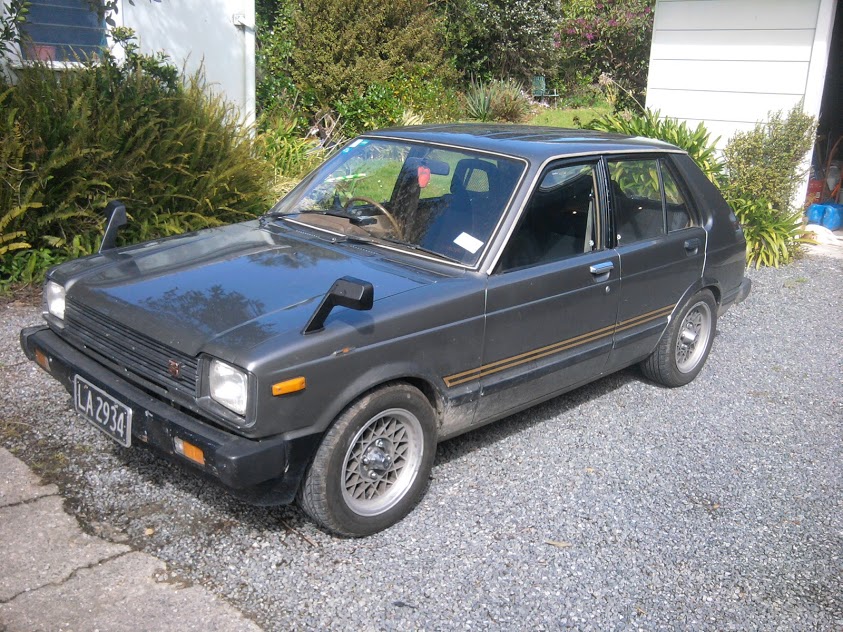
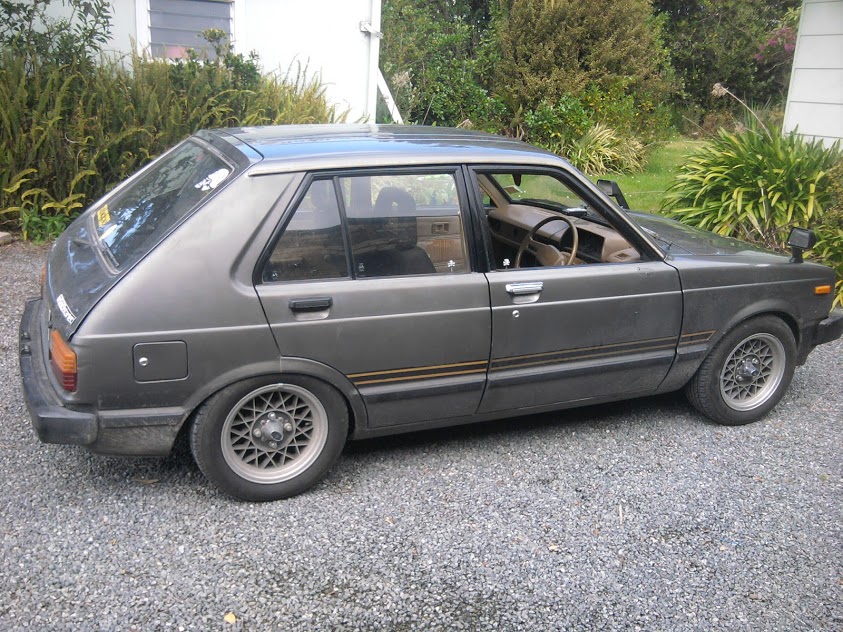
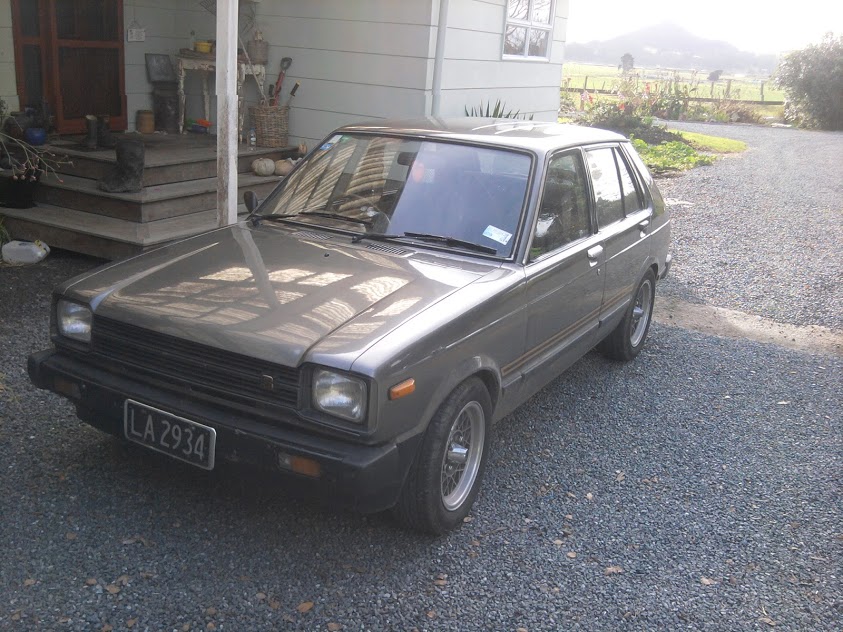
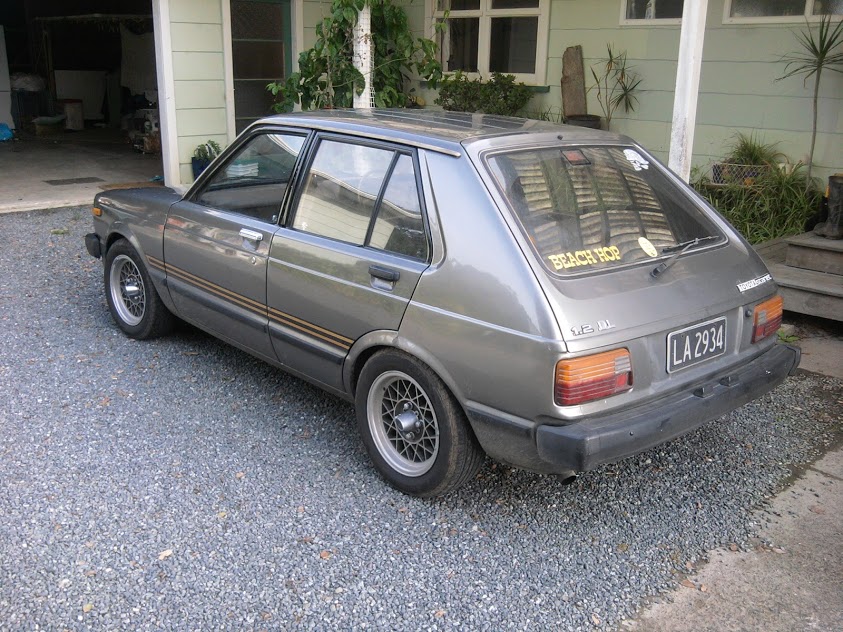
It's still a Viva Alex...3 points
-
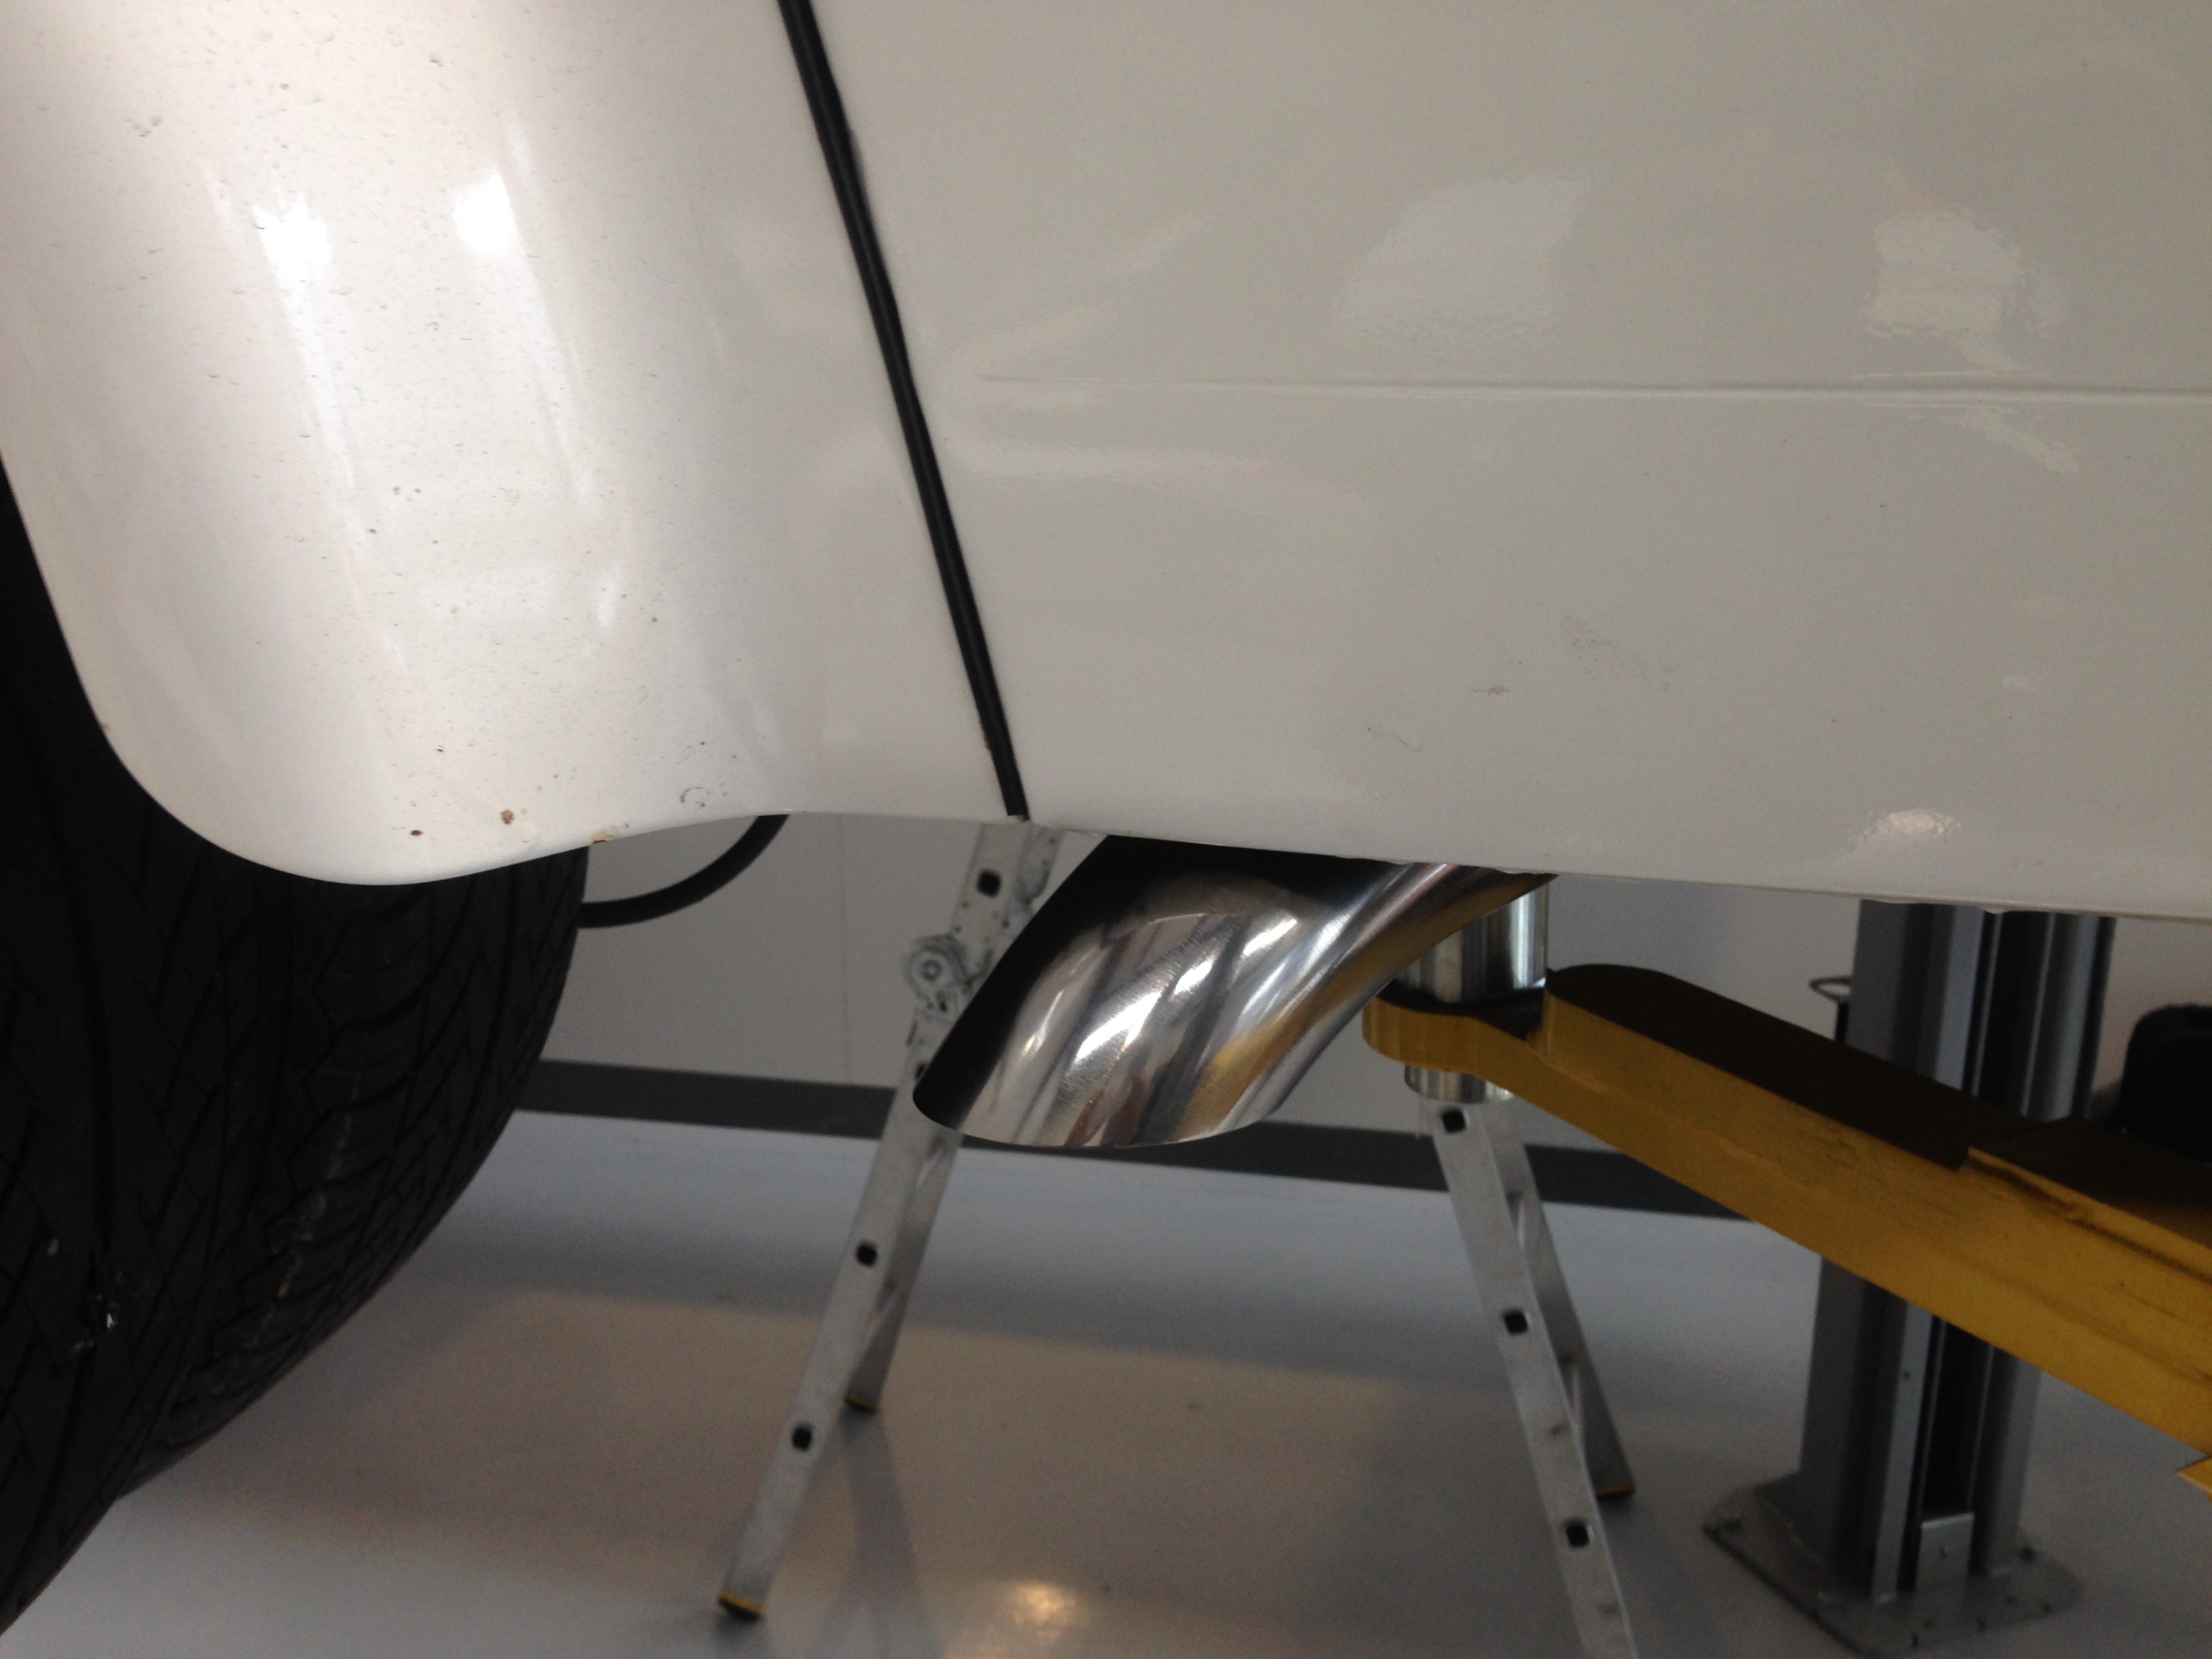
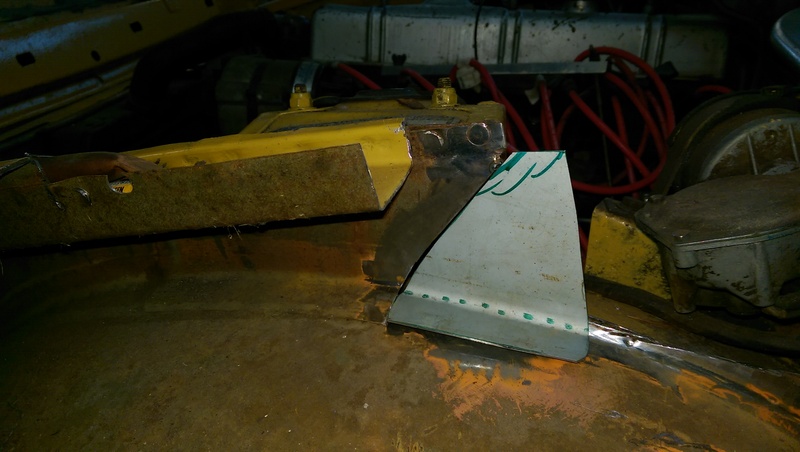
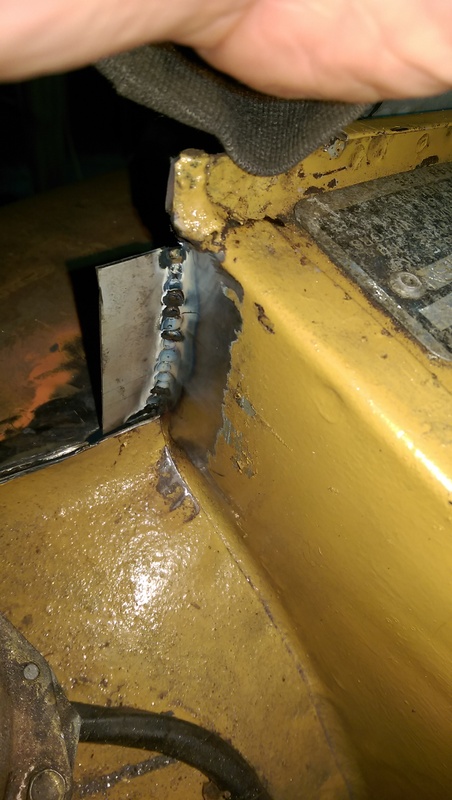
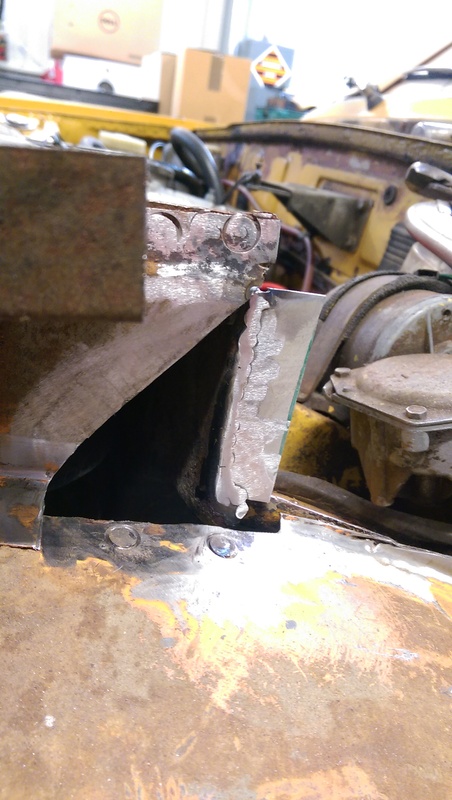
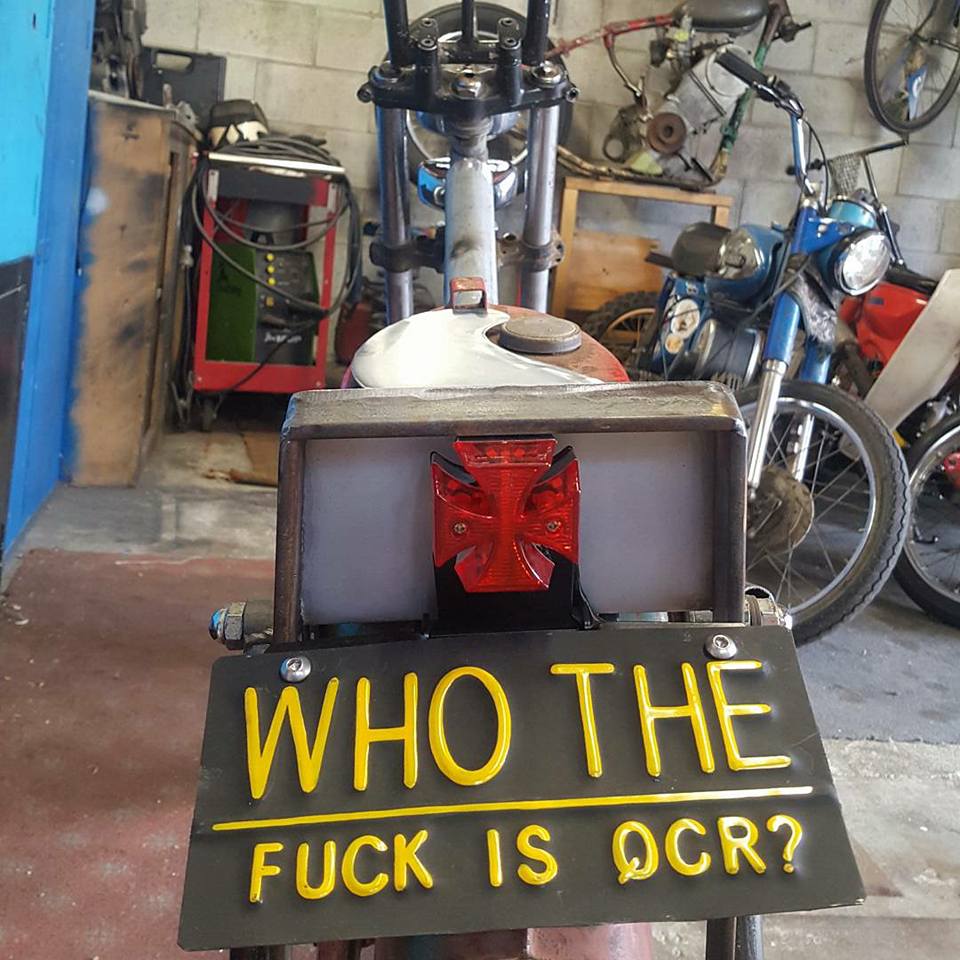
exhaust fitted today
3 points
-
Just over a month til this lush event Come along on Sunday 9th July to trawl thru the always eclectic selection of treasure/junk Eat a speedway hotdog for breakfast Fight off hyperthermia Get your car stuck in the bog they call a carpark Find that super rare something you have been looking for since forever Neat Gates open 7am Paradise Valley Speedway up behind the badlands of Western Heights2 points
-
Oh yeah, pictureless update, sailed through it's wof clean sheet and all, ready for Hanmer meet in August!2 points
-
2 points
-
Inadvertently got a good test of my solar system. Last week at Mount Tremblant I met a guy with a Westfalia in the parking lot who killed his batteries overnight. I isolated my house batteries at the switch and jumped him. I was looking at my volt meter today when driving and noticed it wasn't charging the house batteries off the alternator (not showing 14v). I was worried I had blown my charging relay or a fuse when I jumped him but my dumb ass had just forgot to de-isolate the battery banks. Switched it back on and all good. So I've been operating the fridge and other 12v on just solar all week with no issues and didn't even notice.2 points
-
Nothing much been happening with this as of late, just take it for a hoon once a fortnight, going in for wof tomorrow so thought I should probably sort some flares out for the front, bought some ezlip rip off brand for 45 bucks and that was the perfect amount for the guards, doesn't look too bad either! The adhesive tape seems a bit weak though so may have to ados it or chuck a few self tappers in haha.2 points
-
Still better than a mondeo - fact1 point
-
Project thread: //oldschool.co.nz/index.php?/topic/56678-jo_rollas-1983-kp62-toyota-starlet/ Let me know your thoughts. Cheers, Joel.1 point
-
Discussion: https://oldschool.co.nz/index.php?/topic/56681-jo_rollas-1983-kp62-toyota-starlet/ I've been meaning to make a topic for a long time now. Large photo dumps incoming. I picked this up around November 2011 in Hamilton, no WoF, no Reg, ran like a dog.
1 point
-
Somewhere in between all this a K50 went in. A 4K went in. A new diff went in. Brand new carpet. Extractors/flows, 2 inch exhaust. All lacking photographic evidence.1 point
-
All sweet starlets need some fendy mirrors. Got some hockey stick ones cheap from ebay. Sep2012 Before: After: Made up a simple parcel tray as well:
1 point
-
Welded on a tiny patch. Got pretty good penetration. Unfortunately my dog is shit scared of the noise of mig welding and goes to stand in the furthest corner of the garden and pants like crazy. :/ I have to use treats to get her to come back. So I feel bad when I weld and don't get much done. Hopefully it's better when the house is done and I can put her in there where she should not be able to hear the welder. This patch is next. I need to drill some holes in it, for making spot welds, first. Then I make the big patch that goes behind it. Shouldn't be hard, it's just a rectangle with a bit of a curve.
1 point
-
You need to know the pressure at the injectors, so just before the regulator would be OK, or on the feed side at the start of the injector rail.1 point
-
Fuel pressure gauge ... Install on high pressure feed line or on return line after regulator ? Or does it make no difference ? Seems te aftermarket fuel pressure regs have them on the reg so that's after injectors ... Any thoughts ?1 point
-
Just gob some spray paint on it tbh1 point
-
keen to see results of superthin alloy fins in acid bath1 point
-
1 point
-
1 point
-
1 point
-
The GM180 was also sold as the Trimatic as fitted to many Holdens. So it may be easier to find someone with Trimatic knowledge. Try Auto Care Kilbirnie and speak to Kevin, he knows his Holdens and may be able to recommend someone suitable.1 point
-
The story of a very sad Technics SA-T470 Receiver. Saved from the scrap. I was told by fans of OldSchool to put it up there as something different, as I believe they are Retro/OldSchool just not of the automotive kind. Thats my mint one but This is how it looked when I got it. You cannot really tell that is been dropped hard on its face apart from the missing selector tuning shafts on the very right of it, and the face has been pushed in 14mm at selector shaft. The purpose of getting it was to keep the other three going. But as they are one of the most indestructible amps I’ve ever used, so I see no need in having a parts amp. Solidly built in 1981ish by Fisher & Paykel, Consolidated and some bits from Japan. There a total oddball, the tuner in them is from a Technics ST-8080 with the board rearranged and a few modifications and are notorious for being out of adjustment at this age. So overall they’re sort of based on a Technics SA-5550 which would be the Japanese equivalent. So the first thing to do is see if there is any life in it, plug it in oh wait there is no fuses in and that is just the start. Fuses and stuff in, it trips the RCD dodgy power switch going to ground and some life, I managed to get both channels after a lot of soldering up cracked joints and tracks...... then smoke, a suppressor blows Can you tell which one it is? The shear amount of dirt, grinding dust, overspray, glass and more dust causes problems so magic it away(this took many hours)and its clean. Thanks to Michael I got a new piece of glass cut for it and it showed me how out of shape everything was. So a total dismantle and a straightening of the frame was in order. this proved to be quite hard, literally. They are made of a lot of metal and are solid!!!!!!! It makes me wonder what they did to it to get it this bent. I have pioneer TS-X11 out of a crash vehicle and they’re less damaged but they are a good substitute for a brick. many pieces of wood later and a sore arm from belting the shit out of it, its kind of square.For the selector and tuning shafts I ended up turning up a new ones on a lathe out of brass and circliping them in there. I'm slowly going through and replacing all the eletrolytics (capacitors). so now it works like new and looks good apart from the odd scratch. the top got sanded and new veneer glued and pressed on it. The grill got attacked by a wire brush and a coat of gloss black, looks great1 point
-
When i worked in the radiator shop there was a specific paint used on the radiators that had higher heat transfer. The edge that receives incoming air needs the most paint.1 point
-
Hey bro sorry to bump an old thread but did you ever manage to find some lowering sorings? I'm trying to find some myself but can't find jack haha1 point
-
I'm back! had another jobs taking up all my spare time but that's out of the shed and I can forge on with Mine. in the interim, in no particular order I got some dobi springs and mk1 golf gas shocks, front of car bottoms out pretty bad when cornering and bumping. Probably doesn't have bump stops in there but may as well upgrade, they were cheap. Need to shorten the struts to accept the shorter golf shocks. nick the fab wizard at MFS has the manifolds and carbs to cobble together. I got Rob to spec up a cam and kelford ground it, gave stuff to ERS in tai tapu- head planed around a mil, he skimmed the block for free 'cause it looks good and the gasket will grip nice', and installed the cam bearings. brendon gave me a stack of rockers to go through and find a good one so I did, pulled it apart and cleaned up ready. picked engine up last nite so today I cleaned up the ports and casting marks, cleaned the head, lapped the valves, loaded the springs and put the rockers on. also cleaned and polished the crank, rehoned, cleaned out the block and galleries. i was in the mood to assemble it but a mate is keen to see how they go together so I'll hopefully do that this week.
1 point
-
So tonight a mate of mine (same one that sold me the motor actually) came around and bought his flash TIG over. weldy weldy i wish i could weld this well. Finished pipe setup including air filter. hopefully it wont suck too much hot air, but a heat sheild may be called for. To say that i am stoked would be the under statement of the century. and its not even finished! i was going to polish the pipes, but upon seeing it all together it would be far too much bling, so my mate and i agreed that wrinkle black on the pipes and blower is the way to go, and how all the old school turbo and supercharger kits were often done.1 point
-
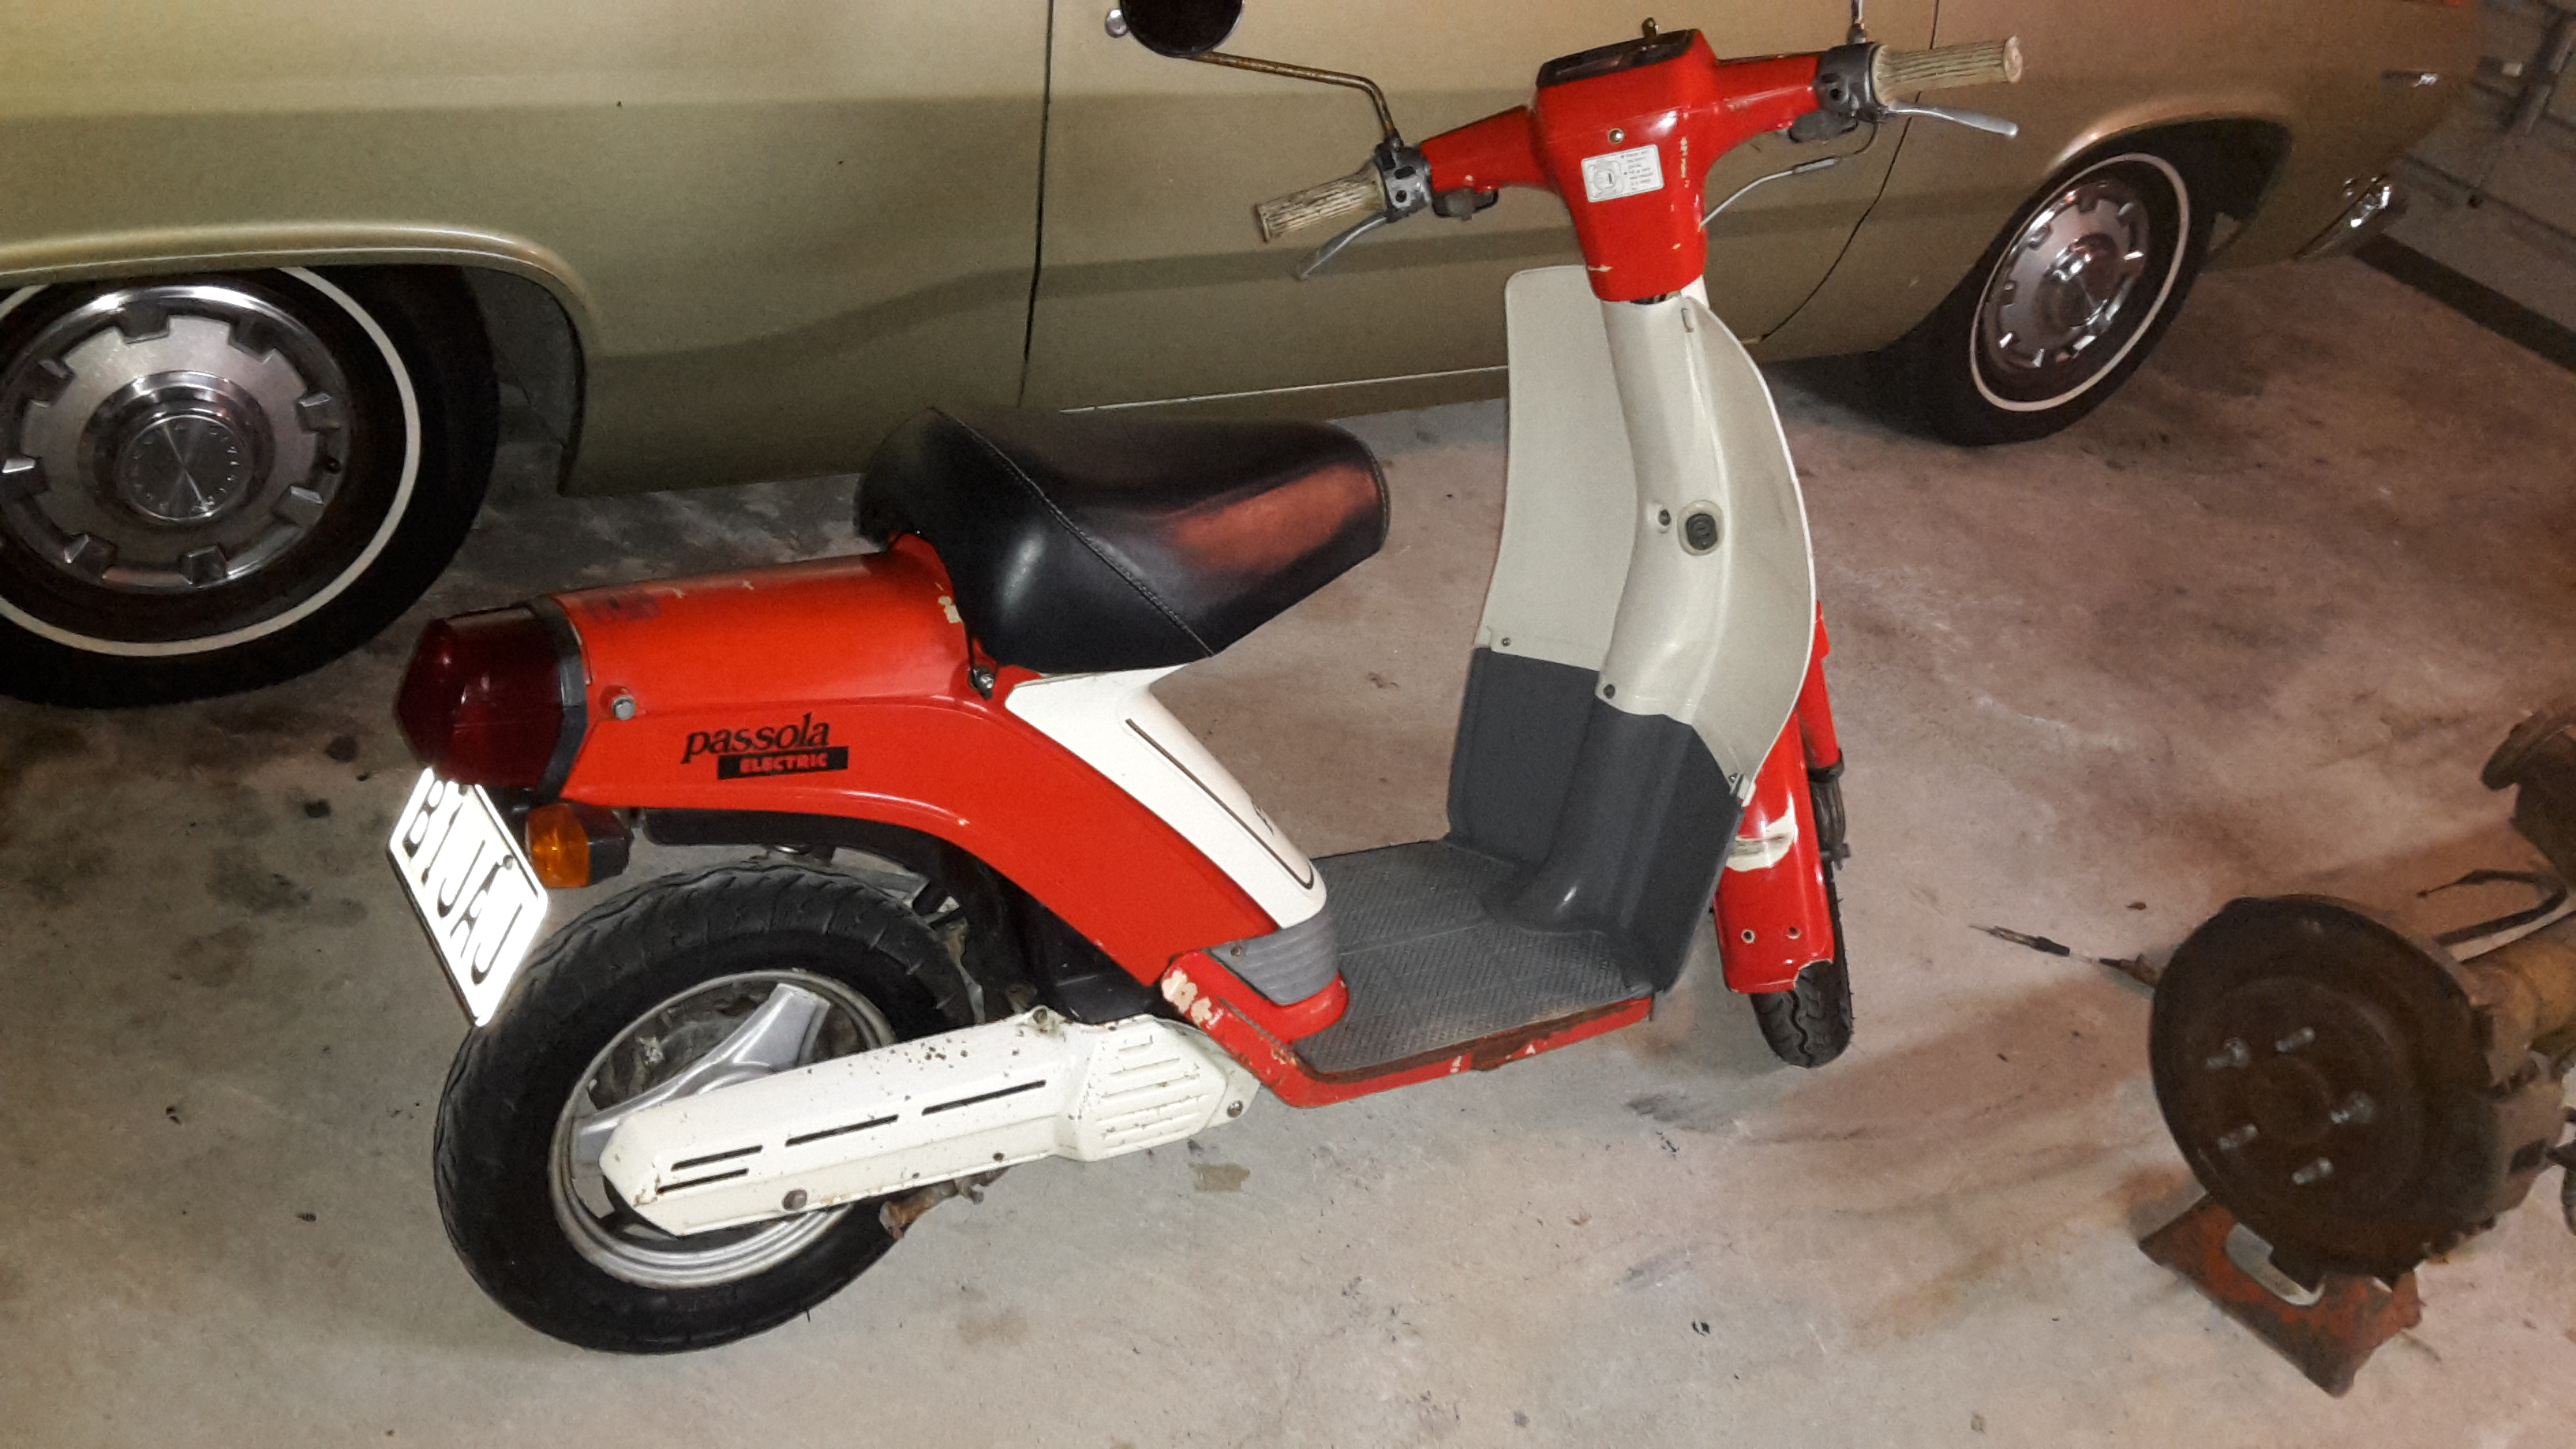
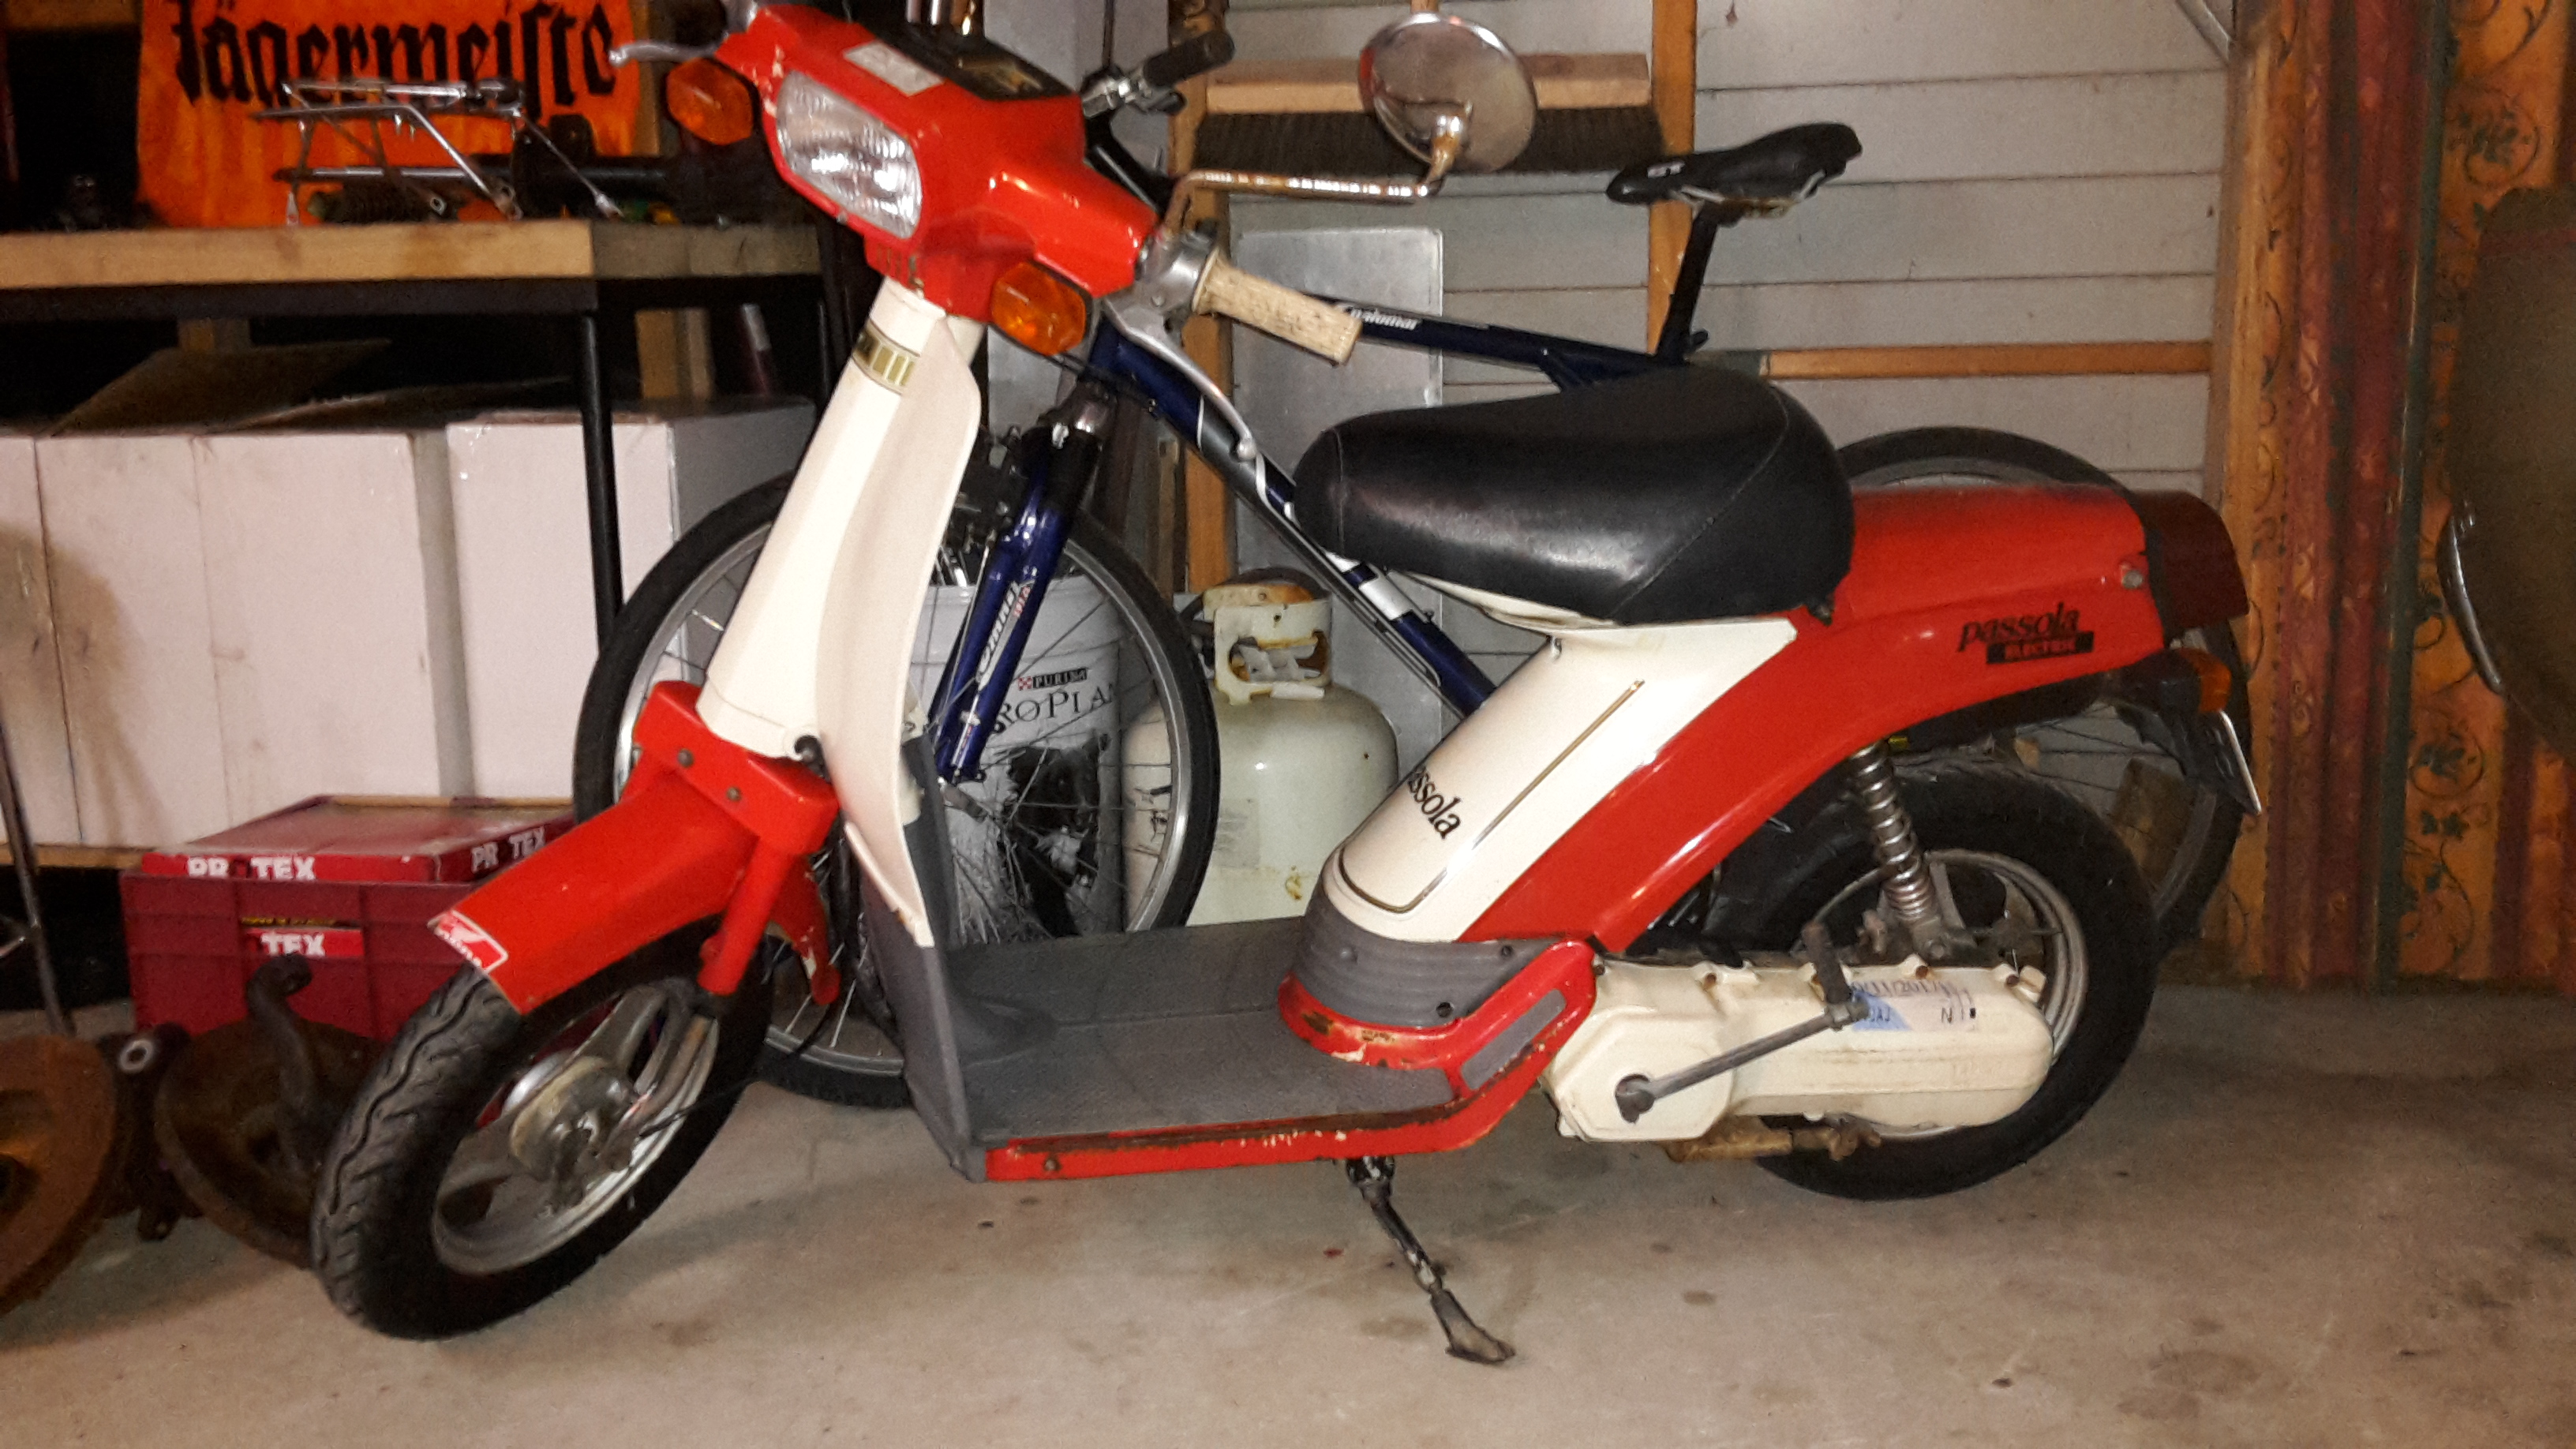
Other end of the engine size scale, I picked up this non running scooter from Scrubb, what a top bloke. I got it home and managed to lose the key somewhere, I disassembled the ignition switch to get that working and it had some water in it, and the air filter foam had fallen to bits so maybe it had sucked some of that into the carb. Anyway after that it started, I fixed the indicators, made a new air filter out of a car wash sponge, cleaned it, and got rego on it. At first I thought there was something wrong with the clutch but it turns out it has a automatic 2 speed. I have had some funny looks when riding it.
1 point
-
Today I received my new shims, installed them and also the cams. Pretty self explanatory. I a have still got to dial in the cams which I will do sometime next weekend whilst I wait for my Dial gauge to arrive. Nearly complete, I have also ordered a brand new alternator and a starter motor also for a good price. still have to order a knock sensor and get the water pump -> back of head lines fabricated with a braided line. Have to do this due to the original piping interferes with the knock sensor, and I am also not running a water based heater so I will not be using those that are included on the original hard lines either. I have also ordered the SQEngineering COP valley cover plate to suit the 2nz coils that I will be using which I should receive sometime this week.1 point
-
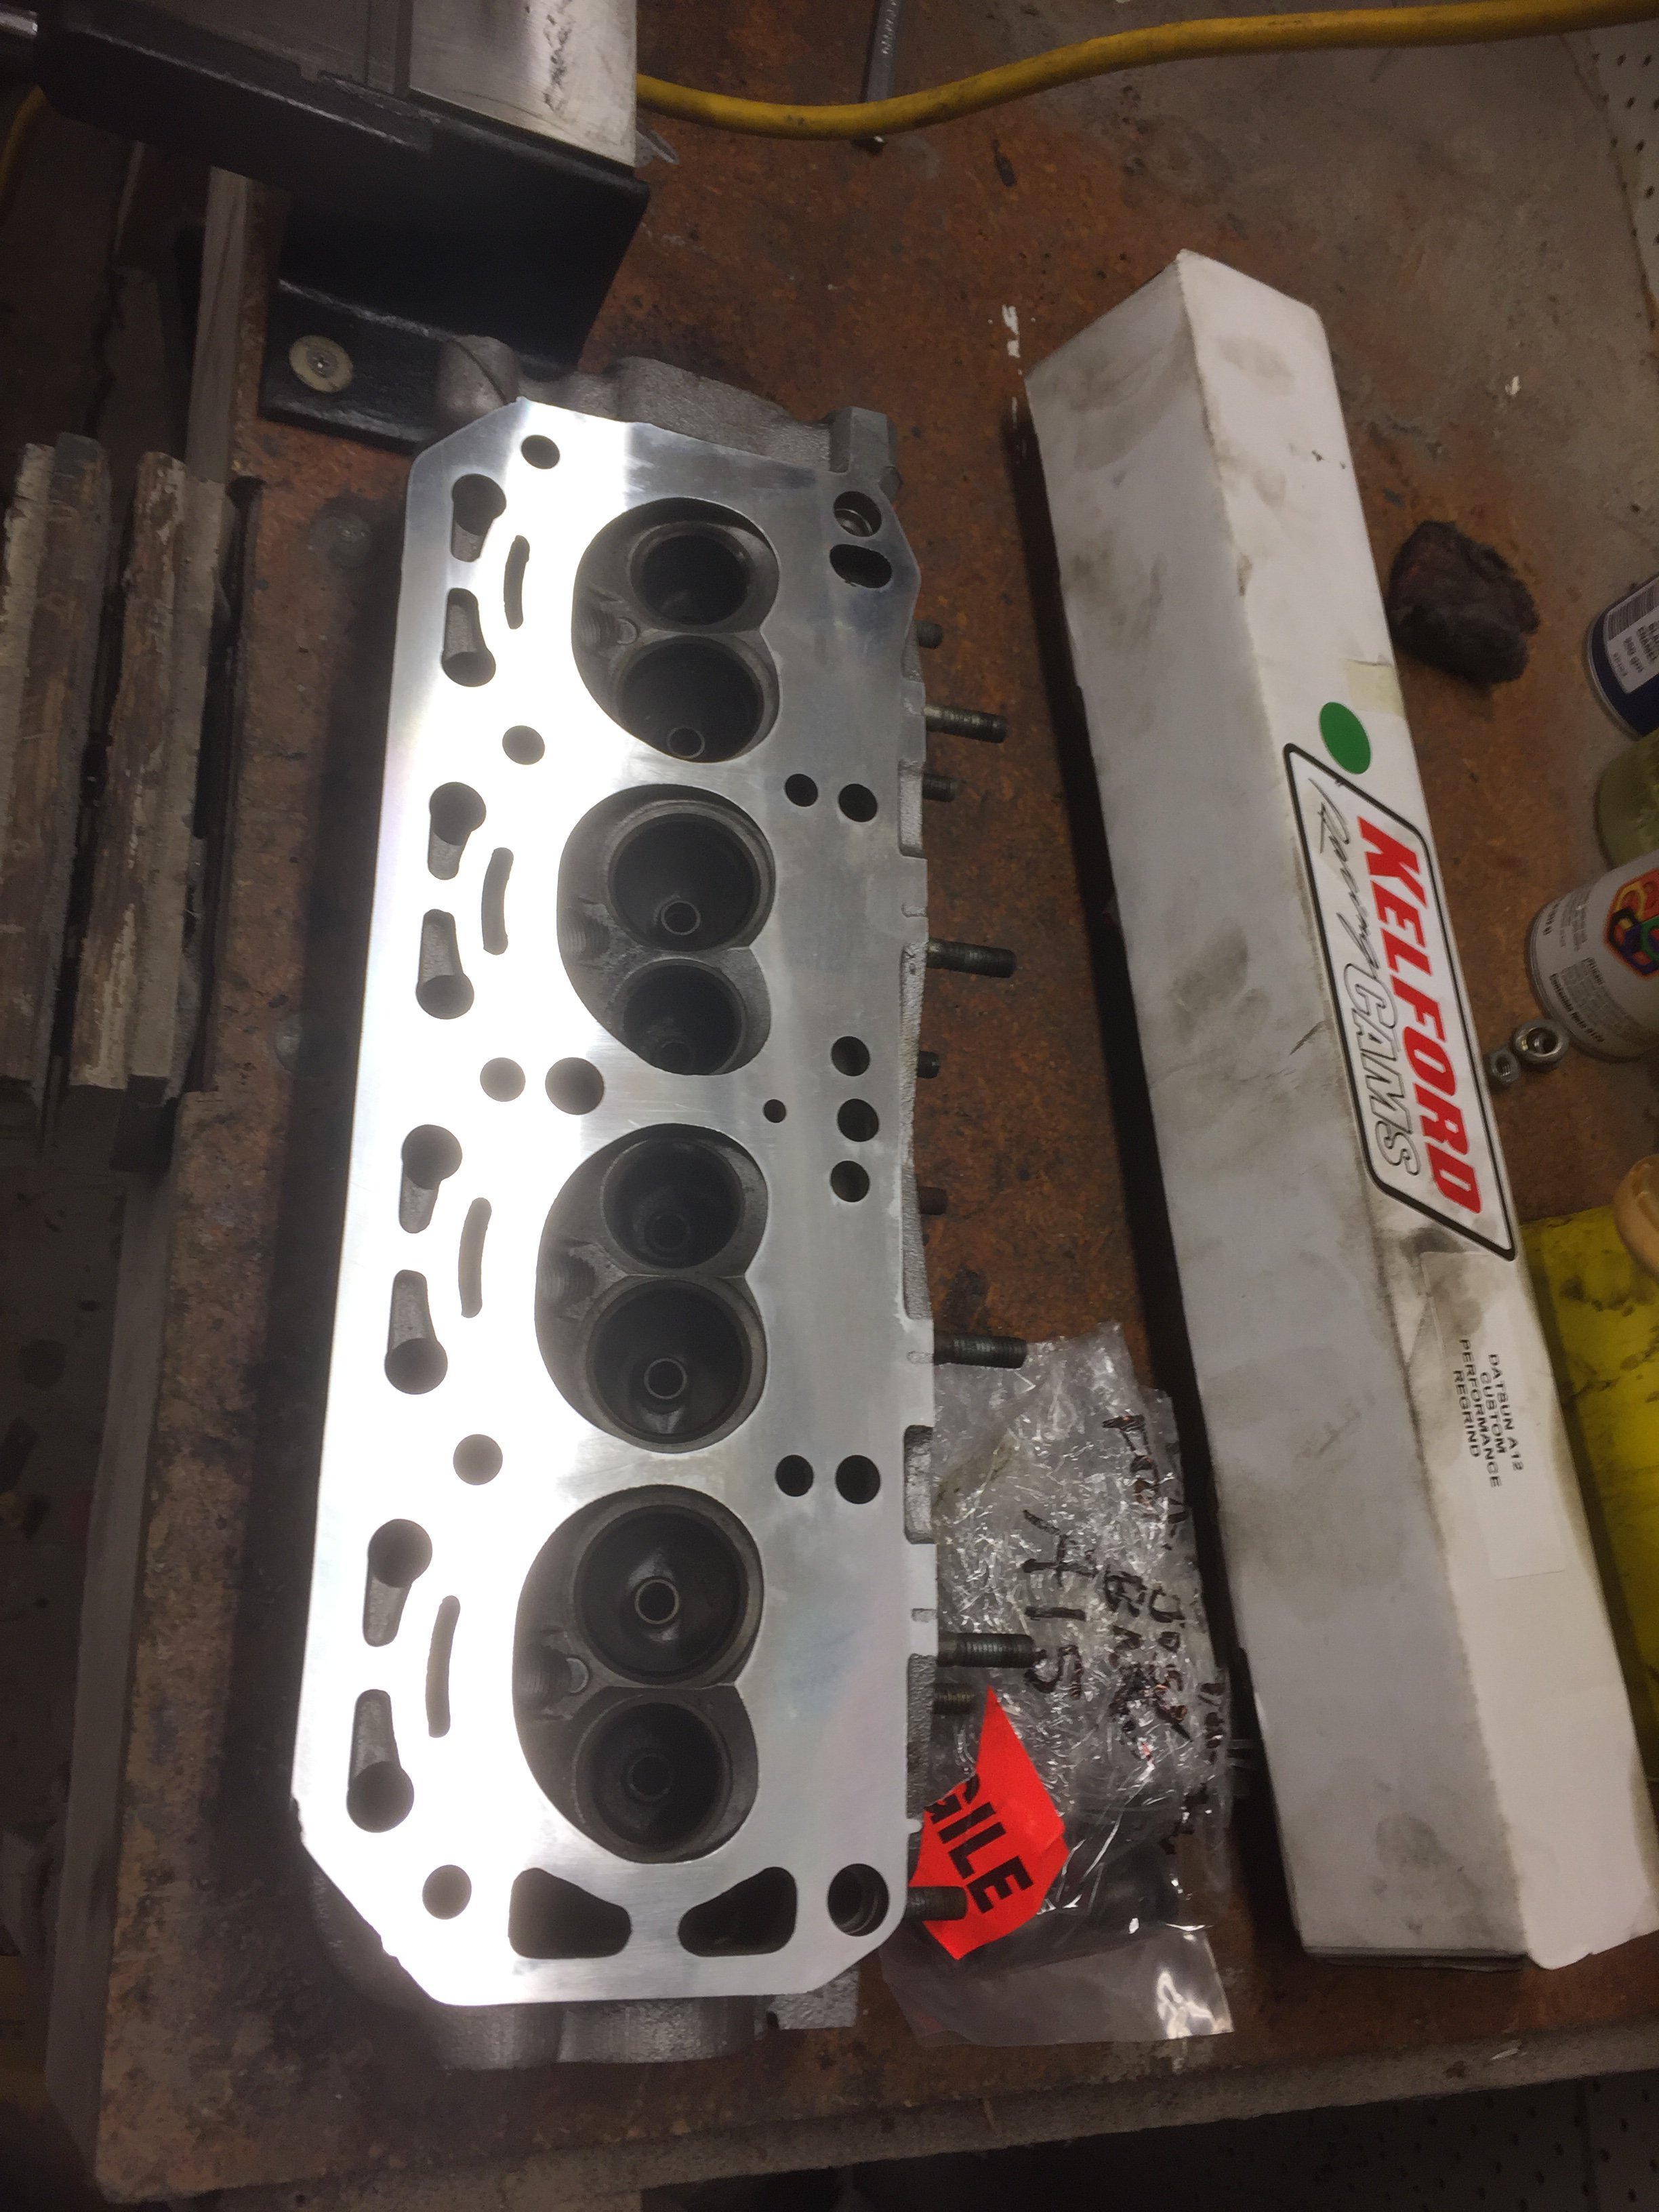
Today was a good day! I got my head back from Barry at MRP. Here are some photos he sent me of the head. No need to take my own. The head had to have some extra work done on it so that the 10mm+ lift cams were able to rotate without hitting anything. With receiving my head I also received the last few gaskets and bolts that I was after. Especially for the intake side of things so I could get these beauties bollted together. I installed the front input shaft seal, the output shaft seal, and also the spacer ring between the box and the input shaft that I forgot to install first time round. Nice new slave cylinder I am using OEM head studs so I have used the Toyota torque specs, so need to do the +90 +90. I just did it by eye with my last engine, decided to do it properly this time round. [ Fastforward an hour of fiddling around I got everything bolted together. I am still waiting on some new shims to arrive from Australia so I will have to wait a little bit before I can install the cams etc. [ With that, not long to go before i drop it down the guts into the KE25 and can finally start on another task. I am thinking diff shortening next. Hopefully less expensive than this engine! Discussion //oldschool.co.nz/index.php?/topic/52401-pbaines-1971-toyota-corolla-ke25/1 point
-
Have been pretty quiet on the build thread front. Got the 18rgeu engine fitted and driving well before using it for my wedding car. ran awesomely all day and looked great! once the wedding was over i started on the supercharger side of things. the factory air con bracket with some chopping pretty much fits perfectly up to the blower and ill make the top mount after all the piping is done. spent today getting all the pipe work sorted and its now ready to weld up, just need to find someone to do it! space is at an absolute premium, so have been taking my time planning the whole setup out. there's not alot left to do, but im not looking forward to wiring in the ecu again. notes - the center silicone joiner isn't the right size, just sitting there to show what i plan, ill pick up a 63mm joiner with the bubble thingy in the middle to provide flexibility in the system and that pipe under the blower/inlet is just scrap metal helping support the whole lot for the pic disussion thead - //oldschool.co.nz/index.php?/topic/30375-flibois-1971-toyota-corona/&page=81 point
-
when your mates on a big A series pine and has a bead blaster at work, pretty things happen1 point
-
Well now it looks good in and out its time to make it move faster! (Yes i still haven't cut and buffed it because I feel I can put it off for a lot longer X-D) As part payment for hacking the rust out of Bart's Val, he's given me this A15. I got the headers a while back in preparation. I tore it to bits today and she is a pearler! Still standard everywhere and bores are sweeter than a hot damn. Im making moves to grind a wee cam to help it along and will run GT 323 twin carbs on a modified manifold. They are a veeery similar design to standard Datsun but likely updated a bit, mine have airbox and linkages and all that shit to make it easier. (sitting on a spare A12) It's a bit like the twin K-series Toyota carb conversion which used to be the go-to mod when they were more common.1 point
-
I was waiting for the long weekend to cross some bigger jobs off the list and managed to! - Put good dash pad in - Cleaned and painted instrument cluster - Cleaned and rust killed floors and etch painted, sealed up screw holes and seams, rubber bungs in - Cleaned and painted glovebox hinge panel (left as much as I could of the factory sticker with key info and tyre pressure/fuel chart) - Made covers for the rear wheel arches, lower B pillars and exposed parts of the floor the carpet does not cover with some patterned plastic sheet - Painted dash top and the area under the rear screen which are visible. - New carpets - Vinyl died seats. Don't know how long it will last but we will see. The cans sprayed too narrow so I emptied them into spray gun and got a great even application. - Put stereo in properly - Epoxy glued splits in the centre console - Factory accelator pedal back on Still need to make a shifter boot and pick up another demister vent from a mate.1 point
-
Bit of an update on this. Rear tyres were rubbing pretty badly so borrowed guard roller off datlow and rolled the rear guards, whipped the drums off while I had the wheels off to check how much meat was still on the shoes. right hand side first, shoes look to be brand new which I was stoked with, left hand side, wheel cylinder leaking, faaaark, all over the shoes too. Gotta wait til tues for a new wheel cylinder as ripco had to order em from Auckland, was hoping like hell to take it down for a wof on Monday too so pretty bummed about that! So did minor things I had to do to it, new oil and filter, new brake pads ($130 retail!!) Sorted out springs so it's all wofable, chucked the cut cobras in the back and cut until they were just captive, fronts are cobras minus one coil and they're still captive, sits too high at the front but moving down south in a month and a half so too poor to get them shortened as of yet. Whipped the grill and headlight bezels out and polished up the chrome and gave them a couple coats of plasti-dip, looks a lot better now! Can't decide whether to keep badges in factory spot or have no badges on it!1 point
-
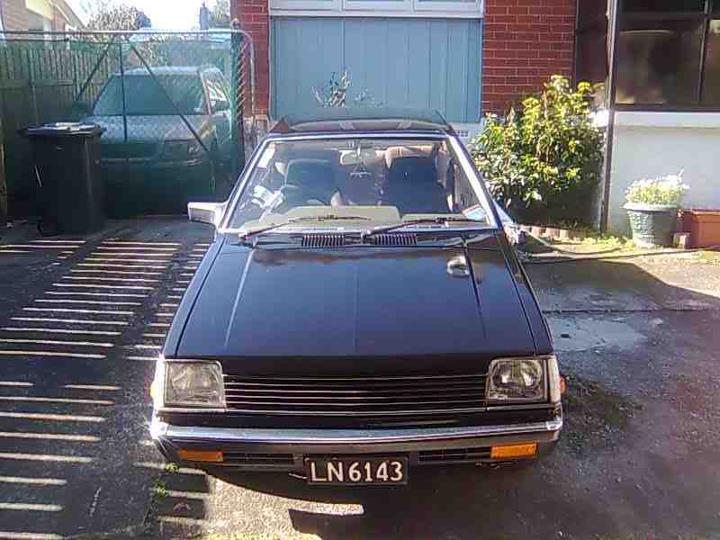
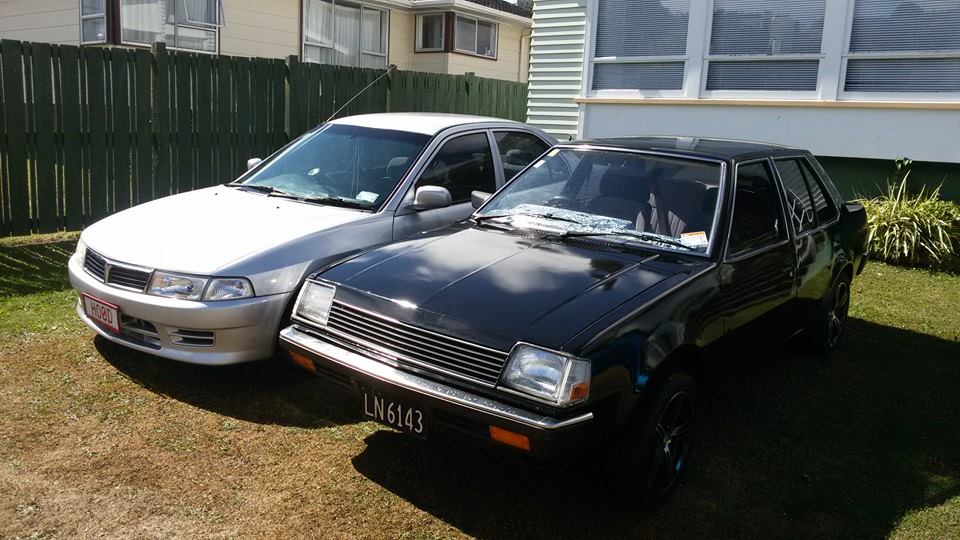
Hey guys new to the website. My names dylan and i own a 84 mitsubishi mirage have done for 15 years nw was my first car and am looking at doing it up now. Have done a few things like paint it black , added sounds throughout, replaced the factory seats with evo 1 recaros surprised to see that they fitted. Now i want to lower it but have no idea what lowering springs would best suit it ?? Ca anyone help here want to go as low as possible as i will be fitting some deep dished 14inch or 15inch modgies in black aswell. Also want to do an engine conversion and am wondering what has alrwady been done out there and what works well in these types of cars with minimal work involved . If anyome can help me out it will be much appriciated . Thanks dylan hood Discuss - //oldschool.co.nz/index.php?/topic/48177-84mirages-1984-mitsubishi-geneva-mirage-mark2-discussion/
1 point
-
A few pics . Old and recent
1 point
-
Yeah the old man brought it for me as a first car along time ago and we jus maintained it and now im into the whole jdm style and thought might start doing things slowly and see what happens . I dont think ill ever get rid of it thoe had it too long nw1 point


This leaderboard is set to Auckland/GMT+12:00