
Leaderboard


Popular Content
Showing content with the highest reputation on 04/03/17 in all areas
-
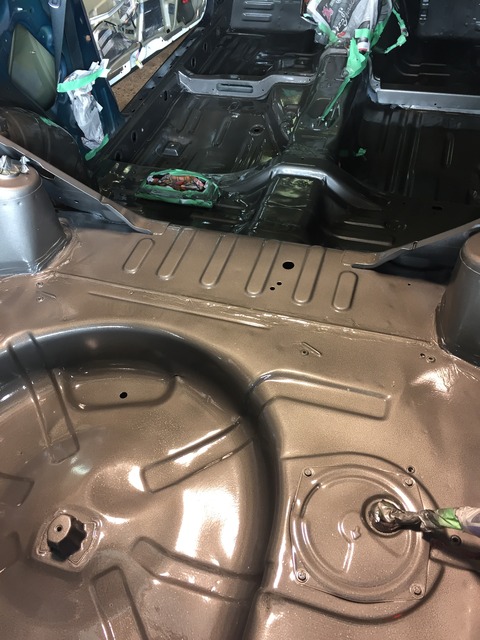
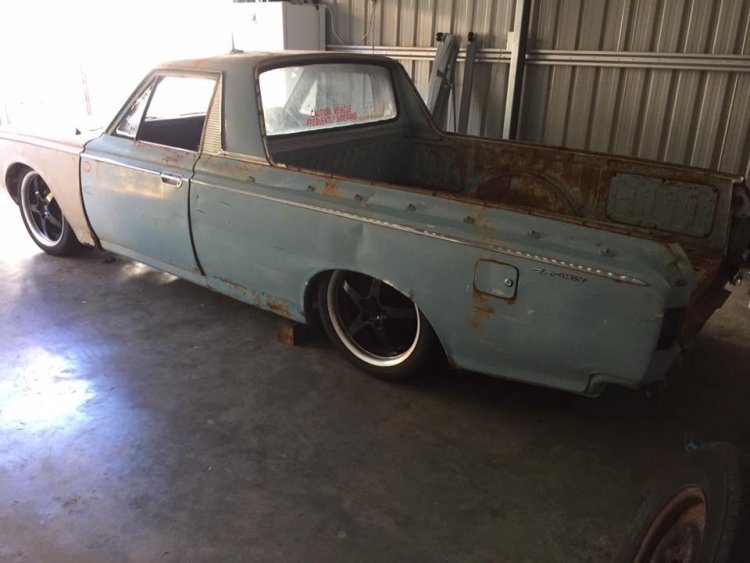
had a busy week and weekend, got the first couple coats of red on the car.did the bottom and the inside and dash area,pretty pleased with it, did one coat on saturday, missed a couple spots, worst thing that happened was sweat running out of my glove on the wet paint, bugger it! gave it a wipe with thinners and it came really nice on the second coat today. Got a few small runs but stoked with it. not bad for a rookie!13 points
-
I have been looking around for a while for a new work truck, wanted to go old school and update it to modern running gear and some creature comforts. I didnt have much of an idea but liked the look of older Chev trucks, did some reading and looking and got to this point. Truck will be in the country mid April, it is currently running a 327 and manual gearbox, and pretty much stock apart from that. Plan is to get it complied with existing running gear then modernise a wee bit. I have an LS3 and 6L80 trans and all associated wires and mechanical stuff in my warehouse now (cart before horse) and maybe a front end suspension transplant from a later truck and a diff with a lower ratio. this one will be either a 4.11 or 4.56 ish I believe, so a bit on the highside. While the intention wasn't to start/have another project, Im quite fizzed up about it. Going to keep it stock looking, no fancy wheels or any of that crap. Will get some hand painted signage on it, I want it to look like it was always there.
 10 points
 -
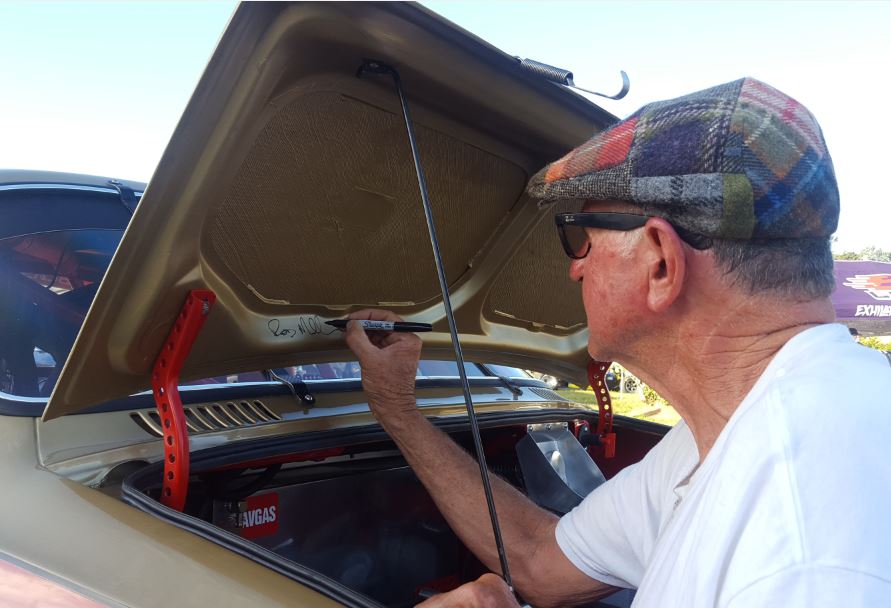
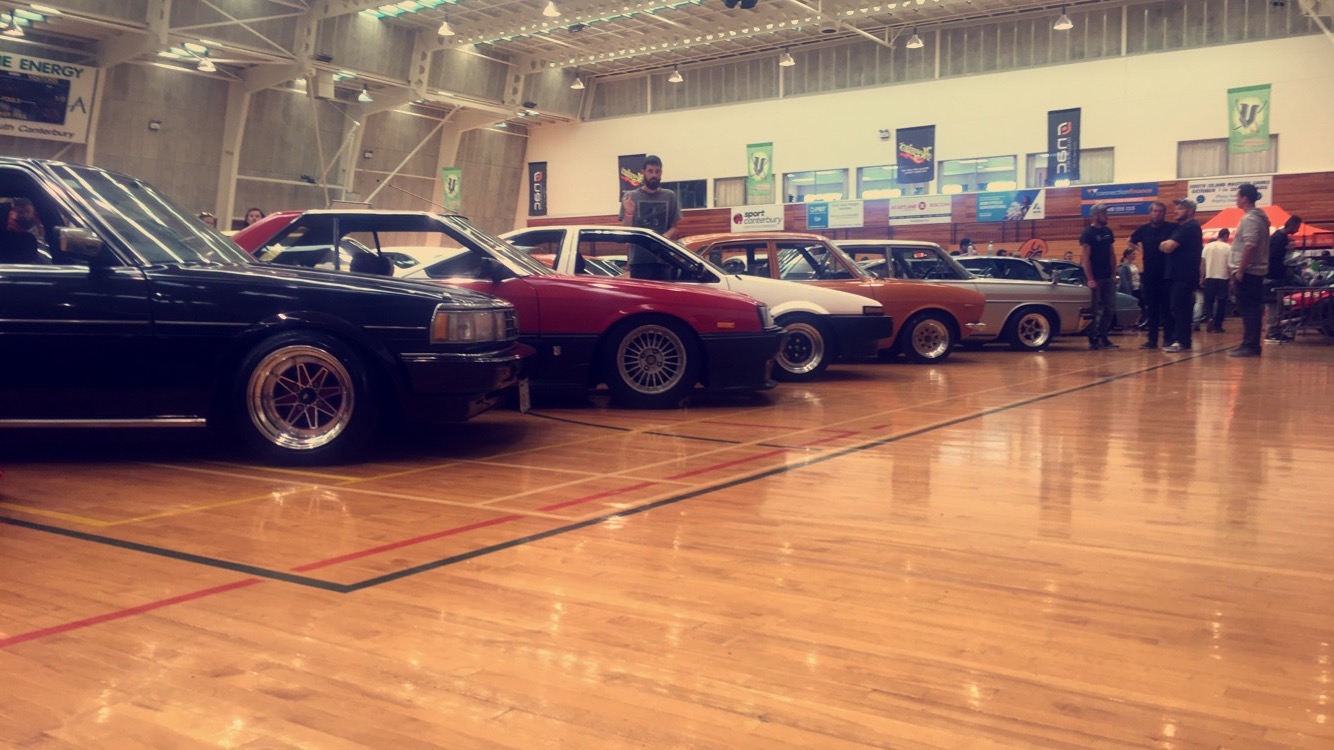
The road to toytafest! Here's a pic to prove i made it, will post how I got there in the coming days7 points
-
Perhaps that's more of a Shelbyville idea.6 points
-
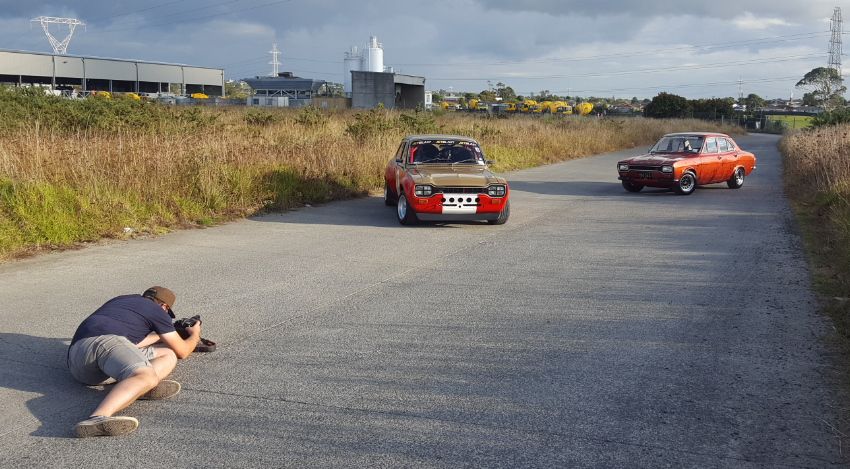
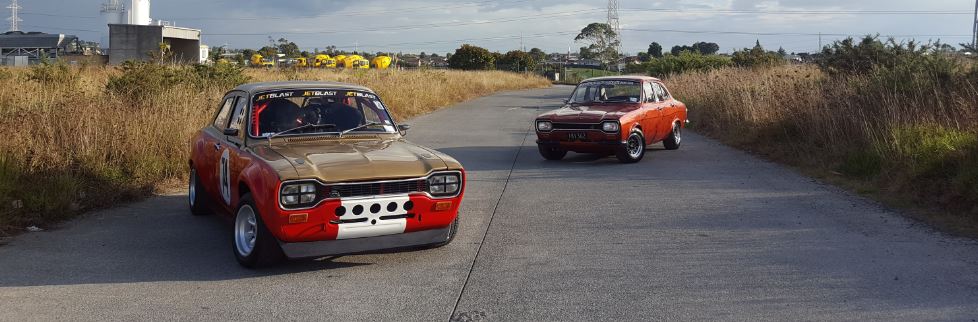
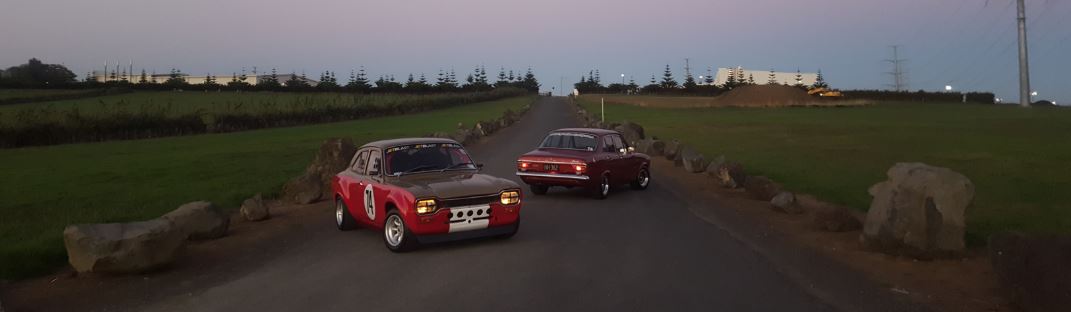
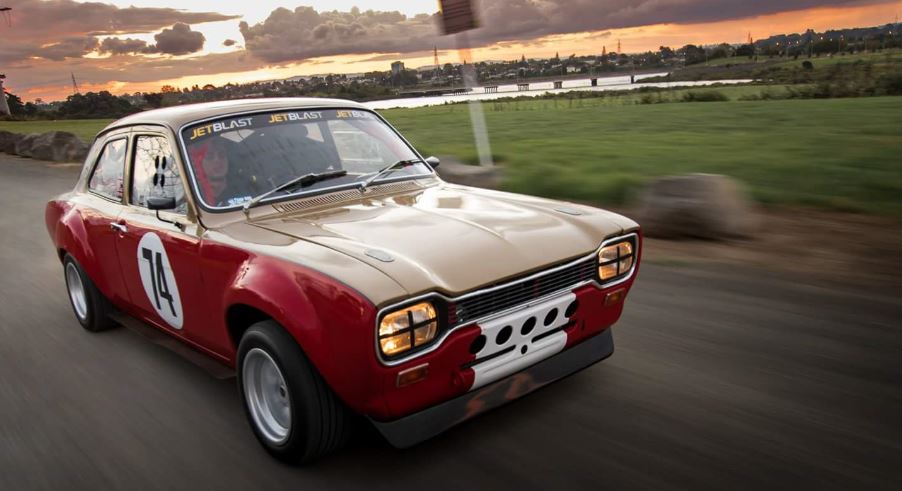
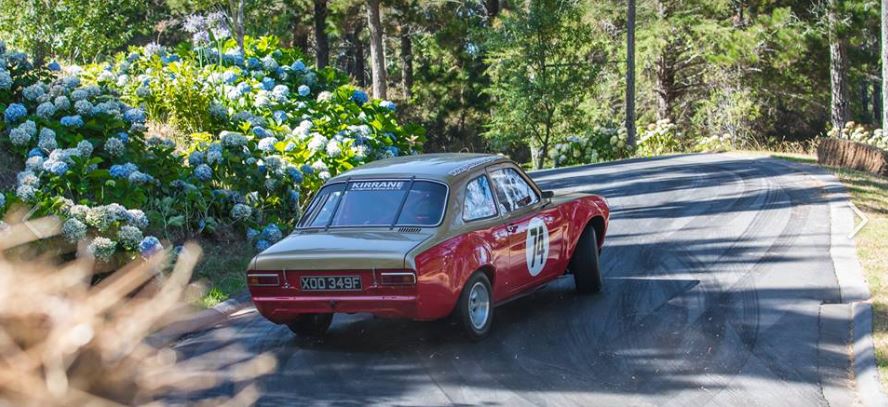
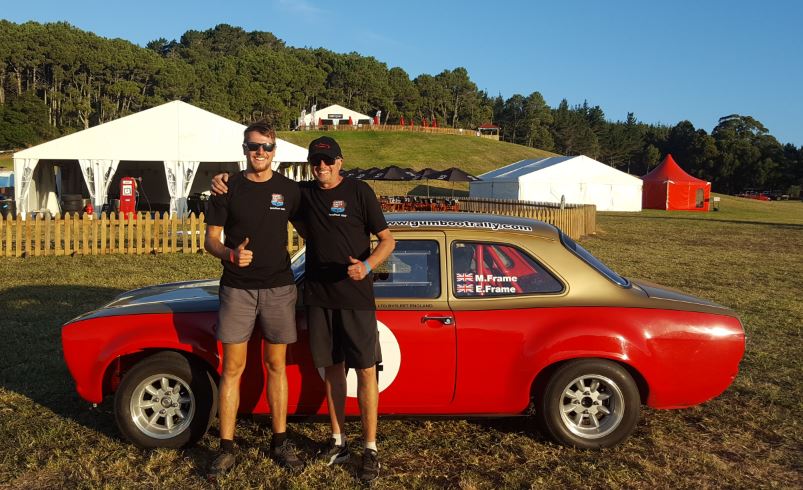
Snoozin hooking me up with a sweet photo shoot for NZ Autocar magazine on both my escorts Working his magic as the sun goes down Some rolling shots to finish the shoot Thanks Richie for the opportunity , great fun
5 points
-
Leadfoot Time - Part 2 Sunday Sideways Here's Leadfoot from behind the wheel Caught up with Tanner in the pits who was super friendly just like everyone else I had talked to over the weekend. Top Bloke Times are in and here's mine for the weekend Prize Giving time Cheers Rod , Shelly and the Leadfoot crew for a very memorable weekend One very happy Father , Son Duo
5 points
-
I've loved to piss and moan about how I think these are annoying and a stupid idea. But after having a driveshaft fail at 80ish kph on the weekend, Oh boy am I glad I had these loops fitted! My brake and fuel lines would have taken a hammering if not for these - They are a good idea, even in my case where all factory parts were used within factory power levels.4 points
-
Only got a quarter into it before it started raining down here. Really happy with how it is coming along and fitting. Got to hate cutting holes in brand new carpet. It's sent out as a blank
3 points
-
3 points
-
Fuck yeah, everyone needs a monorail3 points
-
Good news, talked to the bossman at Laurie Forestry in Timaru and he knew exactly what I was after but it got lost somewhere between him and the yard and I ended up with decking.. thank fuck, I thought maybe I had only thought what I said and not said it. Anywhoo Allan's gonna sort of for me.. by god they're good to deal with I thoroughly recommended them if you need mac, quality product, quality service.. In other photographic news, plaster.. Freshly topcoated, and my it smells good.. Ready to sand, She's getting closer and closer.. booked the sparky to come back and do his fitout, gonna ring the floor sander tomorrow and hopefully start painting this week..2 points
-
I built my own triangulated 4-link for the Mercury. No tests needed, but I did use the specified sch 80 pipe (heavy car) and drilled inspection holes for the threaded ends. I did all the welding myself, including the adjustable ends. I do know the certifier through the Hot Rod club, so I guess he thought I could weld OK.2 points
-
Has a good cooler, xr6 coon one. the turbo should be fine, it was in great shape when I put in on and I've never given it heaps. just make sure the cam cover vent is unrestricted and the seals will be mint..maybe take the top off that wee appletons bottle it's jammed into and leave it dangling inside it instead? I'm pretty amped youve doubled the chooch, I was too scared of cooking the back cylinder. That's the downside to running the petrol turbo manifold. If you do kill it, there's a reeeeal honey motor in the garage you can negotiate purchase of from rovers 8-D2 points
-
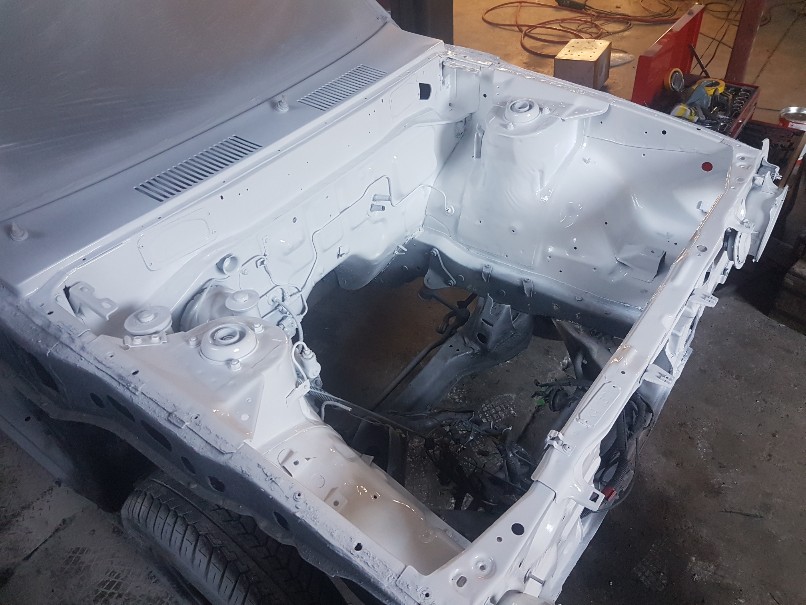
Got the engine bay cleaned up and painted. The body is all paneled and primed now. Just about ready to paint, just a few small imperfections to tidy up and then wait for a sunny day to paint it. All my painting is just done a a outside shed I rigged up made from corrugated iron roof and plastic sides. Not perfect but defanatly better then painting outside under no cover
2 points
-
Mounted the solar panels on the roof and more sound deadening today. I'm really glad the van came with this TracRac Van rack, it's really well made, all aluminum extrusion and stainless. I've worked in ski shops and bike shops a lot when i was younger and have mounted quite a few racks so was really impressed with this even compared to Thule, yakima etc. They are ungodly expensive ($550 for three bars and feet) for a van ladder rack so i don't think i would have bought it if it didn't come with the van. Just some 1.5in aluminum angle for the panels.2 points
-
2 points
-
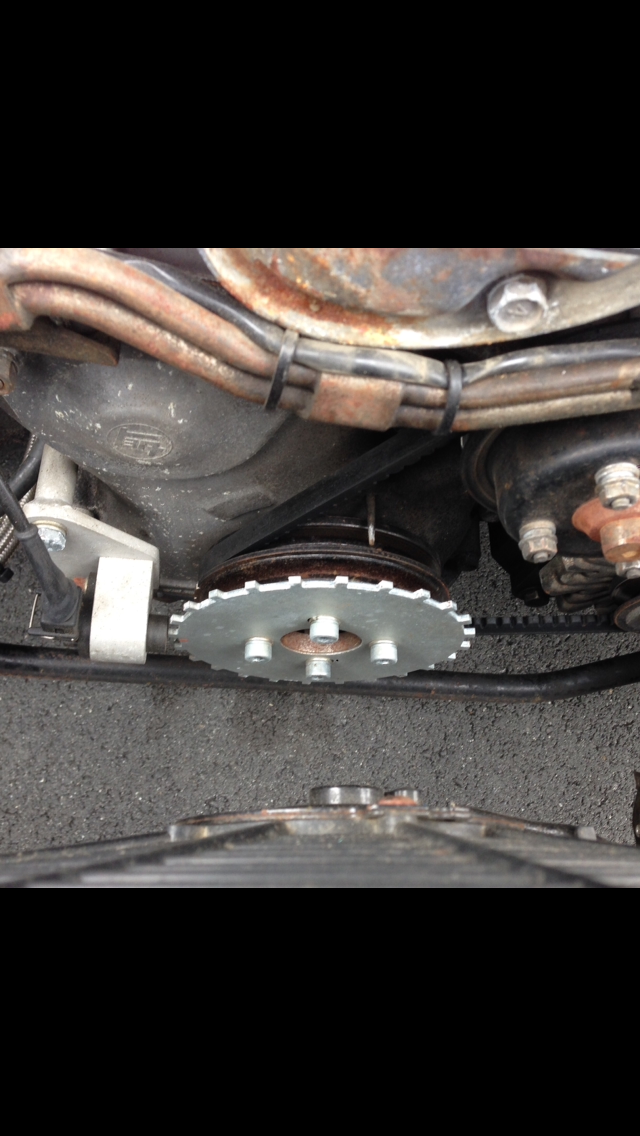
Chopped a bit more out the rear to get it sitting a bit flatter. picked up some 15" ssr meshies off a mate for peanuts sweet cause I can swap the centres over to my flashy 8.5" barrels too had a geez at yota fest at a couple trigger setups. photos from a 3tgte rina and look exactly like what I need. ill use the factory pulley as it's harm balanced etc etc. but for the spacer to sit flat I'll need to lathe the inside surface down and possibly tap the lip off. only needing water pump and alt I might be able to cut the front grooves off as well aaaand I was making coilovers but ended up finding some already made on AA60 stubs so should have those here I couple weeks too
2 points
-
The local gasket place in new Plymouth do them all the time. They use a cnc cutter thing that is usually used to cut regular industrial gaskets and they just chuck a piece if copper in and trace your supplied head gasket. I think they quoted me under $100 for a 6 pot one2 points
-
Manged to squeeze in a panhard rod today. may need a few tweaks, but should work. Will leave it half finished till get the coilovers mounted, to make sure everything works together bit hectic under there, yep.2 points
-
Not as epic as the kids table up there but I got epic satisfaction from this little project. We have a tiny home and it's important to free up pockets of space and remove clutter when possible (I'm not good at this) Greg popped in the other day and suggested I put TV on wall..It's been on the to-do list for ages. Measured wall and tv angles Had bracket laser cut Bend along dotted lines Draw corner of lounge and TV on table and use to get angles for steel (ends are not 45s) and weld Paint and screw onto wall Now just gotta add a power point and white cable so they exit walls higher. @flyingbrick Please rehost images on OS2 points
-
I dunno mate, I think you need to check the ackerman angles2 points
-
Well hot damn it worked Things i learnt theres enough adjustment in the gauge to shift the range +- 40 ohms for fine tuning to a sender (i.e E can be shifted from 40, down to 0 or up to 80, and same with the F) The heating wire is ovbiously bloody small, but it looks to be about 50 coils i unwound 10 of them, and spread out the remaining along the bimetallic strip. and it appears that i have now adjusted the gauge to a full sweep over 90 ohms at around 10v, which seems to be what the gauge will see i the cluster. The bench set up i used was a bit rigged because i have the minimum of electrical tools, but in any case it seems to be proof of concept. i will have to pull the sender out and test it though its full arc to see how accurate the gauge will be in the points between F and E. Will post up a full walkthrough of what i did, because i cant find anyone modifying a bimetallic gauge anywere (dipole types look to be possible with resistors on the full and empty sides). I did find a case of a guy modifying the sender some how, and various senders chopped up and put into other units. But this method would appear to be rather cheap and easy2 points
-
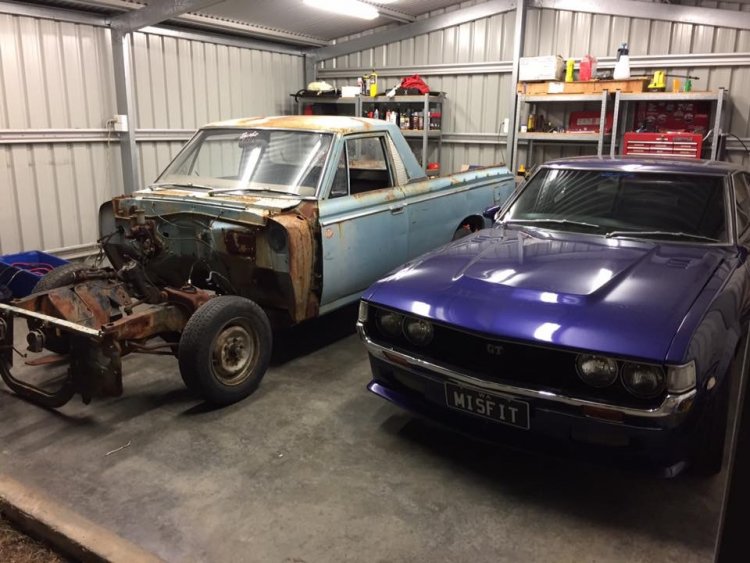
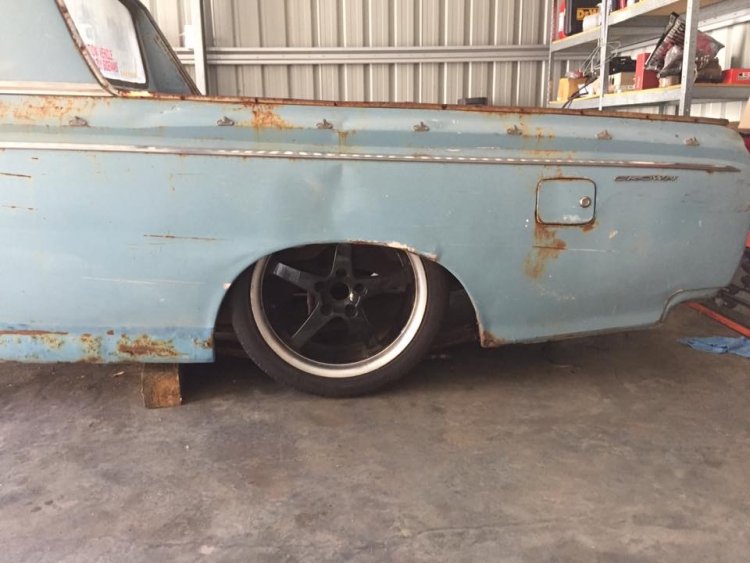
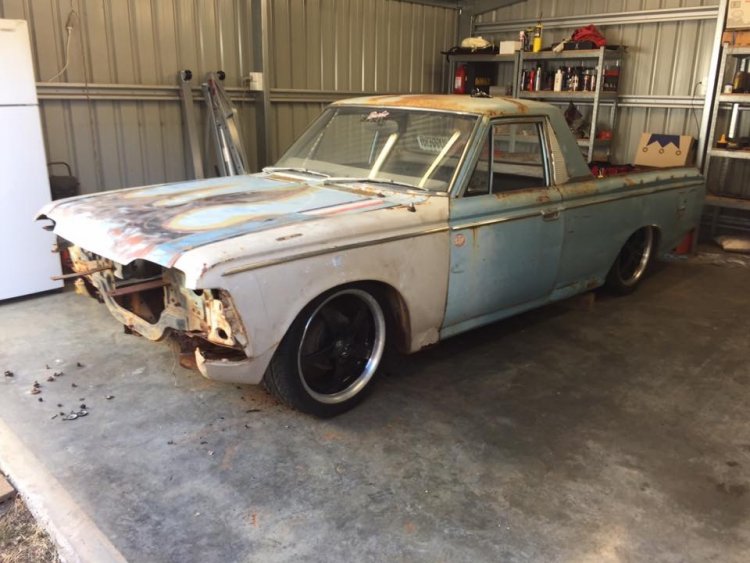
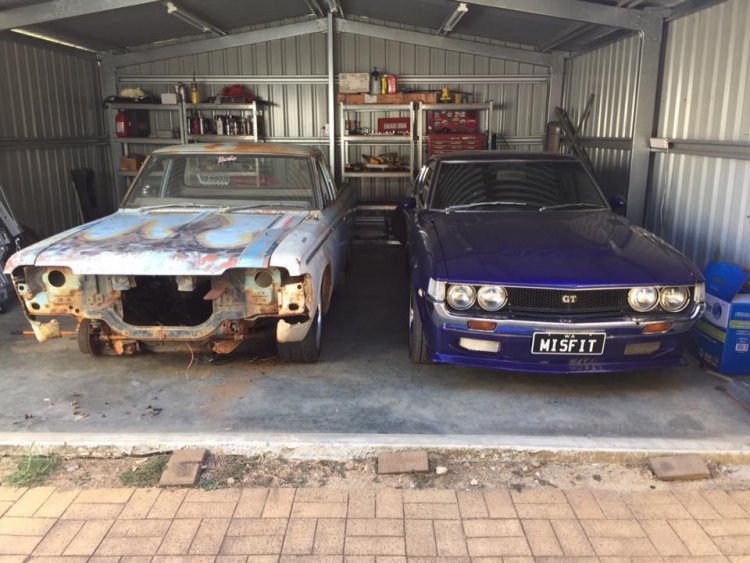
I've been chasing a crown ute since I moved to Aussie 5.5 years ago, I actually checked out a real tidy one the first week I got here but it was in Bundaberg, I was headed to Perth, and the motor was fucked, so I couldn't drive it. Seen a few come up for sale over the years but nothing local, and the few ones I knew of that were local were all either fairly rusty or there's one that's absolutely mint, with a UZ swap, but way out of my price range even if he would sell Then there was this one. I actually lived with it for about a year in a house share situation, where the house owners son had a bunch of old Toyotas on the property. This was body off chassis and set up on a rotisserie, but that's as far as it got. I talked to him about buying it at one point, but he wanted stupid money because it was pretty clean body wise, and it was an M powered chassis, which are way harder to find than the R ones in ute form Fast forward a few years and it's up on gumtree for a grand, so I whip around to check it out. It's been out in the weather for the last 3 years after he had to move it when his parents knocked the house down, the rotisserie ends are still bolted to it, and they're plonked on top of the chassis, with straps holding it on. There's a bunch of extra surface rust, but the only holes I can find are a couple in the sills. It's missing a driveline but I'm not worried about that. All the body parts come with, there's a good tailgate, rear lights and rear bumper. Everything else I can get from a sedan if they're fucked so I'm pretty happy I've got a shitload of work ahead of me, and I'm really struggling with deciding what exactly I want to do with it, but IVE GOT A CROWN UTE!!!! Gumtree pic, it's been at least 5 years since I first saw it, and it has never been this assembled in that time When I went to check it out I knew it!!! Poor Ken Clint has got a hoist, and didn't want to give up his rotisserie ends so he got the body sitting back on the chassis before I picked it up Hi my name is Matt and I'm a crownoholic And at home next to the girlfriends Celica Initial thoughts are sedan chassis (get rid of the leaf rear end), MS112 diff and front brakes (already have the diff), maybe 17" widened steelies, maybe 18" billets (but I fucking hate polishing wheels), tidy up the body and paint it, maybe bags, probably 3RZ turbo, but it's all up in the air at this point This is a fucking massive project, it's going to take years, and a lot of $, and there will be a LOT of questions and upskilling. Lucky you guys are awesome and know what you're doing when it comes to old rustbuckets! Cheers Matt1 point
-
The Auckland Monthly Meet! Wednesday 19th APRIL the SECOND TO LAST Wednesday of every month. Save the date 7:30pm onward (but you can turn up earlier, no dramas mayte) A chance to catch up with fellow club members, talk with people you may or may not have met before and get your mouth filled with meat. Or not meat if you're that way inclined. Burgerfuel, Mexicali Fresh, Ajadz, Subway, Doolan Brothers etc. Corner of Robert St and Hurst St, Ellerslie See map. The DEAL$: FREE Drink with Burger and Chips Purchase (From the COKE range , excluding mini burgers) FIRST MEET?? If you are new to these meats here are a few points that may help; Most people usually show up between 7:00pm and 8pm-ish. We roll down to get burgers and whatever else is available whenever we're hungry. We sit around either at Burgerfuel or back up top in the carpark and continue the yarns. Remember its always a casual affair, a place to yarn to mates and make new ones. An Oldschool car is not required at all, but if you've got one on the road then bring it and show it off!! Doesn't need to be flash or special, As long as it's special to you And to be honest, only lame people would drive a boring modern daily driver there anyway. MOST OF THESE ARE COMMON SENSE. WE WILL PROVIDE A FEW GENTLE REMINDERS WITH THE NEW RULES BUT REPEAT OFFENDERS MAY BE ASKED TO LEAVE. RULES AND THE BORING STUFF!! Basically these are in place so we have a fun and friendly meet and leave the carpark clean and tidy like we were never there. Take your rubbish away with you or put it in a bin, Use the public bins downstairs not the private ones belonging to the business up top. Smokers please don't dispose of your butts on the ground! Please limit the ALCOHOL consumption. Its a public place and the Police/security regularly stop in and we don't want want anyone getting in trouble, We also don't want people leaving empties around. You are welcome to invite a few mates, but please note you are 100% responsible for their behaviour If you belong to other clubs and feel they might be keen to come check out our meet then that's cool but please see Threeonthetree, Shakotom or BDA780 for permission before inviting them. NO Skids or Reckless/Dangerous driving Please leave a space near the fenced off area clear for the cleaners and don't block them in if they are there. Park in a proper carpark! If its full then just use a bit of common sense and try not to park too many people in. Newschool cars please park to one side and be prepared to move if we get short on space. I have had to ask Newer cars to move and park elsewhere and will continue to do so. The old cars get first preference for parking. Don't be offended if you're asked to move your newer car to make space for something old. AU Falcons may apply for an Oldschool dispensation in writing, by sending applications to "Dave's Intech Compassion Klub" or DICK, 126 Grey Street Onehunga where they will be reviewed. If its raining and we have to park downstairs then new cars park upstairs or out of the way. The covered carpark is very small and needs to be OS only,! If you drive your Mum's Suzuki Swift etc than bring ya Mum. If you have any suggestions or input for the meets then PM Threeonthetree, Shakotom or BDA780 Thanks!!1 point
-
Longest exhaust build ever! What a stupid idea it was to design it like this haha. So far has 5 pairs of flanges on each side if you include the ones at the end of the headers. Will have another pair after the diff as well. Got some flexi's and welded them in, as well as the rest of it. Need to put the tray back on now and see where the rest of the exhaust can run out the back. Made some mounts, after making them incorrectly to start with. Had the rubber hanging under tension where-as it should be compressing, otherwise it would most likely tear the rubber in half. Also made some gussets for the 4 link brackets since they didn't quite look strong enough. Might make some to tie in the other side as well. Need to make a start on the fuel tank soon. Any recommendations on an in-tank fuel pump to use? Don't really know much about them, 255LPH should be enough? Tank will be about 220mm deep if that matters.1 point
-
Hahaha. Yup that's a fail. You will have to grab a new master cylinder and start again.1 point
-
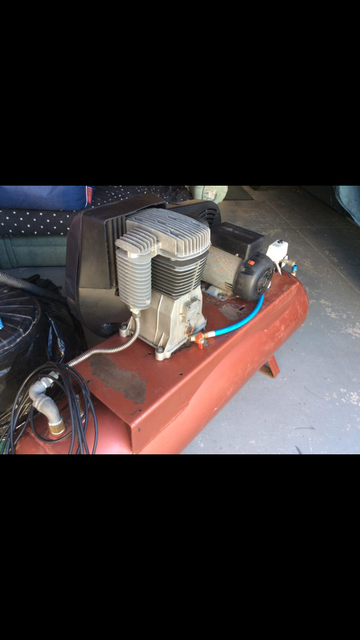
Another coat: That was with my cheapy 40L Blackridge 2.5hp compressor which can't keep up with the HVLP spray gun. So I bought this for when I do this outside (a couple of cars to do): Its 3hp, 15cfm, Ingersoll Rand pump on an old Hindin 270L tank. ALLL THE CAPACITY!
1 point
-
ON Nats 17 looks like this that's another 400mile's on the clock or 640 metric KM's Departed Thurs Night caught up with the Akl convoy at Ashhurst, gave @64vauxhall some cream for his special area then took them over the Saddle Road Credit to @Threeonthetreel for that image Friday went and watched them do this out in a paddock so I went for a jaunt down here (I won) Back to camp for din din's & the yummiest Meat soup and some refreshments Sat was Scavenger Hunt day, went & saw stuff and things then back to camp for Prizegiving & Rocker cover racing I placed 4th this yeah after a few tense knock out rounds 3rd to Trev oh yea dressups Sunday packup & group Photos then a hoon into Featherston to catchup / meet a mate then Long way home via a Lighthouse & some cool machines could Just see Max & Furiosa at the wheel of these Birds like it fin1 point
-
It's all finished ages ago and the owner loves it. Takes it camping etc. Has now got some posh fold out tent thing on the roof.1 point
-
Yeah was a bit of a prick to jack up and align the holes, but these are sealed AGM batteries, so hopefully don't need much for awhile and can take a bit of crap. This location is actually the factory spot on Ford diesel vans. Space is a bit of a premium when building a camper so I'll deal with it. The pull out strength for a single 3/8-16 rivnut is 500lbs, which is like 2kN. I have five of them holding that tray. I'll keep an eye on them for the first few hundred miles though.1 point
-
How far is it up the hill? Rig up a pulley/whinch system. Make a track kinda like a small monorail or even twin train track setup and winch it up the hill1 point
-
To be honest, I should have cut the springs in half from the get go. I cut the springs for no other reason that to make it more pleasant in the shed to look at until the coilovers go in. The right side of the car is a bit higher than the left, I will probably end up with a height similar to the higher side. Not long until the engine goes in!! I also installed my new valance courtesy of Yahoo Japan. The tape is holding the paint/rust on. I decided on a new one as the one I had previously wasn't the straightest and would require some more. Plus I didn't actually own it...1 point
-
This arrived yesterday, picked it up this morning, Started unpacking it, for merchant grade is really good, better than I expected. It's also bandsawn not rip sawn which was unexpected, Made a frame up of offcuts the other night for it to sit while is dries out, Filleted and stored, gonna buy some cheap tiedowns to clamp it a bit and stop it twisting.. All the dried stuff I just stuck on timber hung from the secondary bearers, my only gripe with the timber is for the facings which he recommended dry, fair enough I'll get that, they could mill it down I asked if it was rough sawn and could they mill one side, the answer was yes but then I get this, Not at all what I want and doesn't match a single thing, bit annoying really as I now have to deal with it.. *sigh, add it to the list. At least I can use it to make my bench/s, Dried storage, Also my in laws have done a fucken great job leveling and clearing/preparing the rear of the section, I'm stoked.. Just gotta get all my levels right and I can start cladding.. Yay!1 point
-
I may have the picture in my head wrong, but wouldnt it be easier to simply build a trailer to tow behind the quad to get stuff up the hill?1 point
-
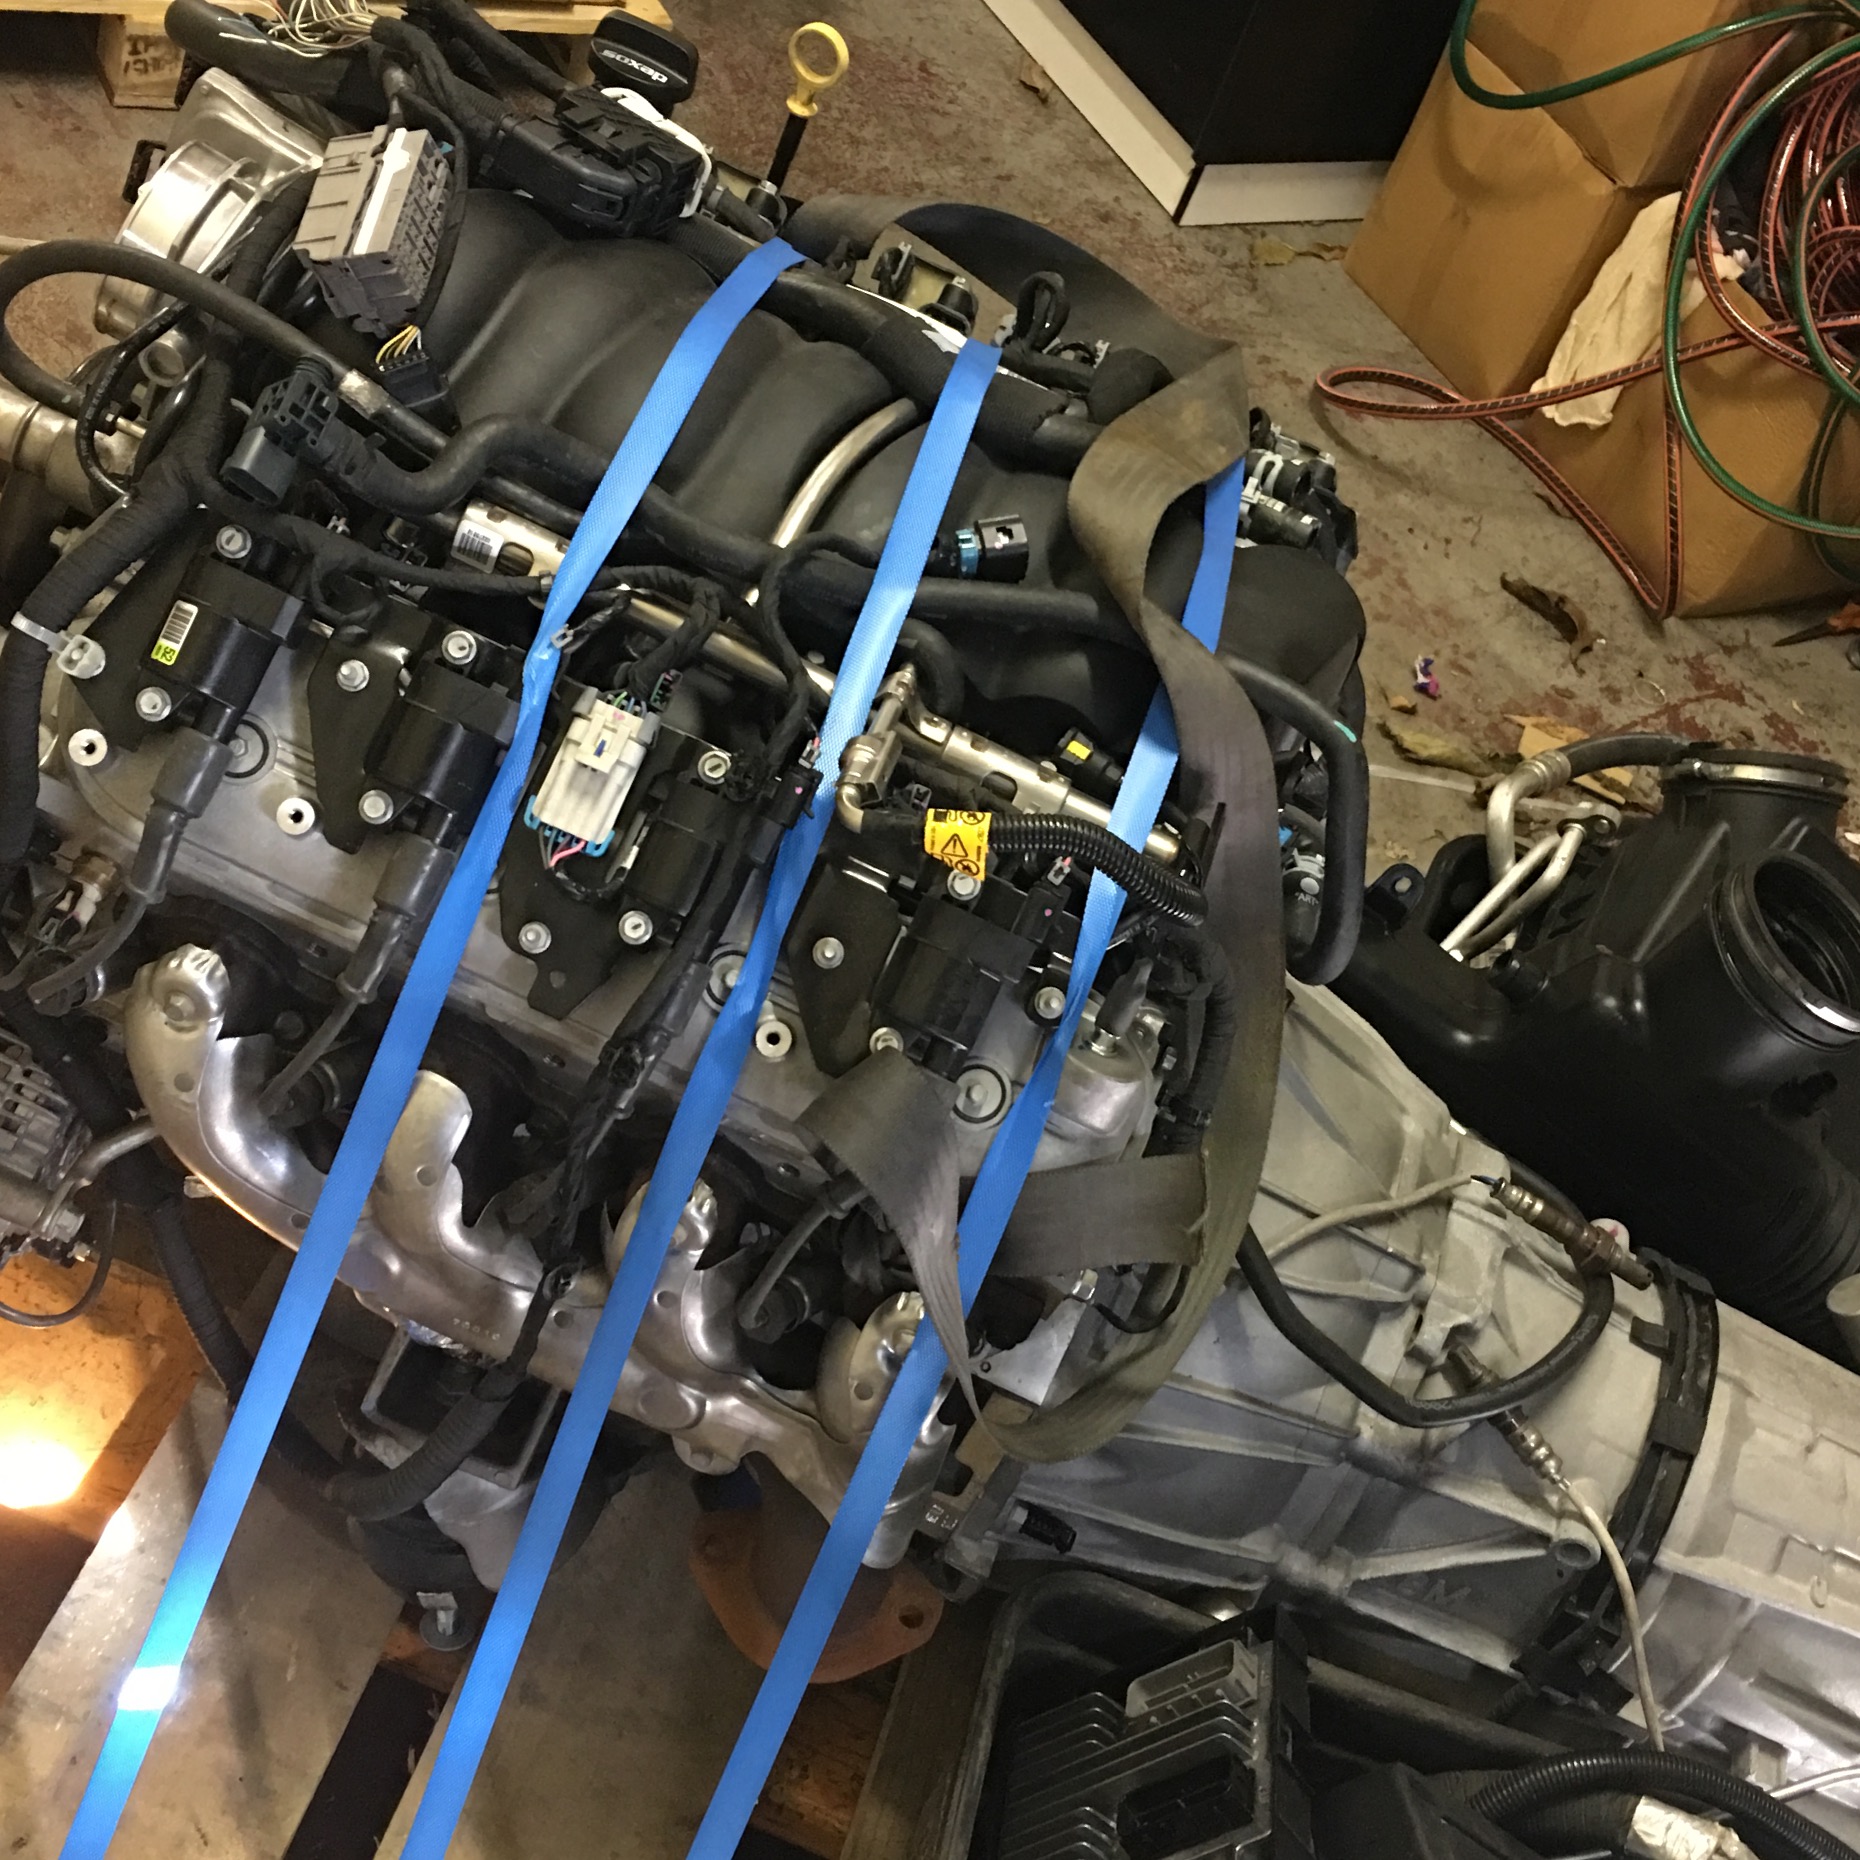
New gaskets, and engine mocked up.1 point
-
Nah it has a teeny single barrel thing on it It is quite good on gas round town1 point
-
I've always been one to have a project or two on the go. Then there's the ones still in the "planning stage" i.e. they only exist in your imagination. Well there's nothing like a deadline you cannot negotiate an extension on (Christmas), and kids would have to be the toughest of all the negotiators to deal with! So when I foolishly thought out loud 3 days before Christmas about an idea I had - that may or may not work??? ...well the pressure to deliver was all on! So: String line and inclinometer dusted off Holes dug, posts in, concrete mixed and poured. Guy wires, main cable tensioned and clamped (that sentence sounded flippant-ly easy... this was a challenge) I had three bits of wire rope. The longest was 50m, so this became the bit between the two posts. I then machined up a connecting rod for each side, that hooks up to the guy wires. Complicated solution...but it enabled me to get the longest span with the free wire rope I was given. Its designed to slip, so tension remains the same in all components. I used basic trigonometry to calculate the forces involved. But if my theory is true, then it should all be good. So I'd call it a success. Now 4 months old and still working well Kj1 point
-
Been sharing these around a bit. Looking forward to a drive in the sun and a spin of the back wheels.
1 point
-
I hear that a lot.1 point
-
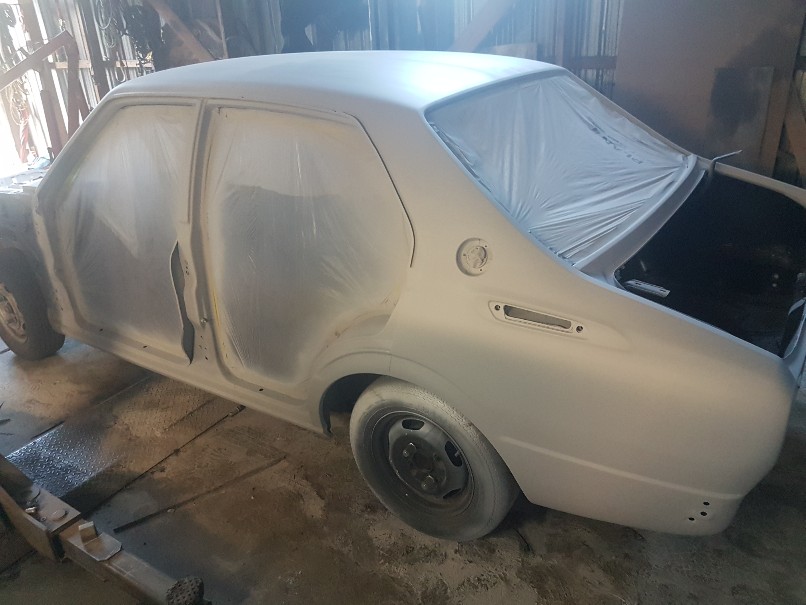
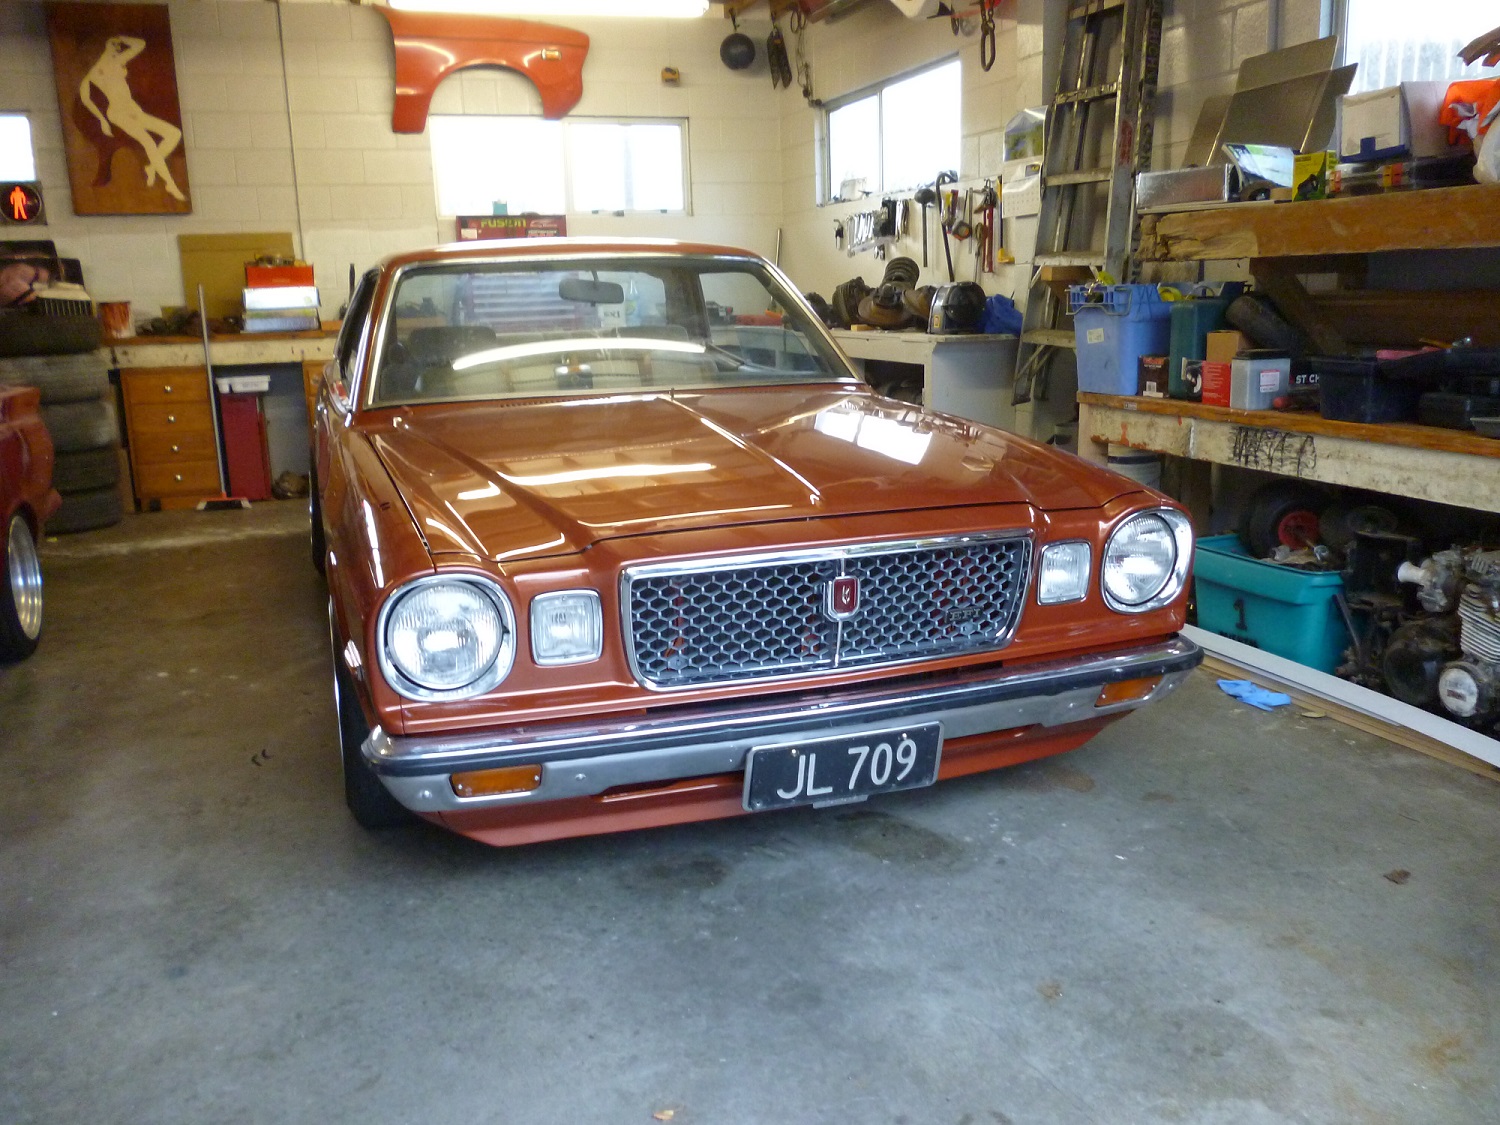
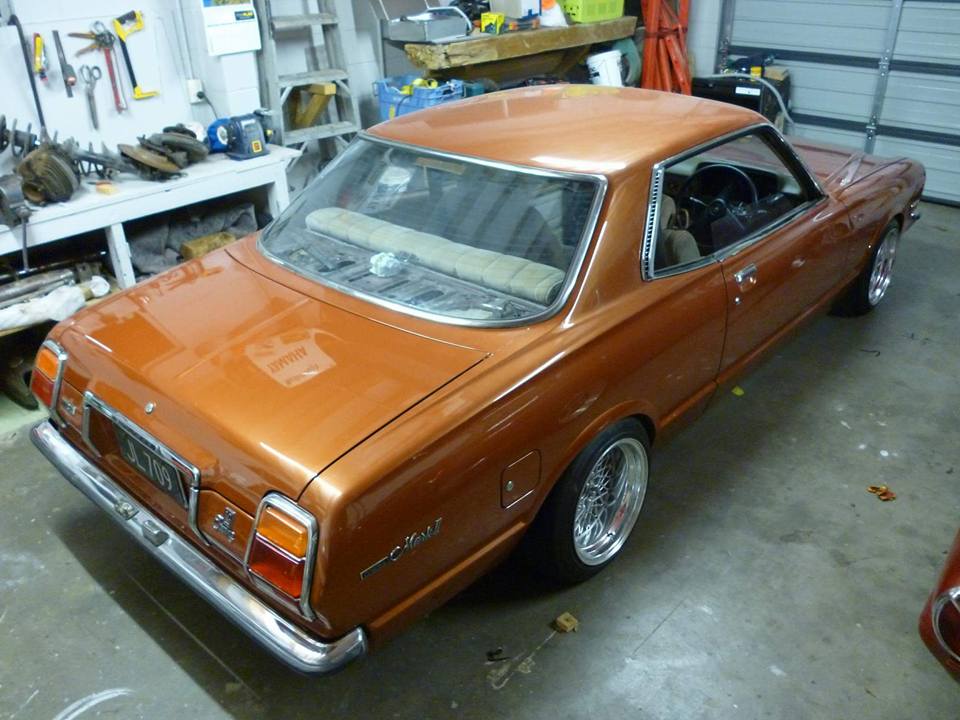
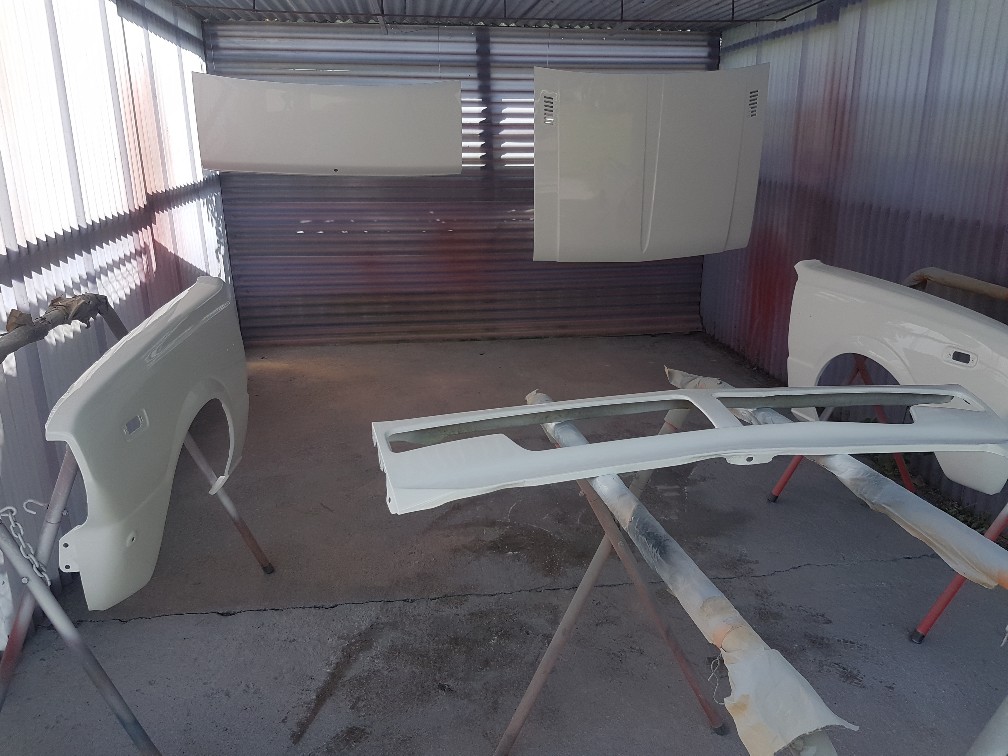
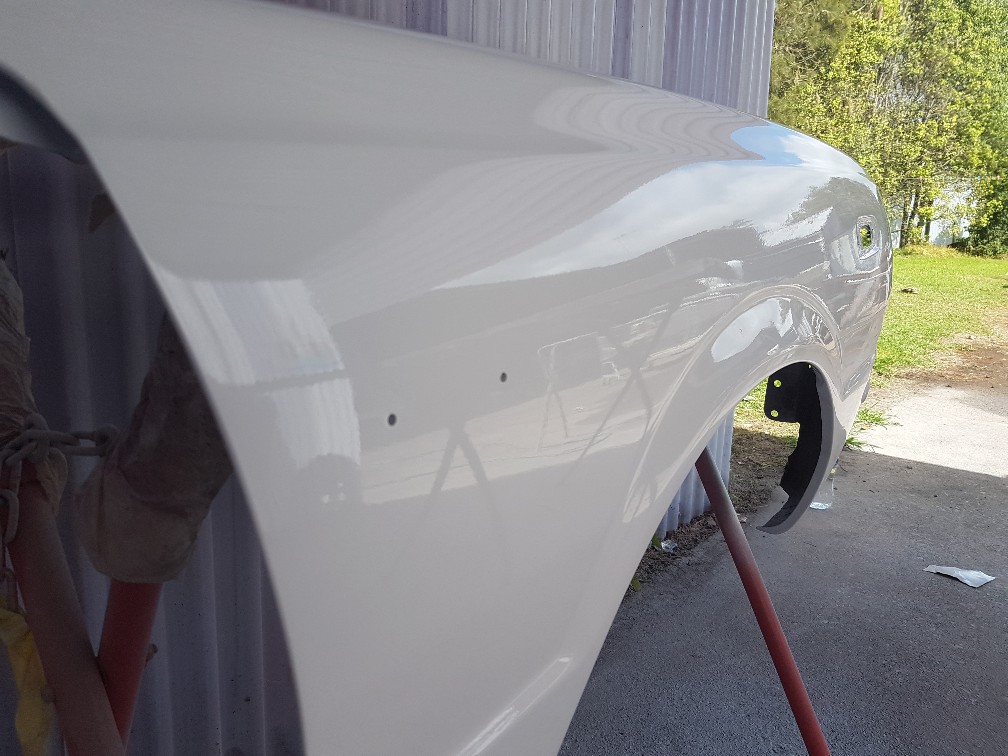
Had some nice weather here, so got some of the panels painted. Iv decided to go gloss white. It will suit the more original look im after. Everything car related iv done is all just self taught over the years. Always trying to improve and get better. Restoring cars is just a hobby of mine.
1 point
-
In the weekend I fixed the divot in the roof. There was a high ridge in the back corner and at the time I decided it was more work than I wanted to do to fix it so left it. But something was crook and it got bigger after paint. so evened that out and sprayed it, also did under the bonnet, sides of bonnet and the inner guards and upper firewall. Could see the primer in the bonnet gap and it was bugging me. And GC nosco me his double sided tape so lobbed on the pillar badges. I toyed with the idea of centralising them and moving them up ala mazda, but went with the factory placement in the end. Im onto the final deluxe badge for the boot, will be a box of Woodstocks if it's right.1 point
-
Its started, hours of grinding. Lower links. the tube adapters were for some usa spec "dom" tubing. machined them down a few mm to fit sch40 1 1/2 pipe. Have cut all the existing mounts off the diff and tacked the lower link mounts in place for test fit. will do the same with the top link before finishing and welding them. Lower link chassis mount, will be trimmed and braced more, as they will likely get a bit of a hiding Its kinda working. lower links look like they will be ok. still trying to find some more up travel. easy way would be to run the truck at a higher ride height, but want to make it work at stock height, to keep it stable as possible. current things spoiling the fun are: sump, alternator, engine mount and the floor..1 point
-
Gone all Roman dave science with the link setup. plugged the numbers into a calculator Tricky to get all the numbers in the acceptable range while working around the chassis, engine and wheels that need to turn. main compromise is chassis mounts on the lower links will hang below the chassis rails a bit. but still will be a touch above the transfer case x member, so shouldn't be too much drama. had to do this to get enough up travel without the links hitting the chassis rails, and also to get the roll steer numbers down. The rear is pretty text book since there wasn't really anything to work around after cutting and modifying the chassis. Done it without using a calculator, just following a guide some geezer wrote. putting the numbers in the calc, looks like got lucky and nailed it. can dial the anti squat up to 100% with the adjustment holes. but this is how it's setup currently got some springs for the coil overs 175lb top 300lb bottom. both 14'" long. shocks should be at 50% travel with the weight of the truck on them.1 point
-
Thanks for my sore neck..1 point
-
I thought i would have this going by Christmas but did absolutely nothing over the holiday period. Have got back into the swing of things now with the engine and gearbox back in place Ive removed the severely damaged dash in favour of one with only one crack in it, still keen to have that repaired at some point however ill leave it for now I have undertaken most of the wiring, this has taken me a bit longer than expected as ive tried to use the 1geu engine loom as a kind of adapter plug to the 2jzge engine loom plugs so have been slowly identifying each wire, a great tip i discovered regarding a ma61 ecu which turned out to be same on my 1geu ecu is if you pop the cover off the board is actually marked with the ecu pin out with labels that are relevant to the wilbo666 jza80 2jzge wiring diagrams, this drastically sped the process up as i was able to eliminate everything i didnt need from the plugs. You will see I've taken apart way more of the dash than i would need to, this was due to literally every piece of plastic being cracked from mistreatment, most of it i have undamaged replacements for but i feel there will be a few bits ill need to pickup or try repair in the mean time. I also noticed all of the plastic pipes for the heater have been removed and outlets taped up, not too sure what this is about but i have a spare heater and ac unit in stock so ill look at checking these out and restoring that! I thought i had struck gold with some monsoon sheilds listed on yahoo auctions japan as gx61 that were chaser specific with a small decal printed on them and came with all the clips and even the bonnet emblem which i was missing and the avante and chaser boot badges However it appears they were for a gx71 hardtop Luckily i was able to pass them on to someone locally who could use them and still use the emblem for the bonnet and the boot badges so not a complete loss Next mission has been the front bumper support. The face lift iron was rusted very badly but upon inspection the pre-face lift has the same core with a few additions of indicator brackets and a top piece spot welded on. These bits aren't too badly rusted on the toasted FL support so I've drilled the spot welds and removed them to weld on my PFL support which actually seems to be pretty good condition. Whilst all of this is going on ill fix the number plate holder tabs that always break off on these too Ill get a friend to weld this up today and then strip it all back and treat rust before painting in a flat black Ive just got the mx83 alloy radiator to mount and plumb in the engine bay, connect the electric fans, finish wiring behind glove box, reinstate dash, finish aligning headlights and fit the facelift front bumper and then off to toyota festival at hampton downs on april the 1st hopefully!1 point
-
I took some quick shots this morning before work just in case anyone crashed into it1 point
-
As promised! this is no diff, no front springs, but 100mm in rear (sitting on 100mm wooden blocks) and held up by the jack in the front (run out of blocks, but a little higher) so achievable ride height on springs in a 50 series crown. its purely for mockup, the wheels are so fucking shit, but came free with my hilux so will do for jobs like this. Definitely got me leaning towards 18's for the finished product though, but will be something a lot more traditional looking, billets would be nice but the stout taught me that I hate polishing wheels comparison height pic cheers Matt
1 point
-
So, I took this for a drive on the weekend. Still need to put a bunch of interior trim in, and go for a cert. It's dropped a cylinder somewhere in the last 5 months, hopefully that wont be a hard fix.1 point


This leaderboard is set to Auckland/GMT+12:00