
Leaderboard


Popular Content
Showing content with the highest reputation on 11/21/16 in all areas
-
Right, time to dirty up that nice clean engine bay by pulling out that poor excuse of a L200 radiator. But first, in lieu of having a proper engine flushing machine, let us chuck some snake oil into the cooling system and drive around for a bit. I'm expecting to cop a bit of flak for doing this, but to be fair I've heard nothing but good things about Philm-Off, and I guess every little bit helps when you're dealing with a 28 year old cooling system (and you're not entirely sure of its history). It's a bit unsettling that it has the consistency and appearance of iodine though. That's a brand new radiator cap, by the way. Fast forward a couple of weeks. ~800 miles of driving later the Philm-Off's done its thing, and the radiator is ready to be drained. Begone. With the L200 radiator out, the task of constructing the breakout loom for the standard radiator fan begins. What's happened here is that the standard loom's been chopped and unceremoniously crimped to fit an aftermarket plug. Fortunately the GSR-V radiator I bought came with the original plug and a bit of wire, so I'll be able to make it work and still maintain some semblance of "factory-ness". Apparently it's already been done, but I might as well replace the thermostat and coolant temp sender again, since it only takes 5 minutes to do on the RWD G63B. Now if only it was that simple on my other cars... I searched around Aliexpress for another male plug to make the breakout loom with, and mjrstar managed to point me in the right direction, but I really couldn't be bothered waiting six weeks for the part to turn up (not to mention there was still the chance it wouldn't have the correct keying). So I did the slightly ghetto thing, and chopped the plug off the existing wiring for the aftermarket fans. Breakout loom, done. Made easier by the fact the GSR-V plug wire colours matched the factory loom. With the old radiator gone, time to roll the car out and run the hose through the engine to get rid of all the old excess coolant and other gross things the Philm-Off may have reacted with, like bits of headgasket. Haha, only kidding. This was also the perfect opportunity to refit the original A/C condenser in its spot just in front of the radiator, because I'll eventually have the air conditioning overhauled and re-gassed. All of the factory bits were supplied with the purchase of the car, which was nice. But I can sense you all thinking, "you've already got cooling issues, you silly sausage... why the fuck would you block the passage of airflow to the radiator even more?" Because I'm a grumpy old bugger who appreciates crisp, cool air on a humid summer's day, that's why. Right, everything's back in place, there's fresh coolant in the system, and all the hose clamps are tightened back up... let's see if the factory cooling fan engages. This is where I hope my calculations were correct in that the Japanese GSR-V has the same wiring as the NZ-new EX. Bravo. Went for a drive, the system seems to have bled up alright, the needle sits at a sensible point on the gauge, and the amount of fan hysteresis is much smaller, meaning that temperature is being regulated a lot better now (and dropping out of the "hot" zone quickly once it gets there). Whereas the aftermarket fans would previously flick on, then remain on indefinitely while the temperature continued to climb. The real test will be driving it to work tomorrow in rush hour traffic. If everything comes up Milhouse, then I can proceed to the next challenge of getting the secondary A/C fan to work. Discuss: //oldschool.co.nz/index.php?/topic/54171-ted-huangs-starorion-0r10ns-1988-mitsuhishi-starion/17 points
-
Drive to work day13 points
-
horsepower? no,no. not 400 horsepower. 400 killerwasps.10 points
-
Some good quality stainless steel mufflers and a 2.5" stainless exhaust is now on the car. Project_KP61_4AGE_2016 (1285) by Richard Opie, on Flickr Project_KP61_4AGE_2016 -1300 by Richard Opie, on Flickr Will put some more up later, Brendan did a great job.10 points
-
Pretty excited to get these on the car!!!! tyre choice is gonna be interesting9 points
-
So has been a busy month for the Impala. Had been meaning to take the ITB's off and balance them on the bench as well as service the injectors. Whipped them off and did that, found the idle screws and been locktighted shut so might explain a bit of a funny idle, Also got injectors serviced which turned out to have 3 a bit chocked up which may explain a couple of things also! While i had the intake off we thought we would do the valve stem seals as i had a set and some new head gaskets lying around, Whipped the heads off got them faced, got some LS7 lifters and new head bolts and put back together. Went to start and it was smoking out one bank, turns out one of the injectors got stuck wide open and was pissing fuel out the exhaust, Got another set of injectors which turned out to be off a later LS1 and 240cc instead off 300cc -.- cant bloody win. Anyways have chucked them back in and car is running and best it ever has. Mates wiring in a Link ECU this weekend and its off for a dyno tune at DTech next Monday so that should cross off all the motor work and have her 100% for summer!! Couple of pics below: Weekend just gone went hard with Mr Midnight Upholstery and finally got around to doing my boot upholstery how i always intended. Real happy with the result, just got some polished hard lines for the airbags to go in and its complete! Sharn down here //oldschool.co.nz/index.php?/topic/34313-the-westpala/page-108 points
-
Friday took the day off and painted it... prob should have posted this before the last post but meh!8 points
-
Hako makes it's first official public outing. I was asked by one of the organisers of a car show if I could bring the Skyline out to have on a Nissan stand. So I agreed. It's crazy to see the size difference between old and new.. everything has just become so much bigger.8 points
-
Project_KP61_4AGE_2016 -1317 by Richard Opie, on Flickr Flare from header to 2.5" pipe Project_KP61_4AGE_2016 -1315 by Richard Opie, on Flickr Braced to gearbox after join to header. Project_KP61_4AGE_2016 -1289 by Richard Opie, on Flickr Then it doorts off down the middle of the car. Project_KP61_4AGE_2016 -1307 by Richard Opie, on Flickr Resonator all snugged up beneath the factory heatshield. Project_KP61_4AGE_2016 -1318 by Richard Opie, on Flickr Looking down the guts (yes the driveshaft is going to fit!).6 points
-
done about 650ks in it now and its going really well. I've got a dyno day booked for this friday, keen.6 points
-
So the vw broke again.... lol Nah the inner clutch cable tube I dodgy welded on about a year ago snapped the weld and made the clutch a prick to deal with so I jacked it up and realised the cable. Took the bendy hose out and put the inner Rod back into its correct location and welded it all up again. With a gasles welder again. Hoping it will hold another year. Also the rear is way to high now so will get around to lowering it another inch before the weekend which is stragglers. Kinda brought another body again... so I gotta hide that some how. Mr West was kind enough to bring back a Rotary adapter plate back from ozz for me so I think il just build another bug out of the spare parts I have.5 points
-
Took car for a wof.. clean sheet !! Although I did fix what it had failed for back in April when I took it for a wof.. which it failed and sat in the garage for 6 months. Anyway gave it good clean n polish and brought some rego so pretty much all set for drag day ! Need to sort a throttle cable issue out. Install my eletric ignition and eletric tacho. but no big deal and take it back to carb specialist as since I've removed all the emission stuff it seems to be running rich. Bring it on ! I picked up my 18rg exhaust manifold from autobend today. You can see how close it is to the sr20det. It's out 4/5mm per port over 278mm Didn't really like the old plastic gearstick/sterio surround so got another rubber and mounted it direct to carpet looks alot tidier in my opinion going to run a Bluetooth amp so don't need a sterio. Gave her a good polish too. How she currently sits. //oldschool.co.nz/index.php?/topic/42444-matteybeans-1978-rt104-corona/page-3#entry1783849 Cheers4 points
-
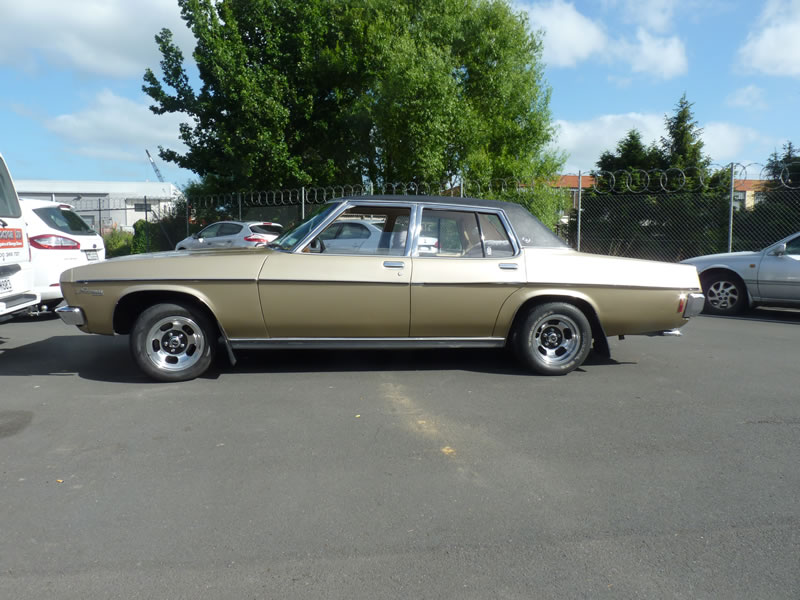
Got it back Friday arvo. Took it for a run around the Bombays and then Hamilton during the weekend. Aint no slug now. A quick wash & chrome polish today. Decided to throw on the tridents to see what they look like. Needs lowing, but atleast the rear sticks to the road now with the 245s.
 4 points
 -
New collector. No change from the steep angle merge. I done a run open header and come away with about 50% hearing loss. Also interestingly it made it worse almost everywhere, compared with the exhaust on Might try smaller diameter collector or "choke" point after the merge. but the 38mm extractors have the same 2.5" collector an they work. So thinking the 44.5mm primary's are just too big even with the stepped runners. Still looking like going back to the 38mm's is going to be best. the massive loss below 6000rpm, isn't really worth the small gains up top. (i need to swap back to the 38's to confirm this)4 points
-
Bog, lots and lots of bog. most of which ended up here. and then I hung the bonnet up so I could paint both sides at once, great plan! made painting the nose of the hood interesting wit it only inches off the ground.3 points
-
Just bought a factory thermostat myself, ain't got time for the Tridon shuffle you put the tridon part in, you take the tridon part out you put the tridon part in and shake your fist all about3 points
-
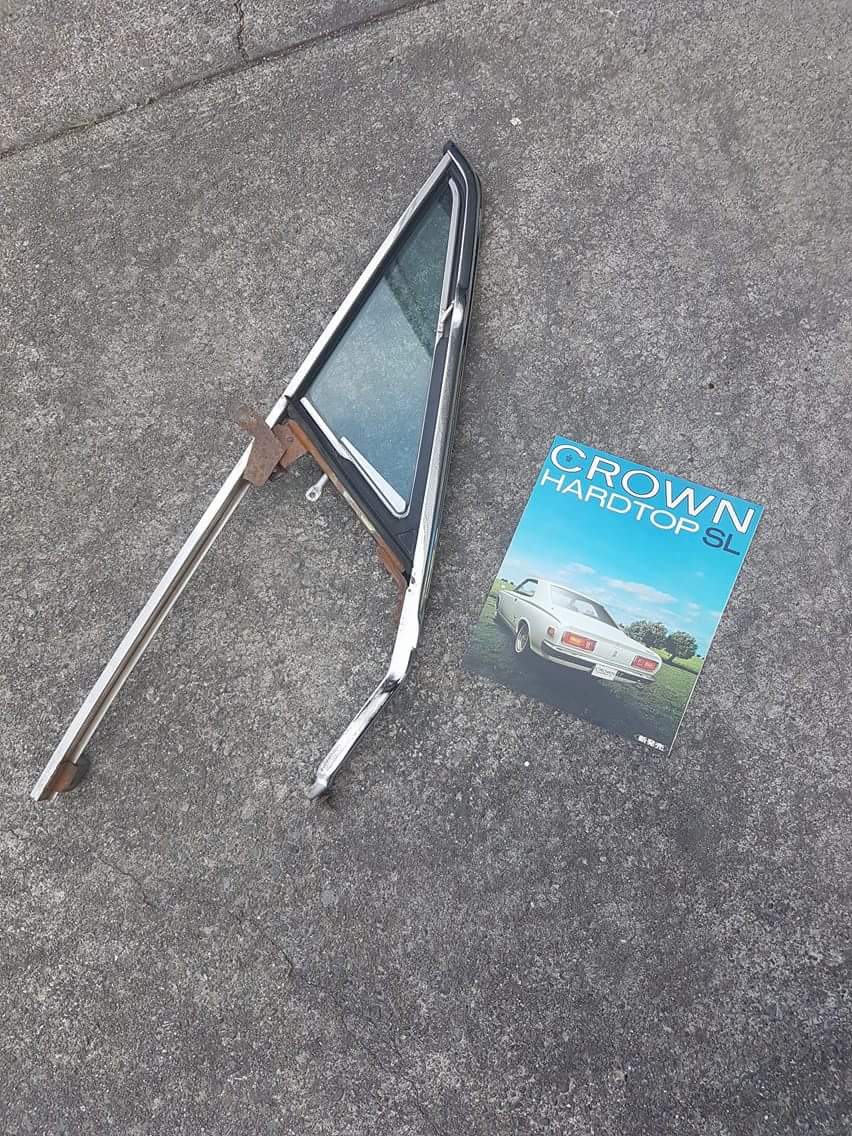
Picked up the diff and front disc brakes out of a ms112 crown ready to go in to the ms51
3 points
-
The world's worst kept secret is out: After years of pining, I finally went full retard and bought a Starion. To be honest, it wasn't even supposed to be this way. Only last weekend I'd lined up a nice, modern, comfortable, and fiendishly fast 2008 Mazdaspeed Axela to purchase as my new daily driver, having owned one before and knowing exactly what to expect in terms of ownership, tractability and reliability. Sunday was supposed to be the day of the full and final transaction, and I wasn't looking back in any great hurry. THEN... over dinner with friends on Saturday night, while idly browsing Trademe, one of them came across a fresh listing for this here thing. They showed me the ad, I rolled my eyes and chuckled, and told them in no uncertain terms that I'd already decided on the Axela and I didn't really have space, nor the extra folding, to also buy a Starion, and a NZ new one at that (not even a lush Japanese imported one). "But the price!" they exclaimed. "You'd be stupid not to at least take a look!" As with most pressing matters, I slept on it. The next morning, because I wasn't realistically able to get hold of Phil, I called my other Mitsubishi foamer friend Ant (but not without first posting it on OS Trademe finds... ) as I'd decided that taking a look would be the wisest thing to do after watching the price of Starions climb and climb in Japan over the last 5 years. Secretly I hoped that by tagging along with a person who knew '80s Mitsis somewhat well, he could point out all of the bad stuff wrong with the car, and steer me away from buying it. Trouble is, there wasn't actually all that much bad stuff for Ant to point out. In fact the good stuff outweighed the bad by about 20 to 1... and it didn't even blow any blue smoke! So as you can tell by the mere fact you're reading this post, I let gut instinct take over, and purchased the Starion. It's a 1988 NZ new, Euro spec narrowbody EX model. From what I can tell that means it's got the 175ps intercooled 8-valve G63B and super tall 3.5:1 LSD diff, and has a full black leather interior (more on that below). Speedo is in miles and it's only done 52,000 of them, which was one thing that swayed me towards buying it. The key differences between this and the Jap model 8-valve GSRs are the interior (leather didn't seem to make an appearance except in the very early GSR-X models, and never in black, only in blue/tan/maroon), the large TC06 turbo, and the 3.5:1 rear diff, which is obviously geared - no pun intended - towards top-speed Autobahn cruising. Jap ones have a more usable 3.9:1 diff and smaller TC05 which I can only guess makes them more responsive down low. The previous owners have definitely taken great care of the car, and I hope to continue that tradition as well as they have. The last owner, Mike, replaced the clutch and cambelt, and rebuilt the turbo. What can I say about that interior? It's totally ribbed for her pleasure, smells like the 1980s, and wouldn't look out of place in the cockpit of a starfighter spaceship. It's a shame there's no digital dash to top it all off, though! Full photo album here: https://flic.kr/s/aHskEhDhXk Time will tell whether I eventually flick this Starion on to try and fund the importation of a proper Japanese DASH-powered GSR-V narrowbody, or just hang on to it and continue blocking out of my mind the fact it's NZ new, which wreaks havoc with my OCD something chronic. But to be honest, that's the irrational side of me talking... because in hindsight if I'd ignored this one locally, I don't think I would have another opportunity to buy one at a realistic price ever again. Especially when you consider that genuine GSR-Vs are now fetching upwards of $25k in Japan. The car yard wasn't fazed when I called them to cancel the deal on the Axela - luckily I hadn't decided to pay a deposit on it. On the flip side I'm still annoyed at myself because I said I wouldn't buy any more garbage '80s cars and I'm still left with the glaringly obvious conundrum of not actually owning a suitable daily driver! Guess I'm dailying the Starion then. Discuss: //oldschool.co.nz/index.php?/topic/54171-ted-huangs-starorion-0r10ns-1988-mitsuhishi-starion/2 points
-
man I always wondered what these were. thought they were just like a vac damper type setup2 points
-
maybe check the tree tops and high up in the lamp posts for crumpled blue celicas.2 points
-
Looked at pipe clearances before bolting things up properly and header is touching the bash plate bar... Surprisingly a 4lb club adjuster didn't fix it, so trimmed a little off the end, angling it for better clearance of side cover. Got a few mm clearance now... And I was trying not to paint anything, but the donor battery box was a bit scody so decided to clean the rust off and chuck some epoxy on it. And since I was doing that thought I'd try painting the spare red plastics, mainly cos 70's orange & grey looks sweet. Just reshaped the melted airbox with a heat gun and scuffed them up... Really rough colour match as just mixed grey and black durepox to an approximate shade. Hopefully the pox will stick to the different plastics ok... and... probably the worst paint job in the world. I'm a shit painter anyway, but (excuses) the gun blocked, a gasket blew on compressor half way thru, I ran out of reducer, was pressed for time and it was raining. I'm telling myself it won't matter as this is a cheap shitta, but I'm thinking of rubbing it down and redoing it properly, cos embarrassing... Hope the first coat sticks.2 points
-
I'm shocked (shocked I tell you!) that you are putting Tridon parts in - no source for genuine JDM versions?2 points
-
Looking sharp man! Forgot I had this pic, spotted out cruising last summer2 points
-
im more interested in making torque and making it early tbh. the turbo is to small for this motor now but i can't afford to do anything about that at the moment, down the track it'll get a more suitable hairdryer, but for now i have to use the one i have. i think the turbo will limit it to below 400 but we'll see on friday.2 points
-
I found a few hours for this over the weekend and tacked the rear end together. I'm very pleased with it. I do however want to move the chain stays out a little to give me more room for a wider tyre, it has plenty of room before it is too close to the chain wheel.2 points
-
Had a sand and clean up then sprayed etch primer around the traps. Including the valence and the front crossmember parts Welded those bits into place And the sill panel. Still need to finish the new bit of guard, but its nearly there. Next thing is to fill the gaps here, should be fairly easy as it's a flat area with flanges. Also need to replace the end bits that connect to the inner guards. I need to get some top coat paint for these bits, will probably get the Resene Lucite LC 400 as I don't fancy breathing isocyanates.2 points
-
I am quite happy to say that I have managed to get quite a bit of work finished on this little wagon. With the evenings being brighter and warmer and having a new dose of enthusiasm I have spent more time on it and its been fun. So where was I last update. Lets start with the doors. I knew they had rust but not too bad and in places that’s easy to get to. I have been putting off repairing them so now is the time after having just finished the last few bits on the tailgate (hatch..) Luckily the rust was mainly on the outer skin wrapping over the inner strengthening panels that the hinges are welded to. I cut it away and let in some nice new thick sheet. I actually ground back the welds afterwards because it it made sense to have it all finished properly in a place that is hard to get to once the doors are back on. Plus the seals, speaking of which I will need to get some decent second hand ones with the originals having fallen apart, will need a good smooth surface to squash against. There was minimal rust along the inner bottom of one door and they fixed up well. Really glad they are in good condition otherwise with minimal dents on the outside (just dented enough I say..) While I was working on them I also had one of those ‘expecting it to be a arse but it was actually easy’ moments when I had to remove a broken screw from a window winder stub. The screw was small, broken unevenly and I sure that Id not be able to drill it central enough. But I did, it worked and I was happy.. With the doors repaired and the repairs painted over I put them aside and started on the wiring. I enjoy wiring and have always planned to tidy all the original stuff up. I got carried away and its now pretty well hidden from view. I added some extra wires for the fan etc and decided to run the main loom out of sight via a hole I added in the tunnel. The original bulkhead grommet worked perfectly. Once I started hiding things I got even more carried away. I disliked the look of the fan wires running externally along the top of the bulkhead so they were carefully re-routed then back through the heater box and through another added hole. The main loom sorted back through inside the car and I was happy with it all. So onto the heater hoses. First I fitted them as per original. Oh dear. No, no ,no.. this will not suffice !… Damn they are ugly hoses, just running over the engine like an afterthought, looking like a scaled up version of a badly designed Lego tecnics kit with poorly scaled pneumatics. Nup. No sir..I don’t like it! So I rummaged through my always handy supply of random hoses and found a few Mazda items that will help in my quest for neatness, a Toyota bottom hose and a ideal tee piece. I also found a heater pipe from the Crysler Northstar quadcam V8 I have been gifted (another story…). Still not enough pieces to complete my puzzle. Back to the wreckers then… I love going to wreckers, especially when they let you roam about by yourself and get your own bits, a rare thing these days with so many OSH rules. Luckily Hannah enjoys it too because she was along for this sortee. We found a variety of hoses from a Datsun something, a Mitsubishi Mirage, a Honda Shuttle and also scored an ideal inline heater valve from said Honda. A few hose clips and other handy bits. All this for $10 free image uploading Back home and I assembled my scavenged findings together and came up with a design. I cut that steel pipe down, welded on a bracket so it mounts onto the carb support bracket beneath the carb. Chopped the excess bits off the heater valve and mounted that in the original place using various bends from my even more awesome stash of bends. Added the Tee into the Toyota bottom pipe. It worked out fine except for one thing.. the heater valve works backwards. Hot is cold and vice versa. Luckily my other Viva, with its Chevette sourced heater valve is exactly the same. So no confusion for us.. just everyone else.. After finishing them I noticed my exhaust was not yet connected to the manifold. Then I discovered holes. Bugger! So old towels out to protect things and I carefully welded in some repairs. I am a bit upset in that the blobby welds might well restrict things and lose me a pony or two. However I shall learn to deal with this. Then on to the breather and brake servo hoses. I have decent PCV valve to use and some pipe now. But nothing matches. Out with my stock of alloy bits and I worked out a plan using my 1/8th bsp taps. I machined up an adaptor and it worked a treat. Finished and mounted.. With that lot finished and looking a lot neater it was now it was time to sort out the throttle pedal to carb interface system. I am using a HC Viva floor mounted pedal like in Viva one. The original top mounted pedal system uses rods and is..ugly. I copied the design of cable clamp and pedal mount from Viva one. Noted how much cable pull was offered by the pedal. Did some maths and worked out the diameter of pully needed. Then I machined up a pulley from a lump of alloy on the trusty old, leaky, English lathe. Made a new cable bracket and used some old bike barrel adjuster. It was an easy enough job but just time and I’m glad its done. Cable clamp so the nipple will go at pulley end for neatness... Measure cable pull.. Pedal mounts here on new base... A leaky (because English made) old but trustworthy lathe and a lump of alloy.. A new pulley.. I wont mount it yet as some wiring to do for the starter solenoid yet to be done. But I’m not far from firing the little 1159cc block of fury up and I’m quite excited. Here's a photo of the new hose layout. I'm much happier with it and it was worth the hassle... Back soon2 points
-
Bit of CAD on a T57 front spring hanger.2 points
-
Opened the bonnet for the first time in close to a fortnight to begin the unenviable task of pulling the L200 radiator out in order to fit the legit Starion one. Then I noticed this... A small puddle of coolant, perfectly in line with the bottom radiator hose. Could the three hose clamps around the electric fan sensor housing be loose? "Nah, no bloody way could it be that simple," I found myself muttering. But then discovered that the pipe was indeed also covered in coolant. As it turns out, I ended up spending the next 20 minutes tightening every single hose clamp on the car. Intake piping, radiator, oil return feeds, vacuum lines... they were all loose. In light of this new finding, I'm going to fit all these fresh new service-related parts instead. I'll give the L200 radiator a short stay of execution until after I've taken the car for another drive to see where the temperature sits with all the hose clamps now tightened up. The engine bay is meticulously tidy, but a typical 1980s nightmare of piping, wiring, vacuum lines and other strange gubbins. At least the radiator is well isolated and easy to get to! Discuss: http://oldschool.co....uhishi-starion/2 points
-
Does anyone else think this logo looks uncomfortably similar to a certain famous movie franchise set "a long time ago in a galaxy far, far away"? Picked up the spare Starion radiator from the shop yesterday morning ready to go. It was 70% sludged up, and had a bunch of badly bent cooling fins, but cleaned up quite well and the guys even re-attached the mounting bracket running down the middle. Here it is all shiny with the OEM fans. This will help greatly when I get around to re-fitting the factory air conditioning - the smaller fan on the left is controlled by the HVAC system and engages with the A/C compressor. Trevor French Radiators - look them up, they do a good jerb. I failed to get a photo of the Skyline one but it was even more impressively clean. I should probably throw these fucked tyres in the garbage, and refurbish the standard 5-stud narrowbody wheels. As if I didn't already have a thousand other things to do Also, if people paid more attention to the caution label back in the day, we probably wouldn't have all the old barrys today still whinging "mayte, those turbo Jappas mayte, they're god damn unreliable pieces of junk, mayte. Get a FORD/HOLDEN mayte," before jumping into their Great Wall utes and peeling off in a plume of oil smoke. Finally, to round out this blabbering update of not much usefulness, here's a neat little time capsule of NZDM goodness that the previous owner generously included with the purchase of the car: the factory MMNZ first aid kit. I showed it to Ant and he reckons it's from 1989, as the logo on the top post-dates the Todd era. The kit comes complete with these glorious late '80s versions of Pamol and "Curity" brand bandage tape, along with a bunch of bandages, plasters and other triage-related items, all similarly decades-old and a bit dog-eared. One of the previous owners must have had the lurgy (or a hangover) at some point, because one of the capsules is gone The rest of the packet is still there, but given the expiry date on the side it's most likely all turned toxic by now, so I doubt anyone will want some to cure their headache in any great hurry! I'll inventorize the contents of the kit and pop down to St. John to have it all updated. If we assume a five-year expiry on all the items in the kit then the 1989 production date makes sense. Wow, this newfangled phone of mine actually takes a decent shot. Too used to shitty budget phones with potato quality output! (compare the photo in the second post above) Now that I've got the radiator back, and daylight savings has kicked in, the plan for this coming week is to spend time in the shed after work doing some investigation on the cooling system. Discuss: //oldschool.co.nz/index.php?/topic/54171-ted-huangs-starorion-0r10ns-1988-mitsuhishi-starion/2 points
-
Dropped the second half on with no drama. So its all bolted up now and ready to go to the foundry at the end of the week. Nailed it Thats like 1000hrs work right there!2 points
-
For those not on FB heres tonights post, Proper photos and engine bay/interior to come but for now: Talk some shit! //oldschool.co.nz/index.php?/topic/34313-the-westpala/page-72 points
-
//oldschool.co.nz/index.php?/topic/54612-tortrons-38-mayte-fair-dinkum-mitsi-ute/ When I was a nipper, my dad's mate had a chalky yellow L200 with orange and white side stripes going up the doors and tray. It was the first car I ever pined over and I had hoped it might be mine when I got my license. Instead it rusted out and was replaced by a dark blue 4wd L200 with flatdeck which I liked less. Been thinking about how useful a ute would be, mentioned it to 3onthetree and how I though a Buick v6 would be good in one. This combo was highly applauded and so I had a casual look on trade me at what was available and in my budget. I wanted 2wd Standard ride height Single cab Tow bar Not a flogged out old farm truck Able to do the speed limit This was the best thing I could see within 150% of my budget, was advertised without wof rego. I figured it was a guy who picked it up not long ago Went and checked it out. Fresh wof and rego and new shocks, battery and brakes Bloke had owned it 19 years, a tear came to his eye as I drove it away Built as a shop hack by master motors, this ute has never left Auckland, except to tow the previous owners stock car around. Features a cut and shut later model tray, l300 brakes, nolothane bushes all round, sun visor, power steering and a Holden 3800 with 4 speed automatic Never late with a 3.8 Has had a bunch of rust patched over the years and had a bare metal respray a few years ago so it's still looking pretty good. I also ended up with enough paint to fully respray it if I want. Seller was very upfront about a few little bits that's will need attention. The interior was never finished, so I have a bodged in commadore gauge panel that doesn't work, would like to swap that for an original one, also no carpet, half finished console etc, and an alarm that will reset itself while driving and go off when you get out. All in all I'm super chuffed, I don't really have to do anything to it but drive around and tidy a few bit up1 point
-
Parts from Japan ????
1 point
-
Is this where I low ball you for your Val wag?1 point
-
Dayum. Fanging corners to conserve momentum and make progress in traffic is what scooters are all about.1 point
-
Man. Keen for a vid of it doing a reasonably quick corner. I can get blizzos melody scraping centre stand on ground pretty easy1 point
-
Lowered it, plans to run no spring front got put on hold after finding that the front shocks are seized shut, so currently just sketchily dropped down in the triple clamp. rear is sweet with the ab11 shock which is a wee bit stiffer1 point
-
This comes to mind Look forward to drag day pics/vids/times1 point
-
and you could still fit heaps in the boot! haha. nice work.1 point
-
Hell yeah dude ! Such a sweet wagon1 point
-
So I had a bit of a ride on a tow truck last week after a big BANG and a loss of drive, fingers and toes were crossed it wasnt Box related turns out suspicions were correct & this thing had dropped its guts with bonus Spider in the pinion ruining the plan to 'just' swap the head moped a bit then got on with the Brown Chrysler rear end, theory being the Wagon has 4.11 & that's quicker off the mark / better saved for the Racecar job done1 point
-
Bit of an update on this. Rear tyres were rubbing pretty badly so borrowed guard roller off datlow and rolled the rear guards, whipped the drums off while I had the wheels off to check how much meat was still on the shoes. right hand side first, shoes look to be brand new which I was stoked with, left hand side, wheel cylinder leaking, faaaark, all over the shoes too. Gotta wait til tues for a new wheel cylinder as ripco had to order em from Auckland, was hoping like hell to take it down for a wof on Monday too so pretty bummed about that! So did minor things I had to do to it, new oil and filter, new brake pads ($130 retail!!) Sorted out springs so it's all wofable, chucked the cut cobras in the back and cut until they were just captive, fronts are cobras minus one coil and they're still captive, sits too high at the front but moving down south in a month and a half so too poor to get them shortened as of yet. Whipped the grill and headlight bezels out and polished up the chrome and gave them a couple coats of plasti-dip, looks a lot better now! Can't decide whether to keep badges in factory spot or have no badges on it!1 point
-
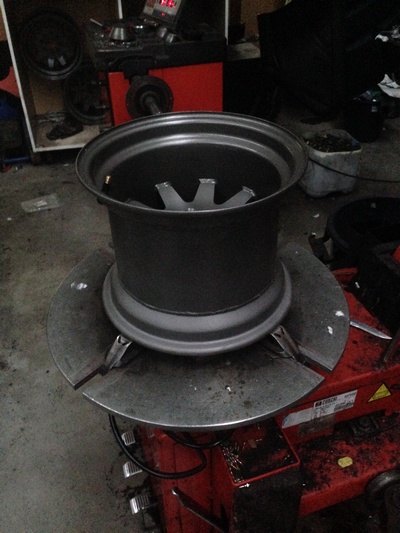
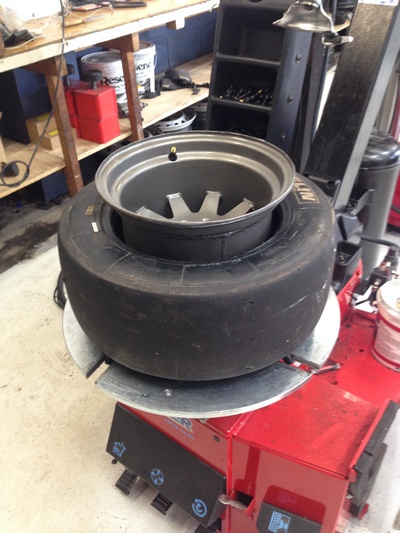
The wheels I posted a photo of back in February All cleaned up and new slicks on Jolly wheels - fronts 13x8's rears 13x10's
1 point
-
Did you know that Stirling Moss raced a Super Snipe in a rally across 15 countries in 5 days in December 1952? I accidentally went for a long drive on the weekend, from Auckland down to Kaiawa through the back roads, then turned left back up the coast road. This road has a few twists & turns including a hairpin or three, some hill climbs and sweepers. Rally country. I wasn't in a hurry. I never am. But then, from nowhere, I noticed some of BMC's finest front wheel drive wizardry looming large in my mirror. I thought I'd slow a bit further and let him pass, after all, 'said Barry was right up my bumper with lights on. Barry won't pass. Hmmm. Nailed it. First, Whooooorp! Second, Whoooorp! Third, Cough Whooorp! Speedo bouncing around 30ish. Whoosh! Strangely (probably gasping from the blue exhaust smoke?) I left him behind. However, the first set of twisties were coming.... Slowed down hard. Bow thrusters full to port. Tyres protesting. HARD into a left hander. Mid corner bump in the road..... SHIT..... That's right - the rear shocks are stuffed..... Entertaining I'll tell you. Said hydrolastic car passed while I changed my pants, however, not to be outdone I thought I'd give chase. Surprisingly, I kept up - no substitute for cubes in the hill-climb section I suppose. Anyway, I knew the rear shocks were poked after some hairy corners on the way back from Hawkes Boes so promptly did some research and found that a Toymota Cressida (circa 1978-80) should do the trick. I ordered a set of Gabriels (because they are red) from Rock Auto. Yes, they cost $14 each + $20 shipping. Ordered them on the 9th. Arrived today. Makes me wonder how Repco stays in business. Old vs new. GABRIEL 81340 [shock Absorber] Guardian Shock for those playing at home Old shocks came out easily. There doesn't seem to be any oil in them at all. Compressed with a finger and no chance of bouncing back. New shocks near perfect fit. Bushes are a little smaller, however some dish-washing liquid and a rubber mallet sorted fitment. Red for Racing. Look out Alec Issigonis. We shall meet again...... All in all a trouble-free hour long Monday night job. Quick jaunt around the block yielded much nicer dampening. Might have to look at a sway-bar next.....1 point
-
Looking at the cost of a new exhaust and the possibility of more $$ to reach the wof I cobbled the piepwork back together and dropped her in to VTNZ before committing the funds. After the usual picking and poking she popped out the other side needed only rear brake balance and the old lpg stickers and fittings removed! the inspector also noted the rear wheel bearing needed replacement but somehow that didn't make it onto the computer. With luck a large order of brake bits turned up from Russia the next morning and with a new wheel bearing from Gee Motors repairs were made resulting in a new WOF. Having a week off I took the chance to head back to central for a week hunting, she ran no fuss the whole way there gaining a little over 10km/L, the way back however was a more traditional Lada adventure, heading to town to fill up she ran rough, finally dropping to one cylinder at the top of the main road, coasting down to the lake front. Without options a quick check up showed the plugs were terribly fouled so I reset the timing and cleaned them up with instant results.......... until Tarras, same deal, this continued a couple of times over the Lindis until I was forced to fill up in Omarama from excessive fuel consumption. Checking everything over again I set off accepting I just needed to get home, which she did, flawlessly! My best guess now is I overfilled the oil that morning and once it burned off happiness returned. Last weekend I drove to Timaru without issue or using any oil so thats the story i'll go with! Lesson learned, max oil on this engine means max oil! Now with University over and done hopefully I can find some time to get her looking a bit nicer and fit all the new engine gaskets that came with the brake bits from Russia.
1 point
-
Needed to make a mirror of this brace for the other side where it had rusted mostly away. Paper should be strong enough, right? Here's where I'm at tonight. All fits together OK. I need to flatten the front piece out a bit as it has a slight bow in it then make a hole in the rear piece for the crank start tube. New brace in the back.1 point
-
so i made it back after my interesting long weekend away..... and it kinda went a little like this hogan picked me up from the motel and we proceeded to pick up my engine and head to metric nut to grab some engine mounts as i forgot to grab some before i left. let the fun begin so this kinda took me half a day mucking around and what not. Chris was kind enough to also head to metric nut and grab a few things before heading over earlier in the day to spin some yarns ect ect, we got it going to find my generator wasnt chraging..... prior to trying to leave to go get my generator fixed hogan spotted fuel dropping on the ground so back in the shed again. fuel line and filter change was in need so a quick drive over the to the metric nut again and said i need some parts.... they sold me everything as at this stage i didnt give a toss i just wanted the bug going. back to hogans place to pull it apart and change the fan and everything else..... pain in the back side have to pull half the motor apart to get the thing out oh the metric nut has some bad ass crap in there shop oh hold up they had there shop truck in there also not one split single cab, MOTHER FUCKER HAD TWO THERE!!!!!!!!!!!!!!!!!!!!!!!!!! any way they are a bunch of gcs and i thank them heaps! so heaps of advertising for them in my thread.... but back to the normal crap. beth was keeping every one updated in her snap chat story got it going at midnight after spinning some yarns with bart. was rad he came to visit. we slept on hogans couch for the night and got up nice a early and headed north towards my brothers place (everyone google Manaroa) any way made our way north. it was a tad cold in the bug. so out with the double sleeping bag to keep warm and yup thats me changing gears with sleeping bag covering gear stick haha. made it to my brothers place surprisingly. here is a photo of me leaving his place. farm land left and right is his farm pretty much as we arrived at picton i started to hear a grinding noise which i wasnt happy about...... and here i am tightening my hub nut so we made it onto the ferry and off the ferry. beth wanted to catch up with her friend in welly, sweet as we walk the street i jokingly said lol old record shop il know some one in there..... why hello there snoozing richy what cha upto....... a beer and some curly fries later we are off to bizzos place to try fix my vw correctly........ yea well that didnt happen...... hub nut came loose again... and again beth was good at keeping everyone informed about me braking down.. any way it happened 6 times between picton and taupo. last one was 2 mins away from our accommodation in taupo. made it there and had the best sleep ever!!! next morning i texted tom asking if he was able to help me fix my lemon. we went to leave to have breakfast and head to toms place. and now we have a no speed vw. at this point a rang my mum asked if she could go get my car and trailer and come pick us up. mean while had a good breakfast walked to toms house spun some yarns and checked out all his cars. much radness. chucked the car on the trailer. and if ya boxer engine car brakes down you call in the new boxer engine car to tow you home new car paying off already. any way got it home left it out side for the night and had a look at it tuesday arvo. to find this...... yes thats correct its ment to have a spline in there. so out to the vdubshoppe new drum and hub nut. cleaned out the bearing and slapped some new grease in there and put it all back together in time to go for a bike ride. and yesterday i went for a drive with Joel the jew to grab some potos while his brother was in from aus. and for those who didnt google where my brother lives here is beth pointing out where he lives..... and bonus photos of how nice it was on the ferry photobucket stopped working so hopefully last pics stay up or lest this reminds me to change them later. ready for summer now i think. oh yeah spoke to the vdubshoppe about whats the go with my engine ect ect. paul has charged me for new parts and no labor on the new rebuild and re rebuilt it himself. so that came in at 400 so not fazed at that and lest they helped out and turned the engine around in short amount of time. that was with the crank skimmed and xrayed for cracks again.1 point
-
Time to recap what's been going on. So the next step of the process was to get the fuel system pretty much finished. Step one of this was to modify the factory 4AGE fuel rail, as in OEM configuration the inlet, regulator and outlet were all mounted on the top face of the rail extrusion, with each end capped off where it was cut from factory. As I was intending to run an aftermarket fuel pressure regulator (FPR), the plan called to lop off all of the attachments on the OEM rail, drill out the plugs from each end and weld on -6 AN fittings at either end. IMG_7025 by Richard Opie, on Flickr Which Sheepers completed for me. It's top rail in the photo above. Which was a spare with the box of gear that came with the 4AGE. Unbeknownst to me, this was a bluetop bigport rail, not a smallport rail which has different injector spacing, as the above image illustrates - after the fact of course. So we had to start all over again. Well, Sheepers did. I drank beers and offered unhelpful advice mainly. IMG_7043 by Richard Opie, on Flickr This is where the inlet and damper/regulator thing originally attached. They'll need to be filled. IMG_7078 by Richard Opie, on Flickr Since I super love taking welding pictures, here's Sheepers welding it all up. IMG_7104 by Richard Opie, on Flickr And this is what you're left with following stage one of the process. This rail welded heeeeaps nicer than the previous one, perhaps it had less contamination in the metal, or we got it to a more satisfactory temperature before welding. IMG_7039 by Richard Opie, on Flickr IMG_7128 by Richard Opie, on Flickr Fairly self explanatory here. With the plugs drilled out from either end and both end faces ensured true, Sheepers welded on $14.00 worth of Speedflow -6 AN weld on male fittings. Nice. IMG_7179 by Richard Opie, on Flickr A portion of the finished product. Obviously the weld which filled the holes was ground flat leaving the rail in a state ready to polish in the future. 0P4A7732 by Richard Opie, on Flickr The next step involved finishing off the rest of the fuel system. Brendan Duncker of Convert Ltd (who built my headers for me) was kind enough to agree to make fuel hardlines for under the car - I had a reasonably specific brief following some discussion with Clint about securing fuel lines, in that the lines needed to follow the factory path so I could pick up all of the factory clip points. This was done, there are now quite beautiful 5/16" hardlines under the car, with black -6 Speedflow fittings throughout, including a filter unit near the firewall. Pics later when it's not wet I guess. 0P4A7743 by Richard Opie, on Flickr Pretty self explanatory with the layout - inlet to the modified fuel rail, 180 degree fitting out, back along the top (may need to clip yet) in braided line to the Aeromotive FPR then back under the car. The remaining port of the FPR will be used for a fuel pressure sensor. 0P4A7734 by Richard Opie, on Flickr 0P4A7752 by Richard Opie, on Flickr Brendan was also able to mount my radiator for me. The Fenix AE86 units seemed to get a solid enough review from most 4AG people I know so I plonked down a moderate amount of folding for one of those. Yeah I know it's a China radiator, but the finish is good enough for the car. With some bolt in bottom brackets and OEM AE86 top brackets it's a perfect fit in the nose of the KP, with enough room for a slim 12" fan and using shortened AE86 radiator hoses. 0P4A7742 by Richard Opie, on Flickr 0P4A7736 by Richard Opie, on Flickr This sort of leads on to how the engine bay looks right now - this is really close to the final product as far as the aesthetic side goes, with really only the wiring plus some hoses for overflow and breather to go in and complete the picture. So yeah. We draw a little bit closer, money is a little low right now with purchase of a new camera gear so to progress I need to allow the bank account to rally a little and then it's time to hit the wiring with the assistance of Stu. Thanks must go to Sheepers, Brendan, Stu and Reuben from Fenix for helping me out with this stage of the build. Discuss the right way to go about chequebook building a car here - //oldschool.co.nz/index.php?/topic/18803-snoozins-1981-kpiz-starlet/1 point
-
Well the last month has been full of late nights, early mornings, massive hours and a fair few km's for the car being towed around, Made it to my deadline of Beach Hop 16 JUST. Had the car dyno tuned the week before and made 260kw ATW with only 80% throttle and a 6k redline. Need to change the TPS from a toyota to a LS1 as the Toyota wasnt talking to the ECU after 80% throttle, with this change they tuner reckons I should get around 300kw which will be a laugh, Once it gets a few revs into her it pulls so well, so much fun/scarieness ha. Greg at Midnight Upholstery worked till 6am Monday morning before having a hours sleep and heading over to put it in/finish it, we got it done by 7.30 pm to get it on the trailer and off to Whanga by 8pm. Having only driven it for about 15minutes prior to Beach Hop this week would be its first real shakedown after the nearly 4 year build. Had some minor electrical issues on Monday night/Tuesday which we got sorted by Wed morn thanks to the Auto Sparkie in Whanga. Got it done just in time to leave late for the run to Waihi Beach Hop cruise, a clear road, mint day, car load of the crew and top down with some sounds made for a epic trip. Its first real shakedown/drive which was a hell of a lot of fun and I couldnt stop grinning! Car went well for the rest of the Hop and was in all the cruises without issue! Very very happy with the end result and now its time to get legal and clock up some miles. Heres a few photos for you guys of the end result, Will be getting my brother to take some sweet shots once its had a proper clean up and we have some time! Pic courtesy of FazyLuck Interior shot Heres a pic of it and my mates 64 SS Impala also as well as a mates airbagged Commer at Beach Hop Talk some shit! http://oldschool.co....westpala/page-71 point


This leaderboard is set to Auckland/GMT+12:00