
Leaderboard


Popular Content
Showing content with the highest reputation on 11/07/16 in Posts
-
Ring-a-ding-ding.... Holy 2 Smokes! 196* Suzuki B100p - which is actually a 120cc two-smoke four speed with self-mixing oil - which is what the 'P' is for, Last ridden in 1980 (legally) and ready for a refresh when time permits. Poured in some fuel, watched the fuel hose & tap leak and ignored it. Three kicks and she started. LOTS of beautiful smoke. Pumped up the tires and gingerly took her for a spin. Seems OK - shocks are softish (to be expected) and the brakes could probably do with some attention. Gearbox seal is weeping so a new seal (tube of silicone) and some 20W/40 will also be on the shopping list. Otherwise moth-ridden surface rusted originality. Long term would like to get her registered for Oldschool scooter / bike runs. Good times.8 points
-
Decided didn't want to drag a trailer around all summer on my adventures and felt like a project away from my house. So have mounted the camper on my c10 bed! (Camper not damaged in anyway can go back to factory in an hour) should look quite call all up. Just need to extend the side legs with extensions. Also midnight upholstery is whipping a new cover up for it this week. If weather is good this weekend it will get test run8 points
-
Spun up some shock mounts for the rear. Top ones got welded through the RHS that goes between the C-notch. Bottom pair got welded to a plate which was then welded to the lower 4-link brackets. Added the commodore sway bar as well. Once everything was fitted we tested it and worked well. Fully welded all the diff and airbag mounts etc so is pretty done for now. Started on the front end again. Test fitted the sway bar and it only just fits in between the chassis and front end. Need to make up some mounts and maybe scallop a bit out for more clearance. Front shock mounts will look something like this. Drew them up and now just waiting for them to be laser cut.5 points
-
The Auckland Monthly Meet! Wednesday 16th November Third Wednesday of every month 7:30pm onward A chance to catch up with fellow club members, talk with people you may or may not have met before and eat some lush foodstuffs. Burgerfuel, Mexicali Fresh, Ajadz, Subway, Doolan Brothers etc. corner of Robert St and Hurst St, Ellerslie See map. The DEAL$: FREE Drink with Burger and Chips Purchase (From the COKE range , excluding mini burgers) FIRST MEET?? If you are new to these meets here are a few points that may help; Most people usually show up between 7:00pm and 8pm-ish. We roll down to get burgers and whatever else is available whenever we're hungry. We sit around either at Burgerfuel or back up top in the carpark and continue the yarns. Remember its always a casual affair, a place to yarn to mates and make new ones. An Oldschool car is not required at all, but if you've got one on the road then bring it and show it off!! Doesn't need to be flash or special. And to be honest, many of us drive our boring modern daily drivers there anyway. MOST OF THESE ARE COMMON SENSE. WE WILL PROVIDE A FEW GENTLE REMINDERS WITH THE NEW RULES BUT REPEAT OFFENDERS MAY BE ASKED TO LEAVE. RULES AND THE BORING STUFF!! Basically these are in place so we have a fun and friendly meet and leave the carpark clean and tidy like we were never there. Take your rubbish away with you or put it in a bin, Use the public bins downstairs not the private ones belonging to the business up top Smokers please don't dispose of your butts on the ground! Please limit the ALCOHOL consumption. Its a public place and the Police/security regularly stop in and we don't want want anyone getting in trouble, We also don't want people leaving empties around. You are welcome to invite a few mates, but please note you are 100% responsible for their behaviour If you belong to other clubs and feel they might be keen to come check out our meet then that's cool but please see BDA780, Threeonthetree or 73crownwagon for permission before inviting them. NO Skids or Reckless/Dangerous driving Please leave a space near the fenced off area clear for the cleaners and don't block them in if they are there. Park in a proper carpark! If its full then just use a bit of common sense and try not to park to many people in. Newschool cars please park to one side and be prepared to move if we get short on space. I have had to ask Newer cars to move and park elsewhere and will continue to do so. The old cars get first preference for parking. Don't be offended if you're asked to move your newer car to make space for something old. If its raining and we have to park downstairs then new cars park upstairs or out of the way. The covered carpark is very small and needs to be OS only, No anti-Onehunga sentiments will be tolerated If xsspeed turns up then the burgers are on me (He won't) Priority parking will be given to Cheviot Turbos If you have any suggestions or input for the meets then PM Threeonthetree, BDA780 or Shakotom Thanks!!3 points
-
Well you will be well happy that my Xmas present to myself this year will be drop spindals for this haha little bit blushing3 points
-
18rgeu!3 points
-
YESSS!!!!! So sweet man!3 points
-
Well well well ........ Been a wee while! Some things have happened... Sketch level 100 Sketch level: over 9000!!!! Fun findings: Any suggestions? I bought a panel puller and I'll give it a go. Plans now: Straighten sills and rails. Strip whole underside back to bare metal. Epoxy prime. Seam seal. Undercoat/chipseal Something like that. Both subframes will get dissassembled, and all the parts sandblasted and re-coated. Not sure whether I should powdercoat of paint at this stage .... Suggestions?? Till next year...... ELEVNS2 points
-
Even if I rock up in a slammed EE80 with a 2ETE?2 points
-
Awesome! Love to old style tank! Cheap rego too. I have a 197? B120p. It doesn't have the old style tank...(sadface)2 points
-
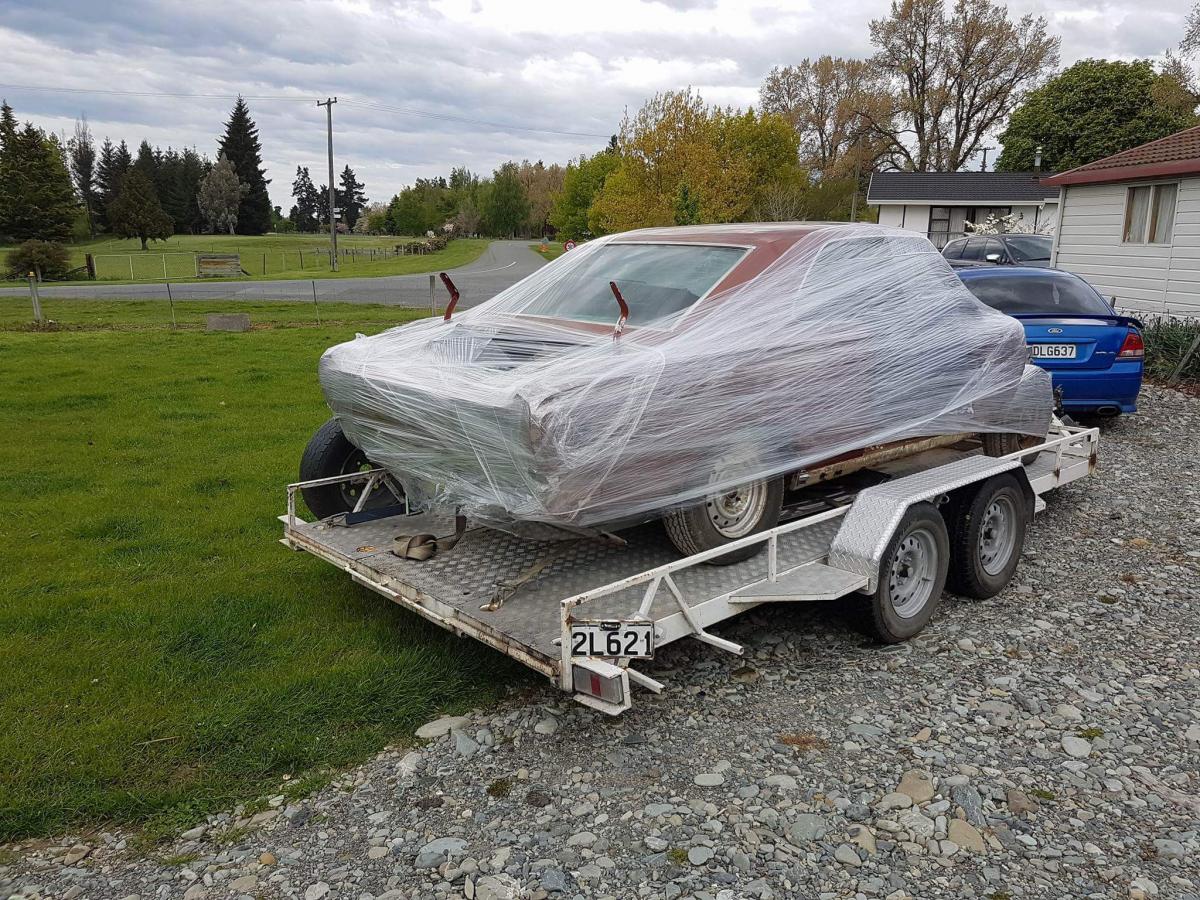
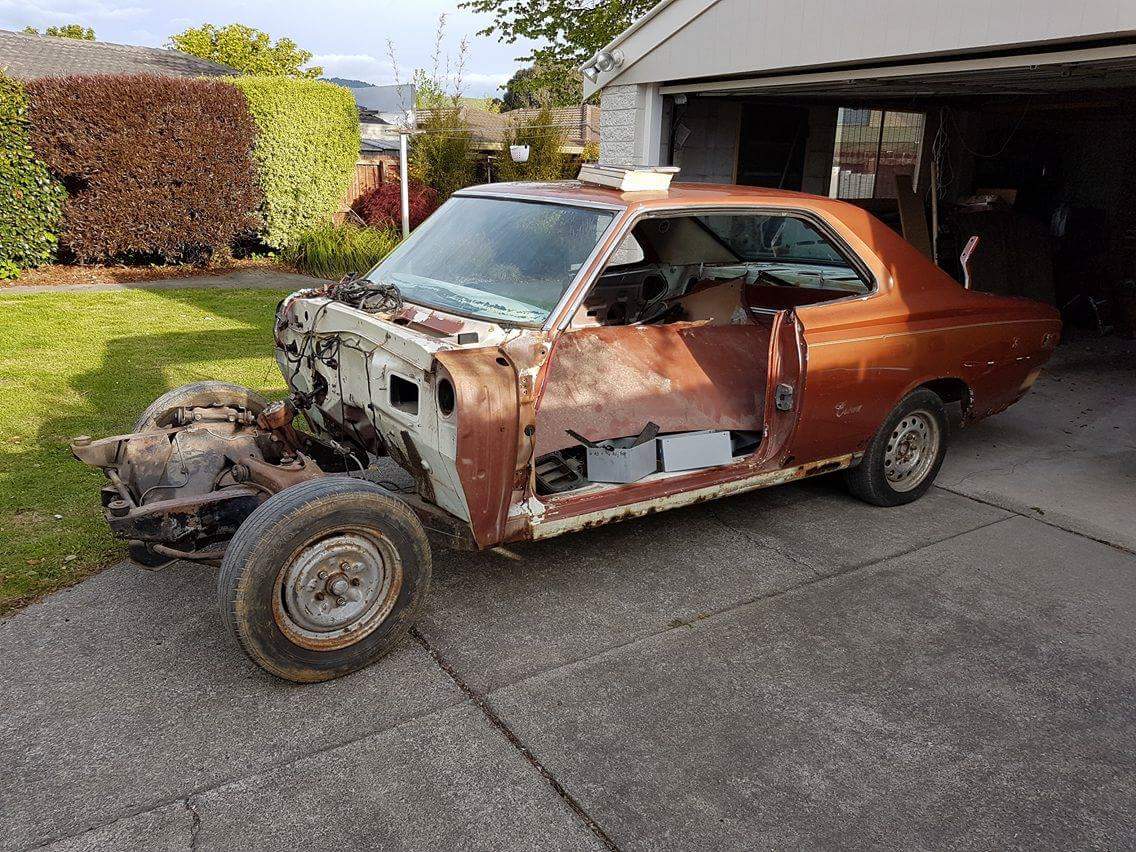
Went to Custom metalshapers today to drop the seats off so that Matt can finalise seatbelt mounts, luckily for me both the front and rear upper seatbelt mounts are a major so that's hurting the budget a bit, but with the kids going in the back you can't put a price on safety. On the plus side one floor plan is almost replaced and the quality of work is fantastic Here's the old girl in her temporary accomodation: New floor pan: And here's the state of the other side yet to be replaced: Hopefully not too much longer till she's back home and the airride can go in!2 points
-
For warrant im putting the 8j focus on the rear with the 195/45 toyo t1rs and ill put some 185/60 on these 6j enkei cross fevers up front. i see above mention of the shifter being very poor, upon investigation this is due to the rubber/metal bush in the selector being very worn, it looks like an attempt to fix this was made by wrapping the nylon socket on the end of shifter with masking tape to build it up Ive ordered a solid replacement from cube racing from Australia which comes with a small rig to press the new one in Will update on how it works when it arrives and will also one of the marlin crawler shifter seats as that is also non existent. Something that always bugged me seeing this car for sale was the lack of leather shifter boot even though it was a factory manual so i had one made up. The original one must have perished but the metal ring was still there and i had a brown one to take in as a template Here is the new heart awaiting Wof to be put in Also have a full set of facelift chaser door cards on the way as well as grill and one of the headlights which i already have the bonnet from.2 points
-
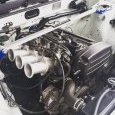
Hey guys Have entered the Corona into drag day for the 1st time. really looking forward to it. Car needed a few things touched up for wof and def a new clutch ! Brought an electric dizzy n ignitor from aussie which should arrive next week. Also brought some factory fender mirrors what a score !! They look great Anyway after fluffing around with them decided it was time to get to the clutch so out with the engine Clutch was well buggered lol belongs in a museum Had a test fit while out Got a bit carried away and ended up cleaning the head, painting the block n gearbox, radiator fan surround and under sealing the whole Corona!! While taking the front wheels off I noticed a split in the flexible brake lines. It only went for wof check the same day n didn't get picked up on.. lucky I noticed it. So while I was at it I decided to both both sides just to be safe. Looks a million bucks !! Will install electric ignition during week need to get another tacho as my smith's one won't work with electric only points ignition Looking forward to a new clutch too that'll be lush Cheers2 points
-
As i have mentioned here and there, one of the big draw cards for having the EFI model isnt just the awesomeness, but the fact that i can convert the car to run a Speeduino custom ECU. I build the Speeduino ages ago, well before i got the car, and have been waiting to get the project moving again. With the car now in my possession, the Speeduino project is back on the boil and parts have been ordered. I will be removing the standard engine loom and making a custom loom with all new wire and plugs. I also intend to run a pair of Subaru coil packs and igniters in a wasted spark configuration. I havent quite worked out where i will mount them. I have completed the initial wiring diagram sketch, And will be building off that with a V2 sketch outlining all the connectors and where it will run in the engine bay. I also need to fuse the main power feed to the Speeduino. I picked the enclosure for the Speeduino today. Has enough space for the boards, wiring and even the Bluetooth adaptor. Being plastic it should help with reception for Bluetooth too, although i may look at mounting that module outside the box. The wiring will come out the end of the box, once i decided which connector to use. I have the new wiring for the harness on the way, along with all the weather proof connectors i could ever need. I just need to weld the WB02 sensor bung into the exhaust, buy and fit the trigger wheel/sensor, and make up a new intake pipe to bypass the AFM (and weld the bung for the IAT into that).2 points
-
Septic guys came at the worst time possible. Mid winter mud pit Water tank in place Fast forward a few months and I had finally finished the outside, winter definitely killed my motivation so I did minor things inside while the weather was shit. Short days also killed any after work progress. Few inside bits while it was wet Attempting my own plastering.. Had to fix up a few bits lol And a shot of the outside now. Mum offered to buy some trees for my birthday, so I decided on some cherry blossoms for the driveway. Should look good in a few years. Currently laying flooring & painting so will get some pics up nearer christmas when that's all starting to take shape.2 points
-
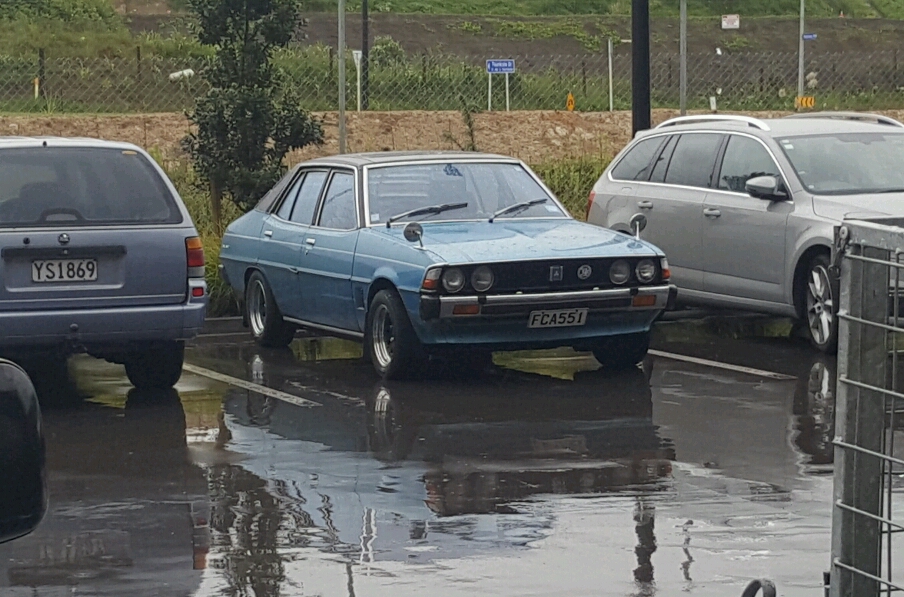
Hello all, I'm not new to oldschool but I haven't posted before. I have recently purchased a 1974 2.5 PI. (I'll try to add a few photos in as I go) sight unseen from Timaru no wof, no reg no worries? Anyway I sorted a few obvious problems. Including a non functioning alternator, a new airel and a door mirror just off the top of my head. And then got it down to see what it needs for a wof. It came back needing both lower balljoints, an adjust on a wheel bearing and a small bit of rust which turned out to be nothing! As I write this I'm waiting for some bushes to arrive. The rust has been fixed, the wheel bearing has been adjusted and one new front strut insert shock thingy has been fitted. I have fitted the balljoints into some spare lower arms I had and am waiting for bushes to arrive so I can fit them along with new bushes (radius arm and lower balljoint arm ones to be exact). I decided not to be tight and replace them all at the same time as I was taking it all apart anyway. I have also already got a white 1977 2500TC which has all the S goodies and even badges on. And she 1976 French blue TC which is being repaired body work wise and will be resprayed eventually. I hope to keep you all up to date with what's going on with these cars etc. I will also start a post over in the discussion area so we can all talk about it if you're that way inclined.1 point
-
Last time I had to use a stat dec (which was not for the last three bikes I reregd) I also had to show proof aka evidence that I owned it to back up what I was declaring. I have used a print out of a Trademe listing with me showing as winner or emails / proof of bank transfer. At the end of the day a declaration is just a statement that is witnessed so JP may want to see proof to back up the statement. Then again, just like every process with land transport (an Inconsistent mess when it comes to reregistering bikes) it can depend on how the jp/entry inspector is feeling on the day or whether they actually know the rules. In my experience about 20% of persons responsible for making these crucial decisions actually know their own rules.1 point
-
Only thing thats different between Y series engines is slightly different port size on the heads AFAIK/mine is a 3y block and the head is stamped 4y so yeah shit is lego as. Townace retrofit for injection should be easy since it was only the Townace/liteace series of vans that got an injected motor, although with yours being a ute things might be a lil bit tricky since theres the rear panel where as a van would have open space. Iv just gotta make an extension adapter pipe for my van to get the T/B under the seat which for a man of your engineering caliber should be a walk in the park1 point
-
Please bring to Wagnats. (looks rad!)1 point
-
I got some TergoPhos the other week, finally tested it. It's like rust removal on meth, it's pretty effective.1 point
-
Headlight relay normally lives by the battery. Probably what released the magic smoke.1 point
-
Mine didn't have a fuel tap so go one from Thailand for $5 or something like that. Works mint. They are pretty easy to revin, then I think they are only $60 a year for rego? Mine hoons along sweet. Great little bikes.1 point
-
Okay so i picked up my rear springs last week and even tho it was raining sunday i convinced dad to move one of hes cars out of the shed so i could work inside, and after it taking me less than 5 mins to do the rears it took me about 6 more hrs to figure out the fronts as removing the front strut out of one of these is not as straight forward as anyother car ive seen.. but in any case its done. Its still not as low as id like but its a solid 30-40mm lower so cant complain. Might look into getting the springs compressed later but for now itll do Discussion here //oldschool.co.nz/index.php?/topic/54160-greenies-mitsubishi-galant-sigma-discussion/
 1 point
 -
Wire vinegar is good for cleaning carburettor body's, it's gets rid of the white corrosion and makes them look like new, I tried using coke to remove rust witch was unsuccessful but it ate the paint off1 point
-
Haha. That's awesome.1 point
-
Lol/youre safe i actually cant make it1 point
-
1 point
-
Top end... http://www.carandclassic.co.uk/car/C792509 These...... http://www.carandclassic.co.uk/list/40/sd1/ Are they expensive for over there ? Some don't seem too bad value but I remember when a good one was 500 quid (blah, blah, don't know you're born, etc....)1 point
-
RUST! Was just getting worse so I decided I should probably fix it. As you can see this panel has been painted quite a few times; Original brown, then yellow, blue, another coat of blue and then red haha So stripped it all back to bare metal. Did the valance as well, since that had some decent stone chips etc. Just two bits of rust to fix now; a hole under the wiper motor and a bit under the fuel flap. Not looking forward to trying to fix them.1 point
-
Well my lack of action on the rear end bit me in the ass. It got chucked out on noisy rear wheel bearings, terrible rear brakes and the exhaust pipe moving too much. plus the high stop light was flashing with the right indicator. I must have wired it in wrong . So it's off to buy brake bits and do a little wiring.1 point
-
Gaha. Was wondering where that was going1 point
-
I have been slowly working away on this van, and dropped the engine in yesterday. What a bloody mission! The extra height of the supercharger made it REALLY tight to get in there. I had to notch the front crossmember to allow the sump to drop down and clear it, and it is really tight for space in all directions. But it does fit! And no cutting or beating of the floorpan or bulkhead required! There are a few tweaks needed for clearance, but nothing major. Here is a pic of it sitting in place. I have also installed a MK3 Transit power steering box. The steering box was straightforward enough, remove the Mk2 mounting plate and fit the Mk3 version. For the steering column I used the Mk2 outer part, and cut it off where it protrudes through the bulkhead. I fitted the Mk5 shaft to this. And used a coupling from a Mk5 with the 2x UJ's so that I could get rid of the rubber coupling that the Mk3 has, and also keep the steering column on its original axis. There was a little bit more to it than this, but you get the idea. //oldschool.co.nz/index.php?/topic/50625-browndogs-supervan-2-yet-another-one/
1 point
-
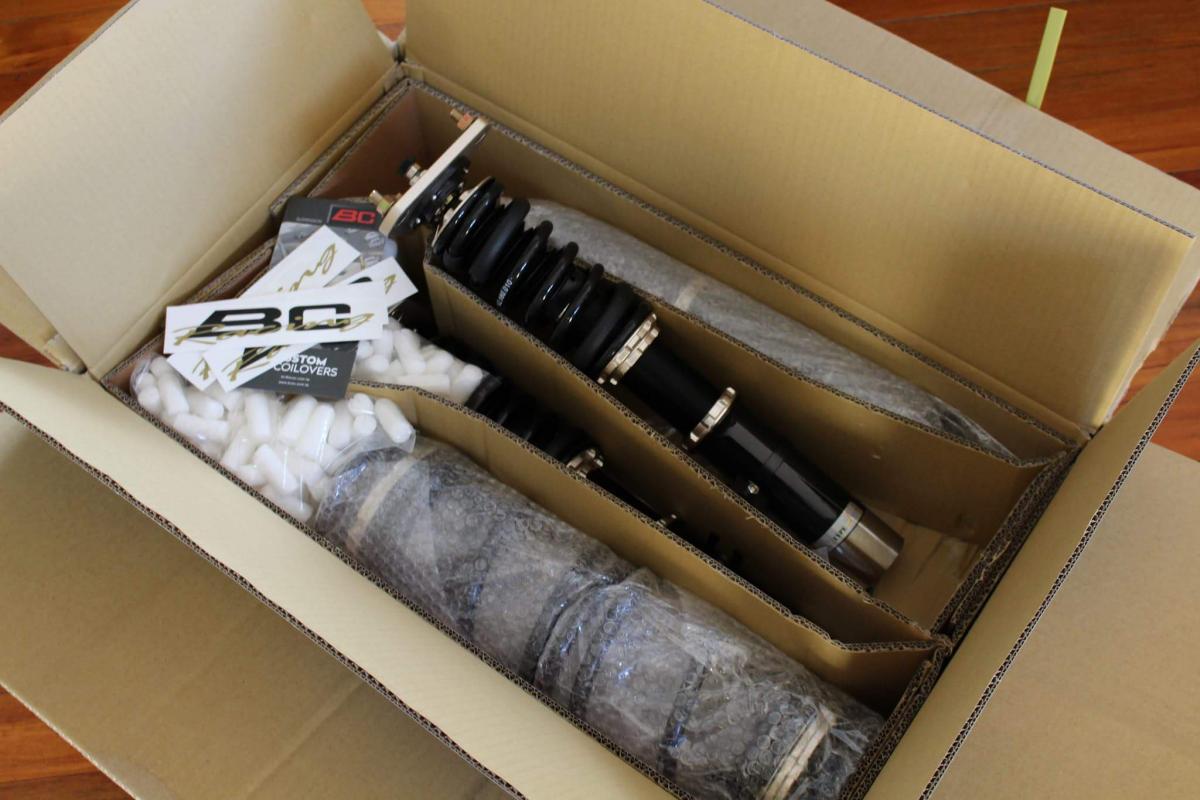
Loom is back and nearly in! BCs have arrived and are off to Surfab tomorrow to get welded up. Old set of C type SSR MK3s are currently with Aidan at Pine Engineering getting turNed into something crazy. Exhaust and cert and I should be done, for the time being..
1 point
-
well this was quite the non-event... i moved islands, no way was taking this with me ever going to be feasible. ended up selling to some gavin who had plans of a hektik track car... it popped up on the tard $1 reserve one week later. however i stumbled into Repco Queenstown for my usual order of blue checker plate floormats and bargain bin spanner sets, when i spotted this thing outside. the owner of the car was behind the counter, a British lad, and saw me cheesin, engaged in a sharn, and said if you want it make an offer as my visa is up in december. so as the stars aligned, i purchased another one! this one is suuper lush compared to the last - manwell 8 valver with 66 kw of pure self esteem, two extra headlights, knock off bbs' and still too many doors. last owner was a foamer for golfs back in the uk, has recently put in a new clutch, timing belt, and while he was there inspected and replaced head gasket. so it is a minta! look forward to putting it through its paces. has a few bits and pieces i would like to tidy up, namely the door trims and replace the grill with a not cable tied/gti number. and some bosch incisions to the ride height. enjoy1 point
-
spent most of the day fiddling with 3 whitworth tappet spanners, a work light, and a feeler gauge trying to contort myself over the engine so i could see what i was doing while setting the valve clearances they had all tightened up a little, probably has not been done for 20 years because its a hell of a job put it all back together, twin carbs back on and put a few bits together to sort out the new throttle linkage and return springs, and put the air filters on. will need a few old gaskets swapped out with new ones for a propper tune once everything is put together and theres an exhaust. warmed it up and did a couple of launch tests down the driveway, its not much distance but it feels noticeably more powerful, i think i could get a wheel going for the first time ever1 point
-
Found a pic1 point
-
The day finally arrived. Up at 4am to pickup and tow the car down to Taupo. Pics below for your viewing pleasure. Car went solidly all day, the gear ratios of the J160 is amazing on the track and the Cusco LSD certainly helps keep the car planted. I did really notice the lack of rear swaybar though (ran out of time to fit it) and of course my cheap chinese tyres, but it was still the most fun I have had in a long time! So now I have a solid list of thing to work on before the next track day and also working towards getting it certed/road legal. Happy days.1 point
-
Woahhhhhhhhh. Its been a while. I have been picking away at little bits here and there and in the last two days put in a bit more effort. I thought I’d better do an update as it’s a great way to motivate myself and actually see the progress. Last time I left you with a photo of the engine bay painted. The car went back on the hoist then I finished making brake lines. I finished cleaning and painting the front brake calipers, mounted them up and cut/bent/swaged/flared and fitted the brake lines to suit. I then decided the shiny new brake lines made the axle look very messy indeed so I just had to remove the lines and paint it. Overall it makes working on the underside so much nicer and looks good for the WOF test too. New seals in the freshly painted master cylinder and bench bleed it before bleeding the system. It was a slow process made faster by using a make shift pressure bleeder and bike track pump. It got even faster when I discovered the loose leaking union on the opposite side to where I was sitting. Brake pedal came up well and they feel good. There is a few years worth of rust to score off the discs on the first application though. People size their wheel dish or lack of road clearance with a phone as a scale. Well here’s a new one- check out the size of my enormous axle… While the car was up I ran some nice thick cable down to the front for the starter.. Oh btw..I had previously forgot to mention the rusty bits along the gutter drain lip over the rear tailgate (hatch..) opening. Well. There was rusty bits. Now they are gone. It was a tricky lots to replace with compound curves but its important. Luckily it was solid around all the hinge area as I could see that being a right pita to fix. So the only rusty bits left are some little bits on the doors and another patch on the tailgate (hatch…..) plus weld a check strap retainer back in place for the passenger door. Then I think I can safely put the welder away. The rocker cover had ugly breather vent tubes sticking right out the top and this had to change. Chopped them off, altered the interior oil splash guard to suit a rear mounted exit pipe so I can hide the breather hose away. Then a flick of filler and a coat of finest spray can paint and it looks much better. The old tube was a tad messy anyway.. Modded the splash shields.. Painted.. I had to modify the inlet manifold too. Same reasons- ugly outlets with no thought to a tidy engine bay. I removed both, welded them up and filed the lot smooth. I then machined up a new boss with a tapered thread to suit a different pcv valve and welded it in where it will work better with the new hose layout.. Hannah painted the engine and bell housing satin black. I refitted a cleaned up alternator Andre gave me. Cheers again Andre. The car previously had a generator fitted with an ugly control box. No no no. That wont do. The alternator looked exactly like the ones in the Haynes manual but it had the lugs orientated wrong ie it was made to mount on the other side of the engine? Then I noticed its front half looked symmetrical. Spot the difference in these two photos… Yep- undoing the front half and spinning it around 120 degrees allowed the alternator to mount on the side I wanted. Clever chaps. So I altered the existing generator bracket… and it all fits fine now. Yay- now I have 35amps of charge capacity to play with. I can probably find a suitable tape deck to run along with a really old inefficient amp. Then play suitable old 60/70’s music as I hold traffic up every where. Yes. Then we slung the shiny clean 1159cc power plant back into its home. Painted the grill area black as well so to work in better with the planned GT grill. I remounted the cleaned and painted wiper rack but will need another tapered rubber seal thingee I’ve yet to source. Painted and fitted the hinges in place. Then I cleaned and stripped the Stromberg carb. It was dribbling out the bottom when I had been checking the engine ages back and I found some hardened perished O rings. That’ll go back together and then I’ll make a little alloy pulley to suit the cable pull offered by the later preferred Viva HC throttle pedal I’ll be fitting. Hannah took the terrible old dash top rescue under her wing. She carefully filled the cracks and missing section in the replacement dash top I was given and made it very neat indeed. Big thanks to Hannah for her patience exceeds mine on those jobs. Then last weekend she celecbrated her fantastic job by sailing a jump on her old Fat Chance mtb and landing in a not very Danny Macaskill sort of way. In fact landing on her face. So as a treat she got a helicopter ride… Hannah is healing well and I have lots of Viva jobs lined up for her to cheer her up. I’ve painted the light brackets and swapped out one of the manky headlights for a good spare. Painted the back of the headlights to tidy them up. Next job will be the wiring and check, rebuild and add the Accuspark electronic ignition kit my Dad brought back home after a family holiday. Hopefully with that I may well be able to reliably sample the full 50bhp that this little engine might muster up! That is a about it for now. Very happy to get that off my chest. I might just go out and do some more! It quite a fun part of a resto this. Pick up bit, clean it, paint it, fit it. Good music, good coffee, helpful fluffy cat and you’re sorted! Here is a photo of how the engine bay is looking at this point in time..1 point
-
Crossmember full of rust and crud - and holes After hacking it out, the passenger side 'rail' needs some work. Drivers side is better, appears to have more oil leaked over it - just needs a small patch, and the corner brace is still mostly there. Need to scratch up some 2mm sheet steel for the replacement bits.1 point
-
OK, so this Wagon has turned up at my place.1 point
-
Yep, there are several ways to skin a cat. This was merely an example of how Molasses works all by itself. This might be considered messy if you are a poof and don't want to dirty your delicate hands but I wouldn't put my hands in a tub of phosphoric acid when by bracket falls off the wire ? No offense intended Spencer. I got my Molasses free from our Office Lady at work to trial its use, the drum was a freebie also. I'm up $80-00 woohoo !1 point
-
Just use phosphoric acid, or for more gentle use citric acid. The molasis has acid in it from bacteria that eat the sugar, it's like the messiest way to do a acid dip ever? It's nice and gentle but so is citric acid and you can make 1000l for about $80, not sure if molasis is that economical? Said it before but no hardened steel should be soaked in acids for long periods so depends what parts are stuck Hemi.1 point
-
Christmas came early!!! Also forgot to mention earlier. I sent my wiper motor off to be repaired, Wayne Grimmer at Western auto electrical did a fantastic job and for a reasonable price ($320inc where as a new one was $550-800 depending on whether I imported myself or went through chucks) the fuel gauge didn't work it always read full. I carried out checks to make sure that it wasn't a faulty sender or a short in the signal wire, which it wasn't. Sent the gauge to Robinsons instruments who found an internal short and repaired if for $160, So now all the electricals are working good (except for the dash lights which isn't very high on my list of concerns) Now the waiting game to send the car off for the floor pans/seatbelt mounts begins. Then install airbags, refit interior, cert, compliance, Drive.......... if only it was that easy haha1 point
-
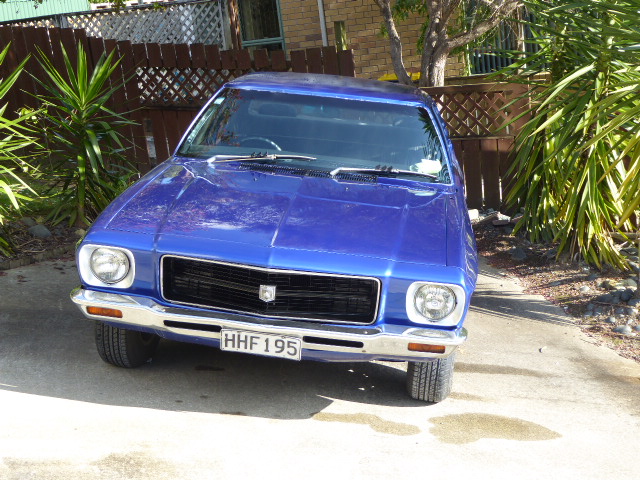
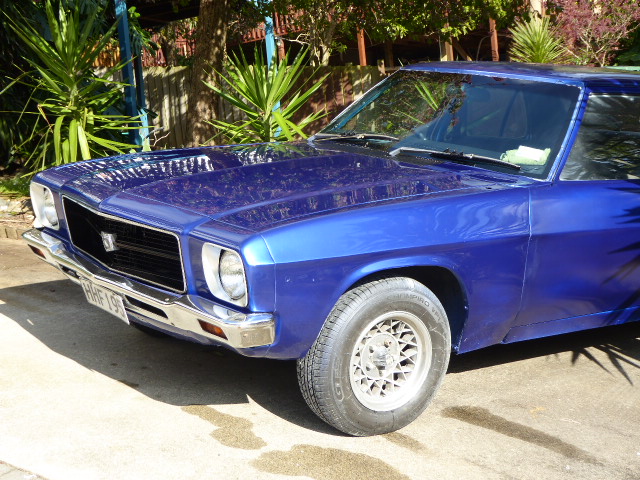
New paint on . Ive flated off ,cut and polished the bonnet and two front guards. I used 1200 grt paper and a medium cutting compound then finished off with a fine cut compound I got from resenes that leaves a lovely mirror finish. I could probably have taken more paint off to get a better finish ,but I'm always worried about going to far and through the clearcoat. I'm reasonably happy with how it looks so far. I havnt decided if I will redo the black on bonnet and boot like it was before. Think ill live with it a while and decide later.
1 point
-
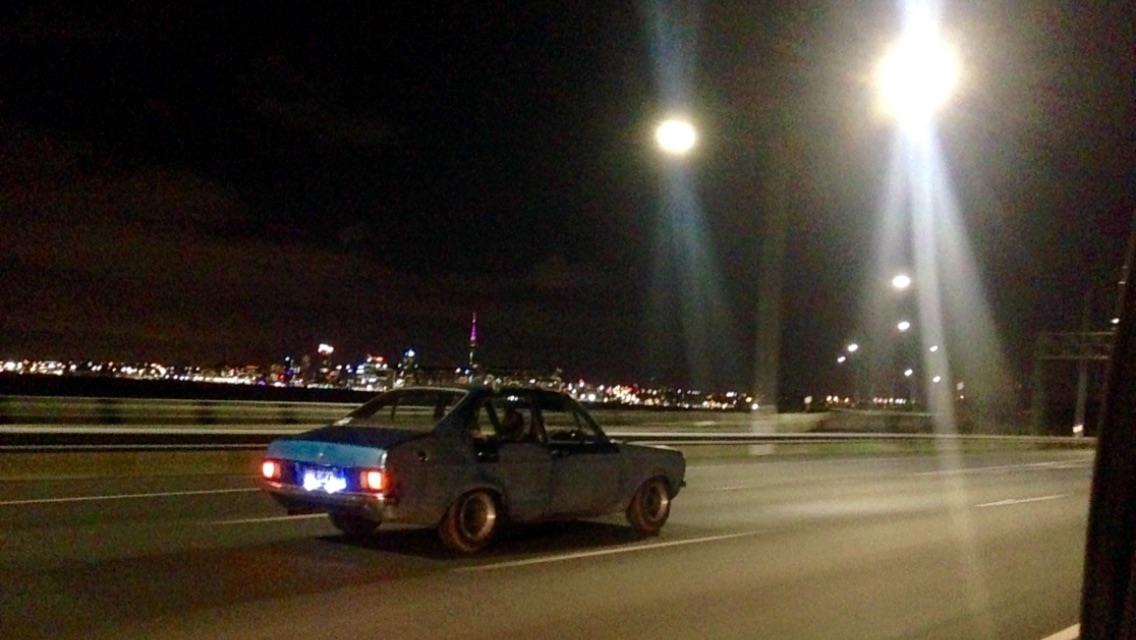
Night missions for the insomniac's These tires are a bit thinner and balder then the previous, ended up facing the other way at one point haha
1 point
-
I am really enjoying doing this its very satisfying really. 12 months ago I never would have imagined being able to fabricate metal patches and the weld them into a car.1 point
-
SOLD to an Oldschooler which is what I wanted.1 point
-
IMG_6728 by Neal OnTheTree, on Flickr IMG_6729 by Neal OnTheTree, on Flickr IMG_6733 by Neal OnTheTree, on Flickr IMG_6734 by Neal OnTheTree, on Flickr IMG_6737 by Neal OnTheTree, on Flickr IMG_6742 by Neal OnTheTree, on Flickr IMG_6746 by Neal OnTheTree, on Flickr IMG_6748 by Neal OnTheTree, on Flickr IMG_6758 by Neal OnTheTree, on Flickr1 point
-
So. I didn't die, but yeah had a bunch of crazy head issues - mostly sorted through an influx of medication. Got the engine and trans mounts done at DKM - they did a jolly good job. Now lego-ing the car back together. Only it's like trying to build a spaceship, when the blocks you have are for a castle. And half of them are Megablox and Duplo. Got the front end of the interior finished, slammed in some sound deadener. Now just waiting on some parts for the engine - picking up an alternator today, then waiting on a longer shift cable, new pulleys and belts and a wiring harness (gonna rewire the whole thing from scratch - yay!) Should be fun.1 point


.thumb.png.46e518f714cdc319554c389f990e75a4.png)


.JPG.48b13980a6c90d9b0813be9f3a2cd547.JPG)


This leaderboard is set to Auckland/GMT+12:00