
Leaderboard


.thumb.jpeg.384ff72c8d2b0ee0d34a7bdedb55bdcf.jpeg)
Popular Content
Showing content with the highest reputation on 03/12/16 in all areas
-
Finally have 4 pipes heading in the right direction. Has been tricky getting all runners the same length, while making them aesthetically pleasing and within the same constraints, so can bolt on swap back to the old extractors if need be.9 points
-
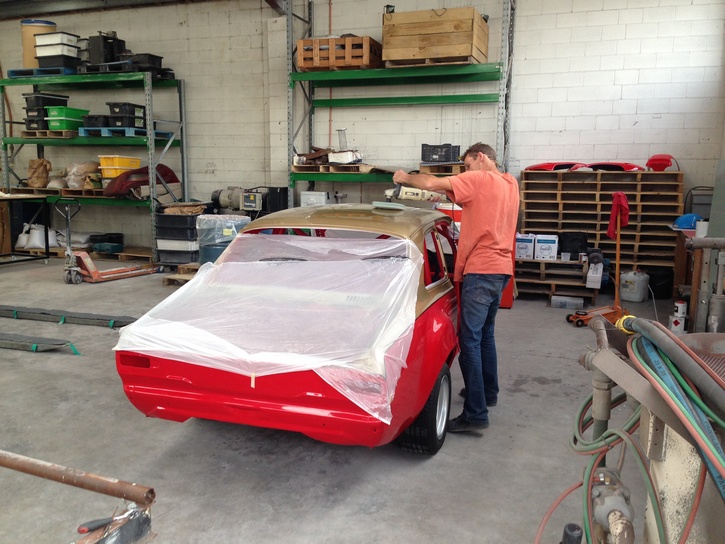
So masked up the block and gave it a decent clean... And removed the stuck oil pressure switch. This was really stuck, tried sockets, spanners, vice grips, heat, and finally got it to move with a cold chisel/punch. Really didn't want to have to drill this as would have got swarf in the wrong place... And threads looked ok... And hit it with rattle can engine paint. Used black because it will look good against ally heads - and because I had a can of black... Tape off and looks pretty good... And I'm finally close to being able to start bolting new/cleaned bits back on...7 points
-
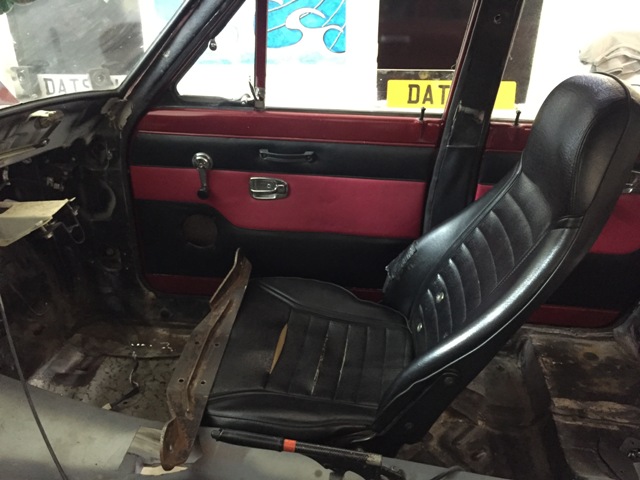
second after slam in importance, was clean it, as its filthy. every bit of trim i pulled off had cockroaches and spiders under it. so i stripped the whole interior, put a bug bomb in it, and waterblasted the whole inside and ''fixed'' the seat, with 2 t-shirts and some duct tape7 points
-
Slowly chipping away at this. Drive shaft now made. Engine bay almost ready to paint. got a pair of seats, will get them re-covered sometime.
 5 points
 -
Success! E21 trailing arms truely are 'bolt on'! Thanks heaps brockzila!5 points
-
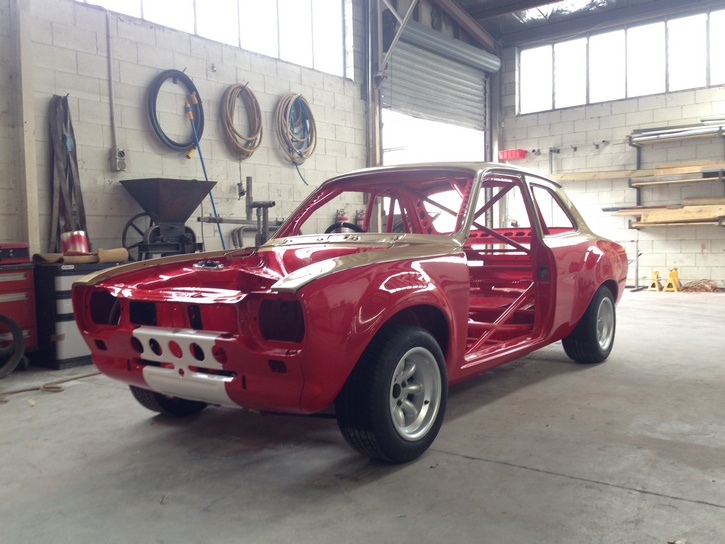
Got the rest of the car stripped to bare metal. Welded in some new framing for the drivers floor and new pedal box mounts. New pedal box in.5 points
-
Still need to build an exhaust as that is open headers haha, Still need to sort the concentric slave cylinder setup, get driveshaft made, buy an ignition module (as the one I'm using is a test one from work), thermo fan and wiring, reseal p/s pump, drive belts, battery bracket, driveshaft loops, front brake upgrade (have got a pair of v8 callipers so just need rotors, wheel bearings and pads) Aside from the driveshaft and clutch parts it's all Mainly just small stuff, Am on track for my self imposed deadline3 points
-
Tickled? Shit you'd be locked up if you Tickled your Mrs like that.1200 is pretty rough as a pay out. I am hoping mine gets repaired. I went into a couple of panel beaters this morning and eventual got someone friendly and helpful. Someone from alpine happened to be in on his day off and was really friendly. I'll pick up the estimate next week and go from there3 points
-
yes ........ but the death happens either way ! as for original question , its part of the oil crisis , we have used up all of the thick dinosaurs so we have been forced to develop cars which can use the oil from the remaining thinner dinosaurs . its science , science is always right3 points
-
I have cleaned all the engine parts and ordered piston rod bearings and a ring set from bowden engine parts. Complete paints has made a spray can with the original engine color for me. Suvic is gone grind my crankshaft as soon if I have the bearings. The main bearings probably have to come from fleebay. I still have to sort out the seals. Back in the original color: Back in the original color: A box with clean parts. I have to make a detailed photo of the Flash logo on the cover and somehow reproduce it. Nice clean parts: The gearbox looks mint. I am not gone open it up, but leave it as it is.3 points
-
Hey guys, update on times for next thurs!2 points
-
2 points
-
there is a week of evenings and $30 of steel to make an oil pan, dont let them cloud your vision to the point that spending a grand on a kent seems like a good idea!!!2 points
-
It falls out at the same rate as anything else. Just run monograde 50.2 points
-
Hey people, Thinking of trying something different again for March's meet. I know the owner of a choice little fish and chip shop in foxton beach that do amazing burgers. Leave Palmy at 6:15pm meeting at the Pioneer Highway Z petrol station or for out of towners approx 6:45pm at the Himitangi turnoff (Palmy guys we'll go Rangiotu way) Destination is Seabreeze takeaways - 62 Seabury Ave, Foxton Beach for an approx 7pm arrival Seeya all there!1 point
-
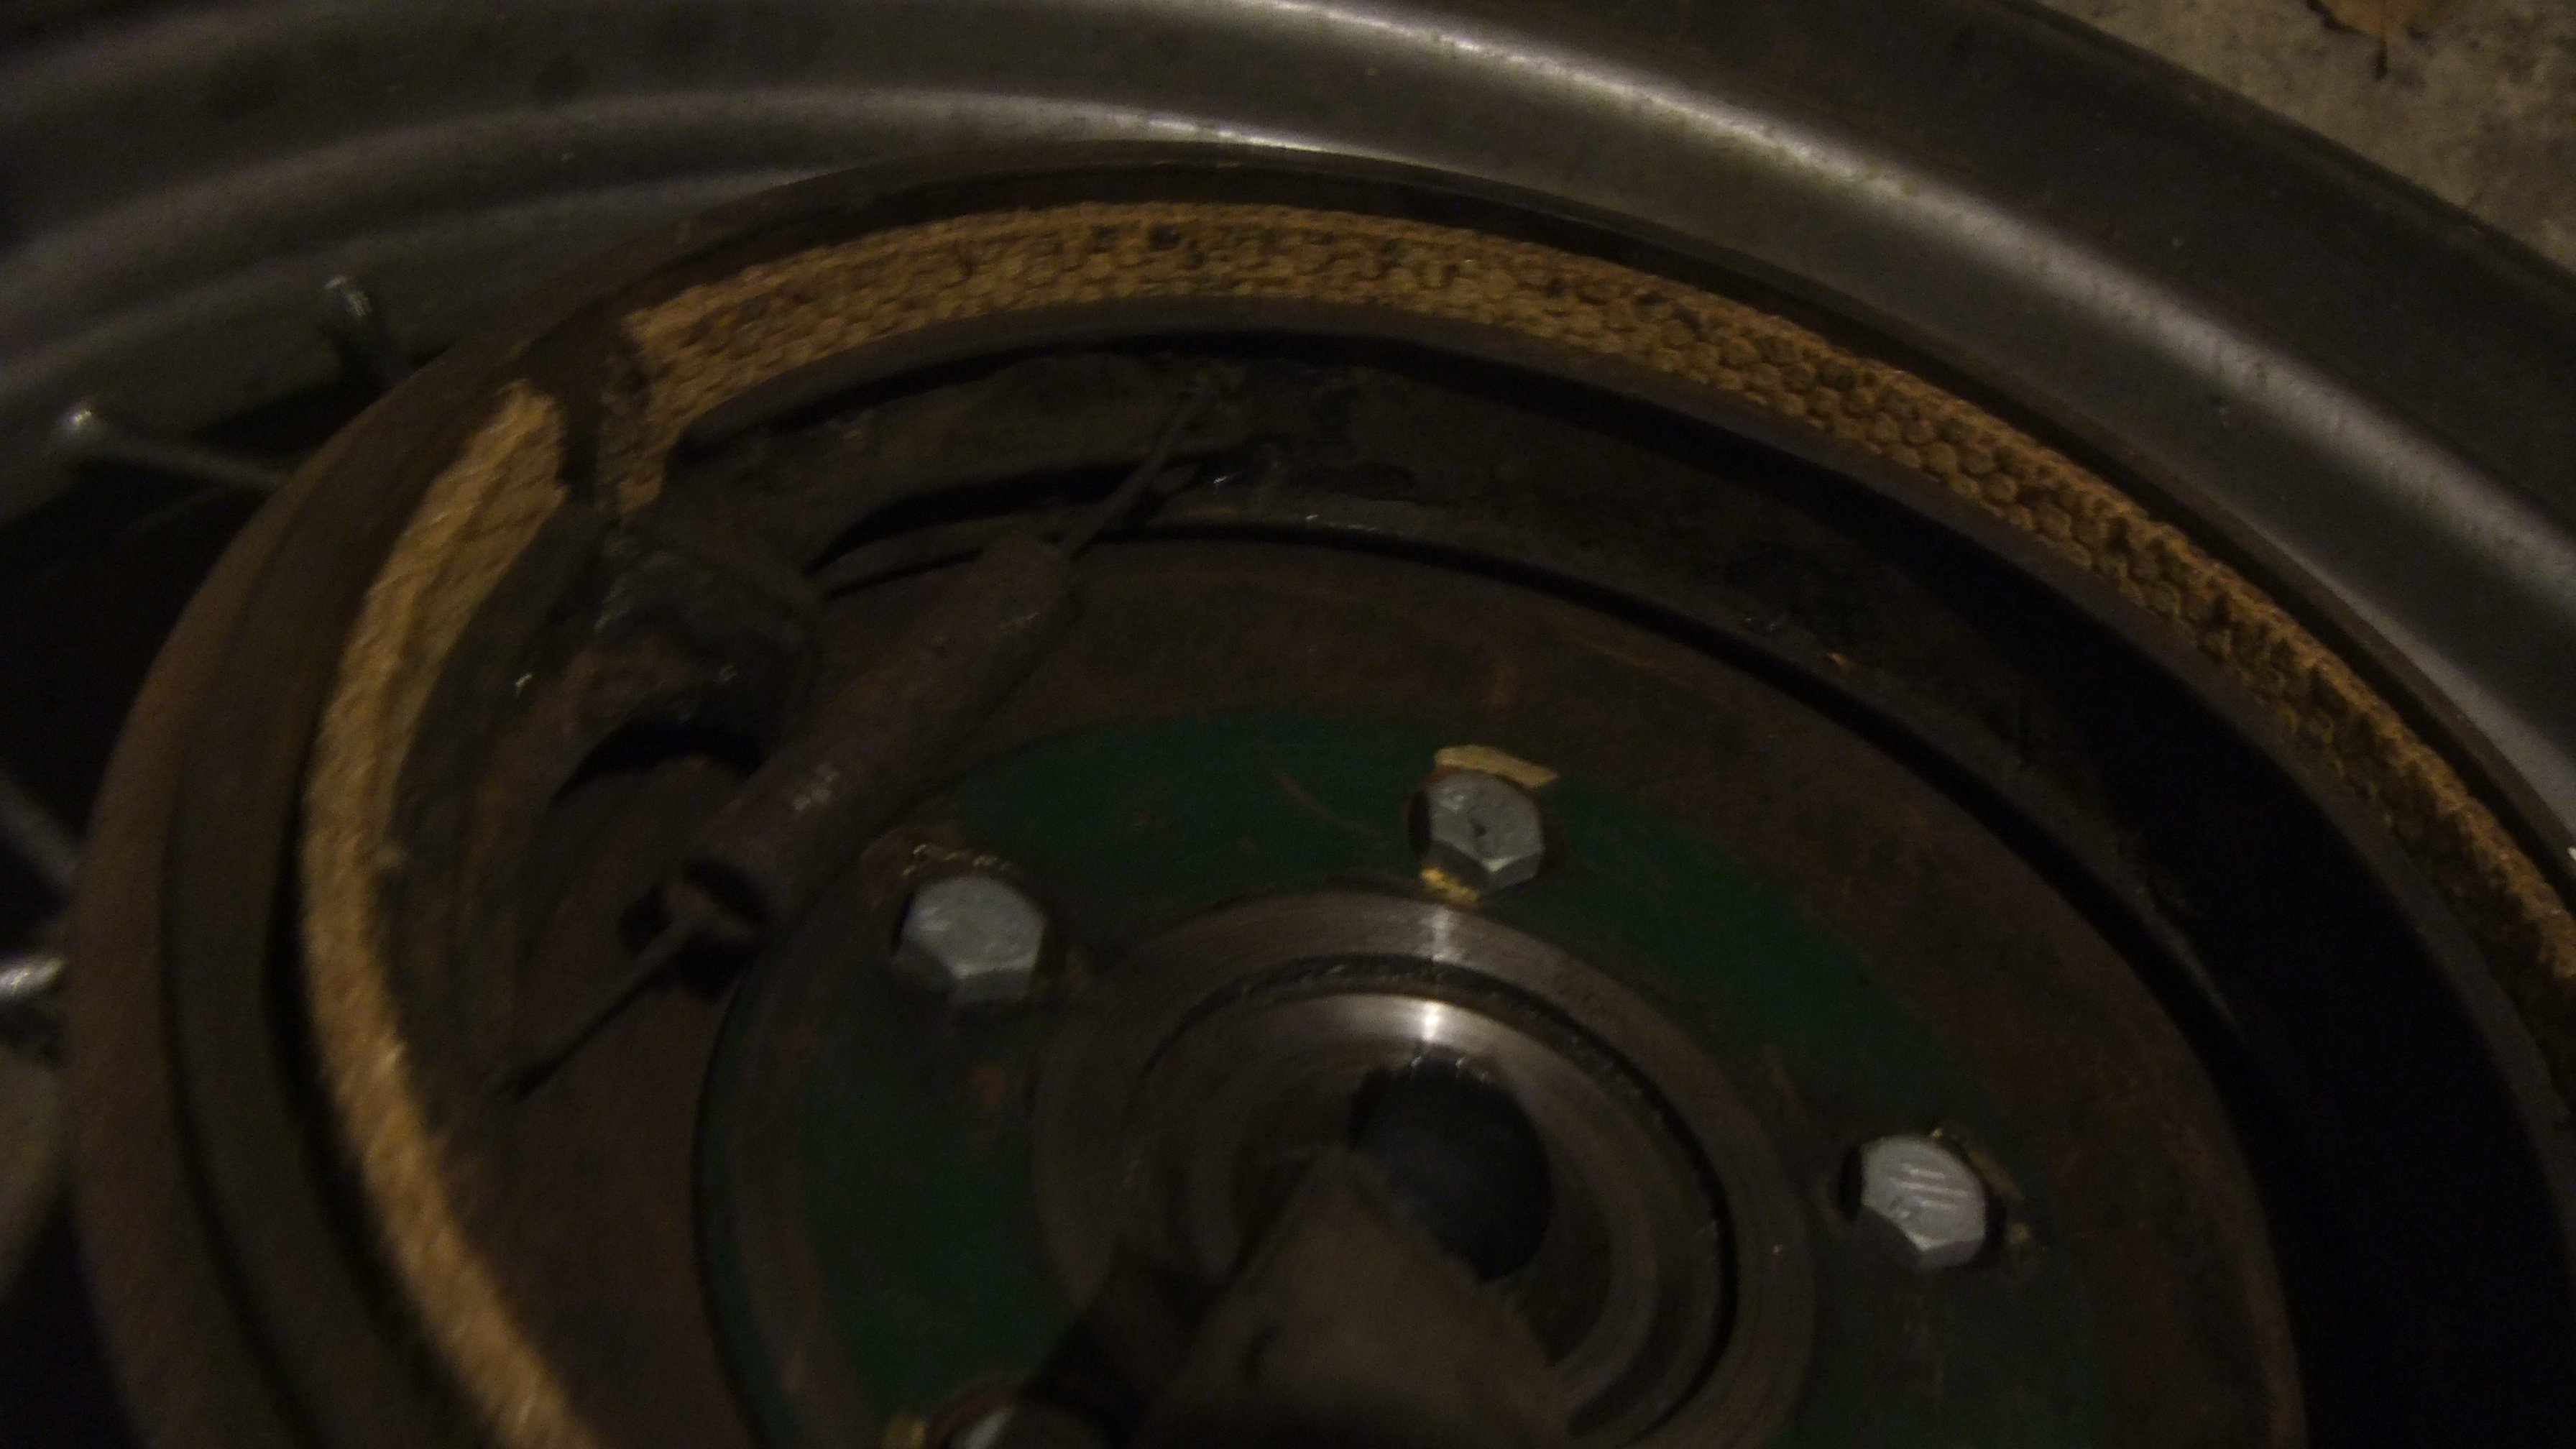
Someone from oldschool trying to free up the starter motor from the flywheel, with the added difficulty that the flywheel is in the sump (it doubles as an oil pump & a form of alternator.)1 point
-
New brake lining. It's a bit too thick but i will make it work. Edit: Someone donated me some V12 Lincoln wheel studs to replace those crappy galvanized bolts.
1 point
-
Thanks to the old school freight system I had a bit of rocking horse poo arrive .A genuine bbs German front air dam. No damage just needs a sand and a paint. So happy to find one here in nz.1 point
-
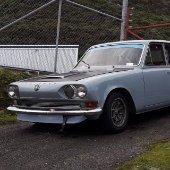
A week ago I got the keys handed over from Colin, the dad of the previous owner of this Simca. Me and my son have checked the Simca, and we found out that some parts underneath are pretty rotted. On one side the sill is a large black hole with a view to the inside of the car (interesting though) Our goal at the moment is to get it back on the road. The second goal is doing the cosmetic upgrade. It looks like the car has been resprayed somewhere in the seventies. The original color is maroon. I haven't decided if I revert it back yet. Front side: The bumbers have been sprayed, but underneath the paint they are fairly rotten. The doors need a bit of welding The rear bumpers are rotten too. Under the bonnet: A engine with a name:1 point
-
Castrol gtx 20/50 and moreys used to be my go to and my dads for well 30 plus years never any problems and to be fair we both gave our British cars death.1 point
-
Being time-poor (as well as poor-poor) I was up at sparrows this am getting some time in. Was dark and almost frosty when I started but was rewarded with this about an hr into it... Made up a harmonic balancer puller (the benefit of welding on cold mornings is you get nice warm hands, wifey wasn't so pleased with me using a cut-off disc at 6am) Just a simple pulling bar pressing against the partly threaded in main bolt. I used heat gun on balancer and a lot of grease but had fears my main bolt was a bit girly... It was, stripped out almost immediately so upped the ante a little... And great success... Timing cover off and the chain seemed really loose, but was still within spec, go figure... And ready to slide the old cam out... Might try to mask off and paint the block today if I get the chance. Nice to make some progress by 8am...1 point
-
Might rock along if I can afford it (poor student) sounds like a good day out1 point
-
rustisize knows what's up. The right solution - available in your average kitchen -and you can have rust like this in about an hour. This took me much longer because I didn't understand what was happening.1 point
-
I have to pull out the brake pedal to remove the old HZ clevis pin and to fit a pedal more suitable for an auto (this was manual) Before and after blasting. I mad the welding much deeper than original to add grip (I believe it's a requirement) Hopefuy I don't need to pour rubber into it as iv made the base out of mild and used a 309 wire..the base should rust and the weld shouldn't...I hope. lol1 point
-
Pintos are only good as boat anchors,, we all know this...1 point
-
well that sounds pretty fuckin sweet! good job. what else needs done?1 point
-
https://trademe.co.nz/10466247661 point
-
Story time. The temp gauge usually only just registers, but on Saturday on the way to the swimming hole it went right up and the heater was blowing pretty hot too, I figured a faulty thermostat and clearly a fucked heater tap cos 30 degree days and non turnoffable heaters suck. As it never really registered full temp the heater obviously wasn't getting noticeably hot. Sunday morning I open it up and find no thermostat at all.... then the spare cars engine also does not have one. There is a listing in the internets for one however. i track down the right number and surprisingly Repco has one, it fits into the spare housing i took along to Repco so i get it along with another gasket. Installed it and go for a run, it quickly gets up to what i consider a normal temp and stays there...sweet. Driving home the stereo starts going crackly, then I turn a corner and my leg gets burnt by steamy hot coolant dripping from the heater valve. Not too burnt cos it is using the stereo to cool things down on the way through which is kind of considerate of the old girl. Fortunately I have a spare heater tap in my massive parts stash, this one is actually fully functional. I install this after pulling out most of the dash, then hop in for a quick run to get it up to temp. Everything is sweet, but on the way back turning into my road I hear a distant crash, which turns out to be the stereo falling onto the road cos i left it on the boot during my test drive.... So a win and a loss, karma is restored. I have also now bought another BT stereo....1 point
-
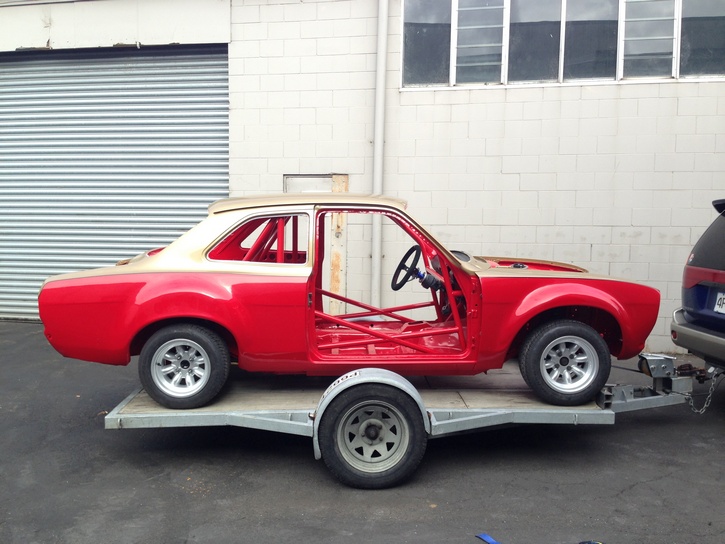
Car has had wiring finished, tested and removed. Now I'm stripping for paint. Have to mount the new Tilton Pedal box and that should be the last of the fabrication finished. Also got the rear brake bits made up. I think I have all the puzzle pieces now.1 point
-
Man i hope this post goes to a new page. Anyway i have inherited Mitch W's unknown suspension out of his yellow car because he is way to stance for coilovers that actually have travel. Still dont know what they are out of other than its something Mitsi Im probably not going to use the strut tubes as theres not a sensible way to get them legal so im going to rob all the bits off them and adapt them to some starlet tubes. sorry for super fuzzy photo but my camera is having a mare as the threaded lower spring mount will have a larger ID than the starlet tube OD does anyone know if it would be OK for cert reasons to have a sleeve with a step on it welded and plug welded to the tube, that the threaded spring mount bit would slide over and sit on? at the moment they are not welded, but rather have a ring welded to the tube that they rest agaisnt. I will want to get it legal for rally purposes so will need to be crack tested etc. as soon as i got the things home i noticed the very very thick shafts and thought hmm they look like group 4 spec Bilsteins, whazaaa i was right they also have much bigger than starlet but still fit inside a 13" rim calipers and vented rotors, so will attempt to make them fit also, im guessing i will need bugeye steering arms but luckily i have a set of those hanging out in the spare parts department. so now i just need to find a set of starlet strut tubes for very cheap monies, as i want to keep the stock pair for spares in case i break something mid rally.1 point
-
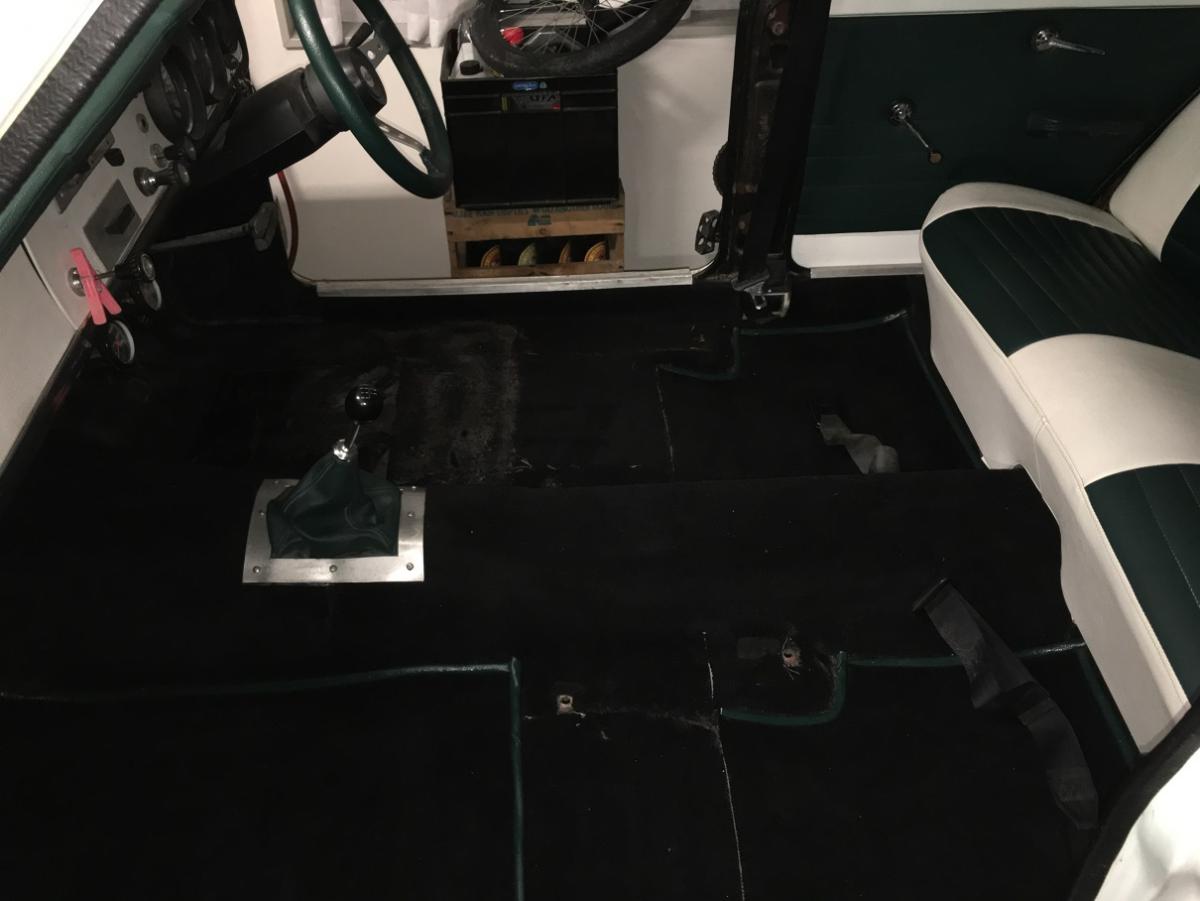
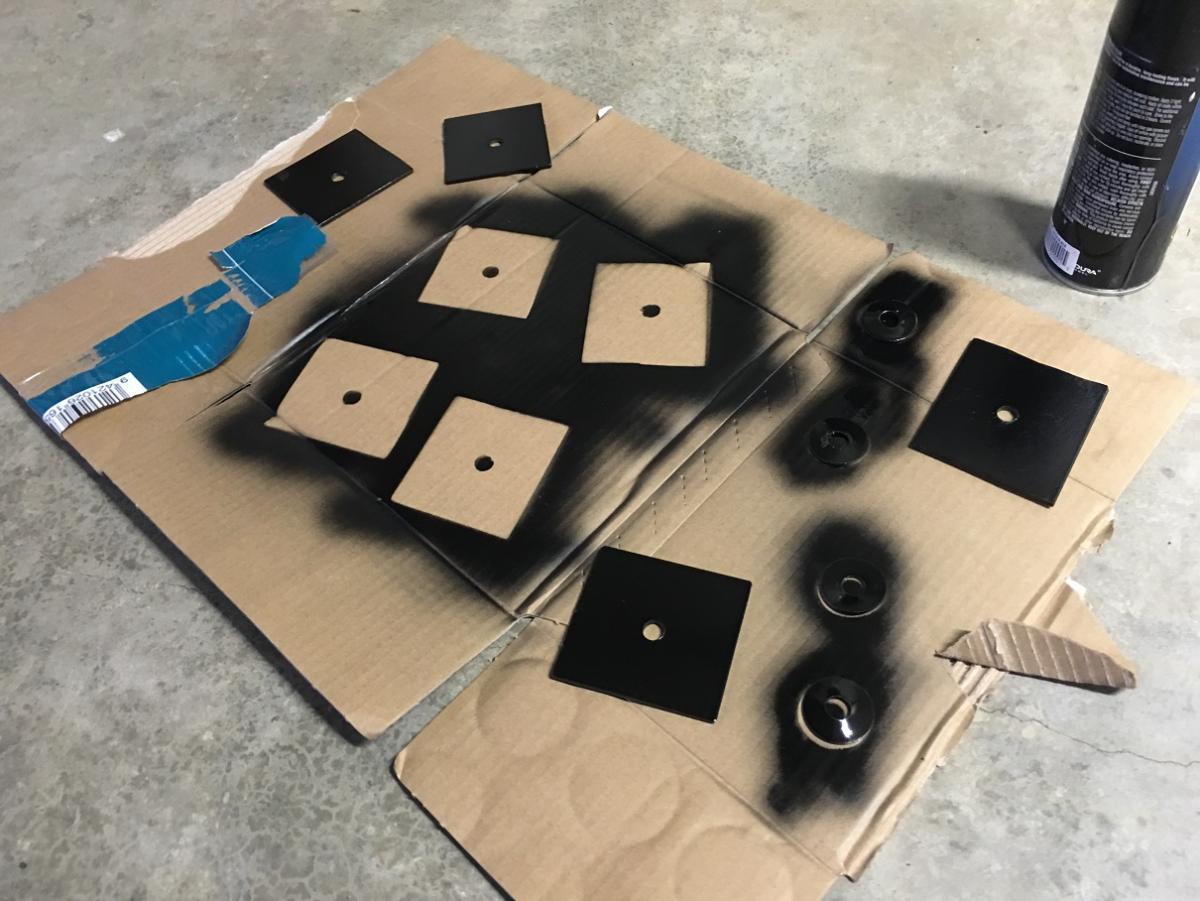
As im waiting for a diff pinion seal to arrive from the UK I thought i would get stuck into the interior. I managed to somewhat resurrect the very tired rear view mirror for now while I wait for a reasonably priced mirror head to come up and I finally got around to getting the drivers seat bracket welded up as it had cracked at some stage. Gave the mounts all a fresh coat of black to keep everything tidy. While the seat was out I decided to make up some 80x80x3 plates to sit up under the floor where the seats bolt down to give some more strength, Again painted all the hardware black. Since I was waiting for the paint to dry I thought I would give the carpet a good vacuum and clean with upholstery cleaner. The drivers floor mat had soaked up some brake fluid when the master cylinder was leaking into the car so I ripped that up (glued down??) and gave it a proper wash in the laundry tub. Gave me a chance to thoroughly clean the floor underneath it. Final step for the night was to give the back seats a really good clean and they look brand new again! Tonight's job is to put the seats back in with the new plates and give them a clean and then the interior is finished for now!
1 point
-
Got around to doing some more on the new extractors. similar design to original's but cant do a direct copy due to pipe diameter1 point
-
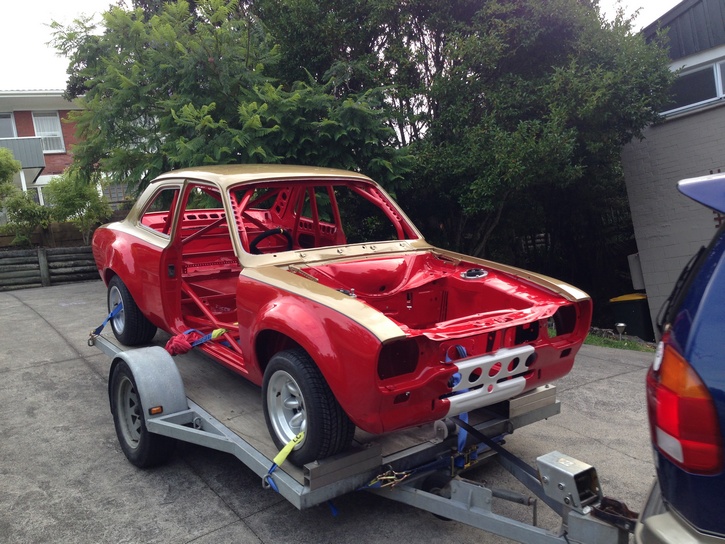
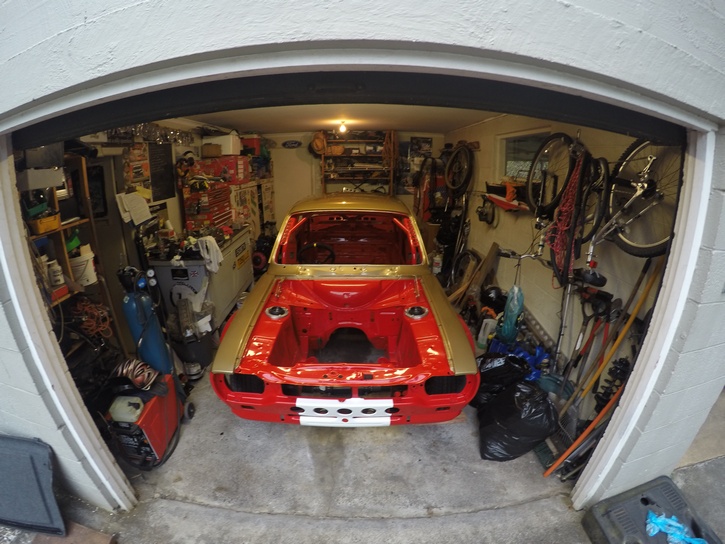
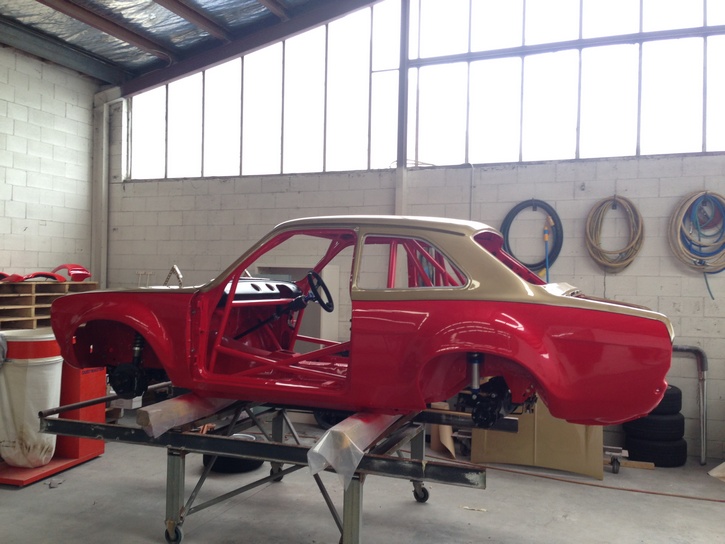
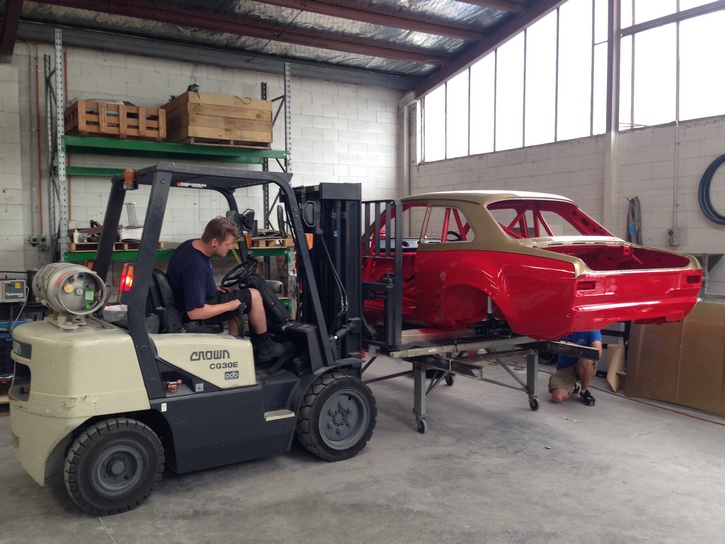
On the trailer Made it home Back in the garage Time to get assembling before the next cert inspection
1 point
-
Diff , Suspension and Steering all back in Almost time to go down on all four Bit of a buff up
1 point
-
Took some pics today for my new insurance policy I changed the rad thermoswitch to one that opens at 91 and closes at 85 which seems to work well with the 82 degree thermostat. The old one switched sooner and was cooling it too far so was turning on and off without letting the radiator work by itself while moving. Booked in for a wheel alignment then all ready to go.1 point
-
This weekend we have removed the engine from the Simca, and some of the front plate work. From the front parts about 30% of the bolts broke off due to rust. Plus a couple of cages of the square nuts in the beams come lose. Not an not easy to loosen job. A large area was covered with a thick greasy substance, which made it difficult to find some of the bolts. In the meantime I was cooking my bumper parts in my bigger Mr. Fusion container. Since it is virtually impossible to get new or good bumper parts for a Simca in New Zealand, I want to de-rust the bumper parts and smooth them out with filler. After they have been sanded I want to try to wrap them with chrome wrap. I have seen some photos on google with acceptable results http://s176.photobucket.com/user/vette427sbc/media/1955%20Chevy%20Hardtop/99529699-EA12-4280-AA01-9218812B887D-30987-00001B0AAC6CA6CA.jpg.html. (New bumpers from Europe will cost probably around 1500 or 2000 Euros, more value than the whole car) Rusted bumper part: Derusted bumper part: Sprayed in black zinc spray: Taking the engine out: Guitar photo:1 point
-
Removing the brakes: The brakes looked pretty neat, but I had to press the cylinders out with a grease gun. Totally jammed. In the meantime I am testing derusting objects with electrolysis. Derusting objects with electrolysis works above expectations must I say1 point
-
1 point


This leaderboard is set to Auckland/GMT+12:00