
Leaderboard


Popular Content
Showing content with the highest reputation on 06/28/15 in all areas
-
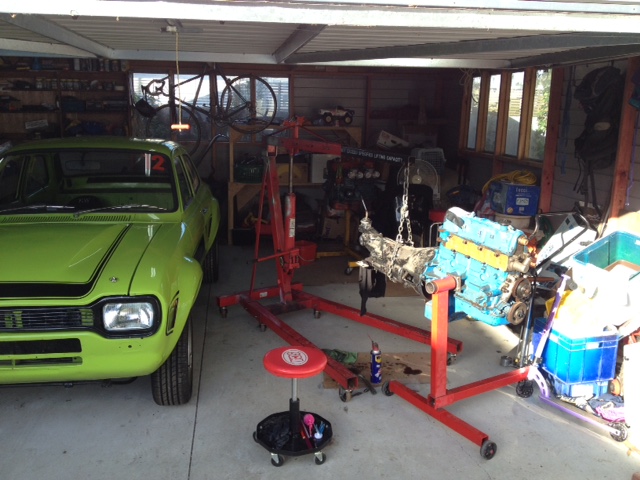
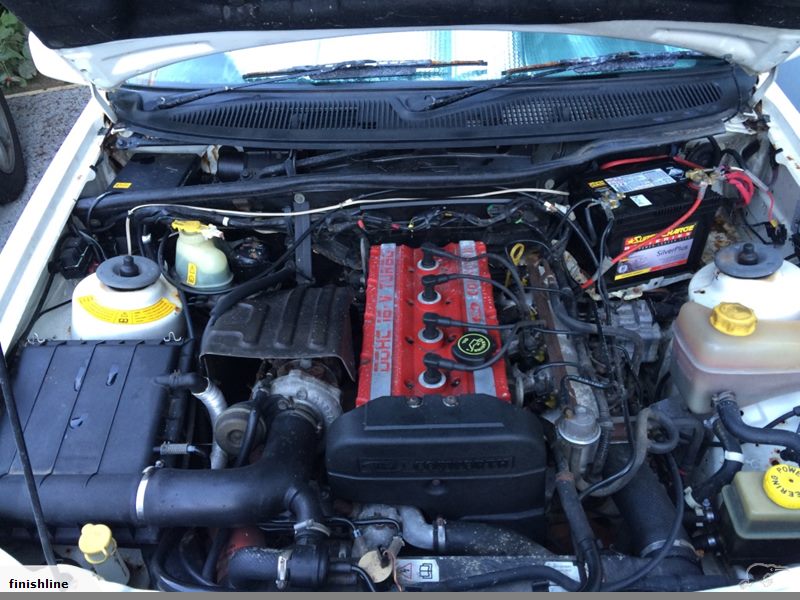
Washing the accumulated storage grim off Felicity revealed her lovely condition. Oh she looks good and I must admit a few caresses were shared as she was tucked back into the garage... With inspiration flowing the W50 gearbox and Pinto bellhousing was trial fitted. Success! As it came together nicely. Then I left my rubber arm a bit too close to the guys and ended up accidentally buying something... Why chose this jellybean shape of '90's excess...? Because YB Turbo. Hmmmm a little distraction, again. Thank goodness I have an understanding wife as I dragged this home.
 6 points
 -
Trying to get this junk ready for next weekend. Put new springs in, 200-100-20lbs. sits a bit high still, but seems to work good otherwise. maybe shocks are a little hard. built new exhaust. put on trail gear transfer case e brake, which was a big heap of shit tbh. still need to get cable shortened or get later model cable. mounted recovery point. then got bored and drove over shit5 points
-
Wheels are coming together, taken a while but worth the wait! Also Jonny is machining up my new diff part. Just running an open diff in the mean time.5 points
-
Today's effort was removing a thing from the engine bay! Before.. After! Before... After! That thing was there to hold the bonnet release bar, the windscreen squirters and, I'm guessing, bracing. Nothing a strut brace wont fix. Main reason for taking it out was that it was going to interfere with new engine. So seeing as I'll be going with a fibreglass bonnet (remembering the current ones super rusty and poos), why not take it out completely! That means I wont need the bonnet release stuff as fibreglass bonnet wont be strong enough and am thinking about using those rubber bonnet latches that the old porches used to use instead (or the leather ones.. or bonnet pins.. Something!) I'd like to think I've made some weight saving too, but the panel feels like it only weighs a kg or two. Meh. Hoping to have an engine crane next weekend so will do the test fitting.. if life doesn't get in the way! Stupid life4 points
-
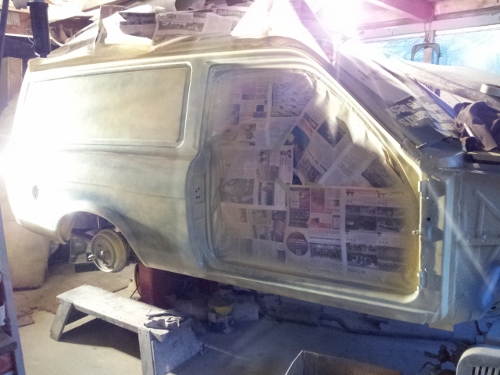
gave the inside and outside of the wheel arches a good coat of primer. i kept pouring it in until it ran out the bottom of both corners. there plenty of paint in there now. Untitled by sheepers, on Flickr gave the rear window surround a wire brush to see what i could find and unsurprisingly there are a couple of shit repairs which ill cut out and make new. havent checked the front scuttle panel yet but the front screen channel is rust free which i s great news. Untitled by sheepers, on Flickr Untitled by sheepers, on Flickr3 points
-
ok have finished off the front of the car with grill and head lights with new lenses for the front bar and have put the canards on the side of the front spoiler . also have roughly fitted in carbon race seat to see for height and leg room3 points
-
Chipping away, nearly finished. Lots of little bits done. Mud flaps, half done tail lights, safety chain, decent pins for each end of the ram, most of the table top welded on, and a hydraulic tank that was a LPG cylinder. The tank was quite a bit of work, It has a removable top so I could get inside it and clean and paint it inside so no grit or welding splatter goes through the pump. It also mounts the return filter. If I did it again I'd do it a bit differently. So it goes. Everything's plumbed up, pump is mounted and it works! Well even. There's a couple of things to do yet, the Chinese ram has a pin hole in a weld and leaks oil, there's a couple of braces and guards to make, and wire up some tail lights. Then it's all go.3 points
-
Pulled off the bumpers and grill today and sanded them back. Decided to try the paint out first on the grill and headlight surrounds. Turns out the paint shop gave me gloss instead of the satin/matte black I asked for. Doesn't look too bad in gloss, better than before. I'll probably grab some matte or satin black to paint the bumpers though, mightn't look right in gloss. Also got a boss kit and pulled the Nardi steering wheel off the racecar to go on this for now, since I am driving this more often. Some fender mirrors and a new front windscreen rubber also arrived. Will get more pics tomorrow.3 points
-
Finished off dash mount and wiring and scatter shield. Dash will mount on roll bar above windscreen.2 points
-
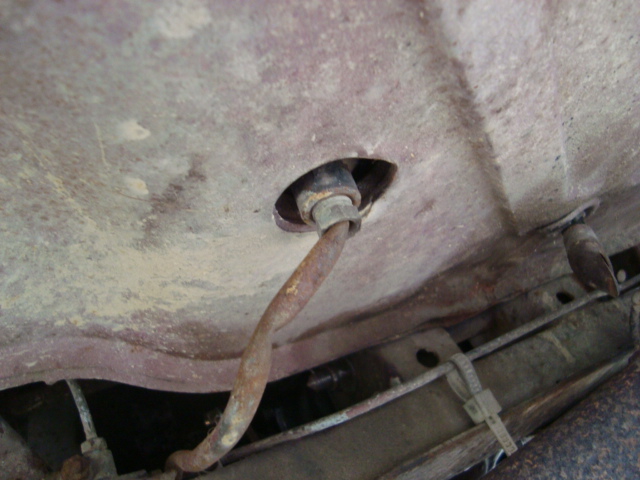
Found this when we were under the car yesterday. Its the fuel line. Cant be good for it to be bent like that.
2 points
-
Just the perfect colours- reminds me of watching club cars doing gravel sprints in the early 90's near Blenheim. Horrible ugly wheels it has on at the mo - please please please take up the offer on them slot mags!2 points
-
Awesome progress guys! Looks sweet. Kinda reminds me of this;2 points
-
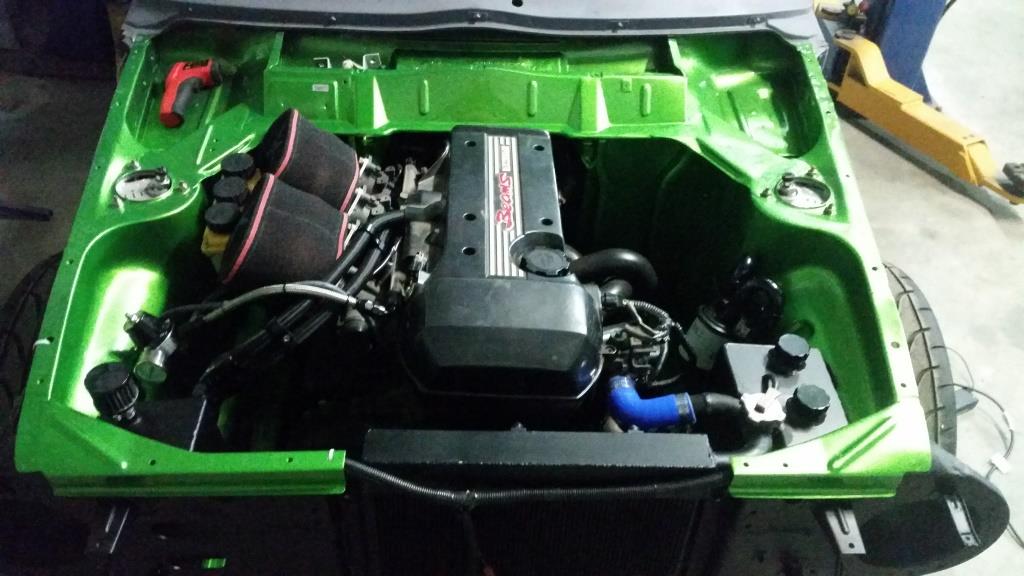
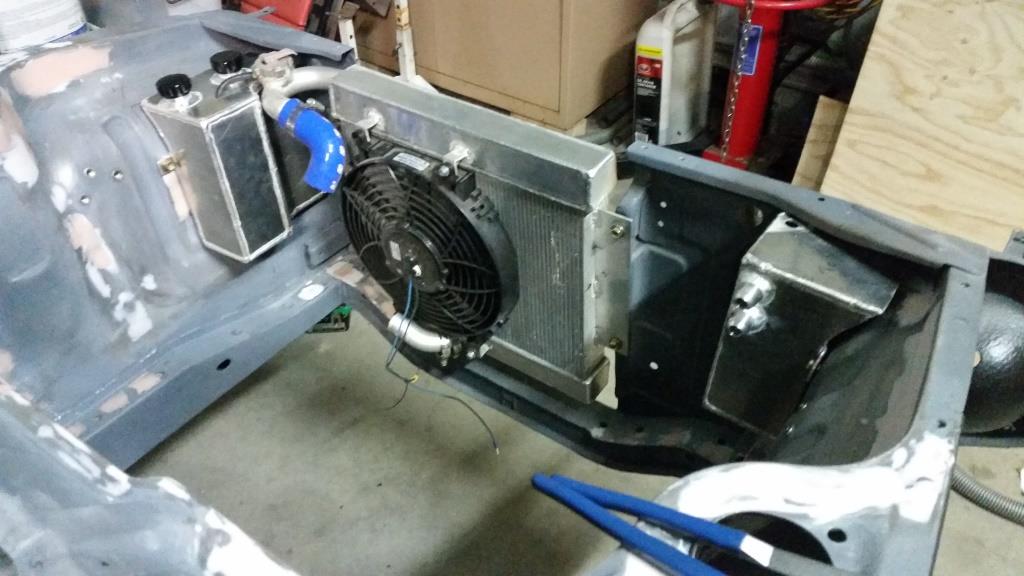
I have made the radiator overflow/washer bottle and catch can. Installed the motor for hopefully the last time. Now the car is back on all fours nearly ready for dyno tuning.
2 points
-
Installed some driveable low and stripes. Lowered the back 1inch since the picture. Drove it to hamner for Hamnats was a good weekend!2 points
-
This is my recently acquired KP60. Its has a 2K and 4 speed, will probably give her an upgrade soon. Only mod it has is some cobra lowering springs, other than that it's all fairly standard. Need to get a new windscreen rubber in there asap, since it's leaking. Short term plan is to tidy her up a bit more - paint bumpers, grill and wheels etc. Are the bumpers and grill/headlight surrounds meant to be black or dark grey? Not sure what paint to use. Might be pretty slow progress. One day.... //oldschool.co.nz/index.php?/topic/48889-matts-81-kp60-starlet-discussion/1 point
-
Freezing me norks off at the moment but pretty well. A ton of little old.fiats here in argentina1 point
-
I'll try. Failing that I'll be in Janes bB or stealing the Torino again.1 point
-
The green one could be the go! How wide is it ? Cheers!1 point
-
I'll let you know how I get on with the cert and you've got it sussed , escort race car and mustang cruiser ! perfect !1 point
-
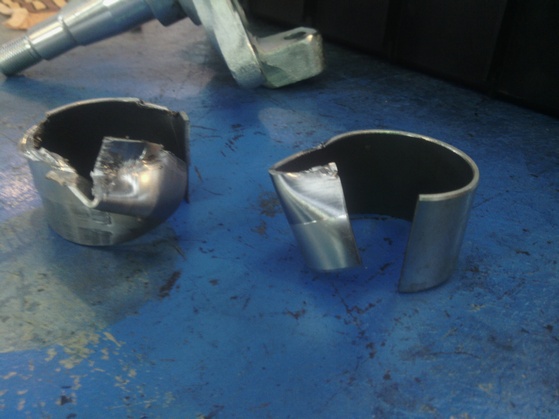
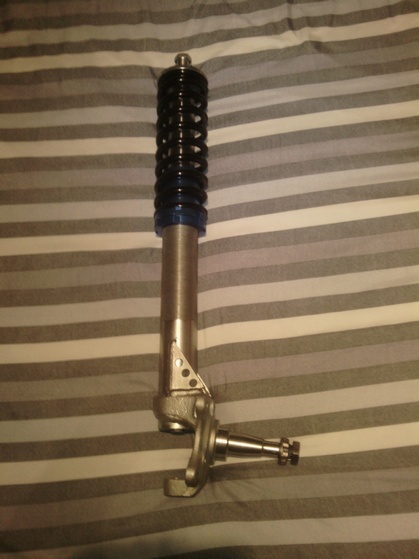
Struts back from silver paz and have been de-embrittled Cant buy off the shelf du-bushes so had to machine the O.D of these very tricky as it kept catching the split on the bush then self destroying. Made a mandrel and had a hose clamp around the bush and took small cuts until I finally had 4 bushes. Bushes in bilstein shocks in , 300lb 2.25" 9" long springs Next to make are top hats and get some hubs. Also might need keeper springs to get nice and low
1 point
-
You can swap the rear tail section of the NA box to a 12a tail. That then has a normal mount position for box support.1 point
-
yea its good ay. highest standard achieved by the panel beater of the year 19981 point
-
1 point
-
Went out to caffiene and classics this morning in the c10 was doing its shit starting again but eventually ran. Swung out for some food after with the crew and she wouldn't start no more so had to get it towed. Next weekend I'll change flex plate and starter motor1 point
-
done a little bit of work around here. pulled the bug inside and gave it a clean. was caked in bird shit was crazy! shot out to the vw shoppe on friday after work and got me a few new peaces. new wheel bearing for the front. inner and outer. and a new clutch fork mechanism as mines munched up after the release bearing collapsed plan is to jack the hole car up on monday and ream the bushes again in the front cause it so stiff!!! while mitchfromhillcrest is doing that il play on this tools and hopefully notch my spring plates a little but so no more bottoming out. once thats done assemble all the front and put these other spring plates in. i also cleaned the engine and engine bay. used a little bit of degreaser...... (6 cans later) i also painted the engine bay compartment, before and after and now im looking for information on raising the engine an inch. try help out with not as much camber. also trying to find some one to buy my link front end with the adjusters in it so i can buy a narrowed one. i had no lock with 4 people in it the other day......1 point
-
Have been searching online to find more info on it. The head sticker says cyclops. By triang pedigree. And the only trike similar is this chap. I think its more likely 70's tho. As the rest of the 50's ones are totaly different. Also grandad got involved and bought a cyclops flyer to tow behind it1 point
-
Things we do know are. These sweet o/s tail lights Are getting swapped out for these even o/s er blue dots.1 point
-
And monster got to try it on for size. So far plans for colours are swirling around. I fancy new chrome and clear cote the rust. But ive been advised that kids dont want rusty bikes. So the new plan is fresh chrome, pearl white with pink flake detailing.1 point
-
#billetforthebruddahs Fuckin pining Horse1 point
-
Ignore comparing the differences in cross section and just think of the quick on/off reaction of ITBs, the extra doort noises and the looks of them with a pipercross filter1 point
-
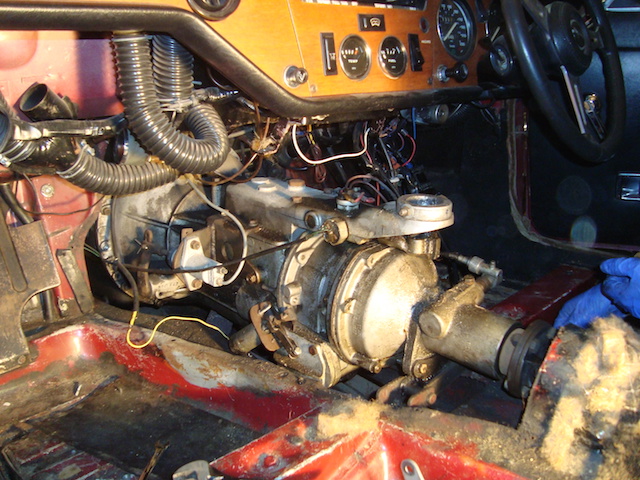
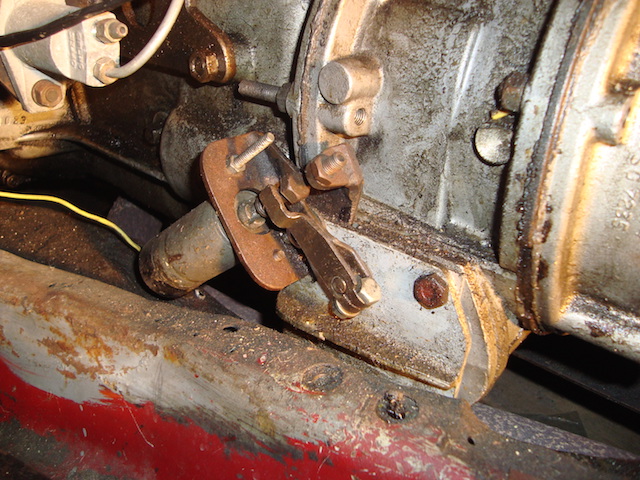
It is definitely a saloon gearbox. It was difficult to shift when we took it for a drive so we will be looking at the gear shifter...and the clutch master and slave. It has a weird modification for the over drive unit. This must have been done to make it fit inside the chassis of the GT6 This is how it looks in a TR6 We will bleed the clutch tomorrow and take it for a drive to see if the overdrive is functioning. Tune in tomorrow to see how we get on.........
1 point
-
Sweet as Camaro! Welcome to oldschool. Please come along to Hanmer meet in this!1 point
-
i took the screens out today. i was worried id find the same level of repair work around the screen channels as ive found elsewhere (the screens were held in with silicone and hope so i knew some cowboy had been in there previously) but to my surprise there is no rust and the original clip pins for the trim are all still there and in fantastic shape so im super happy about that! the door above has been repaired and Peter will soon start on the pasingers side door. in other news, when i told Peter that i was going to buy a fiberglass boot lid for the car because the ones i have are to far gone to repair he had a fit and told me in no uncertain terms that i was not putting glass panels on it as long as he lived so hes fixing a boot lid for me as well. result. i probably would have gotten more done on this if i hadn't been playing with superchargers......1 point
-
most excellent!1 point
-
I'll jump in here and mention that Chris has shown me the light and I am now a firm believer! LED strip lights. WOW!1 point
-
Looking good man! where did you get a boss kit for the wildcat? I've got one I wana fit to my mk21 point
-
So alot has changed on this bike. This is what it looked like at QCR Dirtmasters 2014 Stretched frame with pullack bars I bent the main frame tube doing too many jumps and it sat in the corner for a good year Then once id set a date for Dirtmasters 2015 I set about transforming my bike again So i chopped the bent piece of tubing out and De raked the front forks bring them more upright. Then i welded another smaller diamer tube on the top bracing the neck back to the tank. Then cut rear guard off and moved top shock mount forward Fitted a XL175 21" front wheel with a old knobbly and then fitted a new 17" knobbly on the rear for grip Also fitted a solo seat and tried two different sets of bars out. with the later Chain curtain window bars being used at Dirtmasters Also fitted a 110 auto clutch 4 speed Chinese motor for more power donated by hogan. couldnt find anything i could use for a pipe so welded on a a TMC stainless steel 2 stroke Expansion pipe and it sounded wild! Overall so happy with the bike that im gonna make it a dedicated dirt bike now. So it will get a new front tire and fork rebuild and then some better rear shocks. pining1 point
-
Been chipping away at this in between the other toys and family life Brought some new tires for it. 16x5.00 Avon Safety Mileage MkII 19x.3.50 Avon Speedmaster MKII pretty stoked how it looks. Currently working on the rear end at moment. modifying axle and redrilling the blank sprocket Im hunting down a rear calliper and rear guard at moment. Also made a new Coil mount that will sit in between the two cylinders and keep the leads nice and short1 point
-
Just had a quick read through the build, nice work. Looks good on the RS's, but I did like it a lot of the Hotwires too. And, I approve of the burnout photos.1 point
-
Update please!1 point
-
^^ not always..I run 2 of my cars on laptop tunable factory ECU's both of which shit over aftermarket unless you are dropping 10k+ and plan on running some serious suspension data logging. Both run decent boost, plus bigger injectors etc.. I even considered running a factory evo ecu in my turbo mx5 until I remembered how much I hate wiring.1 point
-
Looks tidy as. Got plans for it or leave as is?1 point
-
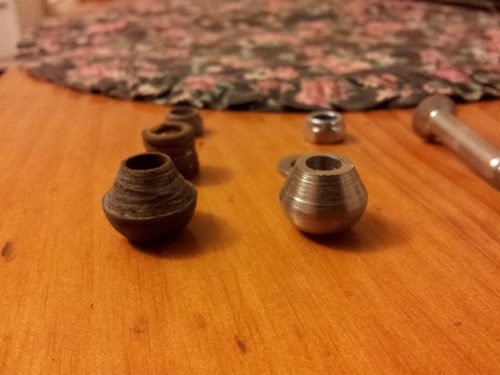
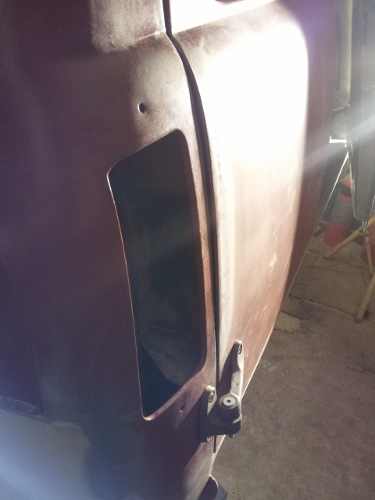
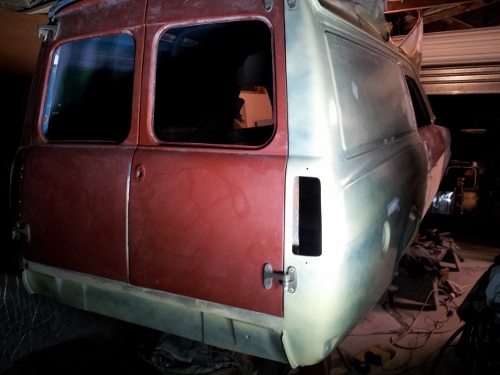
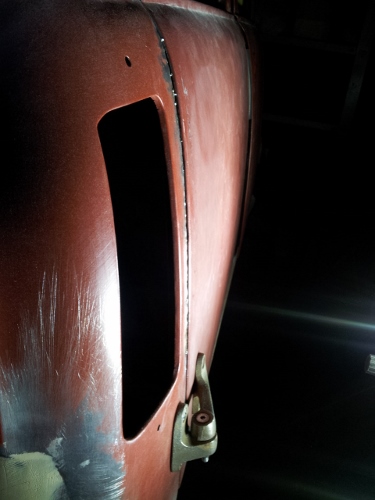
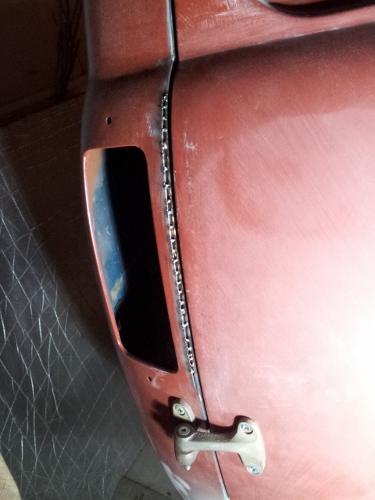
Lots of shaping, guide coating and sanding. Nothing too photo worthy but heaps of hours going in. Had a mate make up some new front door pins and rear door ball joint type insides for the hinges. No more play in the hinges, holds the doors in place a whole lot better. Old vs New Aligned the rear doors with the new hinges. Pretty happy with all the work to the doors. Still more to do underneath them. Heard you like gap. I don't so i cut along the edge, opened it up slightly to match the door and tack welded it for now. Will continue working on the rear doors and then start aligning the drivers door, guard and bonnet.
1 point
-
Update time. Wow! I thought this would be a quick little write up but actually turned into an essay length spiel. Best you put the kettle on... So a fair bit has been going on in our little valley. I've been trying to remember to take photos but usually get carried away and have finished whatever before I remember. I did go up to the ridge a wee while back and take a pretty photo or two of the sunrise. Very nice up there. Cant wait to build a cabin for that place! Coming back down to the truck via the ridge track- Tuis playing morning tunes in the Lucerne tree next to truck. Since getting that lathe in place the shed has been getting used and sort of just evolving in doing so. Things/tools have found a place. With the winter weather it feels cosy- especially in heavy rain. Really needs a wood burner or waste oil burner for the colder days because man can it be chilly in the evening. I will make something but accept that it will only heat up a little area and be hugely inefficient trying to heat it all. Maybe something arond the main bench/lathe area would be good. One thing that we are both stoked with getting is the hoist. We could only afford it because we bought the secondhand lathe instead of a new chinese lathe. The bank balance is getting low as and we ummed a bit about spending the coin on a hoist but so glad we bought it instead of waiting because man its useful! I ordered it from trademe and had it delivered to a Nelson depot. Just managed to squeeze it in the van for a slow trip home which saved on the silly rural delivery charges. Shane came round the next day and helped put up the main structure. It went up pretty fuss free and seems fine for a cheaper chinese hoist. I can see where the costs are cut when compared to a Heshbon etc but its strong and well built where it needs to be. Currently we just plug the hoist into extension cord. Must order appropriate lecky supplies and lights then wire up shed! It dwarfs the Viva. Oh yeah- also note the steel rack we recently built. Was great to get all the steel we have found while clearing the block out of the rain and inside. Stepping away from the workshop we have been busy with many other things. First off we needed to get the ever growing piles of firewood out of the coming winter rains. Into our pile of telephone poles and old iron and we built this. I also nabbed some old wooden shed doors left outside a nelson garage doorplace. Free to take- i like. These I turned into a storage bin for all them little offcuts of wood that are a pain to stack. So now we have some storage but will need more. We have at least 50 pine trees big and small to chop down over next few years. Some in the gullies will just rot or be made into north shore style bike trails. Many we can use to keep us warm. Then that little sailing boat. The sun and the rain wont help it at all plus it was in the way- taking up space I could fill with another old car. So more telepoles and the 6m lengths of NEW iron that had been left in the bush edge by previous land owner came in handy. We built this... (turns out to be also very handy for lawnmower, old pushbikes and bike trailer storage) Meanwhile our neighbour has offered us her field which was overgrown with gorse and blackberry for the past 20 years. We wanted to clear it out so our view was nicer and had been intending to ask her if that was cool. Then she just said one day- hey how about we make it into a fruit orchard. OK ! So it was out with the scrub cutter and chainsaw and with a couple of days hard graft we had it all clear. It looks so much better and the soil is amazing as it originally had two pigs there then getting nitrogen fixed by gorse for past two decades. Next step is to plant it out but for now its just great the have a view with out gorse and masses of blackberry. Before.. During.. After... That little fence we have left up to plant grapes and kiwis on. We are both still very much newbies when it comes to growing things but no being stressy types what grows will grow etc etc Our neighbour- well shes very green fingered and will help us out heaps. Plus there's the nerd net for info. Main thing is I'm enjoying this whole land thingee and planting stuff way more that I thought I would Then there is the track up to our ridge. We had been planning to clear it for ages so a day or so with the scrubcutter and now its way nicer to walk up. Horse and Jen happened to turn up one day whikle there were up here for holiday so they got a tour of our freshly cleared track. We have now almost cleared out the building site at the top where we are planning another cabin build. Not photos of the now cleared track but I did take this one the other evening when we went up to watch the sunset and drink beer. When we got to the ridge a huge deer went storming away from us over the gully. Quite a sight ! What is cooler was the picture on my beer bottle... Speaking of tracks.. Hannah went away on a few days trip with her sister who was visiting. While they were gone I hooked into the start of our first mtb track. We have always planned the first track to head as gently as possible up to the ridgetop- a gentle enough gradient for an easy ride or walk. I really wanted to get something done while hannah was away as a surprise. I cut, dug, raked, carted, stacked, walked, toiled, bashed a track through the Kanuka grove just behind the cabin over two days and built whole first track. I really enjoyed it and worked through till it was almost dark. I was knackered at the end of the second day. Hannah got back from the tramp and I surprised them both with my new track. Its still a touch too steep to ride up easily up so Ive worked out a path for a track that seperates off where it gets steeper and will head back towards the truck then back again. Pretty much..more hairpins = more track = easier gradient (but also = more work....) Big thing getting built right now is our outside bathroom. We have had this planned ever since first viewing the property but had not yet decided on where, what and how. The 'what' bit we have sort of picked away at since before moving here. Discussed over coffee or beer (but not both) we have gone over ideas that have come about from years of using various homemade showers and dealing with a variety of toilets. Fascinating stuff. The 'where' bit sort of just fell in place once the cabin was up in its new location. Its on a slope backed with bush which is ideal for what we envisaged. Situated halfway between the cabin and the back of the shed its in a handy location for us and the cabin and its private with lovely views. The 'how' bit is just evolving as we build. Its an elevated building over composting toilet system. For now its the well proven batch type setup with wheelie bins. Rotated as they fill with a minimum of 1 year composting in the bins before going into a seperate compost area up off the driveway for another 6 months. Then the compost can be used in places like the fruit orchard and areas we are building the native bush back up. From all the reading we have done this is total overkill as far as dealing to any pathogens but hey. No harm there. Its going to be awesome having a decent setup that has a minimum amount of moving shit about, he he, and not have to pay or worry about involving outside services like septic systems. In the future Id like to build our own 'Clivus multrum' style system, a setup that uses a sloped bottom vessel and is continuous in operation. You can buy 1 m3 capacity units made in plastic if you have a spare $4000...which is an absurd price considering our 25000 litre tank cost $2600. I'll use stainless steel to make the structure. But that still involves more pingas and time which we dont have- the latter due to the longdrop filling fast. The grey water will be treated using a reed bed system. This is pretty easy espicially on our type of land because of the clay below. The water will only go down so far and then move along. Moving water through soil is the quickest way of treating it. It does not take many meters before any nasties are dealt to. First off we dug out the bank. This did take quite a while. I had to take breaks and sit down to sip at beer while looking at the mountains. We would take turns at this after Hannah saw how nice that looked. Eventually a large 'void'? was created and funny enough a hill appeared somewhere else. Much of this hill appeared next to the graden because there's some very lush dirt with some mighty fine looking well fed worms in it. Kevin just watched or chased clods down the slope. We also had this fella stroll out of the dirt where we had sadly destroyed his underground lair. What a huge bugger he (or she) is. I released him later further up in the bush but not until Id worked out what brand he was.. Turns out he's of the 'Stanwellia' species- related to trapdoor spiders and quite rarely seen as usually underground. His burrow was massive and we had sliced right through it with the spade. See here for another one.. http://www.nzherald.co.nz/nz/news/article.cfm?c_id=1&objectid=11307026 Then we planted four H5 treated poles set well down into the granity clay below. A thick plastic groundsheet runs up past the decking and right up the walls sealing in the treated plywood clad basement. The decking is insulated below with 40 mm thick insulation and the inside has reflective foil insulation. We want to create a heat trap to keep the interior as hot as possible so promoting a decent heat in the compost. Inbetween building we cleared out the bush around that area. When intially clearing the land last year of gorse we worked up to the bush edge and only so far in. We had left the gorse hiding within because its dying back anyway. But this area was still pretty bad so a few hours and we not only had a lovely little spot but yet heaps more firewood. Some of the old gorse was huge! So much more light into that area and on the bathroom. The pile on the left is gorse from just that little area. Above this we've built a nice solid little bathroom that measures 4 m2. It'll contain sssb - the shitter, a shower, a sink and a bench. Then we built steps using some more of the telephone poles. Its quite high up and we have to allow for our olds etc when they visit so easy to climb steps they had to be. Must build a rail soon because man I'd hate to go trippin off that ledge... We have made a little track through the bush and once tidied up will be a sweet way to walk to the bathroom from the truck. The steps come right down to this track. We picked through our pile of Rimu, picked out some possibly nice bits- possibly because you really cant tell until it goes through the planer. These became window and door frames plus some rafters. When the main shed was delivered the piles of sheets were protected some extra packing sheets in a dark grey colour. There were just enough of them to clad the roof with a decent overhang. Sweet! We still have a little left over for another wood shed too My old boss gave us a whole heap of wood leftover from his house build. All Cedar, Macrocarpa and some Douglas fir. Ideal timbers for building things with! So the Douglas fir we ripped down and planed then made doors with. They are barn style doors and Hannah has oiled them. They look nice. Photos later of them completed but heres a action shot.. Hannah painted the outside of the window frames with paint left over from the housetruck. Then I scored 4 litres of 'mist green' paint from nelson house parts. Its the same colour as the water tank and similar too the main shed. It should help the building blend into the bush nicely. I have a neat idea on an overlay method using random wood to break up what will other wise look like a tall painted ply building. I think it will work well. We will see. Here is the building so far with the primer coat on...1 point
-
Got Engine back in on friday with help from Josh. Also started making Headlight mount and doing some crazy stuff on the Sissy bar1 point
-
ok pics of my new cambered rear end done by race products in briso in some of the pics you can see the cambered rear its like a shim, and the other pics are the axles which are skinnier than the std f series axles the rear end now has 295mm dia and 24 mm thick1 point
-
dry sump lines done on the scavange side just have to do the -16 feed into the pressure sidefrom the tank and the oil filter back into the motor and its finished1 point
-
ok at the moment ,i have had the rear end cambered through race products in brisbane ,back end has now 2.5 degress neg with half of toe in at the moment getting some hats made up to suit the cambered rear end also working on the dry sump set up just have to finish off the alloy fittings etc1 point
-
got motivated after yesterday so i lowered it to the height i would like it at. cannot wait for the new wheels to arrive! Before After. Can still turn in full lock. Rear doesnt need any work, Front i am getting some coil overs made up so this is the mock height for that.1 point
-
Note the “enthusiastic” cage welding. And no papers and main hoop too small for new rules. Will do a few track days once the car is running then have to pull the cage out and start from scratch. Douh. May be able to do some club days with the cage as it is? Surely its safer with a rough cage than none at all? Well it was known before buying the car so just add it to the to do list...1 point


This leaderboard is set to Auckland/GMT+12:00