
Leaderboard


Popular Content
Showing content with the highest reputation on 03/03/15 in Posts
-
Work done..time for more pic's to get me up to date Concrete got cut a couple of days after the pour & the guy who did the boxing who happens to install these shed's as well, made a start on the structure.. now I had all intentions of putting this together with my old man, but with age comes common sense (well, sometimes) & I quickly realised that I'd earn more money in front of the computer in half the time that the builder would take to put this up, so I tee'd it up for him & his son to construct the majority of it with me doing as much of the menial tasks as possible Only took him 2 days to get the structure up & squared off.. At the end of the second day he set up all the wall cladding sheets & predrilled them for me so I couldn't fuck up a straight line (I am a draughtsman btw so what are the chances of that?) made my job easier.. Did the front & back wall with my oldest boy..he's 13 & any chance to drag him away from a screen is good in my book.. Next day, Dad helped me with one end wall, then came back the next day to do the other one.. Decided I'd give it a go trimming the gable ends down with my trusty old tin snips...what. a. shit. job. Pain in the arse & managed to rip my forearm up pretty good, but got it done eventually..computer hands got a coupla blisters but I'll survive.. Saturday just gone, builder came over with his son, & with me on the ground doing all the grunt work, we got the roof on in less than 4 hours...Roof shout!!.. After this I spent the afternoon starting on the roller door framing, & this is where I'm at as of yesterday.. Hoping to get the door framing & front cladding done by the weekend, & the builders son is turning up on Saturday to put in the PA door & finish off trimming back the wall cladding with his nibbler - don't fancy trying to use tin snips to trim those corners up!.. Will update as progress continues..11 points
-
This is my '51 Chevrolet Pickup. I finally got some motivation to work on it after owning it for about 5 years. I bought it back in 2010 with help from my parents, when I was 14 turning 15. It was 100% stock, farm spec when we got it. Was originally from Bakersfield, CA. Had the straight-6 blue-flame engine which has been sold. Currently sitting on a jaguar front end and Holden LSD rear end. It's the longwheel base model, which I wasn't too much of a fan of, but it is growing on me. The extra long tray has been good for storing parts and boxes. Has hardly any major rust, just a hole is the passenger's foot well were the heater was leaking. The plan is to keep the body as is, slam it more with airbags, and chuck in a v8 (probably a 1UZ) Already have new rubbers, chrome badges, handles etc and airbag kit. Next major task will probably be to c-notch both the front and rear to get it sitting where I want / as low as the ground will let me. //oldschool.co.nz/index.php?/topic/47317-matts-1951-chevy-pickup-discussion/9 points
-
ms paint on phone seemed too hard but i think this will do once you are on the road to tairua just follow that north until you get to coroglen pub (its immediately after a one way bridge) and turn left up that road there I think then somewhere up there8 points
-
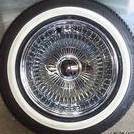
just fitted this. because racecar. first decent run tomorrow, off to picton, then nats. see you suckers there!8 points
-
Well this started way back in July last year.. was getting over a break up & needed to spend some money (not mine but the banks) so thought what better thing than to build a big shed which I've always wanted so I have somewhere to work on my car's.. Borrowing money wasn't a problem..apparently it's ok to have a massive mortgage, so did the ringing around thing for quotes & settled on Waikato Shed Company to supply the kit. Building/Resource consent got approved September/October. Was waiting for a mate to drop his digger around so the old man could prep the site but that was taking ages so got a guy in to do it for me - well fuck me if that didn't blow the budget! Here's me thinking we'll just scrape the surface a little bit & lay down some gravel & shit, but the digger guy suggested I keep the floor level up high to prevent potential flooding off the driveway. Good advice at the time, but 160 cubic metres of metal & $5,200 later I was kinda scratching my head thinking hmmm...what just happened here.. Anyway's, it was all a good thing (convinced myself of this) & the job he did was bloody good I thought.. This got completed back in mid November so I was thinking yea, I'll get this shed up by xmas time!!...yea right.. Tee'd up another mate who is a concrete layer, & he came around when this was done & said "yep looks really good, we'll get this done by early December"...well, let just say I had better communication with his wife than I did with him over the following 2 1/2 months of trying to pin him down to get the job done... Roll on the middle of January & I got a quote from a well known guy in Pukekohe to do the job, & after a bit of phone tag - namely me doing all the ringing & him choosing not to ring me back (same as my mate), I eventually gave up on him too. All I wanted them to do is box & pour the frigging thing, as I was happy to dig the holes, lay the polythene & mesh to save some coin. So, third time lucky - sent a text to Garth at Waikato Shed Company asking if he could recommend anyone. Next morning he gave me a name, called the guy & that afternoon he was around taking a look. So a few days later (Waitangi Day) he came around with his wife who labours for him, & they set up the boxing.. Next day I dug out all of the pad footings & roller door thickening.. And the day after that, I started on the polythene & a good mate of mine came around to help finish off laying the mesh.. Slab got poured the following Thursday by another crew, & they did a mighty fine job.. Even had a little bit left over to fill in some patio squares in front of the house.. Next stage, erection!!!7 points
-
6 points
-
The shed is 7.5m deep x 12m long. Will be a 3m eave & 4m ridge height which is what I was after for when I chuck a hoist in there in the next couple of years. Getting old so I gotta make the car come to my height as opposed to me crawling under the car for servicing etc.. haha5 points
-
So this may look like a picture of a mini on blocks but dont be fooled! This picture represents a major milestone! The passenger door has FINALLY had all the rust cut out. New steel welded back in surface rust sanded back. Dynamat. Cavity waxed and finally a brand new door skin lovingly folded around it. It even works! The innards are in it and its window goes up AND down and the door lock even works!. Yes it still needs 4 spot welds and the window seals etc put in but the seals will wait until the paint is done and I will do the spot welds a bit later...probably after I've done the other door...as Id rather do them at the same time. So anyway...thanks for enduring my post. Ta.4 points
-
Sup, so it's about time I put up a build thread for this thing and got some stuff done. Discussion here: //oldschool.co.nz/index.php?/topic/47324-robbos-1972-toyota-corona-coupe/ 1972 Toyota Corona 1700 Deluxe Coupe Was searching for an old school Toyota for a while but wanted something a little different to the usual k series so after this thing popped up for sale I nabbed it. Not too many around, I know of about 5 floating around in NZ. Sounds like it's belonged to a couple of old schoolers in the past so some might recognise it. Has a few cool bits, factory tinted windows, pillarless, fuel tanker filler under the number plate, hard wired inspection light in the engine bay, disc brakes up front etc. Failed a wof early last year for some rust and had been sitting in the guy's shed ever since. Pic above from just after I bought it (knocking sound coming from FL wheel on the way home, went to take the wheel off to check it out and the nuts weren't even finger tight!) Anyway the good and the bad: Good -Mostly complete (just missing a few interior bits) -Fairly straight body -Runs well when it starts -Has been resprayed not long ago (not a great job though) Bad -Some rust -Auto -Has some electrical gremlins -Weather strips/seals are mostly perished Failed its wof on rust in both sills and the bottom of a door, previous owner said he'd had his mate fix up the door but he'd forgotten to the do the sills (hmm?). Anywho there was also some paint bubbling in both of the roof gutters and around the radio aerial, decided to get it fixed all at once so took it to a cashie panel beater (cheers Mr Mk1 for the contact). Pics of the rust when it was taken back to bare metal, some fairly thick bog in places and the previous owners mates repair on the door was pretty shoddy (combination of new steel, nutech and bog). Panel beater cut it all out replaced with new steel and primered it up. Got it back home and tidied it up a bit and here's how she sits at the moment. So the plan is to sort out the electrical gremlins (either the battery is buggered or its not being charged, has an almost brand new alternator so ruling that out for now) and take it for a wof. Future plans are: Wheels - 14x7ish Mk2s/Longchamps/whatever comes up Fender mirrors - Current side mirrors are crappy Thai replicas Manual conversion - Need to source W40/pedal box Low - May just chop the fronts and throw some blocks in the rear Paint - Might have a go at painting the primered bits myself That's all for now folks, chur.3 points
-
That cat... he is invaluable. Like today he hung about assisting me with the Viva. He watched over me to make sure I did things right. For ages now I have been intending to sort out my throttle pedal cable attachment. When I built the inlet manifold and used the mazda throttle body I had intended to have the cable run through from the pulley end so it was nice and clean. But time was running out to get the car on the road for the oldschool nats so I just used a solderless nipple. I have always wanted to fix this but it was one of those little jobs I never got around to. Until today. So the uglyness I dont like is this... I started by chopping off a chunk of alloy in our new toy- $100 secondhand saw. Saw worked well but I already have plans to modify it. With the chunk of alloy and some steel and some little stainless bolts I wittled away until I had this... That fits into the HC pedal like this... I made it like that so when the cable is clamped it remains straight and kink free. Every time I had to remove the cable from the old pinch bolt it would be all kinked and a bit frayed making it a sod to get back through the outer at re-assembly. Now its clean and straight. A simple little thing that will make a big difference. I forgot to take a photo of the pulley end but will get one in the morning. It looks heaps better.3 points
-
Sweet truck. Such an awesome shape. I hope you plan on keeping the paint as is. If you want a modern V8 in there, it's gotta be a LS.3 points
-
IMG_0782 by Richard Opie, on Flickr Took it out of the shed to Toyota fest, wound front down a bit, yep. Scrubs up ok still. Some parts at the vapour blasters being tidied up at present, as well as changes impending for the lower 4 link brackets on the diff! Bought some 175/50's off Beave so I can have sick guard gap.3 points
-
Speaking of fuel tanks, a mate's friend had used a handfull of Gravel to cleanup the inside of his tank. then the clever clod decided to suck out the gravel with the wife's vacuum cleaner. Boom! Sparks in the motor ignited the fumes and spread the cleaner across the entire yard. spam post....3 points
-
brought this last week, got it home on friday . last on the road in 2006.... 1600 gt motor out, will get a full rebuild later. gt box that will get a full rebuild, next to a sierra 5speed i got from pickapart. 2 litre cortina pinto motor i got from trademe a while ago. uses same engine mounts, just had to flip the radiator mounts. got it running on the sunday, good mate shannon helped me heaps. cheers mate. https://www.youtube.com/watch?feature=player_embedded&v=picasacid it goes as of today!!!! replaced or modified or fixed so far... convert 1600 kent to 2000 pinto convert 4 speed to 5speed. flip radiator mounts and fit cortina outlets. repair saggy drivers seat. remove and regrease front wheel bearings. replace swaybar bushes. fix rust in the roof. remove fuel tank and flush crap out. make new gaskets for fuel tank. replace rear wheel bearings. replace rear slave cylinders. wire up starter and alternator. bleed brakes. replace diff oil and check the rest. straighten rear bumper. modify driveshaft. sierra front with capri rear still got a few bits to do, hoping to take this to nats. have had it 8 days so far. this will be a 10 day build. then drive christchurch to coromandel. no pressure... https://oldschool.co.nz/index.php?/topic/47314-governorsams-1971-1600-gt-capri-of-patina/#comment-14775542 points
-
Ain't nothing like last minute, I didn't have the right paperwork for compliance but a email and phone call and I had a copy emailled to me so back for second attempt tomorrow and fingers crossed for a clean sheet. (I know I'm dreaming)2 points
-
So trying to keep up the momentum! Remove the drivers side door skin. This is the puke that was inside the doors. This one isnt as bad as the passenger one but still pretty shit! And get this bit of new steel tacked in before I have to go make dinner. So lets see if I can keep this up for the rest of the week...actually I wont cos I have to go to dinner tomorrow night. BUGGER!!!!!2 points
-
14 times!?!? Someone had a grudge You may want to chuck in some PVC conduit with a couple of network and a draw cable, always nice to be able to hook the shed up to the internet, streaming music, burglar alarm etc... if you're that way inclined Water is always good to throw in as well..er I mean that's a spare conduit pipe Mr. Inspector Looks awesome btw.2 points
-
2 points
-
so the VW isn't going to make it to Nat's track day... but on the bright side I'm taking the opportunity to tidy up some stuff, starting with powder coating the cooling tin2 points
-
chev duramax diesel man this is rad!2 points
-
Using a drainage contractors stupidity as a reason to do anything should be avoided...2 points
-
600mm, I'm sure if you laid it all yourself and got the sparky to look at it before you filled it in it would be fine. Look in the DIY house thread, I posted how to wire up a sub box if you are keen to do it all yourself. I'm not an electrician BTW.2 points
-
^ this is useless without drawing a picture in some dust with a stick2 points
-
Dropped the motor back in finally.. degreased and painted up the block while it was out IMG_2209 by postlematt, on Flickr IMG_2208 by postlematt, on Flickr IMG_2210 by postlematt, on Flickr I bought a factory ta22 t50 cross member off Mike (sleektoy) as it has a radius in one side for the exhaust to run under, as my extractors sit so close to the floor this is going to be handy to tuck the exhaust up as high as possible for ground clearnce but im running a w55 which mounts further back and fouls on the cross member.. solution.. cut it to pieces and make it work.. IMG_2284 by postlematt, on Flickr IMG_2287 by postlematt, on Flickr IMG_2294 by postlematt, on Flickr IMG_2299 by postlematt, on Flickr IMG_2302 by postlematt, on Flickr //oldschool.co.nz/index.php?/topic/38745-matt-spitfires-ta22-daily-driver-buildresto/page-42 points
-
Not that well but it's not too hard, basically you turn right at the roundabout in matamata and go down the main street keep going until another round about about 1km down with a blue petrol station (can't remember if gull or Mobil). Turn left on to tower rd at the round about then follow tour nose to te aroha keeping the kaimais on your right. I think you just go straight until you come to the end of that road and turn right. When you get to te aroha you sort of do a zig zag and go over the river turn left onto the main st. Then about 10ish km north out of te aroha you turn left over a bridge probably a sign that says morrinsville or awaiti. Over the bridge then take the first right on to awaiti rd at the end of that you turn left (continue straight) on sh2 for about 2km/a couple of straights then on a left hand bend there will be a sign saying coromandel and a turninf bay thing so you turn right to continue straight and take that and goto to the end of that rd. Comes out just before the bridge at kopu turn right over the bridge and follow the signs for tairua.Easy as pie. Basically drive along parallel to the kaimais worst case you end up going through paeroa which is about the same distance just curvier2 points
-
gutted I'm not taking a car with a bonnet so I can roll out a massive oversized map of NW roads with a compass on it trying to figure out routes to take. ah the old days2 points
-
I'm not mad Geoff.2 points
-
I second this. Great looking truck but please don't fit a Japanese V8 motor! (I have nothing against them, they just dont belong in American cars sorry haha)2 points
-
Cheers Man, starting to think brave is another word for bonkers The paint issue came up today in fact, I had already purchased some spray enamel and 1k high build primer on the advice from the guys at the paint shop as I was going to attack it myself, it seemed sound enough but everyone else I spoke to thought I should go 2k. A bit if a re-think and decided to use a professional as I'm no painter. The advice to use 2k was firmly put across by the guy who's going to spray it for me, he paints Aluminium boats for a living so I reckon he should know his stuff.(thanks to nvmyvl for the contact, and Rustisize for offering to help) He's going to supply the primer and the paint shop swapped the enamel/primer and solvents back which was really good of them so I'm hoping for a finish I know I never would have had the patience nor skill to obtain. Had a chuckle to myself when I saw your caravan frame only remaining..2 points
-
Fixed rust. Fixed seat belts. And lots of other stuff. Trying to wof and wheel alignment tomorrow. Not booked in anywhere. Drives nice.looks tatty. Has patina. Running out of time... 9 days of ownership so far.2 points
-
if you want to be real oddball, I can cut you a good deal on the greatest engine ever mayteeee I've got a Starfire that's done a measly 153xxxkm I'll sell you cheep1 point
-
I was thinking of going 1UZ since there seems to be plenty of them around and they're much cheaper than an LS from what I've seen. An LS would be sweet though. Still got ages before I'll buy an engine anyway.1 point
-
Fuel temps are being monitored and logged in the return line and after a track beating only shift about 5 degrees hence my like for the post above. EDIT : fuel temp is just an offspin of the eflex sensor not a dedicated input.1 point
-
Cheers, and that's some good idea's there with the network cable etc.. the house is wired for an alarm so might as well continue it through to the shed as well More updates soon..1 point
-
LOL Fuel cooling is such a wank.1 point
-
buried cables is better, just make sure you do it properly and put some warning tape about 300mm above the cable. and you shouldn't have silly buggers digging it up.. overhead is more of a hazard imo.1 point
-
Yeah this is awesome!!! Top work sam and I hope it all goes well for trip up- though Im sure there will be nothing that will stop you getting there! Fucking cool car btw. Very cool!1 point
-
Or an MS paint diagram1 point
-
Have to come for a spin in it More than welcome to pop in and have a yarn about my silly request. I have an idea in my head I just can't make it myself.1 point
-
Forget all the above 454 or bust1 point
-
I used to make my AA membership worthwhle by getting a million maps all the time. once I'd got to where I needed to go they'd be binned. hah!1 point
-
fill it with fire1 point
-
Last corner dealt to. Only the door area to rebuild then it's time to complete the exterior panels and paint. Nice to have feedback from a boat builder who thought I was doing a great job, hard to know how well you are doing and what consequences you'll suffer later on when you attack one of these as a one off. Cheers to ThreeontheTree for the sand blasting garnet.1 point
-
Is Kevin not doing his job? 4 mice now is 40 mice next month... Still, at least you're providing a valuable food resource for the local bird population (Moreporks, Falcon, Hawks, etc.)1 point
-
Poo spot number three now reserved. Be quick - soon we shall embark on building hopefully the ultimate composting toilet and shower block. We have to do this because longdrops fill up eventually and I dont want to have to empty the hole of Daves pie ridden poo. Plus the longdrop currently keeps us on the right side of the law with them pesky meddling kids at the council however we want to have a setup that will suit more people. Need to allow for future OS meets ! So composting will be the way to go. Adding some photos for thread. I forgot a photo of the most awful bit of tat... And also we caught these little critters who were hiding under the wood pile. Four little baby mice. So cute. I kept them for one day and even though they are pests I couldnt kill them. I ended up releasing them over the other side of the creek. I did tell them not to come back, to behave and not cause any mischief. Hopefully they understood.1 point
-
Wow- its been a while since I wrote some stuff about dirt, gorse and sheds. So here I am. It has been a busy last few months sorting out many things. I have not been working much in this time, well not paid work that is. I have certainly been on my feet rushing about here and there trying to get stuff done in some sort of order so we can start getting a little business going. What we want to do more than anything is just build or fix things for people from the comfort and convenience of our own workshop charging a fair enough rate that will allow us to continue on with a pretty cruisy relaxed lifestyle out here. I am sure that is what most here on oldschool want though- most I have met so far have not been chasing silly big monies but instead want enough to play with old cars and shit. So that's us. With this in mind I had to continue on getting the shed up and once it was up I have been full on trying to set it up neatly in fashion I've always wanted before taking on any proper 'paid' work. Sam will attest to this...his Celica has been sitting here for ages while I get stuff unpacked and sorted away. I promise you Sam that I will soon remove all them big chunks of air from your/Janes car and replace them with steel. Phew- that was a big chunk of words. Here's a photo.. Yep- that's our workshop all pretty much finished. The very eagle eyed will spot a few flashings missing. I have to finish them plus fit a really awesome cat themed wind vane my parents gave us. But yeah, the shed is up and what a relief that is! Its been a few months of ups and downs mainly to do with the shed supplier being totally useless. But that's all over now and in the past. So moving on its all inside fitting out work now. First thing was to get a heap of plywood delivered and line it out. This instantly transformed the feel! its also going to help heaps as extra bracing although the shed feels solid as without it. After the ply was up I built was a place to sit with our coffee and ponder ideas in the sunshine. Using a variety of Rimu bits kicking about I made this bench.. More recently I have parked a little breville espresso machine on top- one that my parents threw out because it leaks badly. I'll put up with that for nice coffee in the workshop Now I am part German. Only an eighth but I think enough to make me get off just a little on organisation, ergonomics and efficiency. At times, often, this conflicts with my mums she'll be right kiwi hippy cruisy slant. Hannah is also a tidy freak so the workshop has to be as well organised as possible. Especially if we want people to come along to see us and be potential customers. I hate messy workshops! I hate spending ages looking for tools or stock when it should be in its place and easy to find. Especially if a good customer is paying for this time. Not on in my book. So for the last few weeks in between entertaining guests and trying to enjoy some of this summer after missing out on December and much of Jan to building the workshop etc I have been organising all of our stuff. We had to make several trips over to Blenheim to help my parents move house. While there each time we would bring back a load of stuff that was stored there. We also took down the little plywood shed we had built before we started building the housetruck. All this stuff ended up in a big pile on the workshop floor. This pile had me in hives with the general messyness. Plus we had to make the place a little bit tidy for the visit from the smoking tire crew. So I made some big shelves. Many of the boxes my parents had used to move house were a perfect size for these shelves but they were covered in print as they got them from macdonalds. I turned them all inside out and re-glued them. Now I had a load of neat matched brown boxes. Awesome! So I organised shit and stacked shelves.. I also built a big sturdy bench. Then I covered the top with a sheet of 4mm thick steel. Its great. Really happy with it. You can see to the right in the above image a big steel table. That was the frame we found in the scrub next to the drive. Its burly and has industrial grade castor wheels with grease nipples. It was an awesome find. So I cleaned it up and welded the other half of the sheet of steel to it. So a 2.4 m long heavy roll around workbench. You could put a car on it. So cool. I love it. My last thing to build was something ive had in mind for ages- well before building the shed. I always find storing paint cans, spray cans, screws, bolts etc, seldom used special tools- all the little things that clog up shelves and work tops getting in the way. So I wanted to get this stored out of sight and safe from errant grinding or welding sparks. I built this unit. Made use of spare Rimu offcuts for the door.. which opens to this.. Yeah Im pretty happy with that it must be said. Amazing how much stuff it holds and how clear it makes every where else. We have built another bench- a bit smaller and with a Rimu top. Its in what will be the bicycle area. That area will be sectioned off and solely for our many pushbikes and keeping them on the road (or on the dirt..) Last night Hannah started varnishing the bench tops and the doors. They already look so much better after ust one thinned down prime coat.. Once the building has been signed off we'll start doing the electrics. We'll do as much as we can but will have to get an electrician to connect our switch board to the main meter box and then test/sign the lot off. Already have local guy who is helpful as. Later in the year we can start building the mezzanine floor. This I am really looking forward to! Plus looking forward to painting the plywood and finishing off all the doorways/windows etc with some feature wood. Other things have been happening away from the shed. WE moved the long drop away from where it was - which was a bit too close to the truck to be healthy. Up the hill a bit and in the bush surrounded by big ferns. This involved digging a deep hole- as deep as I could reach. My brother came over and helped us carry the booth up the hill. Its now in a much nicer place to take a dump! I added a vent and sealed up all the gaps and now it draws nicely up out of the vent and smells nice. well in a composty long drop sort of way. We have also been having a go at creating a succulent garden/area. Big thanks to Andre for the Yukkas and many succulents. Its looking pretty good so far and hopefully they will thrive in the hot little valley here. We have called this garden 'the garden of tat' because a friend gave us a pretty awful wood look carving of a lady sitting next to a wolf. Once it was placed down we have started discovering other gems and friends/family have given us other terrible tasteless ornaments. Dad gave us the concrete cast boy climbing up a log which I accidently broke in half. But then glued together with no more nails.. So to finish off this rather long post here are of our 'garden of tat'1 point
-
so i got a bored about an hour ago and decided to do this.... looks like my vw was a light blue in its early days of its life. what a prick of a designee the made there hoodlinings. (vw still havnt solved that problem) it looks like someone has been here before as well take a close look and you will see all the dots on the left side have been drawn in and on the right side it is actually perforated LOL here is a photo from underneath haha also earlier today i swapped out the back rest of the beige seats onto my bases so i could have some low back seats they fit up sweeeet as!!! took it for a drive and i have so much more visibility around me now its crazy!!!! so now that the seats fit and look super ugly i better do some upholstery work looking forward to this part. ah thats why i ripped the hoodlining out as well as it had some rips in it and what not. since im advertising Midnight Upholstery on the side i should probably have the inside looking good1 point
-
Small update, bought a vw golf front chin spoiler from the uk and trimmed it up to fit the TA.. IMG_1701 by postlematt, on Flickr Had to mock it up multiple times to get it sitting right, plenty of trimming but the fact is plastic made it pretty east to cut and file etc.. IMG_1704 by postlematt, on Flickr IMG_1722 by postlematt, on Flickr IMG_1720 by postlematt, on Flickr got my dad to cnc up some new rear caliper brackets, a lot easier to machine up to suit the hilux diff compared to the original t series ta22 diff! IMG_1730 by postlematt, on Flickr IMG_1735 by postlematt, on Flickr IMG_1738 by postlematt, on Flickr IMG_1740 by postlematt, on Flickr //oldschool.co.nz/index.php?/topic/38745-matt-spitfires-ta22-daily-driver-buildresto/page-41 point
-
So tonight I decided to just go out for a drive. I only just got back 1/2 hour or so ago. I wanted to check out some routes for the nats plus meet the previous property owner who is leaving us some stuff behind on our land so it all tied in nicely. I was not sure how the Viva was going to be on our freshly scrub cut drive way as its not been used much last two years and needs smoothing down. But it was fine and I was all happy to have the Viva out on the land for the first time. Driveway is about 350m long with bush along the sides. Car looked cool in its soon to be new surroundings I thought. Car went so well- its been a while since I have been out for a night time country blast. Fuel gauge still reads a bit high- I thought I had it sussed. I had somehow bent the needle on the fuel gauge while mucking about modifying it. I checked all the wiring, removed the variable resistor, shortened and fitted heavier wire for less resistance and still no better. So I tried a spare old manky fuel gauge and it worked spot on. I compared the two and the old one had a needle that stopped further back with the power off. I looked at the base of the needle on the one fitted and i could just make out a tiny bend/crease. So I bent it back and then fitted it. Took some photos on my phone, sadly a bit poor quality in the low light.1 point


This leaderboard is set to Auckland/GMT+12:00