
Leaderboard


Popular Content
Showing content with the highest reputation on 08/17/14 in all areas
-
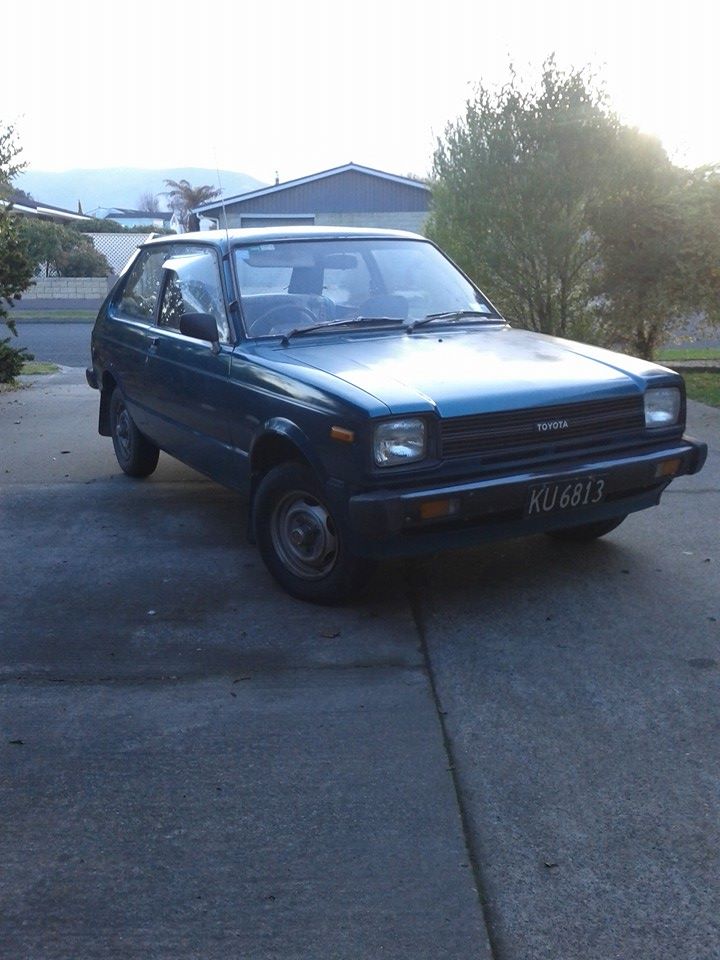
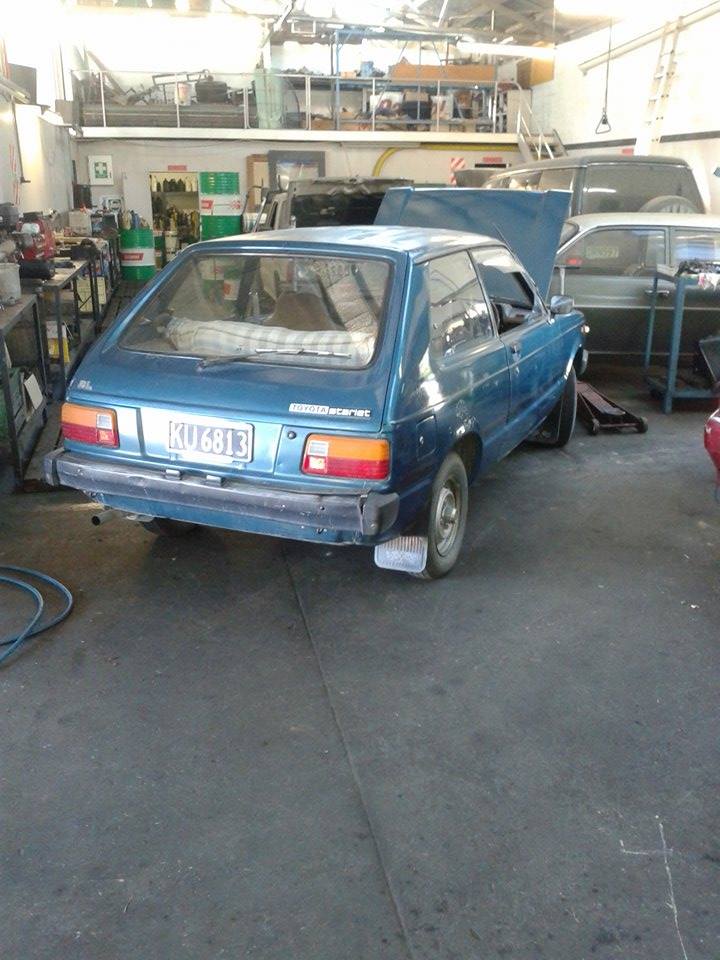
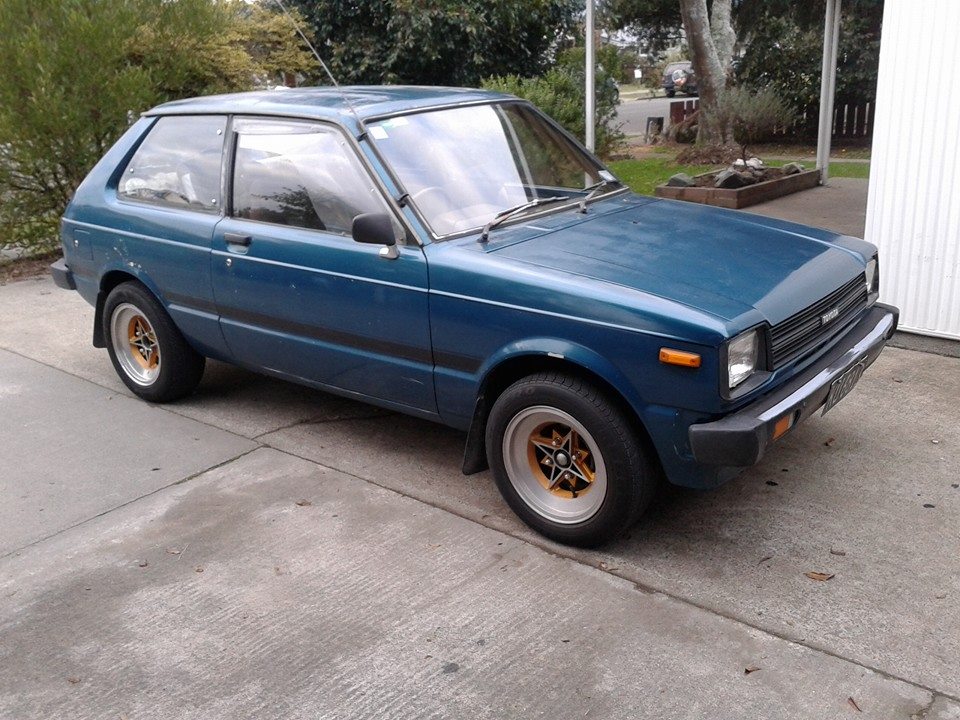
Discussion: //oldschool.co.nz/index.php?/topic/44779-mrs-slacker-sams-82-kp60-starlet/ Hey Everyone, Some of you guys & girls met my partner, Jane at Nats 2014. I thought It was about time that she got her own oldschool car. So this weekend we purchased this little NZ new 2 door KP60. It has been a local car since near new and has been in the same family for 30 years. It wasn't for sale but I kept asking the owner casually if he wanted to sell it (over a 4 year period.) Last week he finally caved and agreed to sell it to me under the condition that I look after it and don't sell it on. I parted with $1500 of my hard earned dollars & it was mine/Jane's. He was very sad to see it go. Its very clean & tidy, especially on the inside. But sadly the paint has suffered from the harsh Motueka sun and is cracked and buggered over the whole car. There is also a rather iffy 80s repair job on the left rear quarter panel. It has the screaming 2K power plant & 4 Speed K40 box. All original & has been maintained beautifully. I decided to chuck my 14x6.5 Techno Phantoms on as the 12" factory wheels just didn't cut the mustard. It doesn't look half bad. They might be a touch too big though. More pics to come.
 8 points
 -
Drove the car to town and got a WoF yesterday used 1/4 tank over 60km. Making the carbs bark is very addictive! EURON8 had a drive - his hopefully his engine swap plans have been given a kick up the bum. Car also got a wax for being good. I fitted my first ever Croma parts - retractable seat belts - much much nicer. Also moved the Amp to under the seat from the passenger footplate (to give more passenger leg room, it was a dumb idea that had never bothered me untill not being the driver for once) and also took the fluffy seat covers off to revel in the velour. Went up north to visit my grandmother today, used another 1/2 tank of gas. Here is why: https://www.youtube.com/watch?feature=player_embedded&v=F9TE4N8ozSk cant stop doOOOOOOOOOrting Also used no oil or water, and starts first pop.5 points
-
wow mega update So yeah, eventually got a wof, had to get a wheel alignment and other sit to get it sorted, but it is sorted. Used it to get up to Parmy swap meet, first decent drive since doing the head gasket etc. went pretty well, including towing a slam trailer. So yeah, been pretty keen to get it lowered as we are planning on driving this down to the hanmer meet. So over the last week been sorting out the bits and pieces I needed to get it slammed Done deal. as you can see, the springs are different, in a good way. holy crap those cobras are so yuck! and the result much better. and no more yuck wires. Really need to clean up my SSR's tho. been sitting for too long. However, the back needs to come down a tad maybe, looking like its got a bit of rake on, not surprised really as I took a quarter of a coil off the front, as I concluded if the car still had original bump stops in it, then it must not have been low enough, so I modded the bump stops also. the back is just captive, which I am surprised about, as all my other crowns have had shorter shocks in the rear. So that might be on the cards soon also Next step is to cut out the inner wheel archers where the tires rub, pretty common practice on crowns, for me anyway. word. Discuss //oldschool.co.nz/index.php?/topic/43431-seedy-als-brown-crown-non-wag/5 points
-
So we spent yesterday building this motor. In continuing tradition, plenty of alcohol was consumed throughout the day and everything took twice as long as it should of as we were going through and double or triple checking everything but at least we know it's right! Exibit A: carbs So these bad boys may have been part of what leaned it out. So they are off to roskilda next week to get checked out and setup for running in this motor. Exibit B: new pistons! Got new block and pistons from Brad. They are 10thou oversized Arias pistons. Fitted up with the standard rods and the crank from the old engine. Exibit C: precision ring grinding Had to get 20thou oversized rings and grind them down to fit. Took some time with a broken file.. haha Exibit D: head job Graham from B&H in palmy had a look at the head for us and deemed it was good enough to use again. Have him the head to find some valves and sort it out. Did an awesome job, skimmed the head and the block, turns out the head is from a 5k. Graham did 2mm oversized intake and 1 mm oversized exhaust valves and Did a 3 angle valve grind also. Roskilda wanted to know compression ratio for the carb setup so we put the head on the level bench, and measured water into it until it was to the top. Worked out the compression chamber to be 17.5 cc. Exibit E: maths hurts my brain Compression worked out to be 12.9:1 which is relatively high. Need to make sure everything is right or else we will have built another grenade. Also turns out we are close to 1400cc which actually works out alright as class A rules have changed to include 1400s. One of our concerns was with the height of the pistons coming right to the top of the block deck, 12 mm lift on the cam and naff all compression chamber, Google provided us with a recipe for playdough to measure valve clearance. Exibit F: playdough making Turns out we have just on the manufacturers specs for clearance after a putting the head on and off about 5 times. At first we had some slight contact but after redoing the cam timing and checking it again and again we got it right. Quite a cool double timing chain and sprockets By the end of the night things were getting a bit blurry but at least we got it together and done right. Will piece the rest of it together over the next week and get it back in the car to run in and get tuned by Roskilda. Going through and replacing the fuel pump and regulator with good quality stuff also as well a s rewiring the charging system.3 points
-
Gave it a clean and wax today3 points
-
Long time, no progress. So I took the car out last in November 2013 at Manfeild and it was not playing nicely. The new diff setup was whining, and the cooling system kept getting hot. I put it in the shed and tried to ignore it. After much procrastination I decided the sort the cooling out. Originally I had done a reasonably dodgy FWD water line setup into the car and used a Pick a Part radiator that once removed appeared to be too small and reasonably blocked. The POS Tridon thermostat which I had installed before the last track day also wasn't opening - 2/2 failed Tridon thermostats for me. That wouldn't have helped the temperature problem. China's finest alloy radiator was obtained and installed, along with a new fan and the water lines rerouted. Had to cut and reweld some of the pipes for the correct outlet angles. New OEM thermostat and some other bits and it's all back together. Ran it up to temp today for the first time and there are a few very tiny beads of coolant around the welds on water lines (mostly where I ground the welds back), not quite dripping spec so will just keep an eye on them and reweld if necessary - probably will reweld them as they'll annoy me, but didn't have a problem under pressure. Got some massive foam and really small bubbles when bleeding the system, a bit like a cavitation issue until the thermostat opened was quite concerned about having a potential head gasket failure on my hands. Had also pulled the diff out again and taken back to Howat's for a checkup. Turns out it wasn't meshing nicely between the crown wheel and pinion and like the teeth had 'stretched' since it was set up. I was asked if I had big torque running through it - I laughed and said it was a 4AGE. Slapped it back together with some tasty Redline diff oil. The final thing that I checked off the list was to sort out the front spring height. Originally I had some uprated LC Torana springs in the front from the days of it being 'slant four' powered (i.e. 2 tonnes of engine), but with the 4AGE in it, it was now as high as a kite. Some lowered LC Torana springs came up on Trademe almost new, so on a roadtrip with KK and Shaz I fetched these. (below, compared with original height ones). Approximately the same spring rate, just quite a bit shorter. With them installed makes a huge difference, but had a problem keeping them captive so it was time for some new shocks, and why not splash out on something interesting - Koni adjustables. Super short shock needed - 290mm extended length. Not much listed that can do that, so the nice man at Stocks took the standard listing for LC Torana and shortened them by ~30mm for me. Finished product - much better, and not such much nose in the air. Diff still whines but I guess it will with the dodgy CWP, seems to manage it's coolant temperature now, so might have to take it to an event to give it a stress test. Edit: and I had a set of old Ward alloys straightened and polished up. Need some new semi slicks so will grab some Toyo R888s in 205/60/13 and give those a whirl.3 points
-
I need to start taking more pictures of things. Yesterday and today consisted of replacing the old aftermarket headunit with a new one and replacing all the speakers. Managed to get 2 pairs of Soundstream 4 inch components to replace the components in each door. Removing door cards and replacing speakers ended up being the most insane mission. The amount of electronics in these cars is unreal. Came across the Fibre Optic system that runs throughout the car while digging under the door cards. Crazy right?! Removed the factory amp and with the help of a mate managed to trace the speaker wires to each door. The headunit I installed was an Android based one from China. Actually pretty awesome. Does everything that a tablet can do but has the addition of Radio/DVD/iPod input etc. Works well for a car like this with a double DIN slot. Need to find some speakers to fit in the rear parcel tray, and probably a 10inch sub to put in the boot, then an amp to power them to finish the ICE.2 points
-
Oops And the result of what happened in the video. So yip broke the moustache bar at the track yesterday. Thankfully it was in the last race. Turns out clutch dumps with slicks is hard work on a drive line. I think the front mounts for the sub frame are a bit sad and this allowed the rear to wind up. It broke where we welded a reinforcing bar across it ironically. And here is a video of me and Keegan racing.2 points
-
Finished off the rolling chassis today. My mate did a great job on the welds and everything came together pretty well. Just need to make seat, add floor, fit lake pipes, weld holes in body and paint. And one for anglia42 points
-
That was my thinking. I will still run the SL/E exhaust system as it is bigger than my four pop system and it looks like if has a less restrictive muffler on it. My current tail pipe looks like a pee shooter too. Bolting the whole thing up will suit me as i wont have to cut or weld seeing as though I will be removing the Diff, axel and rear discs. Cheers for the input.....i didnt know if I was just trying to save money. Ill spend the money on springs insted!1 point
-
Richie for OSGC 20151 point
-
The soon to be evicted starfire Fuel tank is out and painted. All new lines and breathers. Alternator is all painted too. Orderd an adapter for my 2 barrel Holley to bolt onto the redline free flow inlet manifold. Purchased some wheels on trademe and they are on root. Should hopefully get the 202 out next weekend for a clean, paint, re gastketing and to bolt the new shit on. Here is a question though. The Exhast system looks pretty good. She is 2'' all the way through and im not too sure how much extractors and 2 1/4 system will really achieve. It sounds ok at the moe...... I know it will give some benift, but just want to make sure im spending my money in the best areas. Exhaust can be done anytime is all.1 point
-
Yeah I'm not too worried about the bubbles, just makes you think the worst to start with. Do you mean this old junk? Now it's running again I will make a plan to fit this lot.1 point
-
So did wee bit for nice Sun a.m Clear coated frame and finished welding up new "Glory hole leg splitter" bars1 point
-
Not too thoroughly, I hope. I always keep an eye out for this car, but I haven't spotted it yet.1 point
-
Return impact gun next week / talk bout this. Will text or ring Monday. Gaz1 point
-
i Love this car1 point
-
Page 9, What a disgrace. Doesnt mean we haven't been working on the beast. Odd looking lower control arm Chop chop weld weld Finished product Pretty happy with how they turned out considering its been a LOOOONNNNNG time since i tackled a fabrication project. I offloaded the diff on someone else to do in exchange to wire up their crap. Was satisfying to make it, take my time and make it all nice. While I was doing that my old man was setting up his new brakes. The idea of the project was for us to go 50/50 in everything, but I just cant keep up with his spending... Hilux in and fitted, S15 rear rotors and calipers, with Surfab twin caliper/hilux adaptors. Idea is to run 4 rear calipers, 2 for hydro handbrake and 2 for normal handbrake and normal rear brakes. Honda radiator for water-to-air intercooler and 16 row oil cooler Better look at the front strut. Todays bash around the garage inspired me a bit more to get motivated on the car. But its hard to find time between working 2 jobs and running a company. But ive put aside a day a week now to at least try and nut something out. Engine is also wired up. To do: Dash Water plumbing Oil Pumbing Drive shaft Wheels New brake lines Adjustable Pan hard rod Recently completed Front suspension assembly Brakes Wiring Diff Diff head Fuel Alternator mount1 point
-
Cheers guys, yeah it could have been bent but then he said they would prefer to have gussets on the corners to strengthen. Its always a comprimise with NZ rules and visability. Works great though and Im happy! Will get to test it tomorrow!1 point
-
This now belongs to Zebra Dude, Looking forward to seeing it done!1 point
-
Having no internet at the moment has made updates pretty hard, but i have slowly been working away on this. I cant remember if i said or not, but i made the decision to put the engine in the rear tail cone. the gsx engine is perfect for the car, but its huge, and i just couldn't fit the engine, steeling, controls, and my legs in the front. so since the last update, ive spent ages mulling over suspension design, and settled on building a super simple single wishbone setup, using old moped shocks that i had around, im not sure how the camber change over the movement of the wishbone will affect driving, but i want to get it driving so i can test this and other things, and ill make revisions if necessary, ive also mounted the engine and today i finally got around to spinning the engine up with the starter motor, jumped off my car, she spins freeley and sounds like good compression, so im excited to wire it up and run it properly. Heaps of welds to grind back! but its strong as fuck!1 point
-
OK - so need to re assess wheel options here.. Scored some sweet condition Waffles (S1 RX7): But they burned my eyes out - I think they are pretty horrible - clash against the bodywork and just look weird. I love them on the SA22, but not on a S122... So option 2 was some steelies: I love them! These are 14x5.5, and the only tyres I have to suit are donut 205/60 (Stock FB size) but will get me by until I hit NZ shores and fit something abit more blingy1 point
-
Kick in the balls!1 point
-
Decided to make myself a coffee table out of one of the original wheels from the Austin. A little bit cliche perhaps but still a fun wee project. Started with the wheel, a bit greasy and grimey from years of road use: Then I got a bar stool, cut down the legs, chopped the back off, painted the top black (so it didn't show up through the wheel) and put in two bolts to hold the wheel down: Hub cap before... ...and after polishing: The paint I used was colour matched from Car Colours in Albany: Sanded down and masked ready for painting: Primed: After final top coats: I put some shoe polish on the tyre to make it darker, and put on a glass top I got from another coffee table I bought from trademe and sacrificed: Finished!1 point
-
I was talking to my rust guy today. He reckoned that lots of imports were being forced to media blast, and re underseal the underside of said cars. sounds insane to me.........1 point
-
Cut the bump stops a bit more, bout 10mm.. tend to hit them on some of the crappy roads out my way.. Gave them a lick of paint before some custom dirt, also spent a bit more time perfecting them1 point
-
Given it a wash - forst time for a long time! Please excuse the awkward wheel options.... Pic whoring time: She has been in that shed for way too long - about 2 years or so and the crap was just accumulating on top. To add to that, there are some birds nesting somewhere inside as I found a bit of bird crap on the paint - not having that! So out with the gurney:1 point
-
Another small update. Did a bunch of the usual servicing this weekend. Its had a leak in the rocker cover for ages, was pretty bad really but i just couldn't be arsed doing it. having to take all the intake manifold off etc is never fun. It started to running a little rough the last week, so decided to jump in and do it, as well as new plugs and all that. This was the offending area of the cover here, hard to see but it was leaking bad, and the reason for the engine running rough was because the spark plug holes where so full of oil they where shorting out. Wow. So off came all the vacuum lines, plenum and a few other bits. Ok, so grabbed my allen key to start undoing the rocker cover bolts. Lose as shit bolts all along one side and the front. i would say that out of the 8 or so bolts, 2 of them where barely finger tight, the rest were lose by a good 5 or so threads and one was missing. Not surprised if it has rattled out. Explains the leak huh? Checked all the rockers etc, everything looked nice. Will be awhile before im back in there fingers crossed. New rocker gasket, intake gasket and it was just a reversal of the disassembly process. Followed promptly by a good drive and inspection afterwards. no leaks, and idles a lot better. Has much better vacuum at idle. These things are bad with running rough with even the slightest vacuum leak. Small things sometimes make all the difference. Pretty happy.1 point
-
Is 1 1/4" a bit hefty for frame work unless it's going on a big rear tyre type frame ? My old Honda chop was 1 1/8" for all but the centre downtube that had the upper rear engine mount on.1 point
-
In terms of propulsion - an RX7 12a seems the best bet - least hassle and basically the same as what came out. I got all the twin diz stuff to build it back up but that will be phase 2 - plan for now is to get running. So with that in mind I scored a series 3 that had parked a but too close to a building that caught fire. Engine was ok, but body wise was terminal. Only 50k miles or 80kms on the clock but no coming back from this. A friendly fella called Aussie Matt came over to help extract the drive train - while at it, I'm adding a gear - twin diz 4 speed don't bolt up as bolt pattern is different. While Matty was on top, I took it easy underneath Once freed from the bay, its was clear to see it was a right old mess from sitting about for so long. To reveal what we were dealing with, facilitate easier cleaning, and minimise any opportunity for scratches we stripped her back. Looked like it was from a submarine.. Matty got stuck in with the wire wheel while I made the tea And did a sterling job I must say To fit the engine I needed to change 2 main things, the breast plate to suit the RX3 crossmember and the sump as it has a rear bump, instead of the front bump. Sump was previously powder coated so the underside of the engine was looking good to make up for the top. Upon taking the sump off I could see that it had been off before, I can only presume it was to fix a sump leak as the engine didn't look rebuilt - but it was very clean internally with no varnish. Splitting the engine and box revealed... A brand new clutch.. Result! Short shift fitted So, all together here she is, ready to plonk the donk The waiting engine bay Open up and say... Now comfortably nestled in the bay.1 point
-
Managed to piece the bumper together - ass is looking good now.. Add some badges: Then my attention turned to the stanky stocky ridgy steelies. First off, I needed to modify the stud pattern so something reasonably common, start with wheel off: Add a 25mm spacer adapter - but used the original wheel bolts, they are very low profile and sit happily within the adaptor. Behold: Whilst on a roll - I chucked on the grill and mocked her up - no chrome but.. This is the original bumper with the indicators just sitting in place: Shazaam1 point
-
Turned out my factory callipers were just a bit to tight to make fit. Dad decided he wasnt going to use his willwoods any time soon and they were just to easy to fit. So got some hardware, made some adapter plates, spun up some spacers in the lathe and now were good to go, just need to put them on the car. Picture of todays efforts. Probably going to have more stopping power than horse power now.1 point
-
Stupid internets being stupid. This was last nights little project- making a rectangle to round transition piece for my heater blowers. The shape can't be removed from a one piece mould or plug so decided to try using wax. I used a free program off the net to produce a pattern that I then folded. Pillaged the wife's candles, poured wax into the mould and then removed card when cool A few layers of glass cloth Trimmed it when green And then once cured this morning i popped it into the oven to remove the wax I think I'll start again as I learnt a bit about how the wax shrinks etc- and I made the transition over 50mm which could be halved as its a bit bulky- it doesn't matter so I probably won't haha. A 3d printer would be awesome for this kinda stuff! I might have to look at buying one later in the year1 point
-
Well im a pretty happy lad, THE BLUE PI RUNS!. The guy i brought it off was being a giant douche and totally reckon the metering unit was stuffed cos he has spent a week trying to get it to go and had put half a tank of fresh gas in it all new plugs and filter etc so stuff him haha. The body itself is really straight with no rust but the boot and bonnet are a bit rusty. Cheers to Goat on the advice to get it running, i took all the plugs out, pulled a couple of injectors out and just winded it for about ten minutes until the injectors started squirting nicely and then some. Banged plugs back in a broom away she went. Still only running on 5 but it was running. So drove it off trailer and straight into storage. Got told no conversions till after the weeding but i reckon i might be able to squeeze this one in before1 point


This leaderboard is set to Auckland/GMT+12:00