
Leaderboard


Popular Content
Showing content with the highest reputation since 03/18/24 in all areas
-
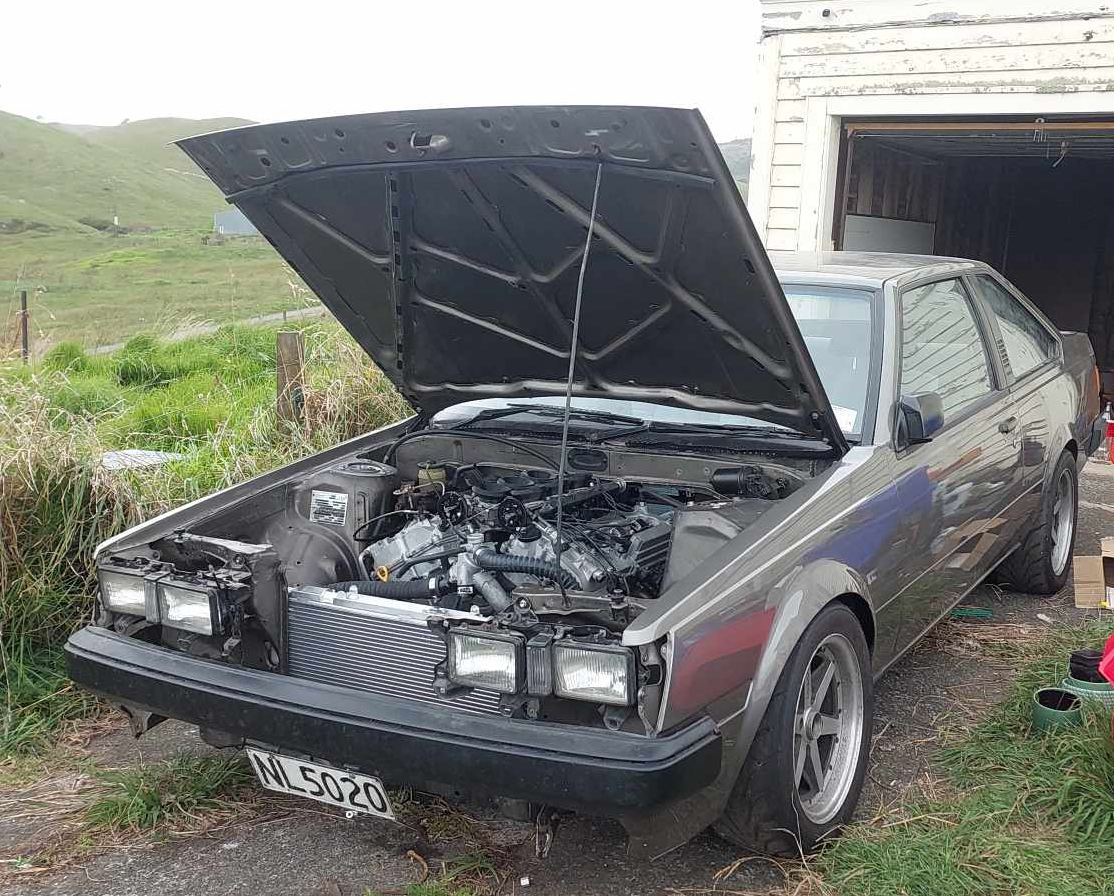
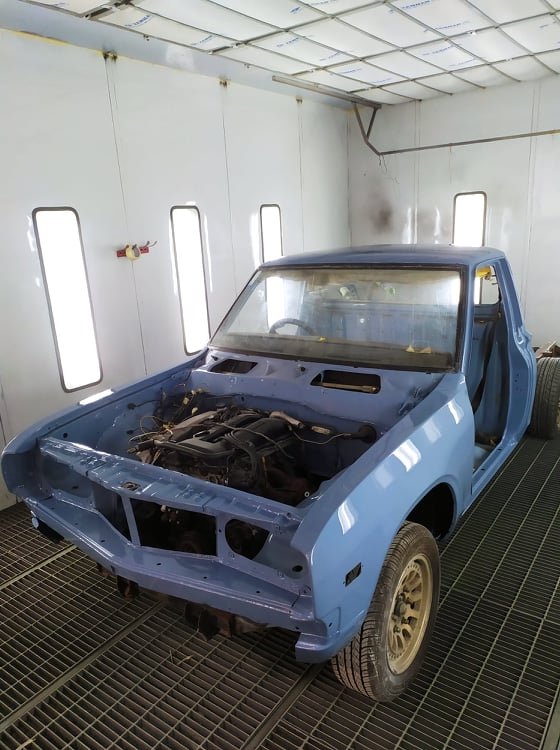
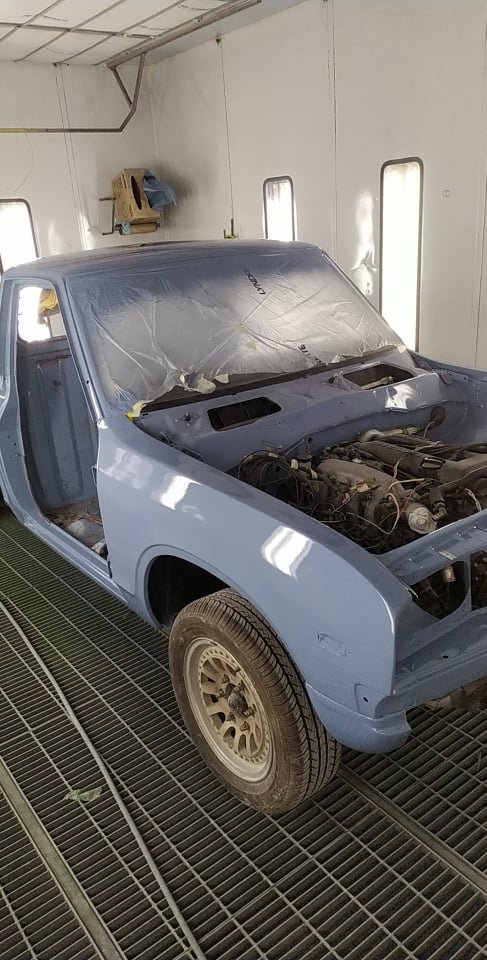
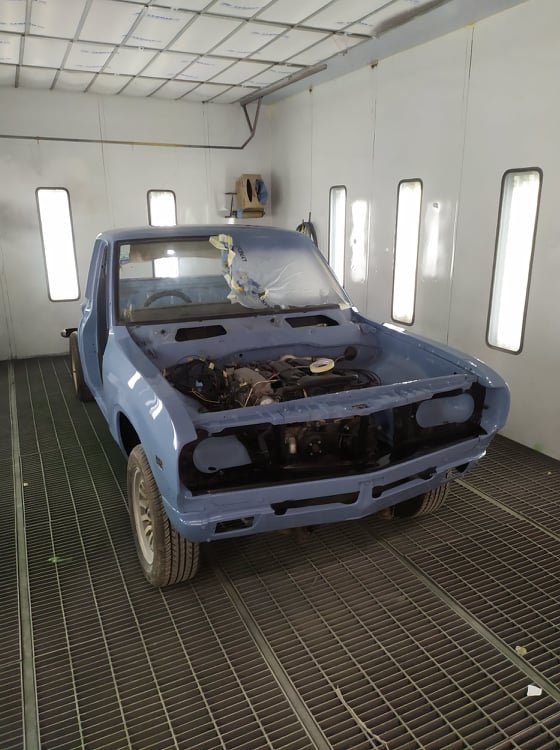
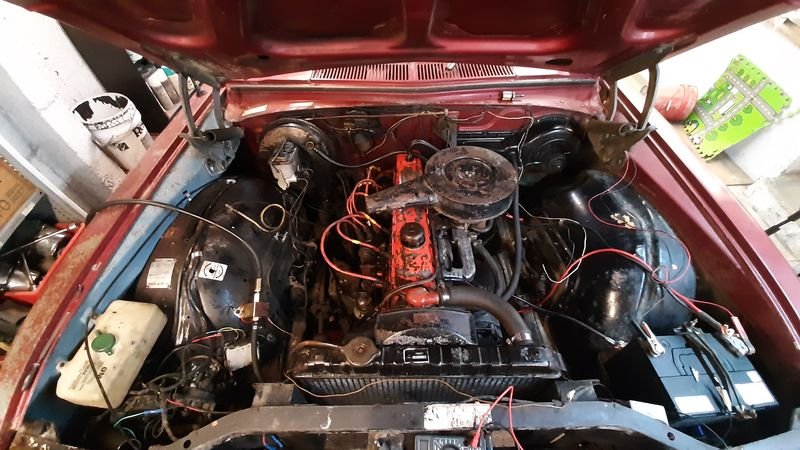
Alright alright alright! So I pushed the car outside this afternoon so I could reach some wiring inside to try fire it up. I filled the car up with coolant, by which I mean water because I was expecting things to leak. Sure enough each head had a hole up the front where water started leaking out. I couldnt remember what these were for, then found out that they are like an air bleed channel that goes back to the thermostat housing. So, these seem to have gone AWOL when moving house so I'll need to pickapart some more. I must have removed them when taking the heads off to clean them. Easy fix. Then I got the fuel pump working and fixed a few fuel leaks. It turns out that AN fittings arent very good at sealing if you havent tightened them up? Crazy. Then I got my tune somewhat sorted, and tried cranking the motor over.... and the bloody battery died! Ugh. I mucked around to get another battery, it sort of spluttered a few times but not quite. I had a look through the tune settings. Engine size was still set to 1500cc from using this ECU in the Echo - woops. I needed to disable the fuel pressure sensor allocation. As since this isnt wired in yet, it took 0v to believe that the motor had zillions of psi worth of fuel pressure. Then when I cranked the motor it was registering the crank trigger, but not cam trigger. Checked the settings, had this wrong. Both were set to VR sensors, but the crank is VR and the cams are hall effect. So once that was fixed... Bam! We are running. It was absolutely awesome to reach this point. So whats next? Lots. Get the coolant system functioning properly. Make an exhaust for it. A lot of wiring work, get the fusebox setup all connected nicely and mount all of the wiring nicely. Need to put some gearbox oil in the box, will do this before running the engine any longer. Pull the fuel rails off, and do tests to work out the CC rating and deadtimes for the injectors. Calibrate all of the sensors Mount a radiator fan Check intake for leaks (I think all of the air bypass screws are currently all the way out) Install the wideband Finish wiring up the alternator And a bunch of other little similar jobs. Most of these I can peck away at over winter with limited space. Making an exhaust will be difficult when weather starts getting darker and wetter and I can only really work outside. Will push ahead as best I can. Super excited for first start though!
 61 points
 -
Dads finished up a radiator shell. Looking great. The original cores are made from hex flared tube to make a honey comb bundle which is all soldered together. There are about 5000 tubes! The plan is to make a false tube core /front but use a custom aluminium multi pass radiator to work as the real radiator. It will be nickel plated once the core brackets are figured out and any other tweaks.57 points
-
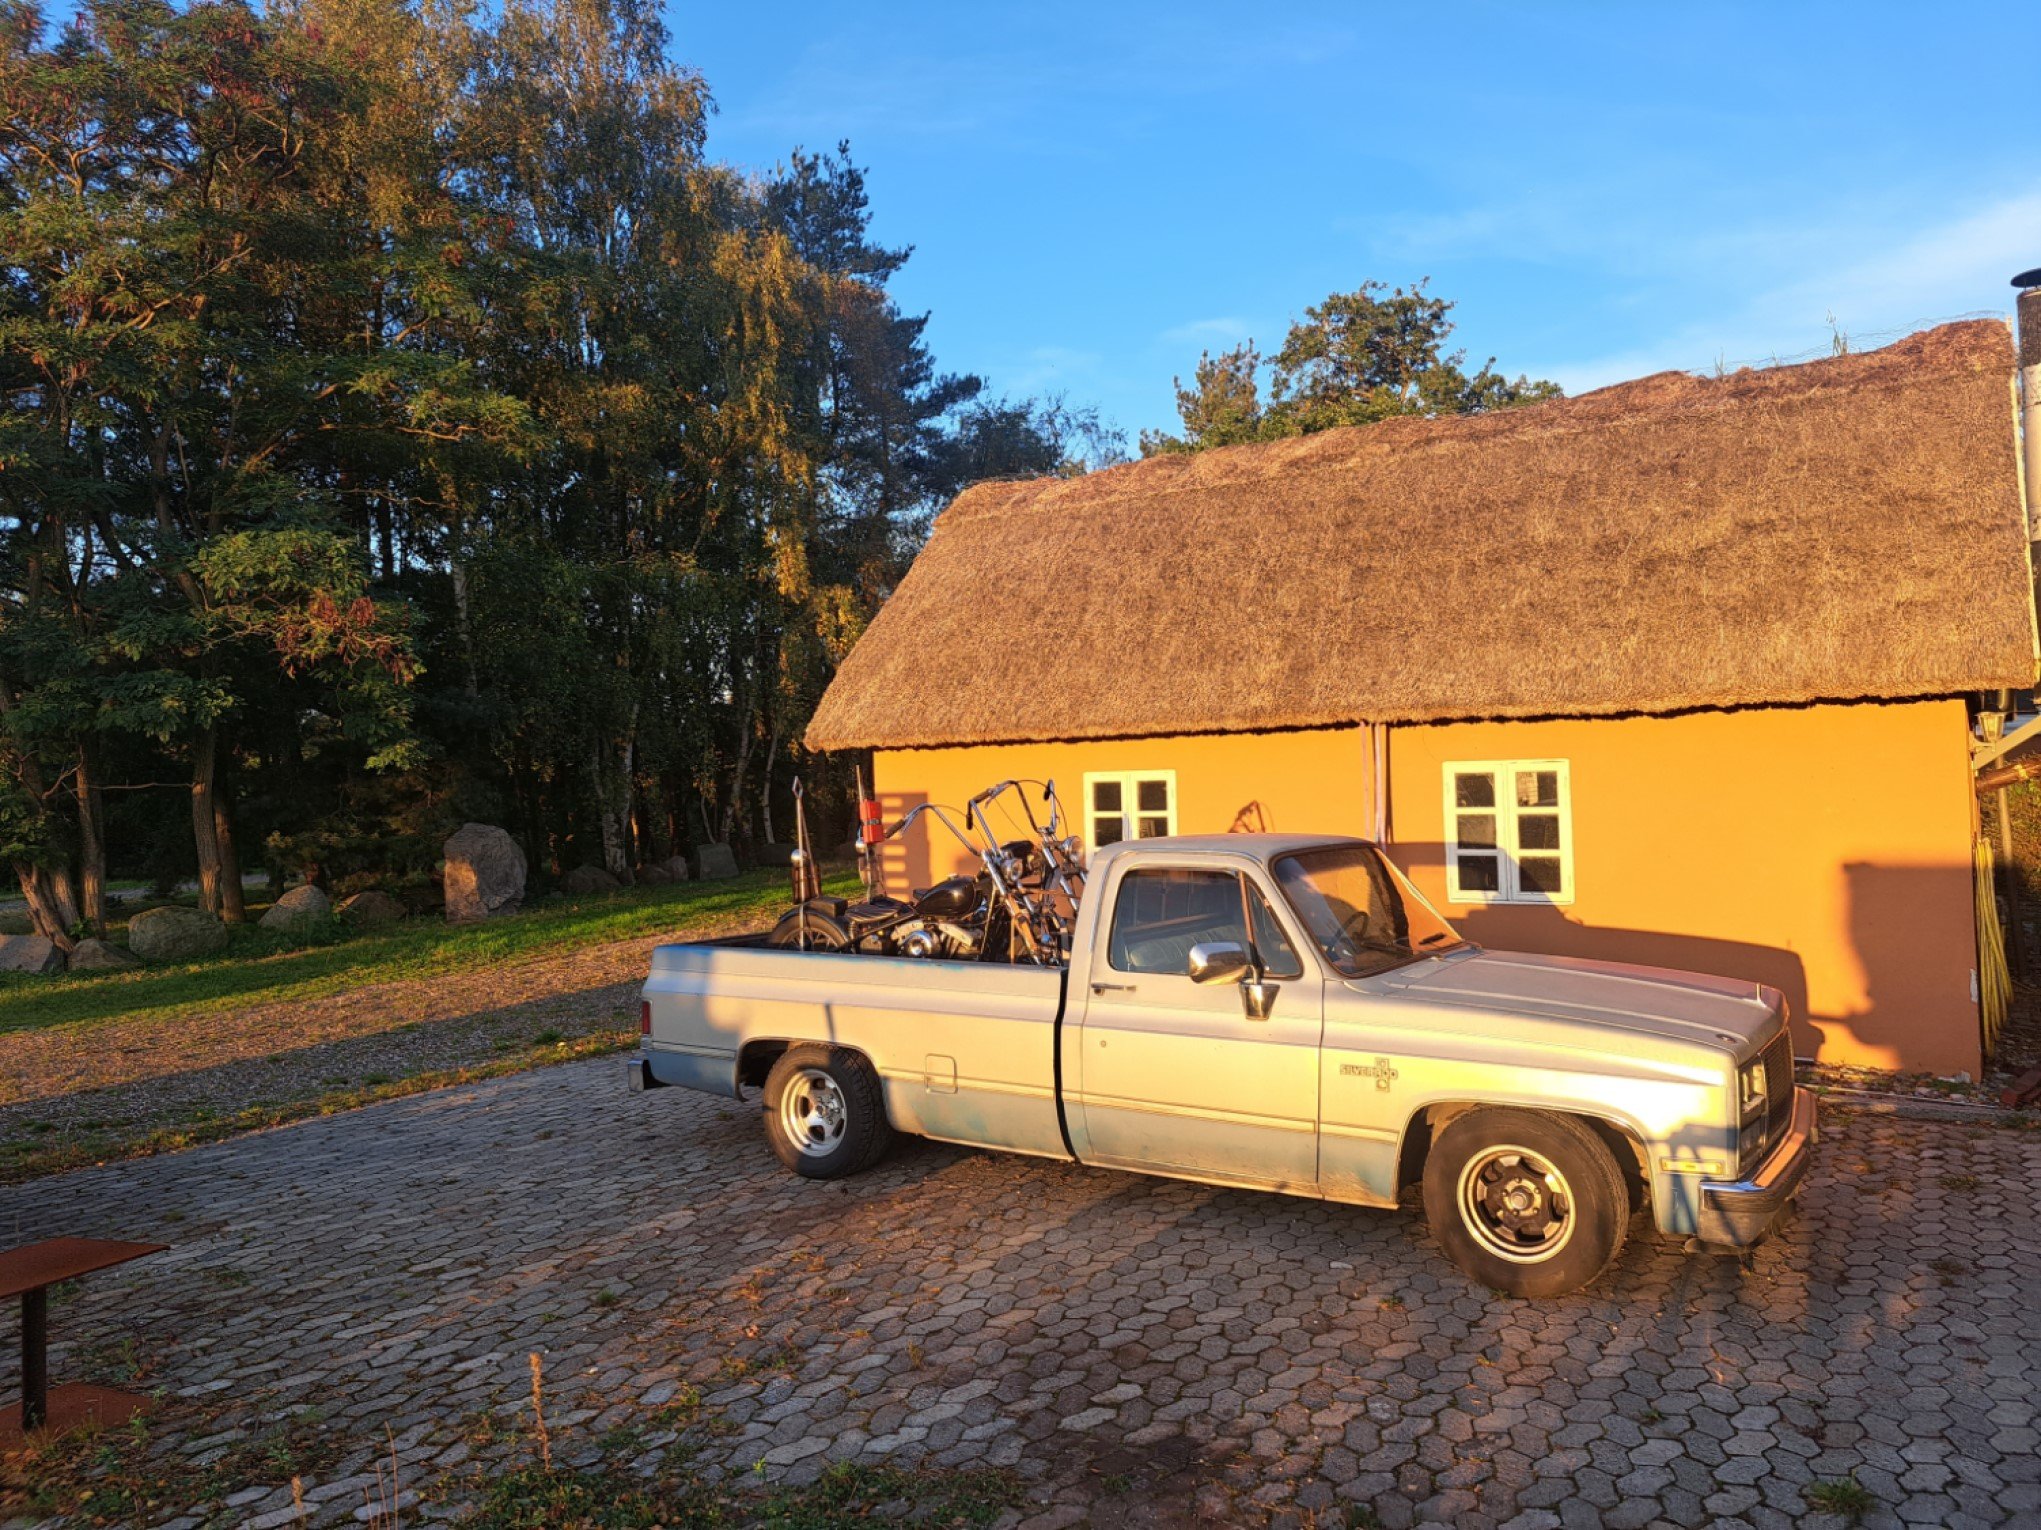
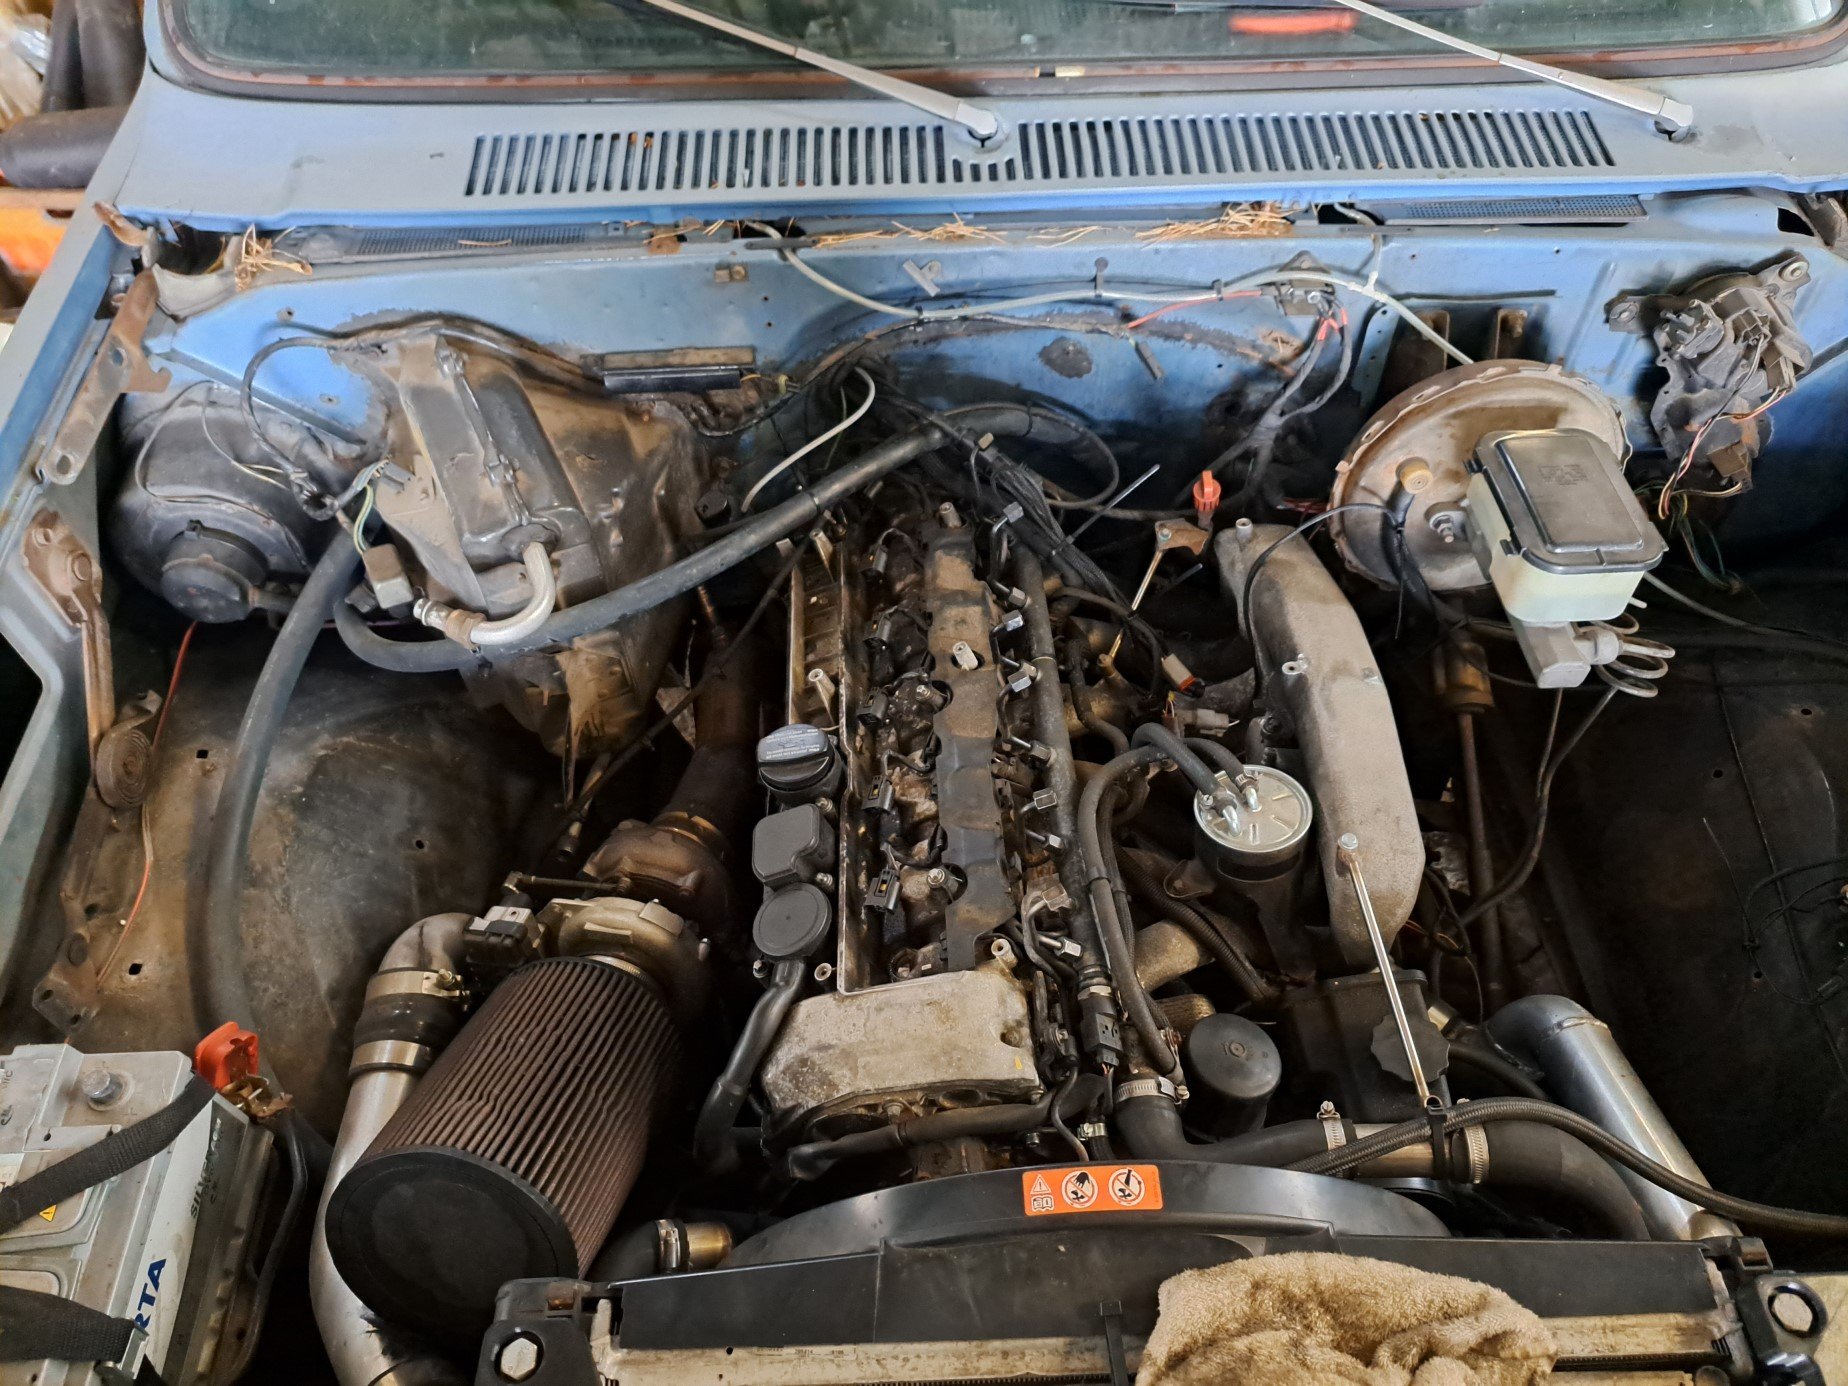
Yo, Long time no see, I figured that because im about to embark on phase 2 of this heap that I should probably make one of these. Anyway, I needed a new daily so I went shopping and found this sweet 82 long bed, I was after a long bed specifically as I needed/wanted it for my shop truck to haul choppers round with. The 350 had a sweet cam and gear drive so it sounded cool and had the requisite chop chop but the 4km/l fuel consumption meant that the daily part of the new car purchase didnt work quite so well. Luckily I had done my due diligence before the purchase and also bought a 2005 Mercedes Benz E320 cdi. Anyway @98cc hit me up and said he wanted to come visit so I put him to work and we pulled the 350 out and swung the OM648 in. Then at some point a @peteretep came and visited so we did some more work, anyway, I had a deadline, I made it, the truck got its maiden voyage with its new motor around Norway chasing a bunch of bikers, good times. Basically the rundown of the swap were: OM648 3.2l inline 6 diesel, the same one the Blacksmoke Racing dudes use. Baldurs Control Systems DID1 stand alone ECU 722.6 Mercedes 5 speed Auto with lockup OF Gear TCU 3 inch intercooler Built 10 Bolt with 30 spline axles, 9 inch housing ends and bearings, Eaton Trutrac and 3.08 gears. At this point it turned into my summertime daily and did truck things Then doing the usual facebook marketplace thing late at night I found a truck camper for sale, so of course I had to have that... At this point I found the limit of the 1/2 ton suspension so with the camper and the 6/8 drop that it has, so I had to do something, I made a bag over leaf setup in the back to help with load carrying capabillity. So about here is up to date, the engine swap is legit, it now gets 14 km/l and will happily cruise at 120 on the highway, because of the 8 foot bed it hauls all manner of things without asking, and does a skid. Discussion
51 points
-
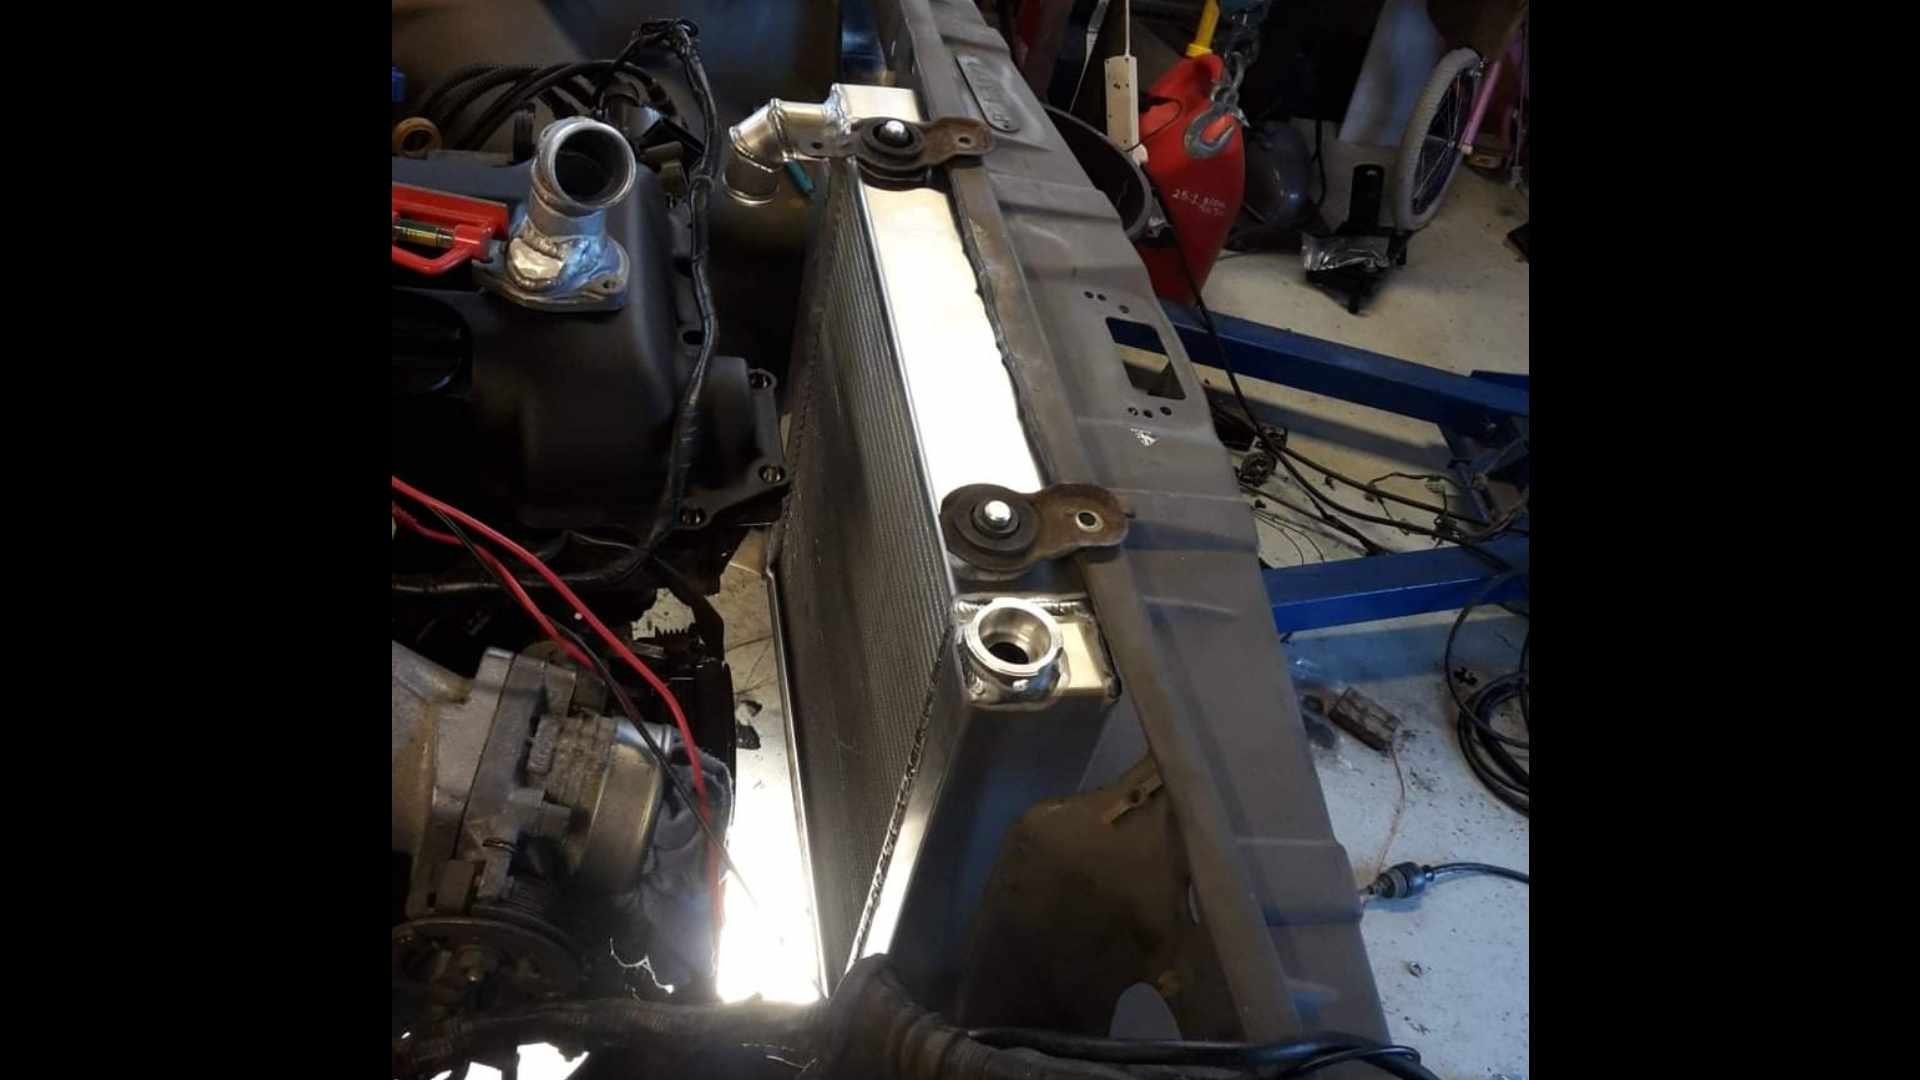
The SW20 radiator turned up, and thankfully it was indeed 755mm wide, not 770. So just needed a small snip up one side to fit. There isnt actually too much in the way of the fins being shrouded by the front panel, because those side parts are mostly the end tanks. So ended up better than expected, it will mount up to the front panel nicely. This is the amount of room to the crossmember level: My next problem was that the radiator outlets are 32mm, but on the motor they are 38mm. Wellllll, turns out that you can buy flexi hoses with 32mm at one end, 38 at the other. At what looks like good lengths (400 for one side, 300 for the other). So ordered some. Too easy! I'm glad to not need a join in the hoses this time. I printed some lower radiator brackets which bolt onto the crossmember similar to the ones I had for the Altezza radiator. I remember we made the altezza ones out of aluminium, and it seems like it took forever and was a really hard job. Now with a printer it's just incredibly easier to test print and test fit a few iterations within hardly any time at all. I've also got all the fuel lines connected, throttles are now mounted on carbon nylon manifolds, throttles are balanced and connected. My to-do list for getting the motor fired up is rapidly shrinking!
40 points
-
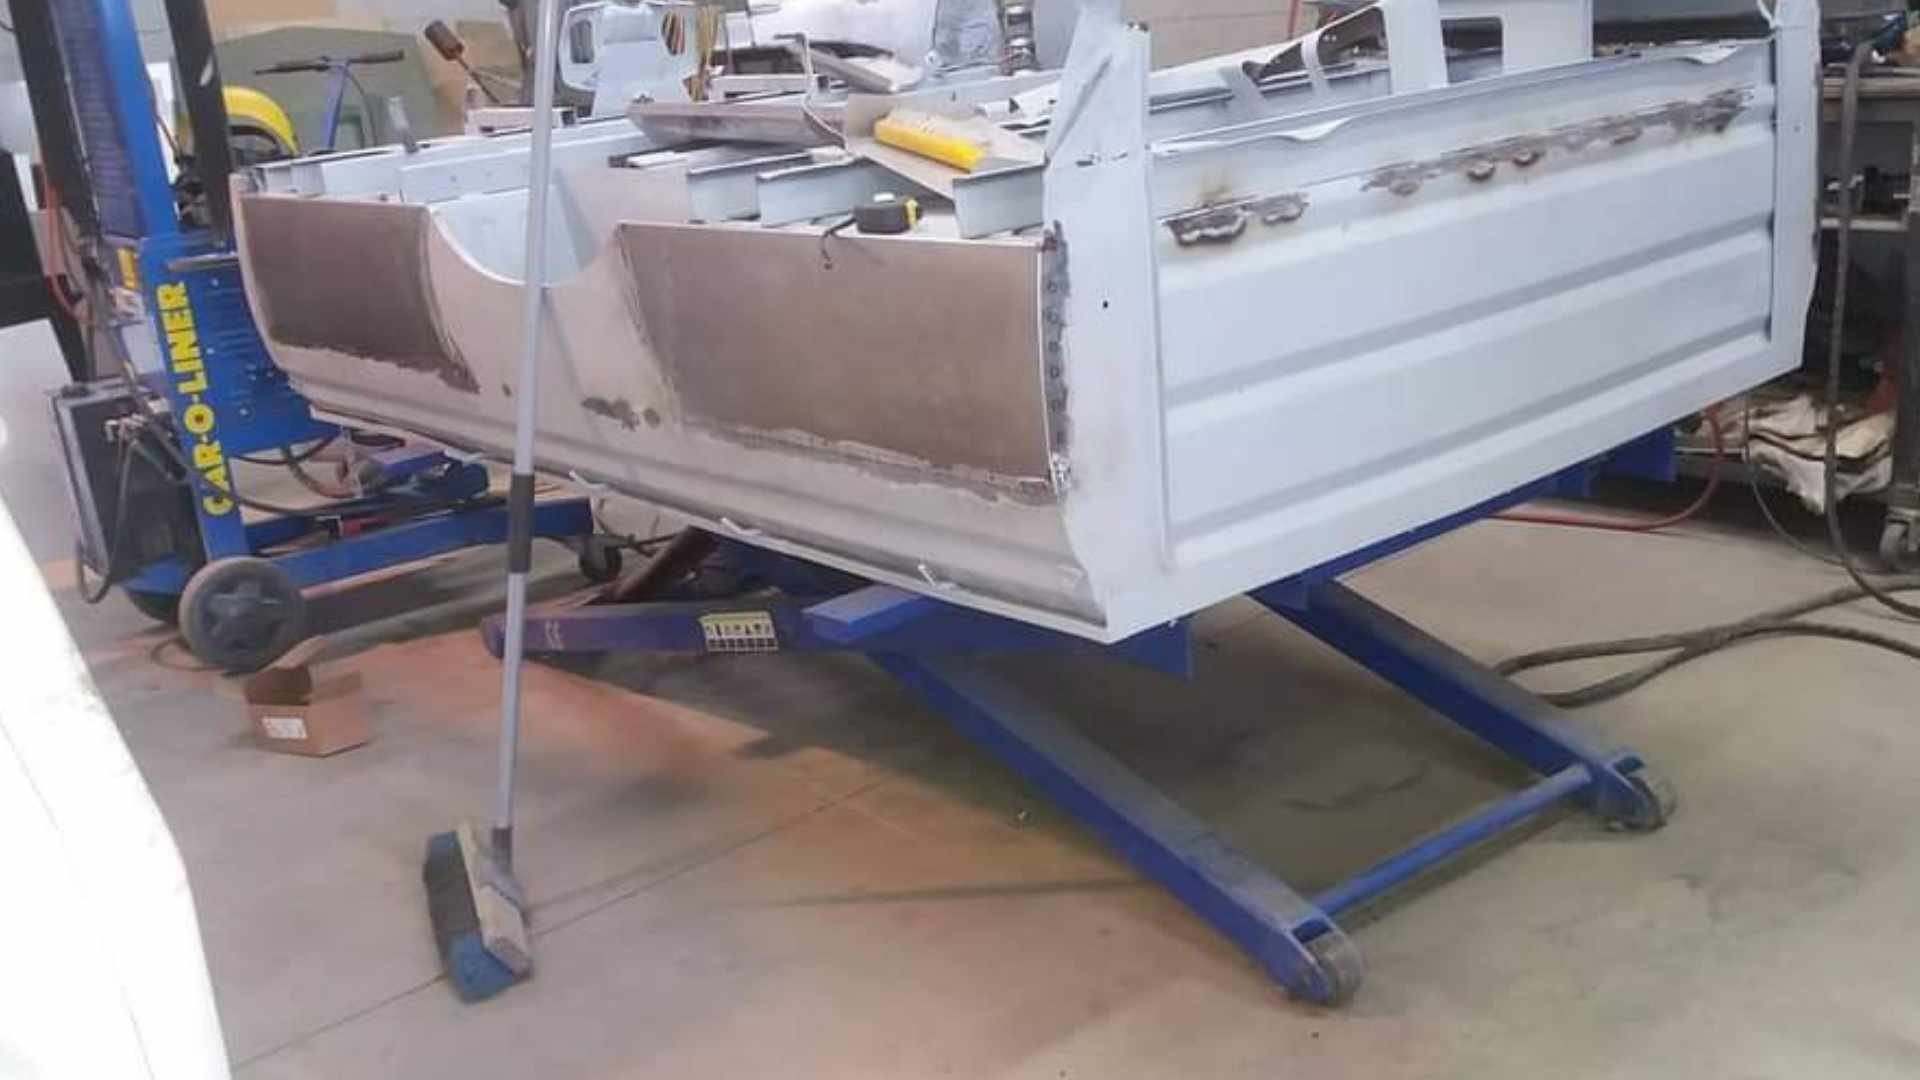
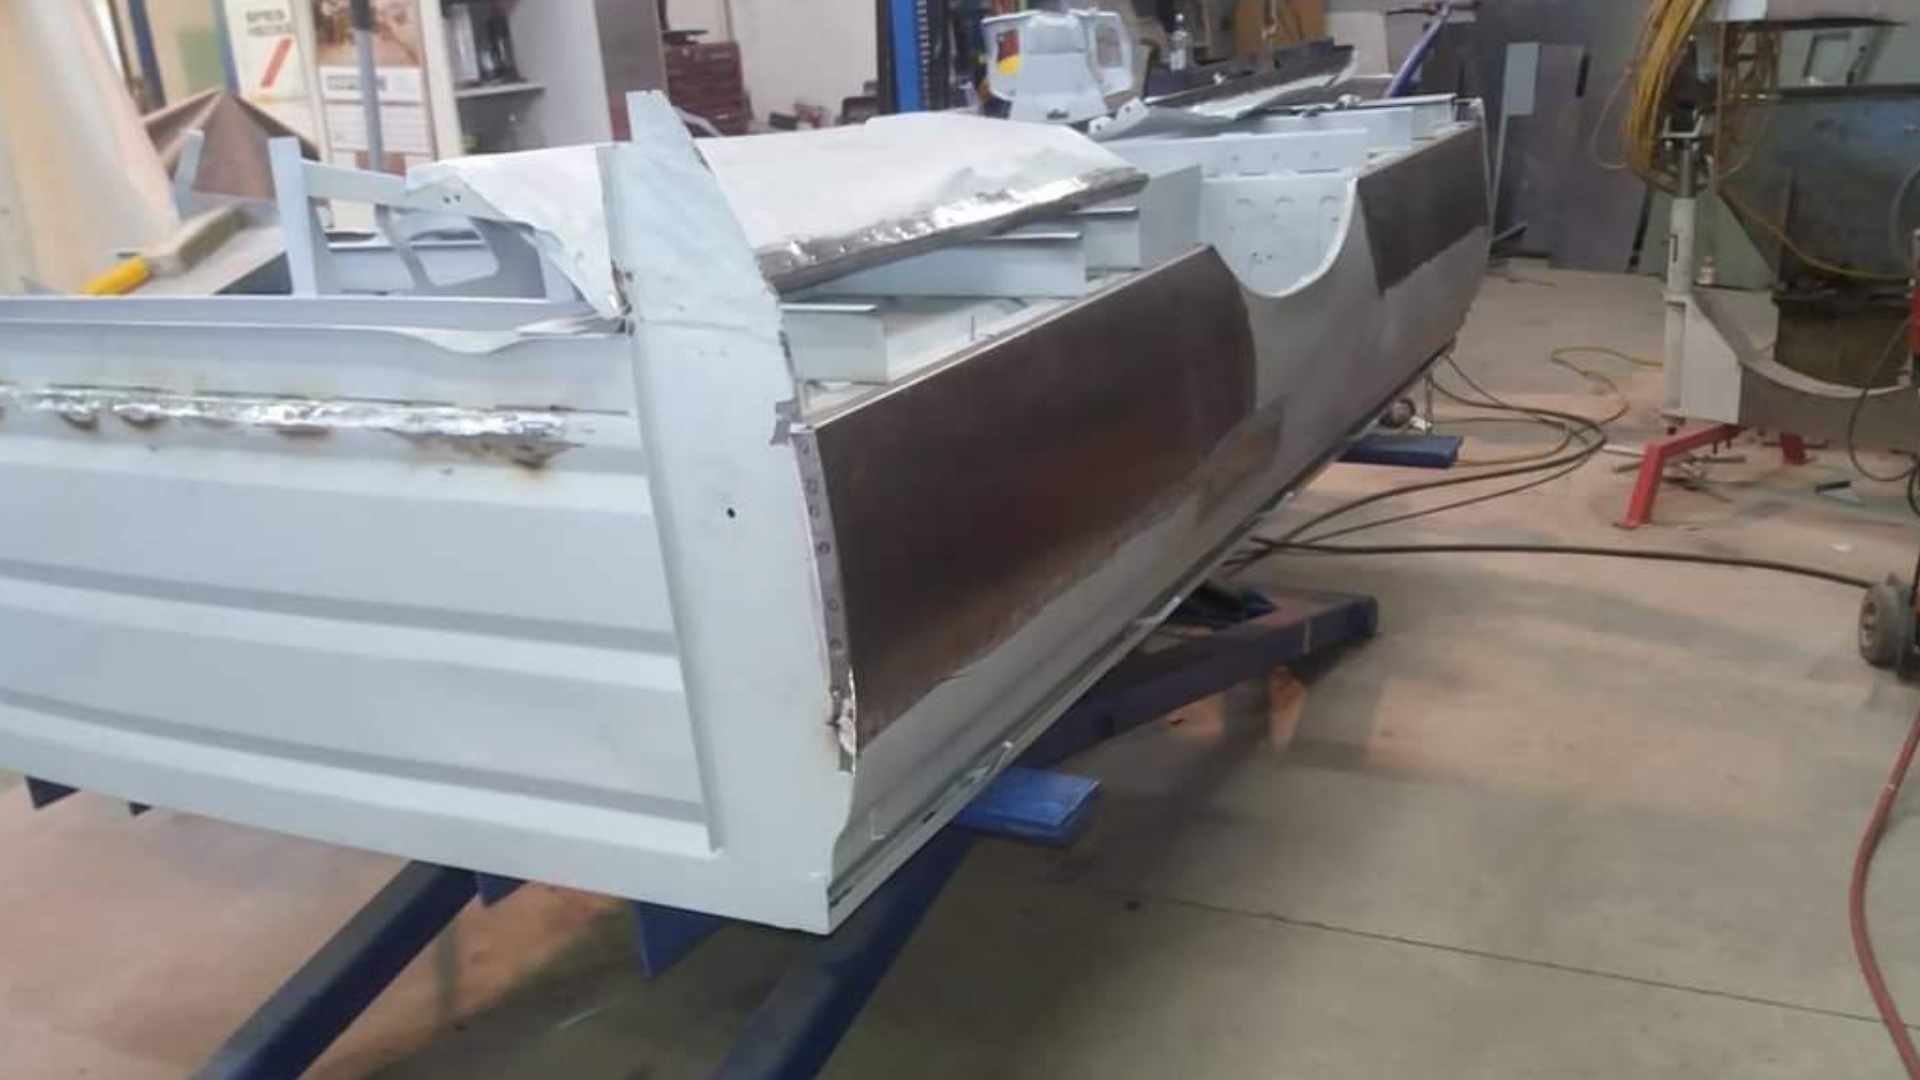
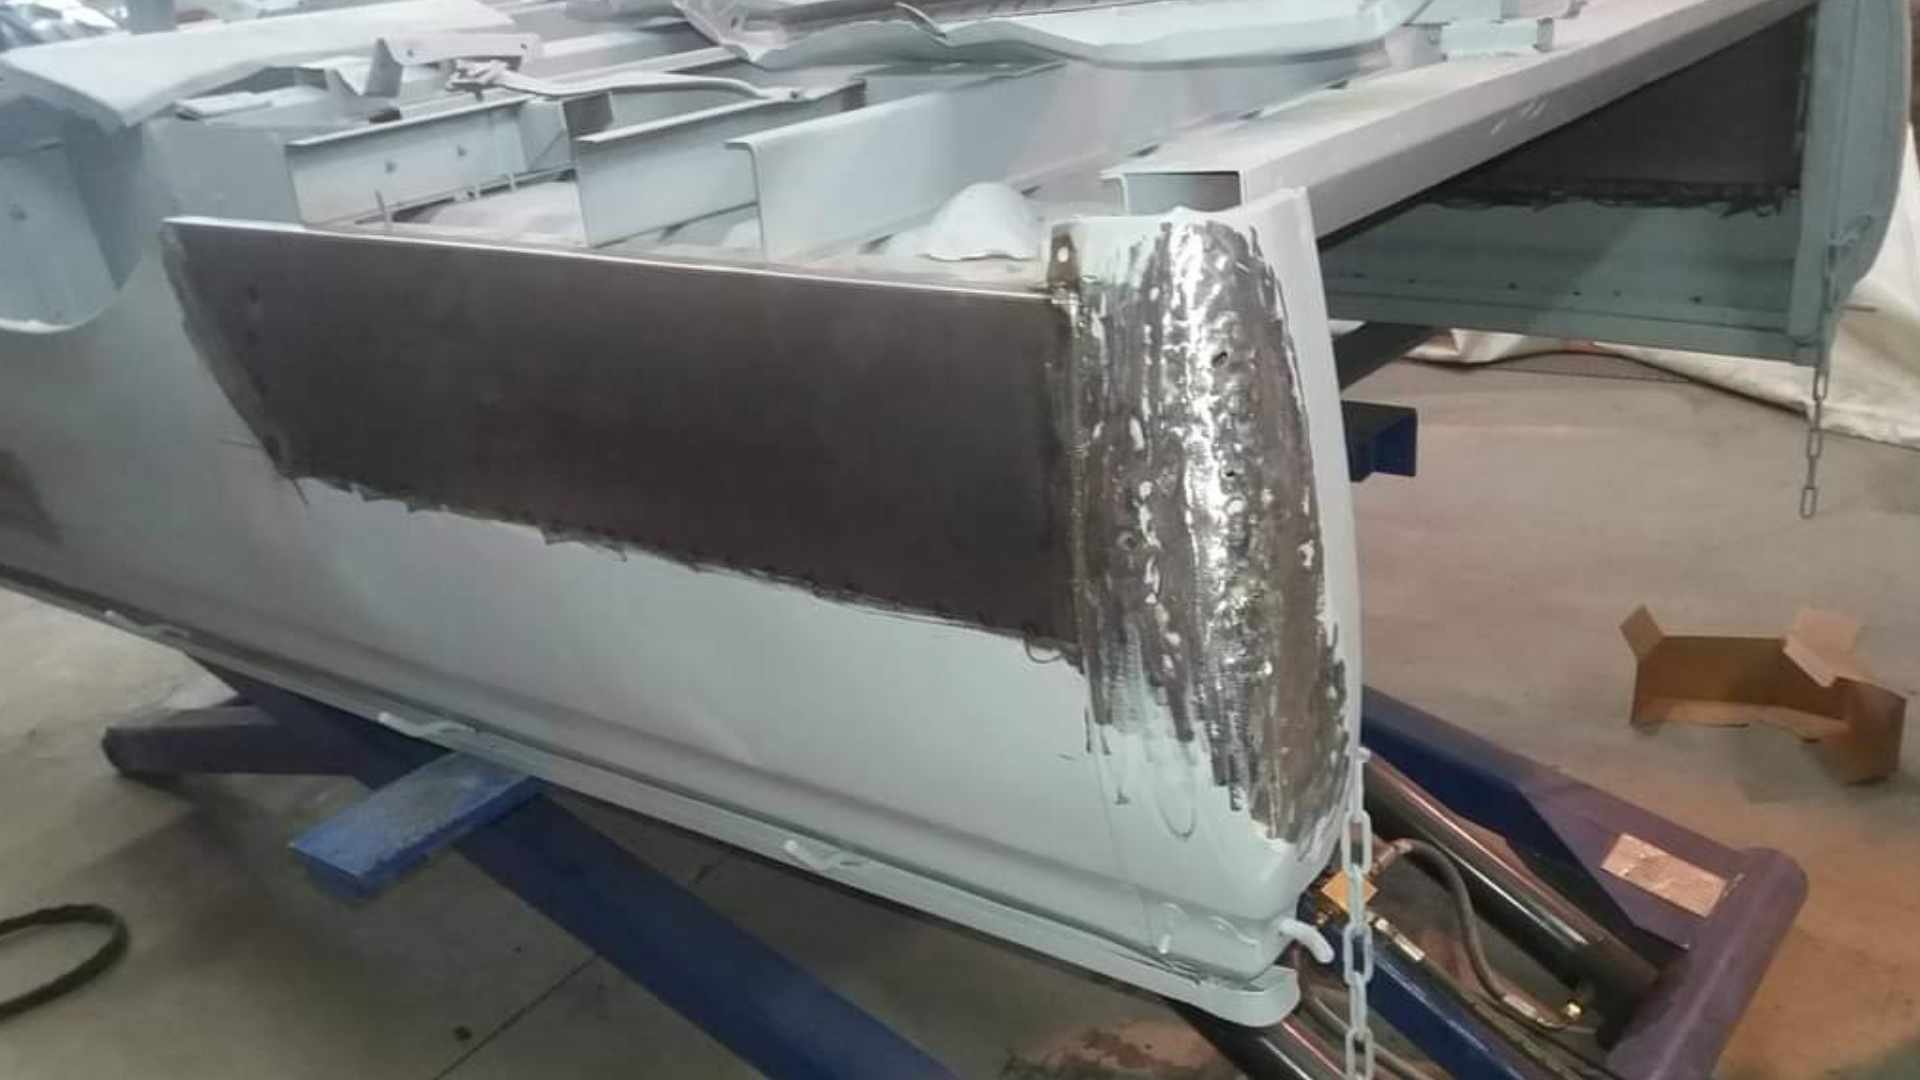
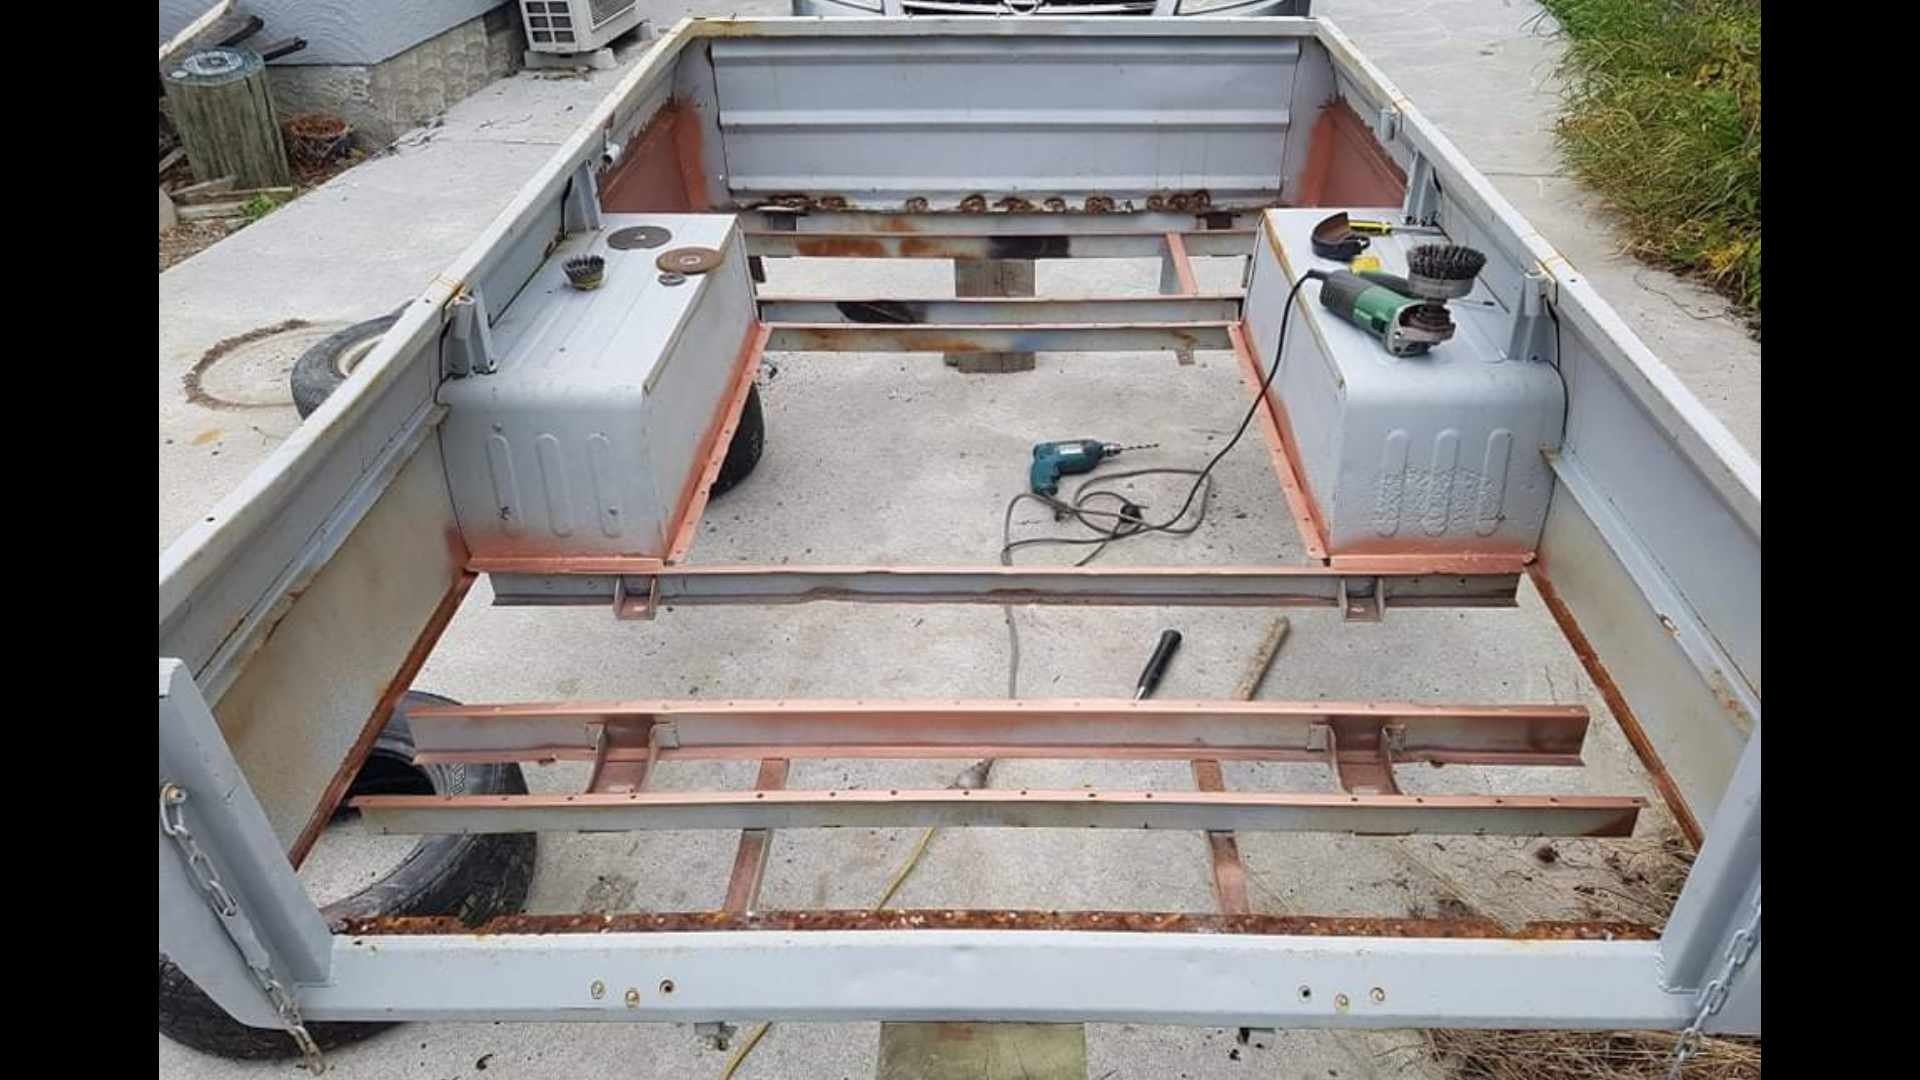
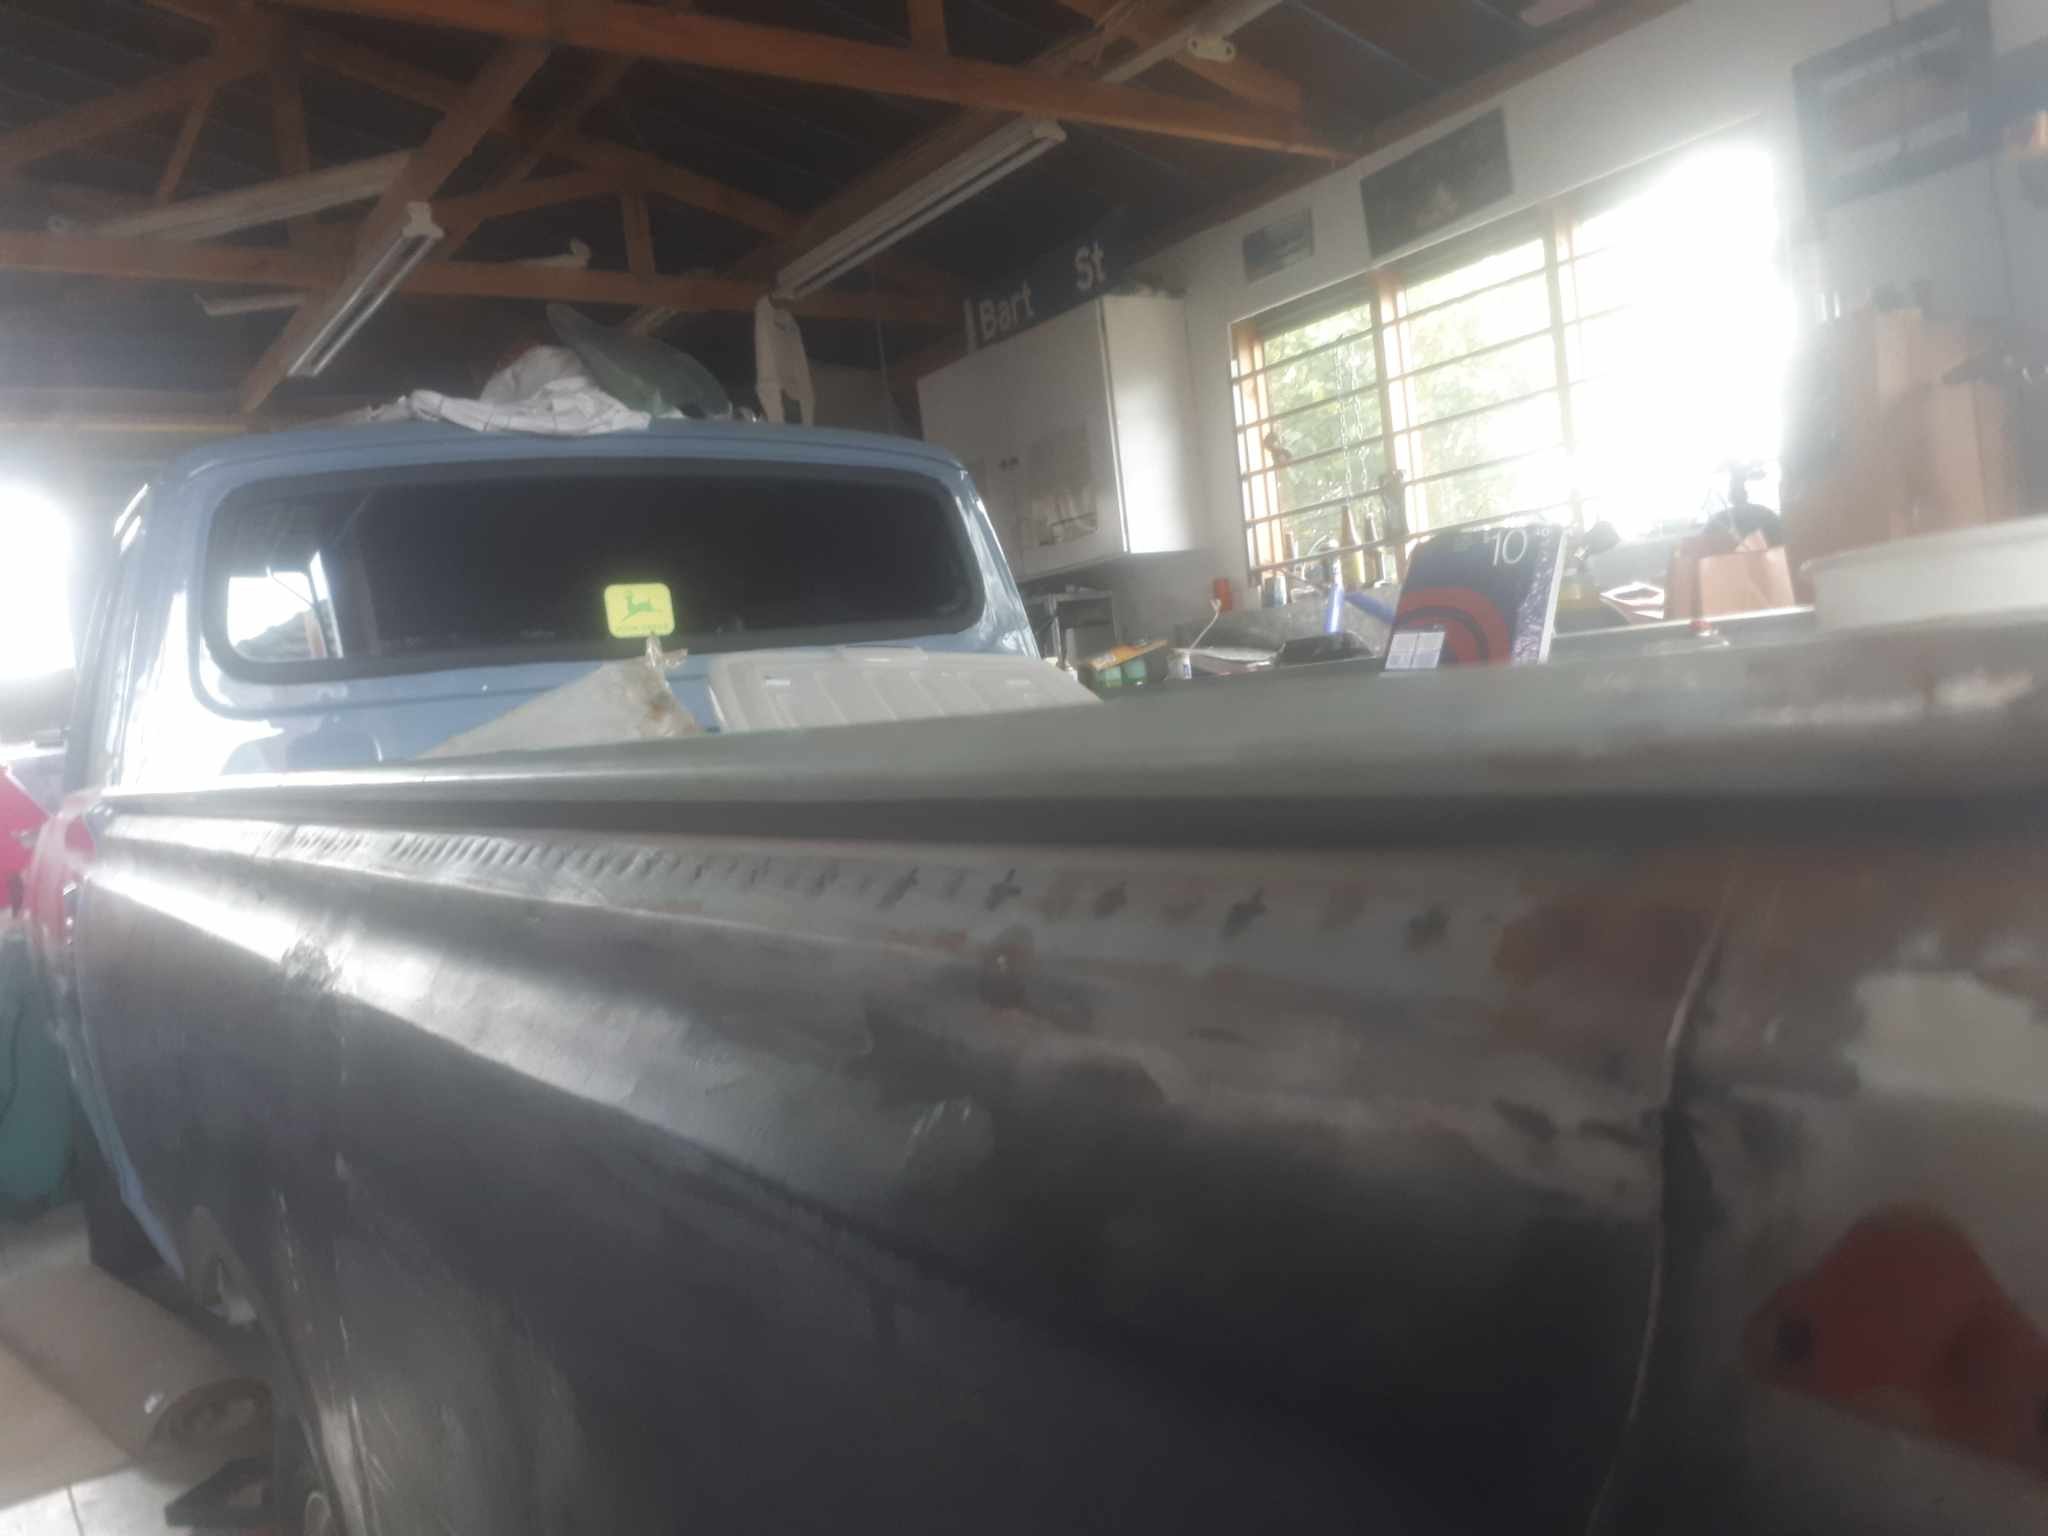
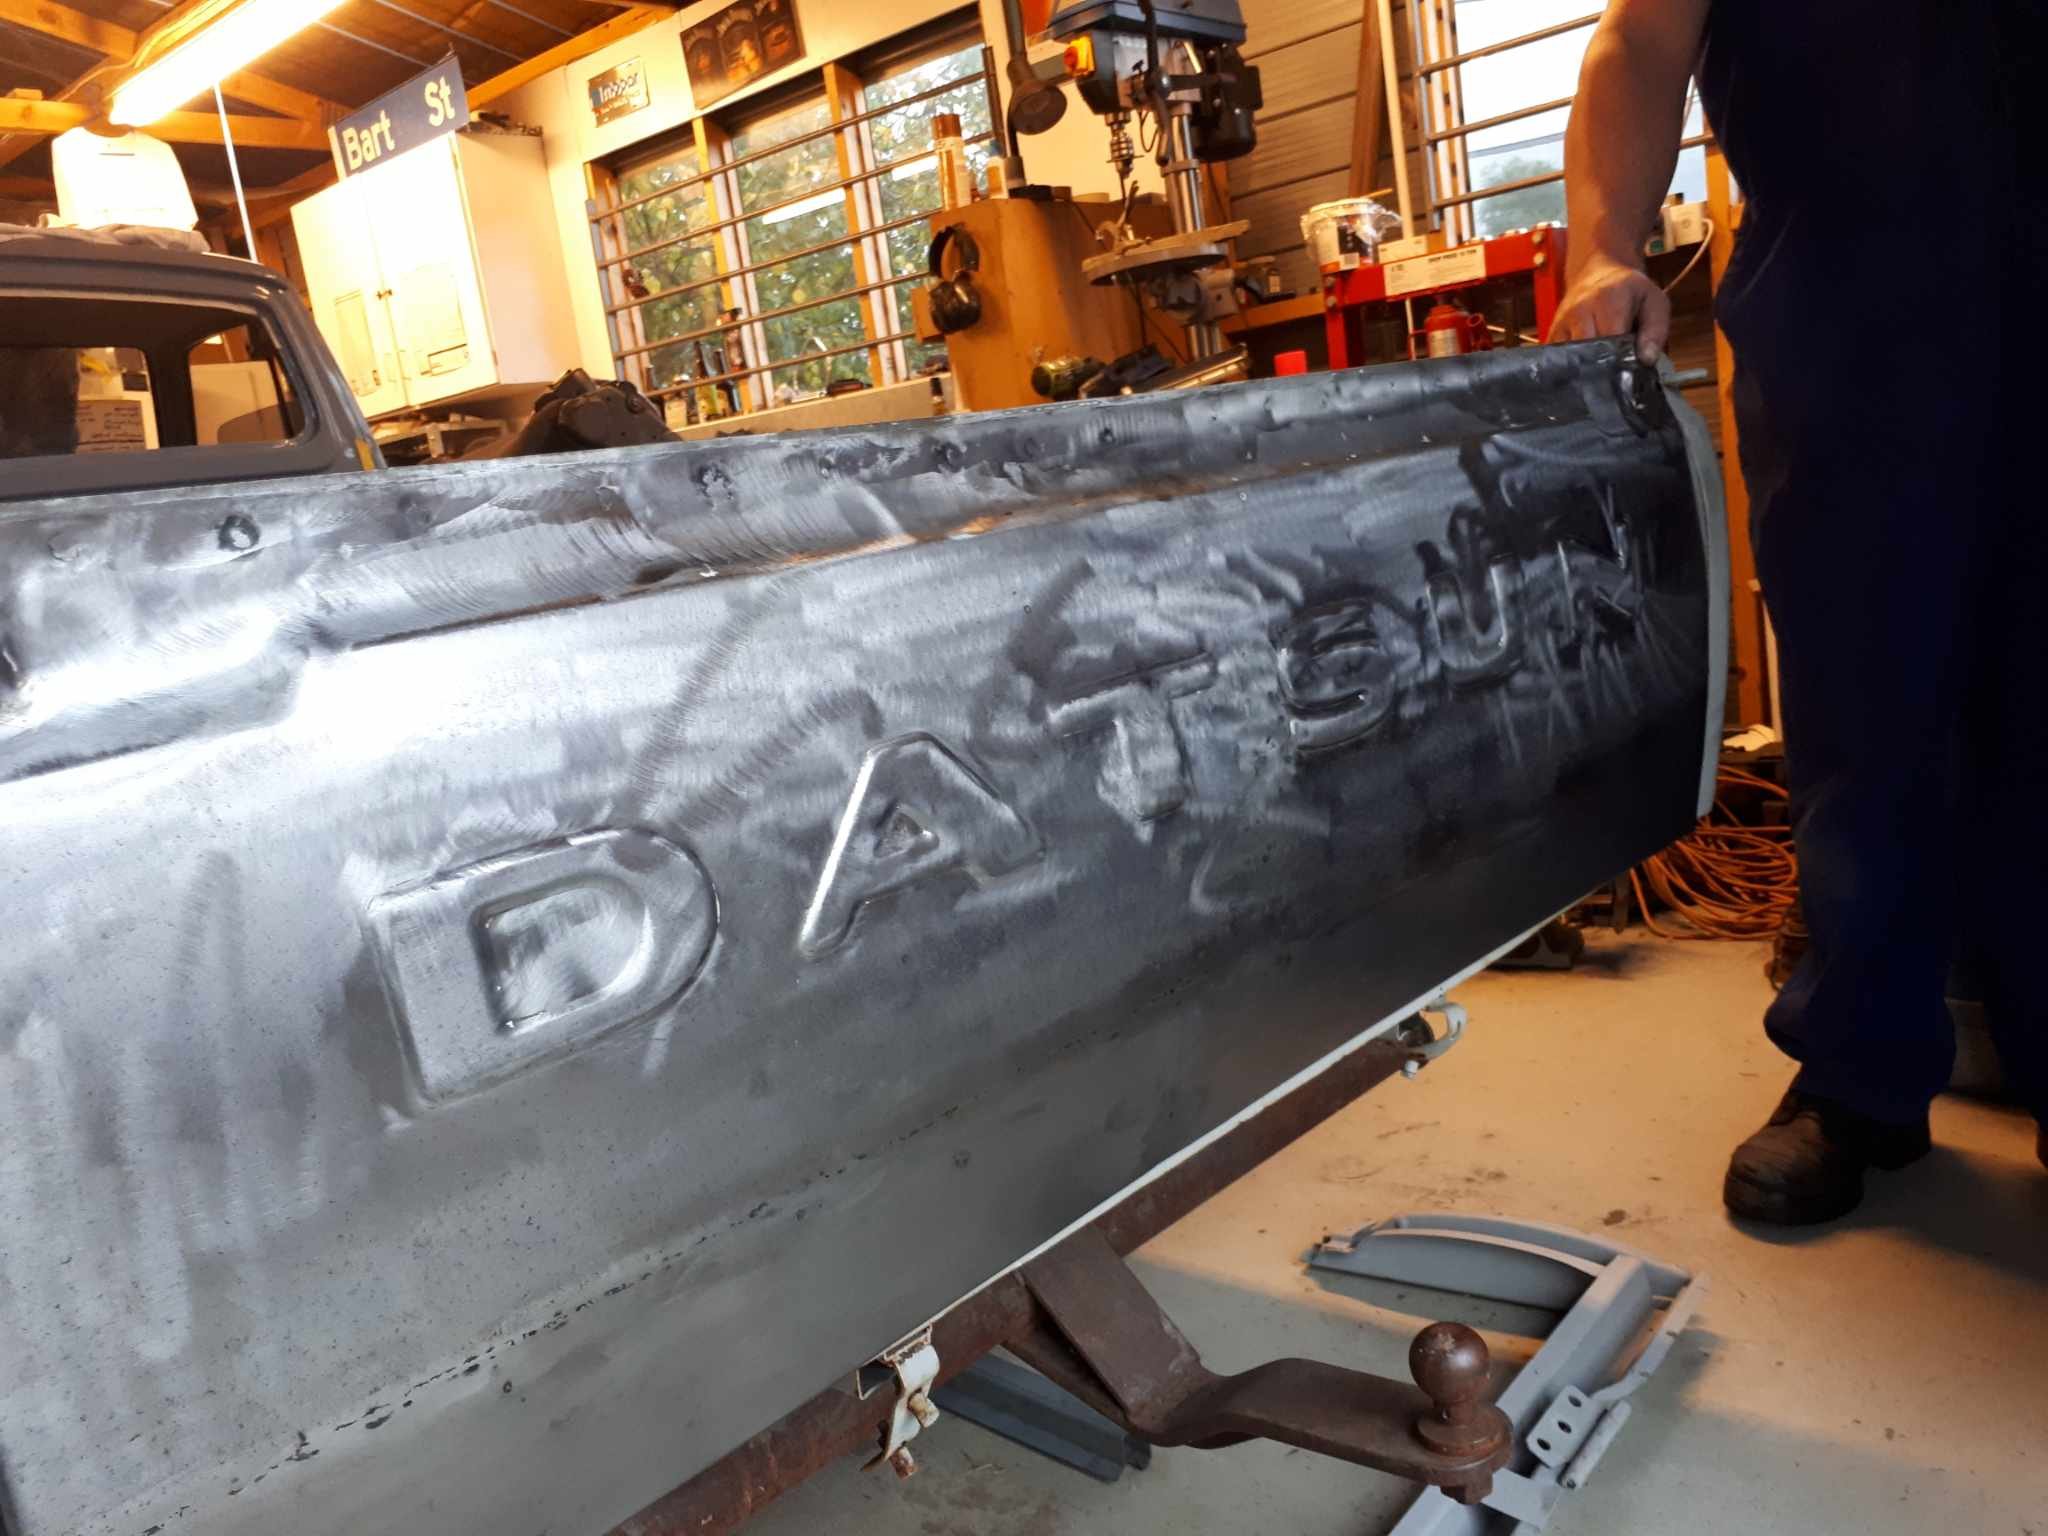
How about that wellside tray i hear you ask? Well, thats an ongoing saga. To start with, i had is sandblasted. Yep, she was a "bit" rusty. it must have been left sitting full of geass or the like i think. Anyway, i was somewhat worse for wear. Dropped it off to a mates shop, and he sid this with it. fast forward to lockdown, and i removed the floor. (It was fuuuuucked) I disovered this was a new Zealand made tray. (Possibly made in Timaru) they had a different profile on the floor, different wheel tubs, no swage around the whel arches to match the front. I replaced the floor with like for like. And a sheet metal mate halped me make new wheel tubs too. ( @JustHarry grafted these in) the same mate helped me reproduce the top edges which were also different. (Harry grafted those on too) Harry also grafted in wheel arches out of some fucked front guards to mimic what a proper datsun tray would have had. The tail gate is actually off a proper datsun tray, and its needed quite a bit of fettling to fit. (The NZ tray is a bit deeper) The tray is still a work in progress. Harry has opted to make new lower sections from scratch, rather than attempting to strighten the mangled mess that was there before.
38 points
-
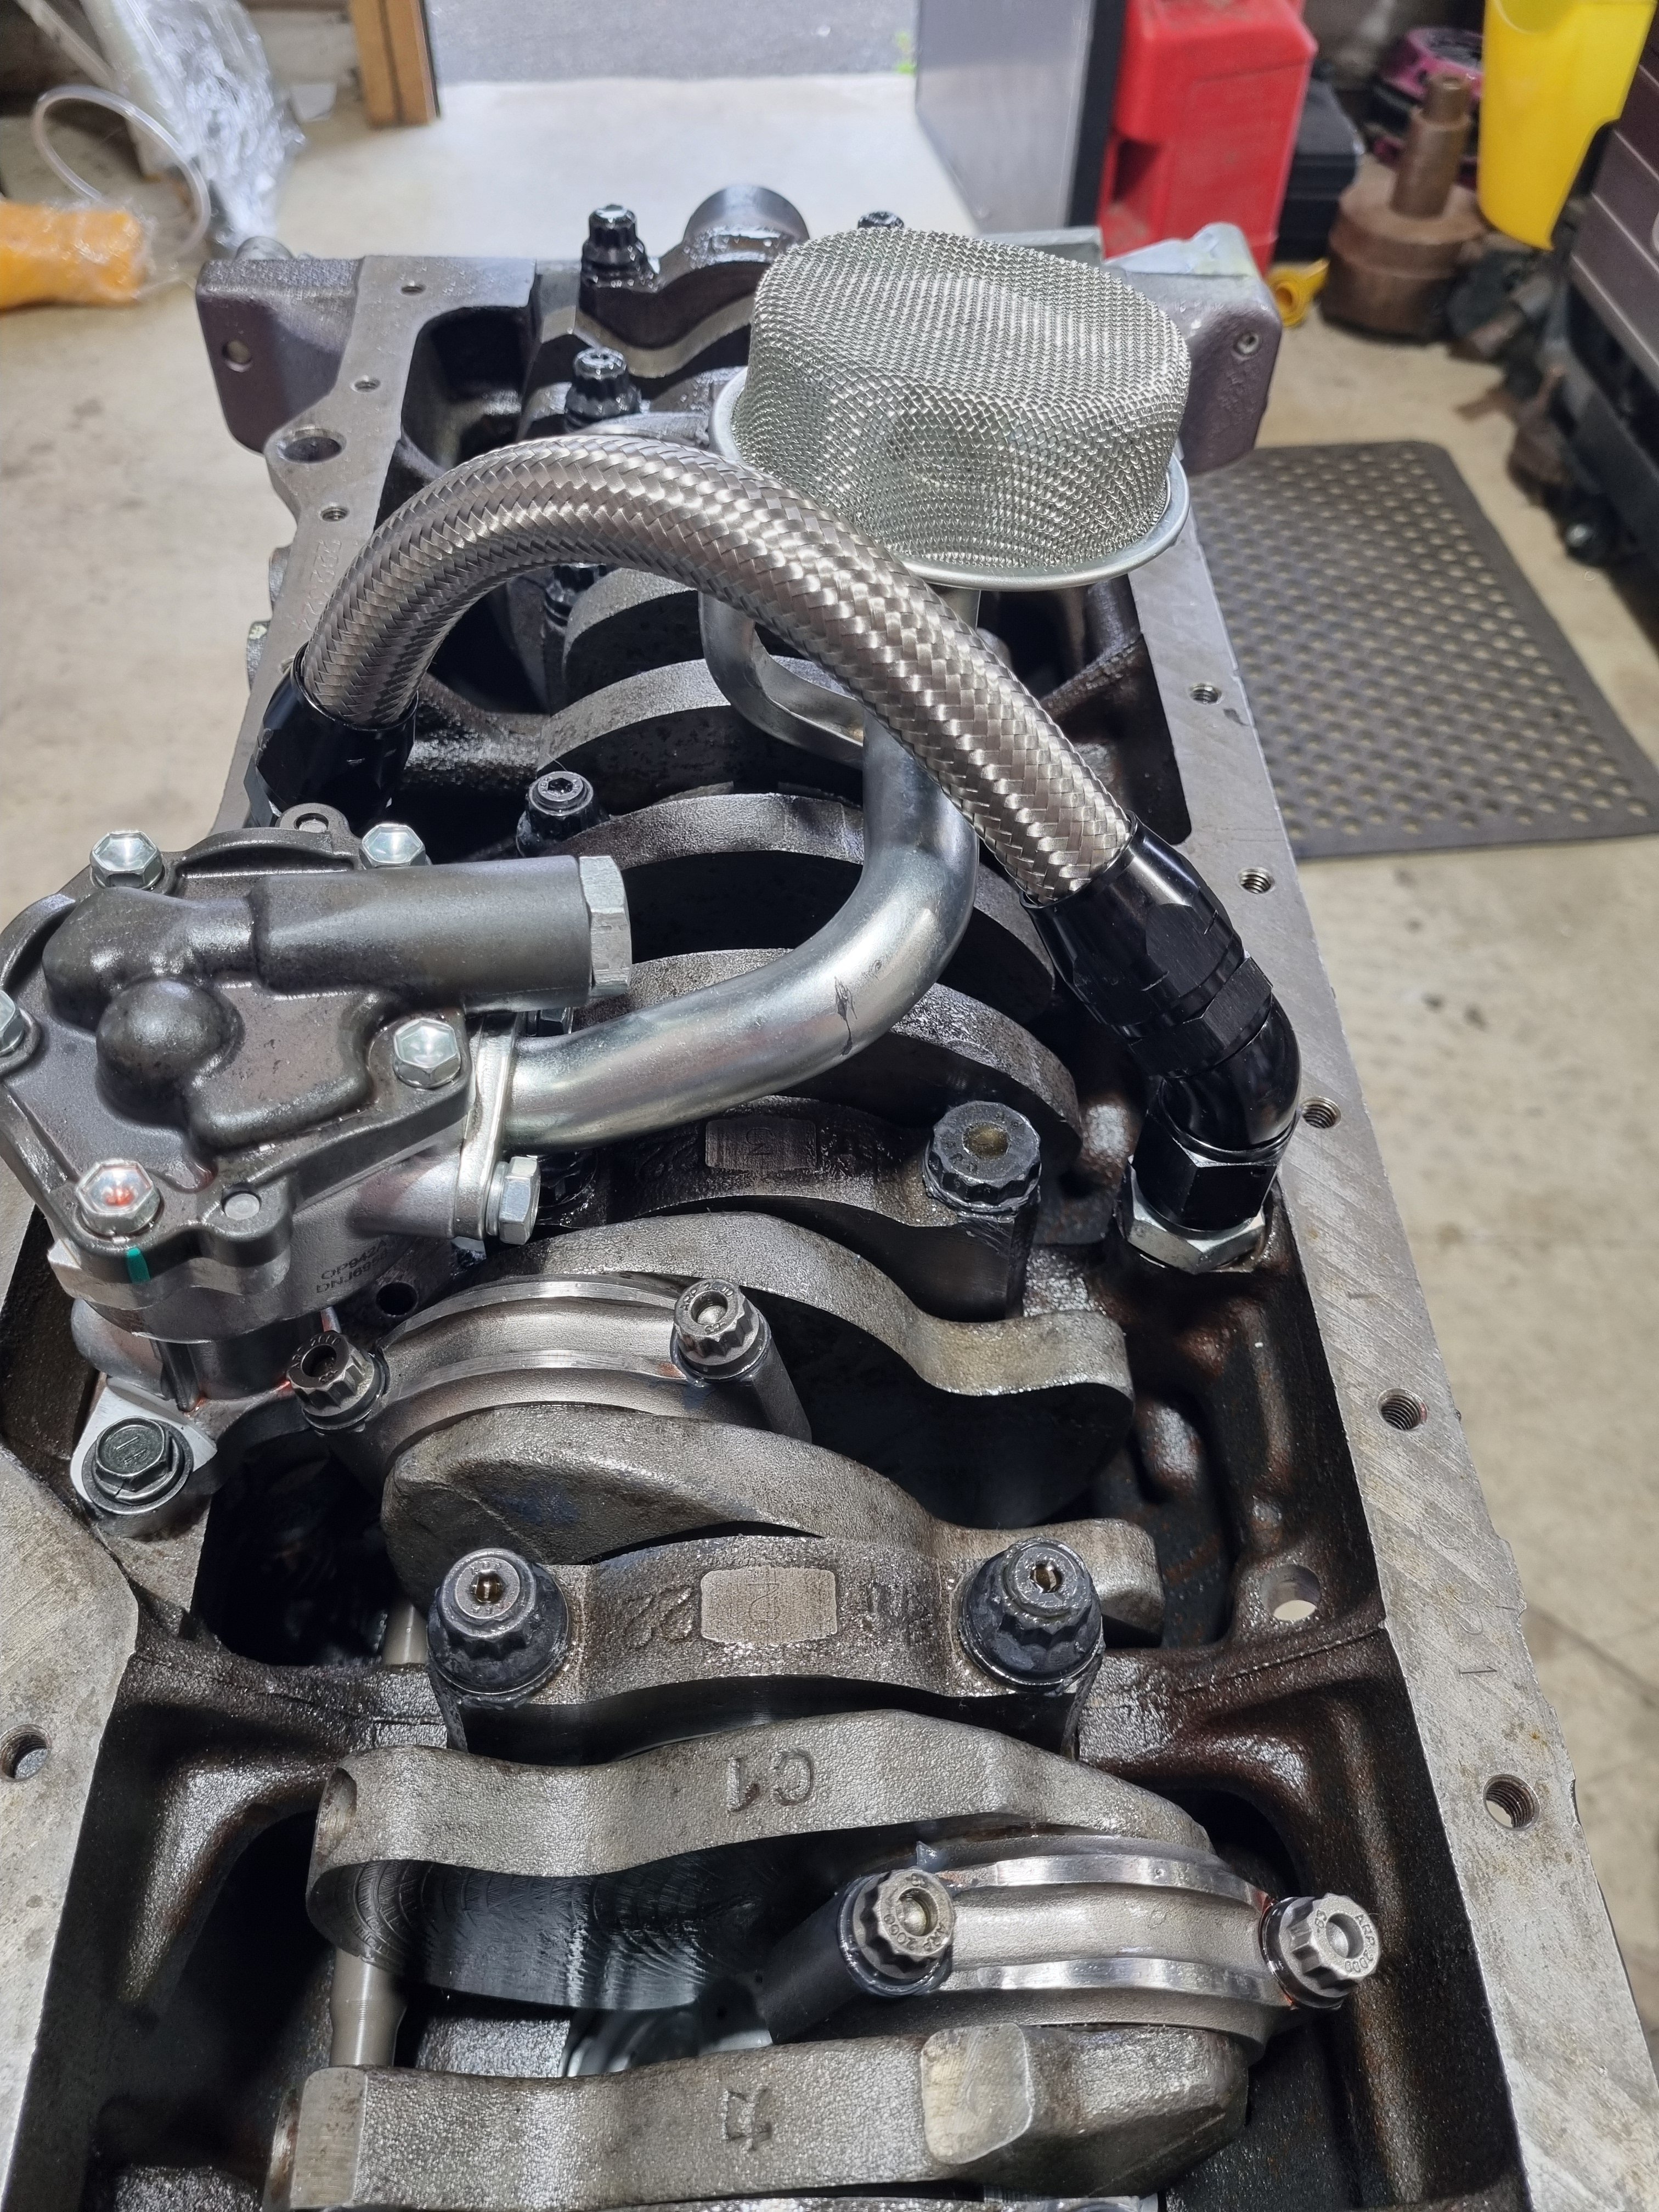
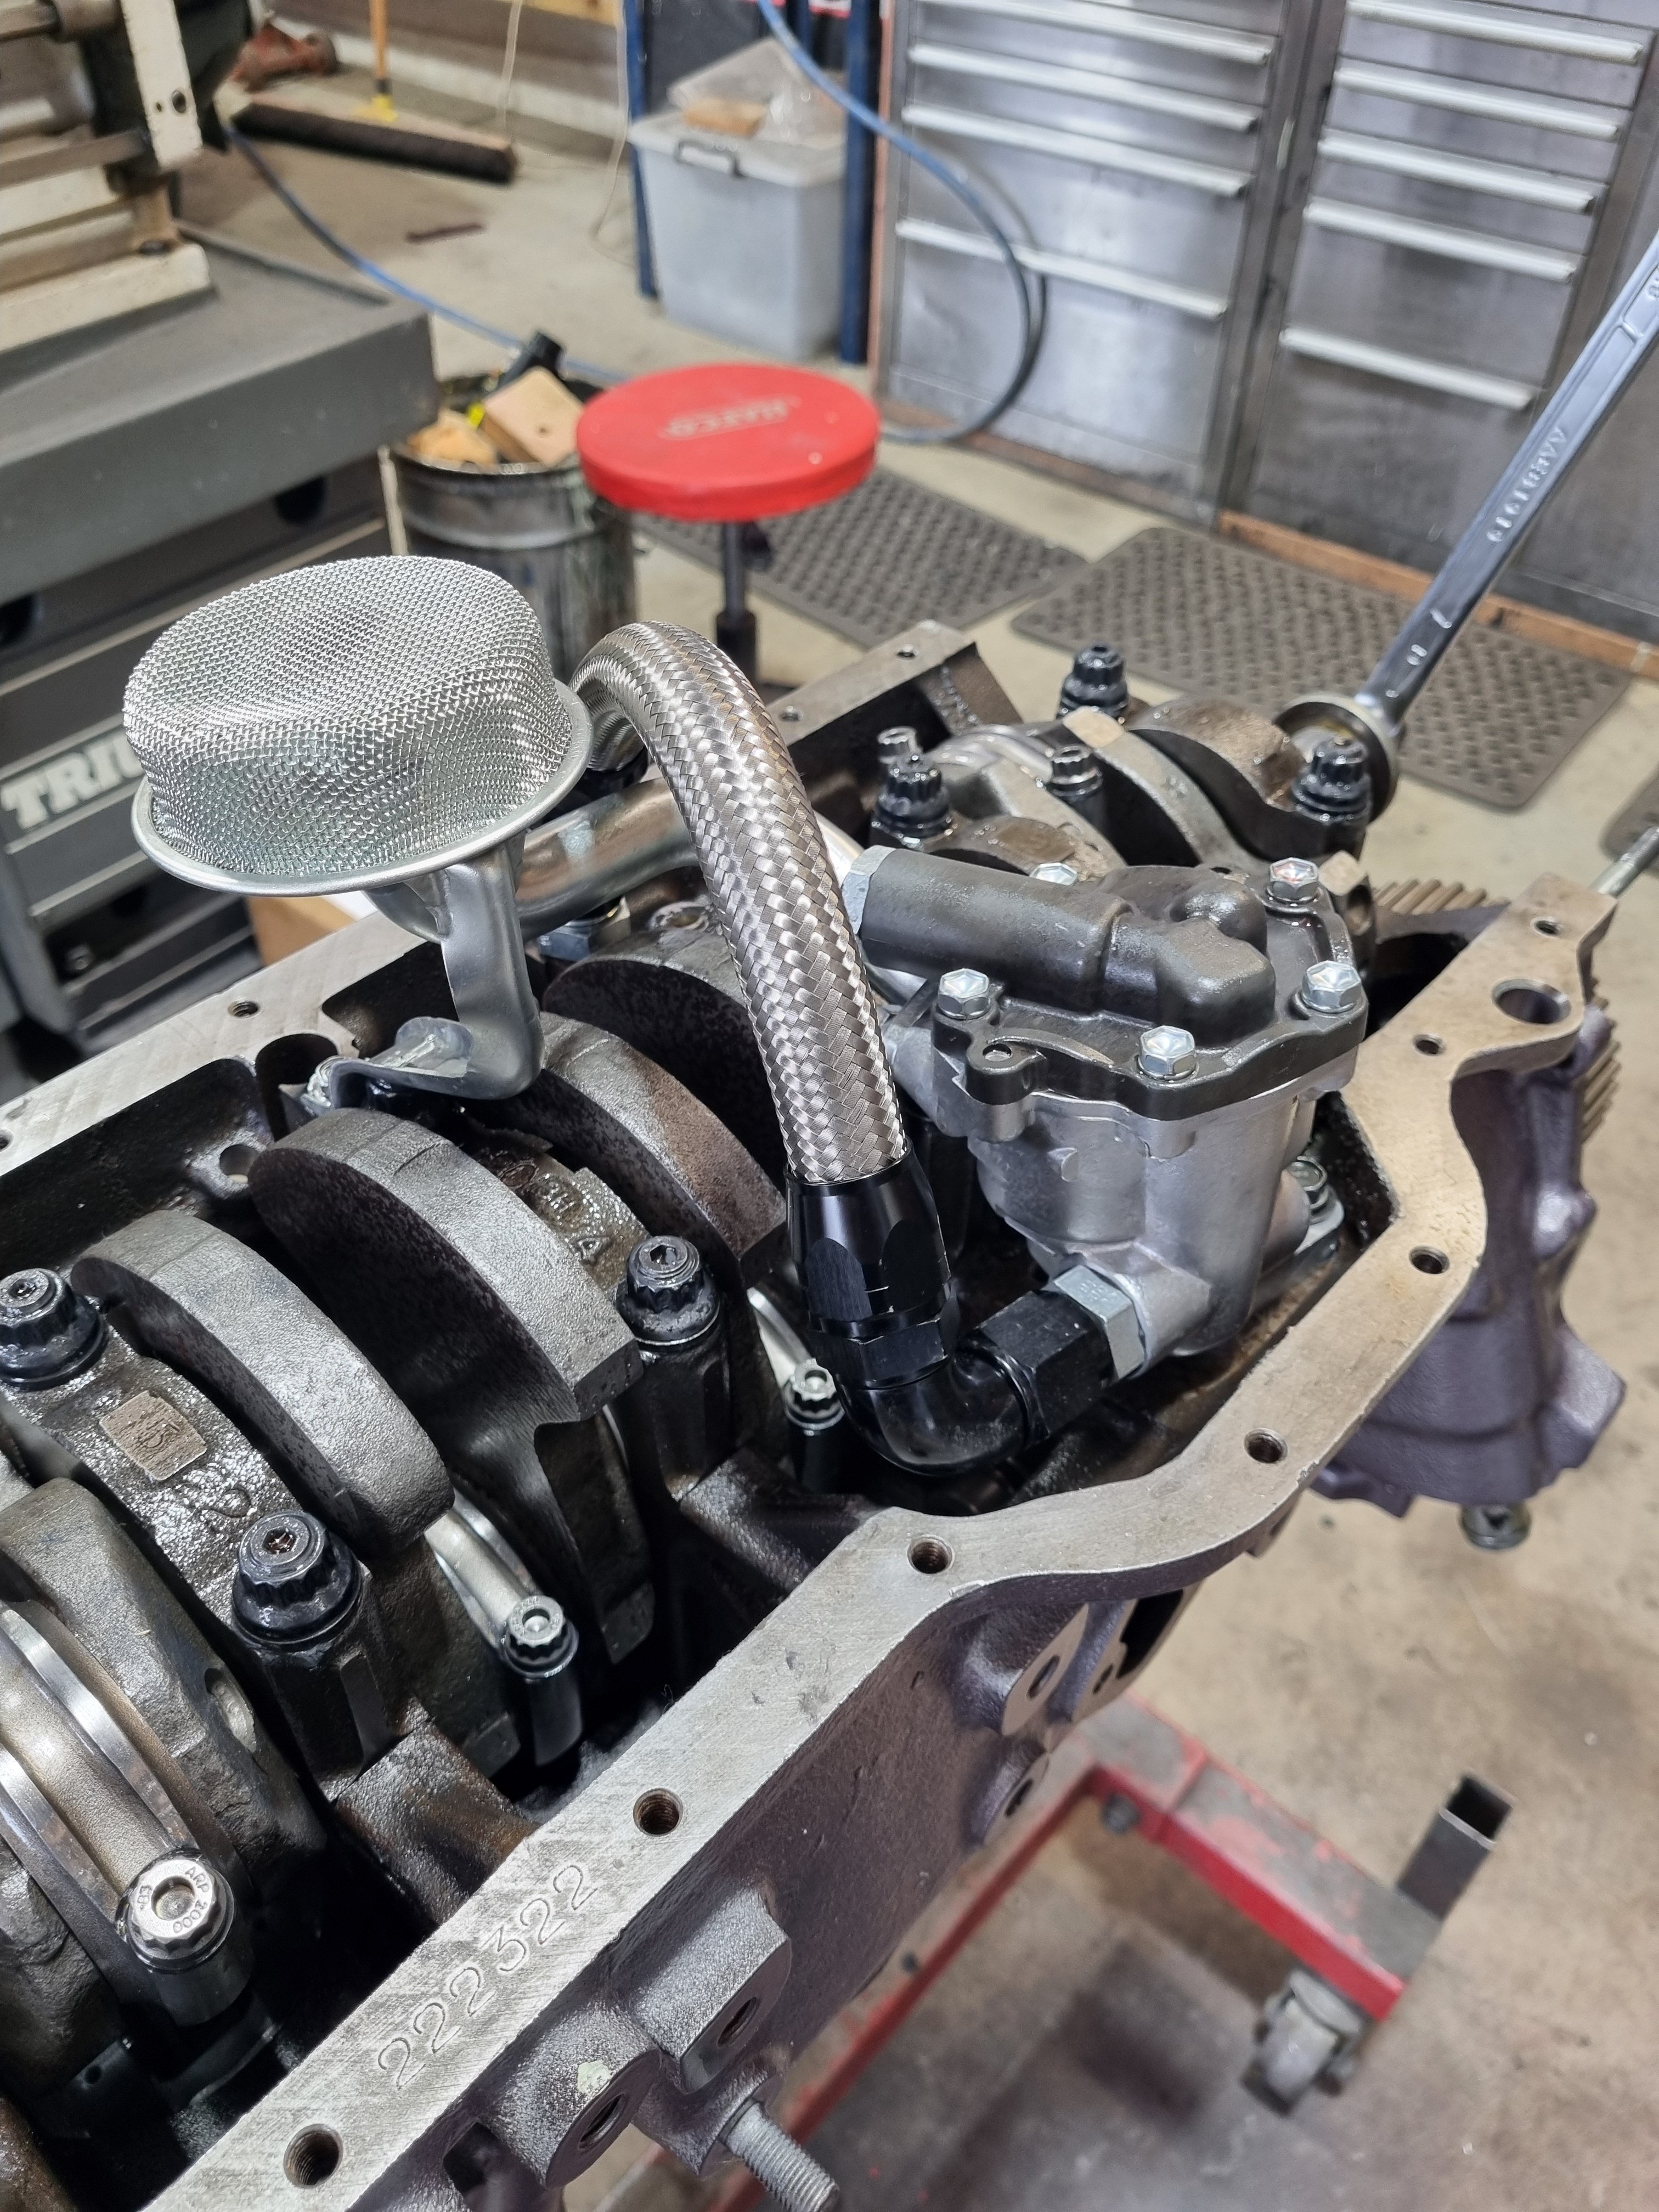
Final oil pump and pickup setup. Slotted pump hole to rotate the pump a bit. Dash 10 crossover pipe with a bit taken out of the block to clear the pipe. 7M oil pump pickup raised 8mm to clear the shallower sump and relocated pickup brace.
36 points
-
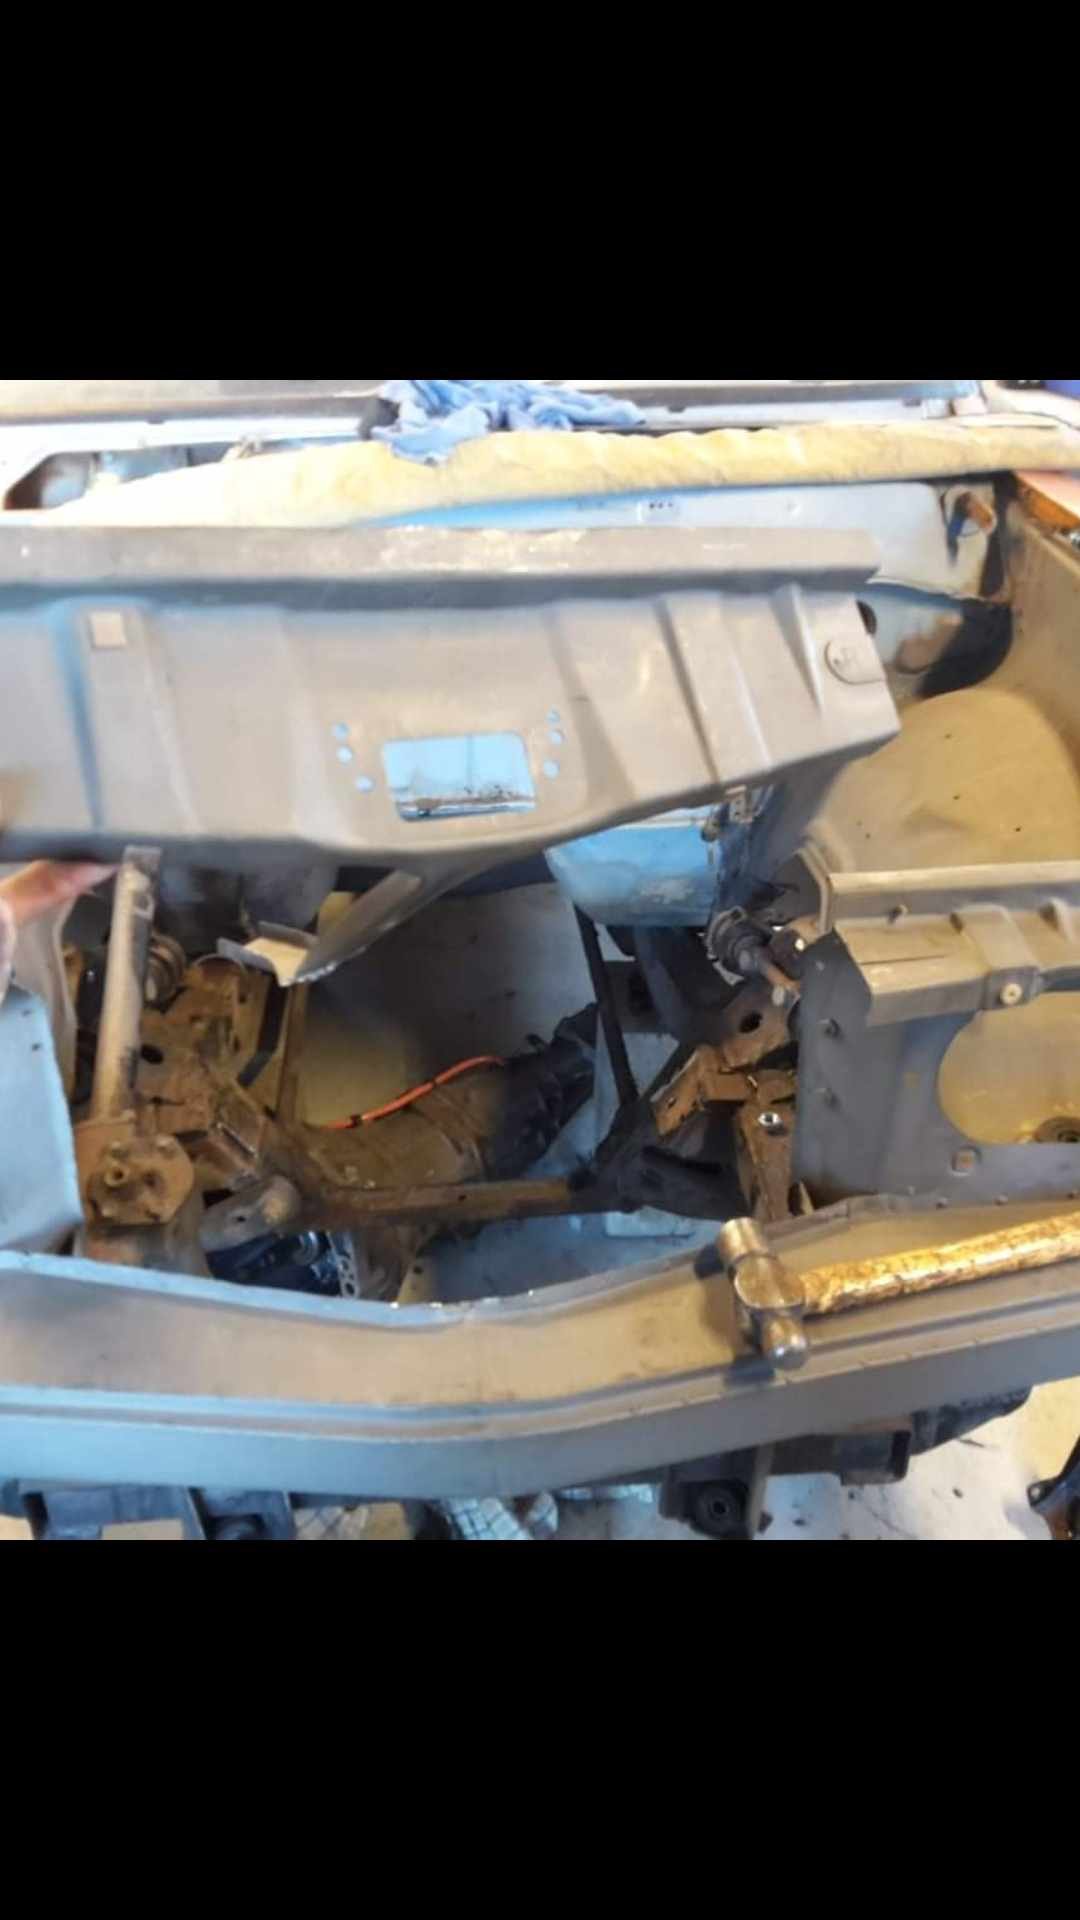
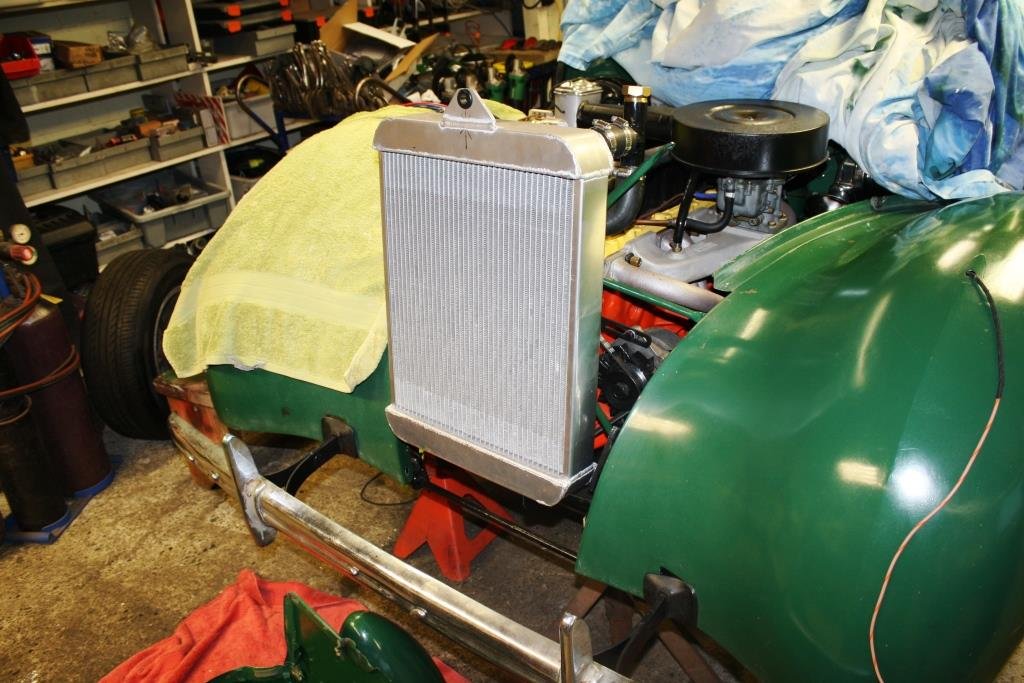
The donor front/radiator support panel came from a farm ute, which had had an L16 repower. Some butcher had gas cut the radiator supporr panel out so they could fit the larger L16 radiator. I tidied this up as best i could (not very well) and got a mate to make me a custom Aluminum radiator to fit in the space i had.
35 points
-
Well after the last novel length wall of text I'll try to keep this update shorter otherwise I'll never finish the thing. Lots of little jobs starting to pop up on my 'to do' list. Driveshafts. Connecting the scooby shafts to the imp axles. A job I wasn't sure which direction I'd take as there's so many different ideas out there on the nerdnet showing 'the best' way to join shafts. First thing I did was to double check the suspension travel allowed by the stock shock absorbers and then use those datum points to work out if there was any growth in the length of shaft required as the wheel moves through it path up and down. There was minimal amount, like maybe 5mm at the very most. I guessed as much because the stock Imp driveshaft doughnuts dont allow for much sideways travel. I then cut one of my 22mm scooby shafts down in length so I could work out the lengths required with the CV joint in place. This move I soon regretted. I was allowing for plenty of plunge into the CV joints to make sure the whole joint could be removed from the box stub axle with the box pushed sideways when removing the transmission. I was happy with the length and then decided to go visit a local hotrod builder friend for some advise. He's well known about for his many many full scratch builds and has done heaps of driveshafts in his time (a fellow machinist by trade too) I showed him the two ways I was considering doing the join. He showed me a better way. Shrink some bored out yokes cut off from some spare axles. Plenty of meat, will never let go and even if they somehow did loosen and spin they cant come out because there's not enough travel in the CV joint to allow them to. No welding needed. He's run axles done in the same way with some serious big block power and they never let go. Just has to be accurate and luckily its the sort of machining/fitting job I like. But i needed to start with almost full length scooby shafts to do it, of which I was now down on.. Roll eyes and back to the wreckers to see this beauty get pulled from the hedge... Hannah helped me remove the shafts. It was her birthday too so wow, what a treat. She got visit the wreckers and get oily. Got home and the shafts didn't fit my CVs. Bigger diameter end. Really weird because I checked online... ha. It lies. Turns out some late 4wd Leones had even bigger axle ends than the imprezzas. Also odd is that one shaft is 22mm and the other side 24mm, although both the same length. Back to the wreckers. This time I got larger 25mm shafts with the smaller ends from front wheel drive Imprezzas. I grabbed two pairs. Same again, 22mm on one side and 25 on the other. Now I had two of each. Got home and spent some time cleaning them up, outside because petrol fumes. Cleaned up the spare pair of axles in the lathe to make sure I had an accurate clamping spot for the later boring. Good quality steel! I turned them down to less than the 23mm bore size and chopped the yokes off. Made lots of swarf Bored out to bang on 23mm with nice radius. Double checked and triple checked I had my lengths required correct. Chopped the two 25mm scooby shafts down to length and turned a step down on one end of each, a radiused step to stop any stress risers. I went for .0015"~.002" interference. Go online and see the debates between all the barries about what a good shrink fit should be There's many variables as well. I consulted my old faithful machinery's handbook. I wanted it tight, but not stressed. Luckily the axle is of good steel. I also made a sample first, using one of the cut off bits of scooby shaft and some 4340 I machined to the same outer dimensions as the yoke. This way I was able to test how hot I needed to get it to expand enough to drop in place. I'll take this to a local engineers who have a press with a pressure gauge and see how much force it takes to wreck this thing Here's about a one hundredth of a millimetre (iirc) getting removed.. Then things got hot.. photos taken after it was done because I had to move bloody quick! Hannah would grab the torch and I would drop the yoke in place. It was a tense bit of time. If the yokes teetered and grab they'd pull the heat so quick and shrink in place before getting to the shoulder. No removing them without damage and I only had the one pair of spare axles. It went well. I was happy and relieved. The light rust flashing off on one is simply due to that one having been left nearer the front of the workshop to cool down and it was a chilly damp start to the morning. They wired brushed up neat as, got painted with black epoxy and when that was set they had new universal joints fitted. I cant try them on the car until I remove the existing axles from the hubs but it should be fine. Next up was to sort the fuel tank out to suit fuel injection. I brought the blue imp in and checked a few ideas out on what I could do. I don't really have room for a surge tank and I never liked the noise on my Viva from the external fuel pump anyway. Nor did I like the way the fuel in the surge tank heats up. Enter the humble Nissan Micra k11 intank fuel pump and surge container... It actually looked like it was just going to fit into the pressed depression at the bottom of the imp fuel tank.. With enough room to run the imp fuel float sender next to it. Cut a hole.. It fits. I'll cut the bracket off the side at bottom of pic and it'll move sideways a bit more.. Made some metal brackets Welded them in and now I have a cradle that takes two cable ties across the top to secure. I needed a flange.... Made this. Its designed to recess the lid about 10mm below the tank top. I want to keep the tank top as flat as possible. It'll have the usual layer of foam over top but I don't want things sticking up proud when the 'frunk' is being used (cant be tearing those bags of concrete now eh....) Many holes drilled and tapped.. Carefully welded in place. Was a tricky job. Thin steel on the tank that had some sort of (probably poisonous) coating. But happy with result. I made another hole... That takes the sender. Drilled and tapped more holes to suit. Now I needed to get fuel from the outside in and from the inside out. I machined up these in stainless.. Thought of a neat way to hold the little bits together for tacking. Blue tack. Or blue tack tack? welded up.. I made an angled recess into the hatch cover so the fuel hose goes even further below the tank line. Visible in that photo are the cable connections. Again - I needed to get power in. I machined some shouldered fittings in plastic.. Luckily the micra pump so handily just uses a simple connector with 6.3 spade terminals. Under the lid... Tank hard work done. I'll paint bits and cut some gaskets. Speaking of gaskets. One of mine between my oil filter pedestal and the block is weeping oil. Plus one of the bolt heads weeps. Typical. Put a Japanese engine in a British car and turn your back for a minute... I've already drained the oil cleaned it up and ran a smear of paintable sikaflex along it and around the bolt head. I didn't take photos because not really exciting. I'll paint it silver and no one will know. Except you the reader. Next up is the exhaust I think.35 points
-
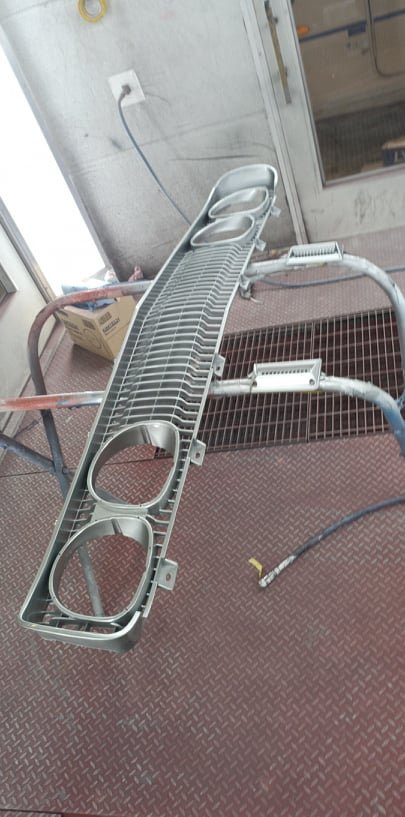
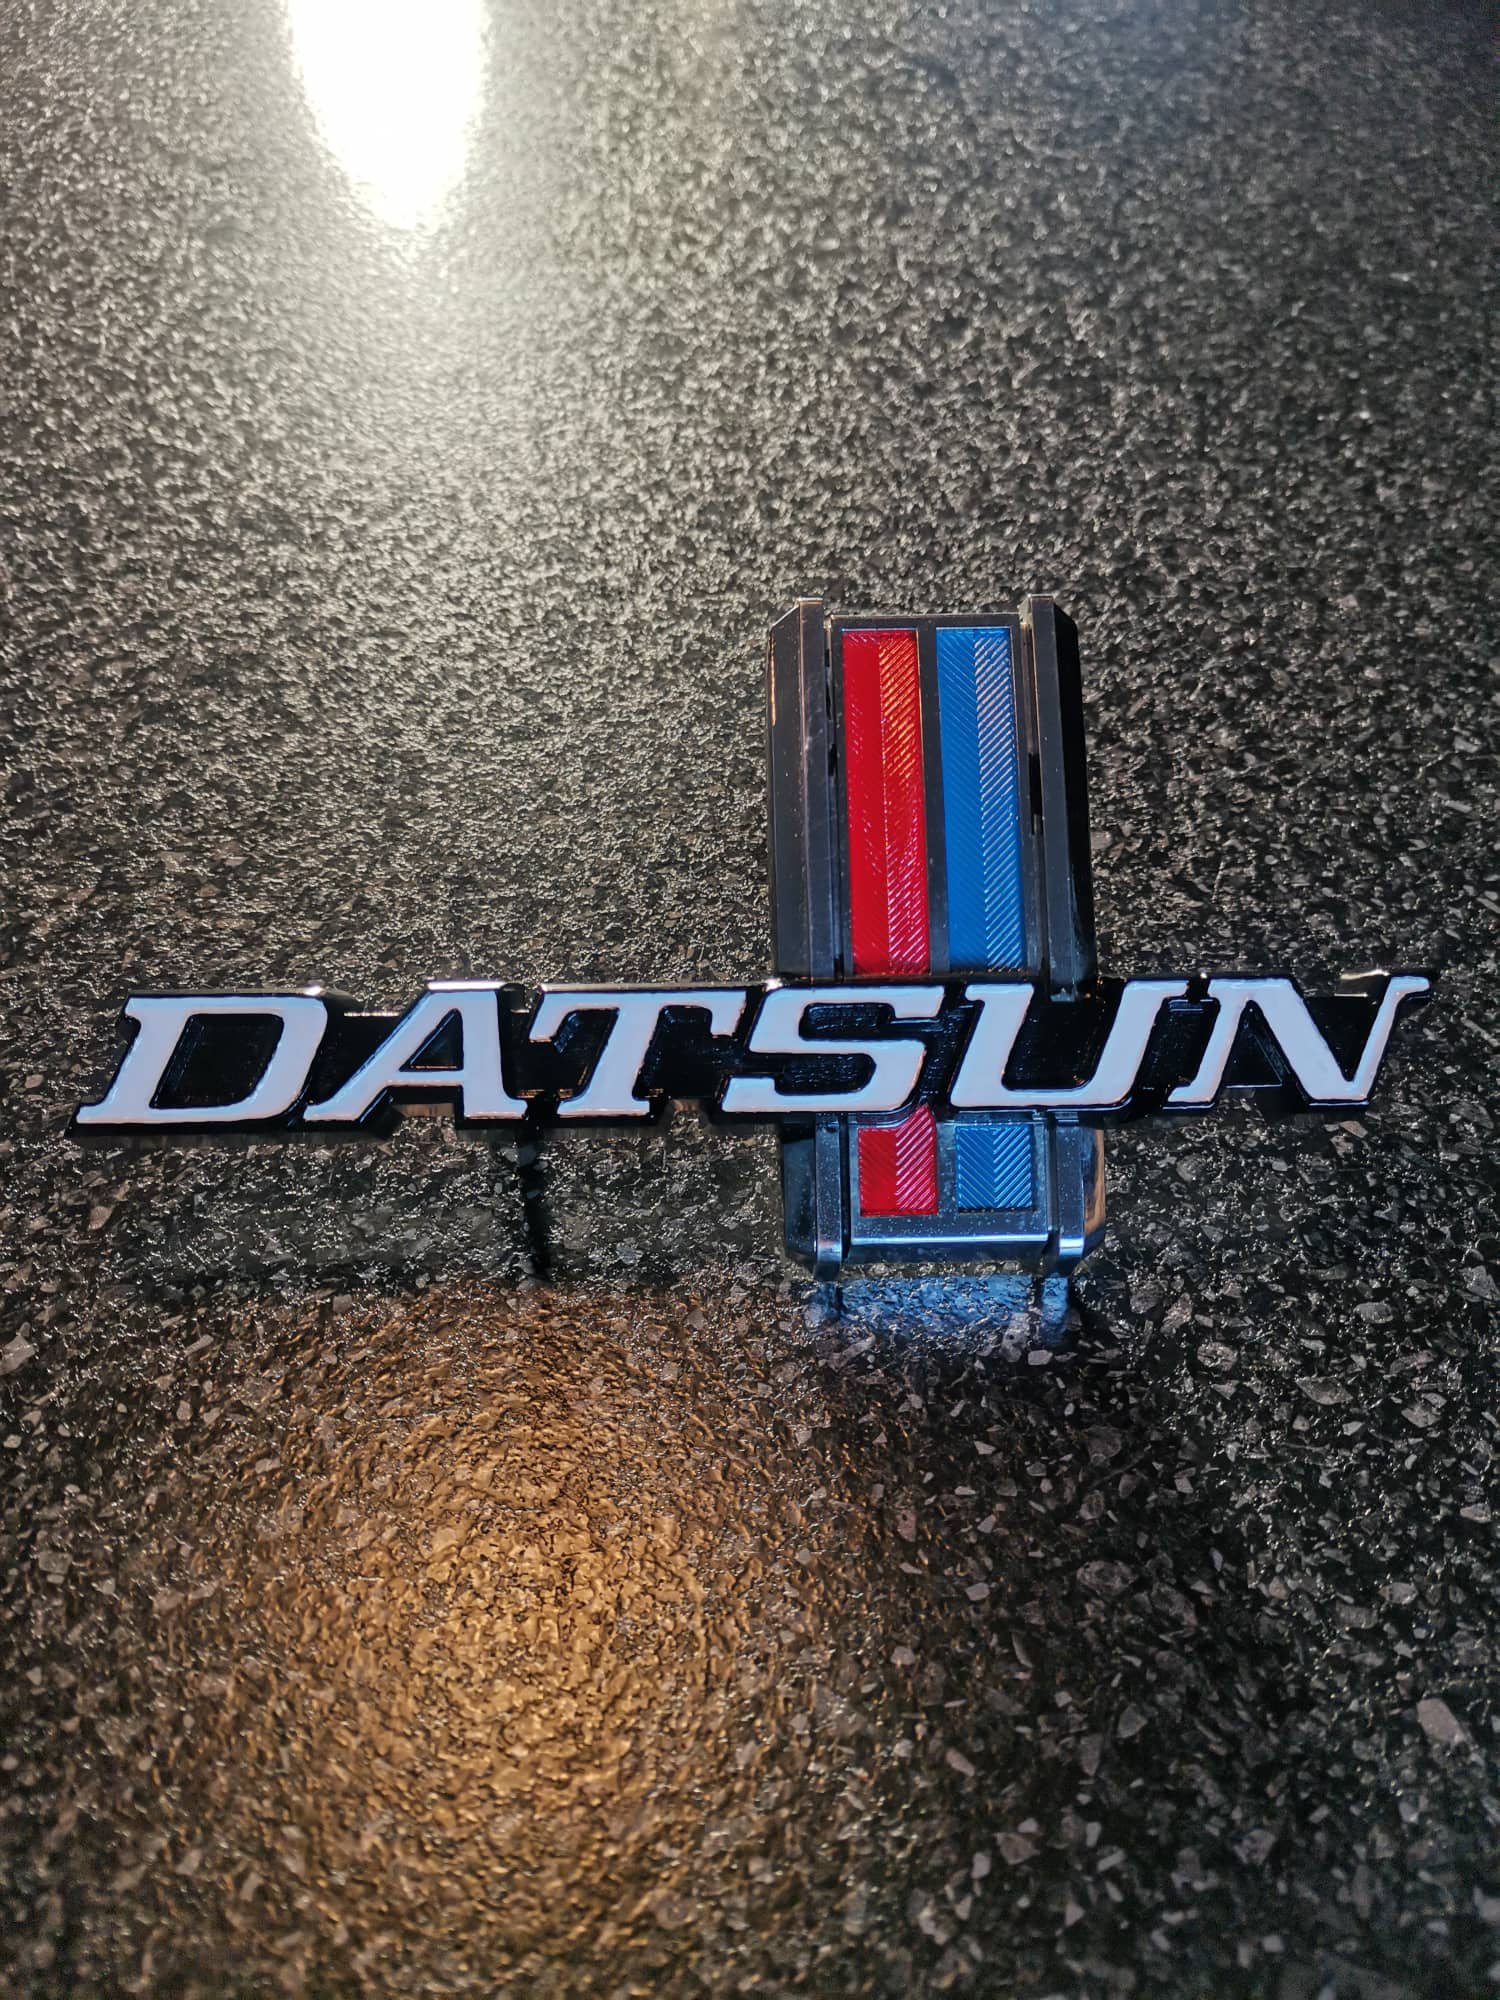
You can see the grill just didnt look nice enough with the rest of the truck painted. So once again i called on Hamish to give it a birthday for me. And the grill badge likewise looked pretty used. I enlisted the help of @filthy one mrs (Gemma from twisted sister customs) to give it a birthday for me.
33 points
-
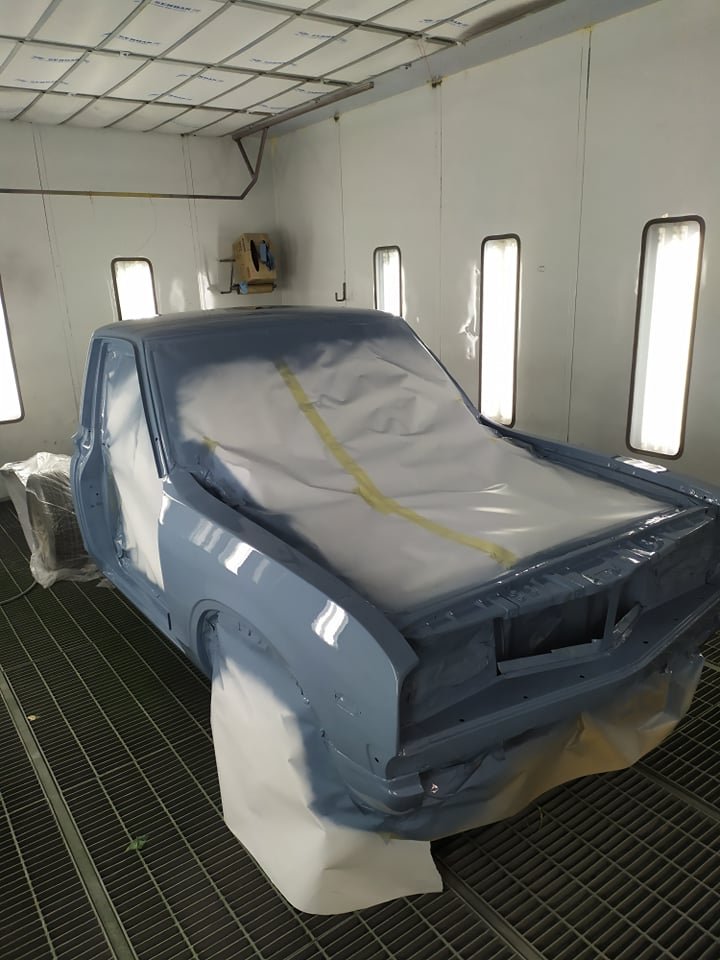
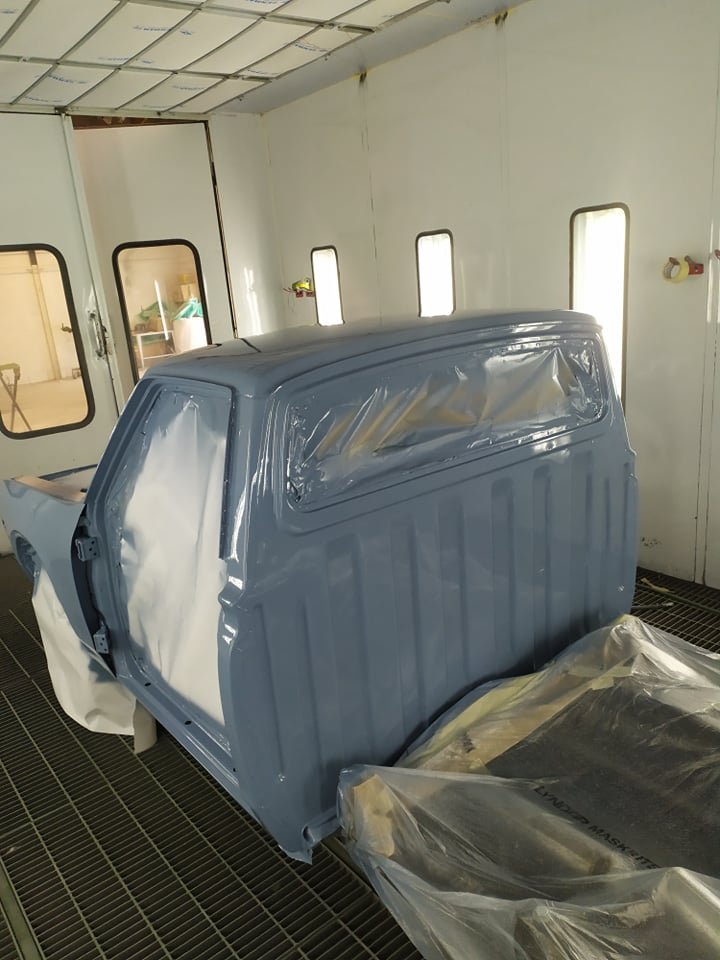
Bit of colour went on too.
33 points
-
Took it for a WOF, WOF not achieved. However there was nothing show stoppy in there. A wheel bearing with too much play, a steering tie rod end, and the right rear brake had a lot of fluid around. This one was a little weird when we first bled it, it wasnt passing fluid initially but then it came free. It might be the handbrake adjustment playing up. It might just be all the fluid used during bleeding, anyway I'll have a looksee. And the low beams were not working, but I am pretty sure its the switch playing up. So overall nothing bad or even unexpected. And just look at that awesome wedgyness;
32 points
-
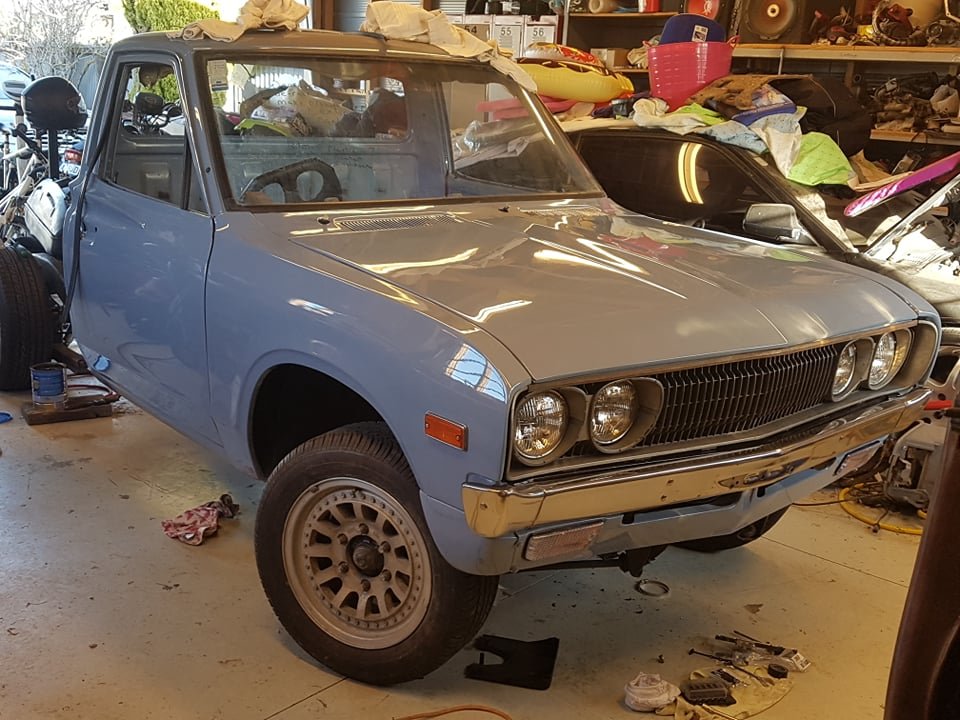
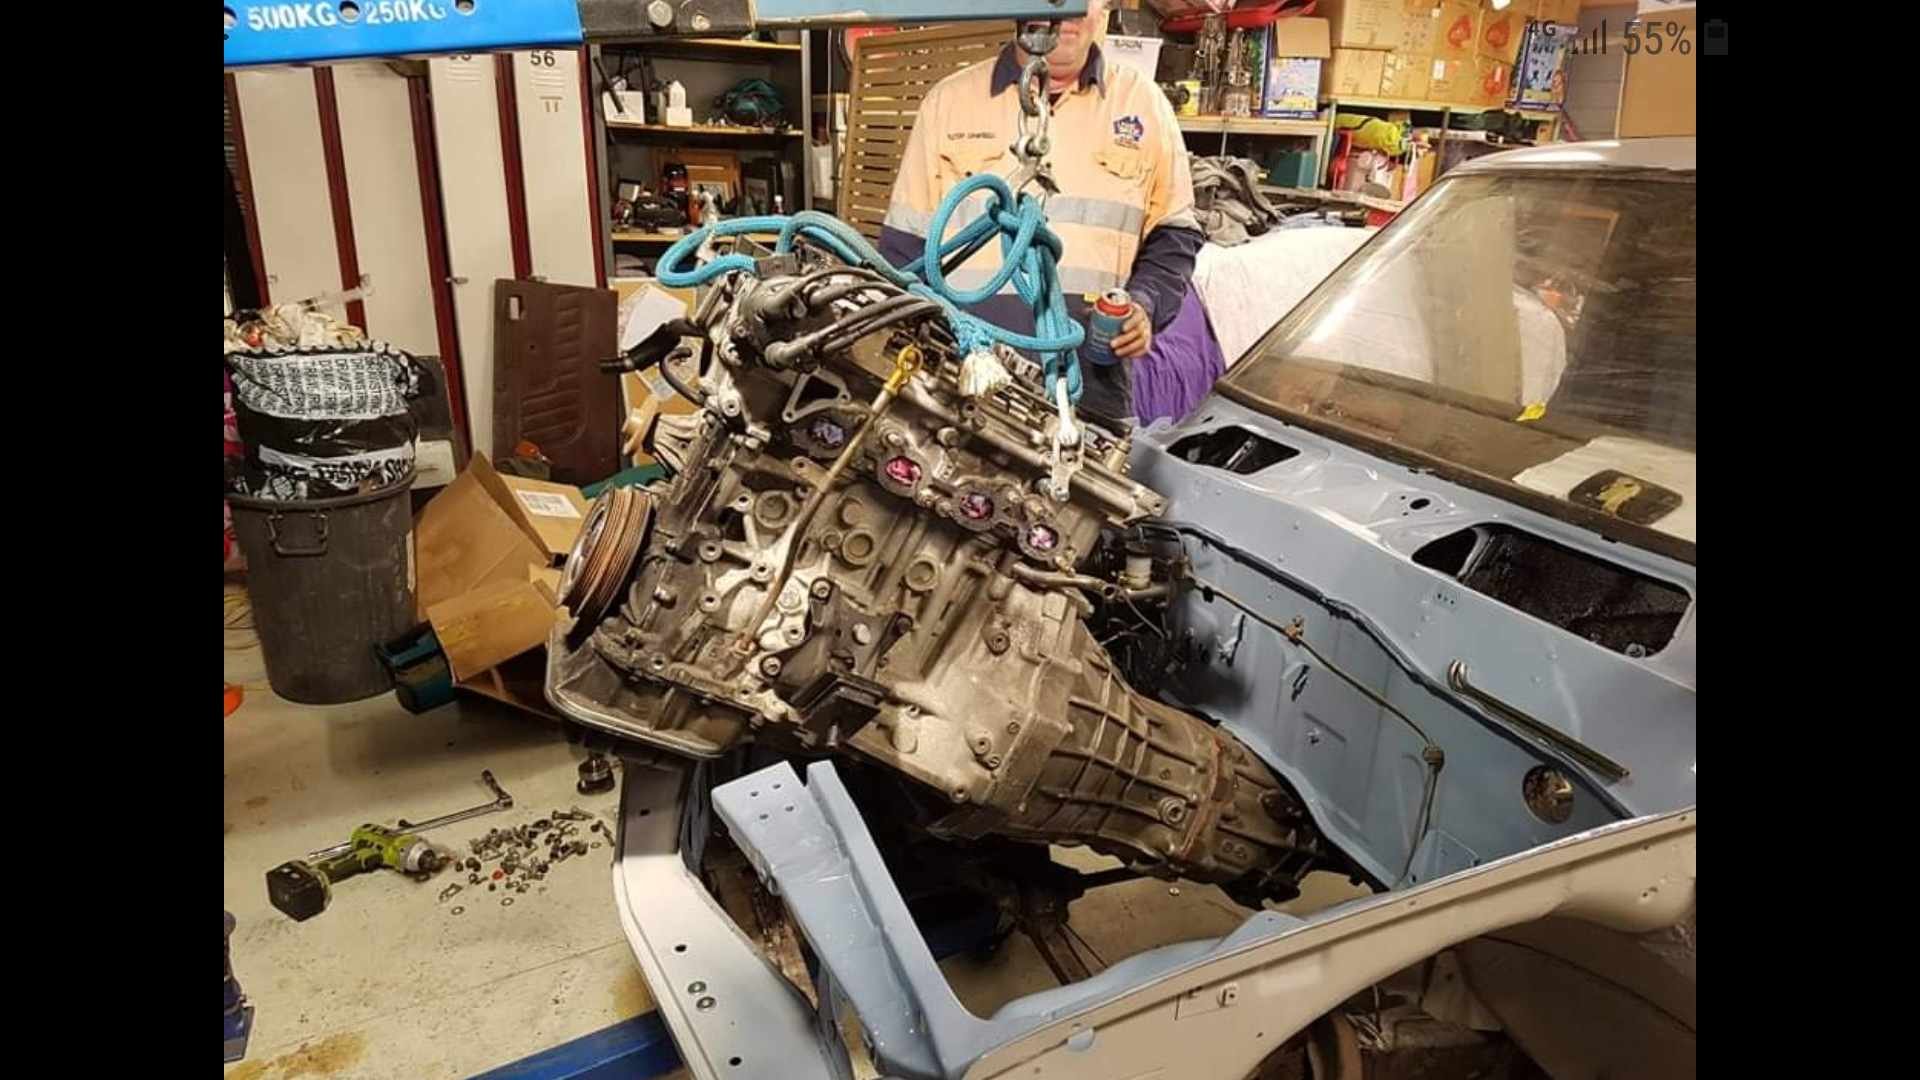
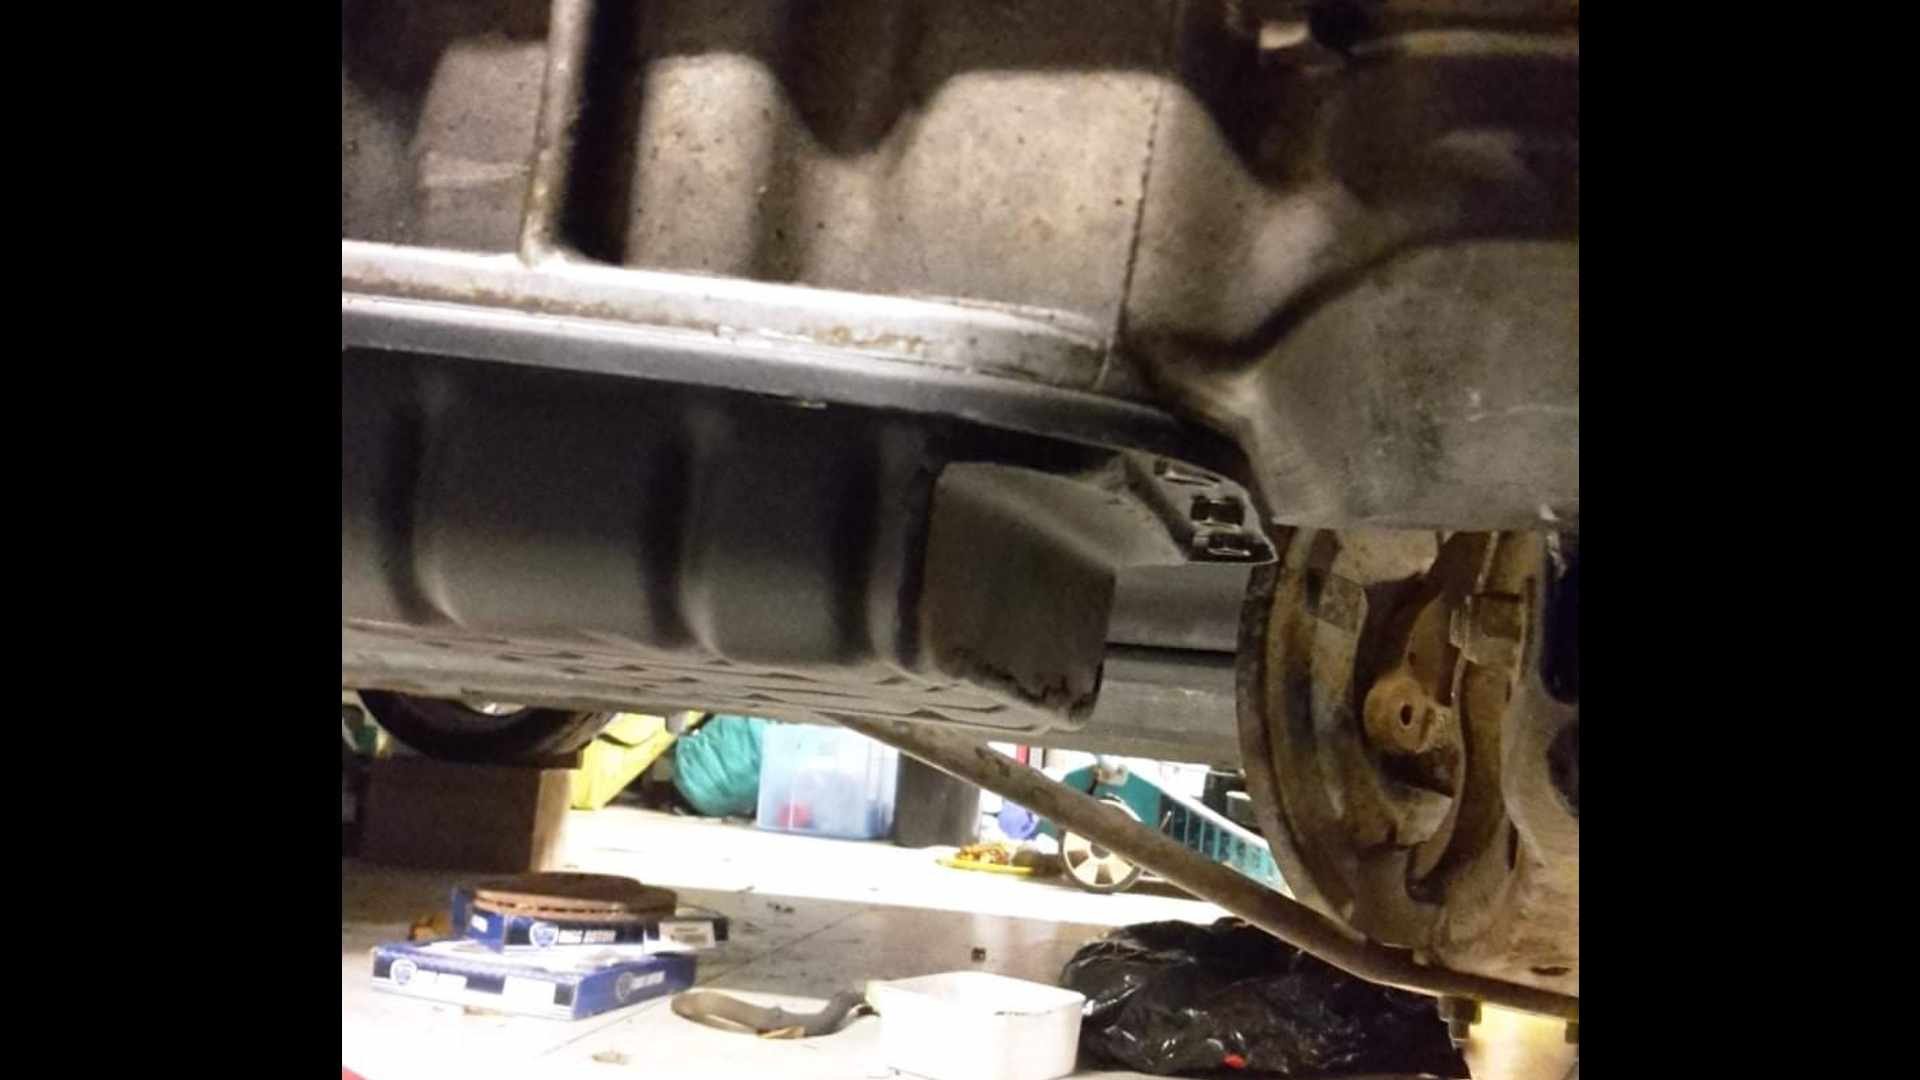
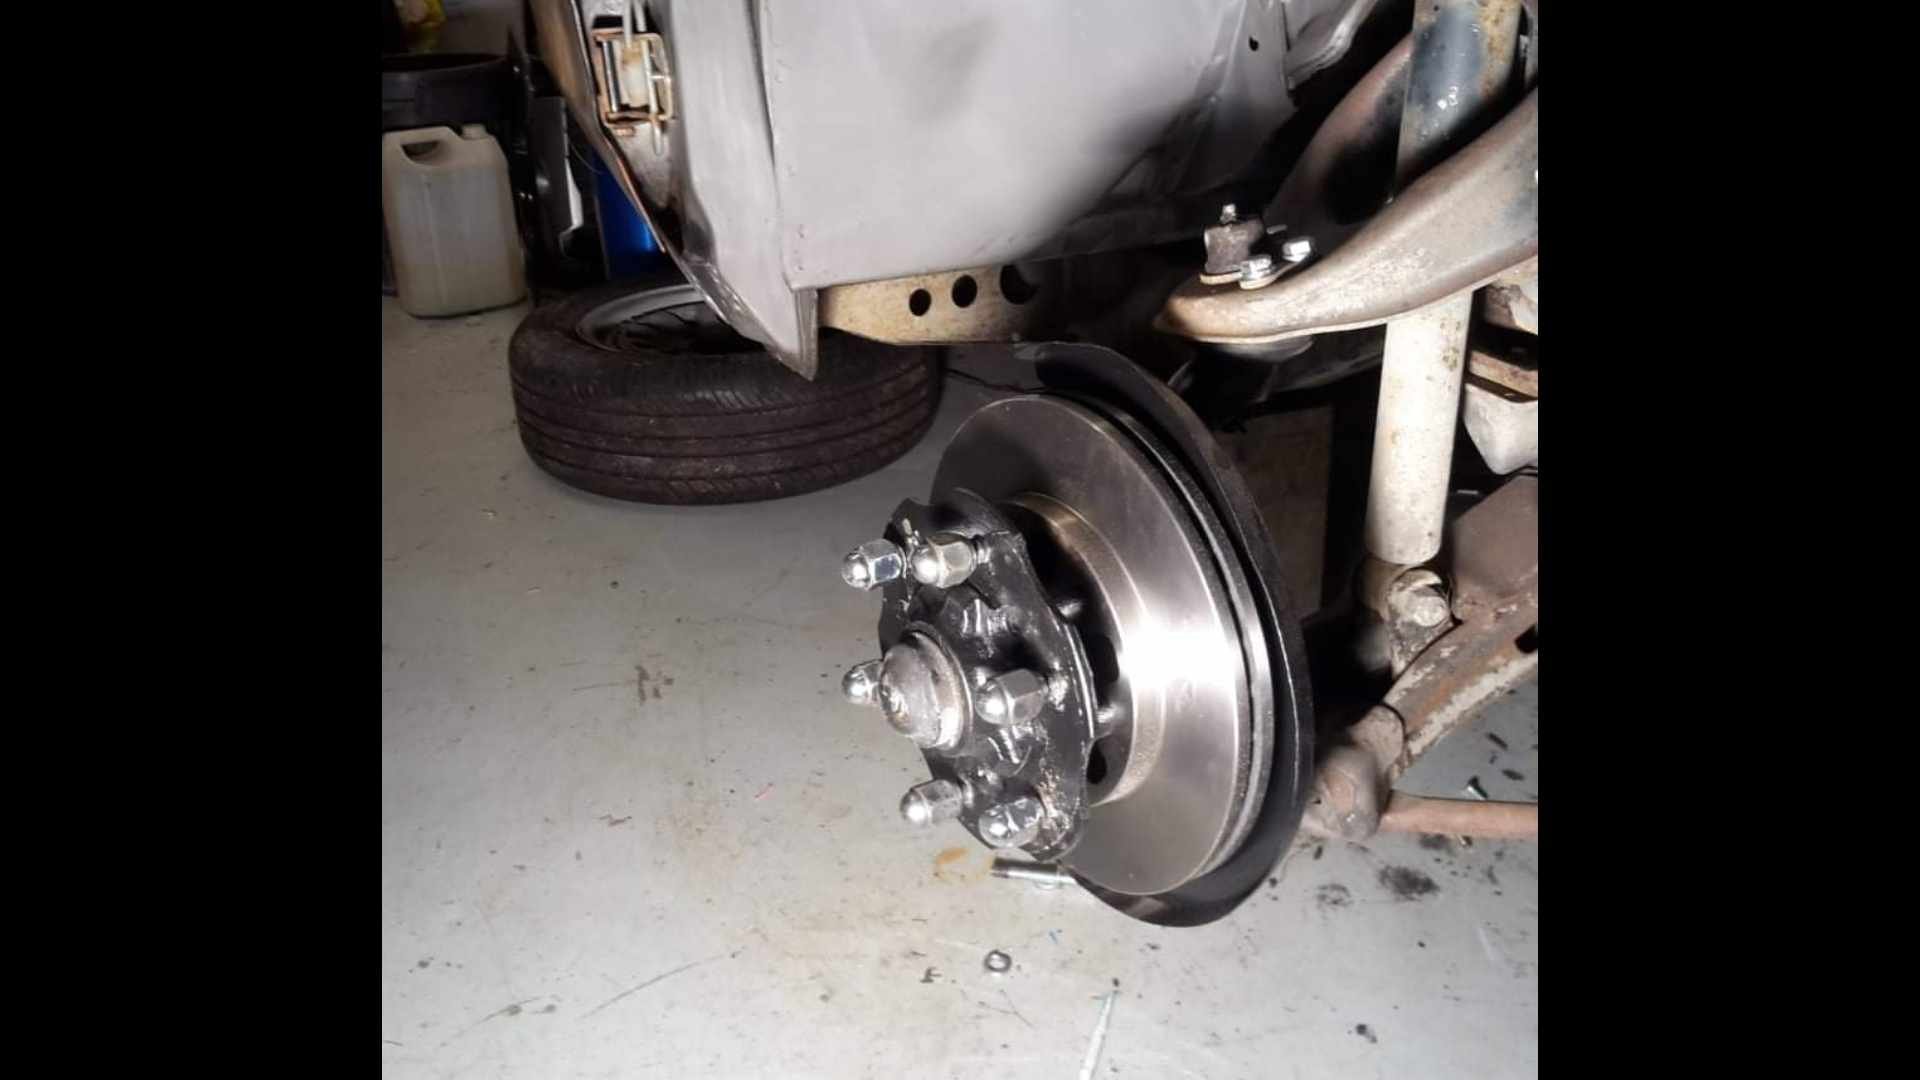
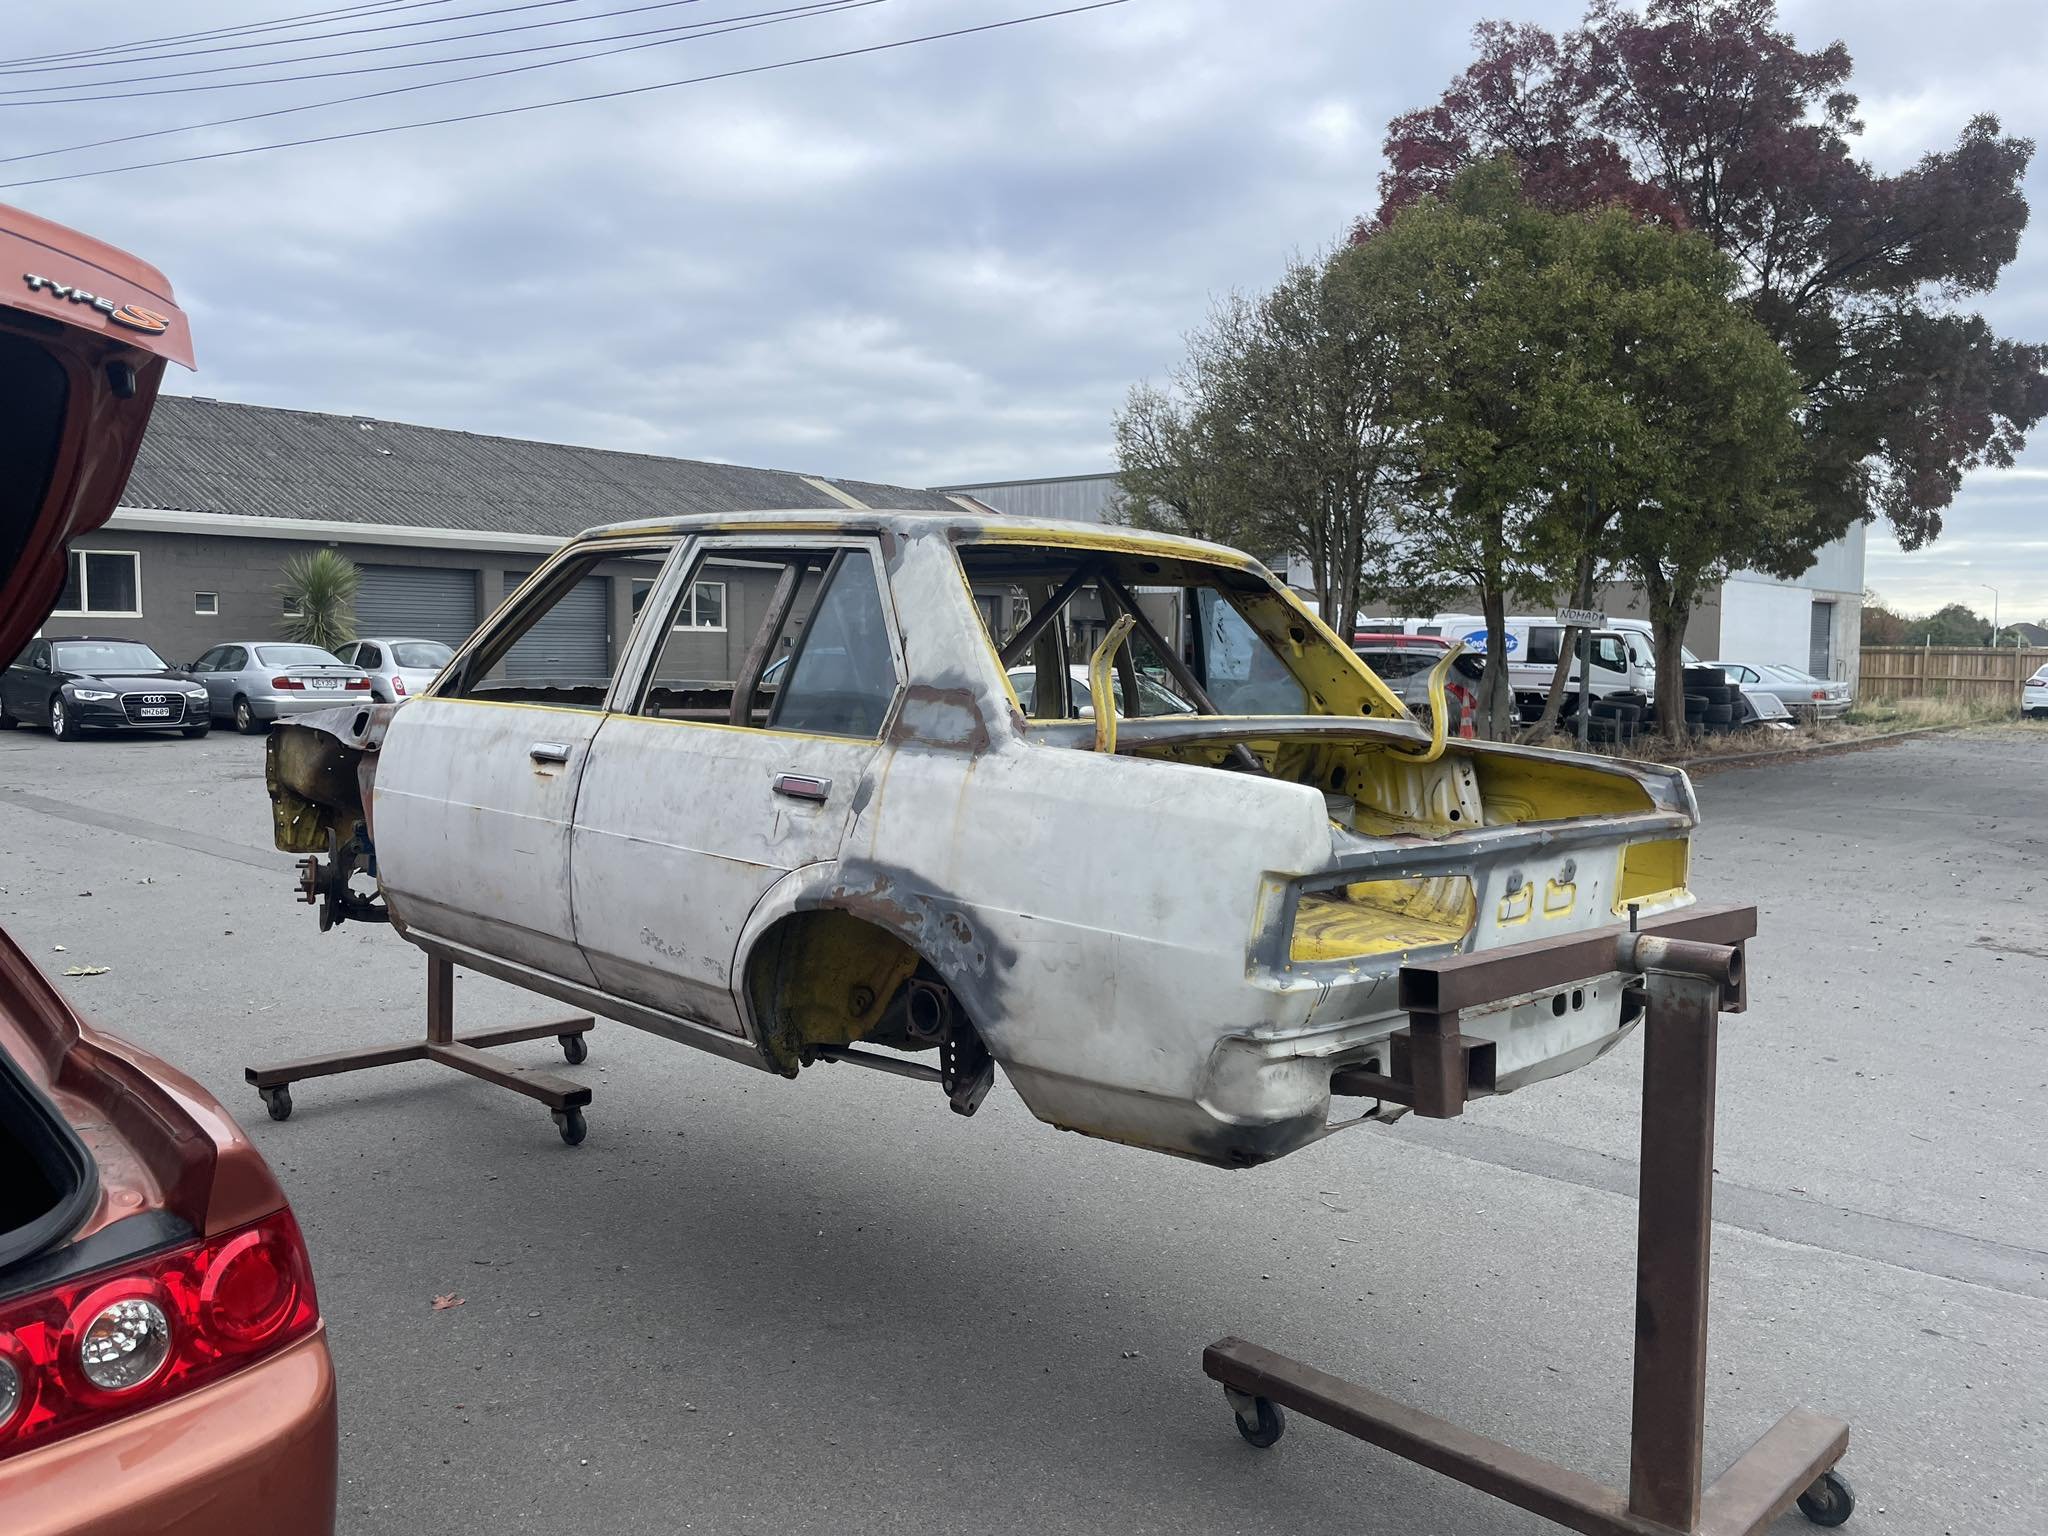
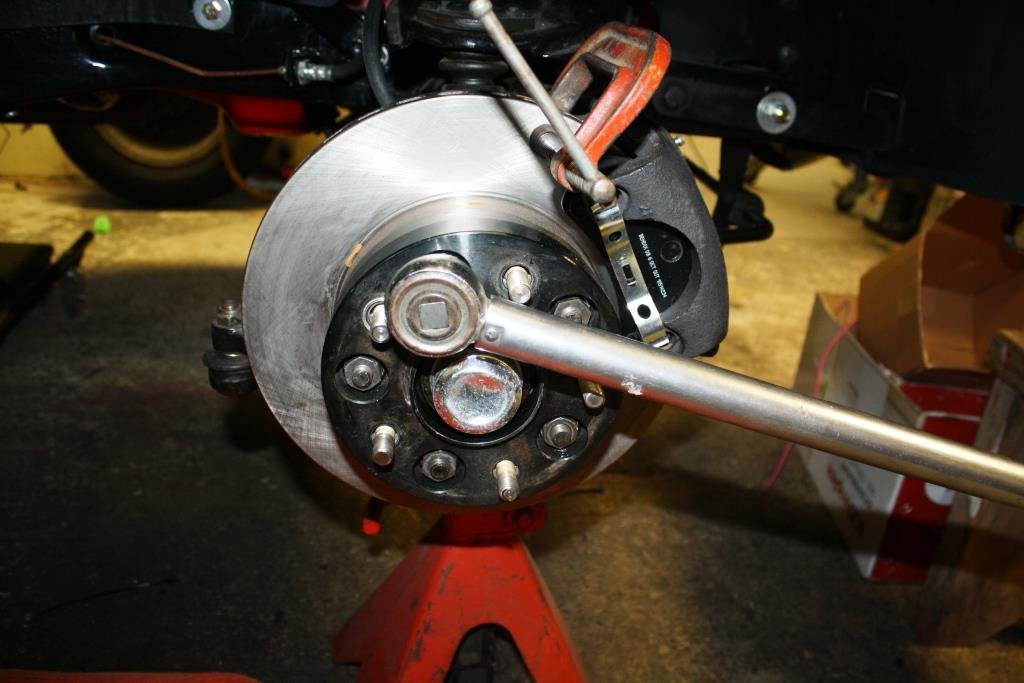
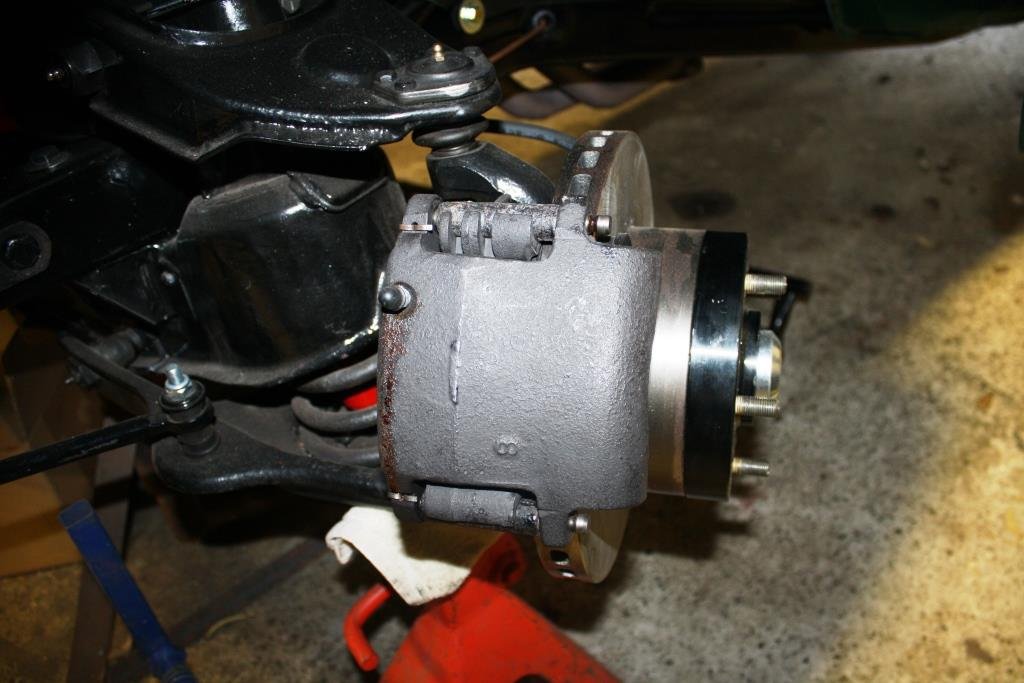
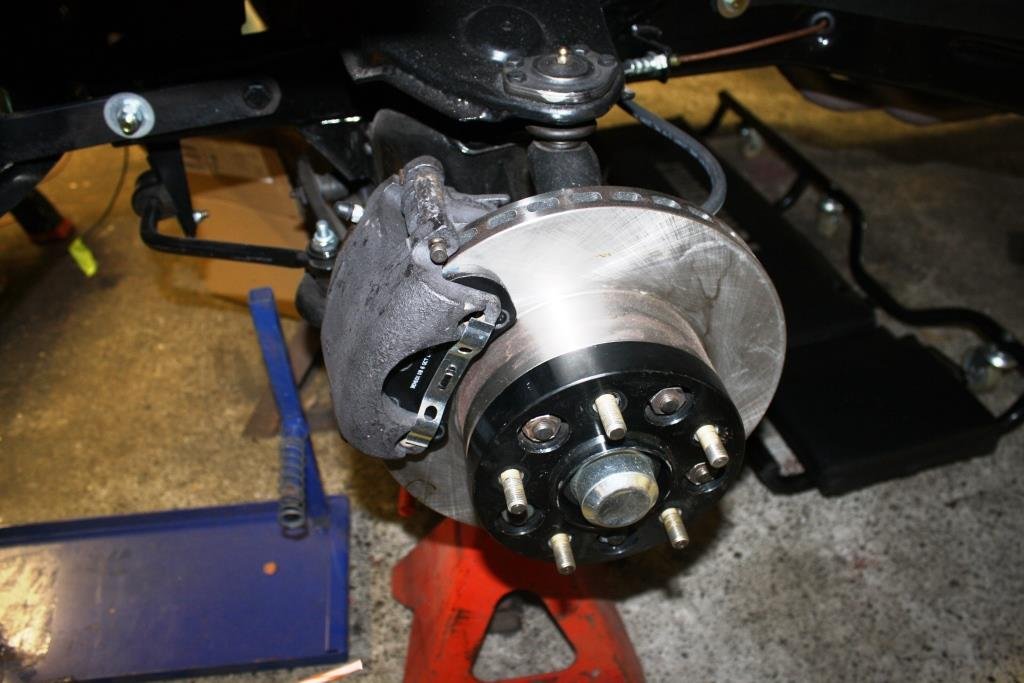
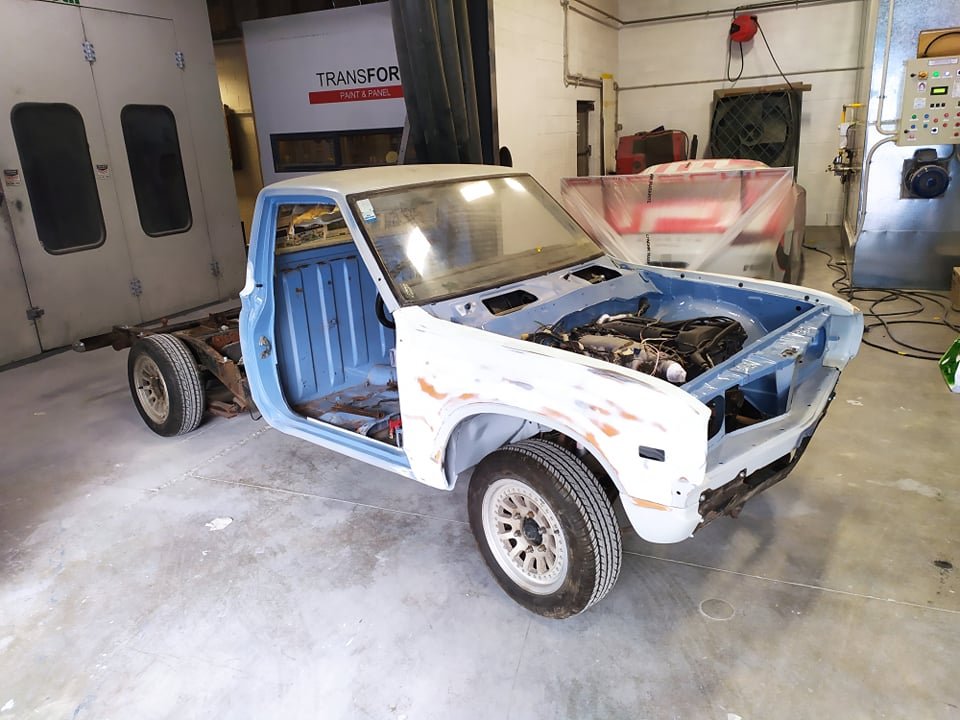
A few people have asked why theres no thread for this vehicle. (Because the owner is so useless tbh) i showed some pictures on my phone to some people at Garlic nats. And one of them convinced me i should post them up. (Thanks @Sungai Sungai) The story begins quite some years ago when i bought a datsun 620 ute of @Mr.Mk1. He'd rescued it from scrap. He also found a pretty fucked wellside tray for it. (Which is also rockinghorse shit 8n terms of rarity) it would seem i only have one picture of that truck. It needed plenty of work, but the rego was on hold, and it was (mostly) complete. When josh and i did the mission down to Alexandra to collect it, he showed me another 620 ute. It belonged to the landlord from whom his brother rented his business premesis from. Daily driven, and a real sweet honey. Because Alexandra is as dry as fuck with no foreplay, it was completely rust free too. (For what its worth, 620 are without a doubt the most rust prone vehicles on planet earth) Some time later, i learned that the elderly gentleman who owned that truck stacked it. And some time later it popped up as wrecking in Christchurch. Hoping to get some parts, i shot around there. Where i met @Agent75. The truck was still pretty rust feee. But unfortunately Shane had cut the radiator support panel off to make removing the engine easier. The inner gaurds were a little bit puckered, but it could have been straightened out. A deal was struck, and i dragged it home. Another mate had another 620 he wanted ro move on. ( @I'm new here) it had been completely dismantled. And had some prettt cunty rust. So i bought that, and had a coachbuilder mate graft the inner gaurds and rad support panel off that cab onto this one. Unfortunately i have no pictures of this. I also picked up a pair of front guards off another mate. As i didnt get the nasty, underpowered, leaky, J15 with the truck, i opted for an S14 SR20 that i bought off @mint16. With the gearbox attached, i had to make the centre of the rad support panel removeable. After id painted the engine bay, @fletch have me a hand to do the final engine installation. Because id slung the engine so low, and so far back, the sump had to be notched to clear the drag link. Seeing as this chassis is the later model/last iteration of the 620, it was fitted with ball joints, rather than king pins. This is a wicked bonus, because i learned that if the top ball joint is swapped over, that D21 navara hubs and stubs are a bolt in affair. No more gawdaful drum brakes. Best of all, a mate gave me a set for free. (Less calipers, which i then sourced of marketplace) because im not a total broken arse any more, i threw on a pair of new rotors too. Discussion,
31 points
-
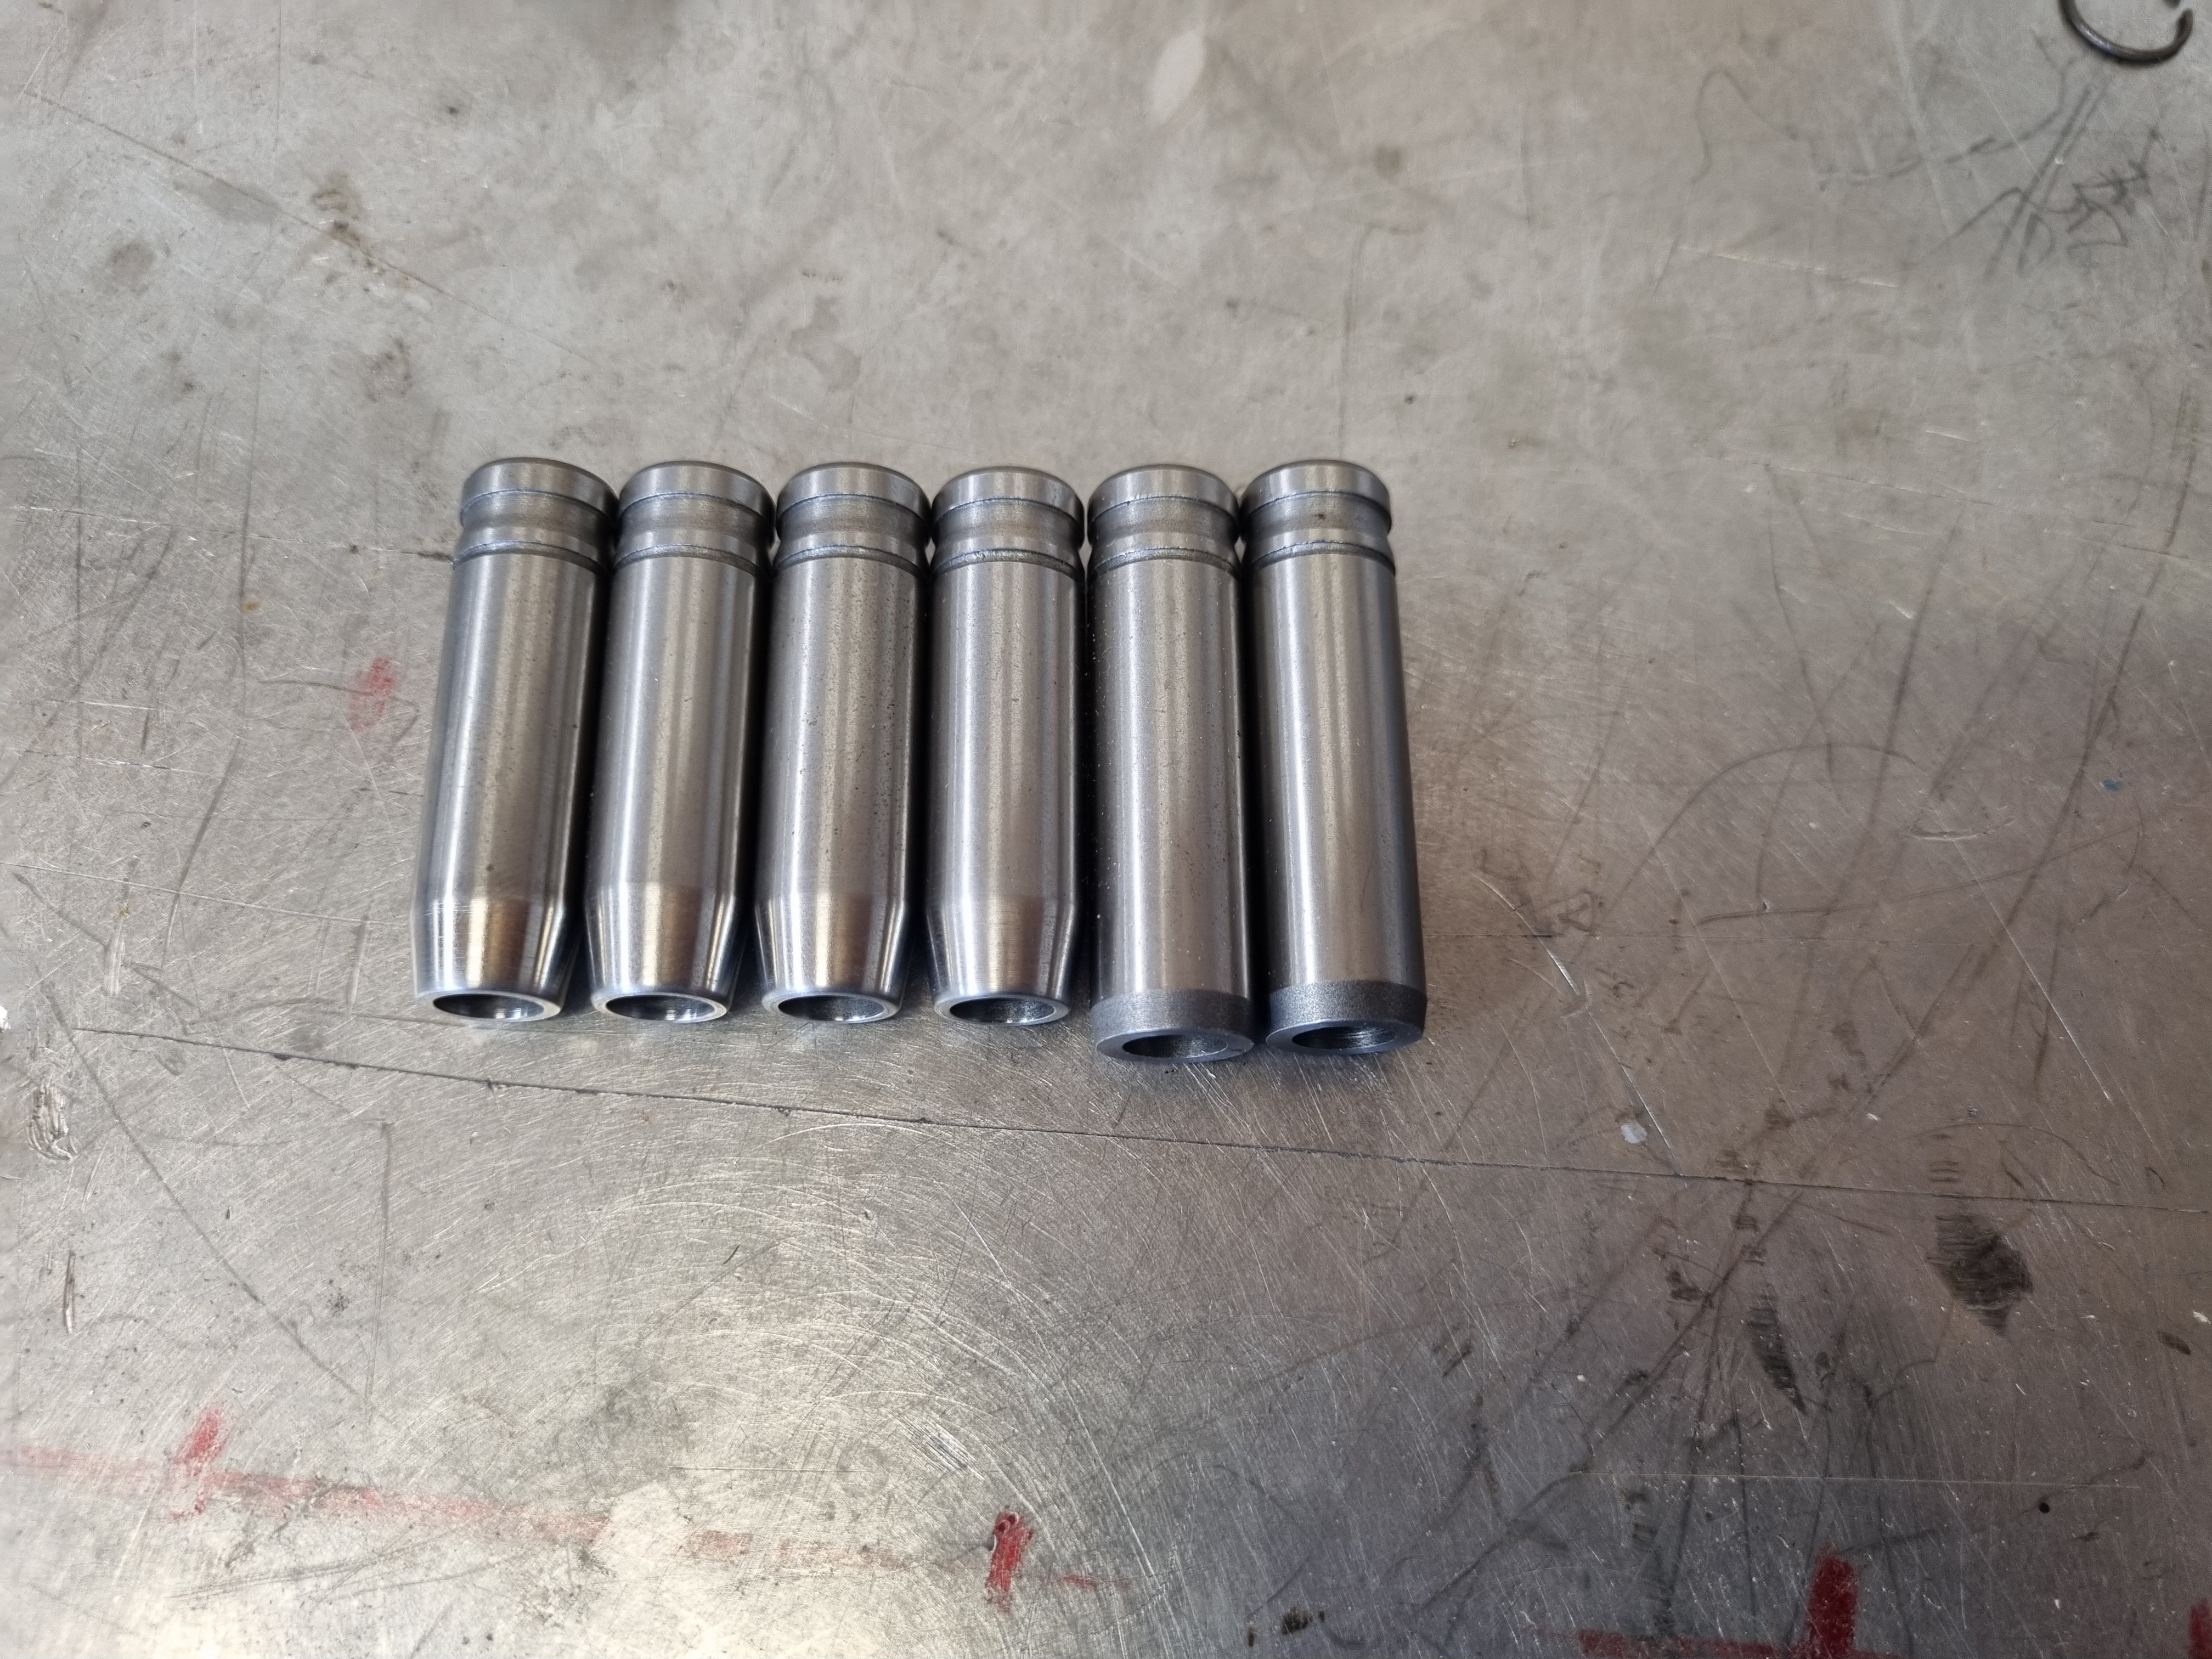
So when I left off the motor was back to completely disassembled. I got the cap machined and now it's back together with the correct crank end float. The other thing is that I got the head flow tested with the porting and bigger valves. It shows about an 11 percent increase over stock. I was kind of hoping for a bit more but using the "no science just hog it out" method is probably why 11% was the result. Anywho, now it's time to get the head all sorted and I can bolt it on. Need new valve springs, new spring washers and retainers - all of which will need to be custom or at least sourced from some other engine. In preparation for this I shortened the valve guides to suit the machining that the head needs to clear the higher lift. 3mm off the exhaust and 6mm off the inlets
31 points
-
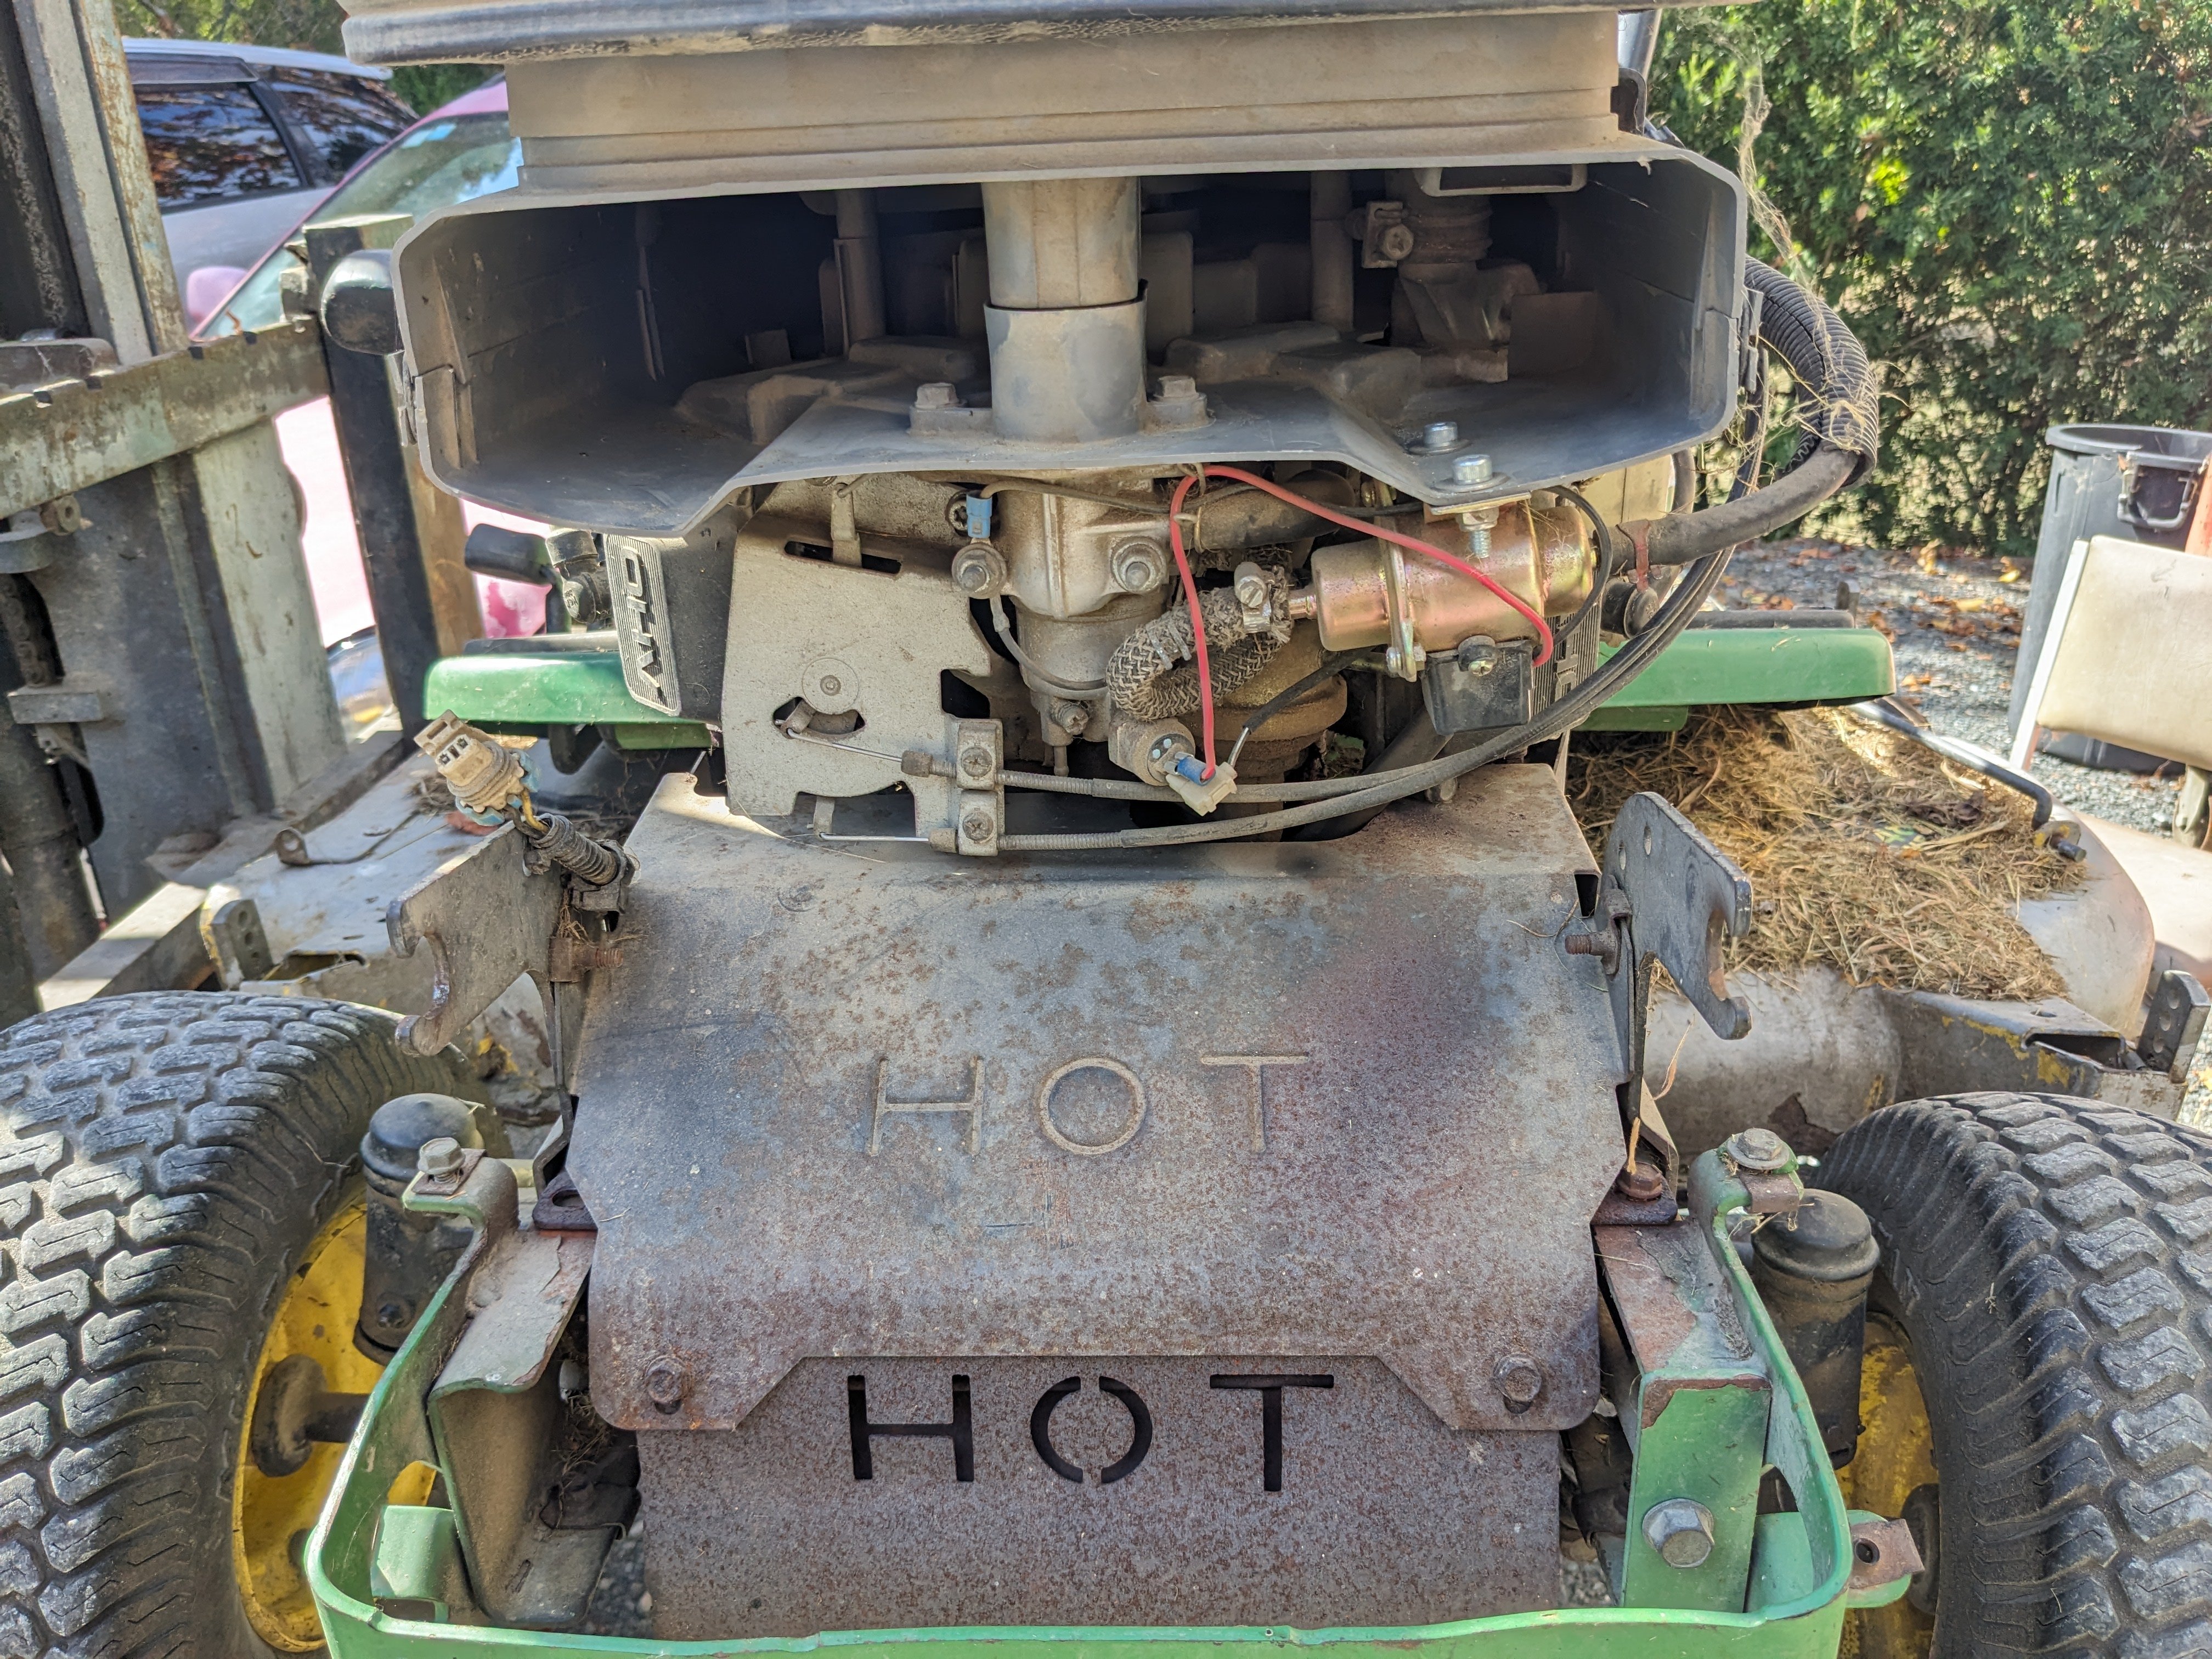
Then I remembered the shitty fuel pump that I hacked into my ride-on a couple of years ago cos it was way too much money to buy OEM; Then naturally this; Dunno what the crackly business is, nevertheless it sounds glorious.
30 points
-
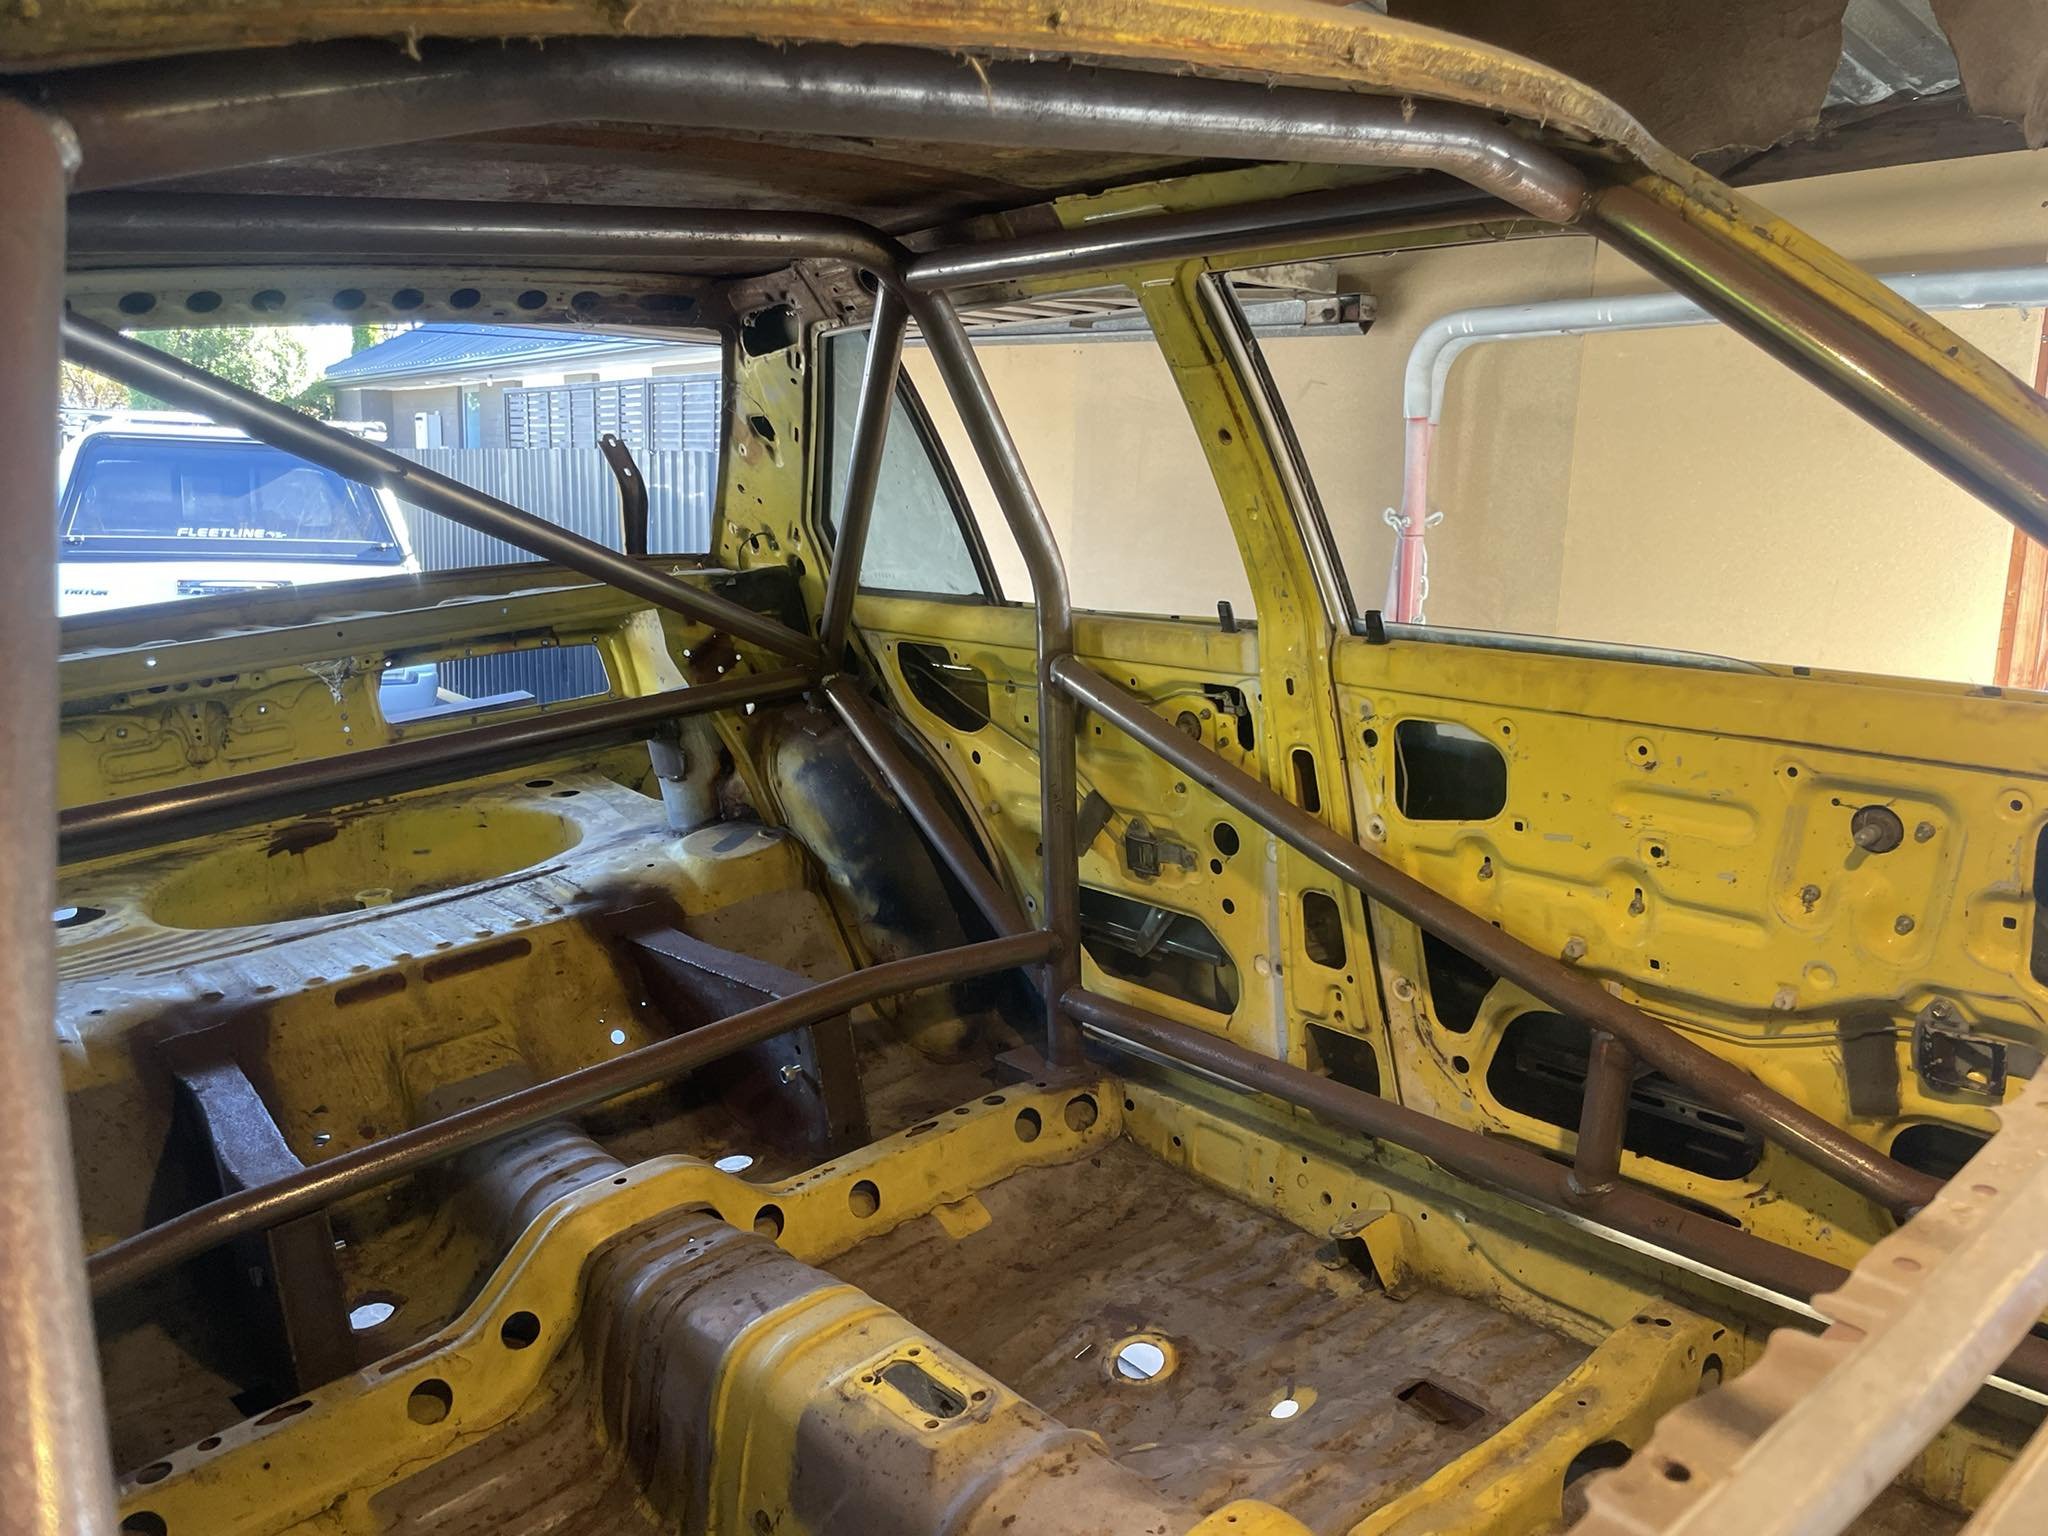
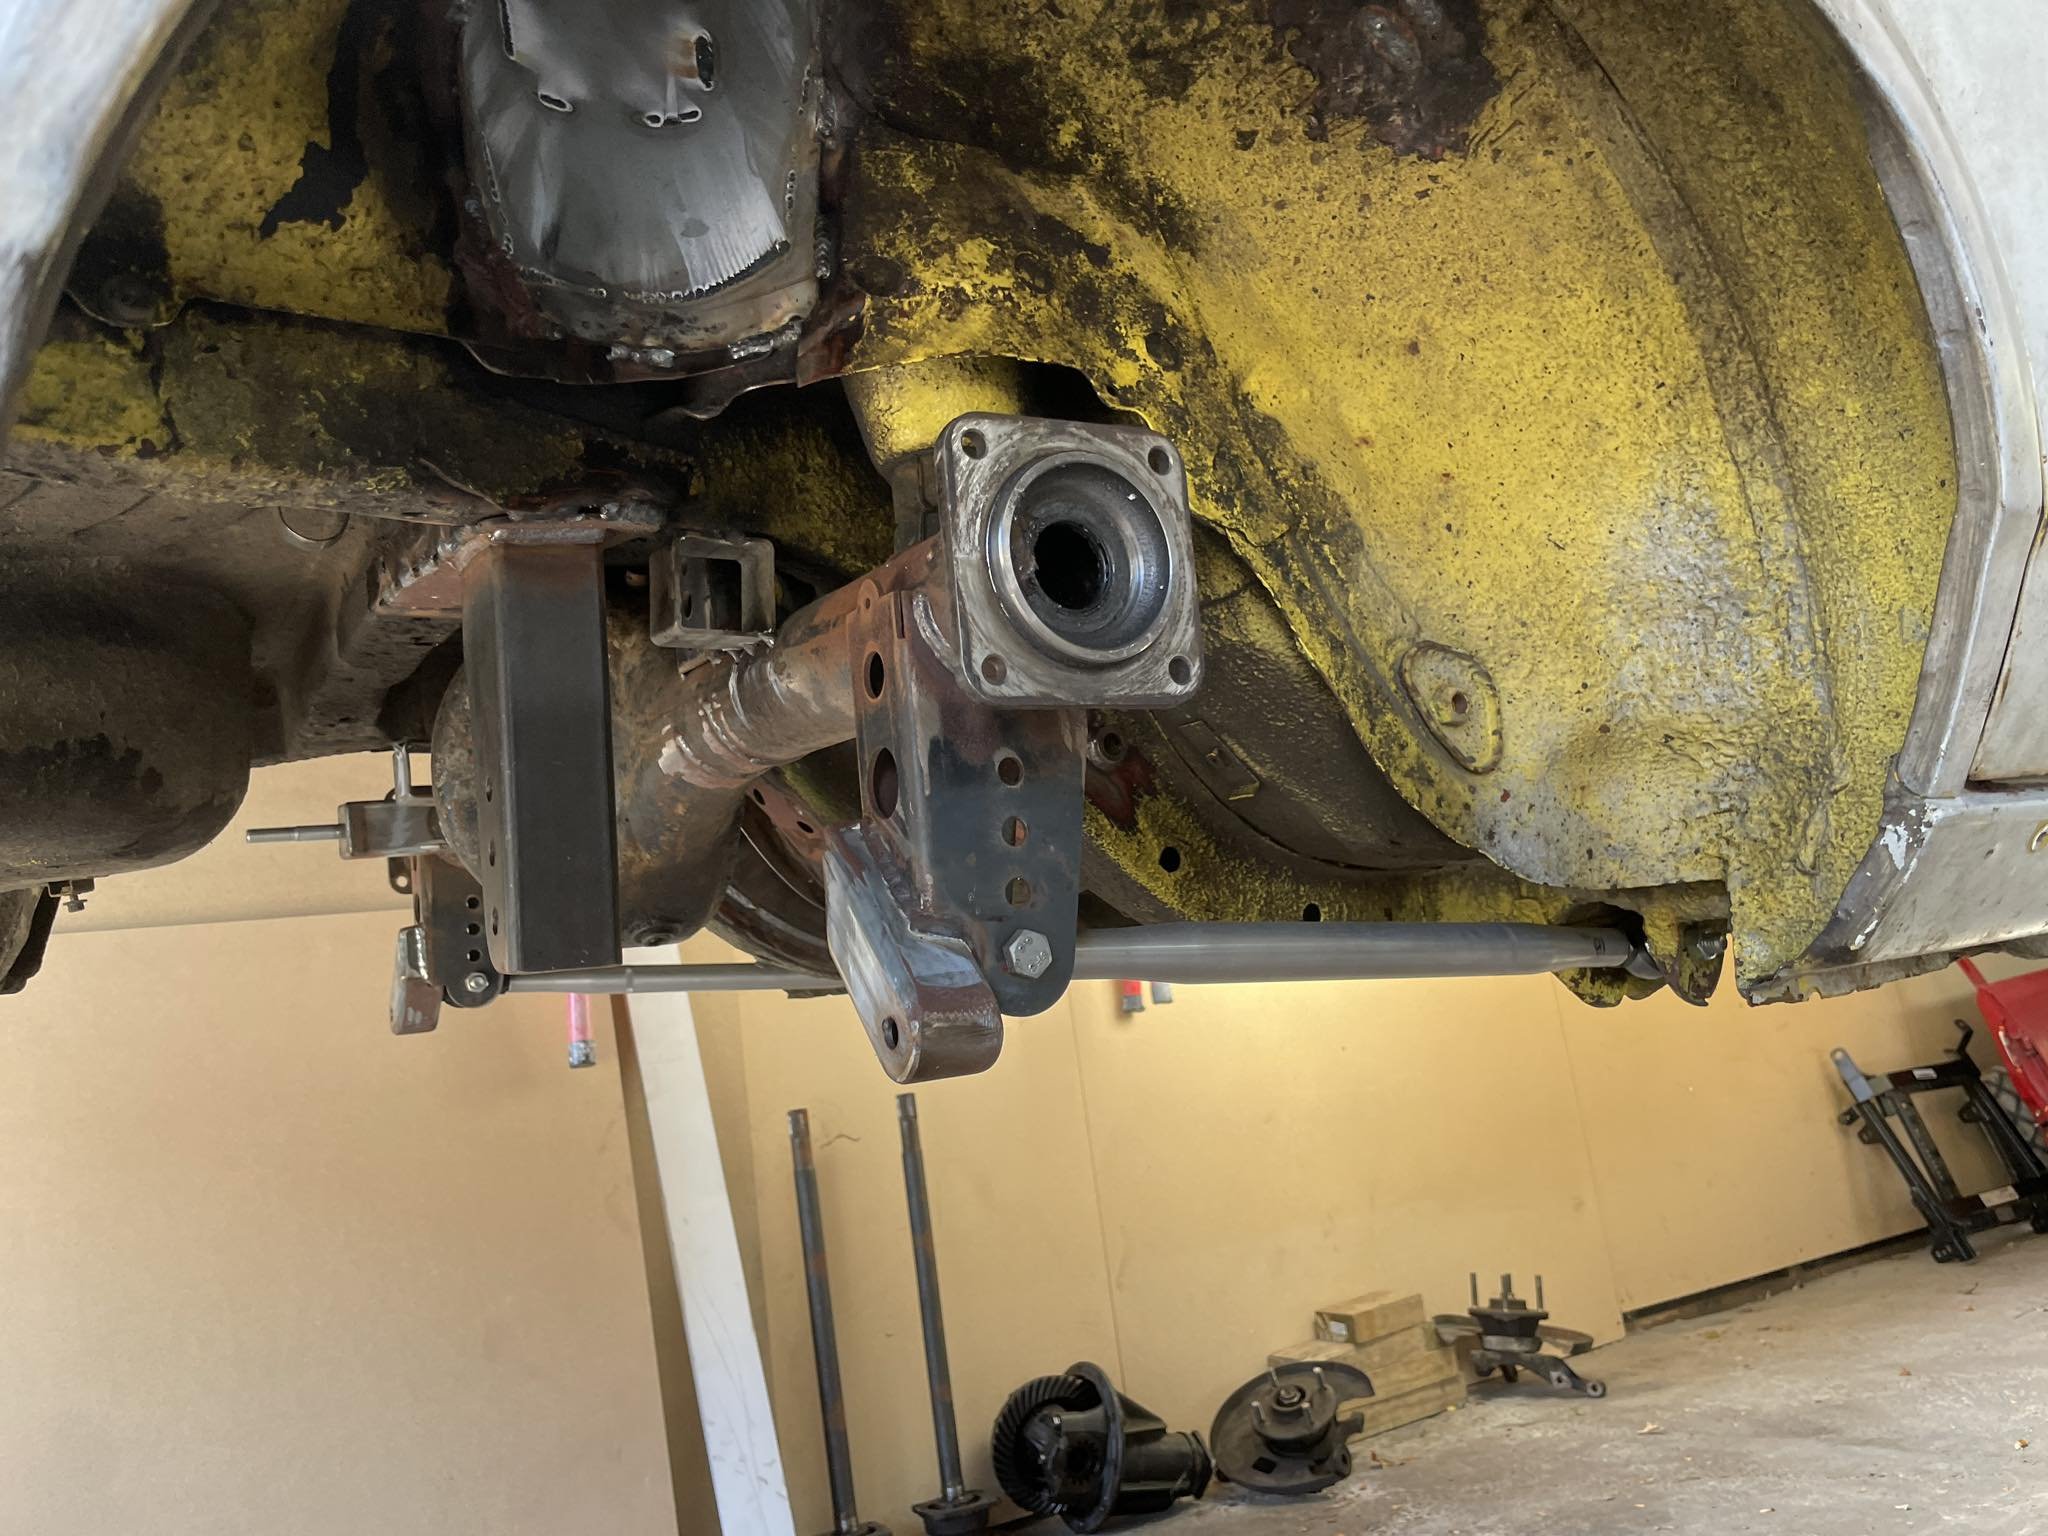
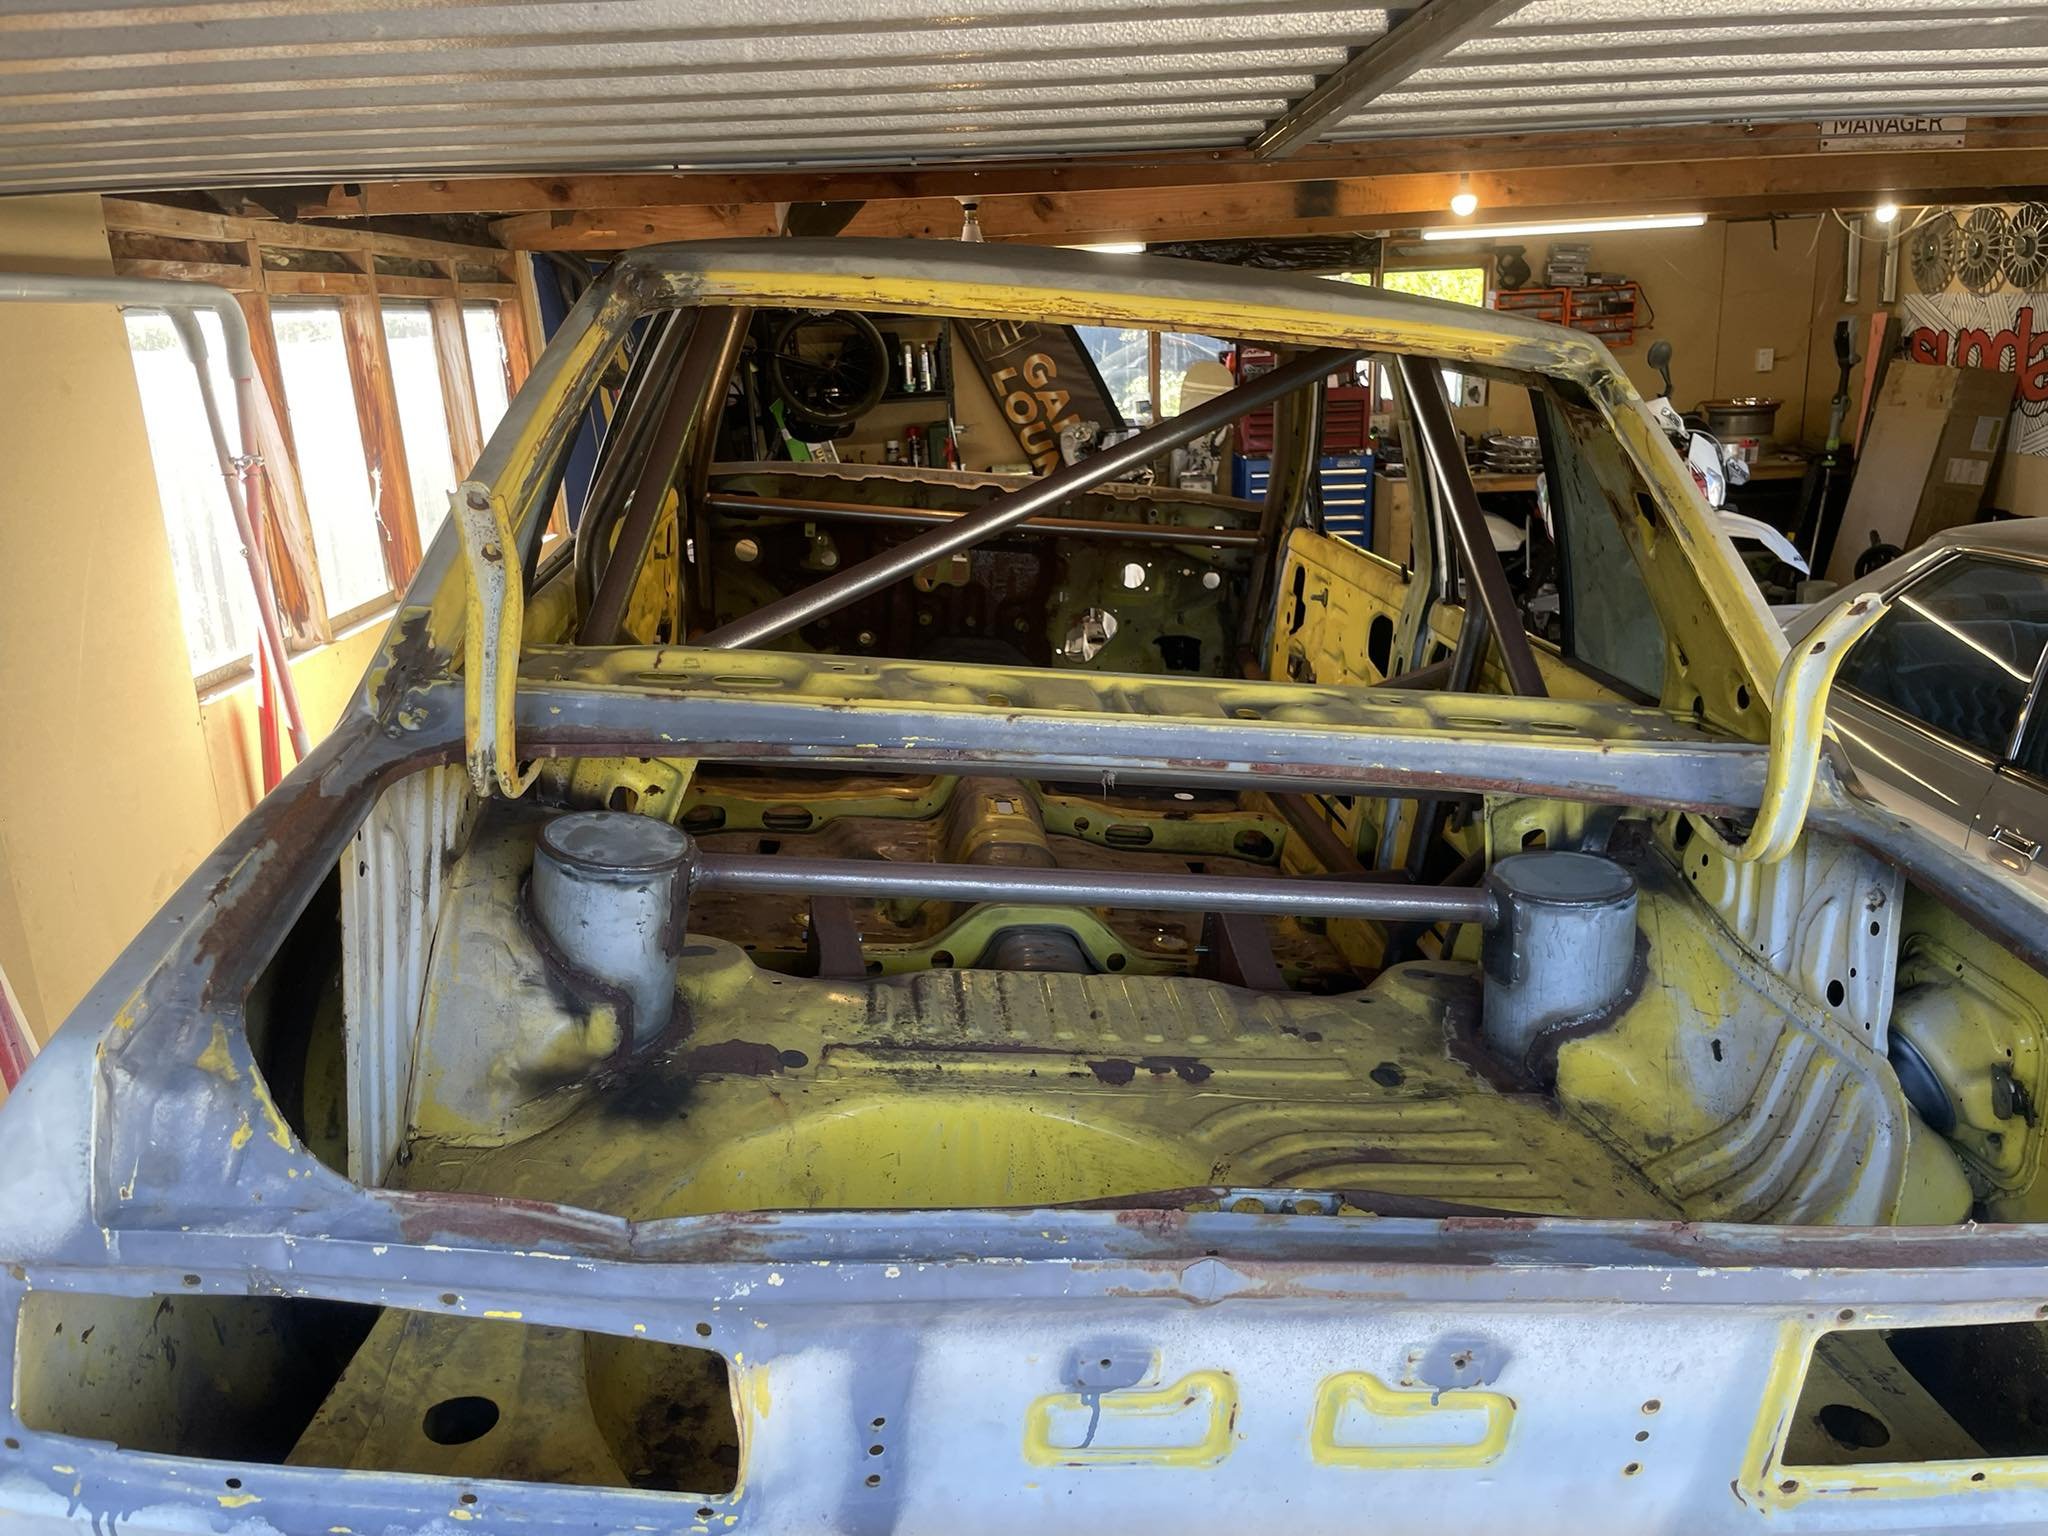
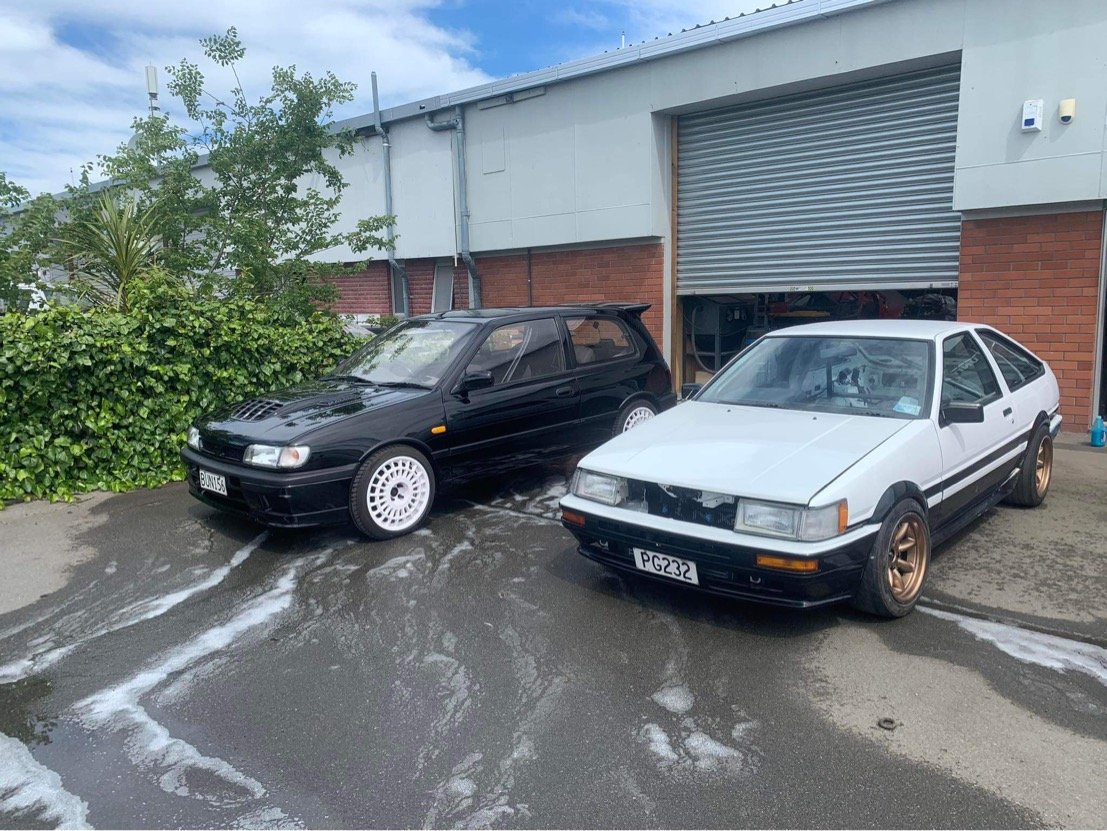
so after getting rid of my ae85 levin because i made it too nice to bash about at the track i was on the lookout for a suitable car to buy/build to have some fun in, bonus of this car is its also rego on hold if i get that way inclined. This popped on on market place for sale, the previous owner had JB Fab here build a 6 point cage and equal length 4 link setup with a b1600 diff, photos below how i got the car. It came with a lot of spares and all the parts needed to put a rolling body together really. i got it home yesterday and started attacking some dodgy spots with a wire wheel to see what i'm dealing with rust wise, didn't find too many surprises only a couple of bad spots that need patches. Removed everything that was bolted on, it had Silvia front suspension which i will be getting rid of and i have ae86 coilovers and knuckles to replace this. before i got this car i had already purchased an engine mount and j160 adaptor kit from Niteparts for 2zz. looking into diff options for the b1600 diff, i've seen a bit online about what heads fit into the b1600 setup. Ideally i would like a nice 2 way diff for this, I saw that potentially fc3s nuggets bolt in? i have a 4.9 Ratio at the moment which is perfect. current plan of attack is: - Rust patches. - wirewheel and re undercoat the underside. - Doors and front end to panel beater for a quick panel and paint. - Weld up all the unnecessary holes in the engine bay. - Mockup j160/2zz combo and start headers and itb setup. - Sort rear brake setup on the diff. - Powedercoat/Zinc everything to make it nice Discussion - Discussion
29 points
-
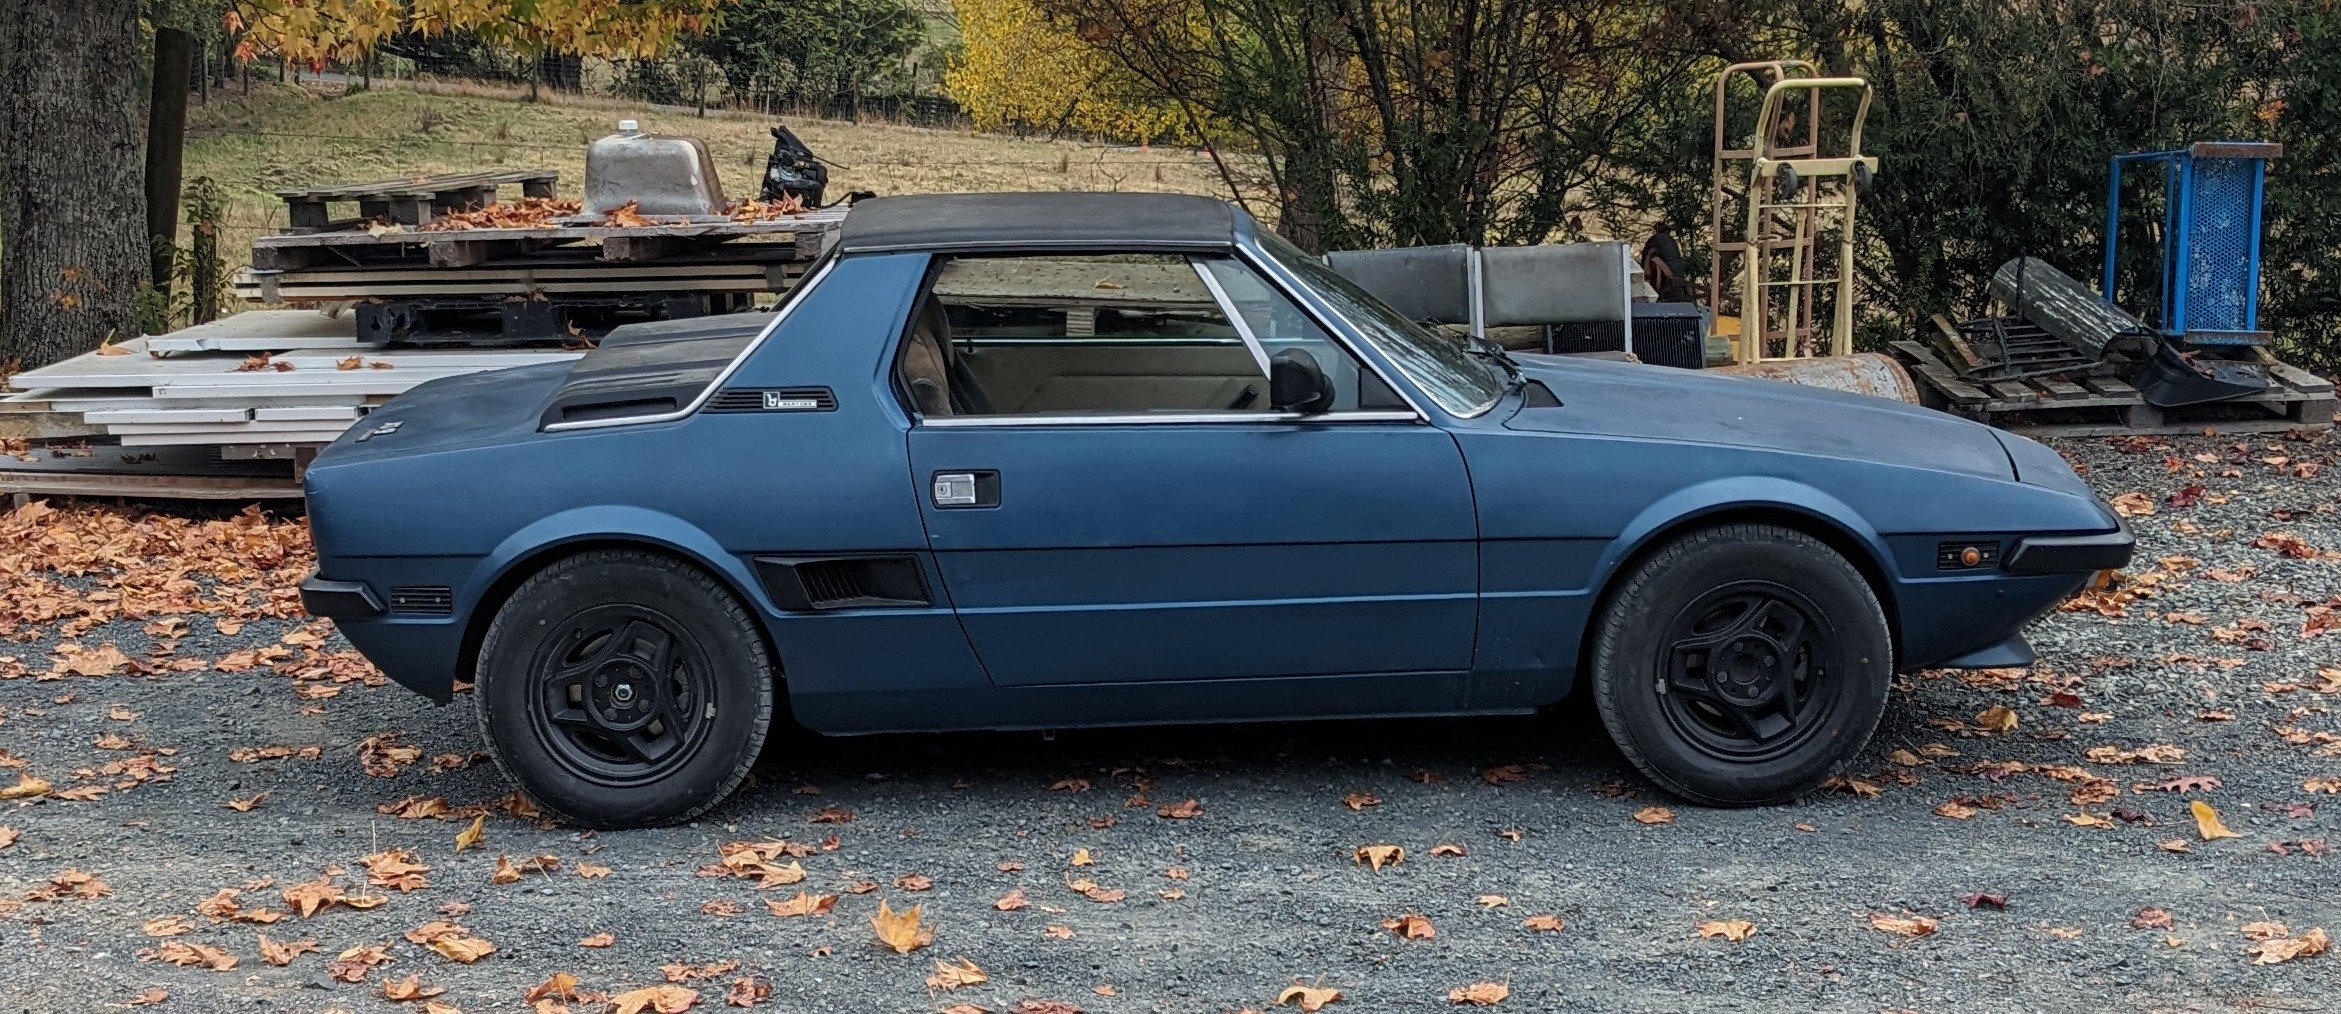
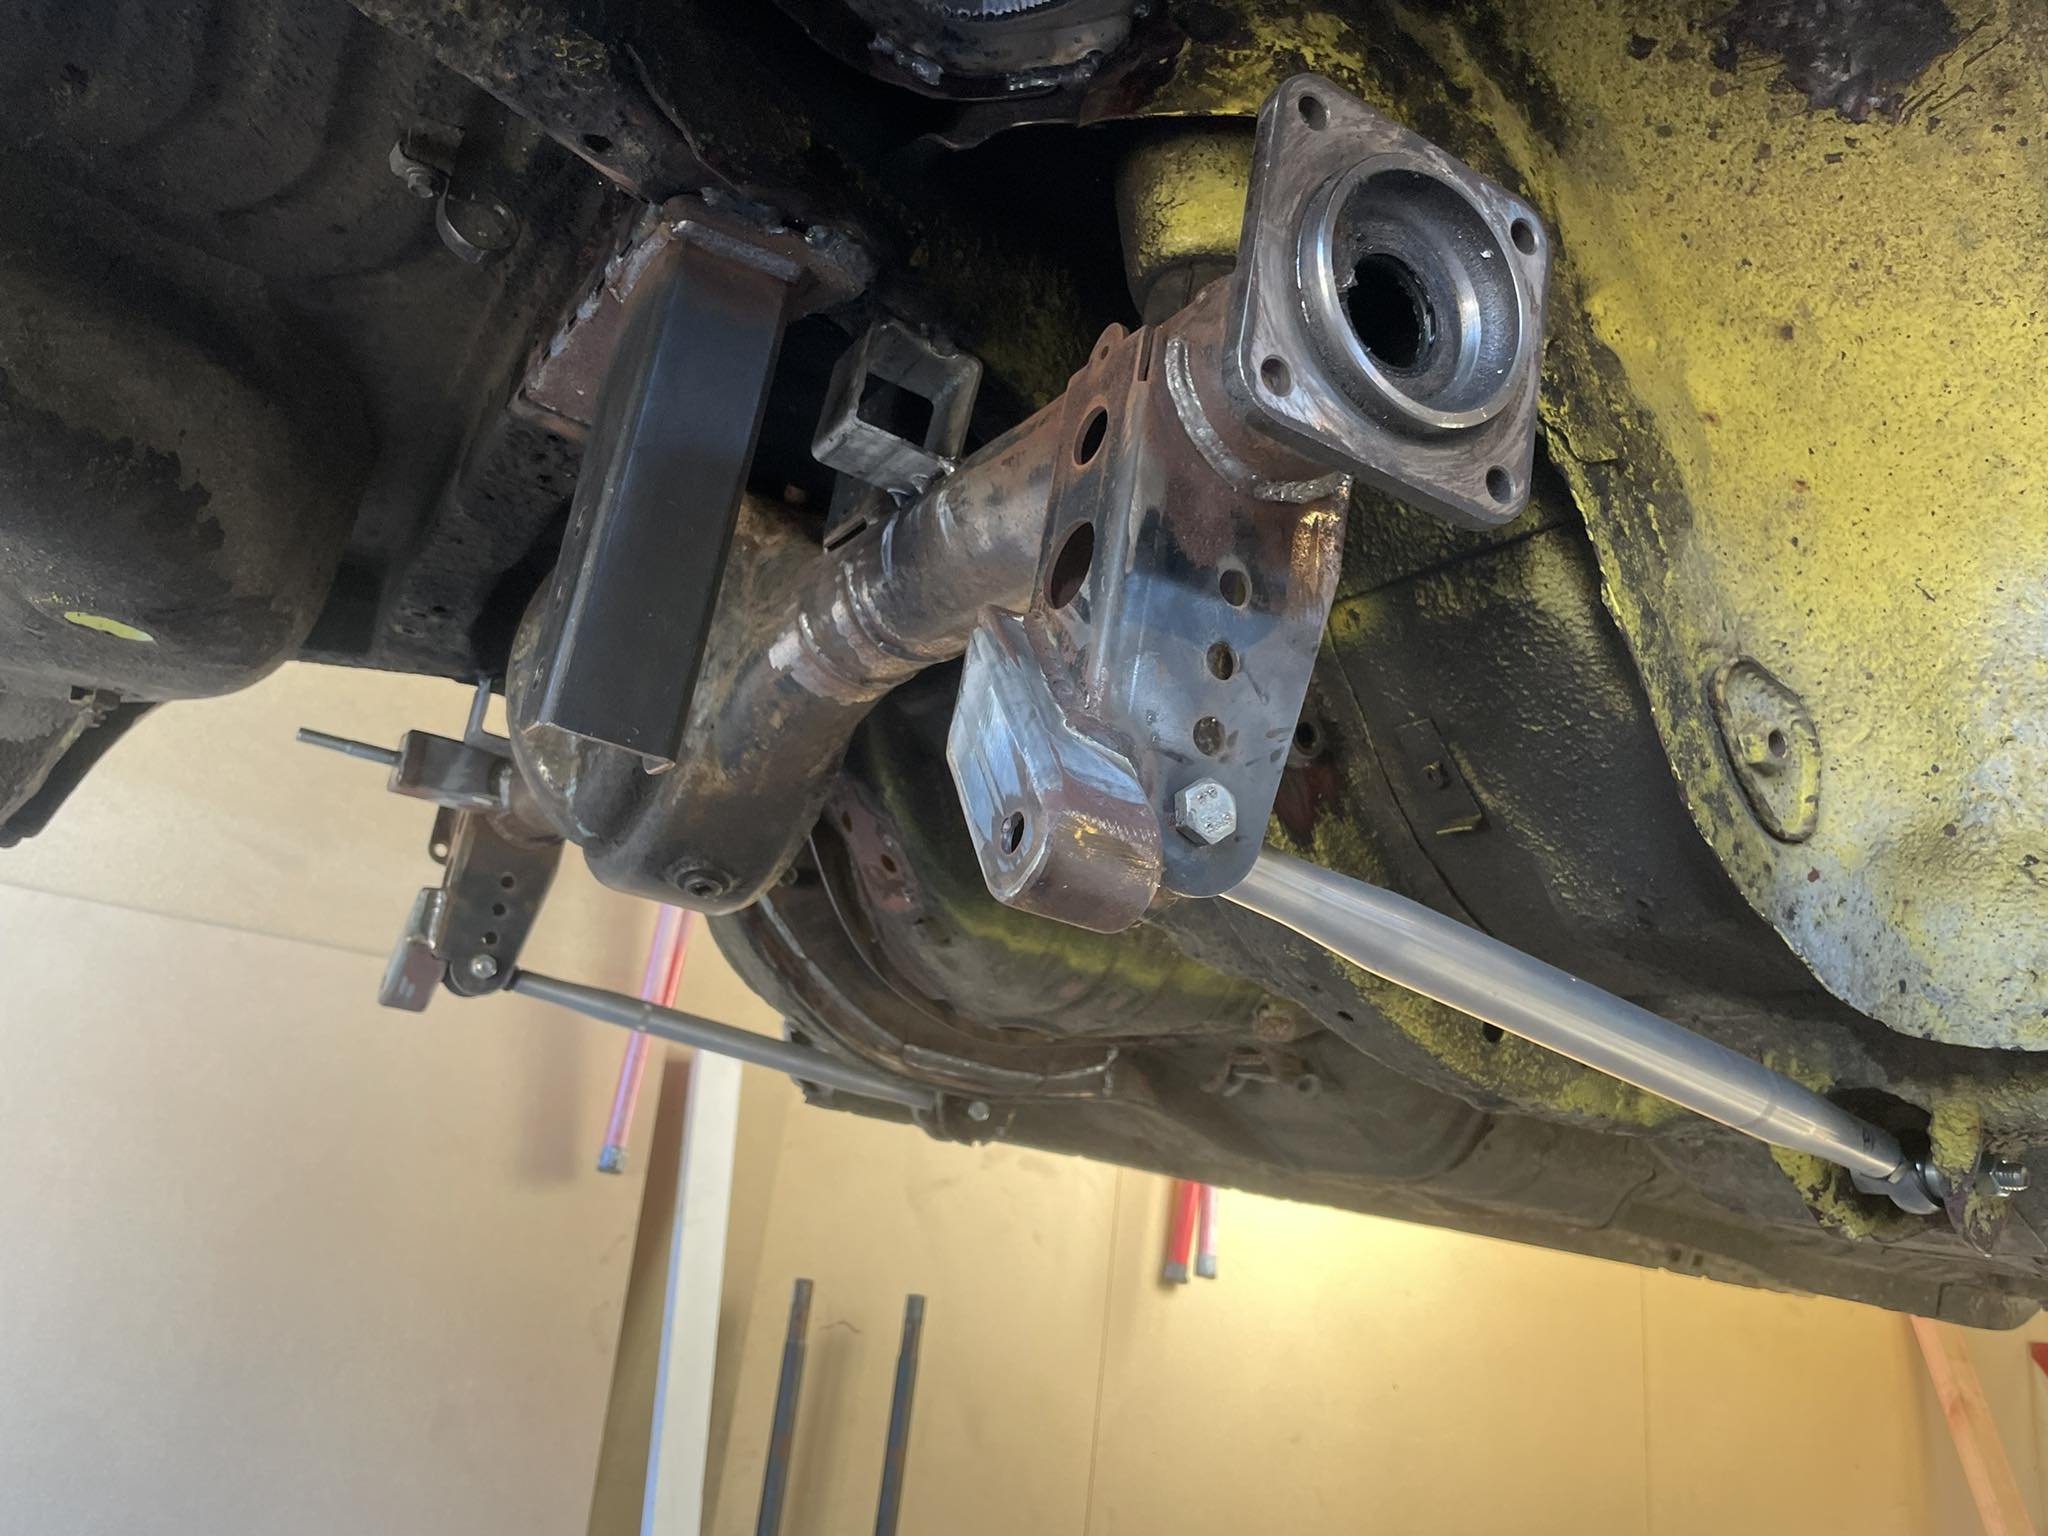
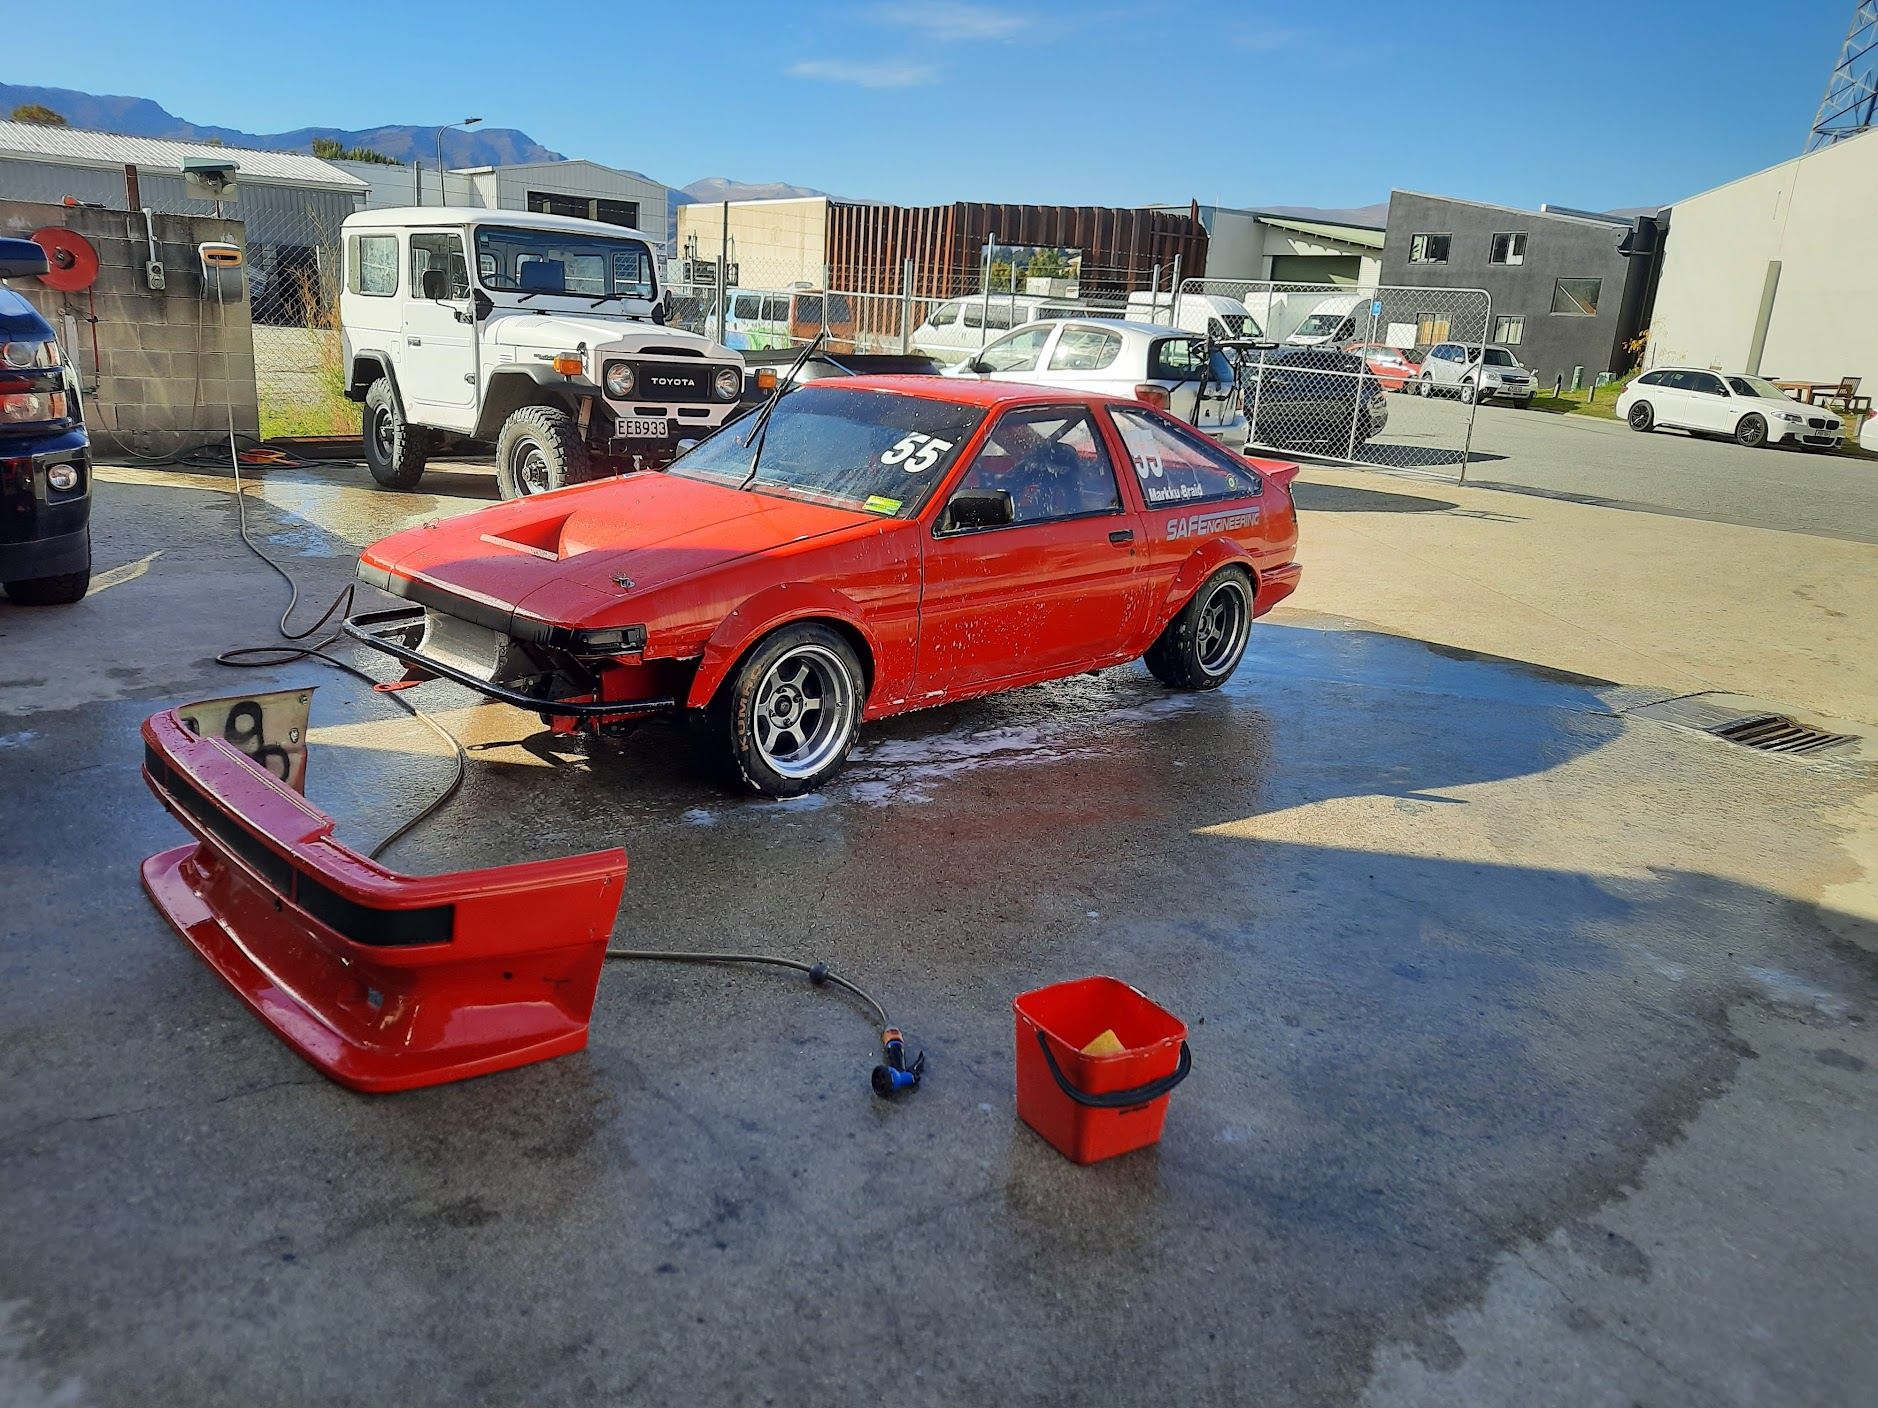
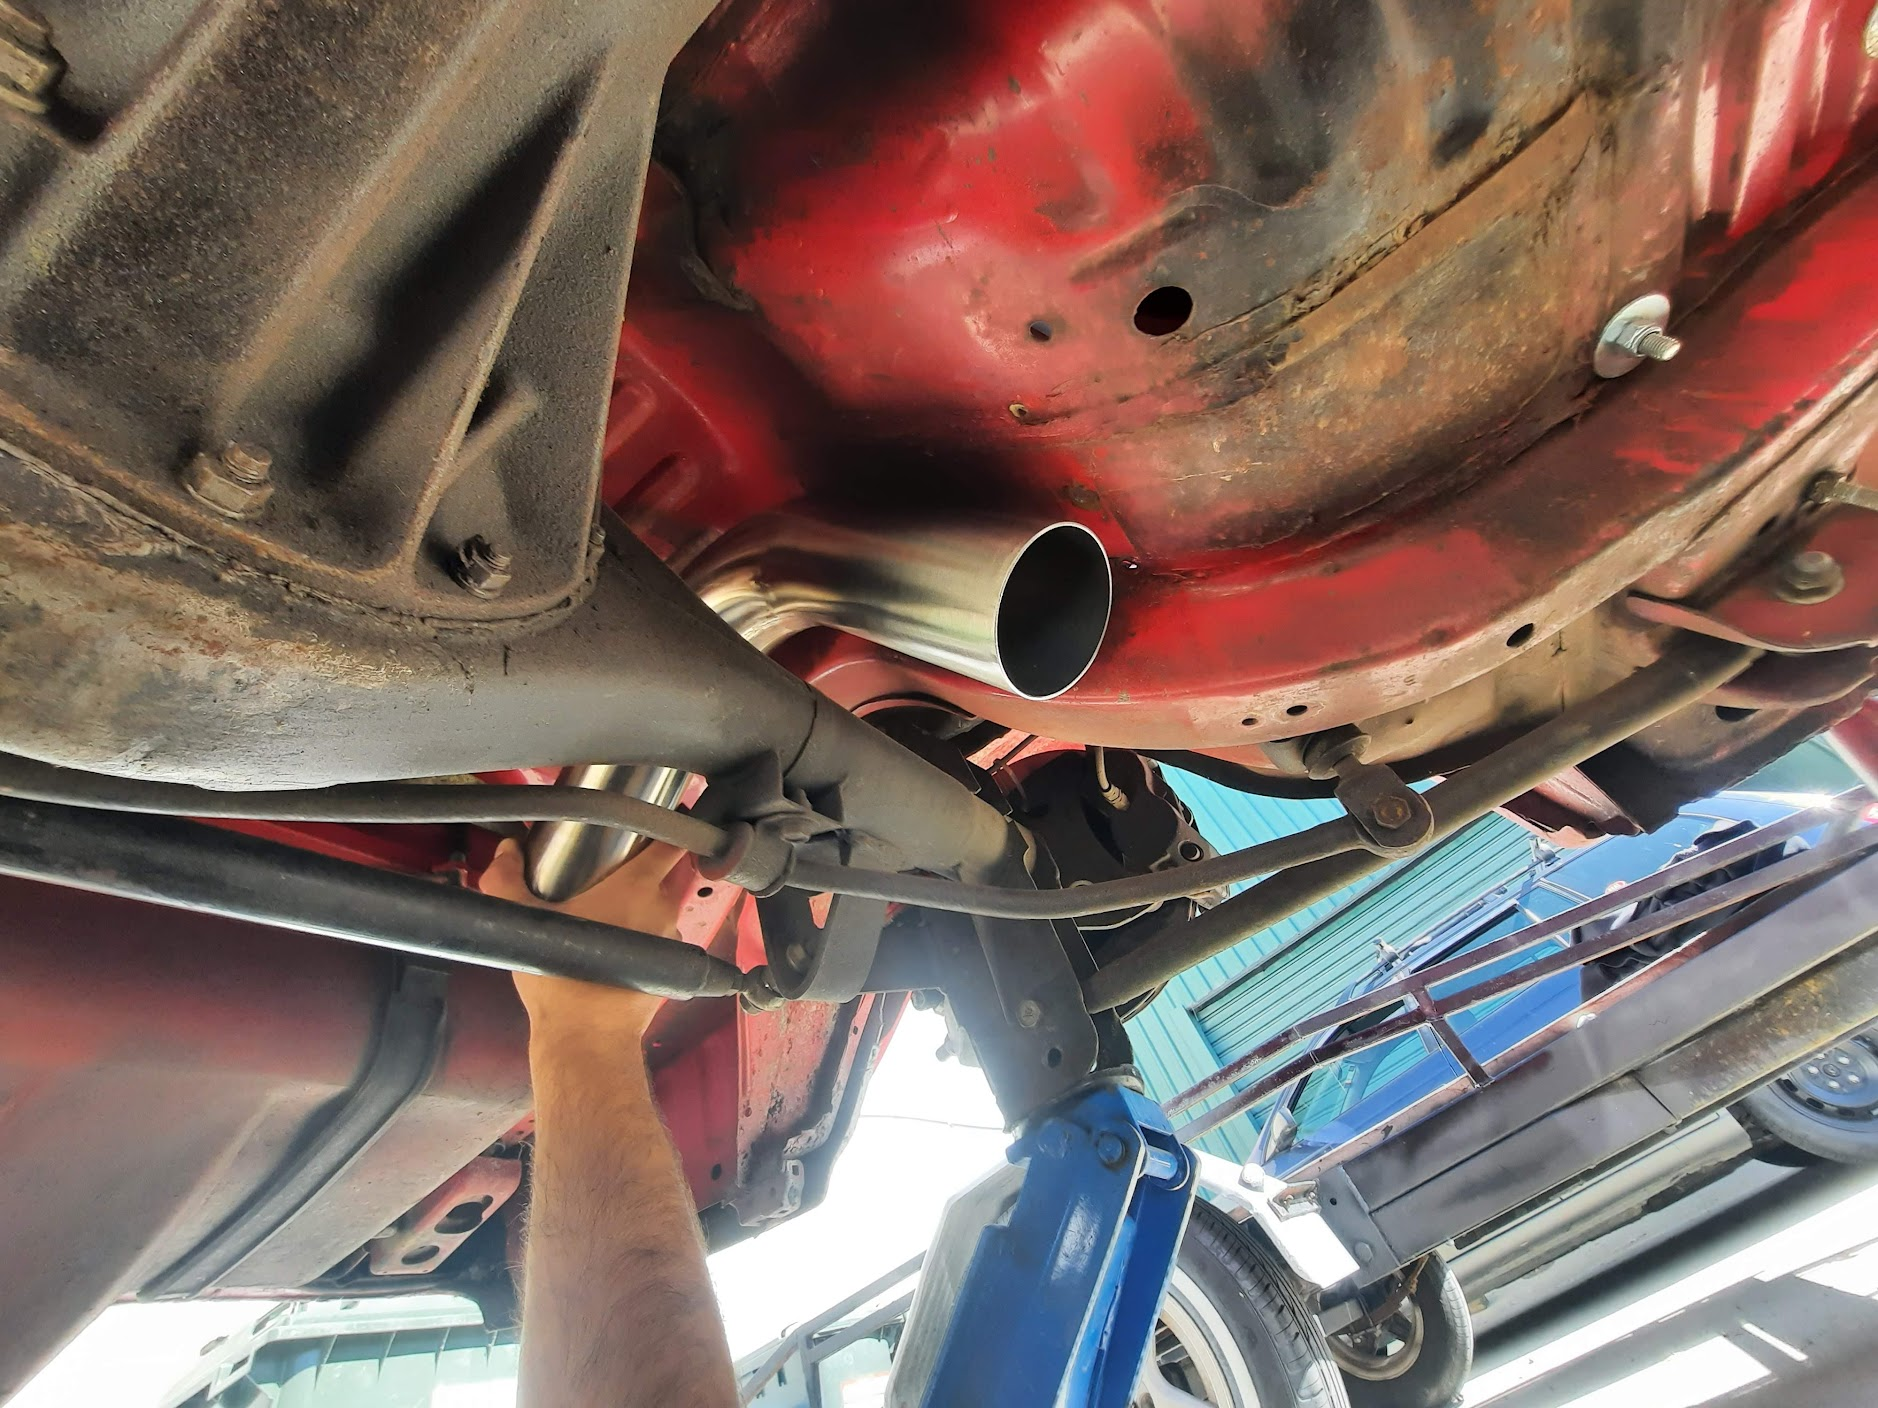
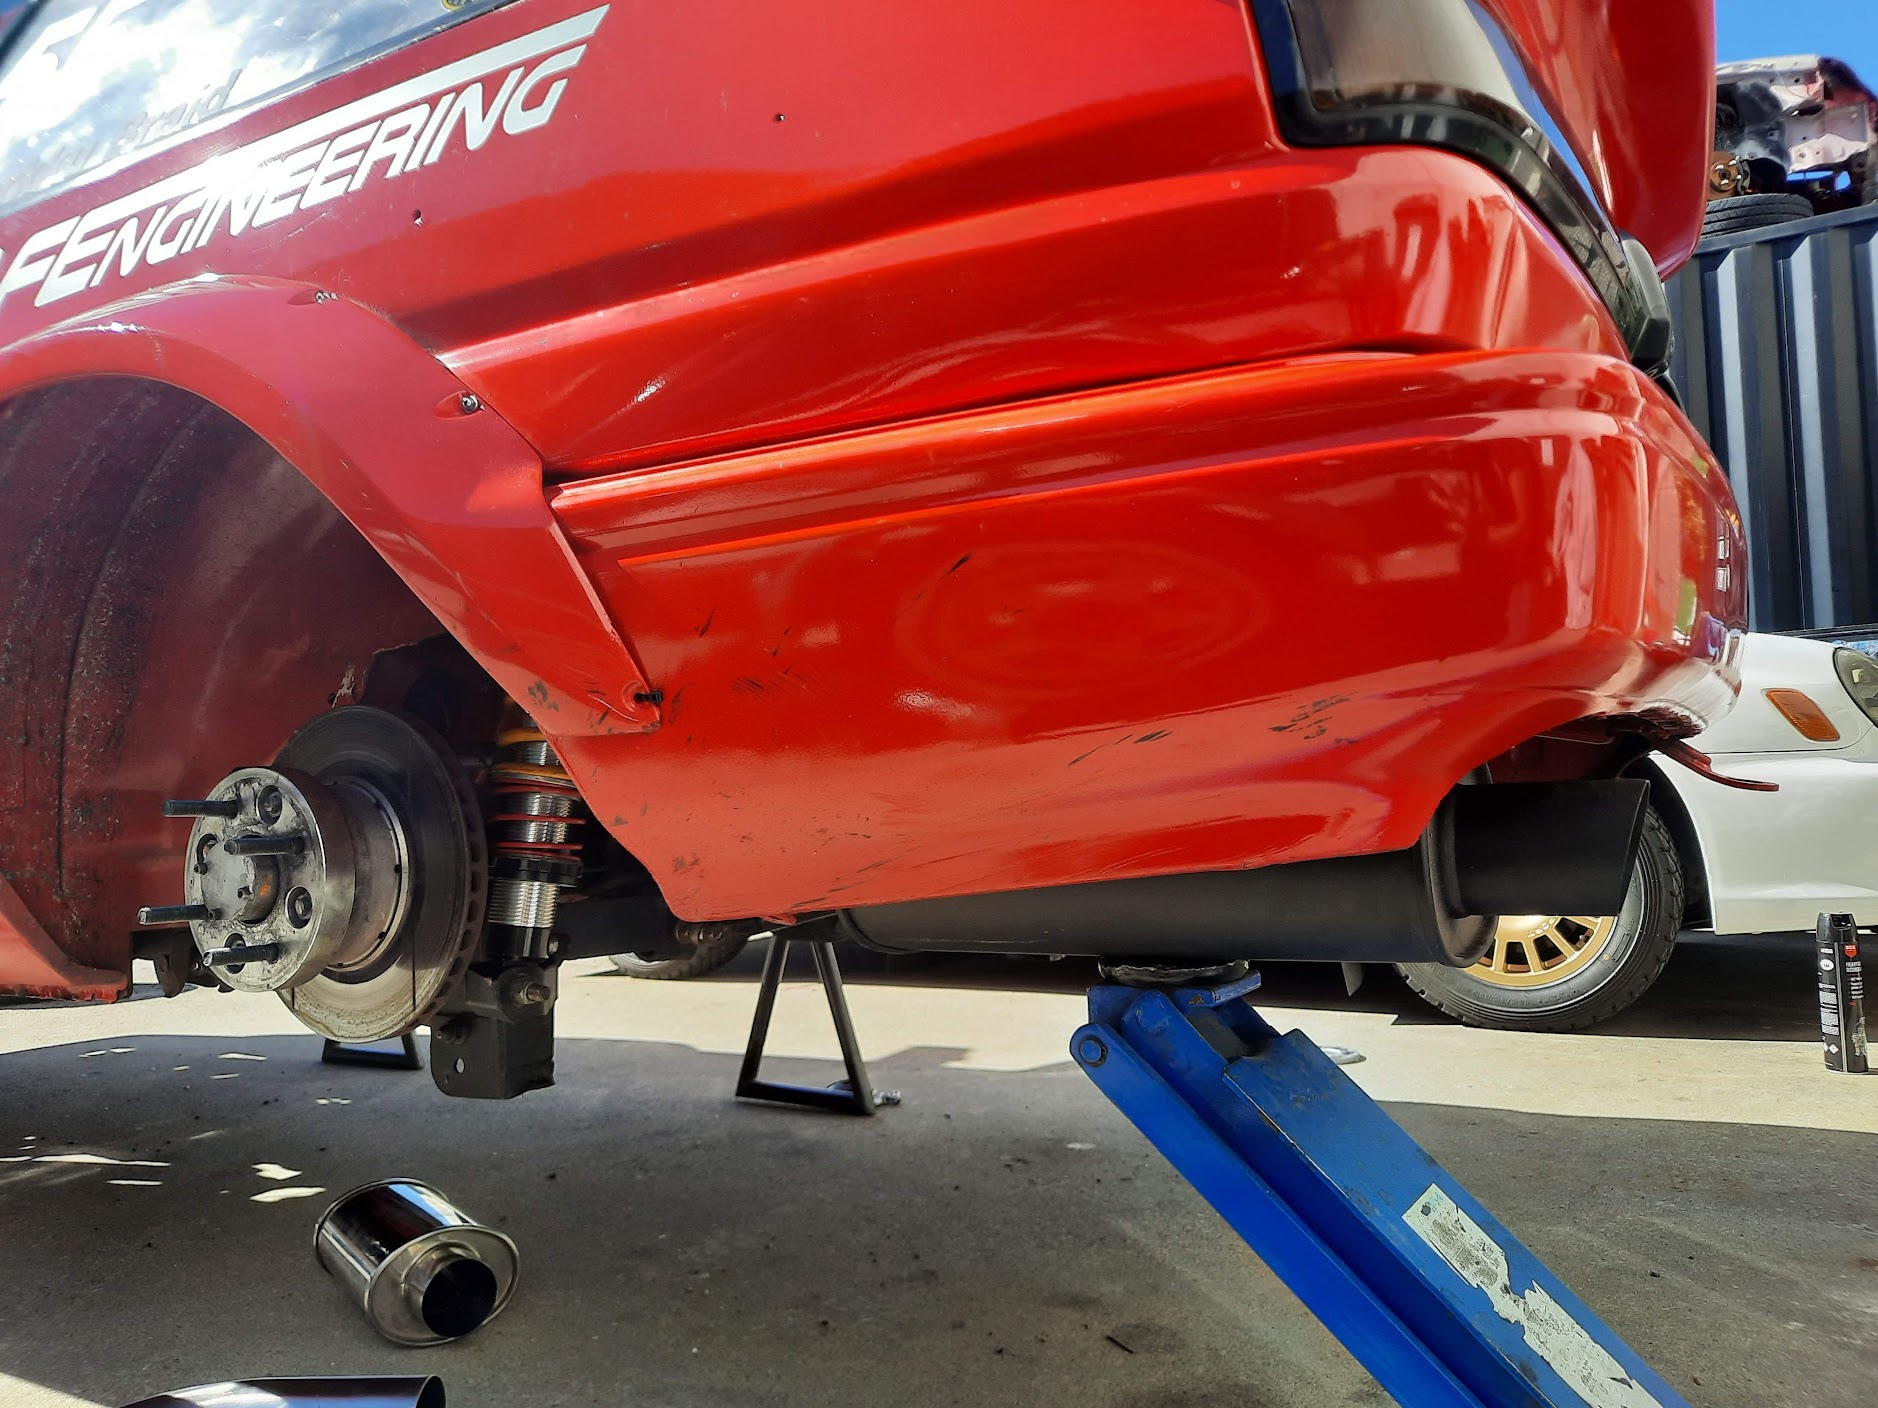
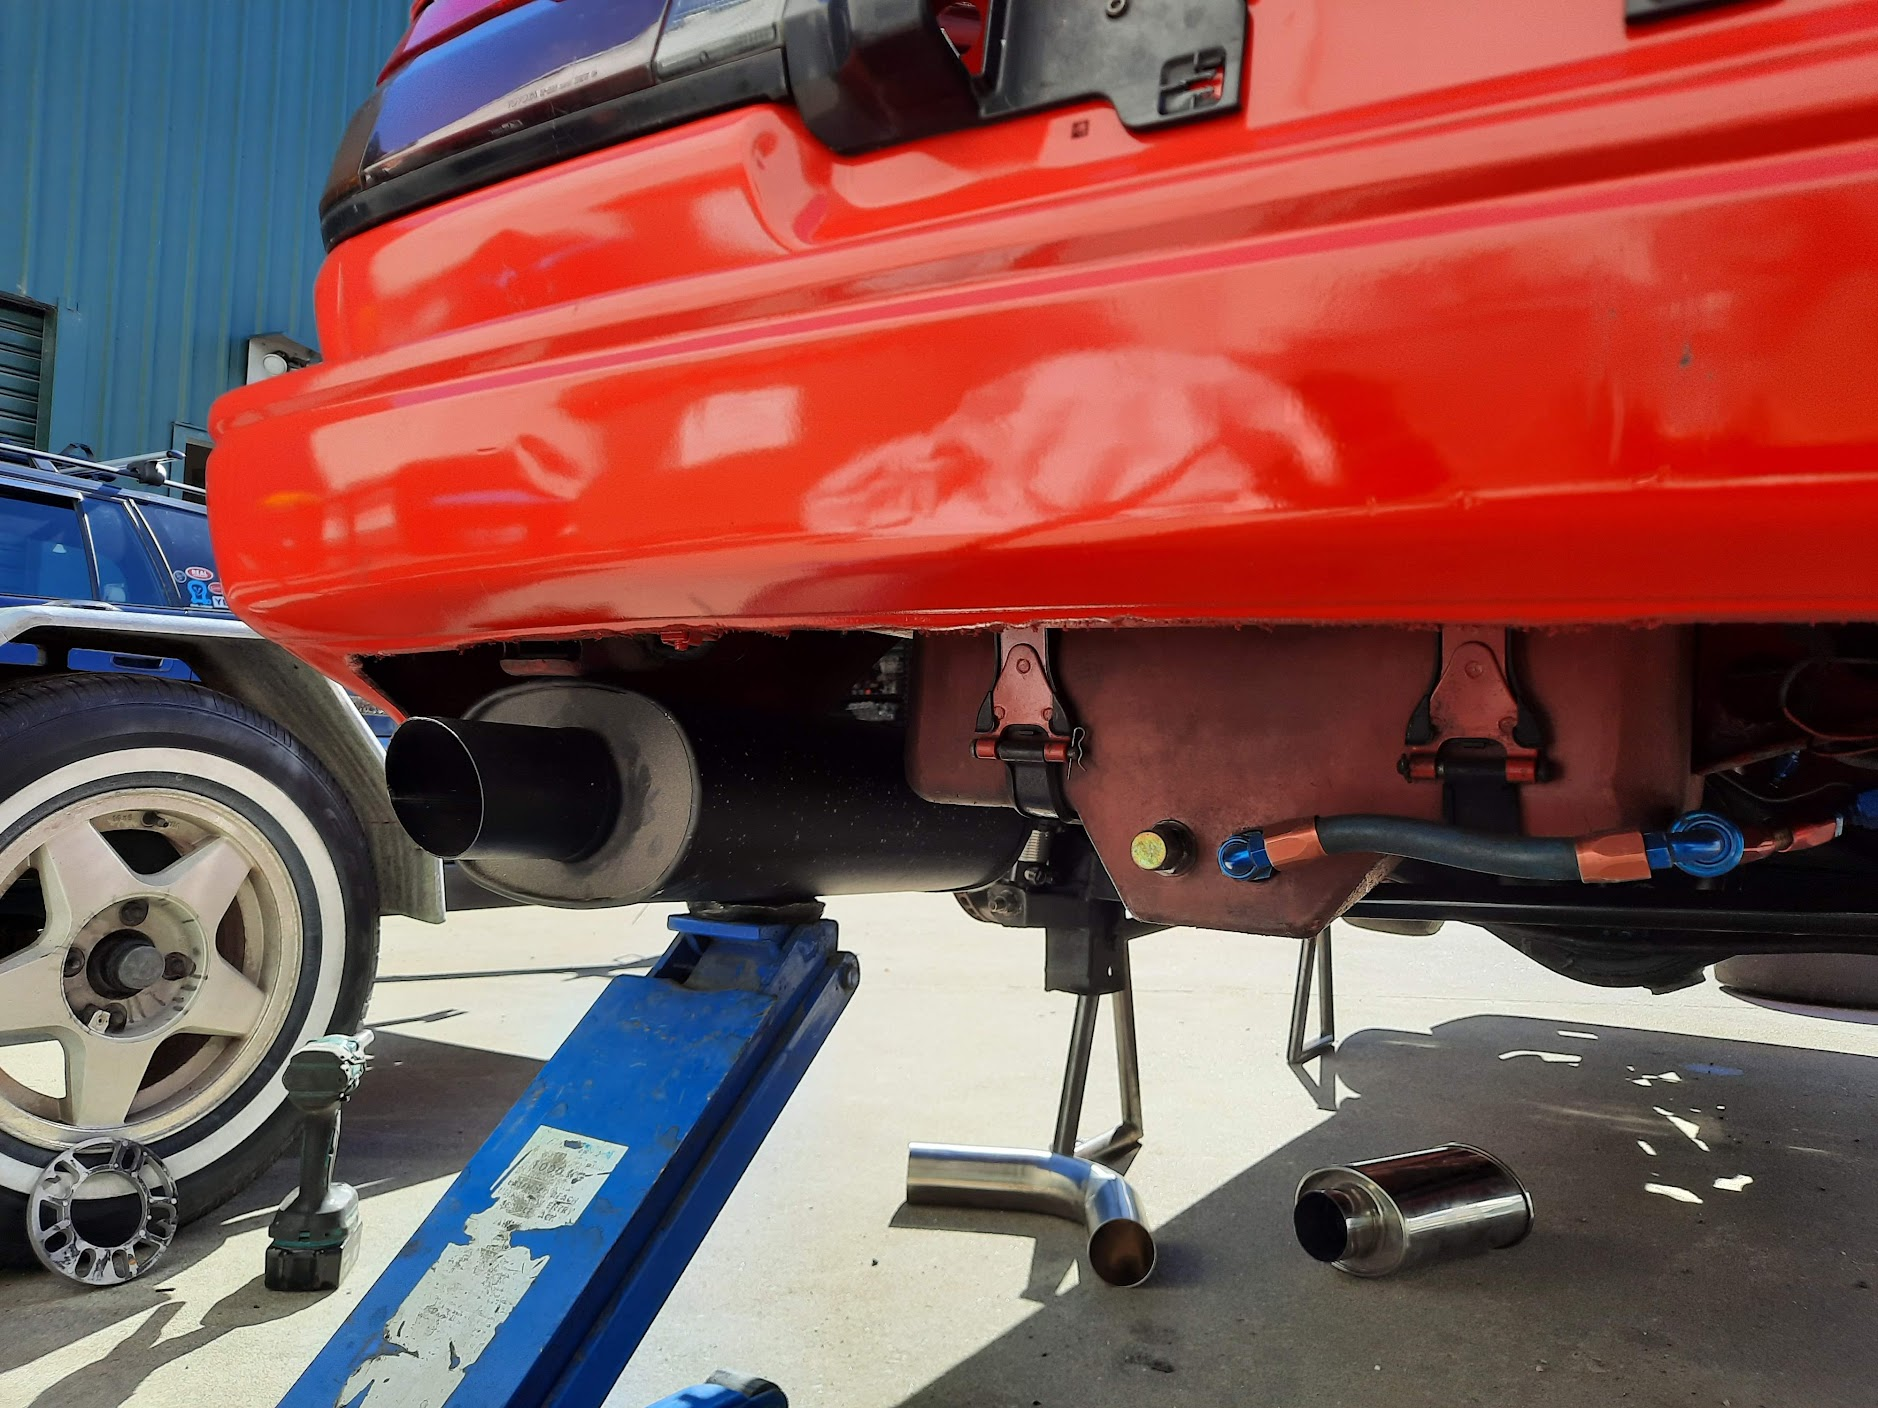
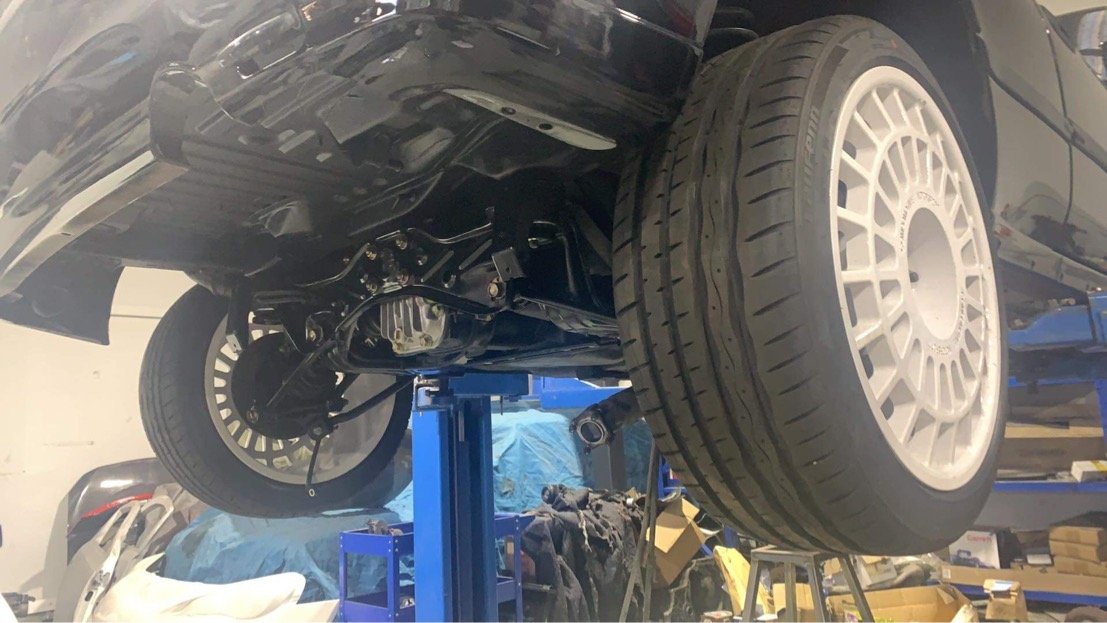
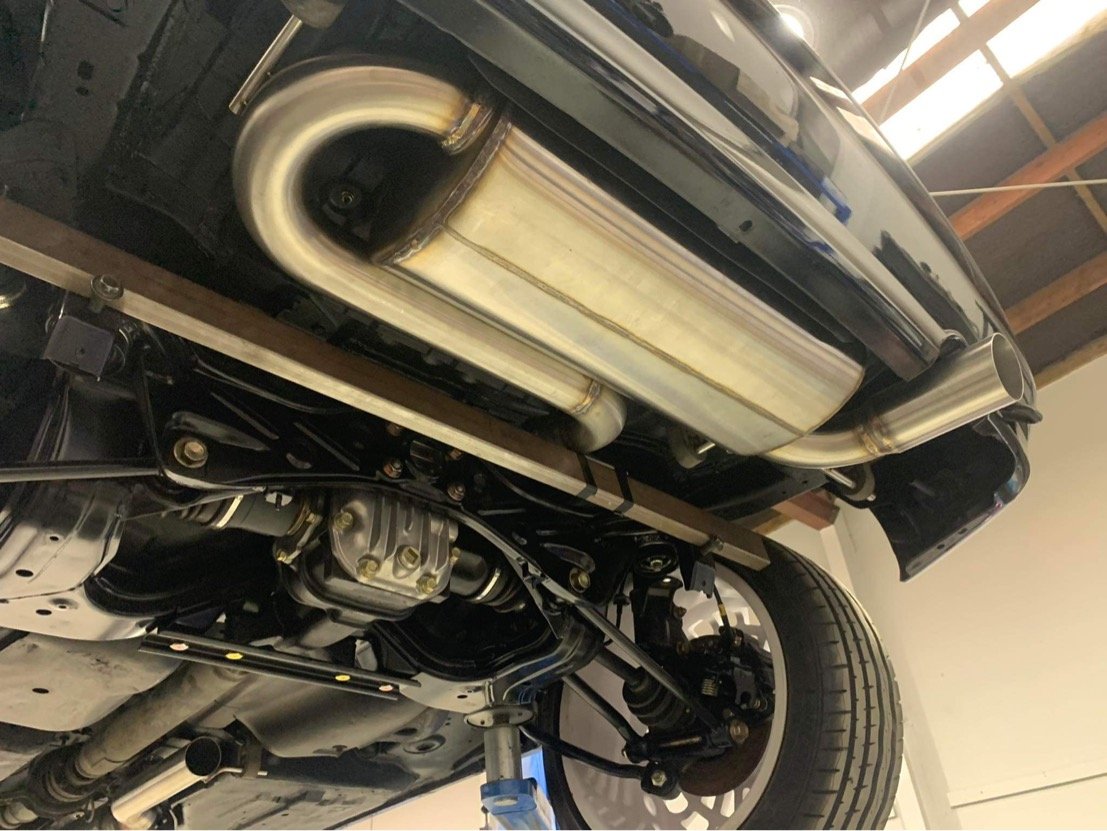
About 2 weeks after I brought the car to Queenstown, I broke my shoulder riding the XR250... So for the last 8 weeks I've been staring at this in my garage without being able to touch it. The sling came off last week. I'm still a one armed bandit for anything heavier than washing dishes, but I still wanted to feel like I was making progress. A couple of mates helped me get the car to work over Easter weekend so I could wash it and start on a few small jobs. Much better. One job I really want to do is update the exhaust. The old side pipe has cracked and it had a bad habit of hitting the ground over ripple strips etc. This time I'd like to go full stainless and exit out the back of the car, with two mufflers. Going under the diff will be tricky because of my droop travel and lowered panhard rod mount, so I'm thinking of heading over the diff instead. It looks like it'll work - this is with the LR shock at close to full compression: Rear muffler location will look something like this: I'll run the smaller reso/muffler just before the diff and might run a V band up the front because the old flanges I've been using are pretty tired now! Taking the exhaust out the back makes me feel old. My ear drums will love me for it though
29 points
-
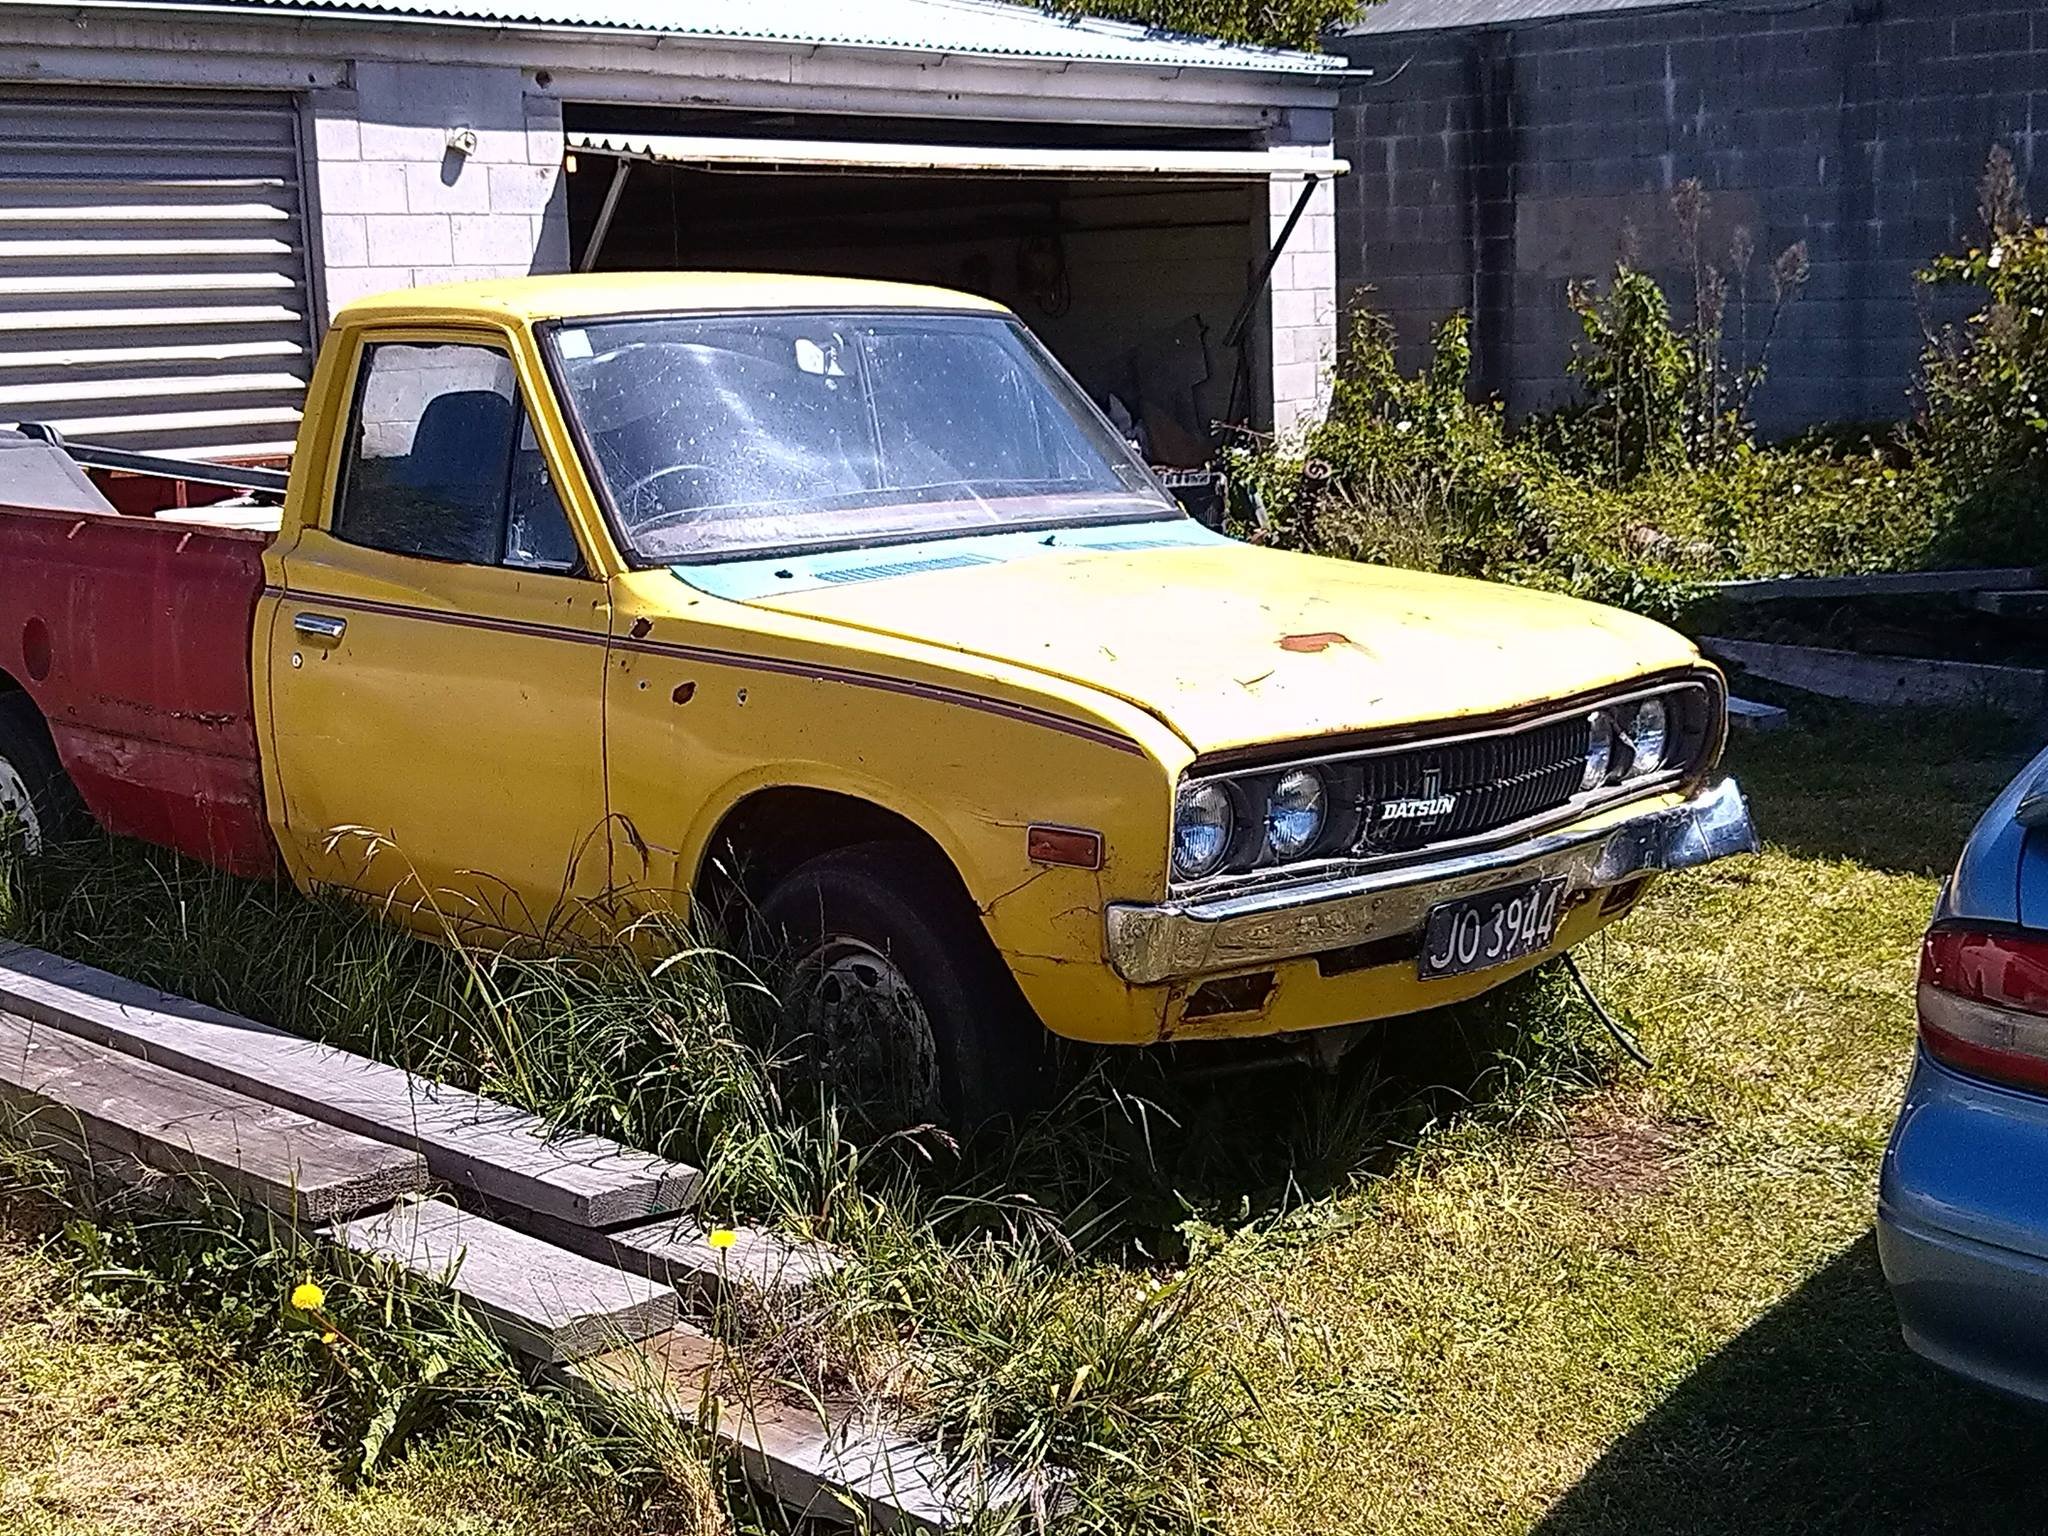
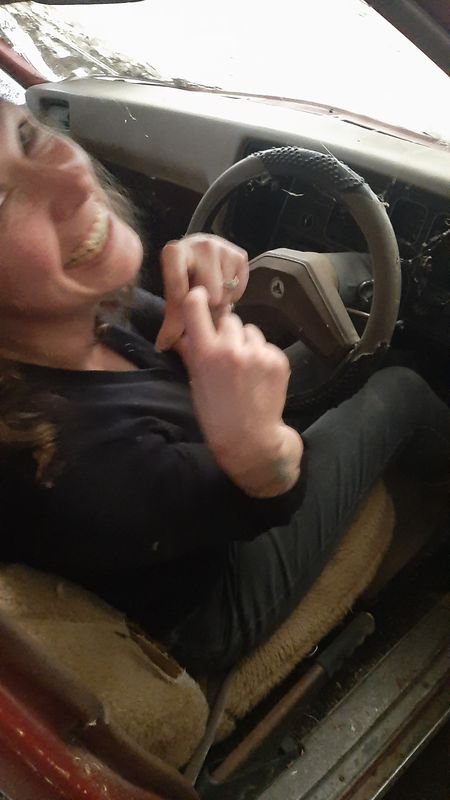
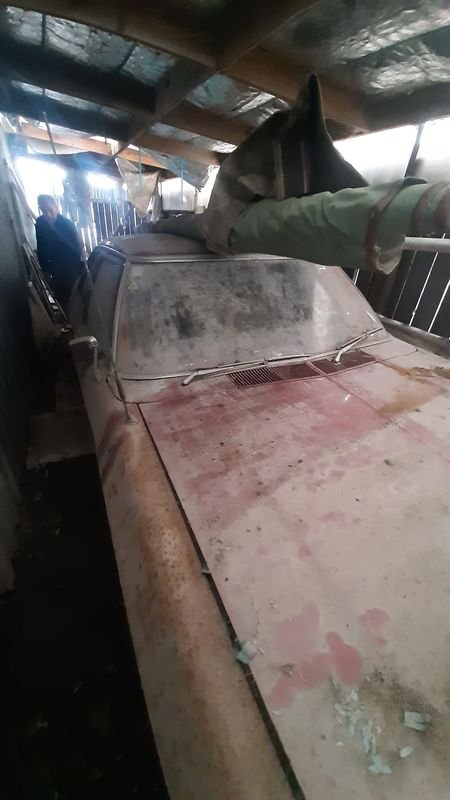
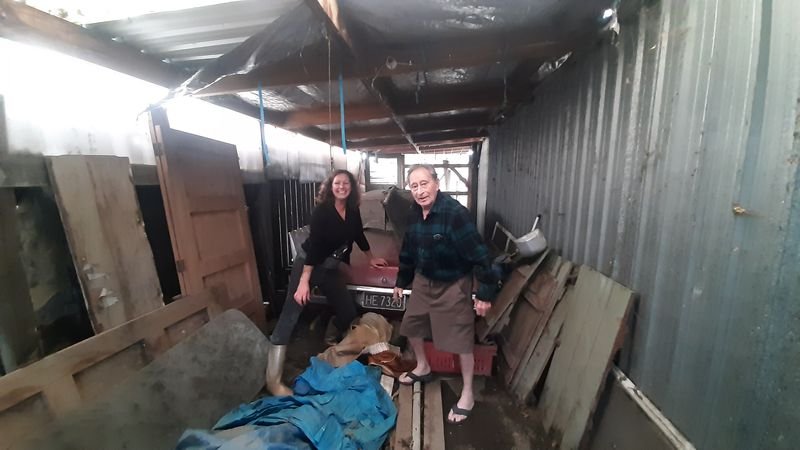
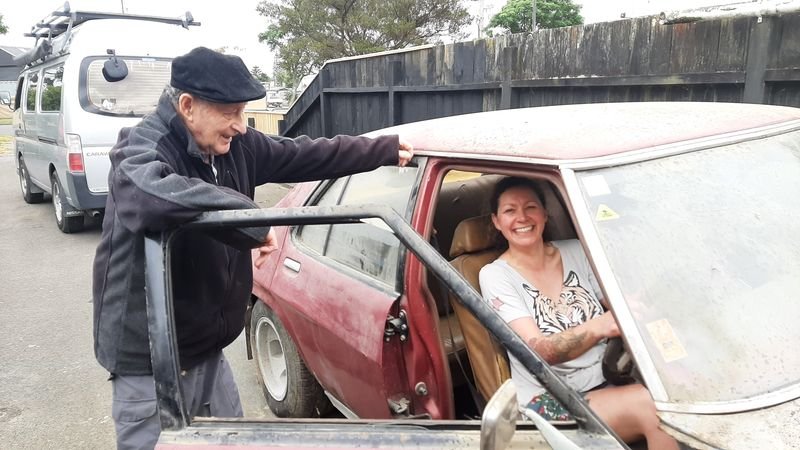
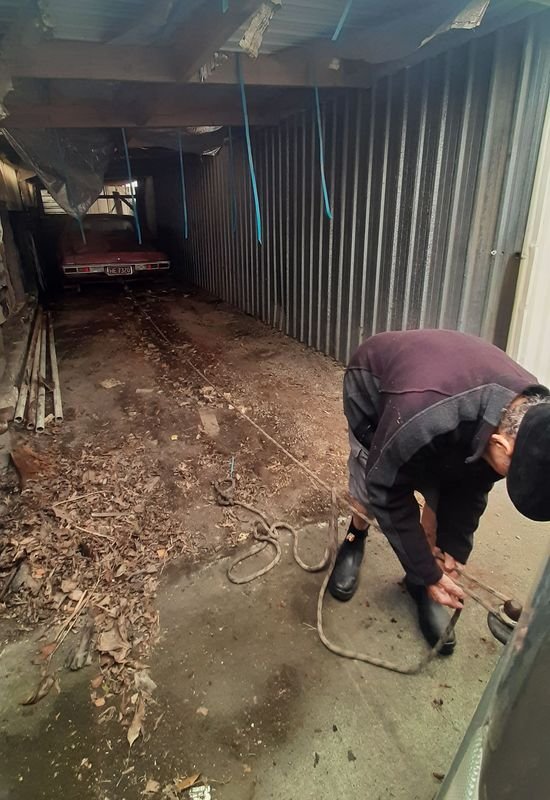
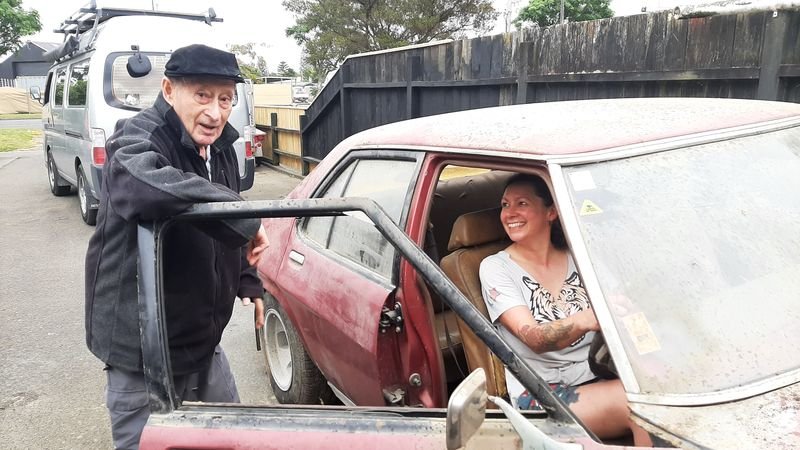
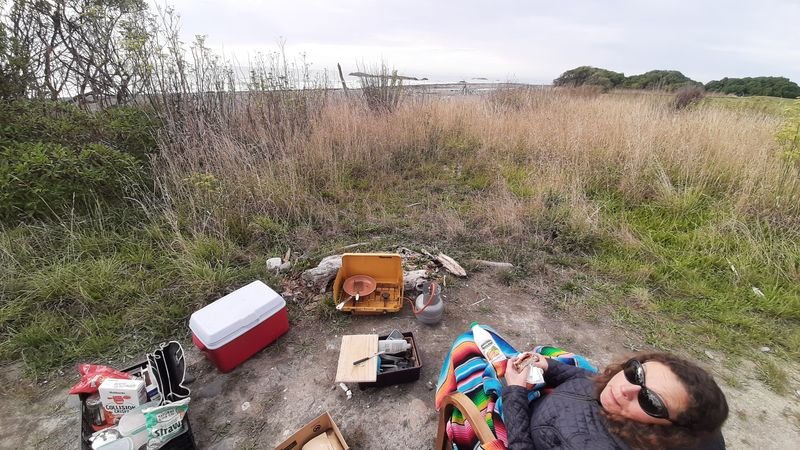
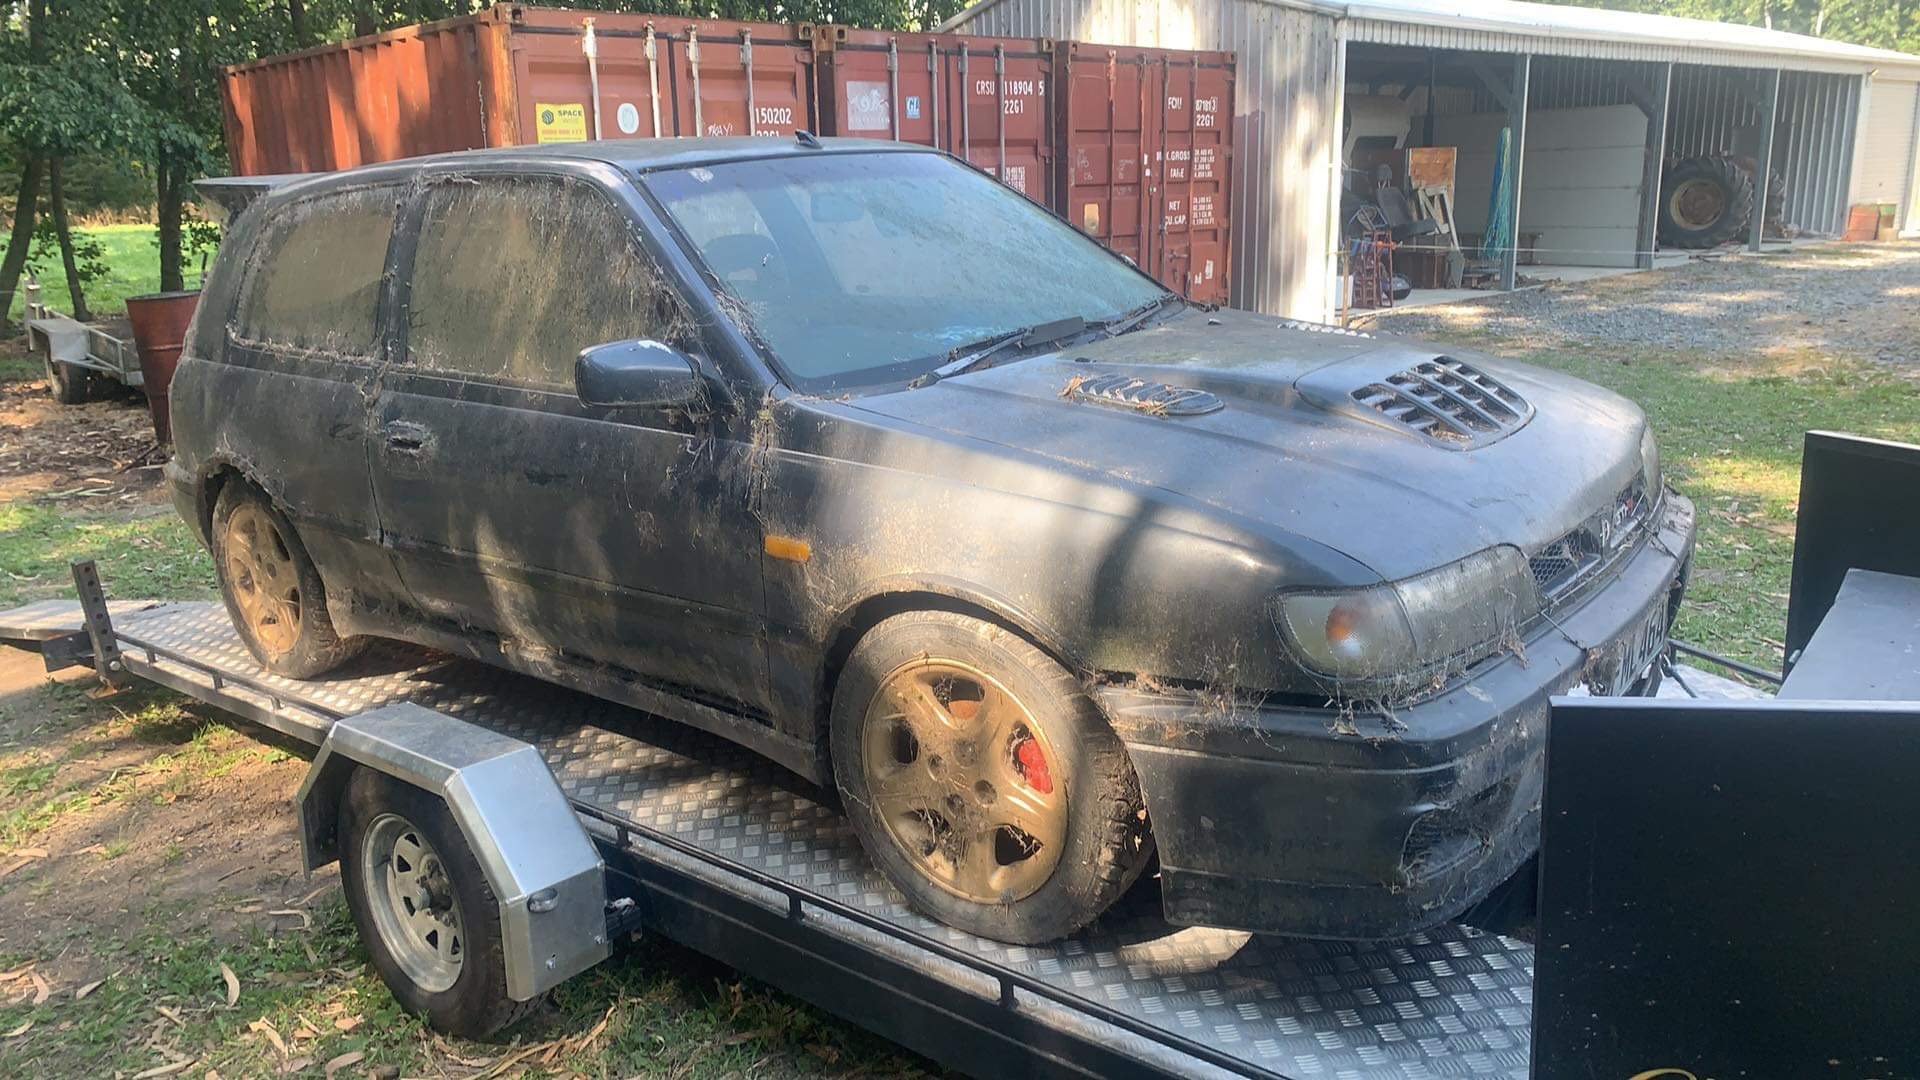
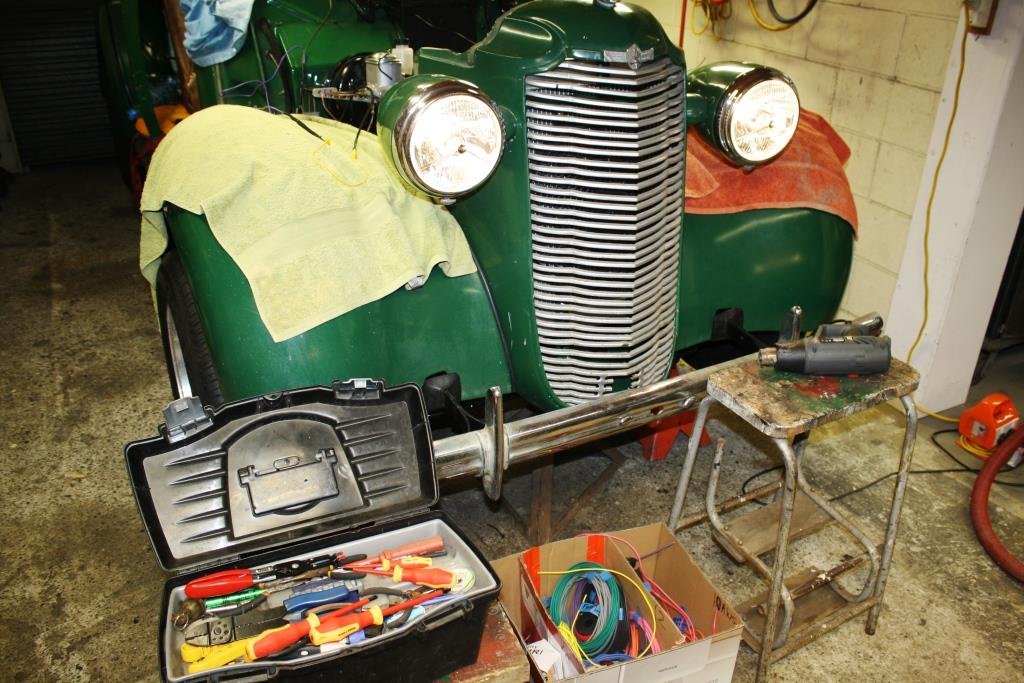
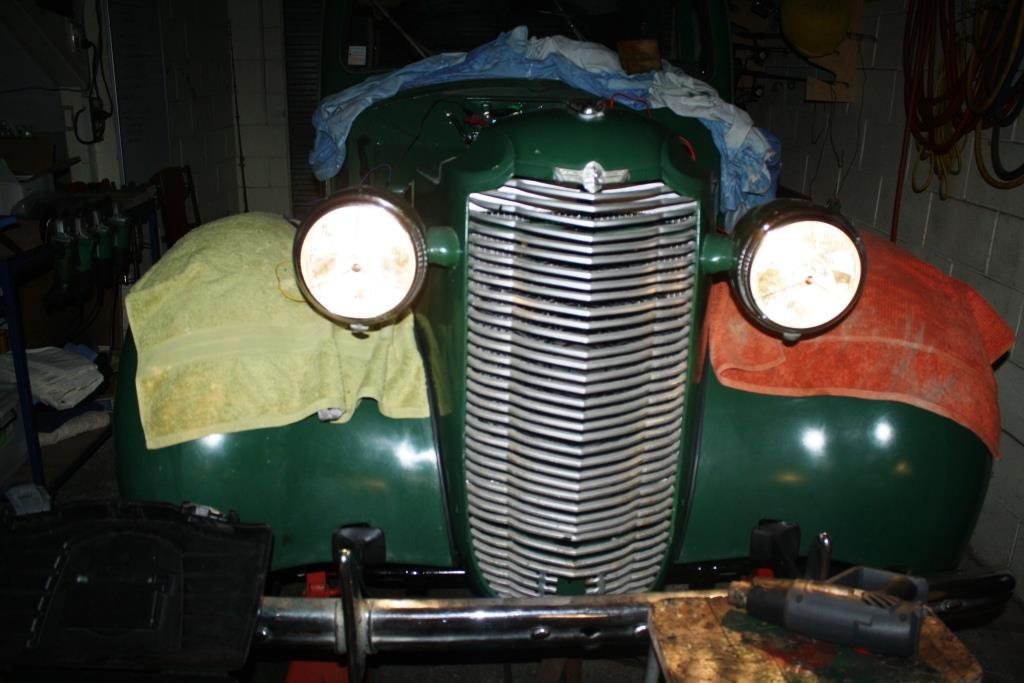
Organized time off and ferrys etc and a cool 10 days hanging in Fielding. Real barn find! Her names on it so this must be it. We pumped up the tyres and had a general look around one day Then cleared all the stuff out over the next few days, did a lot of gardening too, Hooked it up to the van and pulled it into the light
29 points
-
Went to pickapart and replaced the missing air bleed hoses. Fixed a few other coolant leaks. Now it's good. Bought a big syringe pump thing to fill the gearbox with oil, managed to do this notoriously messy job without spilling a single drop of gearbox oil! Miracle! Until I realized that the drain plug wasnt screwed in properly, and itwas on an angle - so I had to undo it and quickly straighten it and tighten it up. So gearbox oil everywhere still. Damnit, haha. Then I think I've still got some fairly massive air leaks, I dont have any gaskets or sealants at the moment so I'll pull it all apart and sort that a bit better. I managed to get it idling at around 1000rpm, but only because I've leaned out the fuel table so much. Again an easy fix, just time consuming. Then another cool milestone, and to be honest something I was dreading a bit - testing the clutch. Everything's good! I drove the car forward about a meter, then reverse about a meter. Which is officially the furthest it's propelled itself in about 6 or 7 years. It's still ear splittingly loud, and dear god it sounds like a straight piped RB or something dreadful currently. Ugh. Will buy some mufflers this week if I can, so I can keep making some progress without making my brain bleed. Then also have enough of an exhaust on there that I'll be getting okay readings on the wideband. Small steps but all in the right direction currently. nother27 points
-
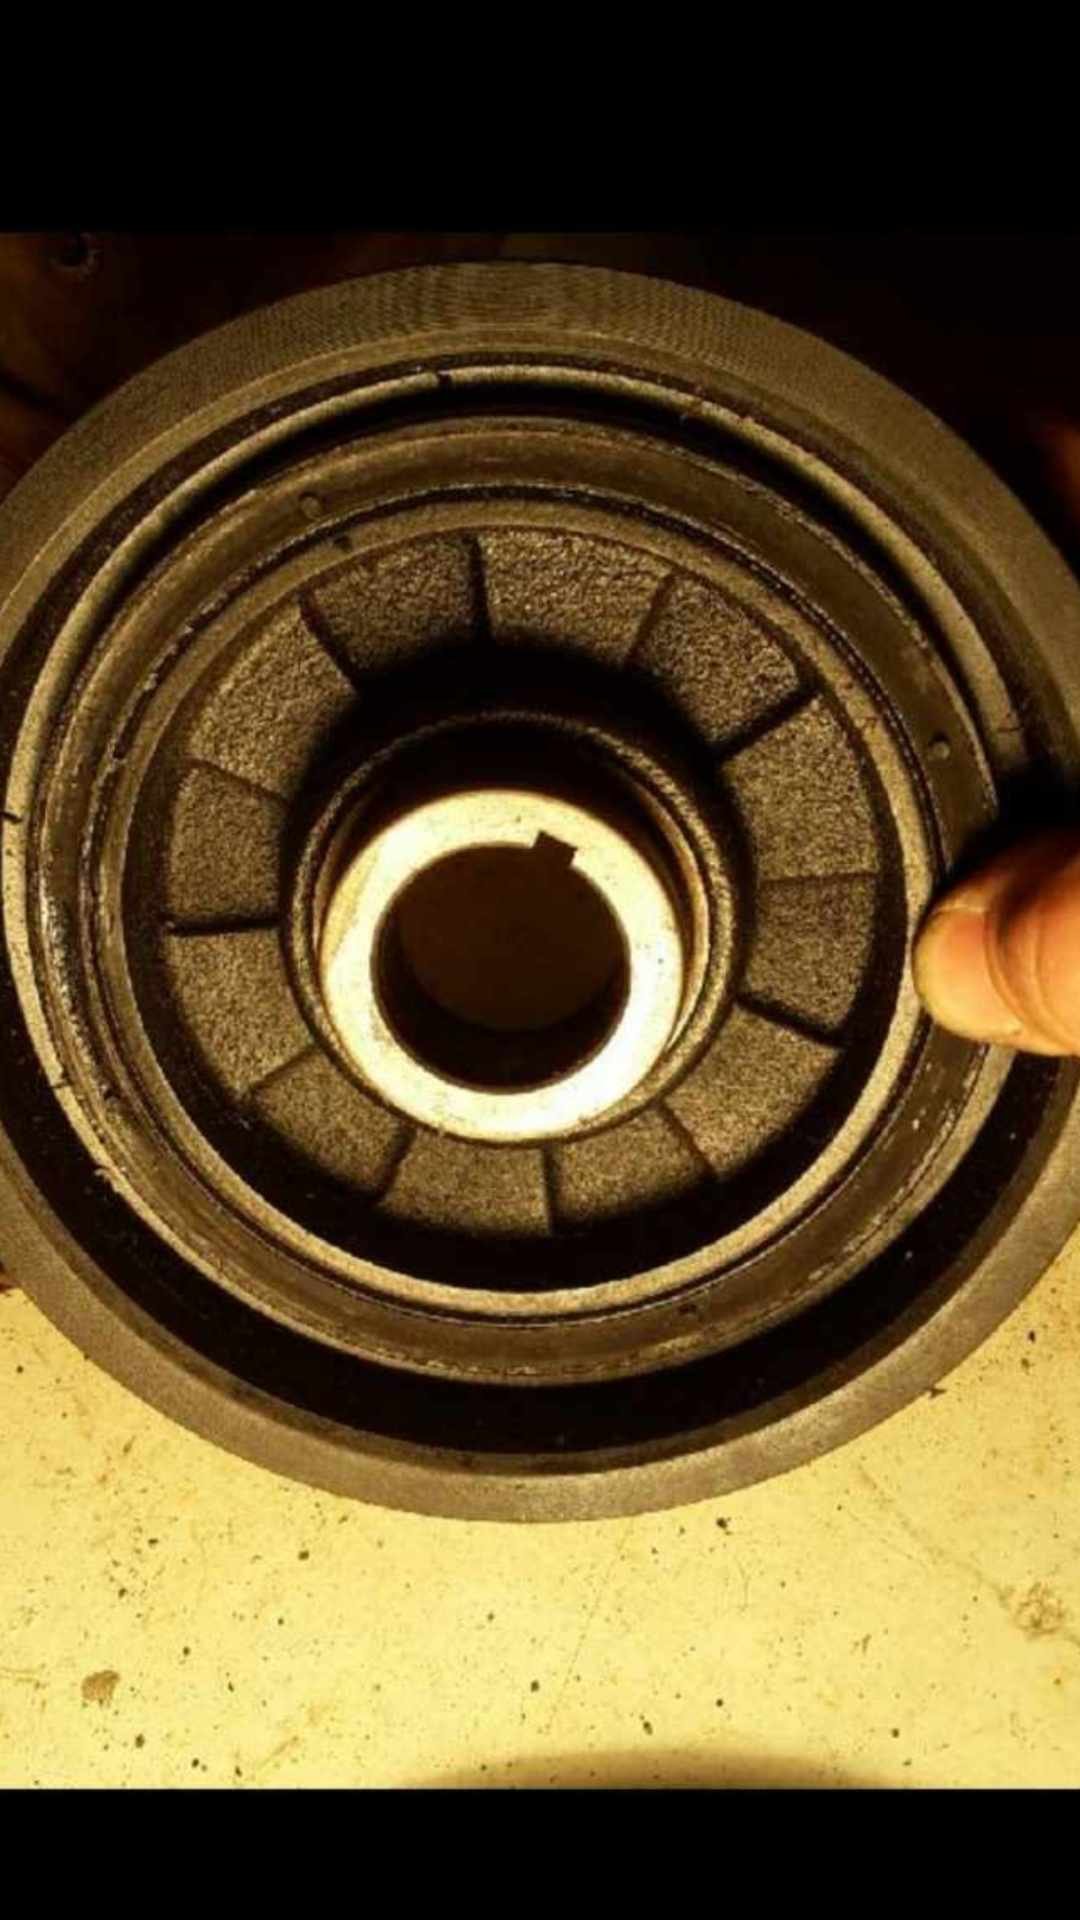
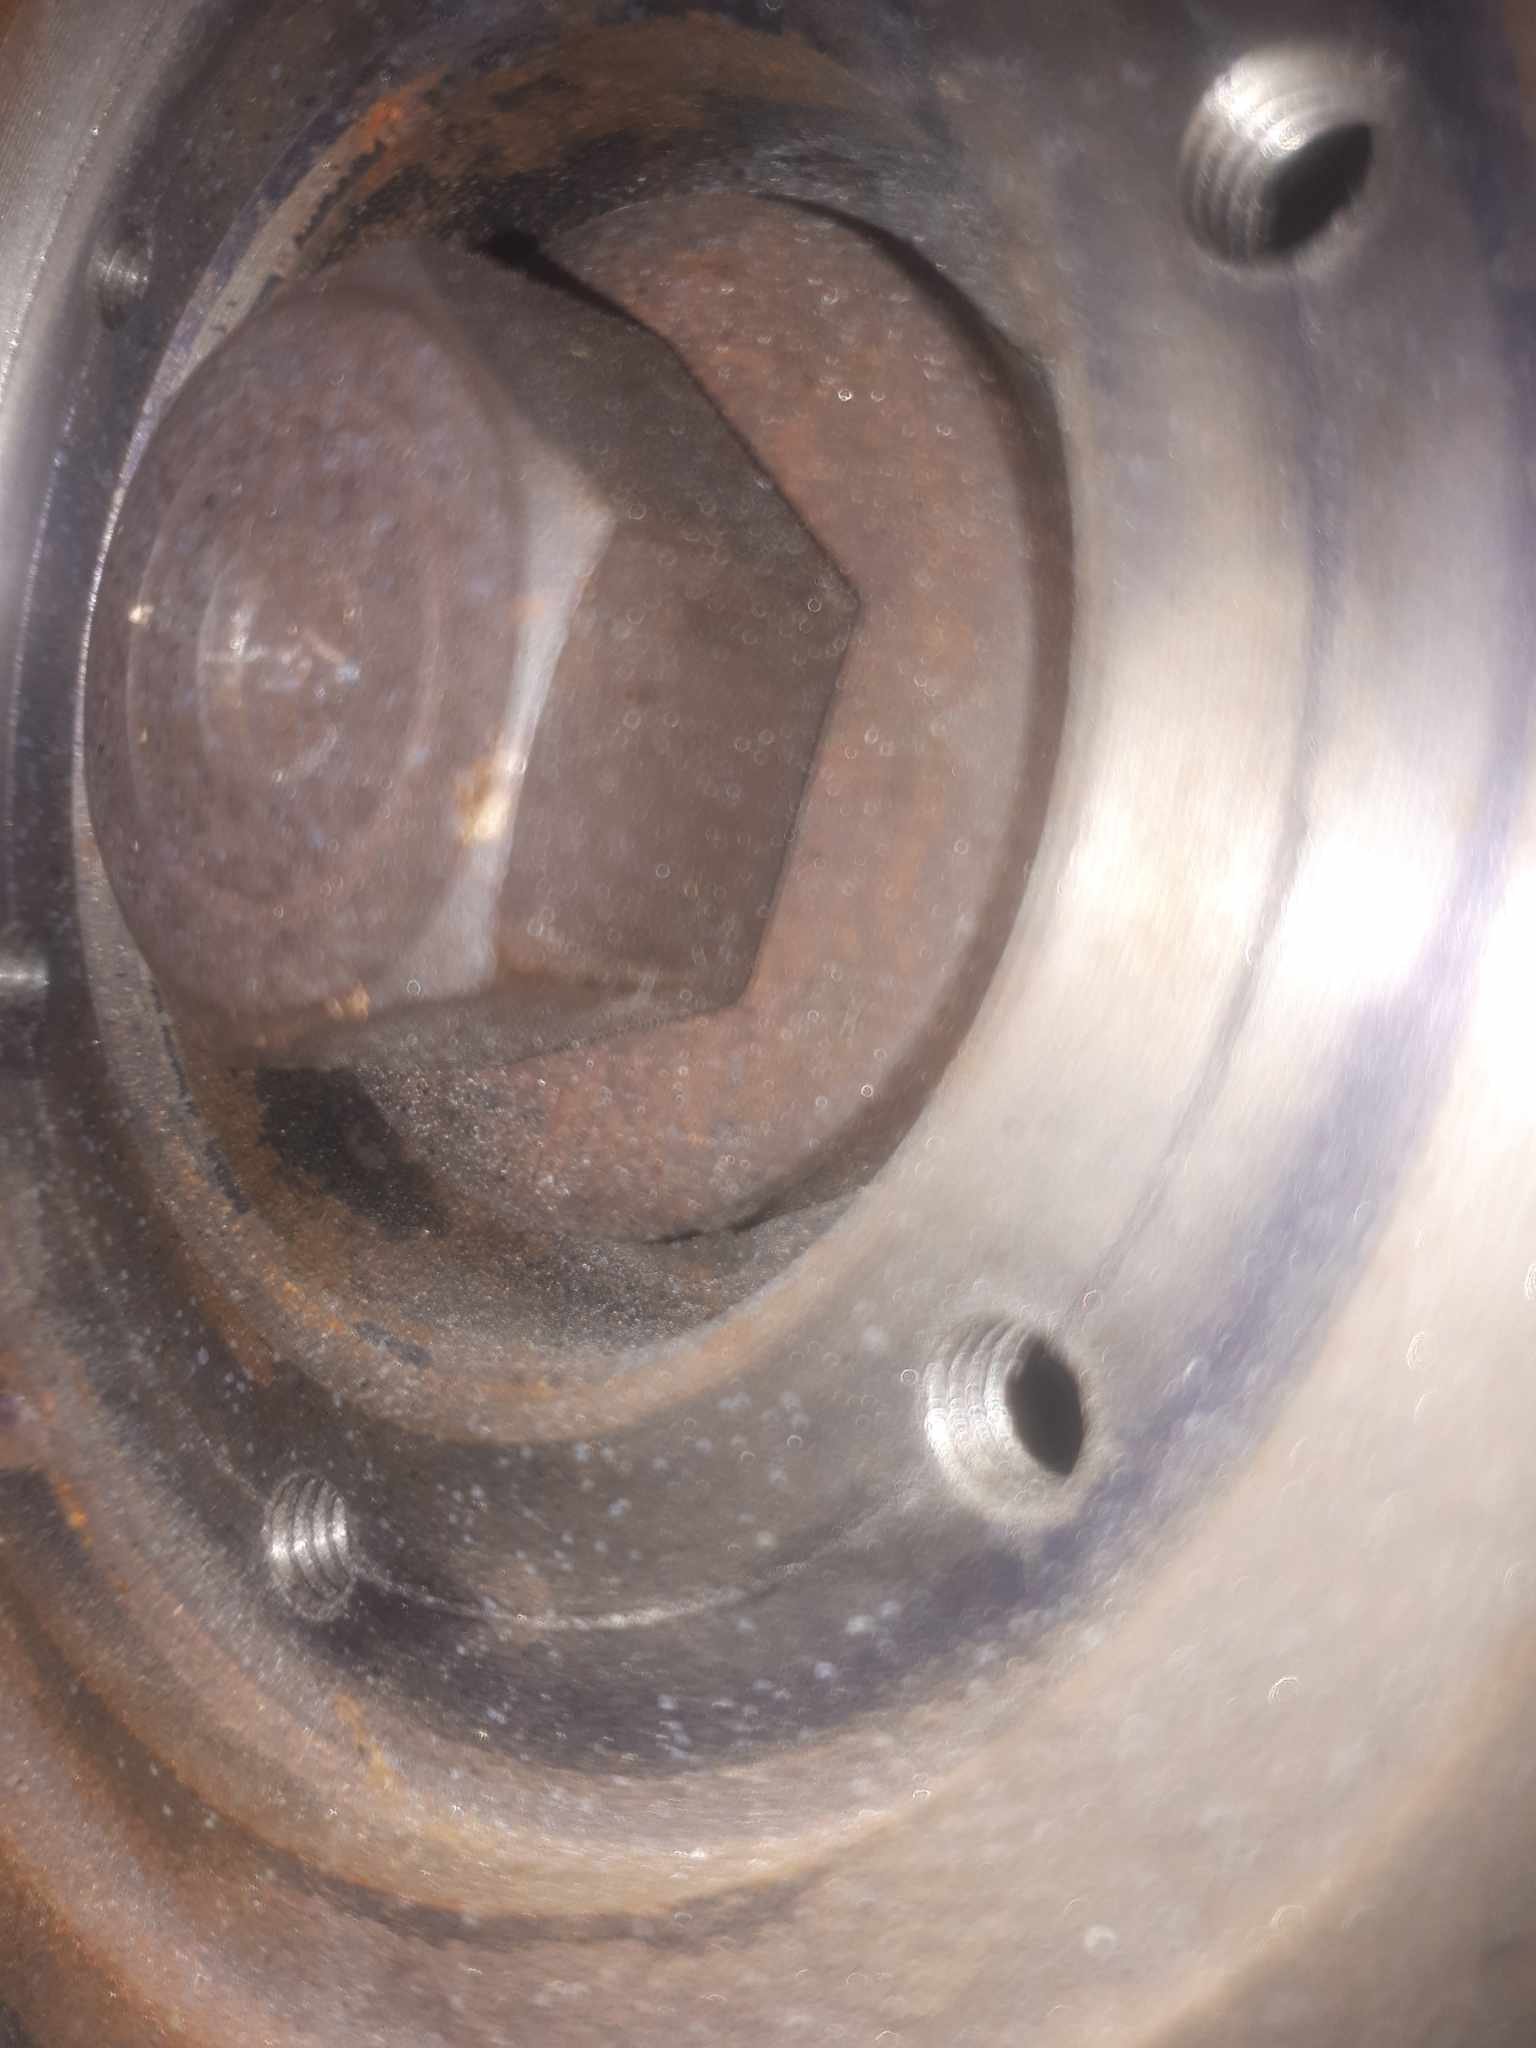
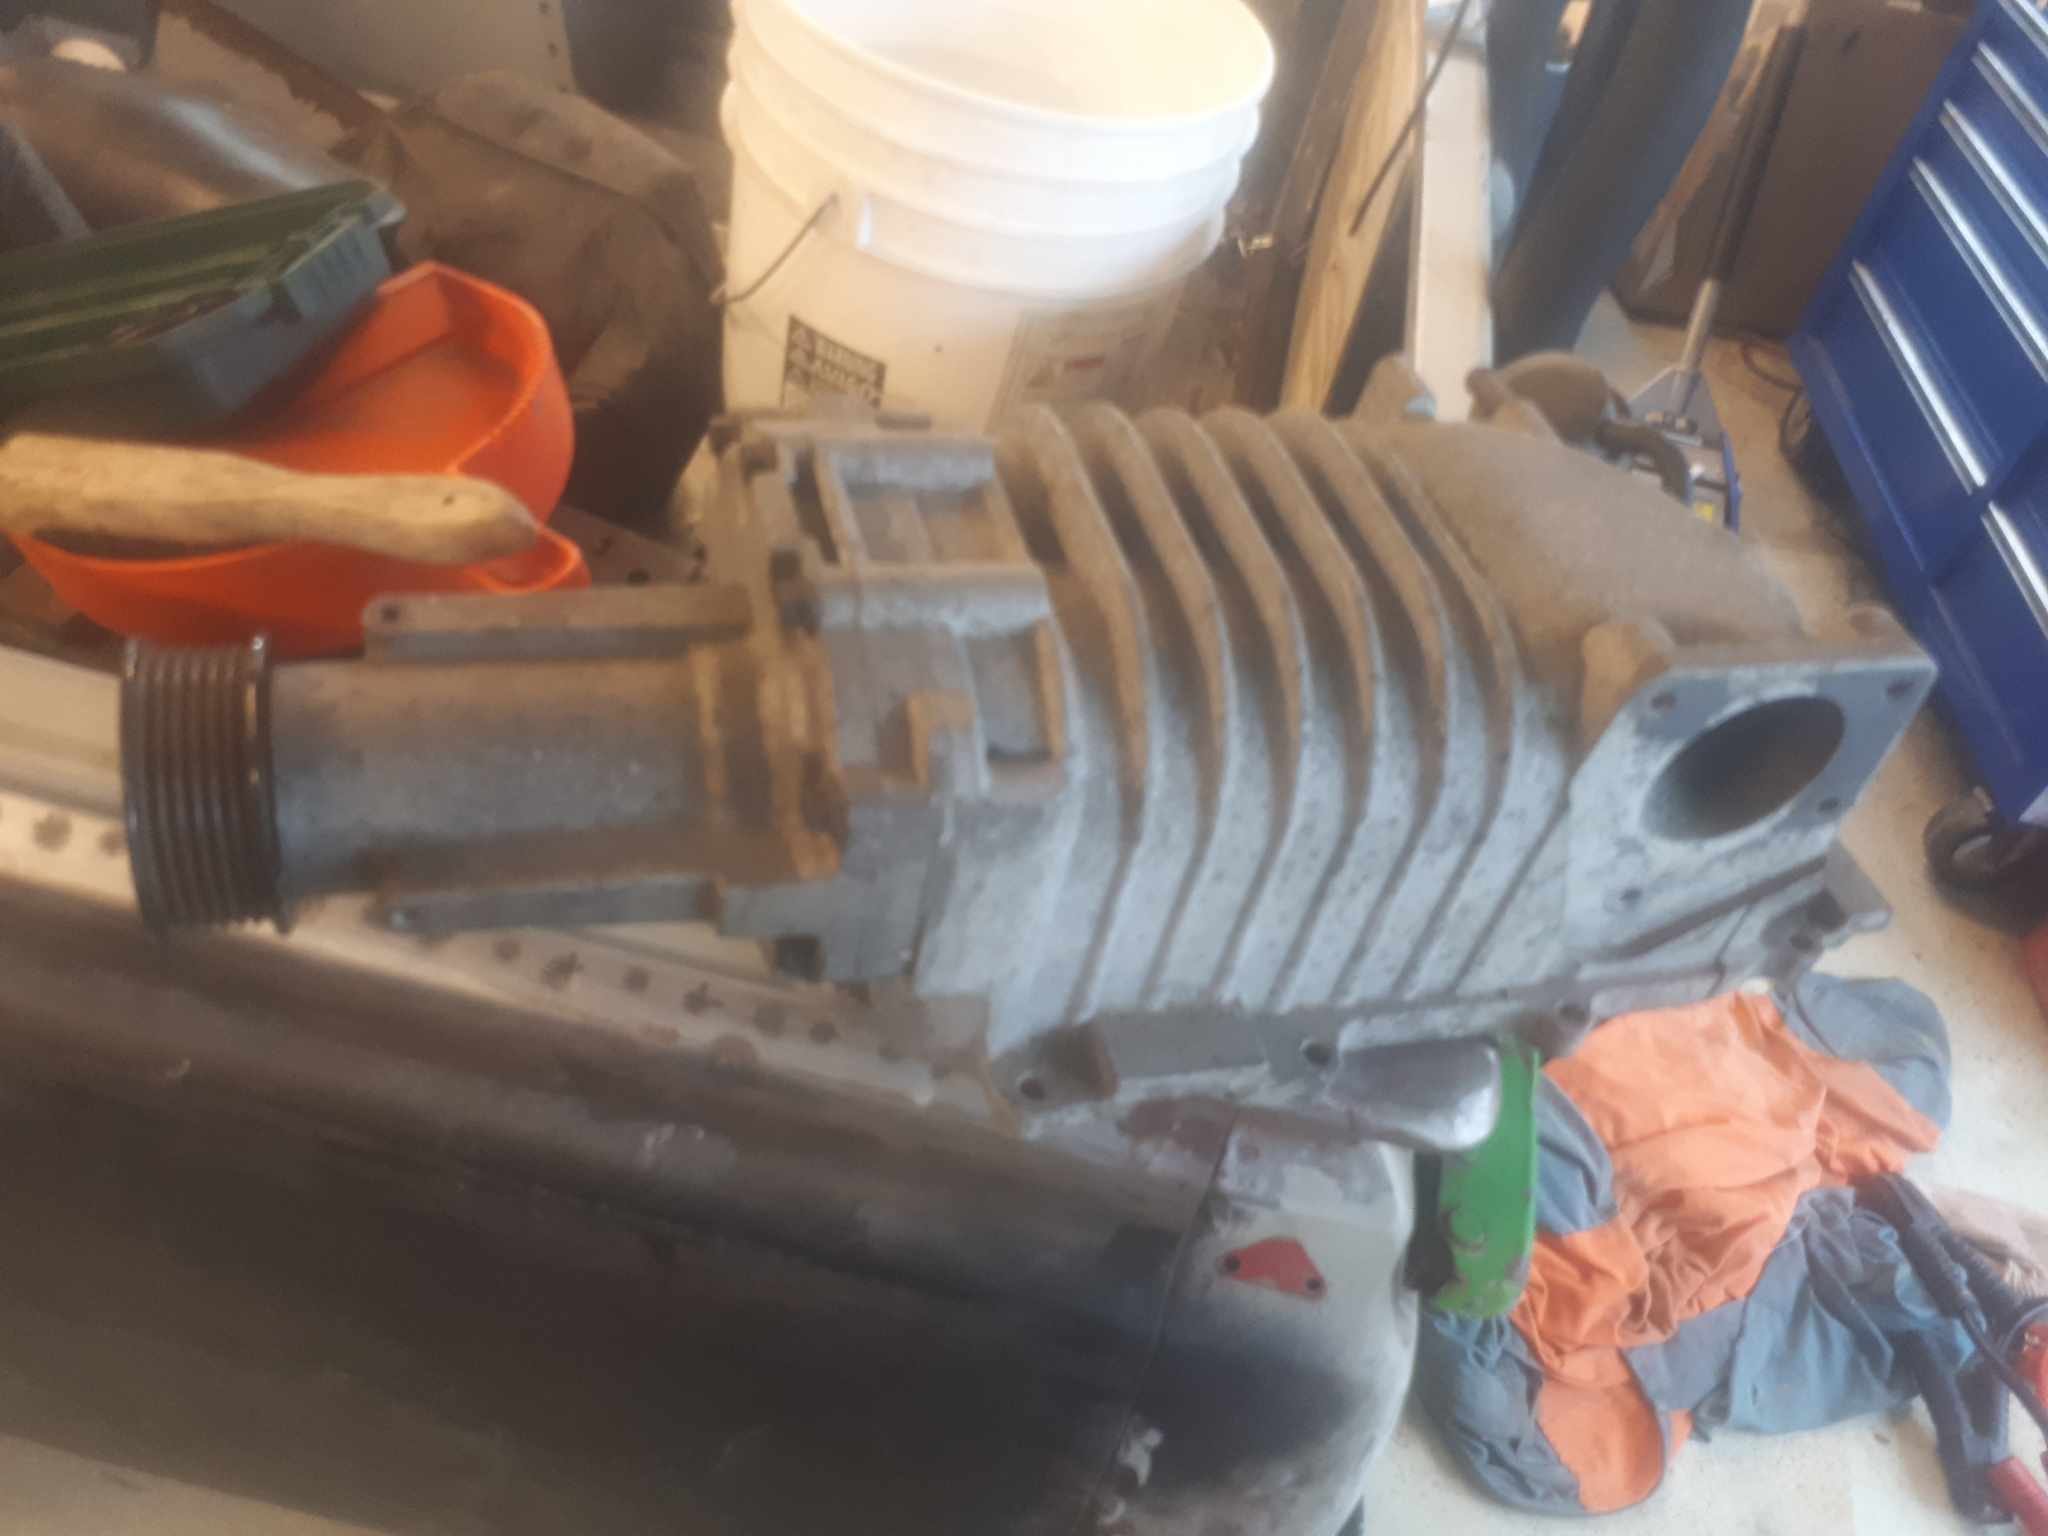
PNot an update as such, more a musing/potential future upgrade. Upon procuring the engine, id noted the front crank seal had been leaking. I whipped the crank pulley off, and much like the pinion seal on the diff, the seal journal was quite rutted/cut into. A speedy sleeve put this back to new. While i had the crank pulley off, i noticed an interesting shape was present. So i figured while it was off, it would be a travesty not to machine off the power steering pump pulley, (these are attached to the main hub, not the dampered pulleys that drive the water pump/alternator/AC) A nice spigot was machined on, and some holes drilled and tapped to correspond with those nice bosses. This is very hard to photograph in the car. Quite a while ago, the old boy picked up an Eaton M62 supercharger off Ebay. It came off a USDM nissan frontier truck, with the nissan VG33ER. (The larger version of the single can VG30 which were once common here) i basically told him, i was commandeering it. And back when @Vintage Grumblewas a cool kid, he had some SR20det injectors which he kindly gifted to me. So in the unlikely event 5his wreck ever sees the road, it wont be too big of a stretch to turn the wick up.
27 points
-
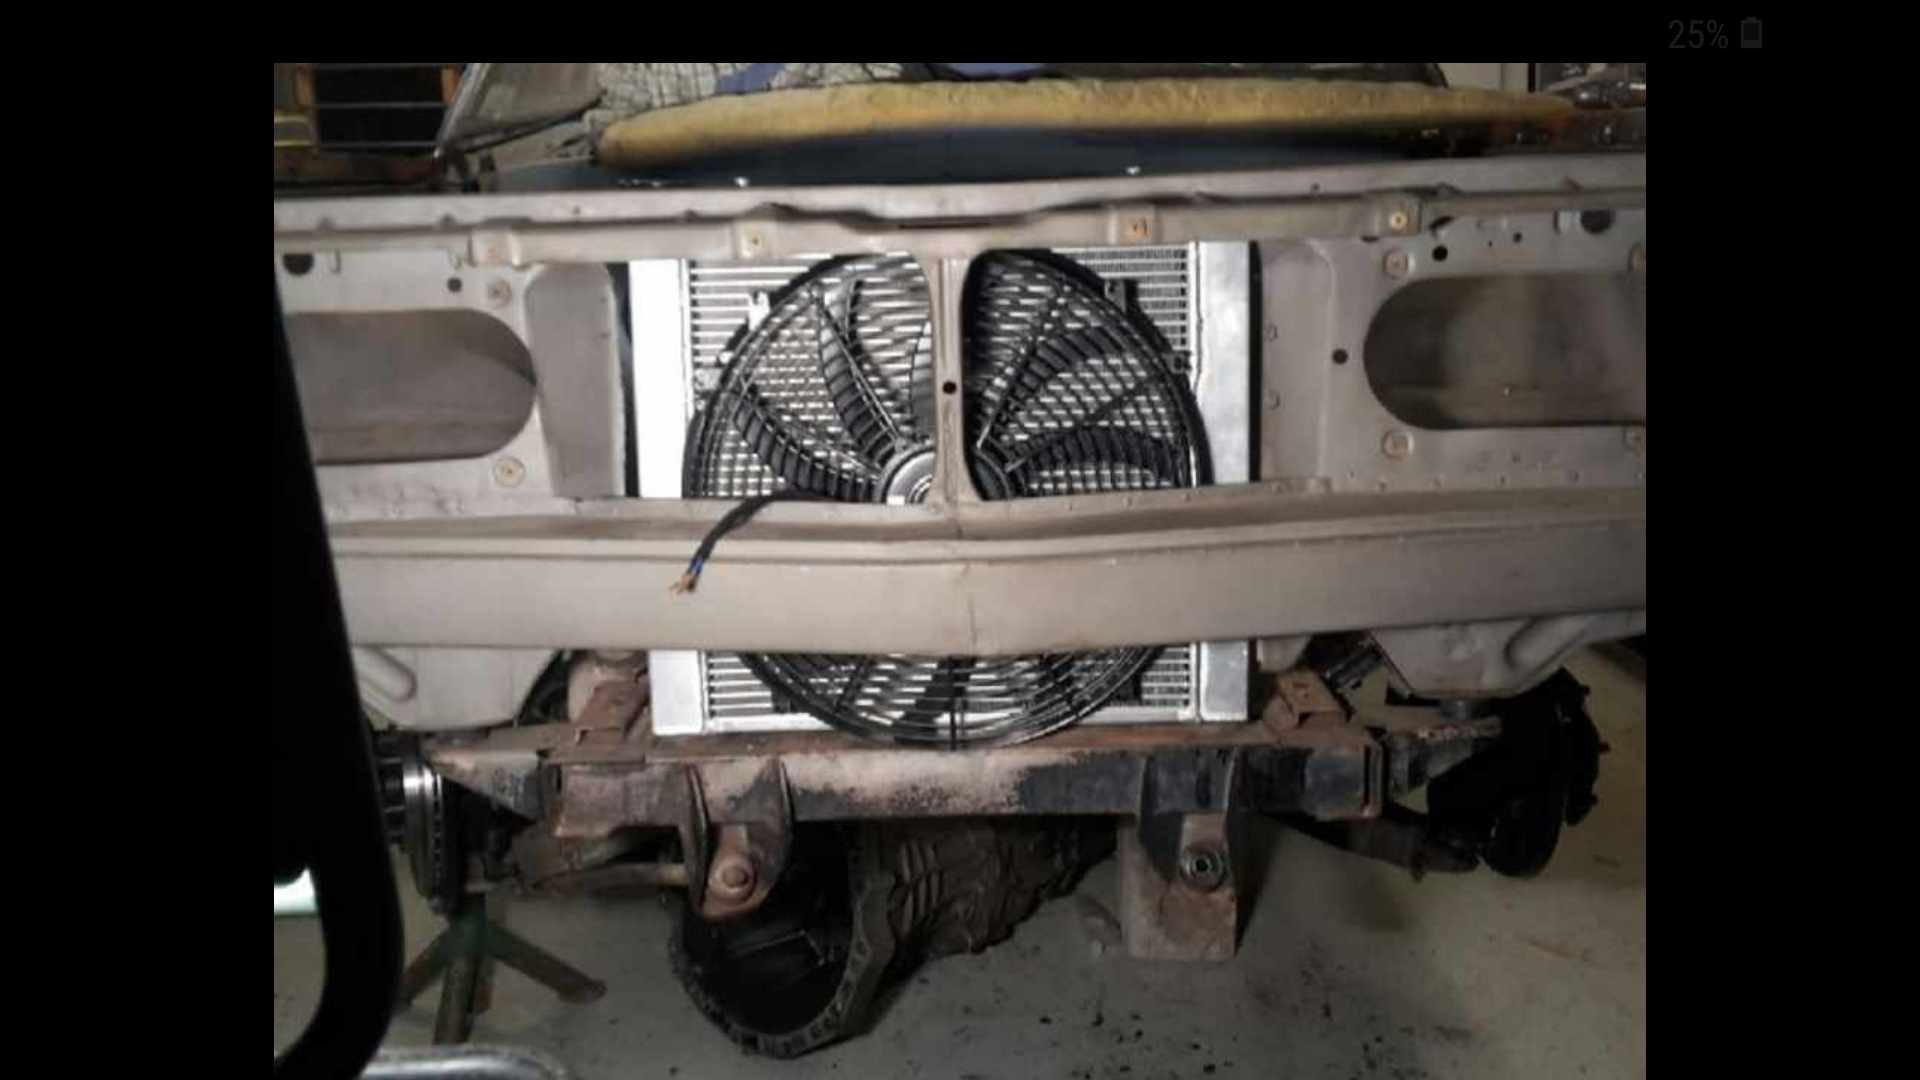
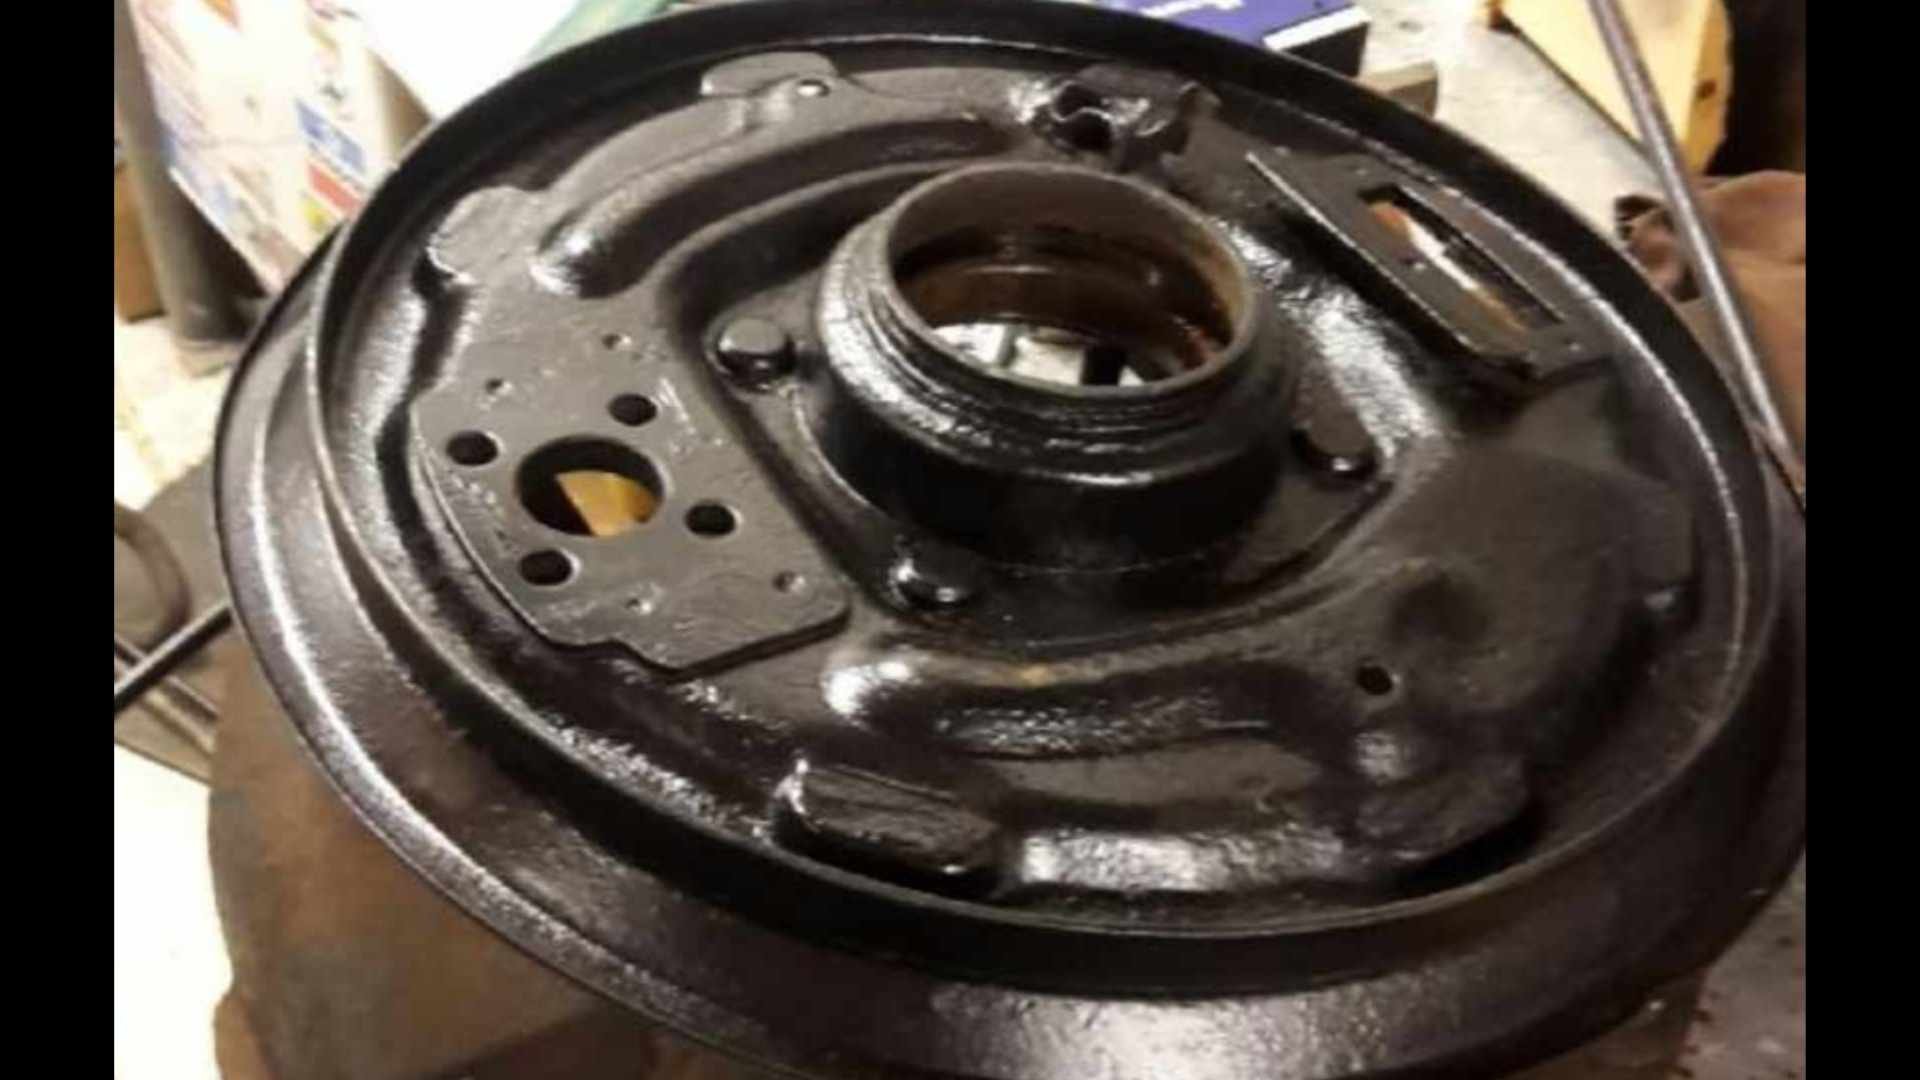
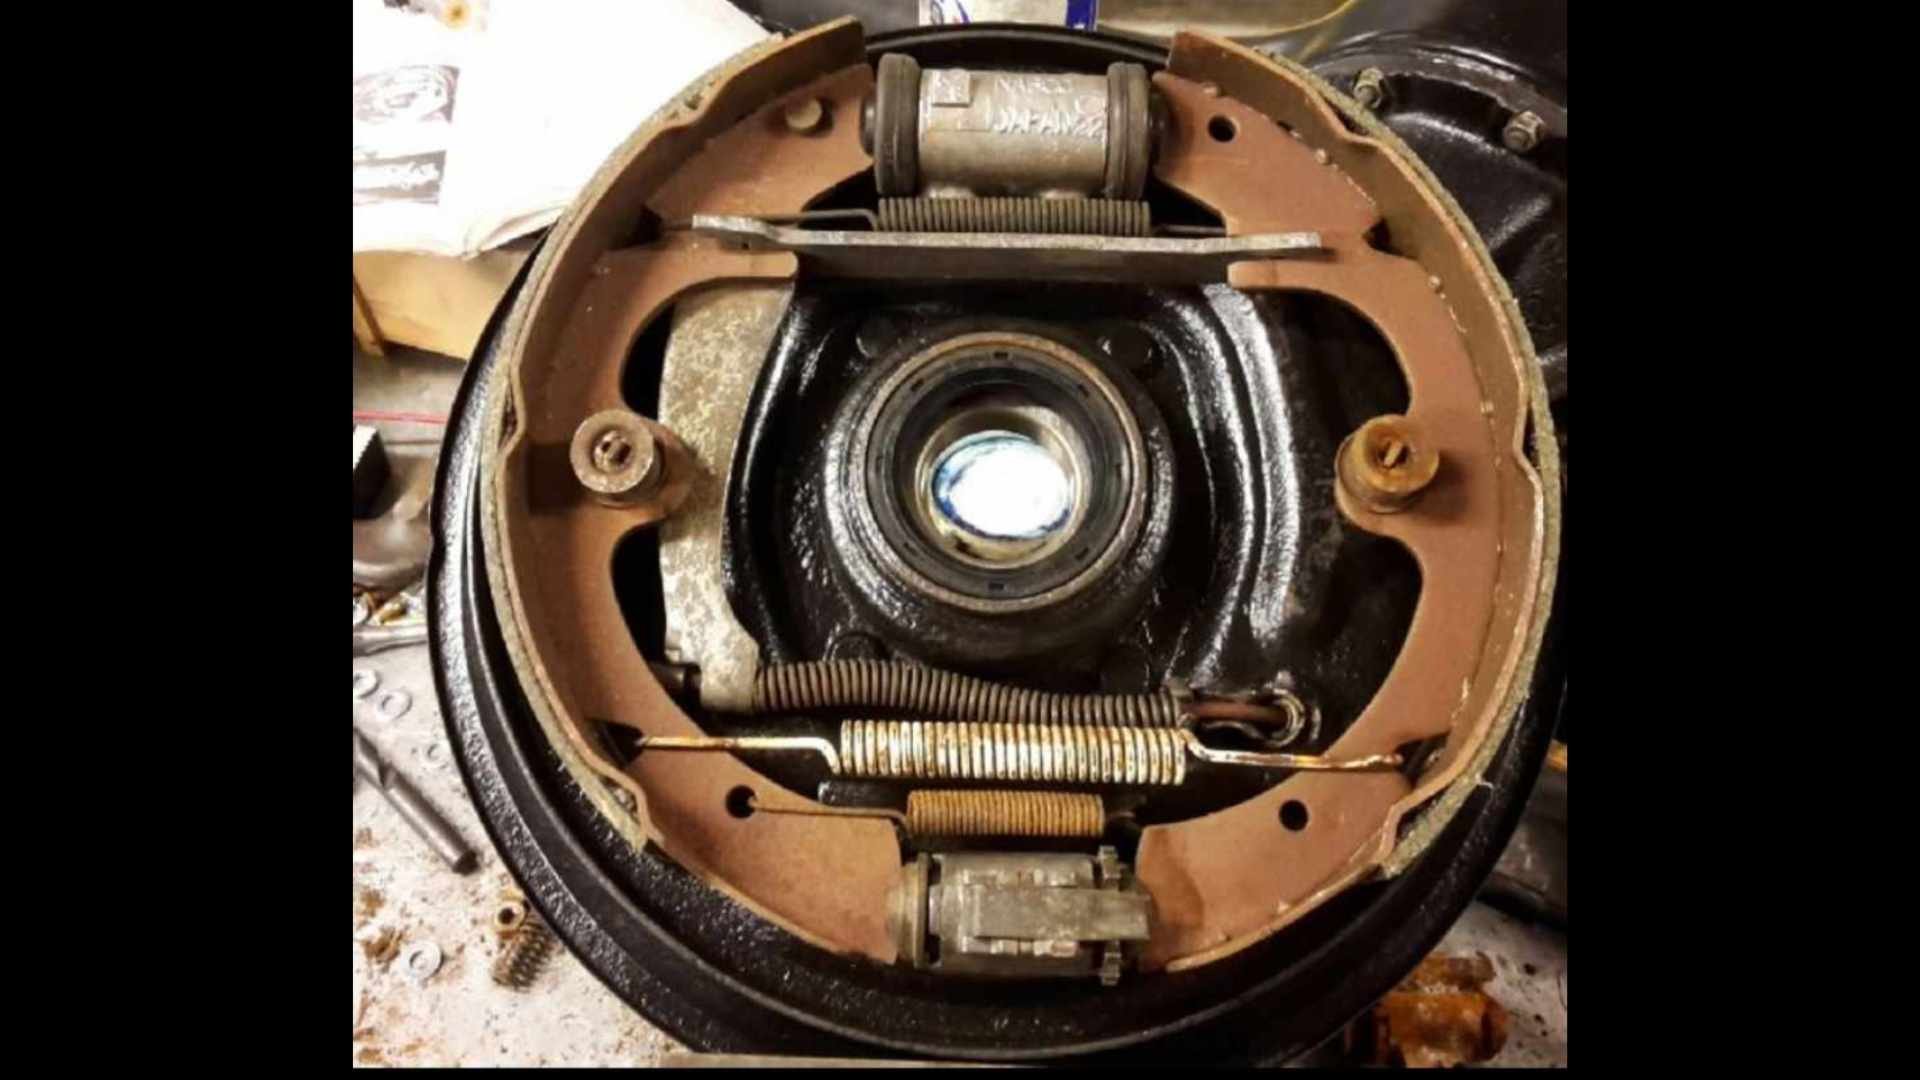
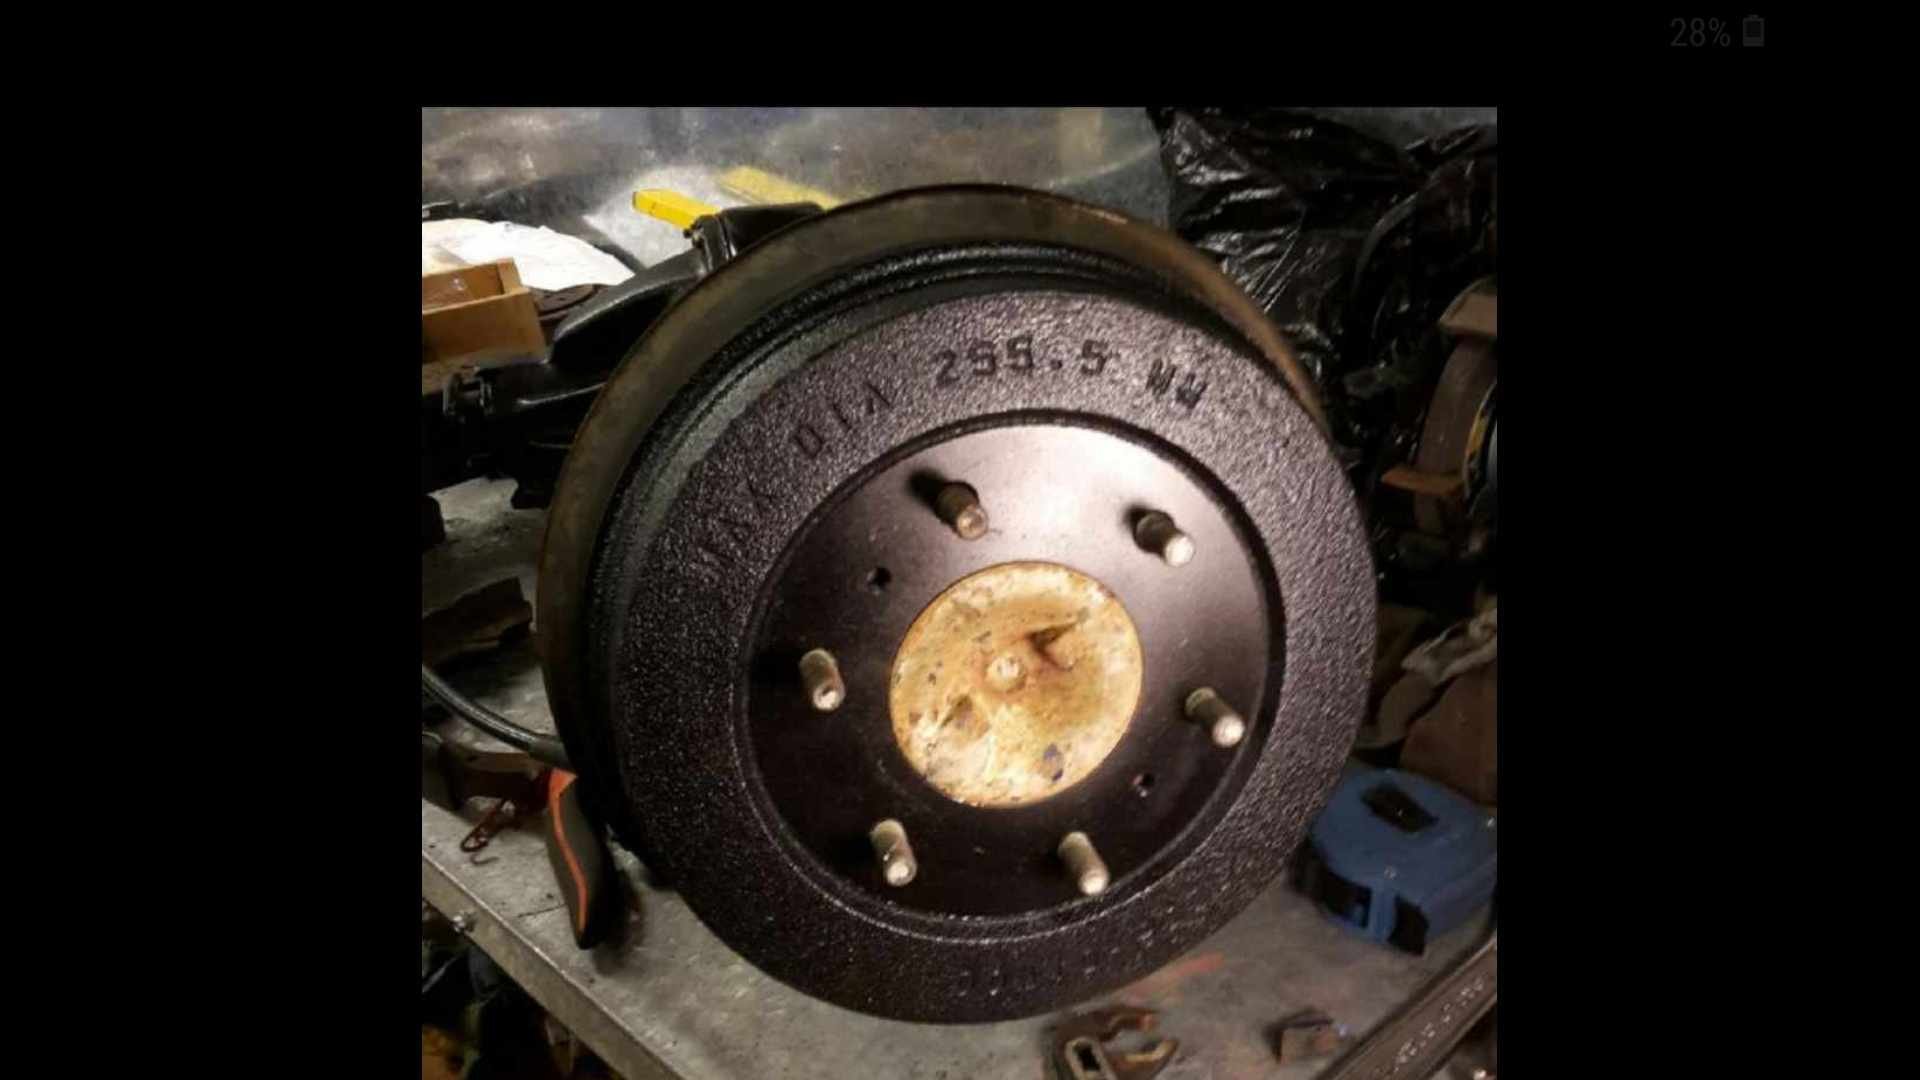
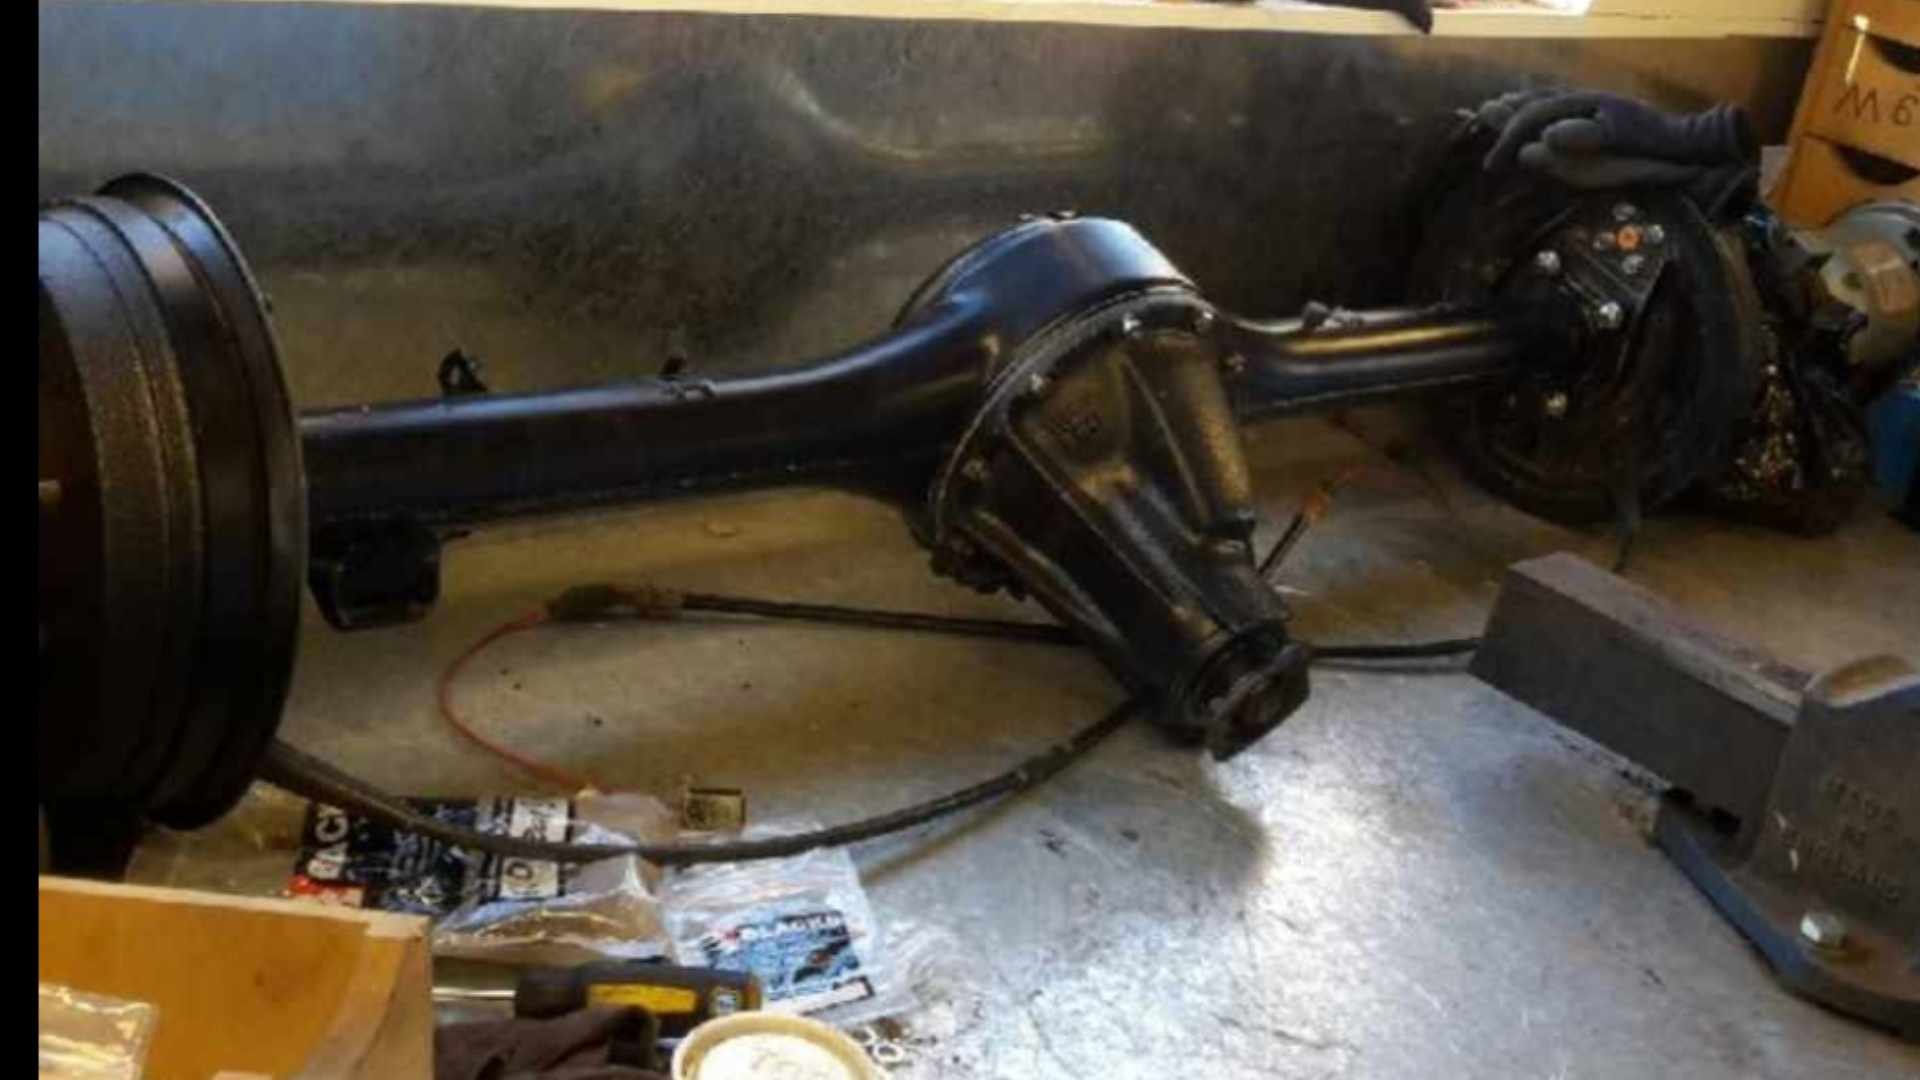
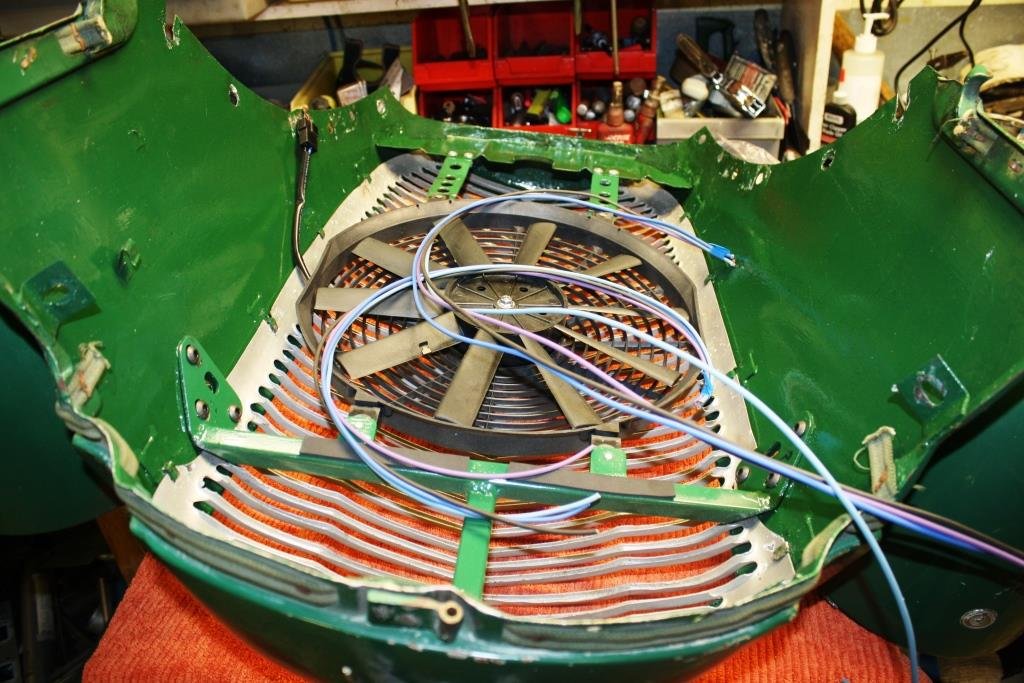
Id made a bet with @Luke that id have this thing drivable in time for an event aaages ago. I lost miserably. Id been sending him pictures of my progress at the time. (Before i had messenger, so by txt at fantastic cost) talking to him the other day, he still had them, and sent a few back to me. I manages to squeeze an Ebay special fan between the custom radiator and the front panel. And i got some pics of the diff too. 620s run an H190 diff, with an aluminium centre housing. However because they were an underpowered light comercial vehicle, they run a 4.6:1 ratio. Great for rally driving, or farm duties. But and absolute fucking nightmare for open road driving. I found a 3.9:1 head somewhere in Hamilton. @mark105 kindly delivered it to camp Rangiwoods for Old school nats 2013. (I might have had the yellow truck that far back) since we were only rolling in a dastun 1200, @Gomaxgo kindly dragged it back down to Christchurch for me in his 6cyl KE70 ' goon. Because reasons, i finished up using the axle out of the one i parted out for the front cut. As i mixed and matched a few bits, (my handbrake cables were fucked) i discovered this axle was ~15-20mm narrower each side. I had the housing blasted by Blain at FastBlast. And @LowTech powder coated the housing back when he had a powedercoating booth. I swapped the pinion flange over. This also required a hefty sleeve be fitted. Both because the seal journal was bady cut/worn, and because the seal journal was considerably bigger on the 3.9 diff. A lick of paint on the head, and it was glued in. Absolutely nobody had a listing for new brake drums. And all of mine were worn out of spec. ROCK AUTO to the rescue. (For all the parts your car will ever need) they were something stupid like $20 each. I gave the backing plates a brush up and paint. And rebuilt the brakes/ew cylinders and shoes. (My bench hasnt been that clear for a looooong ass time) I dont have any pictures, but these diffs use a turbo gay cup and cone arrangement on the axle bearings. You have to set the axle bearing preload by changing shims. (Theres a thrust block in the centre of the side gears that the tip of the axle runs in permanent contact) i fucked these off, and replaced them with deep groove bearings. The deep groove bearing was a few mm narrower than the Cup of the cup and cone. So i had to make a spacer ring as insurance that the bearings could never migrate in and out within that pocket. The other picture i found was of the gearbox X member i made. Its nothing fancy. The material was kindly donated by @Chris.QCR
27 points
-
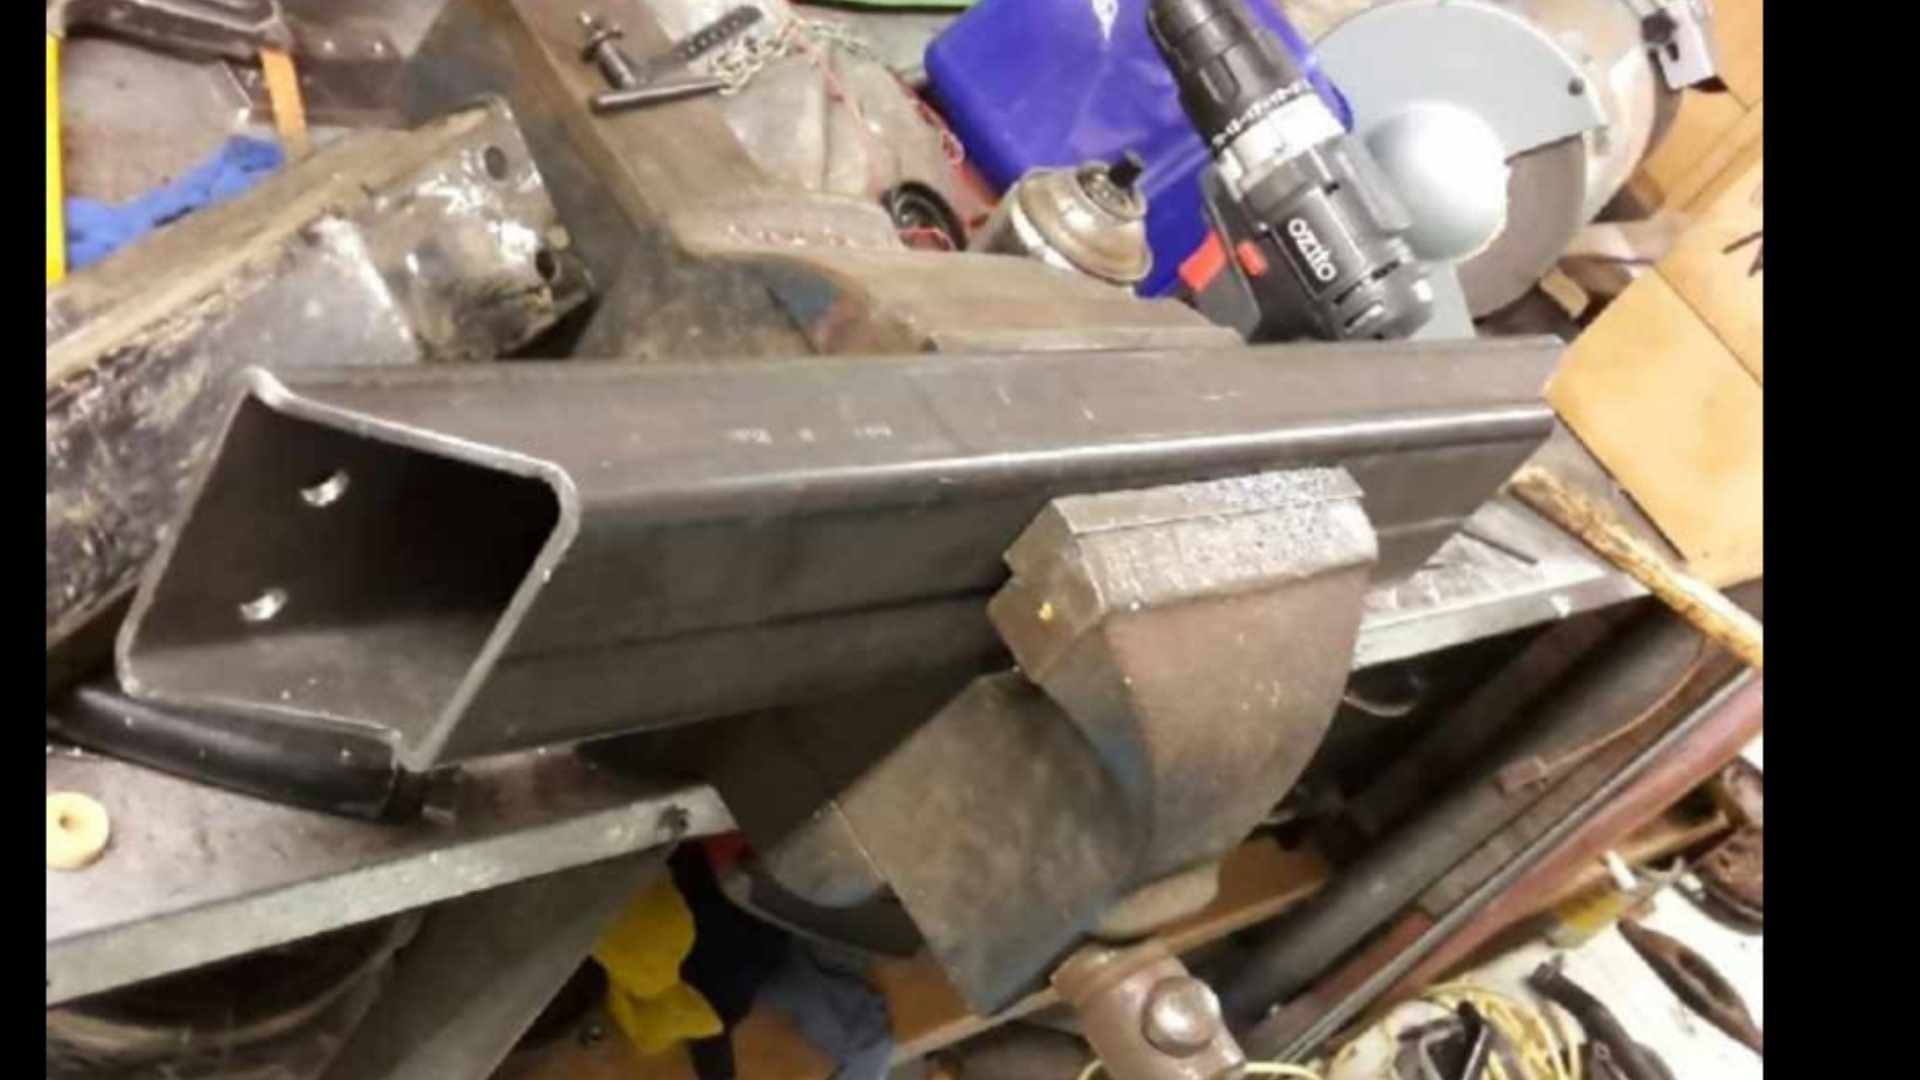
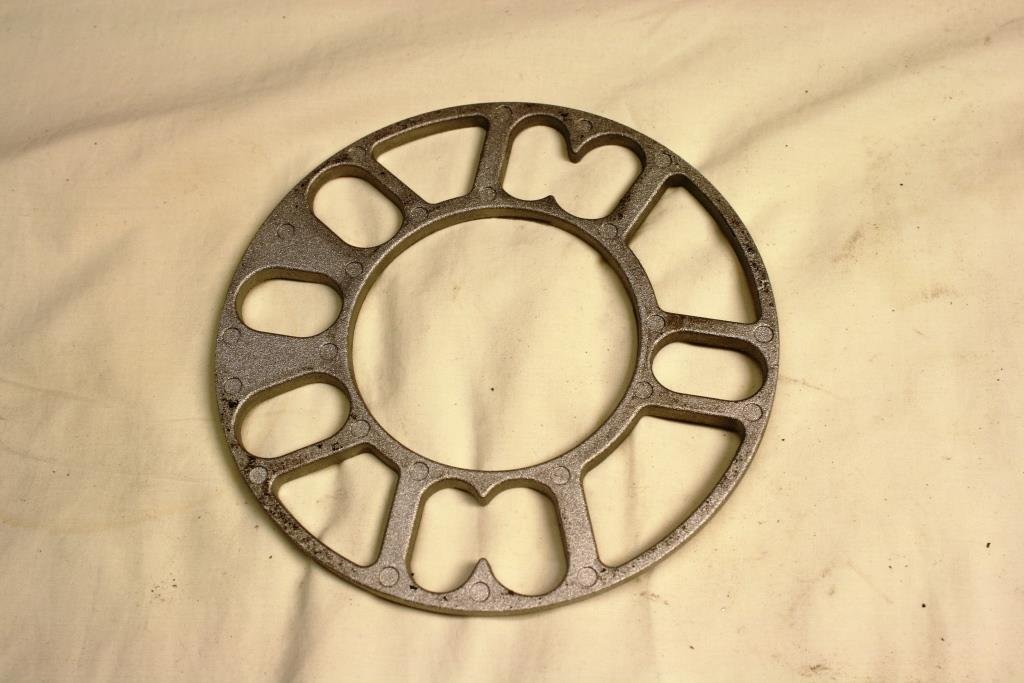
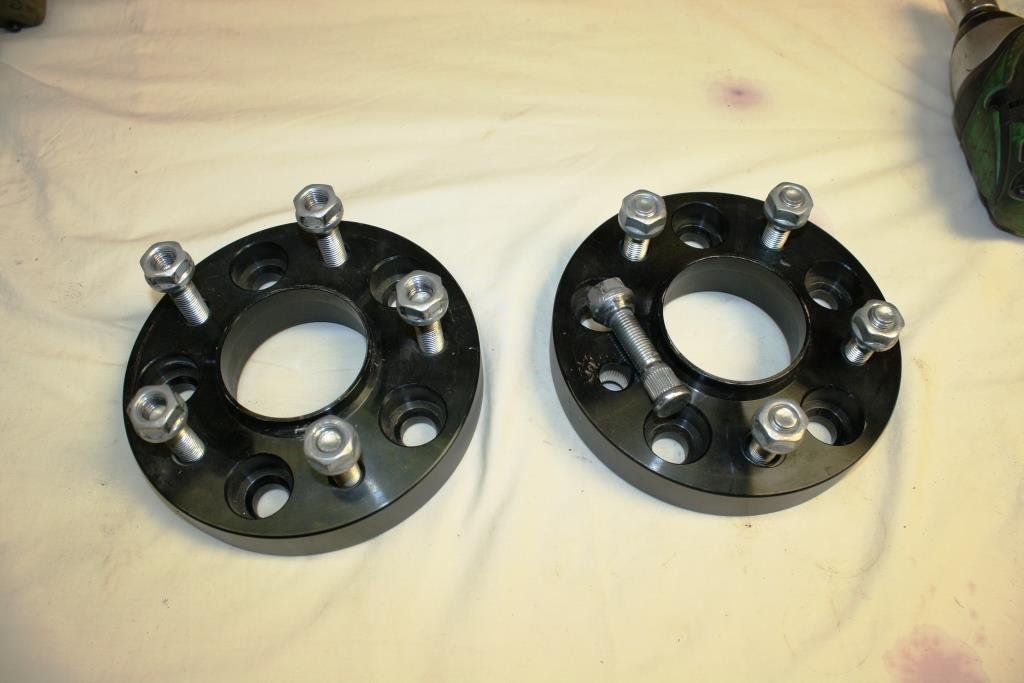
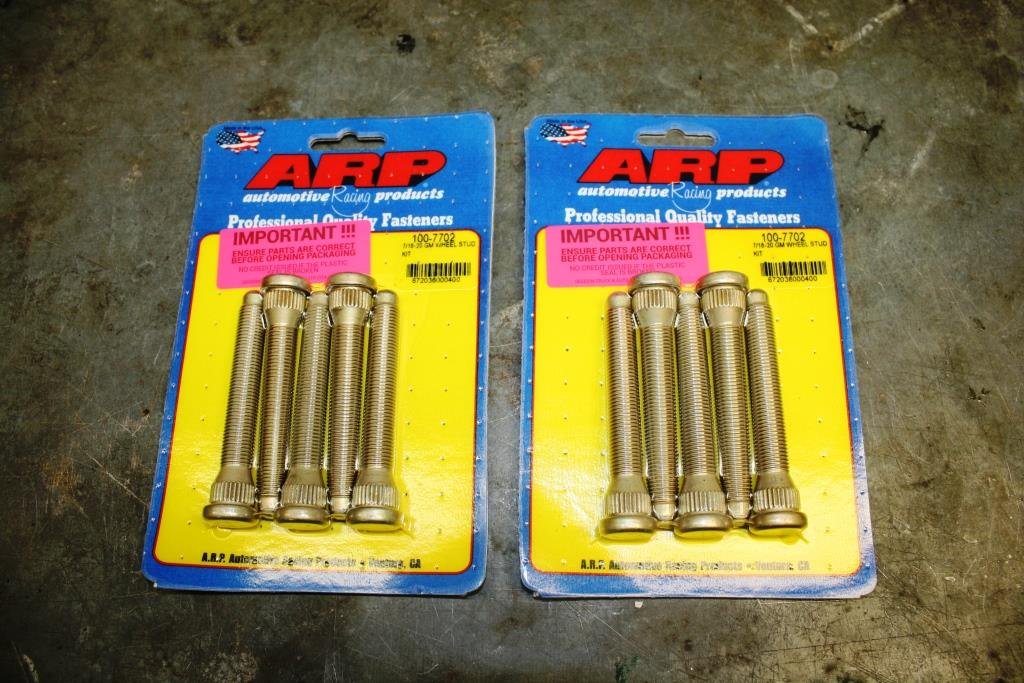
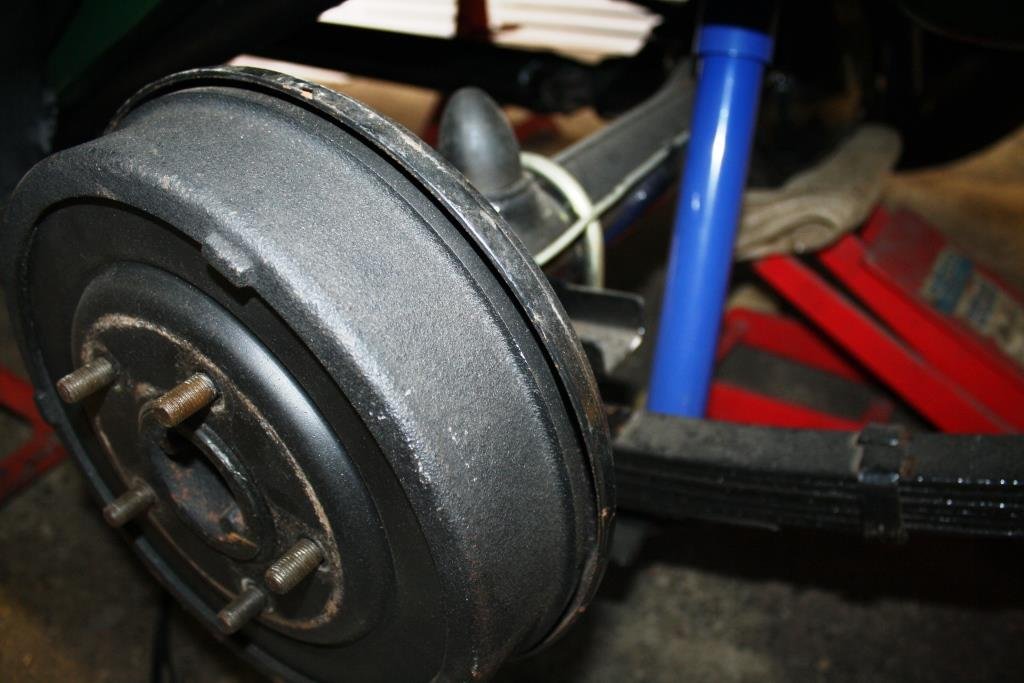
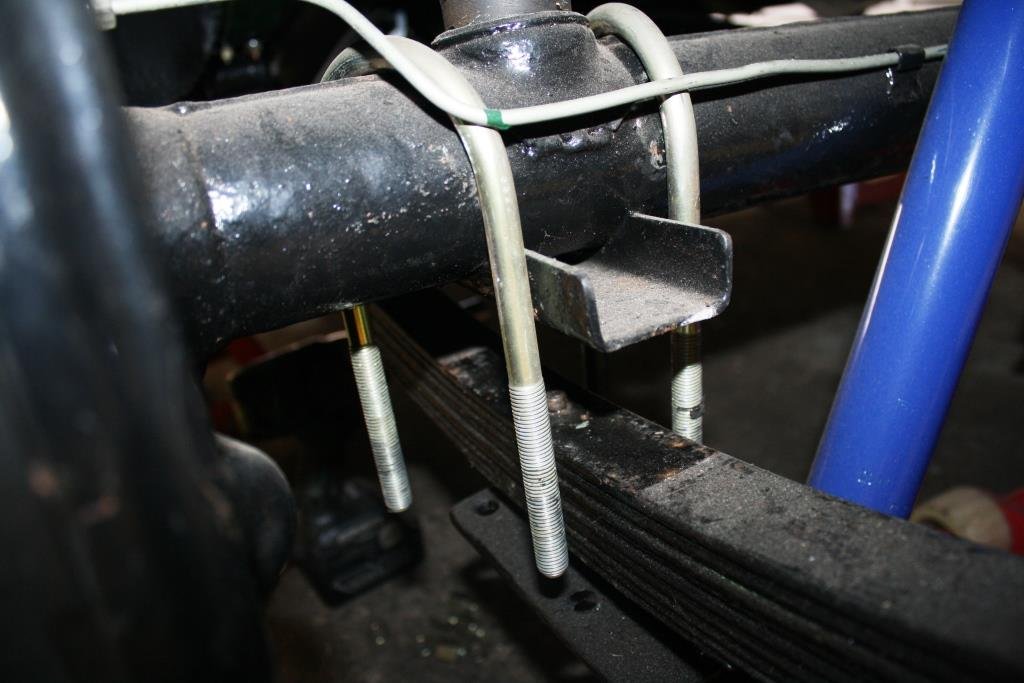
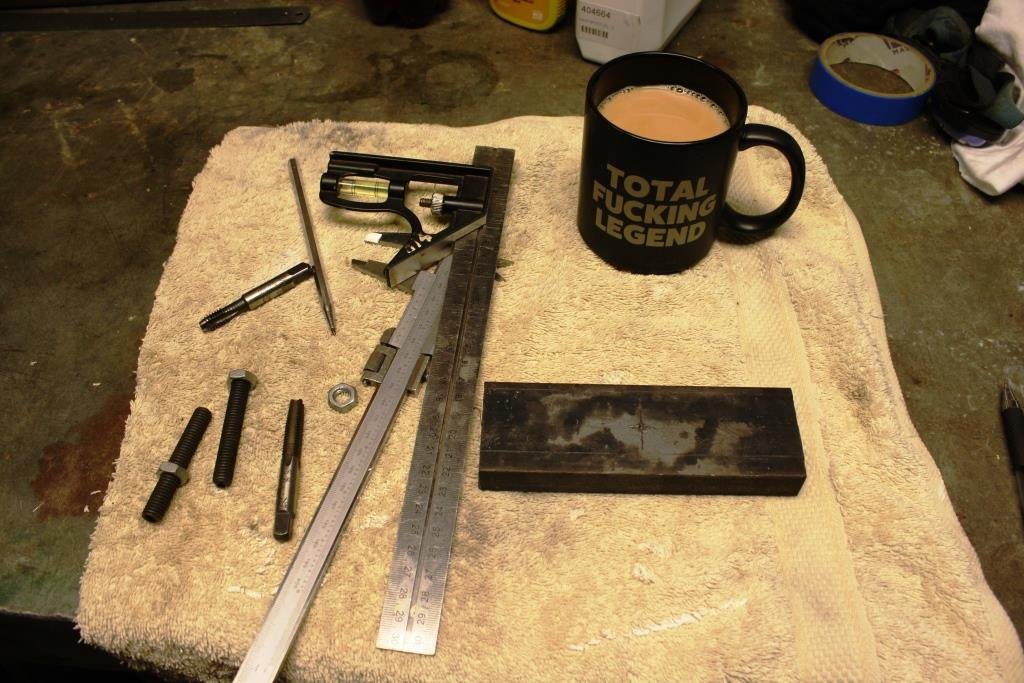
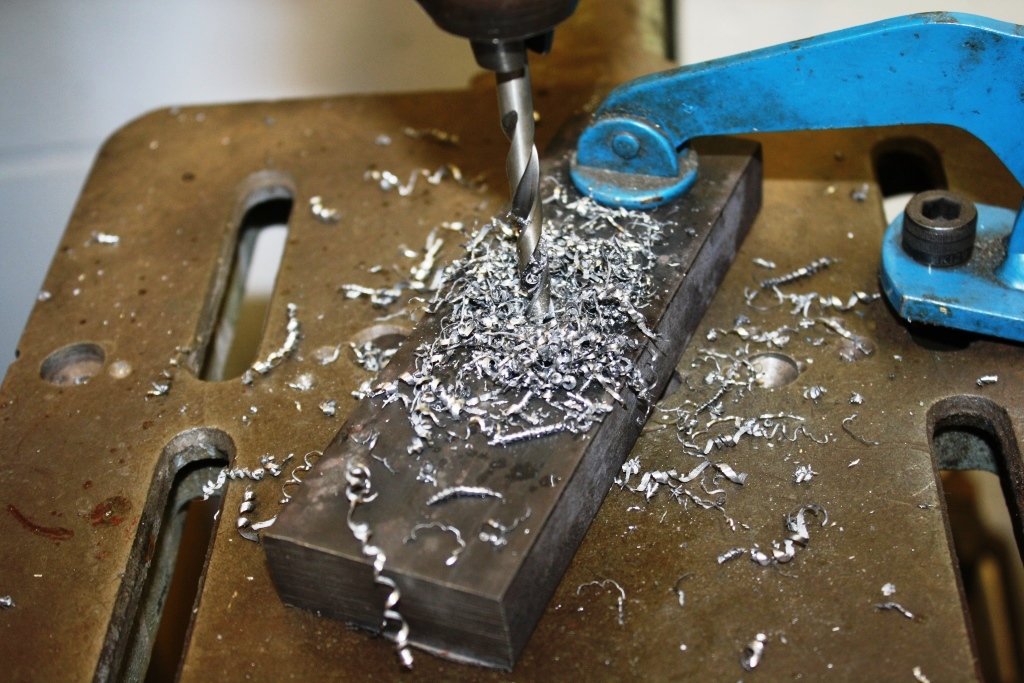
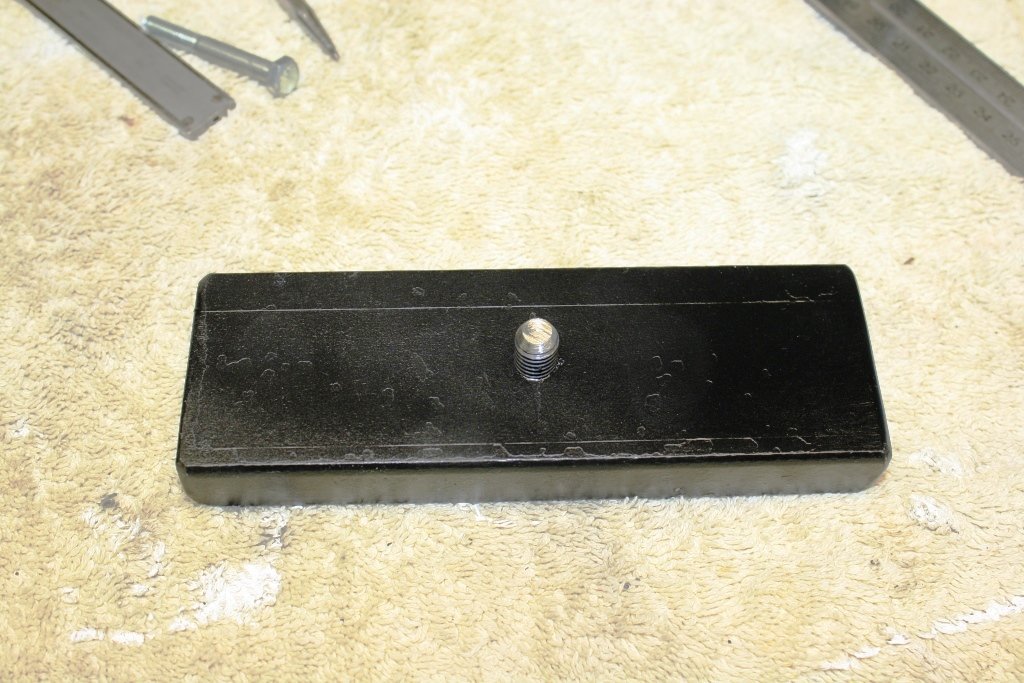
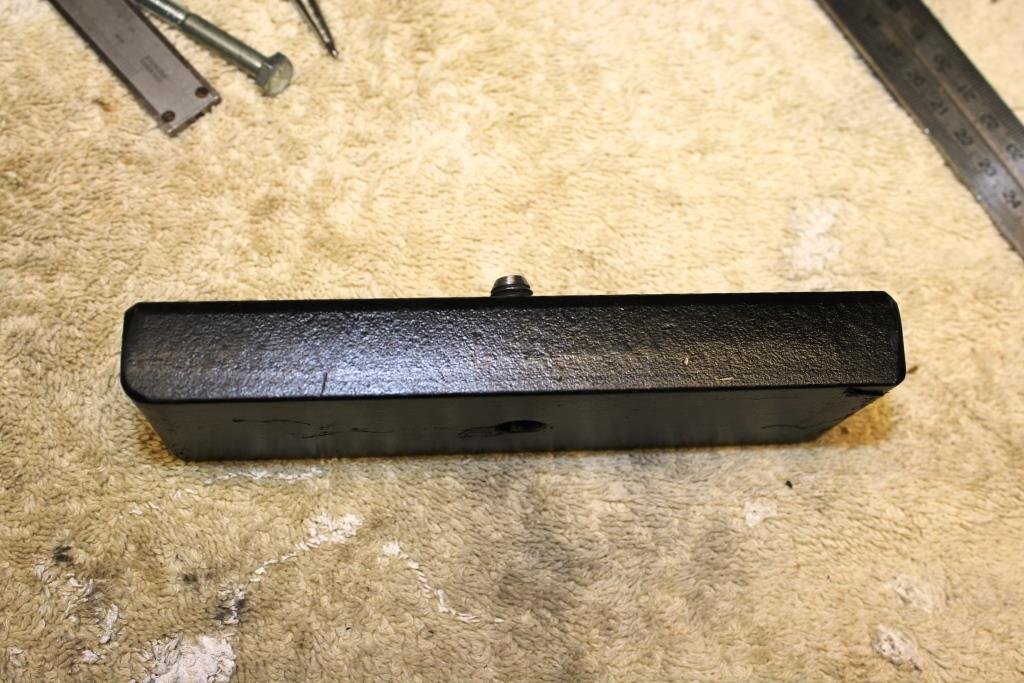
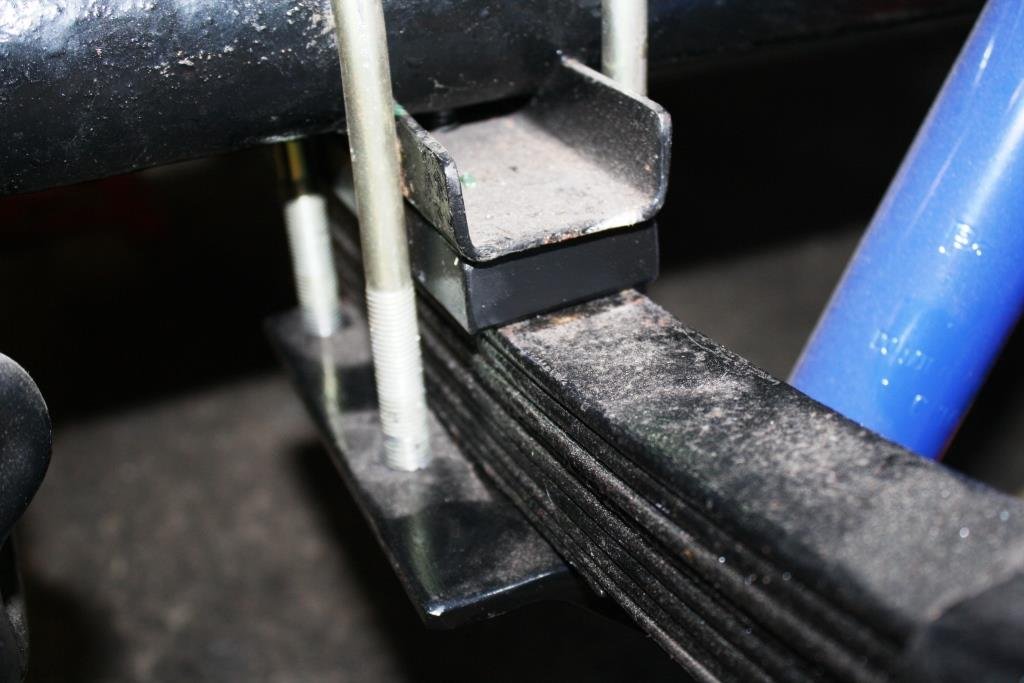
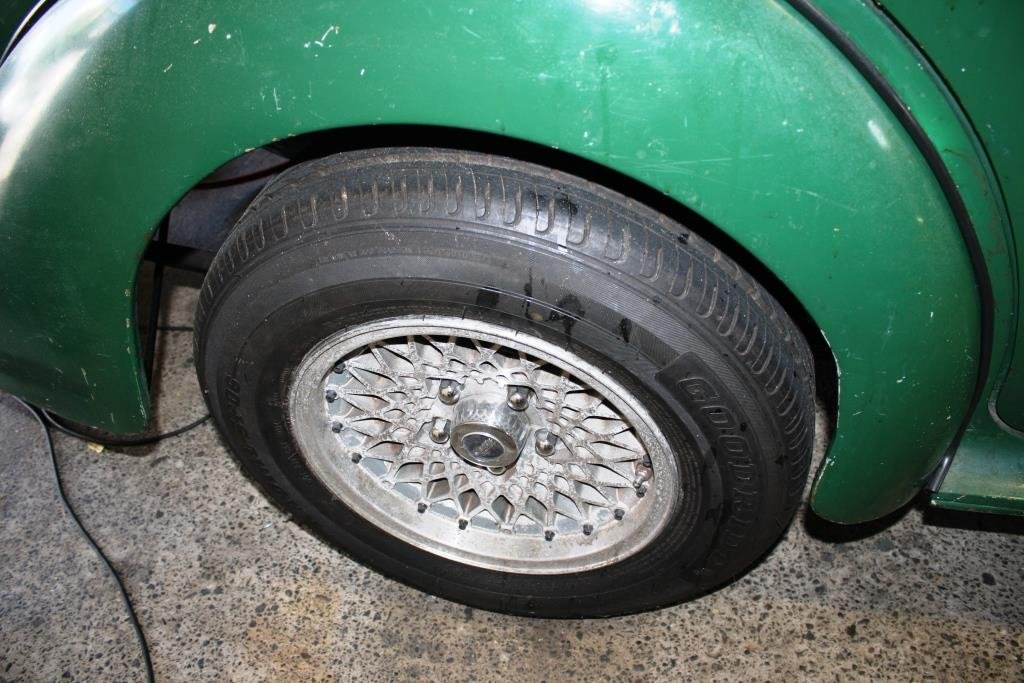
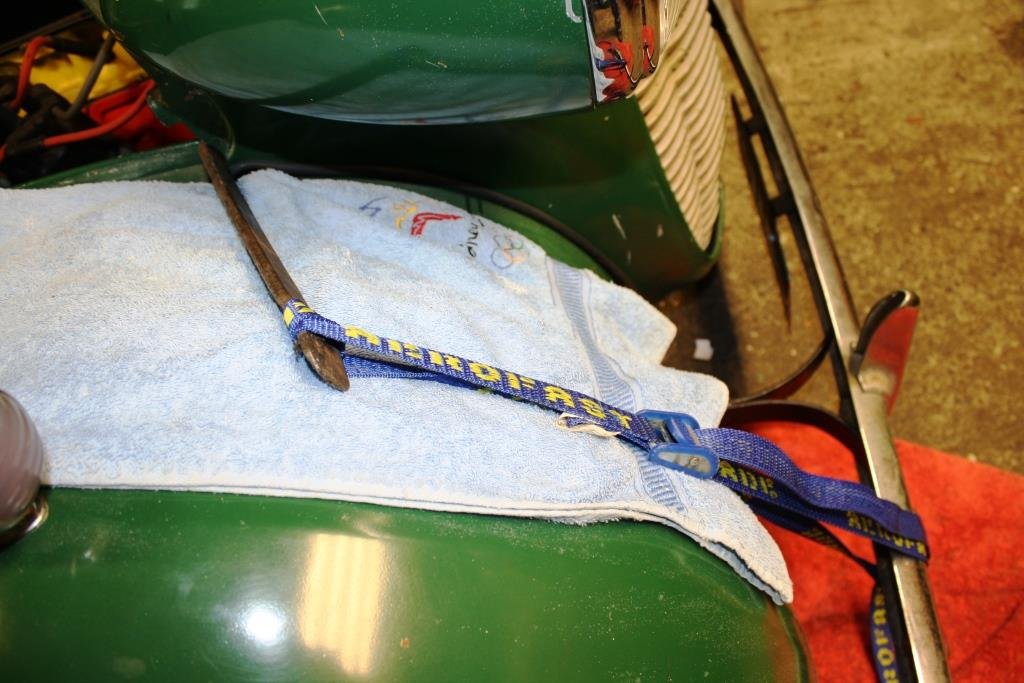
One of Rigamortice’s dirty little secrets was a set of these little shockers hidden behind the front wheels! I found a pair of proper hub-centric spacers on Trademe for a very reasonable price. I then upgraded to some ARP studs at a very unreasonable price. (Talk about charging like a friggin wounded bull!). All torqued up with a snug fit on the hub and wheel. Finally got the front ride height and wheel track just where I want it. Decided the rear needed a tweak, so I backed off the rear U bolts…. …and figured out how much I could safely lower the rear. I ended up using solid bar for the spacers I’m expecting the rear springs to settle with a little use….. Have to say I’m finally happy with the old girls stance.
27 points
-
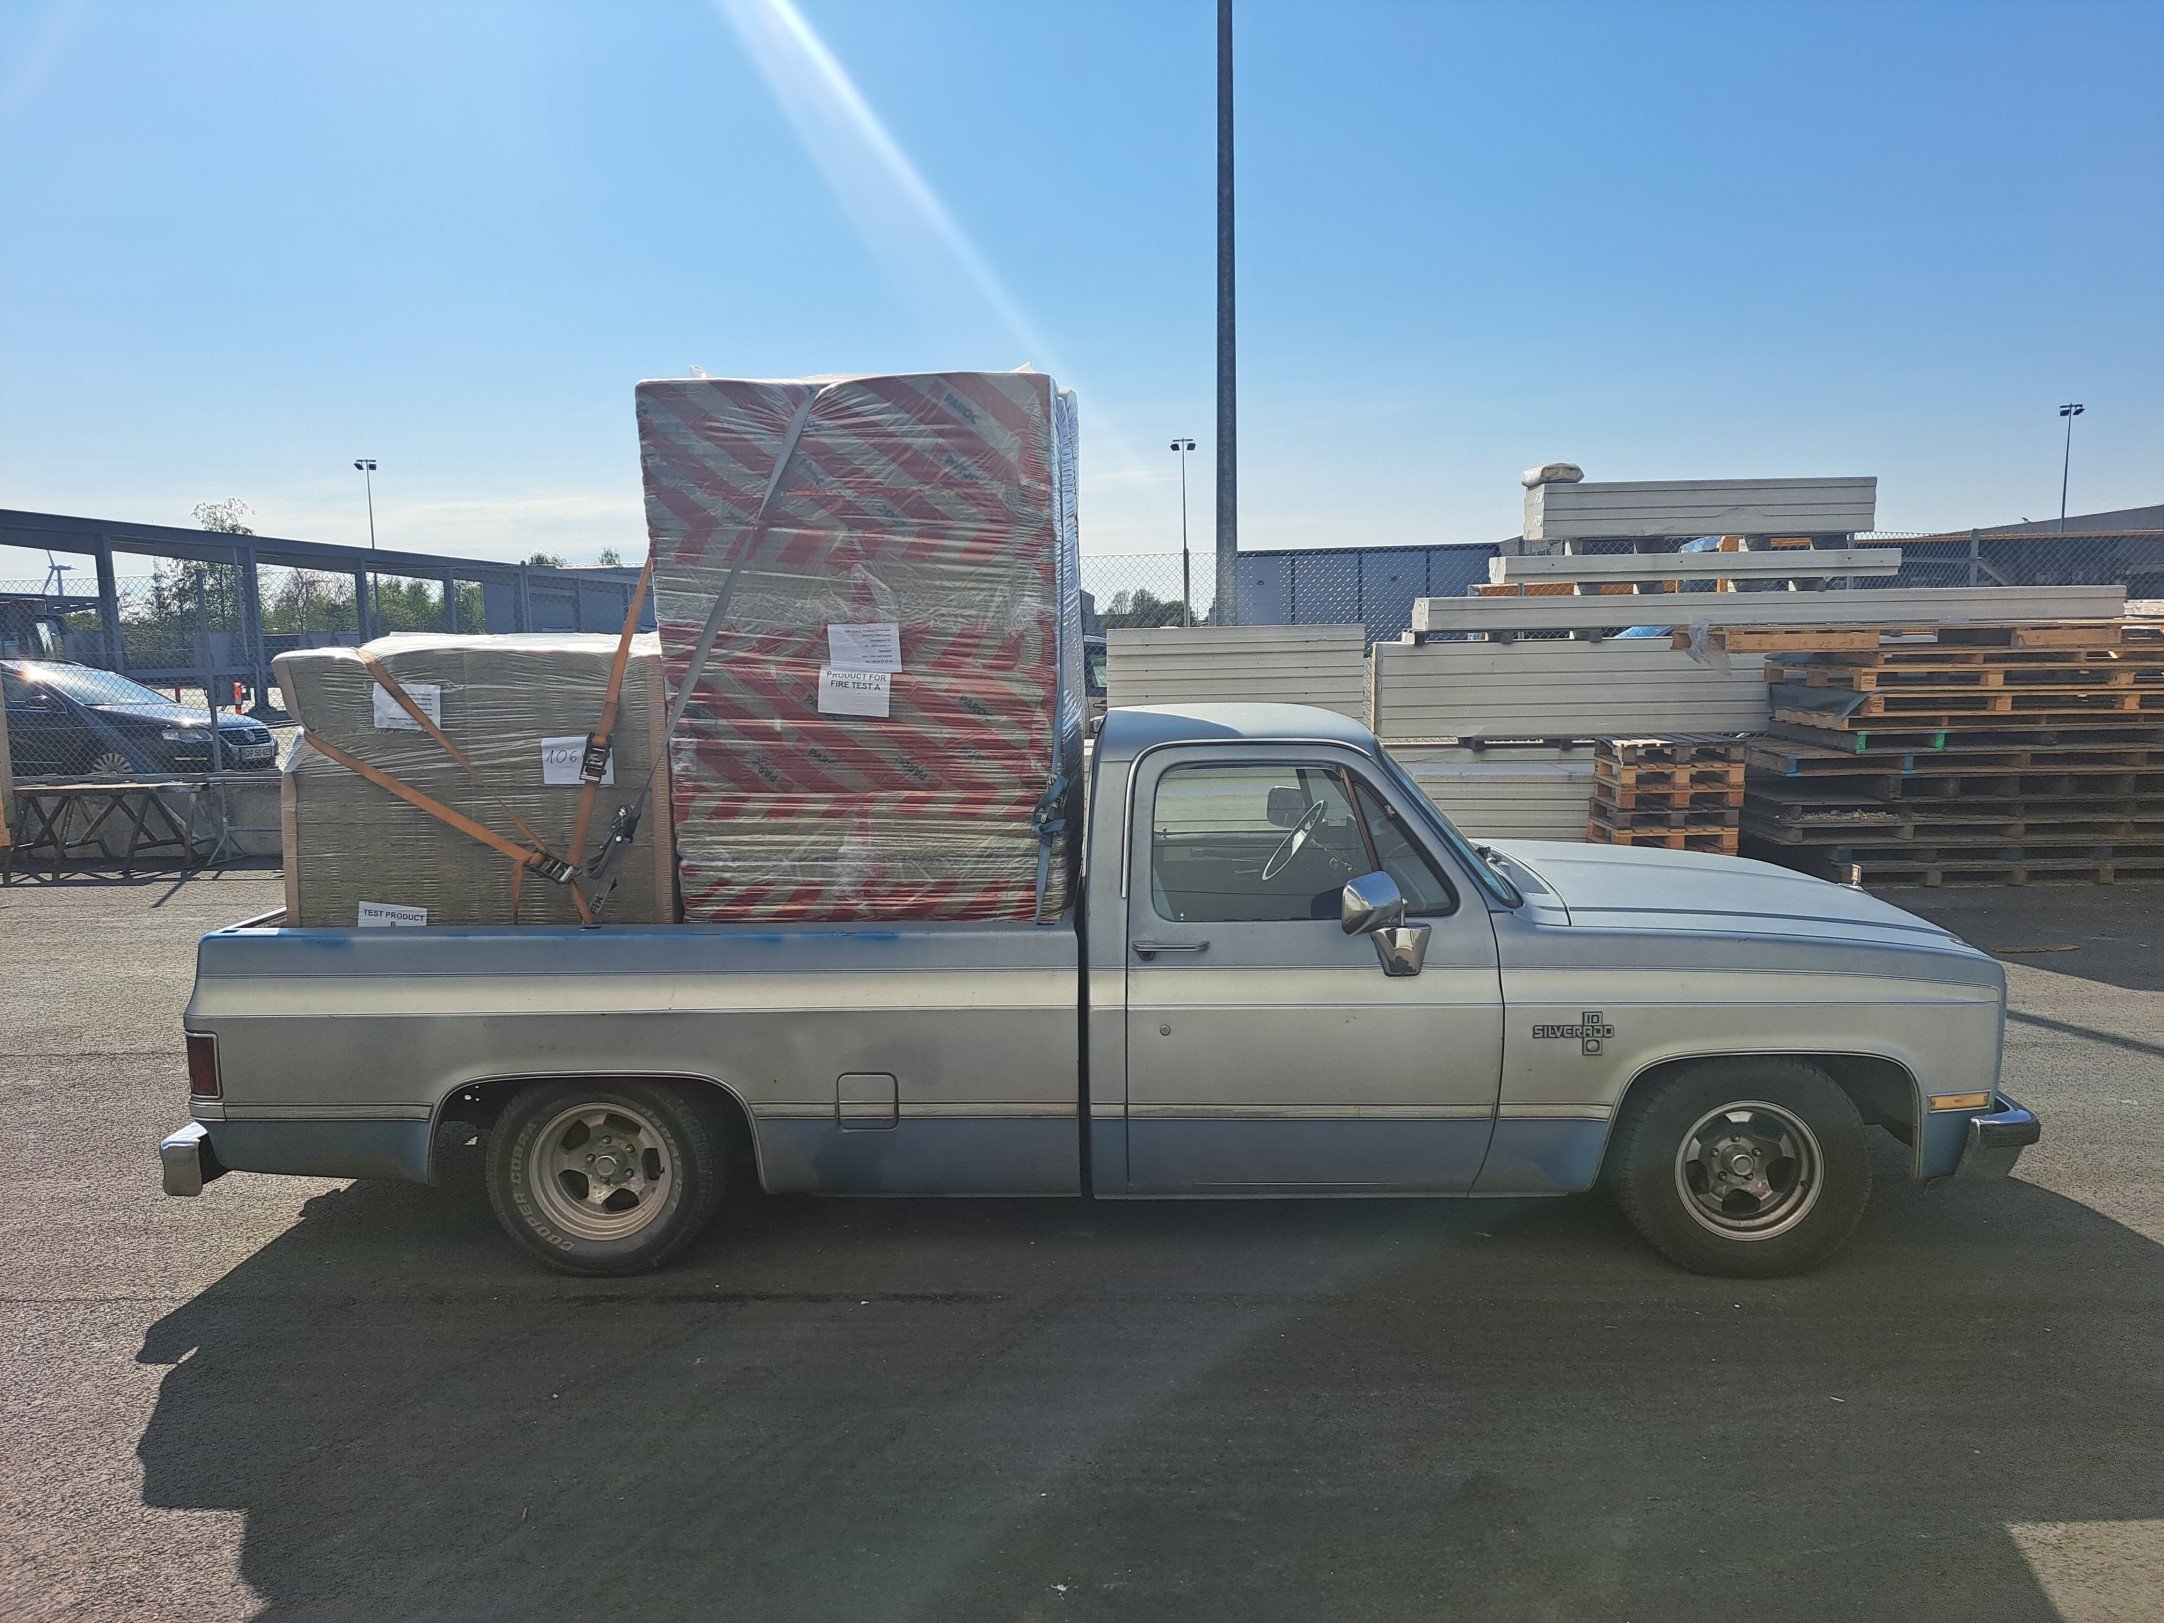
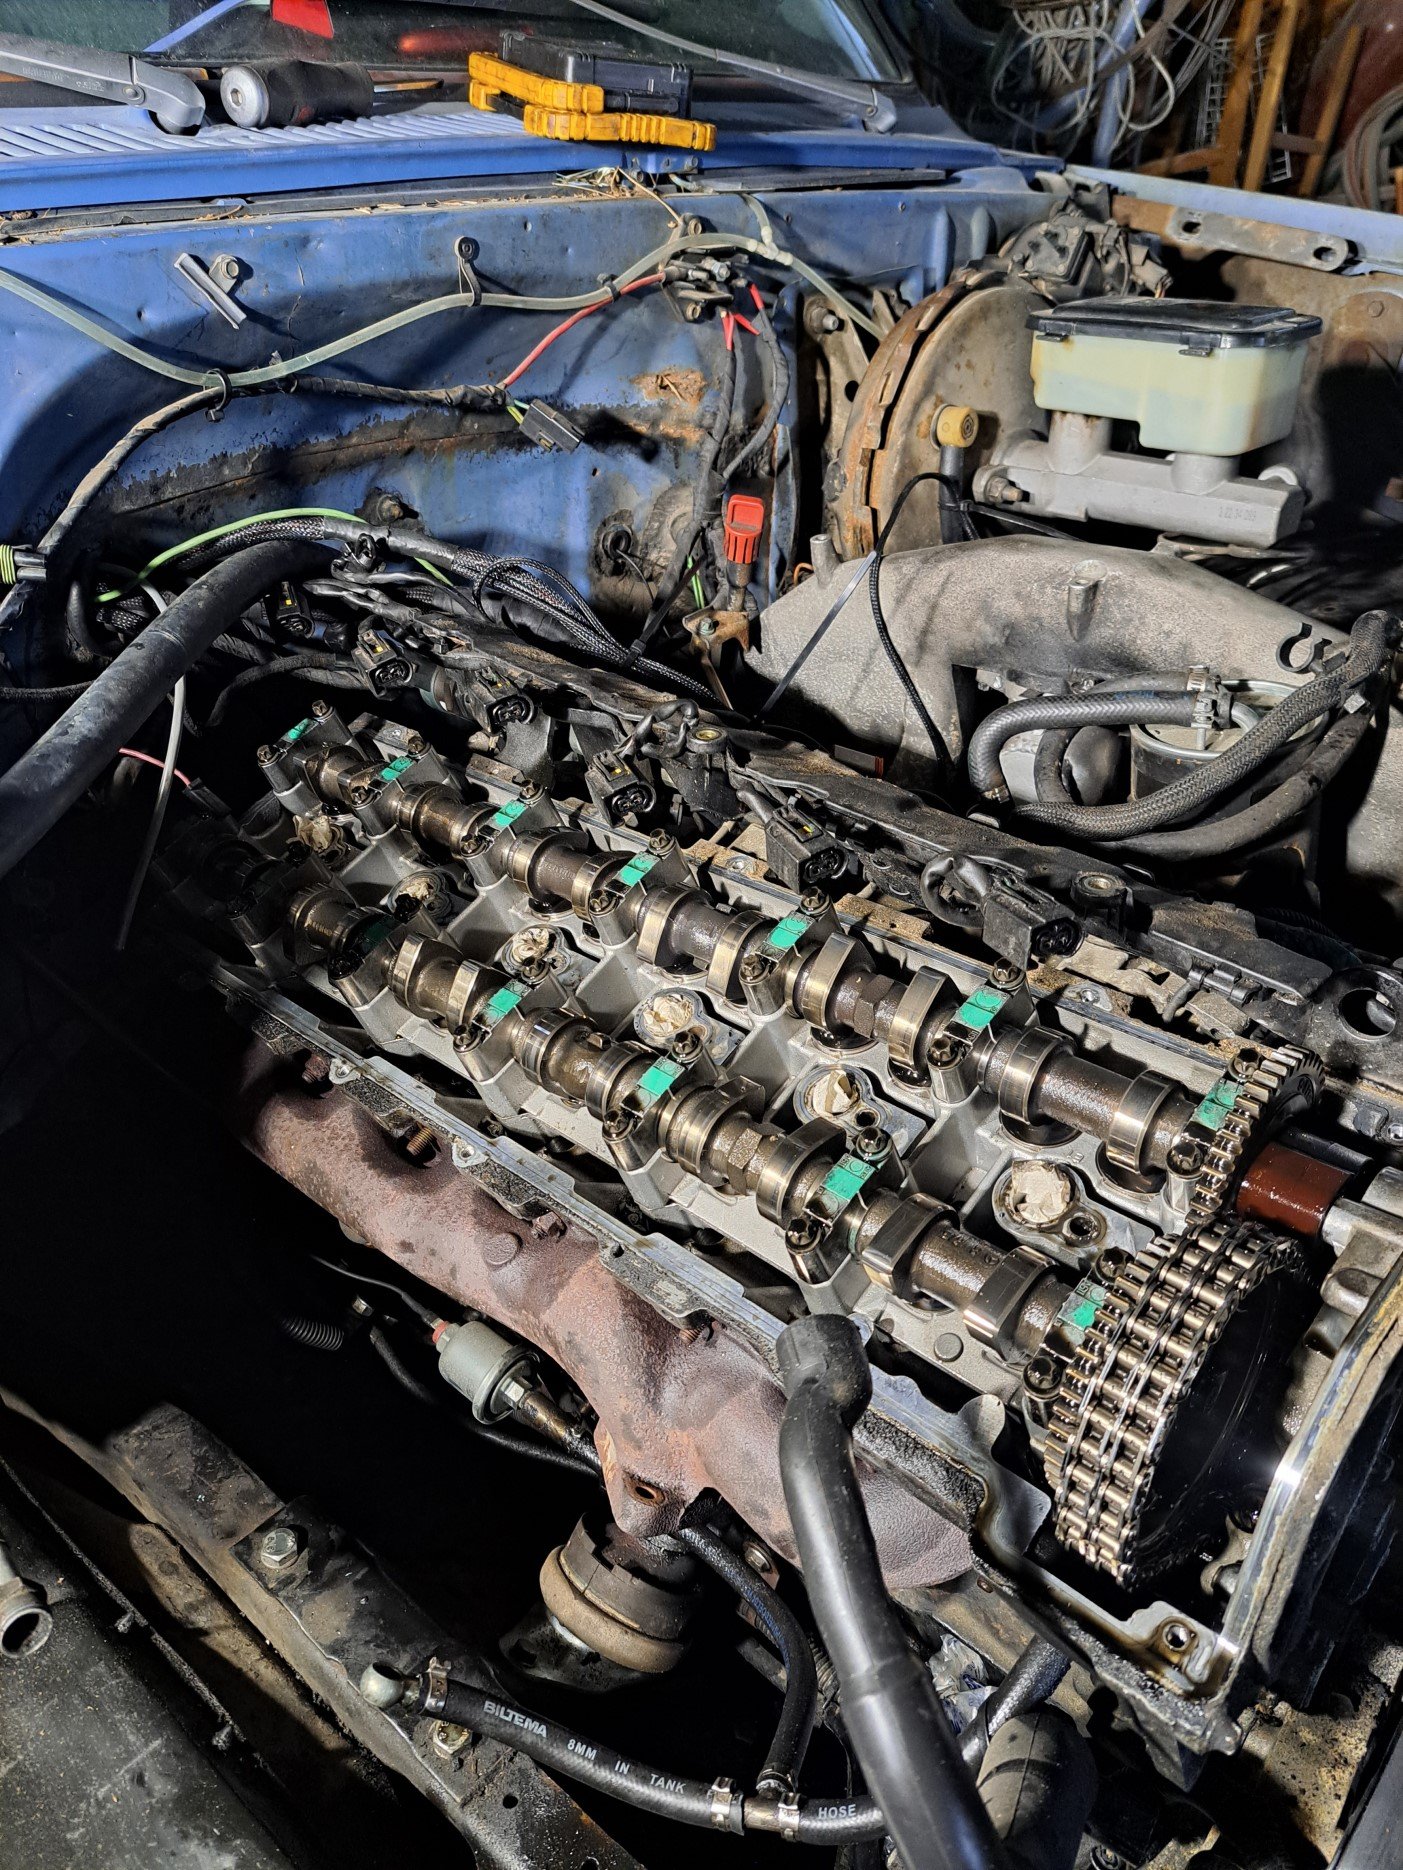
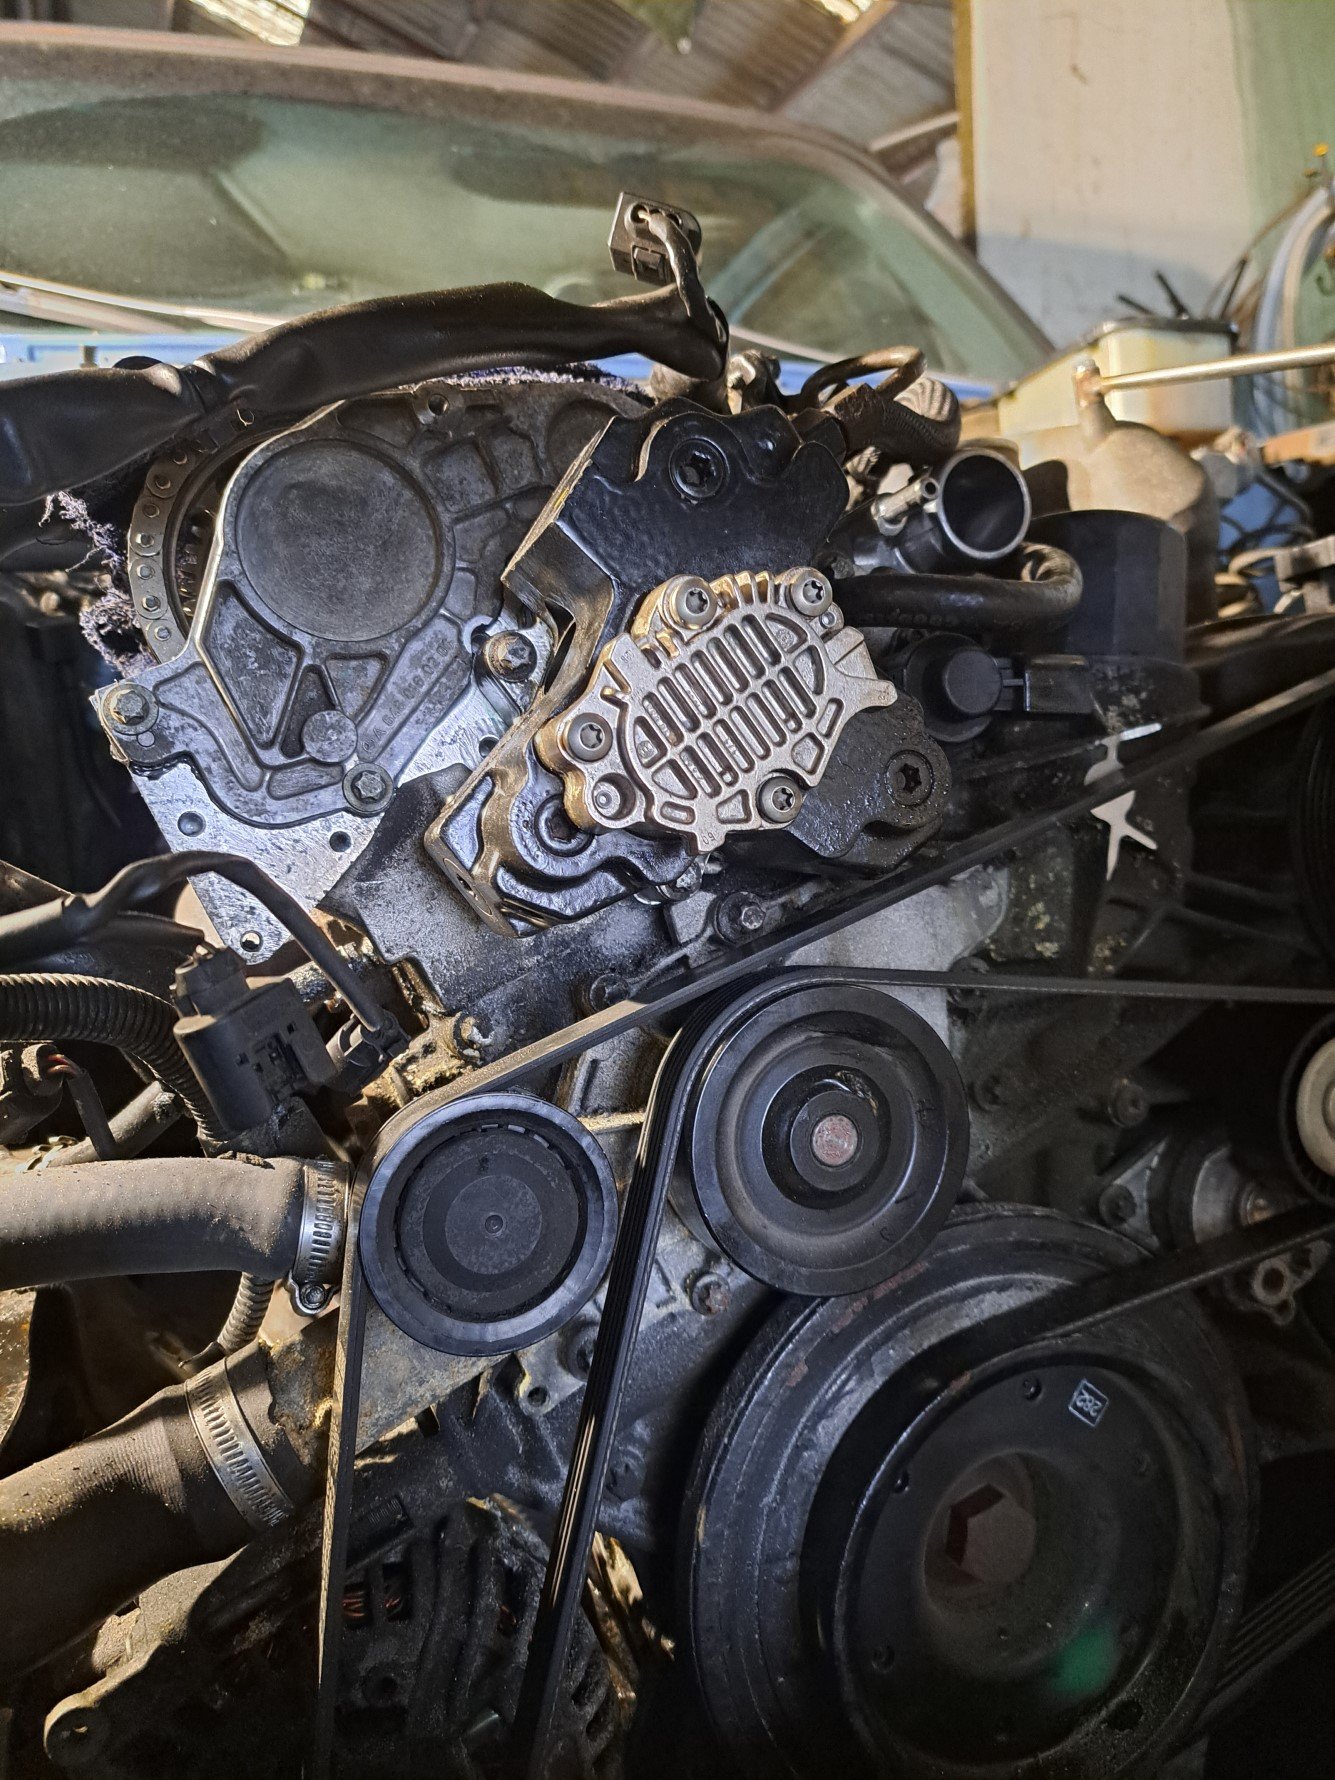
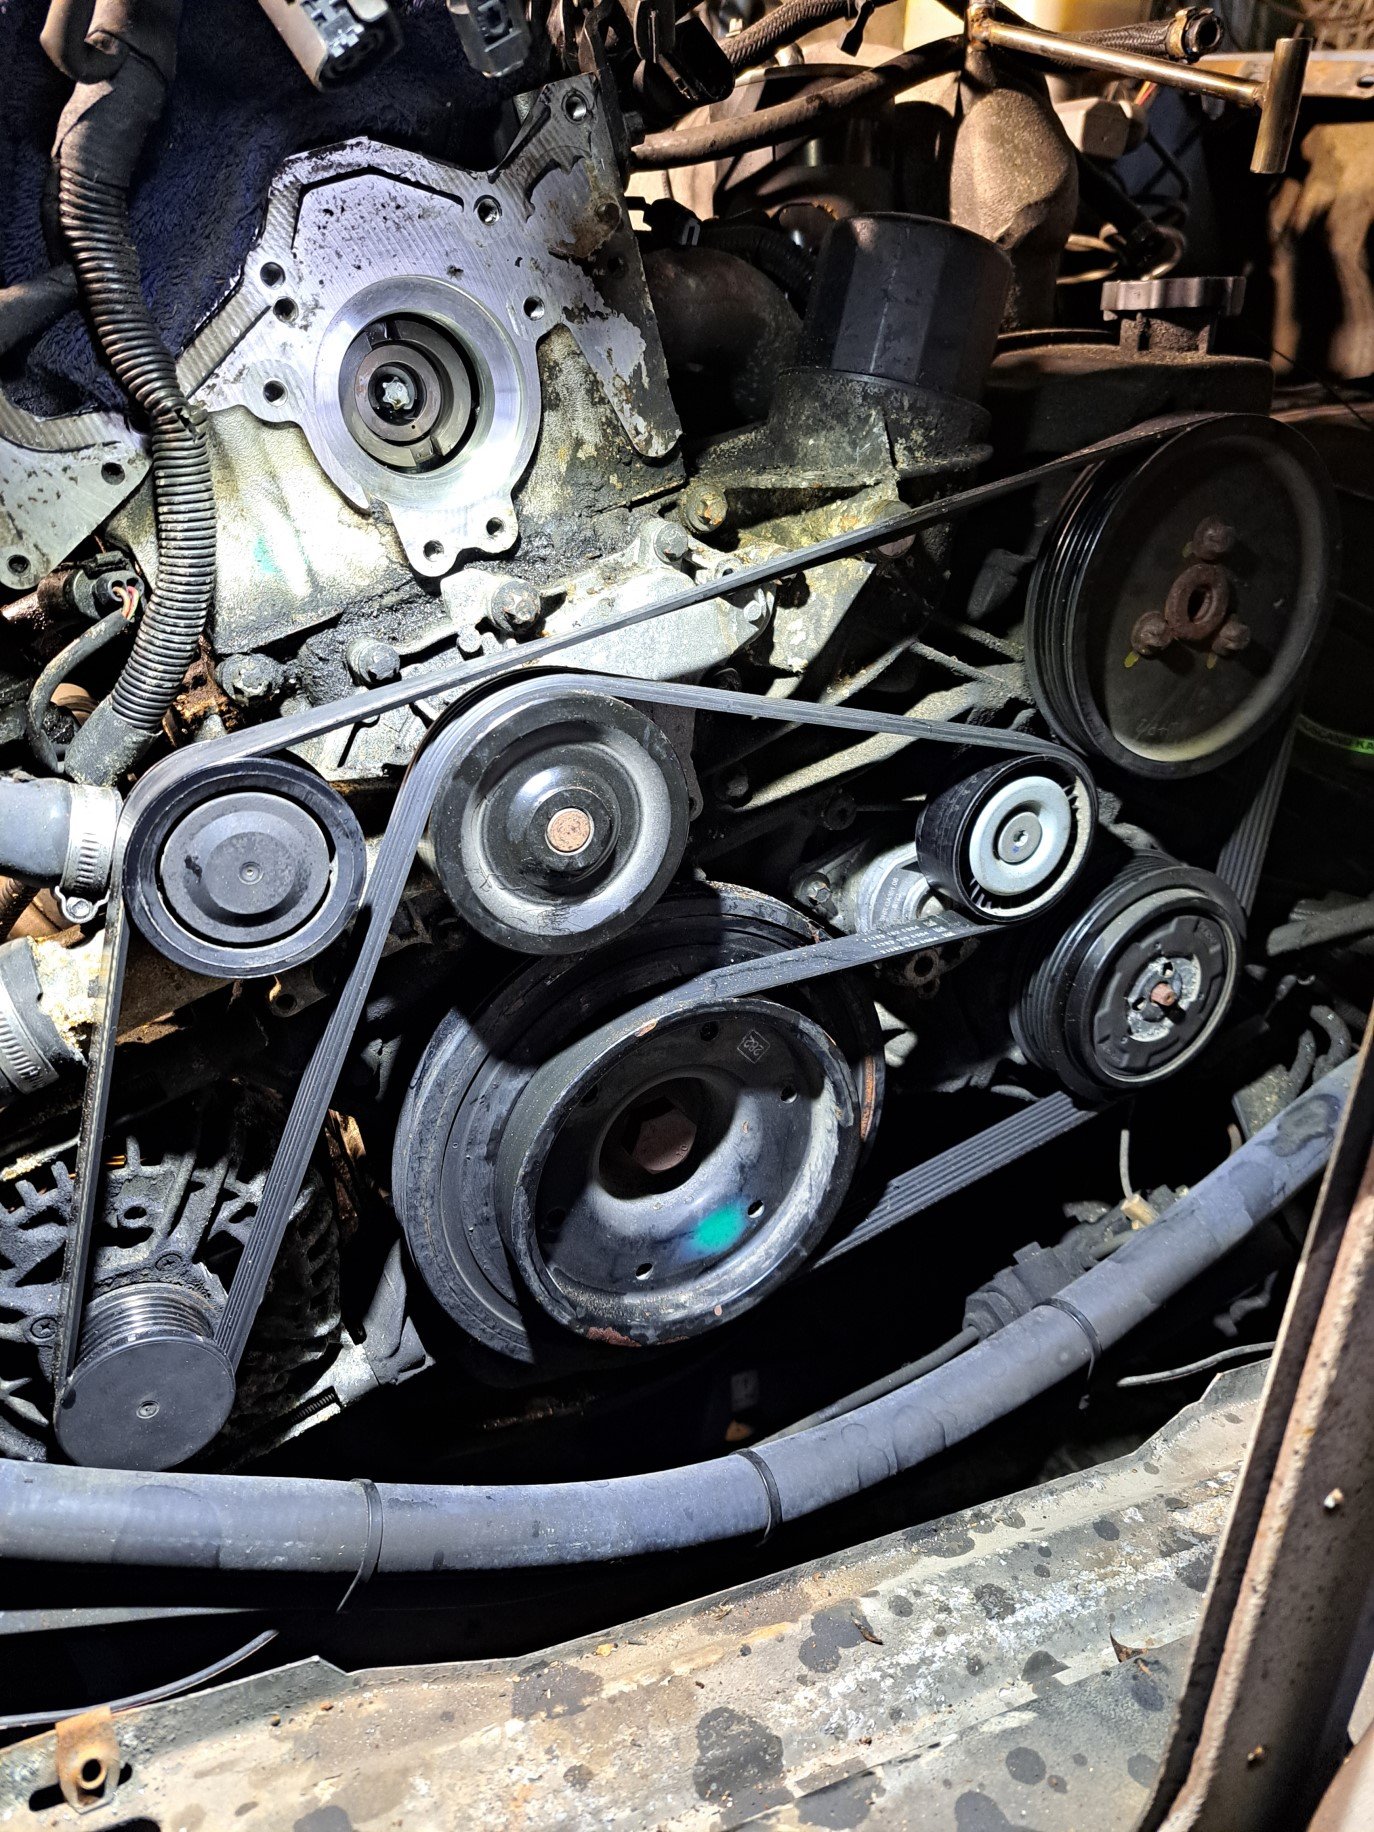
OK, so this is where the story of how my current situation came to be. I was pretty happy with how the truck ran, towed and hauled, but if we rewind to summer last year, I took one of my mates here to see the Malmo race day of the Swedish event StreetWeek, which is a drag and drive event run every year throughout different routes in Sweden. Anyway we floated the idea of participating, I threw it out there that we should use the truck, then I thought a bit more, decided I didnt really want to turn my daily into a drag car, then we ummed and arhhed about buying a 25.5 rolling chassis doing a sloppy LS and going for gold, but the rules to get modified cars street legal (requirement for running StreetWeek) here are dumb so we then put a pause on that idea, at that is bascally where we left it for 6 months. Anyway so I was just randomly doom scrolling Insta on a sunday night and there was a post about getting ready to sign up for StreetWeek on the coming Tuesday.. So I hit up old mate and said, shouldn't we just try and get a spot then figure out the rest after. Tuesday rolls around and I'm sitting at my computer like a Swifty trying to get a ticket, and low and behold we got one. So now this summer we are doing a drag and drive event that will take us some where 5 hours north of Stockholm. One issue though, the truck whilst a great daily does not a drag car make... Enter Phase 2. Basically to get 500 hp out of one of these things isnt too difficult. The formula is pretty tried and true: Big HPFP custom Injectors, and enough air to burn all that diesel effectively. So out came the Injectors to be sent to Diesel Mekken in Sweden, they should flow around 185mm3 @ 1400uS when I get them back. Next on the list was to remove all the things that we wont be using, and seeings as I already had the injectors out removing the rocker cover makes modifying the front cover for the 400cdi pump easier. The gasket was also leaking so it was a no brainer. This is what I found, notbad.jpg for 500,000km It is almost as if Mercedes themselves planned this, because the holes are all there to mount the bigger pump, just a matter of a bit of a trim on the front cover and everything bolts up. After removing one of the idler pulleys and trimming the oil filter and thermostat housings the everything is good to go. So all in all a win. Next on the list is building the new turbo manifold, it is going to be a compound setup with the HX40 over the stock GT2356, so hopefully I dont lose too much drivability.
27 points
-
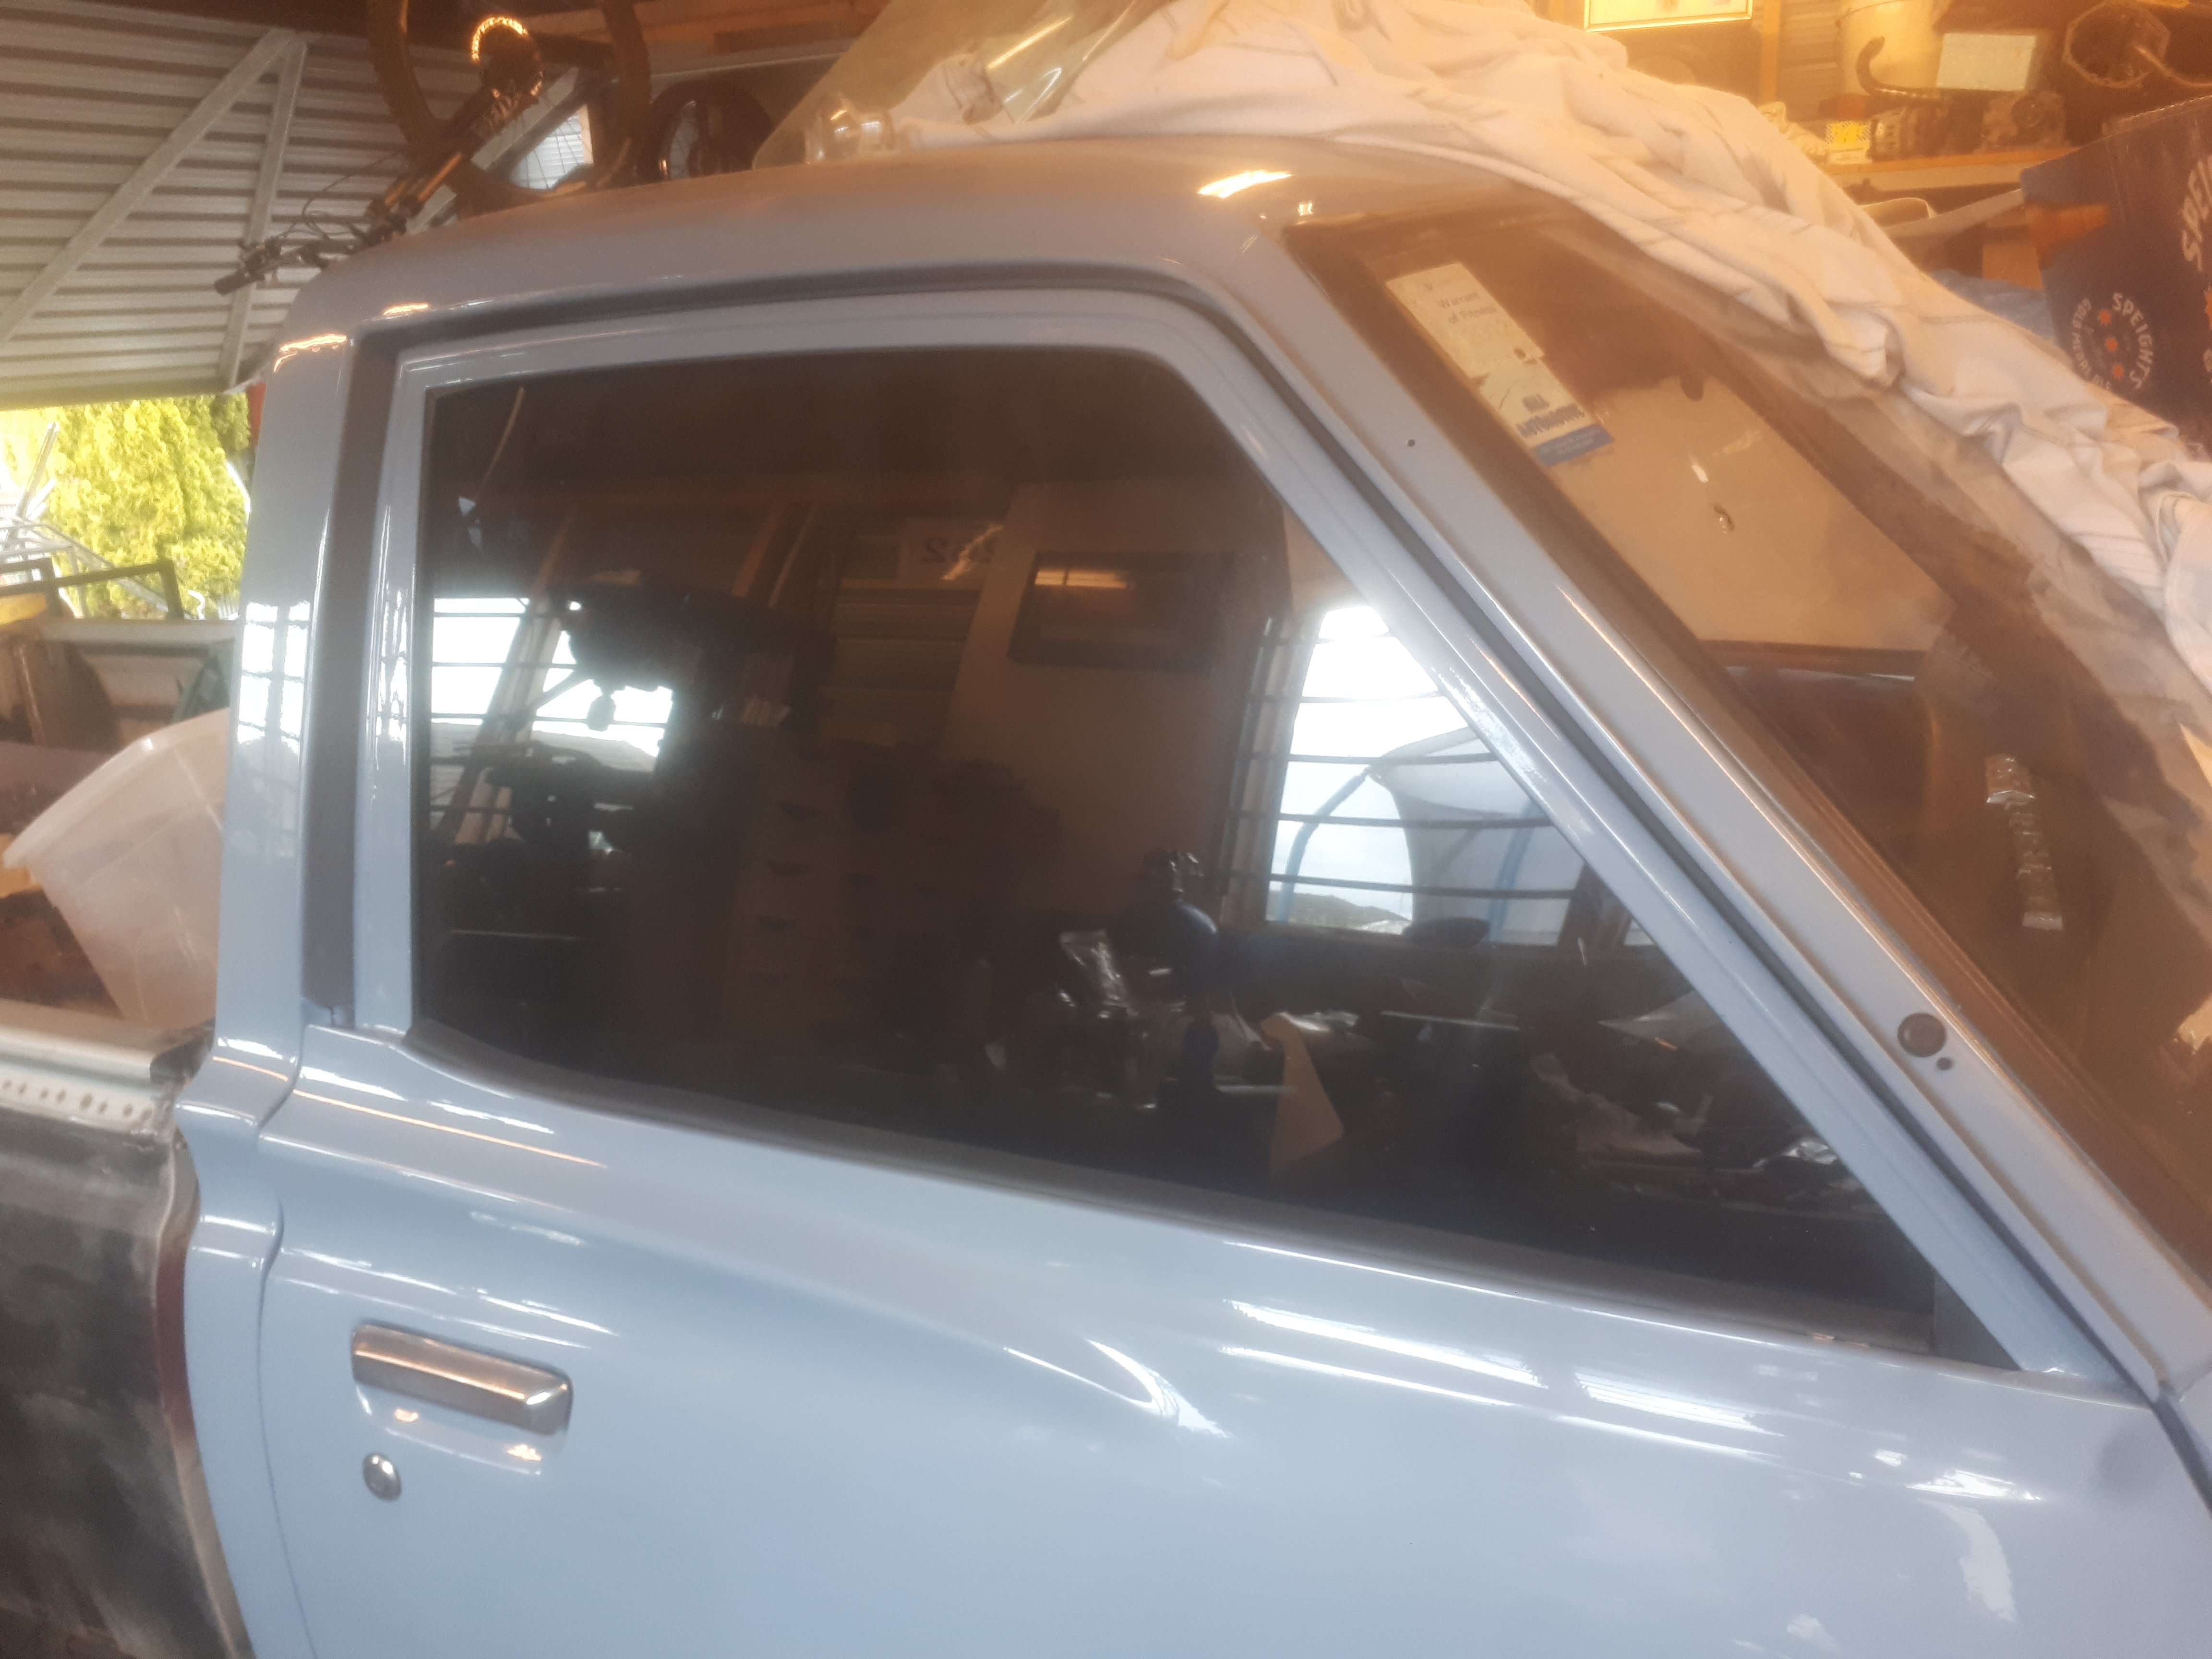
[SHARN] The NZDM 620s all came with the quarter windows. And im not a fan. Im sure in the days when everybody smoked they were great for drawing away the smoke. But they leak, they whistle, and they offer another place for someone to try break in. The USDM trucks all had one piece door glass. A good while back, my dad gave me a heads up. " one of my mates is imporring a couple of boats from the states. Theyre being shipped out of seattle. If you want to get anything shipped diwn here for free, get them sent to qhere the boats are, and they can be put in one" So i jumped on SeattleTacoma craigslist. I found a guy wrecking a 620 KC in Seattle. And although i was fairly sure that the doors were the same between KC and regular trucks, i wanted to be sure. I jumped onto ratsun.net, and explained my situation/asked the question. Yeah theyre the same was the response. Sweet! But then i get a PM from a user on there named @bananahamuck saying his mate has heaps of that stuff, heres his number. (Turns out its the same Bananahamuck as the one on OS! So i ring this fella up, and he says yeah i got heaps of rusty doors etc. I tell him, ill need him to freight them up the Seattle. (This guy is actually in Portland) he says, oh, our shipping is really slow, and expensive. Ill drive them up there on Saturday. Im like how far is that? About an ahour and half drive! Fucking hell. I offer to pay for his gas etc. So i ring my Dad and get the address of where these boats are in the container. Turns out its not Seattle, its a place called Yelm. (Its actually closer to Portland) i email Ted with the address. He replys, oh i work in Yelm. Ill drop them off before work one morning. So a couple of months later i get the call that my glass is here. And after having them tinted, they went it beautifully.
27 points
-
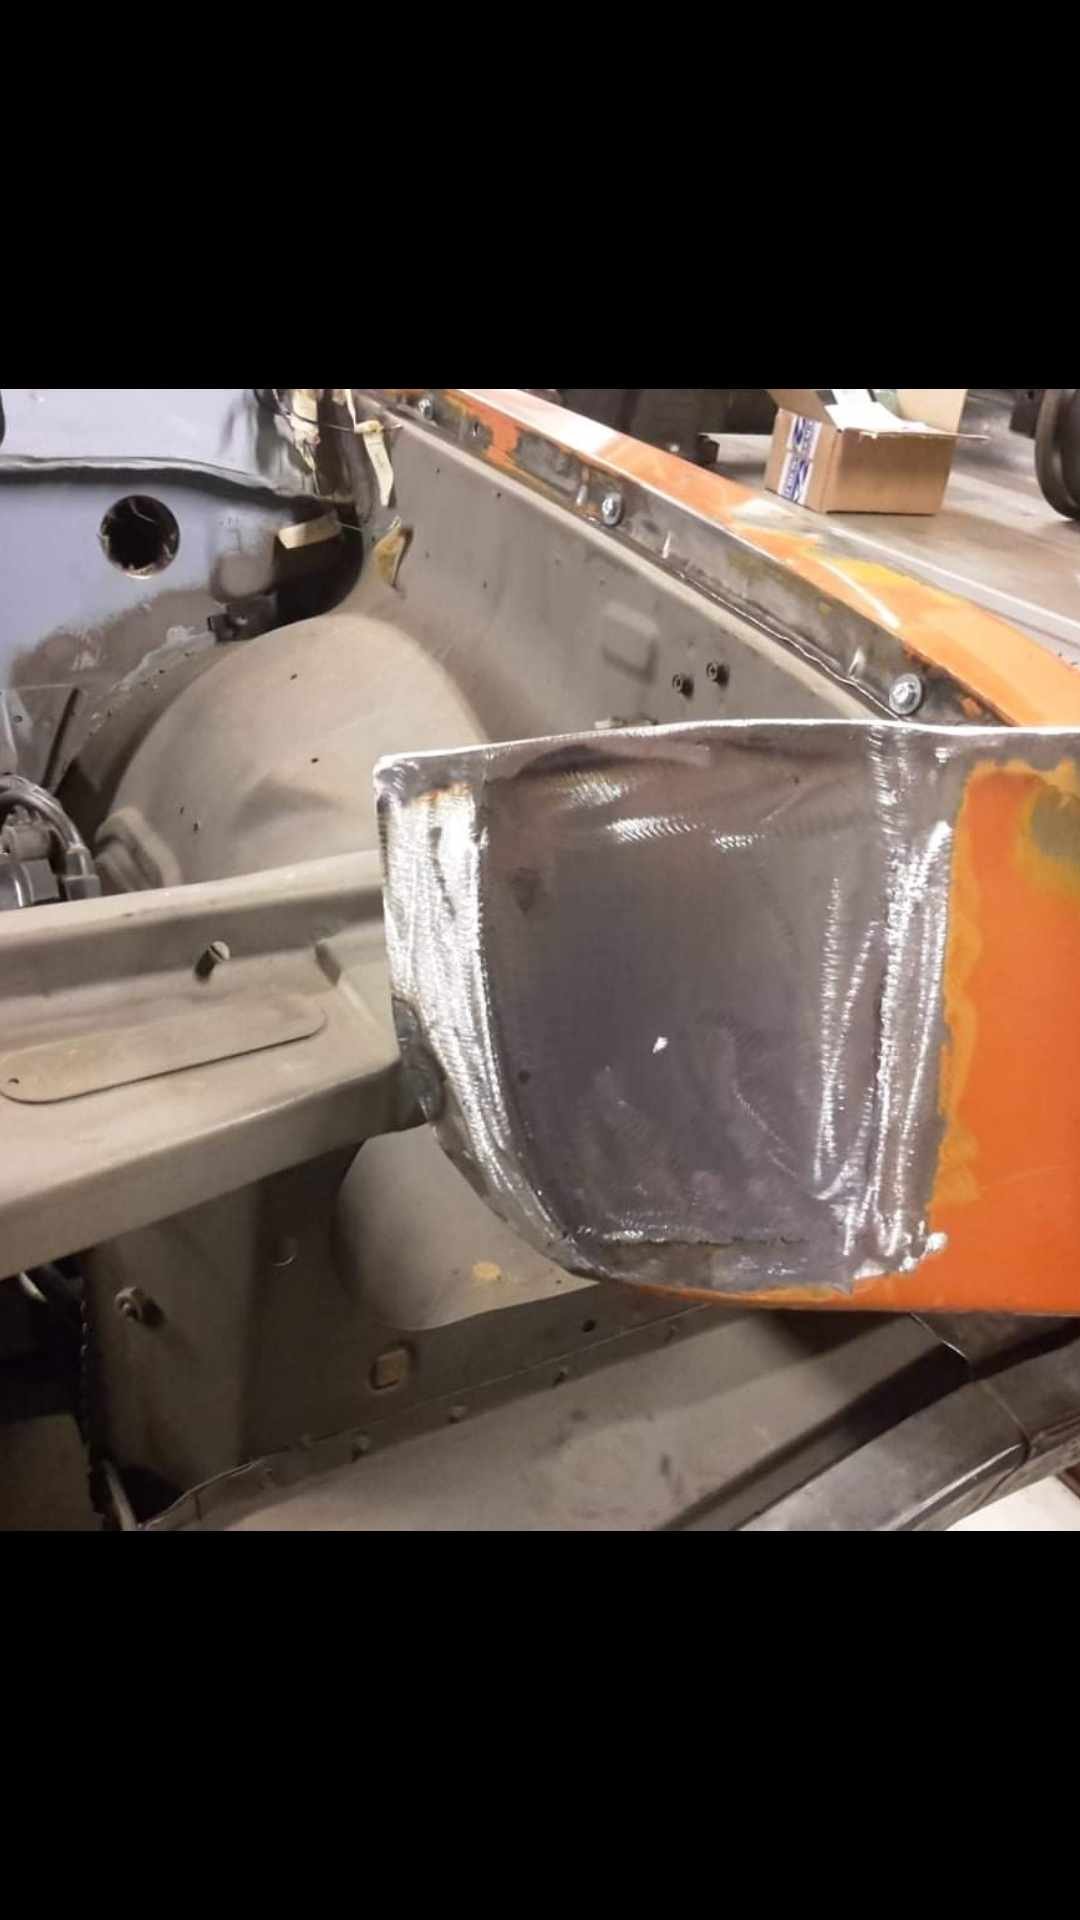
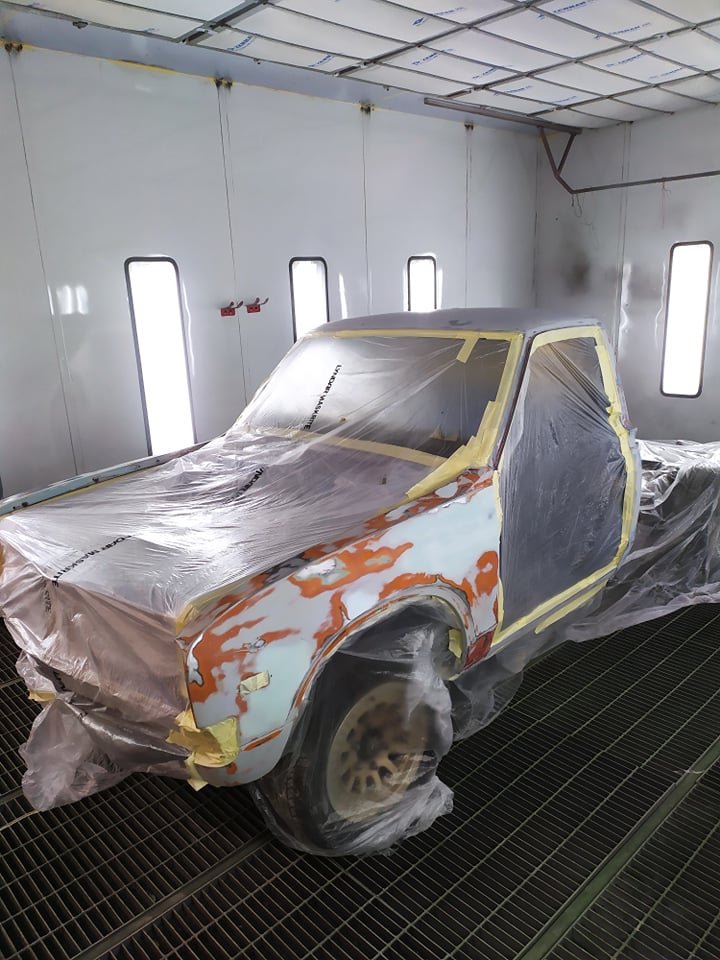
Then theres the body work, So it began pretty rust free. But sitting around outside in Christchurch, a bit of cancer began to show. My coarch builder mate fabricated me a new drivers side sill, and @governorsam grafted it in for me. (As well a couple of other small bits) i dont have any pictures of this either. And one of the gaurds needed a patch too. Again no pics, but i got a panel smasher to come weave his magic. Id fitted the front guards, and they did not match the shape of the doors at all. Also i found that old repairs etc meant that the drivers door was beyond economic repair. And needed to be replaced too. So mister panel smasher had the guards fiting beautifully afternonly a couple of hours. I removed rhe back window, and dropped the headlining down so he could pop some dents out of the roof. (It had been a working truck in its former life) he did a bloody good job all told too. I told him, im not some file finish fuckwit. Its a datsun, and its a ute. You can use as much filler as you need to. Because i knew he wont use more than is necessary. I also said, u donr expect a show car result. If its good enough fo you, its good enough for me too. But as a tradesman, i also knew he would do a good job. The last car he did for me came out really really nice. After the panel smashing was done, a mate brought over one of those paint spectro camera thingos. We took a picture of the paint on the underside of the roof skin. This gave me the colour the trauck was when new. Most of the rest of it had suffeeed 40+ years of central otago UV degradation. Some paint was procured, and it was sent into @I'm new here work on a long weekend. Hamish really pushed the boat out with stopping all the repairs, before paint
27 points
-
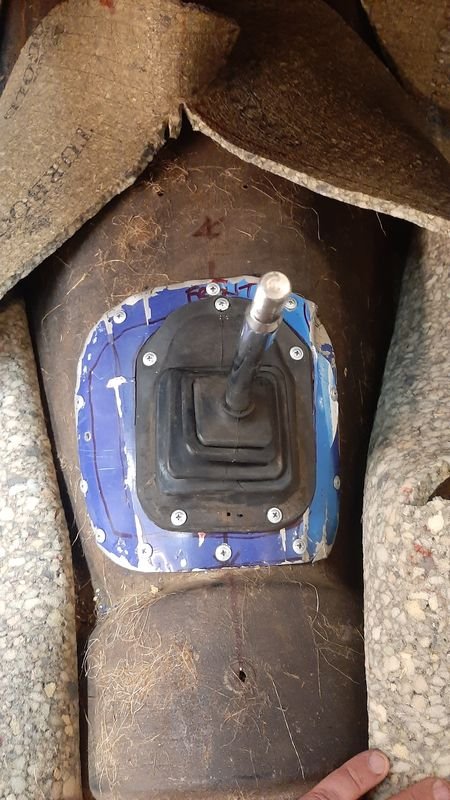
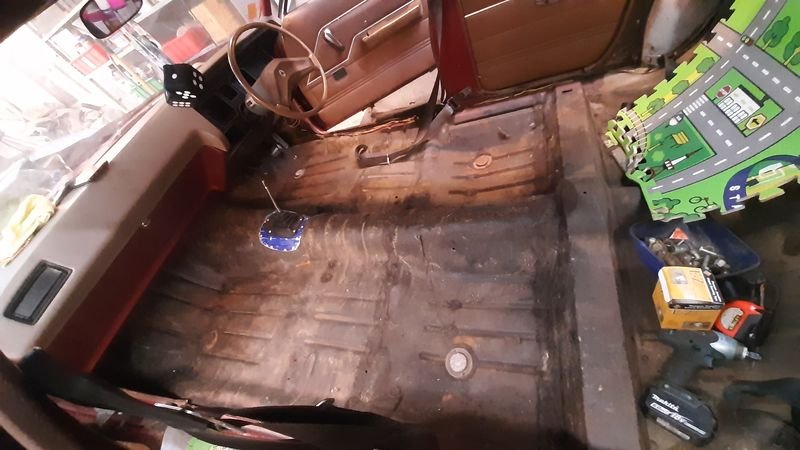
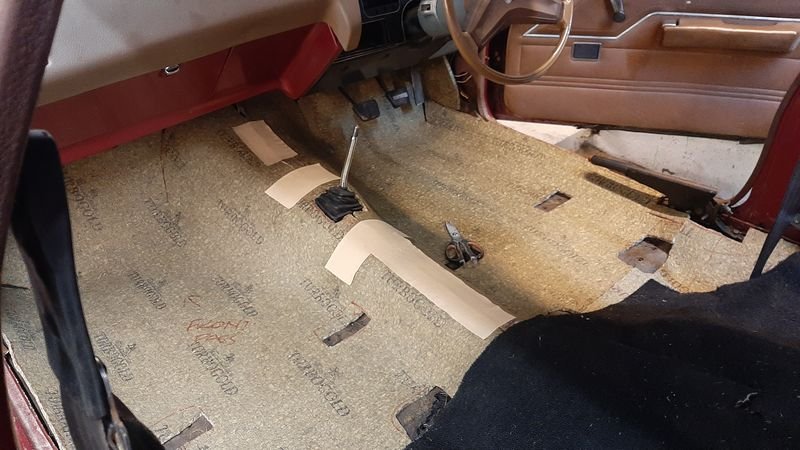
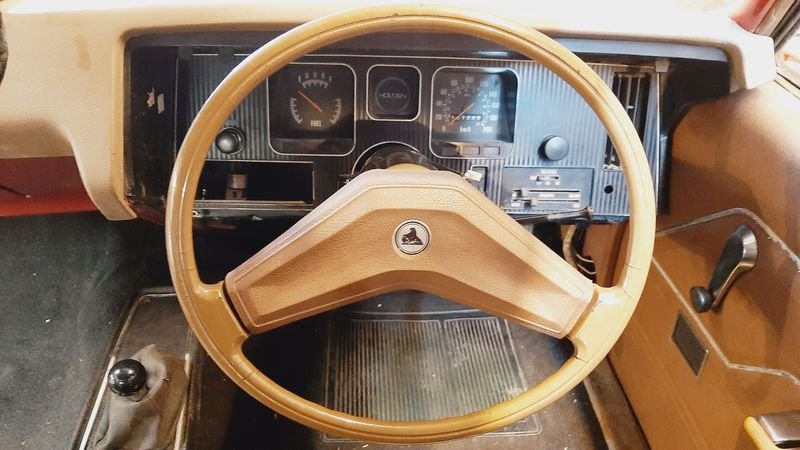
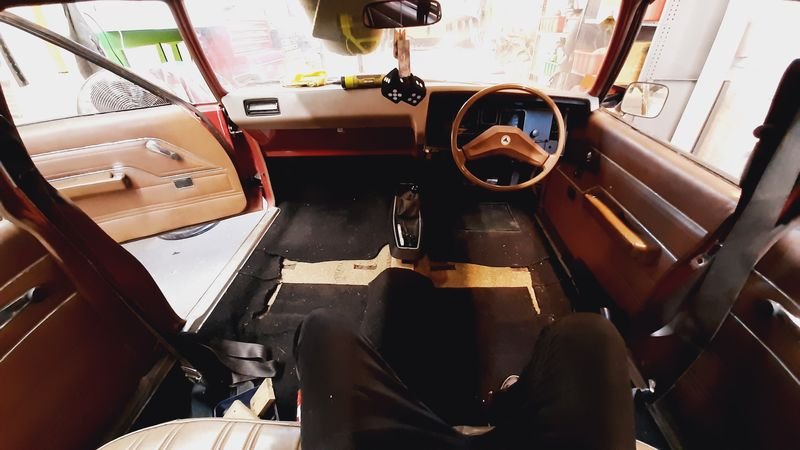
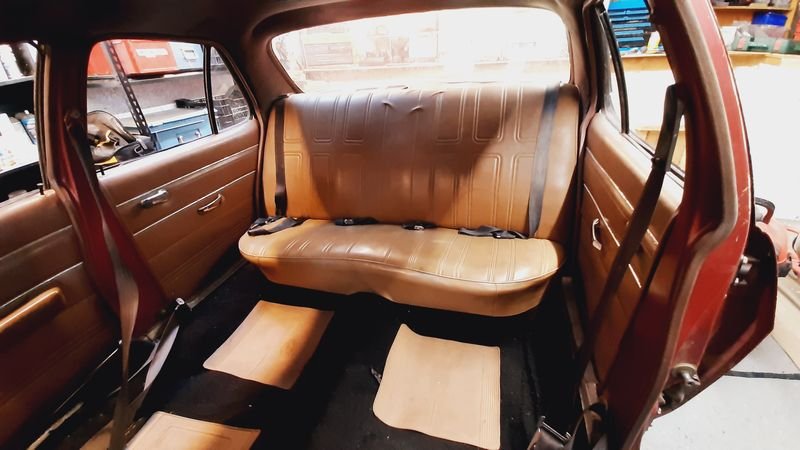
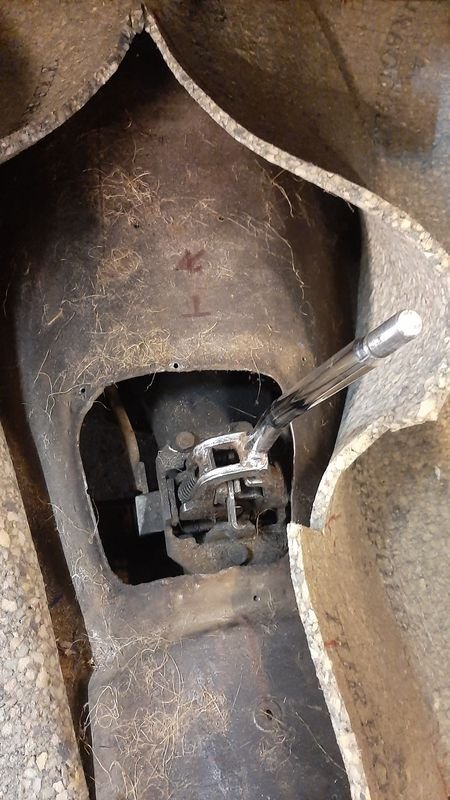
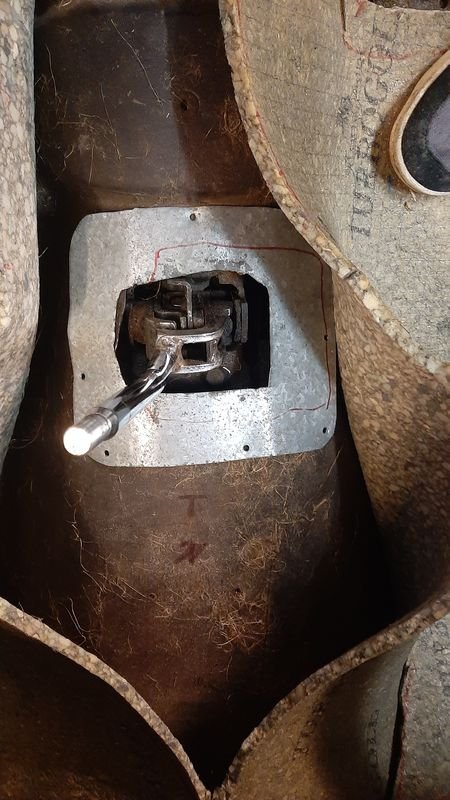
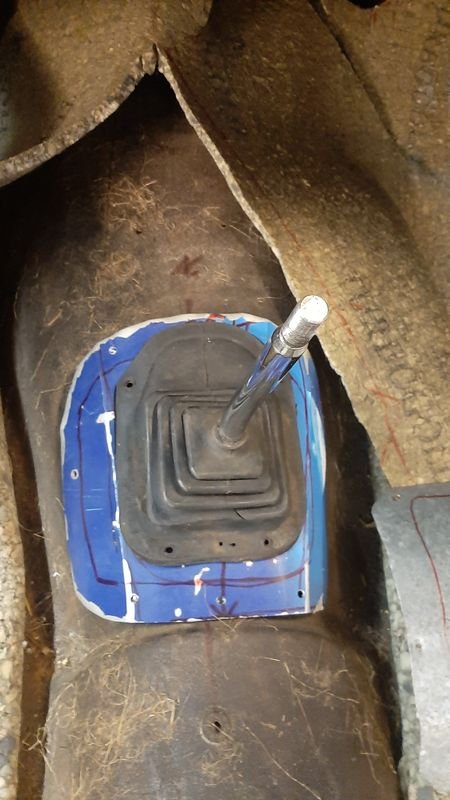
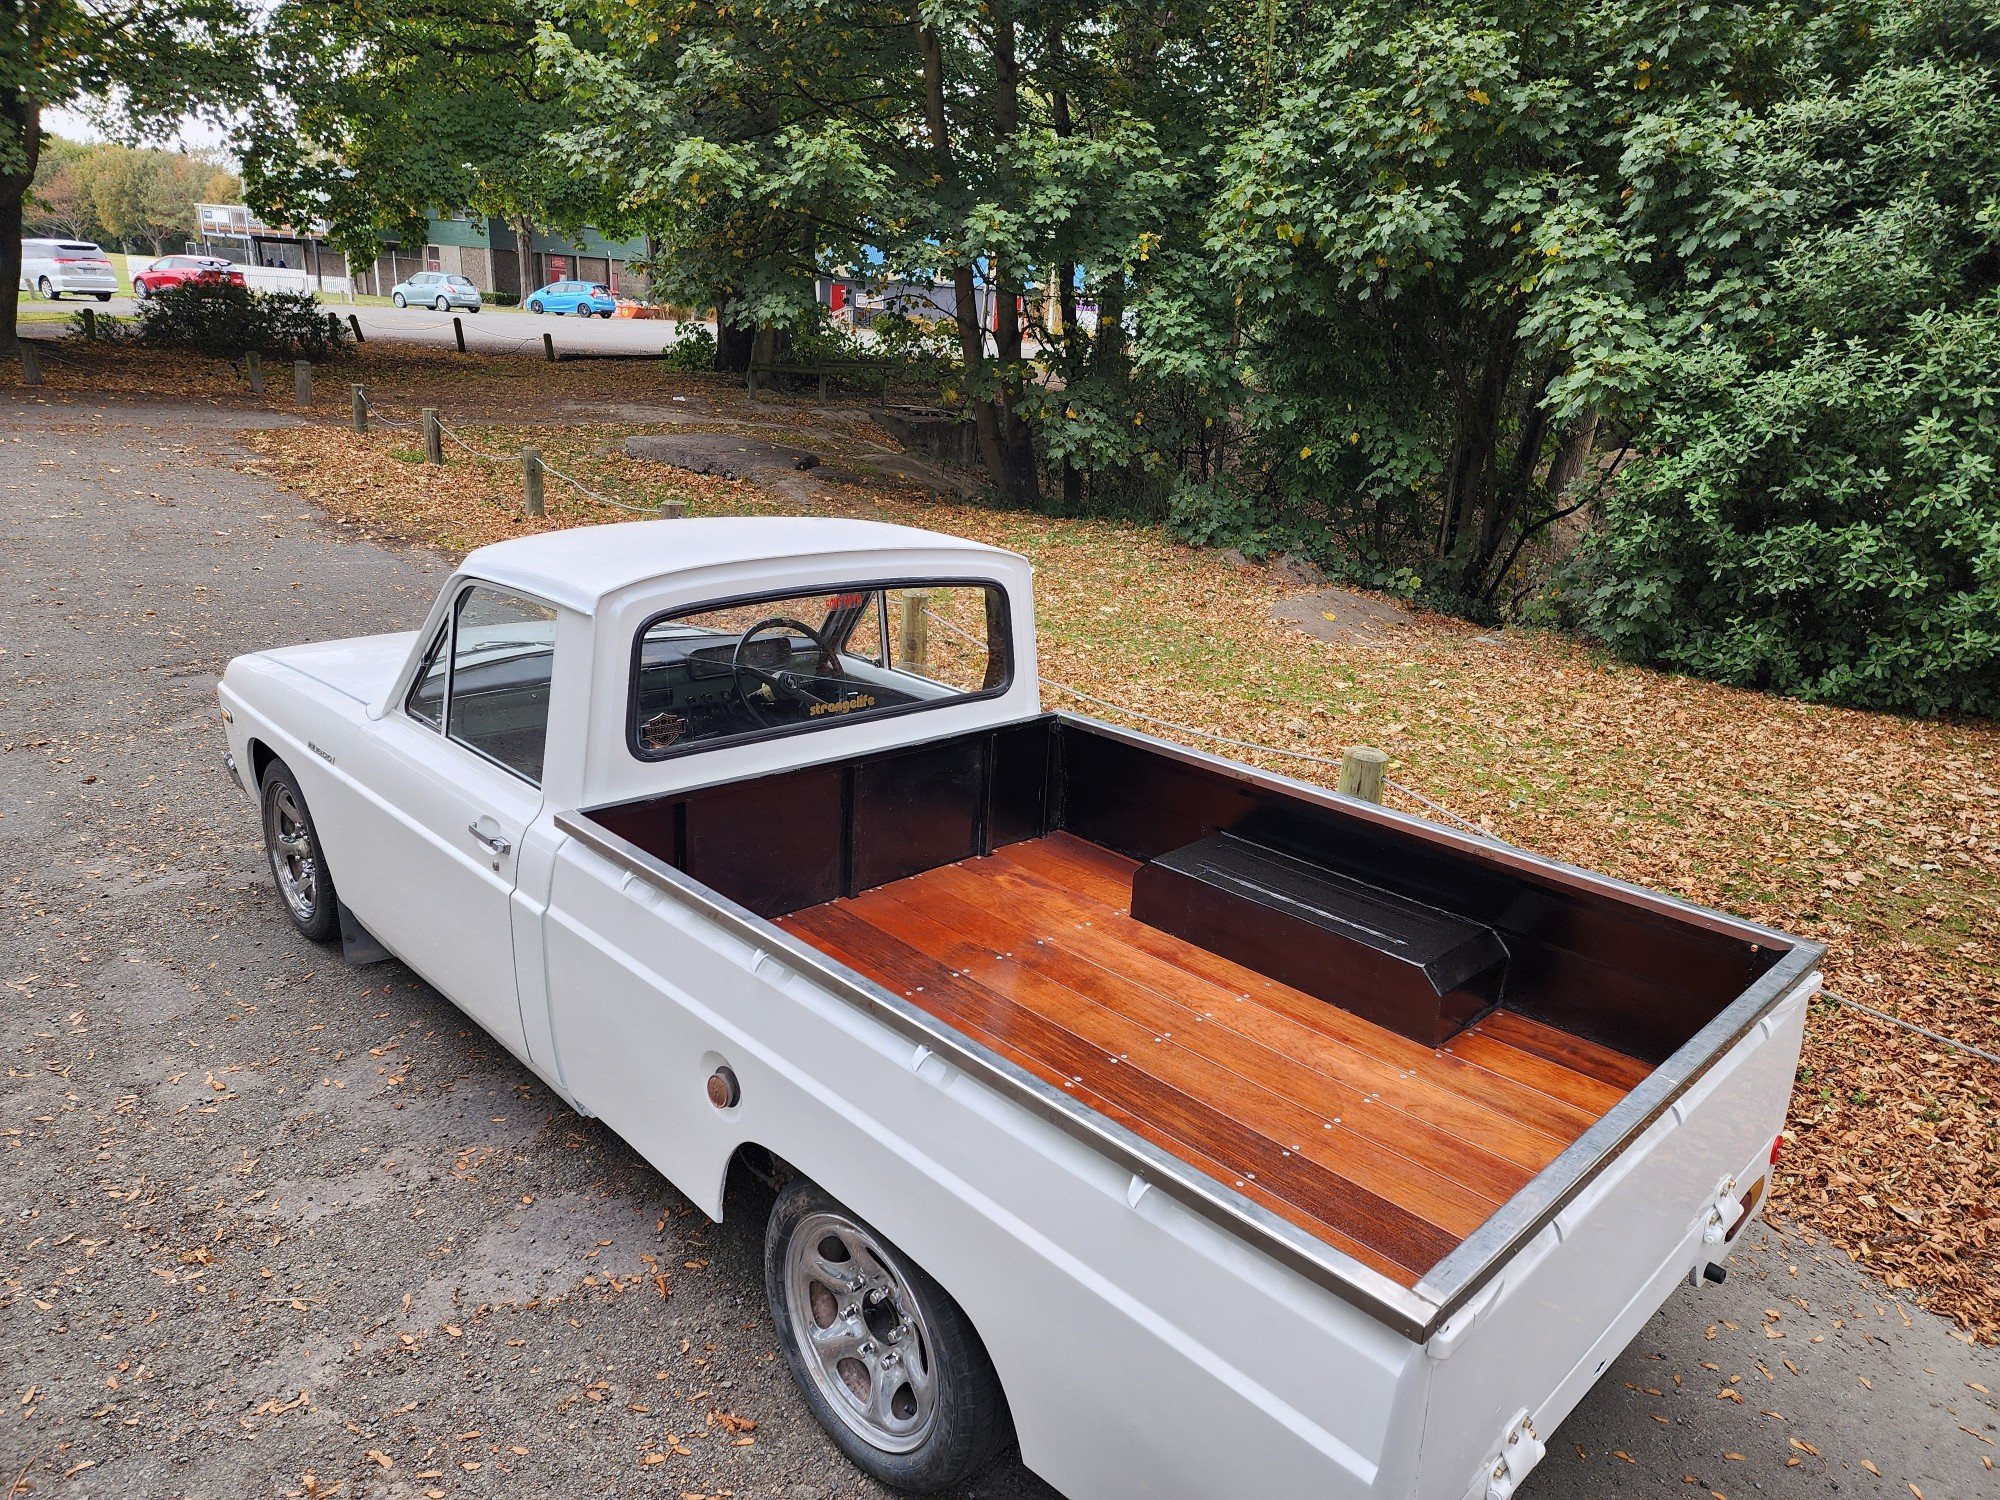
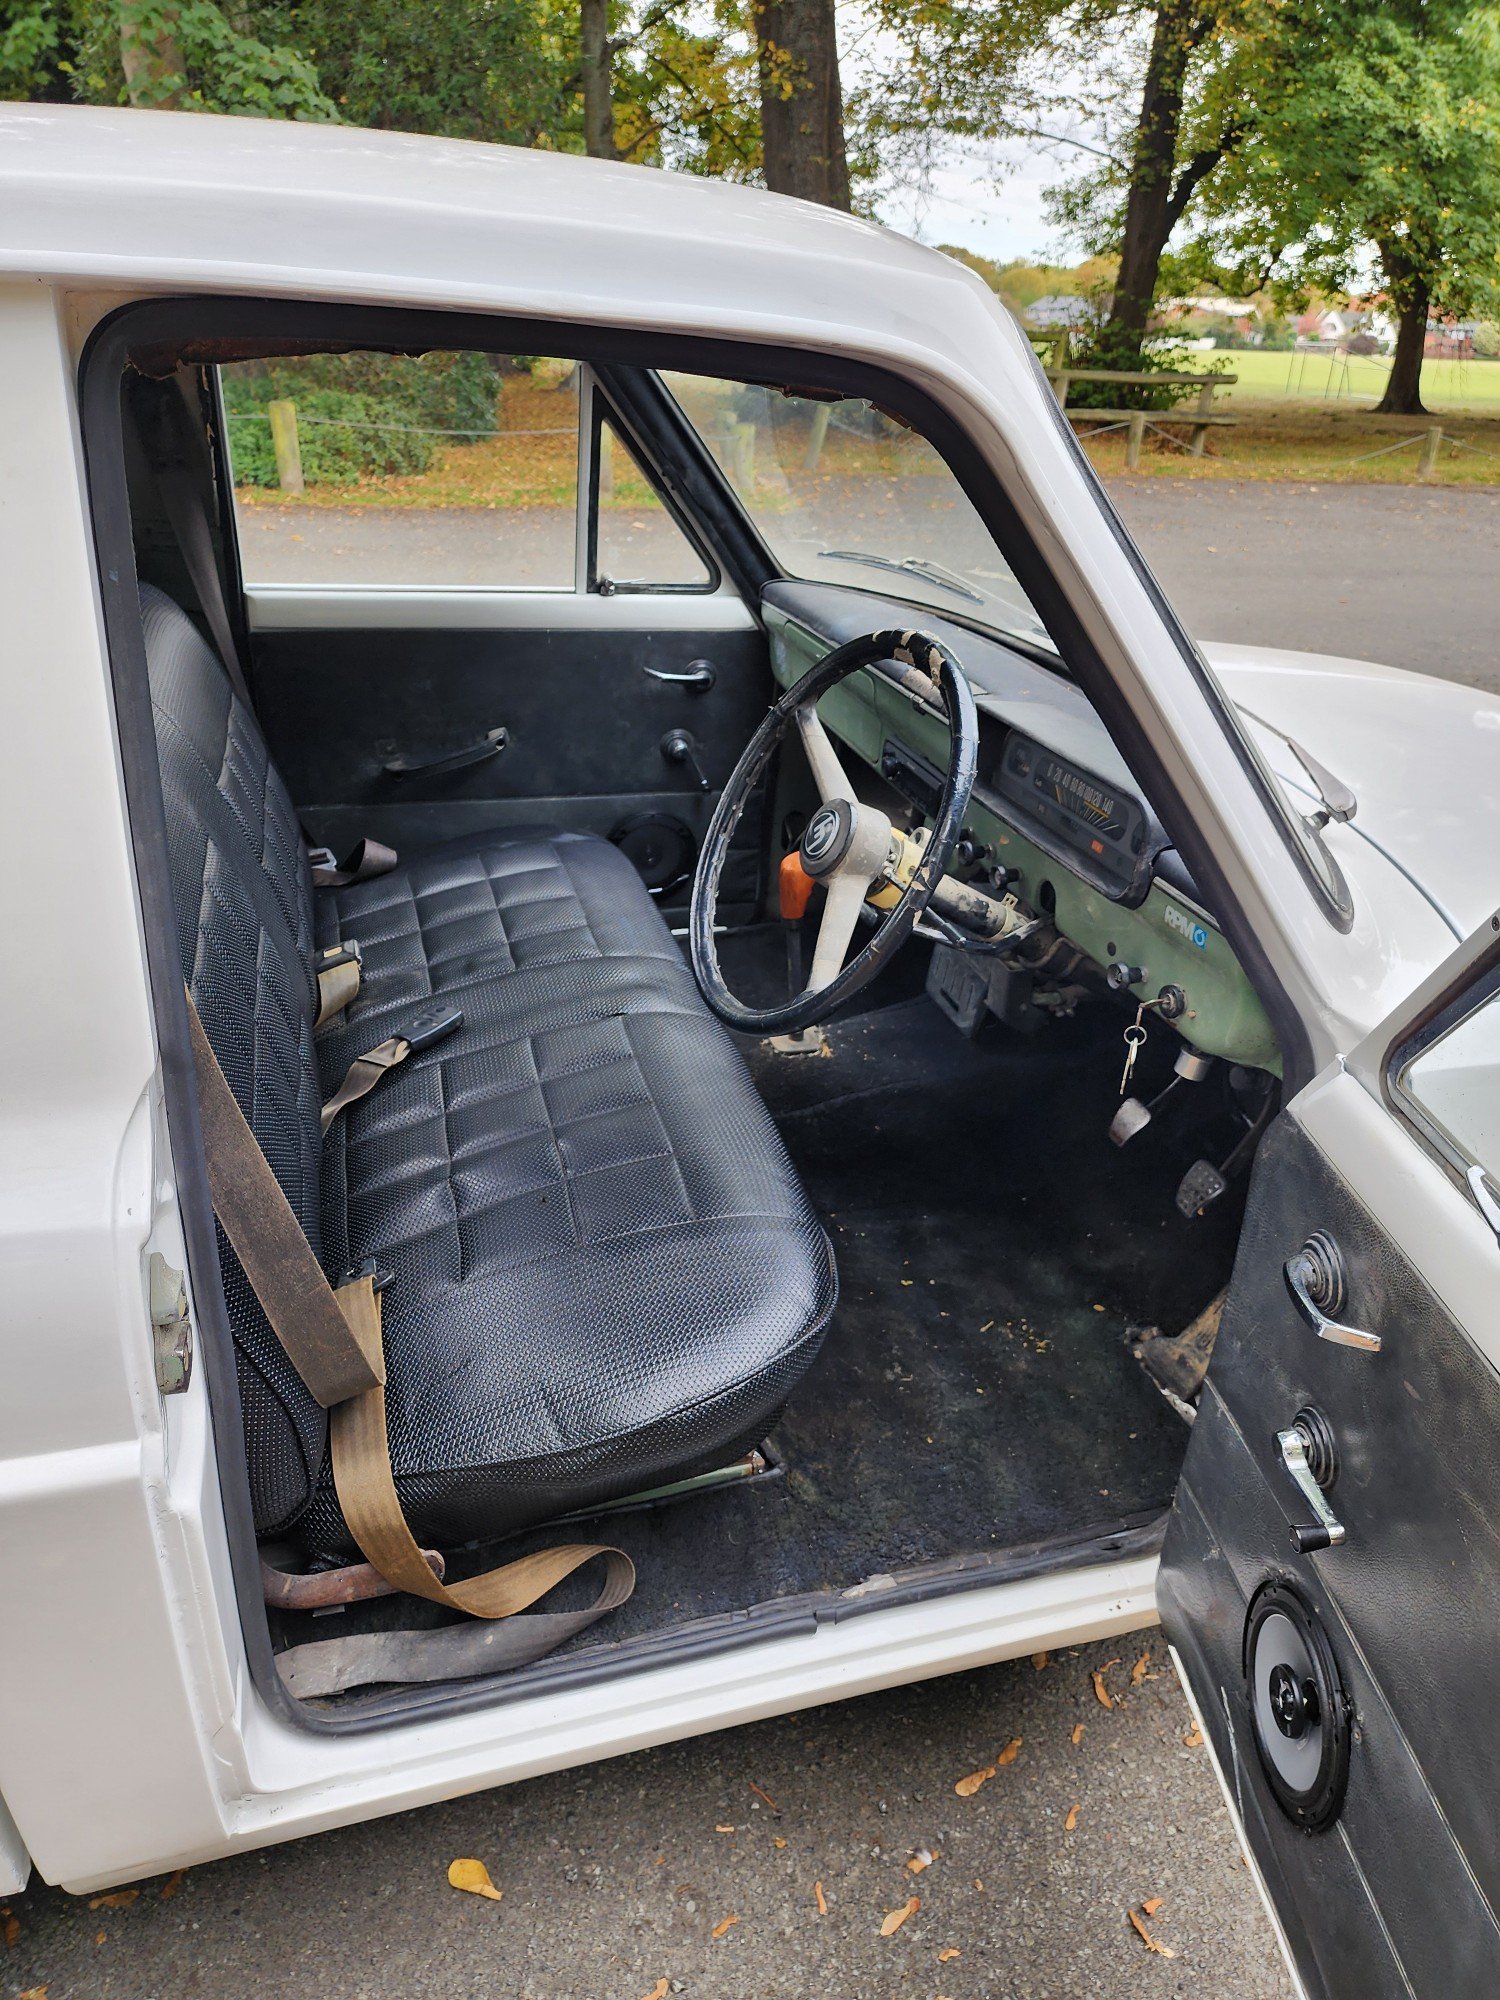
Now we know it runs, next step is to make it worth driving The interior was pretty good condition but there was a lot of evidence of rats eating and storing snail shells in the engine bay and mice droppings in the interior, but no evidence they lived there long, and the shed it was in wasnt water tight so it was all a bit smelly and musty Anyway, all needed to come out for a clean & deodorised the seats, throw away the original horsehair underlay and to make it easier to do a few other jobs, like... Improve the shifter opening, replaced the galv flashing and countersinks that dind really cover the hole with some alloy sheet (from the Sign of the Year! - now in 5 of 5 of our classic cars!) and a rubber boot - adding my first FIAT part Removed everything else and give it a good cleanup. Floor condition is excellent, no rust at all! 'New' Underlay (free second hand stuff) to replace the original horsehair stuff that was a bit smelly and flat. I think the front carpet might be ex-torana too, it doesn't quite meet up with what im pretty sure is the original HQ rear carpet. Both carpets are in nice nick, and we will cover the gap (which under the seats) with some cheap nylon outdoor carpet from m10 that we will also use for the parcel tray that is also unmolested by axe holes for 6x9s etc. Rear came up nice as well, car has a tan interior with dark brown headlining - class! Removed the steering wheel spayed the steering column black (was grey and still has the column change mech in it) and tidied the (omg its so janky!) dash up a touch, and the wiring behind it mainly by removing anything that has added in And then remove the dead weight out of the boot to make room for bodies and crates of DB Its easily 80kgs, empty Things will likley slow down a bit now, as from here its time to start spending money on parts, most likley starting with brakes which i have not even had a wheel off yet to even check what they are apart from being discs up front and drums out back) I suspect the weird too easy/dead stop half way pedal/no brake function issue is the piston is jammed halfway down the master cylinder, as there is no leaks from any soft lines, and lots of fluid in the MC.
27 points
-
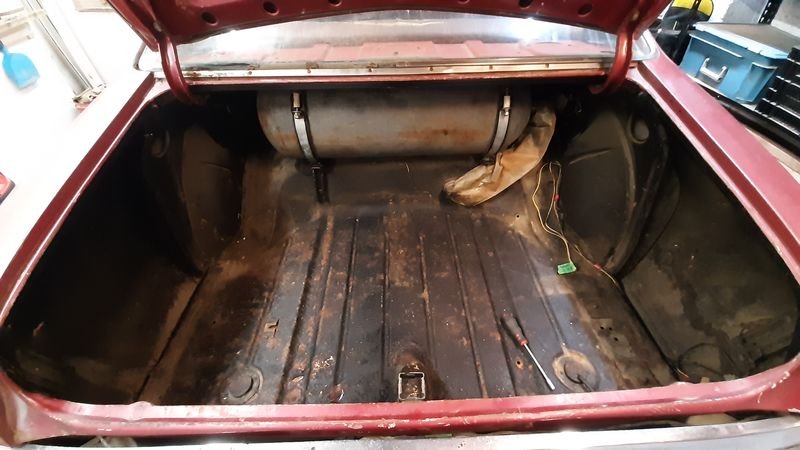
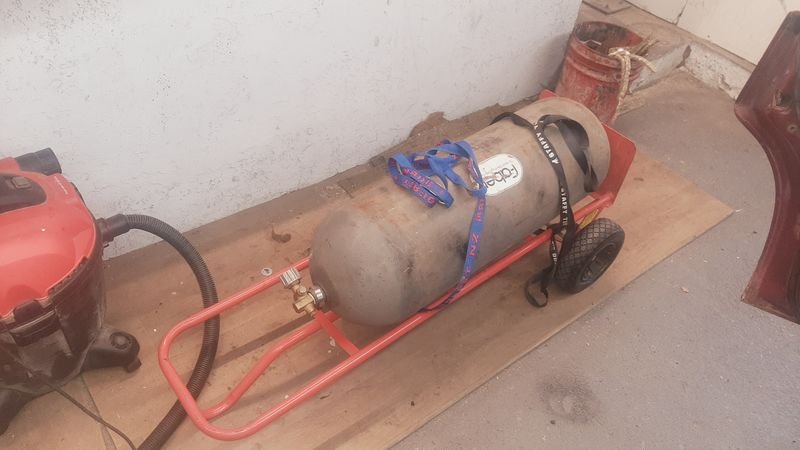
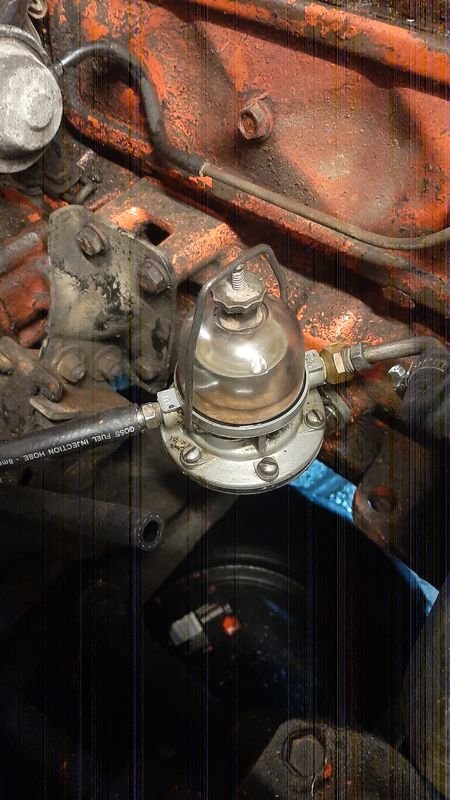
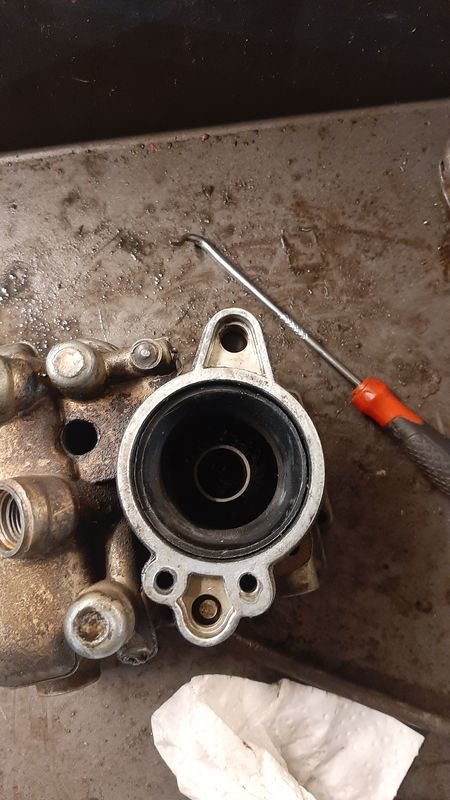
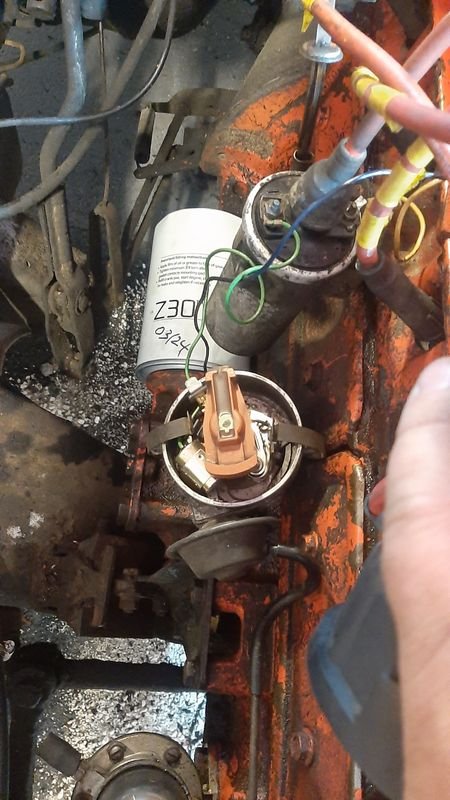
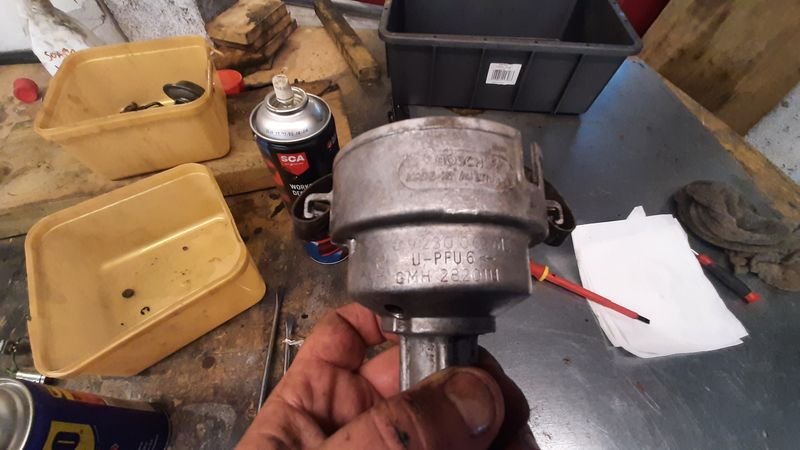
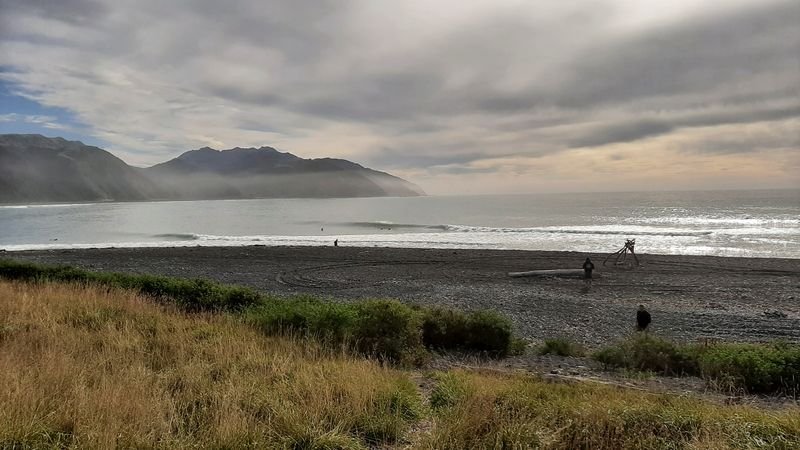
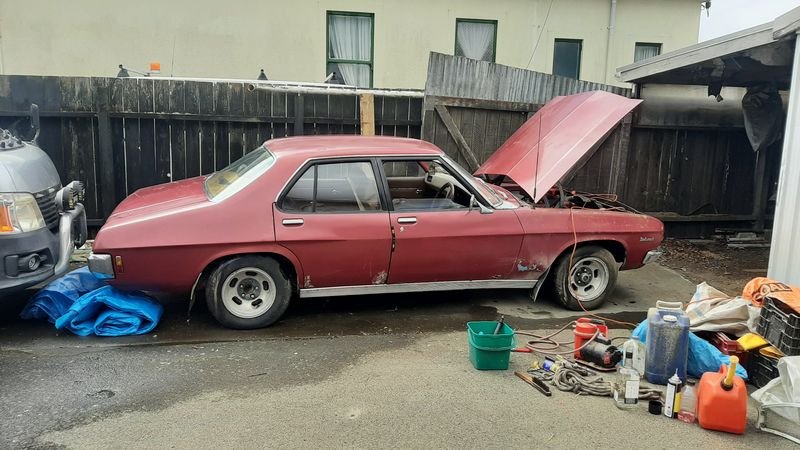
Ma te wa to Bill and whanau, then we headed home, with our van loaded up with other treasure from the shed(s) Forgot to mention i got jealous of her getting new car, so I got me one the same colour as hers on the way up. Given i had to drive this, Kirsty was driving the van the whole way home, she was none too pleased about it (But, yes it is better than my current 2005 Forester X its replacing in every way, thanks for asking - 2002 XT, totally stock, sub 200k and after a few wee issues (MAF sensor, oily connectors, new spark plugs) it really kicks when the whirly boi winds up!) Good Day in Welly before overnight sailing Breaky fry up in Kaikoura a quick stop to rise the north island off And about 3 days after we got home, this turned up. Used Classic Towing - worked out fine, but lucky both Bill and myself are home most of the time because the communication around changes of plan was a bit lacking tbh. The man can sure back a trailer tho. Its a fricken whale compared to my 'big' Fiat, an easy foot wider. Time to poke the bear First thing, remove the CNG stuff from the engine bay. Not only is it unfillable, the electrics are one of the layers of fuckery (the least bad to be fair, but also totally redundant), the tees that loop into the factory heater coolant lines to stop the regulator freezing up were corroded apart, and the carb hat gas injector thing made the air cleaner butterfly nut rub on the underside of the hood. 'New' heater hoses (from the old CNG line) and a bit of a wiring tidy up Fuel pump clean (no go in Feilding, leaks like a sieve now, still no pumping action), now bypassed with a clicketyclack, needs a rebuild kit (diaphram and gaskets) Carb cleanup, was pretty clean inside the bowls etc, works ok now, needs a kit too (tore a gasket) Sitting clean on the still very oily 173 Dizzy removed, cleaned and oiled, gap reset, but all the points, cap, rotor, leads and sparkplugs all look relatively low miles Changed the oil and filter (black and smelled like petrol but no chunks), re-crimped a new loose connections, taped some twisted wires, removed some vampire taps and chock blocks as well Put it back in starting from first principles (ignoring the marks, get cylinder 1 on compression stroke at as close to tdc-ish you can with a long thing in the spark plug hole, rotor pointing to lead 1) and it was about 90 degrees off where it was before - dizzy couldnt be turned enough to get the right timing, so i wonder if it had been tutued with before and the hassle of it not running well was why it got parked. Bill did say it had several minor issues needed sorting out and they got a newer, better car and he just stopped driving it. Anyway, buttoned up and after some further fine tuning it starts on one pump of the pedal and idles smooth. Not smoky (any more) Still no coolant or brakes.
27 points
-
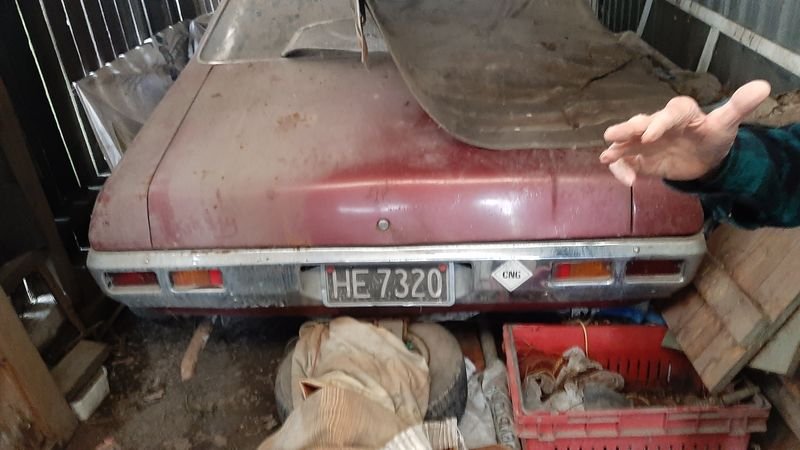
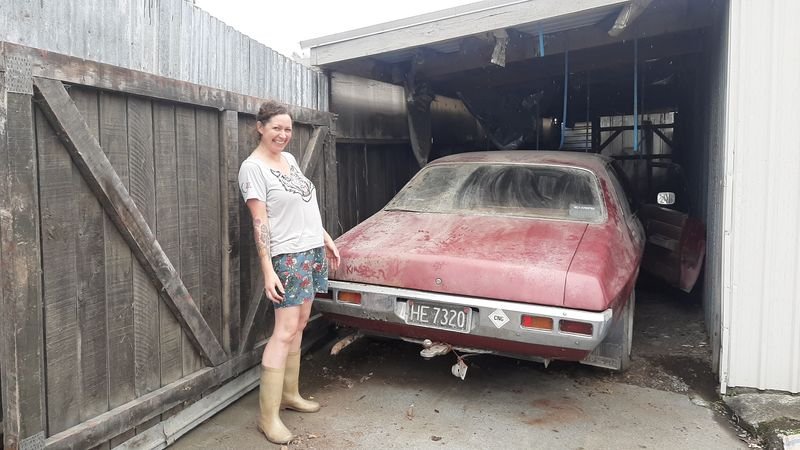
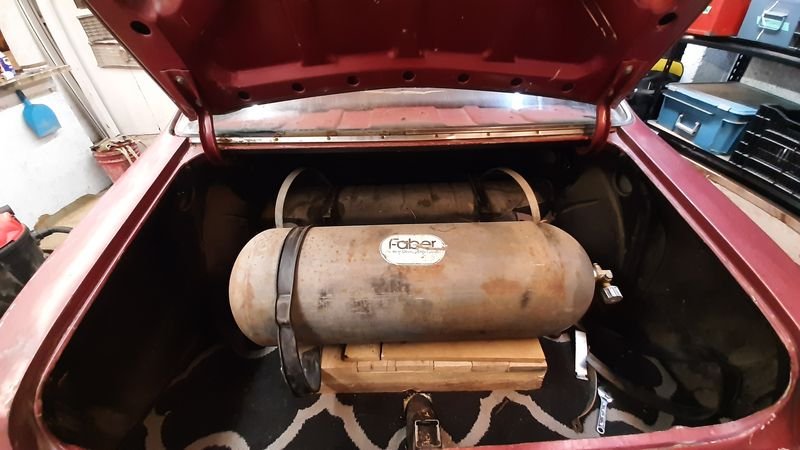
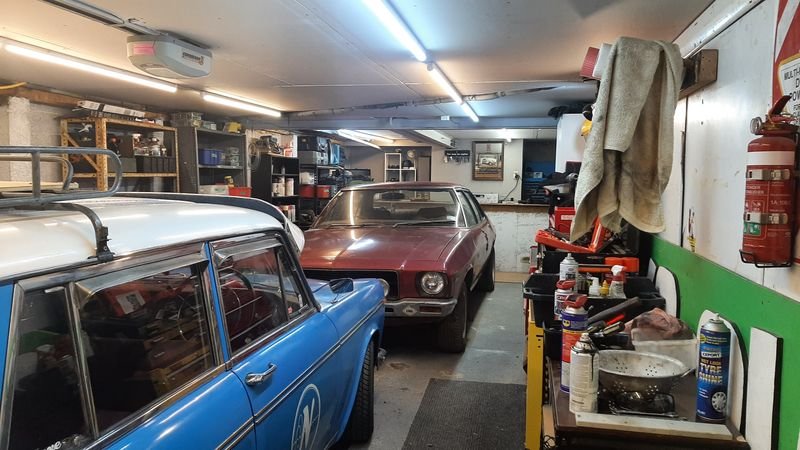
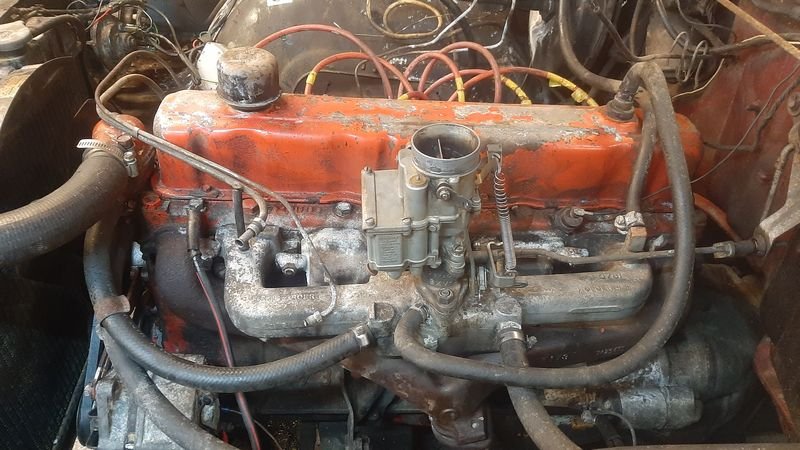
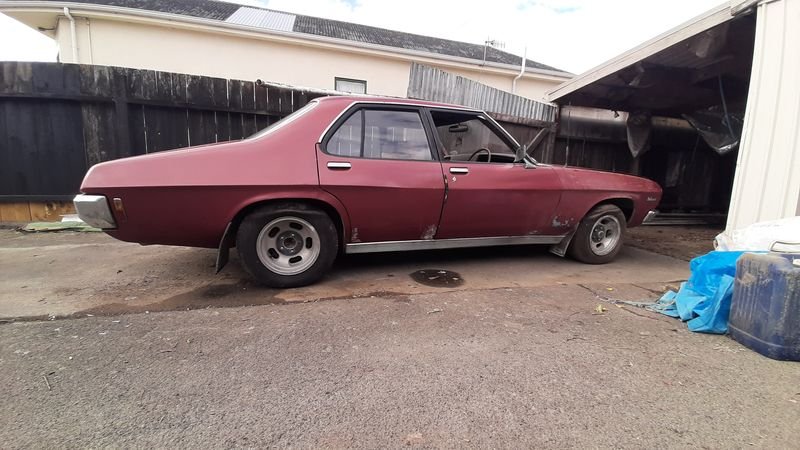
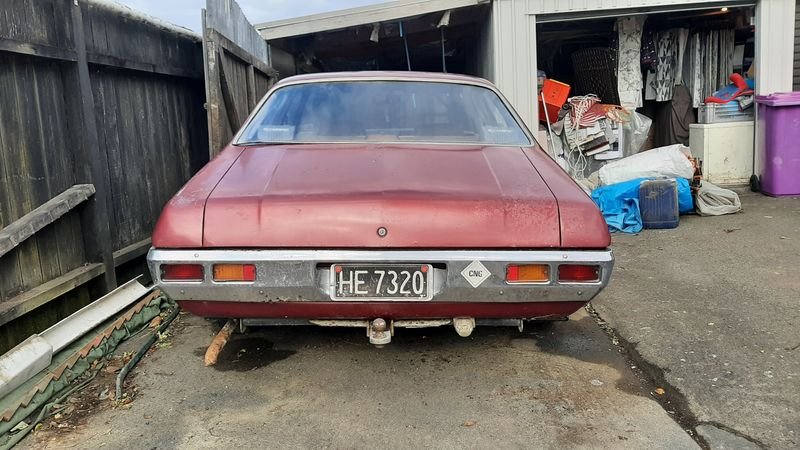
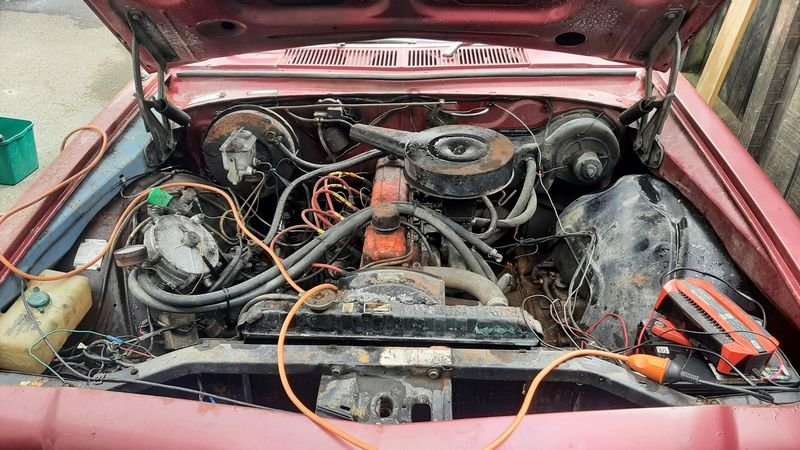
Then of course it was time to have a good look while cleaning it a bit, and taking stock So, its a 1974 Holden HQ Belmont Sedan in Orchid Red. Last wof/reg in 2001, so was on the road into Kpies early 20's around the same time i met her. Seems it also got the Torana front seats, maybe the centre console? Interior looks pretty good under the dust. Overall looks pretty straight and complete. Some rusty bits of course but not too bad at all for one of these 8s out back and 7s up front, massive CNG tank in the book gives it a rake. This car was a NZ new factory 202 manual 3 on the tree car. Bill bought it cheap from a guy who bought it to put the v8 that was in it into something else, or something - bought with no engine in it anyway The engine and box now in it is a 173 (2.8l) with a manual 4 on floor from the aforementioned rolled Torana, which had recently had a fair bit spent on the engine (??) It has a single barrel Stromberg and also has CNG. Only $4.20 to Whanganui! Took the plugs out and oiled the cylinders, cleaned the sparkplugs and filed the points and hooked up a battery. Neighbours come to assist. Many opinions were shared We managed to get it to fire off on squirting gas down the yap, but it just wouldn't keep running. The consensus is that the timing and/or the electrics are weird Brake pedal does nothing till halfway then hard stops, no braking action. Handbrake kinda works. Engine isnt stuck and clutch is free and gearbox goes into all gears. Bill is stoked it fired up, Kirsty is happy, and that it rolls at all is good enough for the transporter man. We push it back in the shed to wait for the transporter
27 points
-
Been a while and I have been pretty shit about up loading on here. . But the car is running and driving it is still on a factory motor (apart from ARP head studs) she is running 10psi at the moment and is happy with it.. We are still road tuning and she not legal at the moment ...but I have taken her to a bunch of meets and to work a few time... (its a fun car Lol).
27 points
-
End goal pretty much this
26 points
-
The wof this week is off the cards. I thought I had better check why the handbrake was so pathetic and discovered that both rear calipers were basically seized. I thought the brakes were not as good, now I know why. I may as well rebuild all the calipers and if my visa can take the punishment I might get new discs and pads as well, I might have to sell some shit So I to feel like I had achieved something I messed with wiring of the fuel sensing relay to try to make it work. @h4nd had given me a dose of RTFM so I reworked the wiring to suit, but now it doesn't work at all. I checked many things but no go. There is a good chance I toasted it when I wired it up wrong. I might just wire a normal relay up to and use the alternator as the signal wire. I also poo'd up the washer tank some more as it was still leaking, tomorrow morning may tell me some things; Then I decided to move the afr meter to somewhere where I could actually see it when driving. Basically lots of tinkering with shit and avoiding jobs around the house that I should be doing. Oh and yesterday I tuned/balanced the carbs a bit, hopefully it will run a little better. And also I noticed the gearbox drain plug was leaking.... Cool cool26 points
-
I spent some time dicking round with the airbox as I didn't like the long studs coming up off the carbs, plus the carbs themselves seem to be mounted in a slightly different position and the airbox really didnt like sitting down in place. So I made a new baseplate that fitted nice and put some 16mm tube in there so the screws could clamp it directly through the baseplate. Its a bit cleaner looking too... Then I glued the windshield trim on with some extra and probably non standard fixing methodologies; I am missing the joiner bits but I might just poo the gap up for now once its cured in place. A new and marginally sexier fuel pump arrived and got placed; Ooh and here is my sexy top link what I made in place; So just the rear valance to make, plus probably a heat shield for the alternator as its still close regardless of the wrap. And the alternator light doesnt work for some reason. And I found another sneaky little rust hole in the drivers floor. I should have noticed it as there was a 20mm stalactite of bog hanging down underneath, but obviously I didnt up til now. There is an argument for step drilling it out to 25mm and calling it a drain hole, but I will make a closer investigation. Oh and I bolted most of the rest of the bits back on;25 points
-
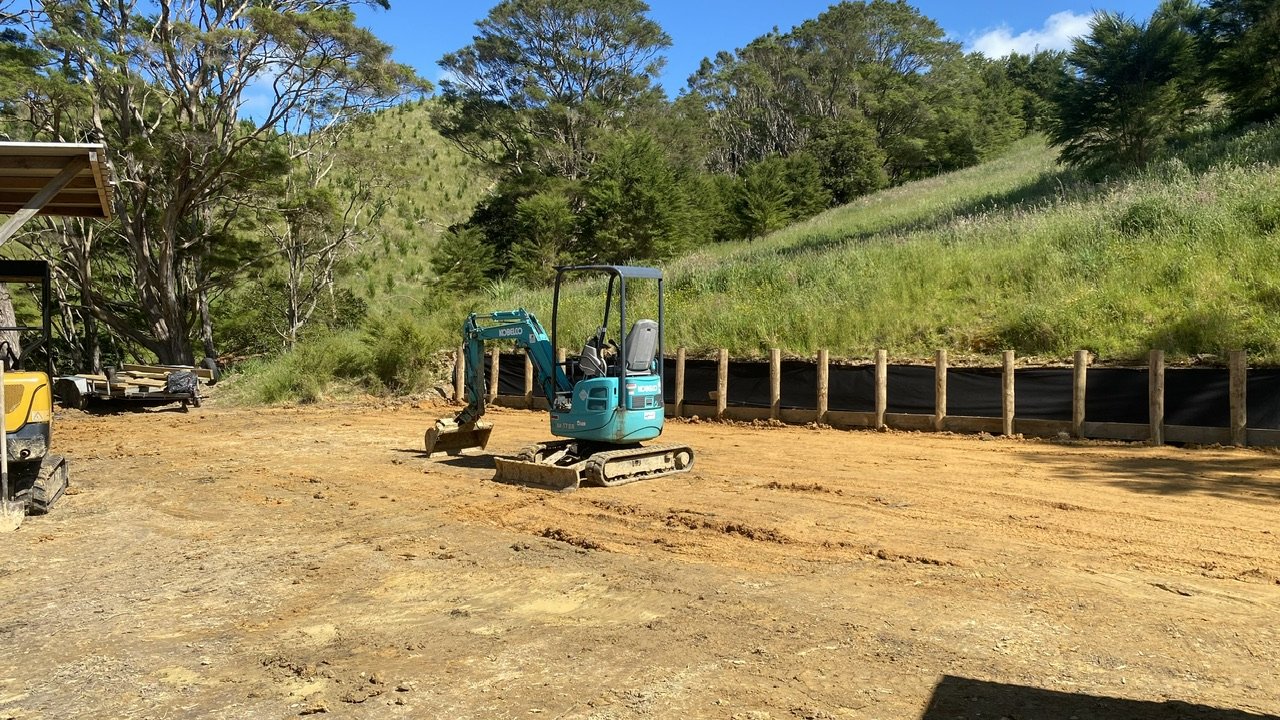
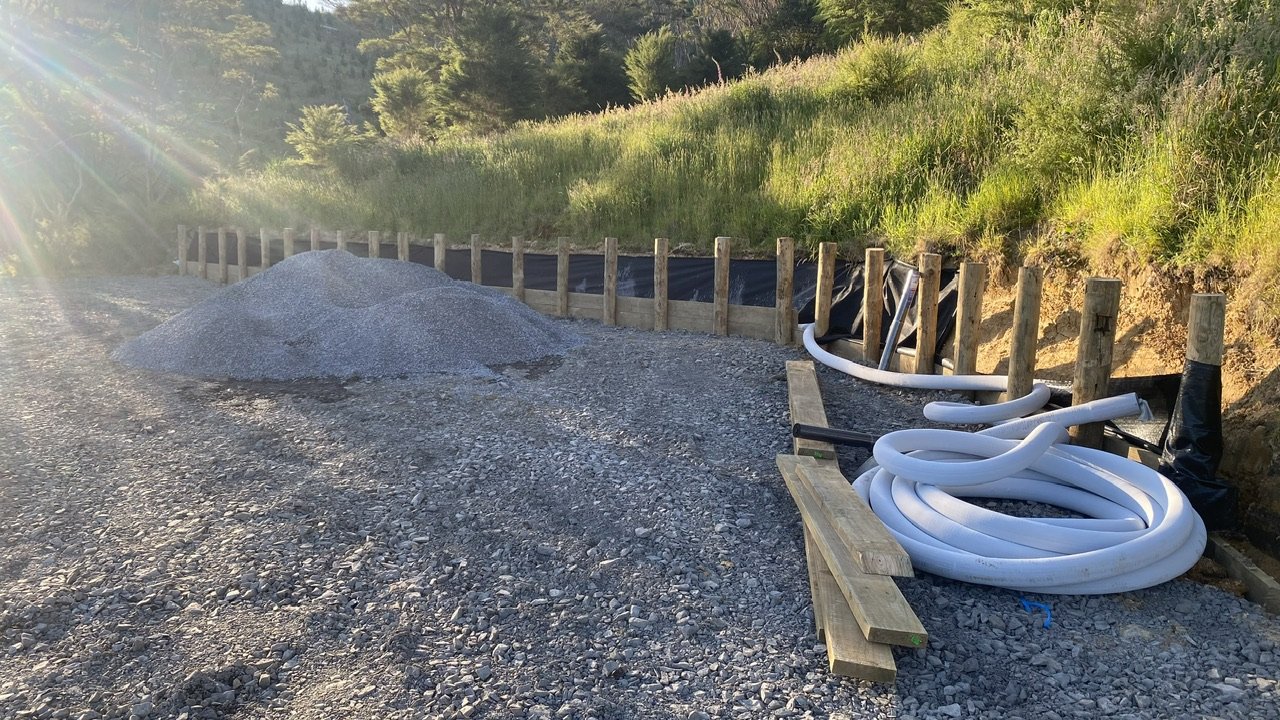
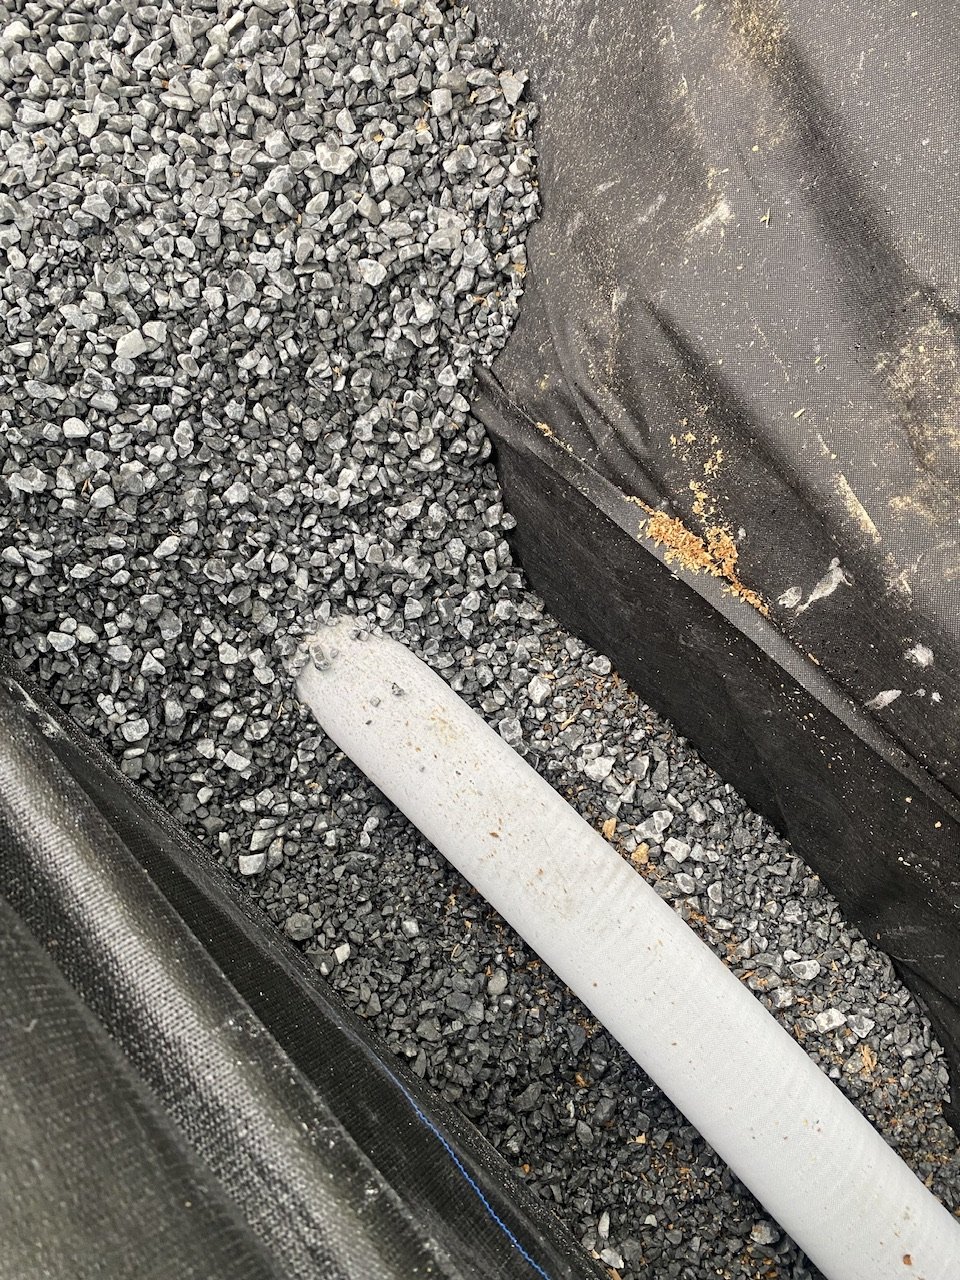
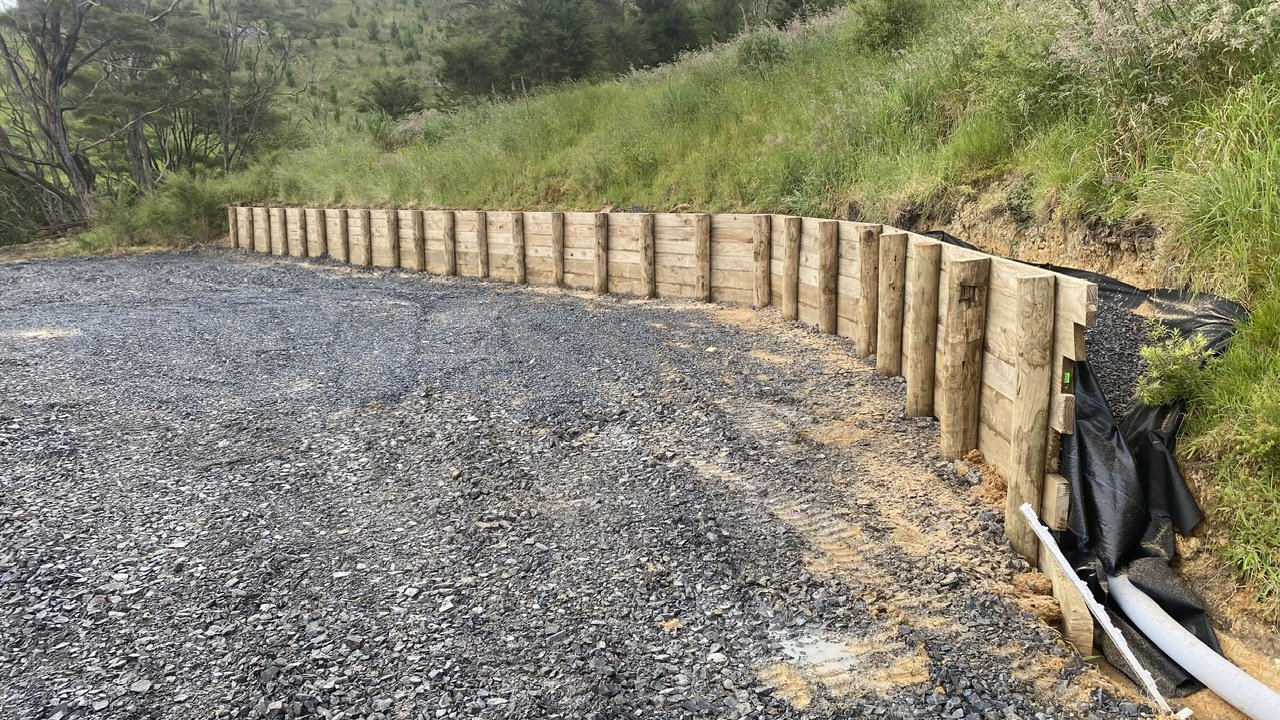
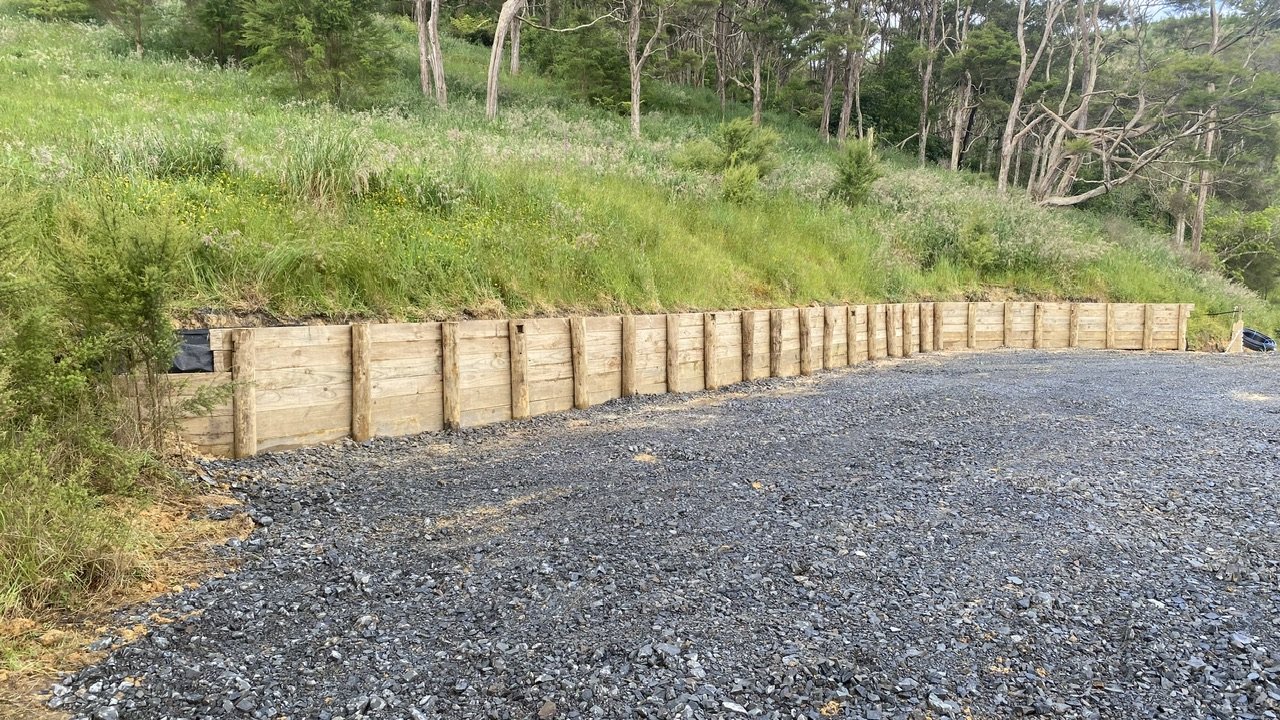
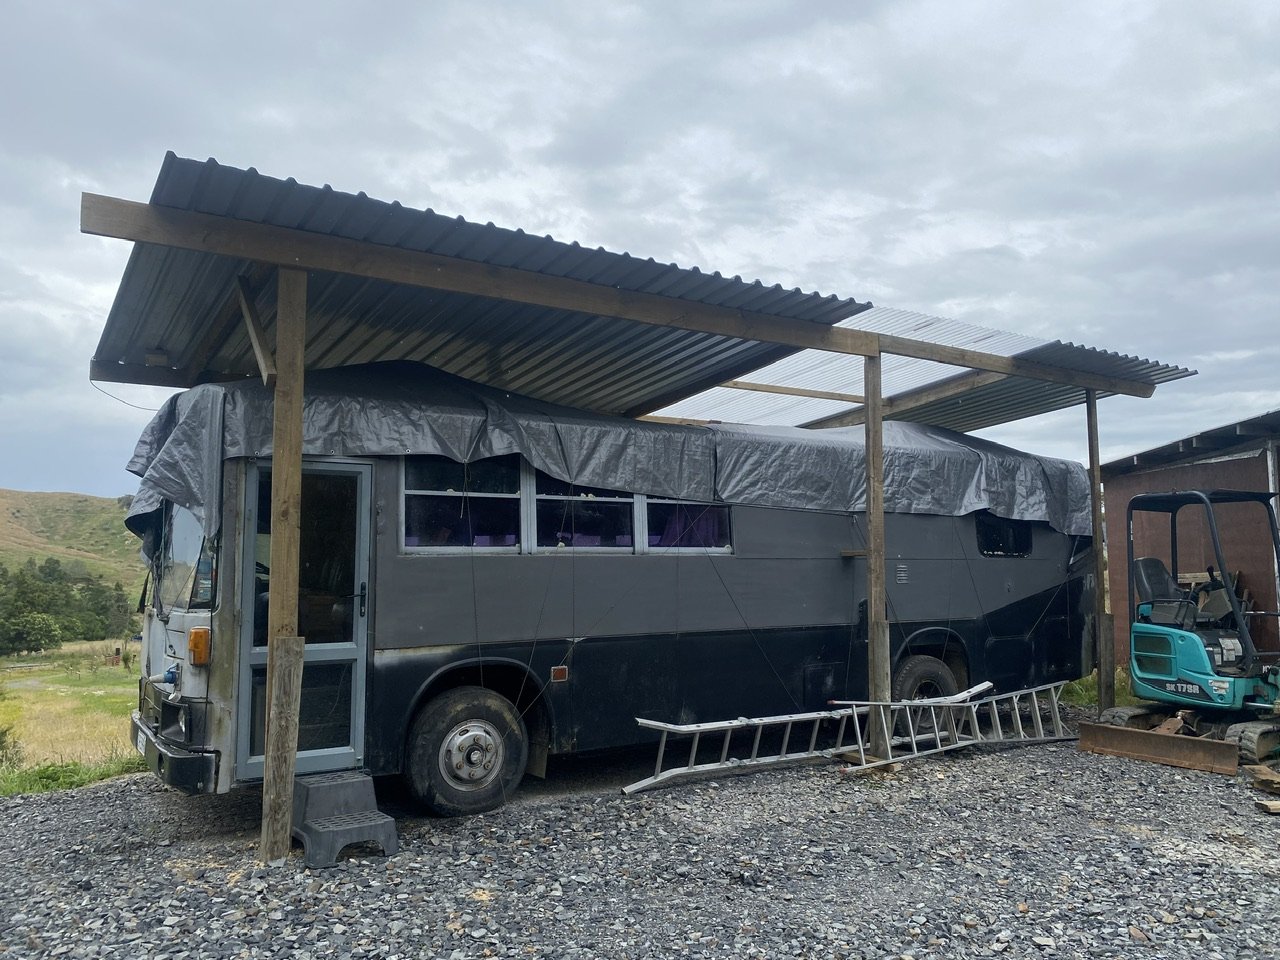
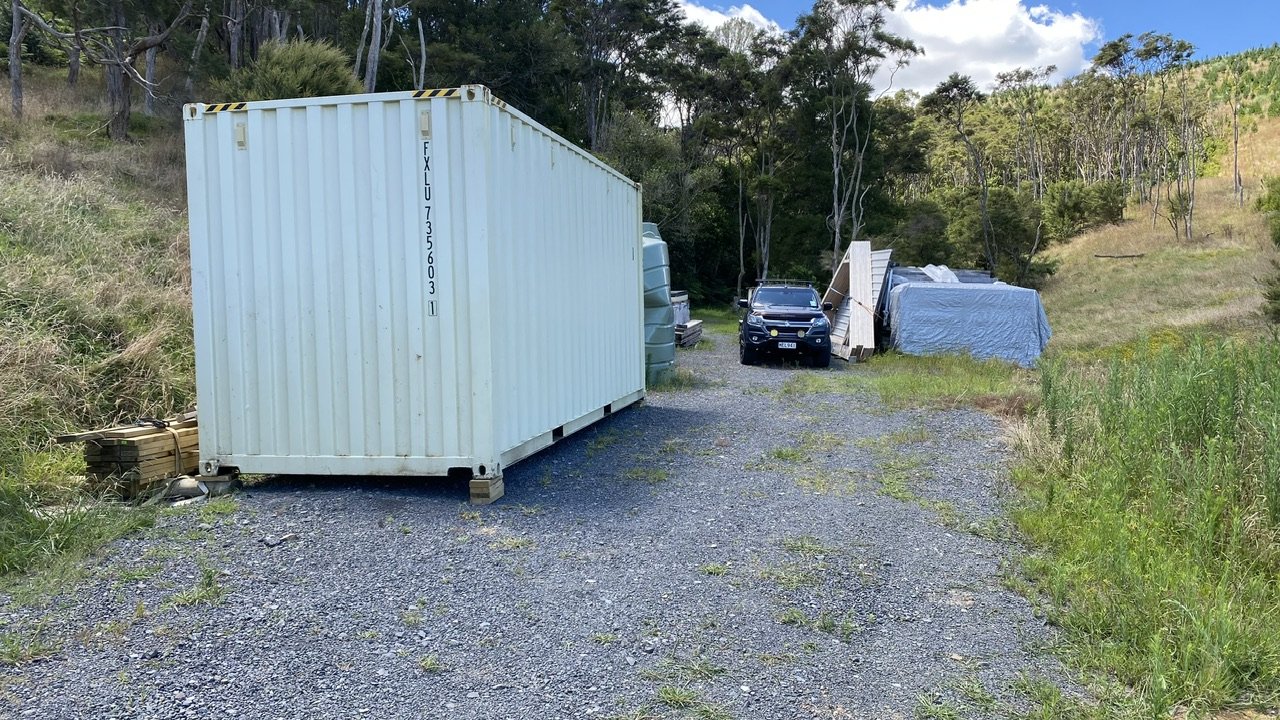
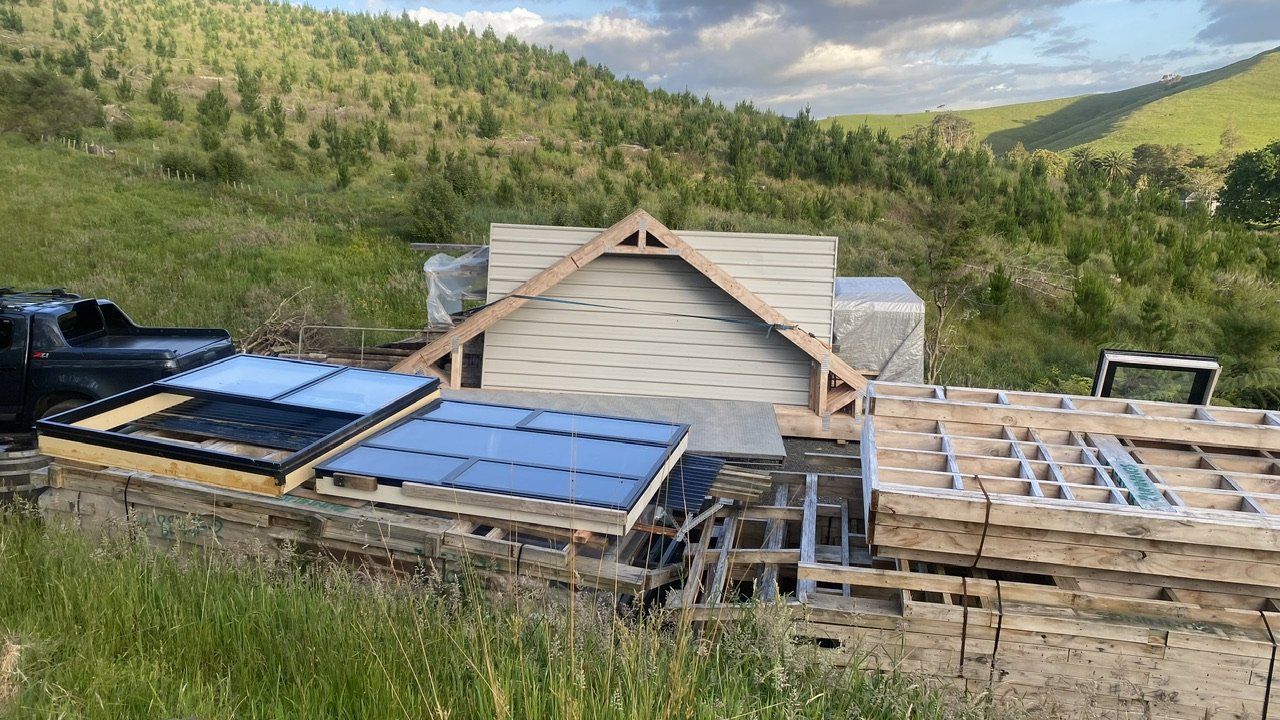
Been a minute or two.. had shoulder surgery late last year which slowed me down a bit. Just prior to that I got dad to come up and help me build a retaining wall. Still got the ends to finish off but it turned out pretty neat for a first timer. Moved the bus up to the building platform and built a sketchy roof over it so it could dry out better. I’ve since removed the tarp. I’ve also got my container down there now and the place is looking more like a builders storage yard.
25 points
-
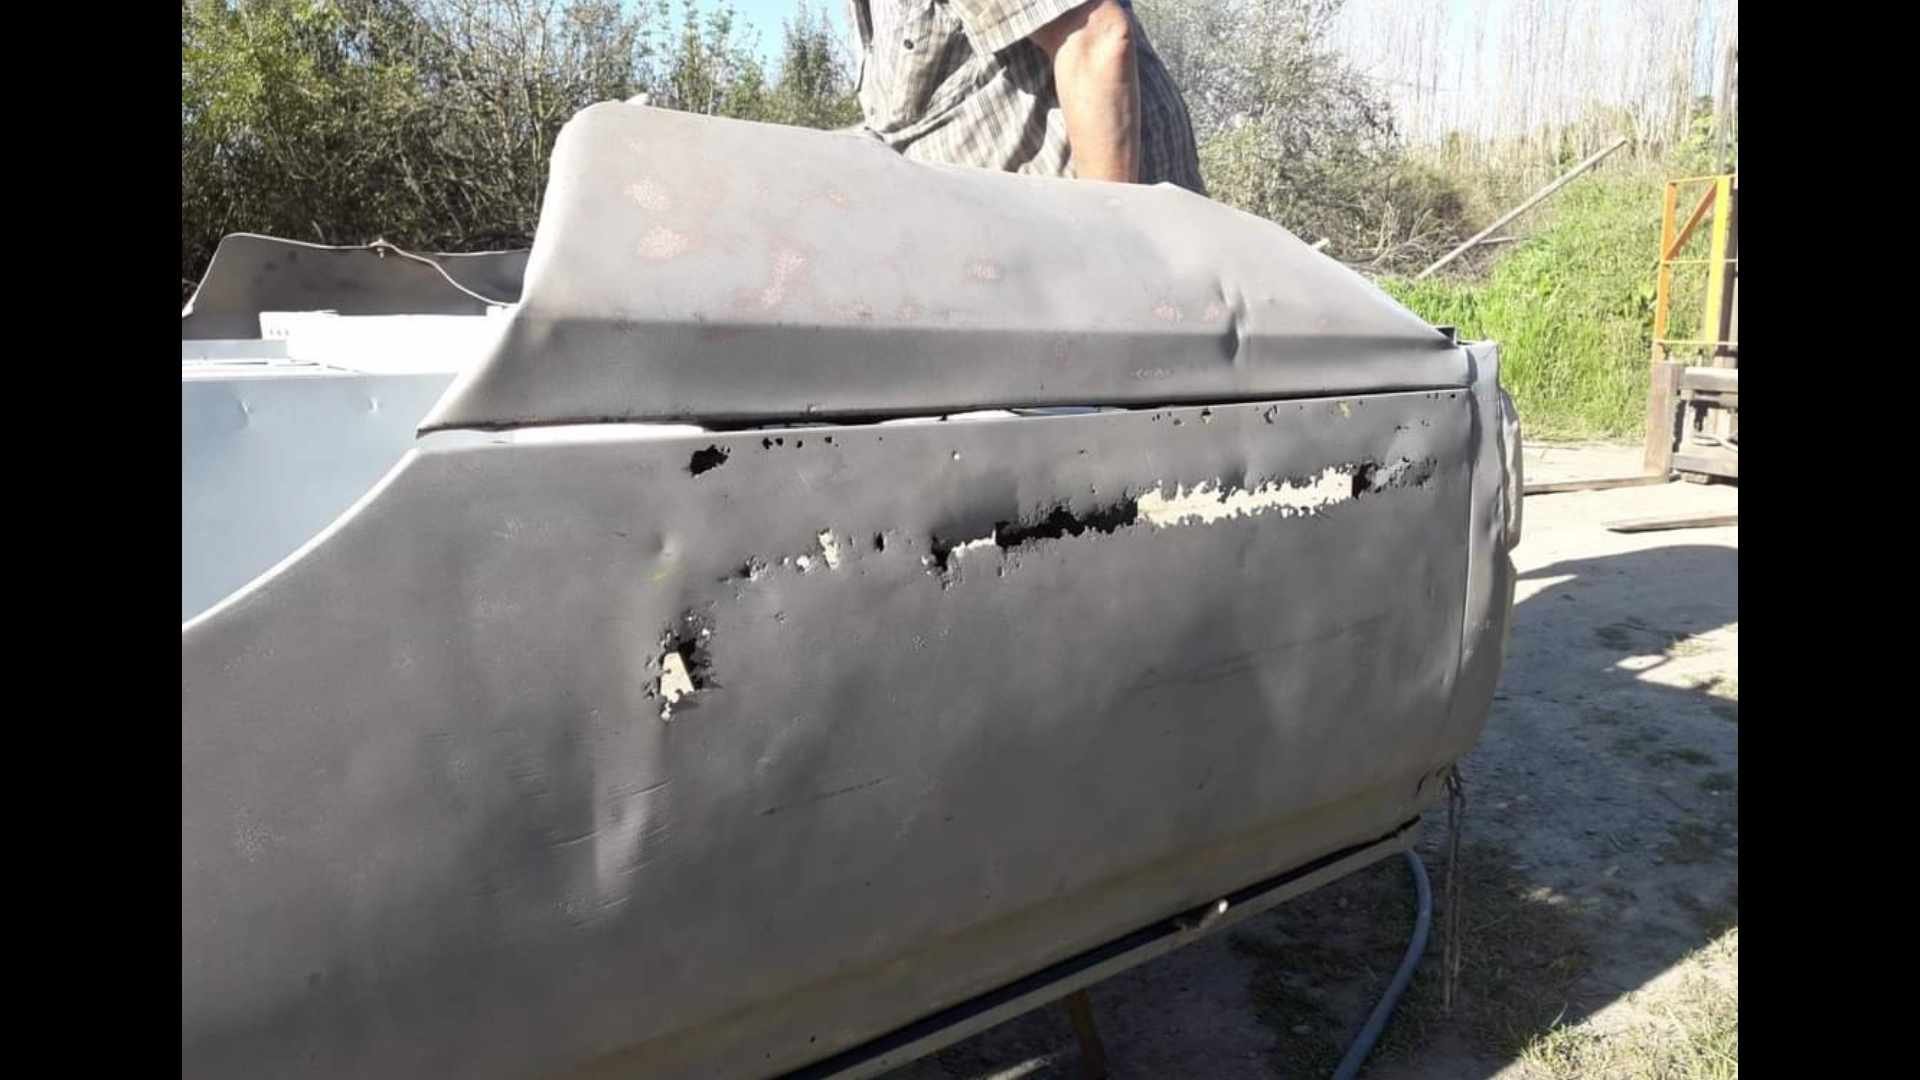
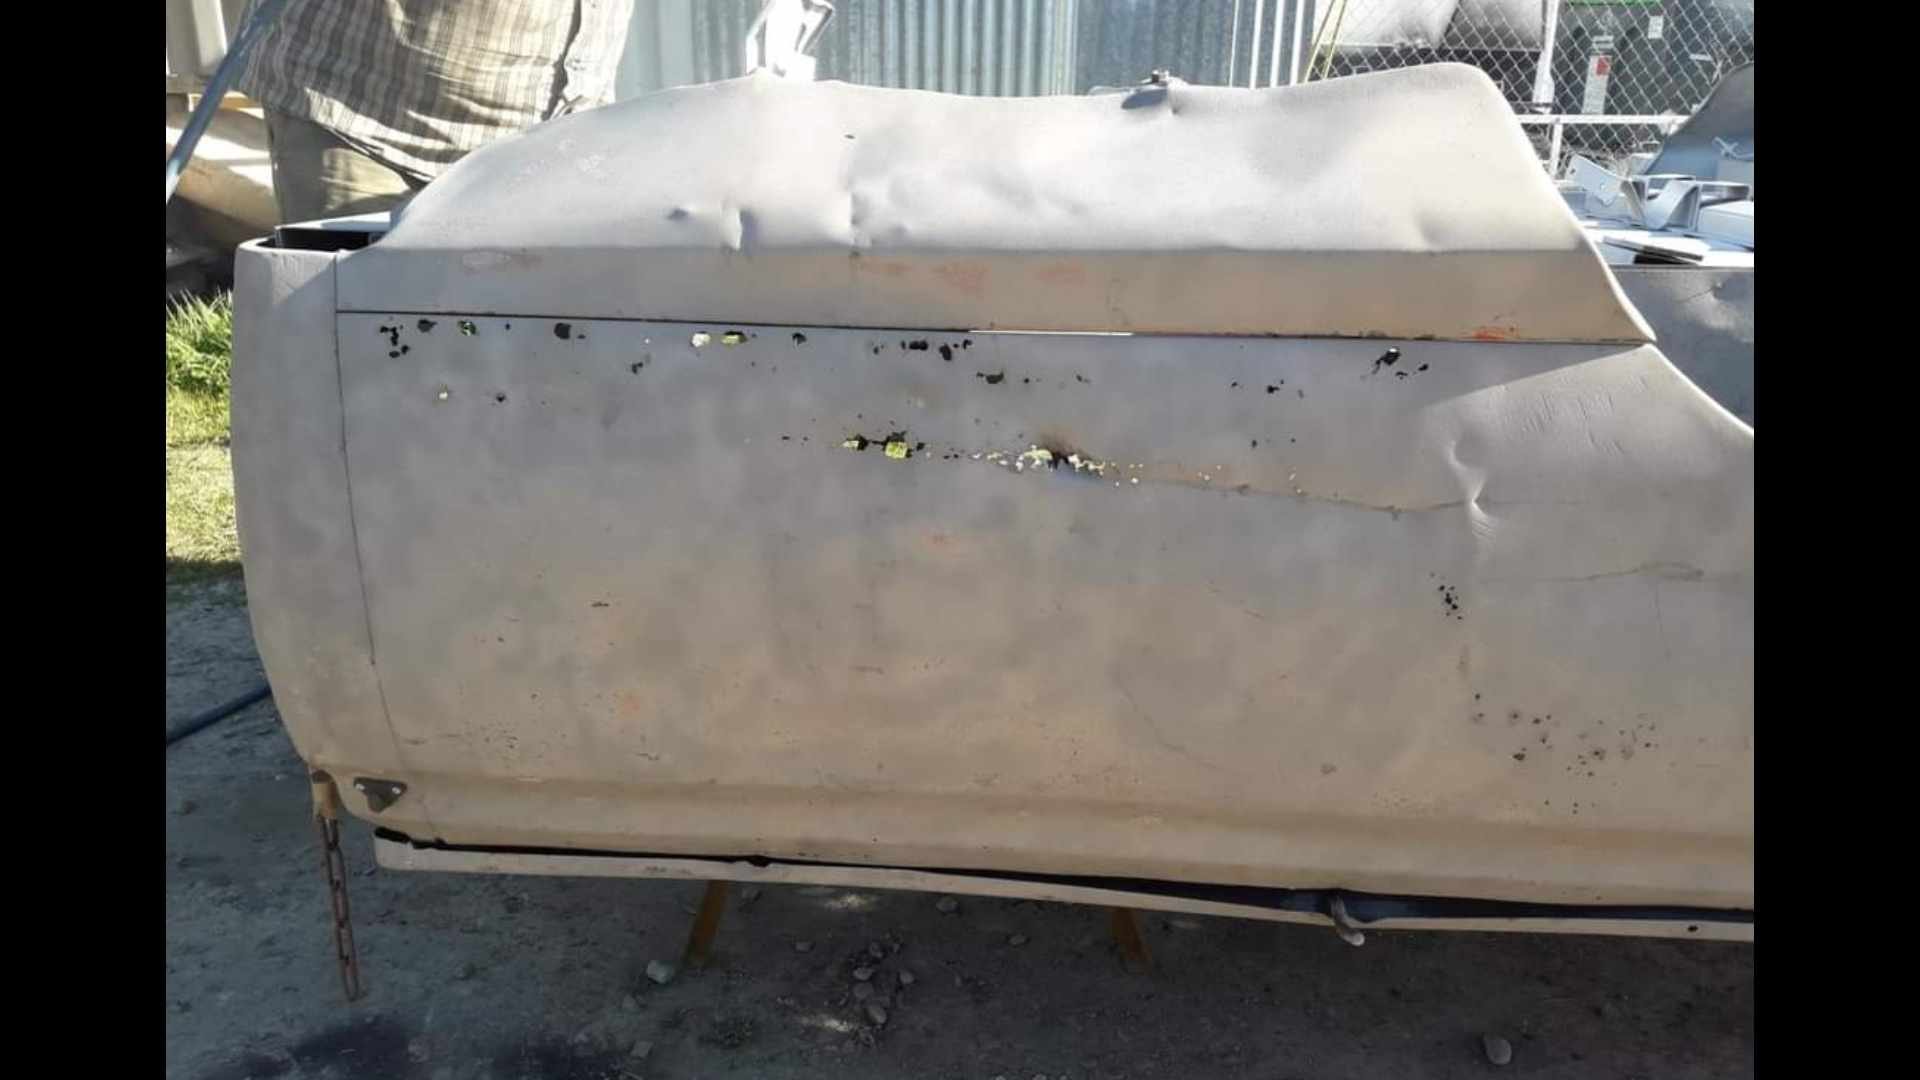
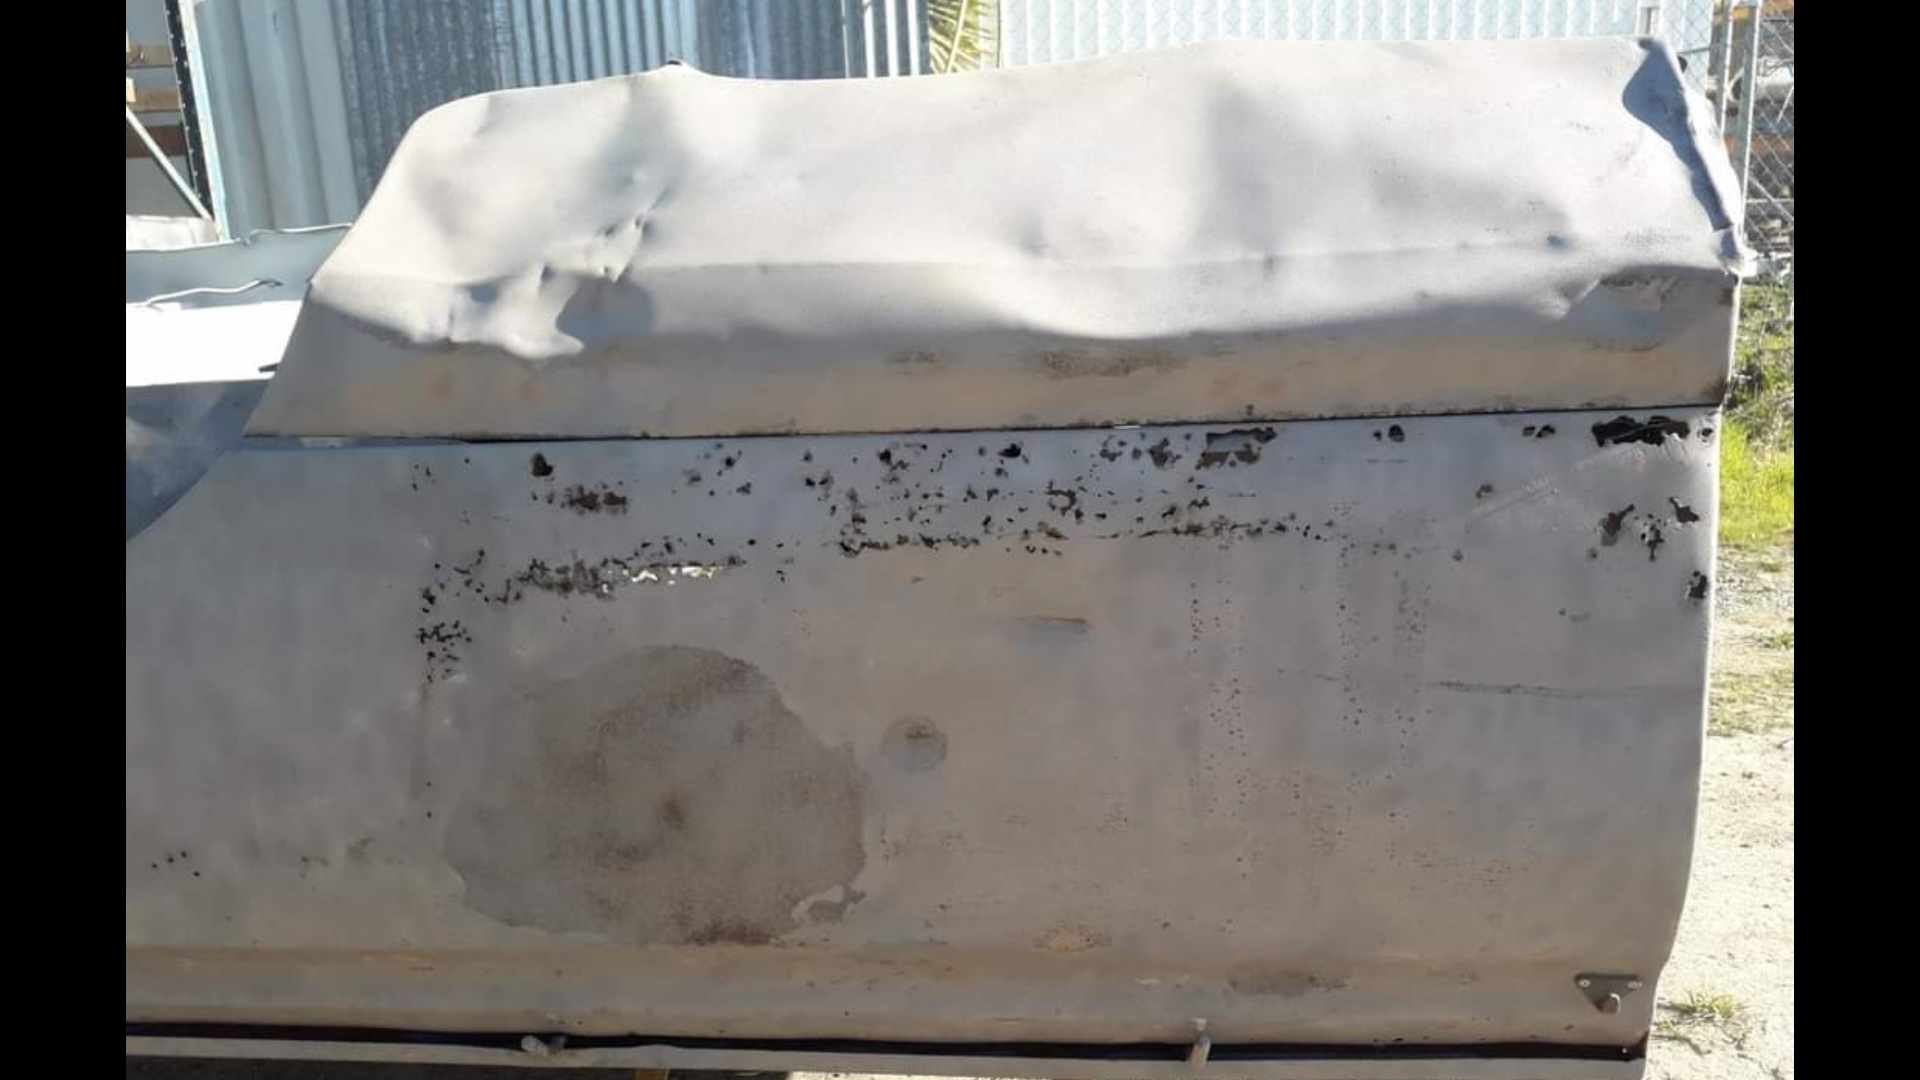
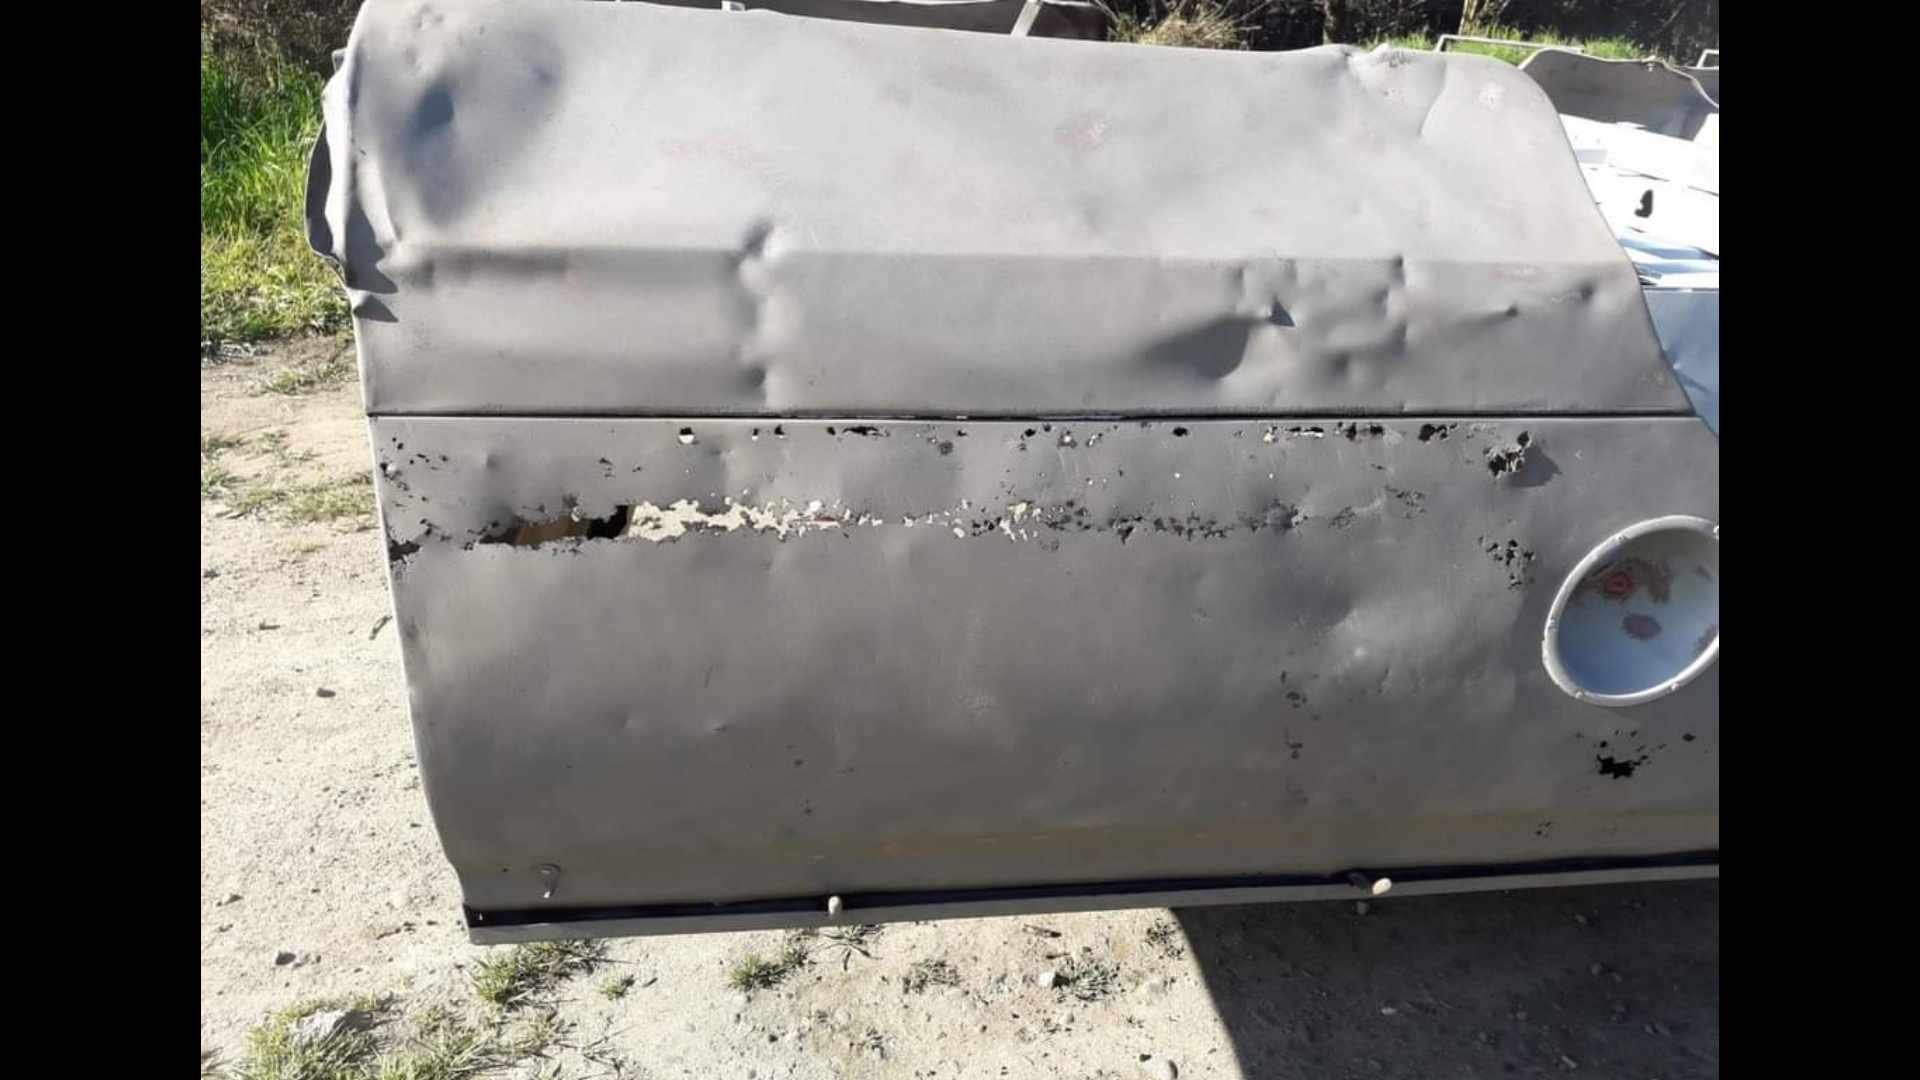
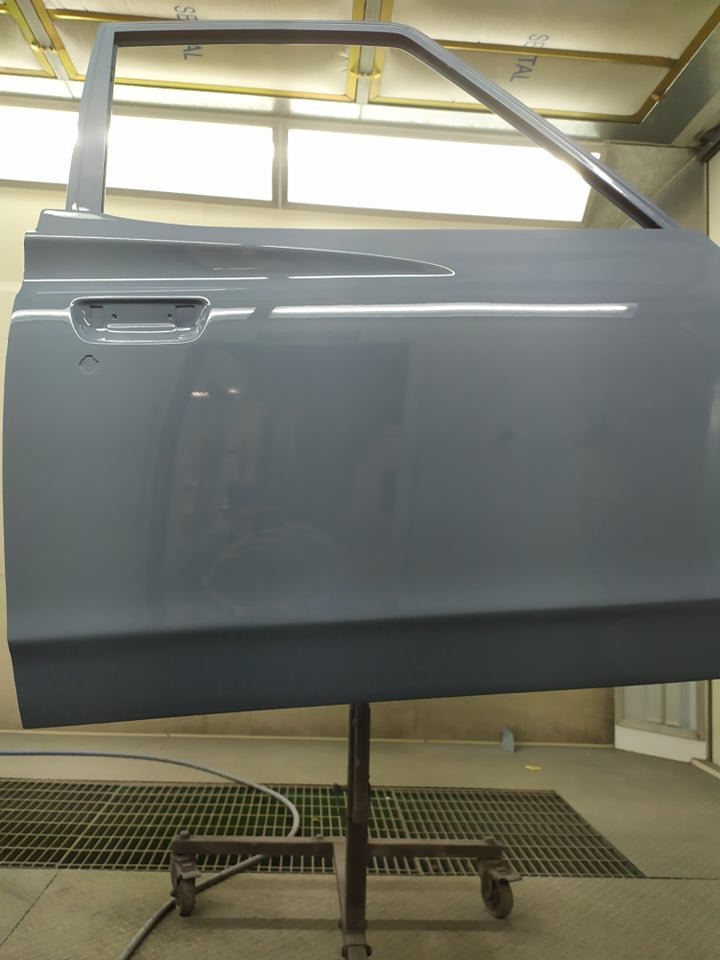
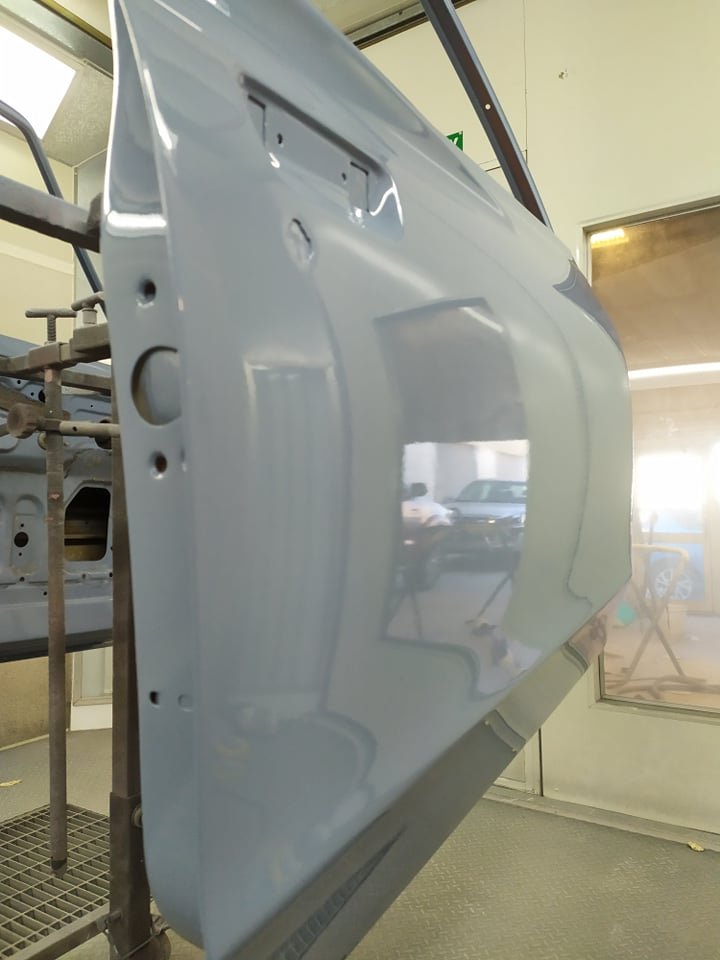
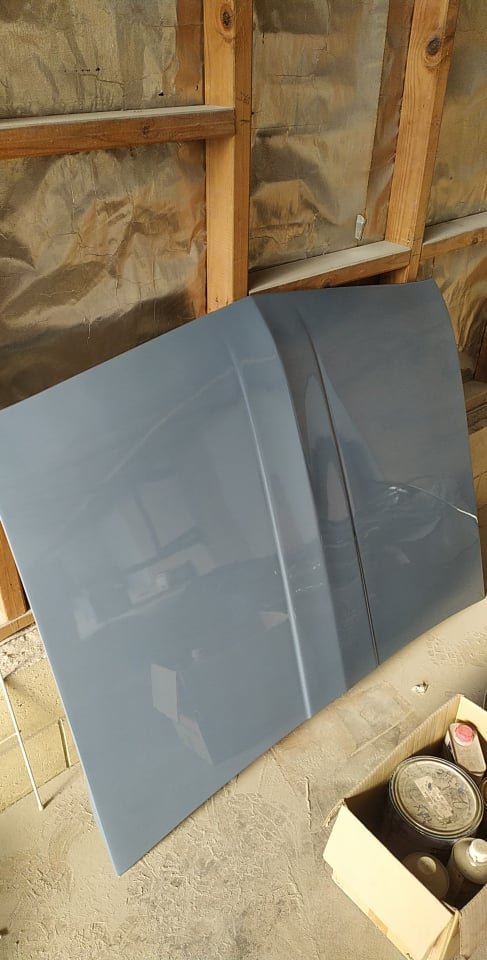
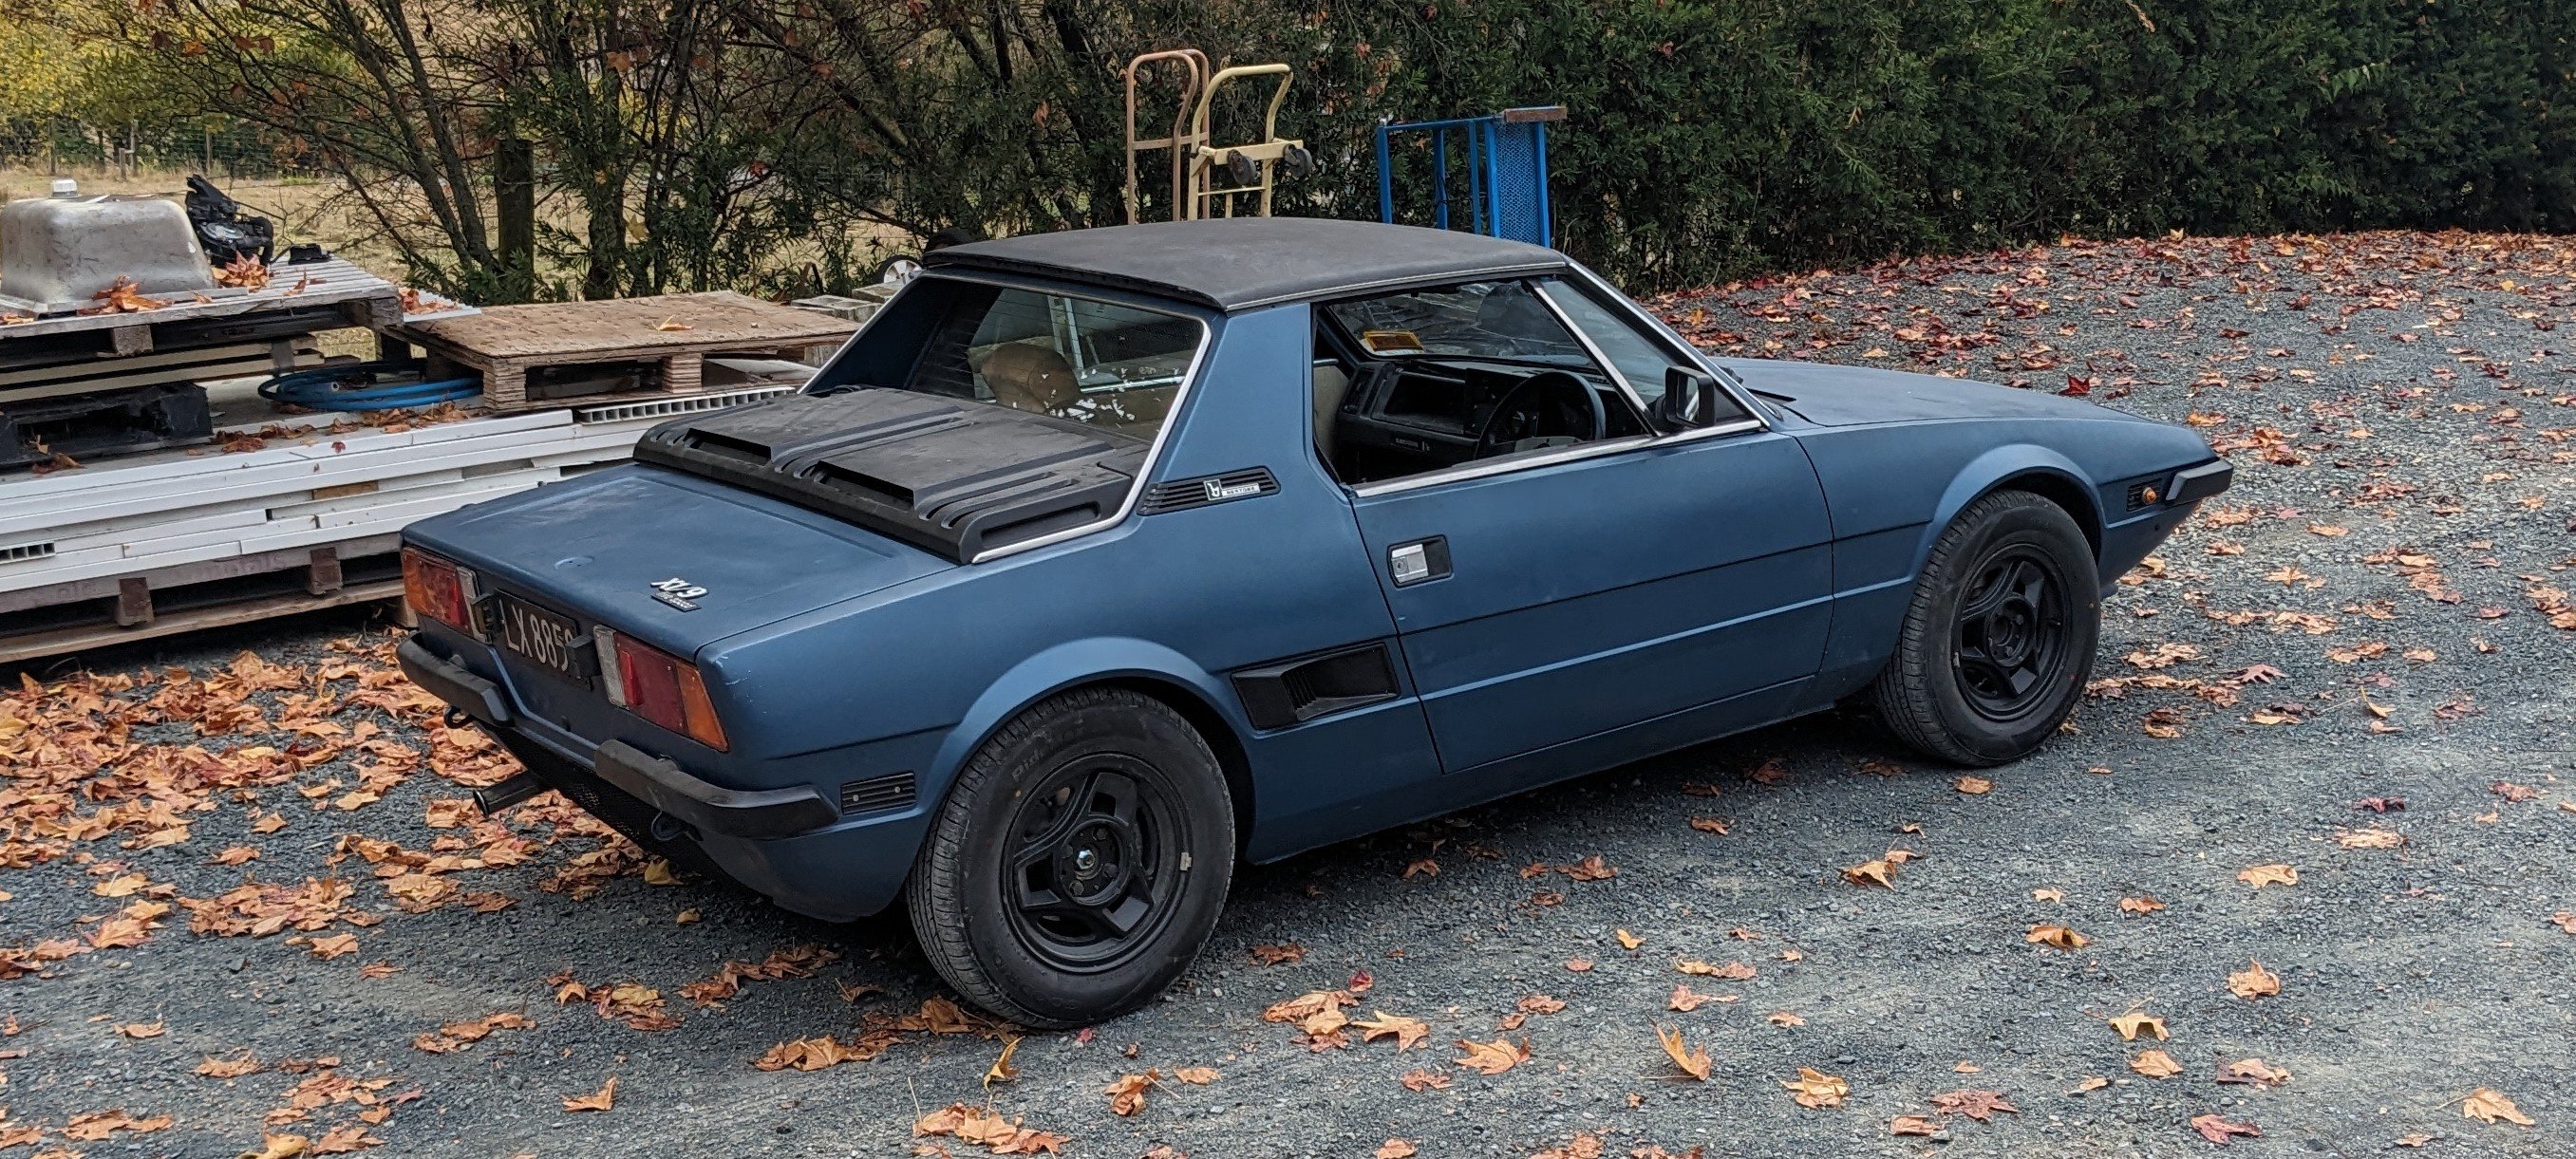
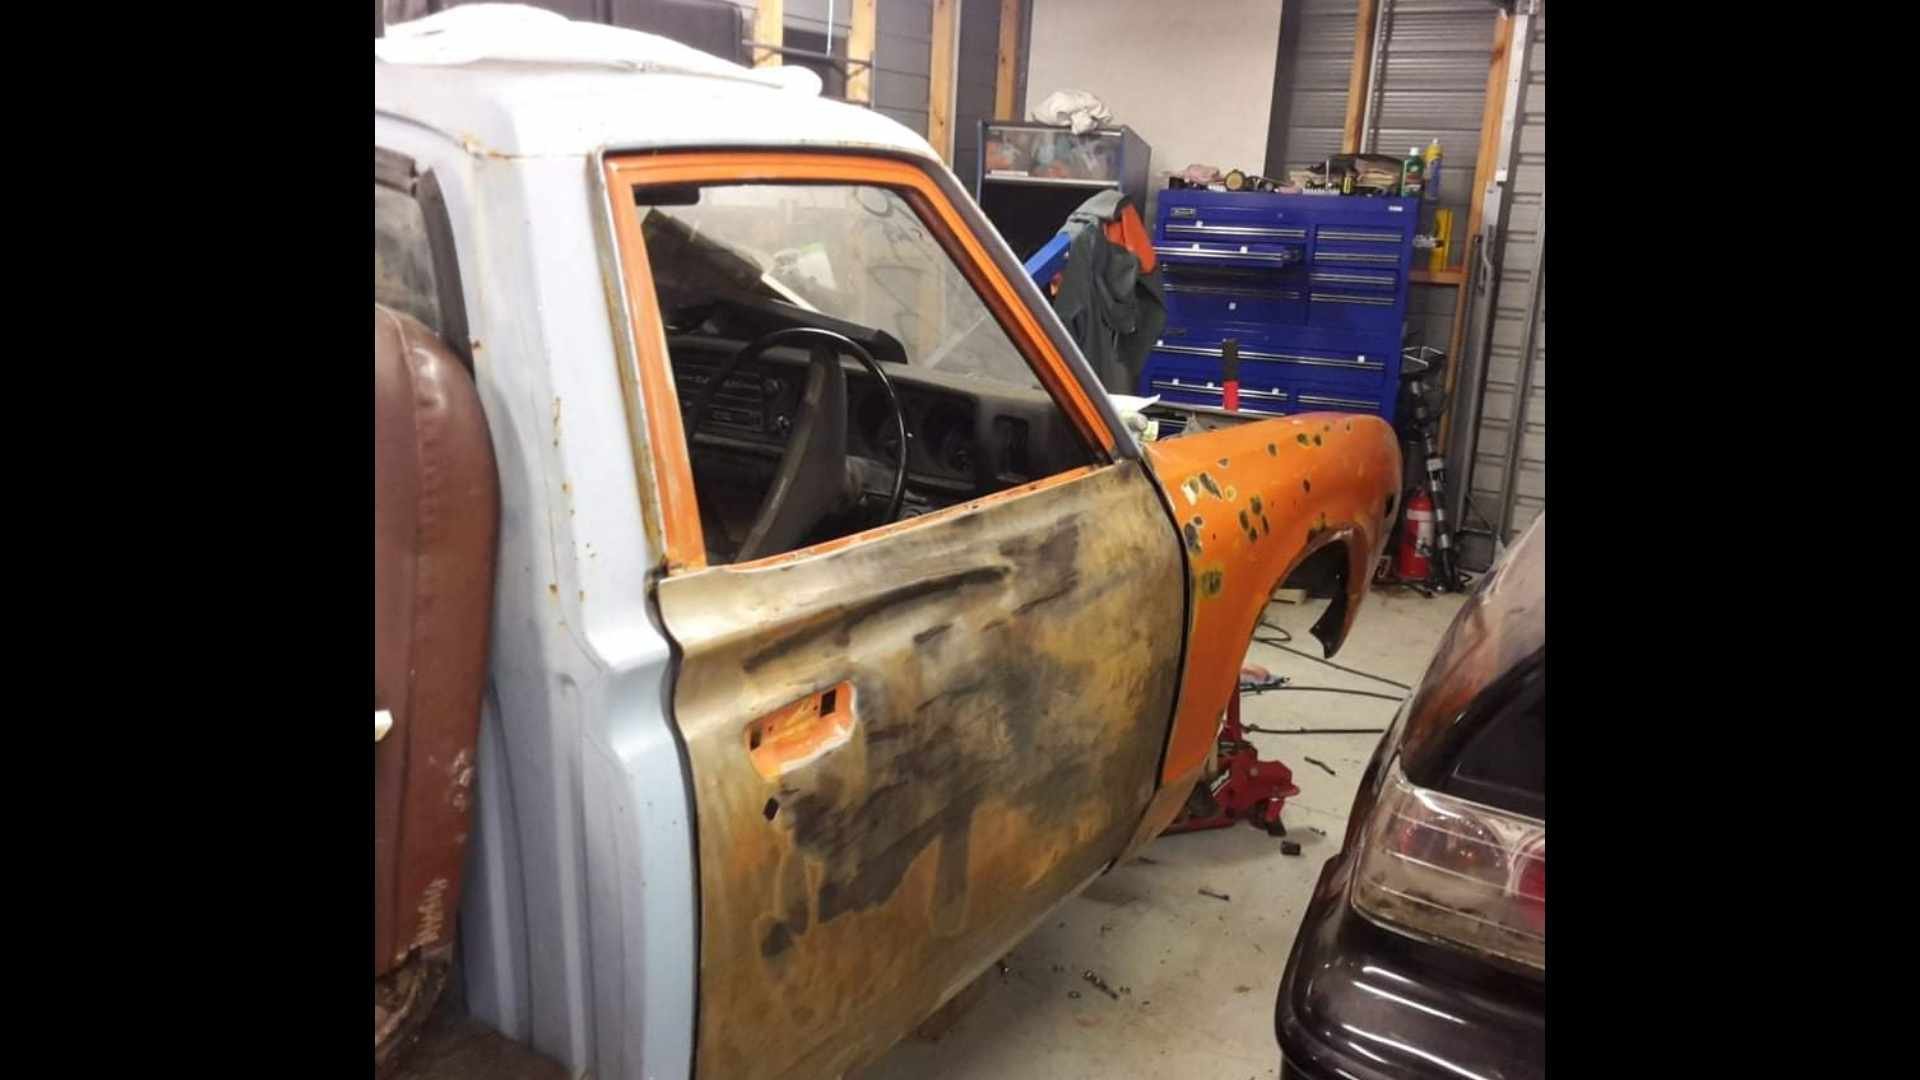
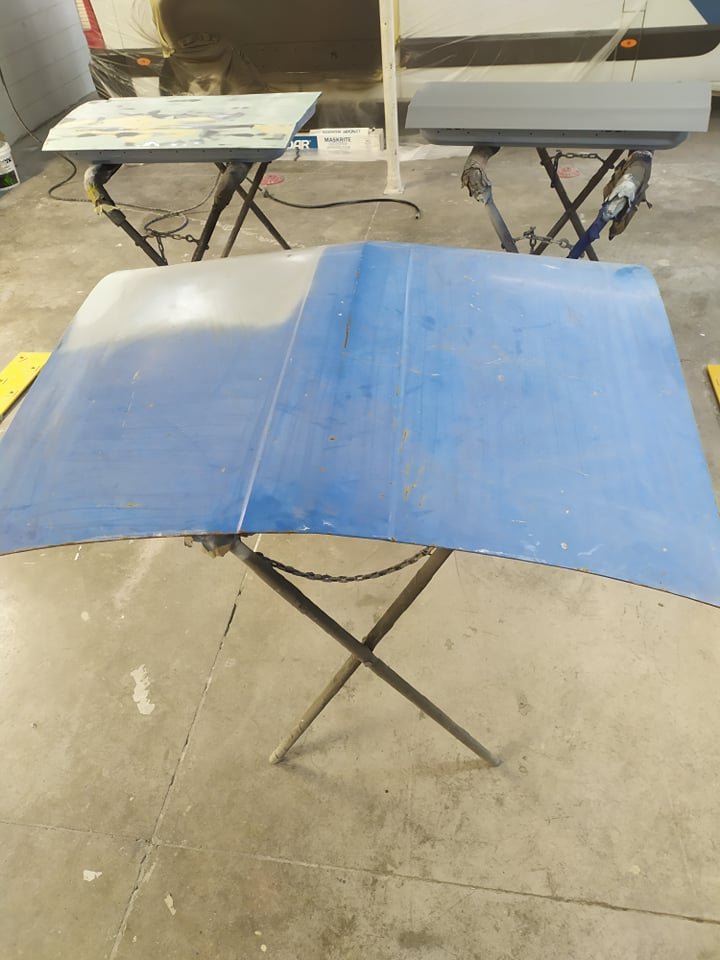
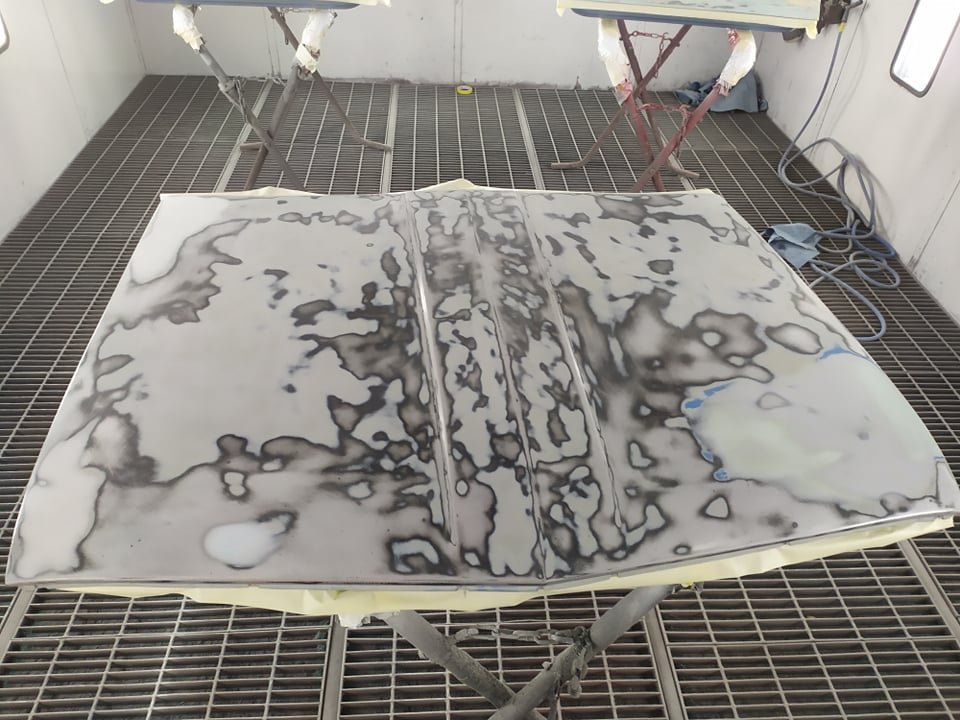
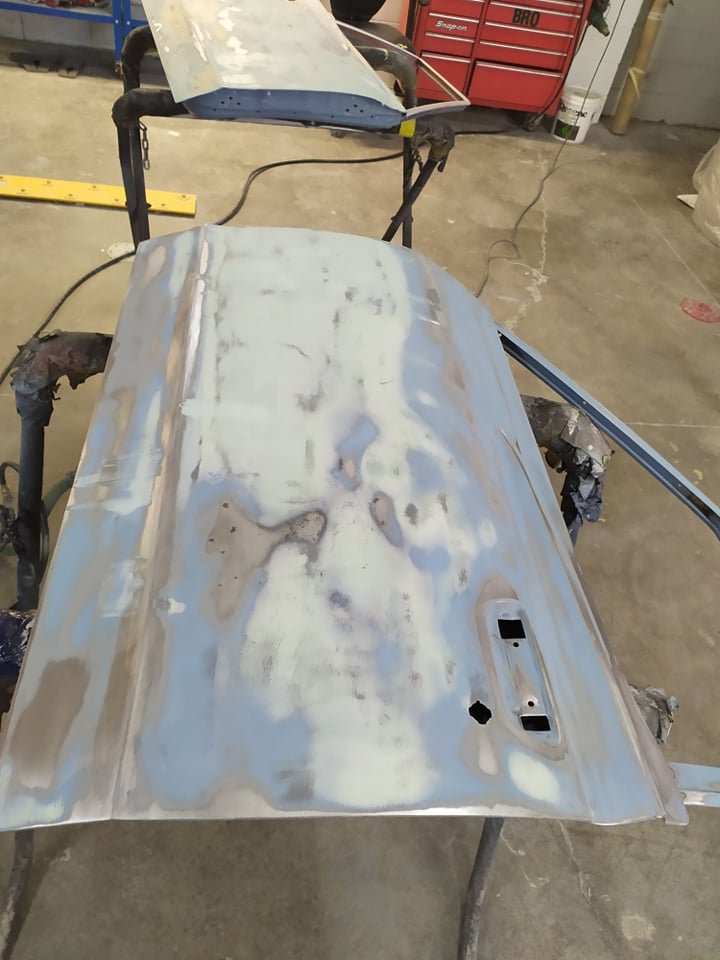
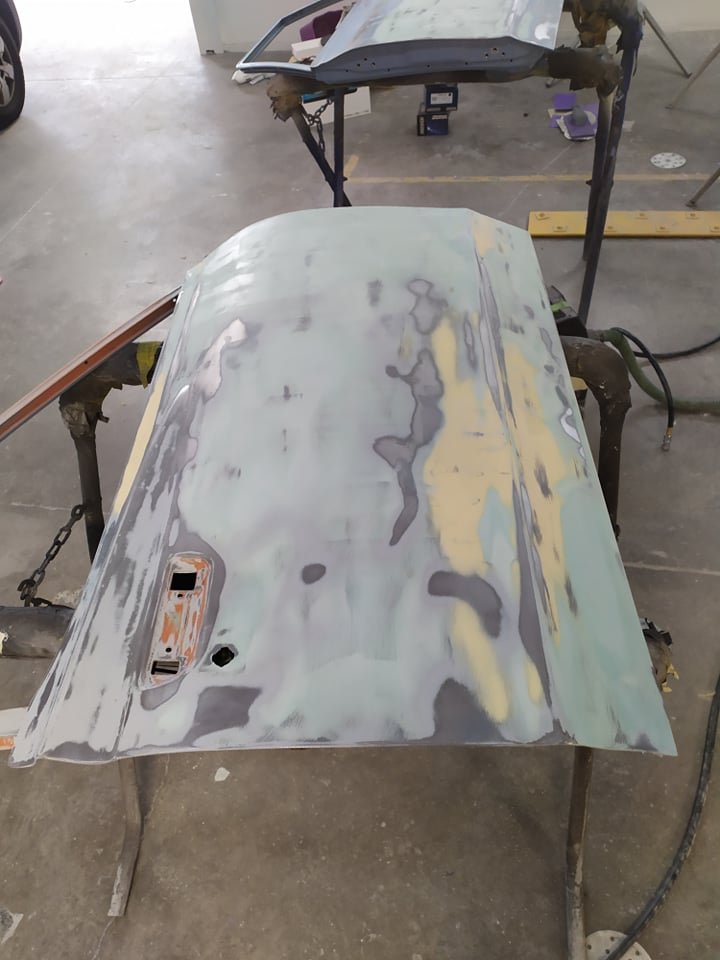
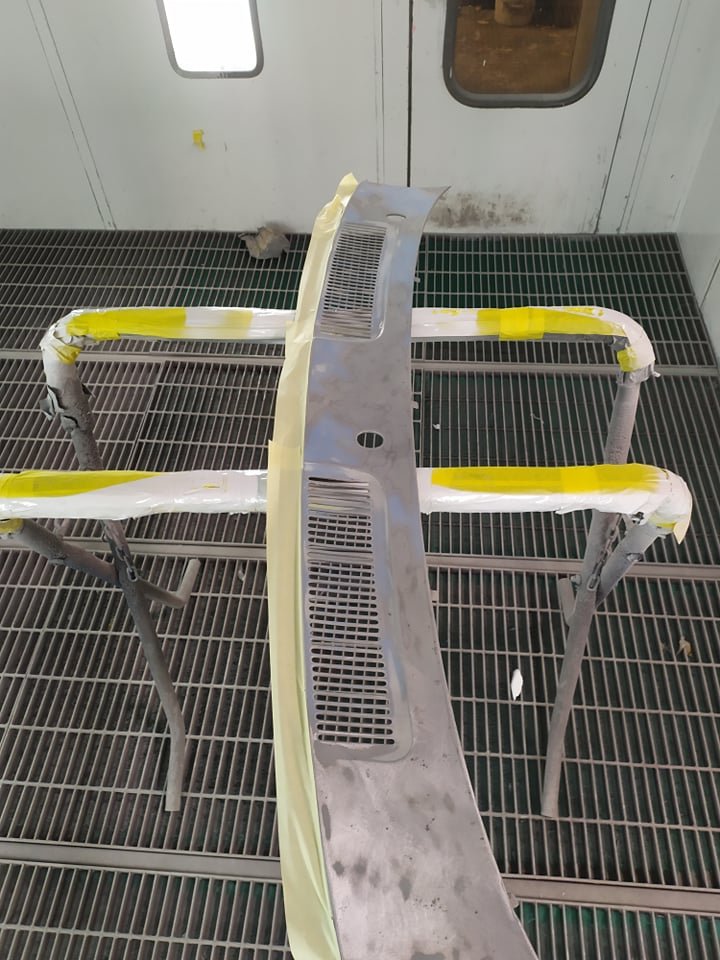
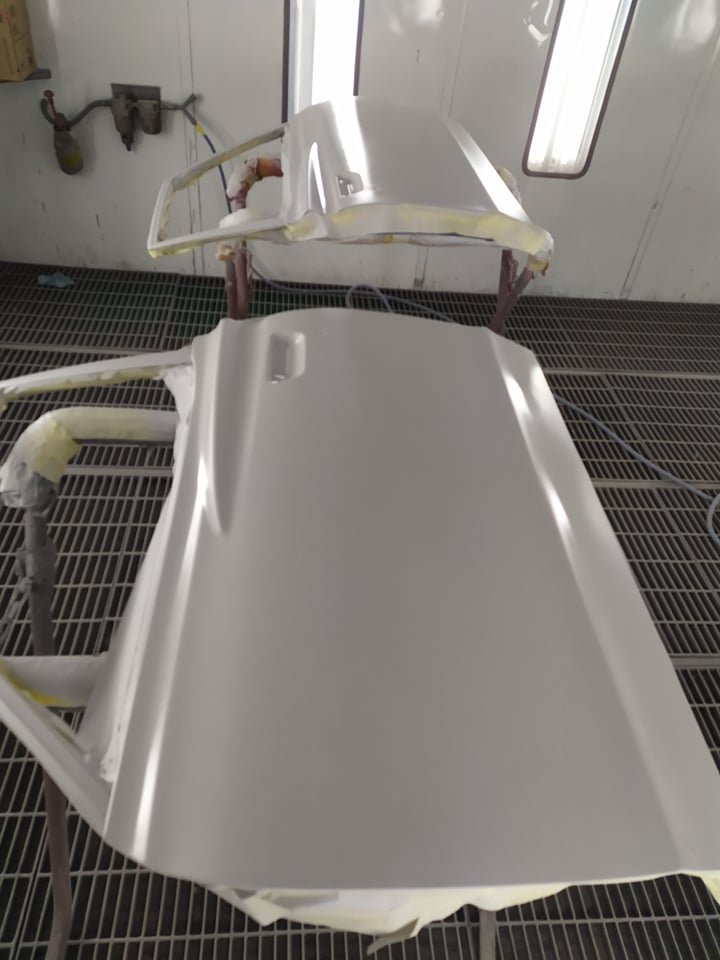
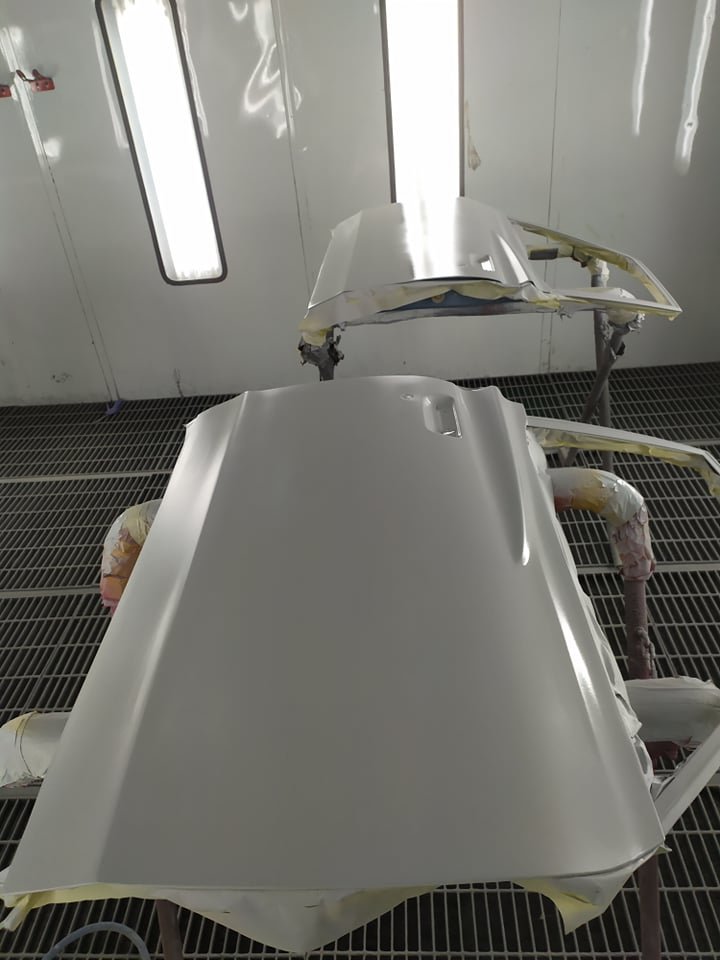
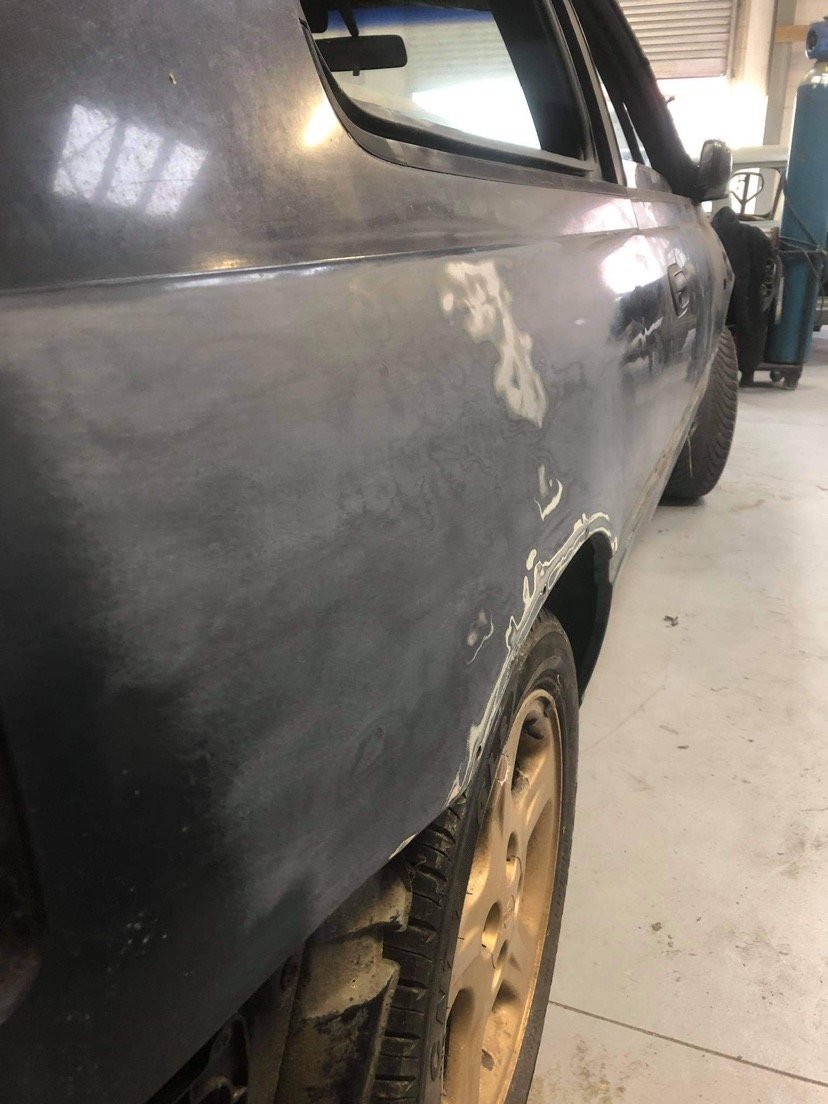
So it turns out when... your daily/operational fun car breaks down and you decide to take on a huge DIY job to fix it that you know eff all about you specifically lay out your mortgage repayment strategy in front of you and truly understand the ramifications of paying off even tiny amounts of principle early in the loan and decide to restructure to get every little spare cent going into it that you can scrounge up you pick up a second job the remaining work on your project car kind of hinges on either a stupid amount of unappealing and tricky skilled labour, or collar-tuggingly large amounts of money to pay for said tricky skilled labour ...things on your project car tend to slow down. But I figured I should post something because otherwise I'll totally forget everything that I've done and I don't want this project to fade away. Before I put all the fuel tank stuff back, I was messing with panels. One of the pre-reqs for the panel work is obviously that it needs to be all stripped back, and I decided (with panelboi's blessing) to do it myself rather than mess around with the local acid dipper or with transport to a more reputable one hours away. The idea is to just pick some reasonable panels, strip them, fit them, and then I've got a clean no-surprises job I can show around and get some better quotes and info on. I test-fit the rear bumper from the original black car and it didn't quite sit right - the panel gap was inconsistent no matter how I fudged the fastenings - no pix unfortunately, so I went with the red's bumper. It fits a whole lot better! Next up is all the front panellage. The two bonnets have their issues so it's really a toss-up, but I opted for the red one as it seemed to be a bit more contained in its damage. Both nose panels are totally fucked so... not sure what I'm doing there just yet. But fitting the nose panel reveals some fun. Uh-oh. Fitting the bonnet and popups makes the problem a bit more obvious. The black ones are just as bad - no pix soz - so it's not just a "different donor car" thing. The frame repairs were done with the fenders and bonnet available, though not the other panels. I need to get in contact with the panelbois to sort out a warranty claim, but the last couple times I tried they didn't pick up or reply. Hopefully this doesn't become a struggle :\ Anyway, forging on. Key and clean. Apply stripper and keep wet with plastic. Create murder scene. Scrape. I probably should have applied more stripper here but newb. The fenders are all pretty crap. The one I've already lightly beaten into shape and stripped and durepox'd is the one that had a minor collision, so you'd think it'd be the worst, but it's actually probably the best one. There's no rust and it's otherwise totally straight. All other fenders... well... So I decided to just keep the fender I've already epoxied, because it's probably easier to bang it into shape than any of the others. The red driver's side fender seemed marginally better than the black one so I went forward with stripping that. I busted out the paint stripping wheel for the grinder to finish it up. I'm not really sure this was a good move - it's nice and shiny, but possibly a bit tricky to spot the imperfections in the panel now? Then the nose panel and popups.. Everything back on. You can see here what I mean about the swirlies making it hard to gauge if things are okay. I'd already taken a sanding block to the driver's side fender in this pic to try and make the flat bits even. As you might be able to tell, there's a fair bit of damage to it... there was quite a bit of bog at the front and the rear of the fender. I think it worked, so I did the rest as well. As you can see, there's a few low spots and dents, but I think they'll hammer flatter without any major headaches, and even if they weren't, they could probably just be straight filler'd without failing. The chunky spot is the part I already knew about - the front corner which had a giant slab of filler applied and has subsequently received a lot of pitting. There's also a spot on the front edge of the bonnet that has numerous rust holes, hidden under a small but deep patch of bog. Honestly, it seems saveable - though I'm also far from an expert here! The pop-ups are fine, no dents. As expected, the nose panel is worse than the surface of the moon. It's probably not worth trying to save and I should just find another one. It's also super easy to dent these to begin with; they're the most natural place to push the car from, and there's almost no structure to them. If I do get a new one I'll try mod some gussets into the back of it. Side quest to put the very first thing I restored on this car back onto it: the fuel pump access panel, which a few years ago was extremely rusty. The CRC black zinc has held up strong . Spot the fasteners and grommets stolen from the red car... Speaking of the red car. It's door time. On both cars, passenger sides have a couple of dings but nothing crazy. Also on both cars, the driver's side is absolute dent and bog city. I have pix but they suck so just hold on till the strippy bit to see what I mean. All the doors also fucking suck at the bottom. So I just went with the black doors since they're both right there, already half-stripped, and the red car is currently sealed from the elements. There's a few holes at the top as well. Annoying, but the rust seems fixable. I completely stripped the doors - which was a massive PITA when it came to the door latch, only removable via black magic / the completely wrong method. The mirror blanking was just gooped in place to fix a broken bracket. Also there was a little protective metal edging strip along the open edge of... just one of the doors? The red doesn't have these. Japanese mod + replaced door? Anyway, it's strippytime. This time I put it on thicker, and did several passes. It made the job a bit easier. The starion makes for a decent workbench... <.< I haven't finished these yet, there's still some bog to remove and then get it all nice and flat. And that's where I'm at. If the panelbois are kind with their warrantying, and the lack of surprises makes the price right, then I might be able to eek something out in this space before we pay off the mortgage :P. If not, I'm buying a welder and the scope of the project shrinks from "like new" to "guy in a garage job but the engine bay looks sweet"...25 points
-
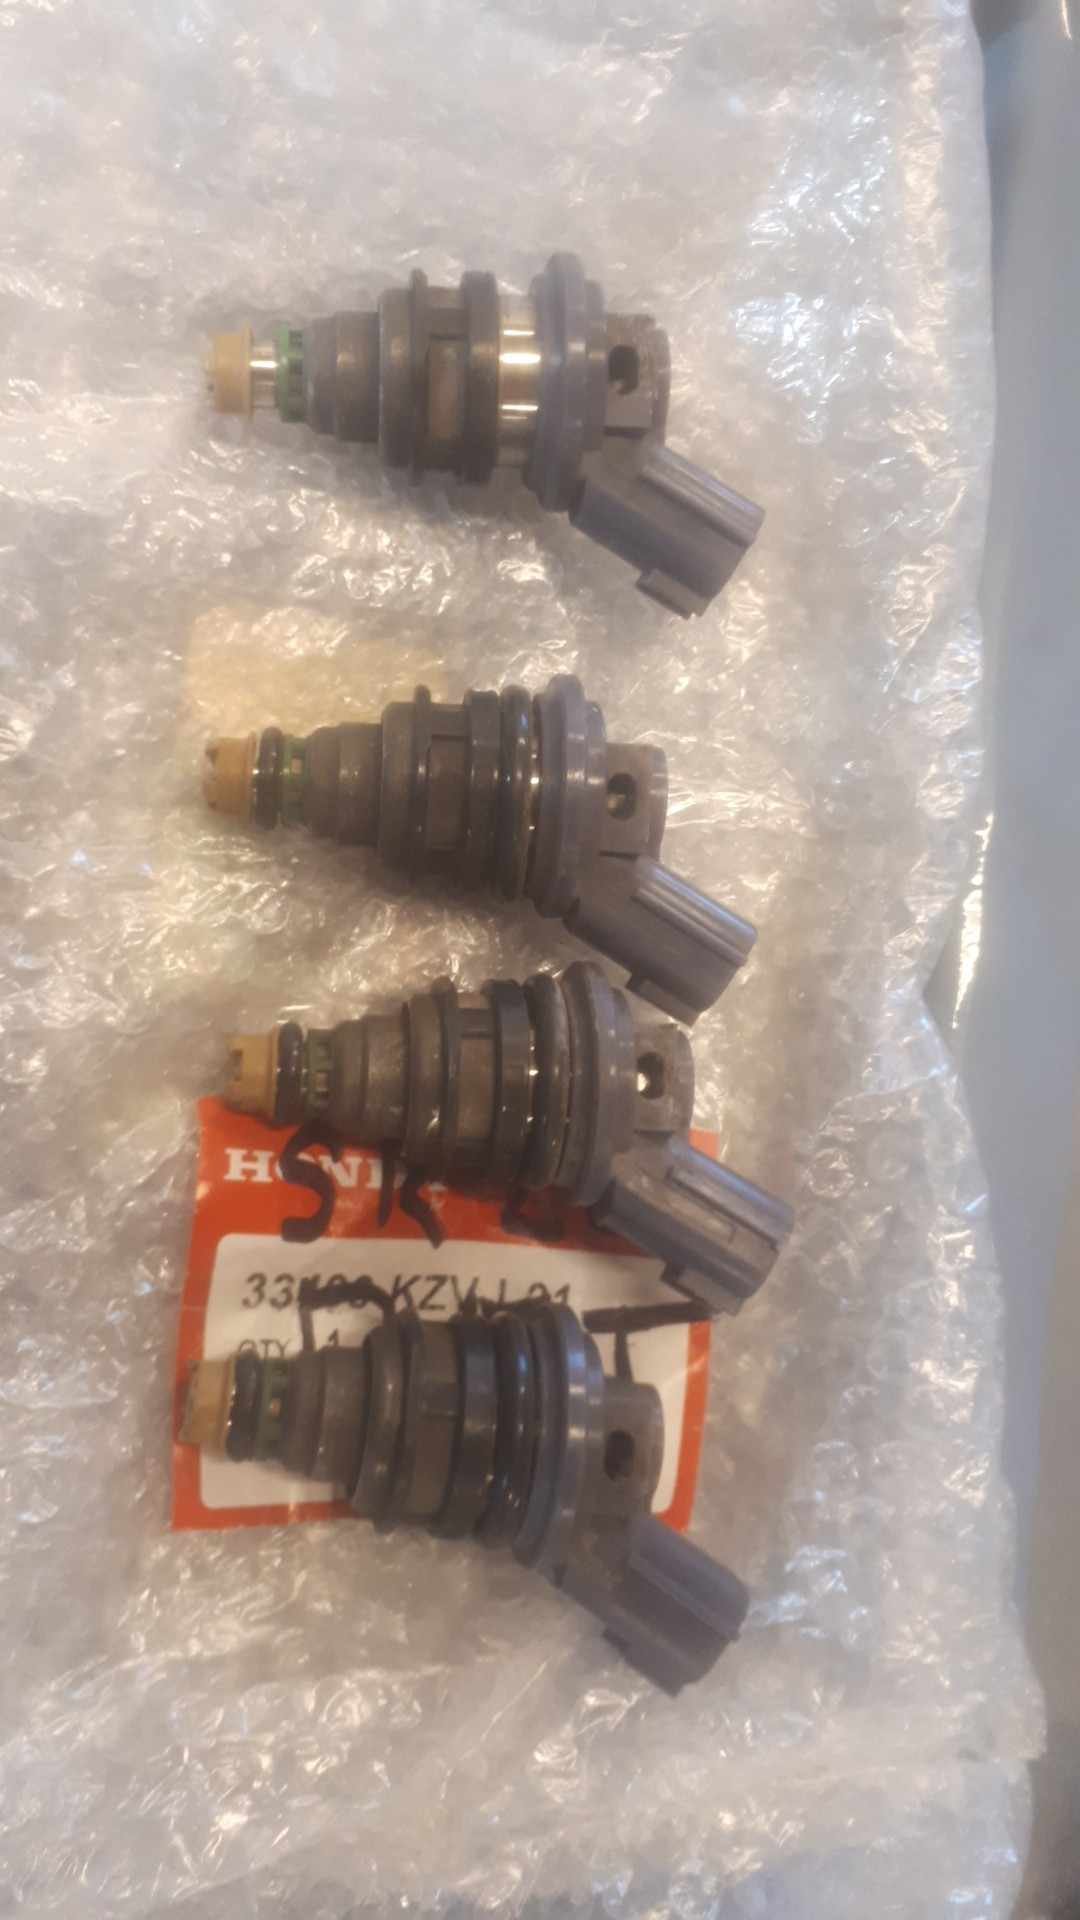
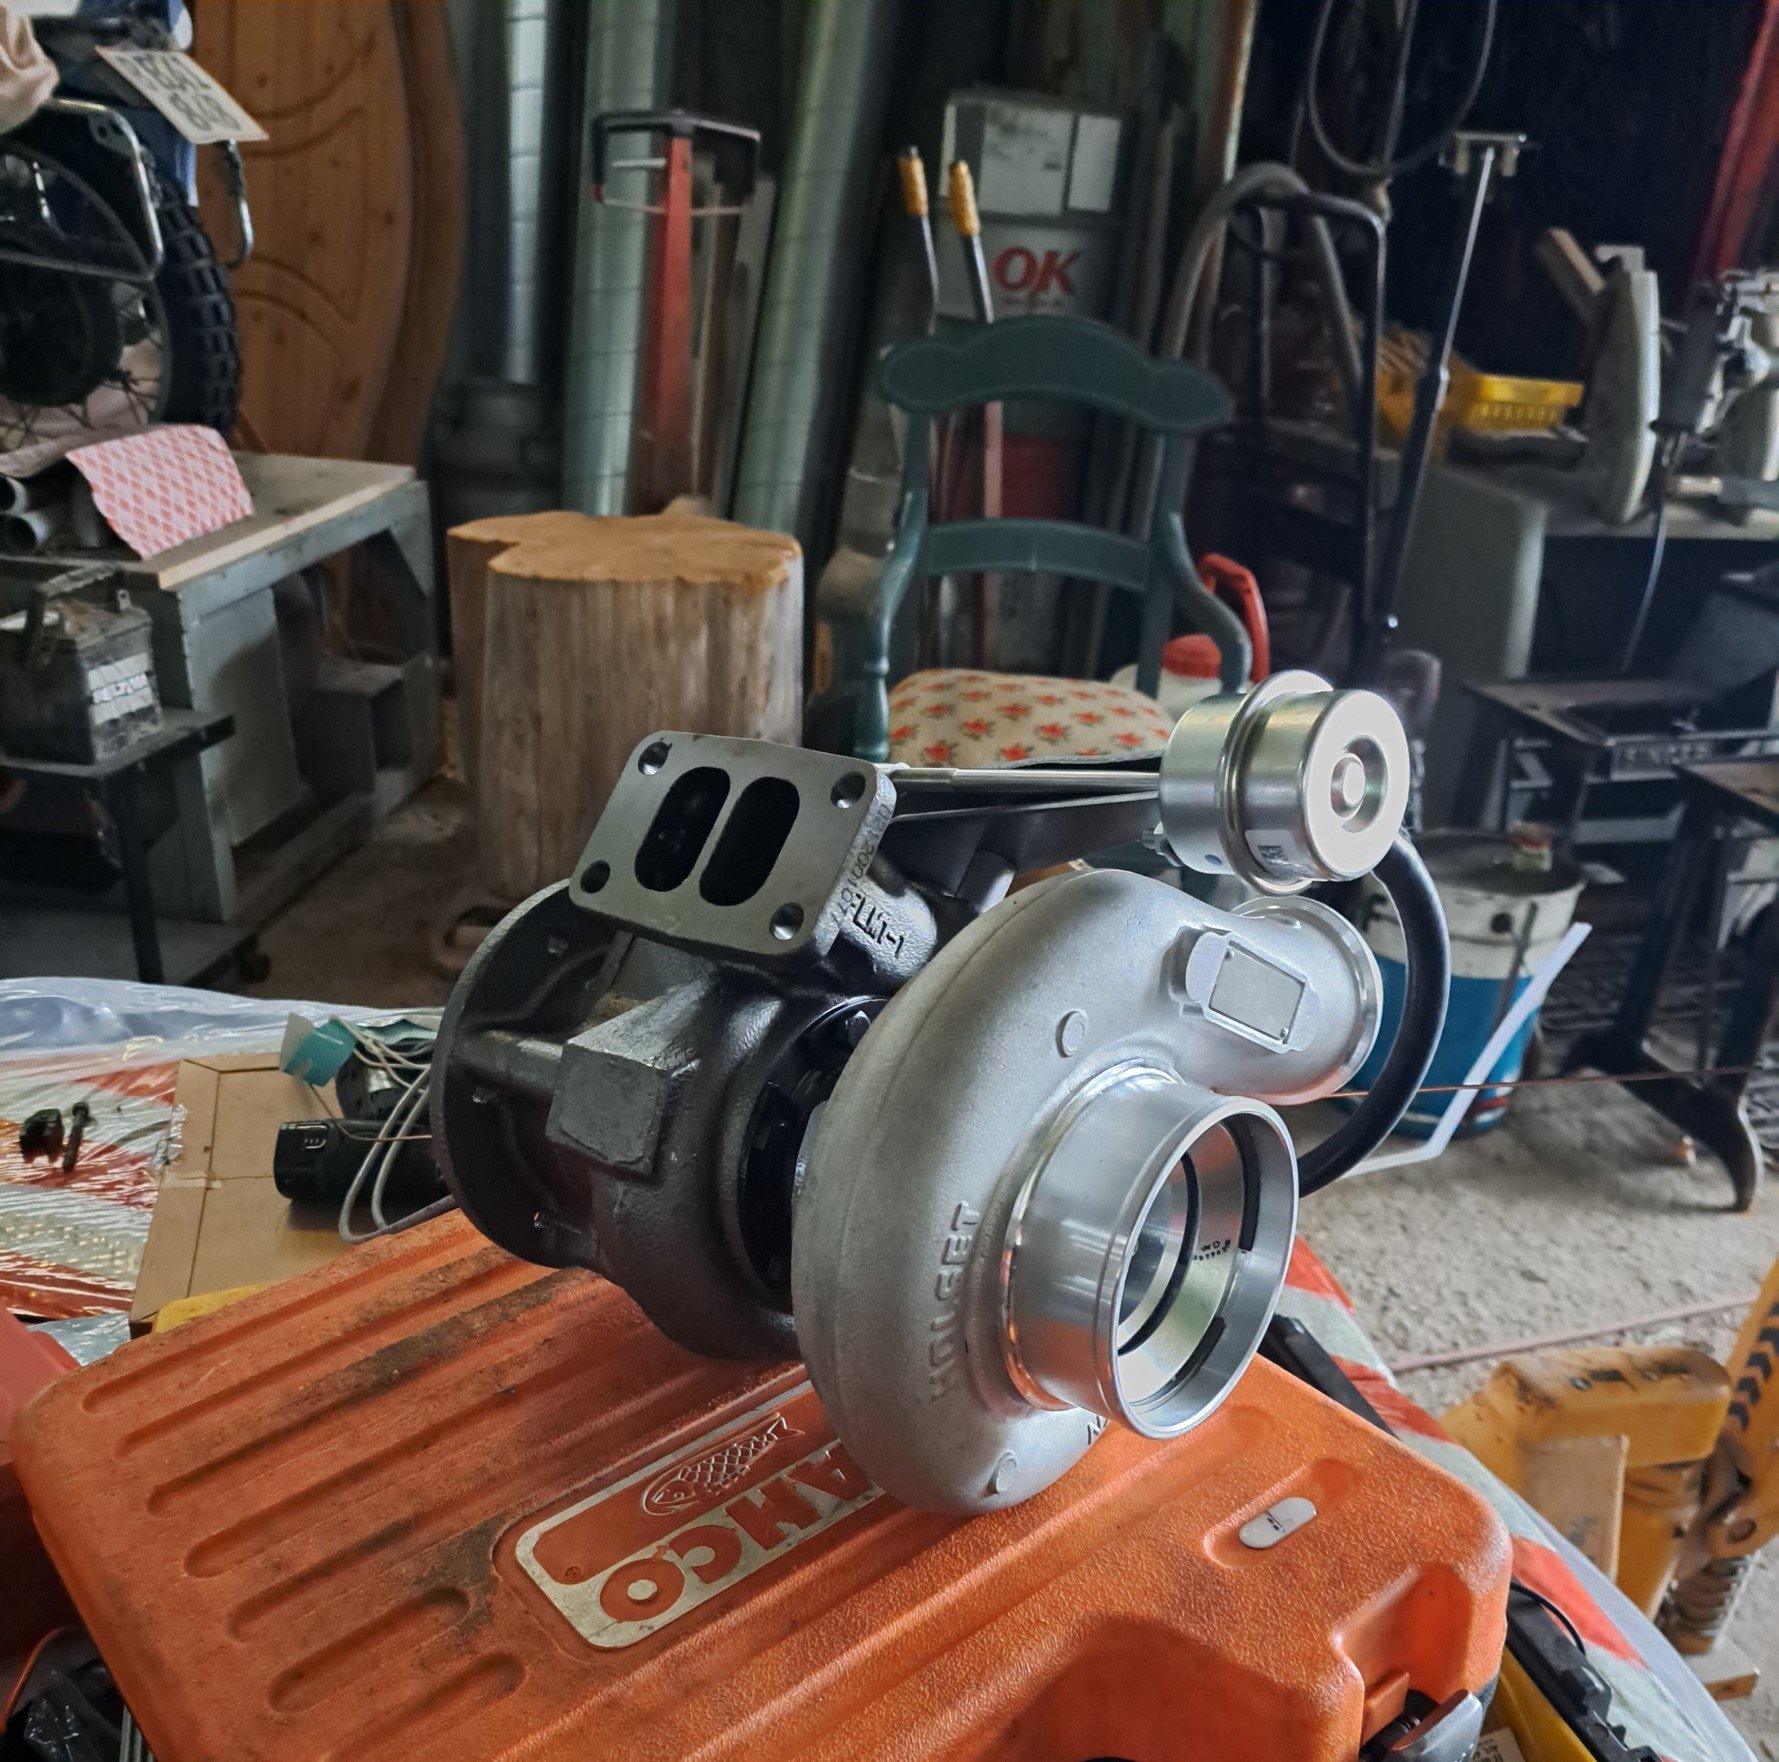
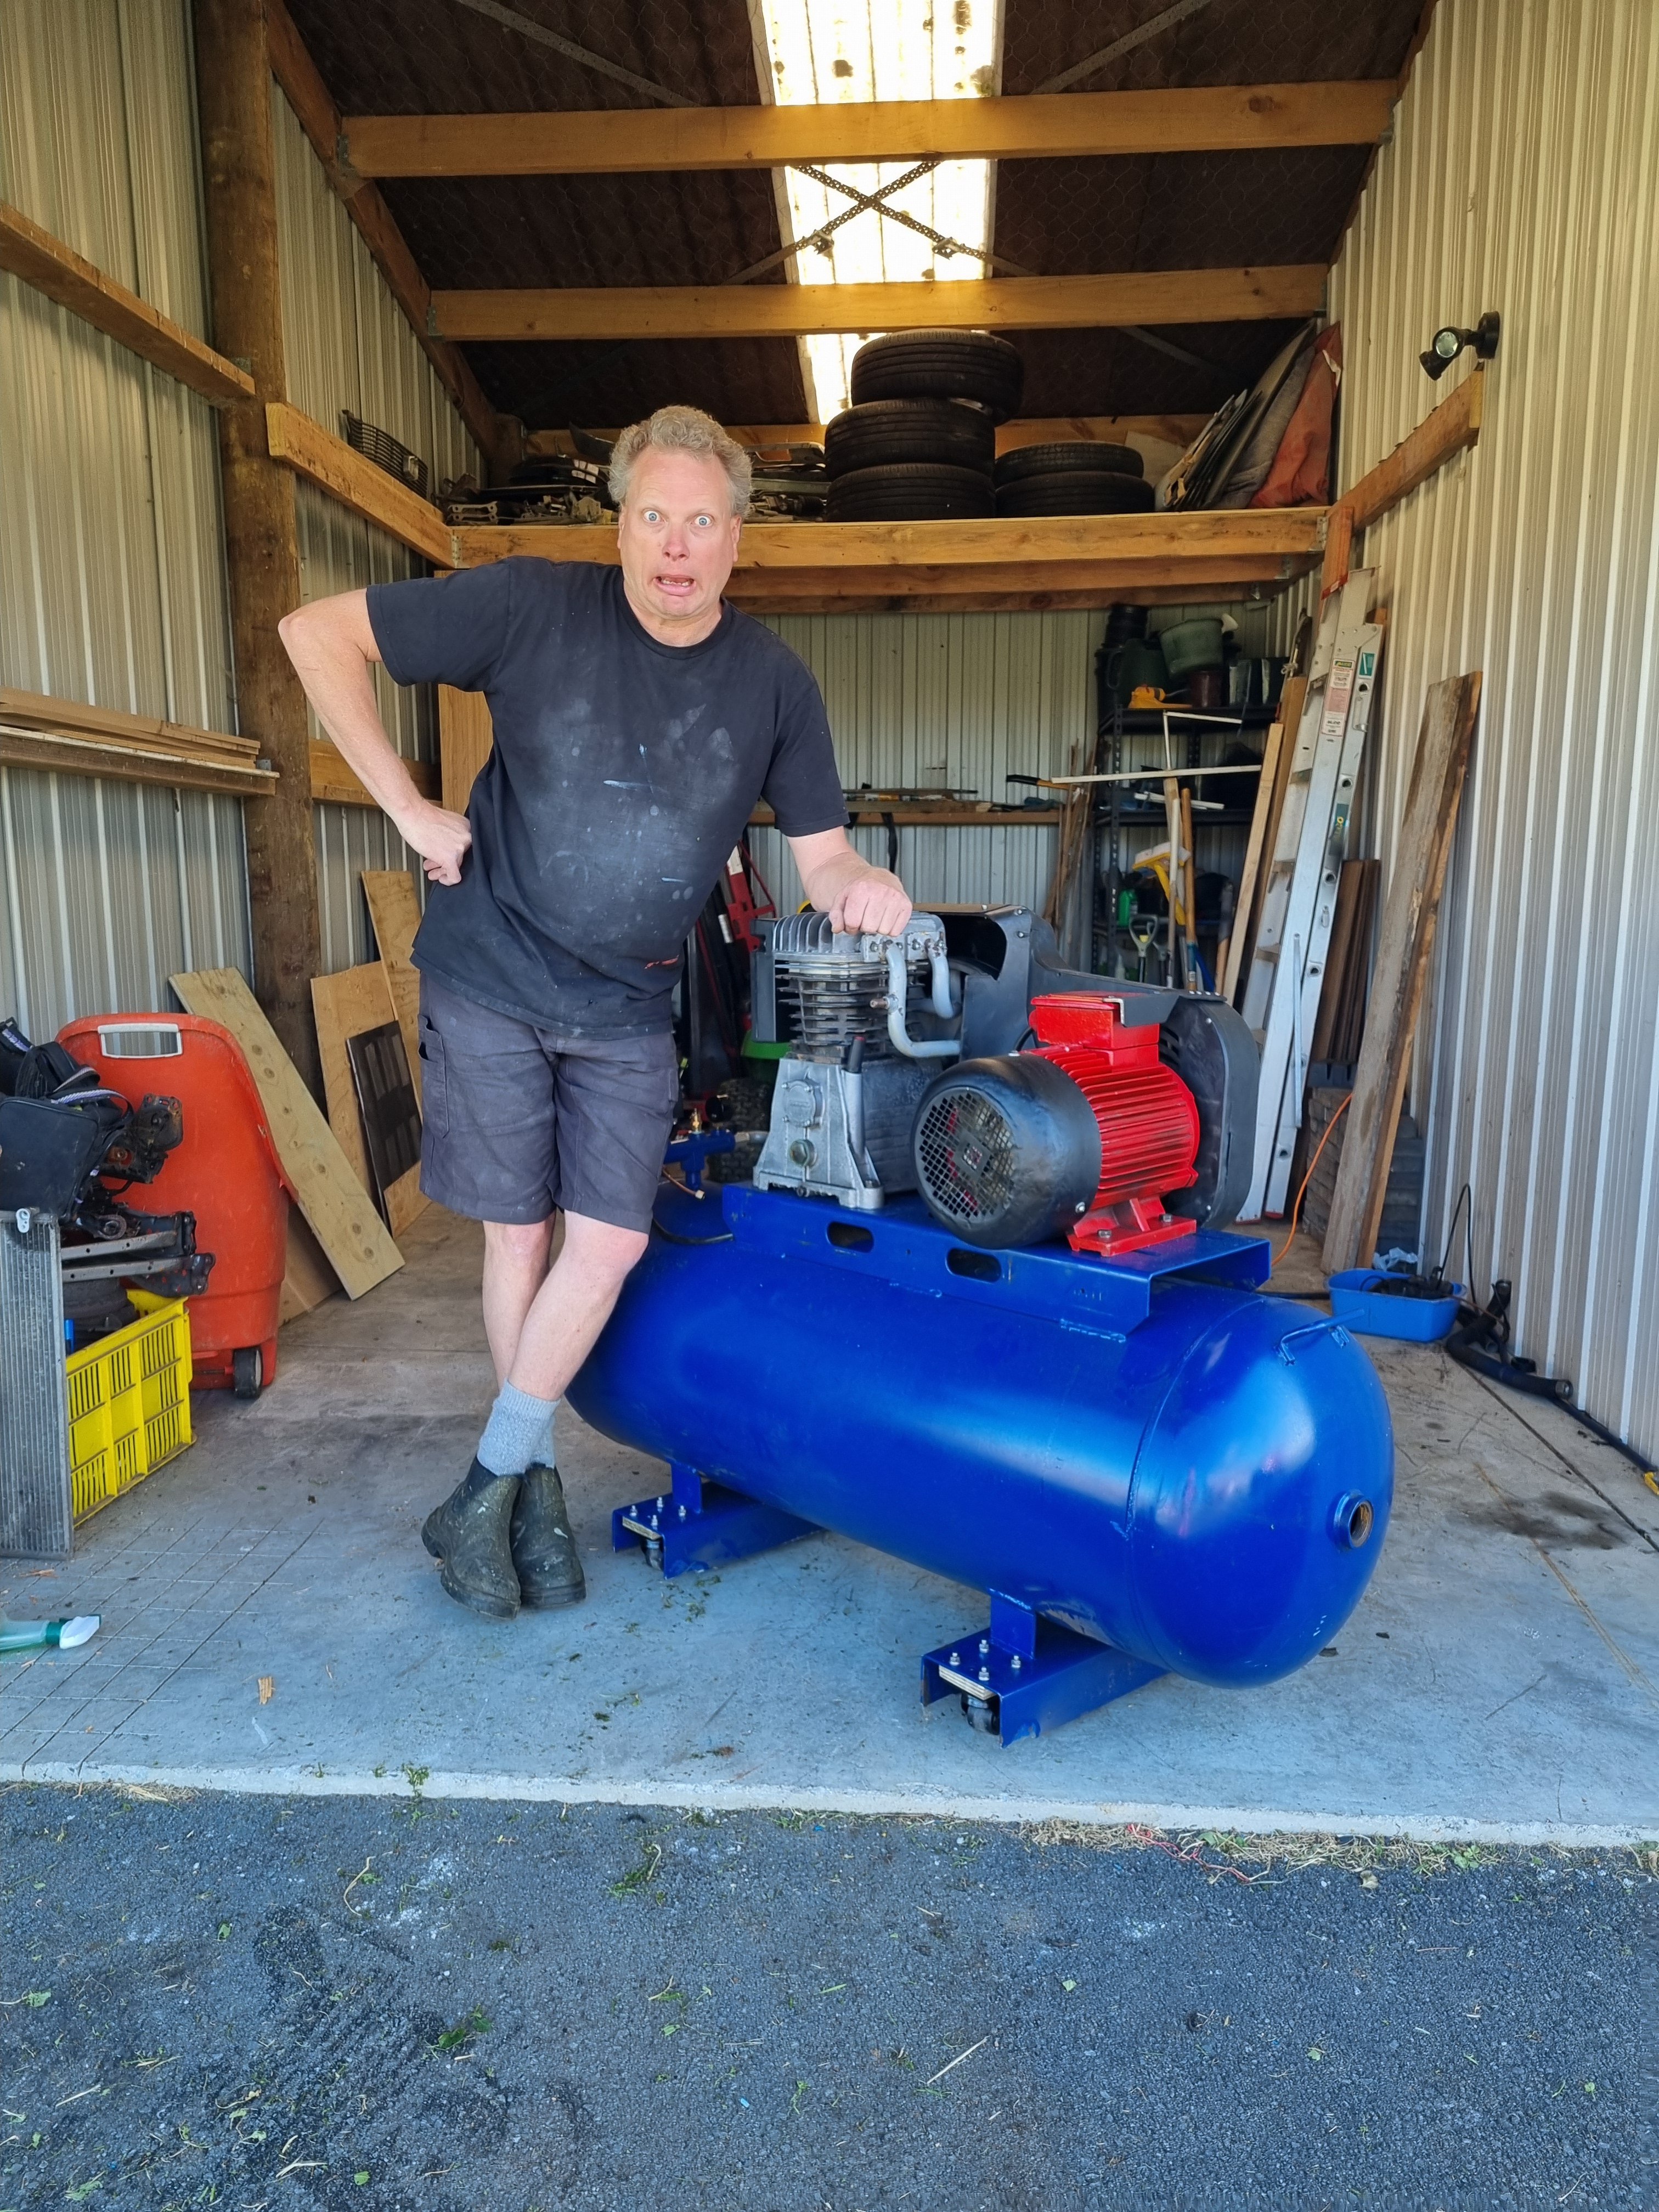
Old compressor vs New compressor
24 points
-
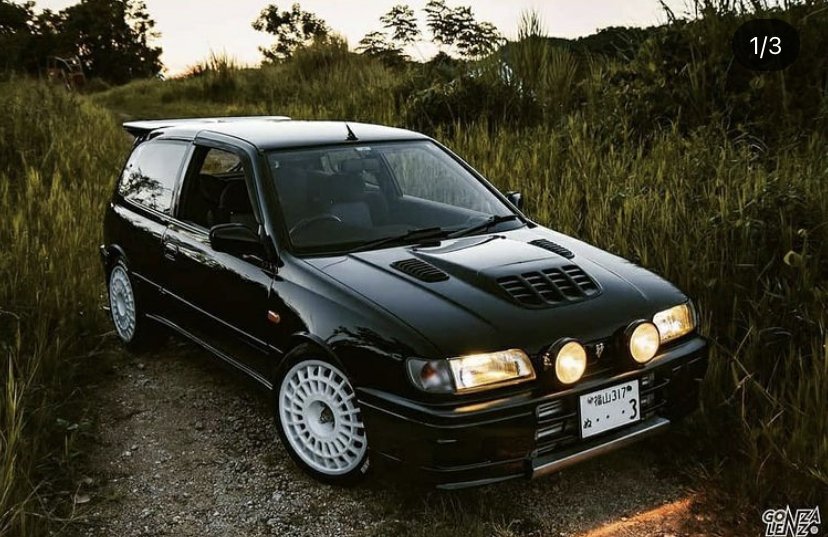
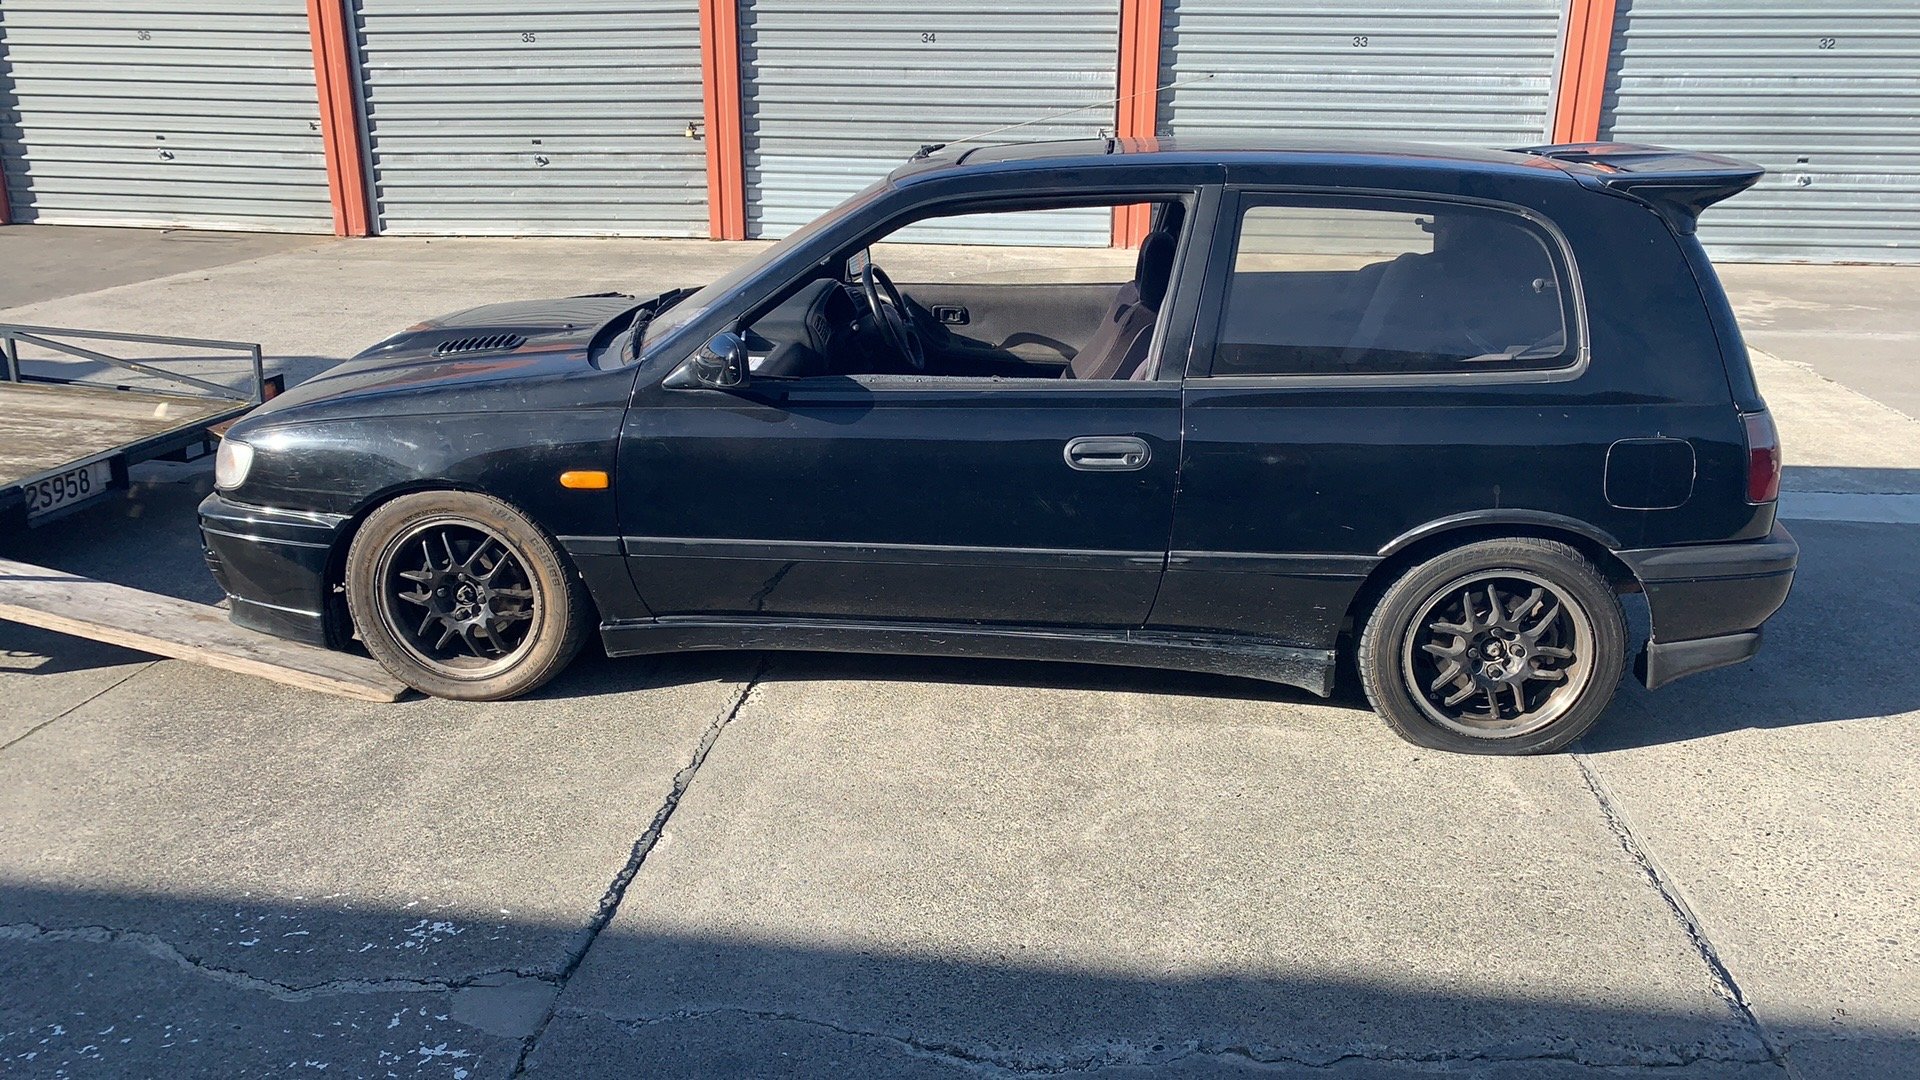
After a couple of failed race car projects over the last decade decided it was time for a more simple road car project. Being of that age where you start to reminisce your youth I decided a 90s turbo car would be the ticket. And had always wanted a gtir as a young fella I just so happened to know of an abandoned Gtir project in a paddock and after a quick phone call a deal was done It had been sitting in the paddock approx 7 years. It ran but had a blown gearbox (of course) some rust and dents and every rubber part was perished and dash cracked etc. I immediately brought up on parts blew it to bits fixed the dents and rust and was ready to send it off to the paint shop, then……. I bought another one its about that point things escalated
24 points
-
Few random snaps
24 points
-
@cletus came over yesterday for a visit and remarked how the compressor looked bigger in real life than on the Internet so I commissioned this portrait with the hope of conveying the size of the compressor accurately.
24 points
-
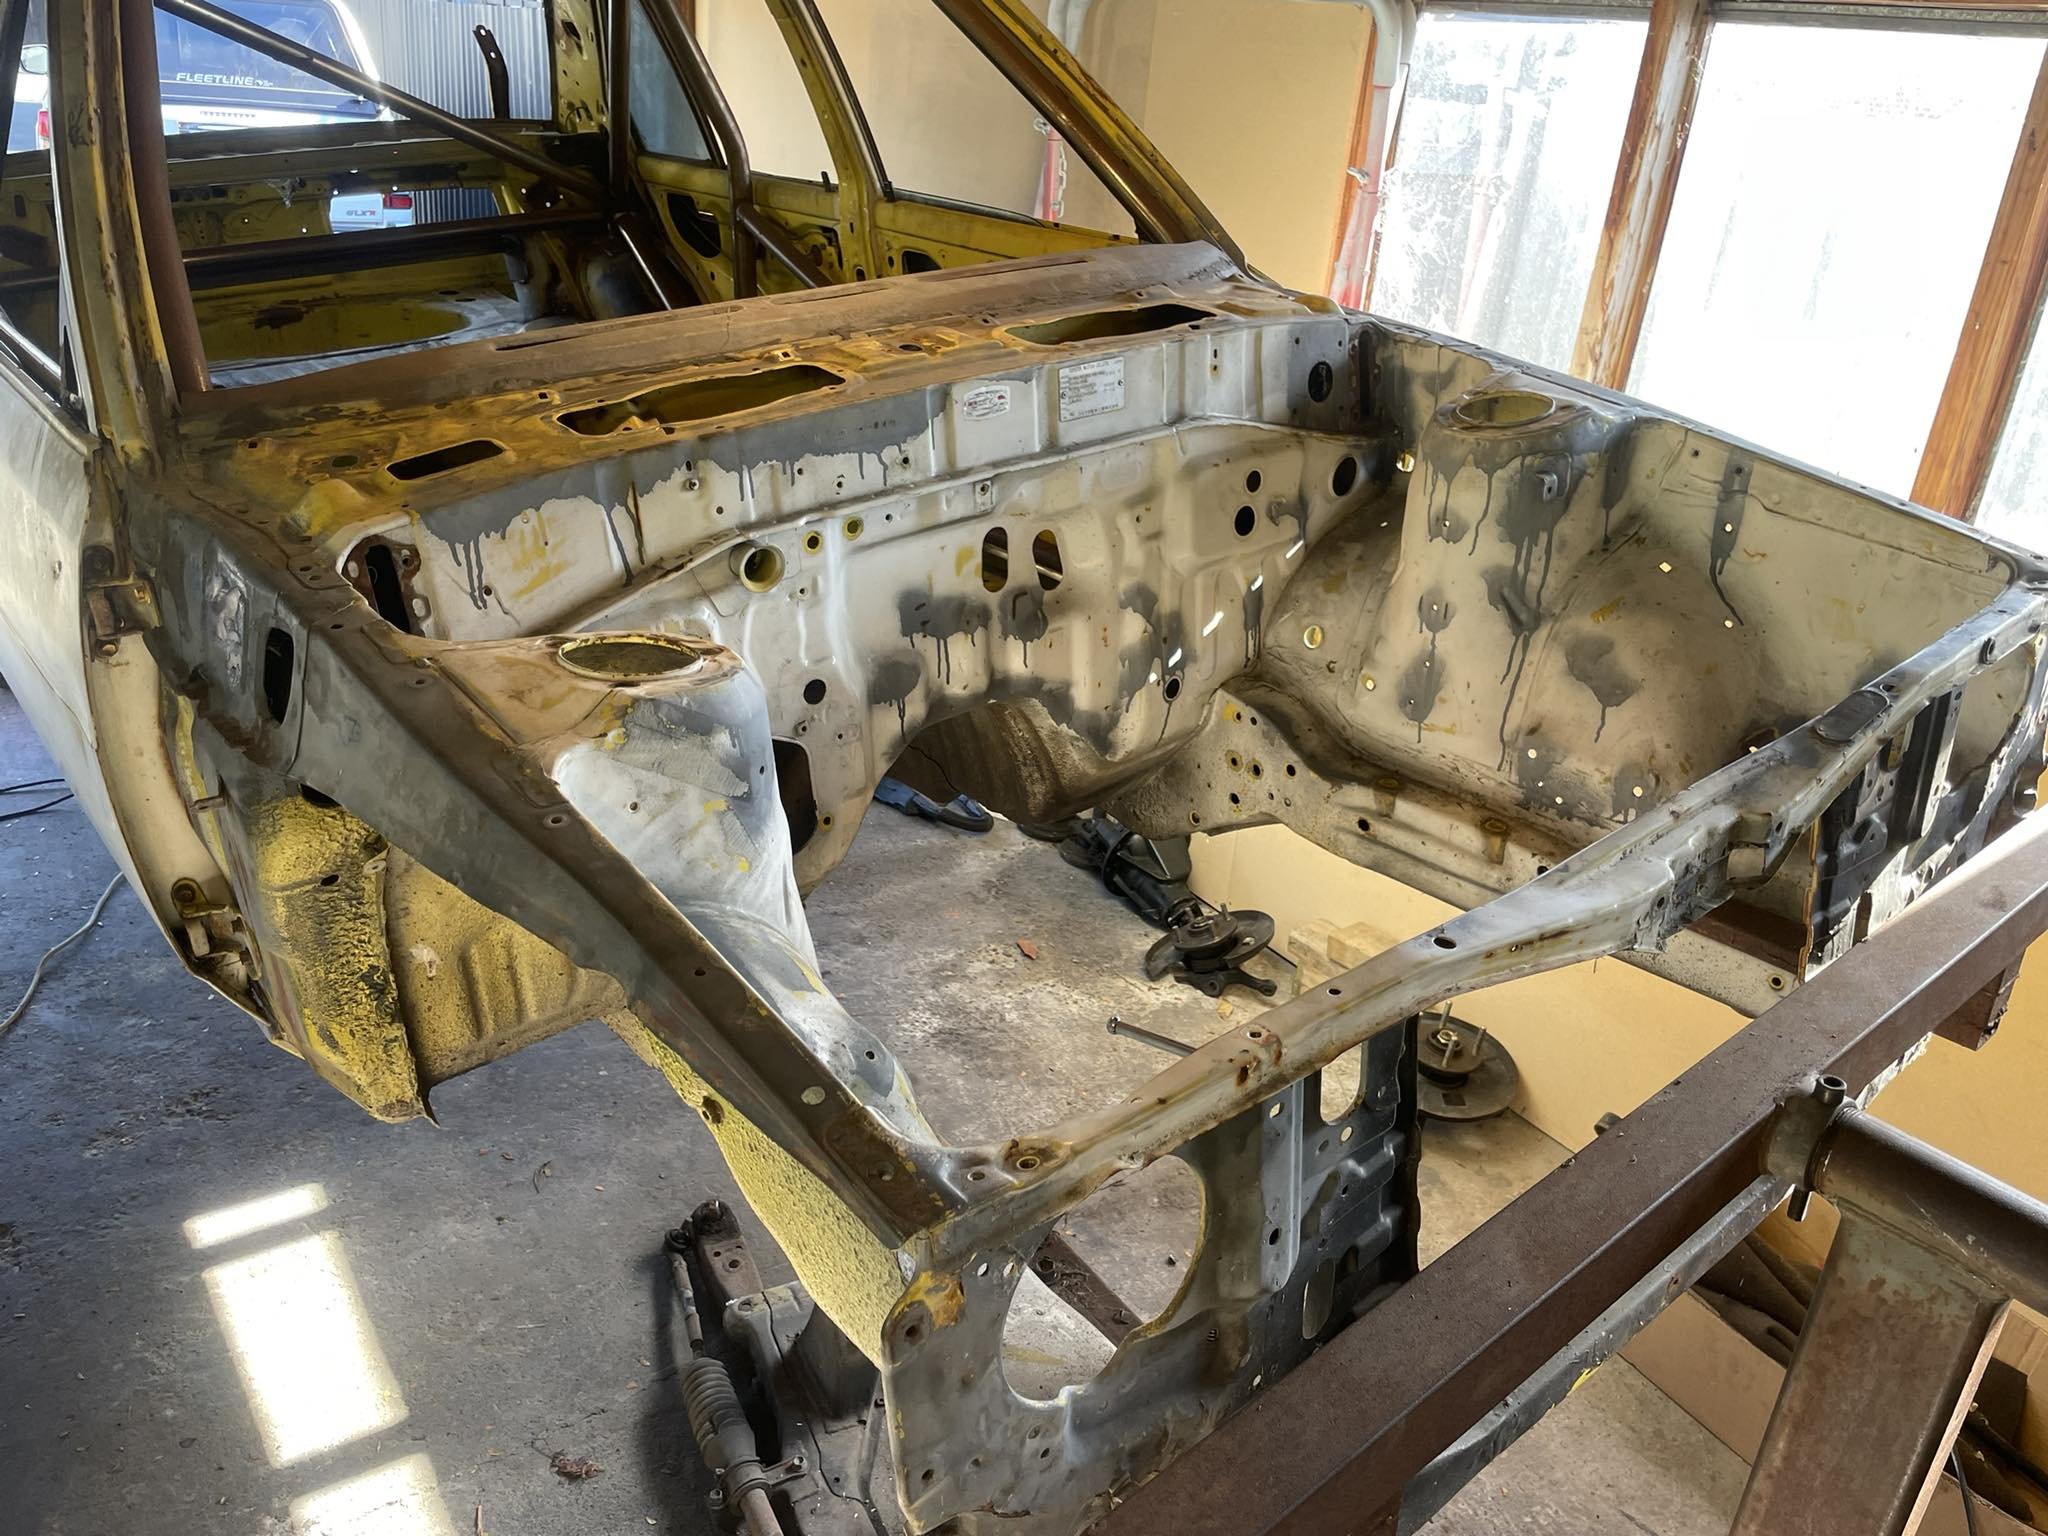
Car has been delivered! Currently organising it to be stripped and off to panel/paint/repair cert so hopefully have some updates in the coming few months.24 points
-
Bright and early this morning, firstly time to pour some liquid money into the box once the engine is kindof level. 3.2 liters of Redline MTL which all the cool kids say is the only shit to use in an X1/9 box. At $200 for 4x bottles it fucking better be. Then on to the main event; Then after half an hour of wiggling and jiggling, angling and dangling etc Then the rest of the day bolting shit back on; Just the driveshafts and some oil and it might be time for a skid. But thats tomorrow's effort.24 points
-
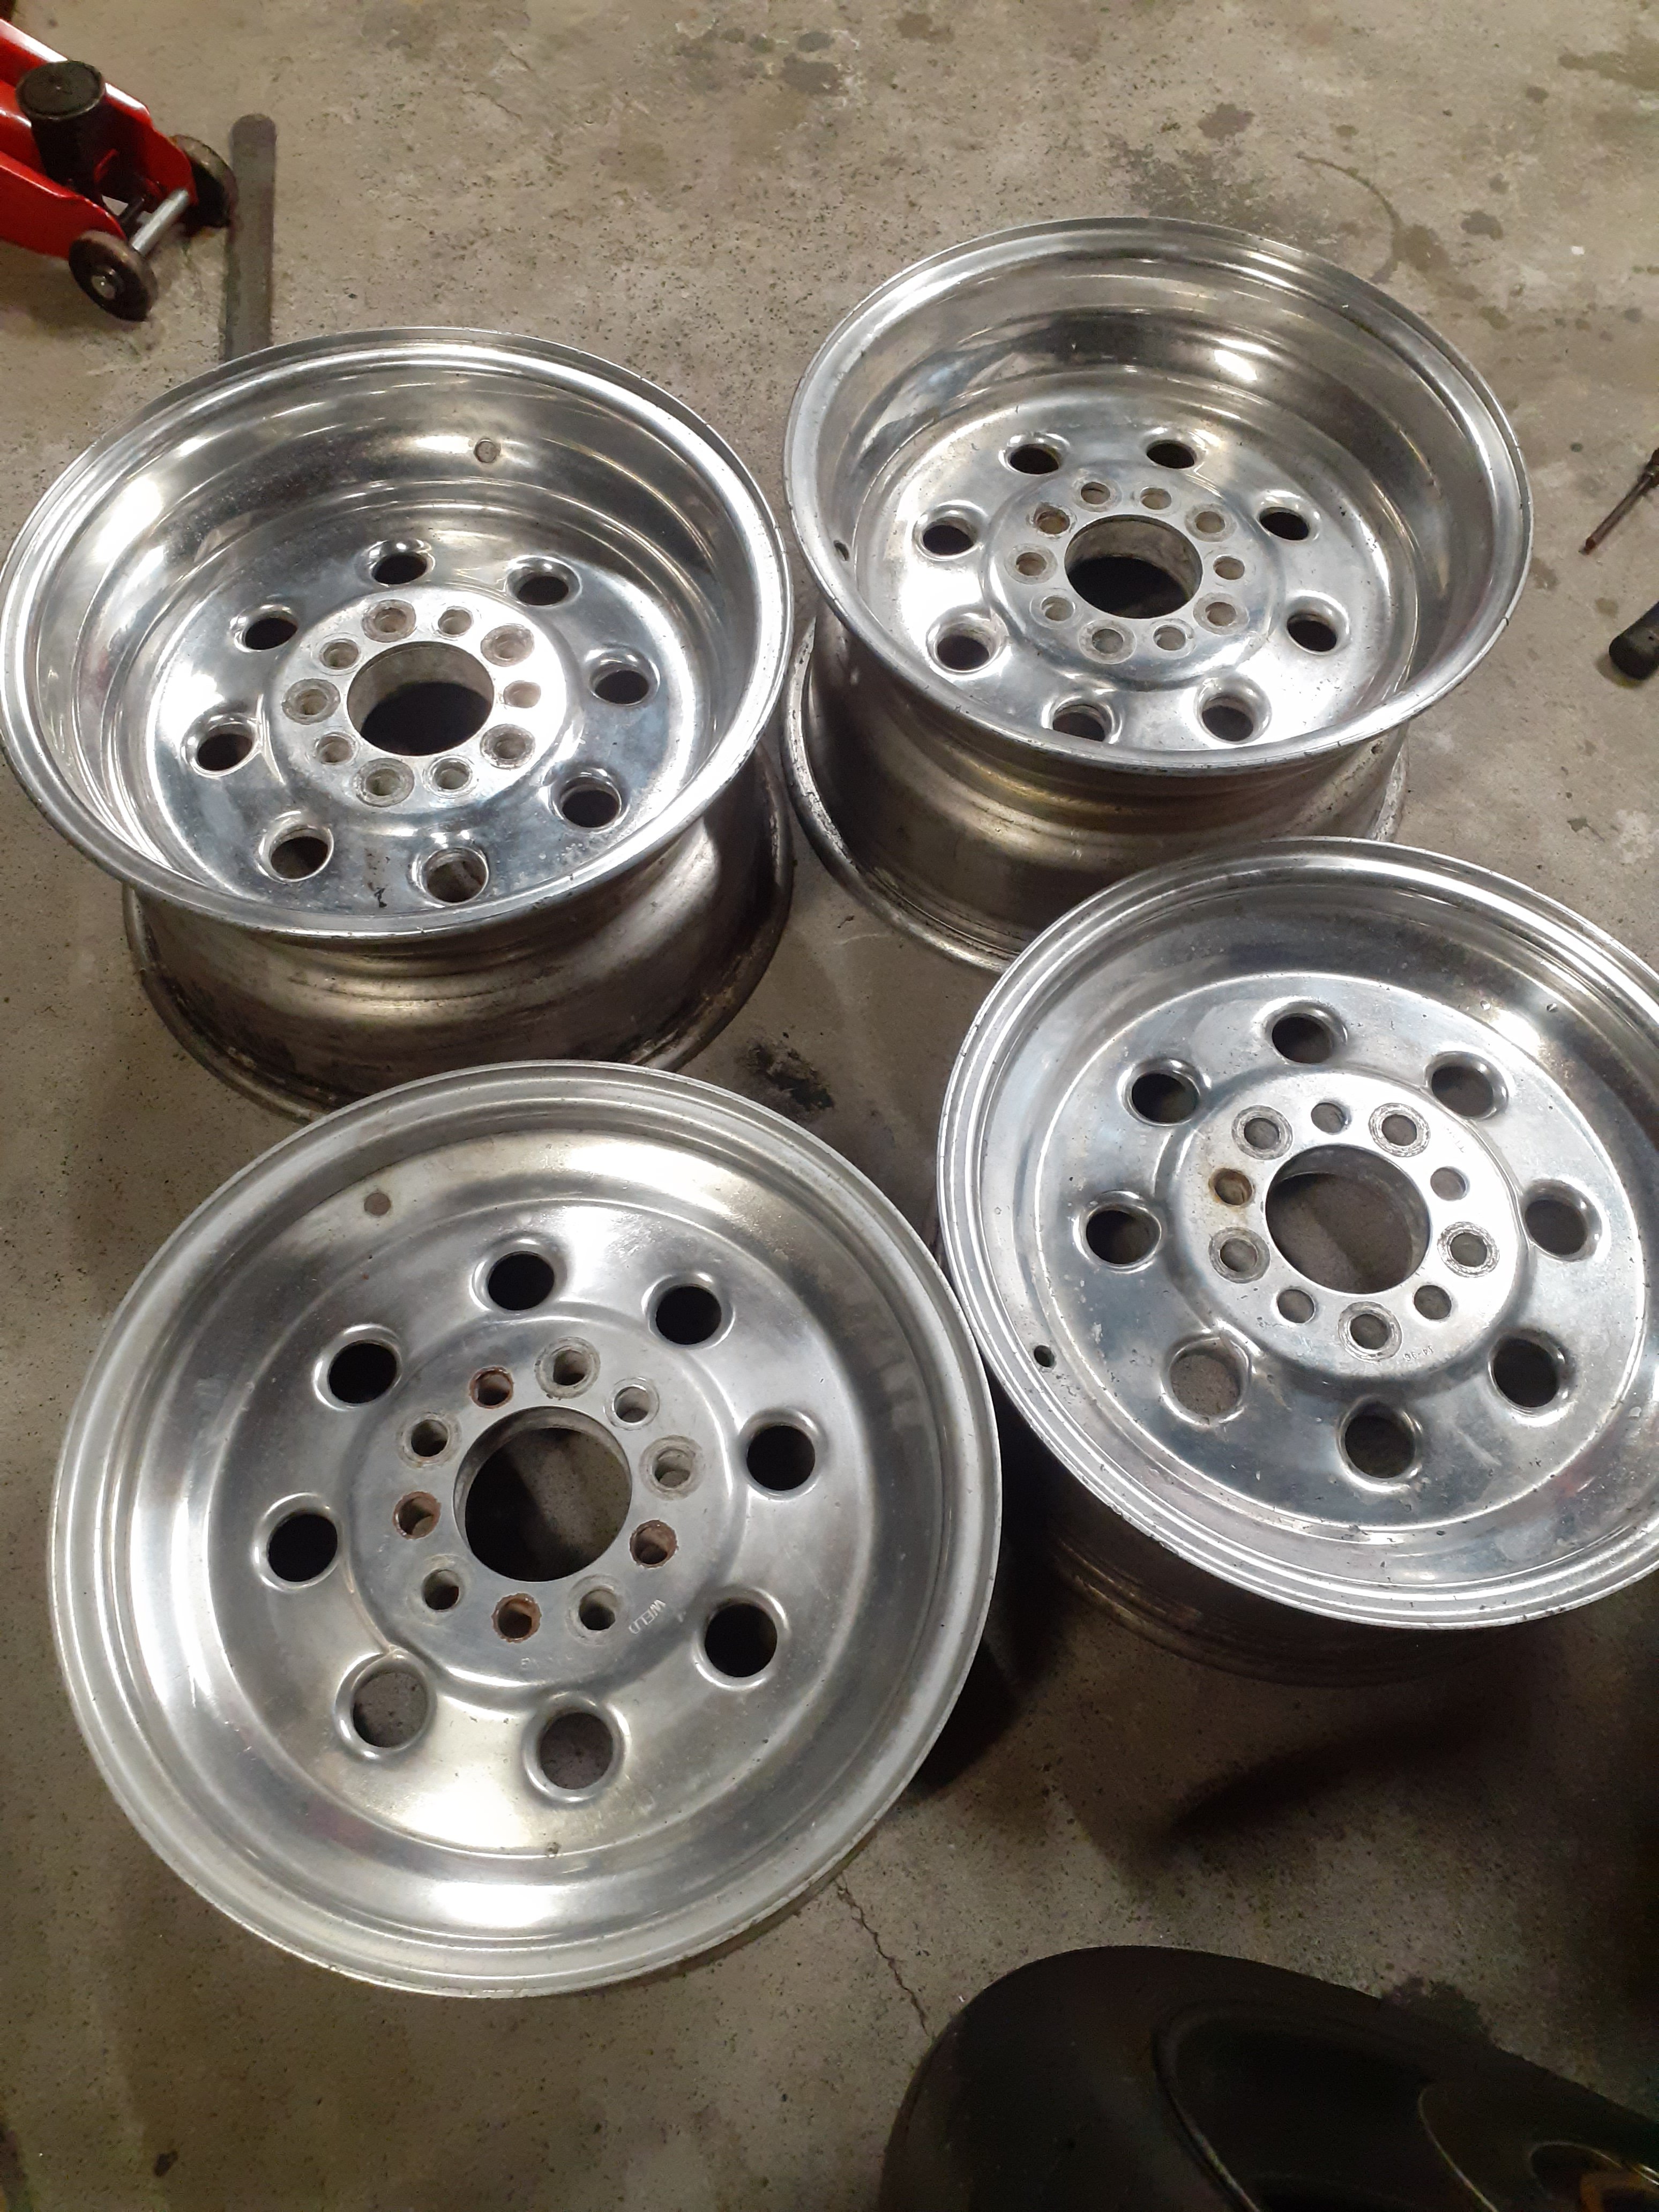
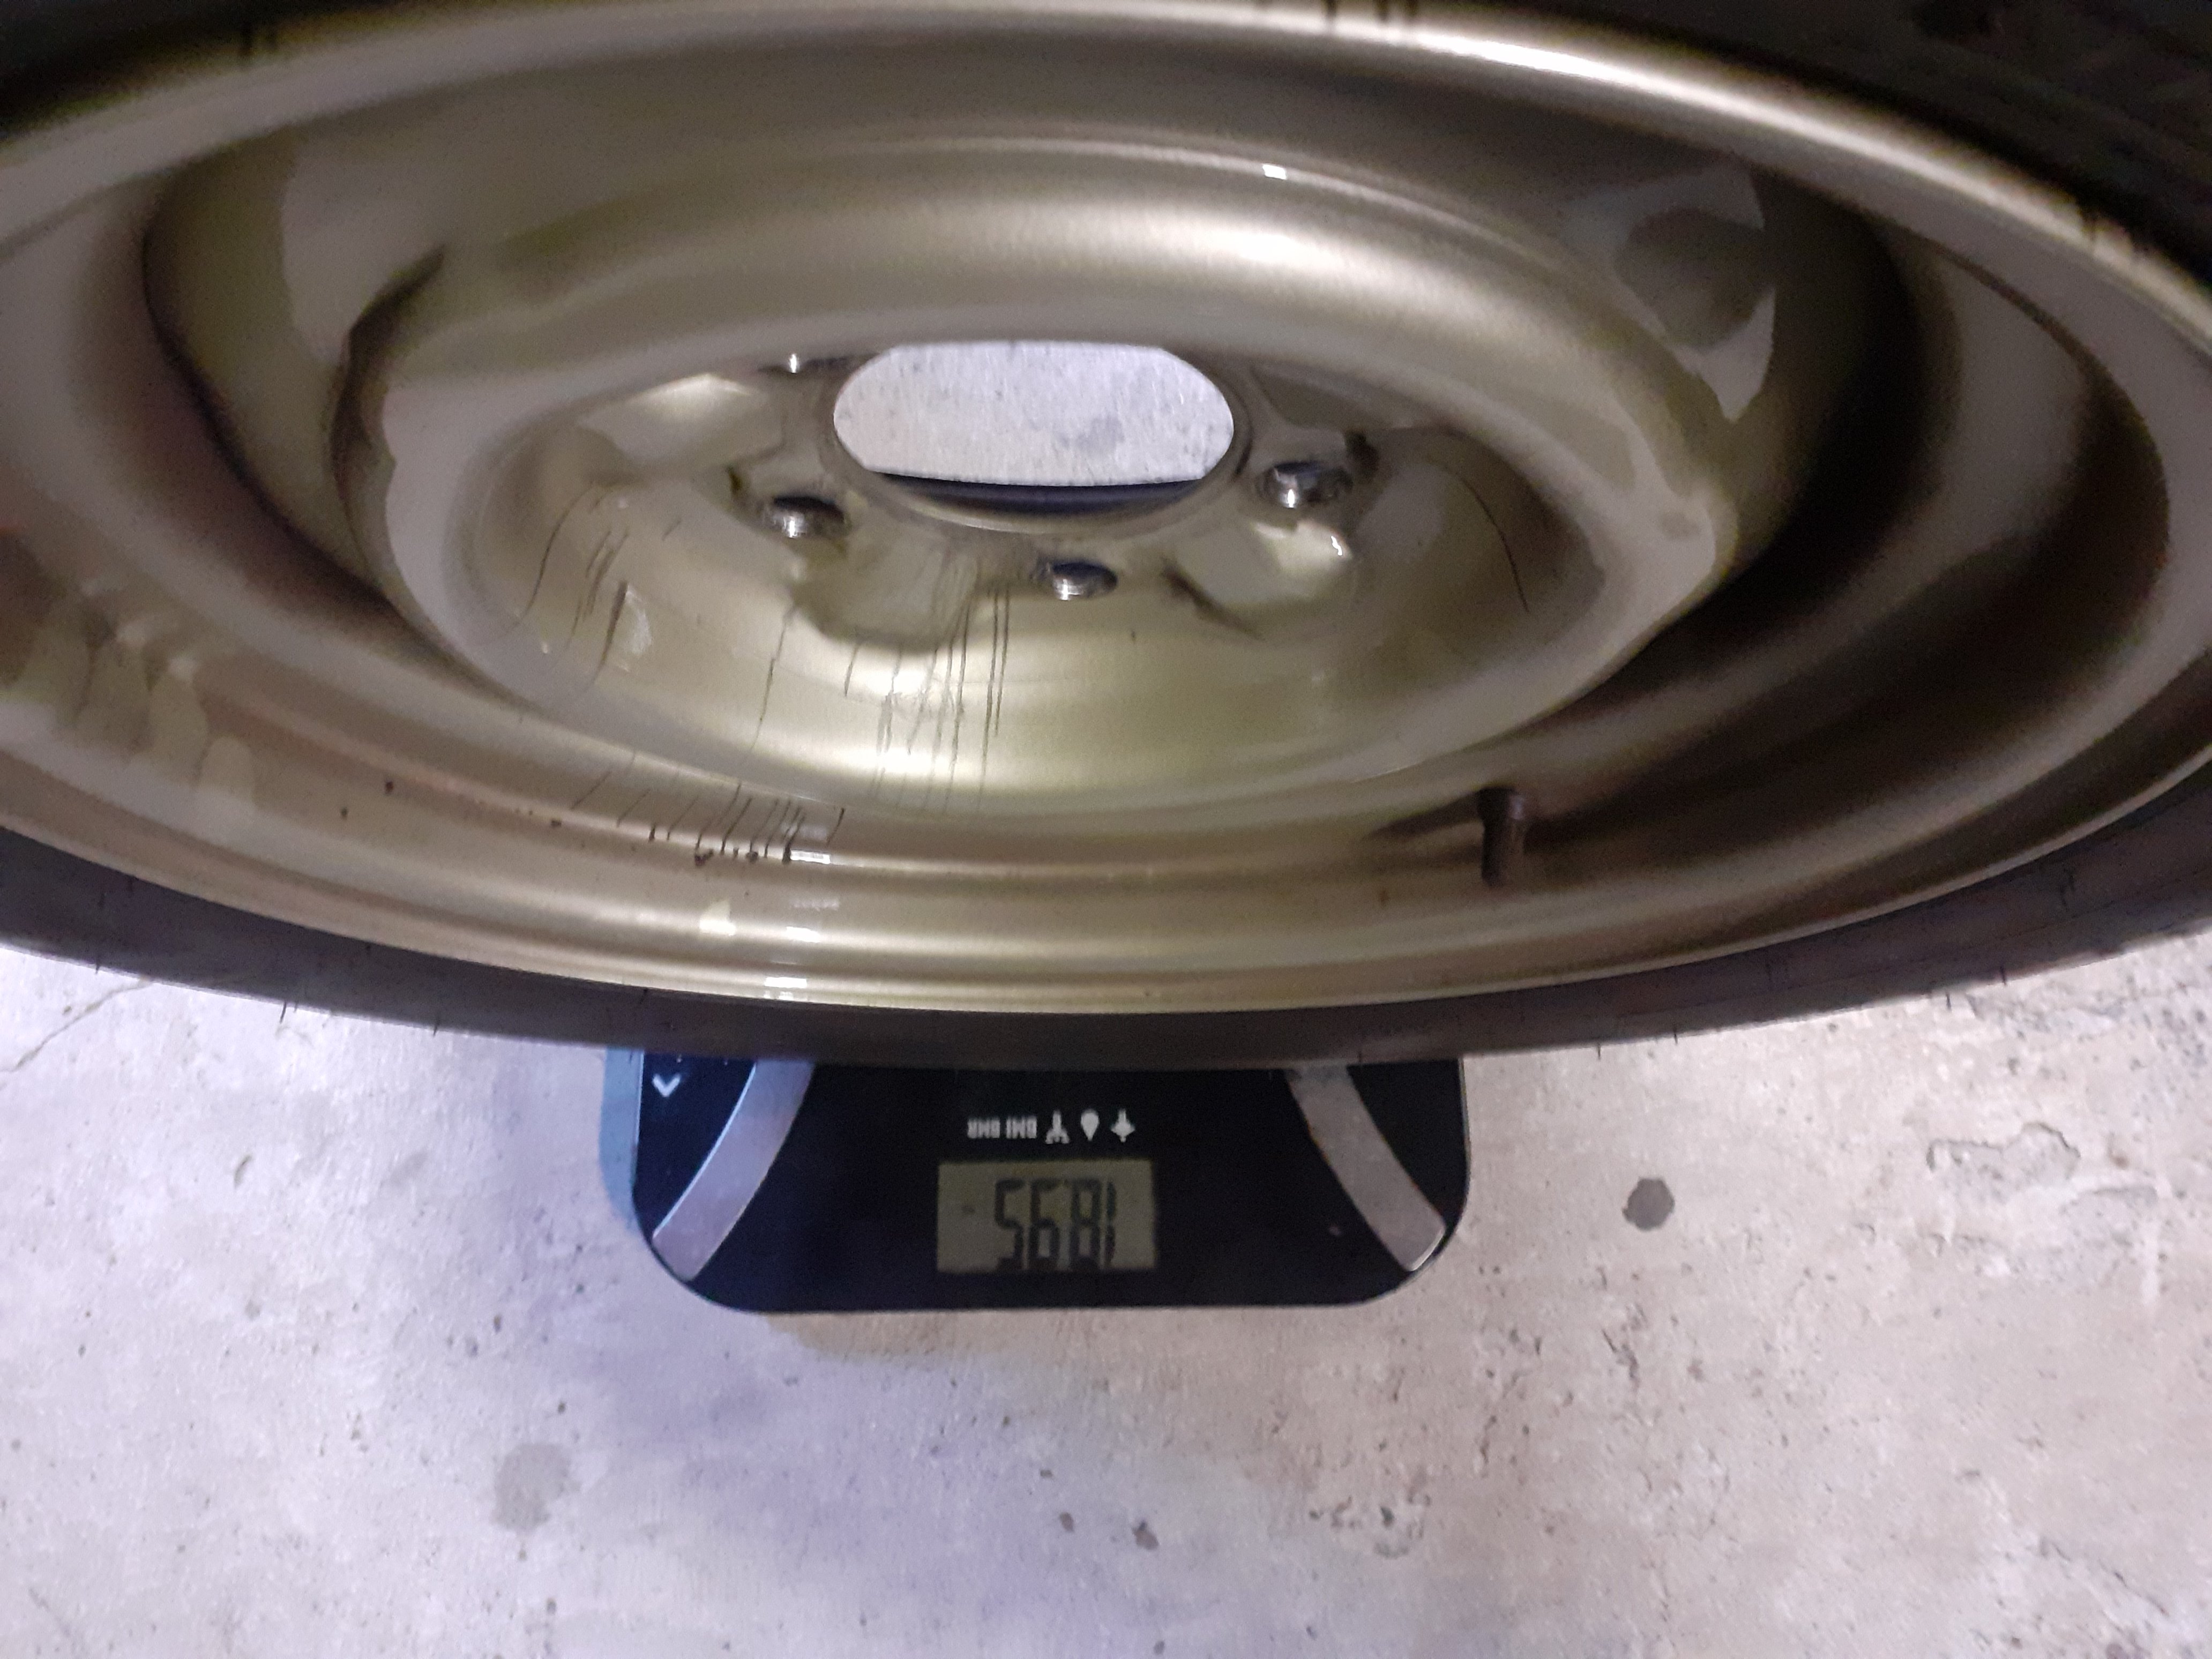
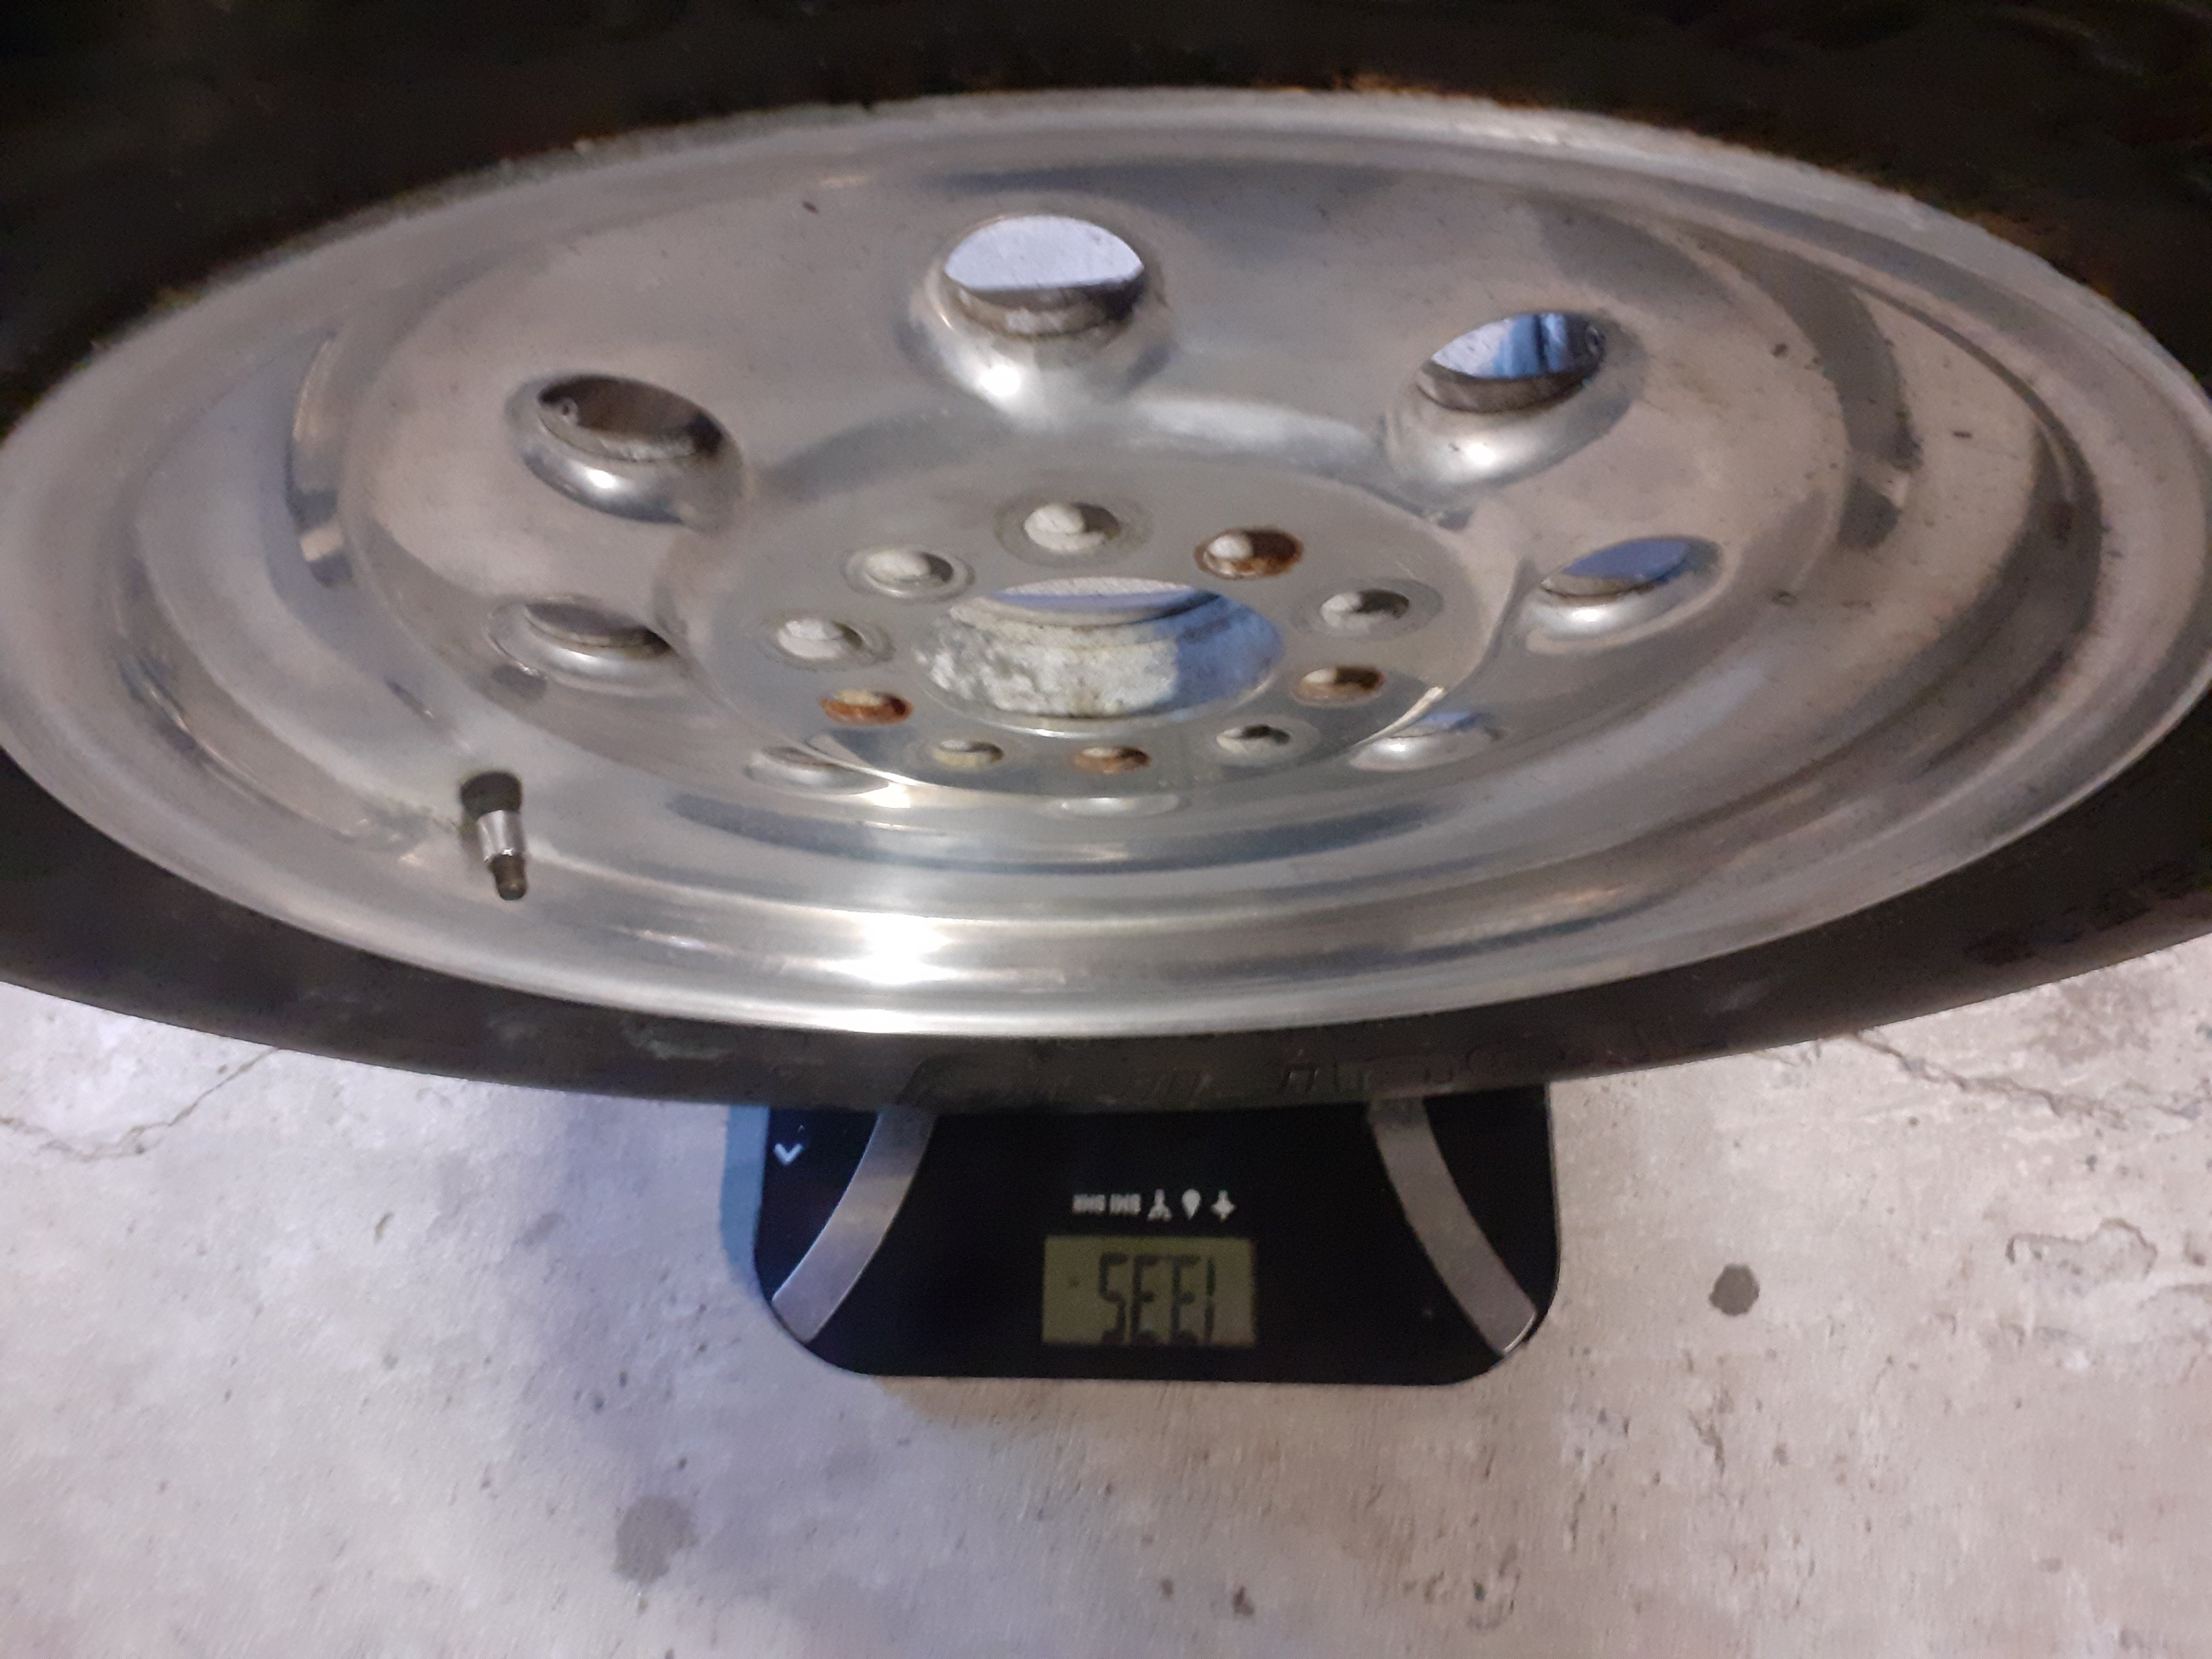
The steel wheels on it are very heavy. When it did its quickest time it had some very light cragar super tricks on the front. They were popular in the 70s but the internet reckons there's not many around these days because they were prone to failure. I bought them ages ago from a guy who took them off his car because they made creaking noises when doing tight turns, they were very cheap. They weigh as much as a bag of chips and are a bit sketchy, also the tyres were right on the limit speed rating and load rating wise. Plus I had to run a 5mm spacer which I did not like. I only did 2x passes with them on and didn't like it So I've had my eye out for a second set of wheels suitable for drag racing Being an impressionable teenager in the 90s who read street machine magazine a lot I've always wanted a set of weld draglites. They don't come up often second hand, I found a set a while ago but they were not wide enough. You can still buy them new but they are pricey Picked these up today, 15x5 and 15x8. Tried them on then got the tyres off, they are very fucked. They need a polish but should tidy up well Anybody know a good polishing place in south auckland?
23 points
-
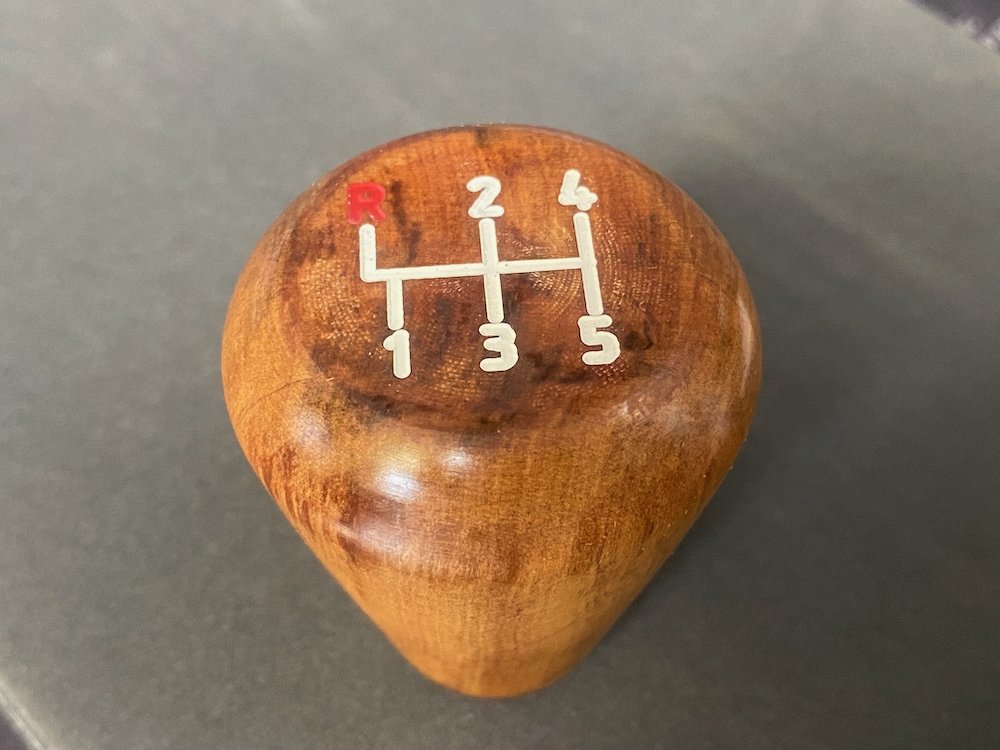
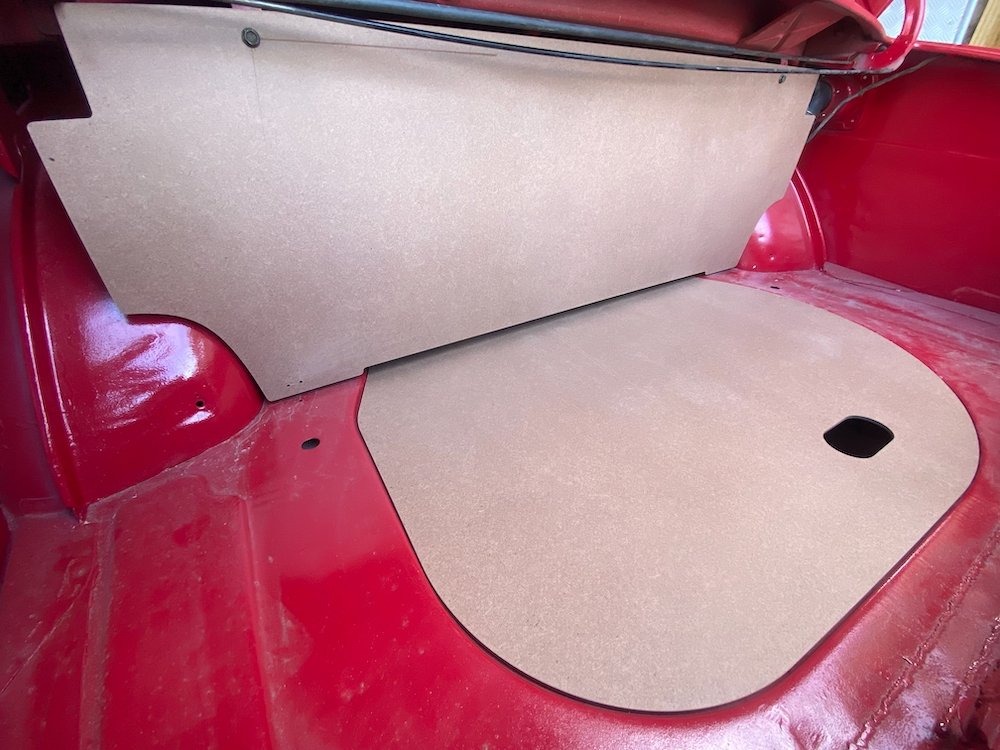
After guessing the shape, dad provided me with dimensions and photos of original boot panels, gave the CAD model an update, grabbed a sheet of 4.75mm hardboard and set about probably the most to factory spec part of the rebuild! Also carved up a gear knob from scrap rimu with the correct shift pattern, scrubbed up real nice with linseed oil too.
22 points
-
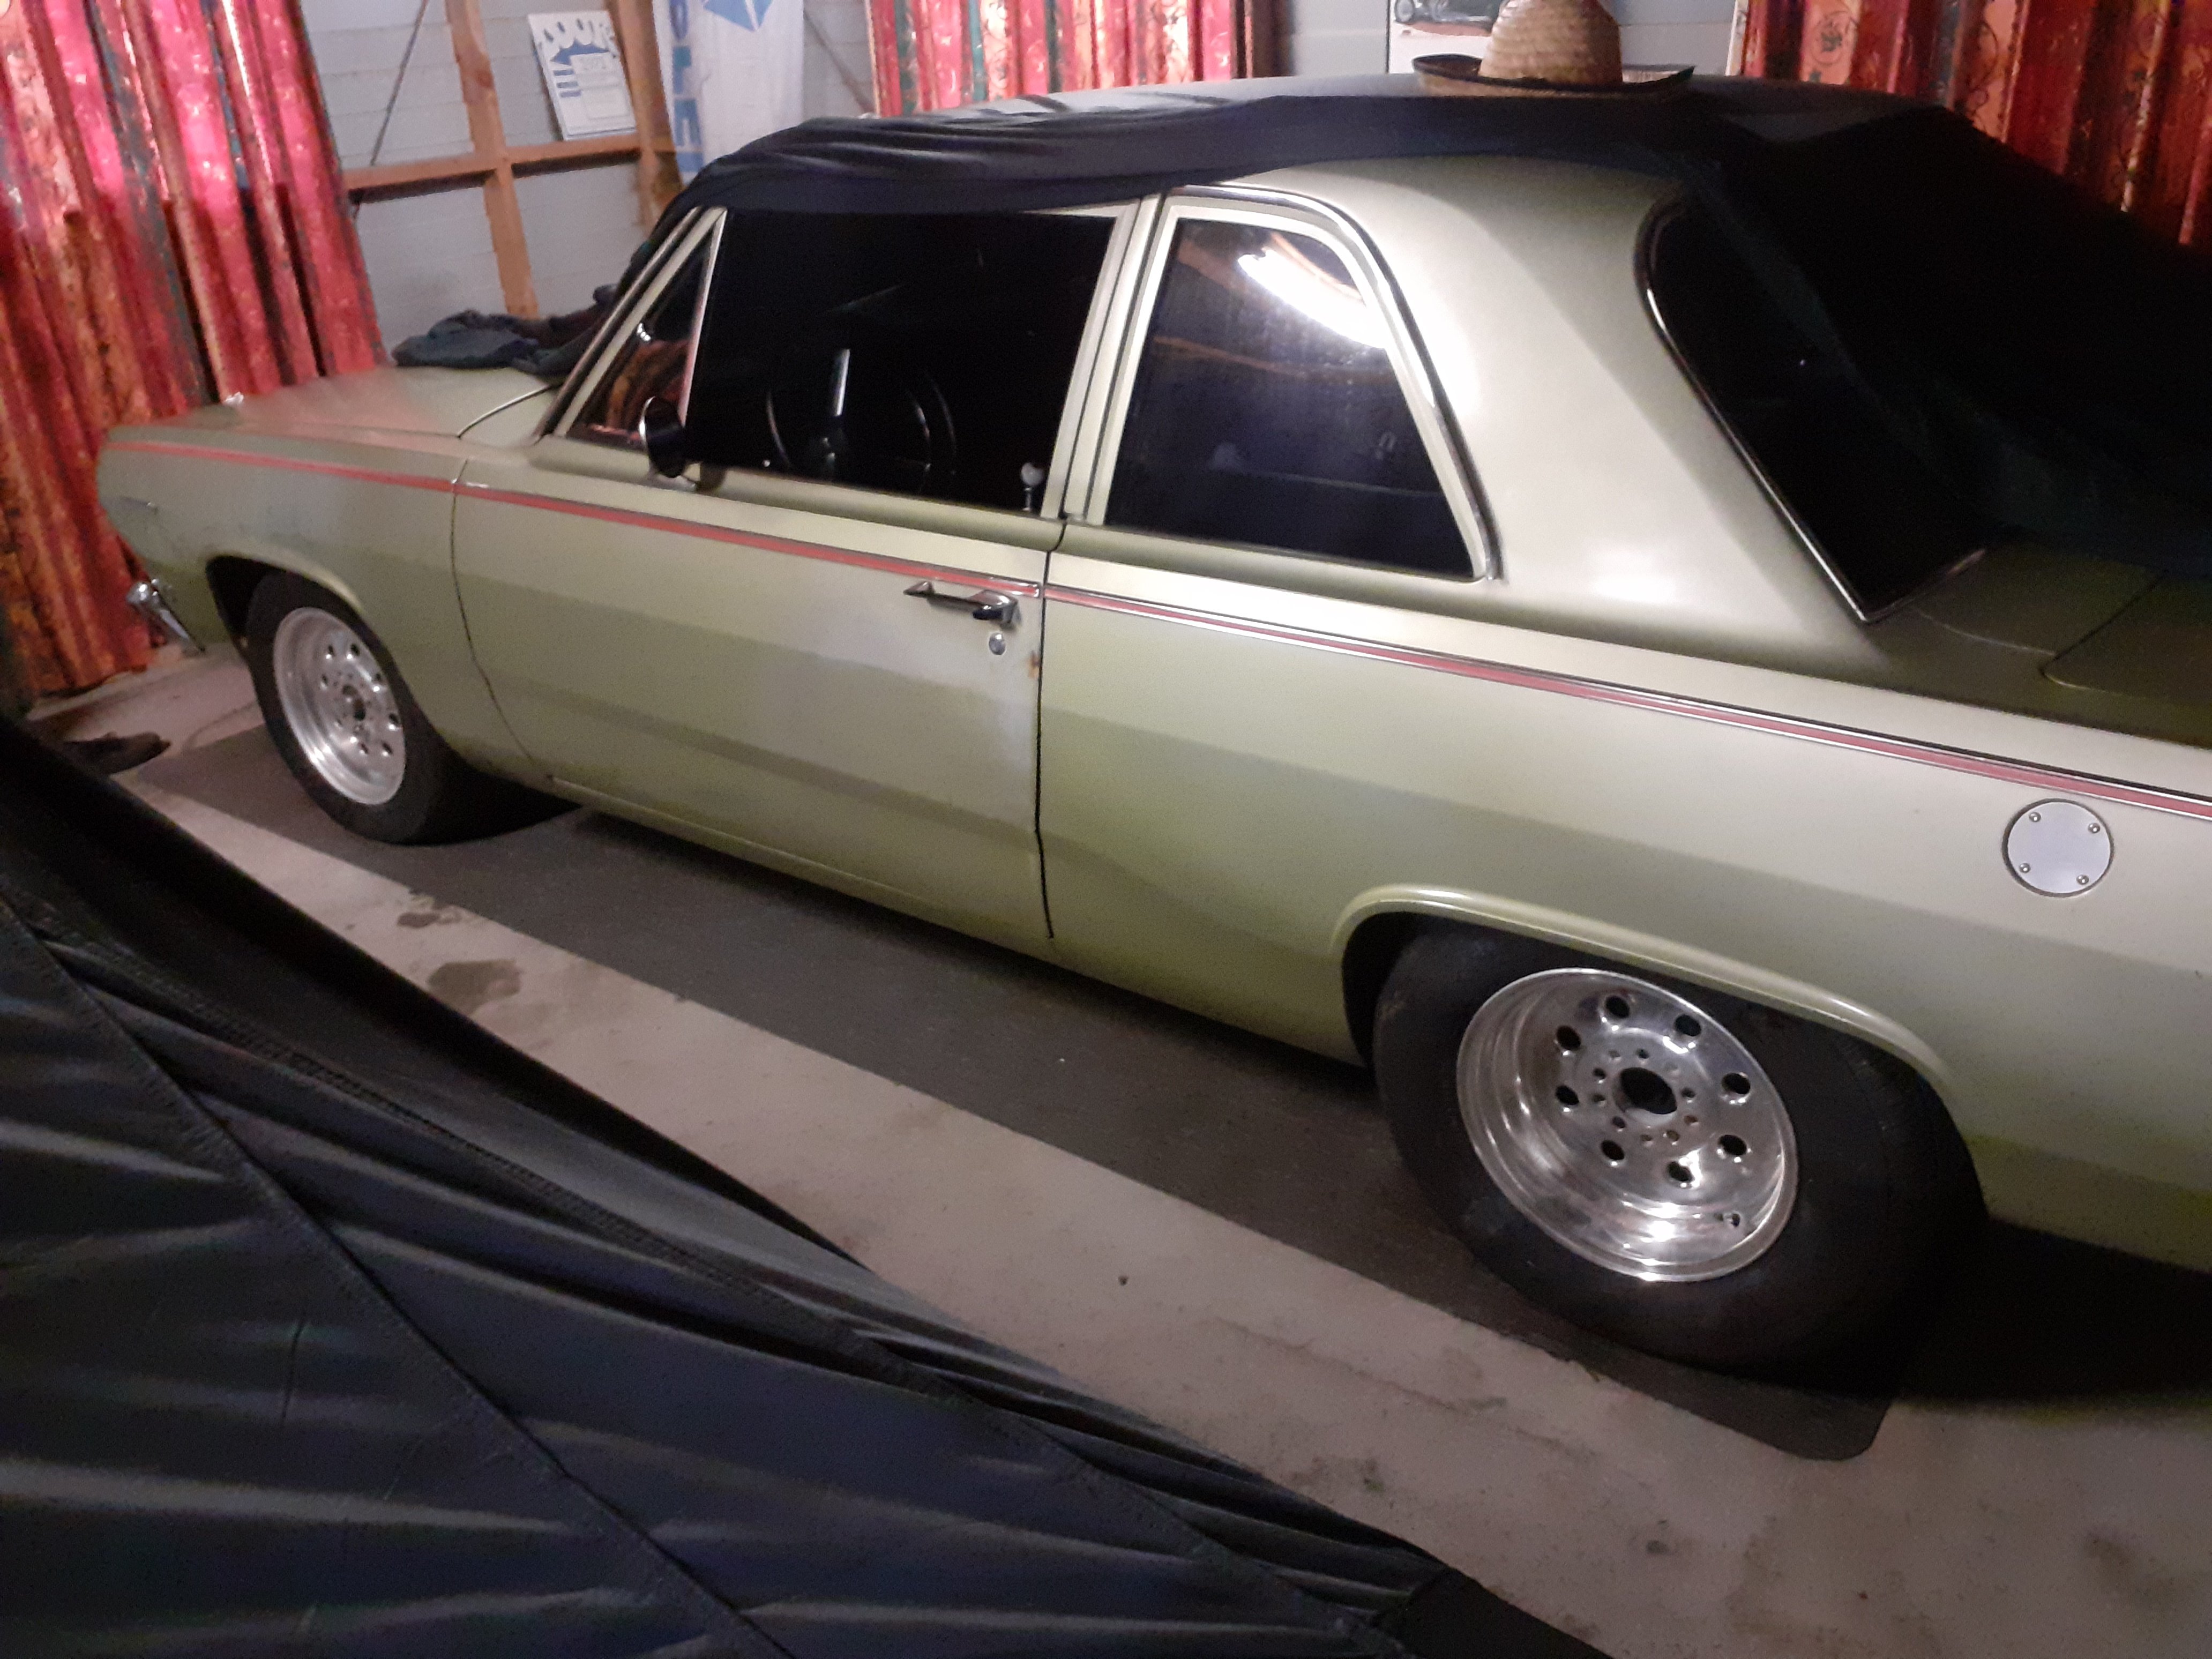
Whatever you do, do not accept an airport pickup from this man ^^ Bort kindly offered me a ride one time, which I was happy to take, but then at several points on the trip I seriously feared for my safety and death flashed before my eyes. Sliding around the back seat of the angry V8 Valiant coupe (2 door sedan?) with no rear seatbelts as he did the imperial ton passing slower traffic on twisty roads. I was not entirely comfortable with that situation. Drive it like you stole it comes to mind. Then we were regaled with stories of how he rolled a car while younger, and other interesting motoring calamities he had encountered - whilst entertaining, did not add to the feeling of safety. Then we were relieved of the near-death experience when he decided to do some road levelling with the sump of the aforementioned car, and it decided to drain the lubricating fluids, rendering it inoperable for the remainder of the event. Hence the nickname "Sumpson" was acquired. Then IIRC @yetchh gave me a ride back to Christchurch in his 121 which seemed to have an intermittent fueling problem and so it wasn't being super reliable either, but we made it. Such memories. TL;DR - if you don't want to die, don't travel to Hanmer with @RUNAMUCK22 points
-
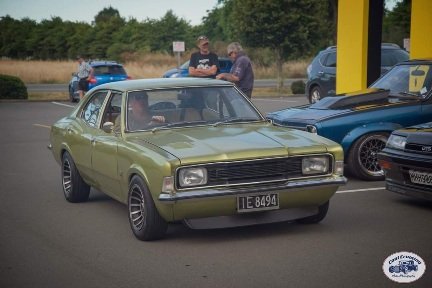
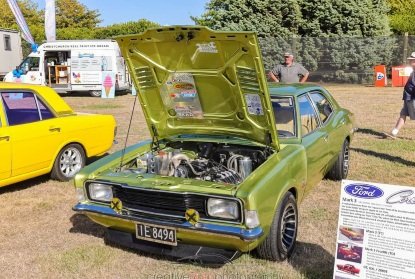
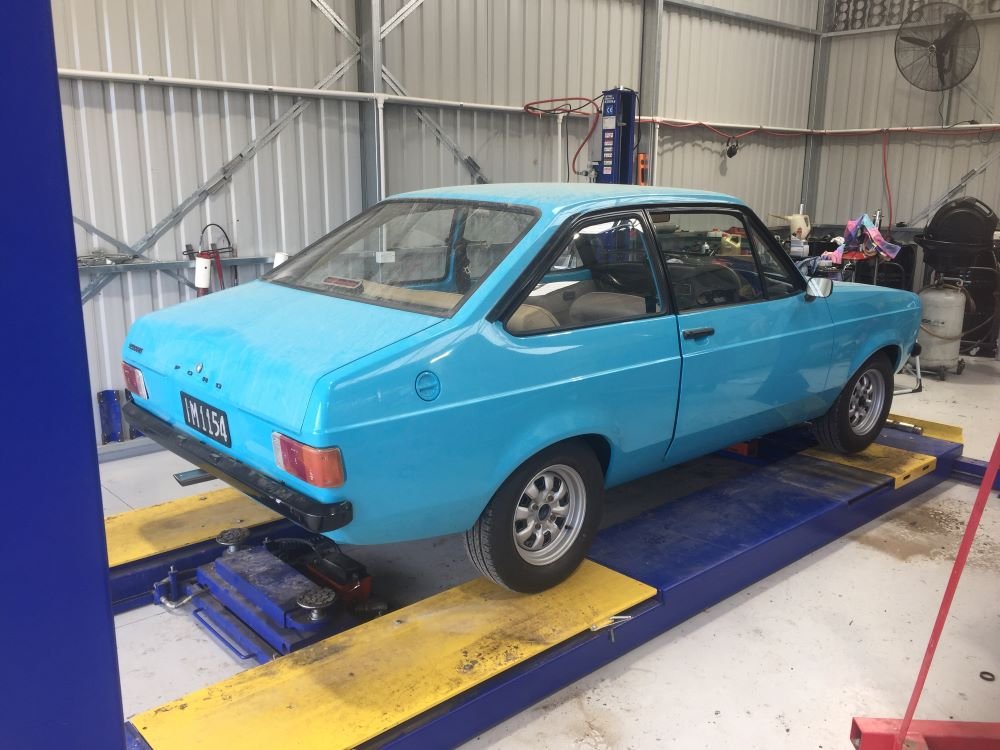
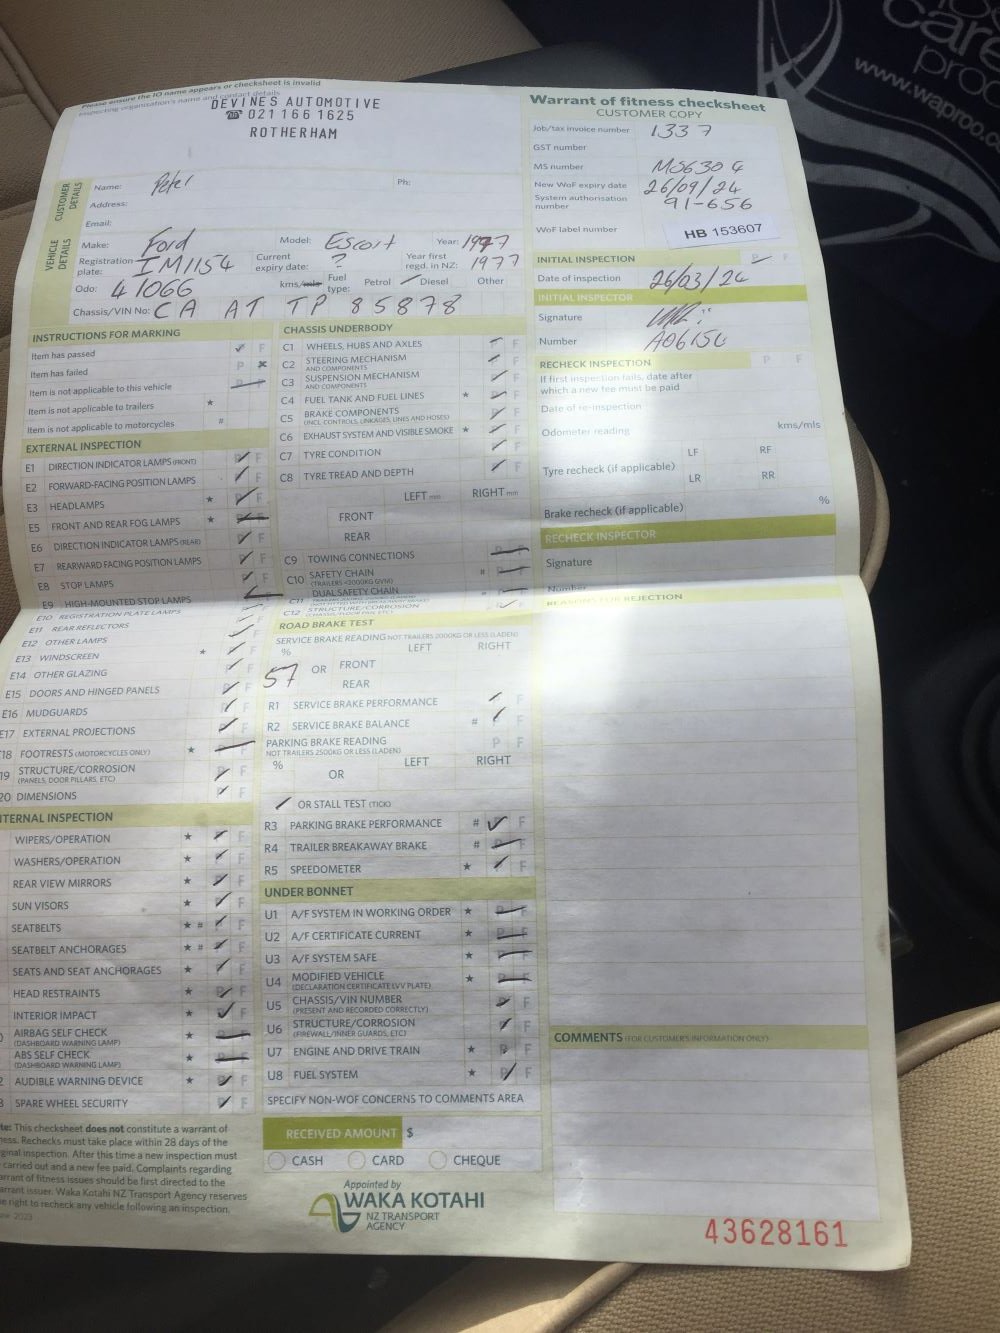
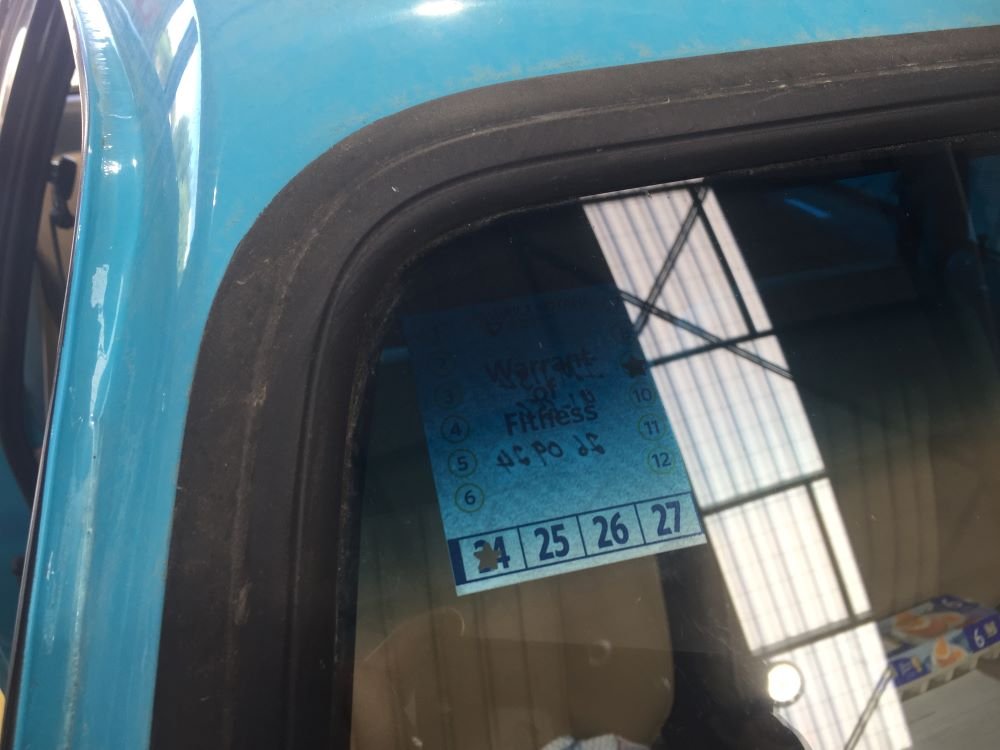
Escort back on the hoist again for its first WOF in approximately 18yrs. Have gone over everything and hope it will pass first time. Well, that went really well. Paperwork completed and sticker on windscreen. Quick trip home and now cars registartion done. Will feel more at ease driving around now. Tune is the next next thing to get sorted Project Discussion https://oldschool.co.nz/index.php?/topic/84912-petes-mk2-escort-1600-sports/page/3/#comment-2628128
22 points
-
Beem working on this thing pretty flat out. Done a bunch of interior work and just rebuilt all the steering components. Everything feels a lot tighter now . Not too far away being ready for a warrant
22 points
-
Fixed the rust hole, no pics cos boring. Made a heatshield for the alternator, first drilling and tapping some brass hex to stand it off, then some CAD, then some shiny so it reflects heat; Then I grabbed the pretty non functional catch can that I made for the truck, modified it so the wire wool was less in quantity and right before the outlet rather than at the inlet, which is why I suspected it didnt work well, then gave it some chode so it would fit in the engine bay; Went and filled it with some 95 as it was pretty low and it definitely needs some time spent on tuning, the low throttle popping and banging sounds good but the afr tells me its not right. Man it feels good to drive tho, the combo of the gogo and the noise is pretty great. If anything it sounds better now the air filter is on, a really purposeful growl.22 points
-
Hey good news I've fixed all the broken image links in this post.... Soon I'll update it on everything me and the wee car have been up to.22 points
-
Yea the brakes. I ordered the whole shebang, good old Brian at The Italian Job hasnt invoiced me yet so no idea what the damage is, but fuck it it needed to happen really. I pulled all the calipers and gave them a cursory clean up; The rears had a bit of pitting but not so much that I thought it worth replacing, I may order some pistons anyway for just in case. This is the worst of it; Then the bits didnt arrive til Saturday morning, but it was exciting when they did; I had already decided to spend some time giving the truck some new oil and filters, so I cracked on with that. After I drained the oil I did get distracted by that Honda S800, which ended up being a bad plan as when I got back I missed the quite important service stage where you put the sump plug back in before washing out the engine with 10 liters of pristine Delo 400MGX and dumping it onto the garage floor Fuckety fuck fuck. And fuck. Anyway after I had flagellated myself for a while I cleaned things up then went back to the X, at each corner replacing the seals and discs etc and bolting it all back together; Then today I enlisted the wife to help bleed the brakes, which I had to do many times as a lot of quite ugly fluid kept coming out. After that I took it for a gentle test drive which was pretty meh, then I bled them again and they came up mint. So hopefully a wof this week maybe....21 points
-
Lots of spreadsheets and mulling led to the decision to rebuild it ourselves. The engine the mechanics sourced had no information other than "64kkm"; engines before 2019 models have thrust bearing issues I'd like to avoid. They'd charge a lot of money for something that I'm meant to be learning how to do. The cost of getting an appropriate year replacement engine from Japan is approx $5000 delivered with gst, depending on who I go with. Engine reconditioney man said if it was his block, he'd re-use it. Obviously he's not going to put "it's fine" on paper but it's better than him saying a perfectly reusable block should be tossed to avoid liability. Anyway, The good news The crank and conrod could be saved! The block should be fine! The bad news For the life of us, we couldn't find any undersized bearings for the crank in the "standard 0.25mm" increments. The engine is used in so many cars, I find it hard to believe there's nothing out there, but we just couldn't find the right people. Apparently part numbers are king in Japan and they are super cagey about anything else for liability reasons. After a while of inquiries and searches, I gave up and bought a new crank and conrod. The good news 2: electric boogaloo I'd been plugging part numbers into Amayama and bugging them to update their database because no altos past 2015 are in there. But while inquiring with Jesse Streeter, he mentioned off hand that he could get them for cheaper. I gave it a shot and.... yeah he's right! Amayama: $1.9k Streeter corp: $1.45k Delivered faster, too... That said, I'd already bought a batch from Amayama; still, the bulk of the parts went through streeter so I'm very happy with that turn of events. When Jesse's first batch arrived at his office, I asked him to send a pic of the crank stamps. This let me use the block and conrod stamps to figure out the most likely bearings to use and order them in advance. I forgot to get him to check the new conrod but fortunately it worked out While girlface cleaned the schmoo and old (possibly metallic) oil from the block, I cleaned up the old crowns. I struggled a lot with some old kitchen scourers and toothbrush with acetone before I spot-tested a brass brush and absolutely blasted through the rest of it. I also replaced the new flywheel bearing (don't worry it's clean now), 10mm for scale Cleaned and schmoo'd the transmission clutch housing, ... and the floor, went slightly overkill getting rid of those fuel fumes that we really should have dealt to weeks ago, And sorted out those drive shafts. When we removed the engine, we cut the boots open. I was super dubious about this move, having (somewhat) recently dealt with the Starion's shafts and watched people on youtube reinstall their modern FWD shafts, but since when is DIY engine overhauling smooth? I popped the shaft ends out of the transmission easily with gentle pressure from a crow bar and some light rubber malleting. Then dealt with the other ends which were still in the car. Fortunately I didn't have to remove any suspension bits because there was no engine blocking them, I just had to remove the wheels and hub nut. That's a rusty rotor. It's okay bb soon hush Then I recruited girlface to slam them out in an afternoon. Ew Ugh gross This is the closest I'll ever get to baby poop We struggled for like an hour to get the big end "properly" seated. It just looked like there was a notch waiting for it. We used shims, screwdrivers, pliers, the vice, brute force... I finally had the idea to go confer with Kelvin on how they look assembled on his car, and also hunt for high-res second hand drive shaft shots on the internet, and discovered that nope we'd been all the way on the whole time .... :') So fine, moving on to clips. The suzuki boot clips we got were this design I'd never seen; you bend a piece of metal over and it has the precise correct clamping force for the boot. Cool. Well it was cool until we had to do the two large clips. You see with the small ones, we could just use adjustable pliers to perform a reach around and grip both sides of the shaft. This let us press down easily and evenly. There's a lot of force required to get the metal to bend over, and it needs to be consistent along its length because it'll happily deform. We tried a few things, and just when we thought we had a good thing going with a hammer, we broke it :\ We didn't think the other one would go any better - or inspire confidence if we did get it on - so we decided fuck it, we'll go generic. One clamp installer and generic set later... ... the drive shafts are back at square one. I sure hope the outer boots don't die any time soon because you have to take the inner ones off to service them ... ... We need a final shipment (bearings) to arrive which will take up to a couple weeks probably, but we've got all of the other parts and there's plenty of work to do in the mean time. I've been assembling a (work-in-progress) dependency/workflow diagram to try rein my brain in and have been printing out sections of the manual for stuff that's trickier to do in front of a laptop with greasy hands. And we're caught up. Oh I bought a head stand and it's probably overkill... So um, here some more pics for scale.21 points
-
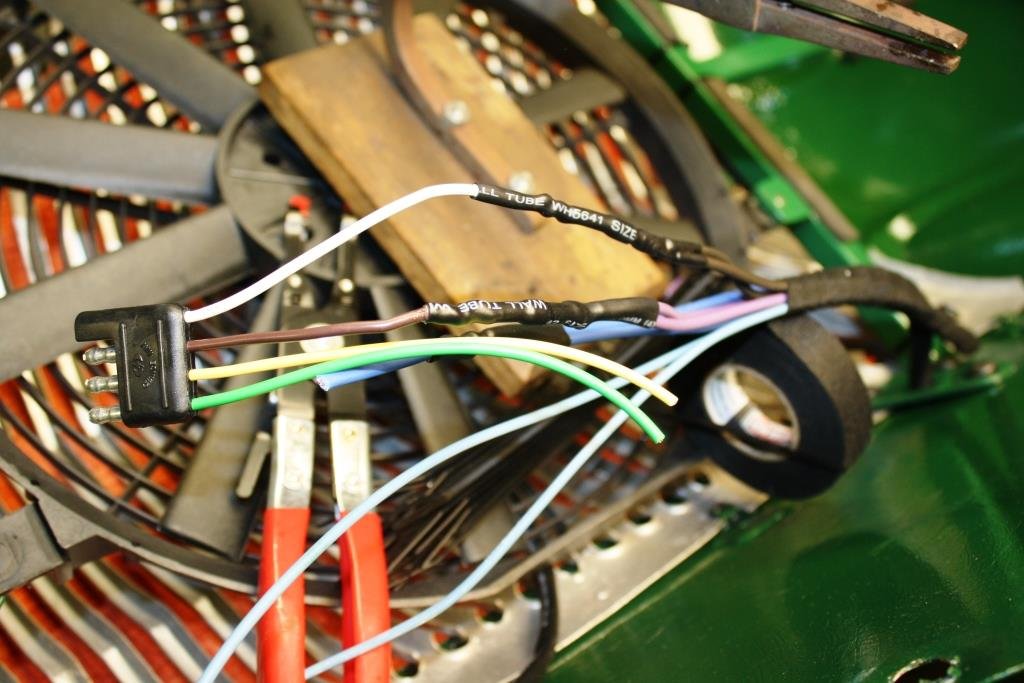
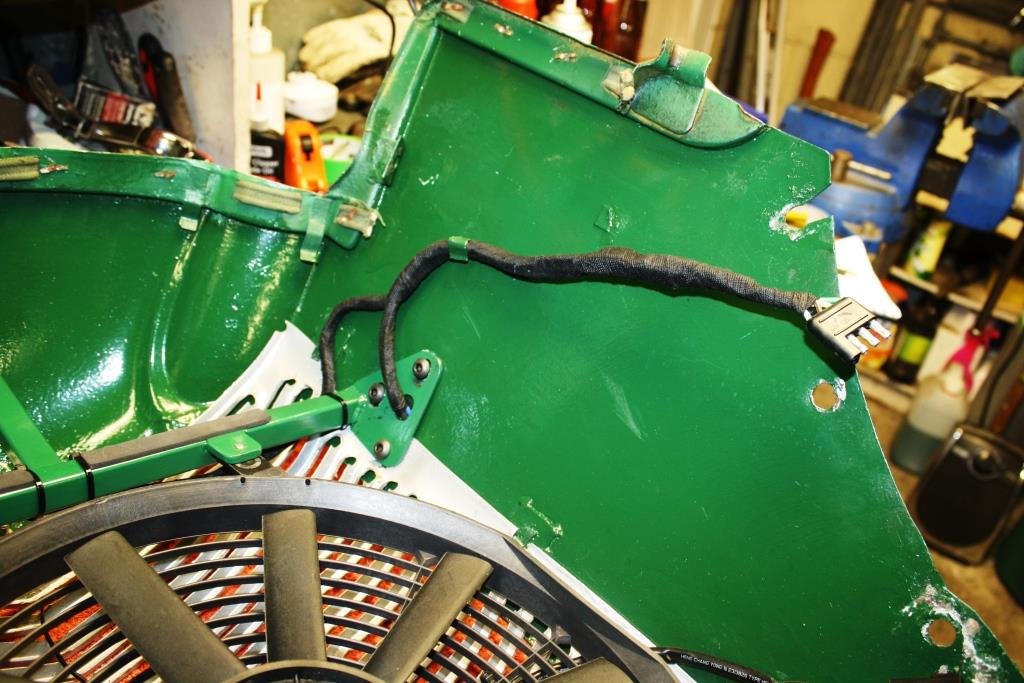
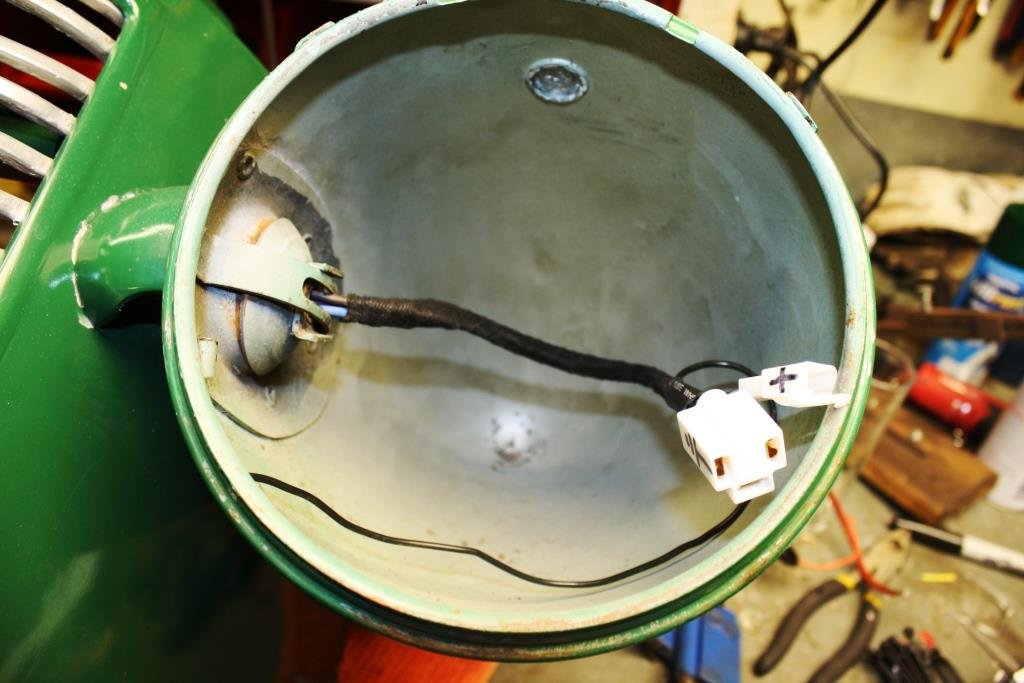
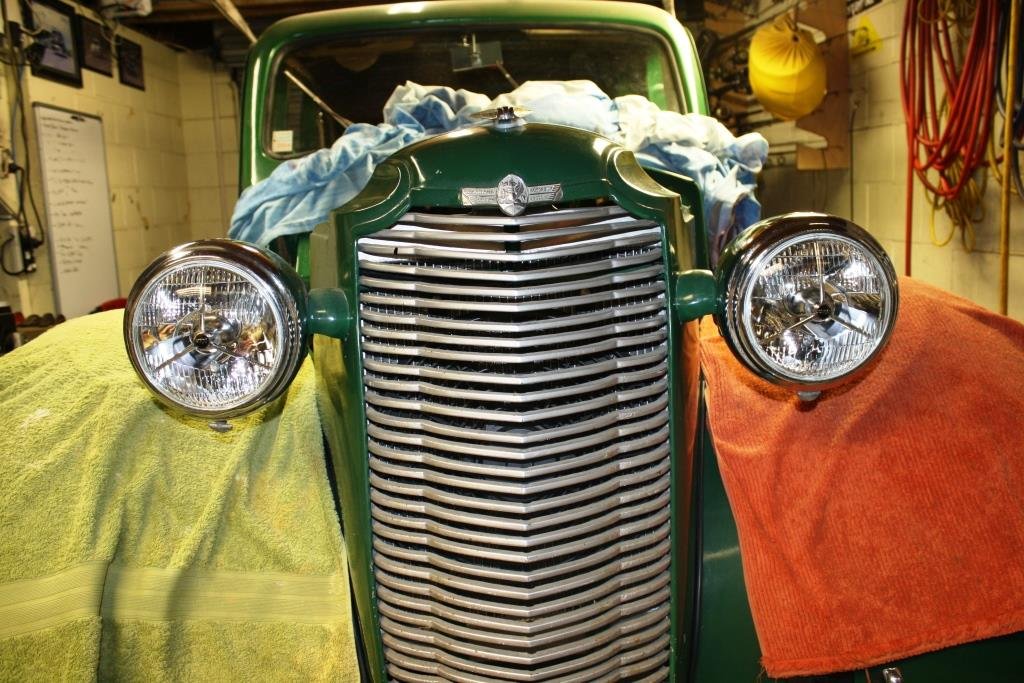
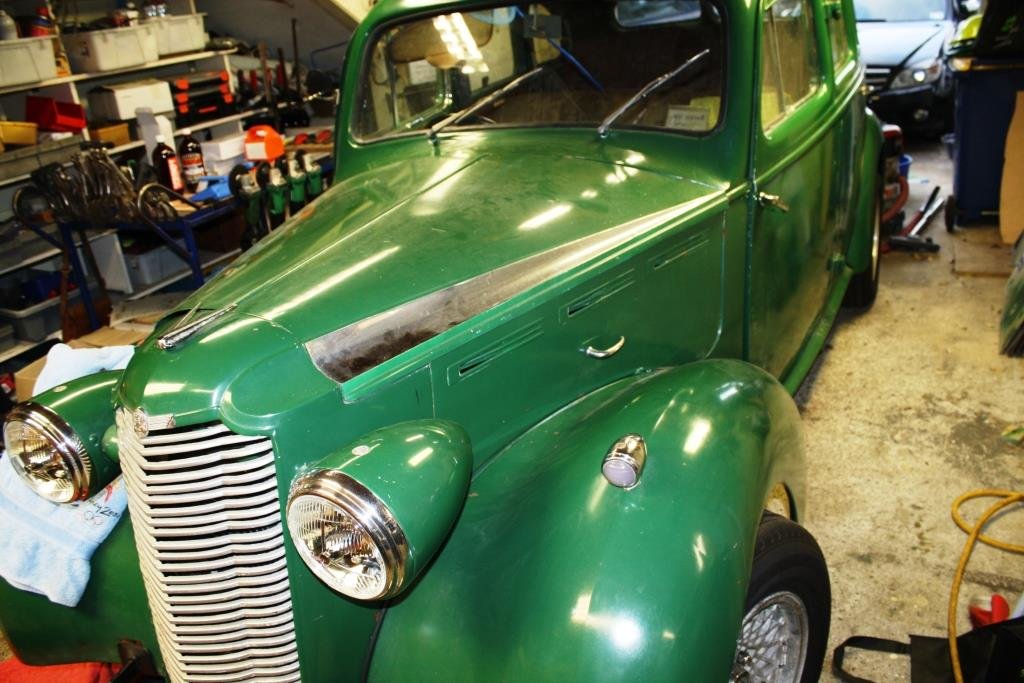
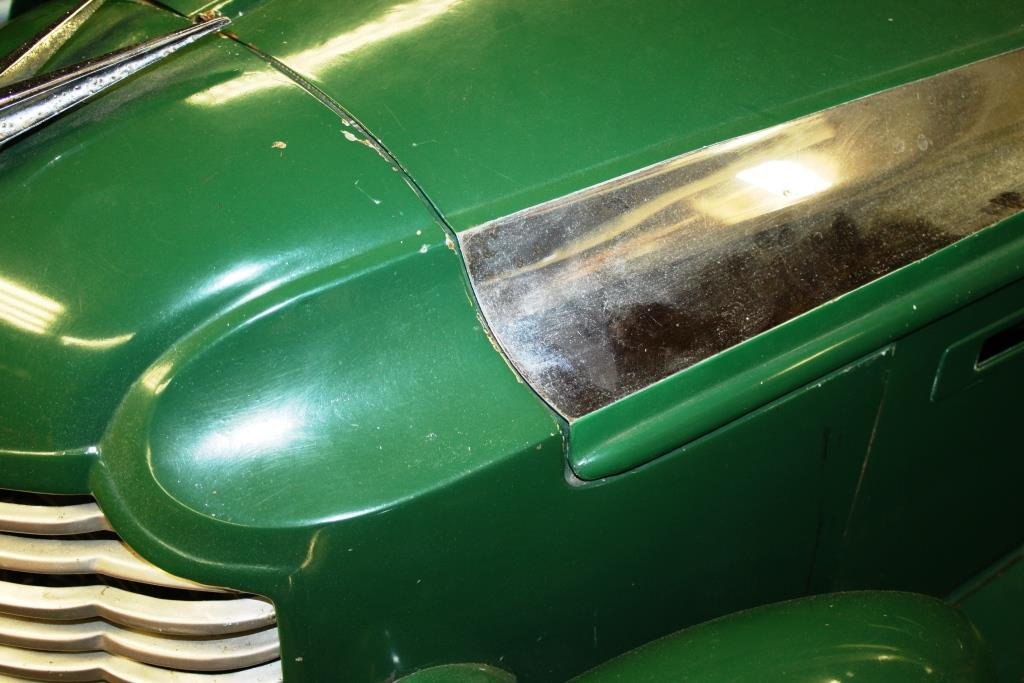
With space in the nose cone so tight the only way to wire the headlights and fan was to take the front off for the umpteenth bloody time….grrr….! So much easier to wire on the bench. Found some heavy connectors to make disassembly easier in the future. Love using the old school fabric wrap. I’d bought a big box of connectors off Banggood for a price that was too good to be true…….. … so I wired up the headlights. I refitted the front………. I installed the gorgeous over-priced P700 headlights…. ……..and started blowing fuses whenever I powered them up! After an evening of uttering nasty horrible words and throwing thinly veiled insults at Rigamortice re the marital status of her parents at her time of inception, while going round and round in circles with a variety of test lights, test probes and multi meters - I discovered the f****** “too good to be true” Bangood connectors were………. You guessed it ‘too good to be F****** true’! After a quick trip to Jaycar the following day, I paid through the nose for the right connectors…and we now have head lights. And as an added bonus they even worked in the dark! So I stuck the bonnet on and discovered it didn’t fit…. I loosened it off and started pulling things into line before re-tightening. Finally, it all fits, (sort of).
21 points
-
Here is a wee update. The fist job was to sort out a couple of issues on the hydraulic clutch setup. I realized that the slave cylinder I had that came with the bellhousing fowls on the headers. After a bit of head scratching and hunting I found another slave cylinder that just fits. I heated the headers then tweaked them out about 15mm to give a bit more clearance, it is still very tight. I still only have about 10mm of clearance. I'll make a heat shield I think. That is the new one, only problem is that the bolt holes don't line up with the holes on the bellhousing. So I milled slots in it. I was going to TIG the bellhousing holes and tap them but I decided not to just incase this new slave cylinder doesn't end up working out. For the master cylinder I welded a backing plate to the fire wall and mounted it in the engine bay between the booster and the header. Tight fit but it works. That picture makes it look much closer to the header than it is. I couldn't have it directly behind the clutch pedal unfortunately, so it's off set from the pedal. I used some steel rod linking them all together and threaded the ends. It's nice and smooth, I'm hopeful it will work well. Engine in for hopefully the final time. I couldn't mount the gearbox as when I went to fit the fly wheel I realized I don't have any flywheel bolts. Doh. ARP ones are on the way. Next I'll start wiring her up and put the dash back together. Cheers guys. P.S. Pro tip... Don't spray a car in jandals. That was taken after 2 showers.20 points


This leaderboard is set to Auckland/GMT+12:00