mlracing.co.nz
-
Posts
456 -
Joined
-
Last visited
mlracing.co.nz's Achievements
Advanced Member (3/5)
1.4k
Reputation
-
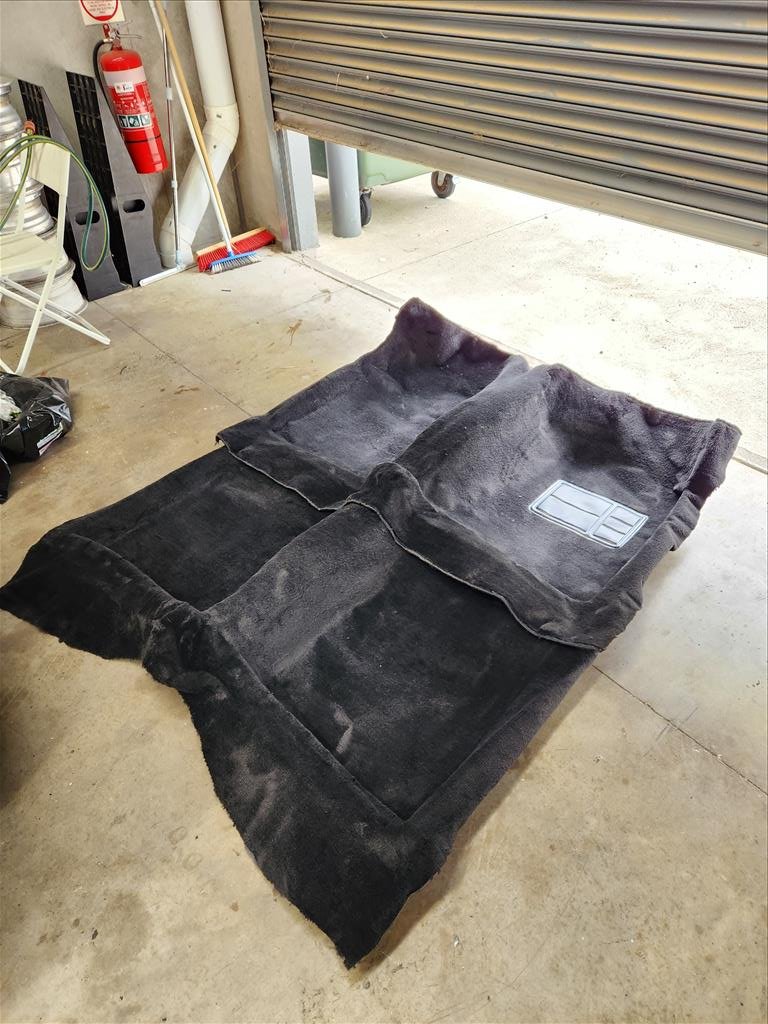
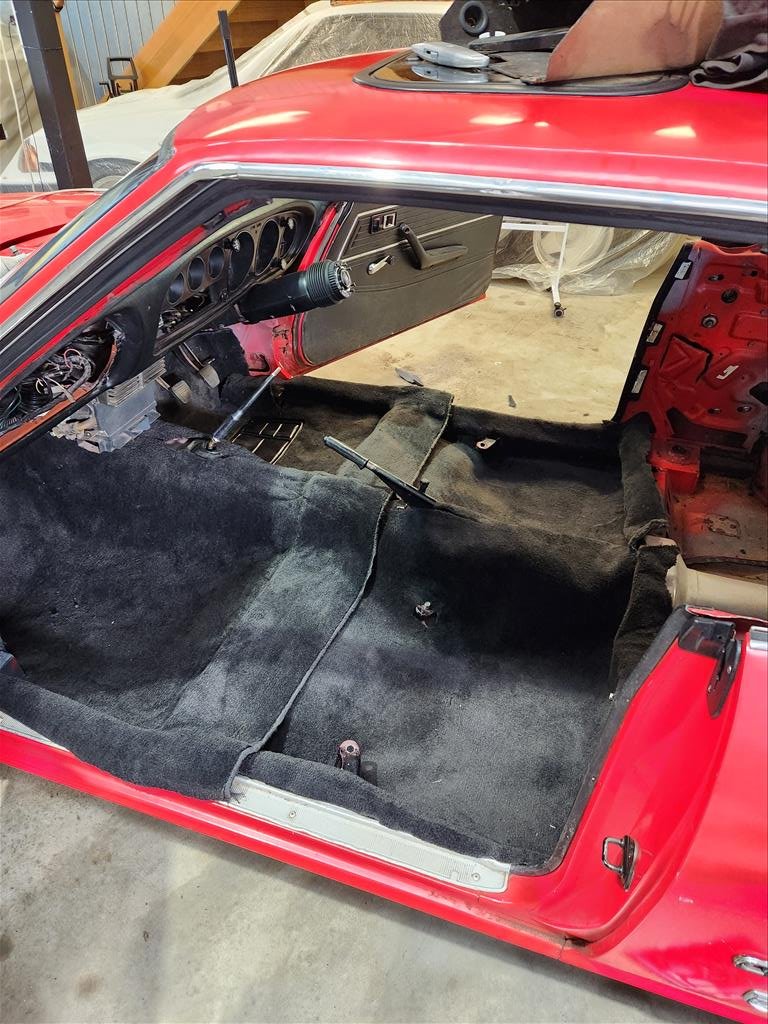
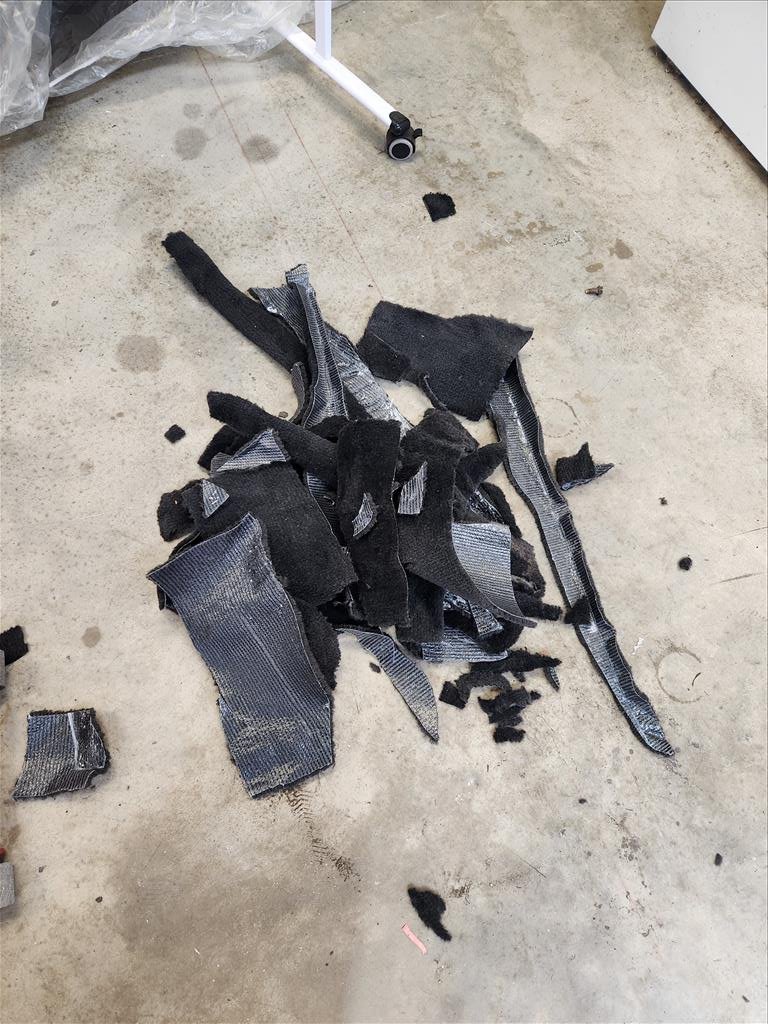
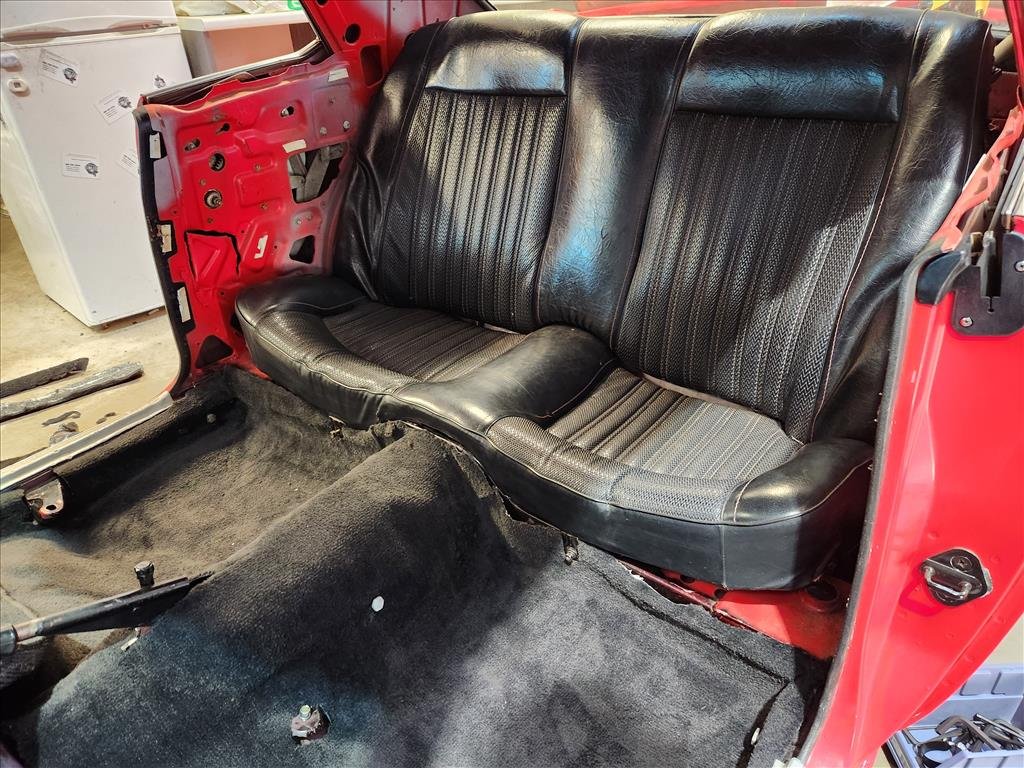
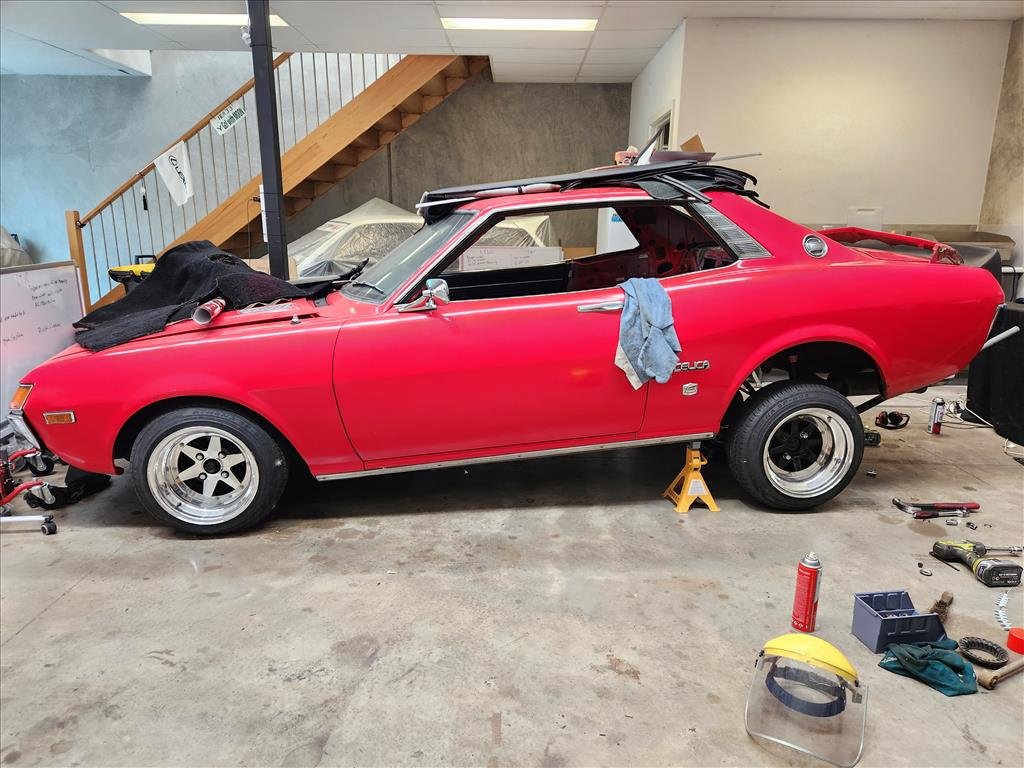
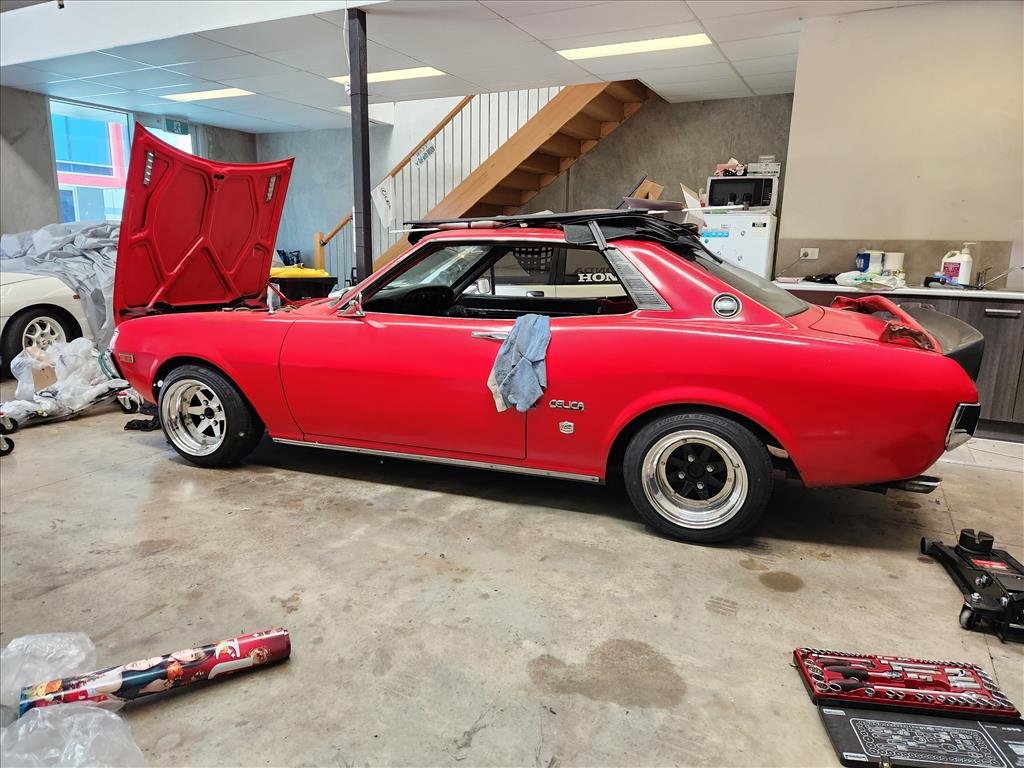
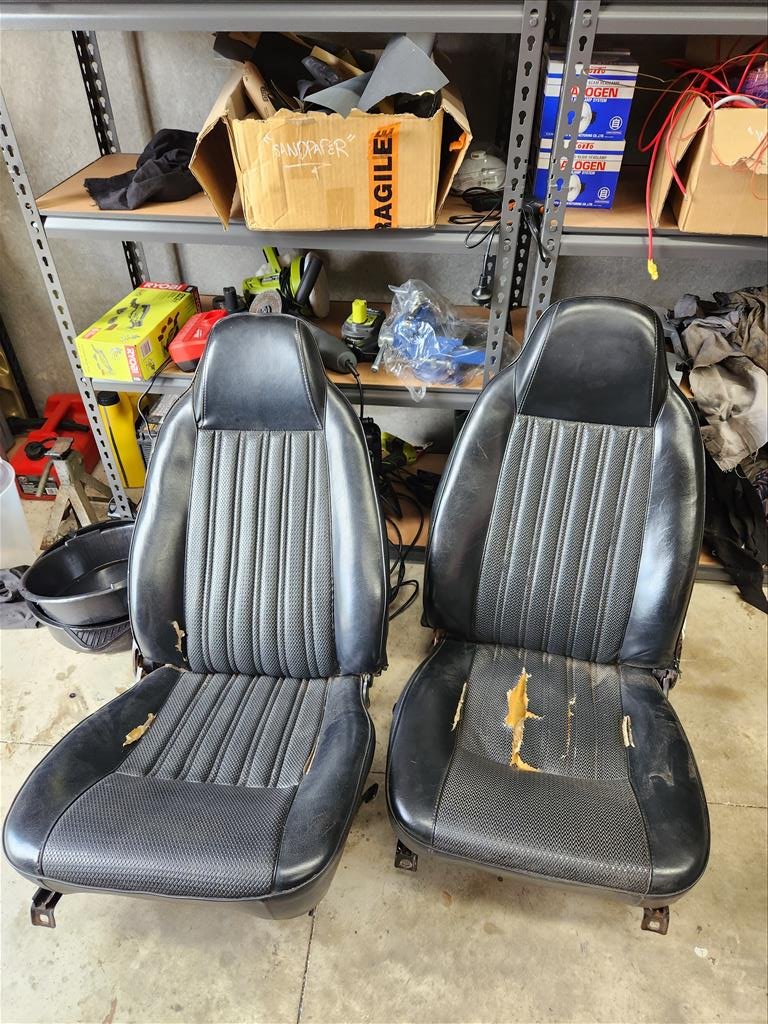
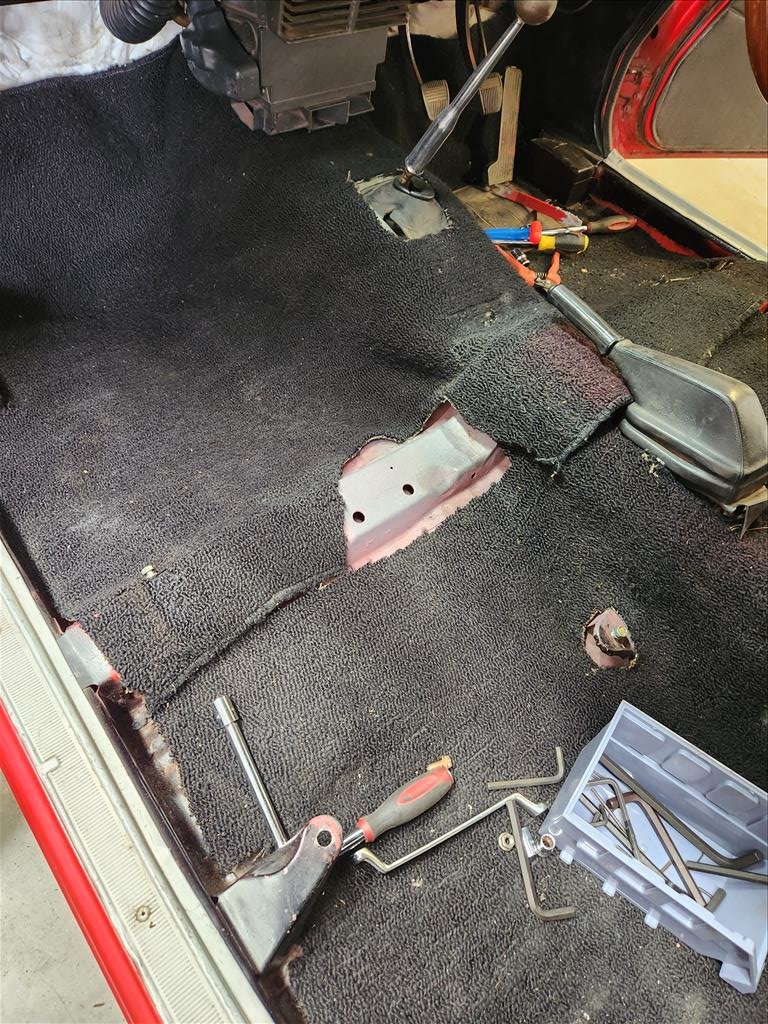
Aftermarket carpet sucks. I learnt this the hard way I suppose. The Celica carpet was already aftermarket by the time I got it and it was super old, dirty and chopped to hell. In my attempt to try and freshen up the interior this year I decided to get one of those moulded carpets. I quickly realised I'm not made for an upholstery career. They say you should start from the rear and move forwards when fitting them up. The problem I quickly found was that these are not quite right for this car. Research suggests that they are in fact moulded off TA23 not TA22, a small but important difference. TA22 did not even have carpet like this from the factory, more like glorified floor mats. My cutting skills are terrible as I was getting annoyed by this point, and the blades were getting blunt. I initially wanted to wrap it under the seat base however the seat sits directly on the body with no room to move so that was not possible. Additionally the roll cage mounts in the rear are in the way of the seat bottom which is why its curved up on each end. I'm not sure what the OEM TA22 carpet looks like but I believe there are some clips that it can use to hold up, but I've not actually seen any factory standard TA22 carpets in person before to compare it. I'll paint the floor black and the rear around the seats so it is less noticeable but yeah, disappointed with my efforts on that one. Another thing about the TA23 vs TA22 is the TA23 side rocker sill things are designed for the edge of the carpet to go underneath and bolt down, TA22 are not. That means more rough cuts along the side edges too. As you can see, lots of bits cut off. Anyway I got the front kind of fitted up as best as possible (remember those fucking blocks in the way) and installed the seats back. I'll need to replace these as it turns out as there is some damage on both of them (more than just superficial and foam). Then I got her fired up and went for a burn and I didn't care about the carpet at all. The fuel is probably 2 years old by now and it still worked mint. Sadly I don't have a phone mount but the sounds on song were excellent. The panhard rod I put in stopped any rubbing that I could tell and actually the car handled surprisingly well. It goes, stops and turns just like it should. Good car.

- 44 replies
-
- 12
-

-
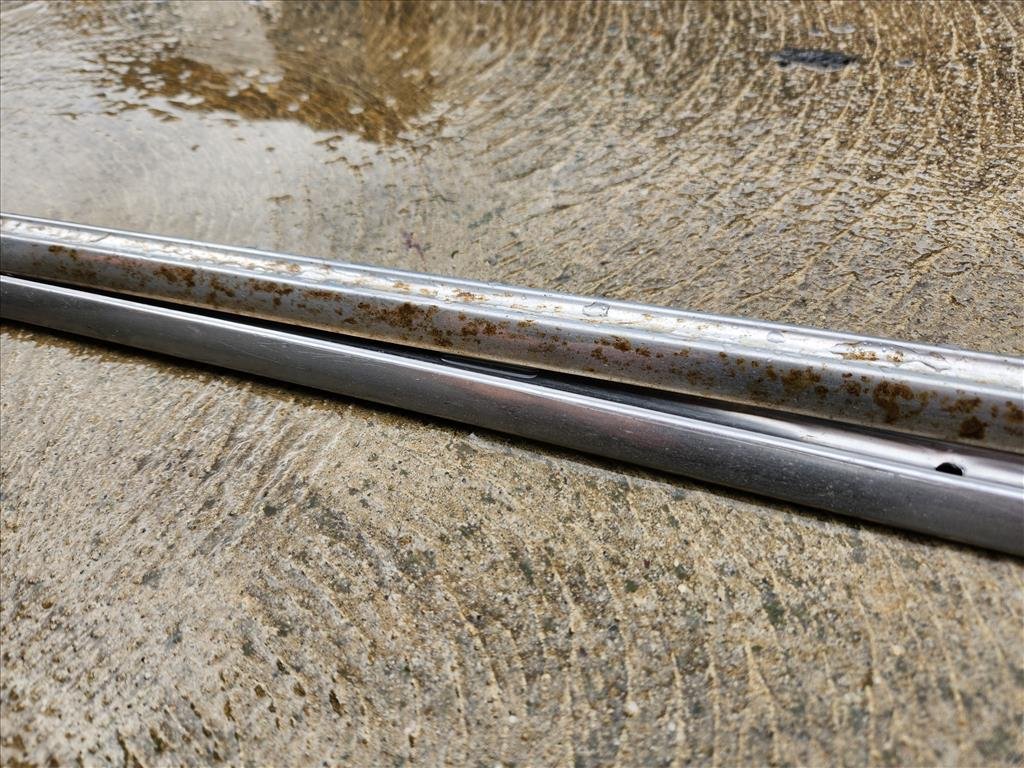
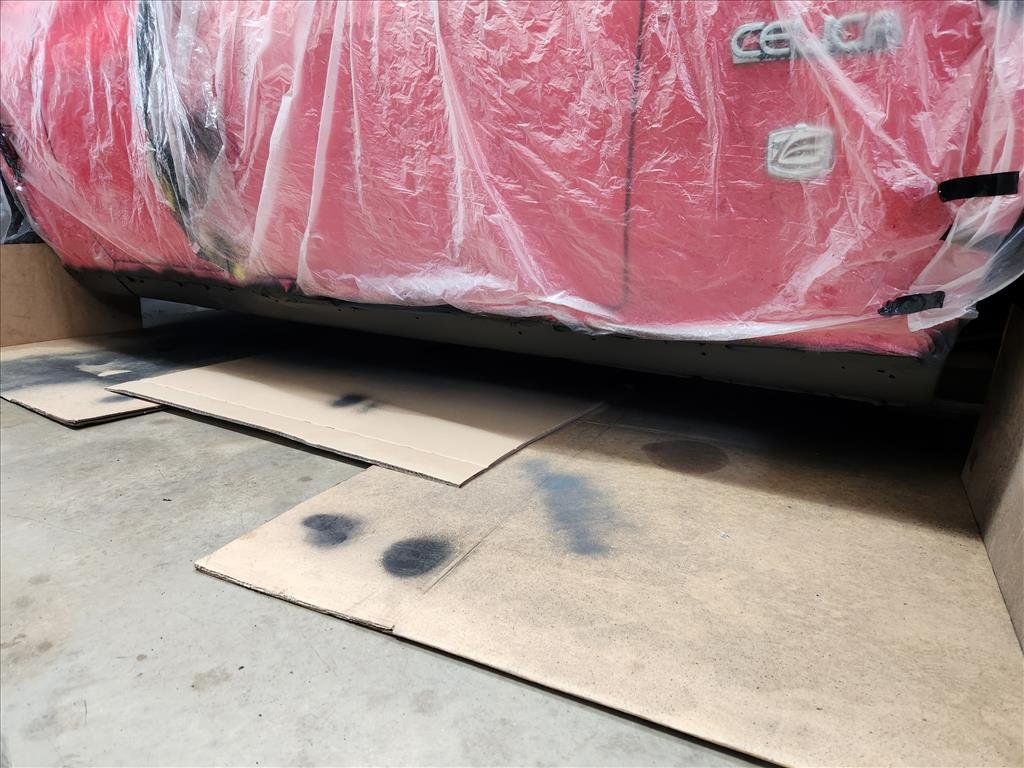
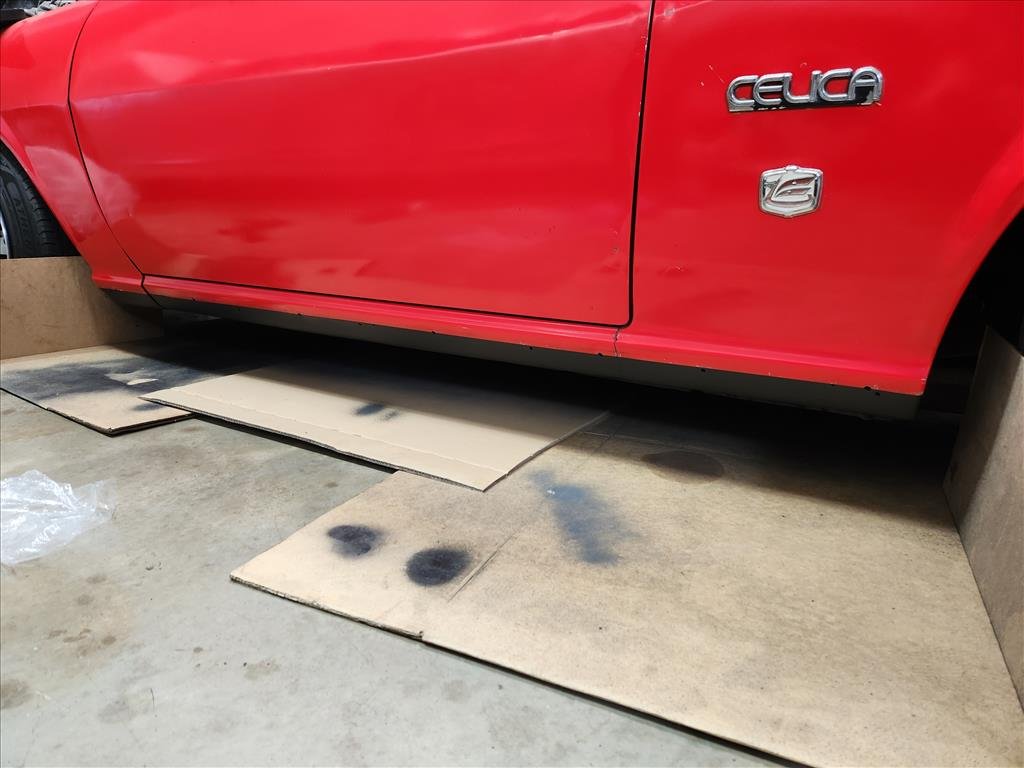
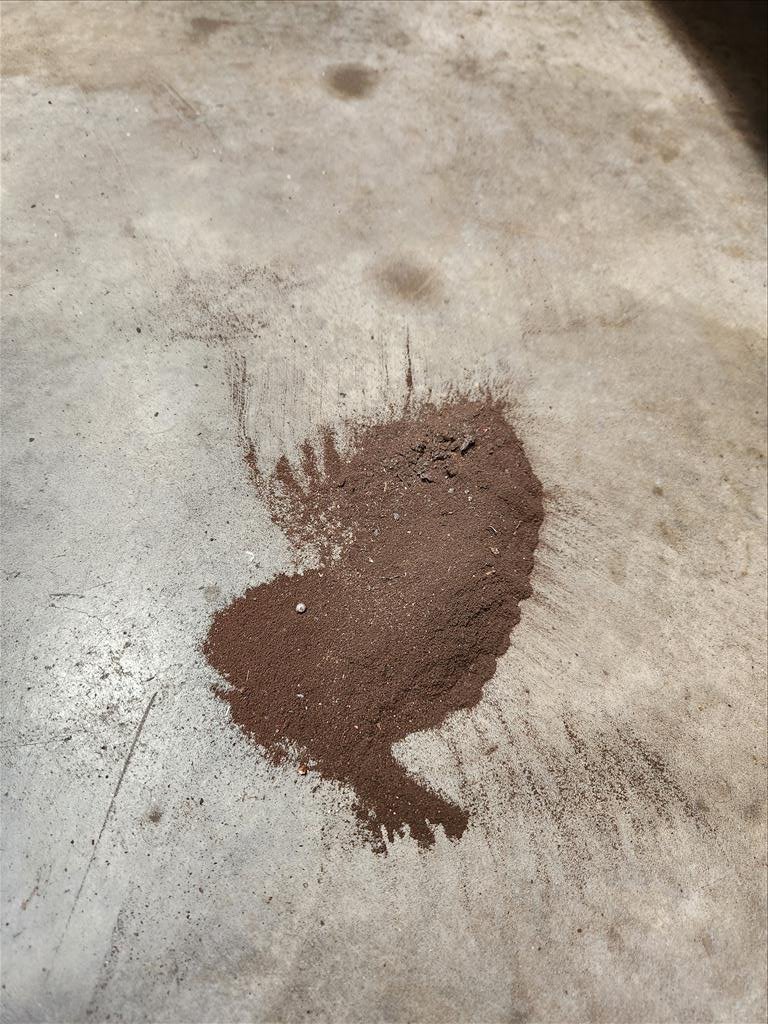
In typical Alex fashion I started a job without having all the bits to complete it. That mess I posted yesterday got covered up today with new underseal but I ran out so only have the one side done so far. I've just sat the trim on there loosely with some incorrectly sized screws but you can get the idea. I think it turned out pretty good. The trims looked pretty nasty after years of sitting around so I hit them with a bit of scotch pad to get rid of the muck and surface rust. That'll do.
-
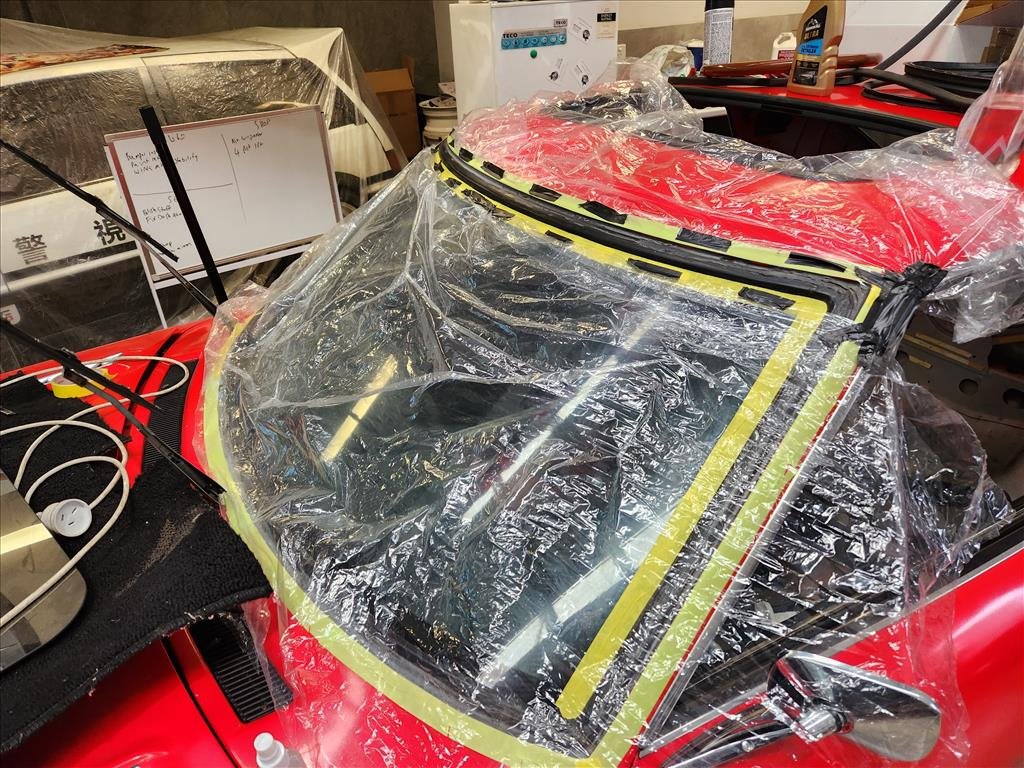
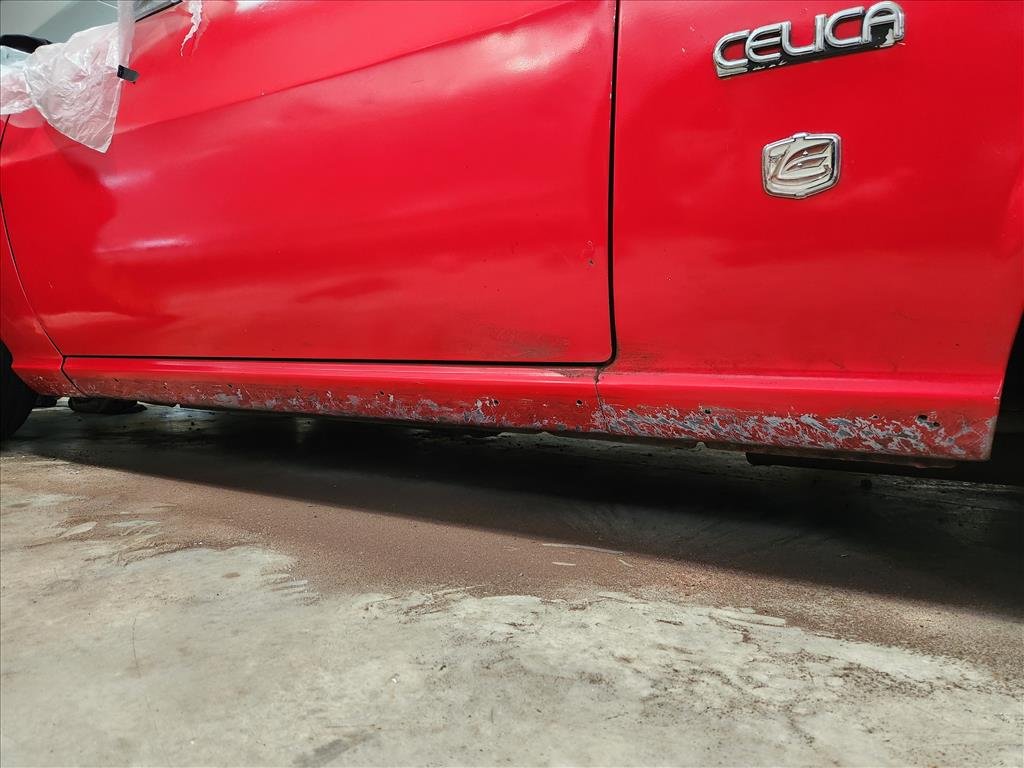
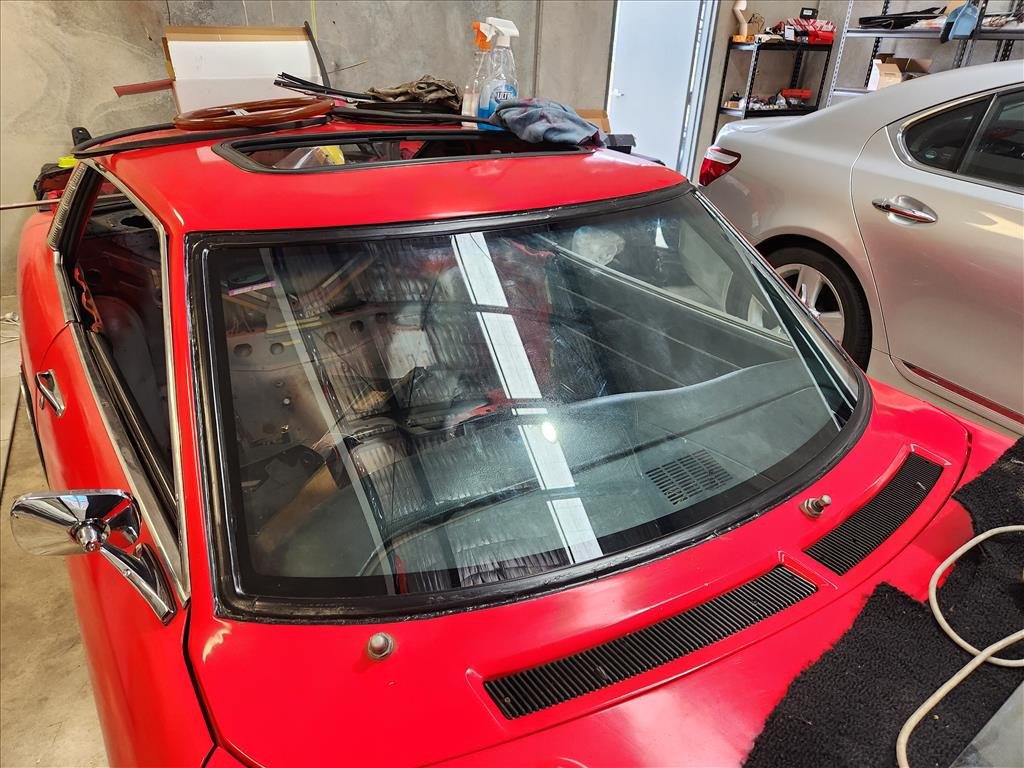
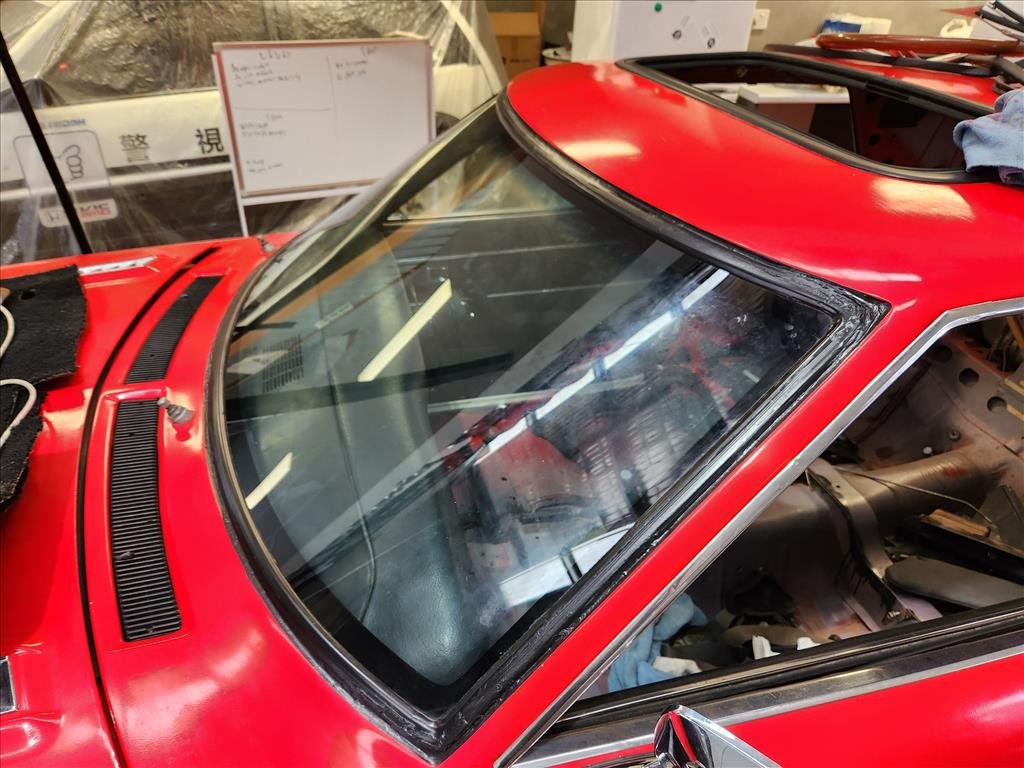
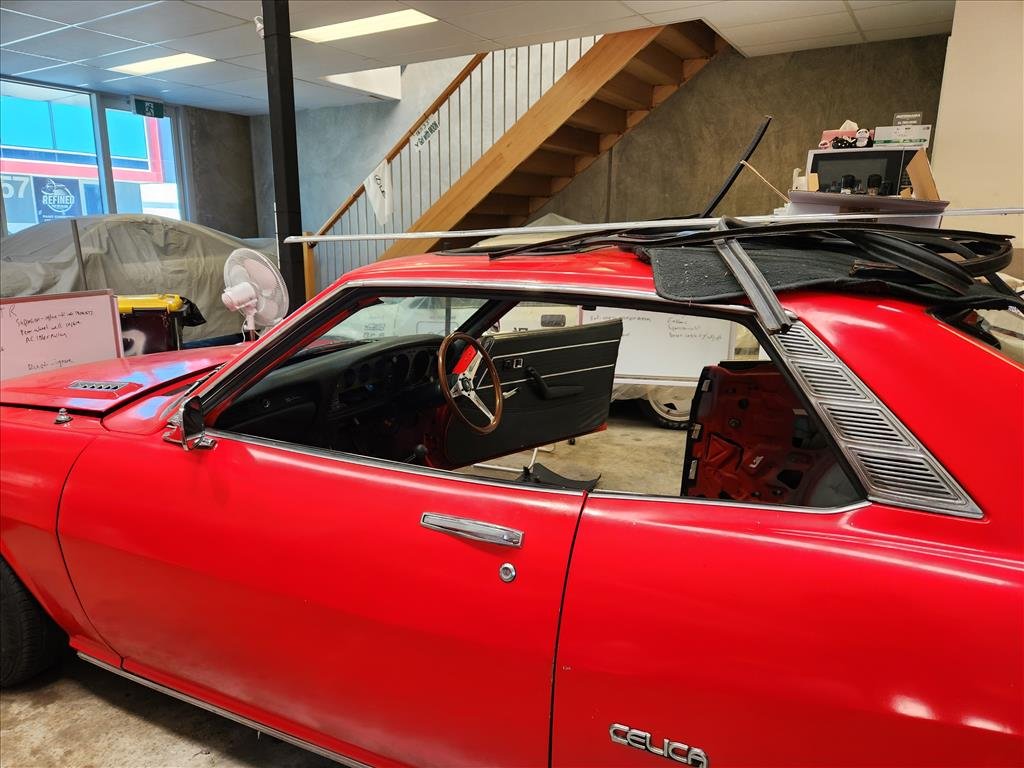
Even after spending like $150 on some beefy blades I still can't cut these damn rollcage boxes out. They must be made of uncutanium or something. Congratulations rollcage boxes, you live forever. I even tried to grind down the top so it was flat but that would have taken 20 years, ain't nobody got time. I'll just get the new carpet and then try to cover them somehow, maybe use the old carpet to make up something; not sure yet. So after that disappointment I found a distraction. I mentioned some time ago about the trims around the windscreens being terrible to look at and it just so happened I had some trim paint laying around. I think they came out great, but now they're a little too shiny compared to the rest of the car.. hopefully over time they'll fade a bit. I'll get some more paint and tape and do the rear to match. I do have the trims to go around the front and rear windscreens however that's a windows out job and I don't really want to find out what's underneath. This is what 20 year old underseal looks like when it's wire wheeled off. While I was in between coats of the windscreen seals I removed the side trim and wired off the remaining crusty old underseal coating that was put on. Unfortunately as you can see lots of the paint also came off so I will spray new undercoating there and re-install the trim after giving it a polish. Originally those trims use plastic clips to hold them on but mine was riveted so not sure if I will rivet again or maybe use screws instead.
-
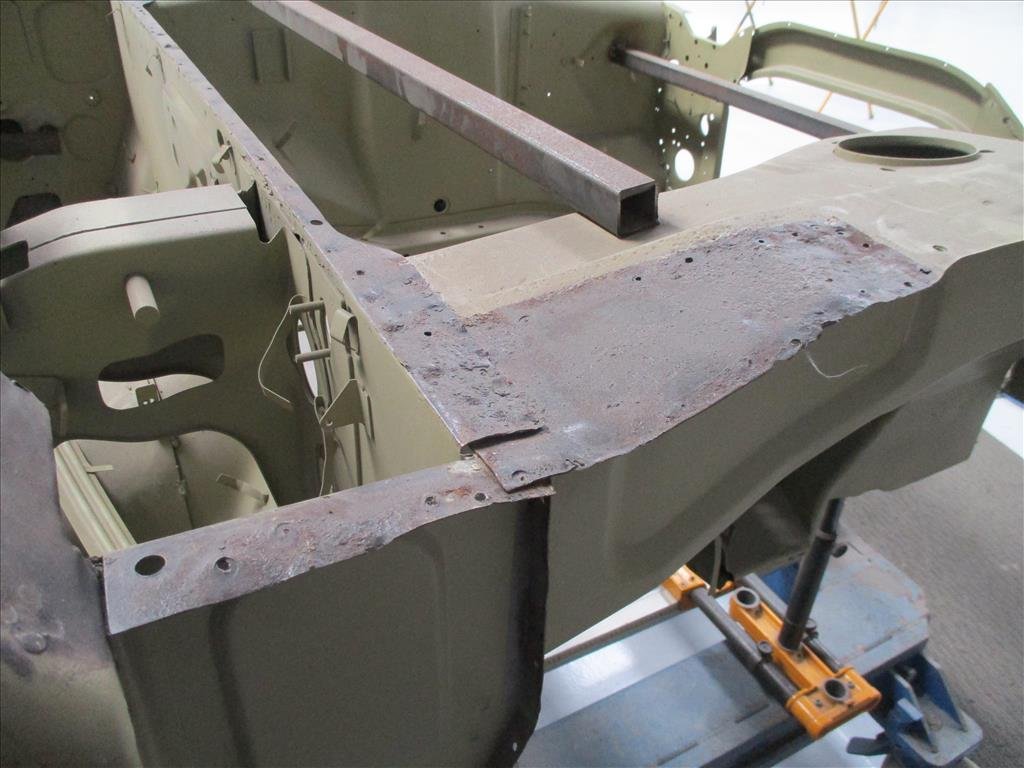
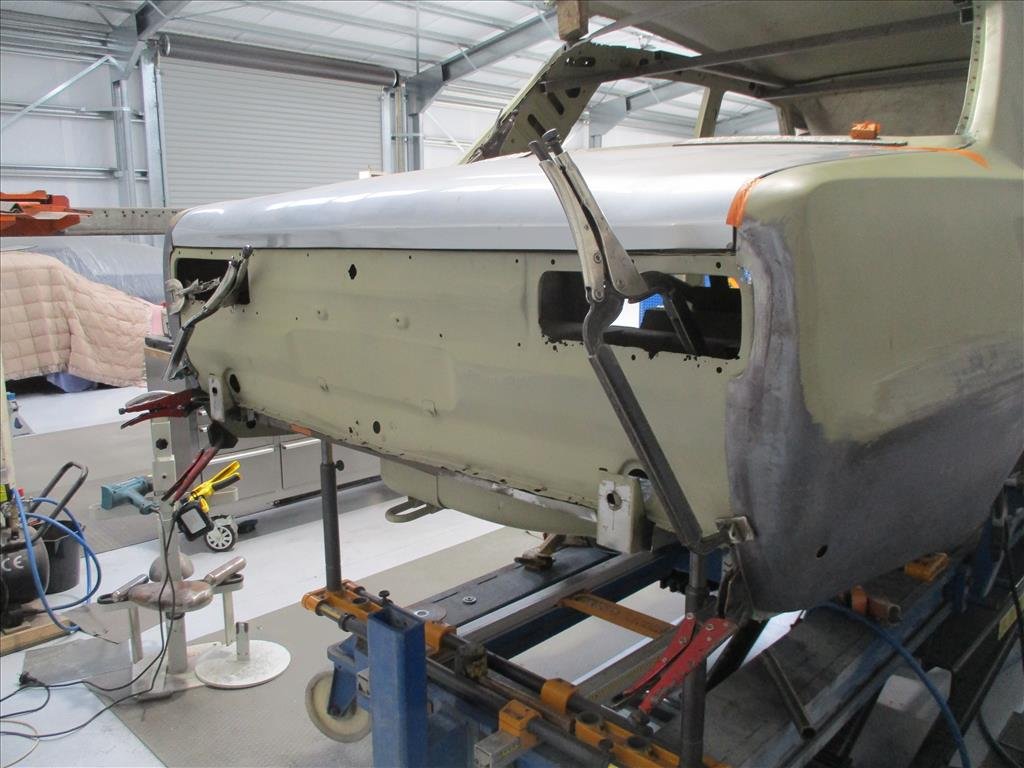
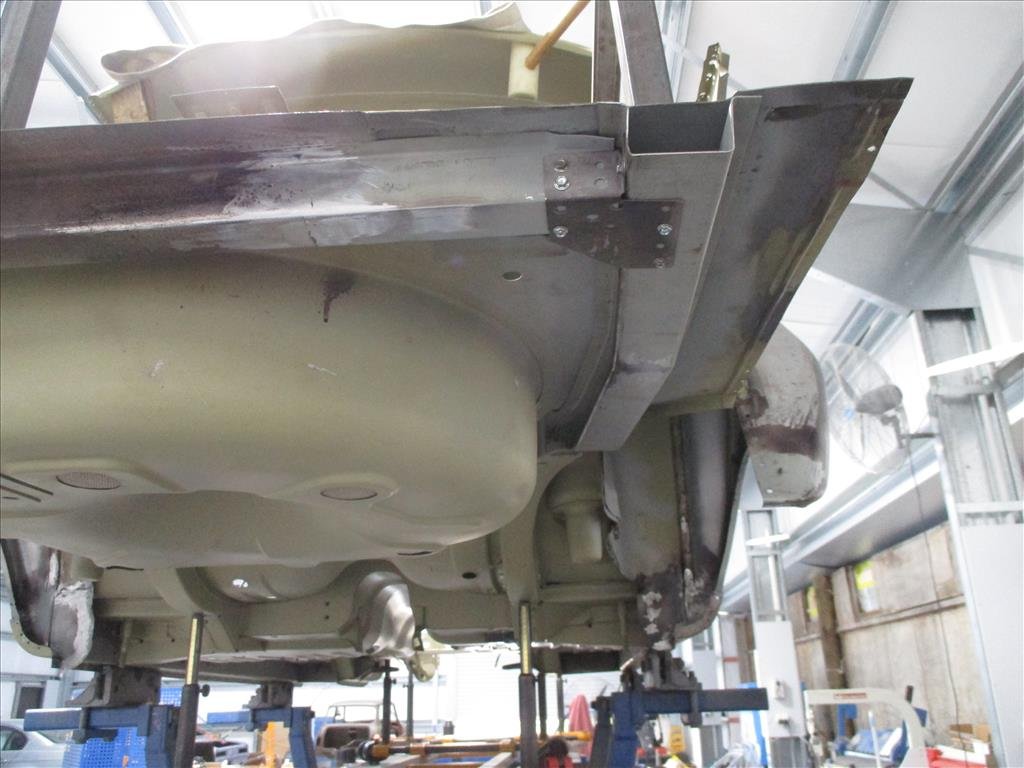
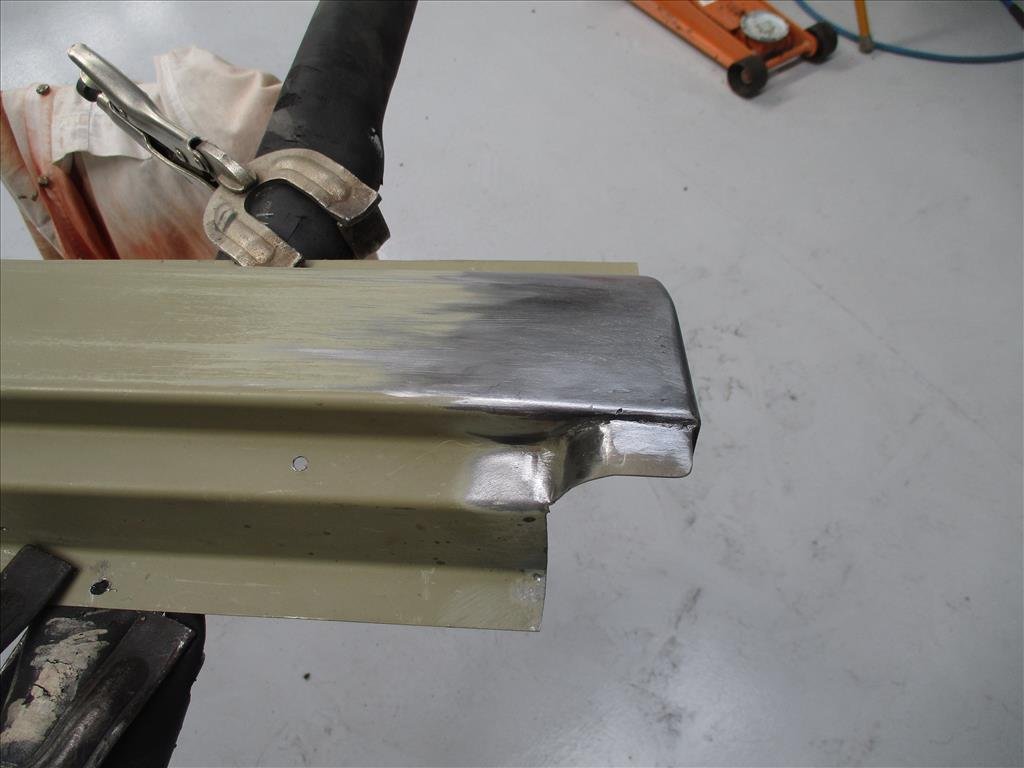
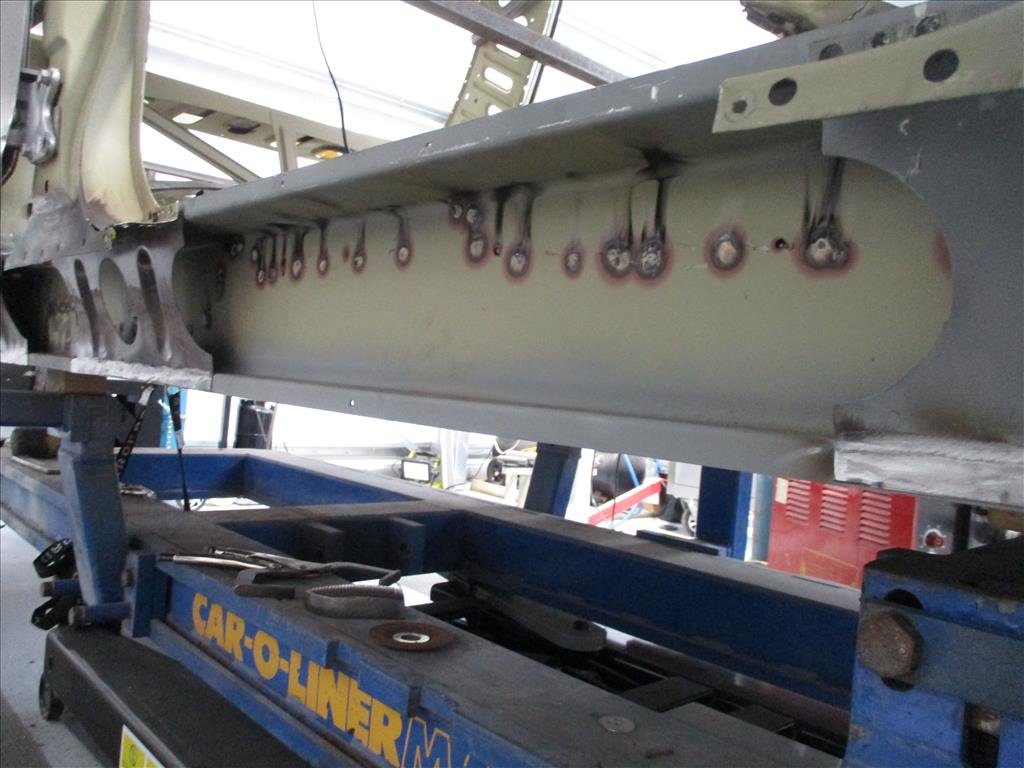
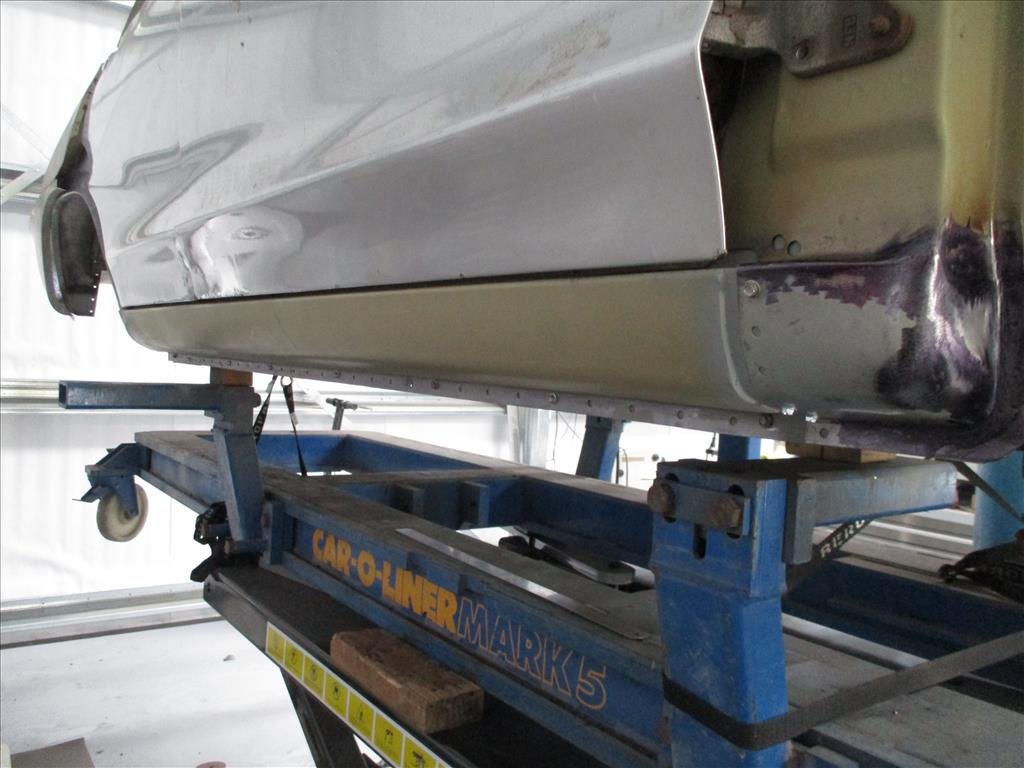
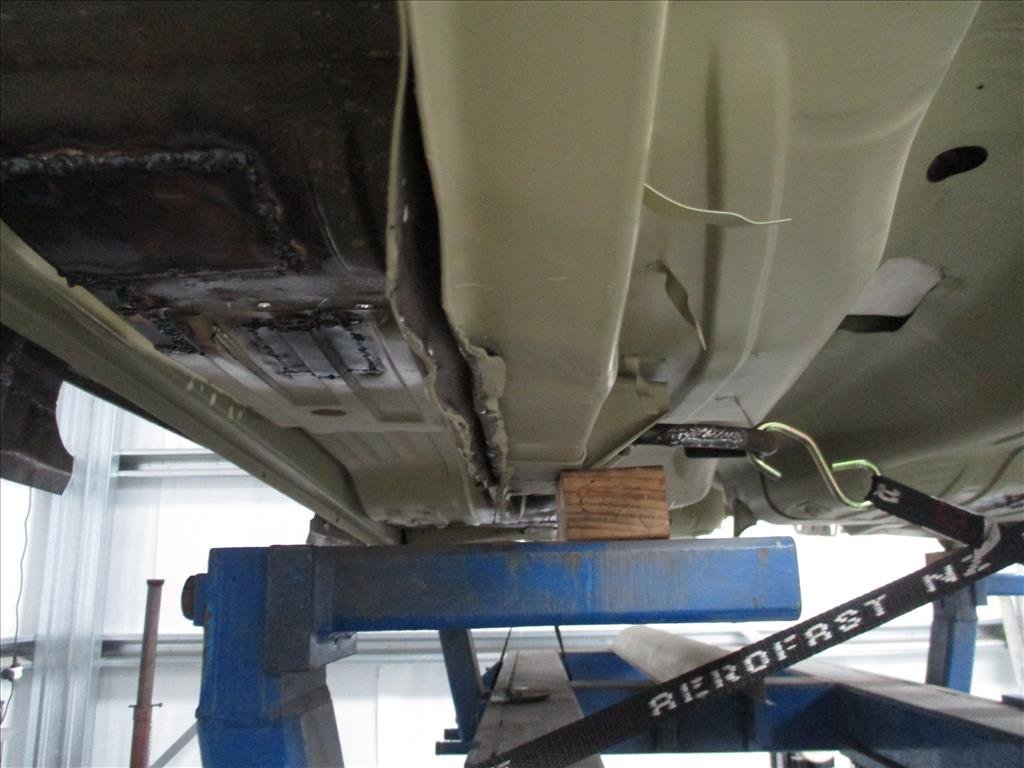
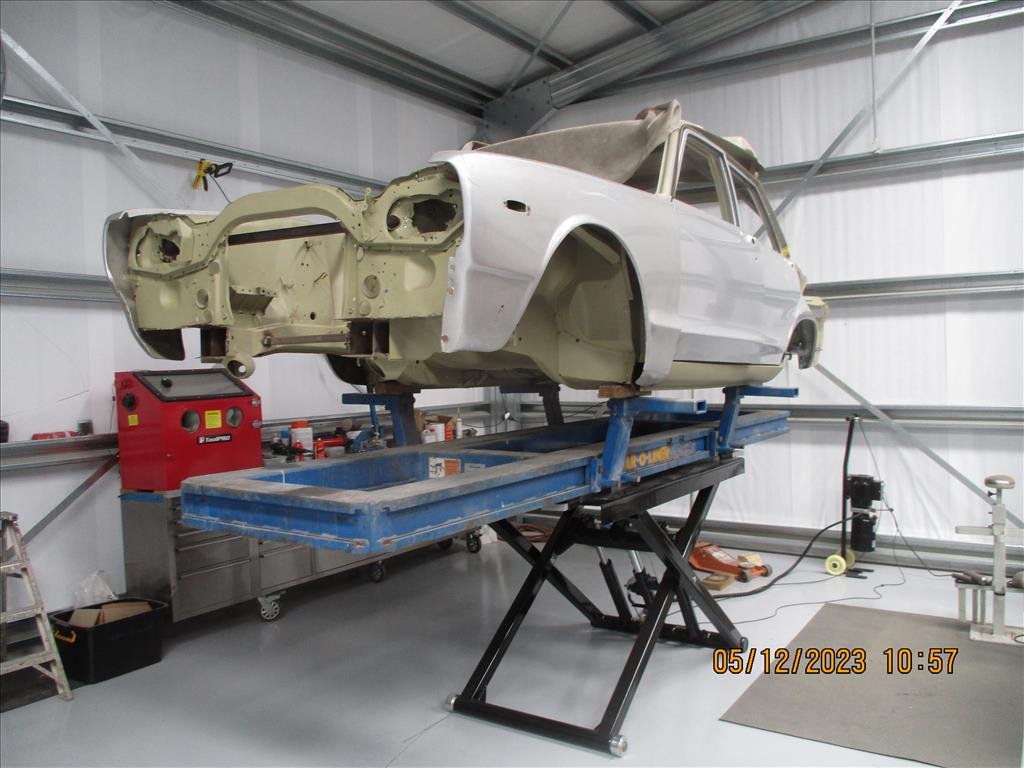
I won't bombard you with 50 more Panel Barry Hakosuka photos but this one is a huge milestone. The majority of the fabrication and rear end structure have been completed and the final weld up is on! The chassis is now razor straight, likely straighter than when it came out of the factory. I can't remember the last time it had a rear end on it? It's been over 5 years for sure. The back panel you see there is the original one which he's using to get the correct holes for welding then will be replaced with a brand new reproduction item that I've provided. Onto the front and to my amateur eyes it doesn't look nearly as bad as the rear but I'll leave it to the professionals on that one. He will have a poke around, clean up what can be cleaned up and replace what needs replacing.
- 44 replies
-
- 11
-
-
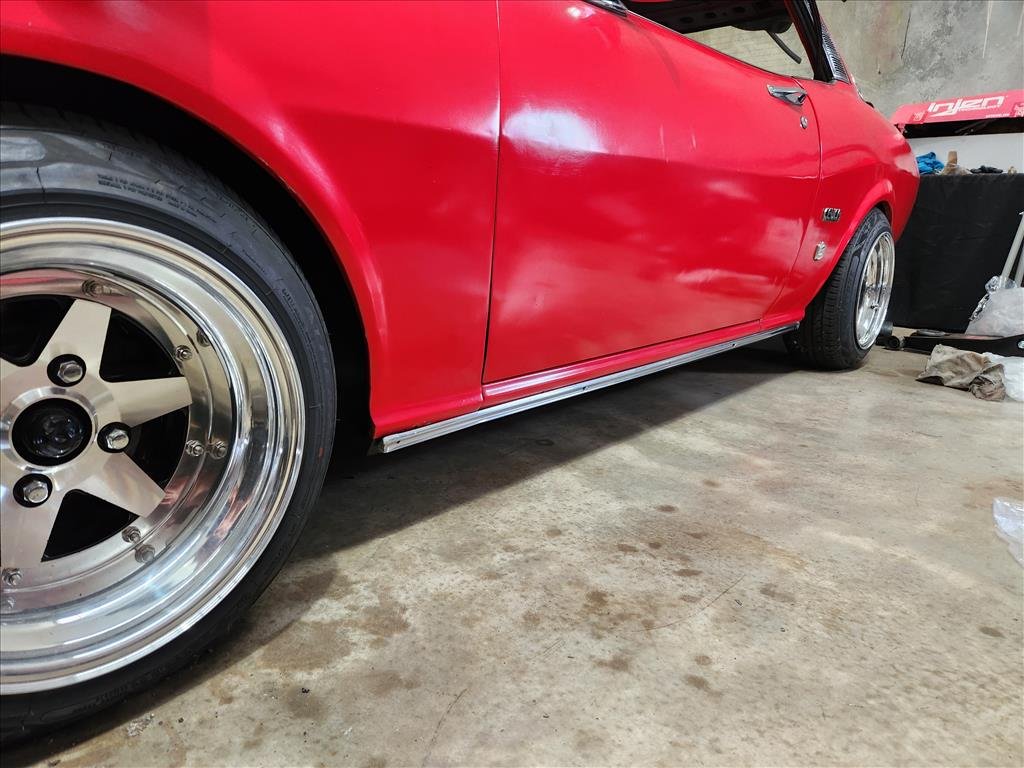
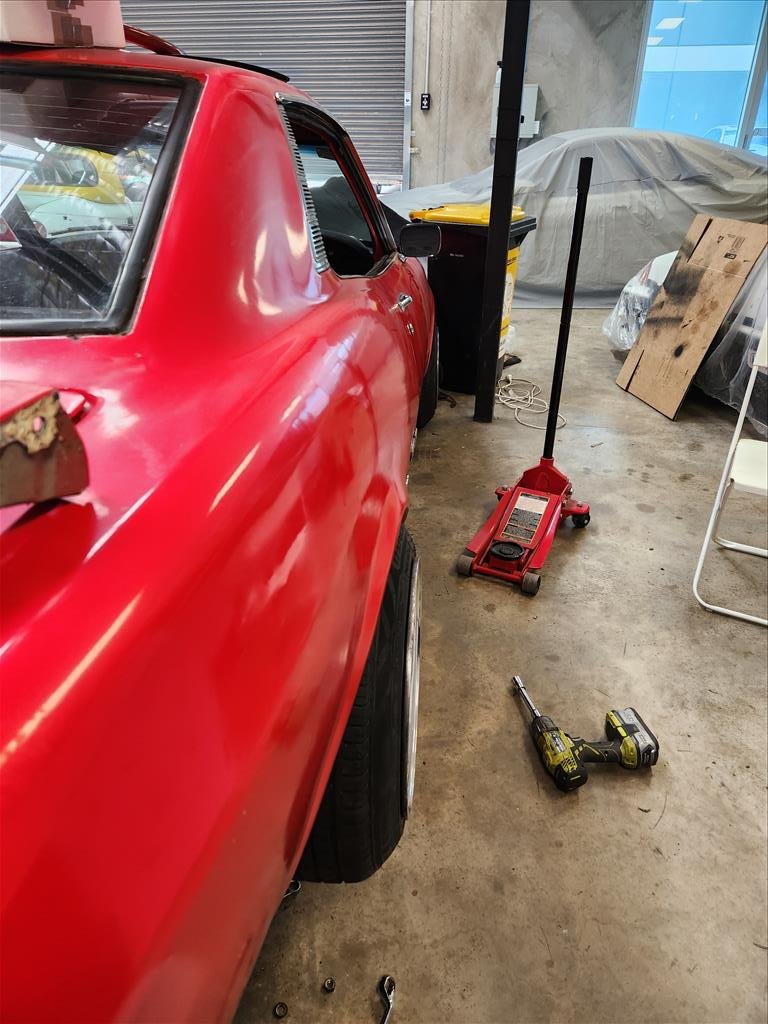
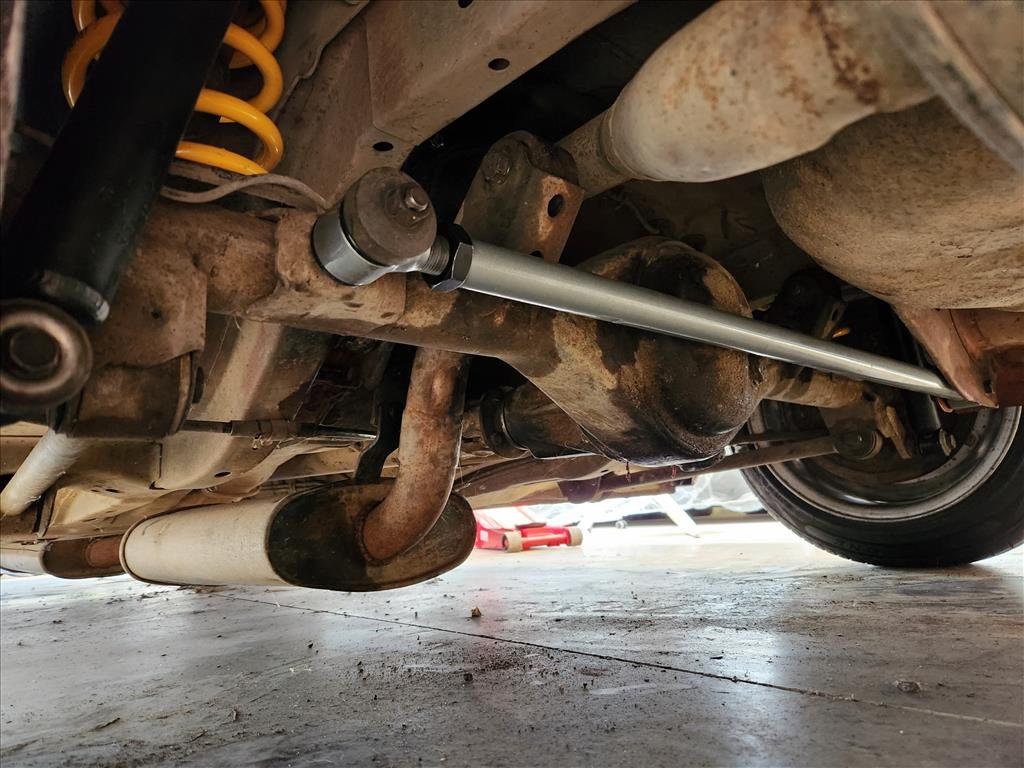
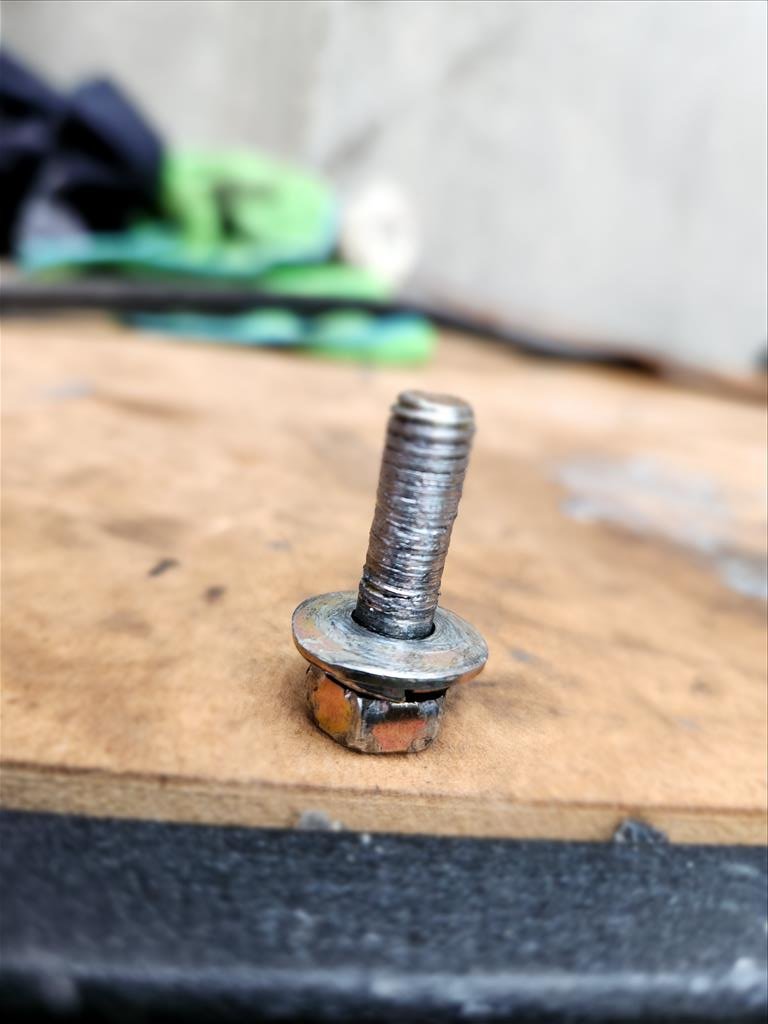
Trust me to turn a one hour job into two days. Ever since I had the SSR MK3s built there was some fender scraping on one side in the rear (which is why I decided to switch it up briefly and have one side swapped around front to back). This is partially because the rear arches are probably uneven and filled with bog and partially because I had the wheels built without measuring anything. Seeing as I was doing a Whiteline stock order I added one of their adjustable panhard rods and try to square up the rear diff. First issue was one of the nuts stripped threads so I had to cut that off and made a hash of it, then I was trying to do this job without unbolting the 4 control arms which meant the diff was super hard to move around so I gave up and went home to sleep off my hangover. Day 2 I straight away unbolted the four control arms and life was considerably easier. I need to get another castle nut to replace the one I cut off but otherwise it's on now. Also a little bonus is the control arm bushes appear to have been replaced so they're still nice. Seems like I was also adjusting it the wrong way so rectified that and I think it's about even on both sides now. Keeping in mind the guards are filled with bog so also not really even. I was thinking about doing a slight one way height adjust on the rear but might leave it for now until car is back to driving and see how the clearance is. Long term plan is not to use those wheels anyway.
- 44 replies
-
- 13
-
-
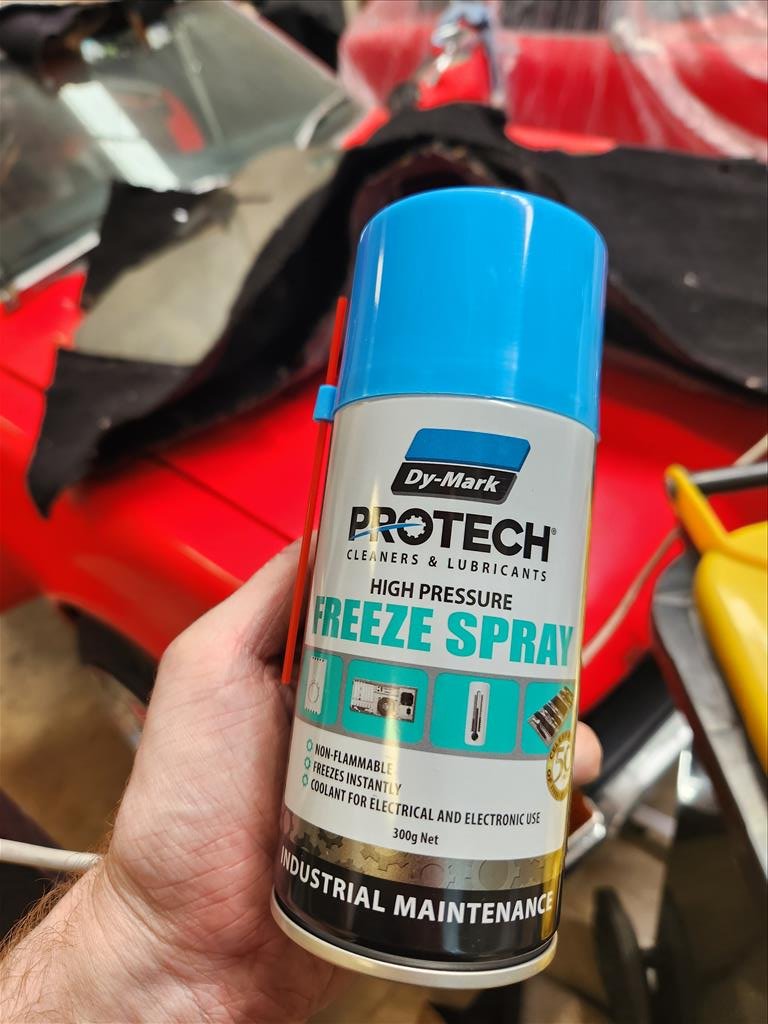
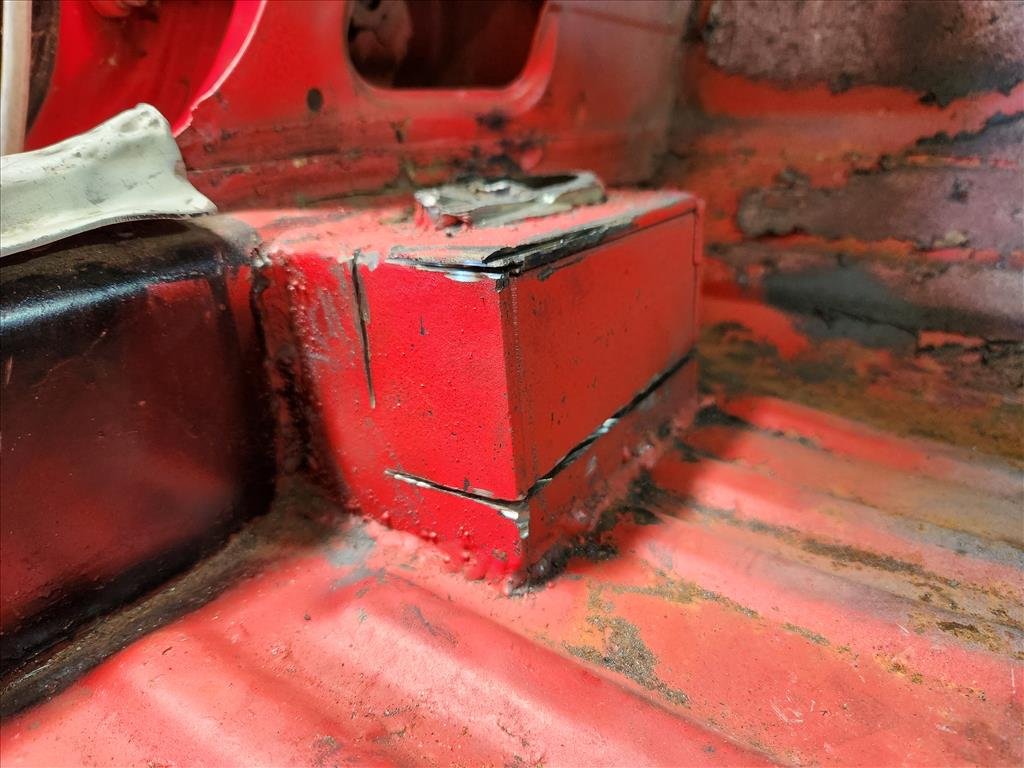
I picked up a saw during the week and had a go at cutting, didn't get very far before the blade decided to become smooth and basically just polish things. Smoke fell out of it too. So today I learnt there are different blades for cutting different thickness of metal. I've now spent my life savings again to buy a bunch of blades for chonker steel. If that doesn't work then I give up and will just get new carpet and cut around these stupid boxes. I did conduct a somewhat successful experiment with sound deadening though. I was reading about how to remove sound deadening without dry ice and this freeze spray stuff came up a few times so I gave it a shot. It didn't work too bad but it would be a ludicriously expensive way to actually remove large portions of sound deadening. Just getting the chips of this little bit used up the whole can. I haven't really worked out where the cuts for these boxes will be done but hopefully when I start to cut things it will make more sense depending on what access becomes available.
-
Another email from panel Barry come through recently. He's been spending time cleaning up the sills and preparing for the final weld in as well as getting all the welds in the rear floor/boot area ready to support the rear end going back together.
- 44 replies
-
- 10
-
-
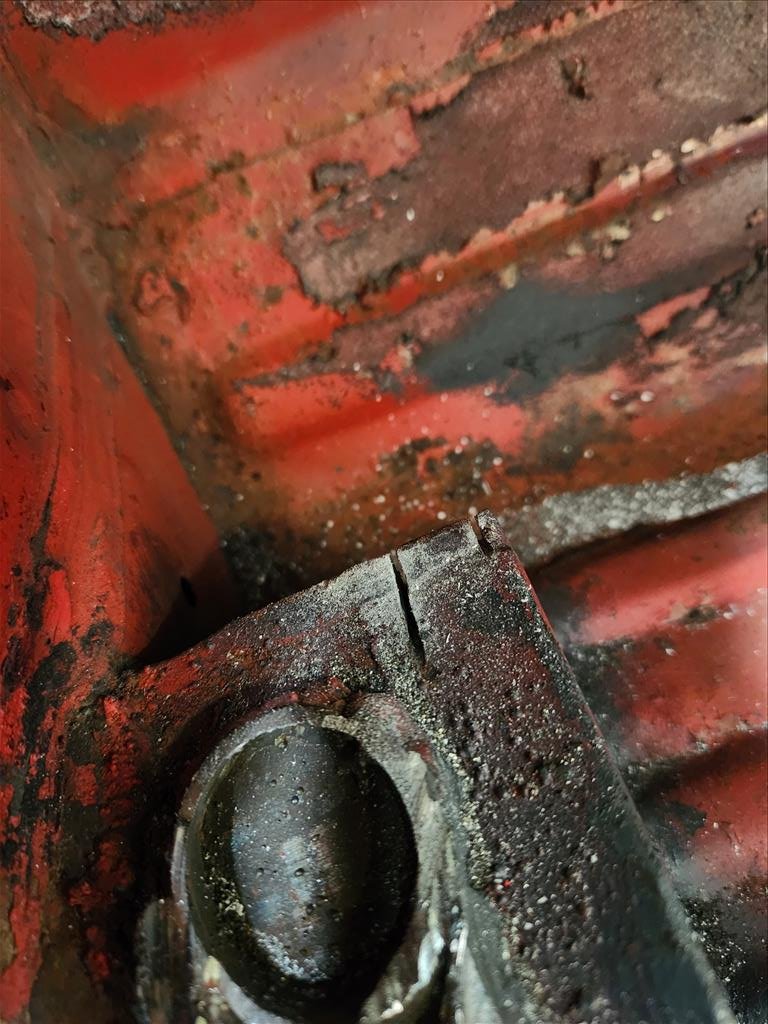
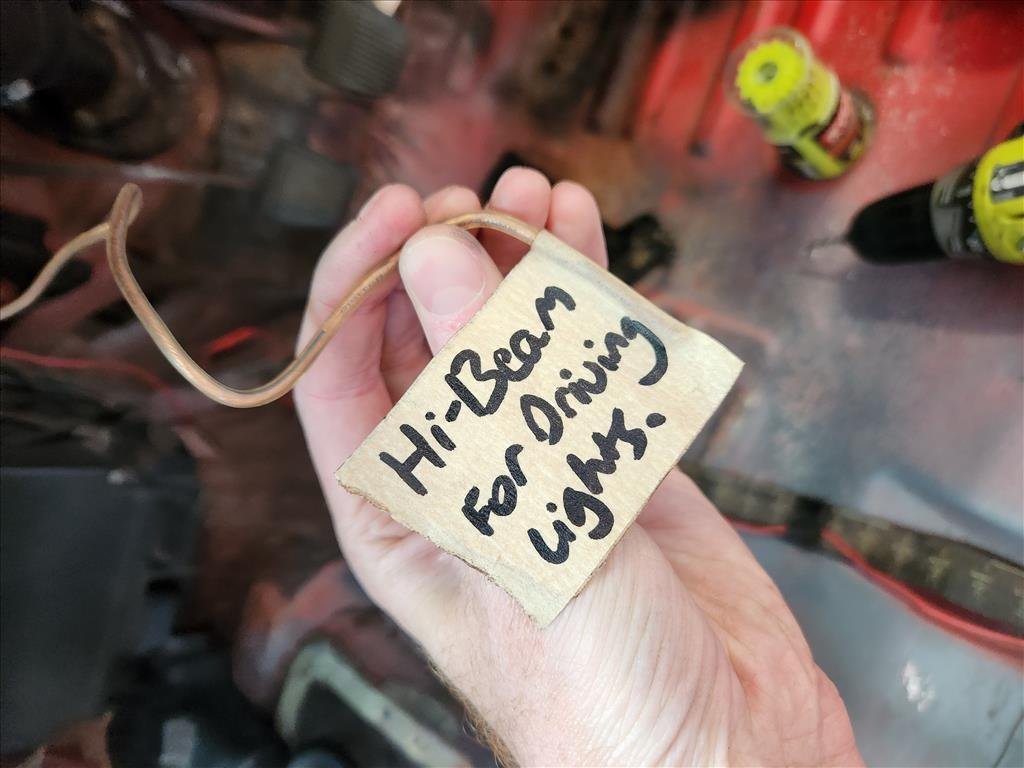
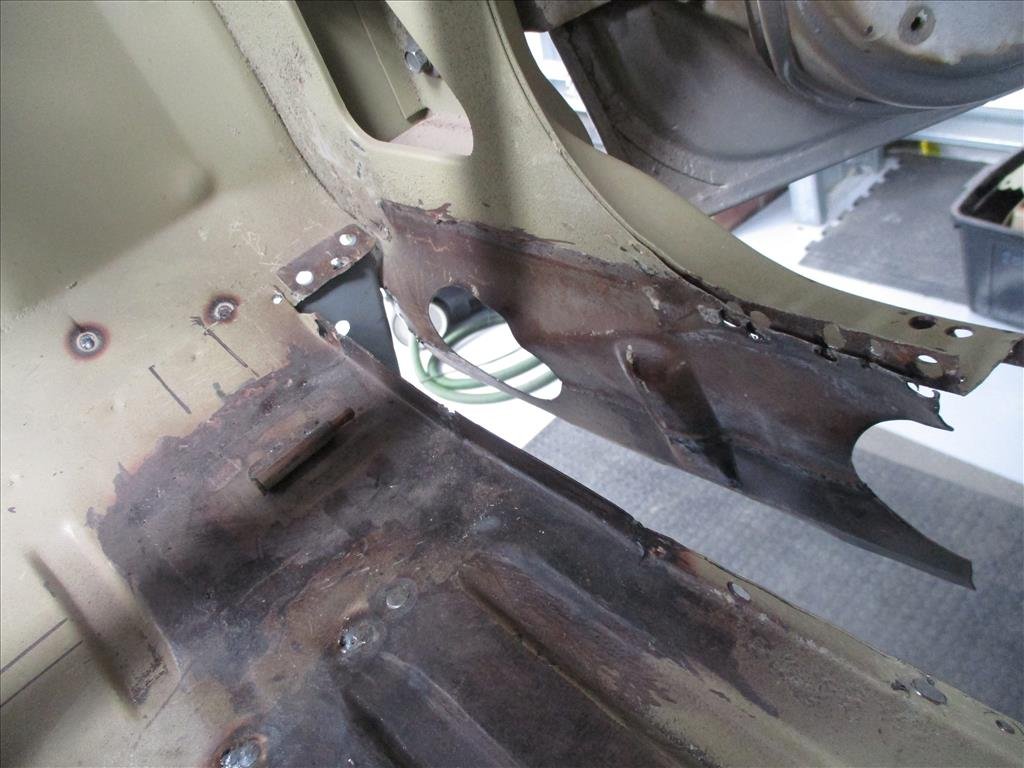
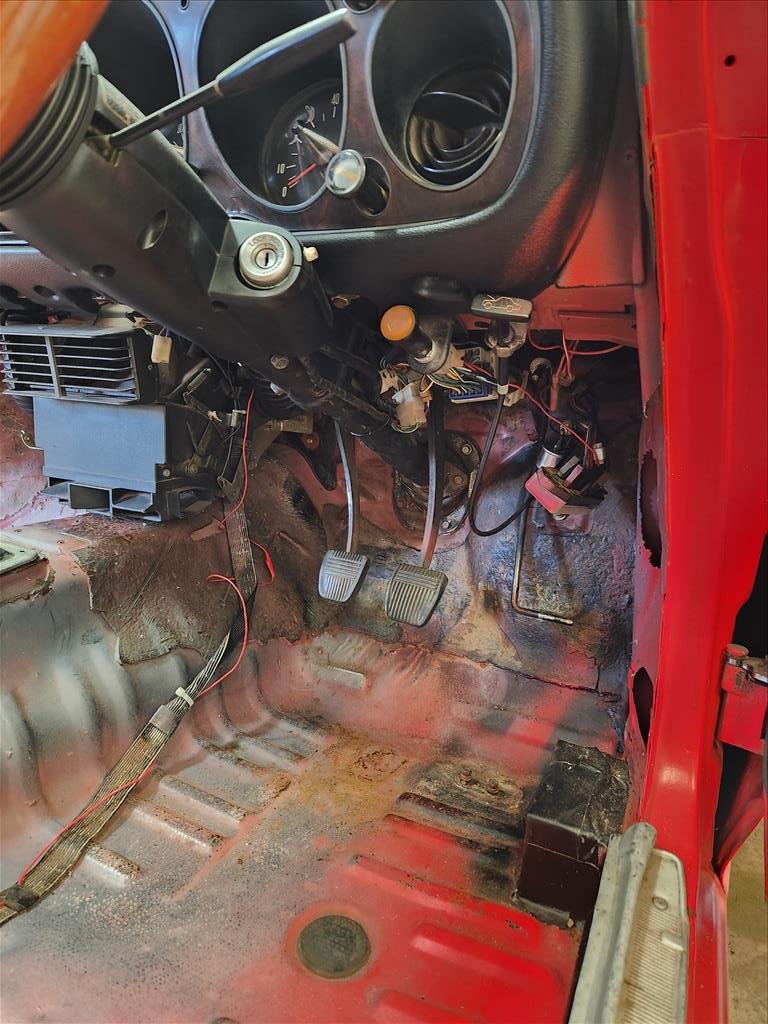
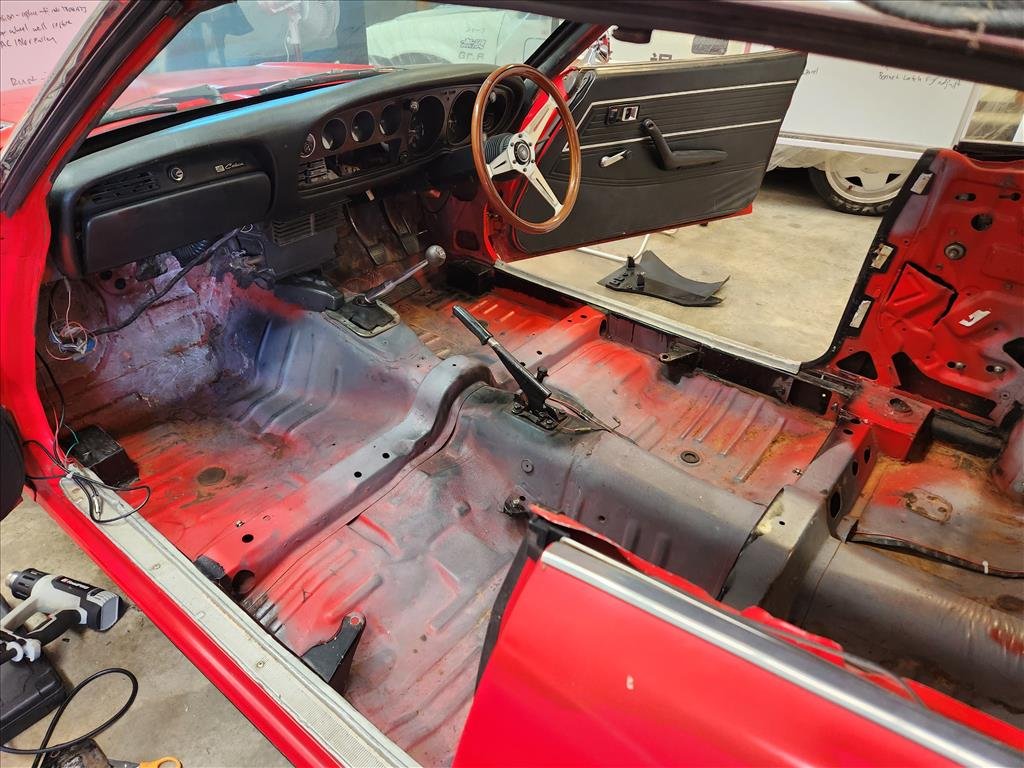
Two tasks planned for today, both failed. First task was to remove the dashboard. Reason for that is so I could check out some wiring behind it and also make sure I could eventually get as much undercoat sprayed up in as many areas as possible. Additionally I didn't want to damage it when trying to grind away the mounting blocks that were put in for the roll cage. After drilling out one broken screw and breaking the surround for the steering column unfortunately I did not get to take the dash out. I was thwarted by the choke cable knob that seemed like it was fused on by the nuclear power. I also didn't want to undo the choke cable from the engine bay and drag it all the way through as by this time my interest in that portion of the project had been depleted so I put it back together as best as I could and had lunch. I did find this gem under there which answers one puzzle about the headlights. After lunch I thought I'd see how I went with grinding away the roll cage boxes at the front. Unfortunately I could only access so much with the grinder and when I got to about here is where I gave up. Talking to some panel beaters the suggested method from a DIY point of view is reciprocating saw to get in as many cuts and angles as possible really and smash/grind out the rest. Just a shit job all around. Oh well, an excuse to get some more tools.
- 44 replies
-
- 12
-
-
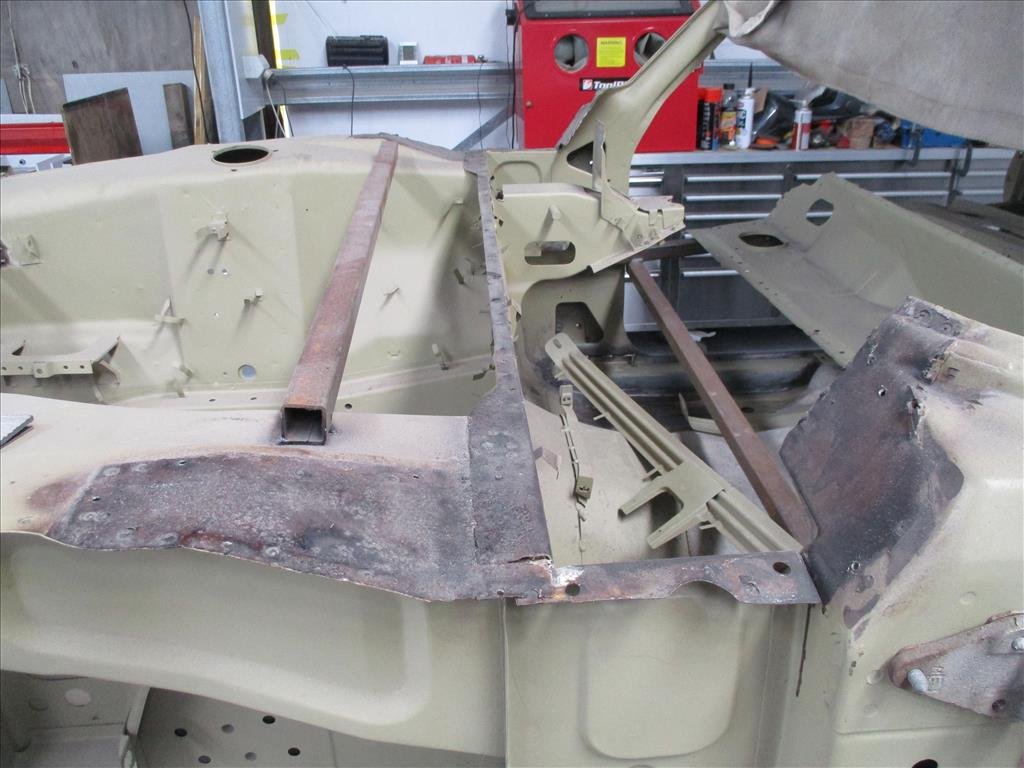
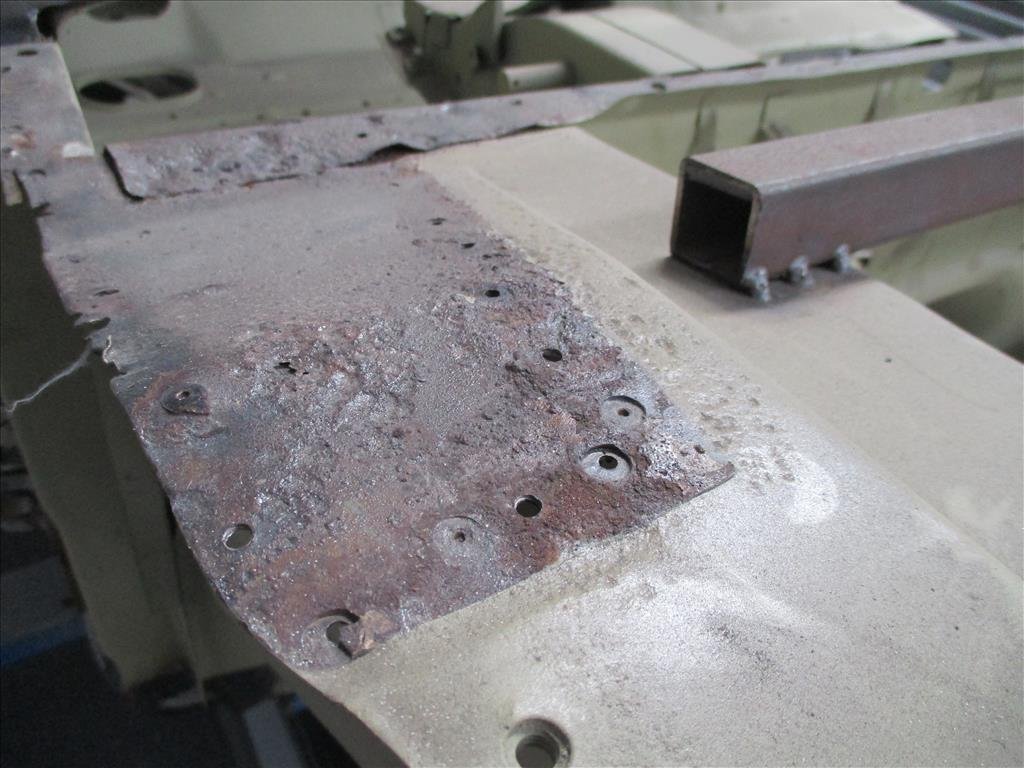
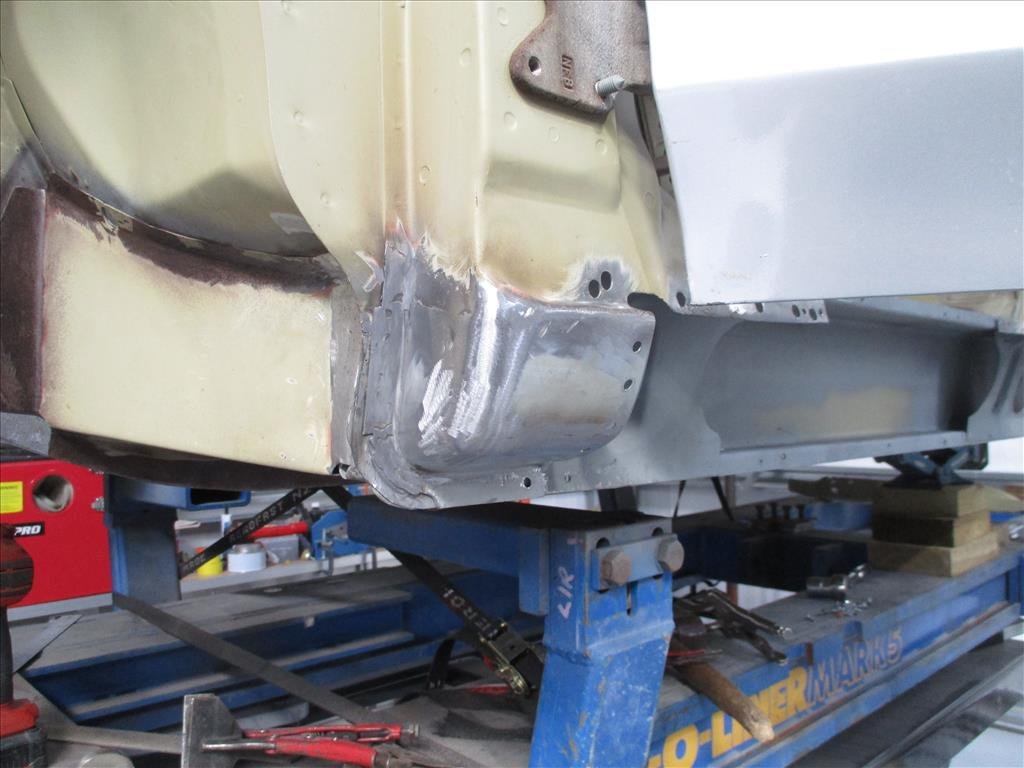
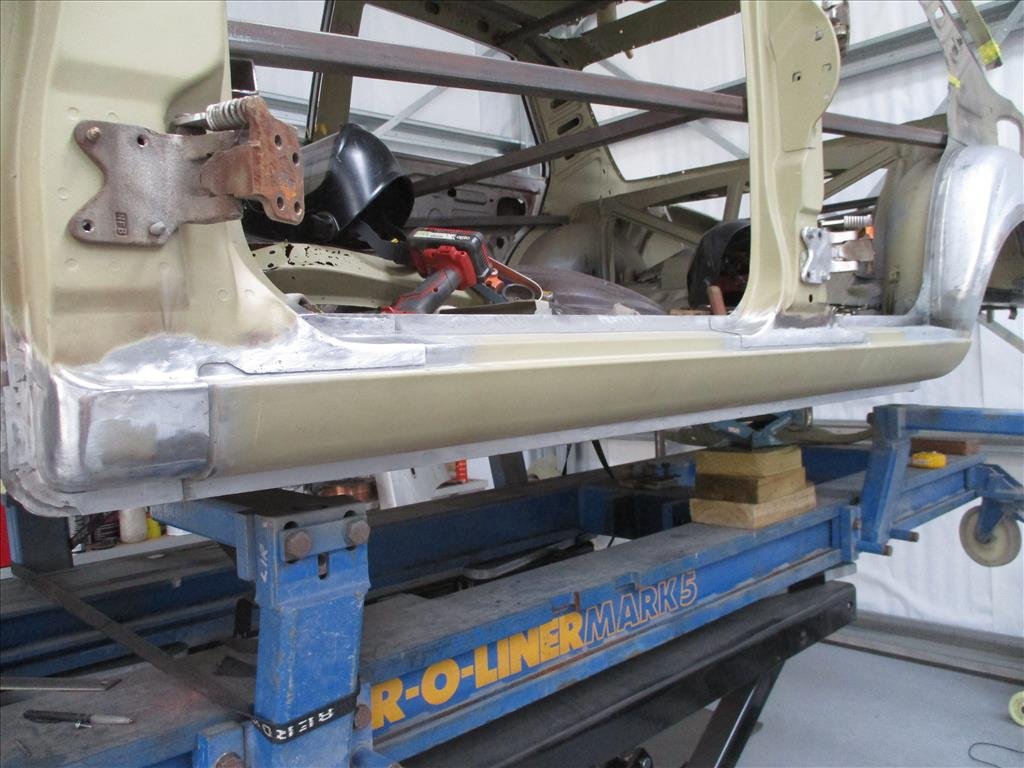
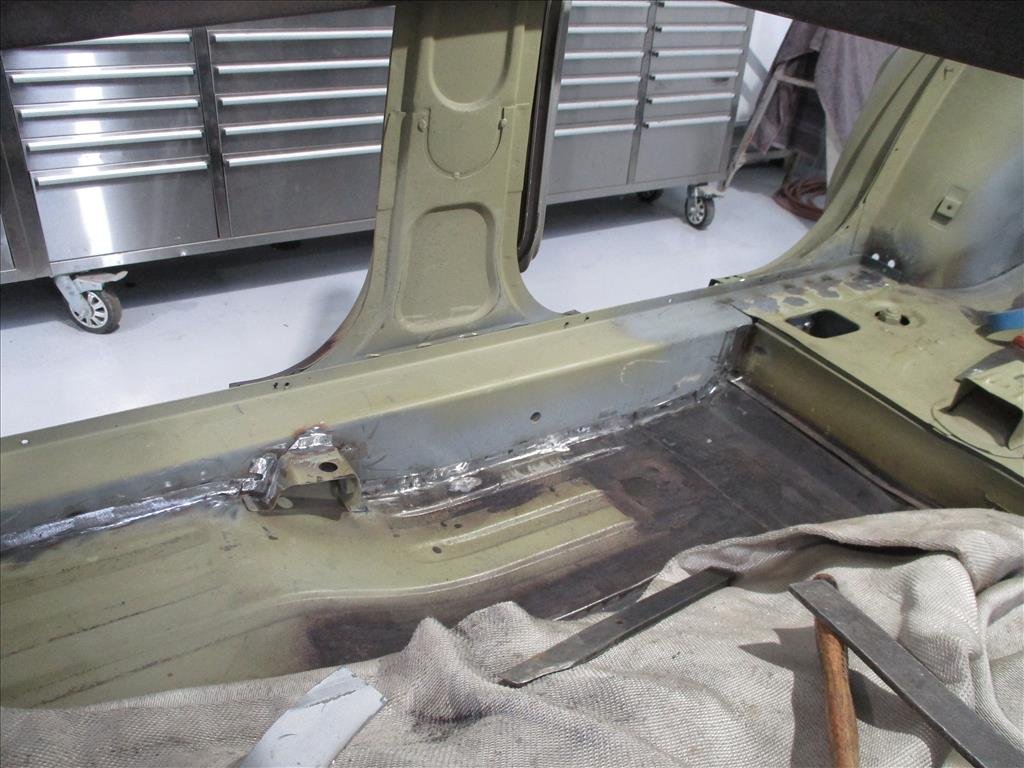
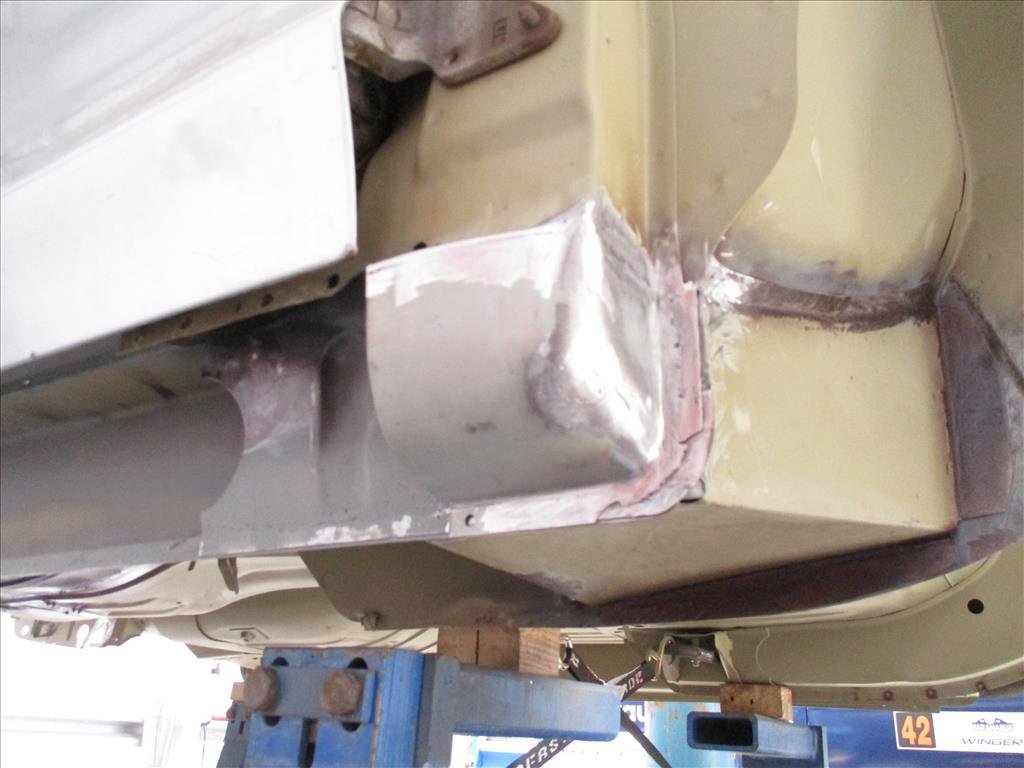
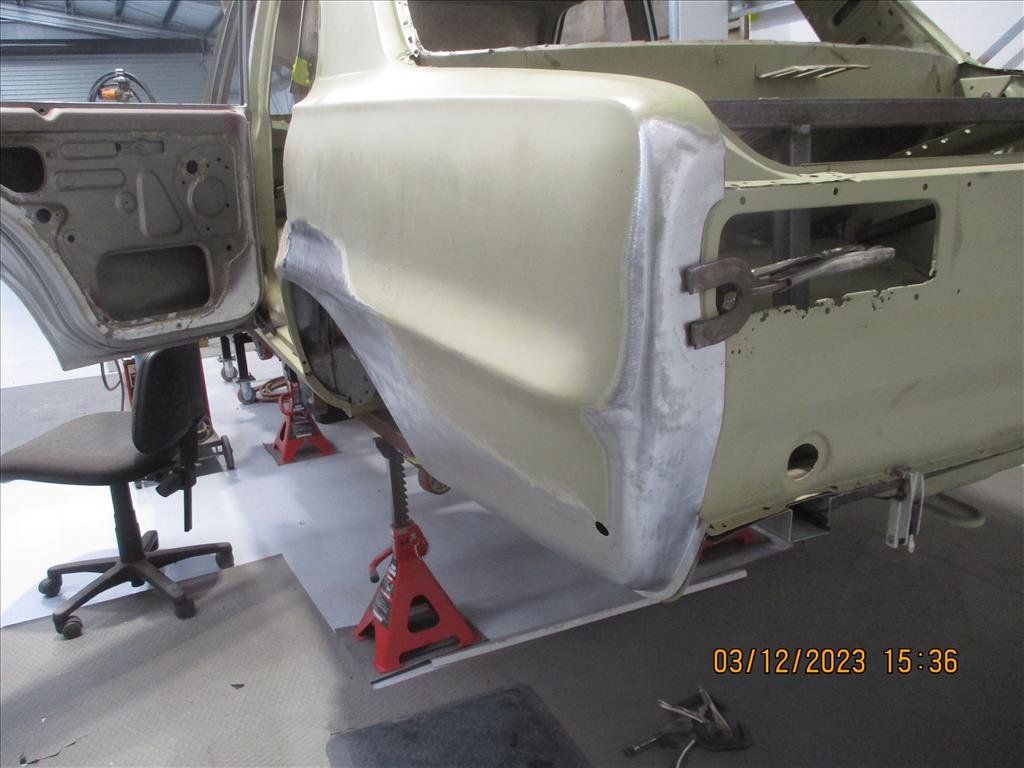
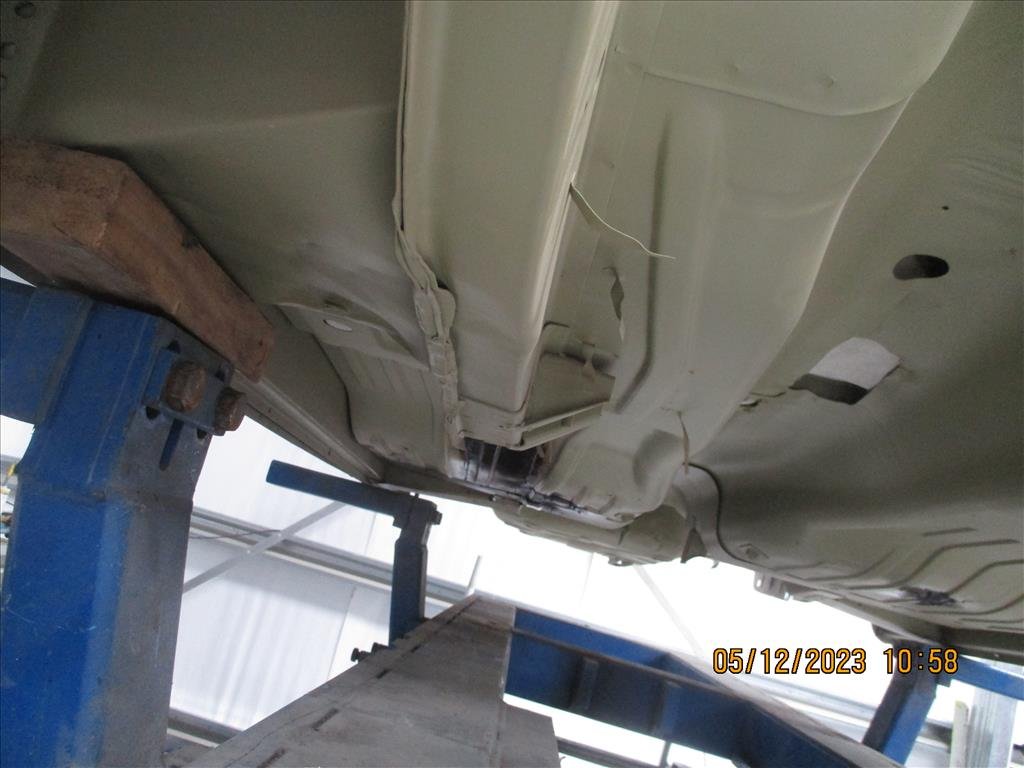
I might've jumped the gun on a previous post saying the car was quite straight, turns out there was a bit more to do.. Chassis rails were mulched from forklifts as mentioned earlier and once the car was pulled straight it was apparent more things were not in great shape. The side sills on driver side had to come off and be modified as well as the chassis rail torque boxes. Some more rust was found underneath (to the surprise of nobody) so they were recreated. I was a little worried about this part of the b-pillar as it was pretty pitted originally especially where it connected down with the inner sill but that's looking much better now. Door gaps looking mint. So yeah these are the kinds of jobs which take ages but aren't really exciting to look at but needed to be done to ensure it can survive another 50 cycles around the sun.
- 44 replies
-
- 13
-
-
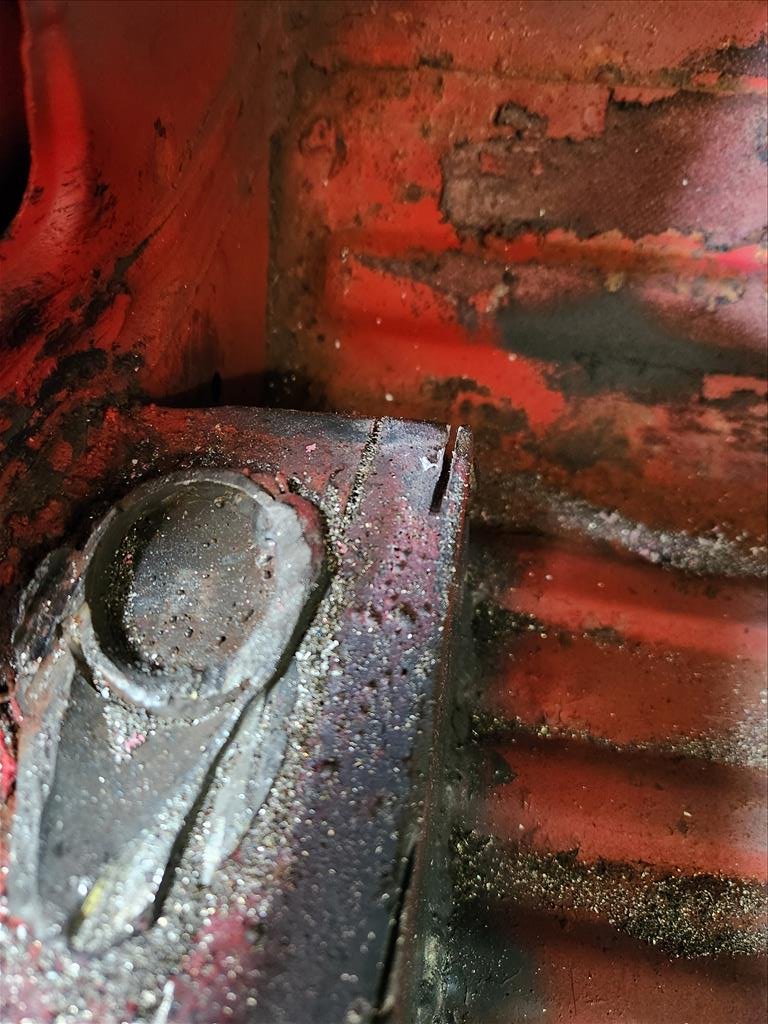
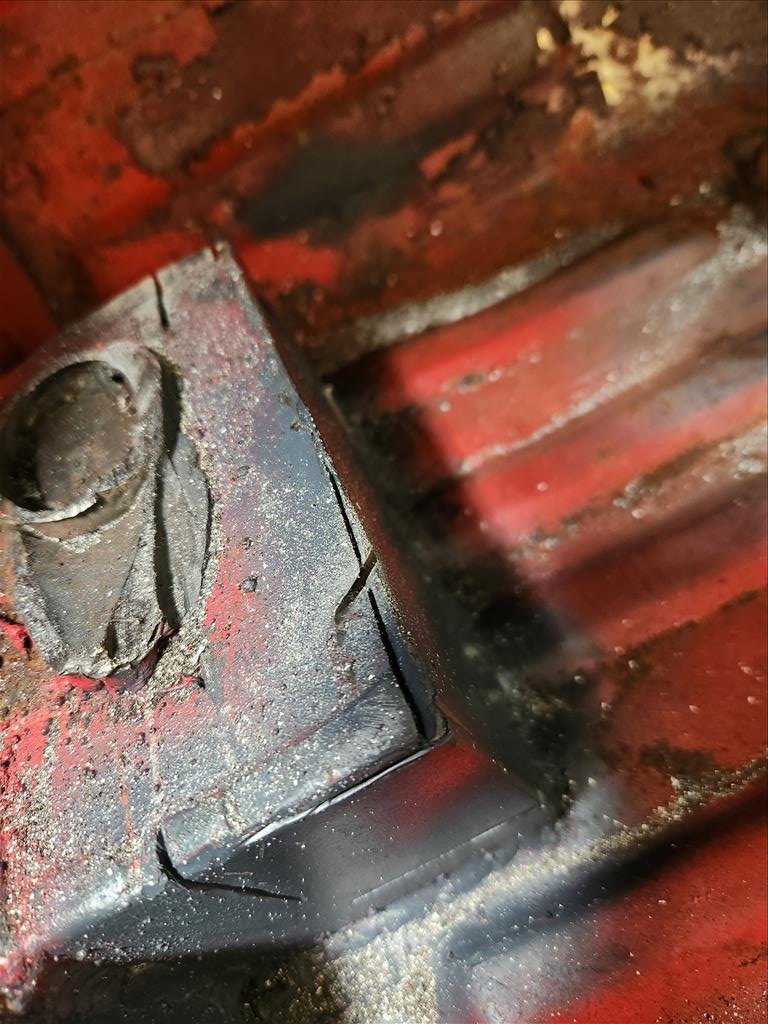
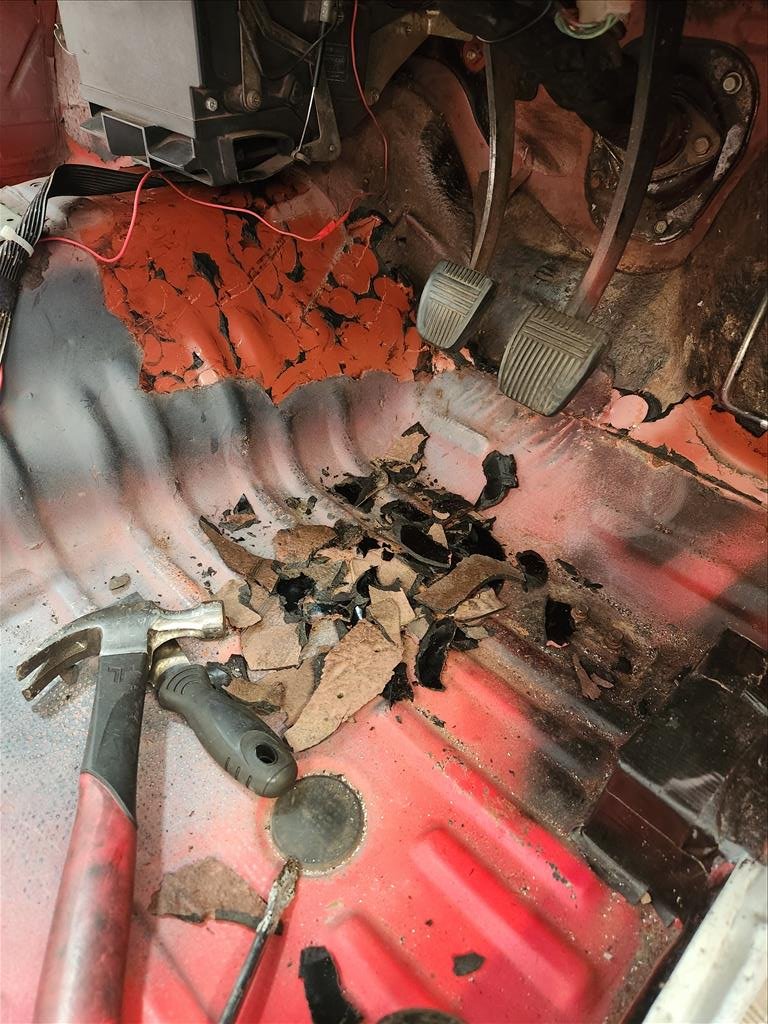
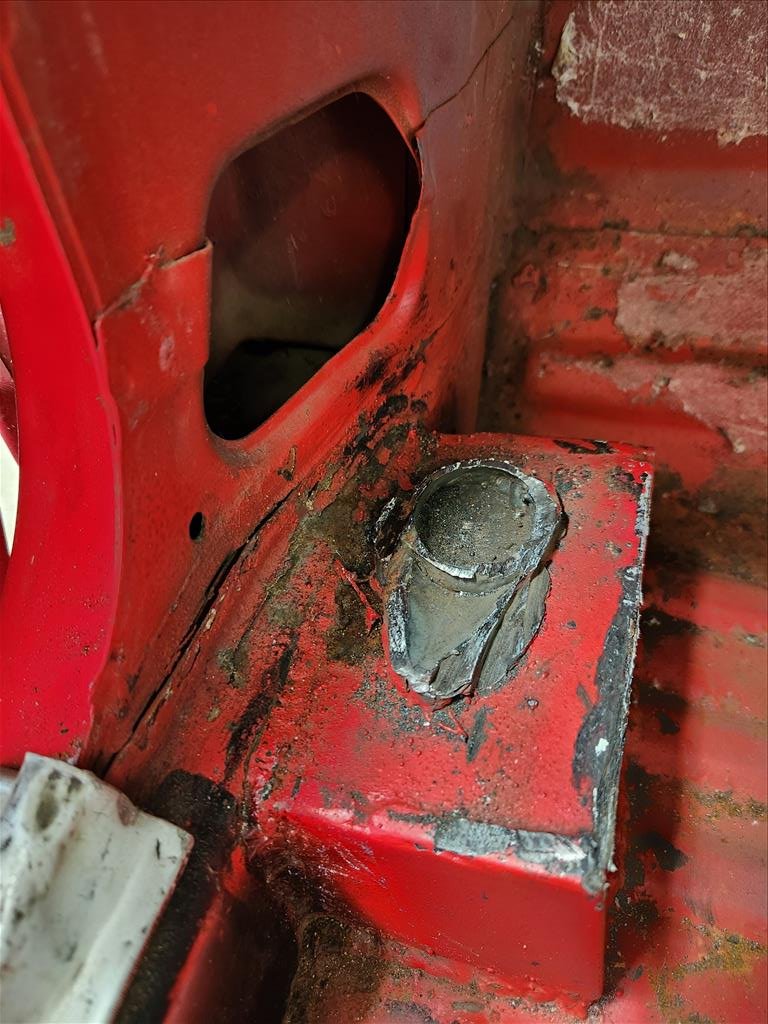
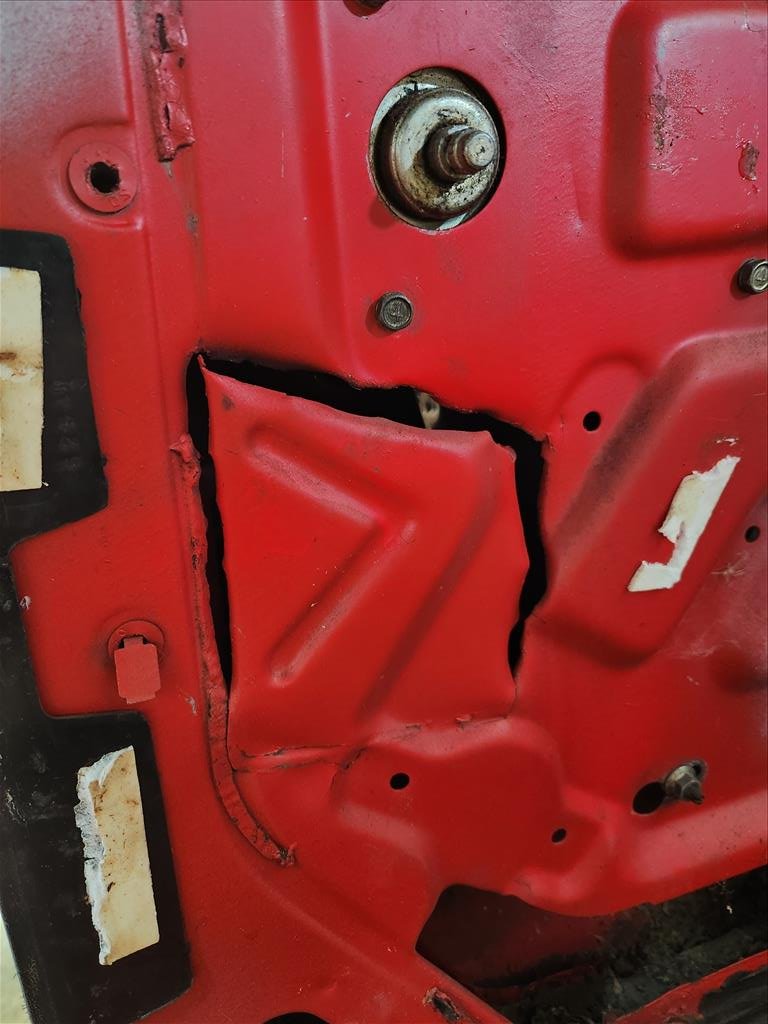
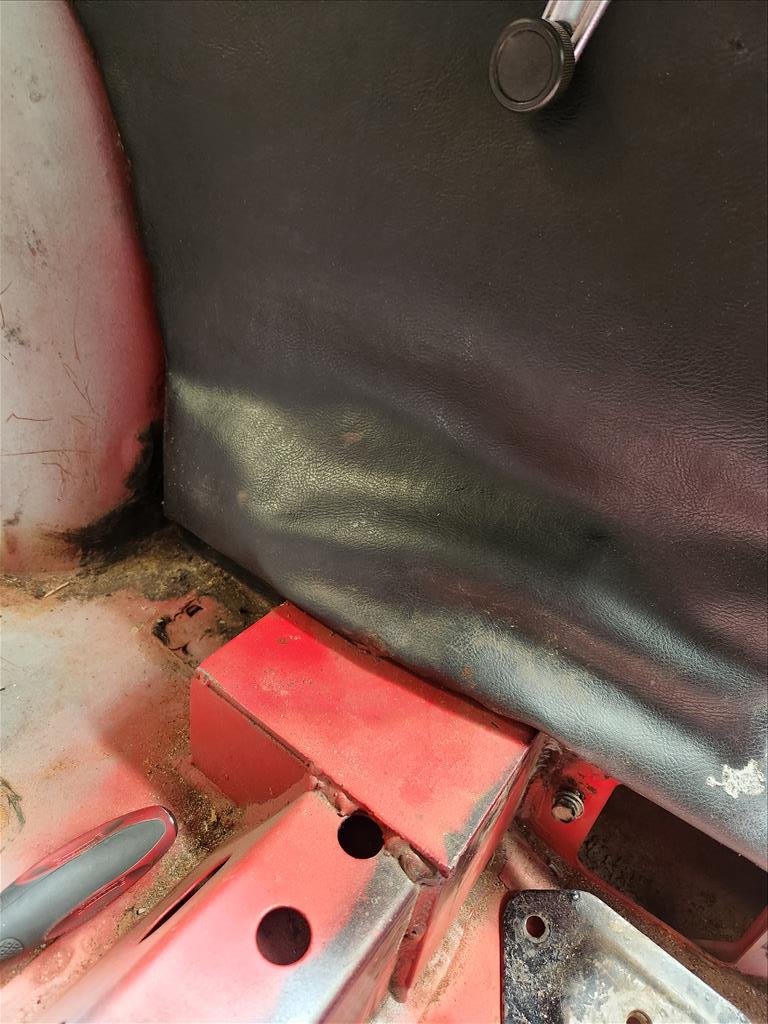
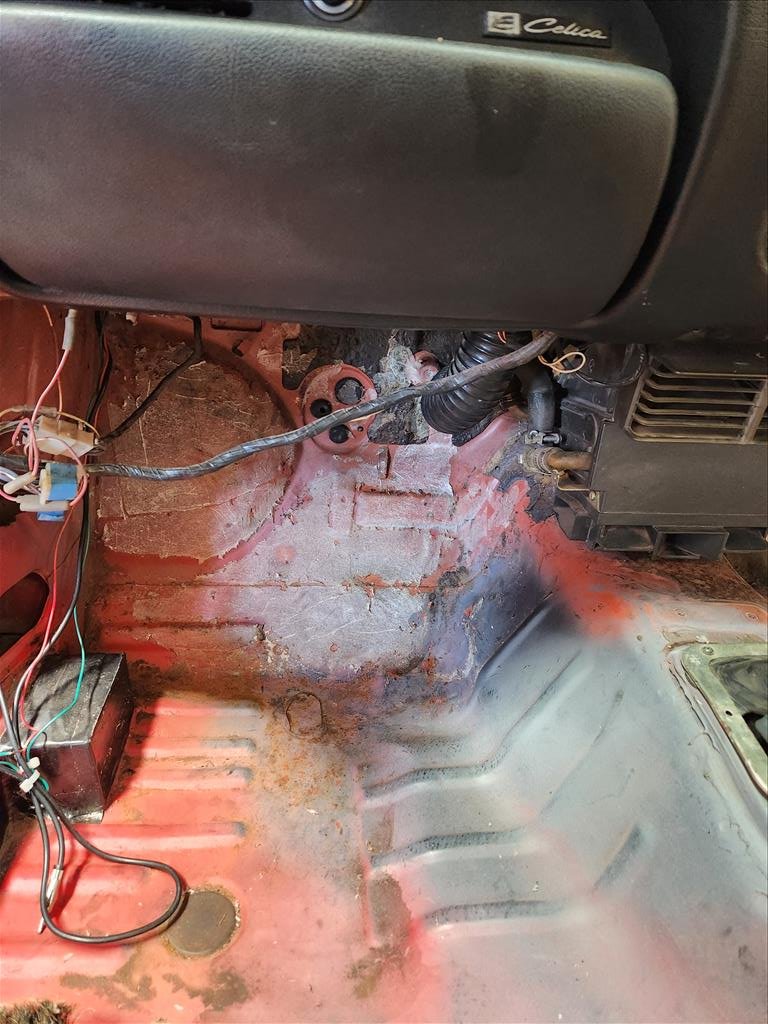
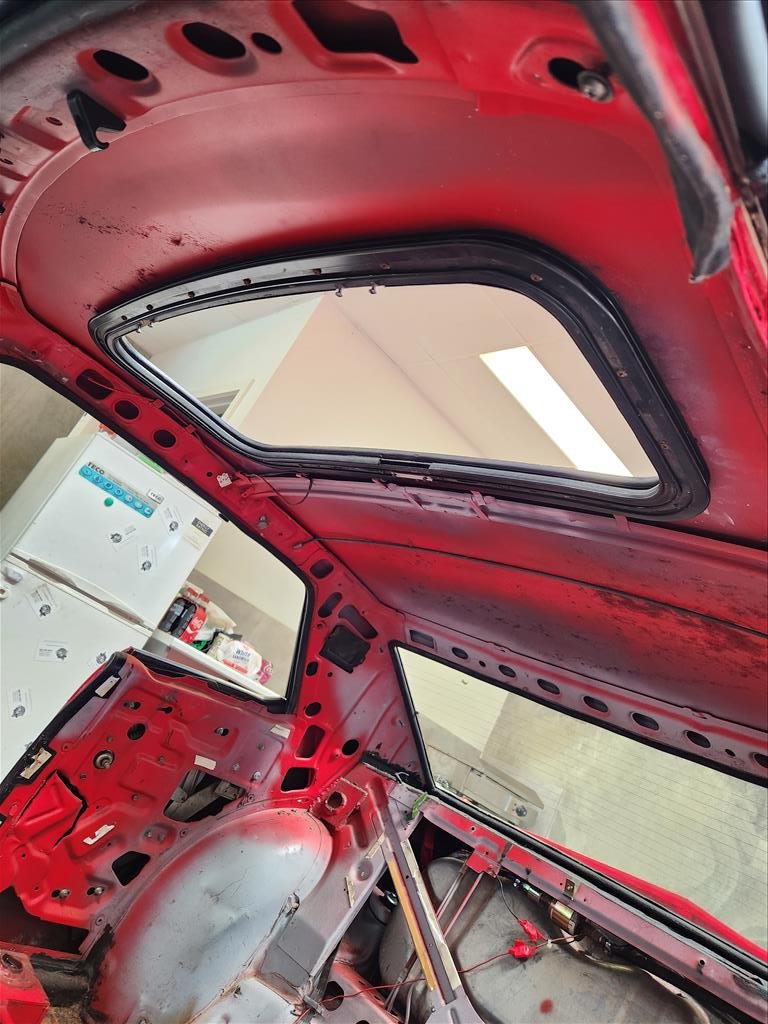
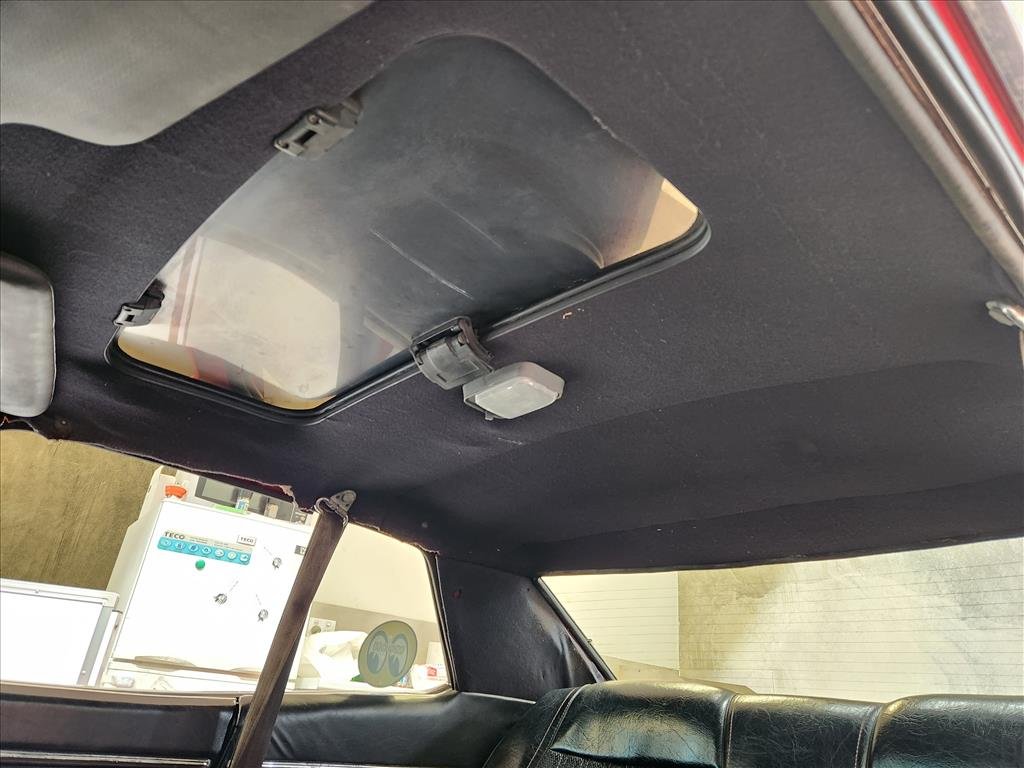
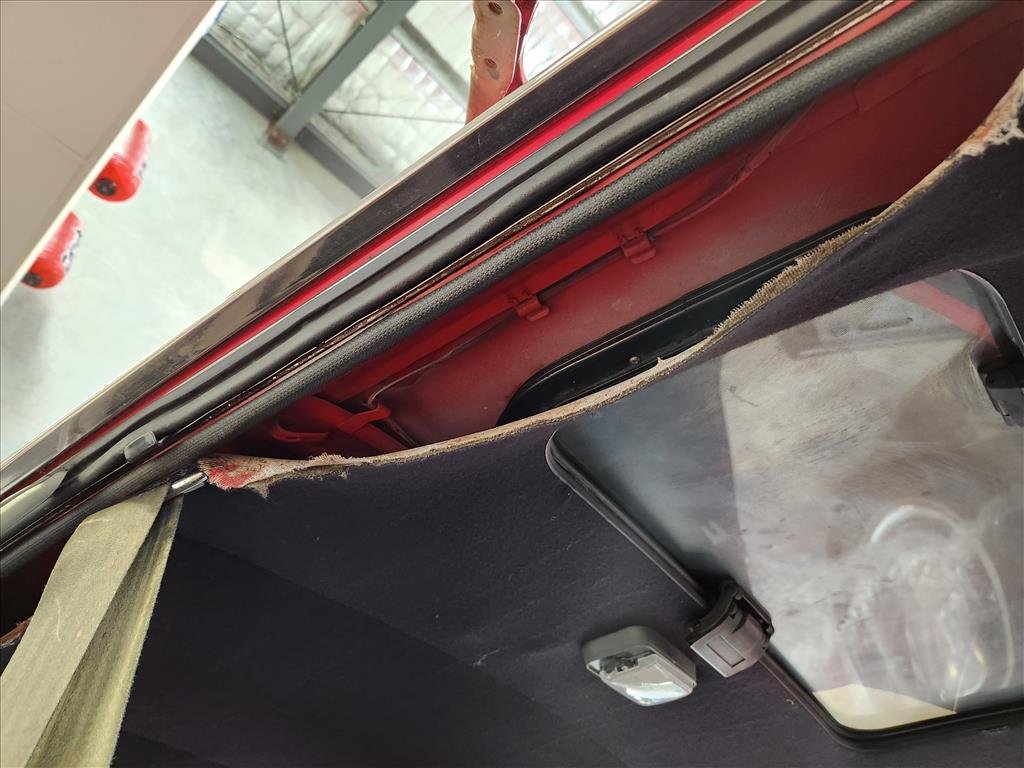
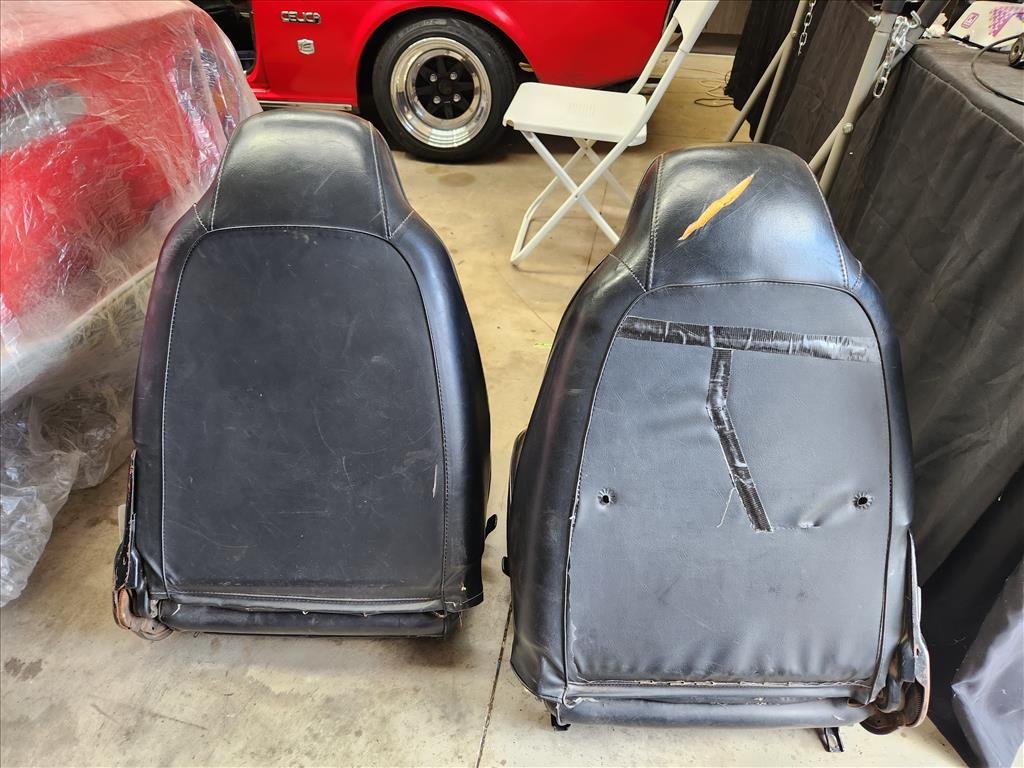
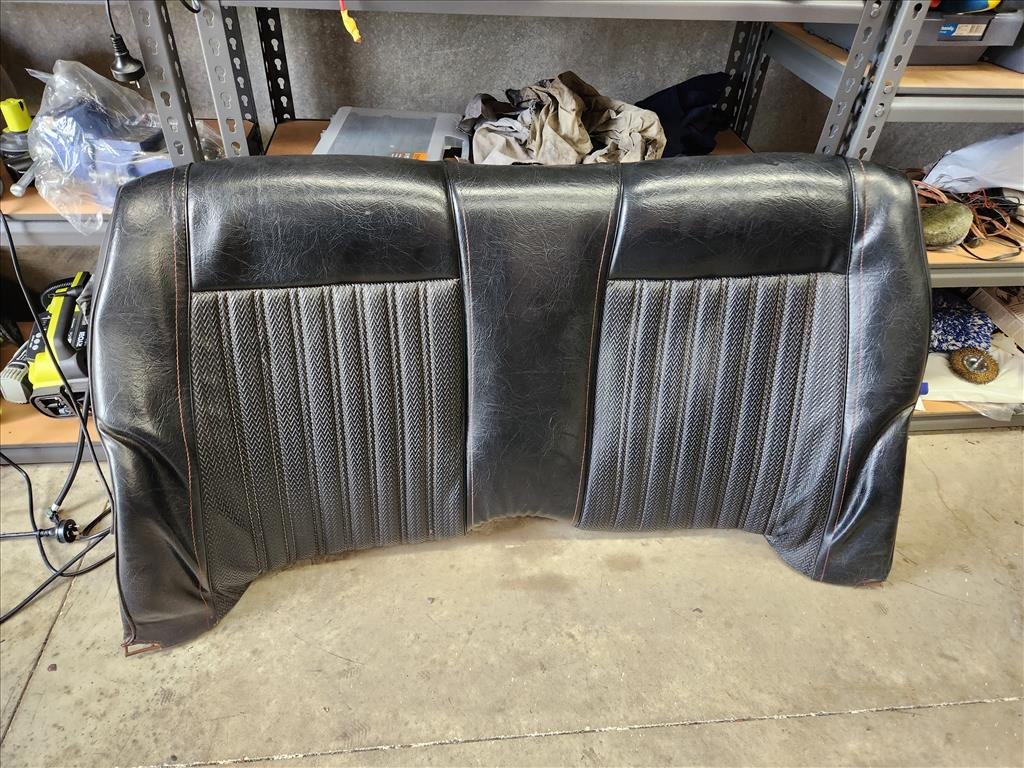
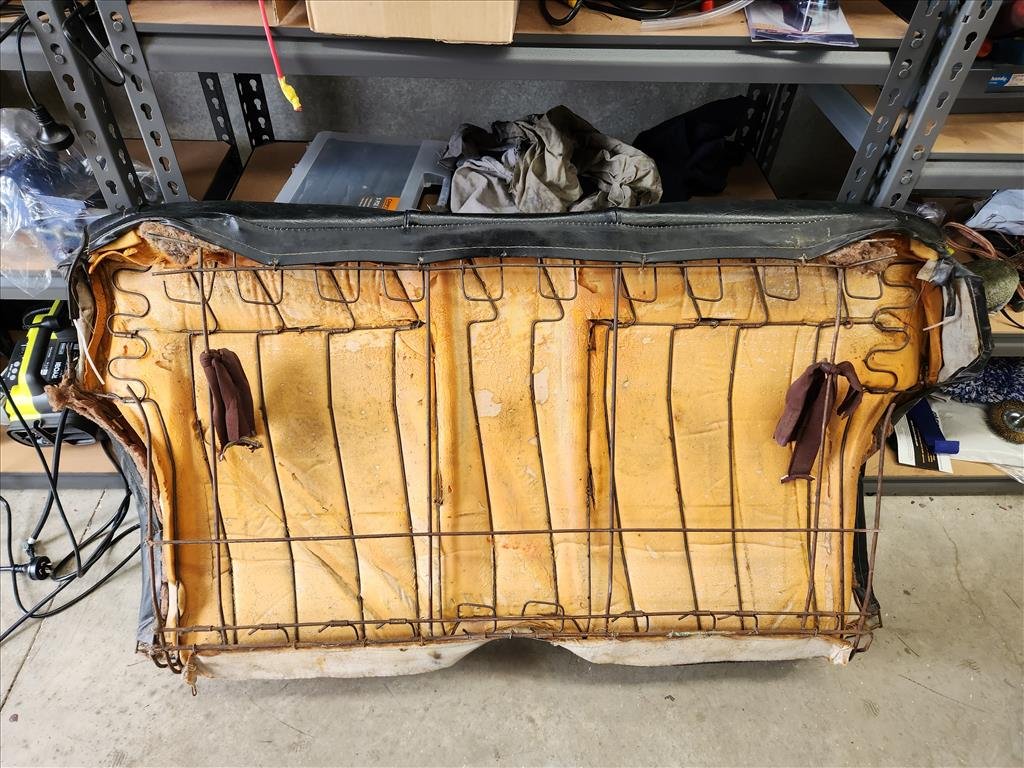
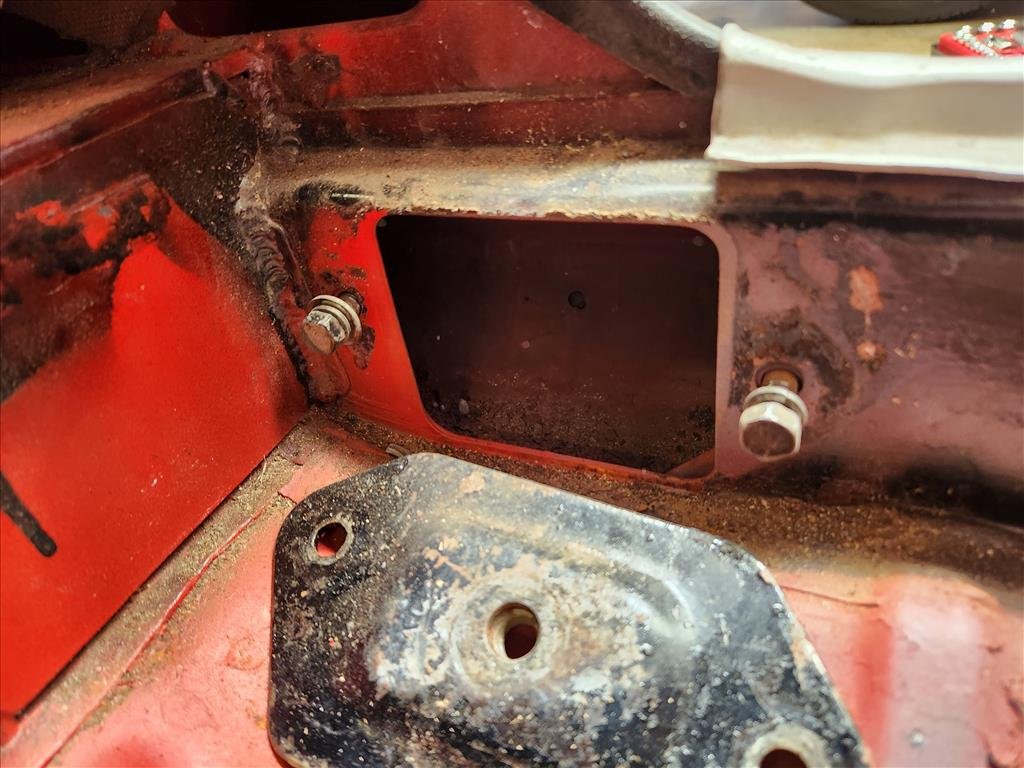
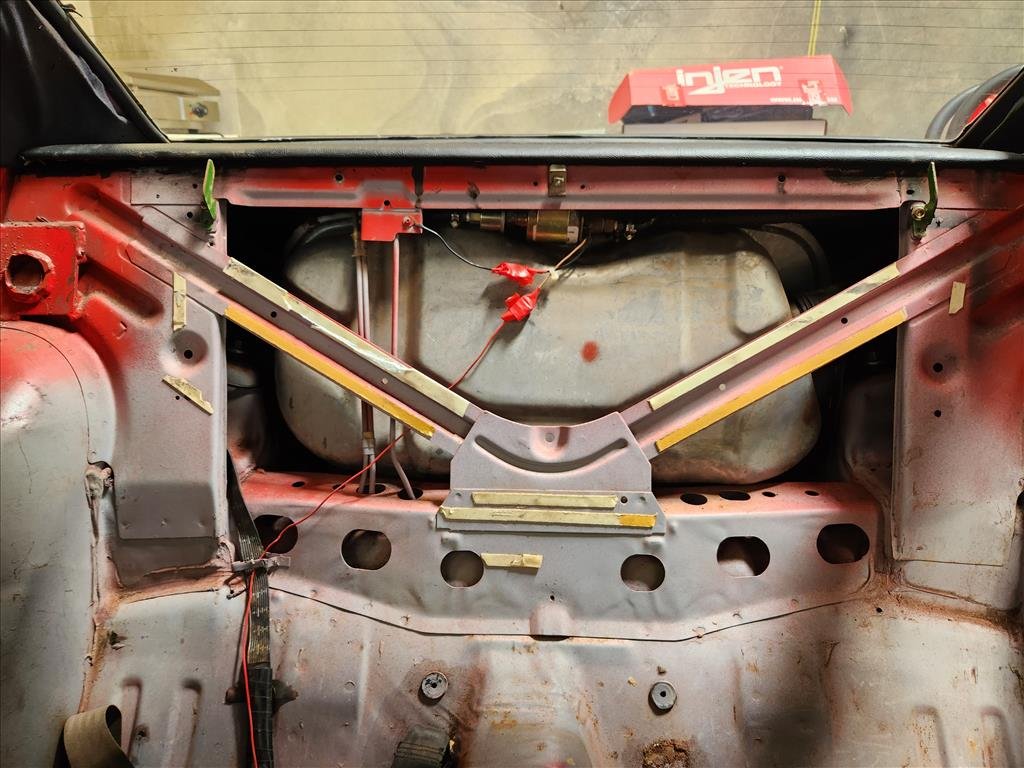
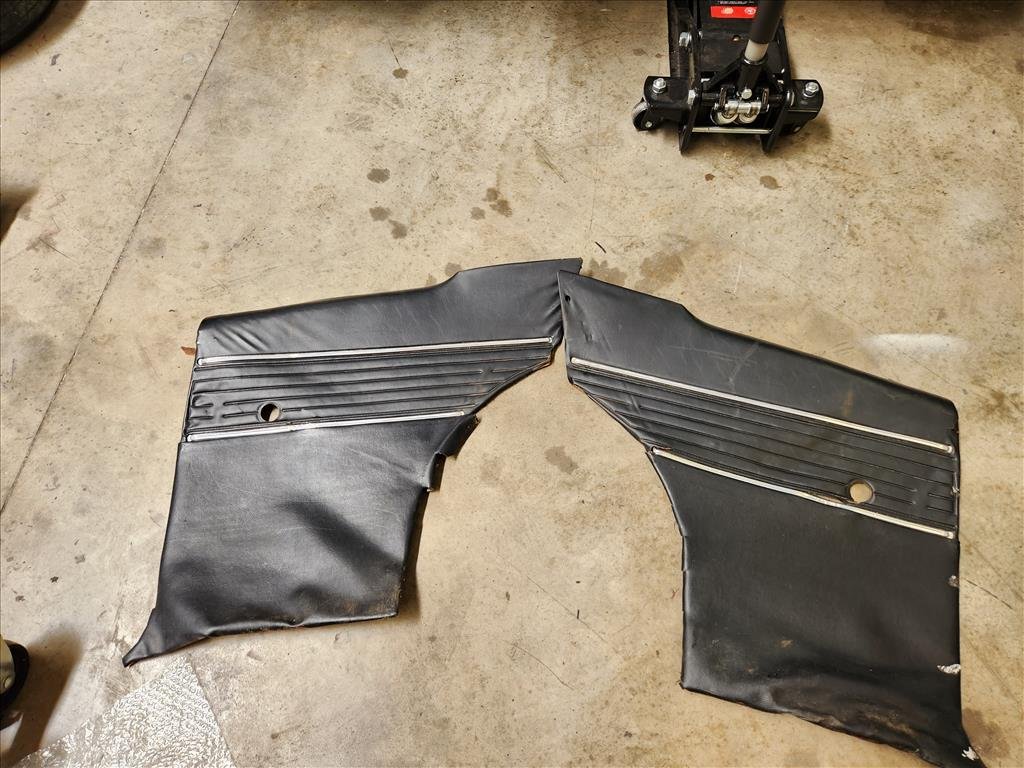
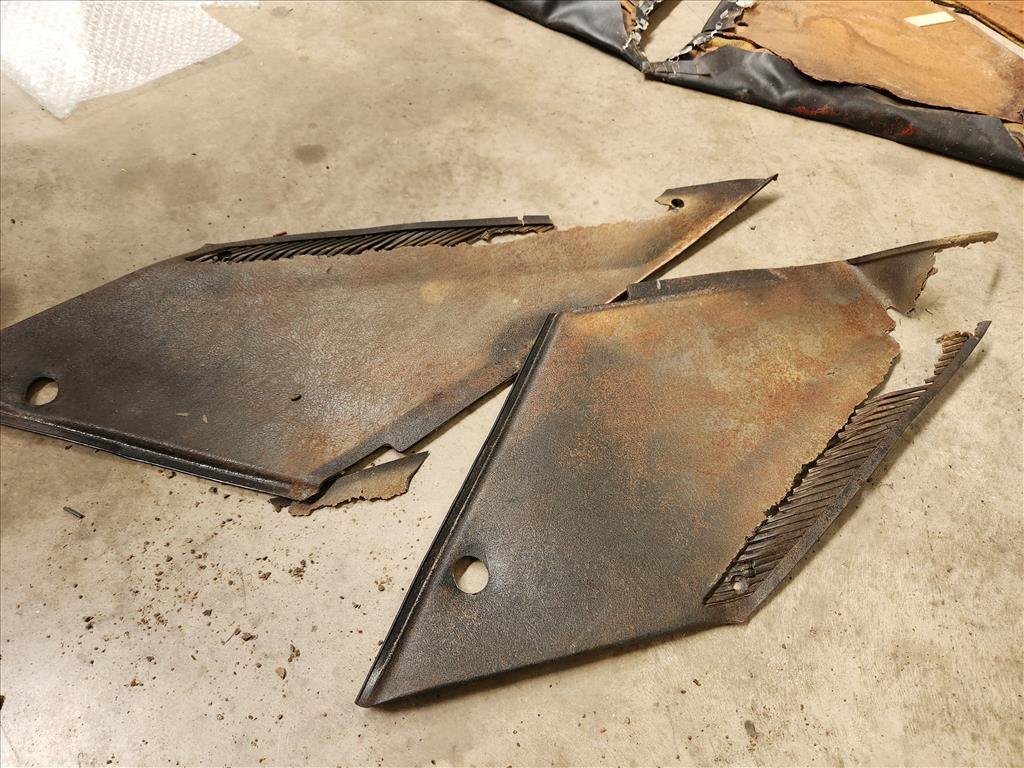
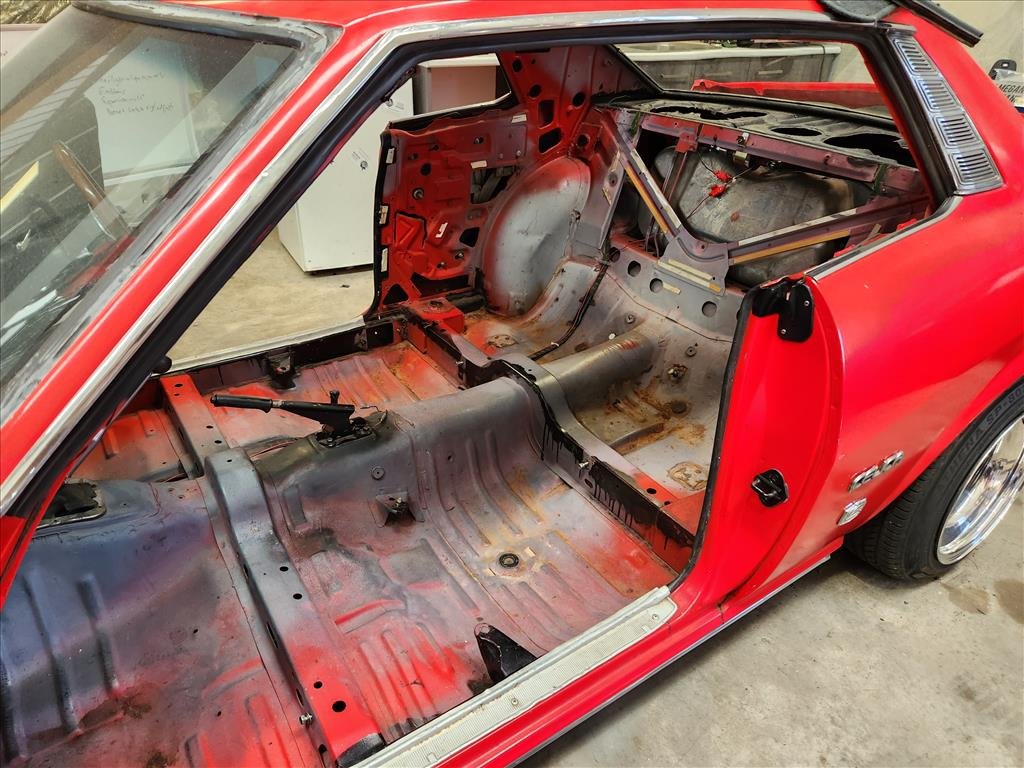
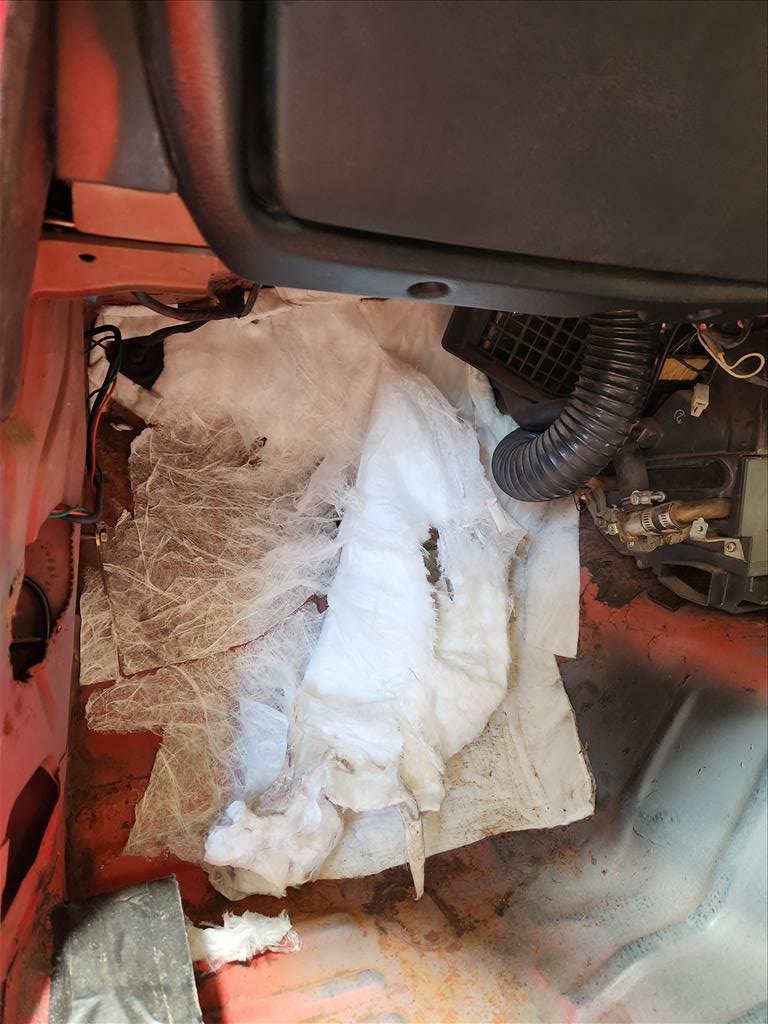
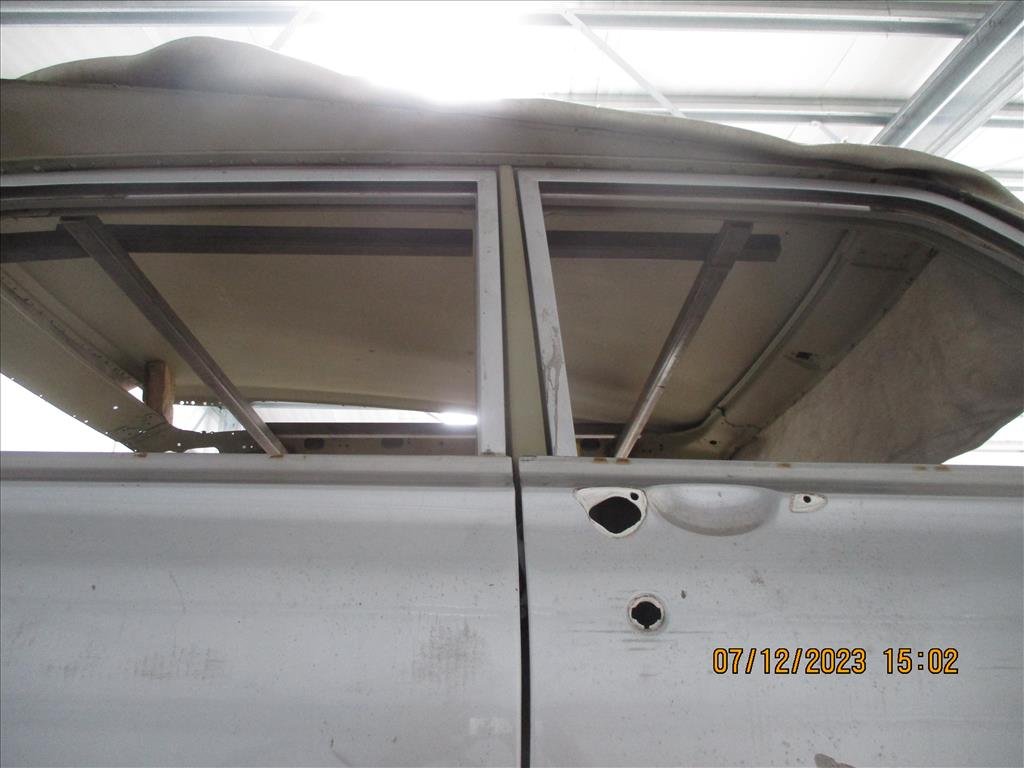
56k Warning (hahaha) there's a few photos and a whole lot of carryon in this post! As I mentioned before, this year is interior year for the Celica so the first thing to do is tear it apart. Unfortunately the front seat covers are pretty mangled, rear covers may be salvageable but there's a guy here that does really nice OEM-spec covers for front and rear so might just get a set of those eventually. I will need to get a new rear seat set before I can do that though as it's been bent up and cut for the roll cage that was in there before. This roll cage also means there were mounting blocks around the place like these ones which cause the side trims to be a little messed up at the bottom. I don't think I will be able to cut this one out easily so might just have to live with it. I have to get all new trim panels anyway as you can see these are completely mangled. Thankfully these seem to be available as well. Something else that's mangled is what was behind the trim panel on the rear driver side. This window winder is stripped meaning the handle doesn't work. It looks like sometime in the past they might have tried to think about fixing this by cutting an access hole. It's not fixed so I don't really know what happened there but I would like to try and fix this so I can get sweet pillarless action. After I saw the dramas with getting in here from the Speed Academy videos maybe I'm a little bit happy they decided to do some bush mechanics on this part. Speaking of access panels, thought this was interesting. This car is perfect for running drugs as it turns out. In reality I think this may have been a hole for retractable seat belt? Unsure exactly as the replacement seatbelts mounted to this extra panel that bolts over the top of it, bit odd and probably put in for ADR approval or similar. Seatbelts will need replacement as well but I think I'll just pretend these cars did not have rear seatbelts and do the front only until someone tells me off. The front driver seat was interesting, I can't even blame anyone else for this one as I was the last person to put this seat in. Suppose I did the old "it's future Alex's problem", yeah future Alex isn't super fond of that as it turns out and yet, there is no effort to change habit. Threads are for losers anyway. Another thing to get sorted while things are all apart is the fuel system. Once upon a time an electric fuel pump was wired in, wiring job looks like something I would've rigged up honestly but it needs to be properly done. For one the pump is in the wrong place so that needs to be relocated and it's not on any kind of relay or anything so it runs all the time as soon as you click it over to accessory on the key; I don't think that's correct. I'd like to install a fuel pressure regulator as well to keep it in check. The roof lining has been cactus since I bought the car and probably has been screwed for years before. It's just some cheap fabric that has been kind of glued up there and would've been done when the sunroof was installed; probably in the 80s. I tore it all out and will have to work out a plan to replace that. I won't be coating the roof portion but I wouldn't mind slapping up some squares of sound deadening. Carpet needs replacement as well; I think this was a kit once upon a time but honestly it looks like leftover garage carpet, yuck. Replacement carpets are available in much nicer material these days. Also this white insulation looking stuff under the front got me a little worried. 50/50 on it containing asbestos according to Google images so I masked up with some gloves and tried to tear it out. Frustratingly it's stuck down really well on the passenger side so even with the wire wheel on drill I couldn't get all of the stuff off without spending all my life in there. It's good enough to coat over I reckon. Thankfully driver side was much easier as they were lazy with the application. I plan to remove the dash and everything anyway to get it cleaned up under there as there's a bit of messy wiring as well as the heater core seems a bit locked up (I can't change the heat on the slider) so want to have a look at that, or maybe remove it? Don't need heat if you don't drive it. You'll notice the little boxes in the front as well that I need to cut out which will be a super fun (not) job before I can start coating so that might be one of the next jobs on the line. That brings us to the end where it sits now. Stripped out mostly, vacuumed but not cleaned up yet. I will get the brush and anti-rust spray out for that little surface rust that's kicking around. As for the coating I plan to use bedliner then decide if I want to add additional sound deadening or not; haven't quite decided yet. Bedliner is hardy, it's fairly cheap and it will be covered by carpet anyway so should be fine. I haven't decided exactly how far up I want to go, whether I do all the areas without trim or just the floor areas. This is why I need to get the rear windows working, how sweet is that pillarless life.
- 44 replies
-
- 13
-
-
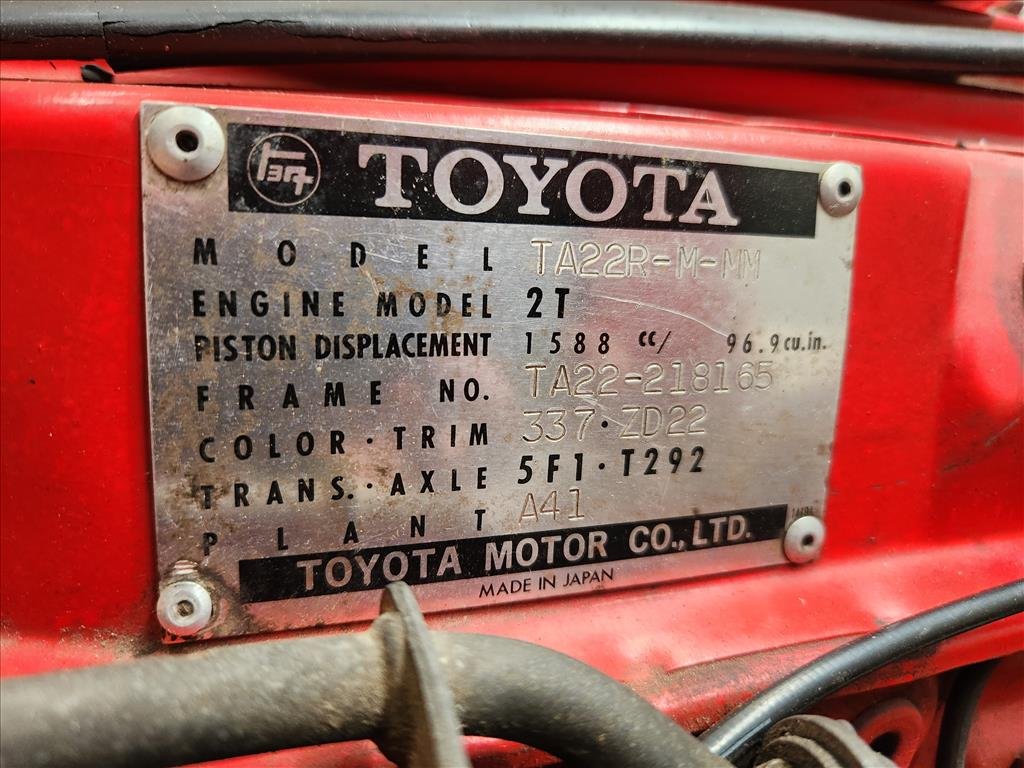
Awesome so the trim might be OEM, that's cool. I wonder if that plant offers a tour.. thanks for that, most appreciated! Good info about the tag number, I'll have to check it next weekend. According to Vicroads that frame number is in their records so presume it's the same.
-
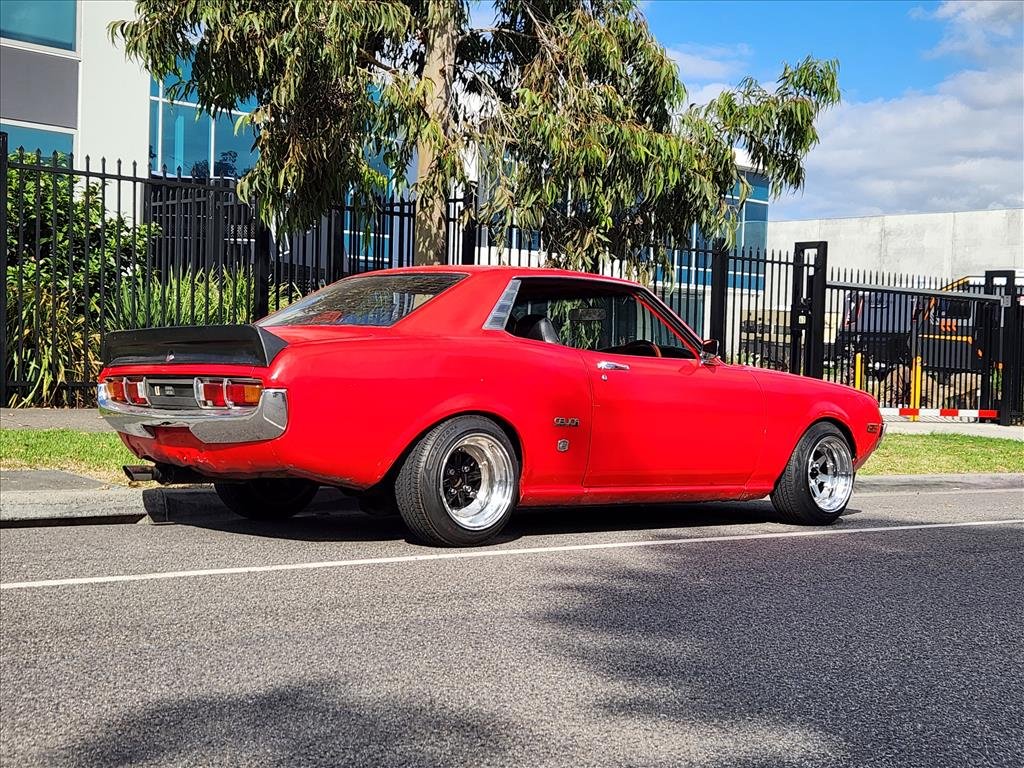
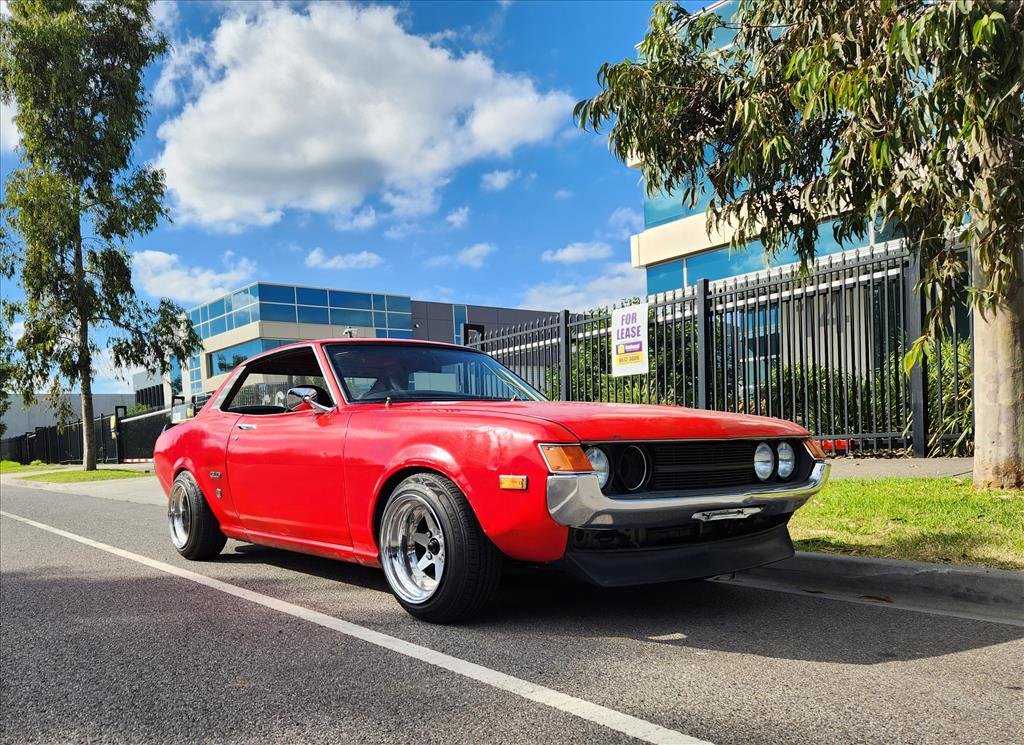
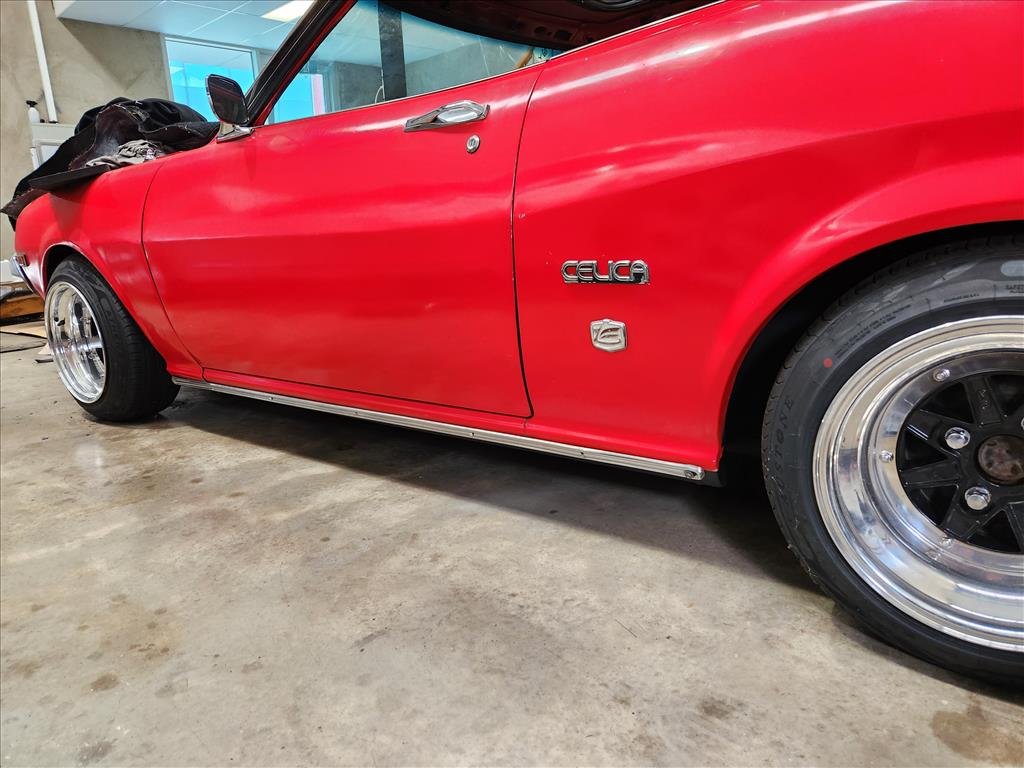
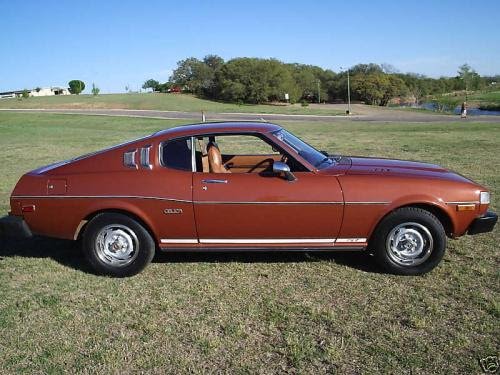
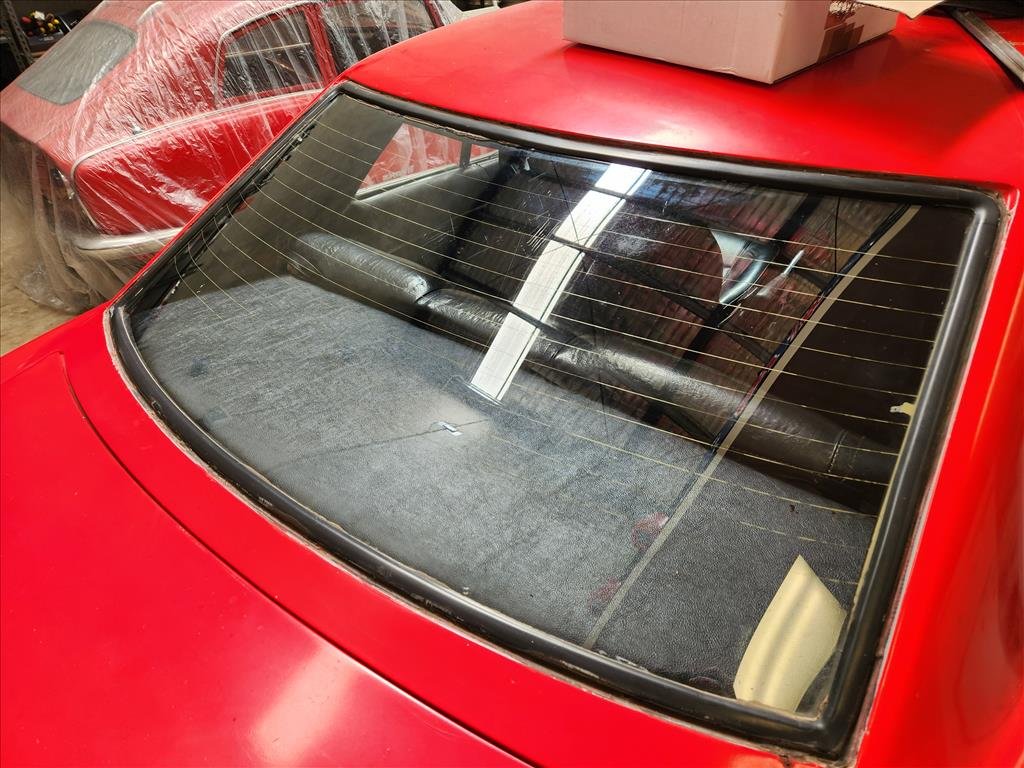
Goals for the Celica this year are get the wheels/suspension fitment all dialed and fix up the interior. The exterior panels are not great but also not really a concern for me this year. The interior however needs work. Finally I was able to find a parcel shelf locally on marketplace which someone had recreated and trimmed up really nice. Obviously it doesn't fix up the actual parcel shelf disaster but if I can't see it then it's fixed. Next I'll take it all out again including all the carpets, seats dash, interior panels etc and replace everything I can. The seat covers are all torn up and the rear seats need to be fully replaced due to the frames being cut up for roll cage installation. I can get new covers as there's a guy in Aus that makes OEM-spec stuff which is awesome. I believe the door panels and side trims are not too difficult to get either. I'm not sure what to do with the roof yet as it had some shanky carpet-type stuff put up there I guess when the sunroof was cut into it. Any Toyota nerds able to decode the trim from this tag? I found the body colour which is that brown looking colour so I presume the trim will be the beige/brown interior that usually goes with it. Being that my car is red with black interior there's every chance this tag is not even from this car but be interesting to know.
-
Cleaned it up as best I could around the edges, still a bit poo but oh well, good enough. Looks like it'll stay on there so that's the main thing. I slapped it and said "that's not going anywhere" so I can't see it falling off. One day I might paint the car so it's the same colour.
-
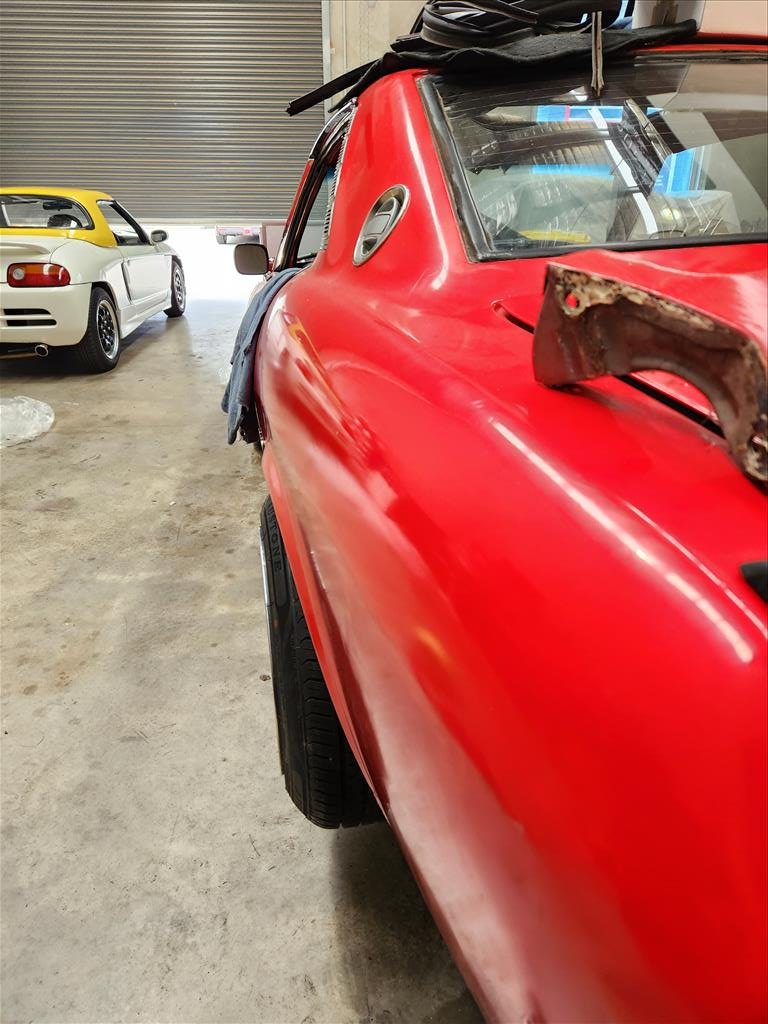
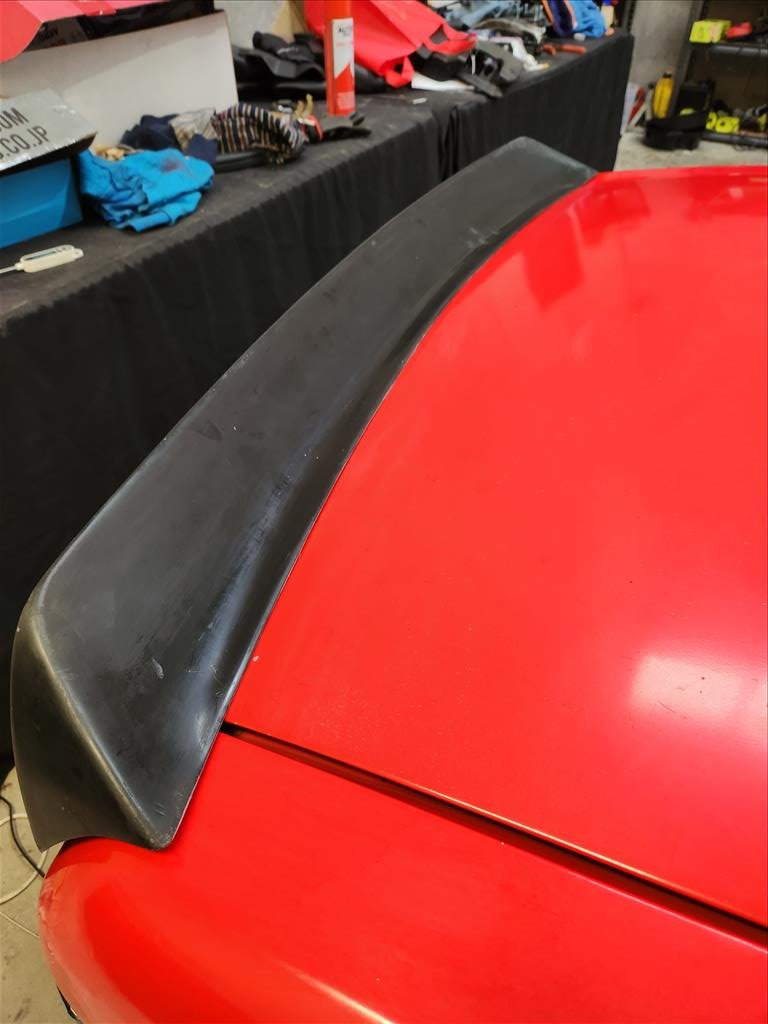
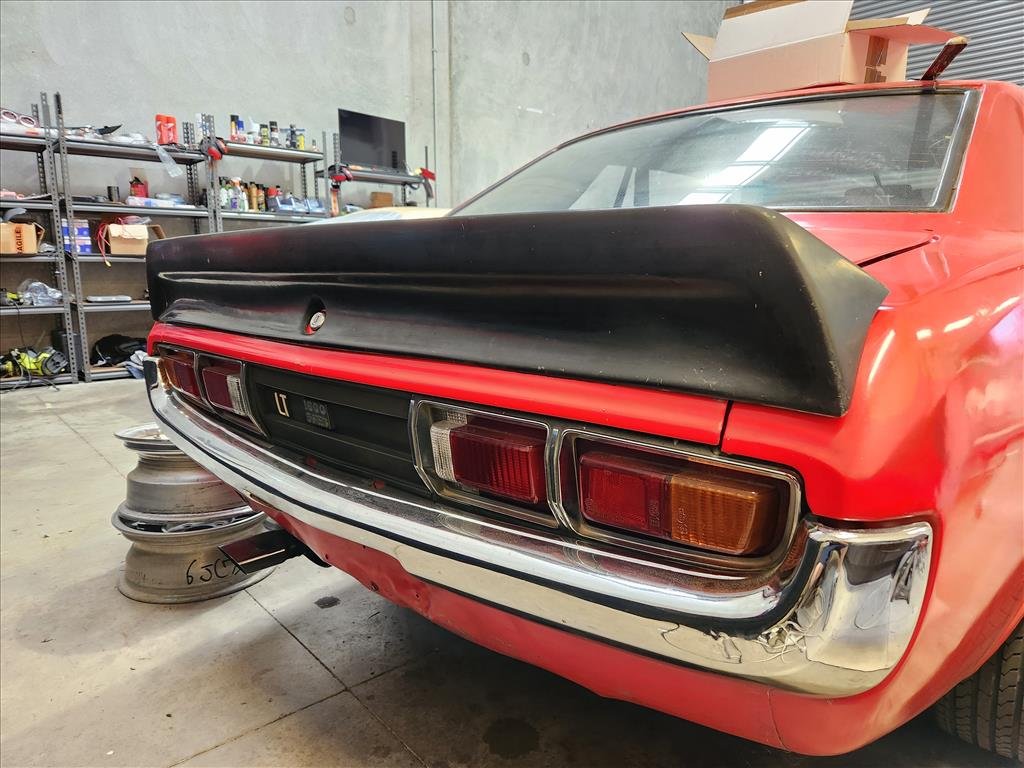
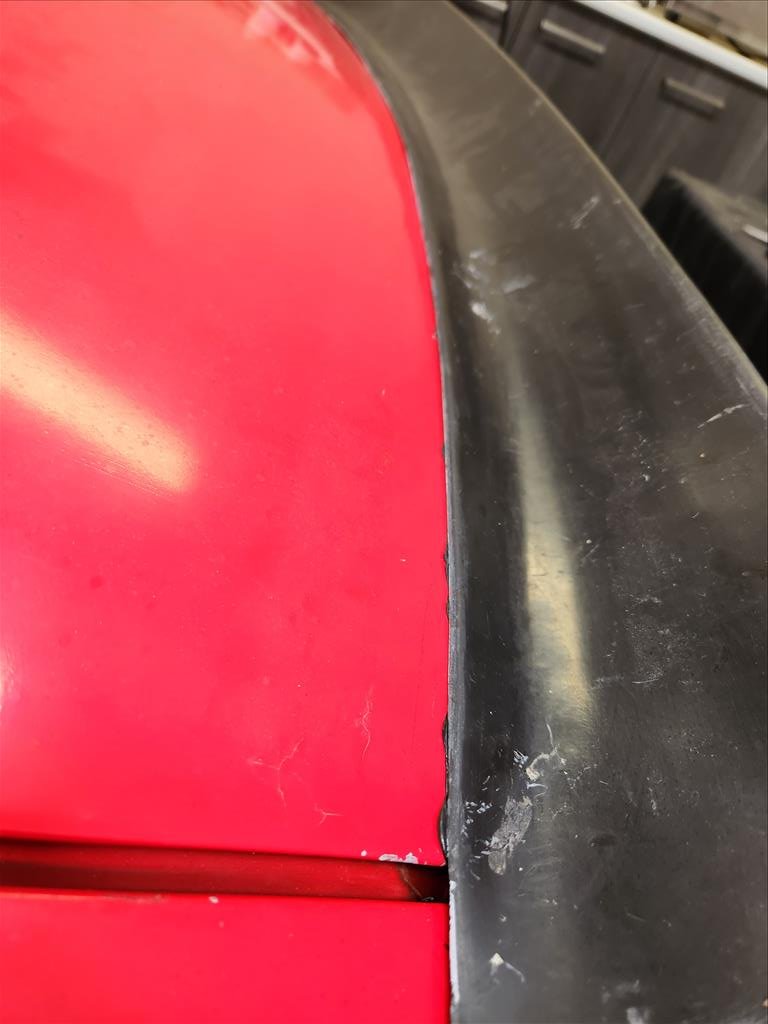
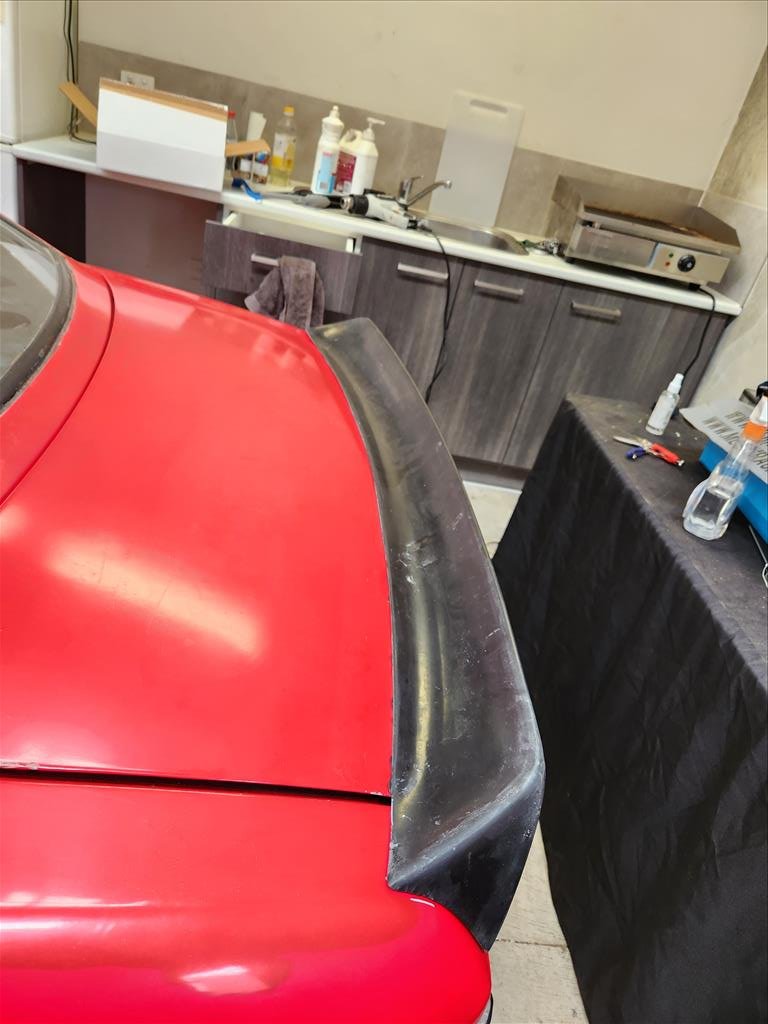
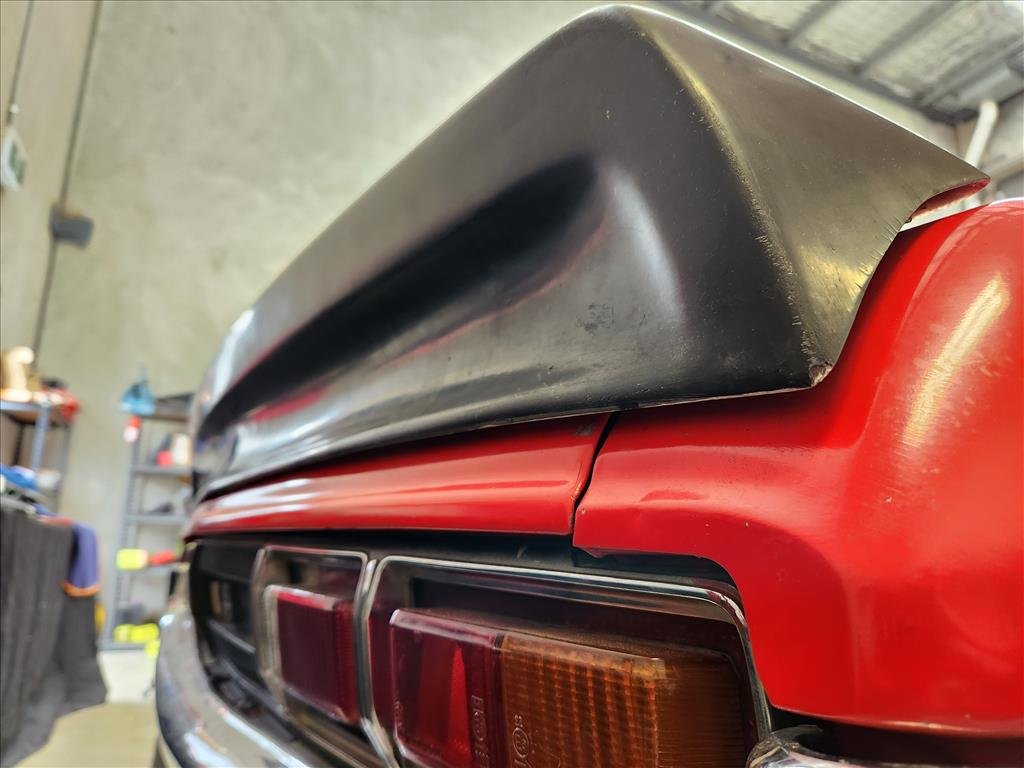
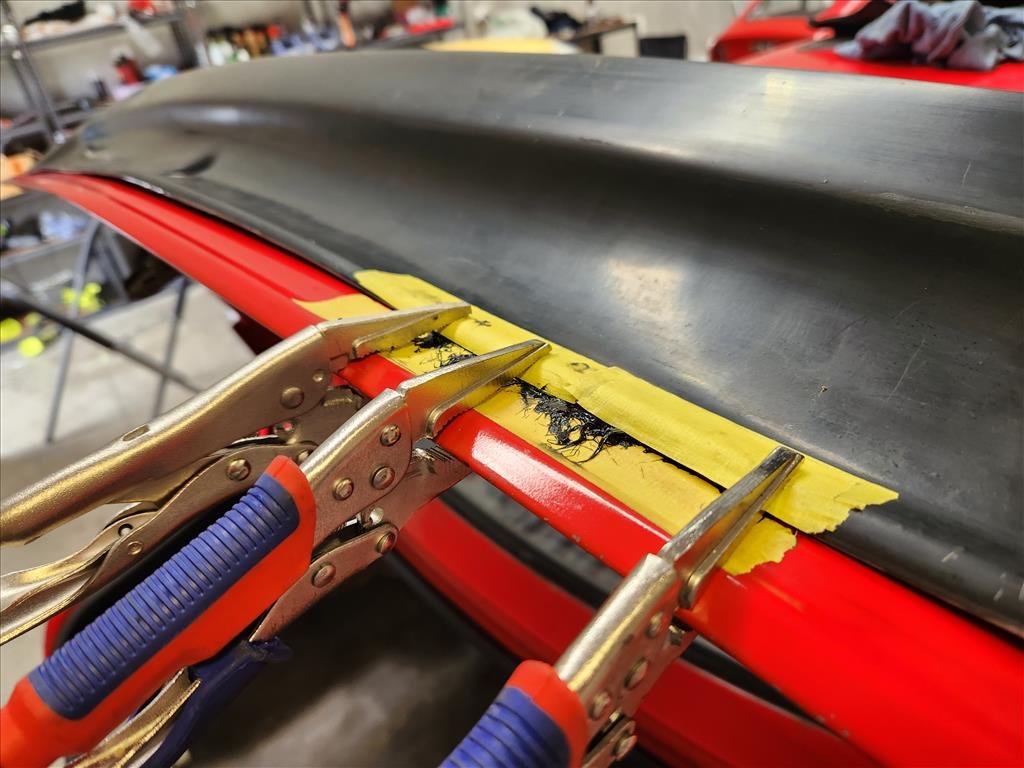
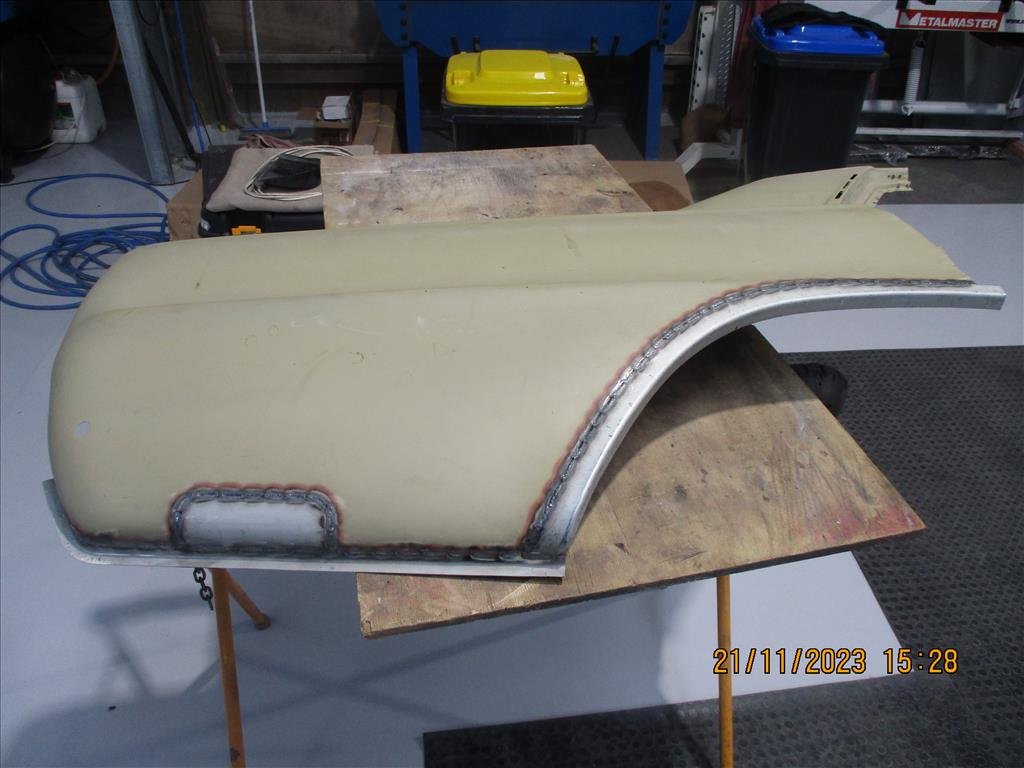
Last week I gooped the shit out of this wing on the Celica as I was sick of it just getting in the way of everything. I had to do a reasonable amount of trimming on the edges so it wouldn't hit the car when I shut the boot but now I can close the boot without contact on the sides. Now I have this overflow goop so not sure if I'll do a RWB style make a big goop line all the way along or just try cut it off.. I'm thinking I can just trim it. Problem is, this spoiler is warped to hell. That could be from a shit mould, could be from sitting in my warehouse/various places for 2 years; who knows. But there's a giant gap on the driver side now. Also I just realised how bad the boot is aligned LOL Naturally I'm doing some sketchy shit to see if it fixes it, or at least improves it a little bit. I used some heat to try and relax the resin but it's pretty well set in shape so I don't have high hopes for it staying stuck down.
-
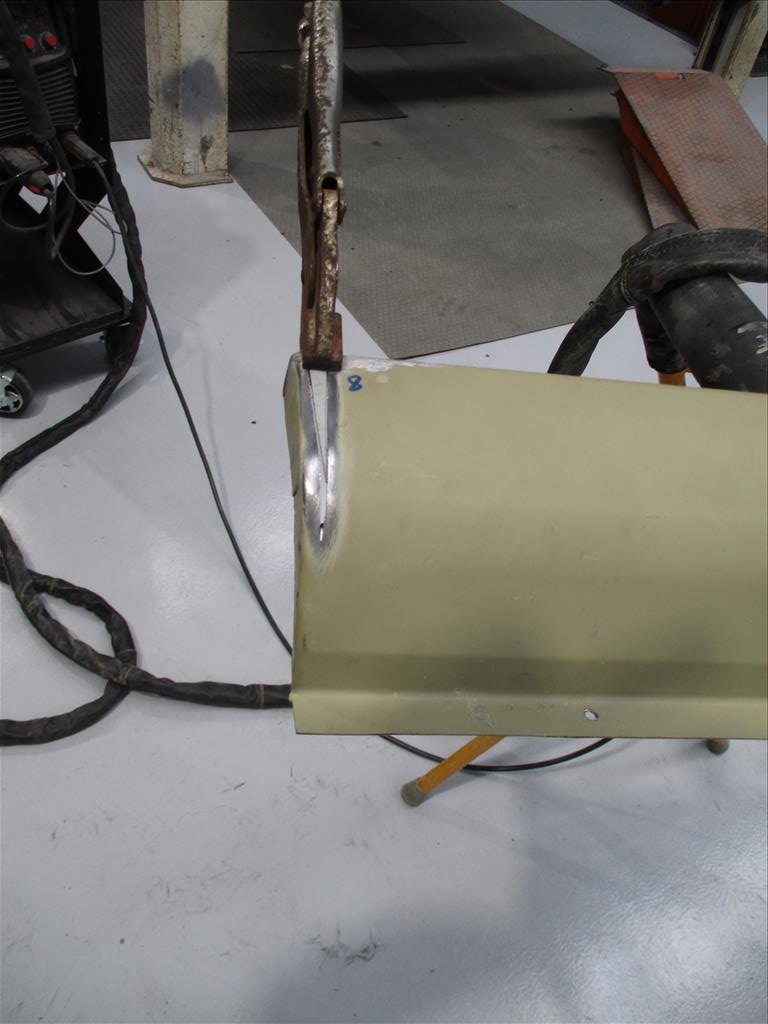
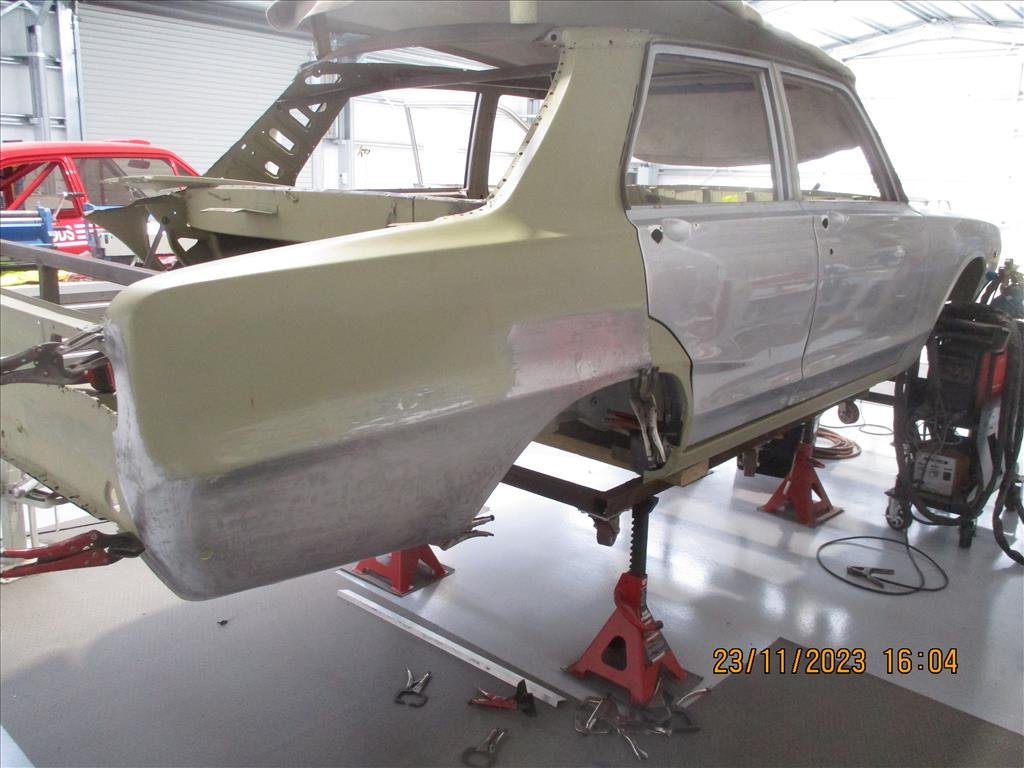
Another Panel Barry update has arrived in my inbox. He's now finished up all the rear quarter work which was quite extensive. The edges were rebuilt on both sides as well as some of the inner parts where it met up with the side panel and inner arch to make sure it was seamless. Next step as mentioned earlier was to get it on the chassis machine which much to our surprised it seemed fairly straight but there was marks from where it had been previously pulled. Not really a huge surprise, the car is old so it would have been ambitious to presume it had never been in an accident before. He's also been busy doing some re-alignment on the side sills and the doors to make sure they all line up and close properly before having the doors dipped and see how much of them are just filled with bog. He also found some damage on the chassis rail at the front and underneath a bit, probably from a forklift lifting it which is unfortunately common in Japan so that's being fixed up too.
- 44 replies
-
- 21
-

-