bmxnz11
-
Posts
1157 -
Joined
-
Last visited
Everything posted by bmxnz11
-

Wellington Monthly Meet - Discussion thread
bmxnz11 replied to KKtrips's topic in Lower North Island Region
Same as above -
Press it in, block the vaccum port and it should hold?
-
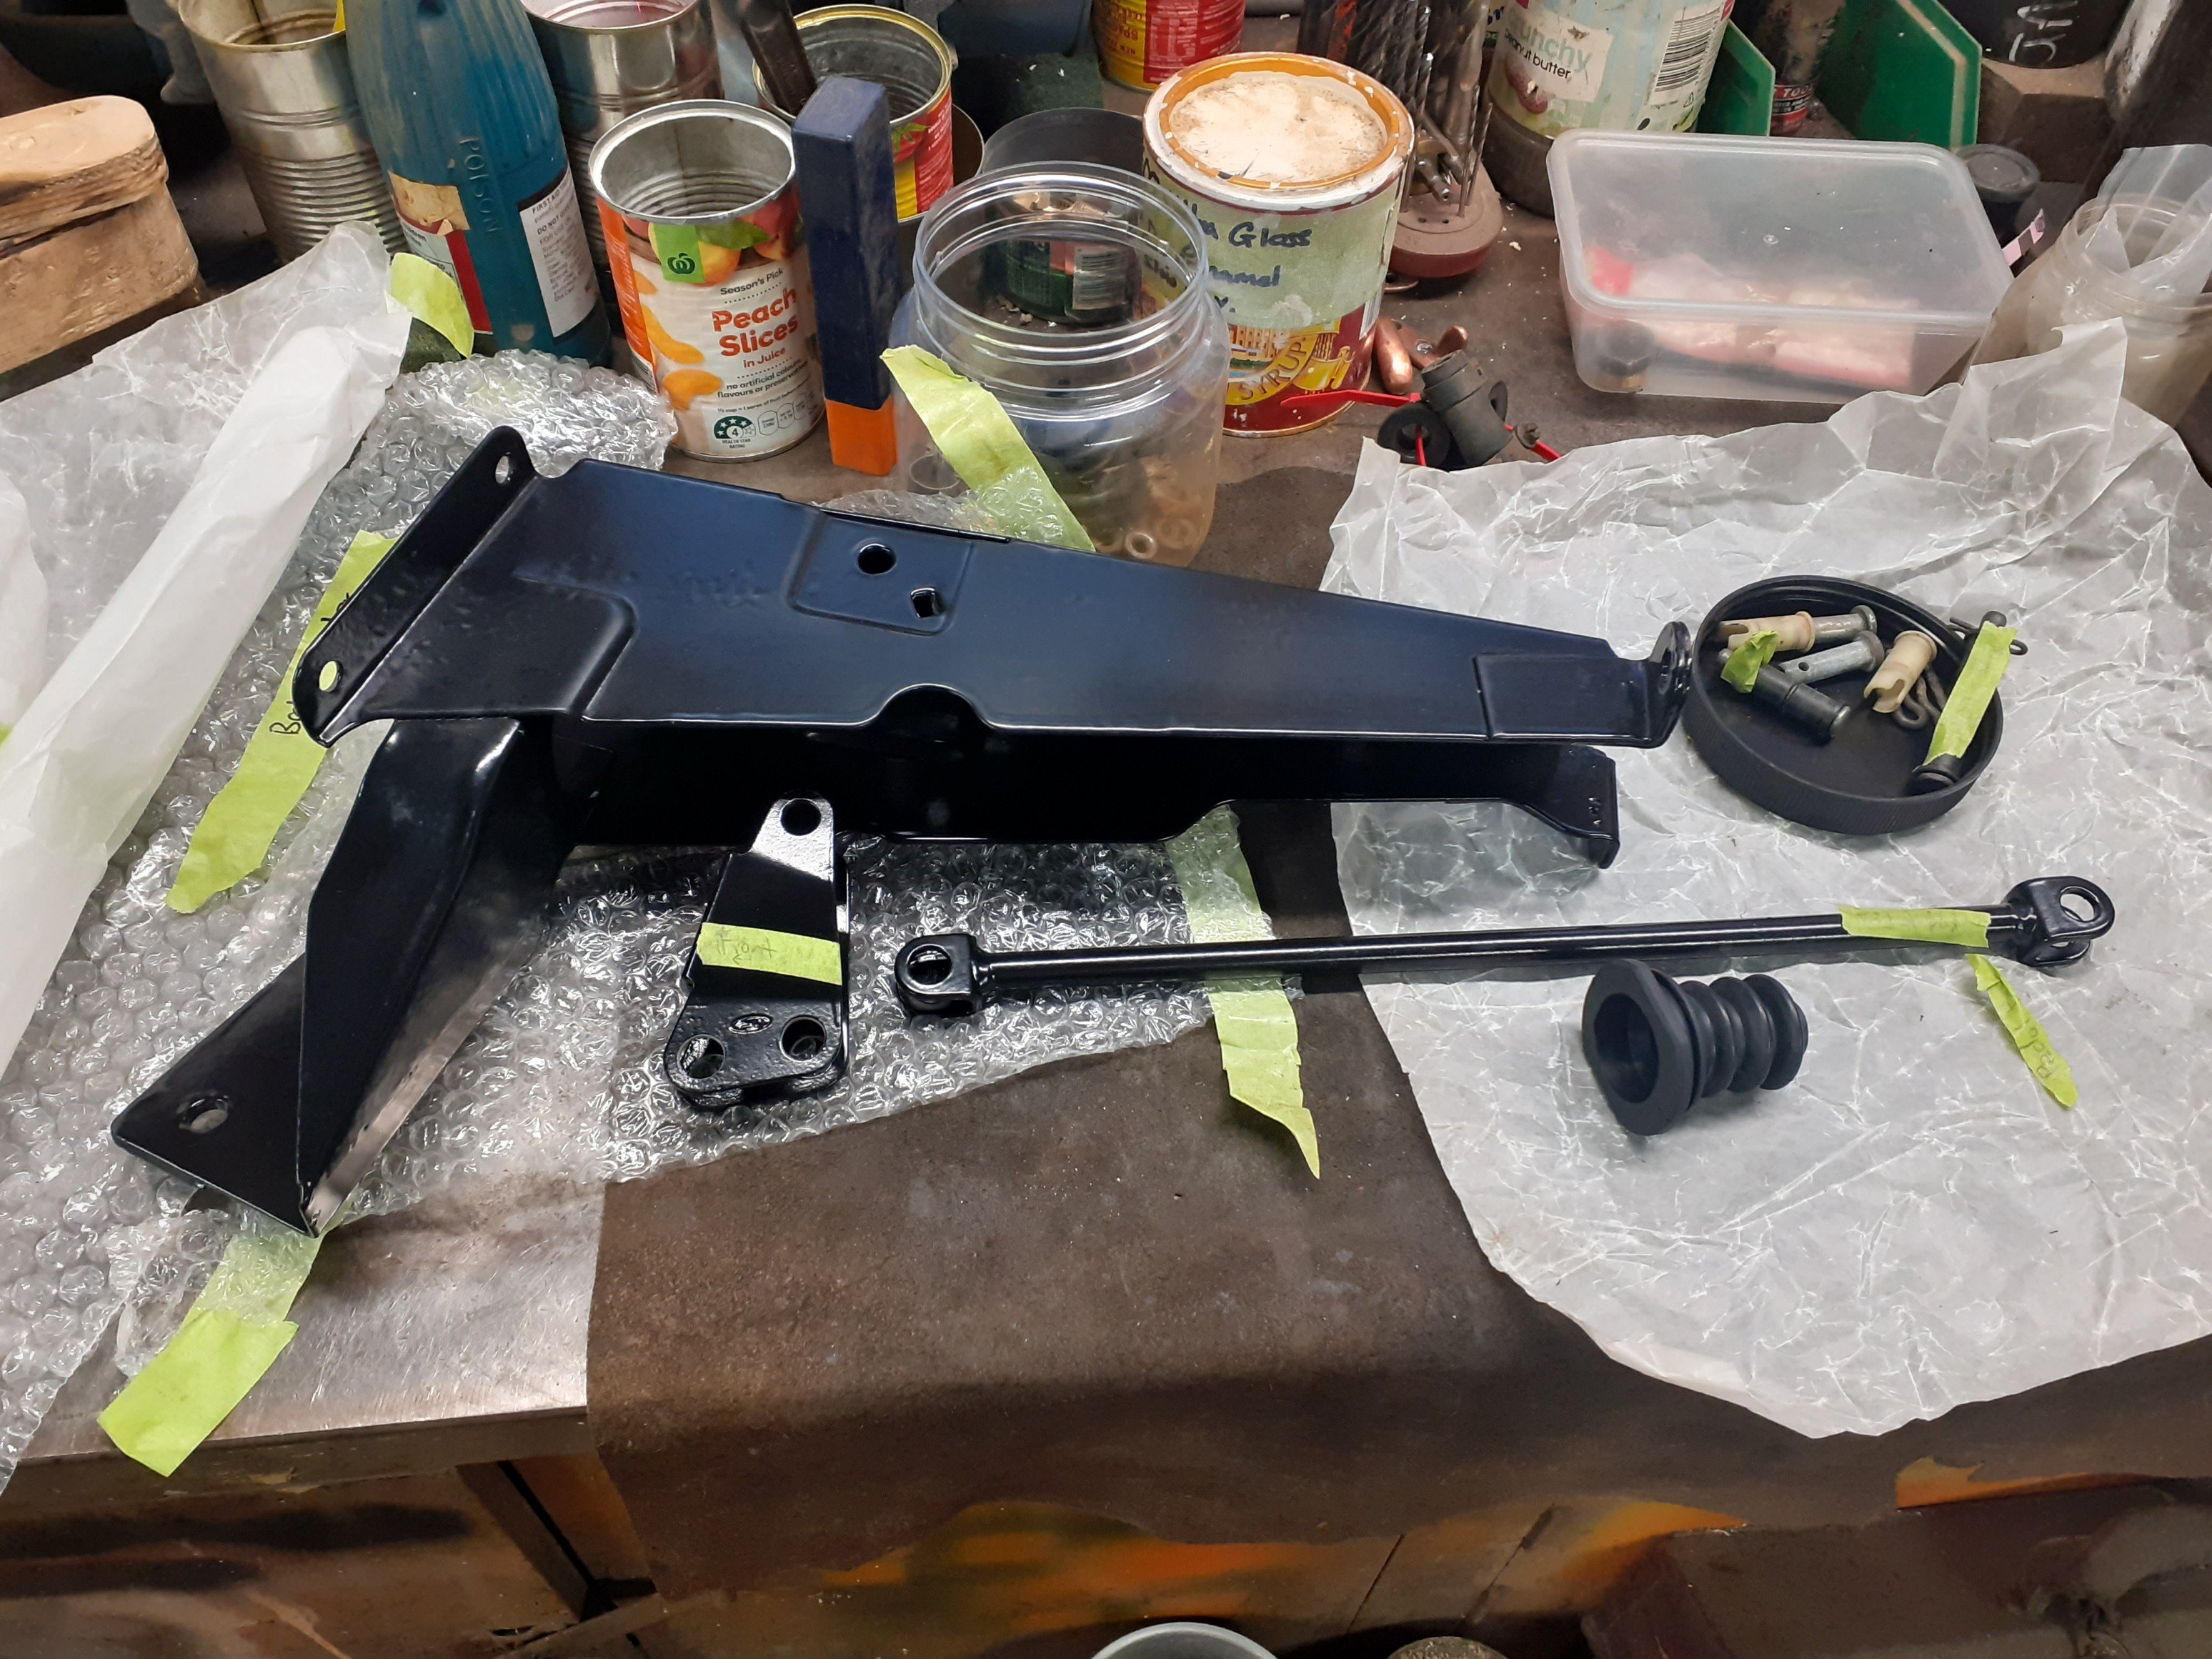
Installed the pedal box and steering, then started on the brake booster. The booster I was planning to use seems to be wheeping a bit fluid out the front, where the output rod pushes into the master cylinder. Pulled a spare booster out which looked good and realised it had a longer input shaft but everything else externally looks the same. The longer one wasn't going to fit my set up. I checked booster bracket against a spare and the spare was also 40mm longer so I cant chop and change between them. Im possibly a mk1 vs a mk2 part. Anyone know if its possible to bench test a brake booster? They both move freely with the same amount of pressure when pressed down by hand but that's all I can tell.

-
Wellington Monthly Meet - Discussion thread
bmxnz11 replied to KKtrips's topic in Lower North Island Region
I'm gonna try and make this. I'll be more 7 than 6.30 but don't let that stop anyone from starting early. -
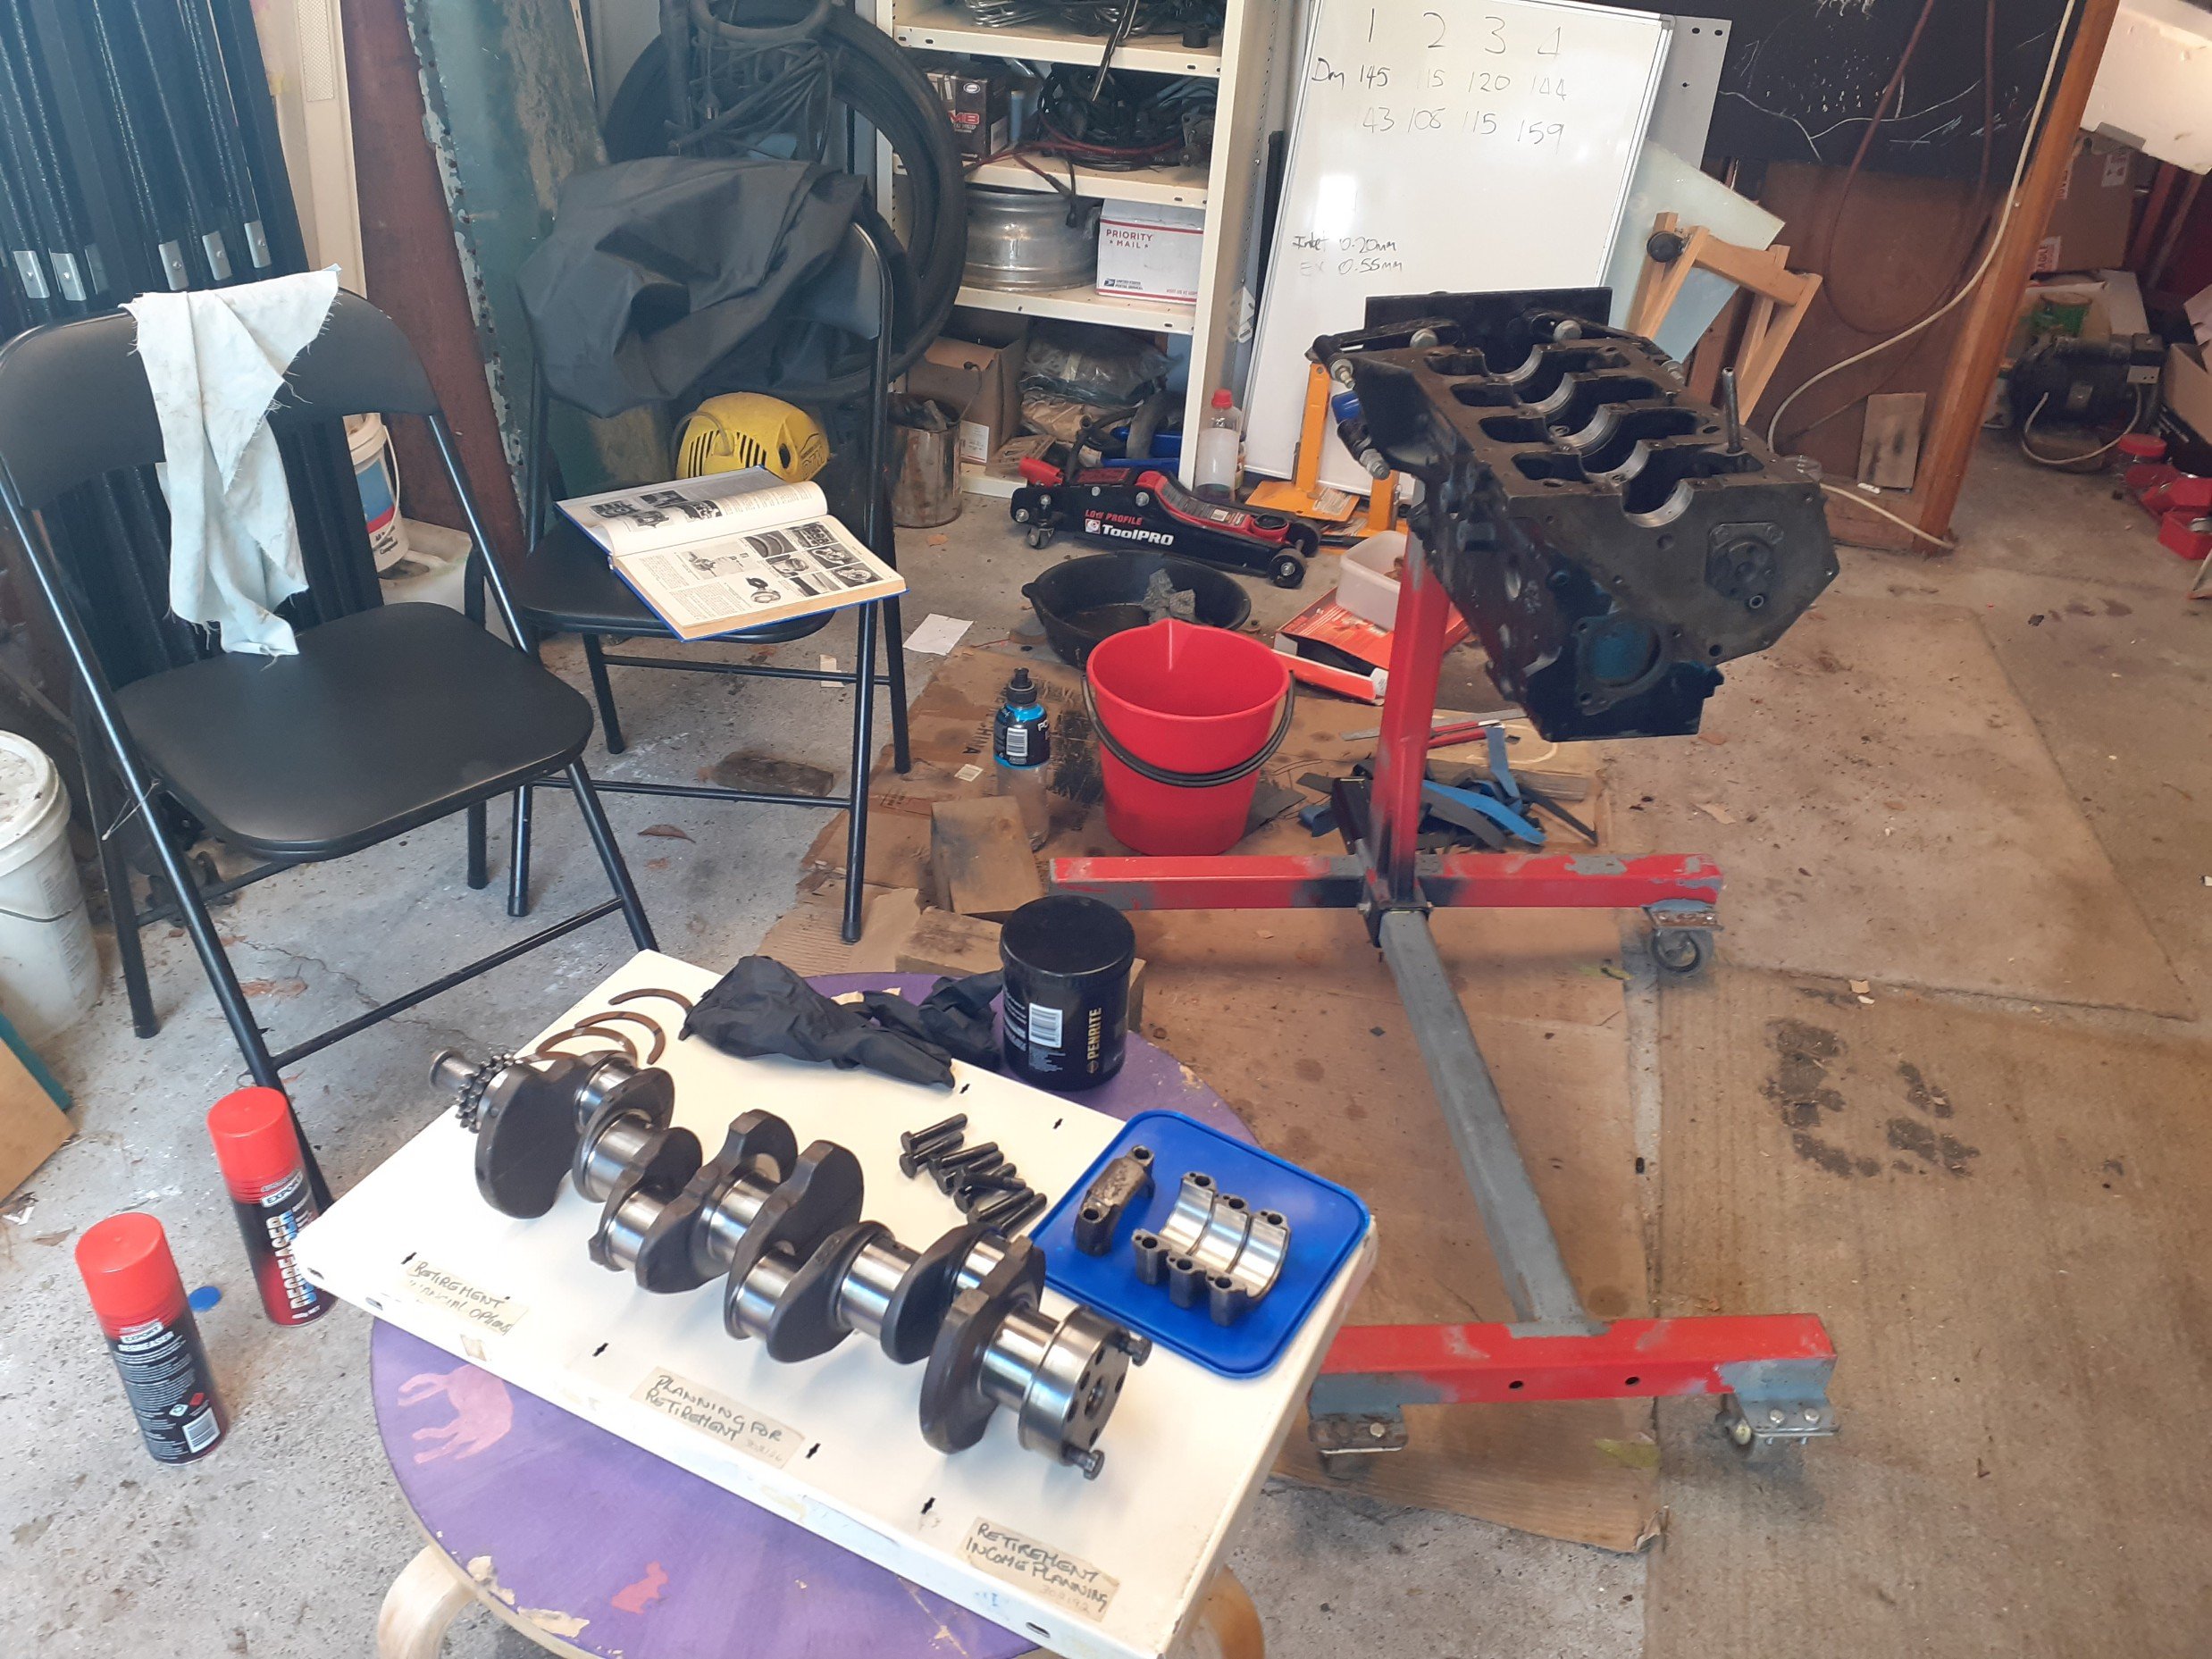
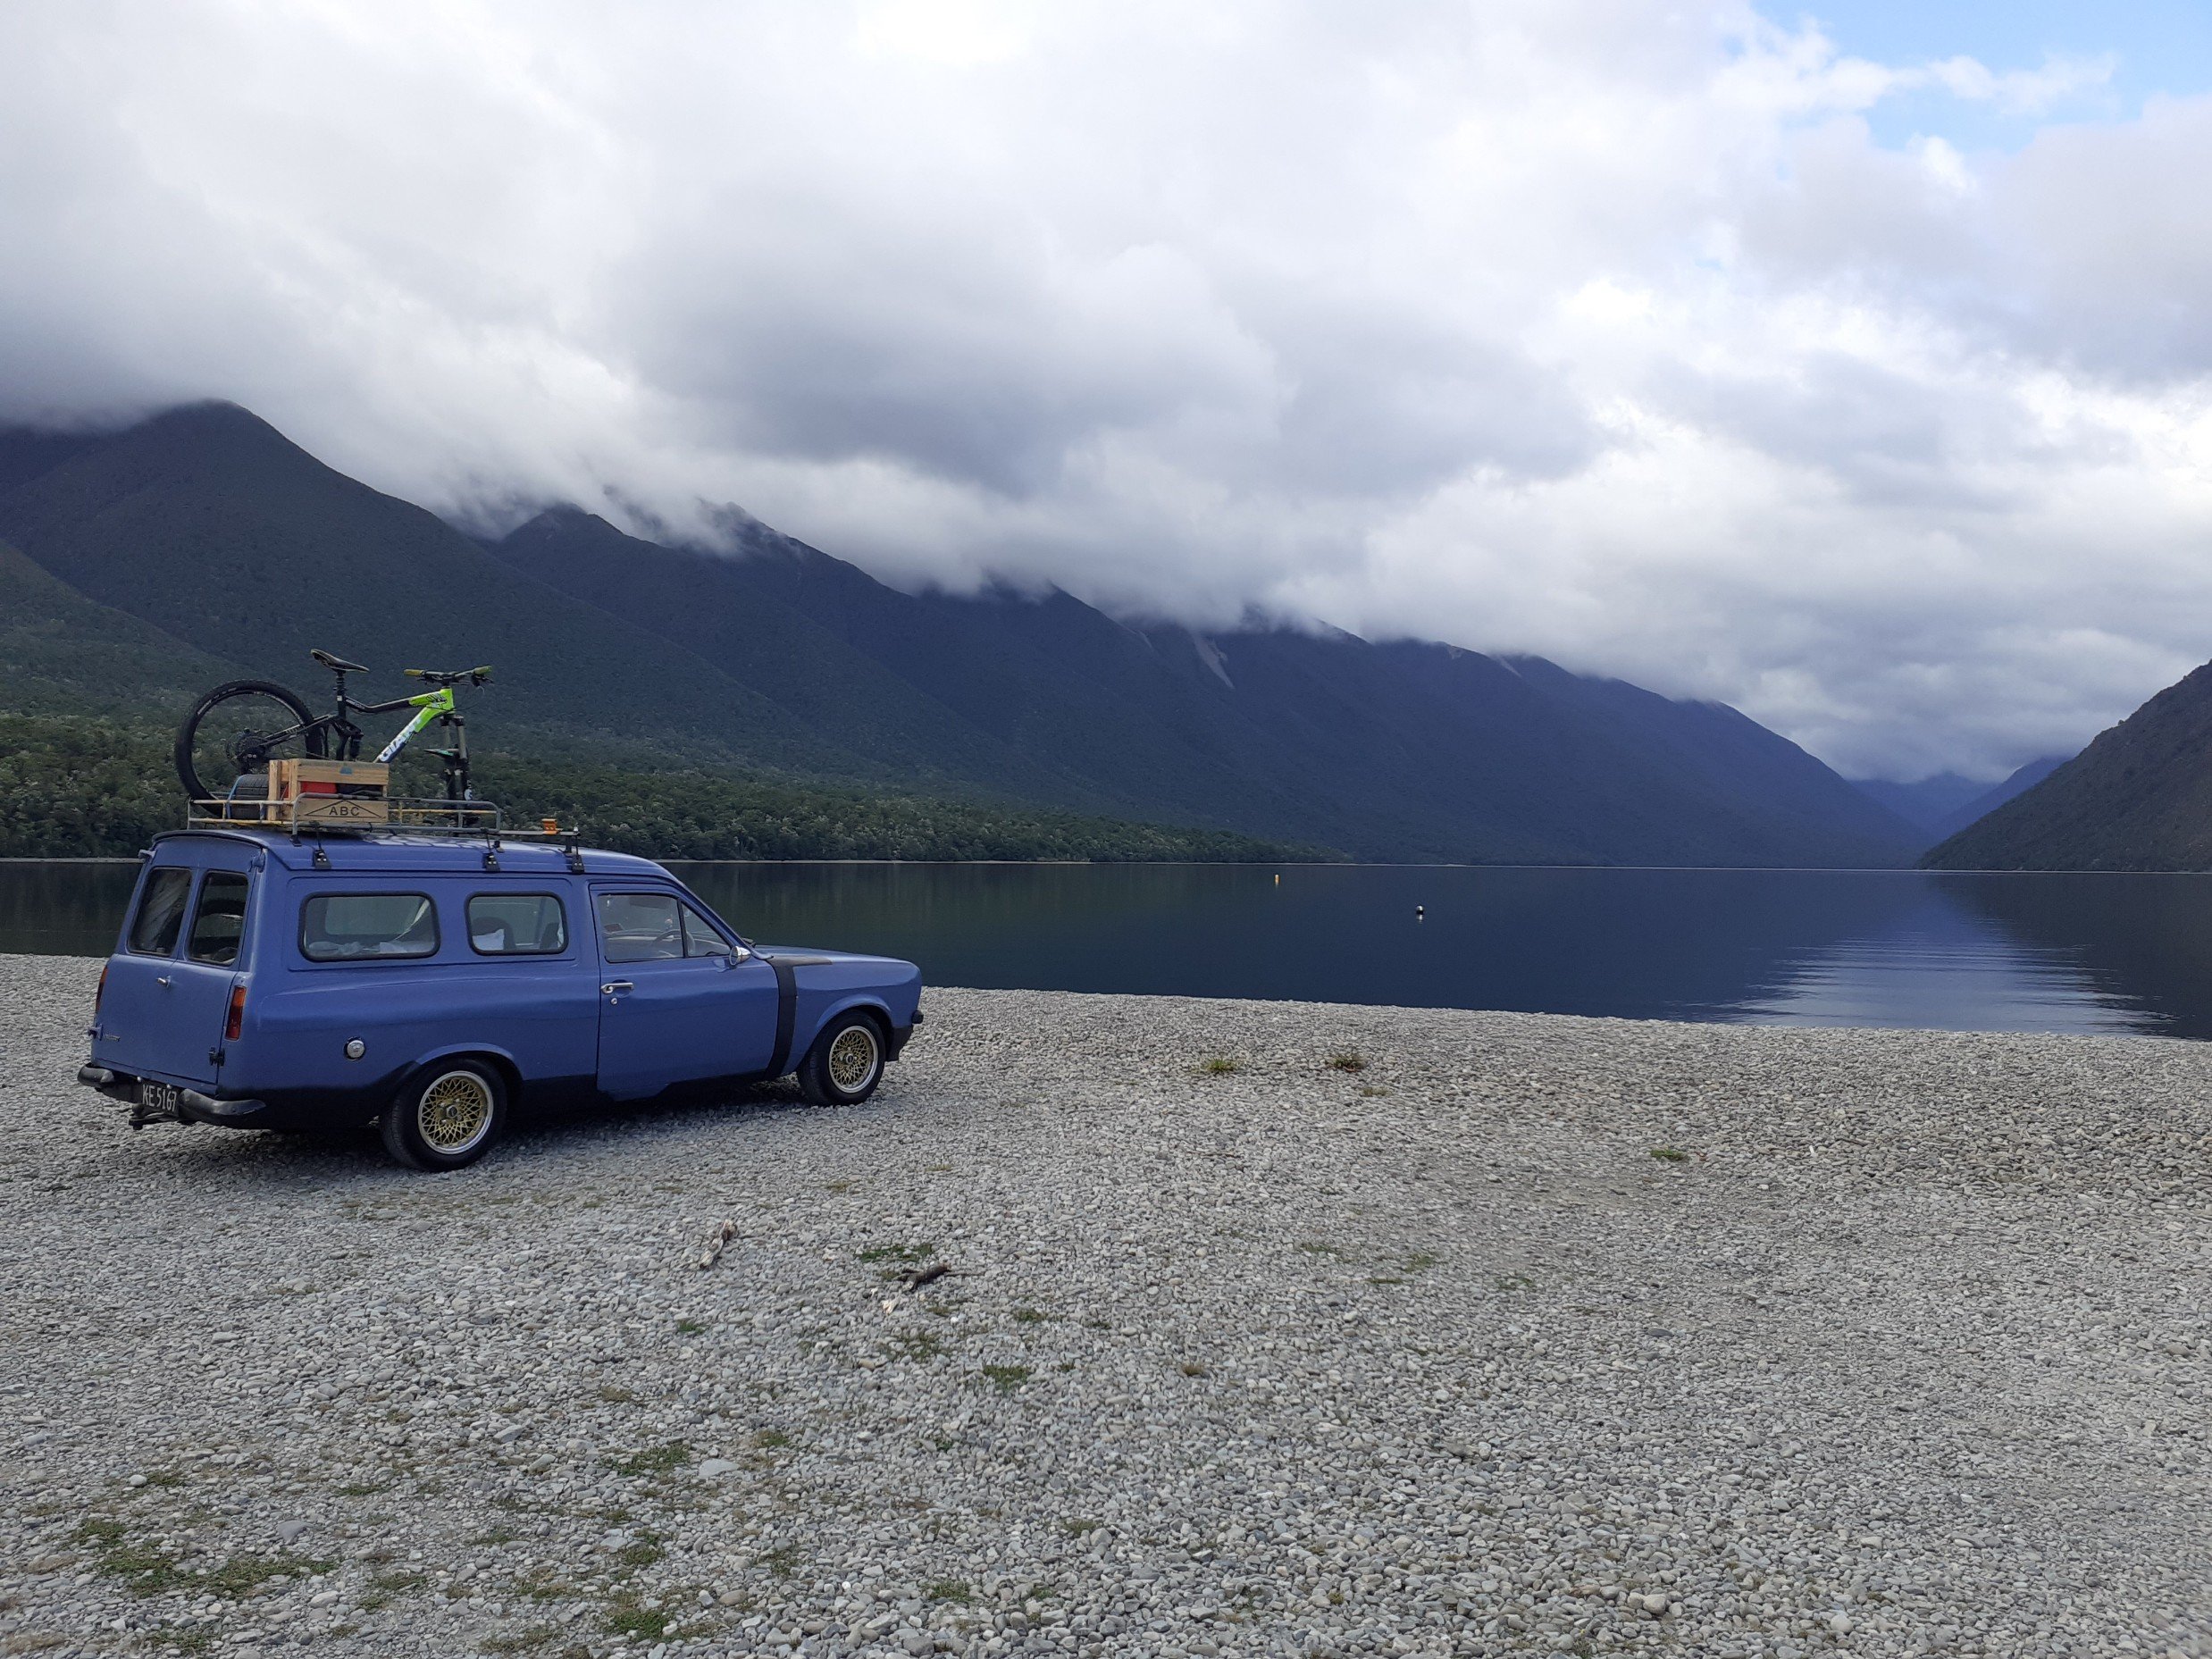
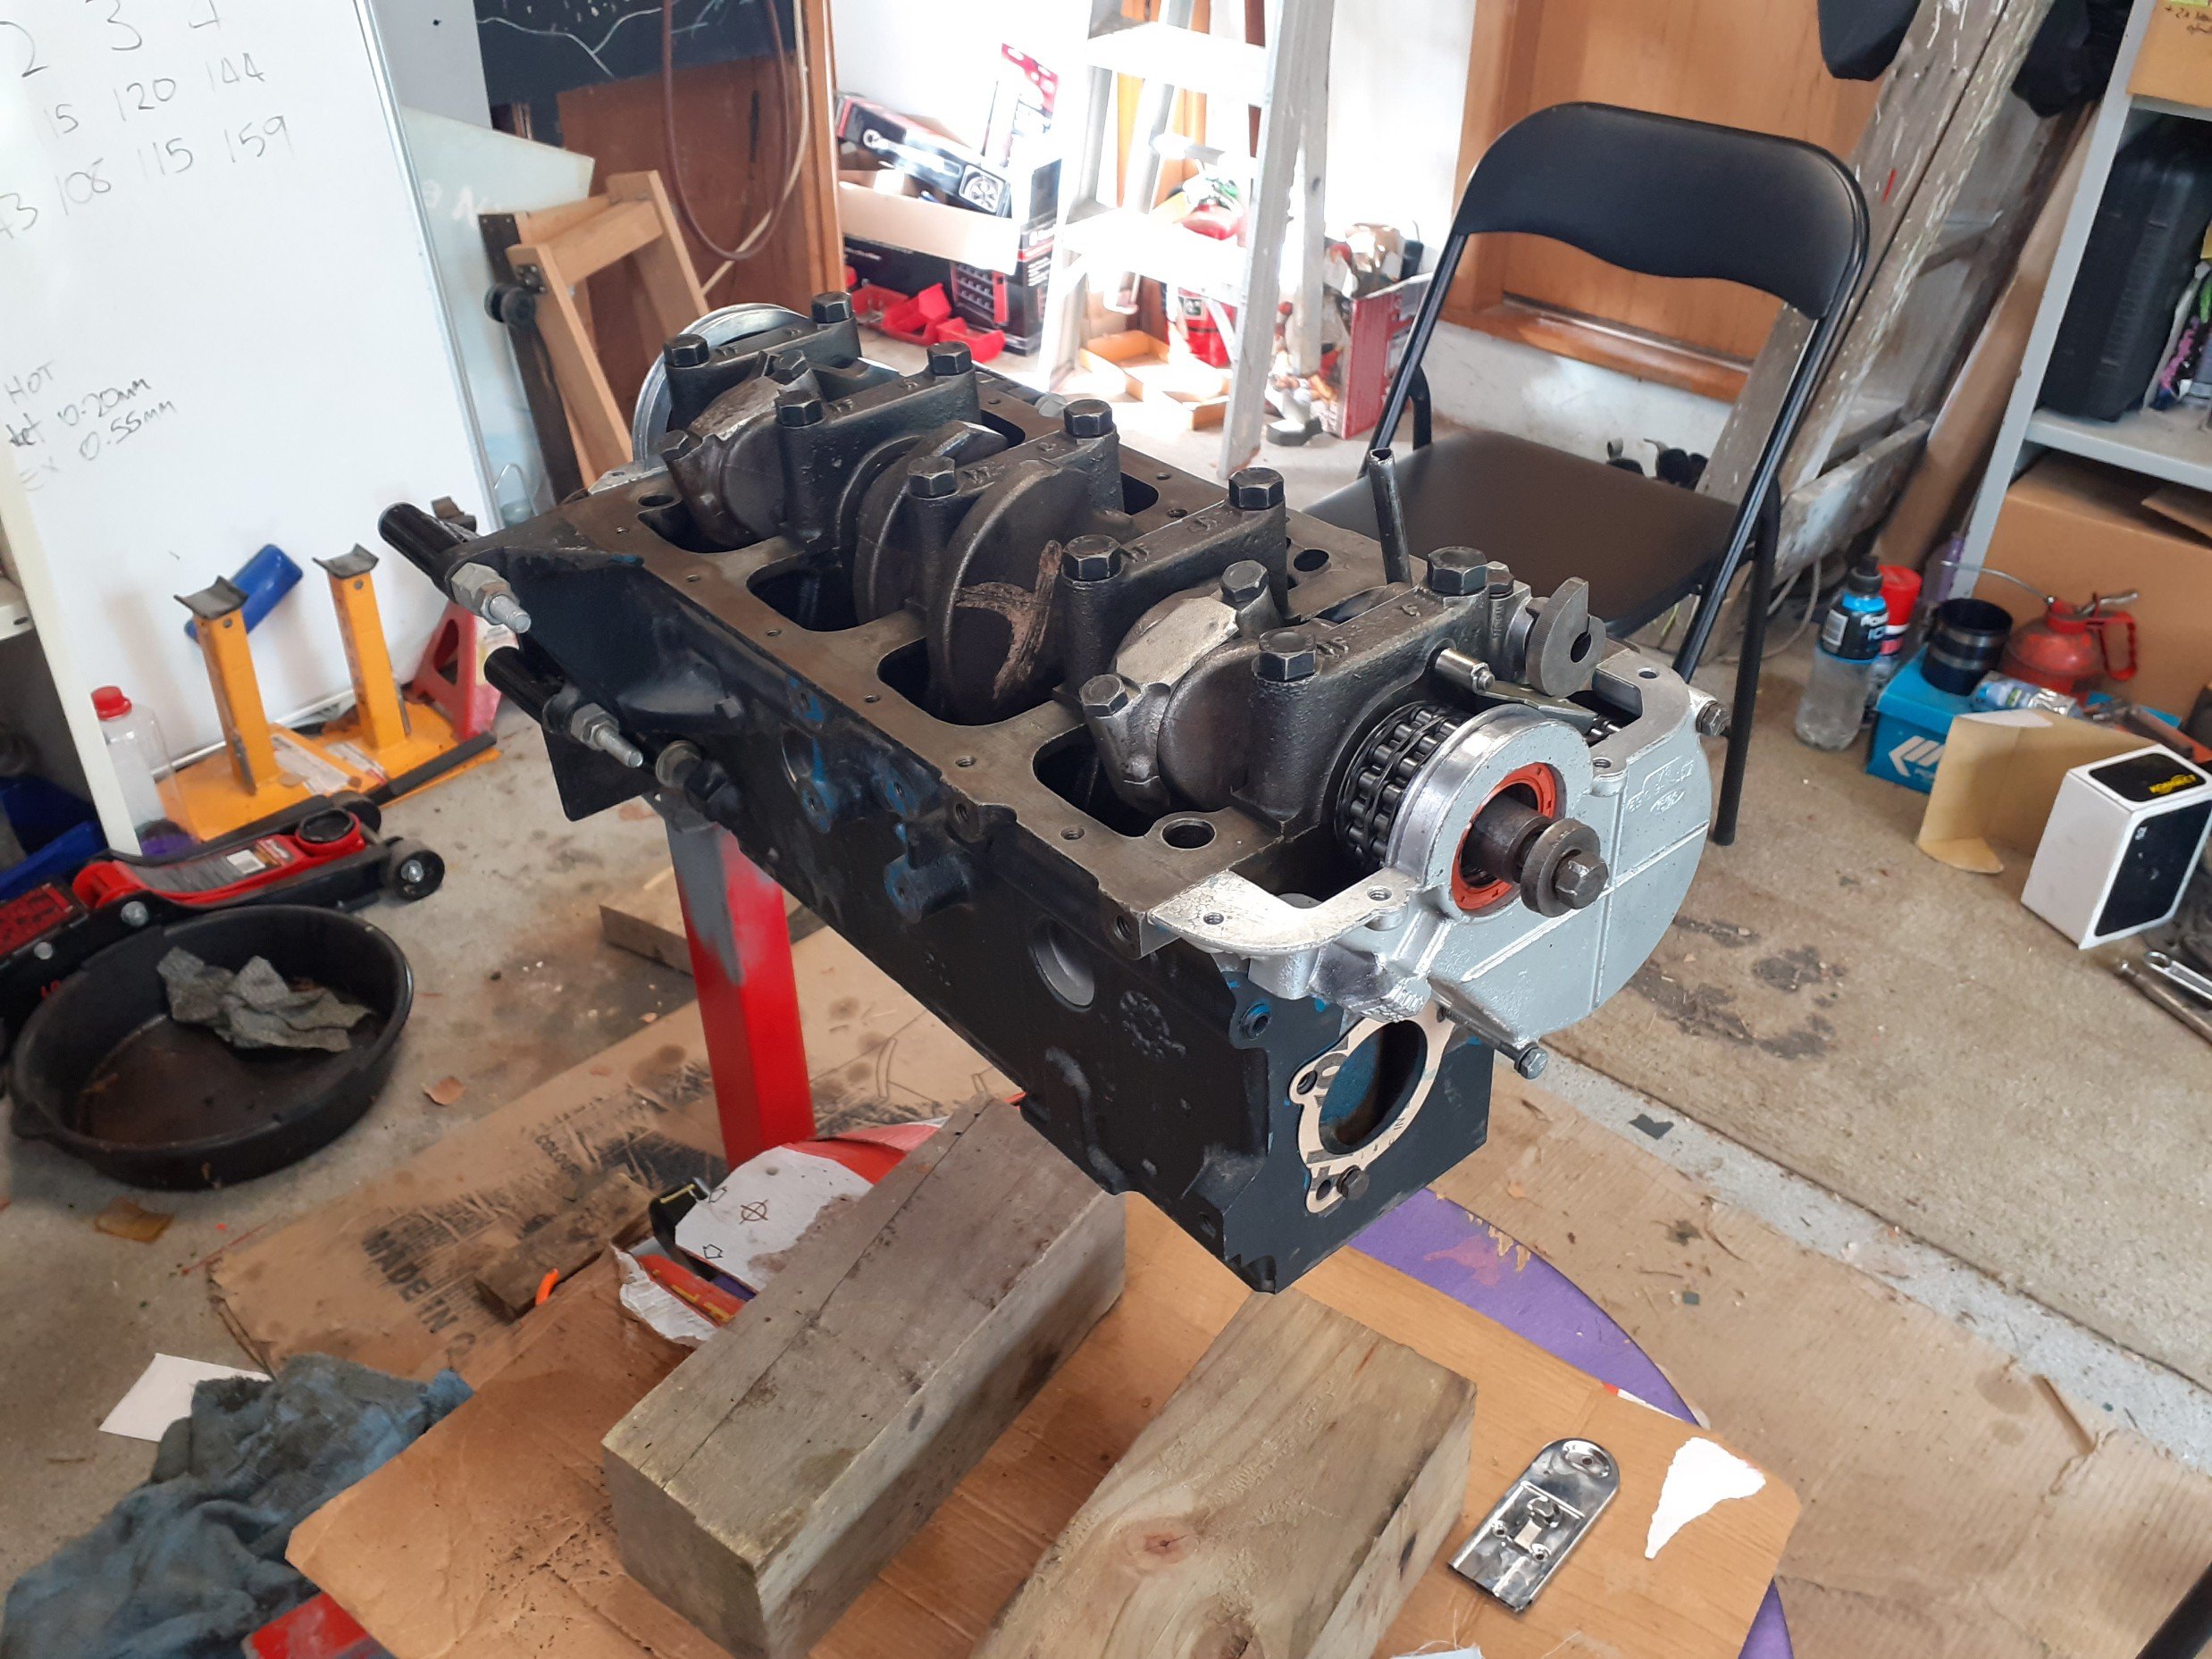
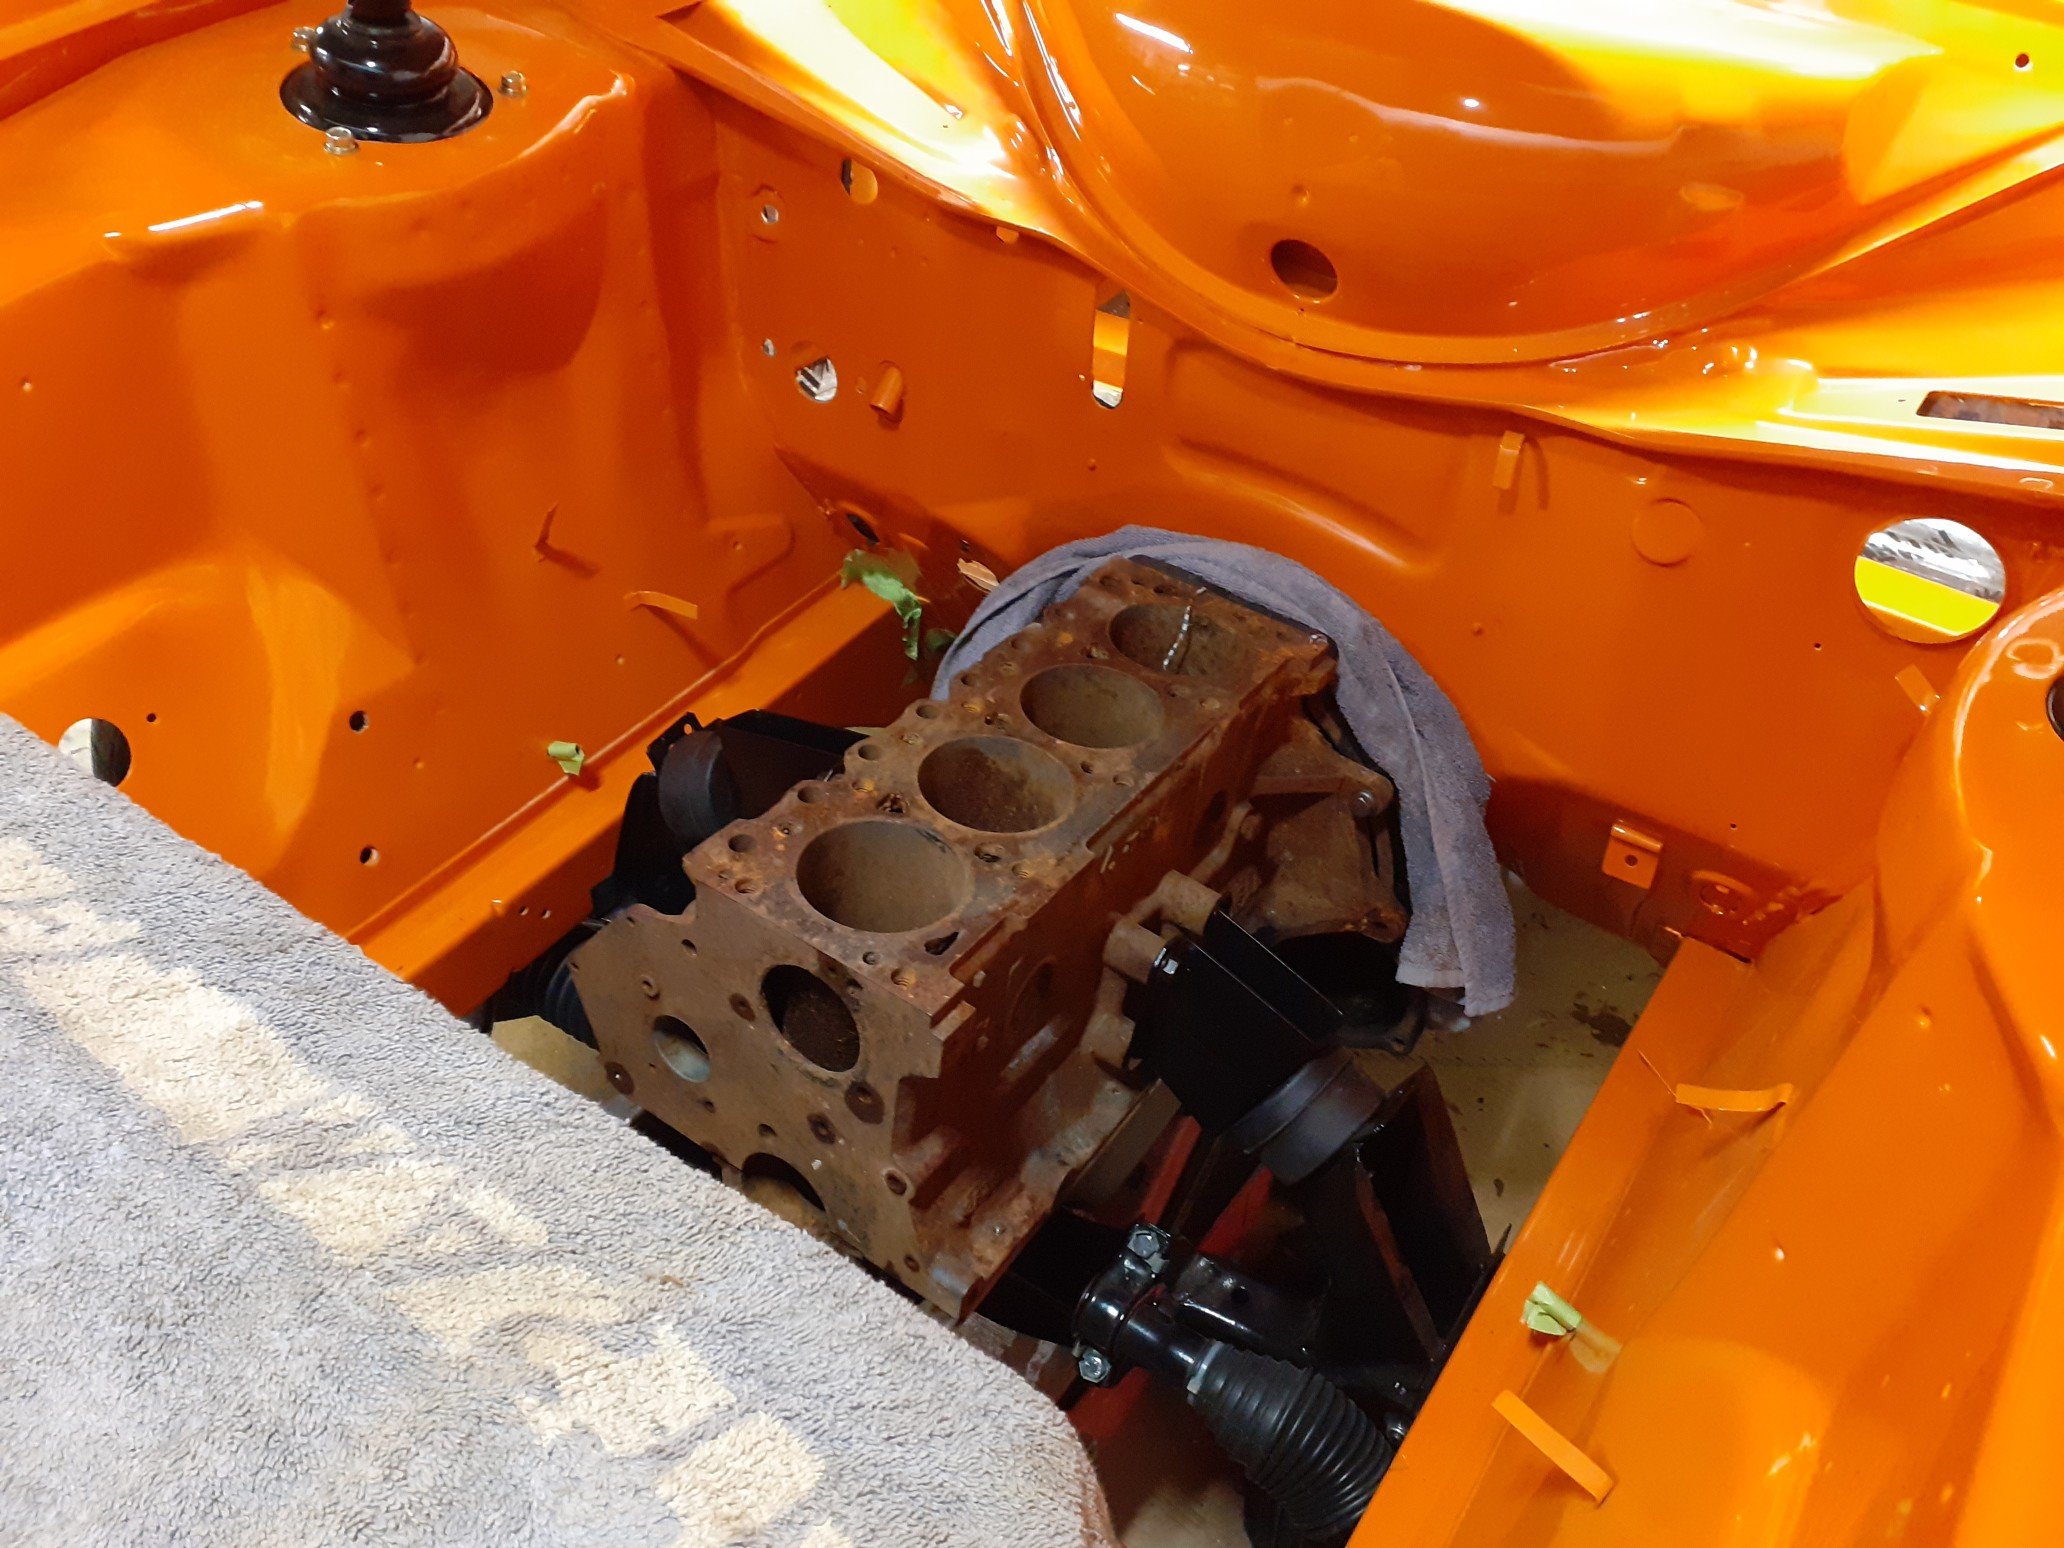
Took this down to nats, had a ball. Went down a few days earlier and took my bike. Camped out at rarangi the first night and then went down to st Arnaud before Nelson and marahau. Was concerned about heading over the takaka hill but it was sweet, didn't get warm or anything. 1,000km trouble free motoring. Started work on the spare motor for this. 691m block, 1600, +60 1300 pistons, lightened and balanced rods, crank has had work on it, gt cam, new cam followers, double timing chain and the modified head. Won't be installed anytime soon as there's a few other things on the go first.
- 37 replies
-
- 14
-

-
You too, was great to meet new faces. Cheers man, it's slow work so they're not the most active threads.
-
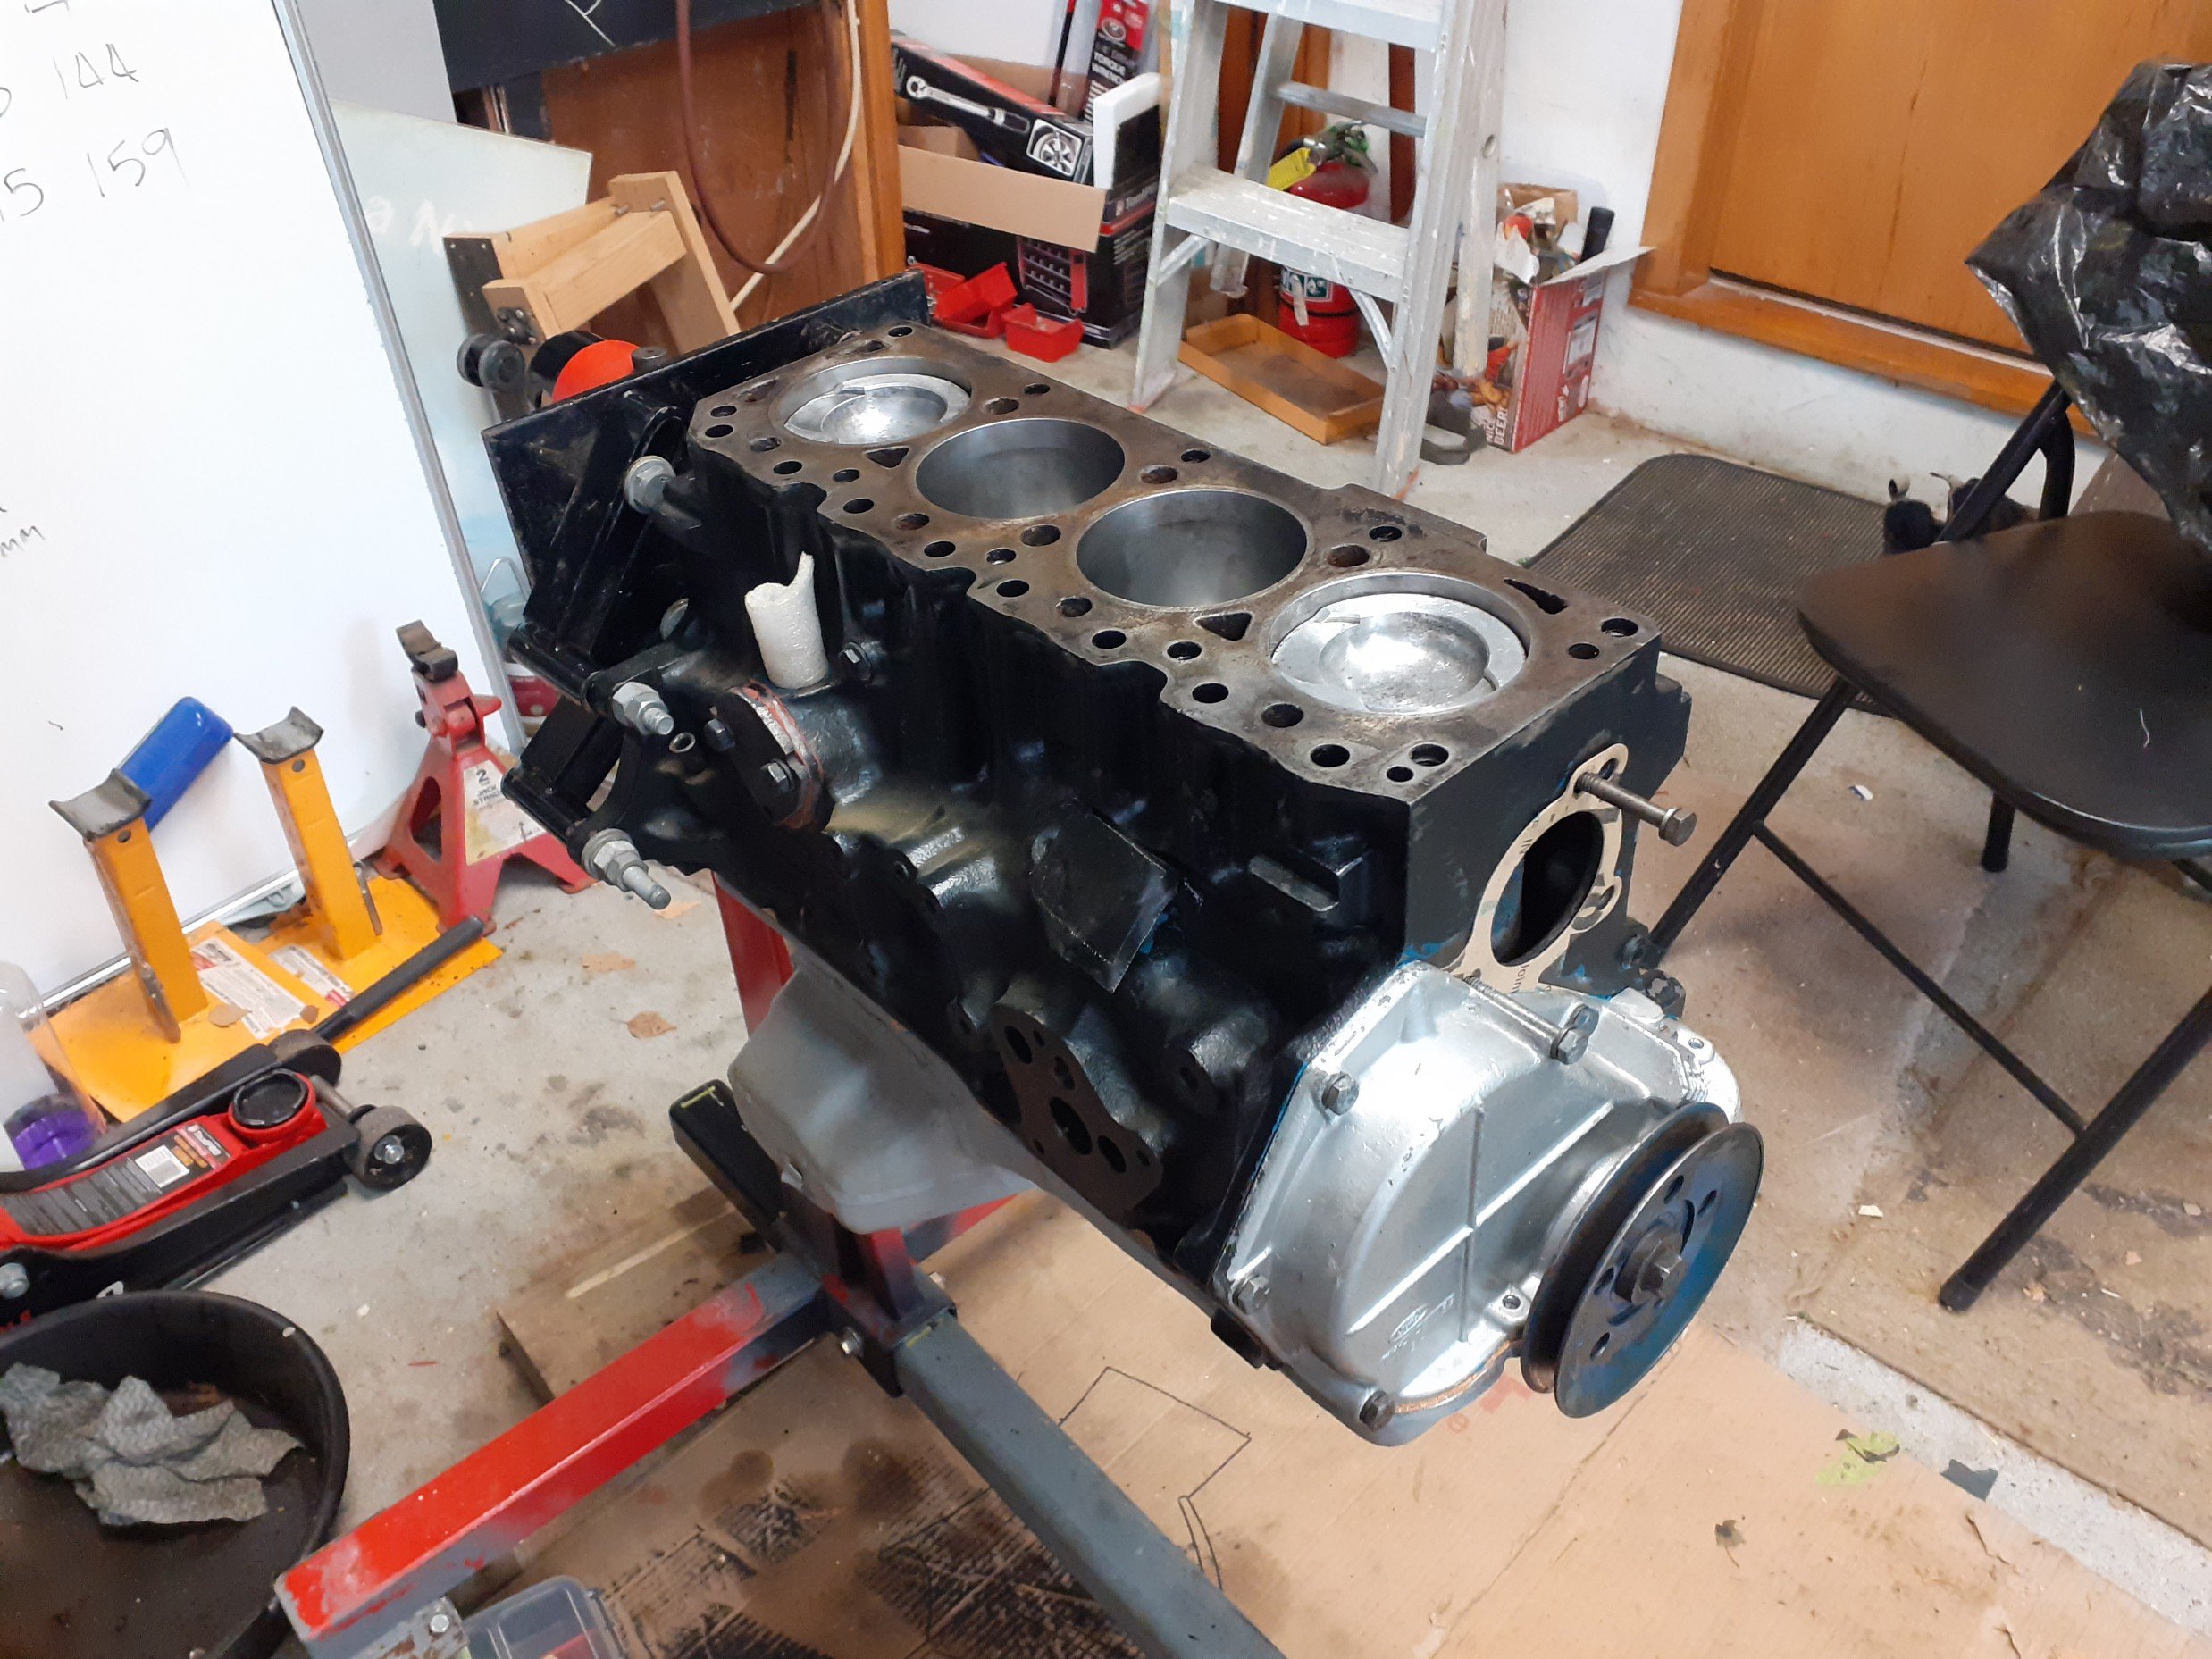
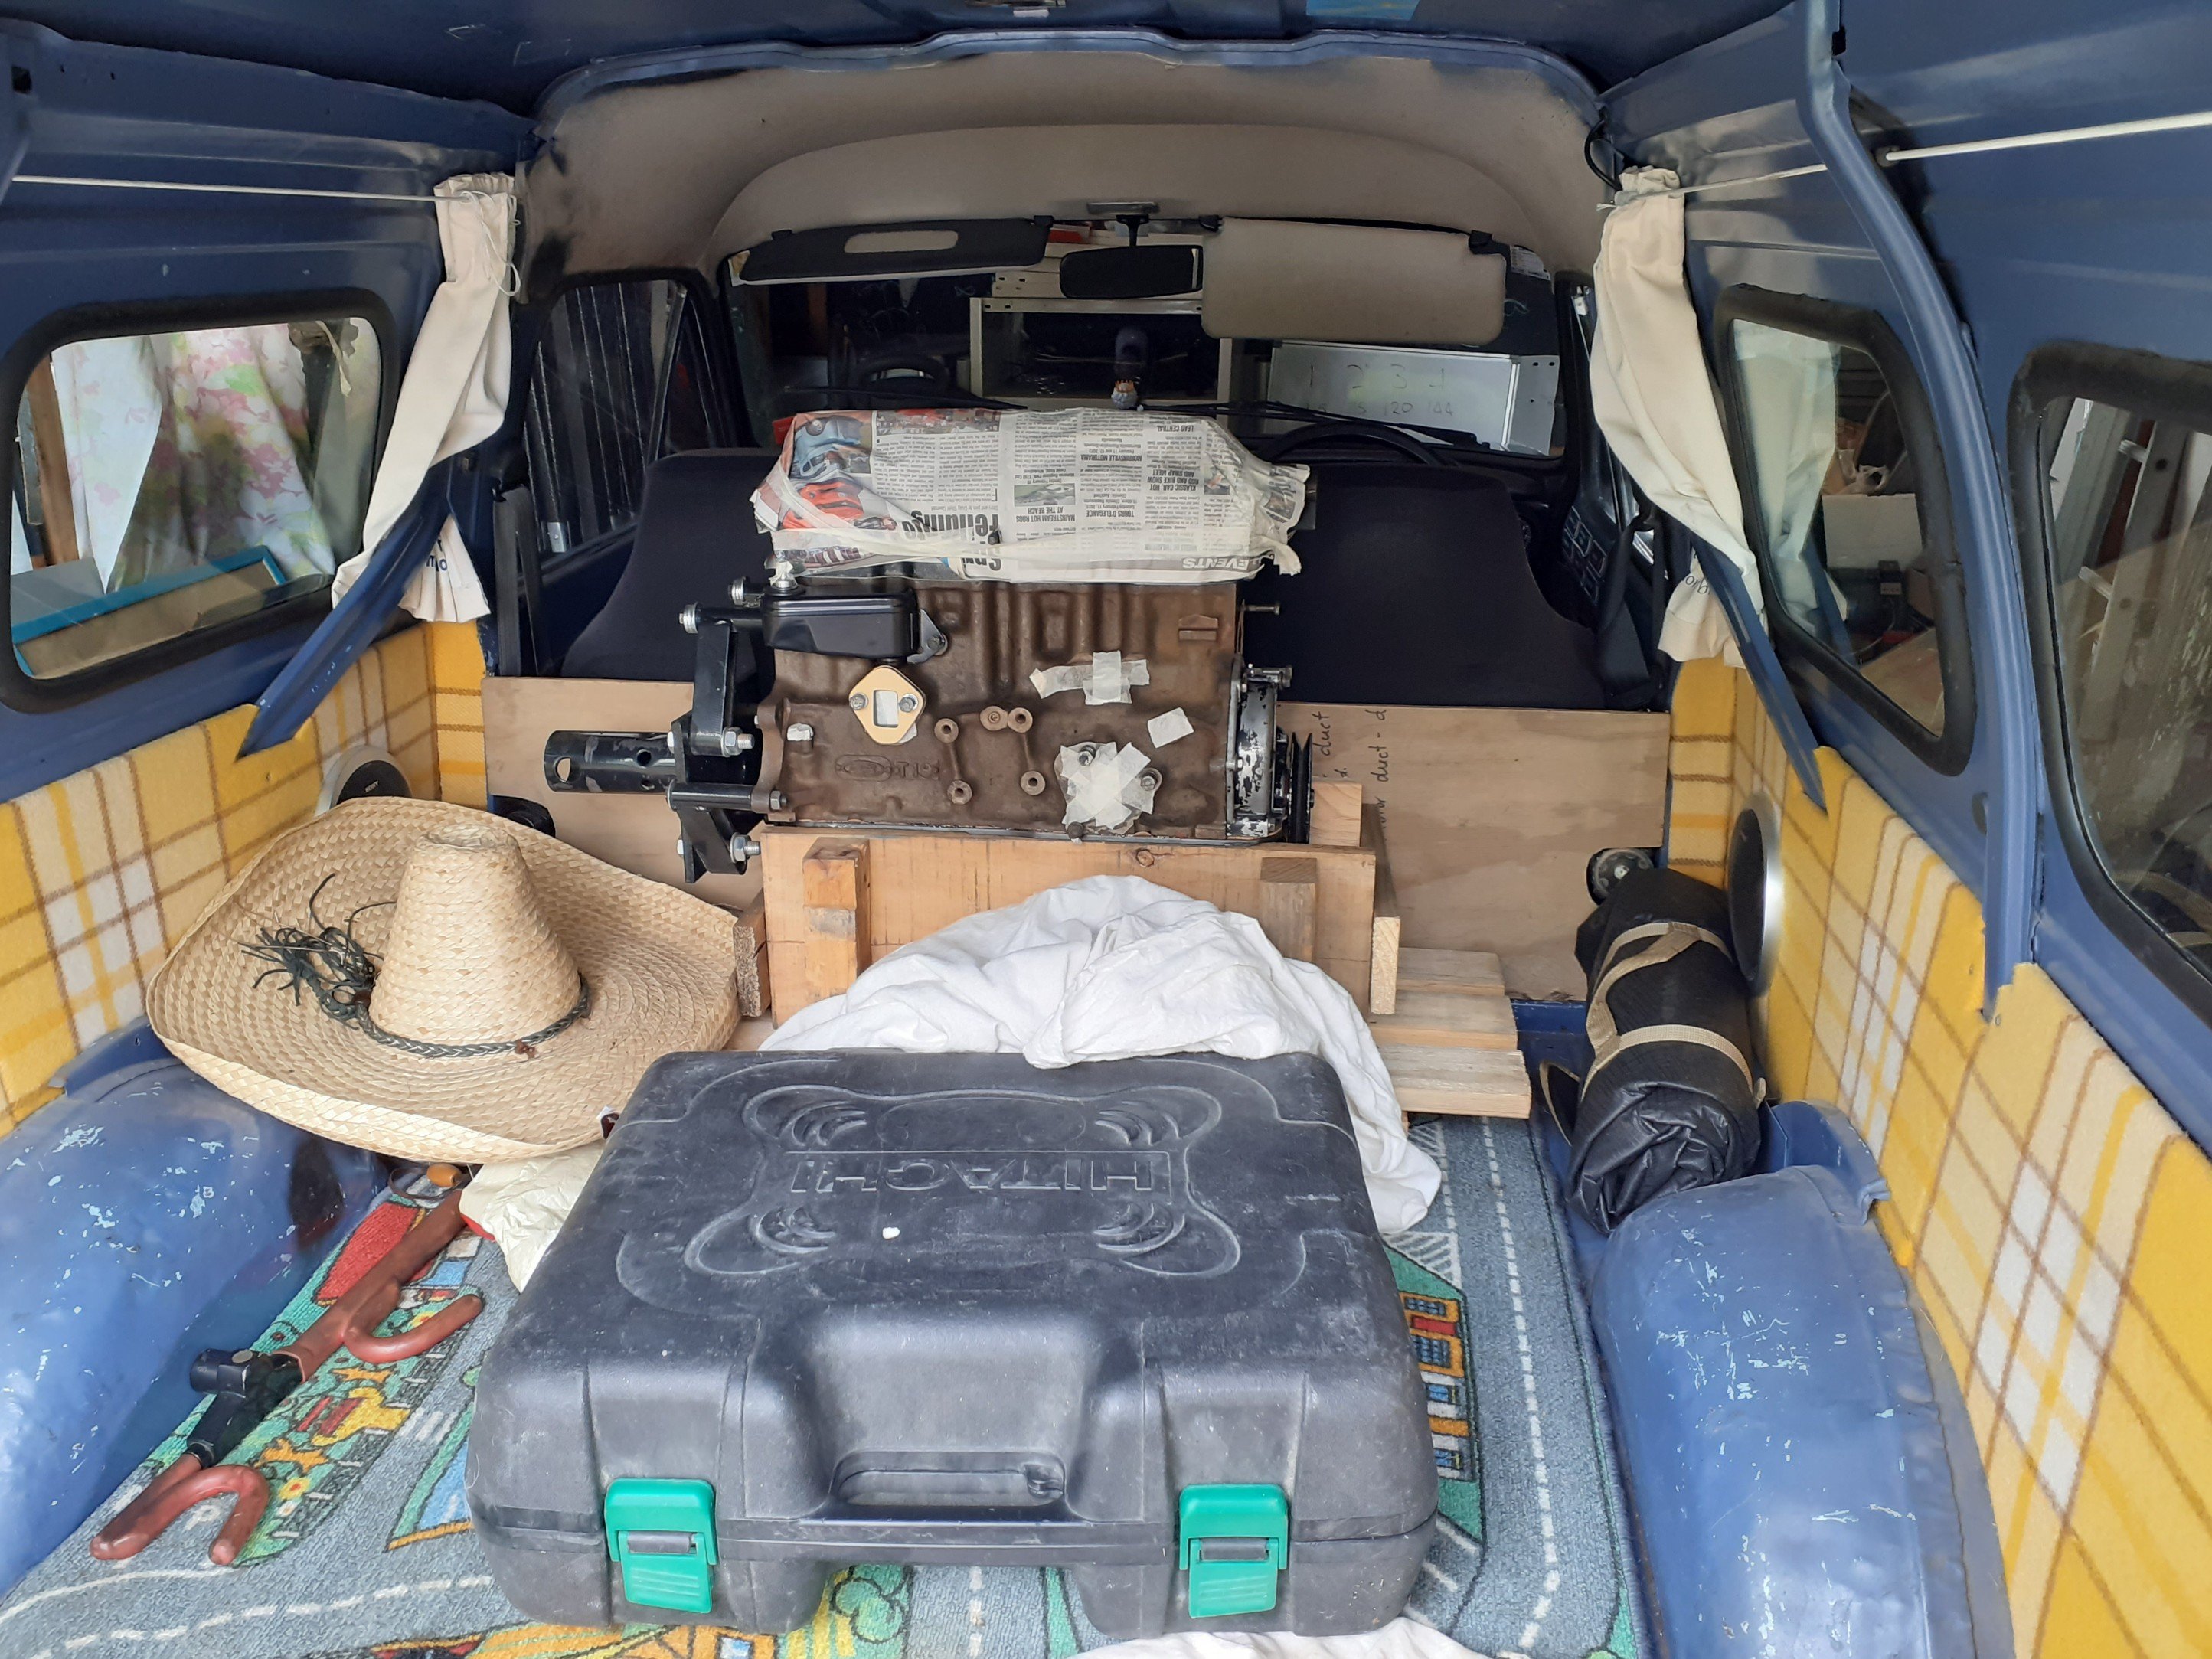
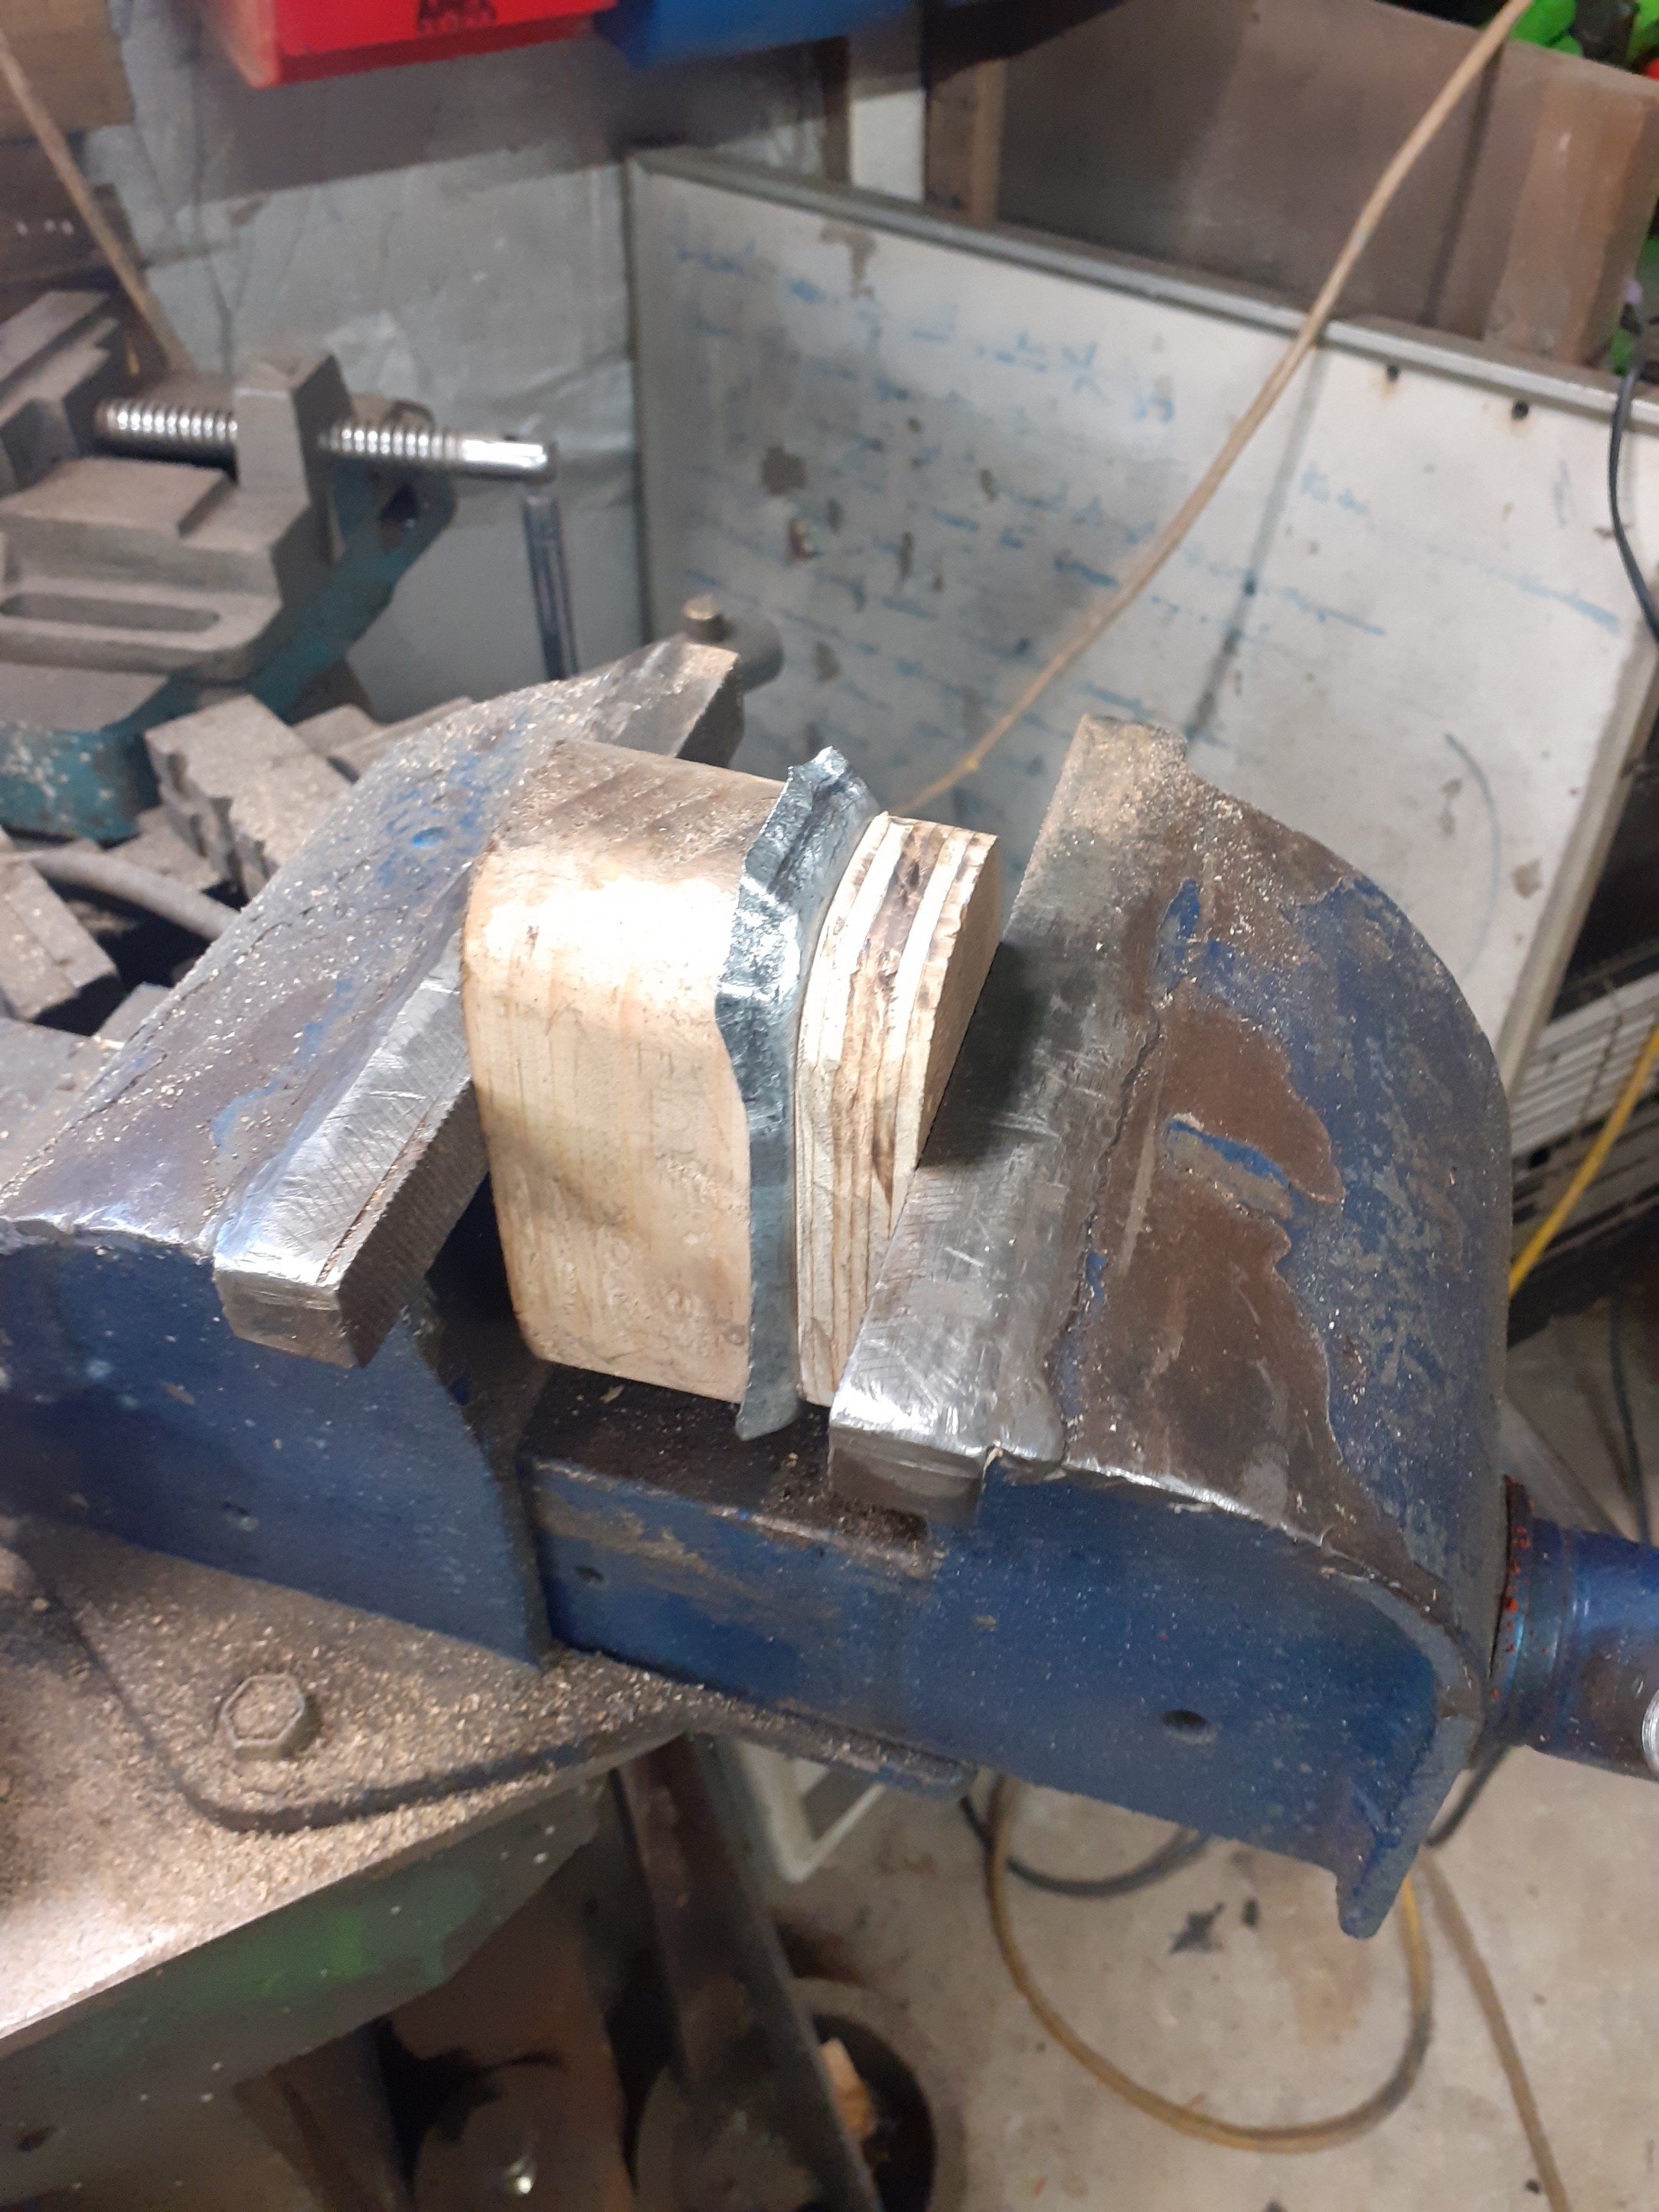
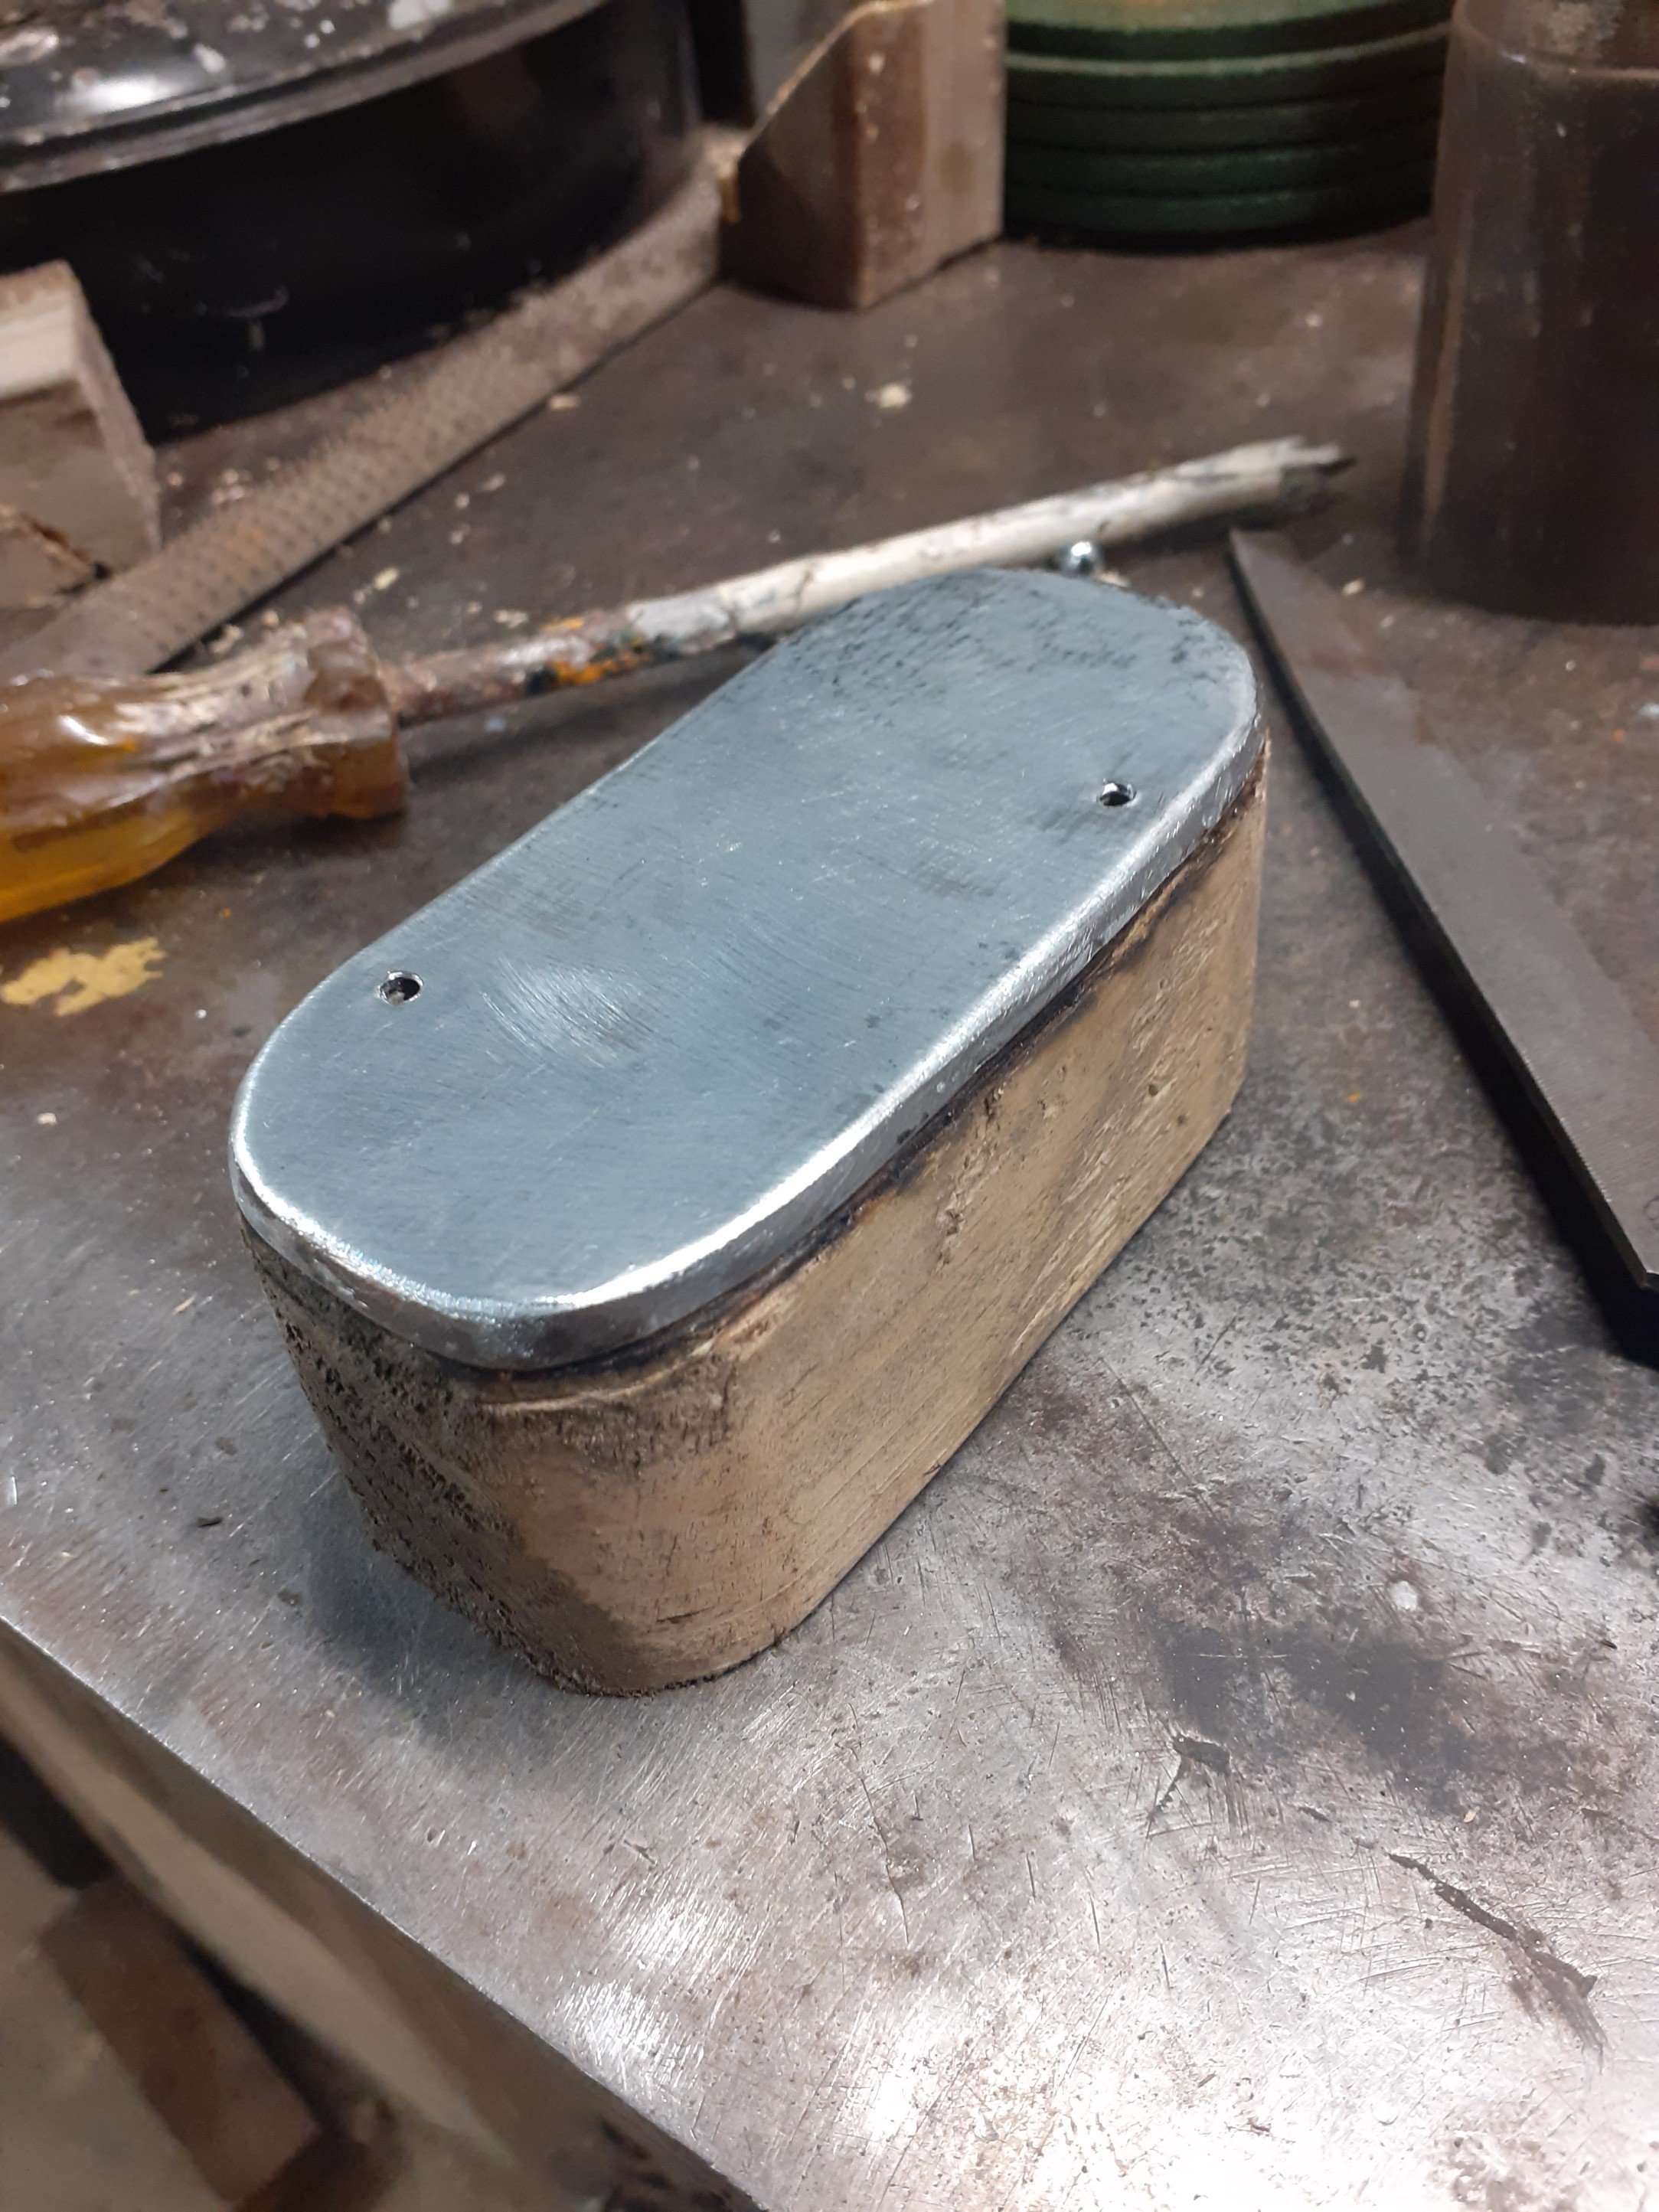
I got the motor back all assembled. Specs are 1600 +40, lightened and balanced rods, 234 cam, 1300 pistons, hardened seat valves, new gt valves, ported etc etc. Usual crossflow work. Sitting in the back of the blue van whilst I sort a bit of space. I have been a bit slow with the orange van doing other things but I did make another piece of the puzzle. I can't find the original heater pipe bracket that sits on the firewall and holds the rubber grommet. Made a wooden jig, used a stretching hammer on the flange, massaged into place, trimmed, dressed it up with a file and called it done. Its the little things.
- 104 replies
-
- 22
-
-
Hey yeah its been going well. It's been on the back burner a bit but I'm slowly building up a 1600 for it to swap in. Took it to nats and had no issues what so ever, even over the takaka hill! Certainly enjoy throwing junk in the back and going for a roadie.
-
Wellington Monthly Meet - Discussion thread
bmxnz11 replied to KKtrips's topic in Lower North Island Region
Keen for tomorrow night -
Wellington Monthly Meet - Discussion thread
bmxnz11 replied to KKtrips's topic in Lower North Island Region
Count me in -
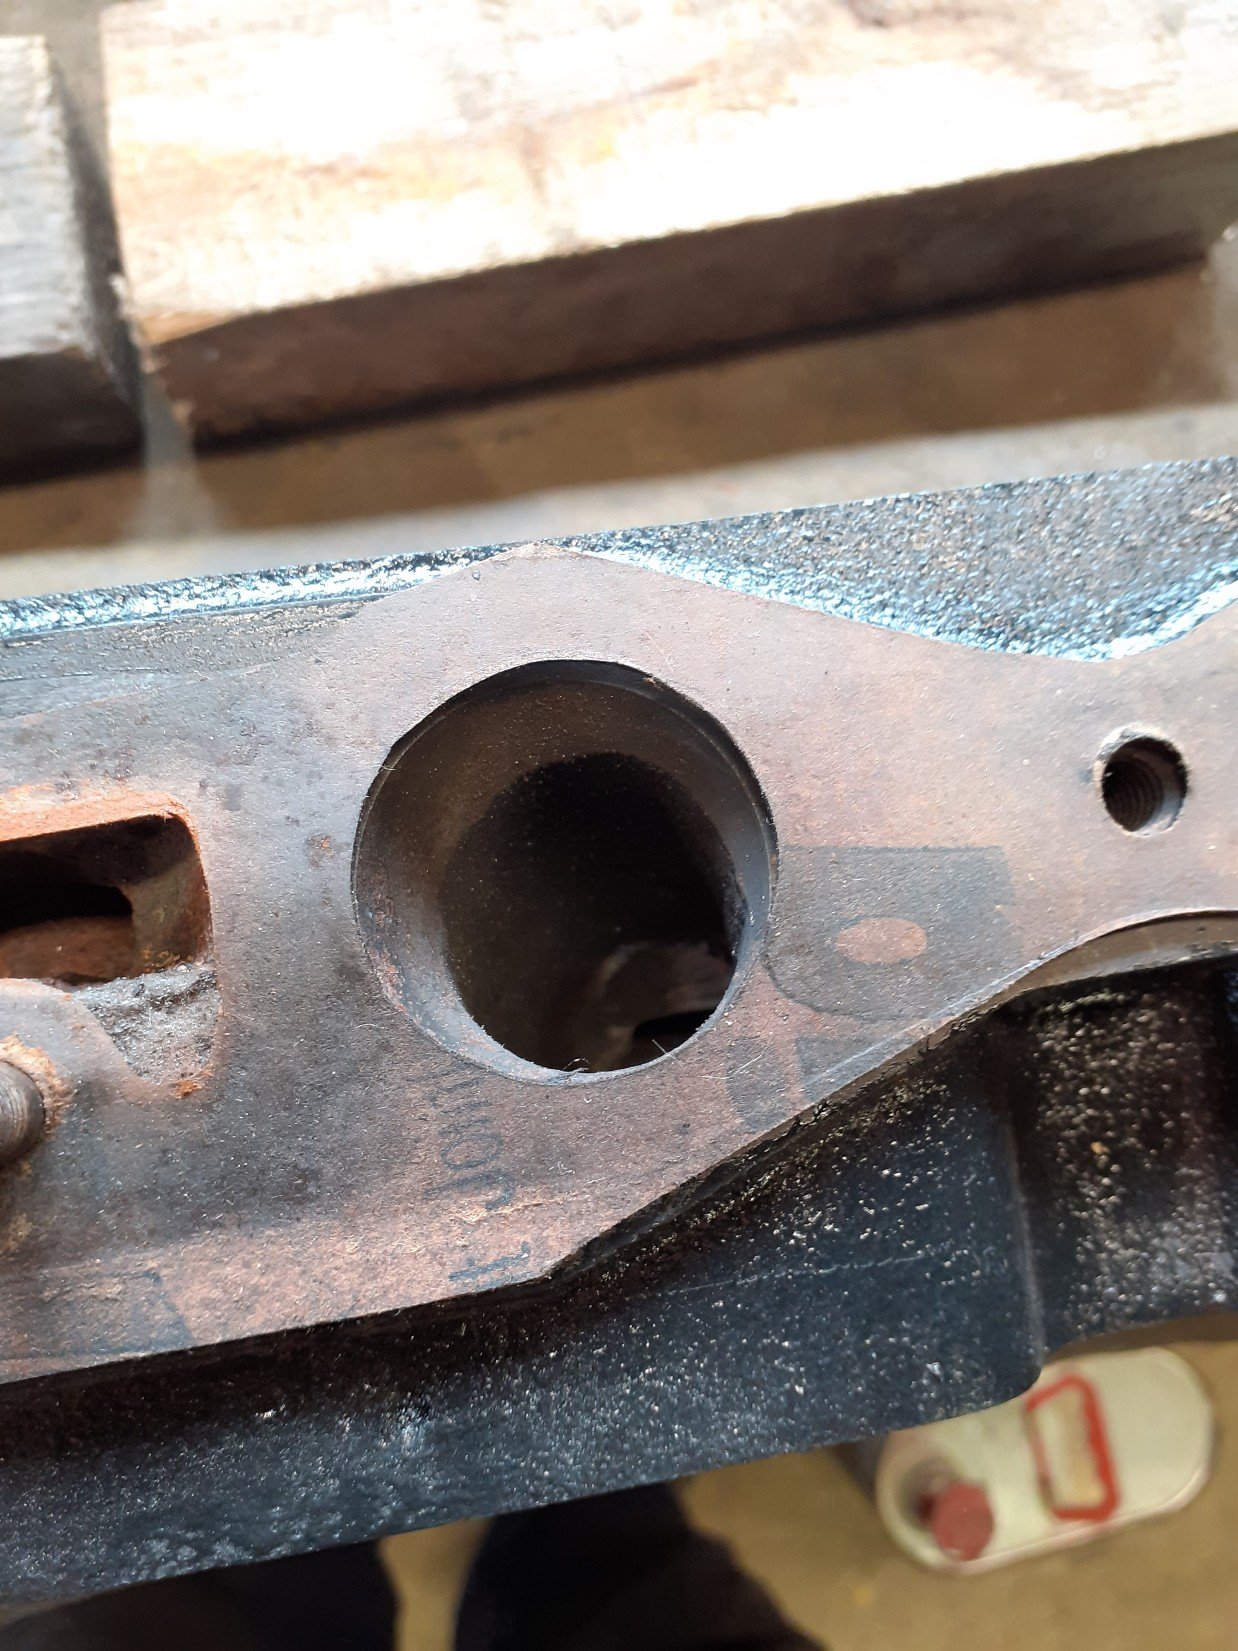
Valves all lapped, threads all cleaned and the remaining surfaces were skimmed. I was hoping to build this motor before Nats but I got unexpectedly busy over the holidays which didn't leave me any spare time so I'm thinking I may not have it done. The current motor is a bit sluggish on the hills due to being a bit low on compression on a couple cylinders so tonight I did a wet compression test to see if I could locate the low compression issue. Engine up to temperature, all spark plugs out, wide open throttle, turn over, check numbers, pour a little oil in the chamber, repeat. My understanding is if the numbers change, the rings are the issue. If the numbers don't change, the issue will be something in the head. Hoping the numbers wouldn't change and then I could justify simply putting my new head on and away we go. Unfortunately the numbers did change so is it even worth changing the heads over?
-
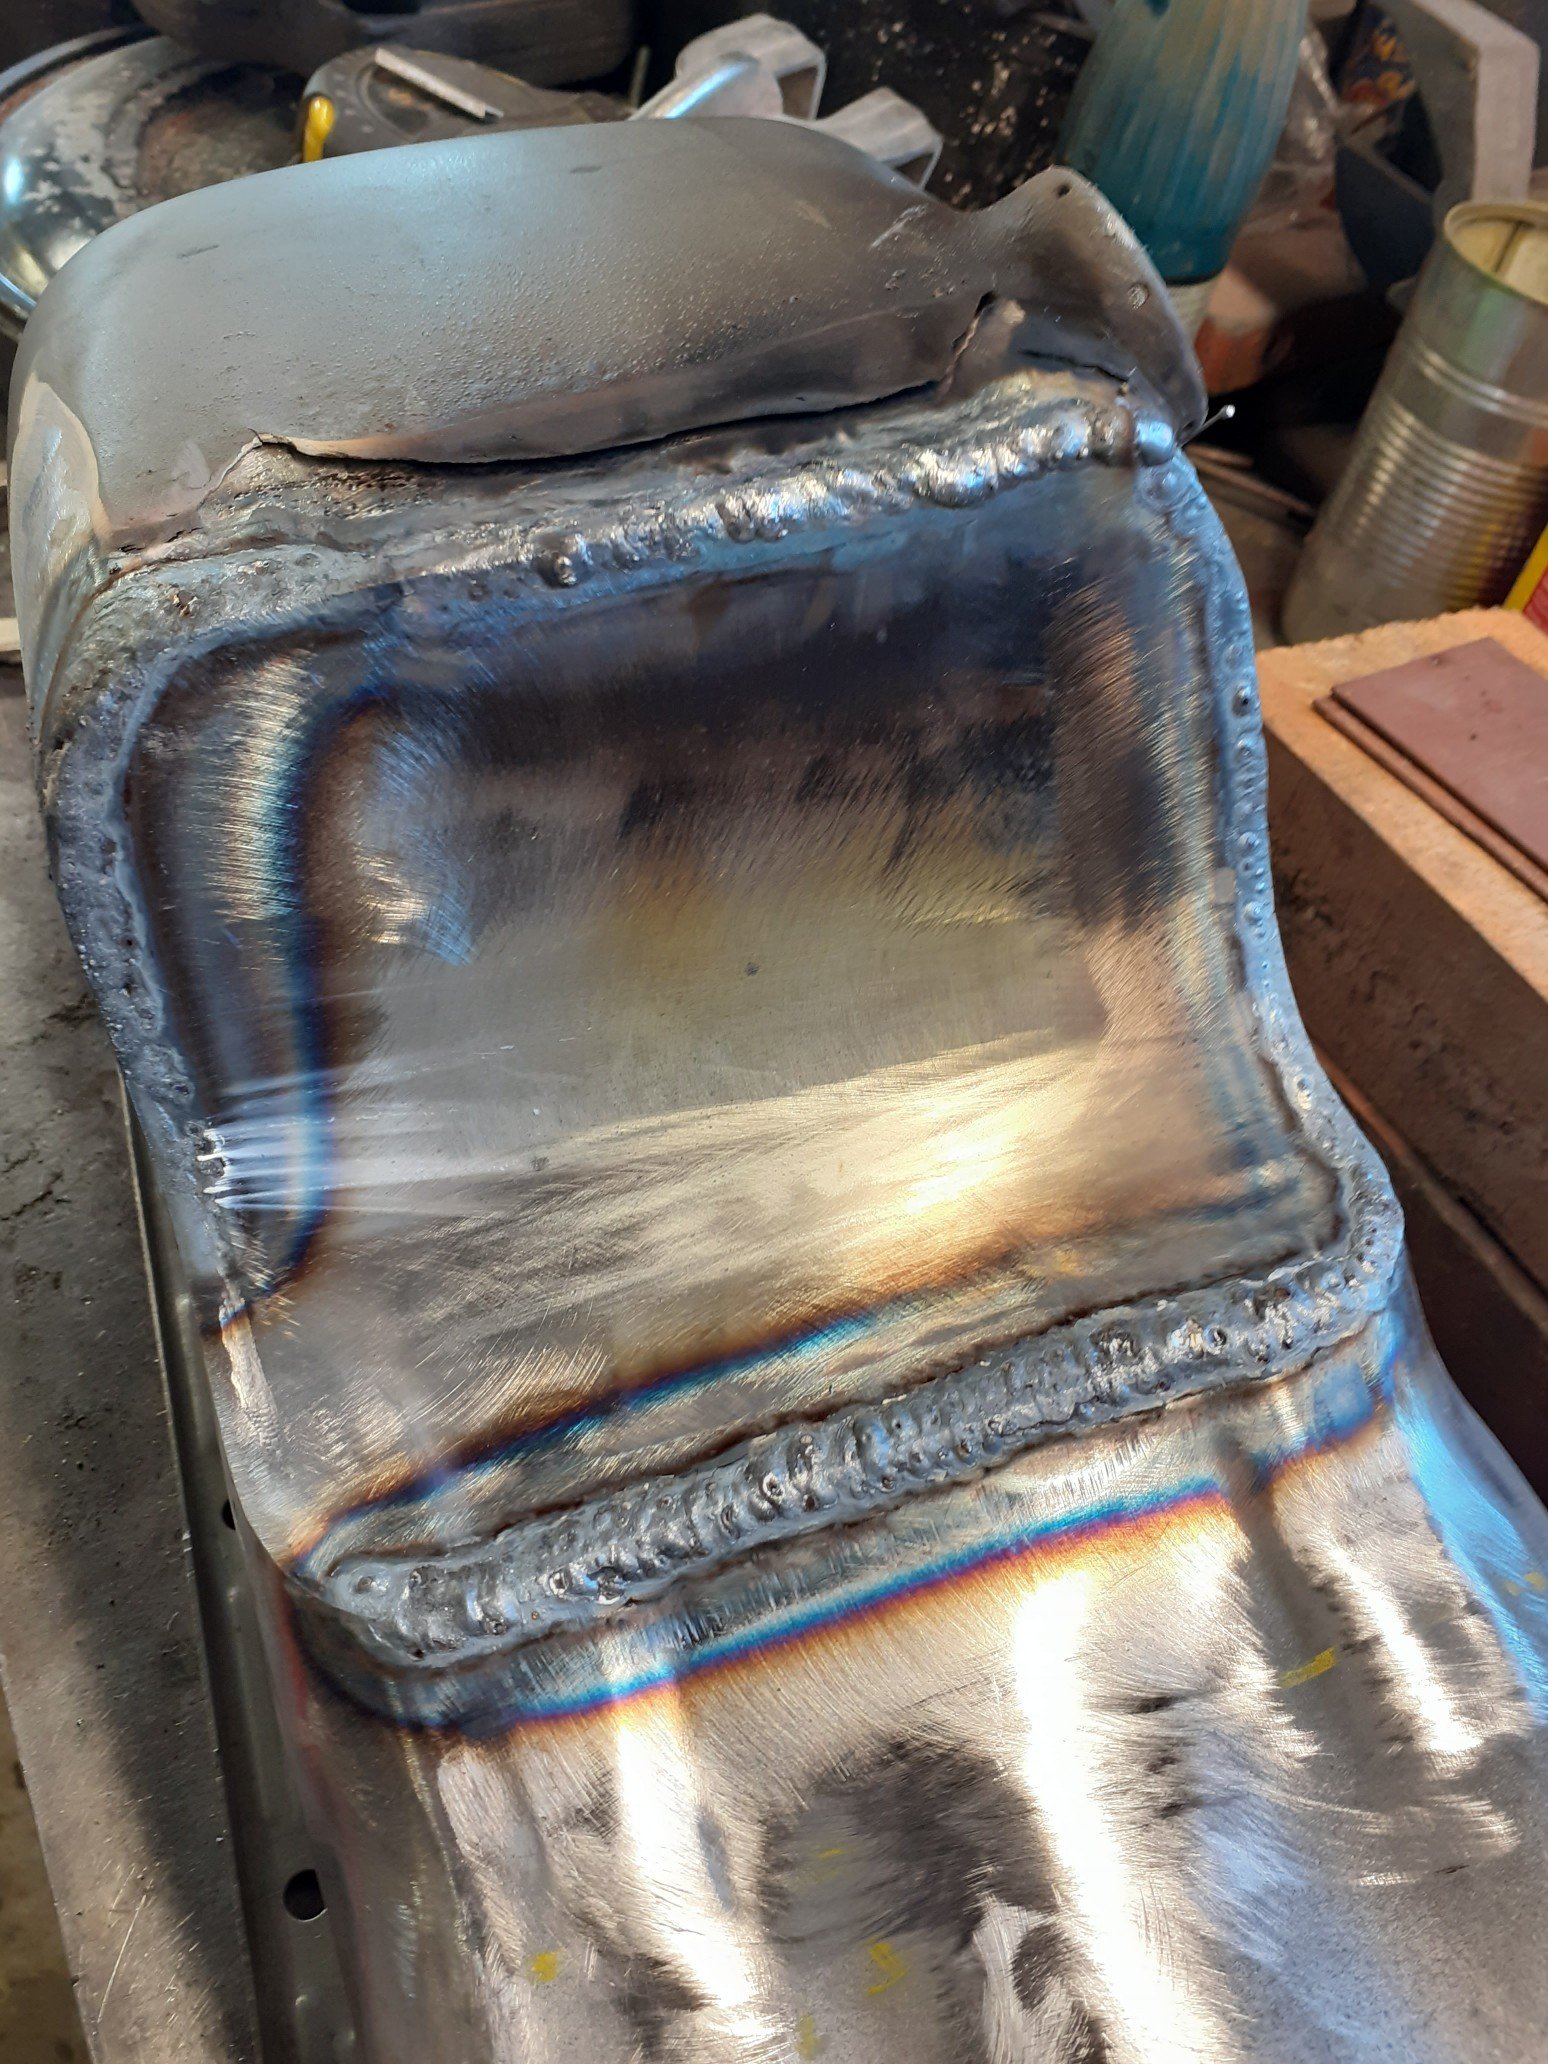
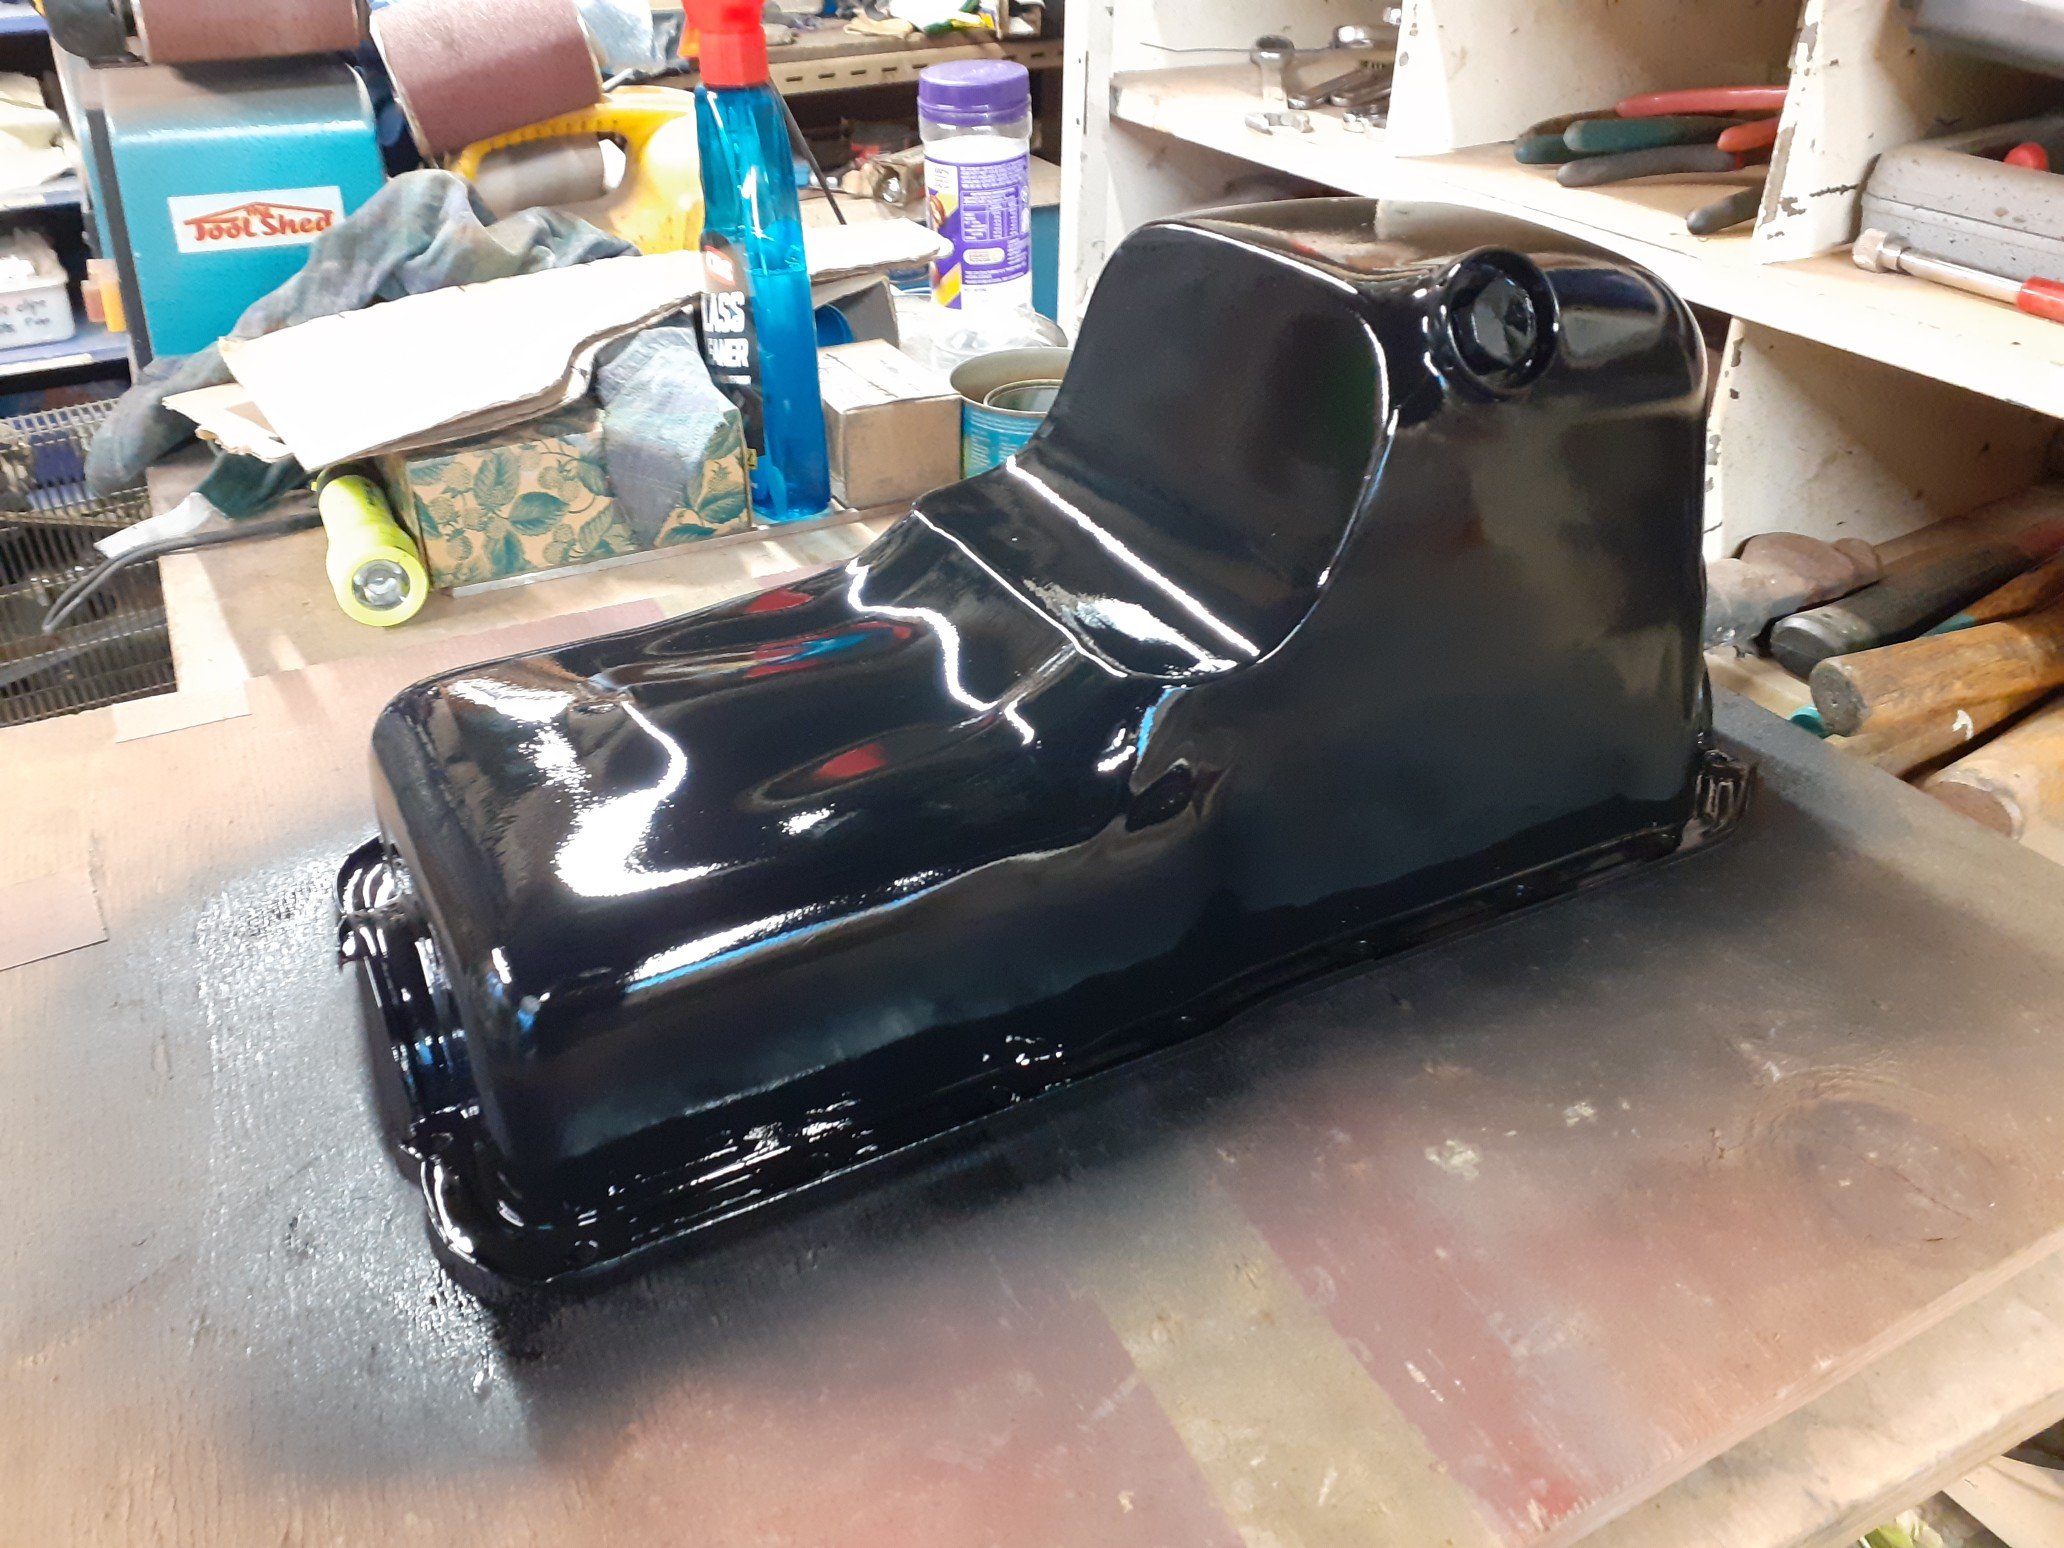
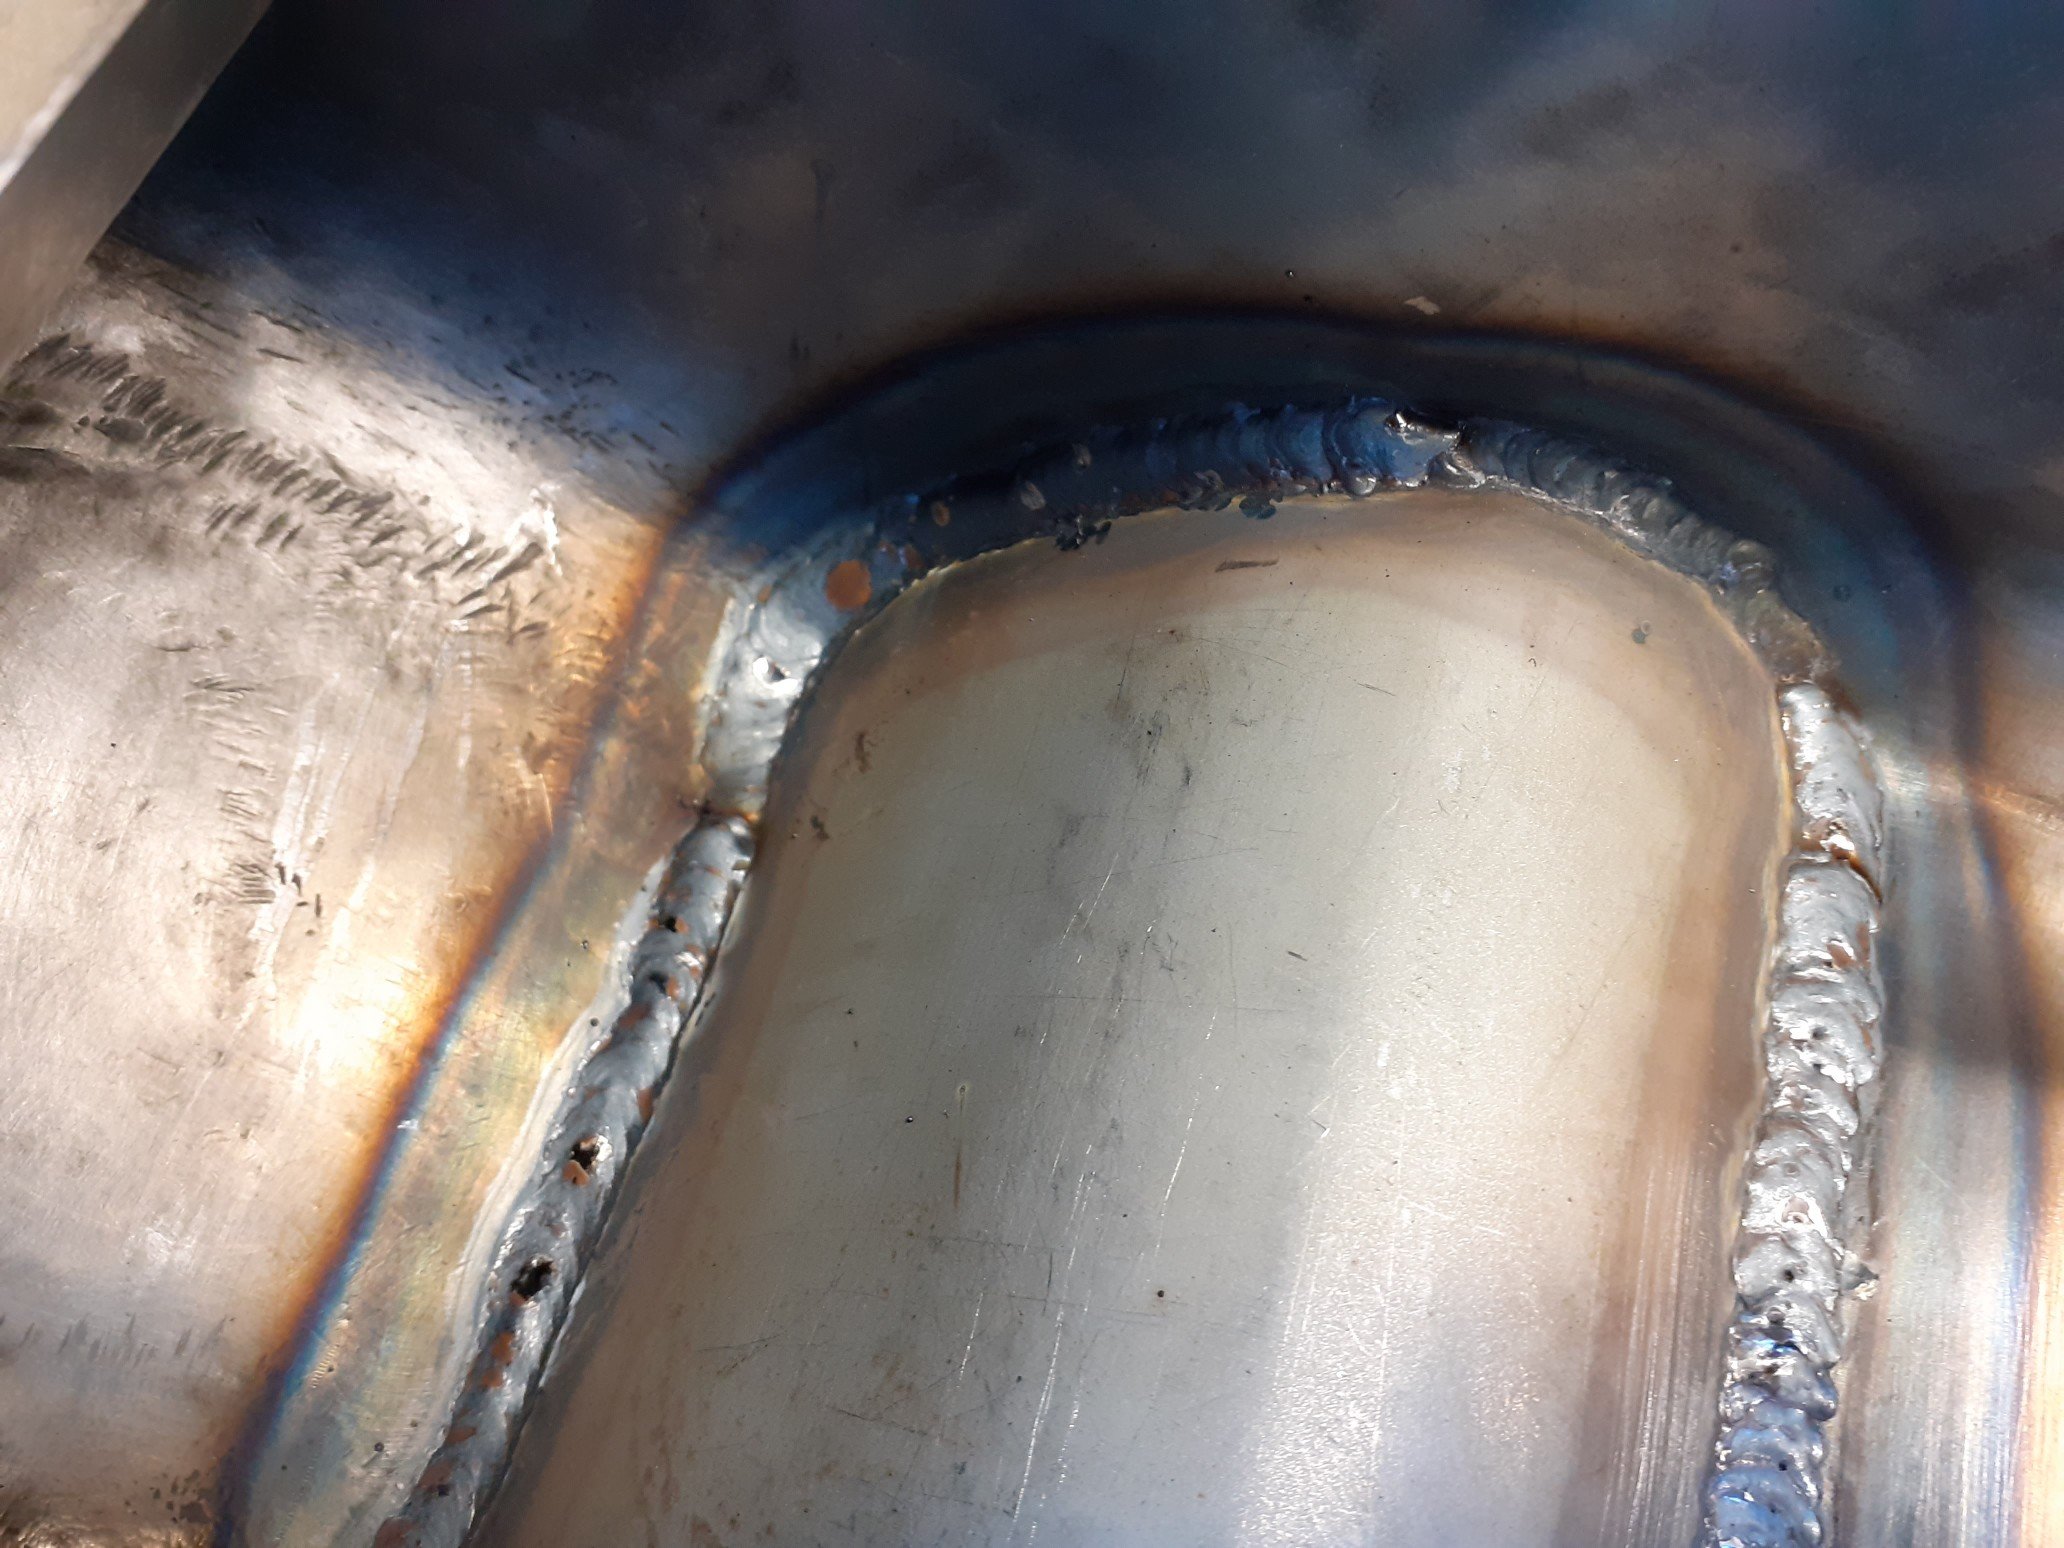
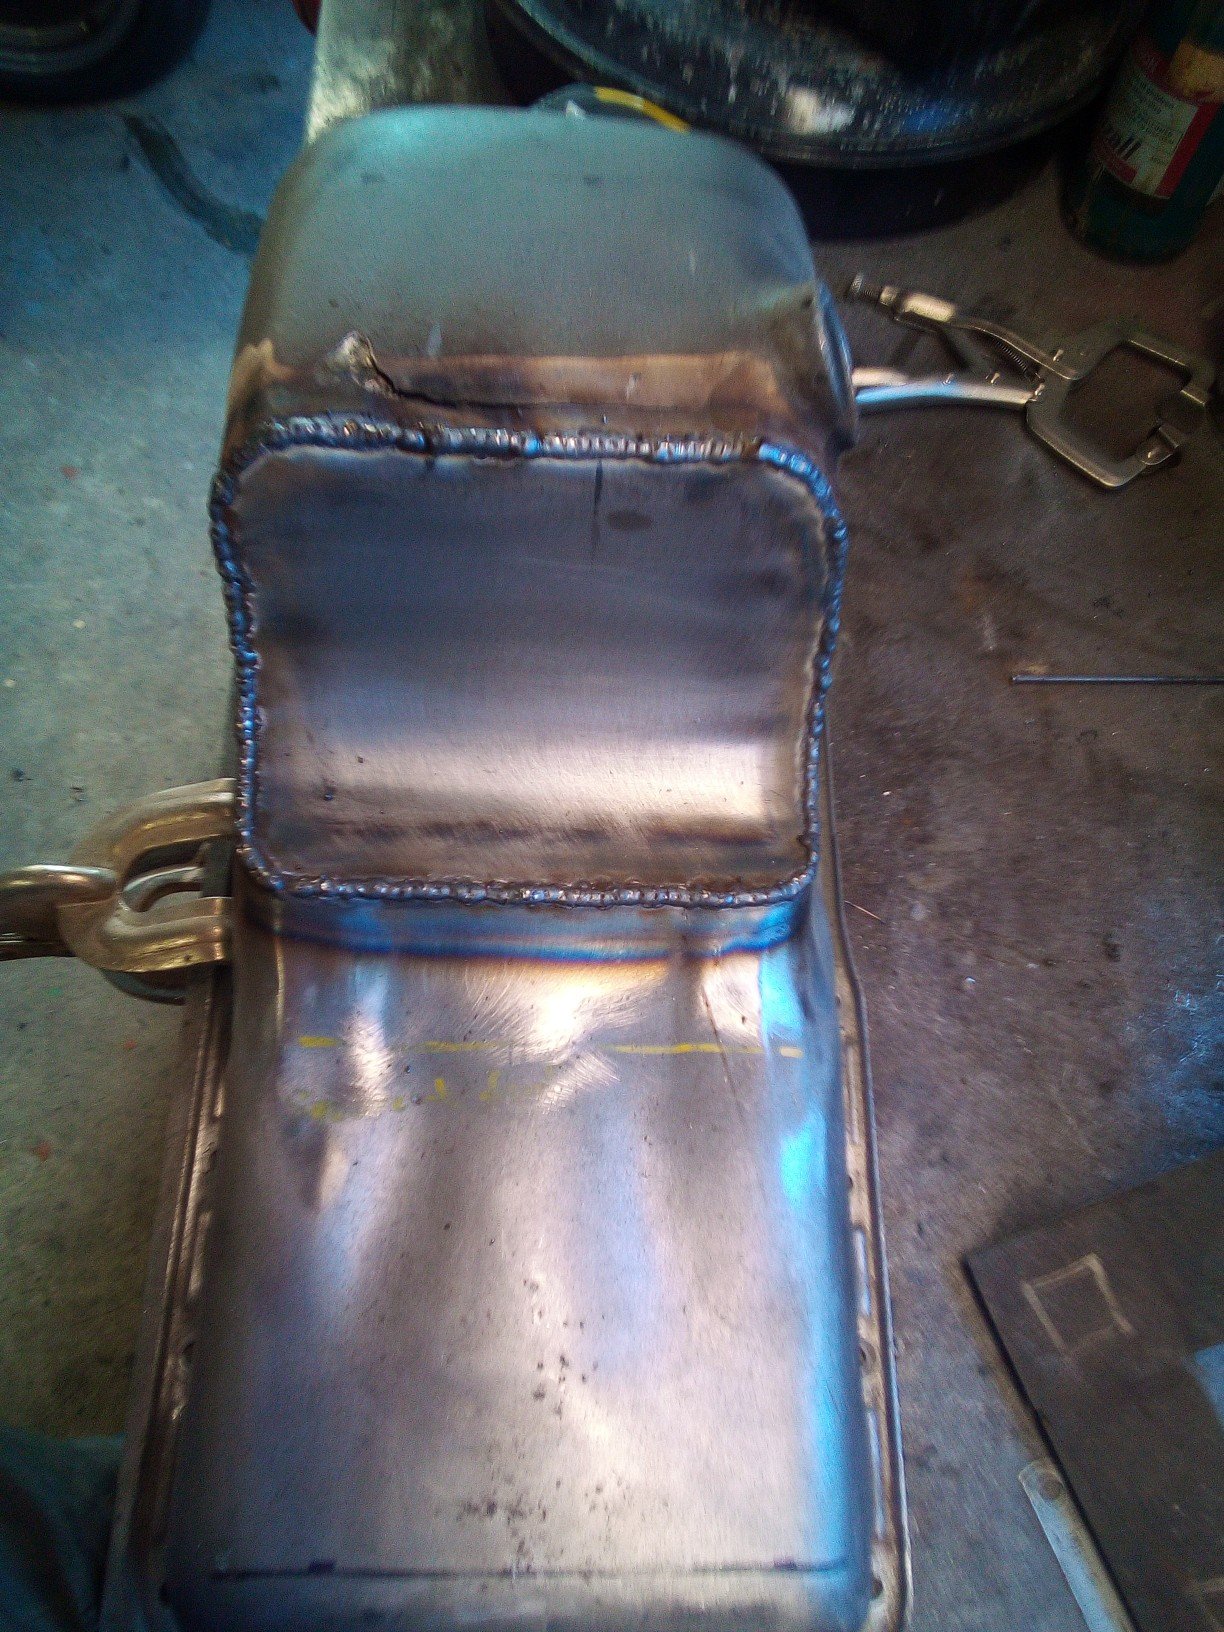
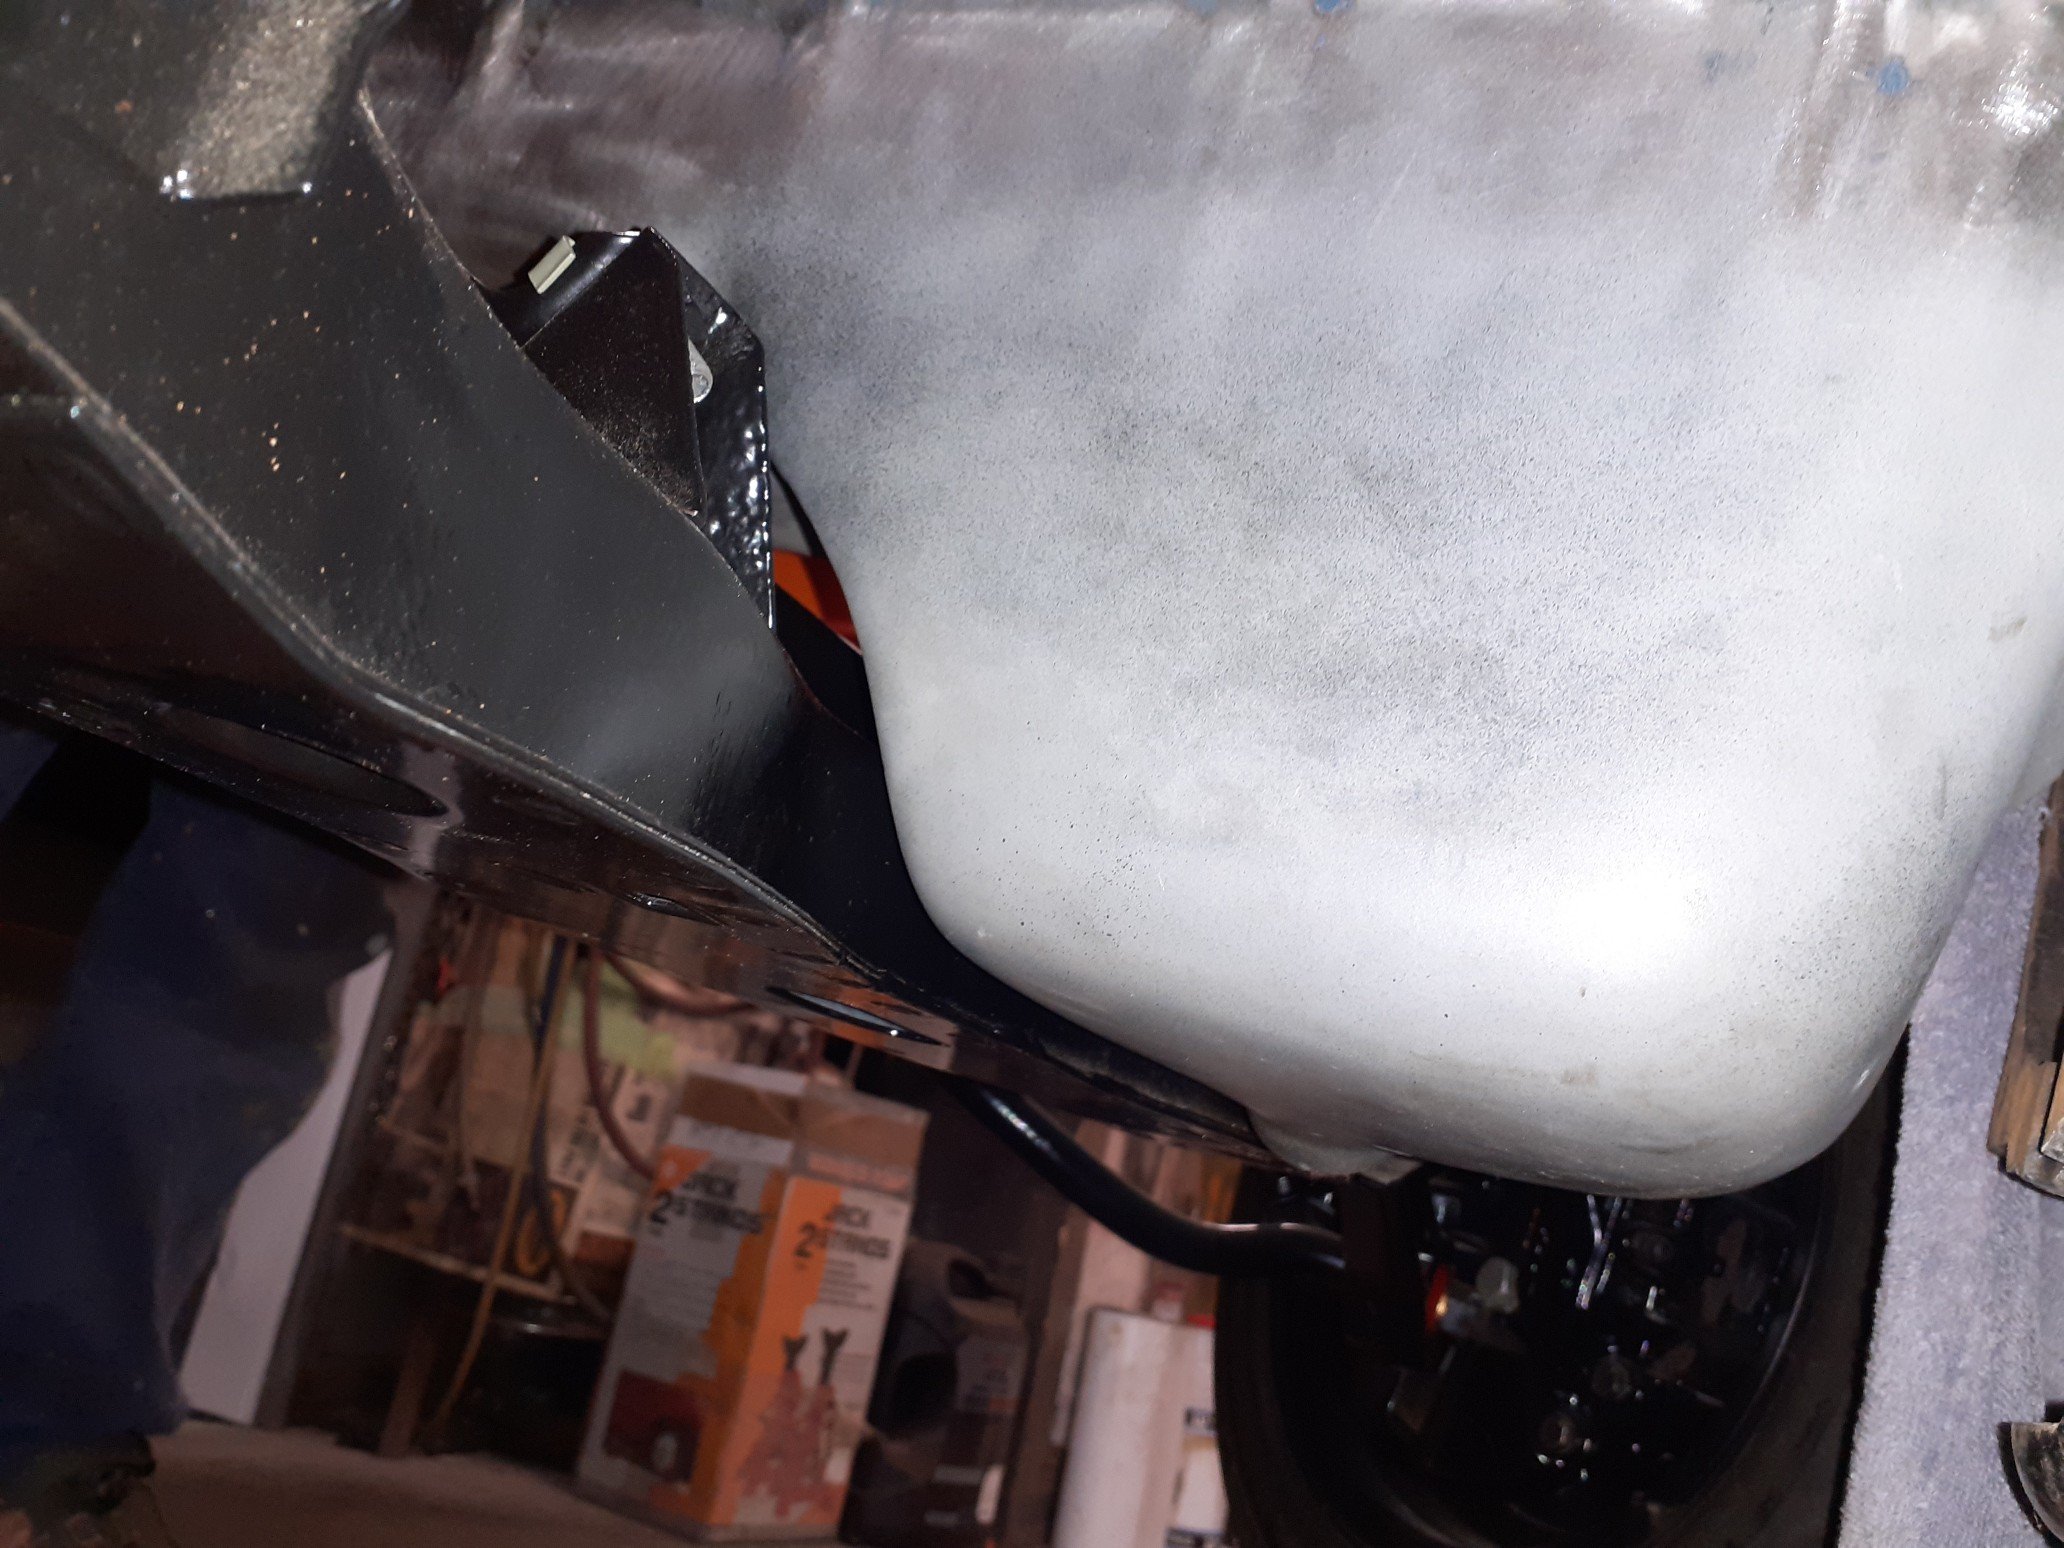
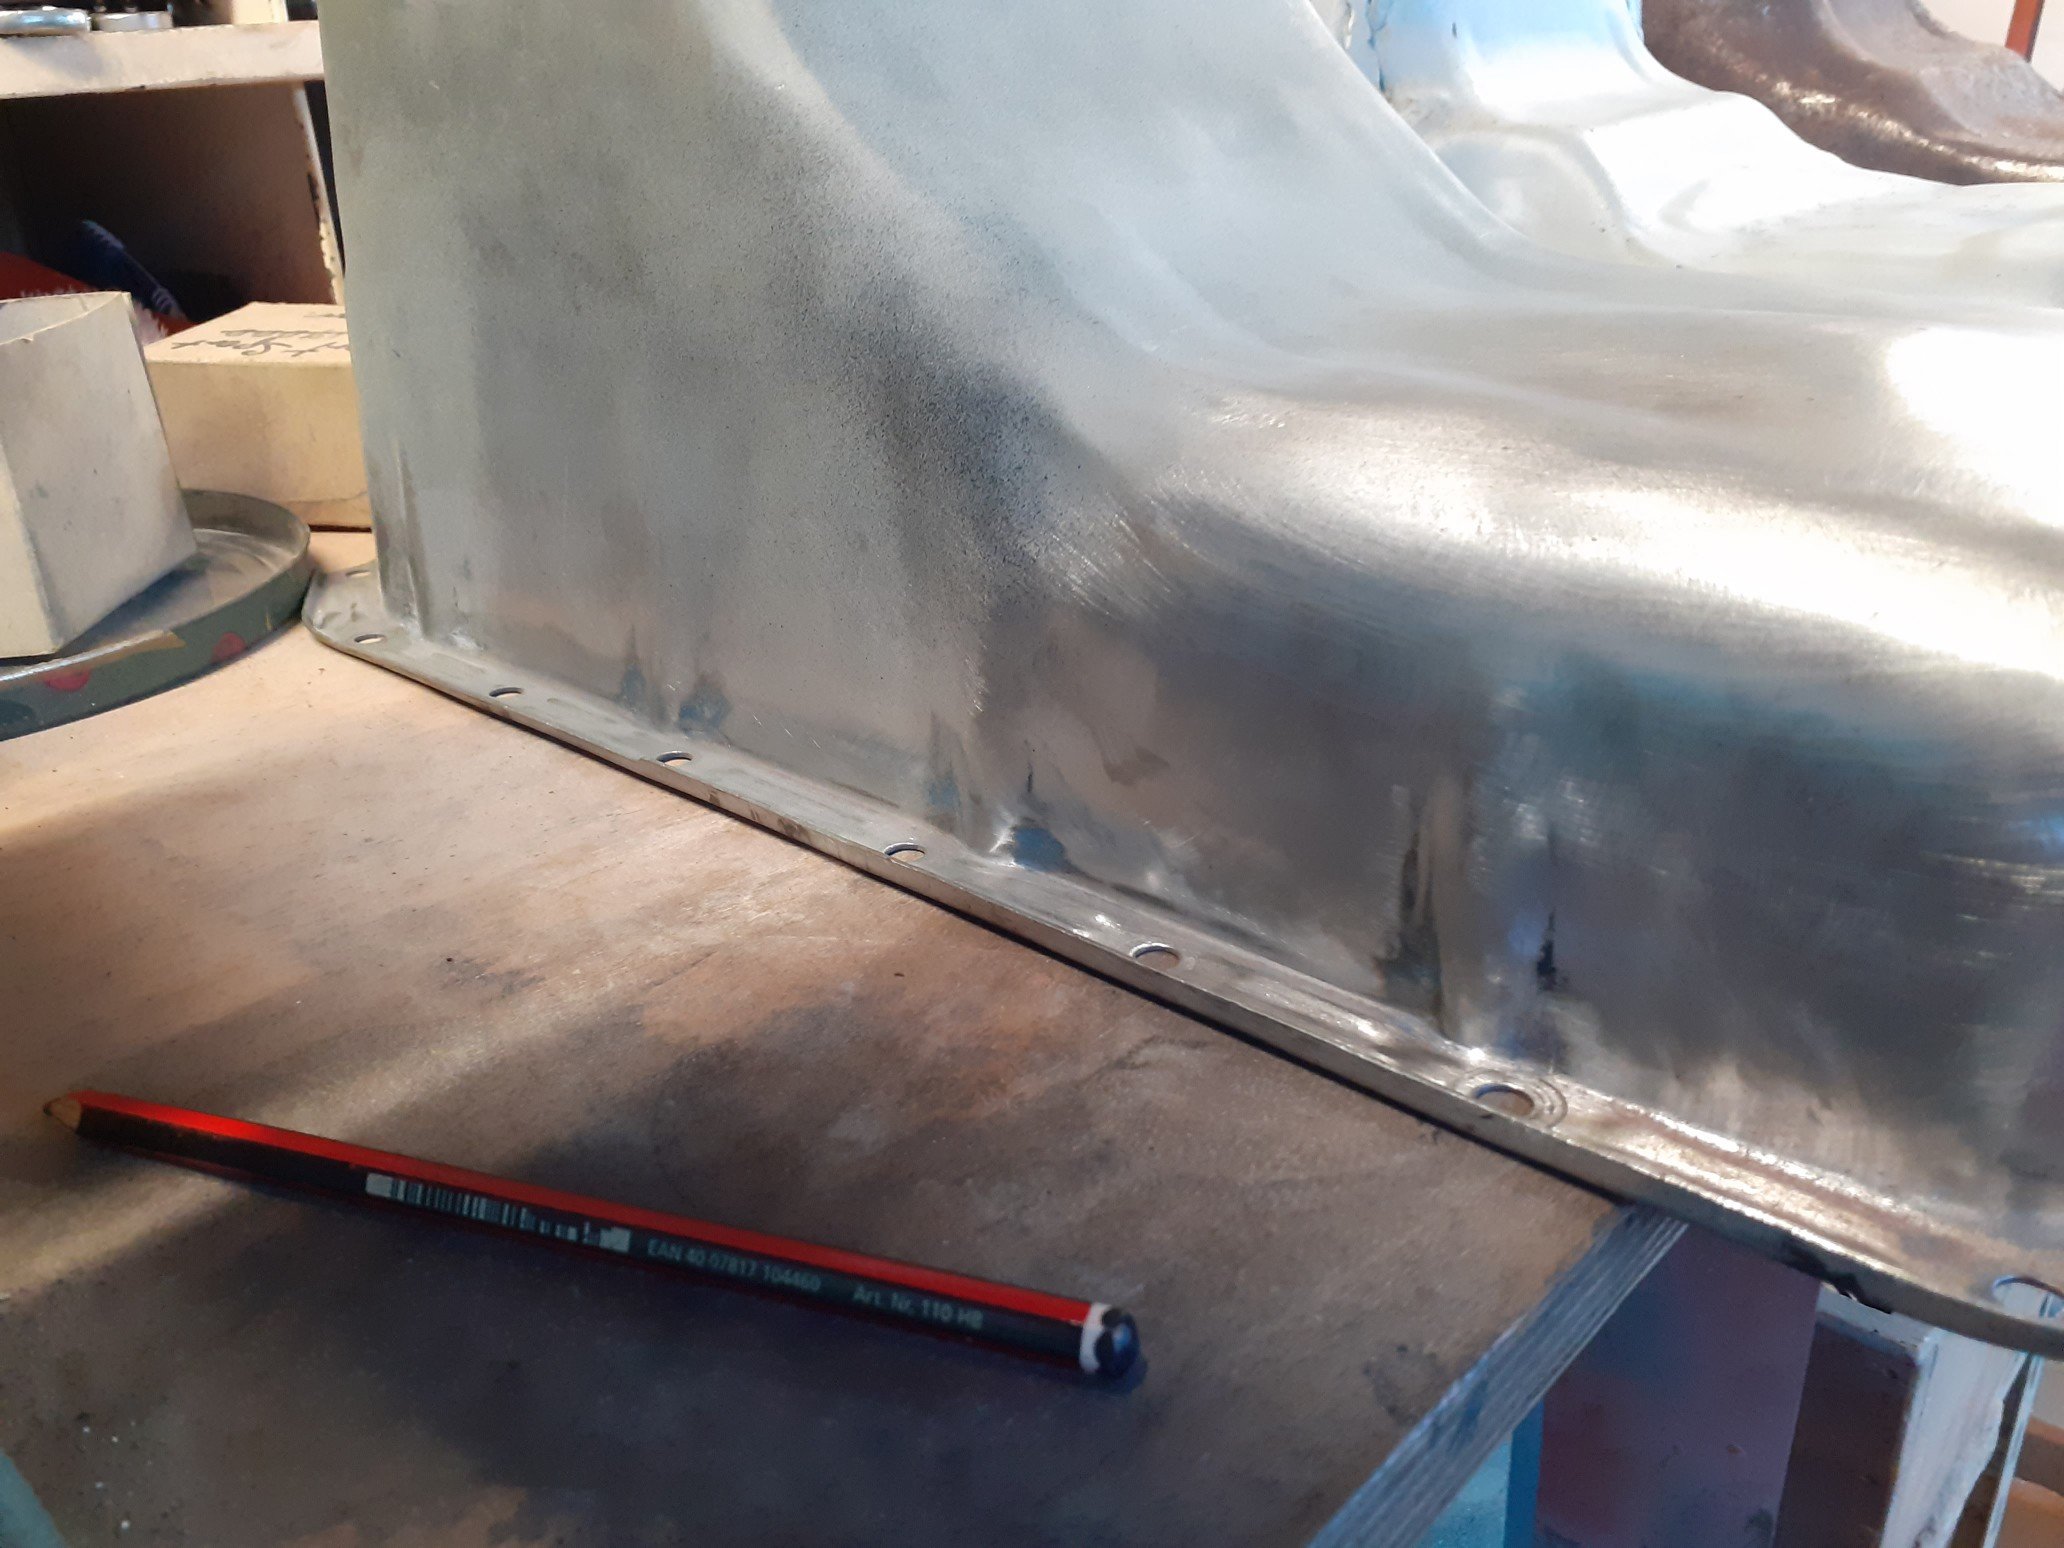
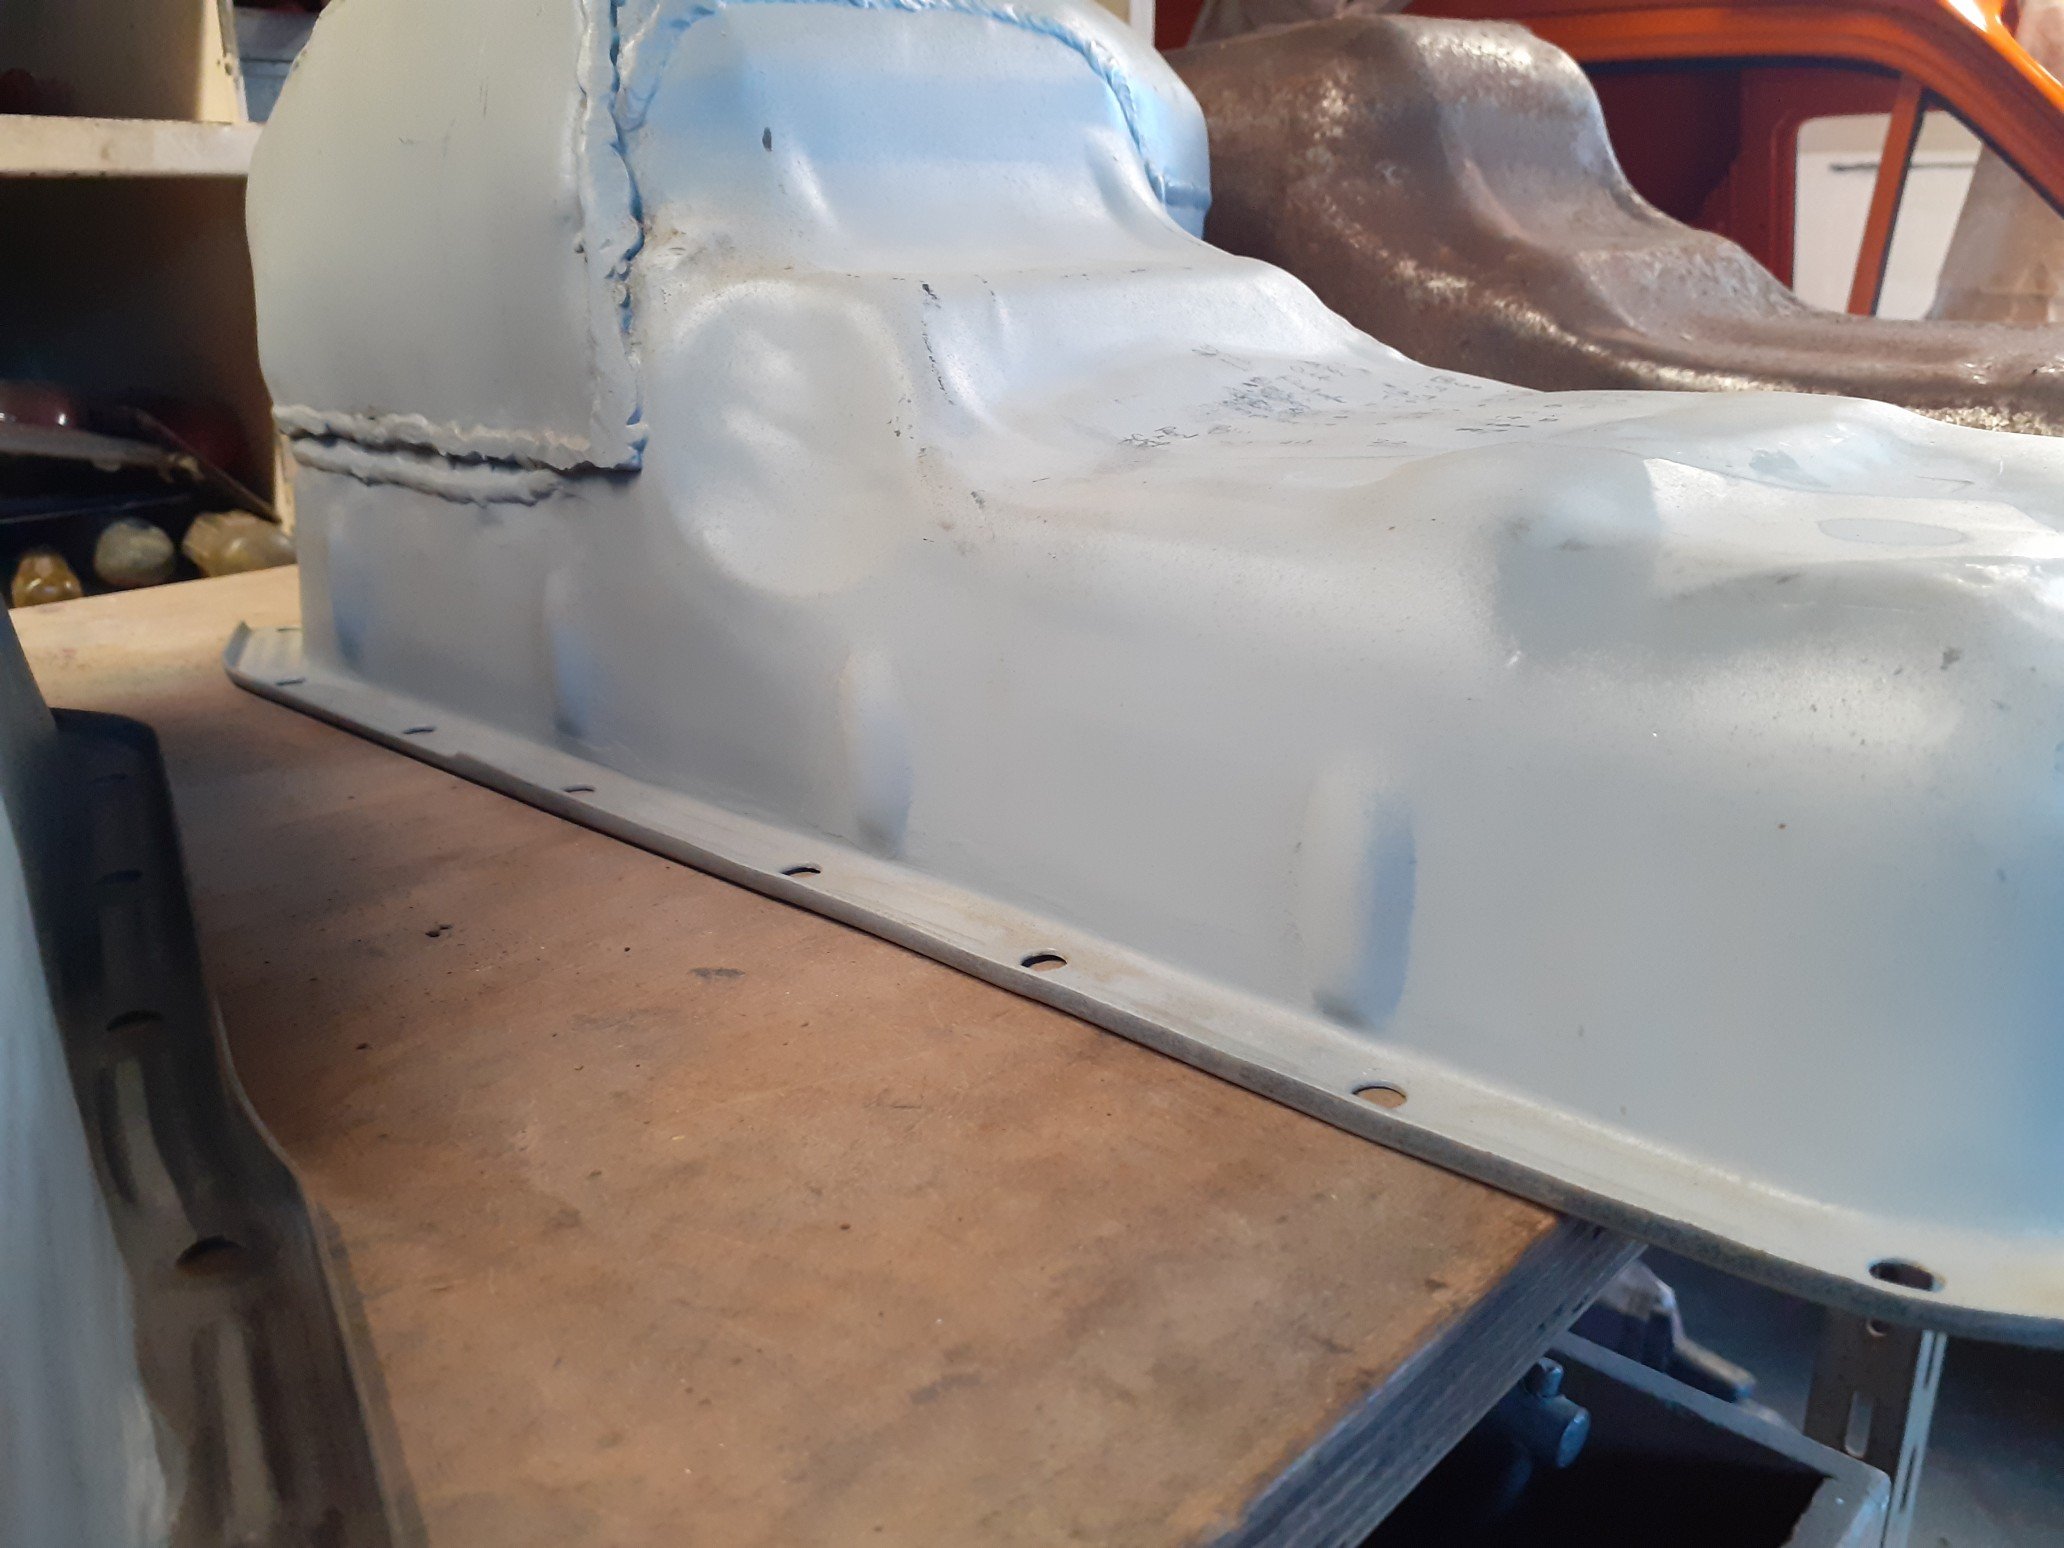
Decided to modify this sump. 1600 escort sumps are very hard to find and I've been looking for an original for some time. Made a template of the 1300 which clears the frame, cut, make plate, weld on the outside, weld on the inside, clean welds and prime. Have also ordered some smaller mounts which should help bring the motor down. Bit better then a previous owners attempt to make it fit.
- 104 replies
-
- 24
-
-
Cheers. On my web search last night I found a similar comment by you on a different thread. I'll make something work out of the bits I have.
-
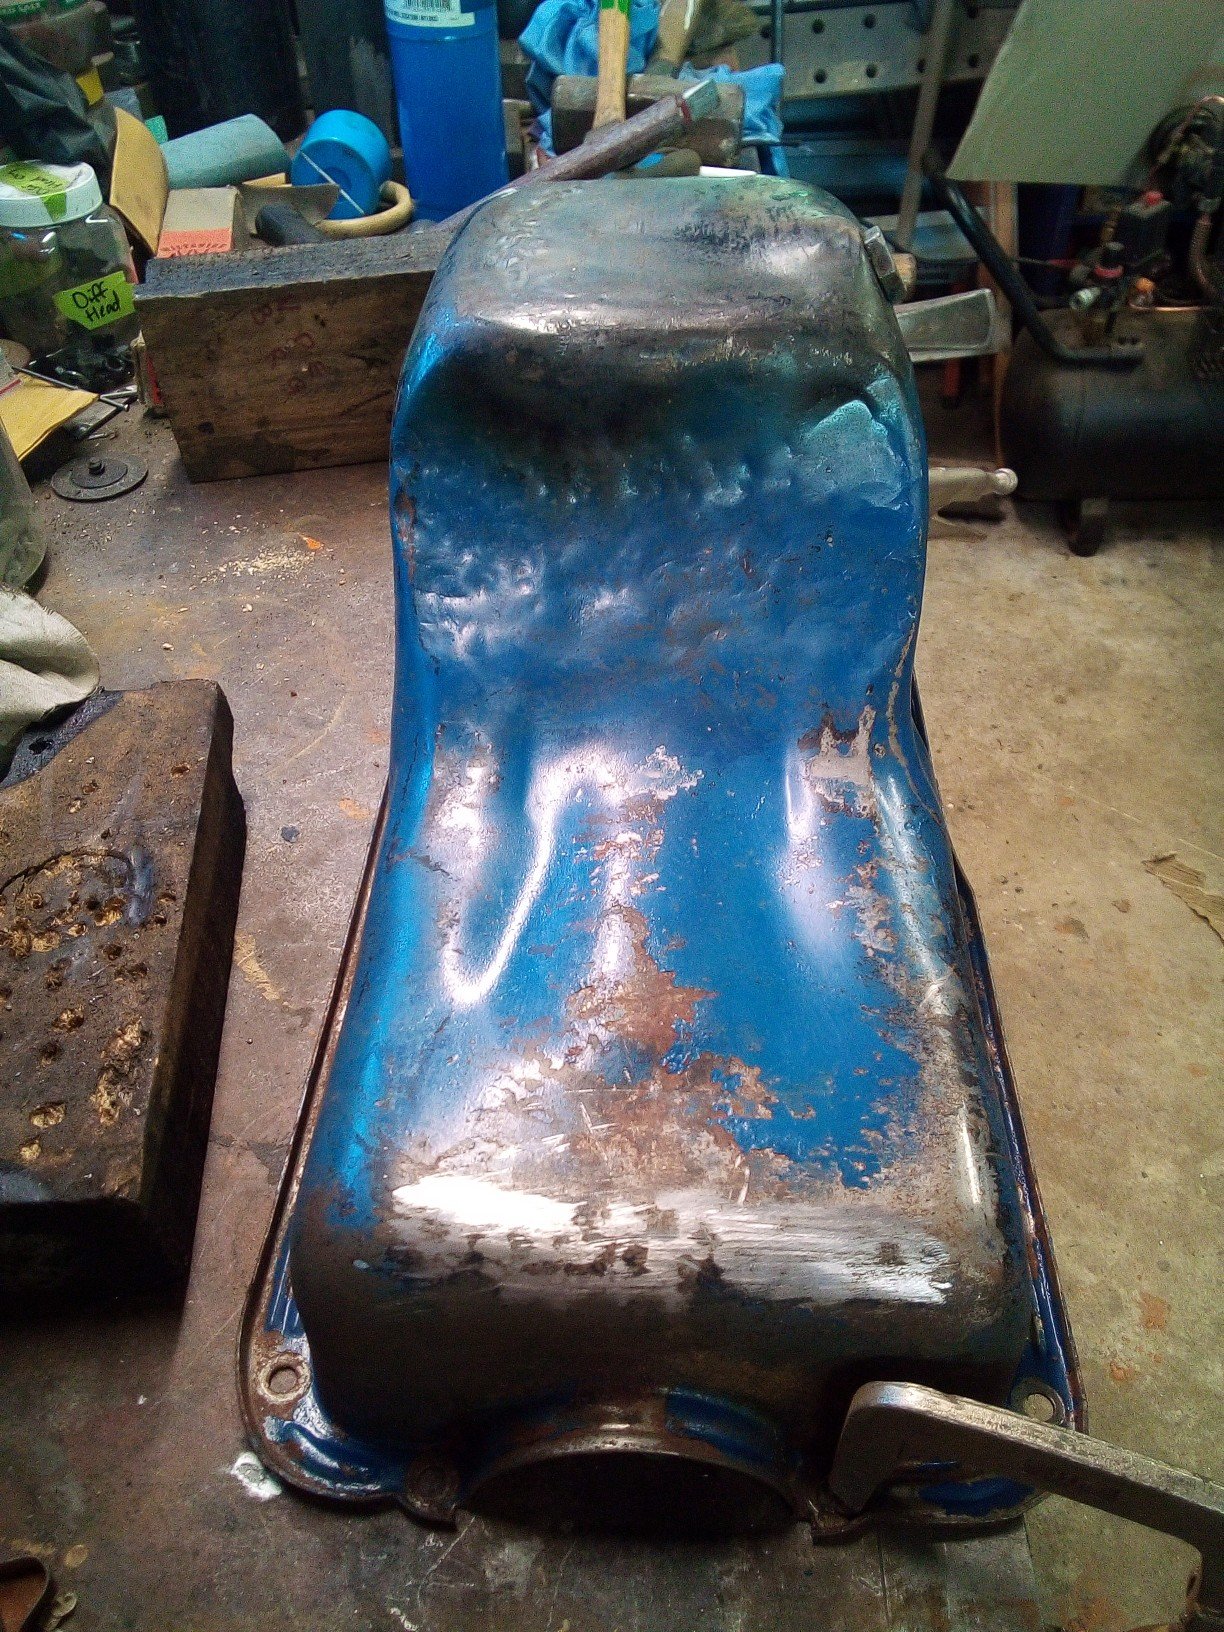
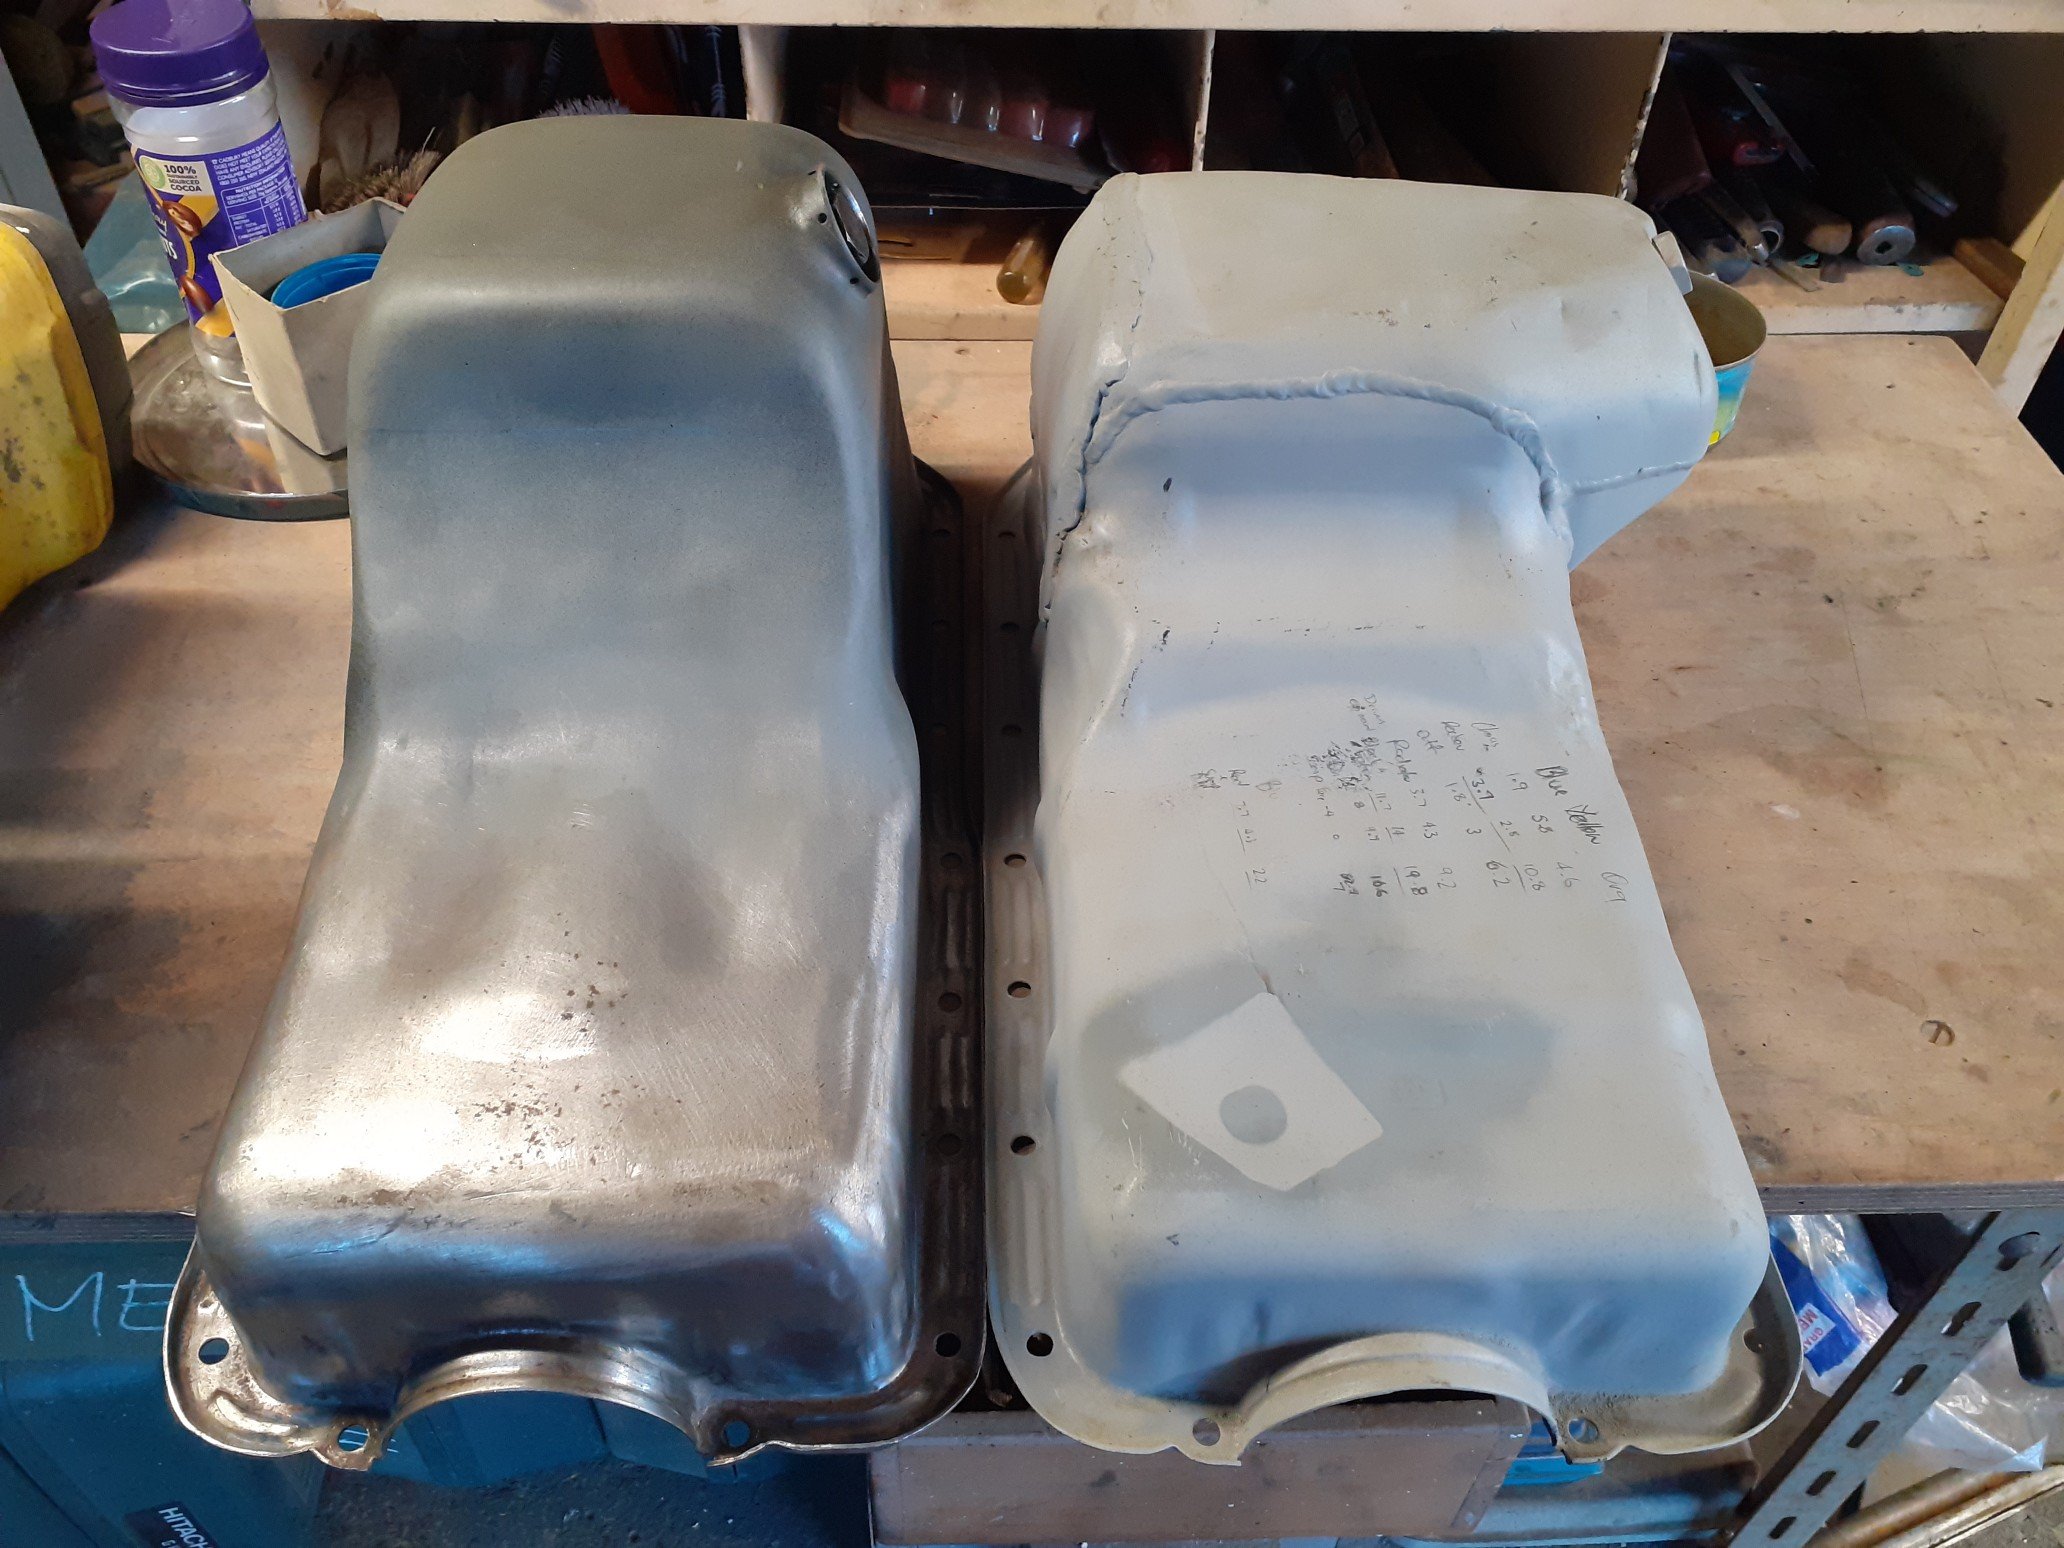
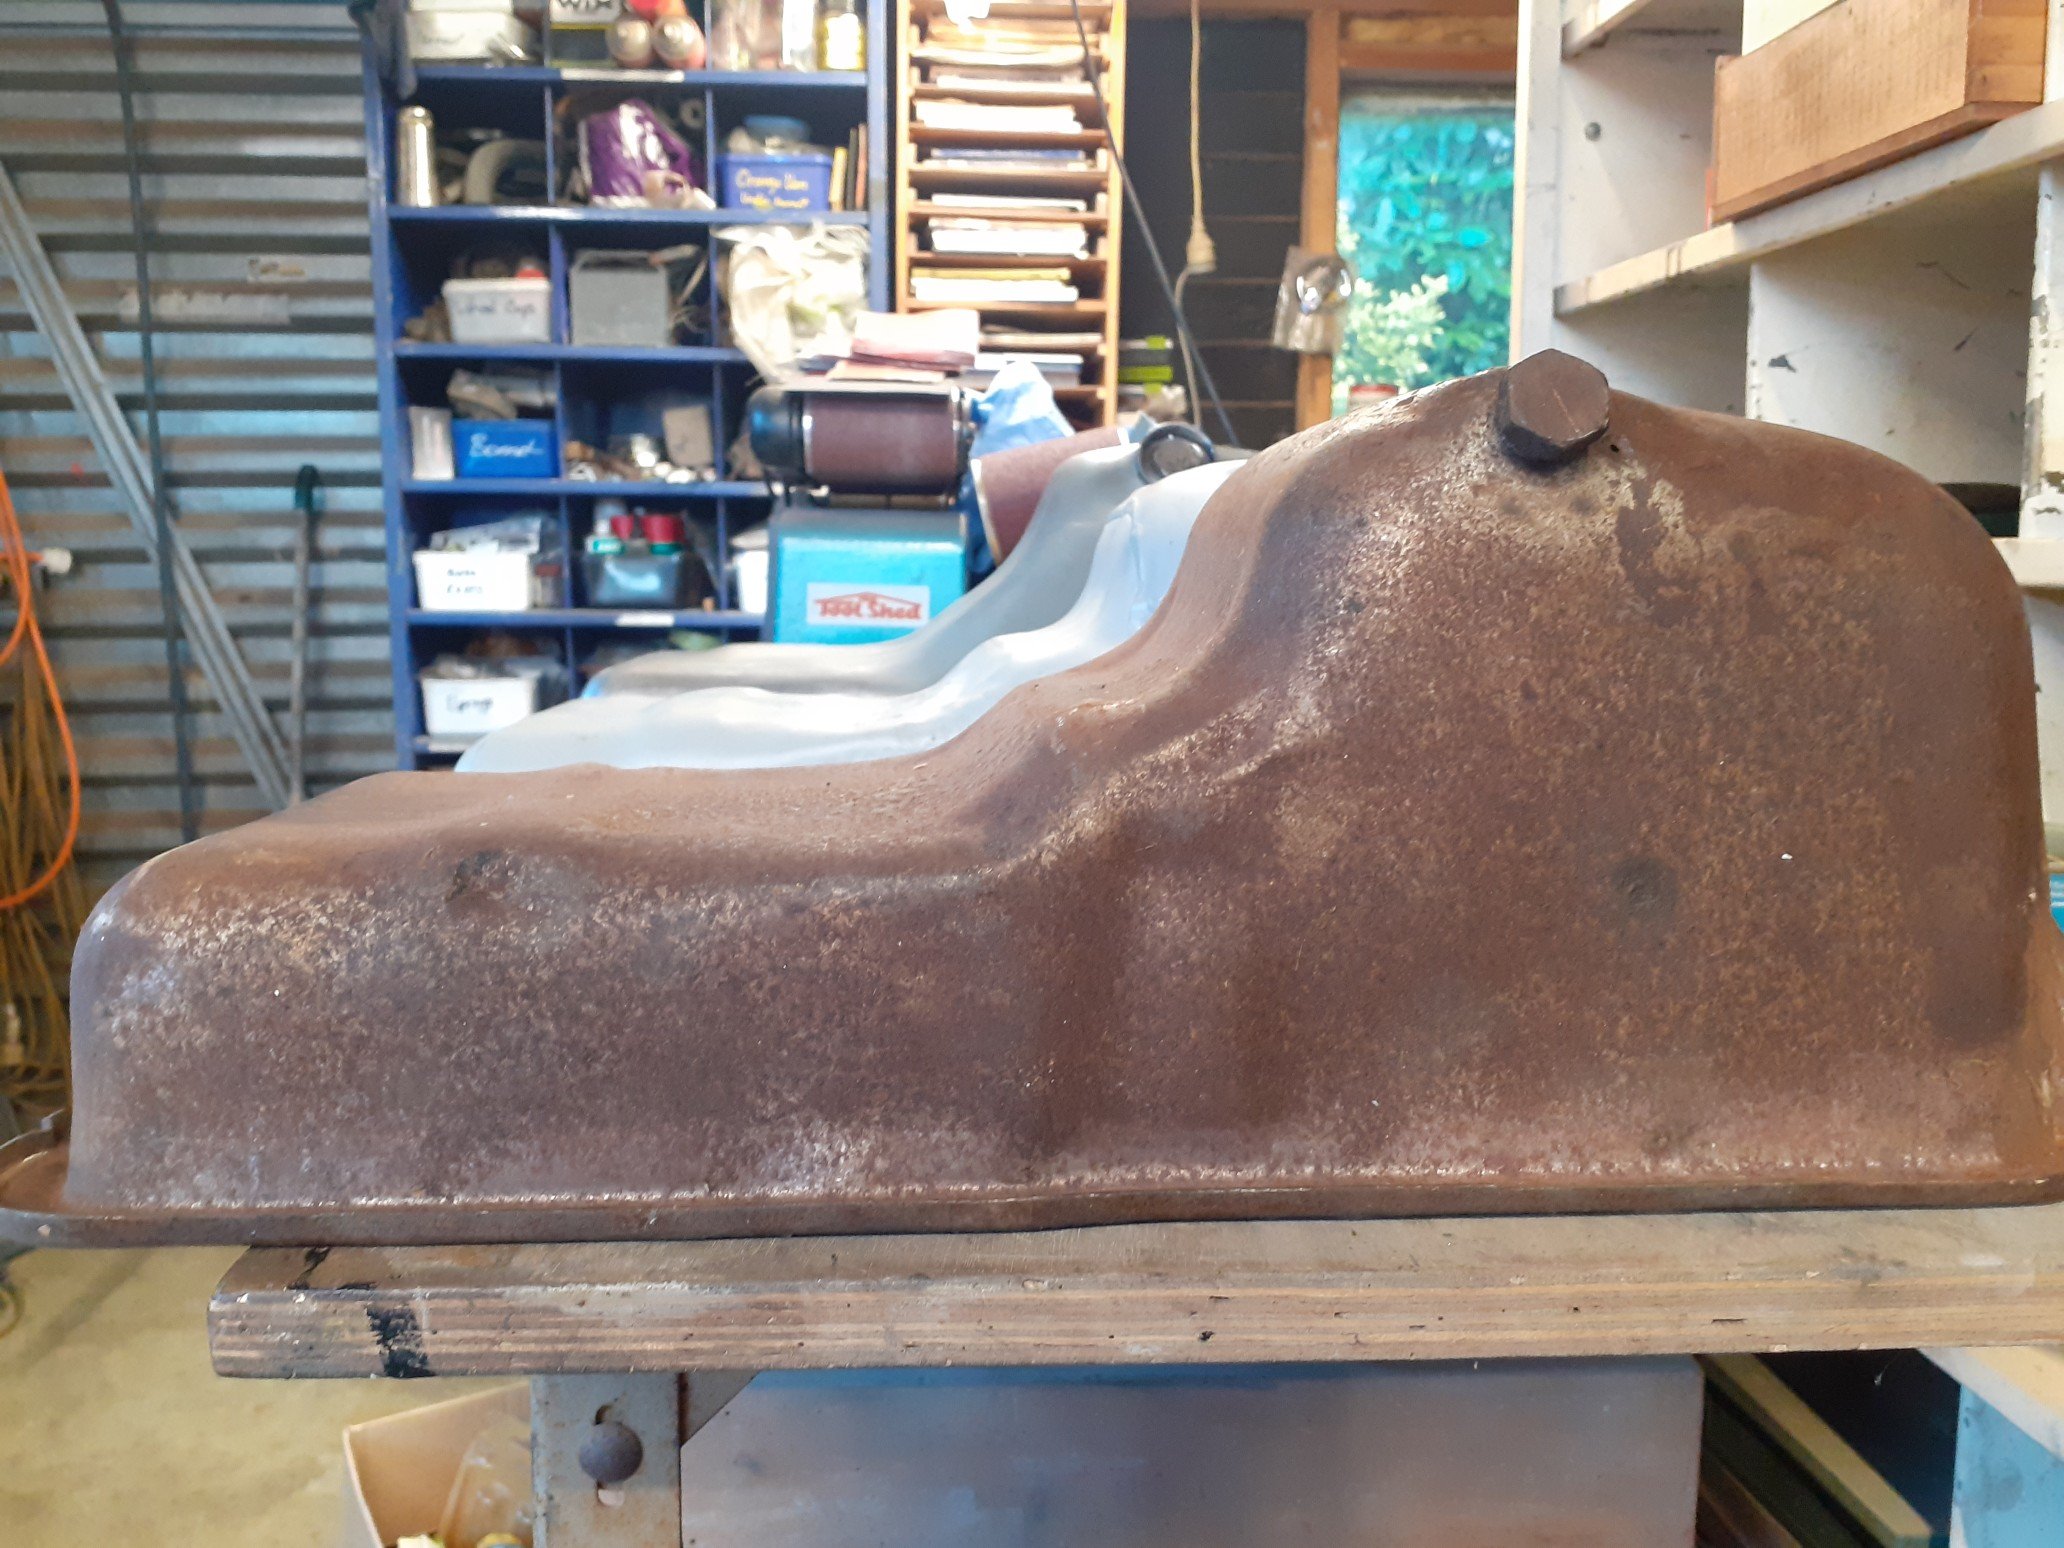
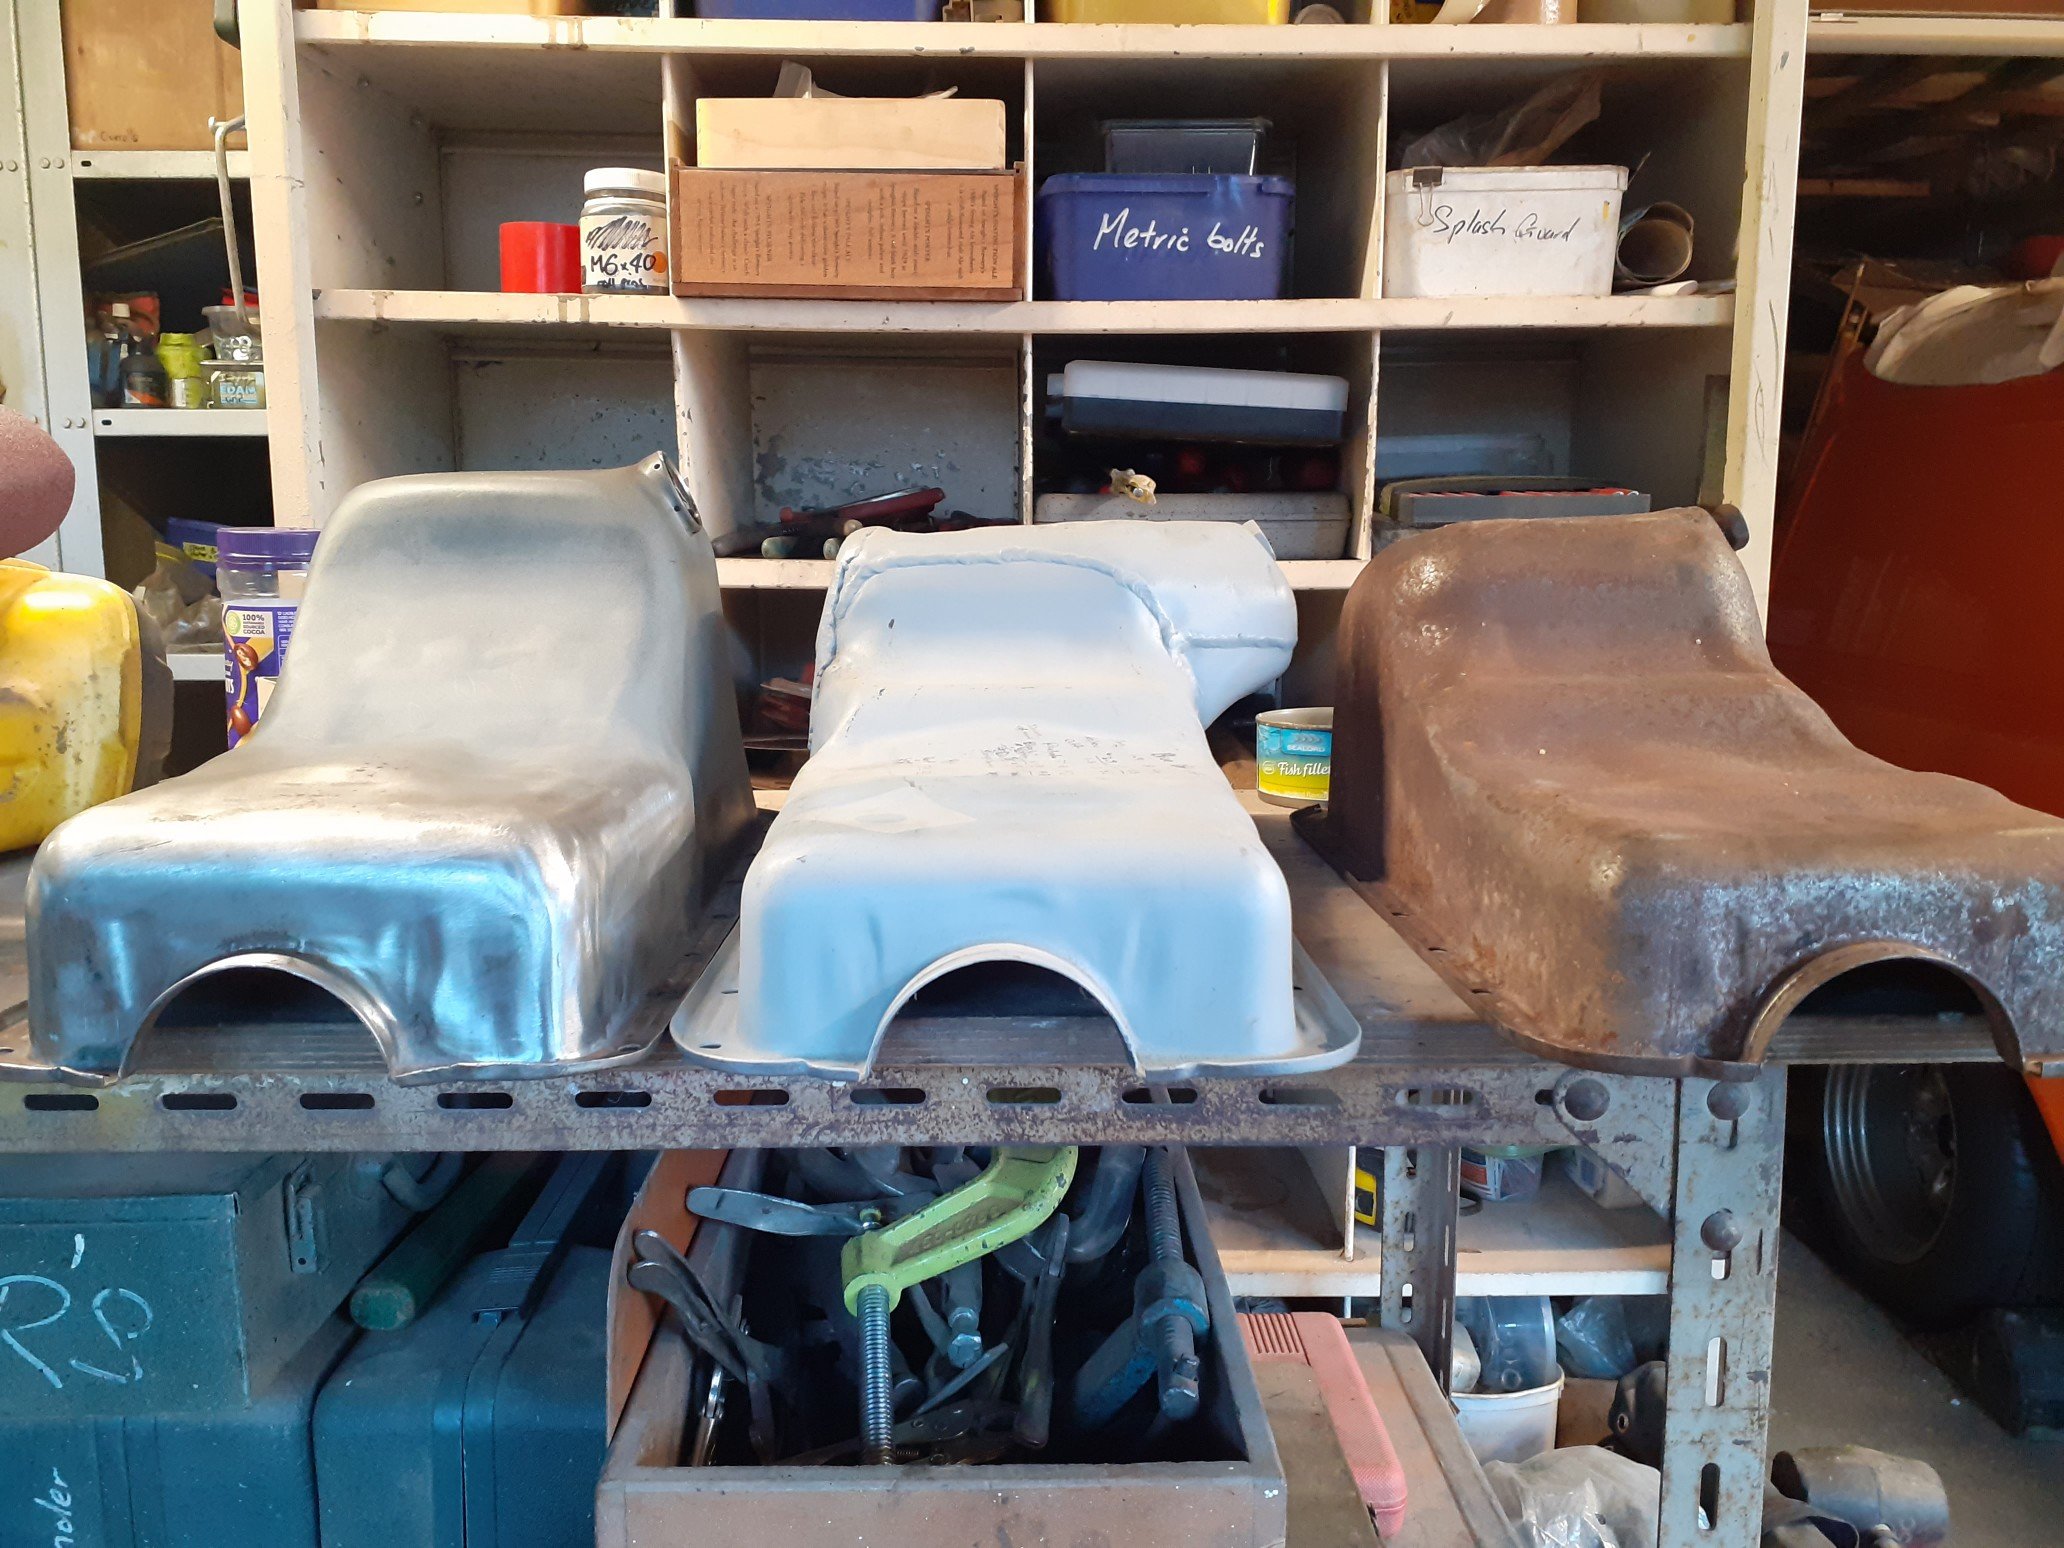
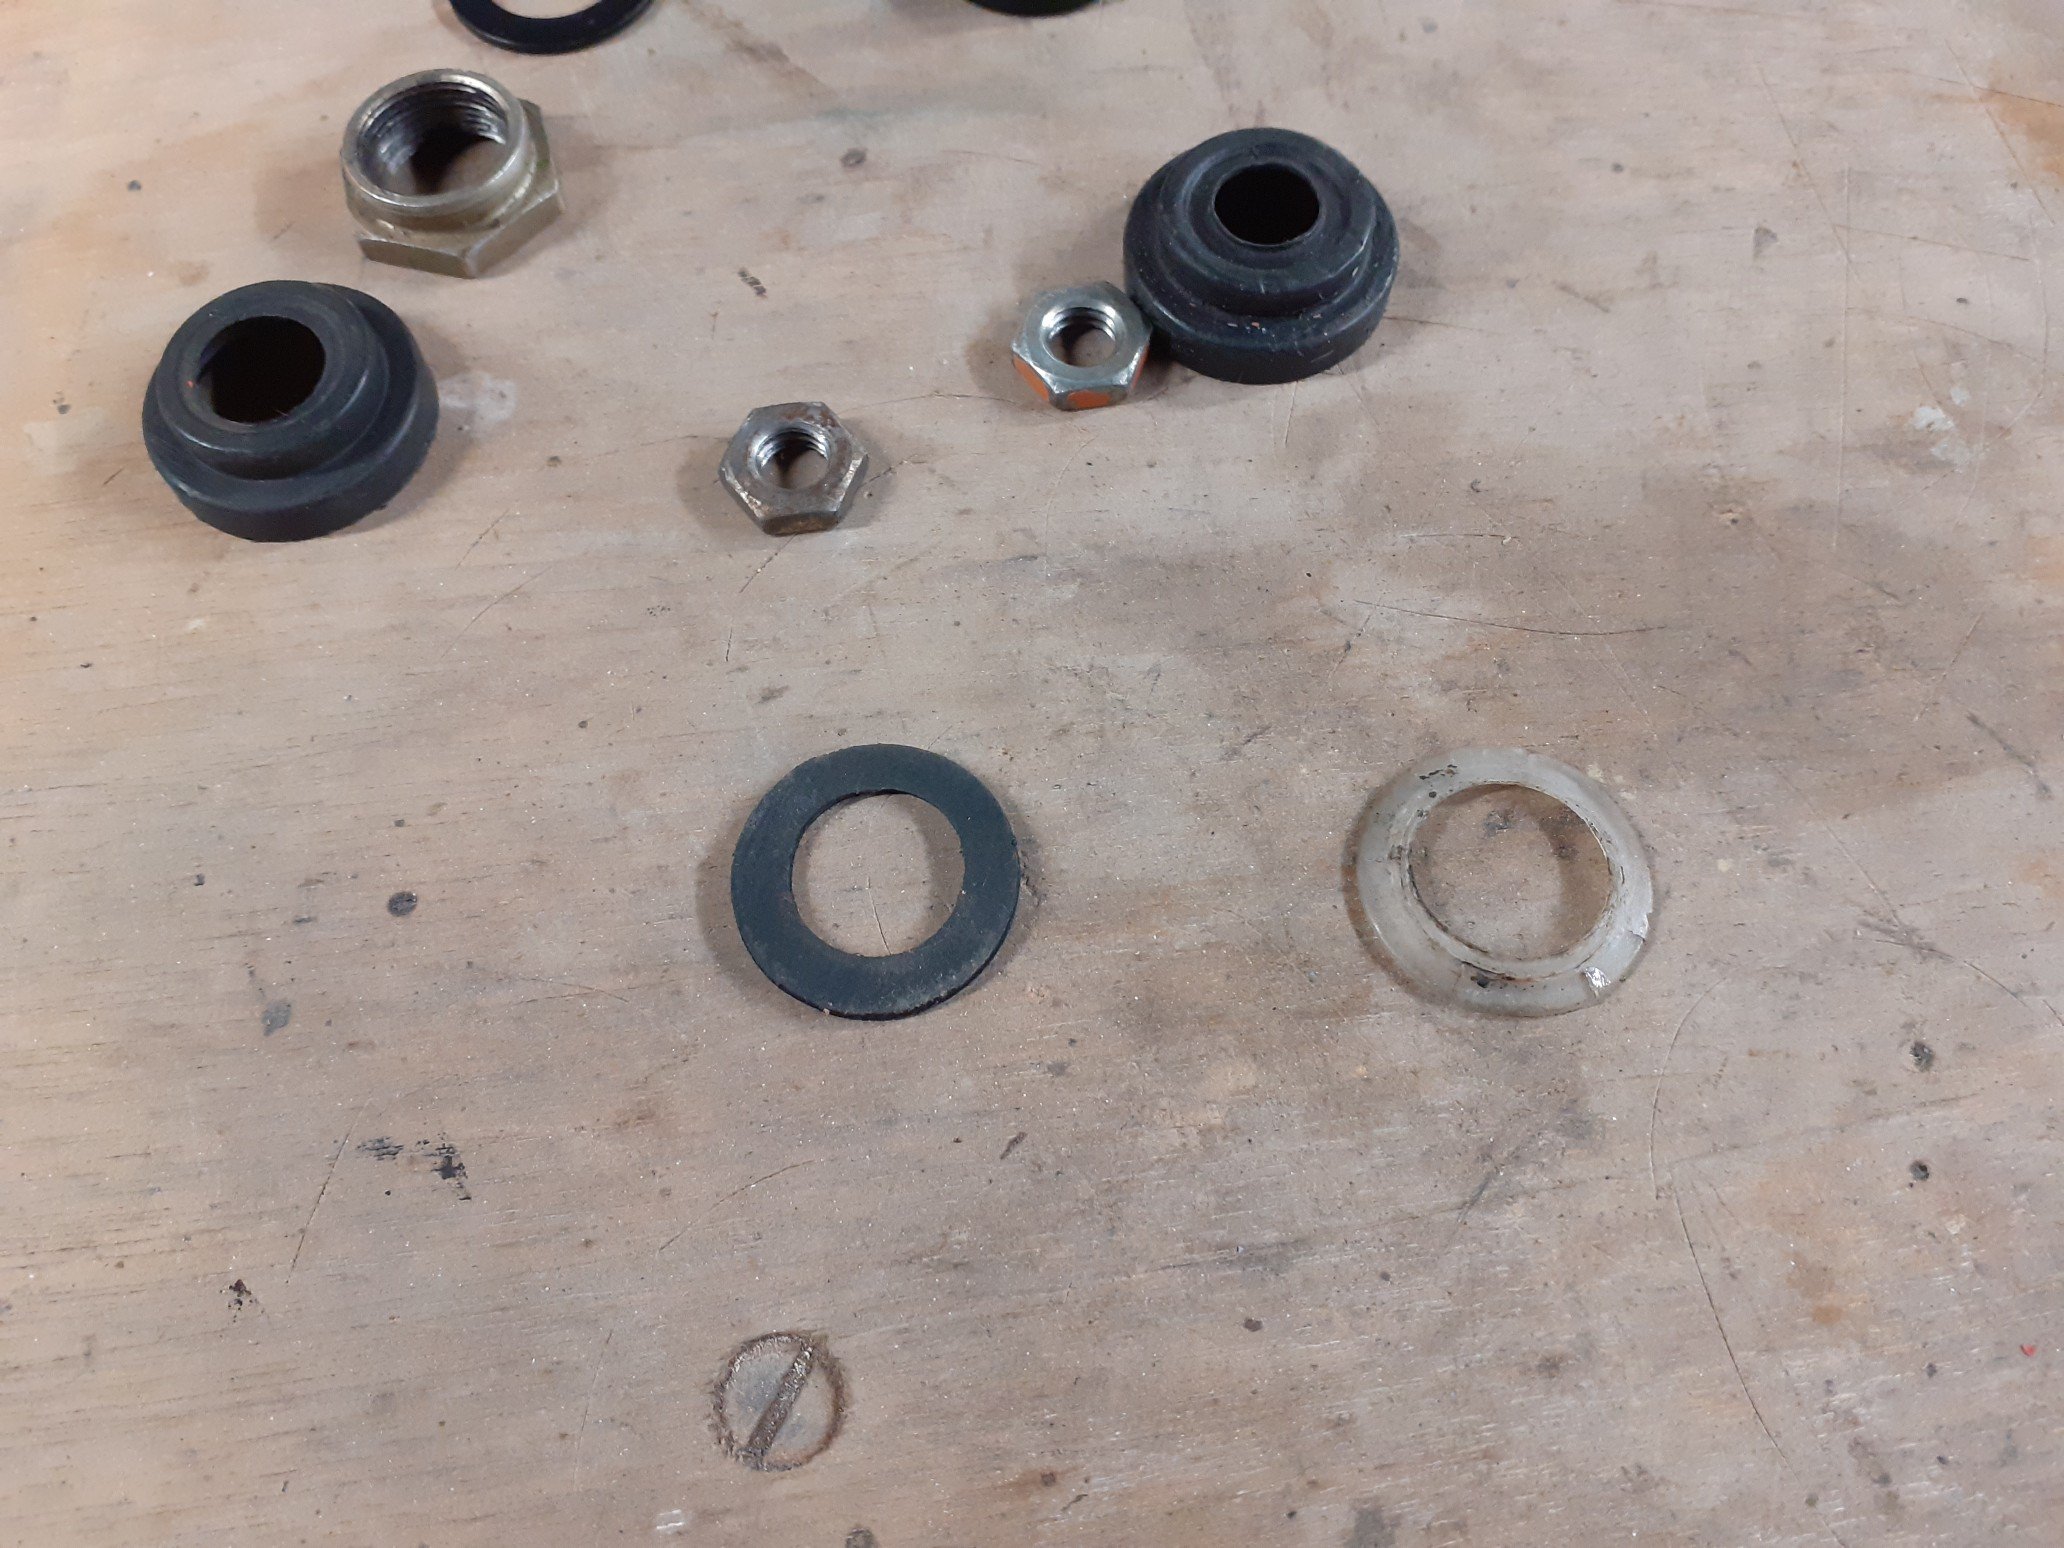
Does anyone know what these sumps were off, specifically the bare metal one? The bare metal one is the one I had with the van on the 711 1600 motors but was severely beaten in place to clear the cross member. It's been panel beated back into its original shape but it no longer clears. The grey one is one that has been modified and similarly matches a 1300. The rusty one is a 1300. My understanding is the ribs on the side of the bare metal and grey ones are for 1600 motors to clear the crank, the rusty one does not have these. The metal one has a smal bowl pressed in on the bottom infront of the rear bowl, the others have flat pressed in sections running north to south. The bowl on the bare metal one extends further forward and doesn't have the step shape compared to the other two. I'm picking its a cortina or capri sump? Trying to get the correct combination of sumps and mounts to make it work. The round sport 42mm type ones I have currently have the motor too high. Any lower and it hits the cross member. I'll order some smaller mounts and look for the correct 1600 sump to match.
-
Thanks for the suggestions. Unfortunately I just found out most the scene has been written out of the script so their no longer needed. Thread can be locked/removed.
-
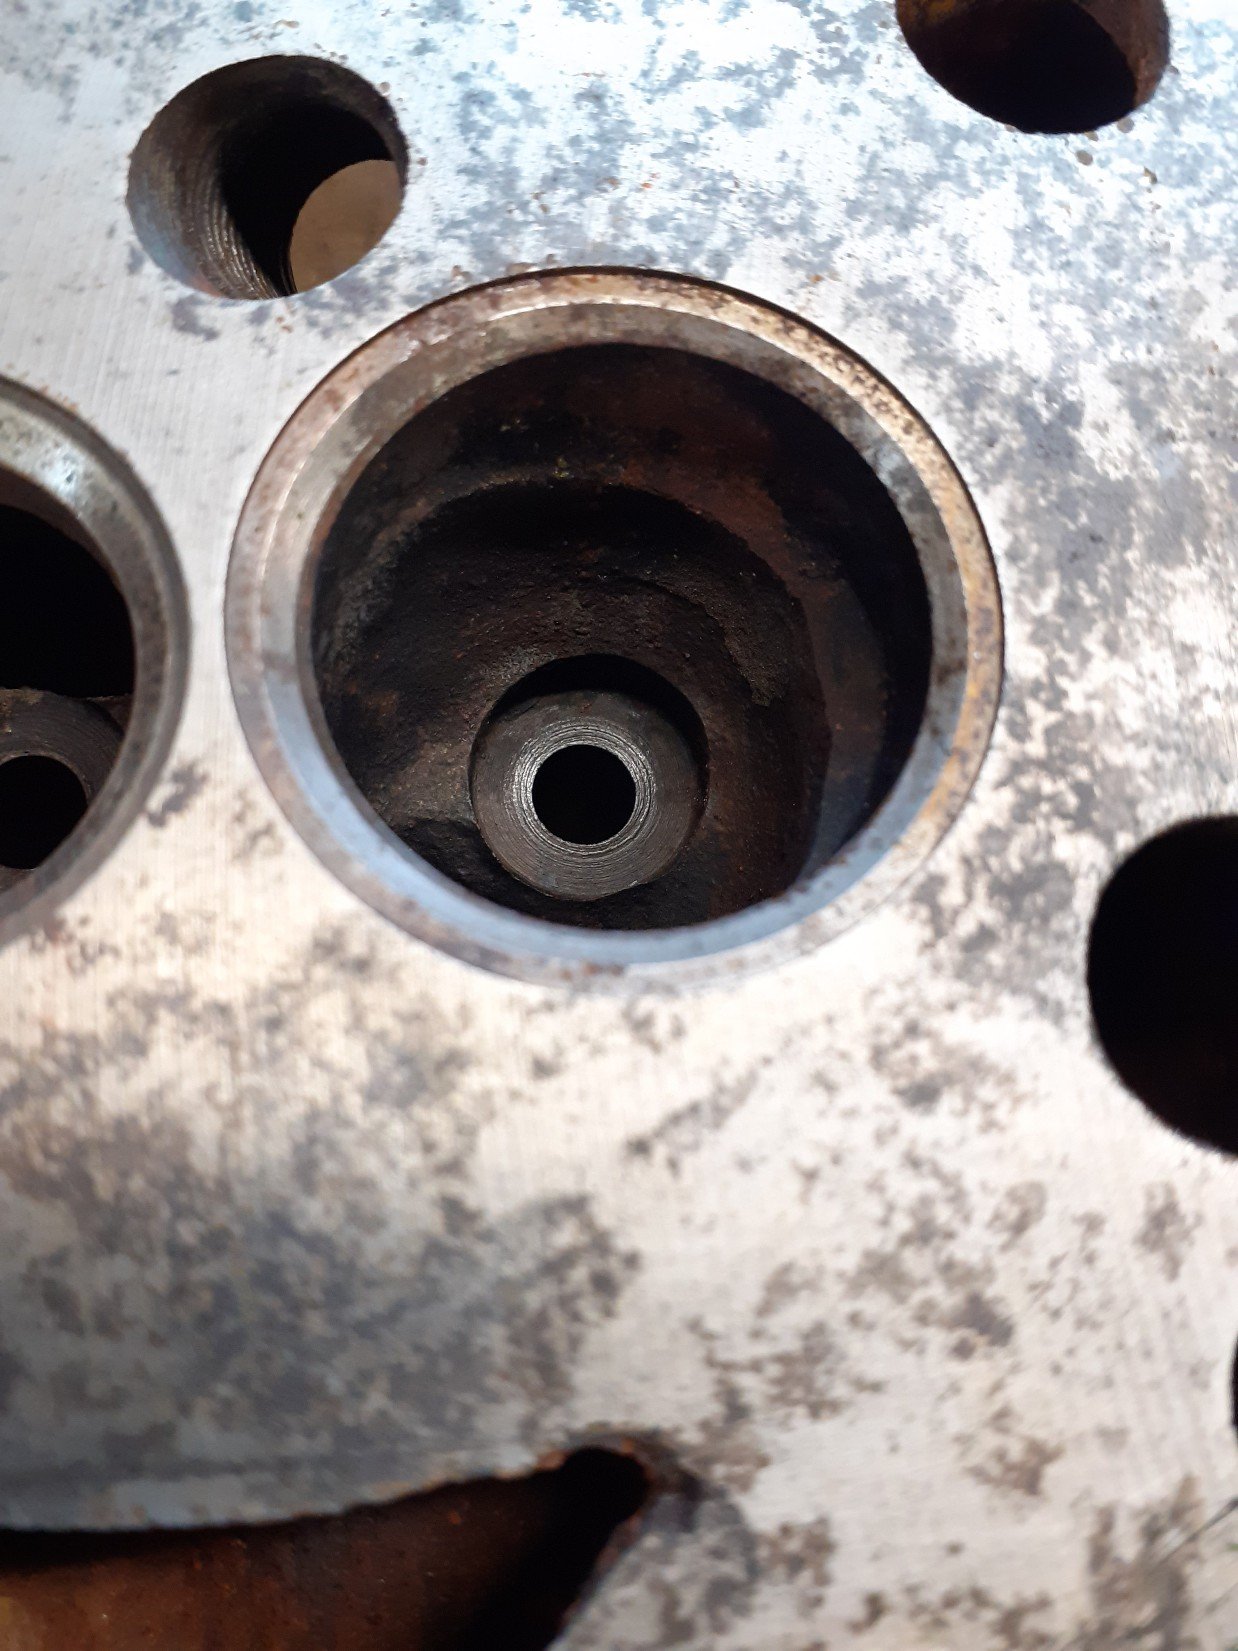
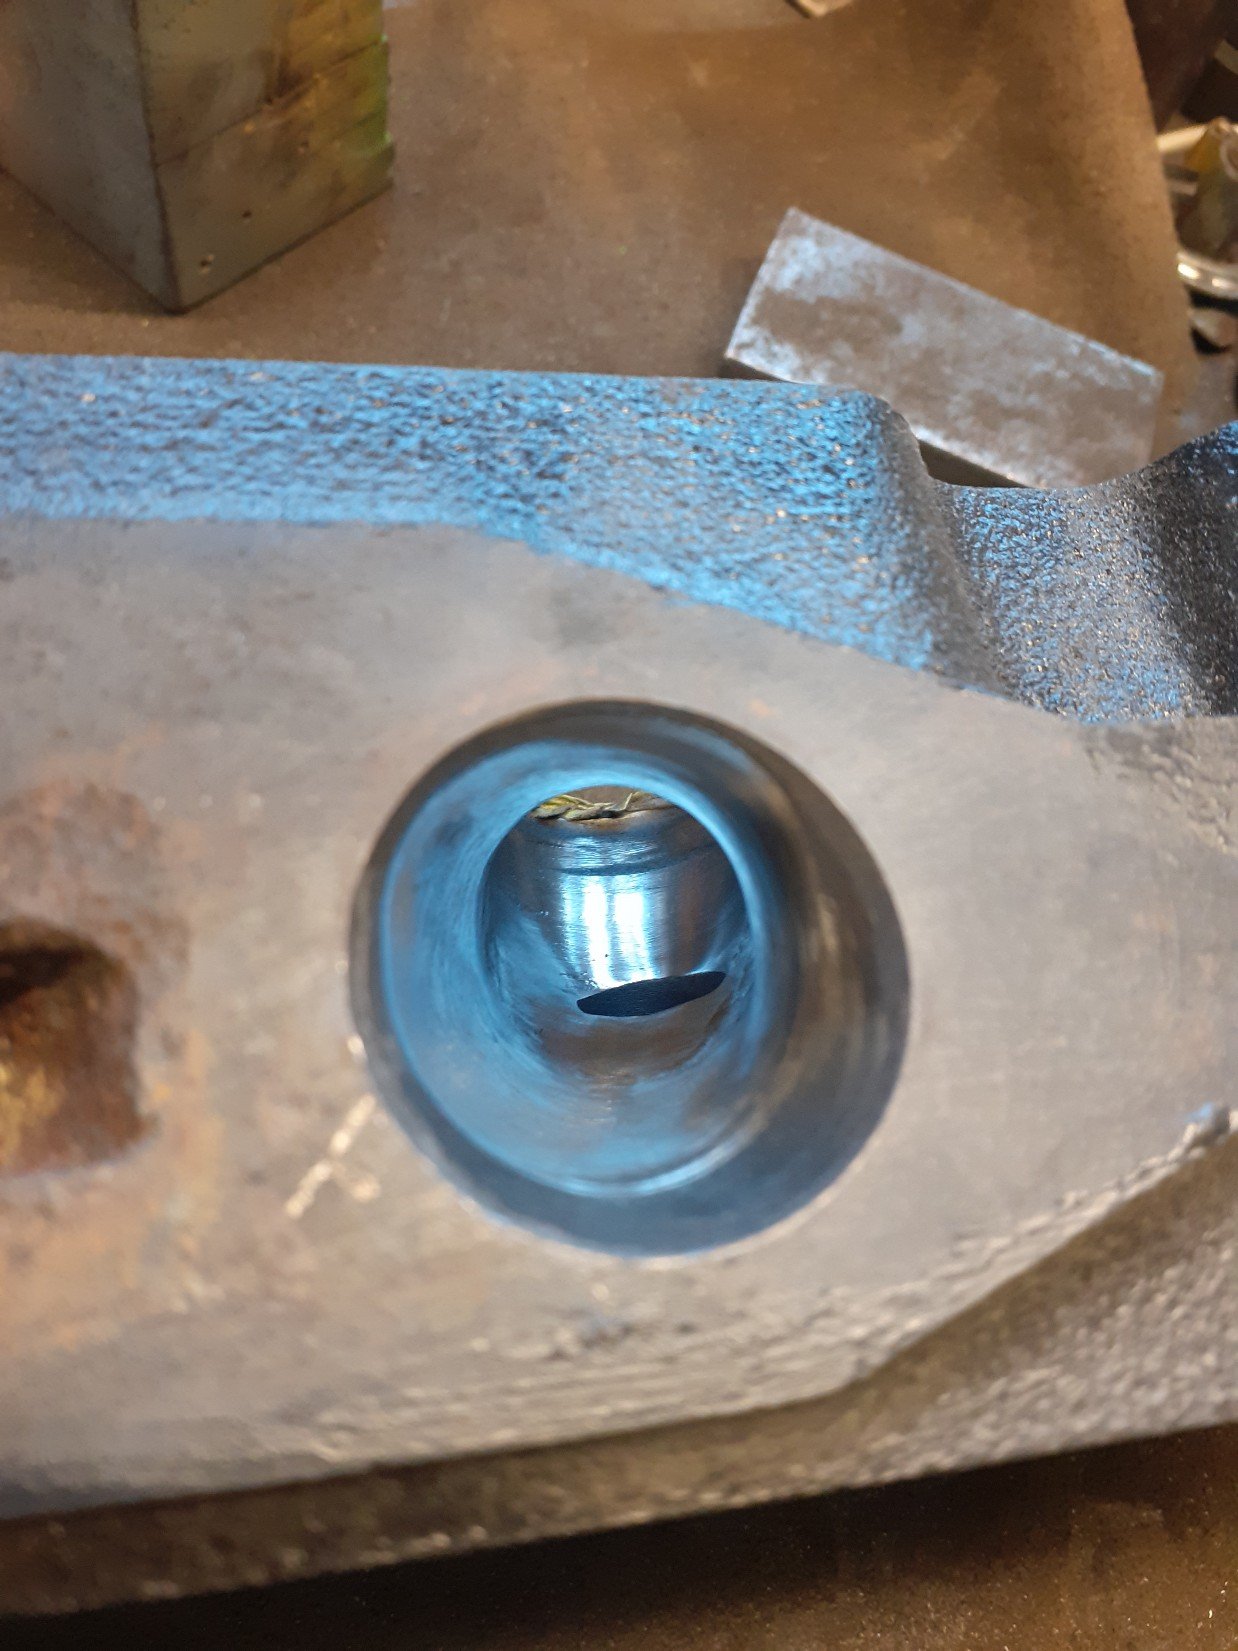
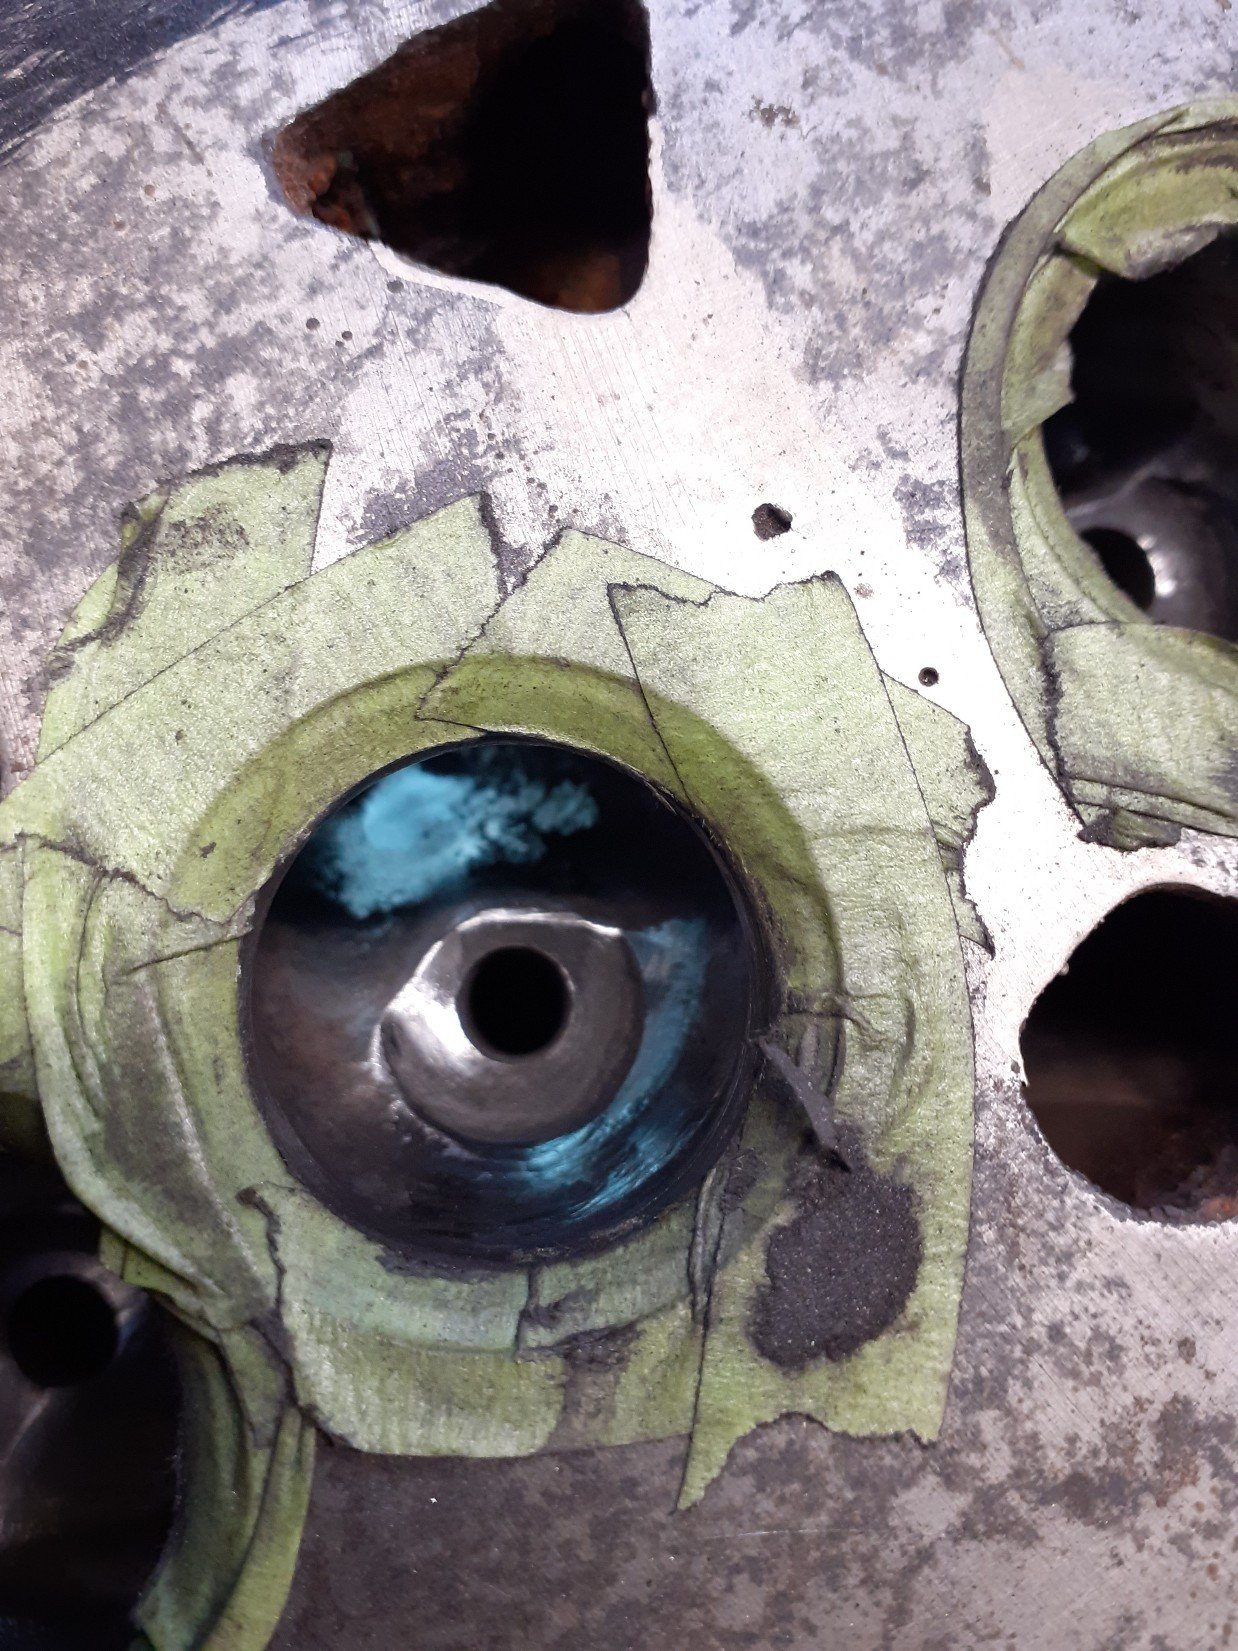
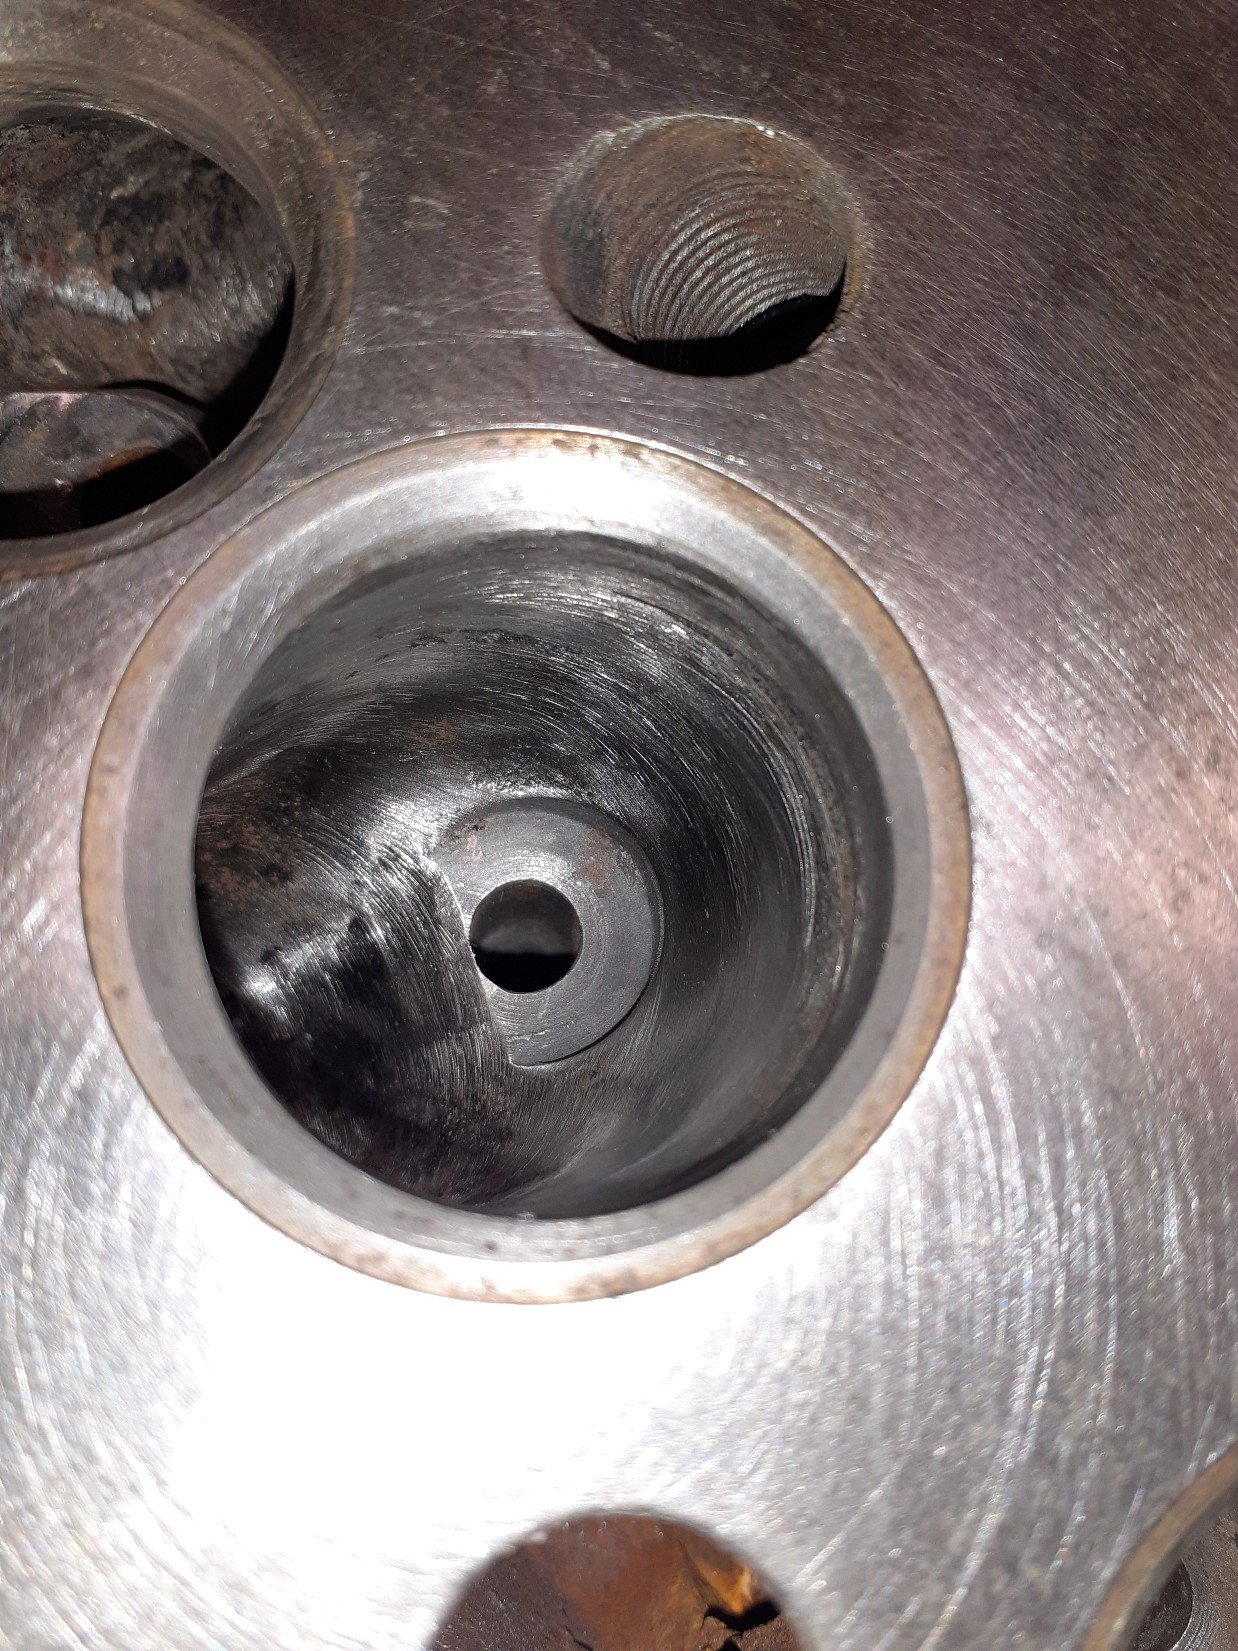
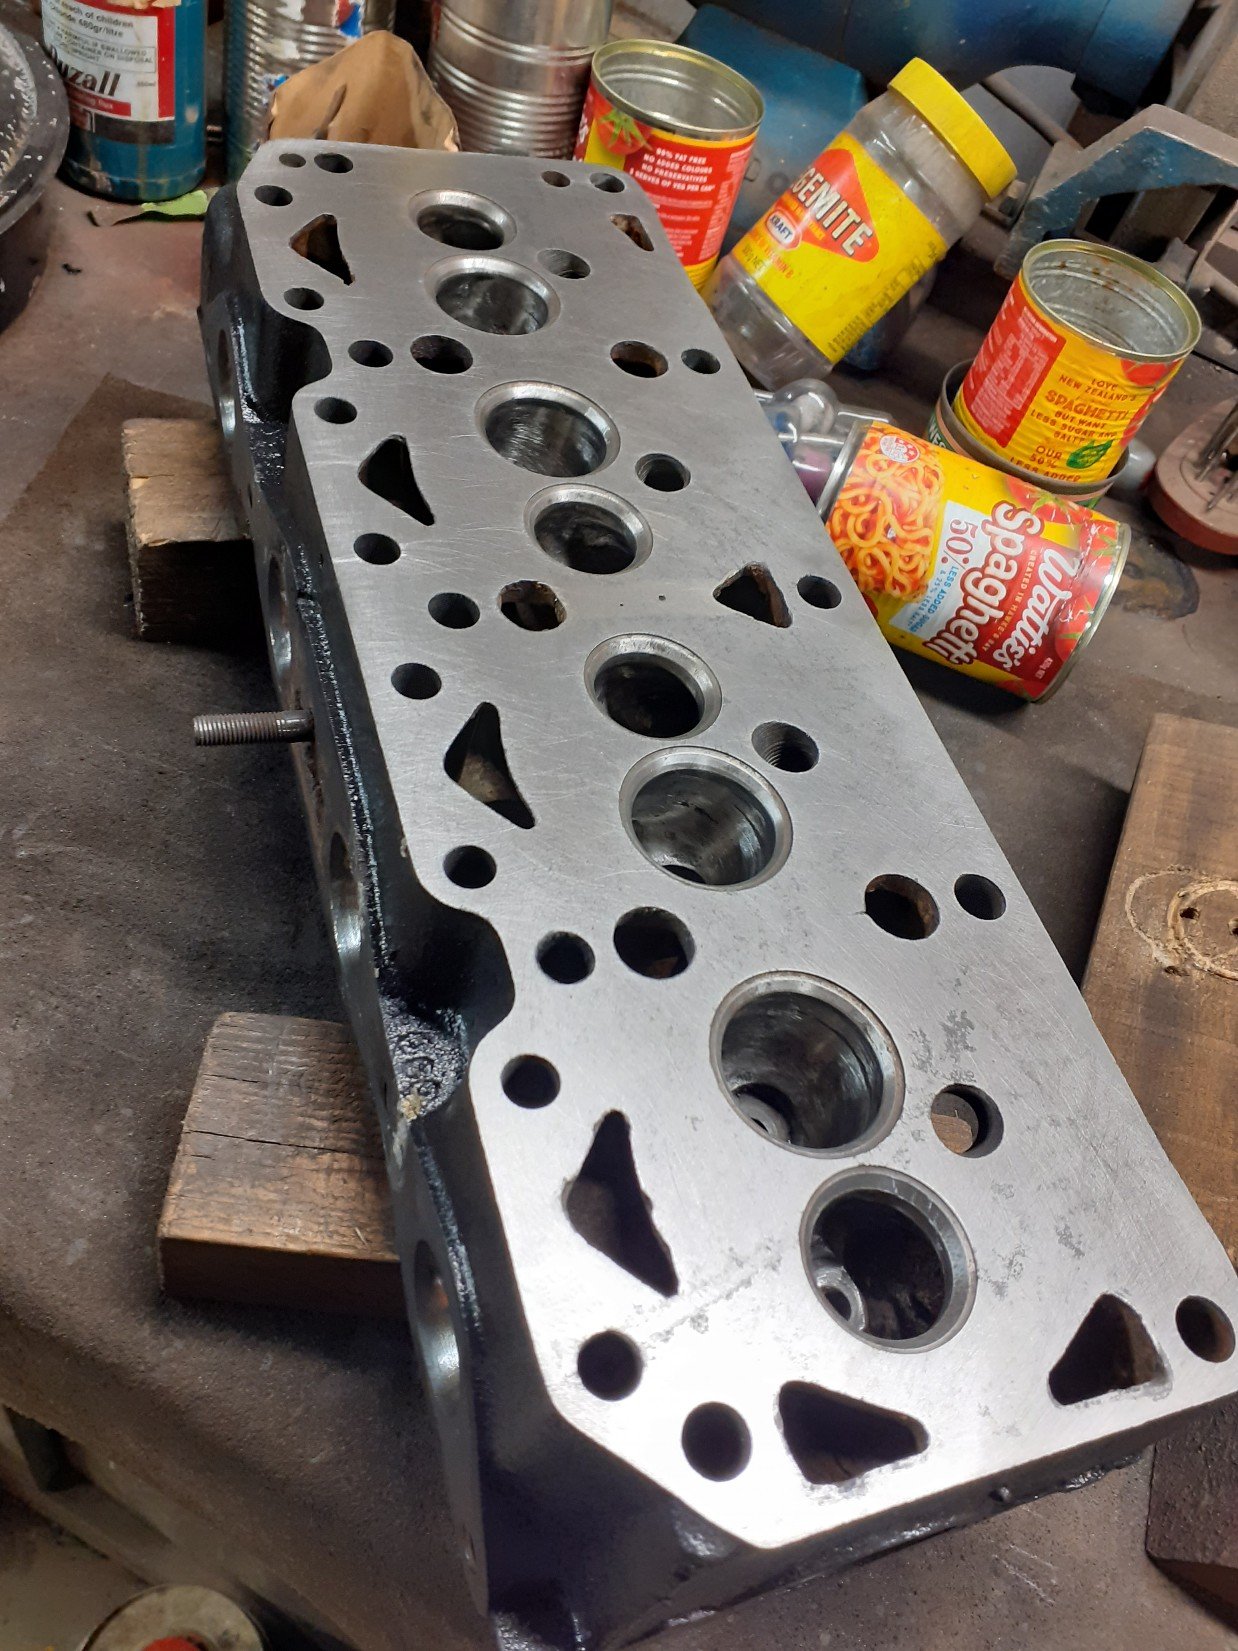
Used this over summer then it sat unloved for 9months or so. Went for a wof the other week, failed on a tear in the driver's belt. Replaced them with some retractible seatbelts and we were away. I've been meaning to build a simple 1600 motor out of my spare parts. I've slowly been gathering bits and pieces. I have a bottom end which I picked up years ago, bored to 60tho, new pistons, bearings, machined crank, all balanced and lightened etc. All my heads are the standard 1300/1600 size so I grabbed one which had the best valve guides as I'm trying to avoid getting anything machined. Stripped it and dunked it over night in our funny hot tub with washing soda and it came up good. I could have thrown it together and called it good but I may as well tidy some of the areas up. First was to remove the lip around the push rod gallery. Removing the lip will help the oil drain. Porting. I read up on lots of porting do's and don't and it appears there's quite a bit to it. From what I read on crossflows, pointless enlarging the ports if I'm keeping with the standard valves. I ended up cleaning up the casting, removing some restrictions and smoothing out the lot. Inlet bowl before. Inlet bowl after I didn't do as much to the exhaust bowl and ports but still tidied them up some what. I was going to do the whole gasket matching thing but it turns out theyre actually the right size. One less job to do. For the Inlet ports I removed the casting marks, smoothed the entries and removed a little meat from the sides to try and direct the flow a little better. Before After All surfaces were taken down to 80 grit. No exact science here but in my mind it looks like an improvement. The head has been welded in the past and has been skimmed bit I hit it with some glass and emery cloth to confirm it was flat. Just need to lap the valves and I'm calling it done.
- 37 replies
-
- 14
-
-
A friend works for a production crew and organises vehicles for films. He's currently on the look out for some original 80s vehicles for a 1990s film based in britain, filmed in the wellington area. British ideal but they can have the odd Honda or mitsi. Looking to rent some for a couple days. I'm unsure of the exact date or reimbursement but if your interested, let me know and I'll pass on the details. Cheers
-
Wellington Monthly Meet - Discussion thread
bmxnz11 replied to KKtrips's topic in Lower North Island Region
Thanks. On me way. -
Wellington Monthly Meet - Discussion thread
bmxnz11 replied to KKtrips's topic in Lower North Island Region
I'm not too phased where but I'm certainly keen for a catch up. -
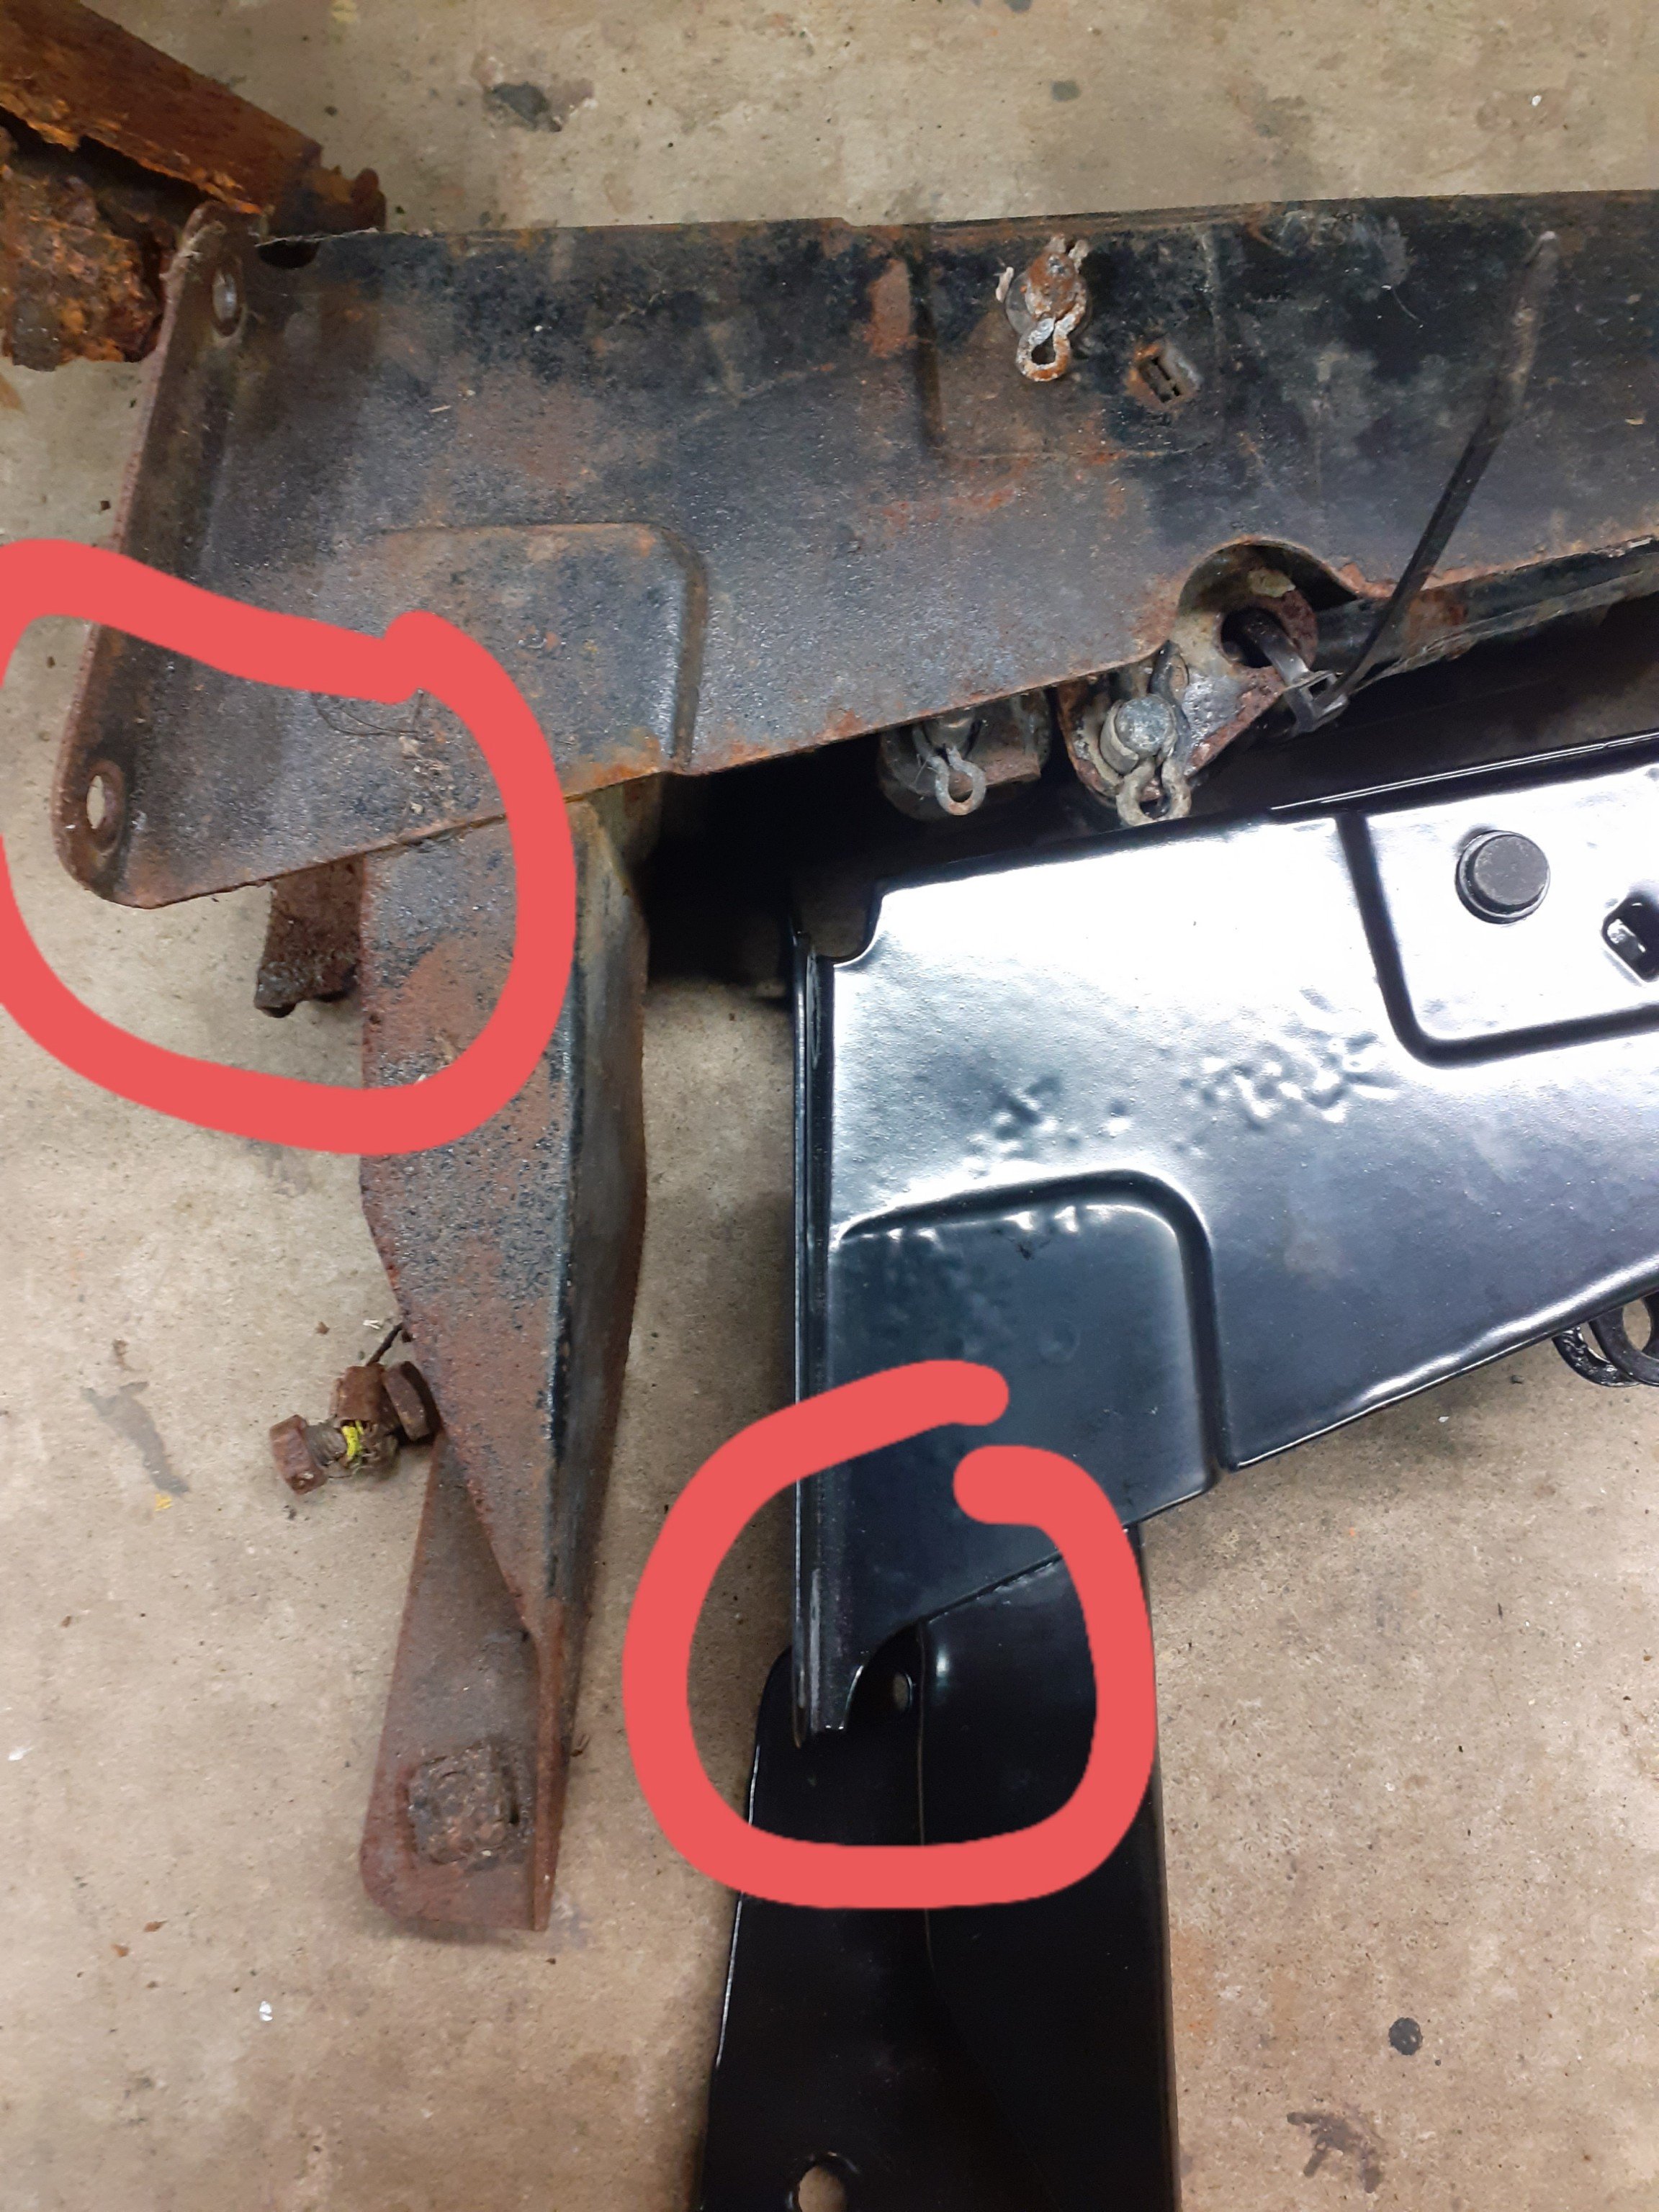
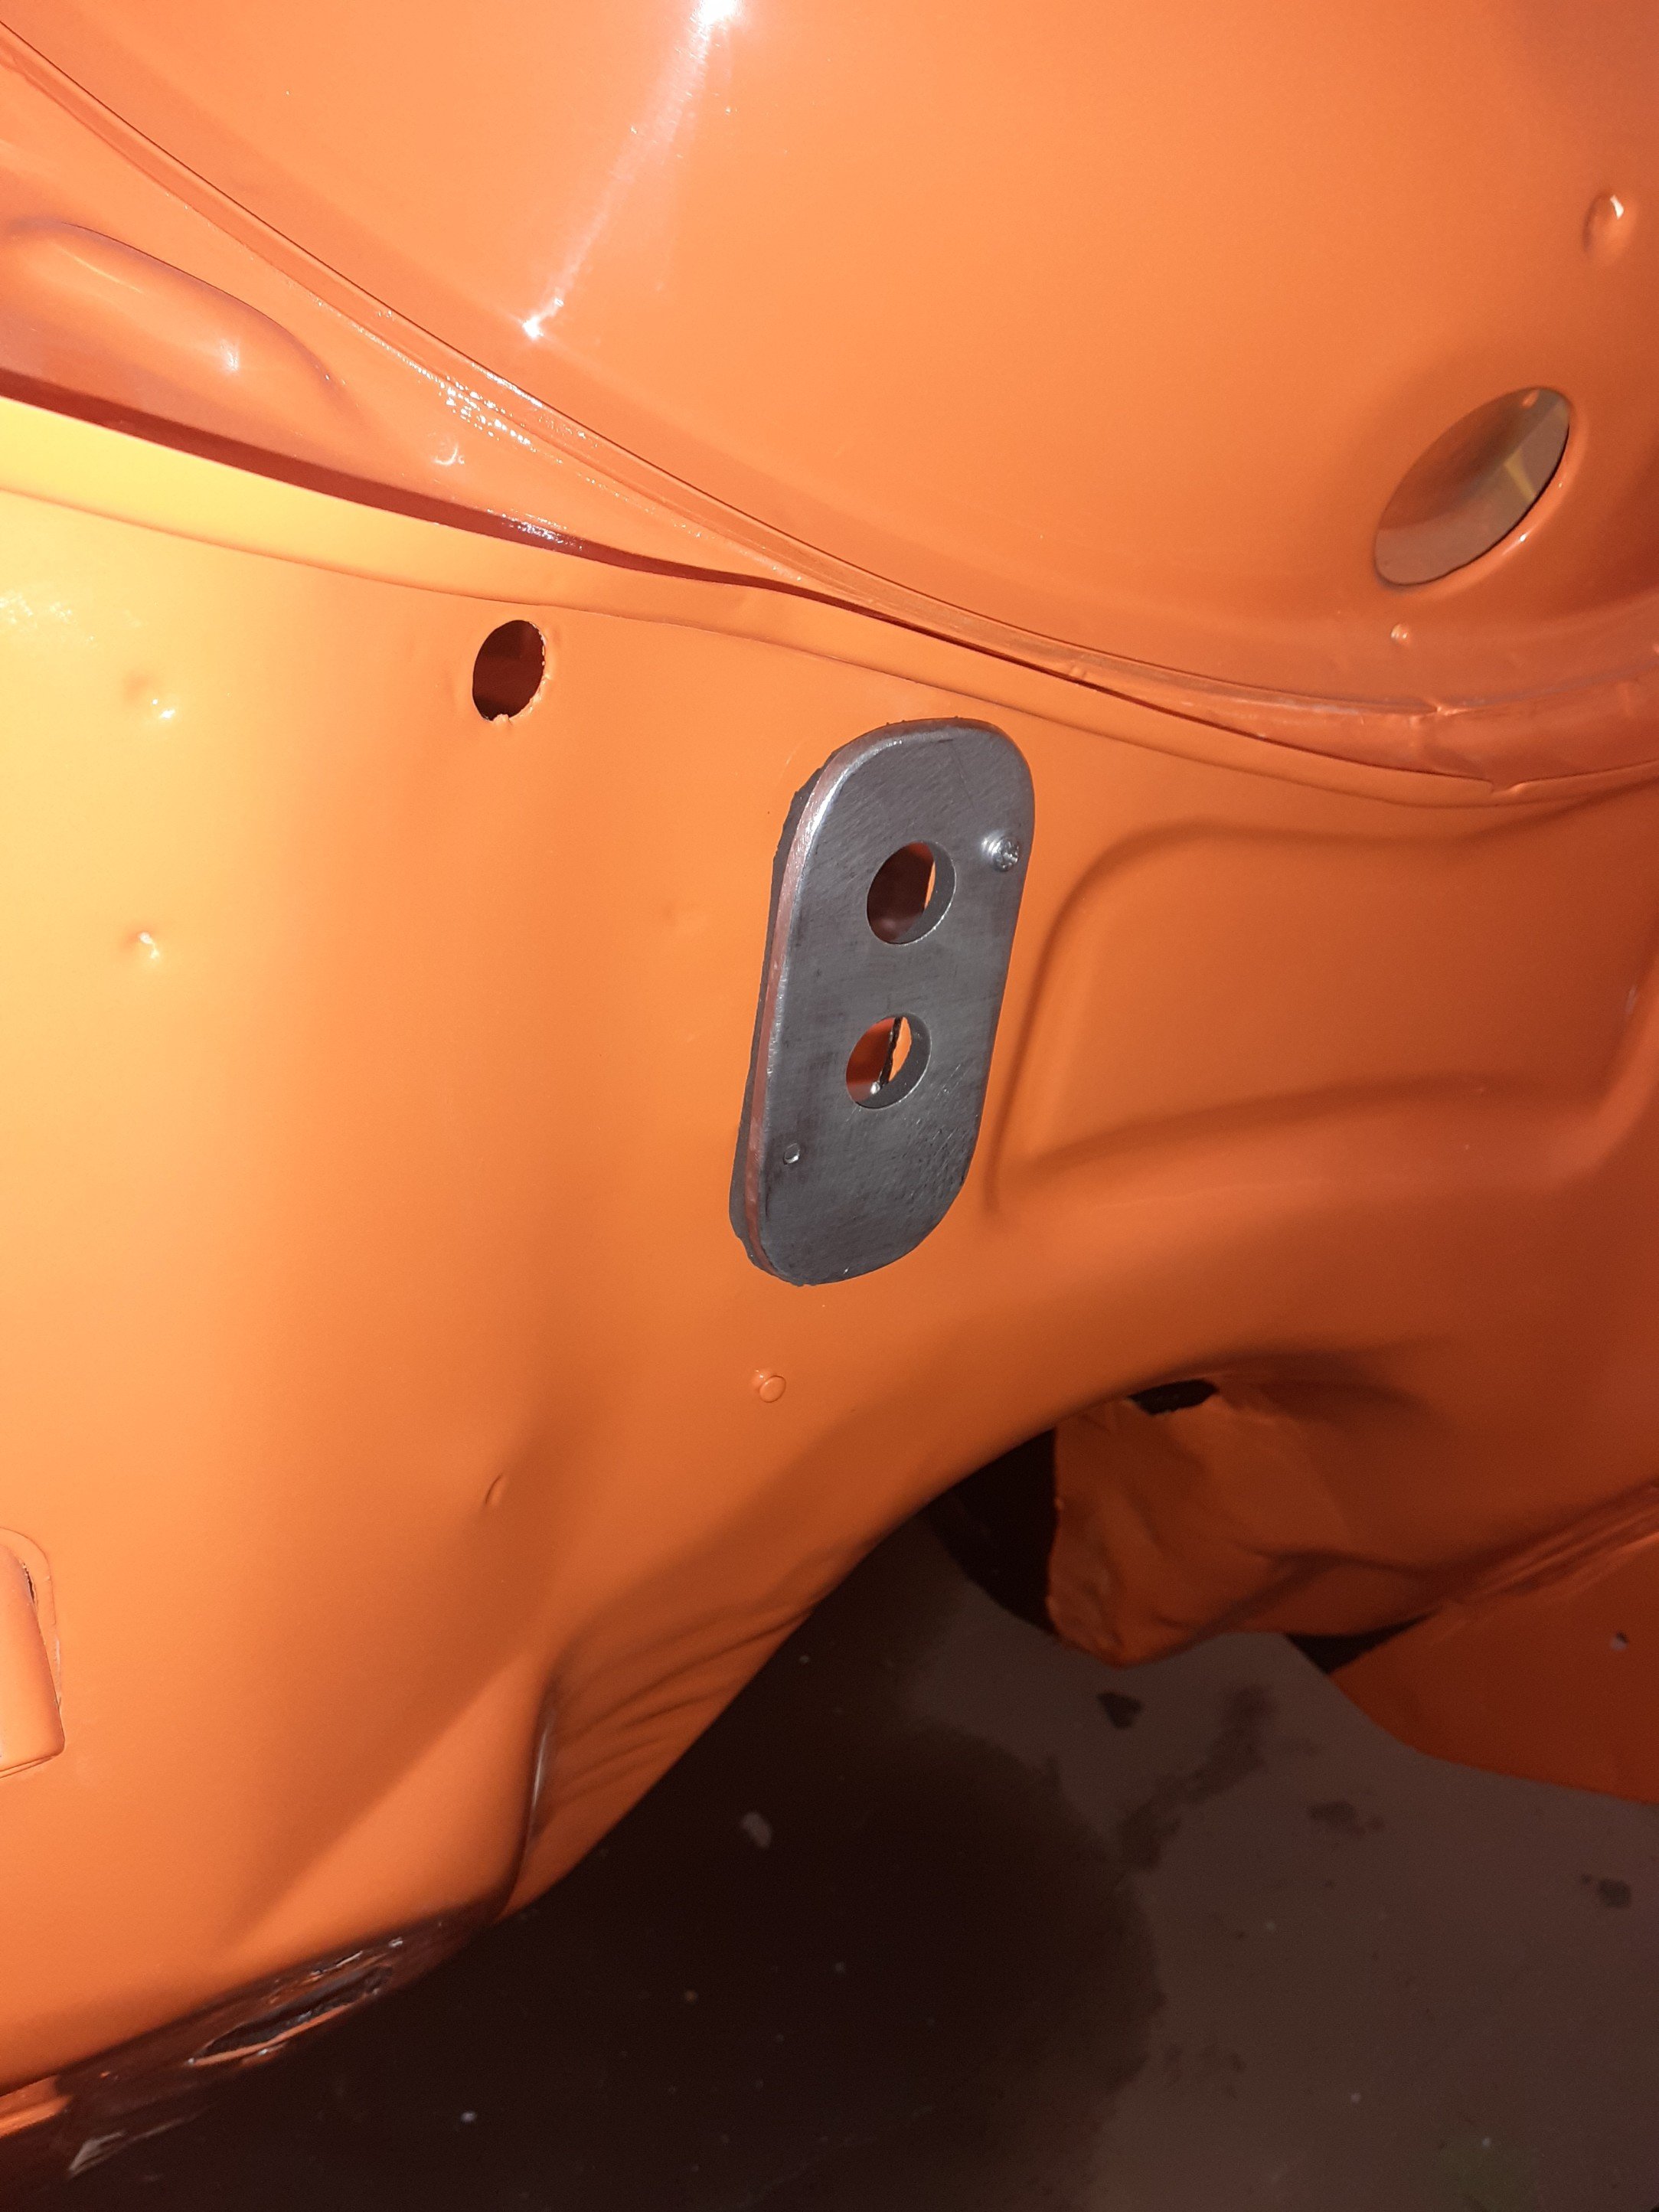
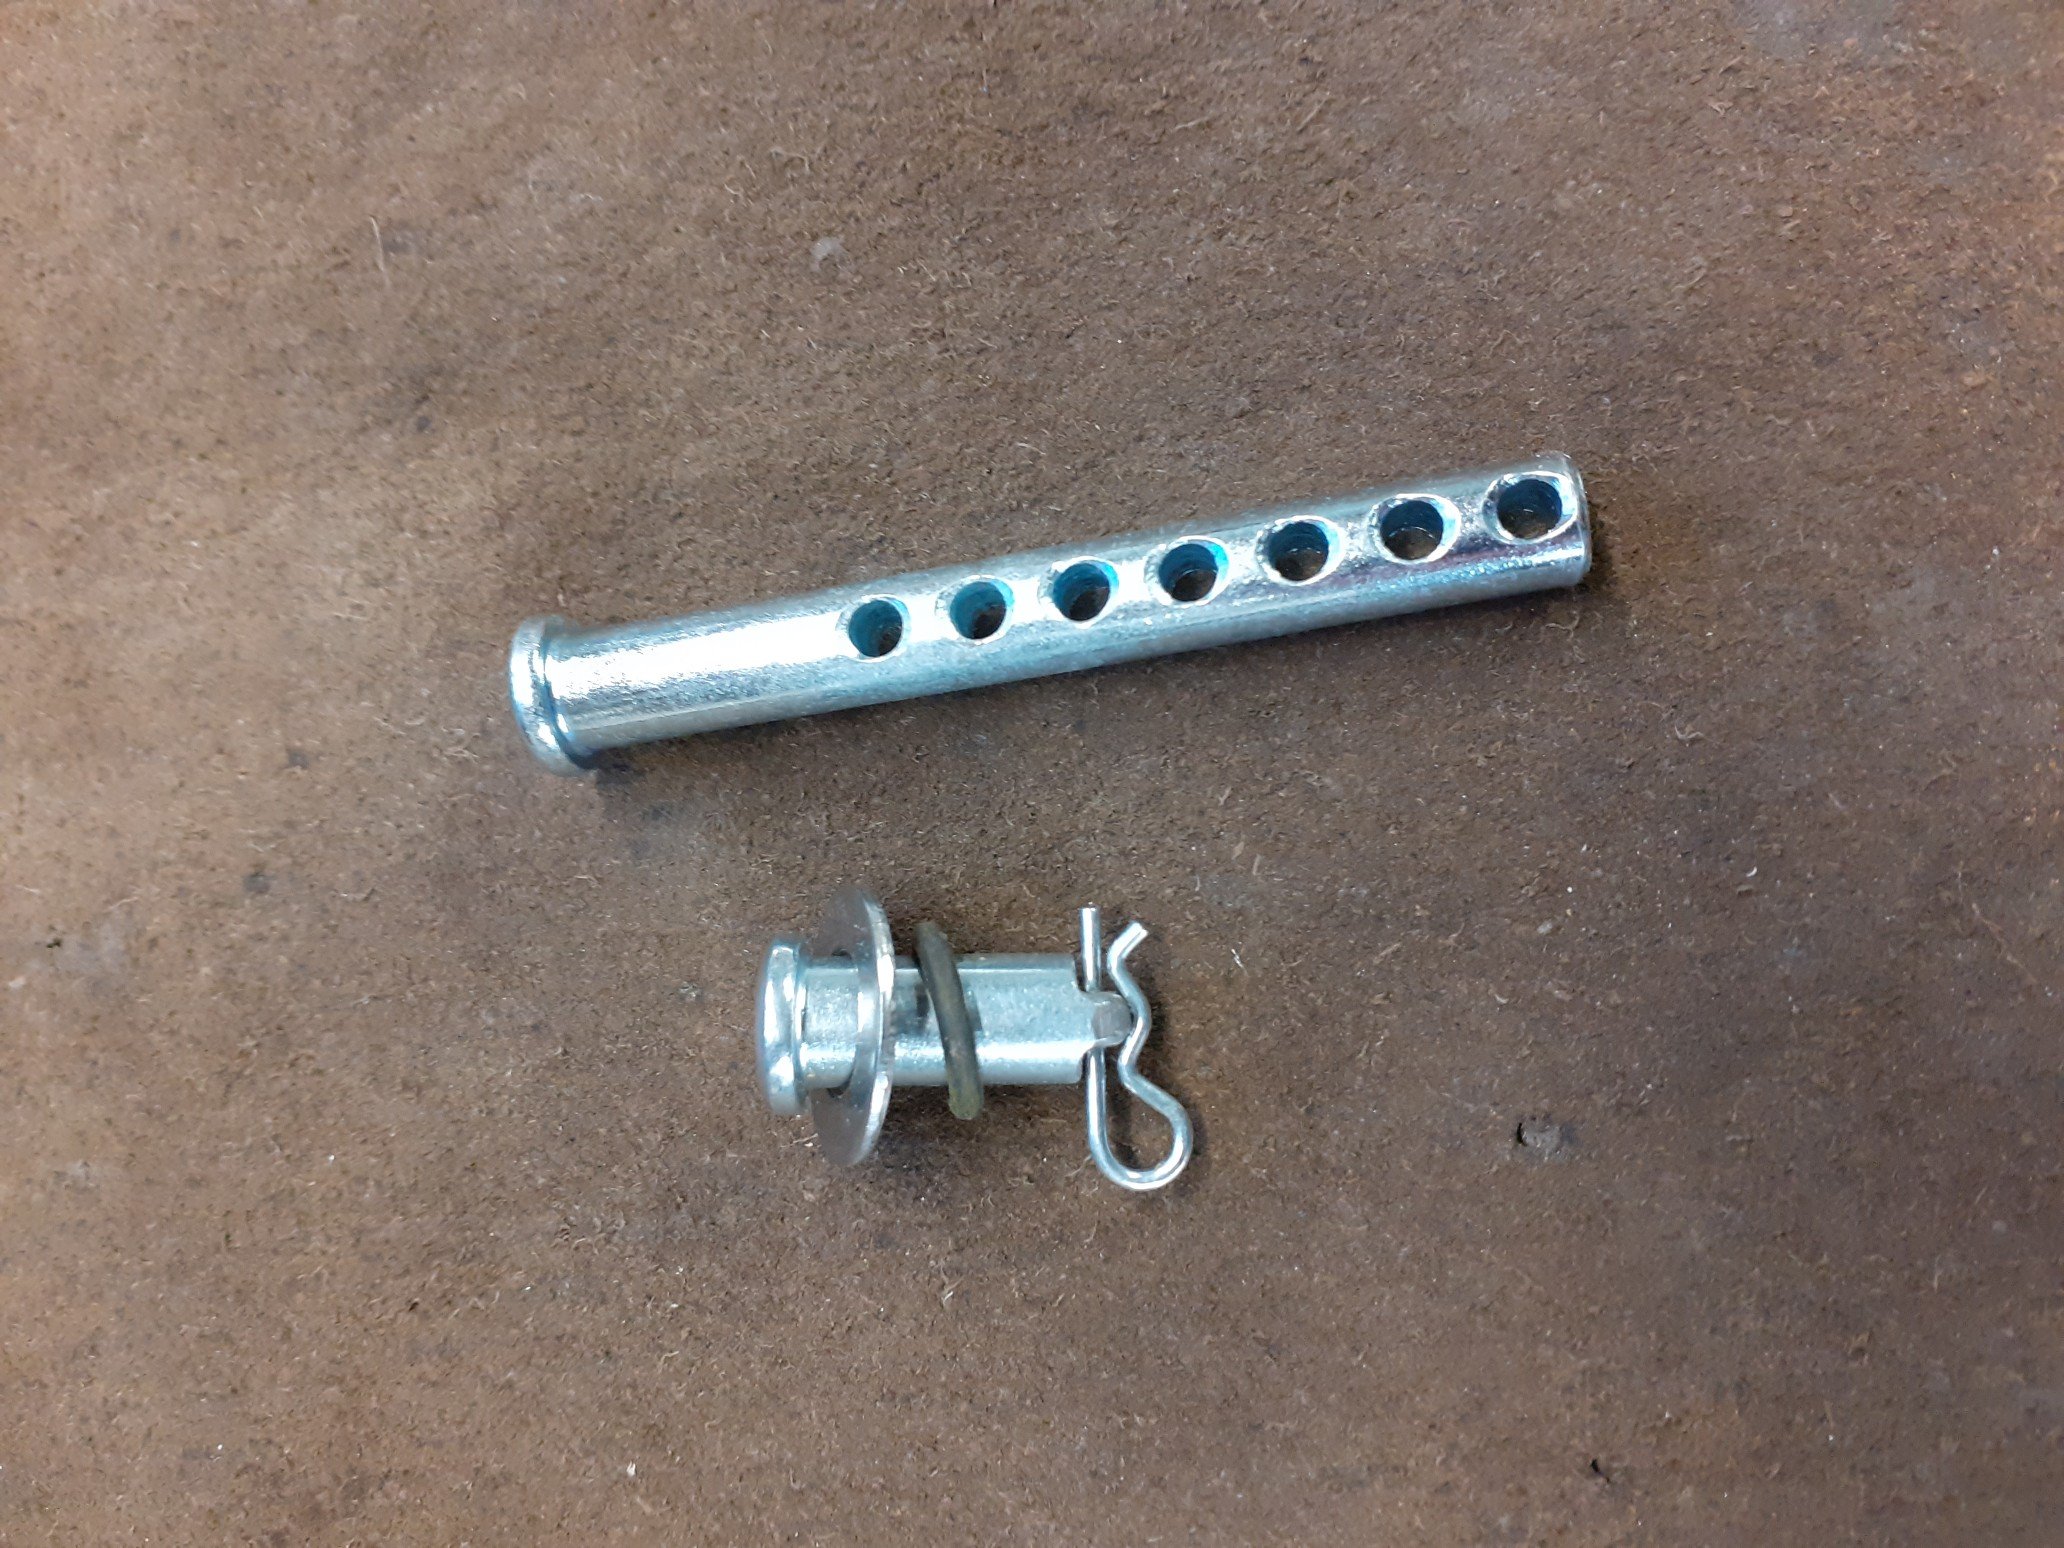
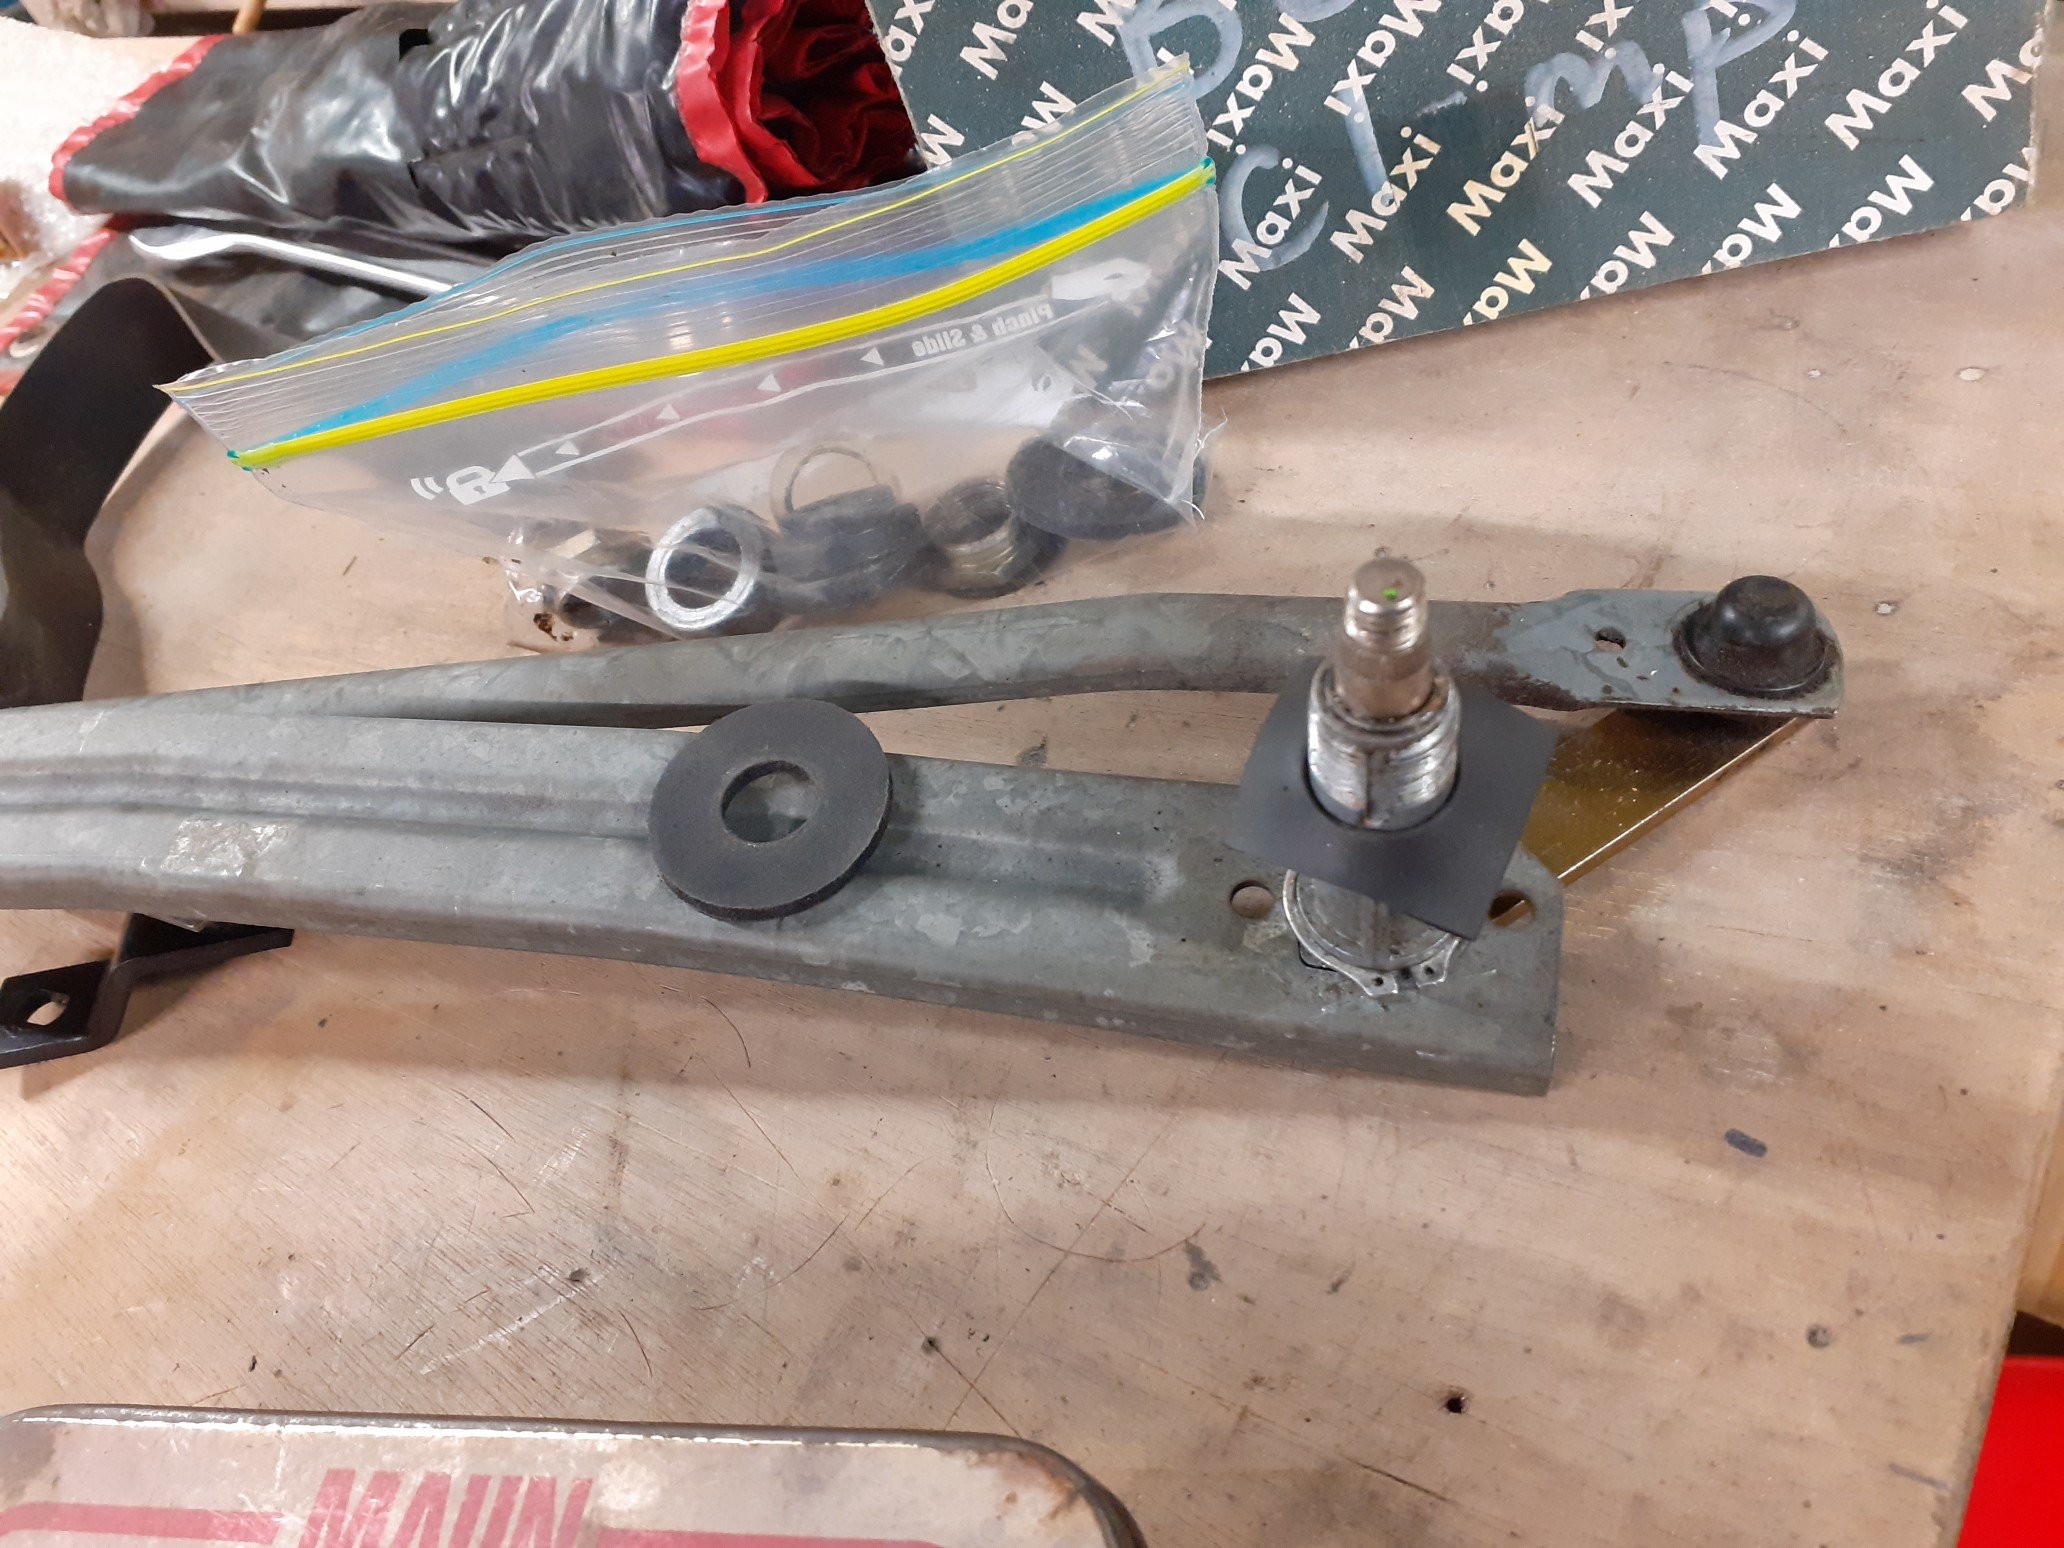
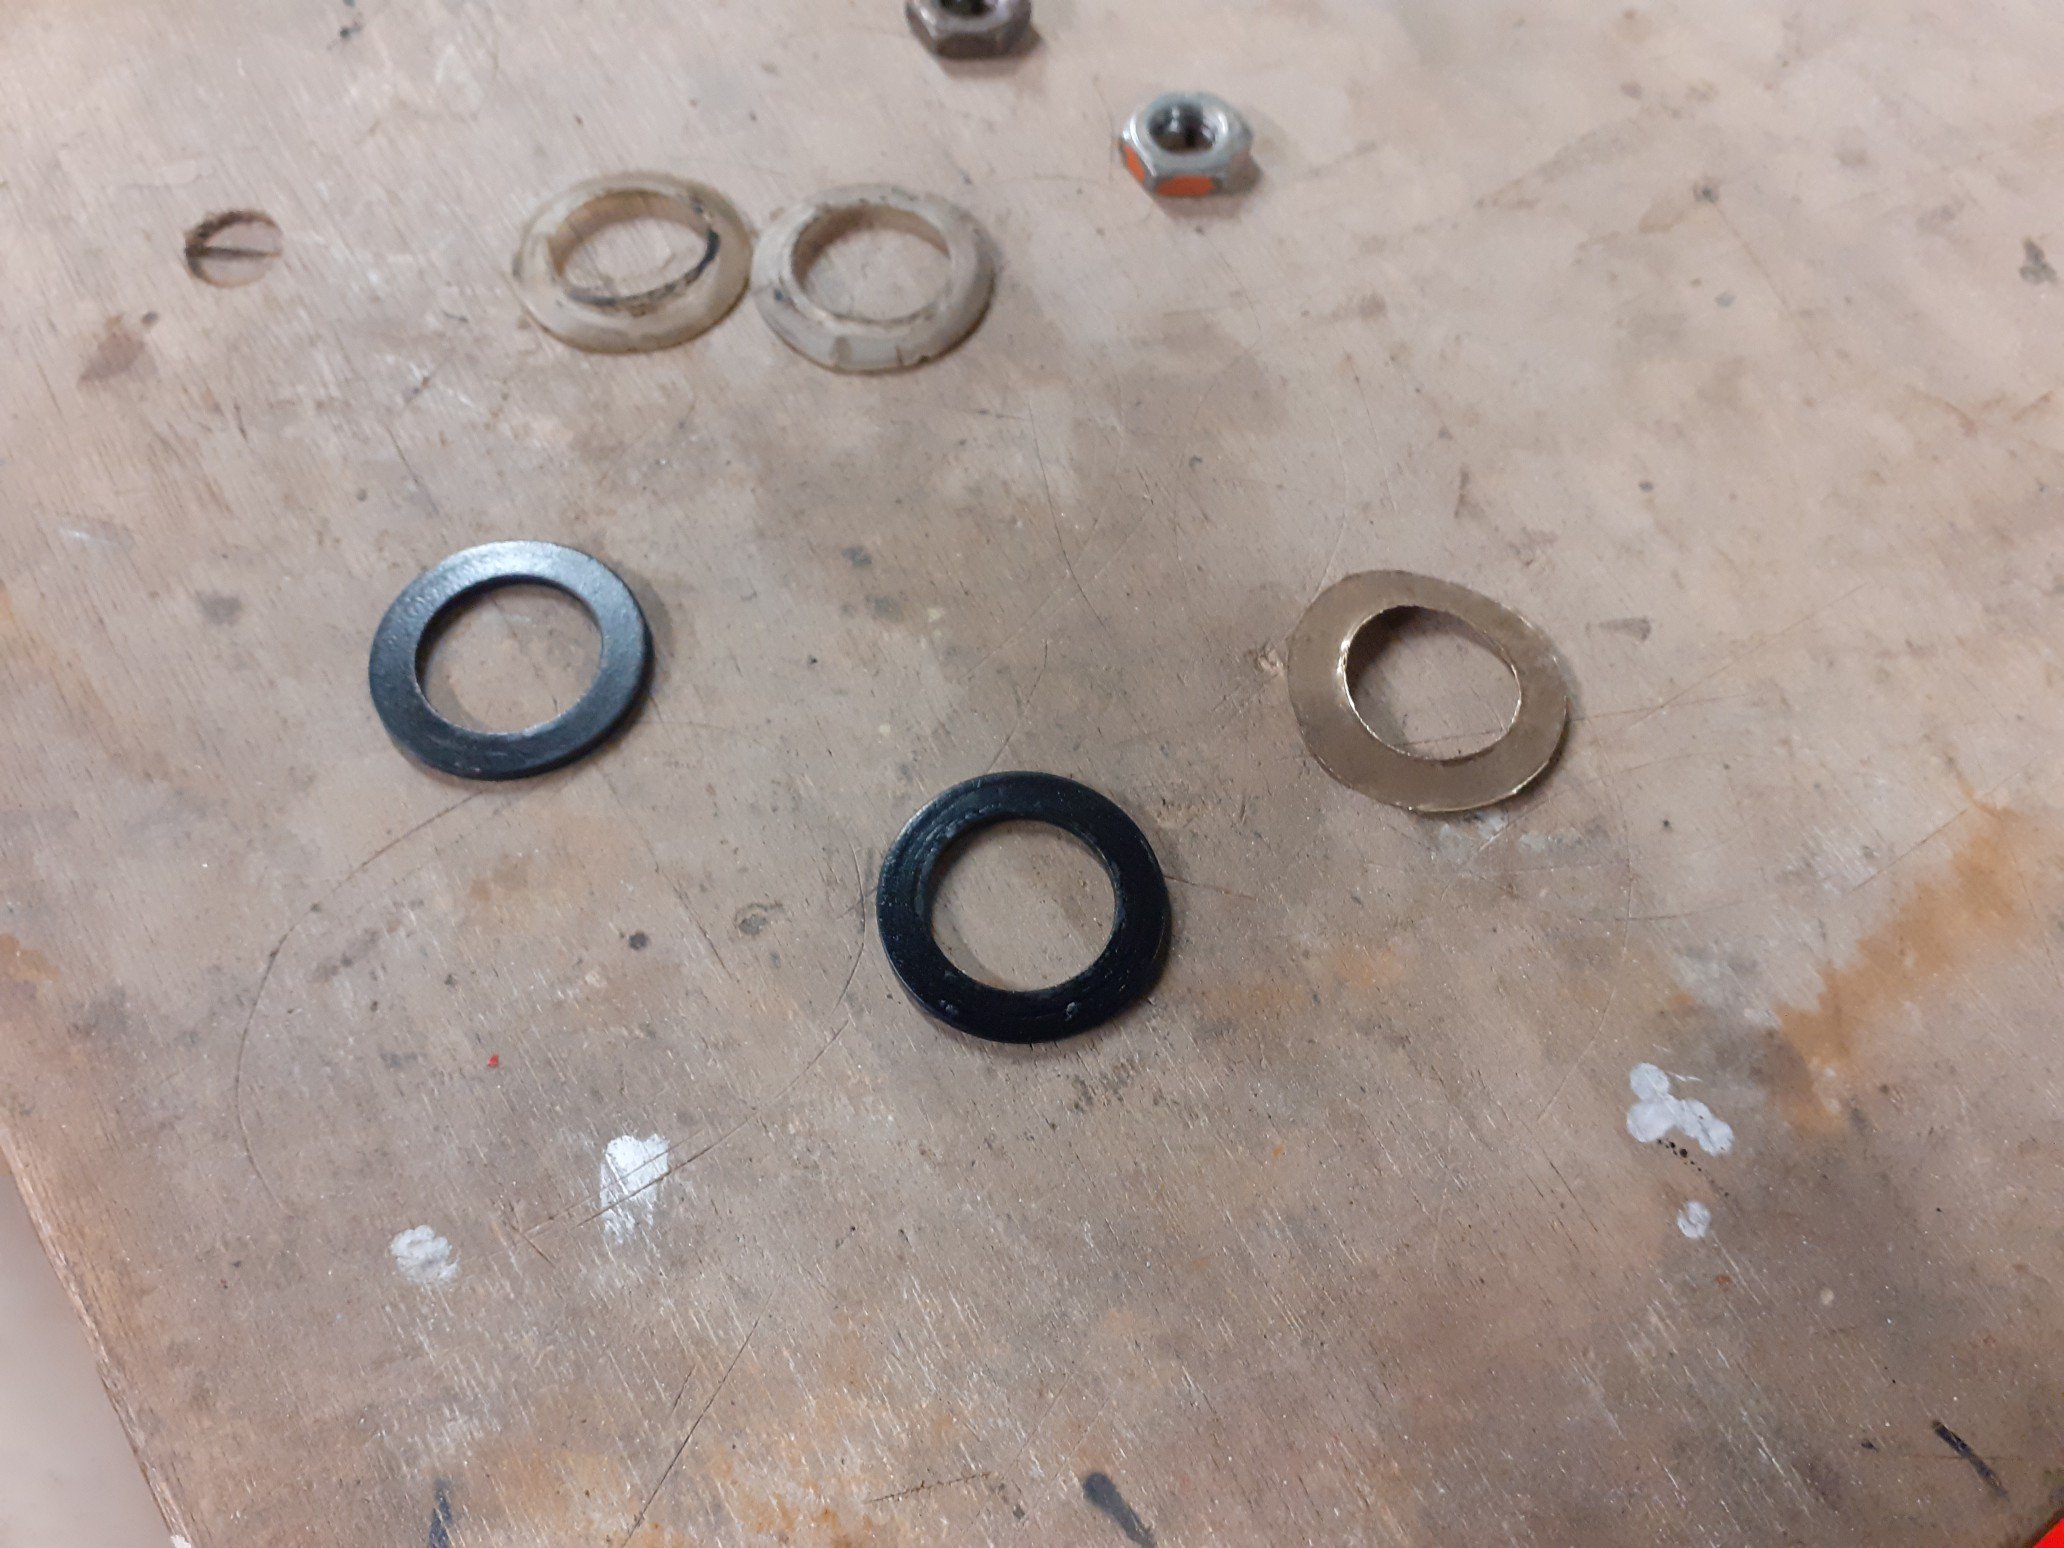
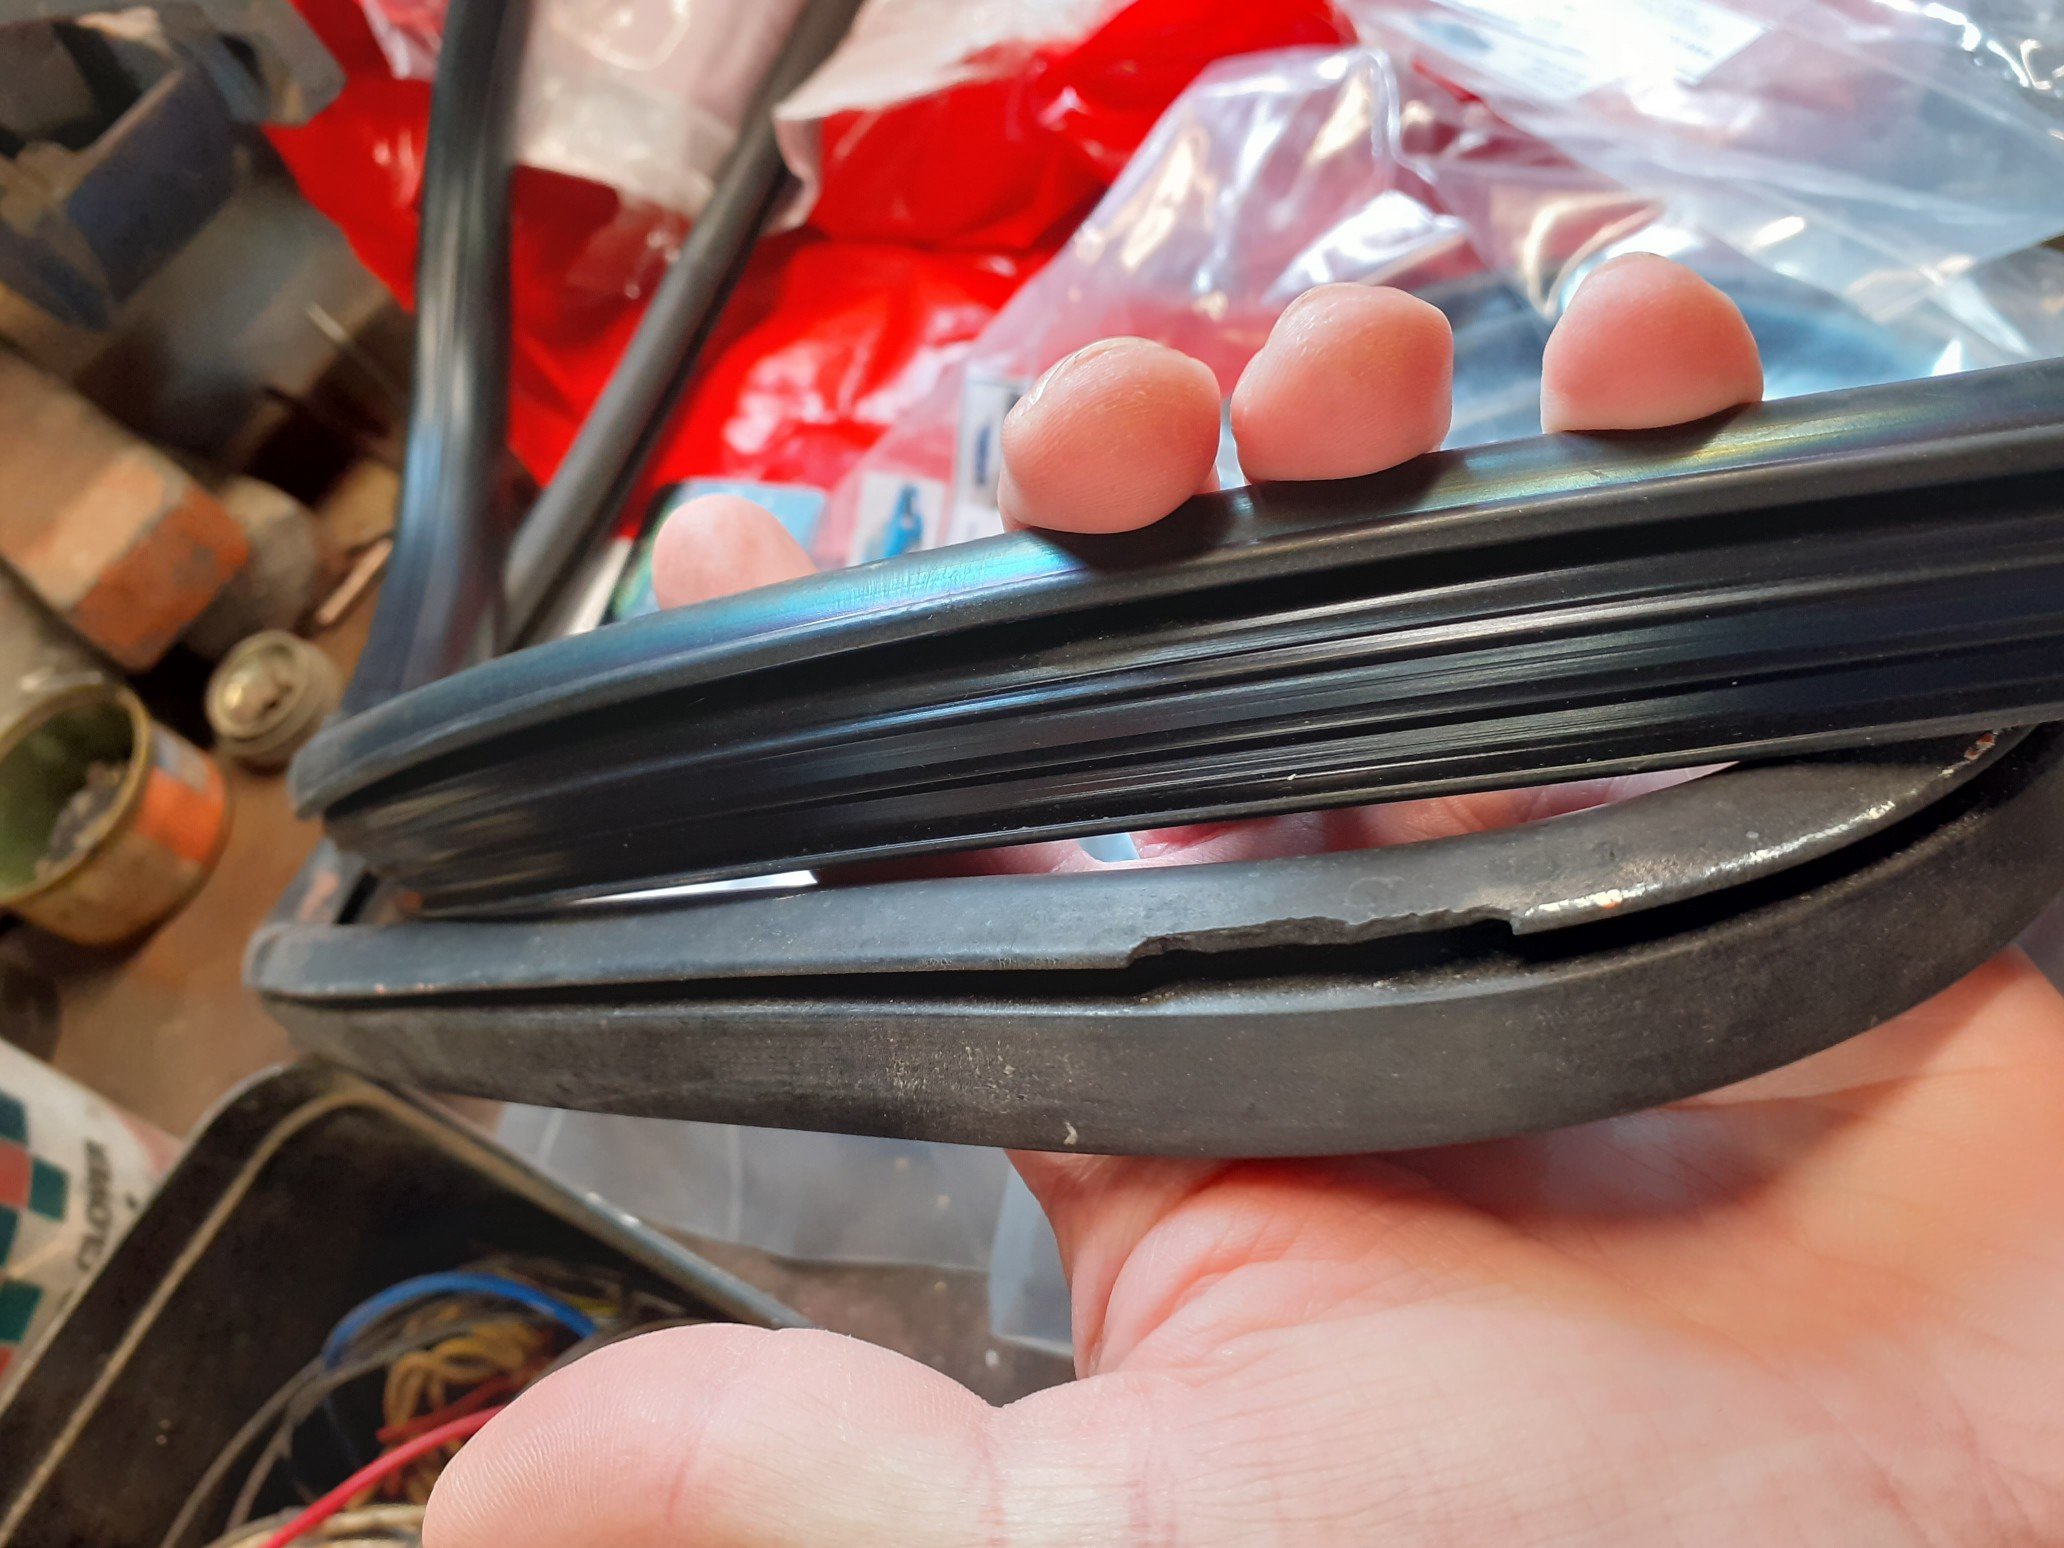
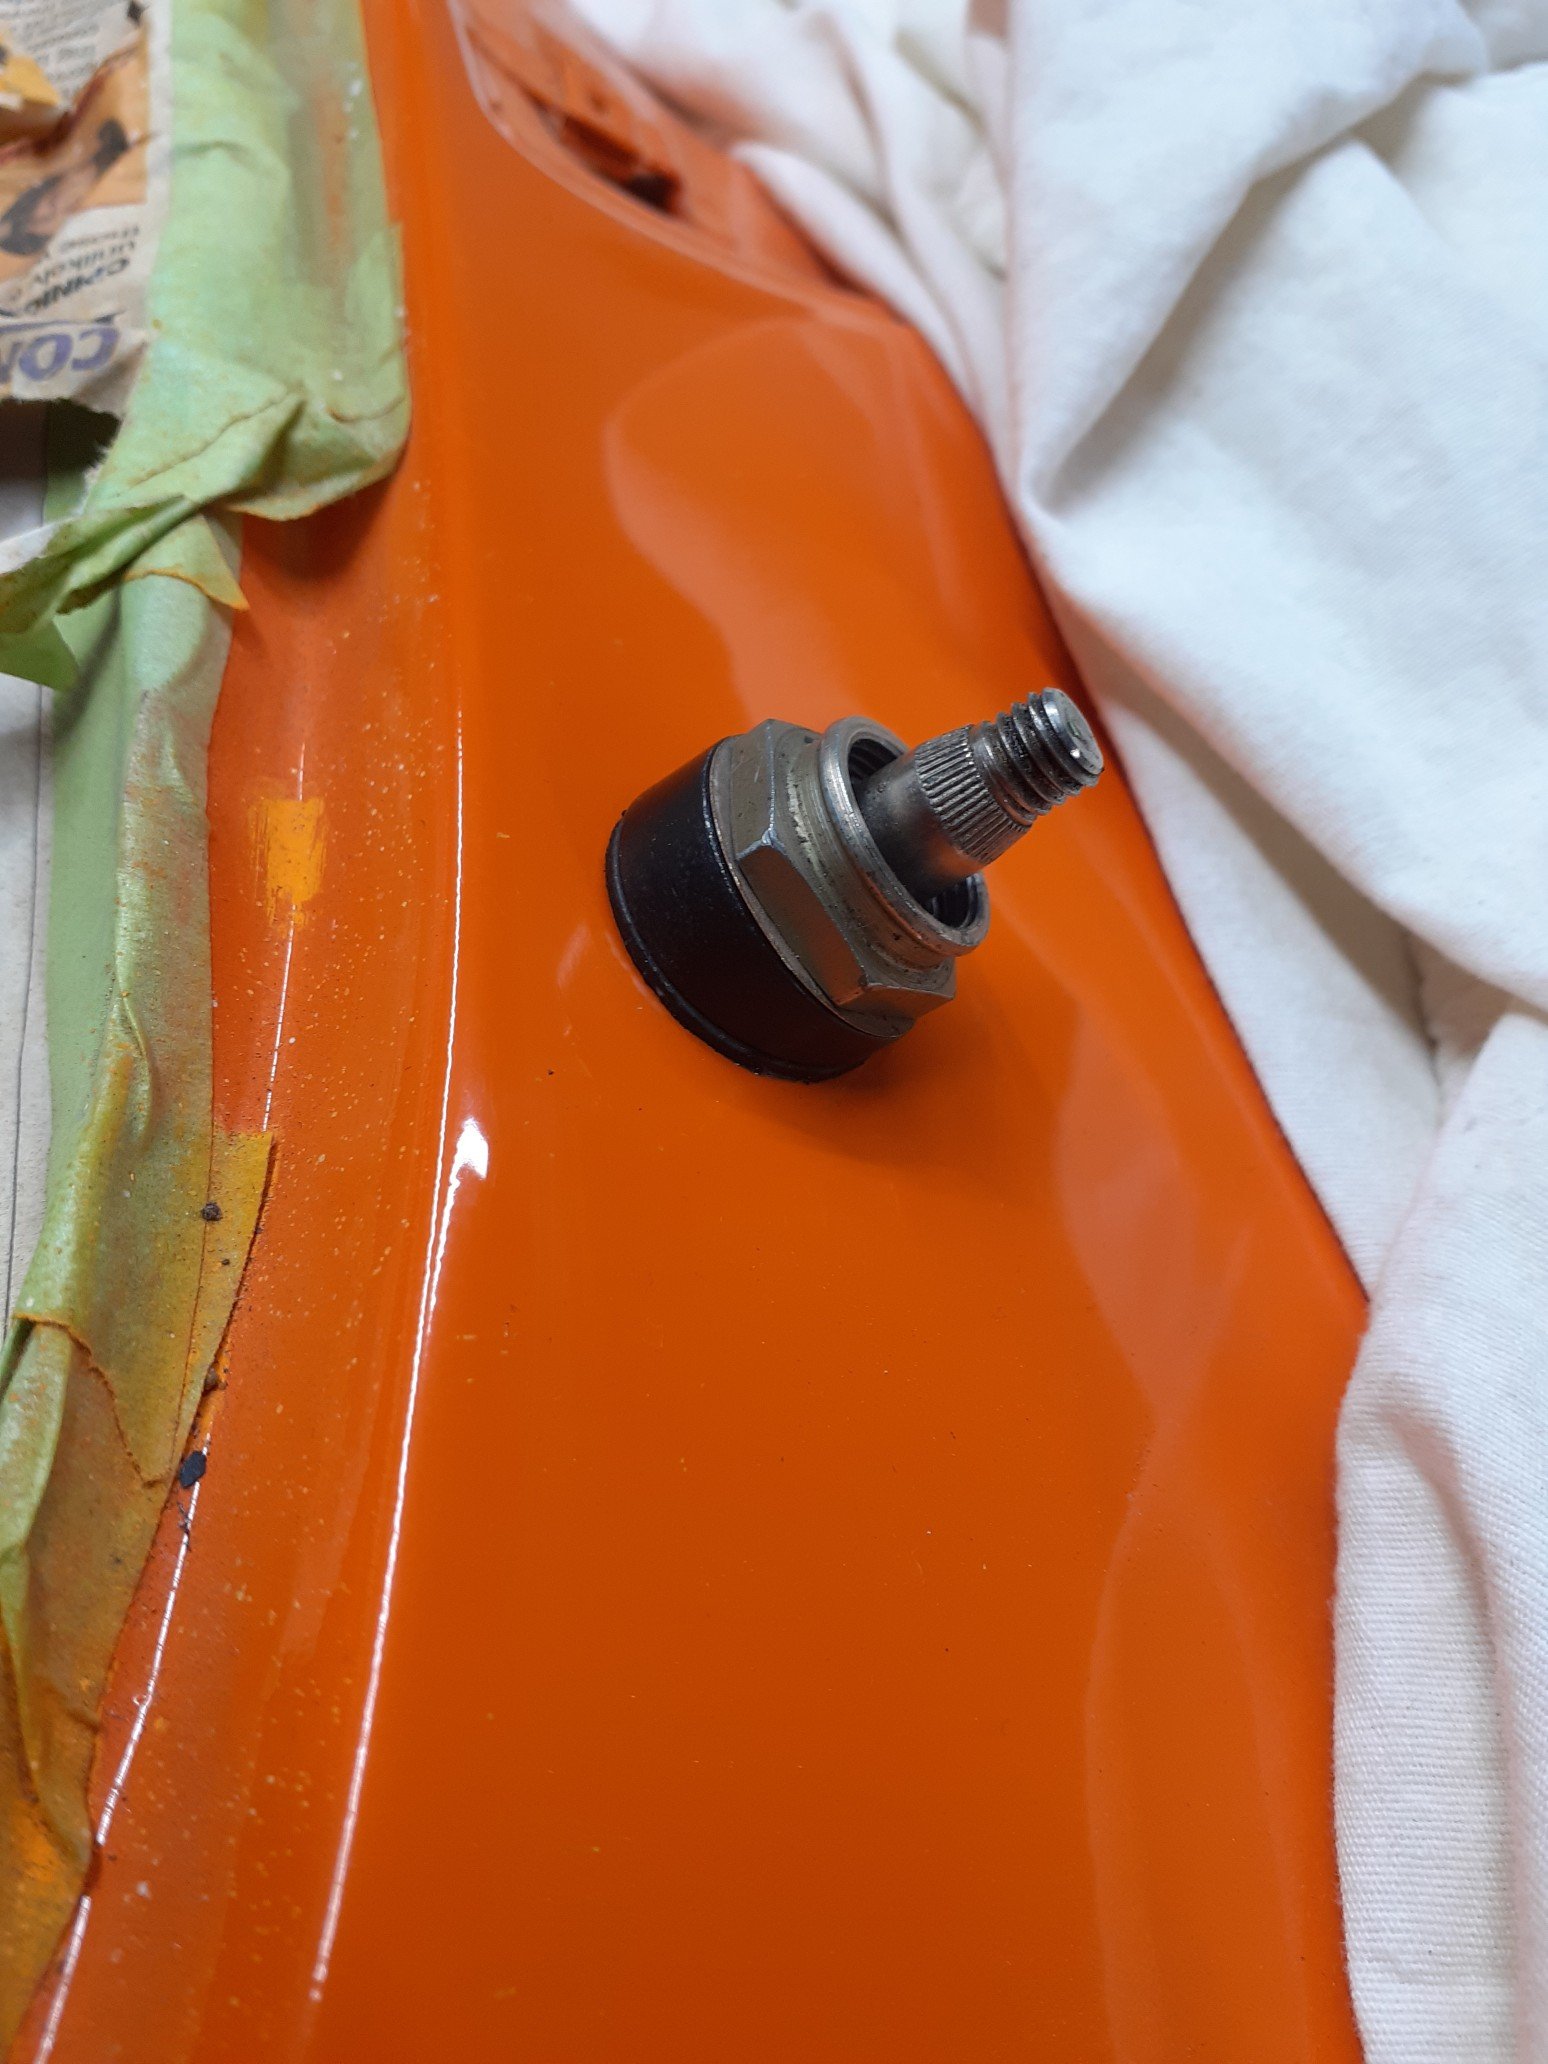
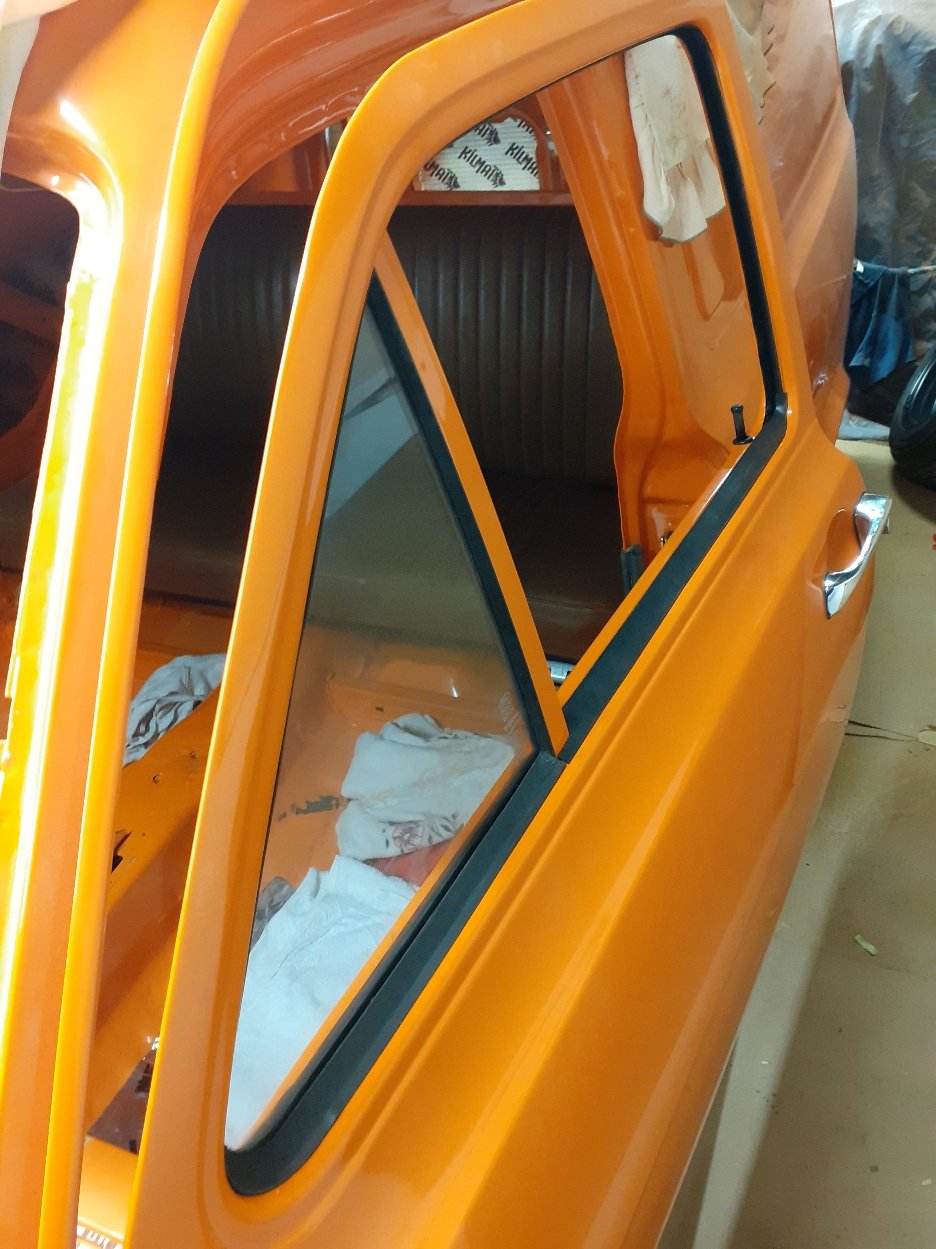
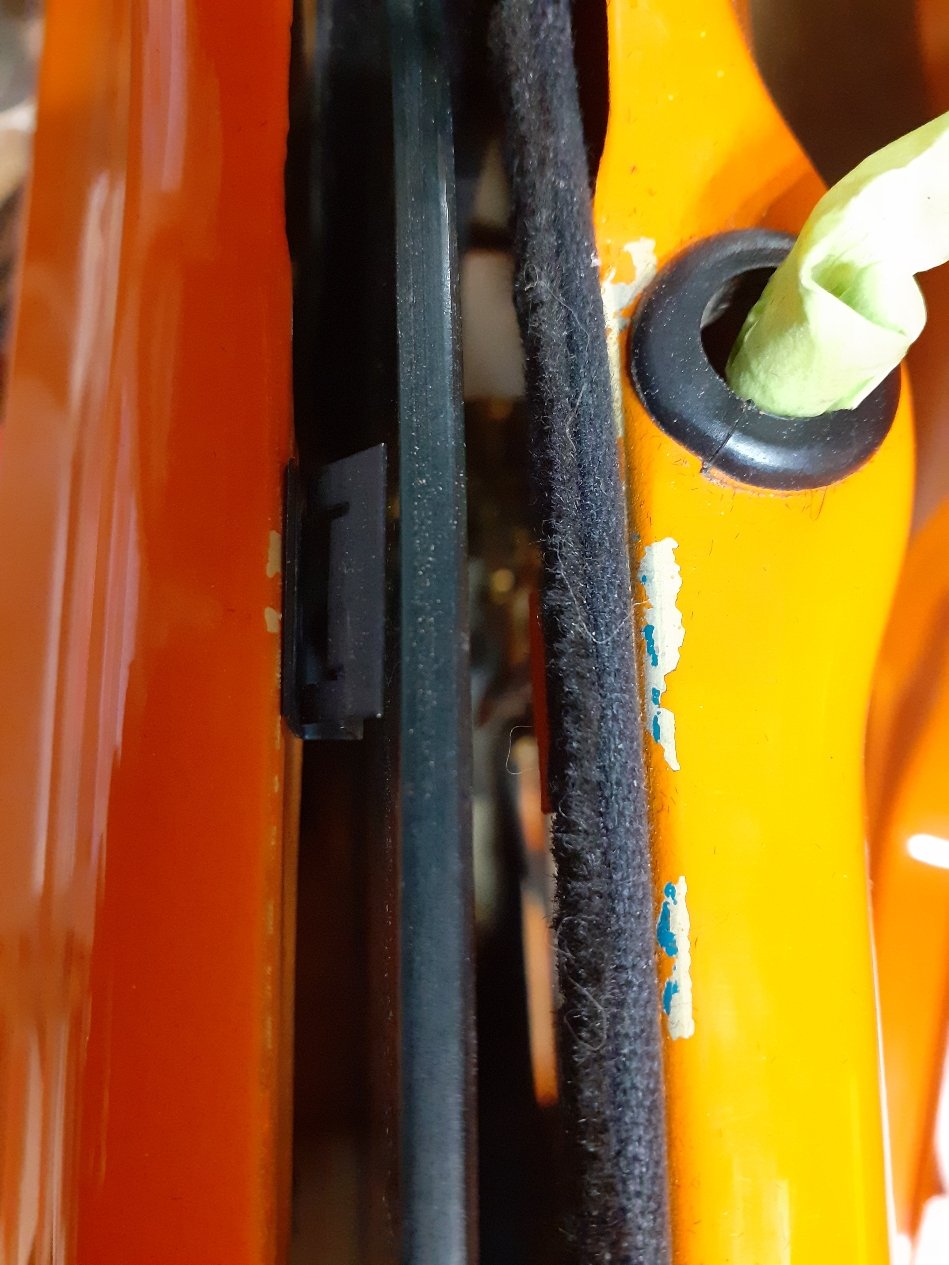
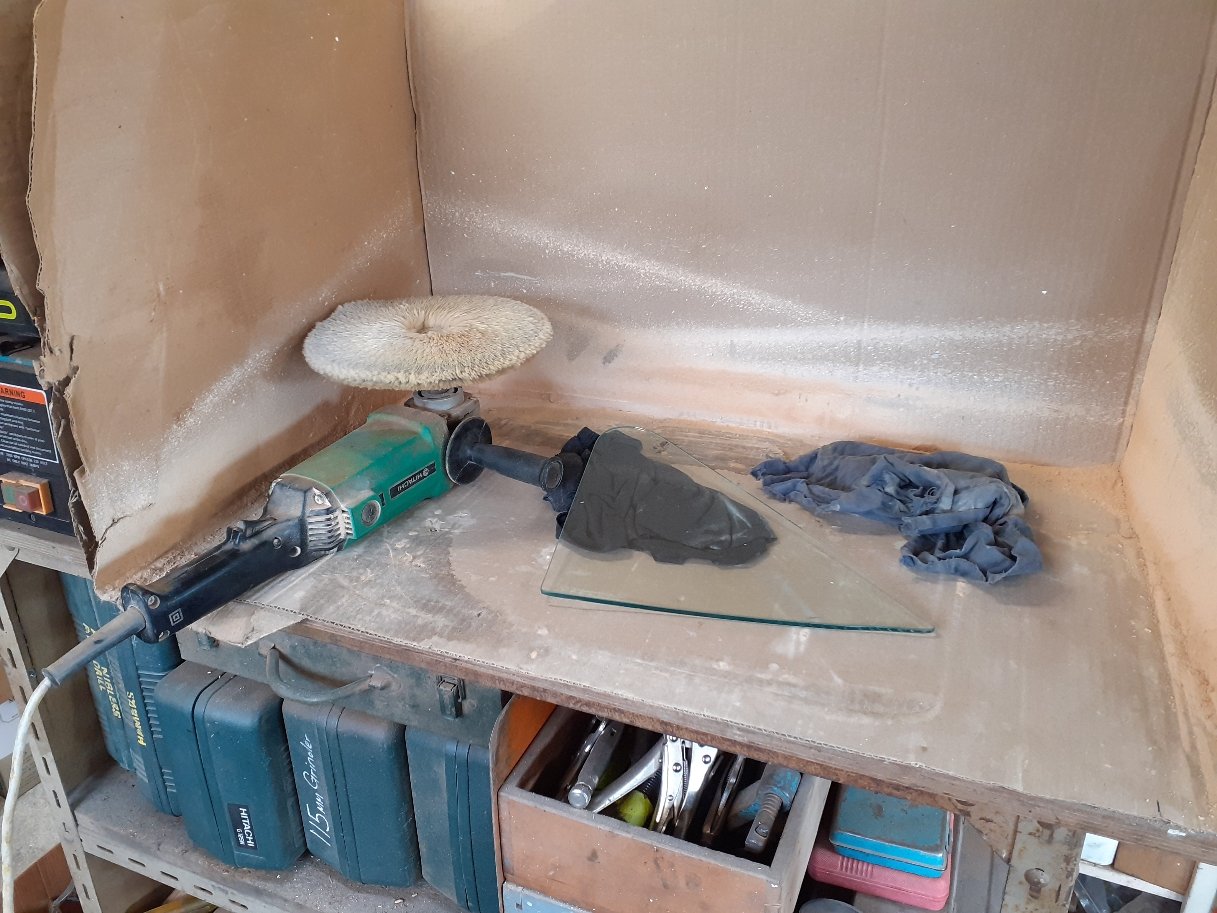
Couldn't find my door limit strap pins so I made some up from a couple of Clevis pins. Before and after. Went to install the window wiper mechanism and I didn't like how the spindles butted up against the panel. There's a small shoulder on the cast spindle which is supposed to sit hard on the panel. I added a rubber gasket to help bulk it up and take away the harshness. This, along with the plates I welded in a few years ago had fattened the area the spindle bolts up to. I replaced the old cracked gasket and spacer with some thin rubber and brass which lost about 5mm, enough for the final product to again be within spec for the actual wiper arm to fit. Also bought some rear window rubbers fro. Aus which were immediately fitted up with the windows. Pretty good product.
- 104 replies
-
- 17
-
-
Cheers. The orange is everywhere so it takes awhile to get used to. Thanks. Slow work.
-
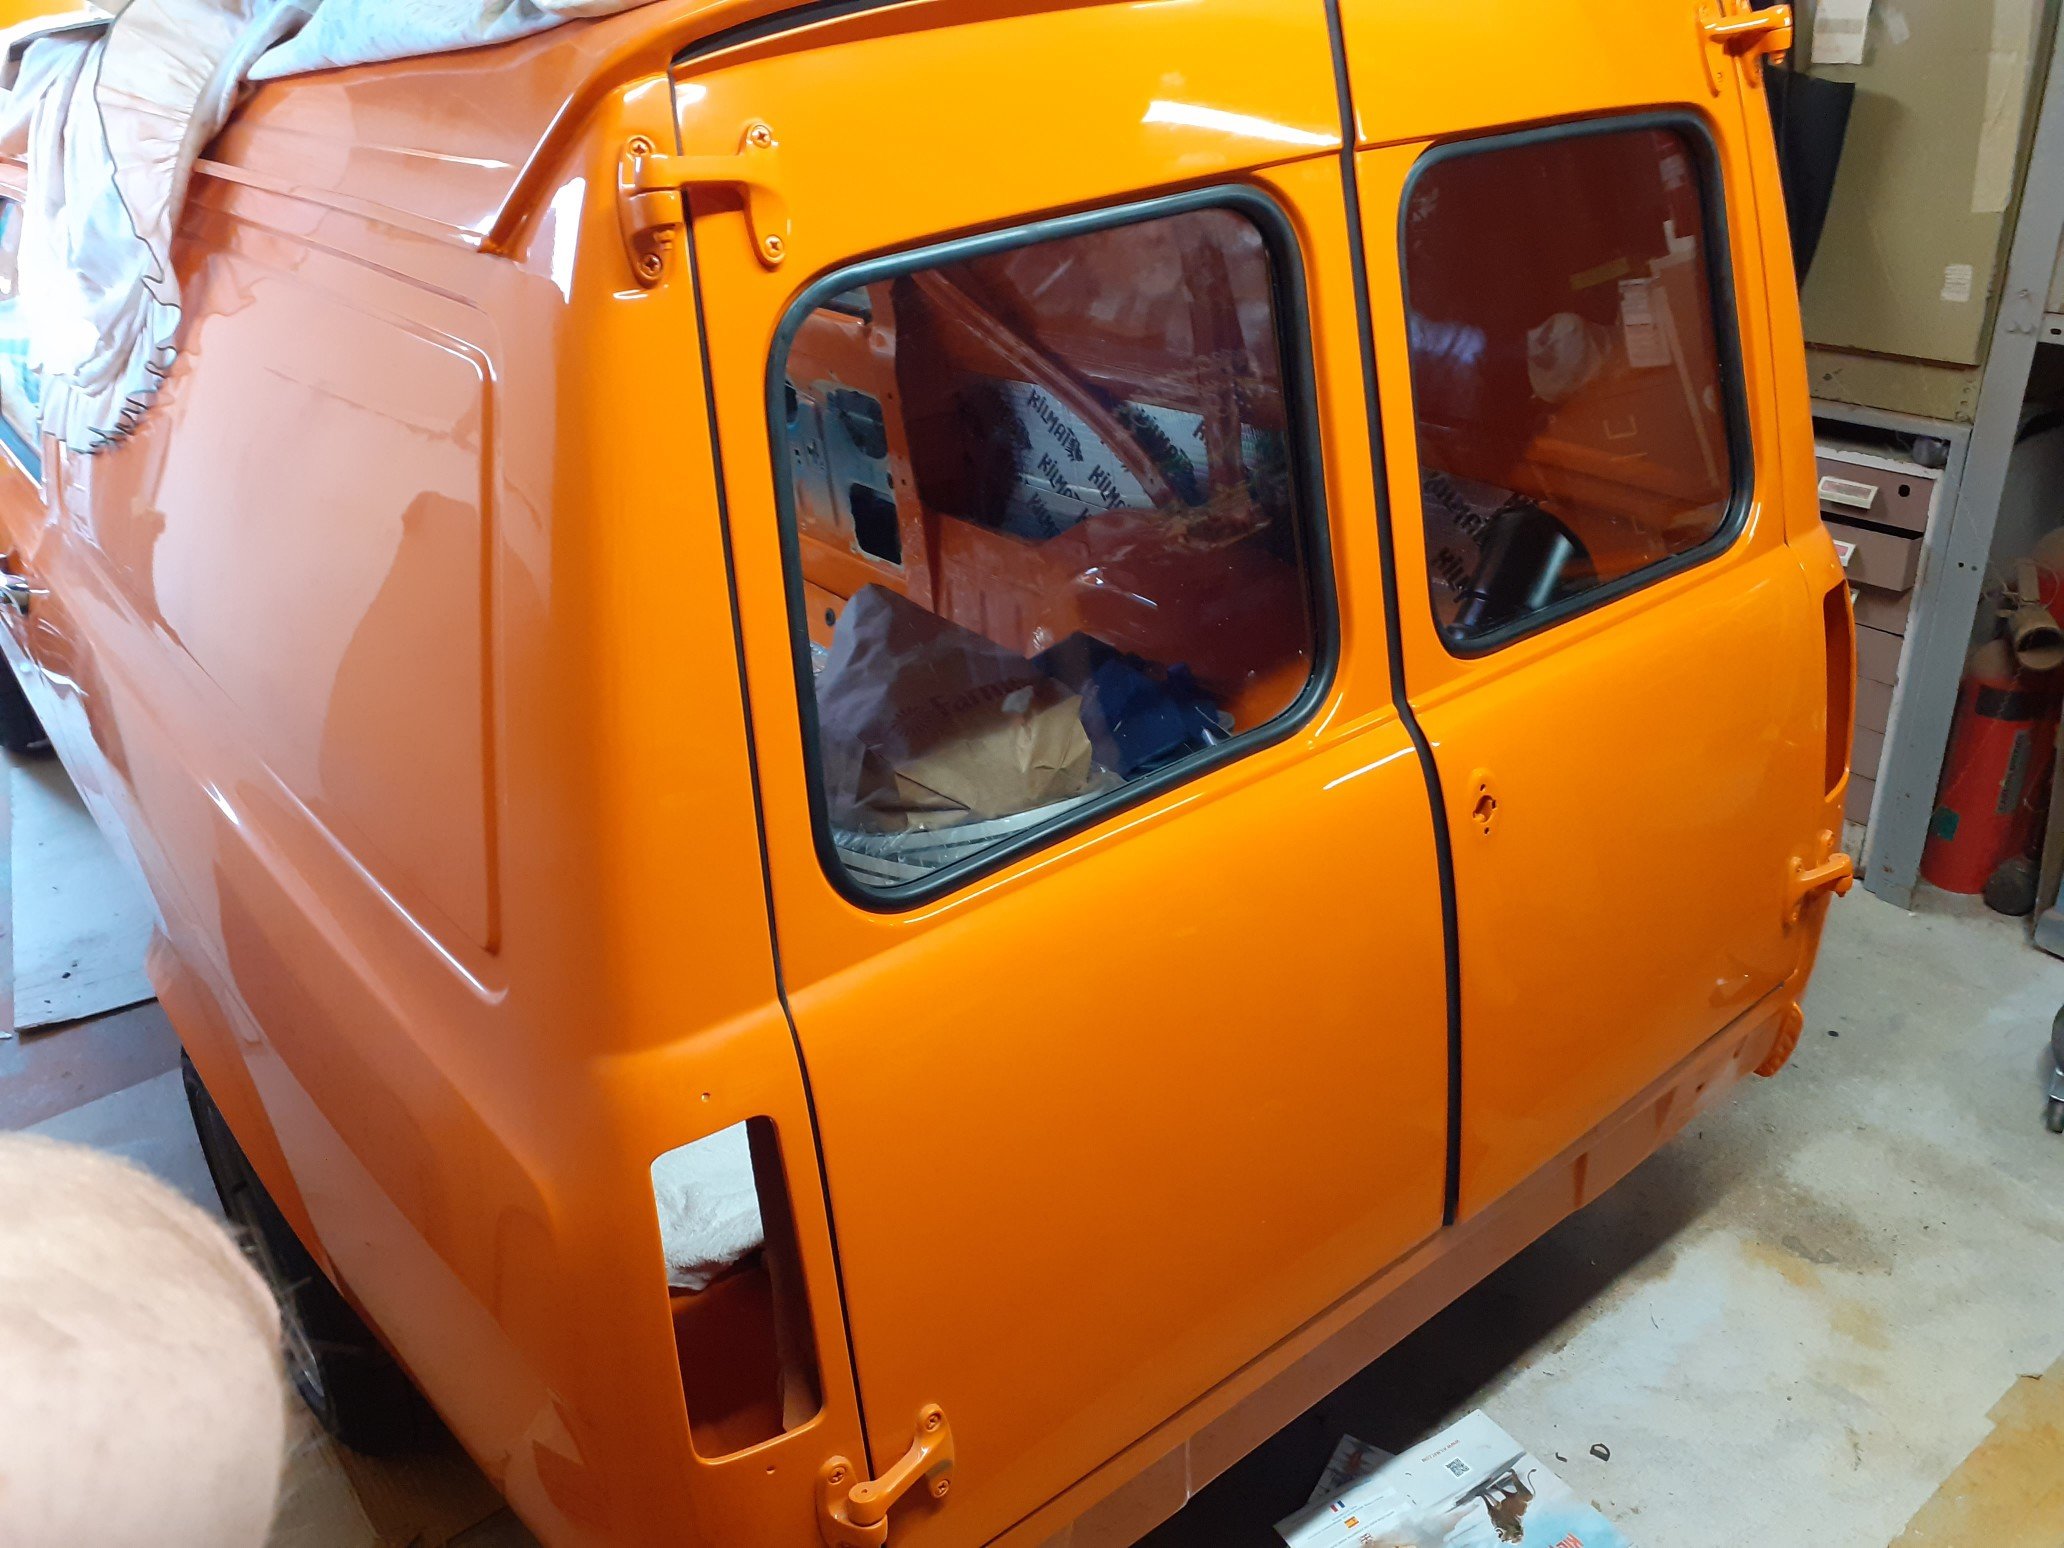
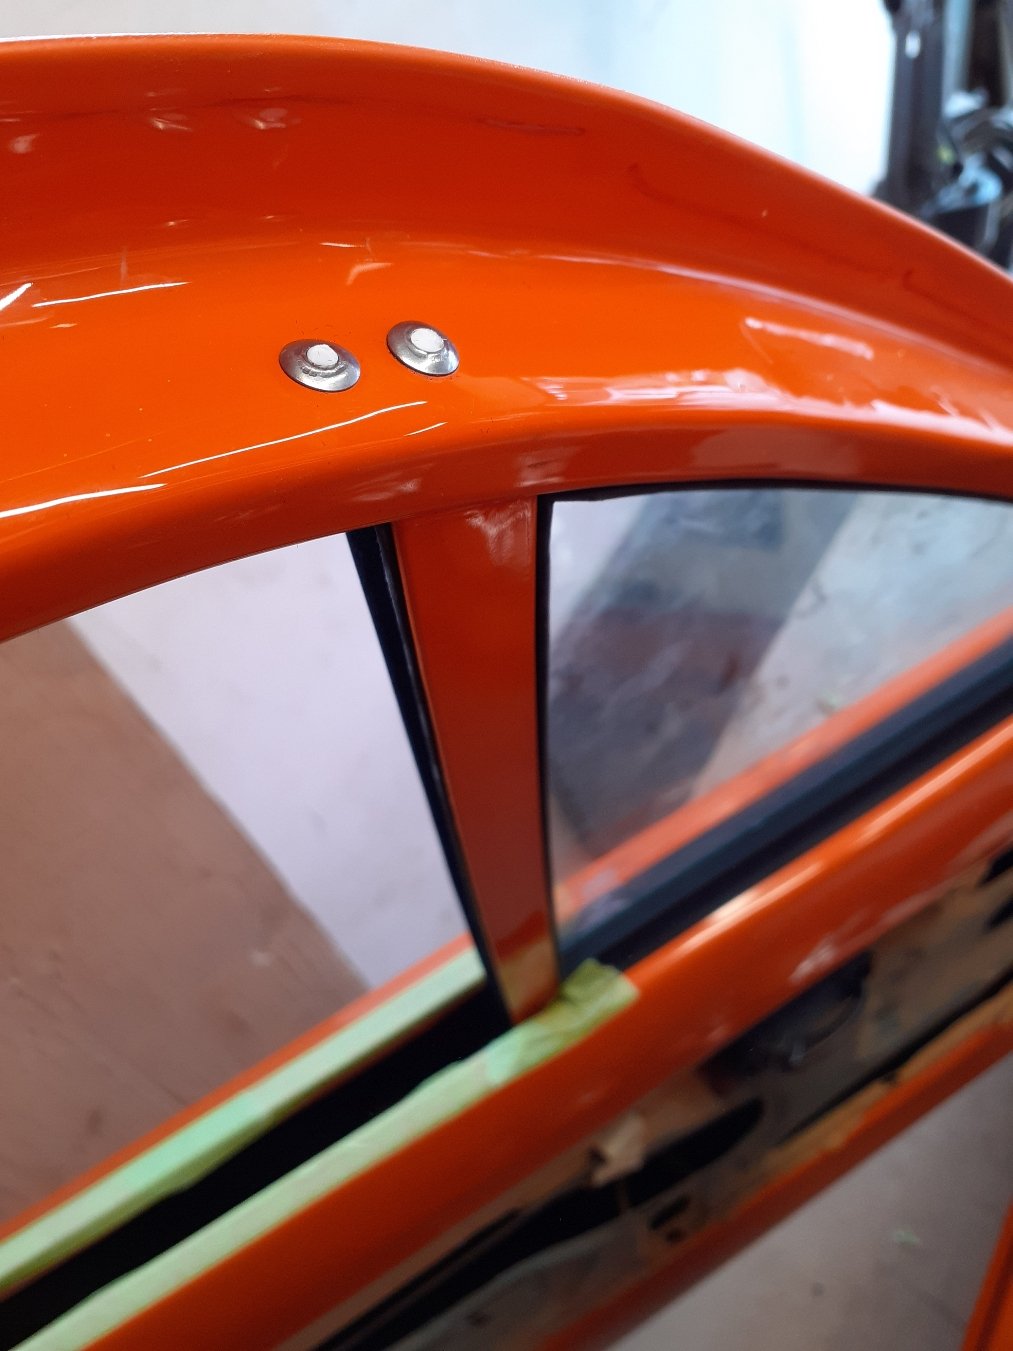
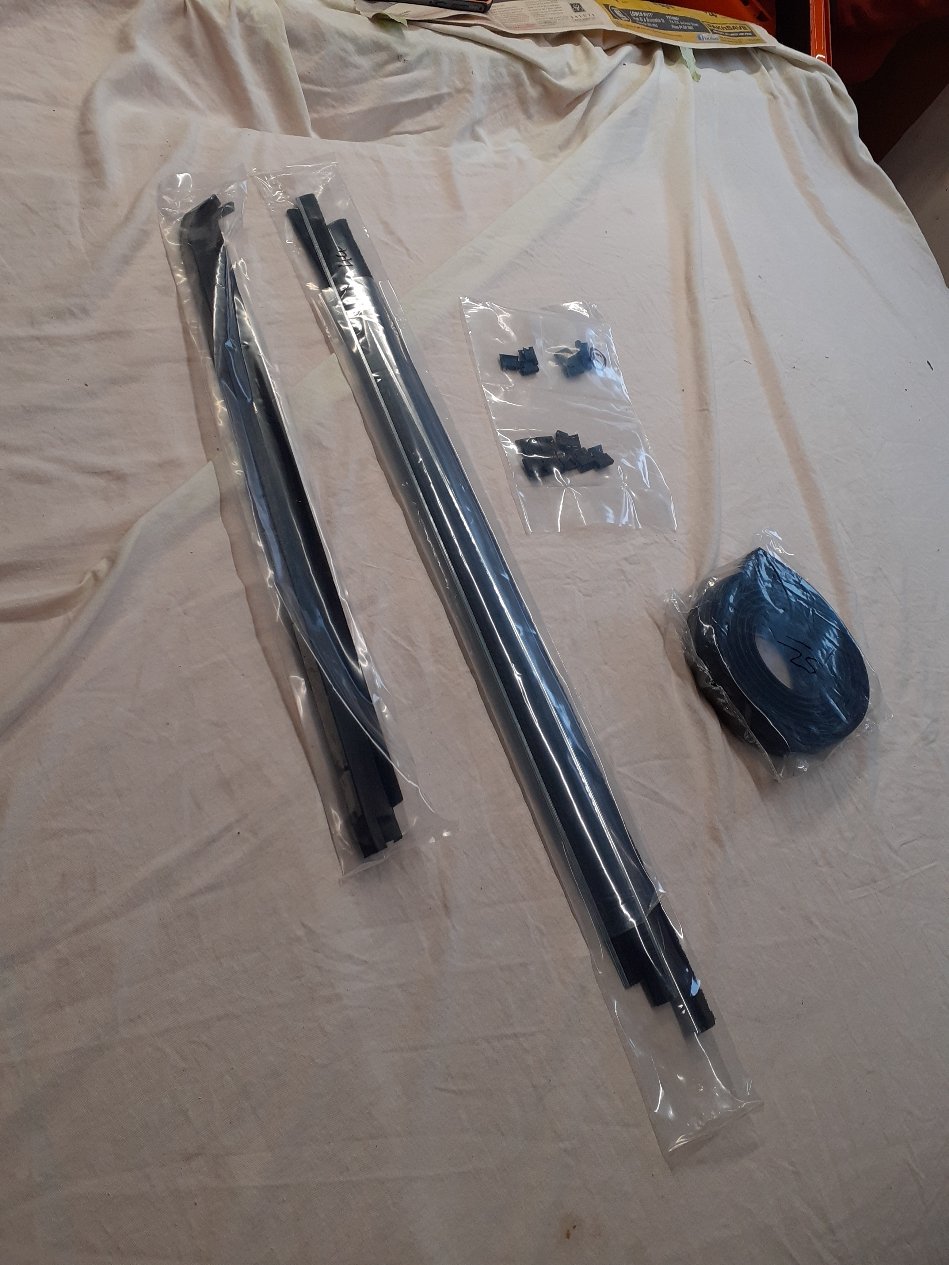
New parts for the doors arrived. New inner and out window seals, clips and new window channel seals/guides. Buffed all the glass while it was out. All my spare drivers windows were all scratched up pretty bad in the same way which is a bit shit. Have just used the best of what I have. New quarter window seals needed some adjustment in one of the corners. There's actually a machined groove in the side of the glass to fit over 2x rivet heads on the frame and the rubber needed a little snip snip to make it fit. All fitted up with stainless rivets for the window quarter frame rods. Inner and outer window seals seem like quality products and left plenty of meat to cut to suit. The clips for the outer seals ended up fouling on the glass. Quick bend of the top tags on the all clips and they just clear.
- 104 replies
-
- 18
-
-
Wellington Monthly Meet - Discussion thread
bmxnz11 replied to KKtrips's topic in Lower North Island Region
Unable to make it tonight sorry -
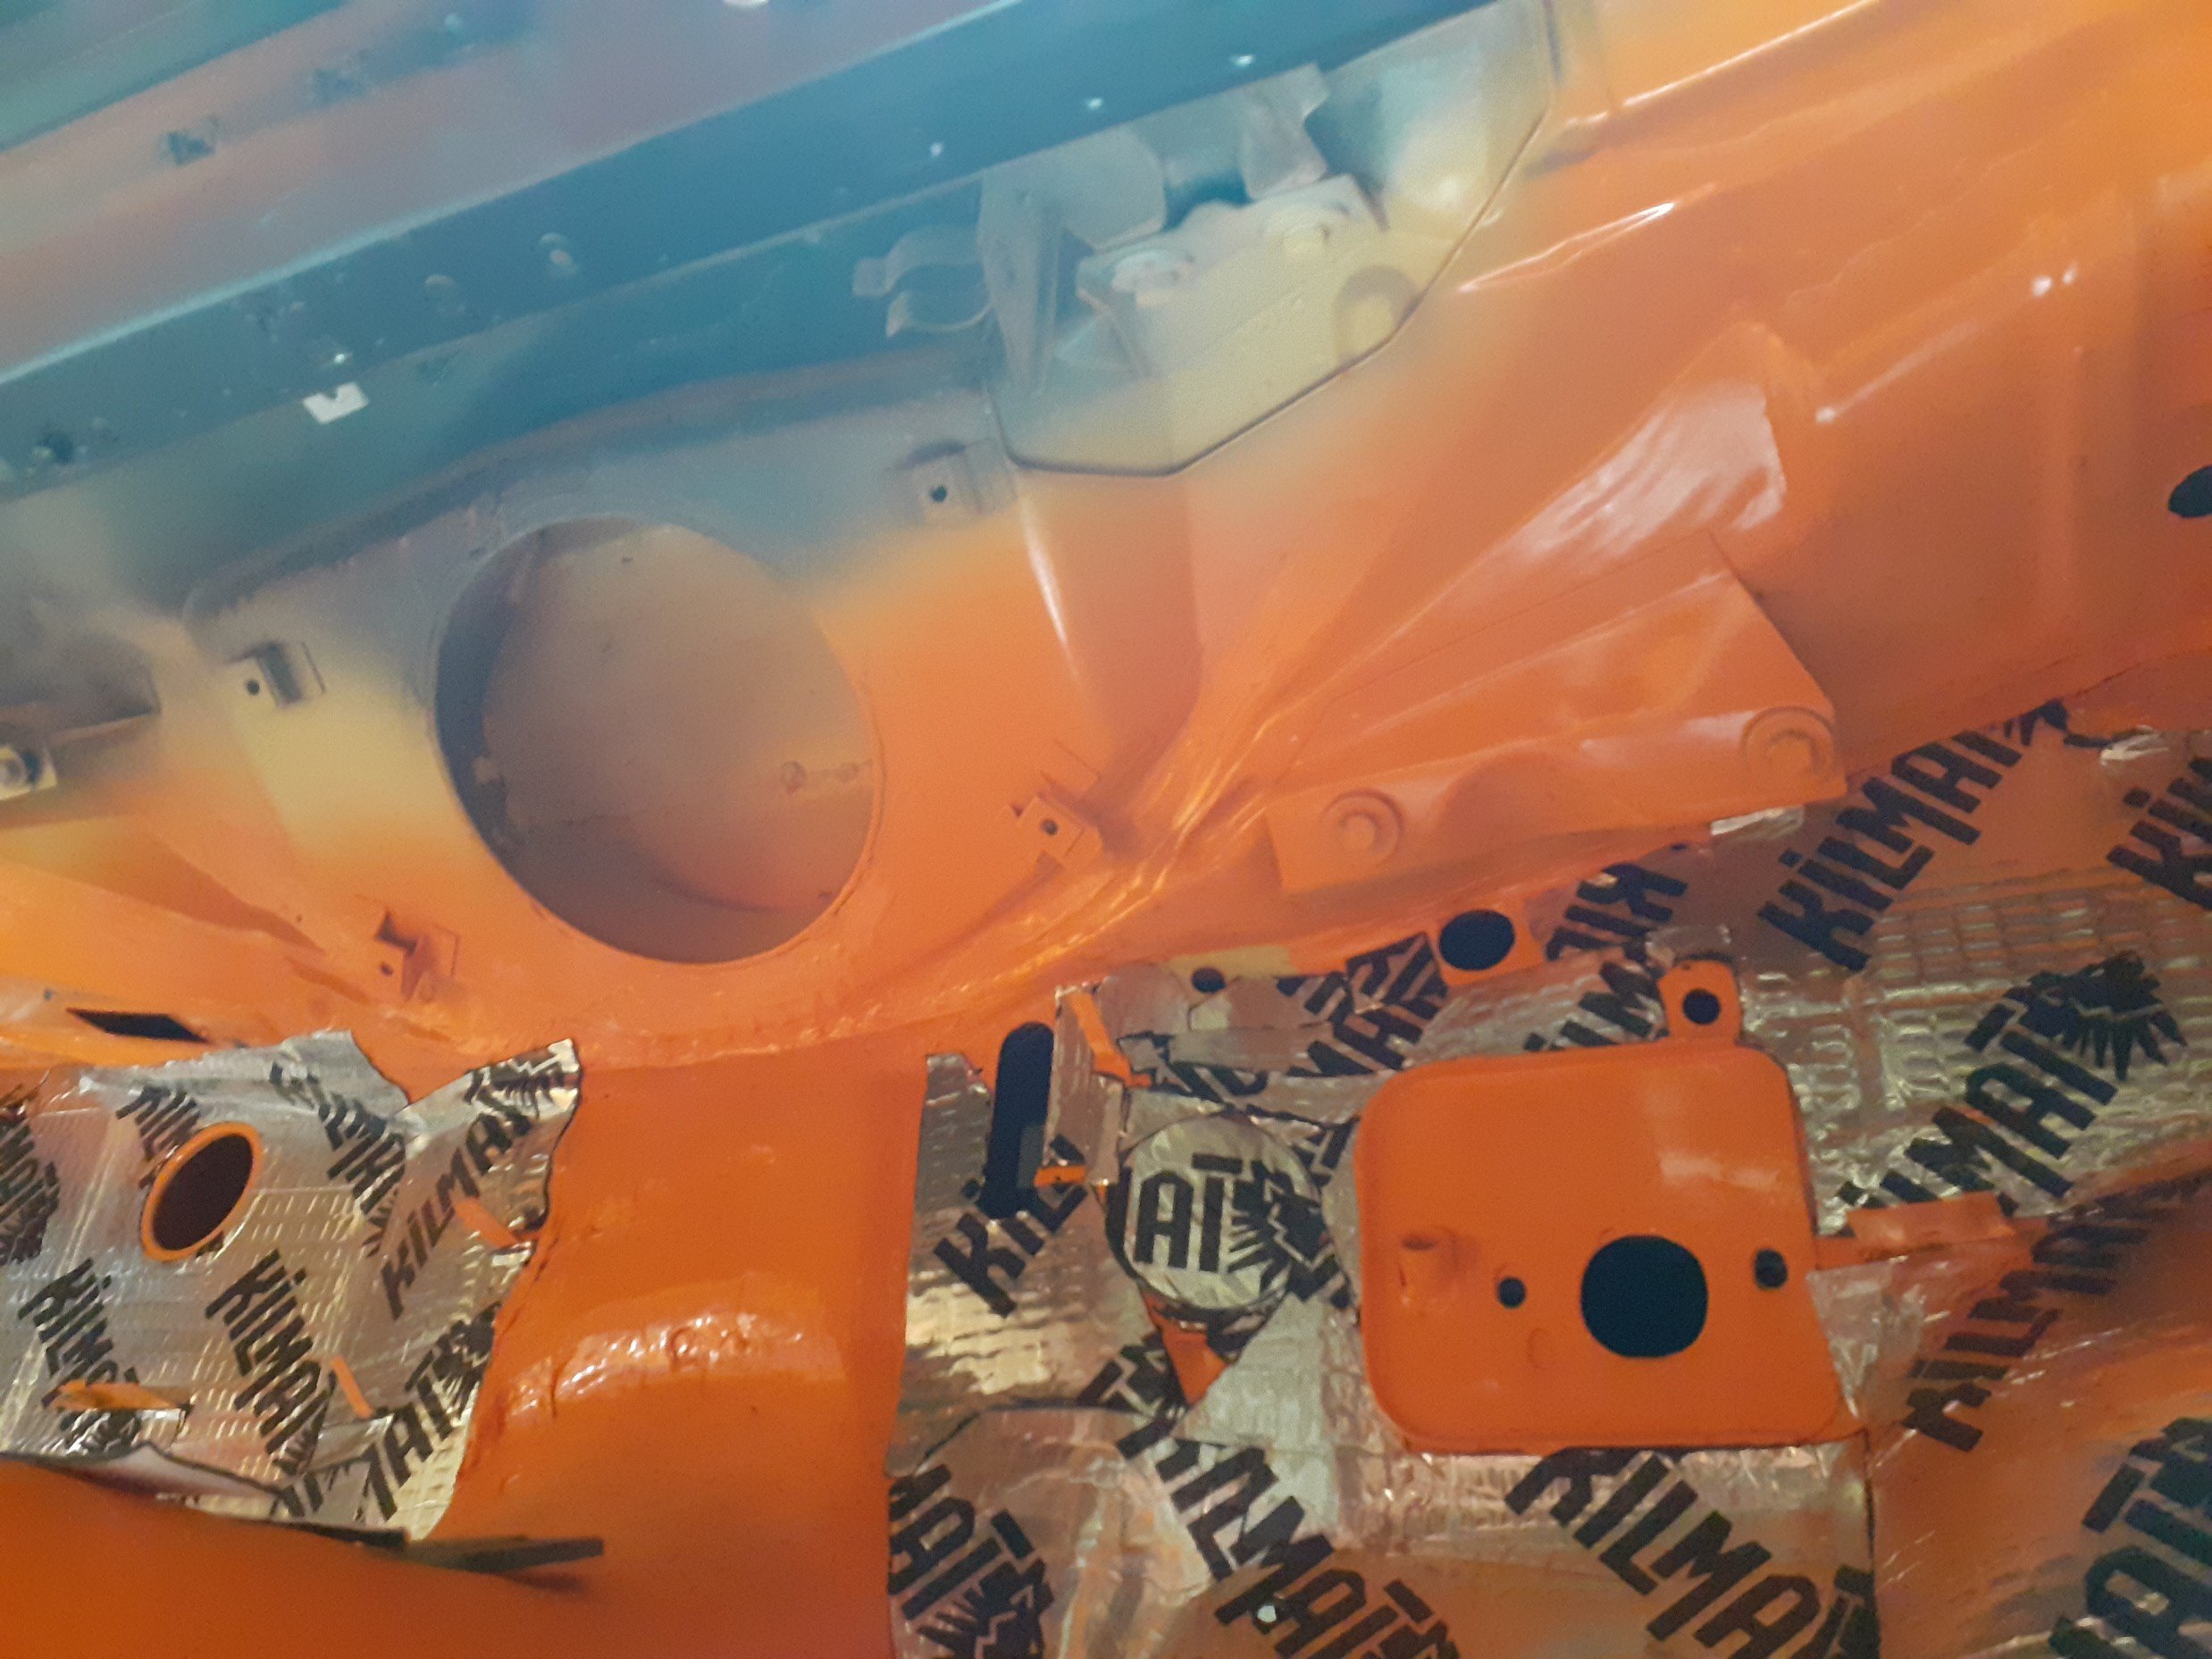
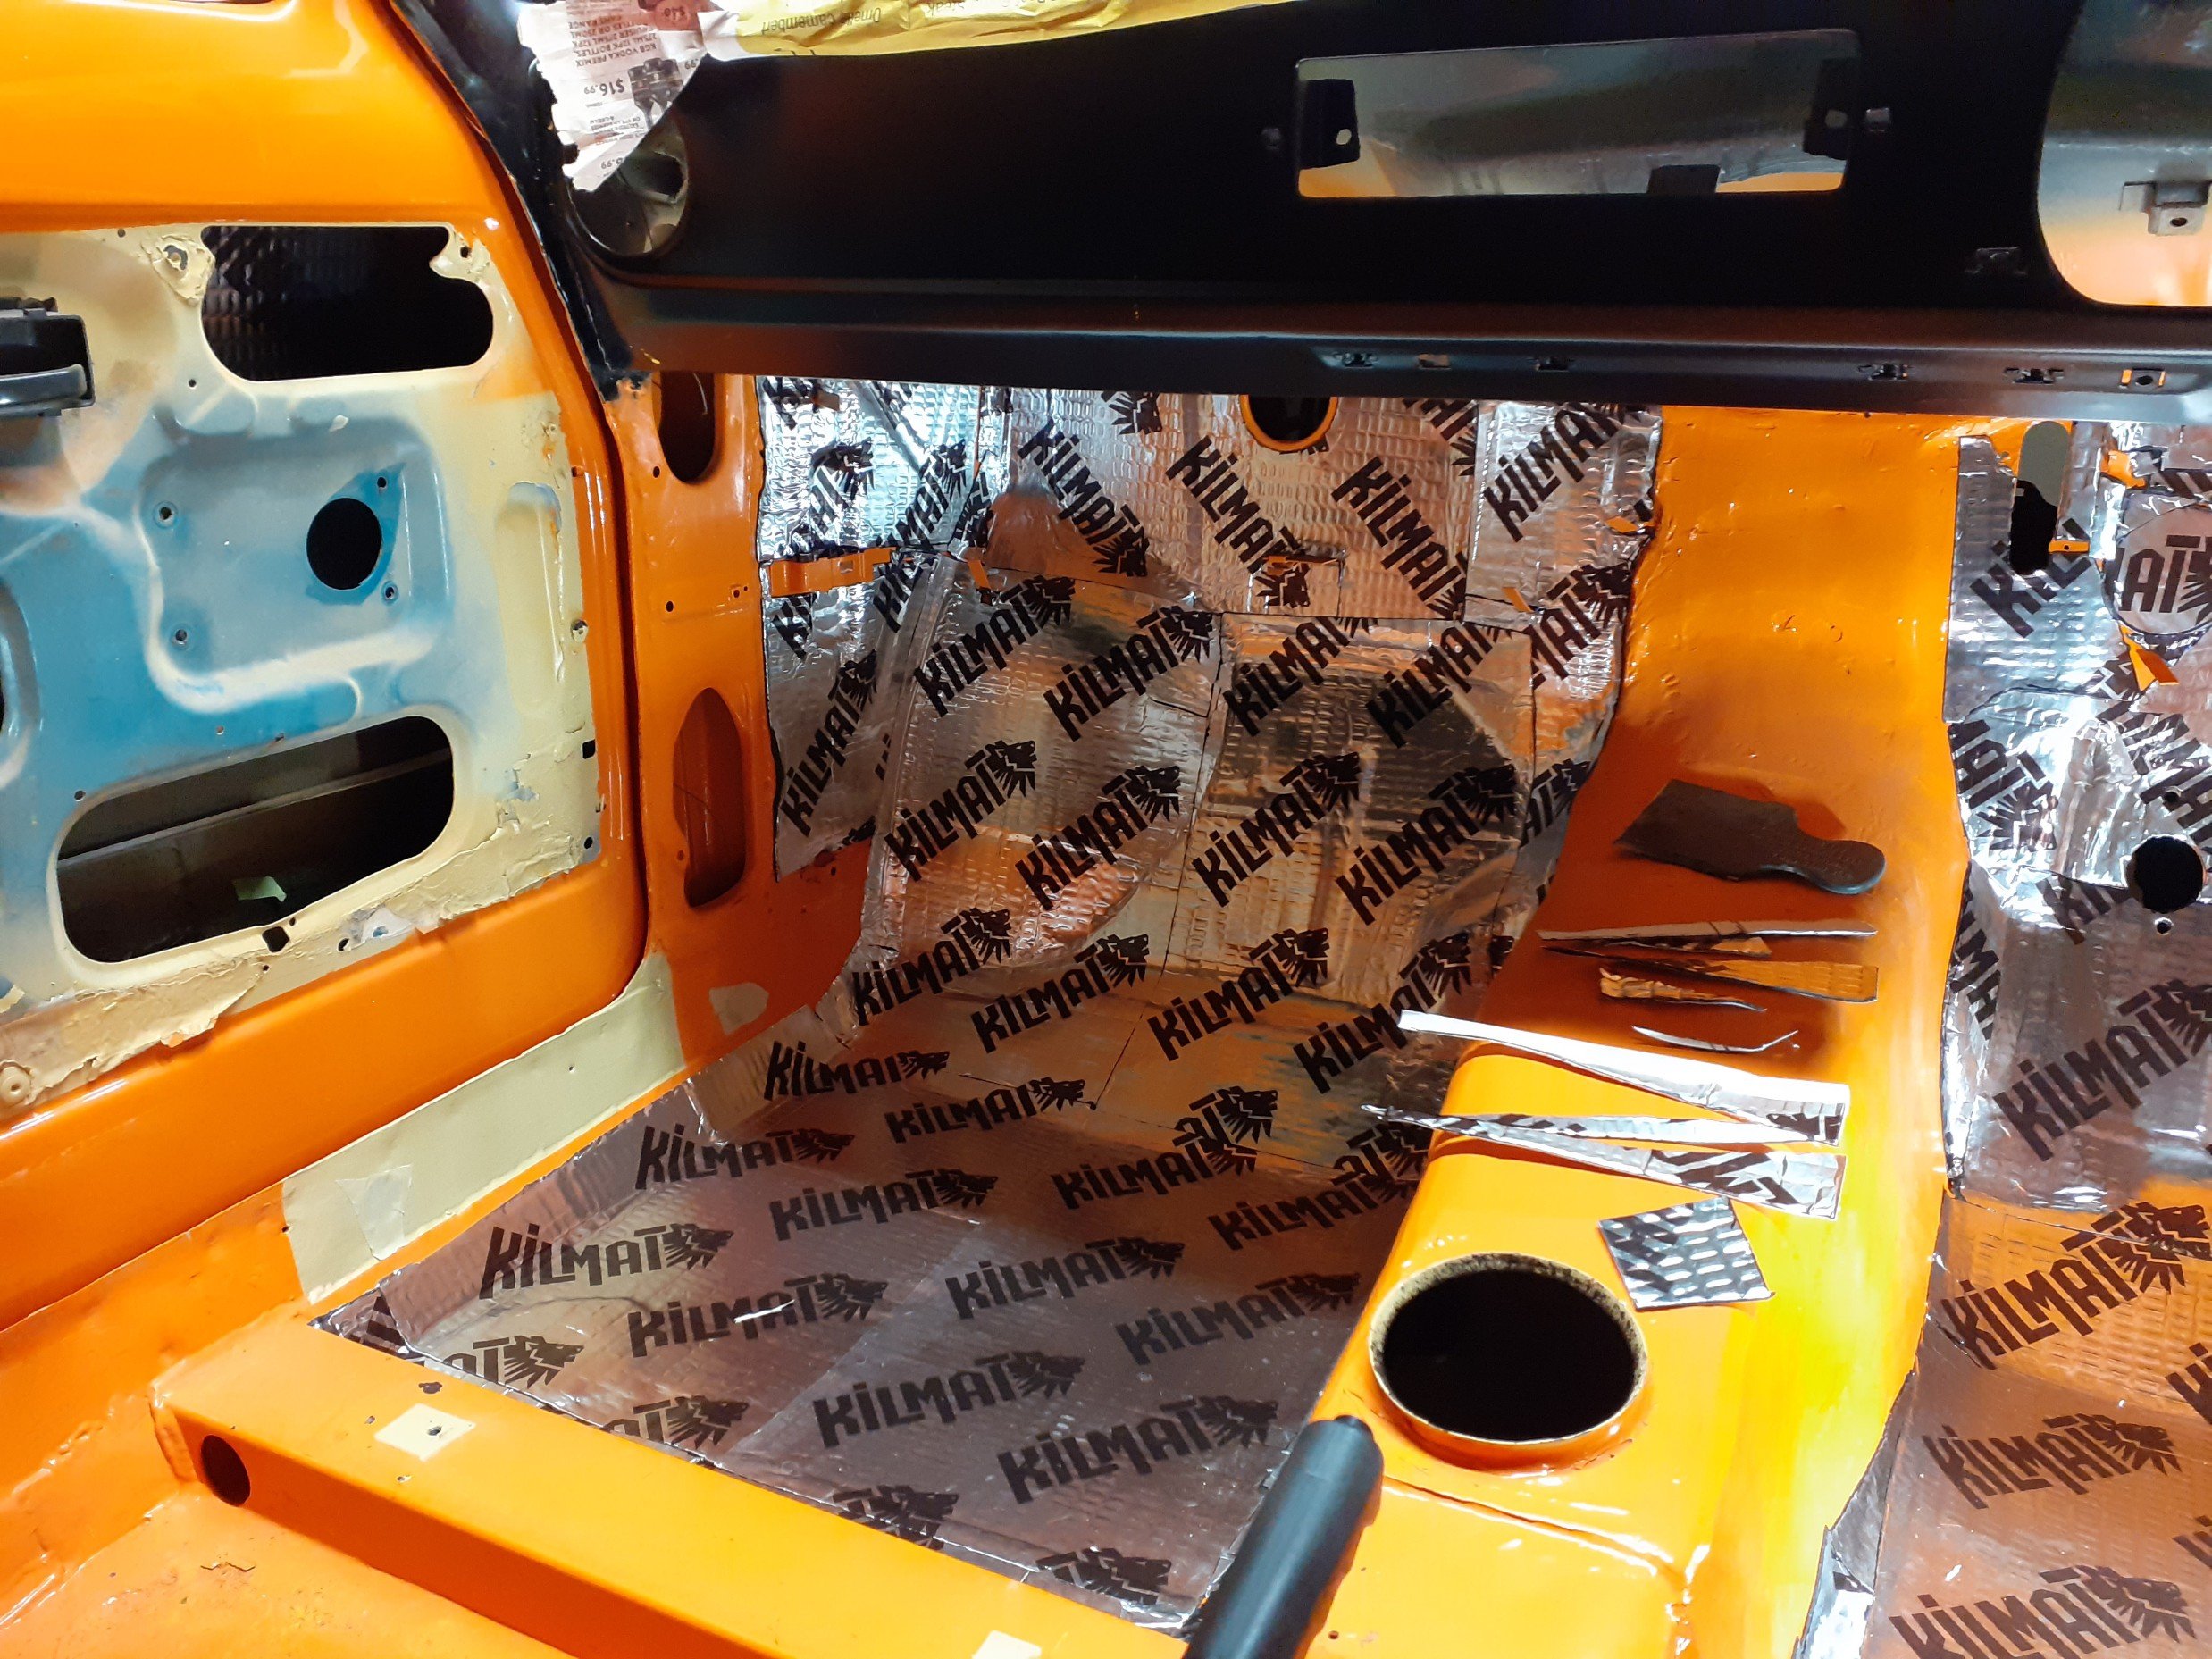
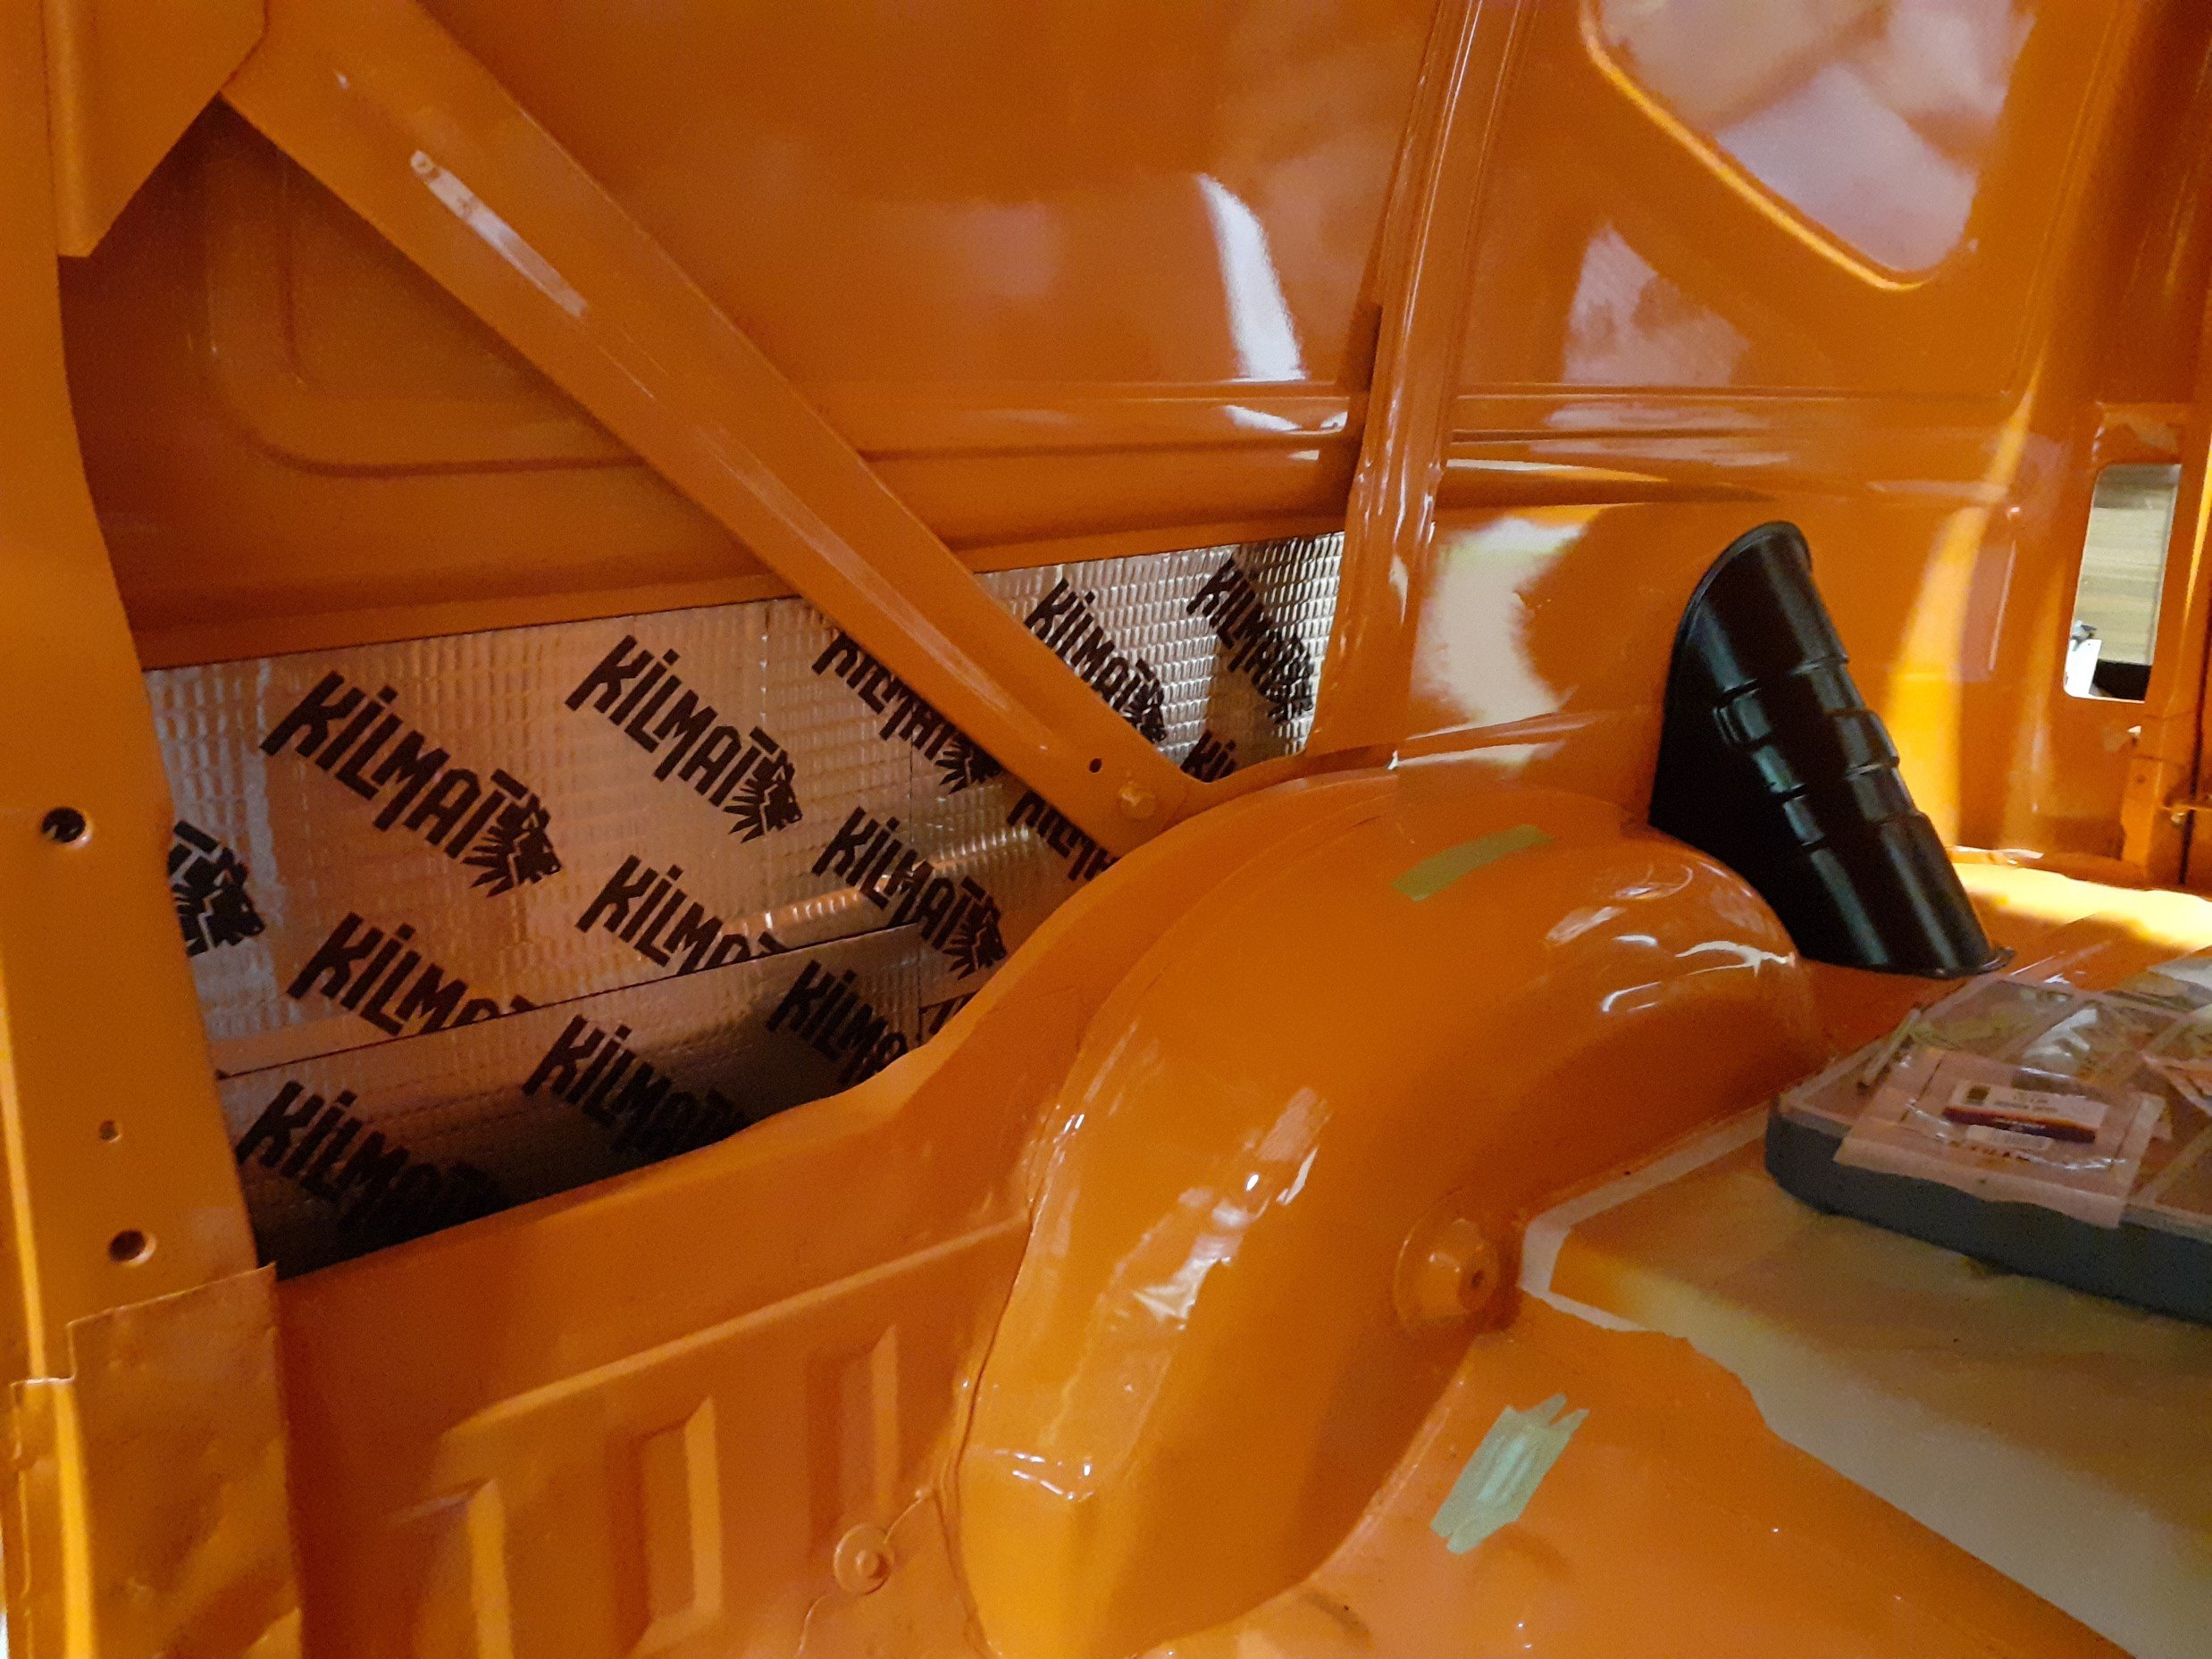
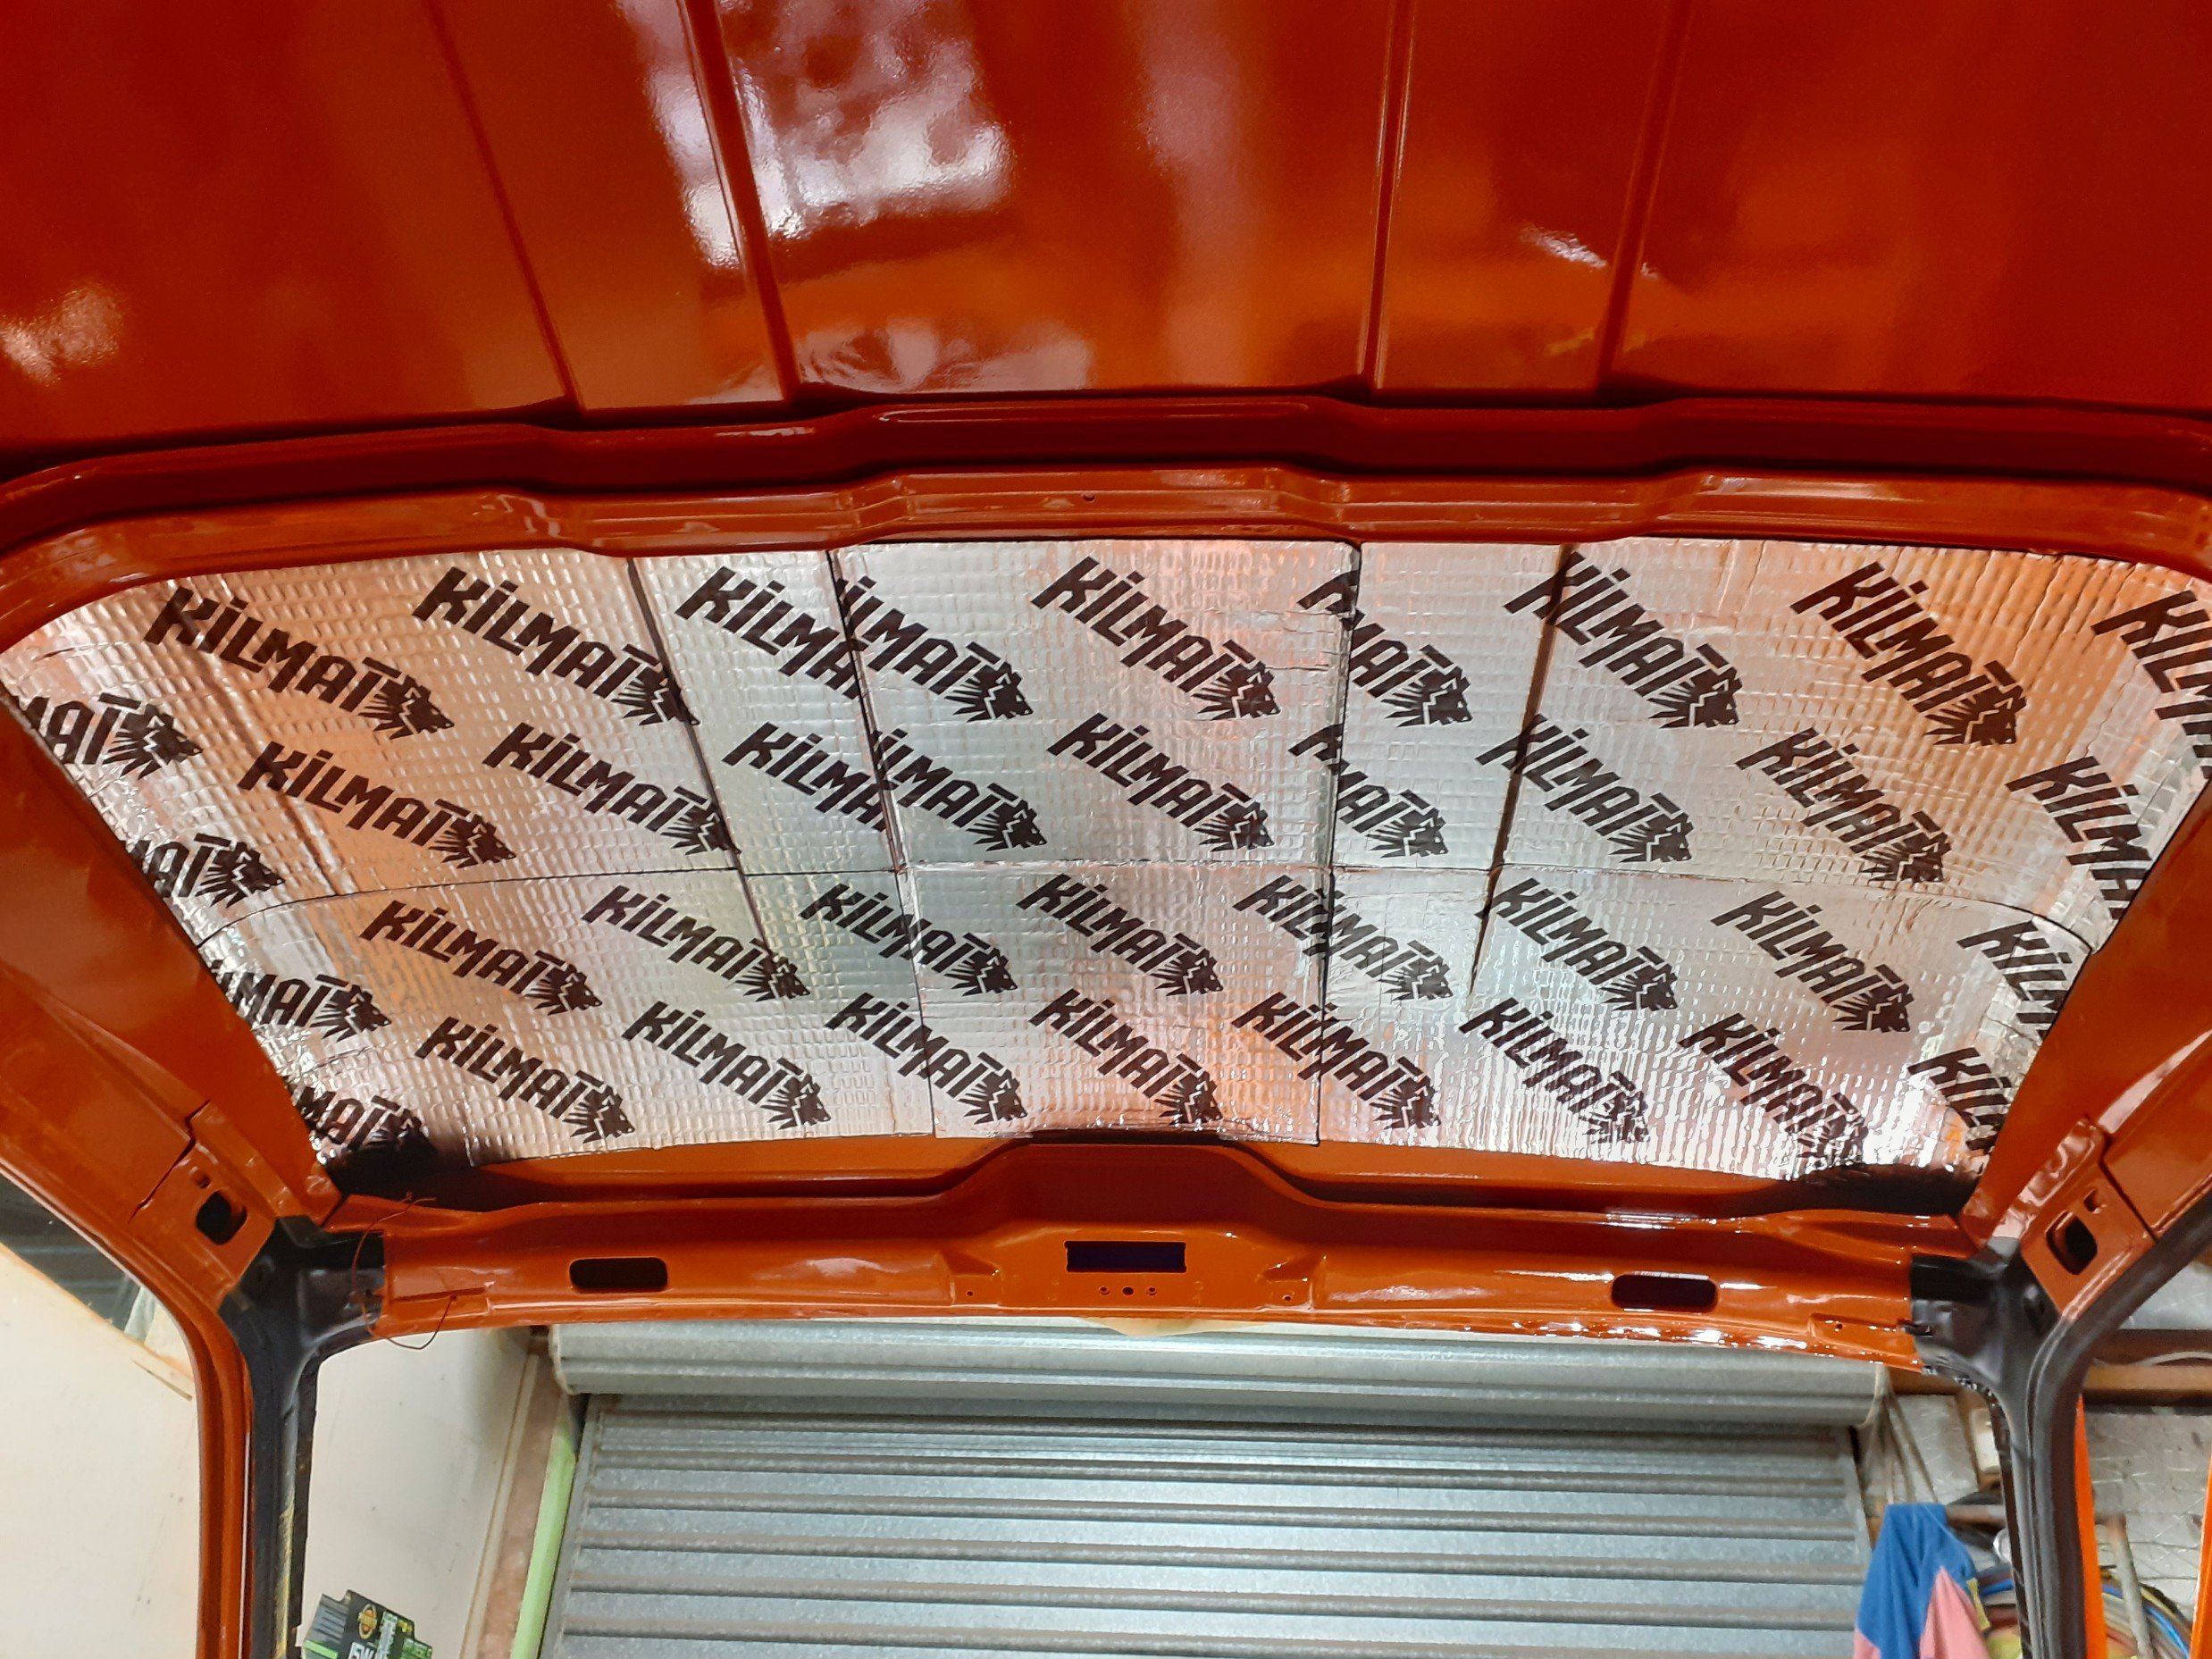
Have applied to the rear doors, front doors, firewall, part of the floor and roof of my van. 30 sheets of the 34 used up. Easy to apply and work with. Adhesion feels the part. Do people normally apply sound deadening under the dash area/bottom of the windscreen or is this a waste of time?
-
Firewall, front 3rd of the roof and floor done, and have starting working towards the back.
- 104 replies
-
- 13
-