.jpg.75c043a44982294d69ea071d787bc2b4.jpg)

64valiant
-
Posts
6282 -
Joined
-
Last visited
-
Days Won
10
Everything posted by 64valiant
-
back again and at work doing bugger all so lets get to the updating this thread. looks like a few days later i decided the engine needed to come out. Pretty sure i removed it this time as i was having issues with the clutch shuttering and i wanted to remove the flywheel to get it skimmed. looks like i got bored that night and got into rebuilding my steering box while i waited for tools and the fact it it was midnight after removing the engine going off the time on the photos. must have been night shifts or going into night shift. yup so must had come off or gone onto night shift. following image is from 2pm. steering box apart and the peg out ready to be replaced. usually the peg wears out from been in the center all the time and gets a flat spot which creates steering wheel wobble when you are driving along in a straight line, mine wasnt bad but i wanted it better. the peg sit on the worm drive in the box, has a bunch of little roller bearings. the peg itself is on the other side of the nut in the image itself. i was trying to find a blown up diagram on the net on how it works but shit out of luck sorry. this here it self is the peg. i struggled to find any information or videos on youtube how to do this so i thought id make a quick how to. this also might make sense of what i'm replacing here. old mate from vdubshoppe recommends grease in the box itself when you rebuild it, so packed it in there. smashed that back together and done a bunch of fine tune adjustments and i feel its definitely better but not 100% so i think ill replace the rubber steering coupler next time i remember to buy the peace. back to where i was with removing the engine. fly wheel skimmed and back, replaced the rear main seal while it was apart and slapped it all back together. turns out i am better at upholstery than a vw mechanic which is good and not good..... engine back out and replace the rear main seal as i pinch it on instillation and probably didn't use enough lube. never had to use heaps of lube before....... back in again and we are driving, had to shoot to Bunnings grab something so took Tayla for a hoon, we got 4.7kms away from home and she stopped, completely, no power at all nothing happening. had a look around done some digging and checked a few things. wasn't really having much luck but i found one of my wires going to the coil had snapped off. killing all spark. some how dodgied that together and made it to a better position and had a mate come with some new terminals and some plyers to crimp it on. so back to Bunnings we go. next up was to visit my local wheel alignment shop and annoy him cause the bus is low and he cant get the things on the wheel so have to jack up the rear. got it steering a bit better but i think im to much of a race car driver so so might need to find someone whos keen to take some time and fine tune it, wearing the out side of the tire a bit to much for my liking. wanting to change to a 15 inch rim so maybe wait till this are worn out and go to a 15" and a smaller tire and then get a better wheel alignment for race car driving. so you remember how i replaced my screen not long ago in my previous post. turns out this one didn't like been in my car and i got sprayed in stones heading over the kai mais. went for a walk the following day and come back to this. shit a brick. thankfully we got insurance. ahh well off home we go. stopped at the top of the kai mais got a photo and continued my trip home. about 7 days later it started making some horrid noises after going to get some sushi for lunch. bad enough i didnt drive it into the garage. thought it might have been my thrust bearing been i didnt replace it while the engine was out. so lets get into this. engine out time and i give you 18 mins later ermmm spinning release bearing and nothing sounds abnormal? what on earth could it be. spin it a few more times, feels a little off but not enough off to make that type of noise. ahh fuck seems like my flywheel nut has come loose. well clutch off and flywheel nut was finger loose so we undone that and lets see what kind of damage i have done. looks like the dowel pins were the only thing holding it there and they have elongated the holes in the flywheel and the crank. so looks like he's going to need some love and be off the road for a while. lets pull the gearbox out while we are here since its going to be off the road for a while. ' you may ask why am i pulling the gearbox out? well. i have a taller ring and pinion i've been wanting to get installed. you may ask why? well the factory ring and pinion is a 5.375. with the tire size i run i sit at 82kph at 3200rpm i used a website blocklayer. enterd my tire size and gear ratios and diff ratio and it does some cool calculations. we worked out what was going to be the best way about changing the ratio, be final gear or the ratio via this website and diff was the best option. so i ended up going with a 4.13 ratio ring and pinion. this will inscrease my speed from 82kph at 3200 to 107kph and at 3000rpm ill be doing 101kph which is going to be a far better cruising speed. with the old ratio id have to be doing 3900rpm and id be doing 100kph. so that's that really. kind have caught up a bit more with the thread. i think ill have a couple more quite shifts coming up where i can smash some keys and update this thread a bit more.
- 49 replies
-
- 27
-

-
- kombi
- volkswagen
- (and 2 more)
-
seems like some of your images aren't posting there @sluggy looking good though, thats a crazy good starter motor location on the top of the gearbox.
-
Gidday team, she has been a while and things have been happening. Going off the order of my images these have been the events so far. originally I built the accelerator bracket out of some thin panel steel and it was moving around so i headed out to see @Geophy and robbed some flat steel from him. made me a thicker bracket. gave that and the carb bracket a lick of black and put it all together. next up I had two 6 inch speakers and a bluetooth kicker amp laying around that were going to be used on something else but never ended up using them and i got sick of turning the UE boom on and off. so time to get busy. I really dislike having speakers in doors of kombis and classic cars so i done my best to hide them, so got cutting holes in the inner wheel tubs. these are not full tubs they don't go out to the under of the car. they have pressings in them and let a bunch of road noise through, so no loss and no gain. should be covered with something but like 90% of buses never cover them. got some clear pvc out of under the bench and drew up some templates and made some wood cards. had some black carpet under the bench and wraped them in that. installed the little amp behind the passengers seat and all the wires tucked away and into the wheel tub. shes pretty small and comes with a small hand controller, the product is kicker pxibt50.2 thats the small controller and speaker installed. goes well enough for two speakers and to listen to music. In fact here is a video. next up i needed to weld a scrape plate on my muffler cause it turns out its still to low and ive made it less round and more flat. that should hopefully make the muffler last a bit longer, i also added a fire extinguisher to the bus. here is a image of me just using the bus wof was due not long after this image and it turns out the screen wanted to crack the day before the wof, so out she came, using the most safely way of course. and hello. we found some rusty holes and she wasn't the prettiest under there. welded the rust up and quickly put some rust killer on it and chucked a new screen back in it. off to tga for a wof and catch up with a mate and a customer. ah did i mention ages ago i sneakly brought a repo clock for the dash? well i told my other half one day and then i installed that during this same time. getting into those positions that you only see your steep sister get stuck in on those videos. a fun job getting in behind the dash to remove it but we got there wof aquired time to repair some other things. got sick of the side door dropping and been a pain in the ass so i pulled the side mechanism out and and had a closer look. this u shape pin has a bunch of play in it. so it was time try put a bush in the body. a quick visit to see @Kimjon drill the bad boy out and kim machined up a bush to go in it. it was also missing a locking key thing, thanks google for supplying this image but yeah got one of them and slapped it all back together with a new block for it to slide on. and job well done. brought myself the volkswagen script that goes on the tail gate that i never had. saw dubbed had them for sale on trade me so hit him up and got that on the back of the bus. drove to tga for xmas and then up to sentras house for new years. and thought after all that driving i should probably grease the front beam, while i was there i chucked the bump stops in that i made. pretty happy with how well these turned out. and that will do for now, i think I'm going to have to go do some work so ill continue updating my silly vw activities next time.
- 49 replies
-
- 28
-
-

-
- kombi
- volkswagen
- (and 2 more)
-
your second image has dropped out @sluggy Glad you've gone to the dark side
-
@flyingbrick do you still own this?
-
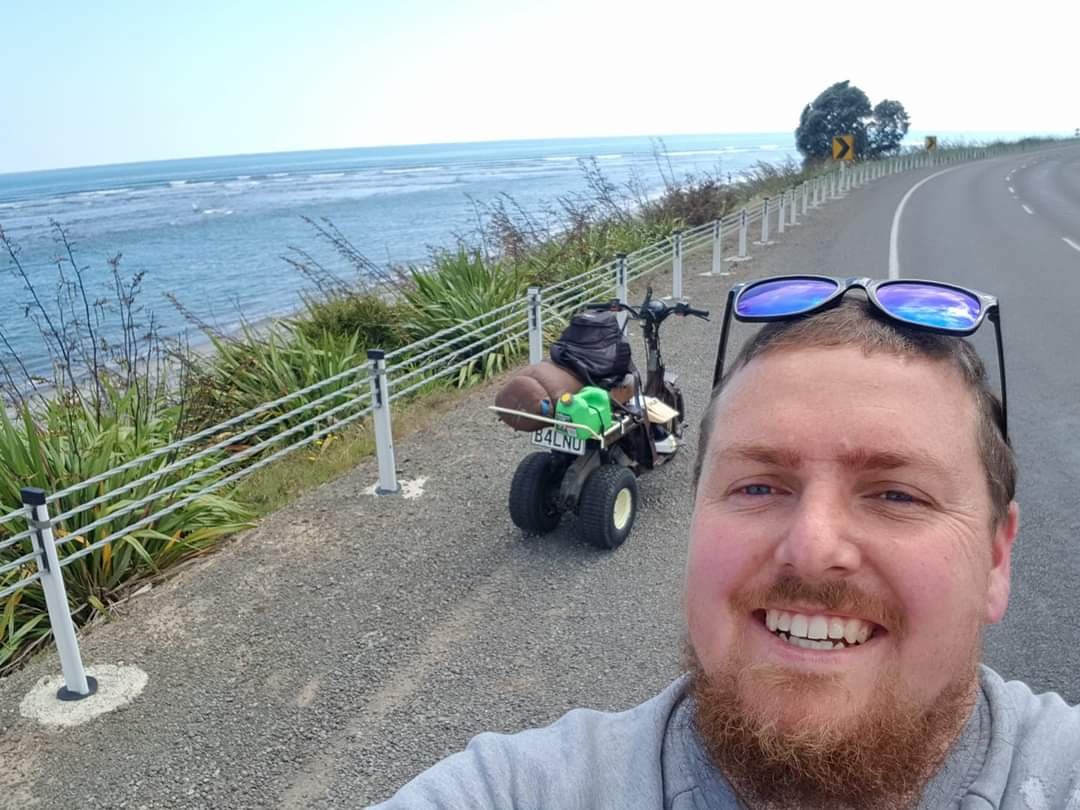
bloody reble over here trying to get to @sentra daves house for new years party. bloody hoofing it as you can see, must be down hill and gusting winds behind me.
- 49 replies
-
- 17
-

-
-
- kombi
- volkswagen
- (and 2 more)
-
since we were talking about this in the weekend @Yowzer and @Evan i thought i would dig up the thread and an image while im super busy at work.
-
Can also agree with 10speed
-
Man this took some time to find. Ended up Googling it and come across it. Re oil leaks and pressure, did you find your cork gaskets always leaking? Vw mechanic who built my engine puts wheel bearing grease on both sides of the cork when putting them on. Solves leaking from that region and helps hold them when you put them on.
-
Eastcapescapade 2021 November 12th, 13th, 14th
64valiant replied to johnnyfive's topic in Upper North Island Region
Images from a simpler life with out covid complications. I'll be thinking of all the great sharns and the intense scenery you guys shull enjoy this weekend. Will see you all next year, much love from the guy sad about missing out. Greg.
- 474 replies
-
- 14
-
-

-
-
Nah just go ahead and hand stitch it back together if it isn't to badly damaged. Have done plenty repairs in my time, air bag will bust through that shit pretty fast.
-
Possible Facebook marketplace collect palmy
64valiant replied to chris r's topic in Lower North Island Region
@_Matt might be able to help. -
Eastcapescapade 2021 November 12th, 13th, 14th
64valiant replied to johnnyfive's topic in Upper North Island Region
The odds looking against me coming with this covid stuff. Actually gutted. Might just have to do it when I'm aloud by myself. -
Eastcapescapade 2021 November 12th, 13th, 14th
64valiant replied to johnnyfive's topic in Upper North Island Region
Man I really don't like the odds for those that want to attend from the likes of Auckland and even waikato with all this covid going on. I just wanted to ride my scooter with friends. -
Eastcapescapade 2021 November 12th, 13th, 14th
64valiant replied to johnnyfive's topic in Upper North Island Region
jokes @Mrs 64valiant is pretty strict on the rules so I'm just keen to come along. -
Eastcapescapade 2021 November 12th, 13th, 14th
64valiant replied to johnnyfive's topic in Upper North Island Region
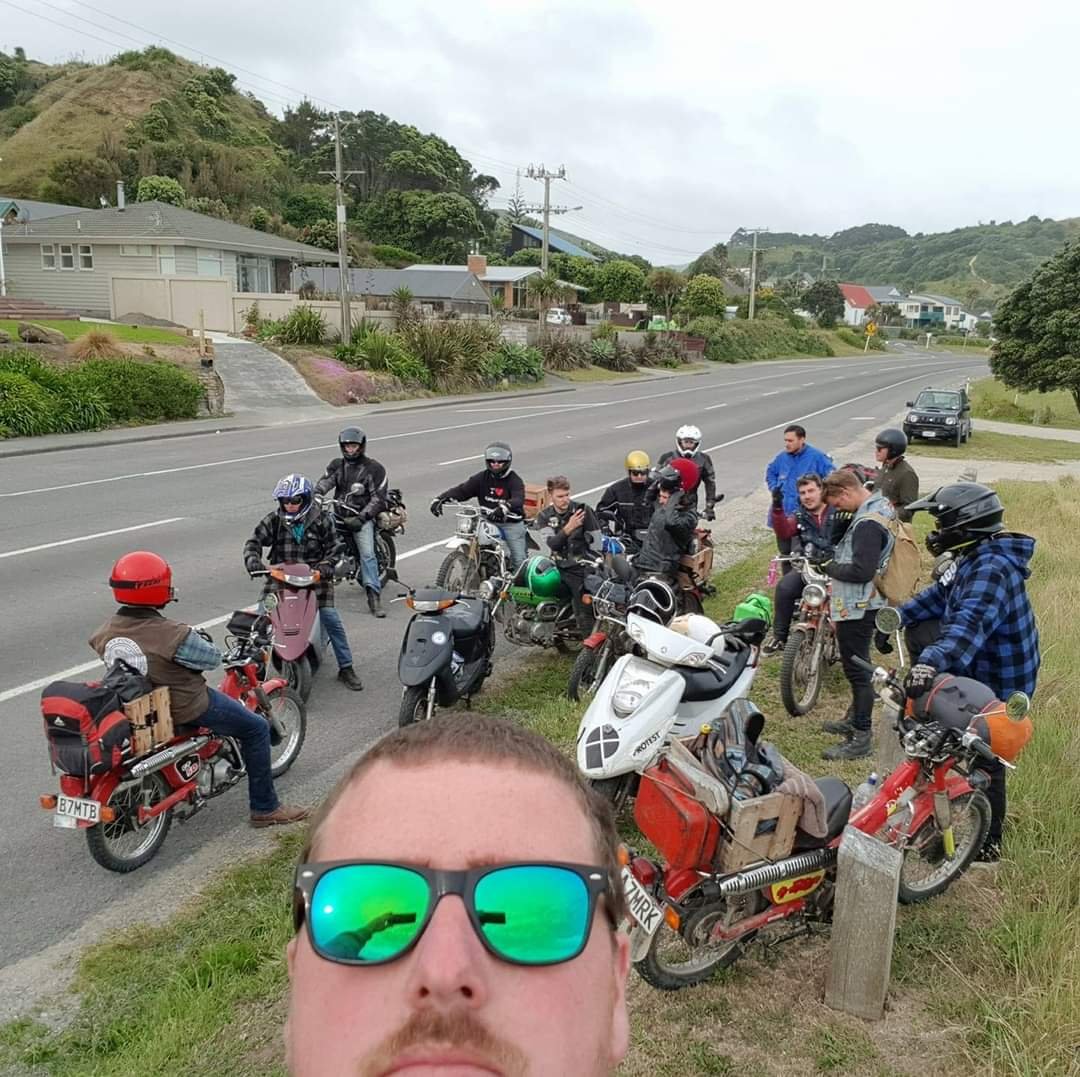
to be honest i might just so happen to be going for a ride around the east cape. if i so happen to bump into 40 others going that way, well they must have good taste in routes. really hoping Hamilton is lest out of some kinda lvl3, my leave at work got approved so pretty keen for a hoon on the vespa -
Eastcapescapade 2021 November 12th, 13th, 14th
64valiant replied to johnnyfive's topic in Upper North Island Region
Have personally delivered my leave form to my manager. Wait patiently to see what he has to say and anyone got a spare room? -
Eastcapescapade 2021 November 12th, 13th, 14th
64valiant replied to johnnyfive's topic in Upper North Island Region
Have registered. will apply for leave this morning. Now to shall try get accommodation at said places unless people have empty beds or want someone to spoon with, can be big or small spoon to sweeten the deal. -
so oil seals done and oil cooler bolted back down. time to clean up the intake and parts so i can assemble the engine. a sweet before hand hit the tubes with a wire wheel and then a scotch bright from under the kitchen sink and after hit the intake manifold with a scotch bright as well to clean it up. ideally i wanted o get it vapor blasted but no one was open and i really wanted to get it back together so this will do for this time round. gave the twin port intakes a quick scotch bright as well. and after started to get a little bit over the top with my cleaning and cleaned the external of the fuel pump and alternator and then started to assemble the engine. had mentioned in a group chat that id like to hide the wires a bunch more and would like some spark plug wire holders to clean up. @flyingbrick said he had some anodized pink ones i could have, a quick flick of black paint and look good again. now i could try make the carb fit. turns out it liked to touch the alternator so i had old mate @Geophy make me a 10mm spacer giving me that little bit of room i needed it needed a bit of fine tuning to match my average tolerances but very good!!!!! fast turn around as per normal. boom that on and looking good with the tolerances i needed. now it was to make the linkage for the accelerator. had me thinking for a bit as its backwards to pulling how my previous one was. again we chatted about it and @Kimjon had a few good ideas which prompted me to end up making the final design. i had shot to the vdub shoppe to grab some other parts and i got this which had a big rod in the middle of it for adjusting. i didn't need it to adjust and a bunch shorter so i just welded it together and made it none adjustable. next i needed something to leaver the top and bottom, i had previously cut down a spanner so i drilled three holes in that. the accelerator cable will go in the bottom hole and the thingy i modified above will go on the top and will pivot on the center hole. make it look something like this as you can see i have also made a bracket off the bottom of the carb that has a small bolt with a couple of nuts on it so the cut down spanner can pivot on. actually here is a video of it working. the top image you can see I've put a spring on the back side to help with some resistance and making sure it pulls back to idle. with this all done i chucked the engine back in and fired it up. and fuck me i was pissed. engine still making a fucken rattle! so again i removed the fan belt, yup the fan was un balanced and causing some racket, so guess what i did. engine back apart. i wasn't so happy to have this apart. but again a quick visit to the vdub shoppe and a new one purchased also found my gen strap was a bit sad and had a big crack in it. hit that with the welder and grinder that fixed and time to chuck that back together All done, I managed to paint the engine bay cleaned up a few other things including some loose wires. here is what it looked like before hand psych, only kidding! thing was running like a bitch, so took it out to vdub shoppe to get paul to give me a hand tuning it. was pinking really bad and was maxing out the timing so i put a stronger spring rate in it. now its running at around 30-32 degrees. no more pinking and running really good, Paul also made it a it richer to try fix the down low stutter i was having. ive also repaired the coil bracket. welded that back together and painted it black, had already repaired the other side a while ago. also swapped out my J pipes for some vintage speed steeped down pipes keeping the heat away from the heads. here you can see the difference with them stepped down. put them on and had an issue with the exhaust gasket been to large which must be designed for bigger ported heads. you can see here these are stepped and the gasket wasn't sealing against the head. so standard exhaust gasket fixed that issue. welded up my bump stop brackets haven't put them in yet been to lazy. might try put them in next few weeks when i have some time off. and my favorite mod/addition i have done is putting in the front bunk bed that goes over the front seats for Tayla for camping. pretty happy with been able to steel that from a mate as he doesn't use that in his bus. That's that for tonight's post. kept me occupied for a hour or so. if you want to yarn about it head on over to the chat fred.
- 49 replies
-
- 34
-
-
-
- kombi
- volkswagen
- (and 2 more)
-
Hi all. long time no posts. Been some big adventures in George the bus since may. 1st little event out of town was to beach hop. day one at Waihi. supporting my new Westfalia sticker on the front of the pop top. cooked myself a nice feed by myself later that night, good thing having everything on board with me. Day two was at Thames and spent the day walking around with these two mates. day three i had a flat tyre so just chilled out around town while waiting to get that repaired. day four was main cruise and got no photos of the day but had some one snap a good side on. and you can also now see the new sign writing on the side of the bus, something little to brake up the stripes a bit and give it a bit of retro style. next trip was down to kapiti for vw nationals, first family trip with Tayla and @Mrs 64valiant made a few stops on our way down, stopping in at Ohakune for the night and catching up with @oftensideways and his family and getting those token new zealand photos didnt really have to many issues along the way other than just leaking gas from somewhere around the tank. and from here ive just been using it as a daily. other than eating a muffler in under 3 months it had been really good daily. the muffler is a empi single quiet pack exhaust and better suited for a beetle but i just made it work for the bus. it was hanging down a bit and had slowly worn its way through the muffler. so i brought a new one and cut the two of them up and modified them so i had a bit more clearance here in this image below you can see the new one dips down straight away from the flange. so i cut the old one up and done come calculations that it'd work if i made it straight then i cut the good muffler off and rotated it a few degrees and tac welded that in its place sent that home and then test fitted it again and adjusted the last tip on the end to be in a better position as well. call that a success. doesn't scrape as bad going in and out of drive ways now. next issue has been most recently and the engine hade been rattling a bit, didnt know where it was coming from. thought it was from the oil cooler tin wear. so u wedged a peace of timber in there to stop it from rattling well that didn't stop it from rattling now did it. mentioned it to a mate while he was visiting from the gate and he said i should take the fan belt off and that would help eliminate the issue... and yup it sounded great with out a fan belt on. so i thought i better fix it been it will be the fan and thats a pretty simple job. so proceeded to strip the engine down i got it to this stage and i tapped the tin wear.... she was rattling like no tomorrow. ment the fins inside were not tac welded any more. soooo yup, engine was required to be removed so i could take the shroud off. once it was off i shot around to the vdub shoppes home and he welded them up for me. now that the engine is completely out lets do some other things while we are here. fuel tank removed and sender unit seal replaced, over flow lines replaces and hose clamped on and i also gave the earth wire a clean going from the sender to the body, check out how fast this needle moves now now thats back in and running better than brand new time to carry on with the engine. ive been wanting to upgrade the carb for a while give it a bit more power by allowing the engine to breath so while i was at the vdub shoppe i grabbed a few other things i already had the manifold from buying a few od parts here and there so a 32/36 empi copy was a good option. also replaced the oil seals on the oil cooler while the tin wear was apart. plenty more to update you all on but that shull do it for today. when i log back on at 2300 i shall continue to update this thread with whats been going on. hopefully you have enjoyed reading
- 49 replies
-
- 35
-
-
- kombi
- volkswagen
- (and 2 more)
-
Eastcapescapade 2021 November 12th, 13th, 14th
64valiant replied to johnnyfive's topic in Upper North Island Region
Fomo is kicking in hard. Might have to put in a leave request in at work and pull my finger out and bring the vespa for a ride. -
You can use foam underlay like in a house, but unless it's closed cell foam it will all absorb water. And that foam underlay will hold it longer than underfelt. If you are thinking the under felt is going to get that wet I probably wouldn't be putting carpet in it. I would look at rubber/vinyl matting. But really depends how often you plan on getting the carpet and underfelt saturated. 10 times a year? Cause dehumidifiers work a treat in closed up vehicles to dry out carpet.
-
no. I would recommend going to buy some under felt from a local supplier. usually 50 bucks a meter 1.8 or two meters wide. probably wouldn't put that under carpet as you might find it able to compress and movable causing it to brake down where under felt is a lot more hard wearing. I would put this type of product on a fire wall or on a ceiling.
-
Gidday, me again with the crappy volkswagen. so last time we left off that i got it out side. WAHHOOOO the next thing on the list was tires and to dial in the ride height. i had messaged seedy al a we while back and asked what size tire he ran on the front and i run these also but this time i fired him a message to see what he was running on the back, and yikes it was a small tire compared to what i was running, which was a 205 70 14, i done some tire comparisons online to find something that would give me a smaller tire but nothing to small. I ended up with a 205 60 14. this is 22mm smaller in the side wall, allowing me to go a little lower with out having to ram the tire up into the guard. but since going lower i now have a lot more toe in, now causing the tire to catch on the spring plate adjuster. so i got some shims from bunnings, yes bunnings stock shims for vw kombis (washers). what i needed to do is shim the spring plate out a bit from the arm to help correct the toe in being this is one solid arm with no adjustment. this required a bit of fucking around, with the 1st attempt having to much toe out. so i removed a shim (washer) and put it all back together and it seemed pretty much bang on. So i got my 3 meter straight edge and drew some lines to the front and back and chucked a tape measure over them. i had the wheel alignment 5mm toe in. this measurement was comparing 2 meters behind and 2 meters in front of the wheel. so i thought my 5mm was pretty bang on for something that is not really adjustable. picture of the solid arm which i placed shims on to correct my toe in issue ^^^ this is the rear i placed spacers where the arrow points With that all done i was able to actually drive it out side and down the road a couple of times. was good to finally have it out side. I was using it a bit here and there to see if anything was an issue or i would need to adjust anything a bit more. My biggest issue was i was not able to select gears that well, i was really starting to get pissed off about this. got talking to the guys at v-dub shoppe and they gave me a bush to replace in the gear linkage system close to the gear box. fucked one this little guy was toast, it was ment to be solid and have no movement but it had about one 8th of adjustment in it causing it to no select gears correctly. replaced that and OMG what a change! while i was up there i got this image of it all done. next up i proceeded to loose my drivers side hub cap about 4 times with in 10kms from home, found it each time which was a bonus. next i needed to sort some shocks out for the front, while i was out at @Fuckedifiknows house i was talking about what i needed to do and he passed me these. and then i got some shocks but i was going to need to do something as the shaft was to big for the bush on the shock. well we had @Kimjon pop in and take my vespa for a ride and he suggested he take them home and chuck it in the lathe and take a few mm off it to make things easier. finished result! next up i needed to tap the shock tower so these could go into them. she was a tight squeeze but we made it work. time to make some bump stops for the front and the rear. front ones go a little like this. put some holes in them make sure the holes line up then you get them lazer cut and leave them for 2-3 months back ones go a bit like this remover rubber dog chew toy (way before we started this) Get smaller rubber chew toy make small rubber chew toy screw into metal thing thanks to @Geophy make metal thing that rubber chew toy screws into be one with George the kombi glad i still know how to melt metal together not that well. so paint metal thing black and screw little chew toy in also removed the big cup thing off the rear control arm for more clearance so i have a bit more travel before bump stop hits, this was only held on with 2 little tac welds so i feel like i done good here. now when it touches a good solid peace that wont fall apart. done some other things to make clearance issues not an issue but i wont show those as i didn't take photos....... but here is a photo of it allll done. do you guys like the no hub caps? or with the hub caps? visited my mates out at the v-dub shoppe to show of and thank them heaps for all their help. and our next adventure was to the bay of plenty to see some vdub people and inquire about getting the kombi checked over for a wof. the bay of plenty was great to us. chilled out with beth and tayla before visitng the wof place. re done my wheel bearing while i was at the wof place cause it was making some noise and then headed out to catch up with a vdub mate brought some rego and went to take a comparison photo when i got back home. thats it for now. next time on adventures with the 64valiant family and George the kombi we head to beach hop and vw nationals. stay tuned
- 49 replies
-
- 45
-
-
-
- kombi
- volkswagen
- (and 2 more)
-
Thank you.