Guypie
-
Posts
854 -
Joined
-
Last visited
Everything posted by Guypie
-
They are there if you want them. Just pm me your address and how many you need.

-
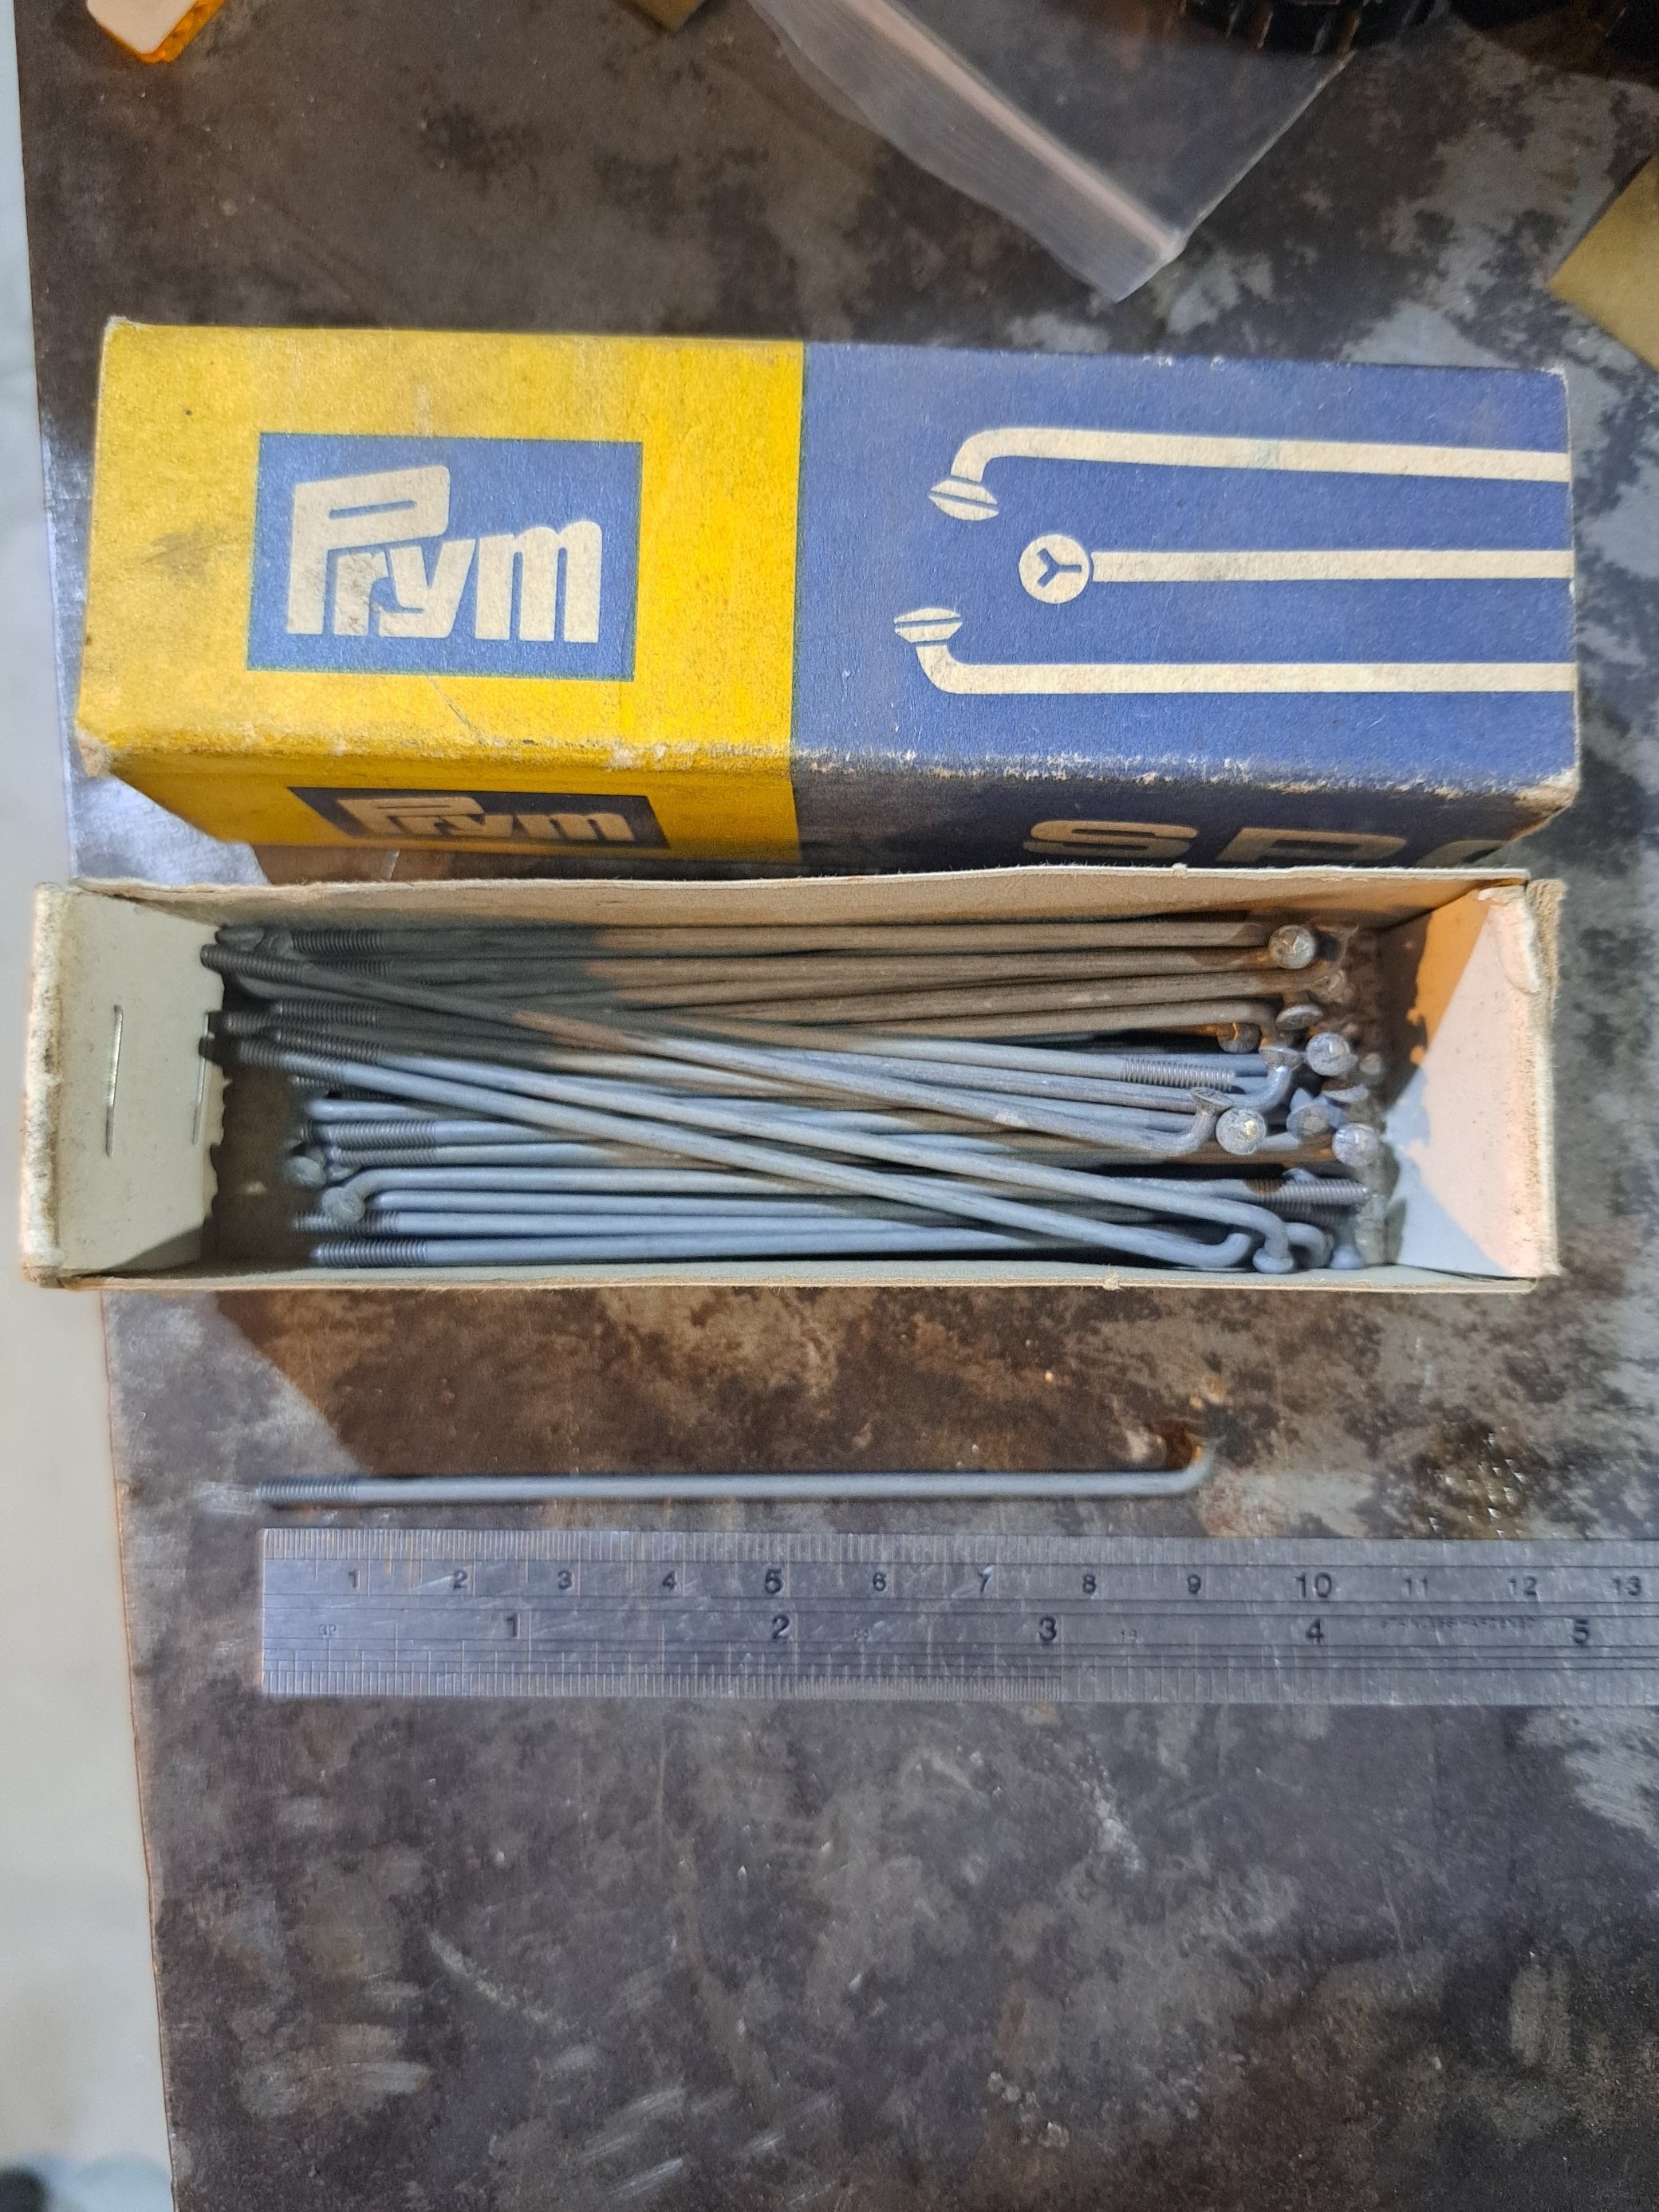
I might have some new spokes in the right length. Let me know how long they are and I can probably hook you up.
-
I know that a friend got his coregas or eziswap bottle filled by gaspro in Hamilton when no swappas were available. Doesn't look like they have a welly branch though.
-
They aren't updating stock on the Bunnings website from what I can tell. Give them a call and ask, I got some argon from my local the other day and the one on the other side of town had mig gas.
-
Yeah CO2 bottle here. Would trade again, have been running it about 8 years now. Lasts way longer than mig gas per fill due to storing as a liquid.
-
How's the ring gap? I have heard of ring gap closing up when pistons get hotter than intended from the factory setup then wedging in the cylinder. Maybe it happened at tdc and the rod yanked the bottom of the piston off. Probably unlikely but another thing you could check on the other pistons. Maybe do some maths with thermal expansion coefficients and see if it would be likely to close the gap in the temperature ranges it could be experiencing.
-
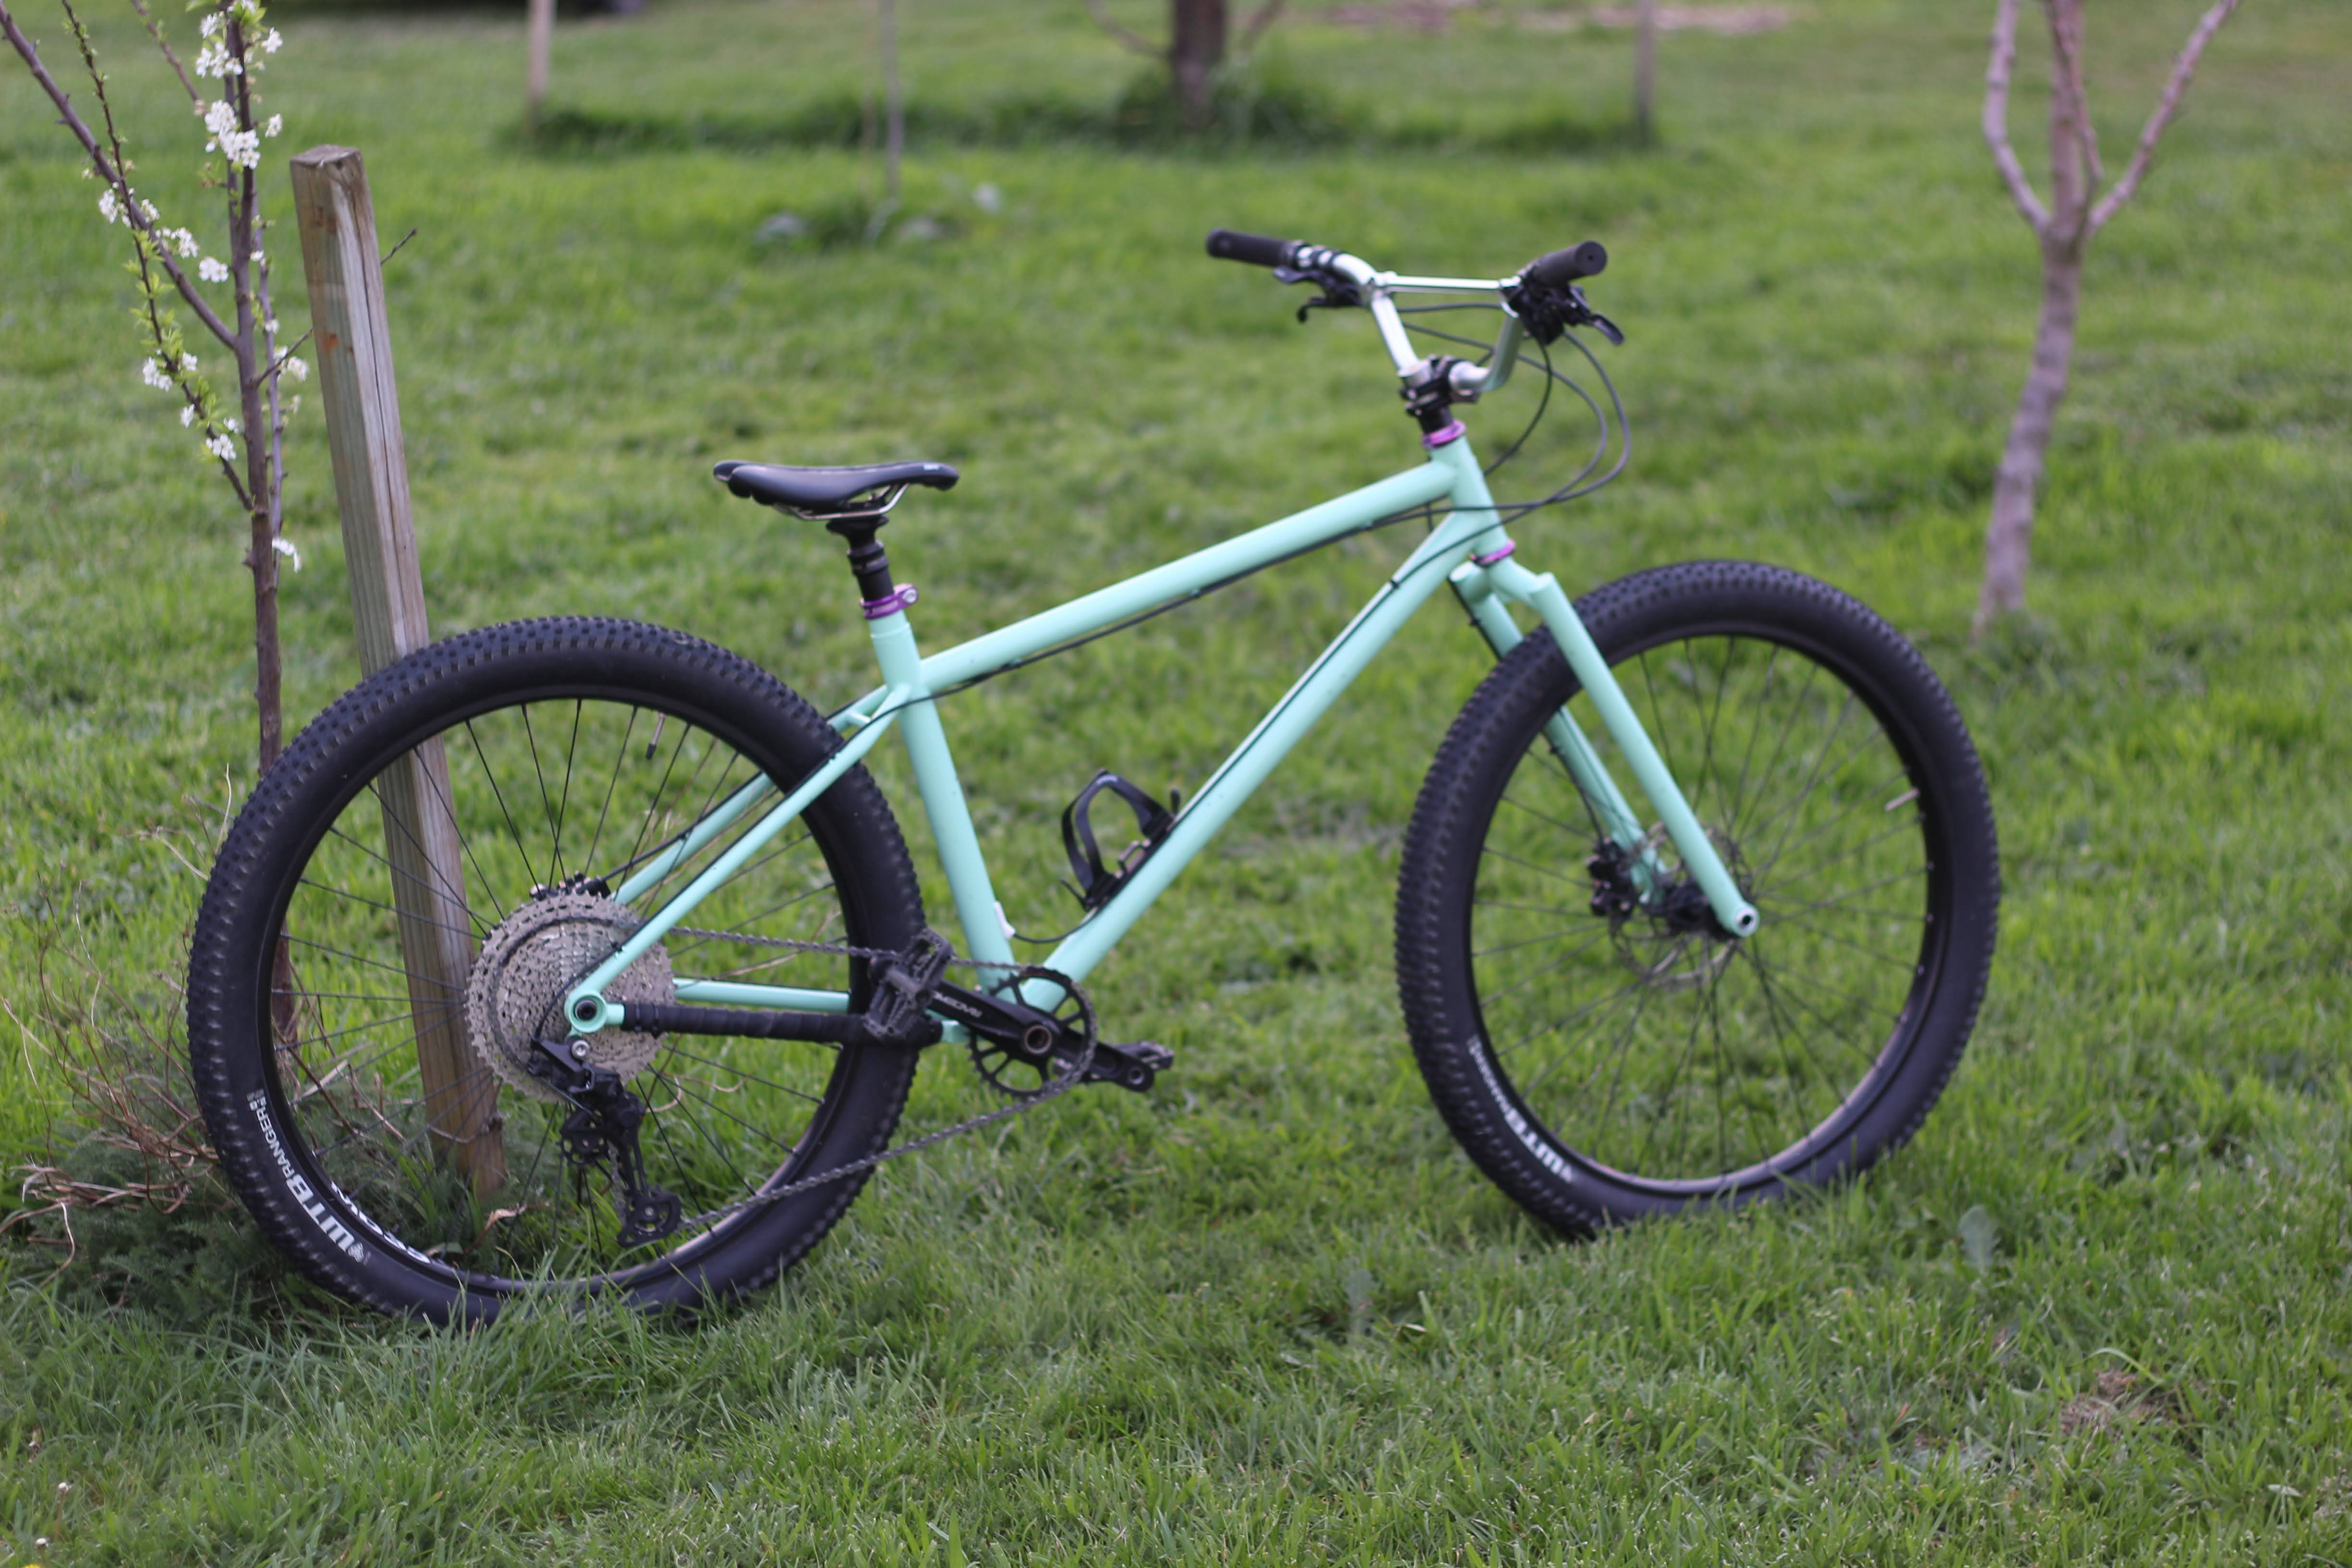
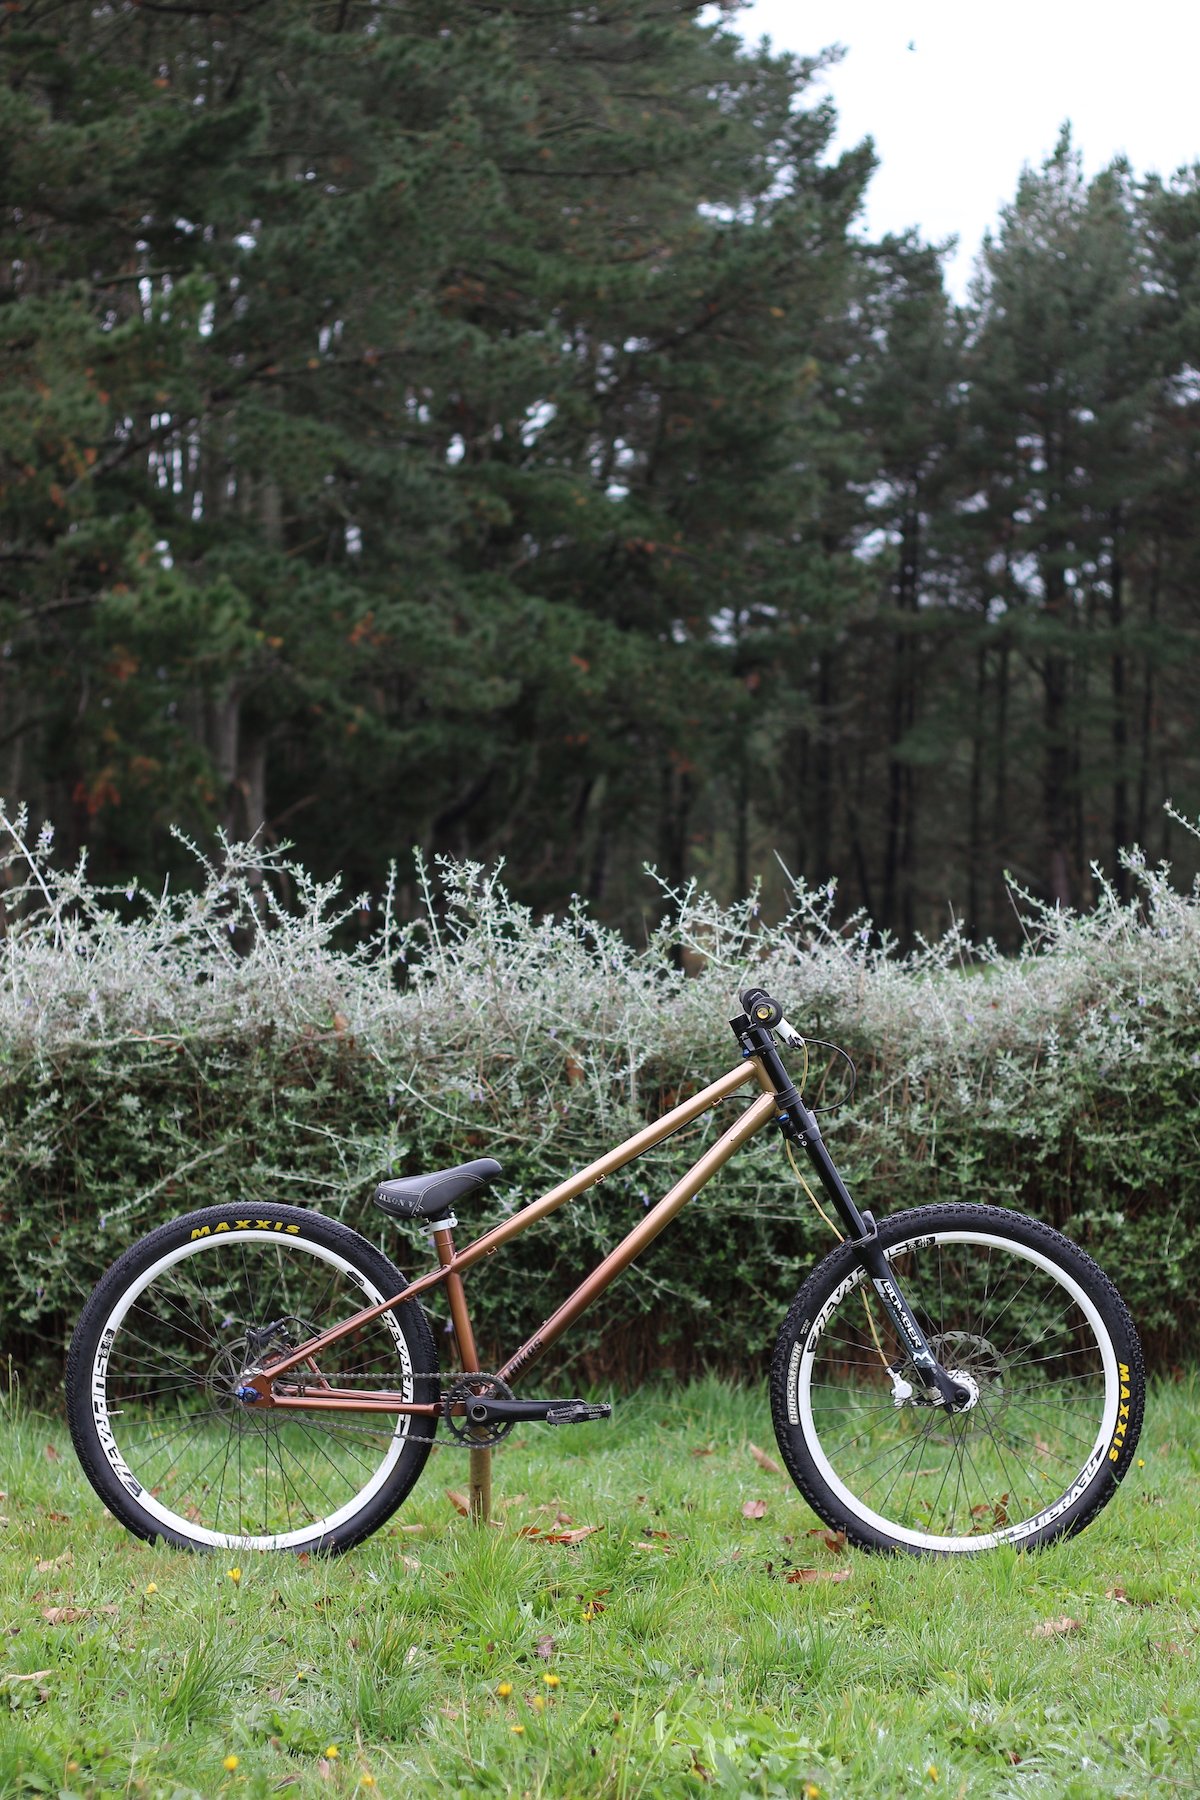
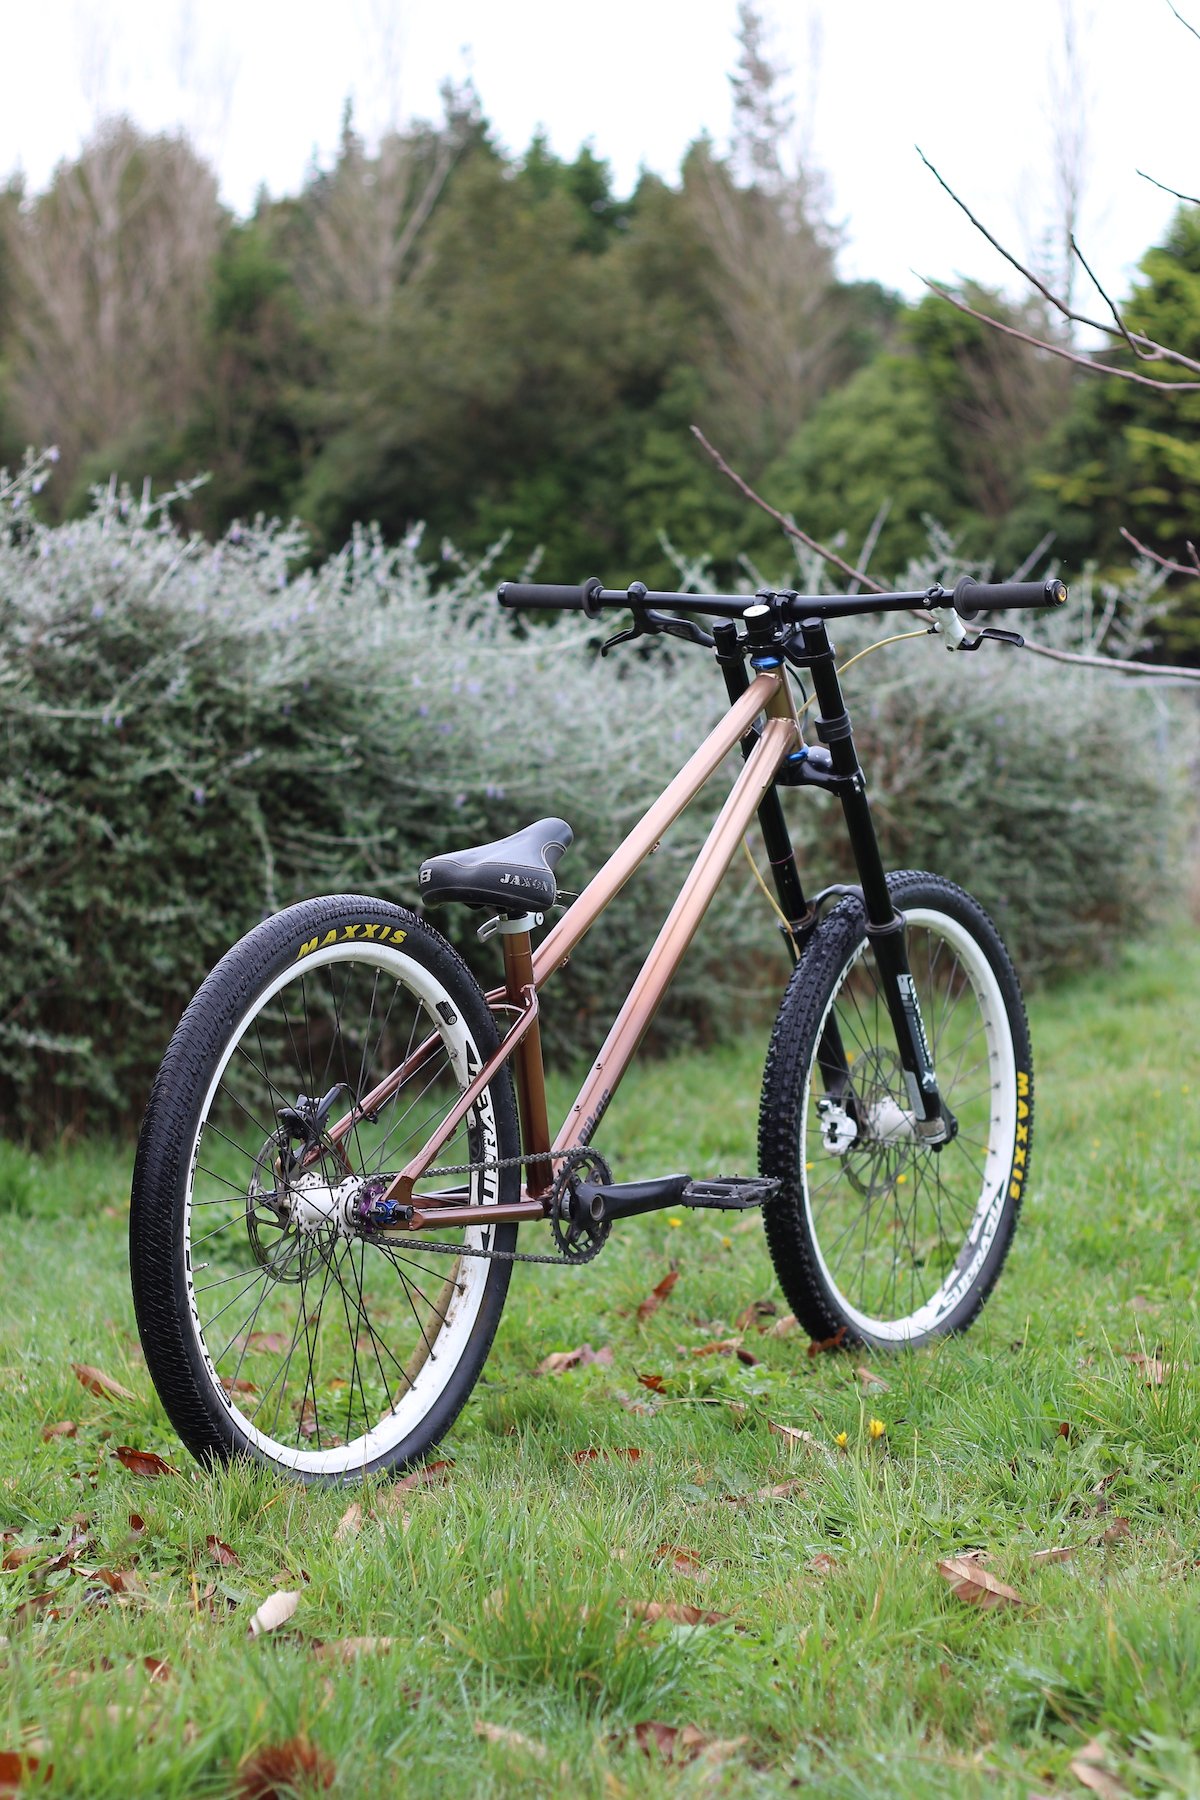
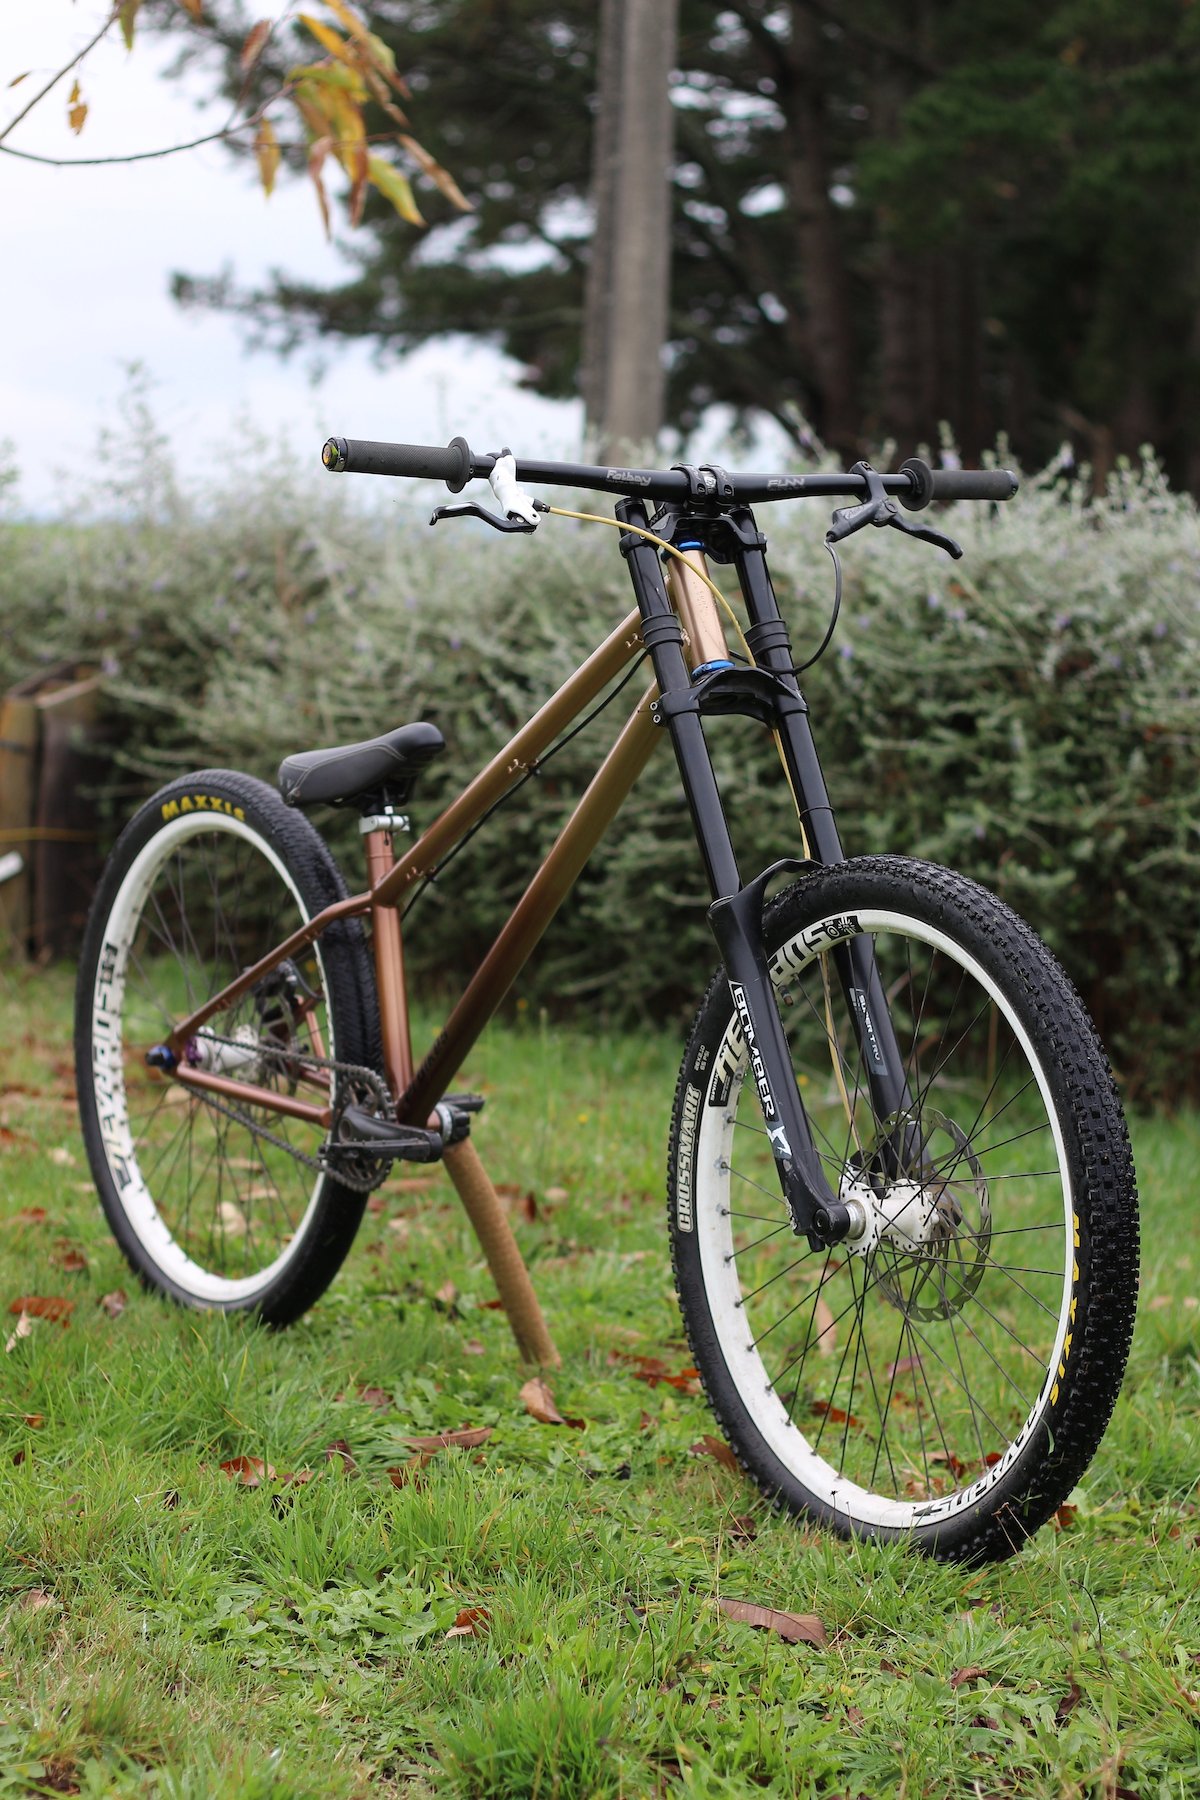
I didn't really give it a big test run before paint like the first 2 bikes, I don't think there will be any issues so I decided to paint it after spending about an hour or so riding it around the house doing bunnyhops and generally messing around. I painted it GM beechwood medium fading to GM beechwood light, a very 80's metallic colour. Pretty happy with how it came out, its far from perfect but its straight and shiny and looks very purposeful. Now I need to get some good tyres for it and go do some shuttle runs! ... it might be a little while I think I might have cracked a rib out riding on friday hahaha.
- 102 replies
-
- 13
-

-

-

-
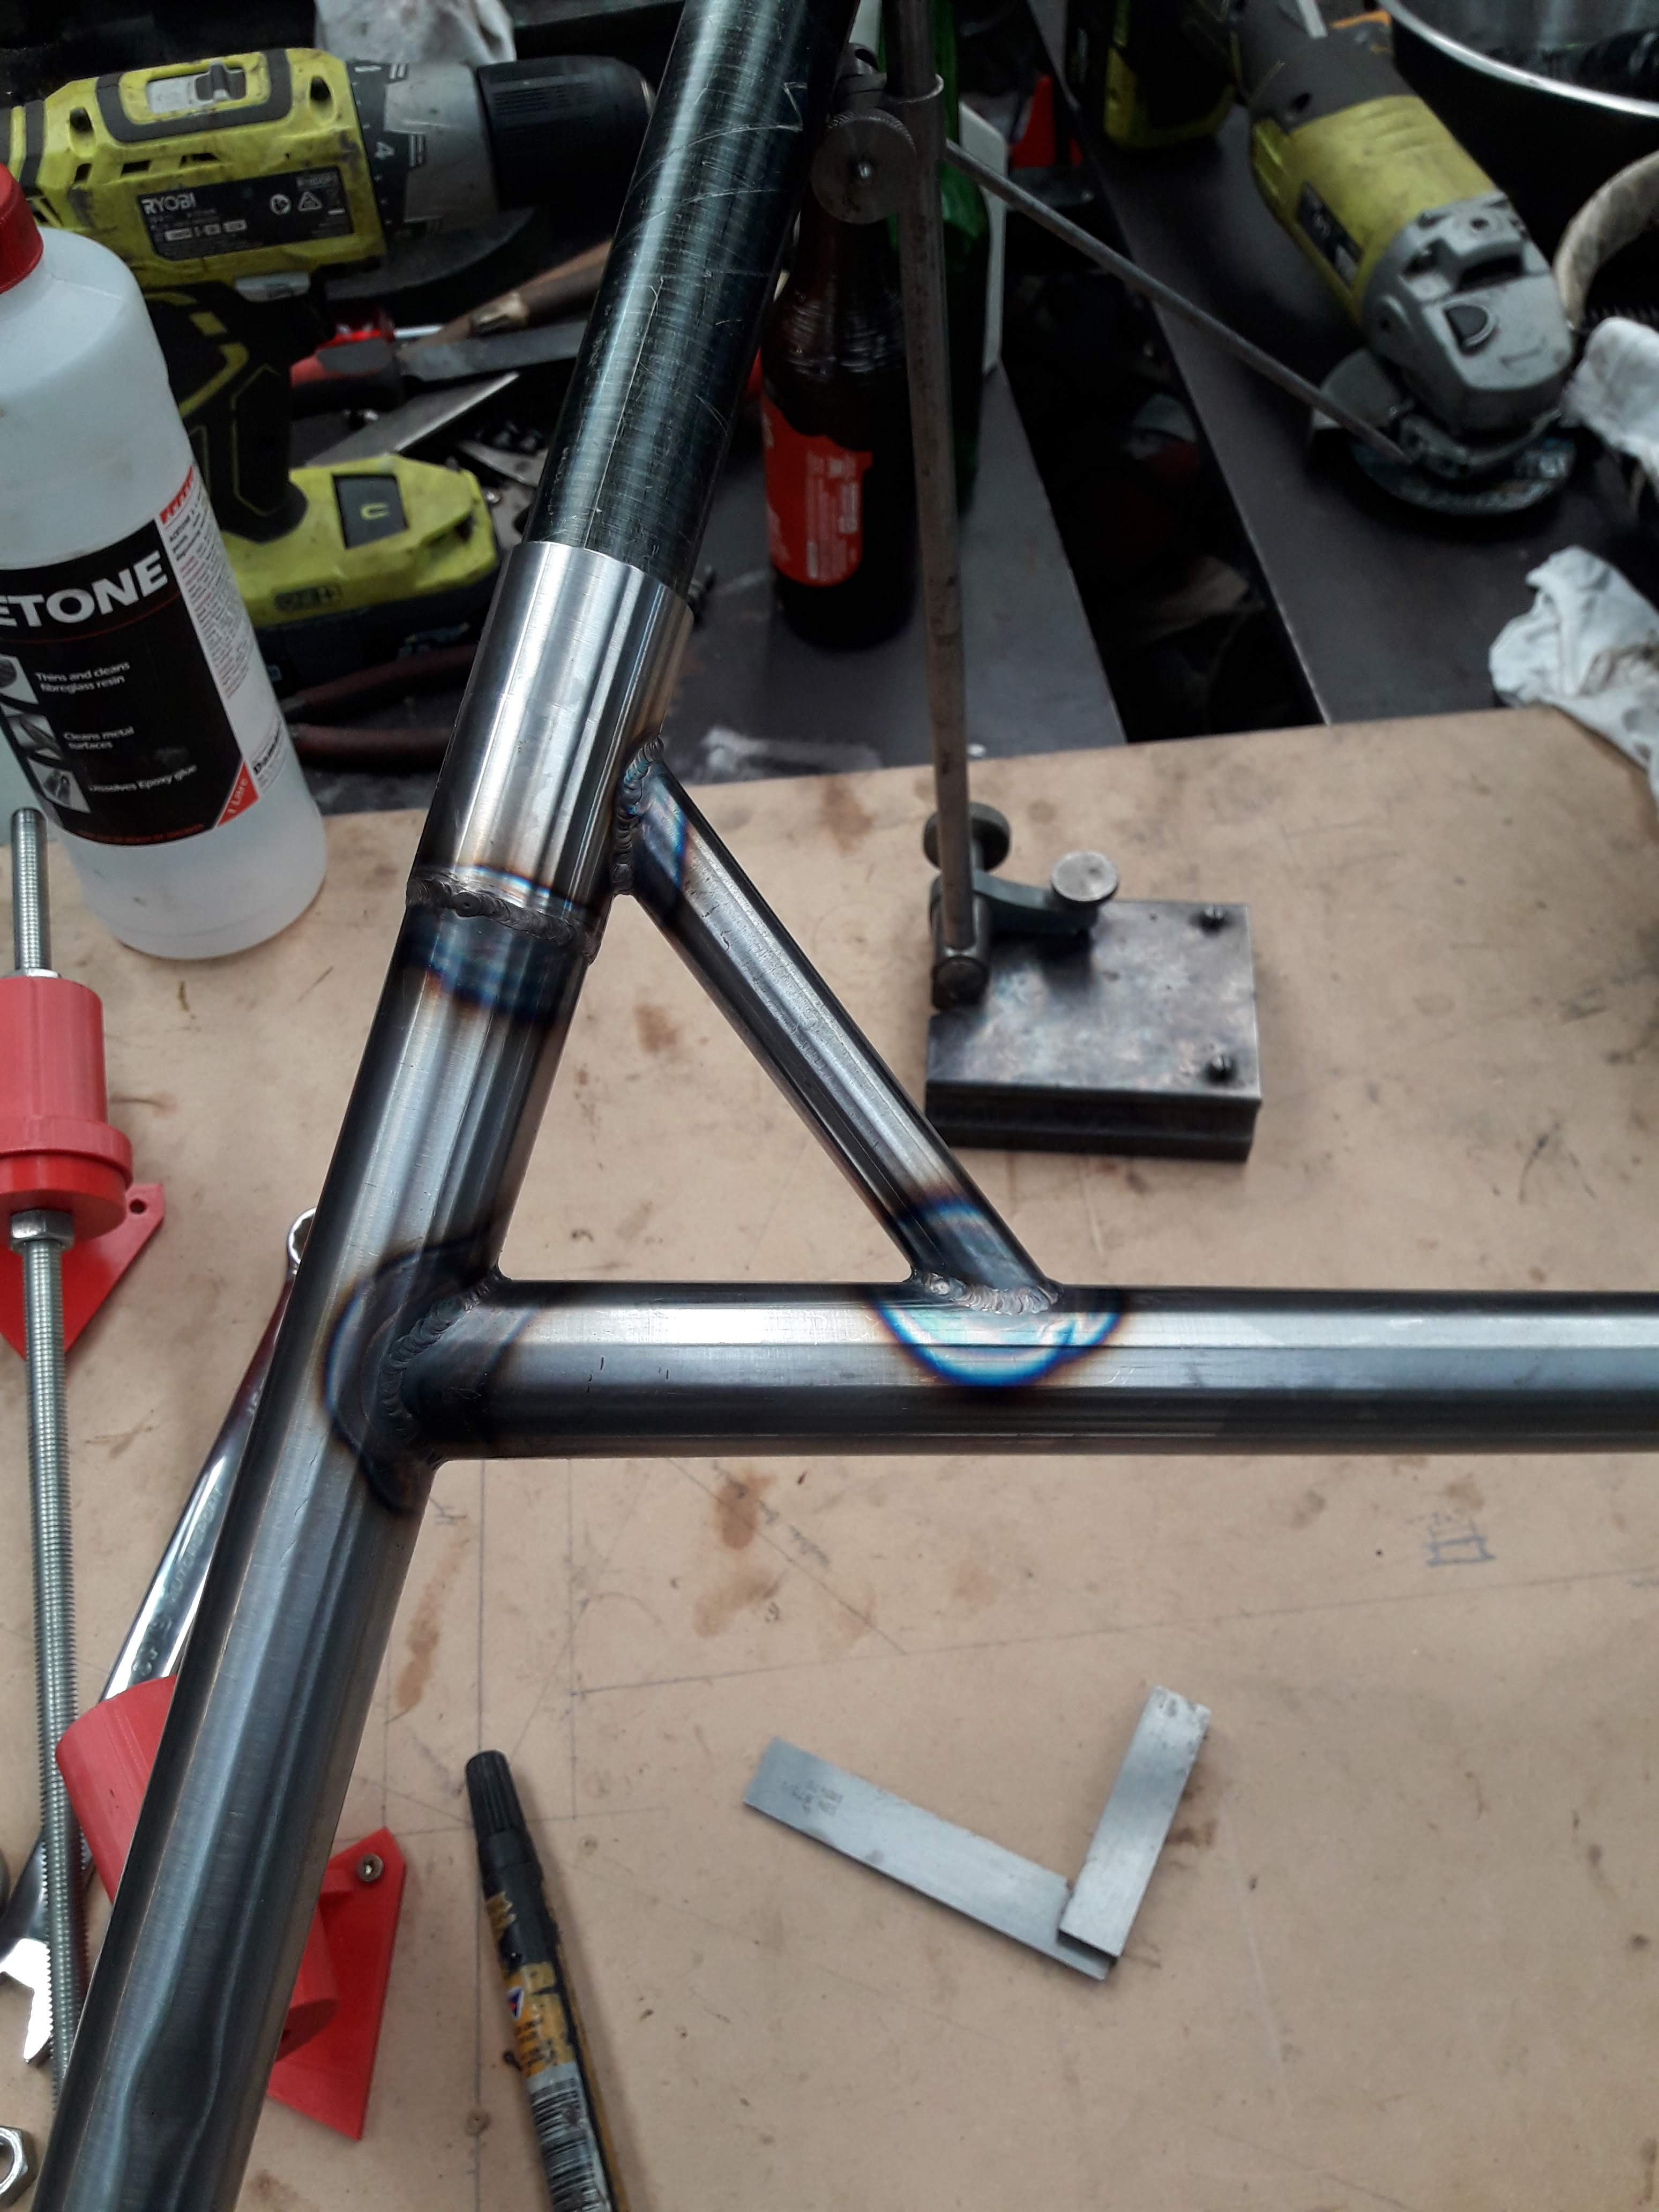
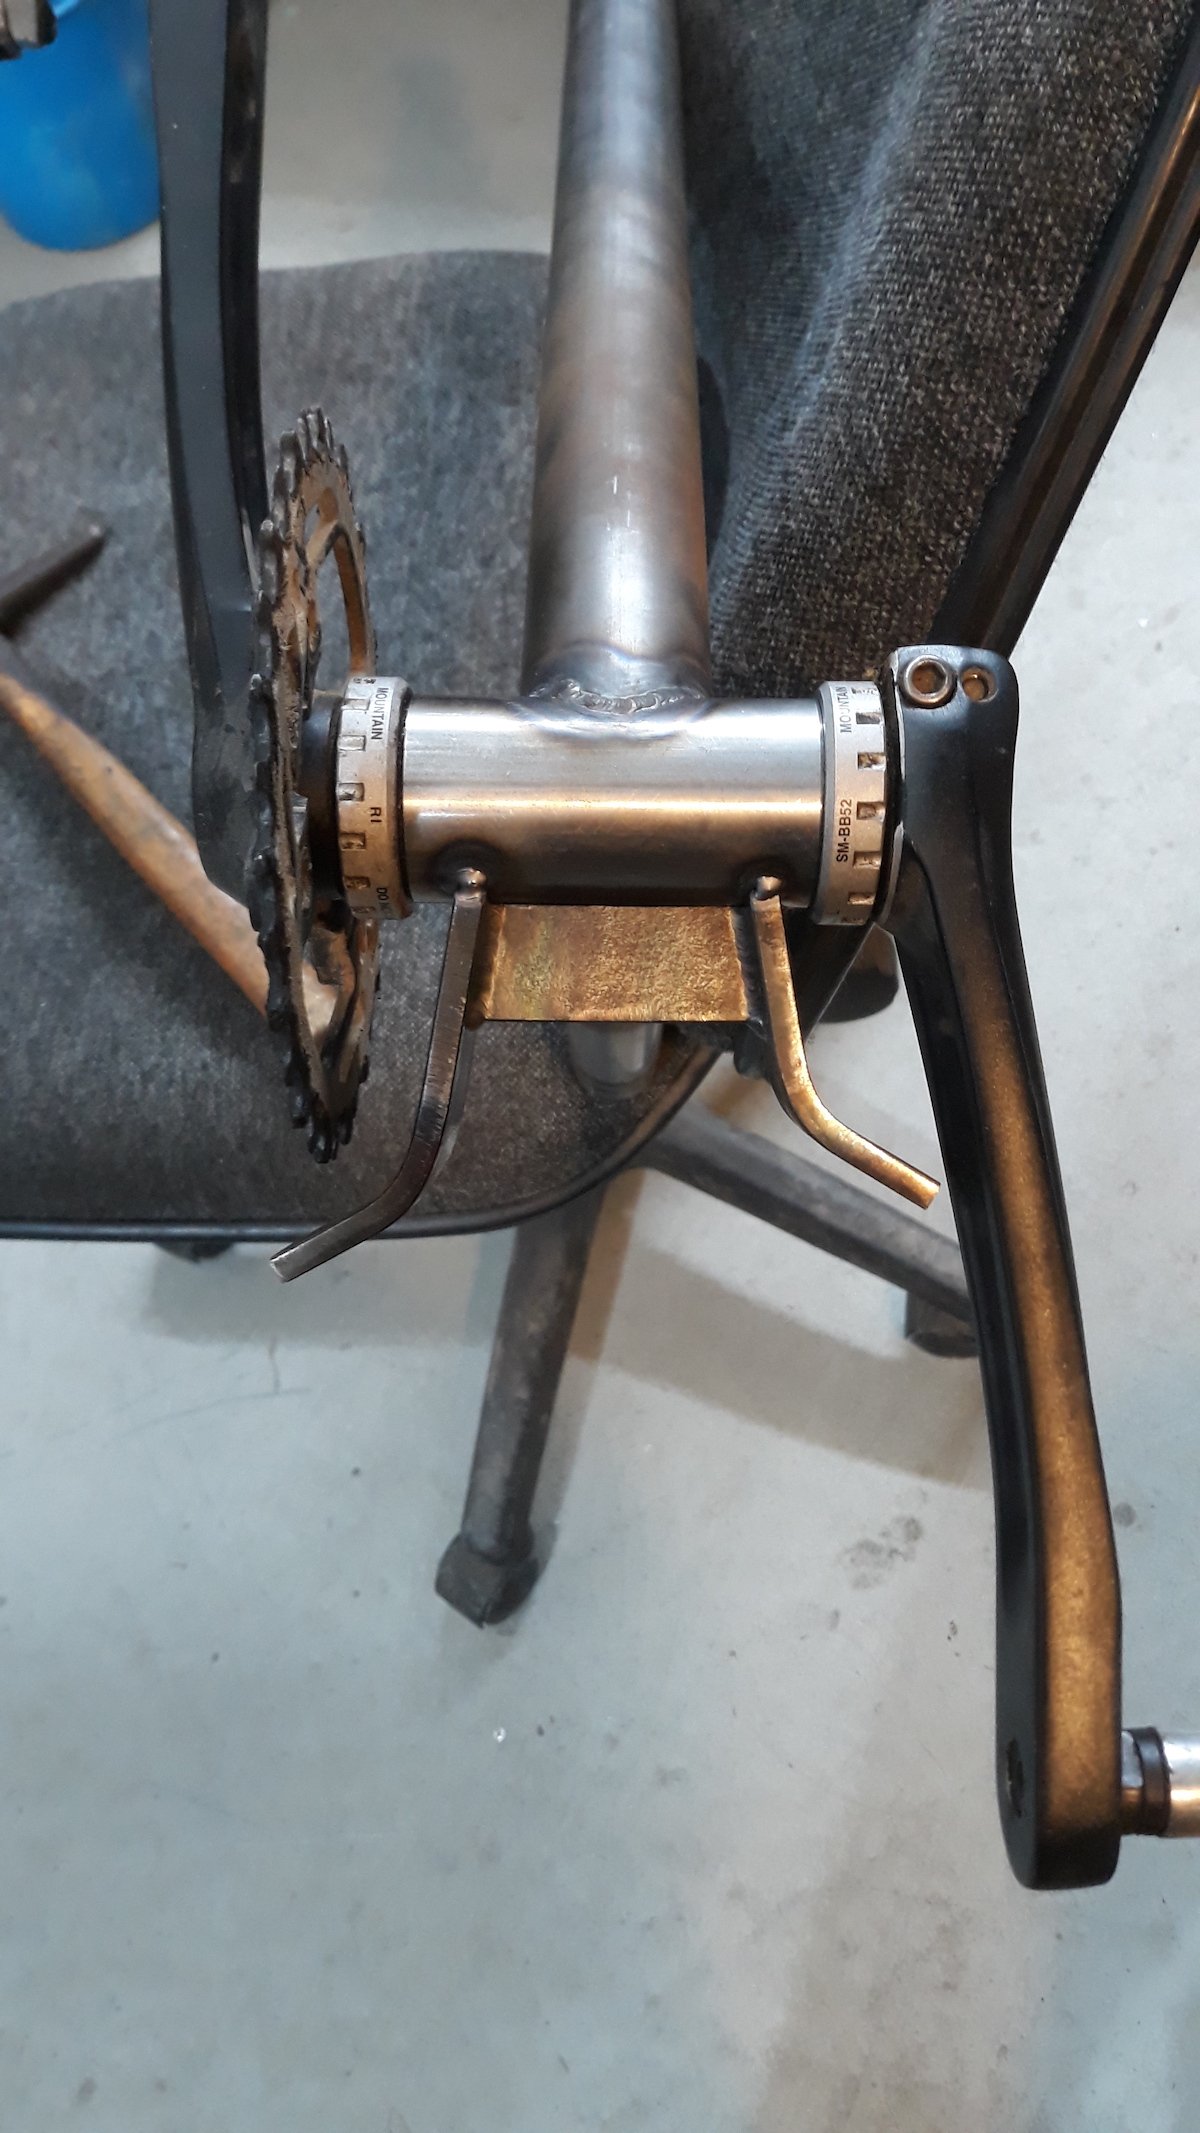
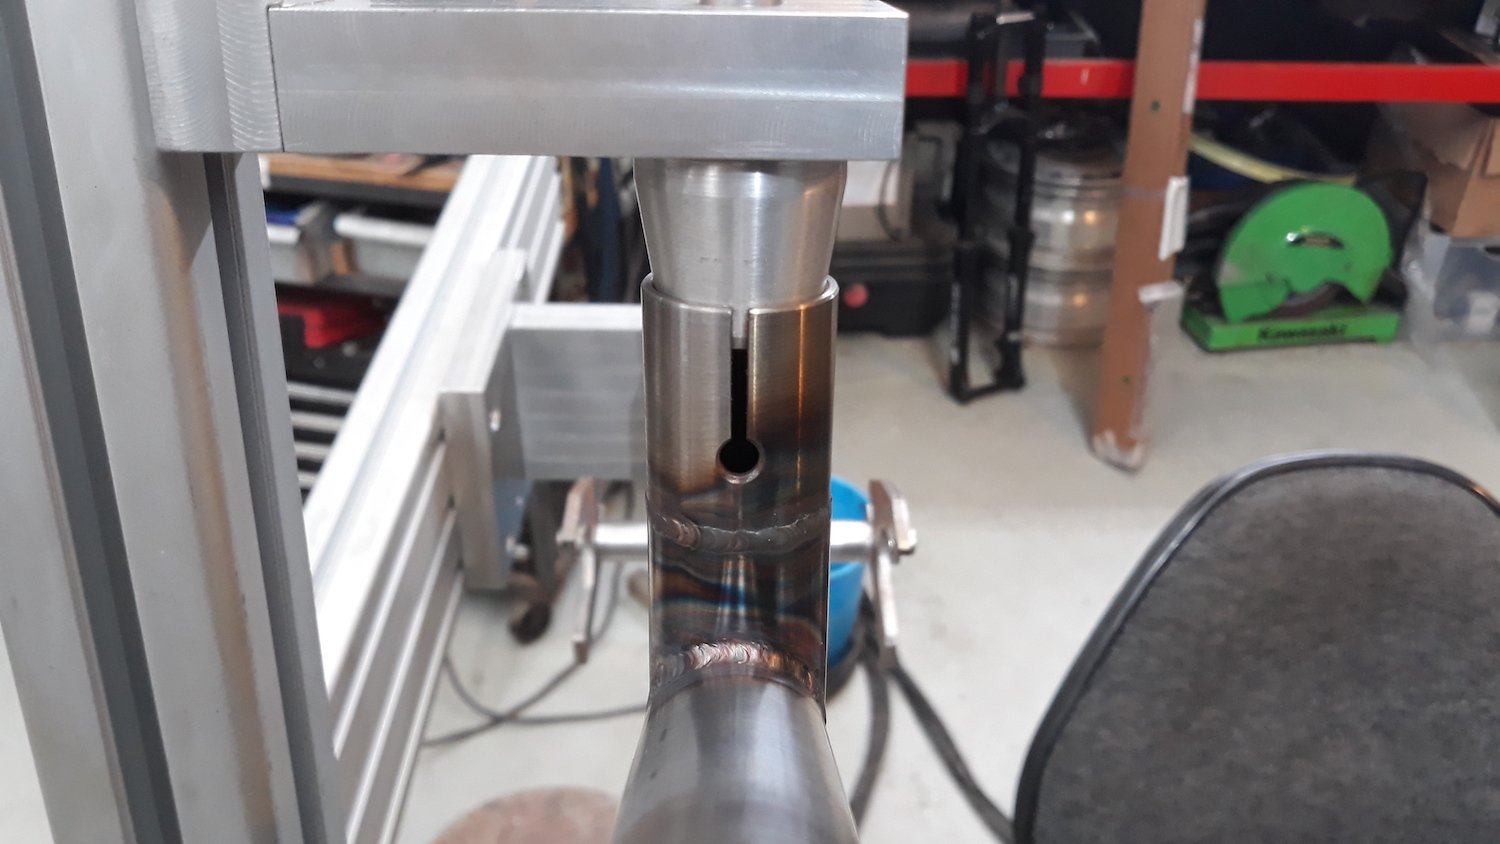
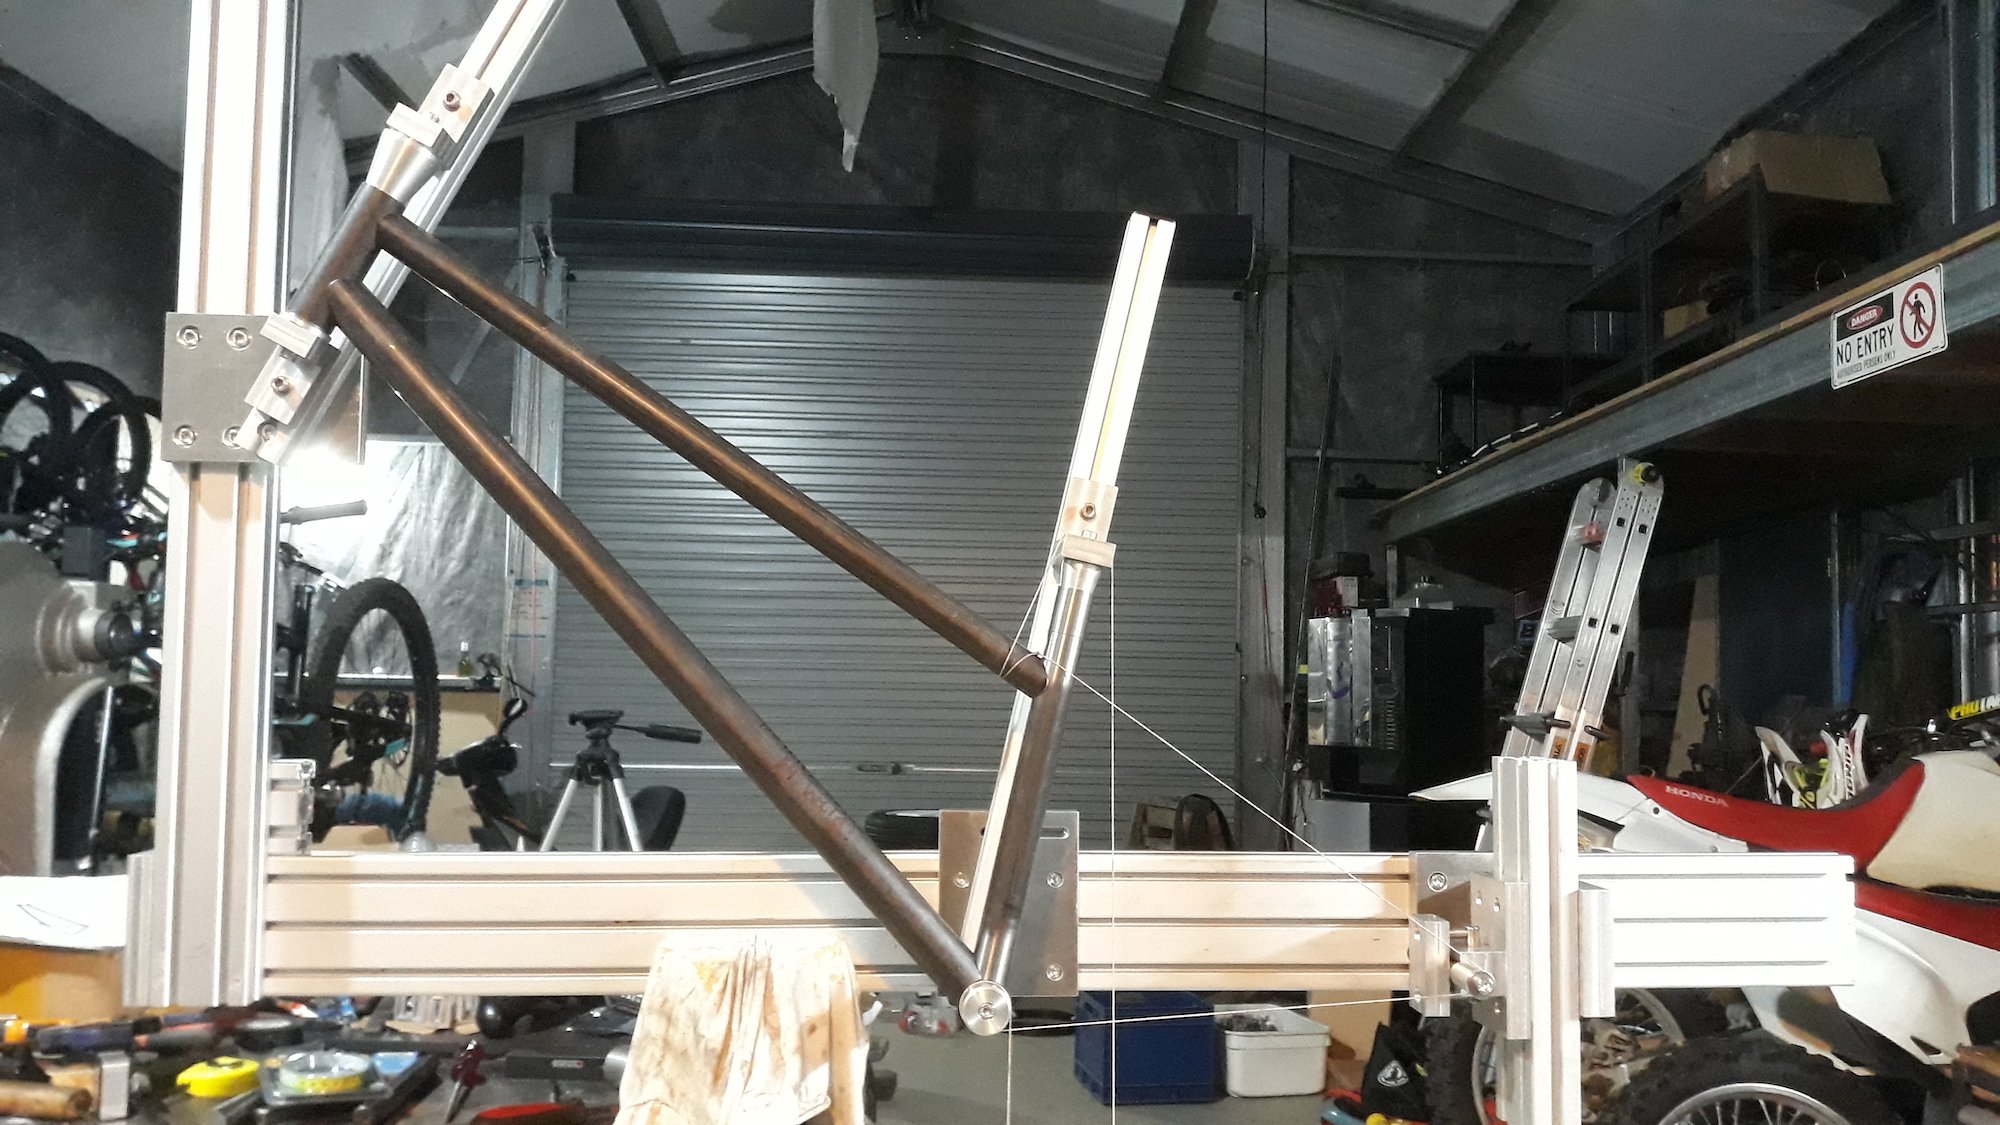
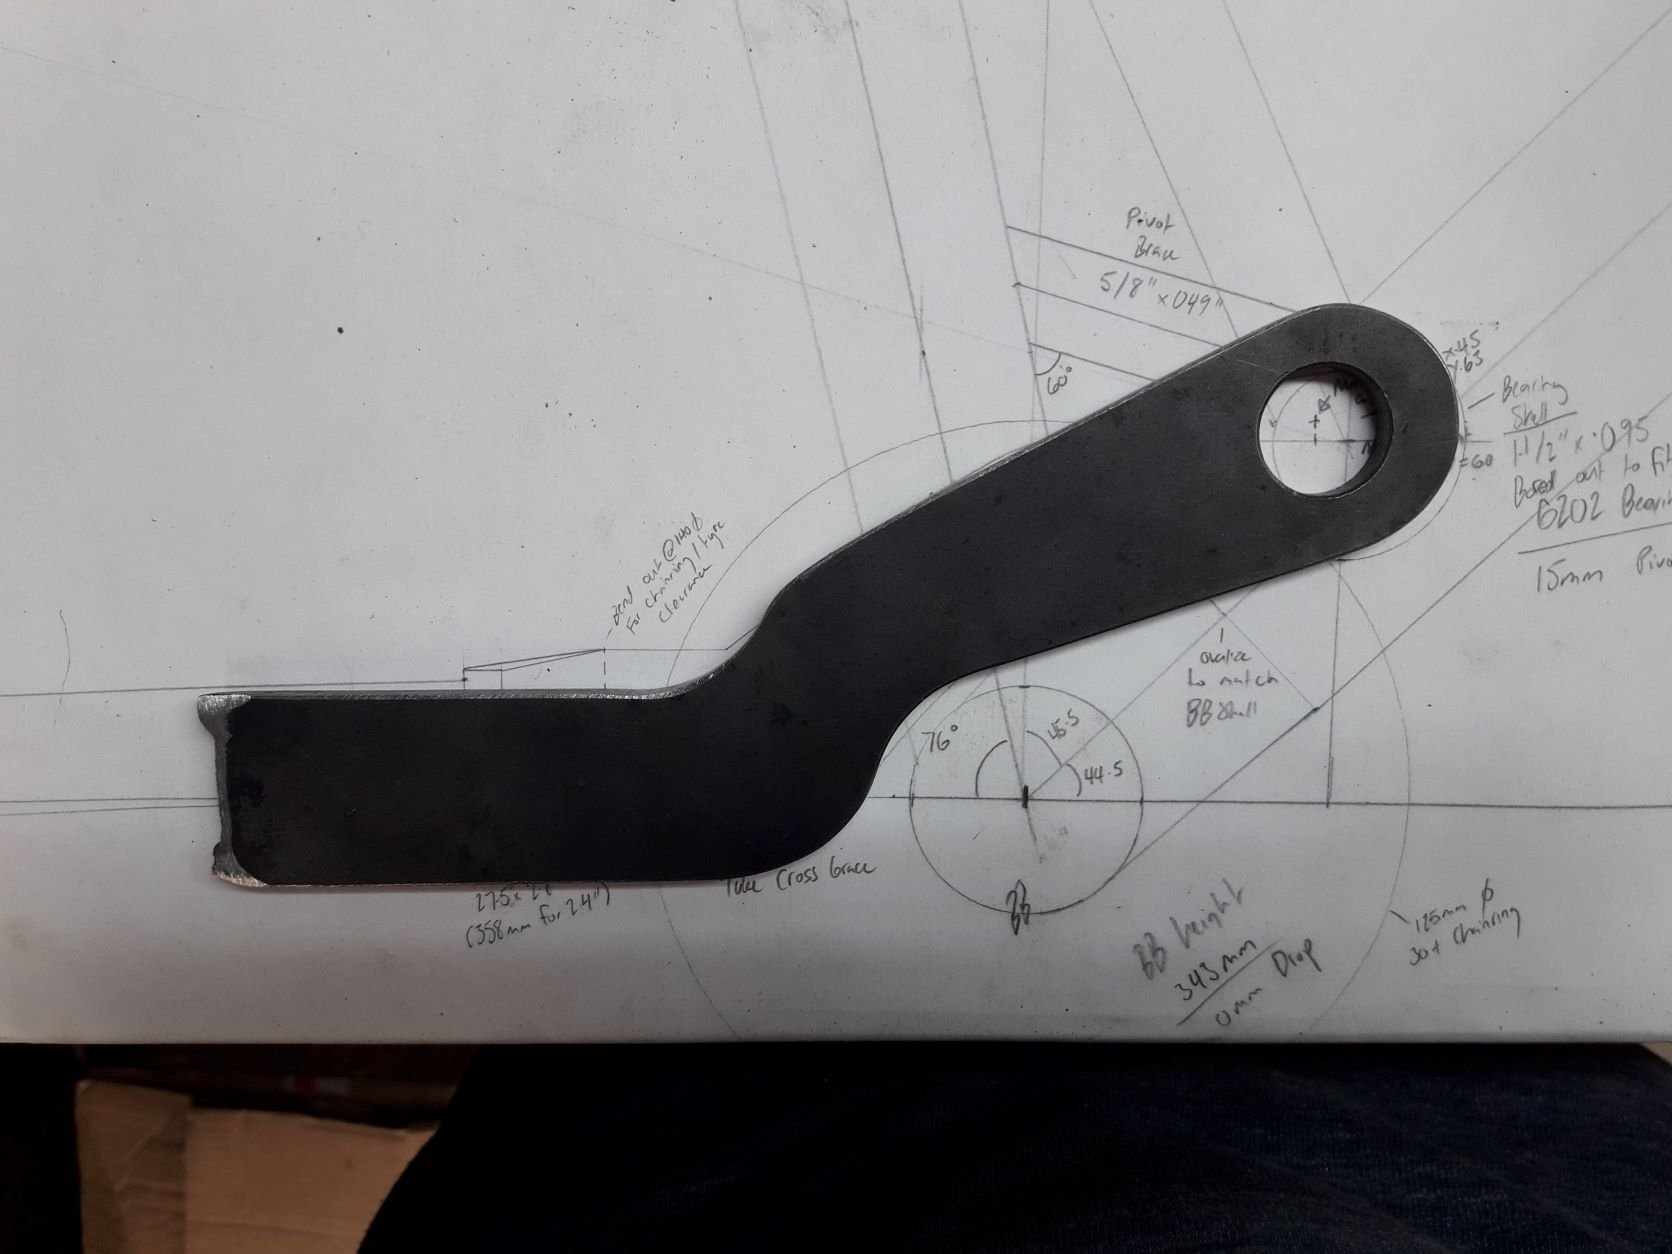
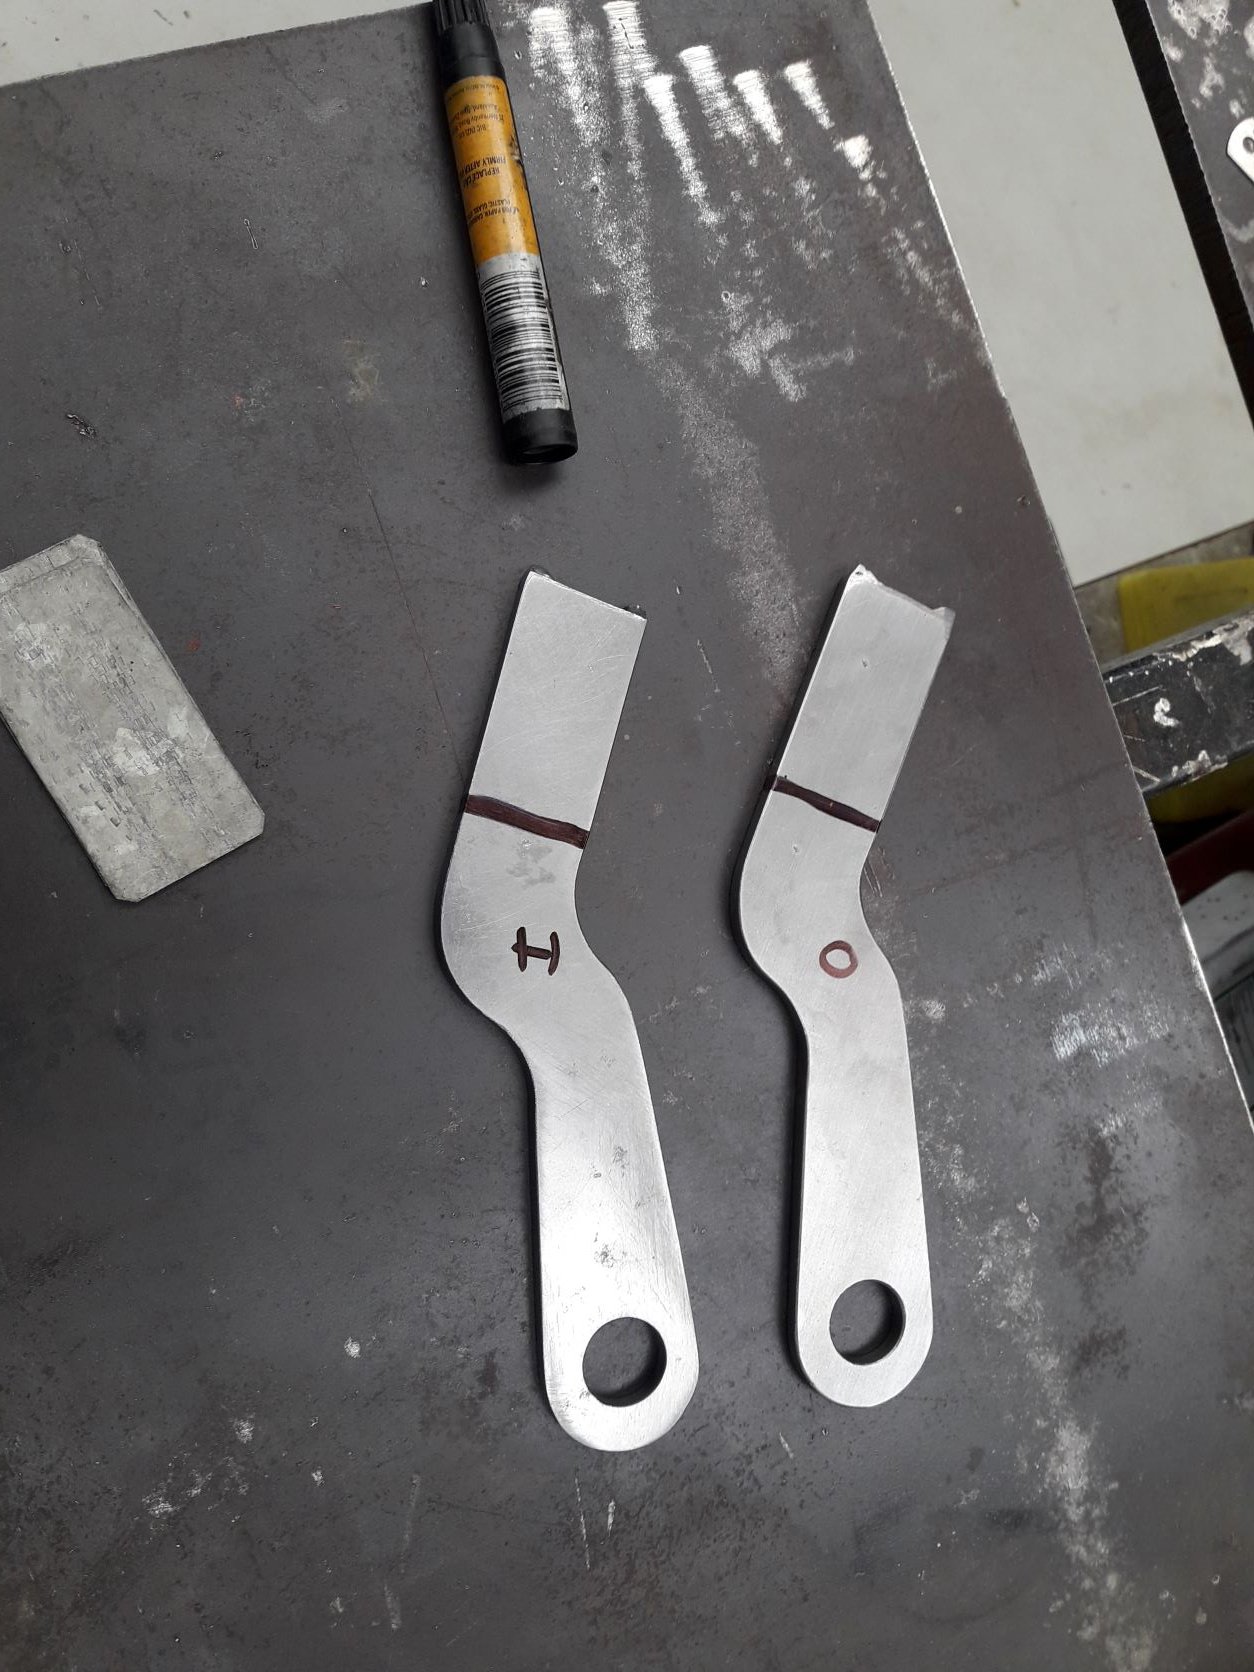
So for bike number 3 I decided that my previous 2 bikes were far too practical and that I need to make something that is almost useless. Well not really but thats is pretty much how it turned out. Most of the design decisions were made for 2 reasons. First reason is that I wanted to make a bike with as short a chainstay length as possible as that has a few advocates in the frame building world. I'm not convinced and think that it should be a ratio of front centre to rear centre, so if the front gets longer the back should too to maintain a neutral weight distribution between the front and rear wheel. But I don't really know so I figured I would make a long bike with a short rear end and see how it rides. Second reason is that I wanted it to be cheap and use as many of the parts that were already floating around in my shed. So it has a few odd standards that will make it ineligible for further upgrades in many ways. I had a single speed setup in the stash and sliding dropouts would be easy to make at home and allow for chain tensioning. I had a spare 26" wheelset from a dirtjump bike that I had built up then decided I didn't really like and then sold off the frame, so I made it to suit this wheelset with a 10x135mm axle. I made a chainstay yoke out of 25x6 flat bar with a couple of bends and the dropouts are from some 6mm plate. After putting all the parts in the jig its a just a game of connect the dots. So much easier! there are still some processes with getting tubes mitred that I need to make tools for, particularly the seat stay to seat tube interface. It intersects at an angle on 2 planes so I really would like to make a jig for the seat stays so I can just pop the mitering jig in the milling vice and get a nice clean cope. that is probably next on the to do list after building @hampie a bike. I made a reducer to go in some straigt gauge 31.8mm tubing to fit a 27.2mm seatpost. I slotted it on the mill with a tiny wee endmill spinning at 4000rpm. that was quite exciting but it came out pretty well I think! I borrowed @Geophy's bramley bender and had a go at bending up some seat stays. they came out ok, a little wrinkly on the inside. Probably could have done the packing with sand or ice trick. I mostly covered it up with a little brace that I was super happy with, I recon it looks cool.
-
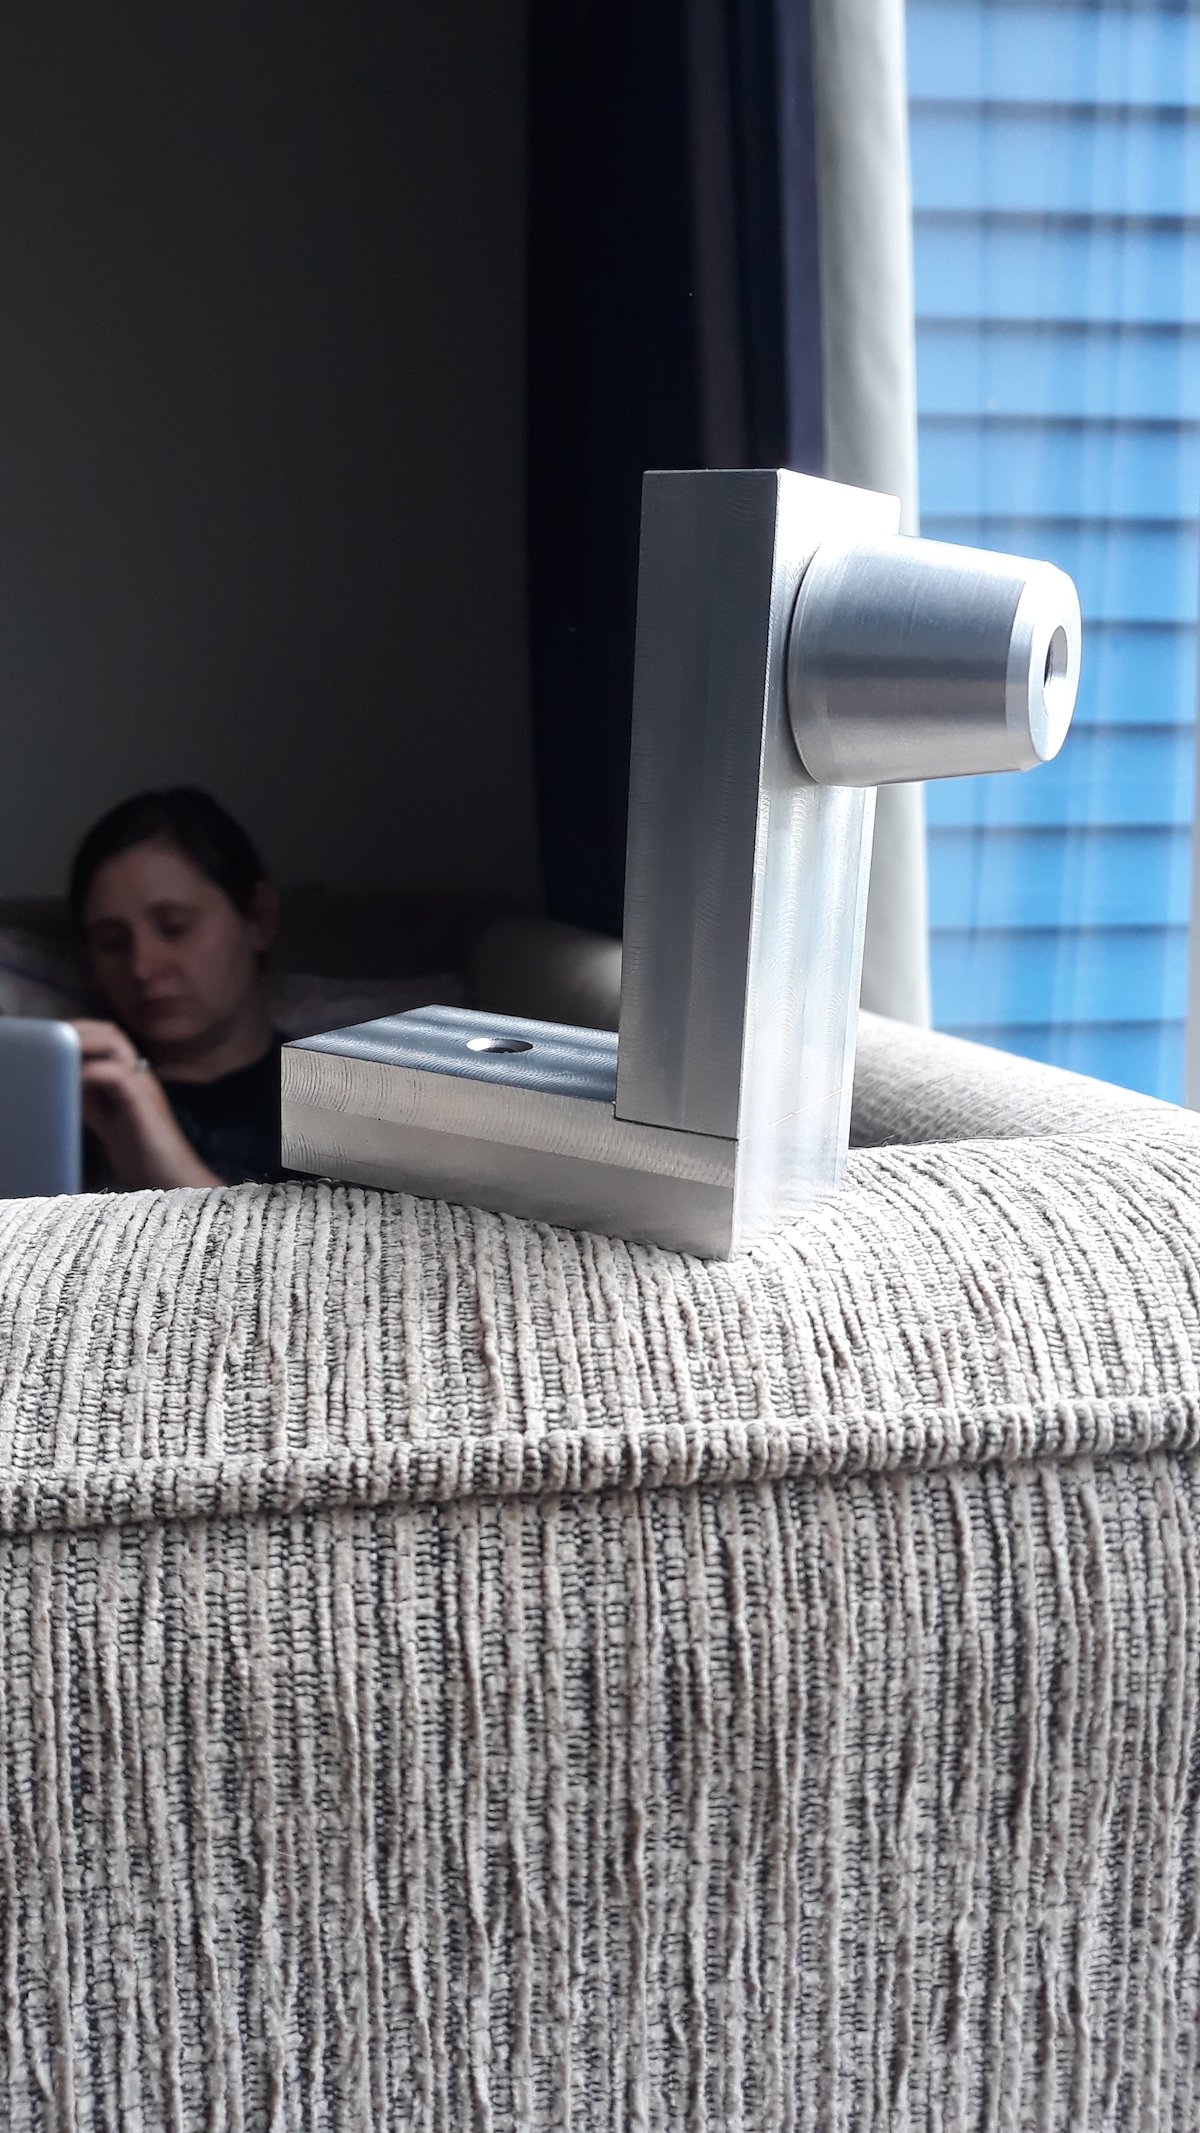
After the great success of the Llama based seat post alignment tool design I decided that maybe the dummy axle holder would work well if it looked like a duck. With that done a dummy axle and clamp followed shortly after And that is the jig mostly done. Certainly done enough to make a bicycle with.
-
Next I made a small legless llama another L bracket thing for centring the open end of the seatube. Almost immediately this happened: Wow a jig makes life so much easier. that front end went together in a matter of 3 or so hours without even trying to be efficient. Bike number 3 was underway and the jig wasn't even complete!
-
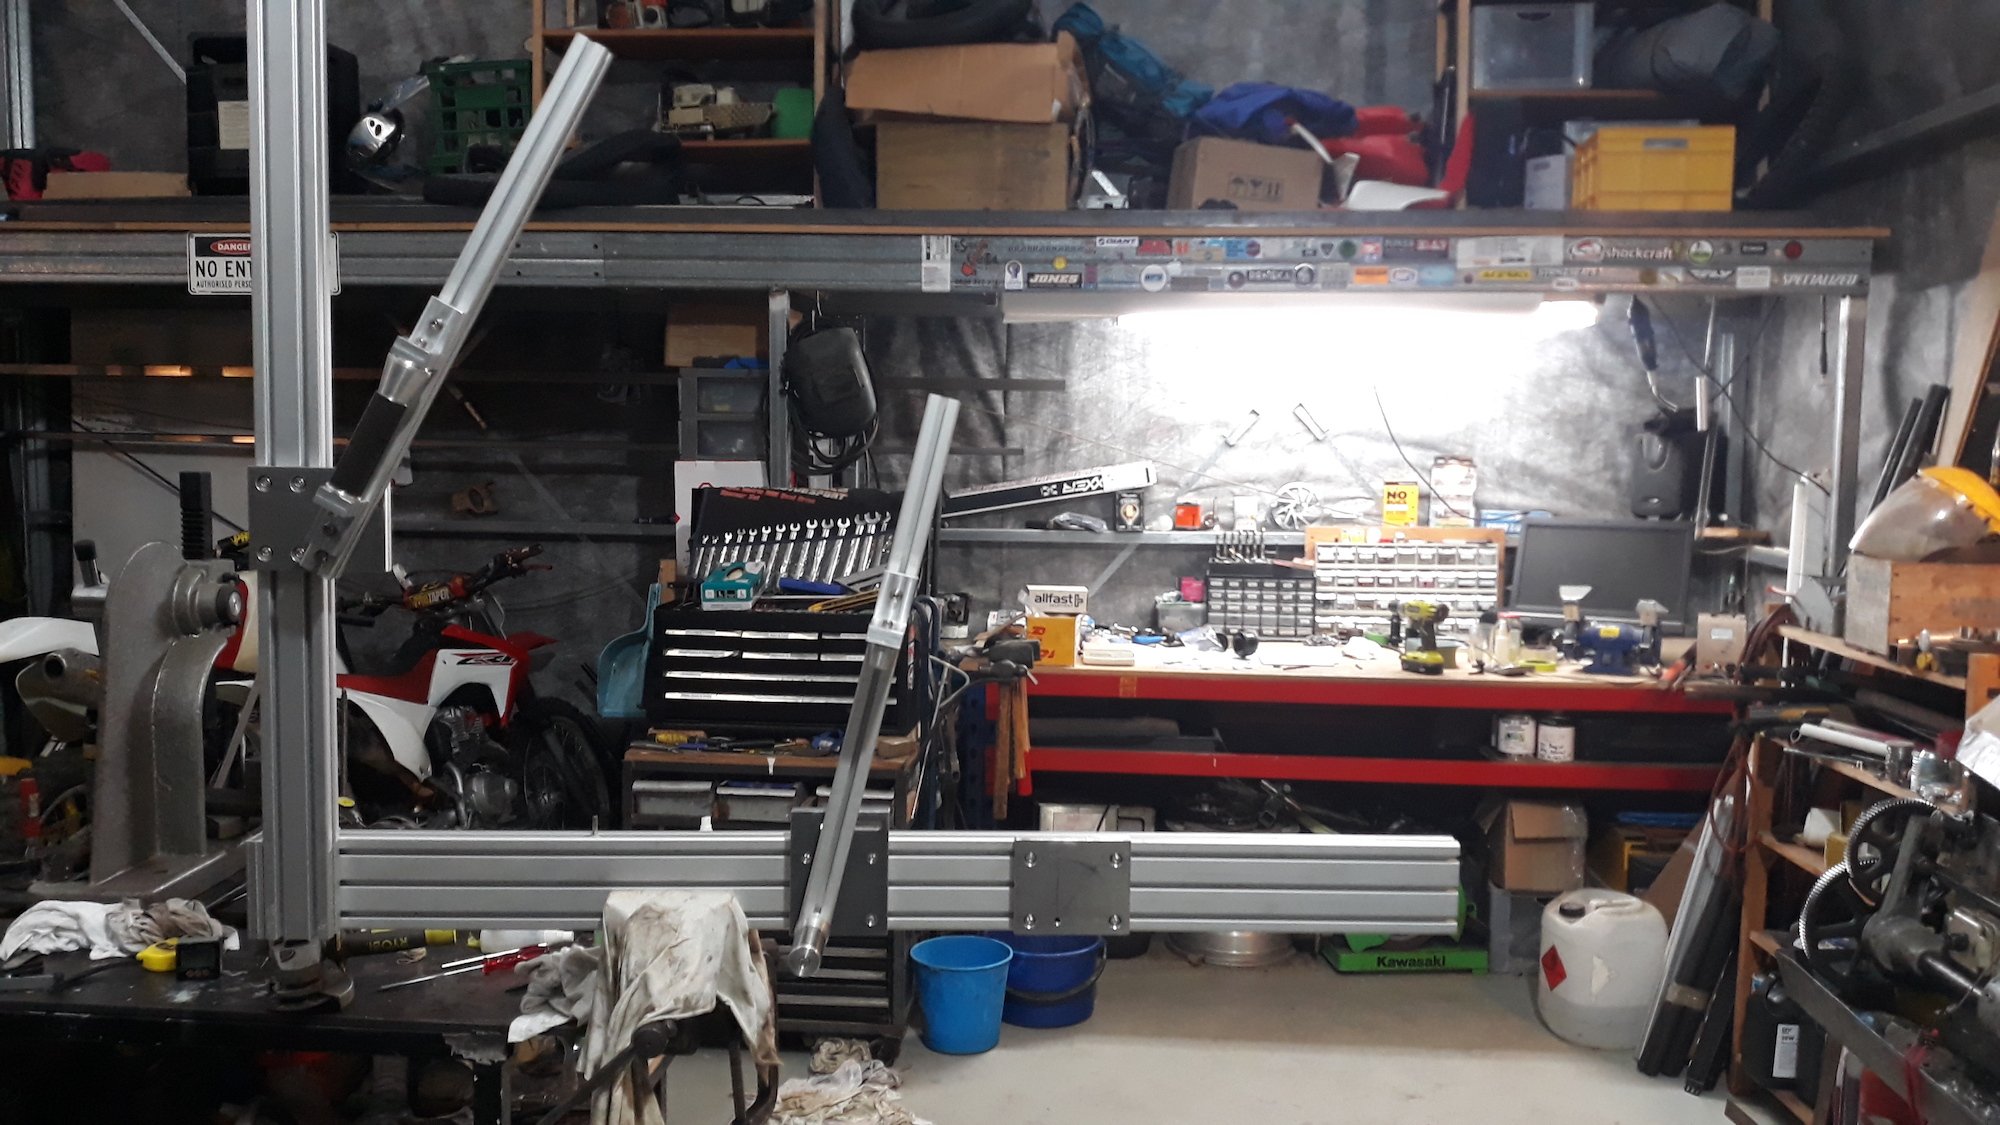
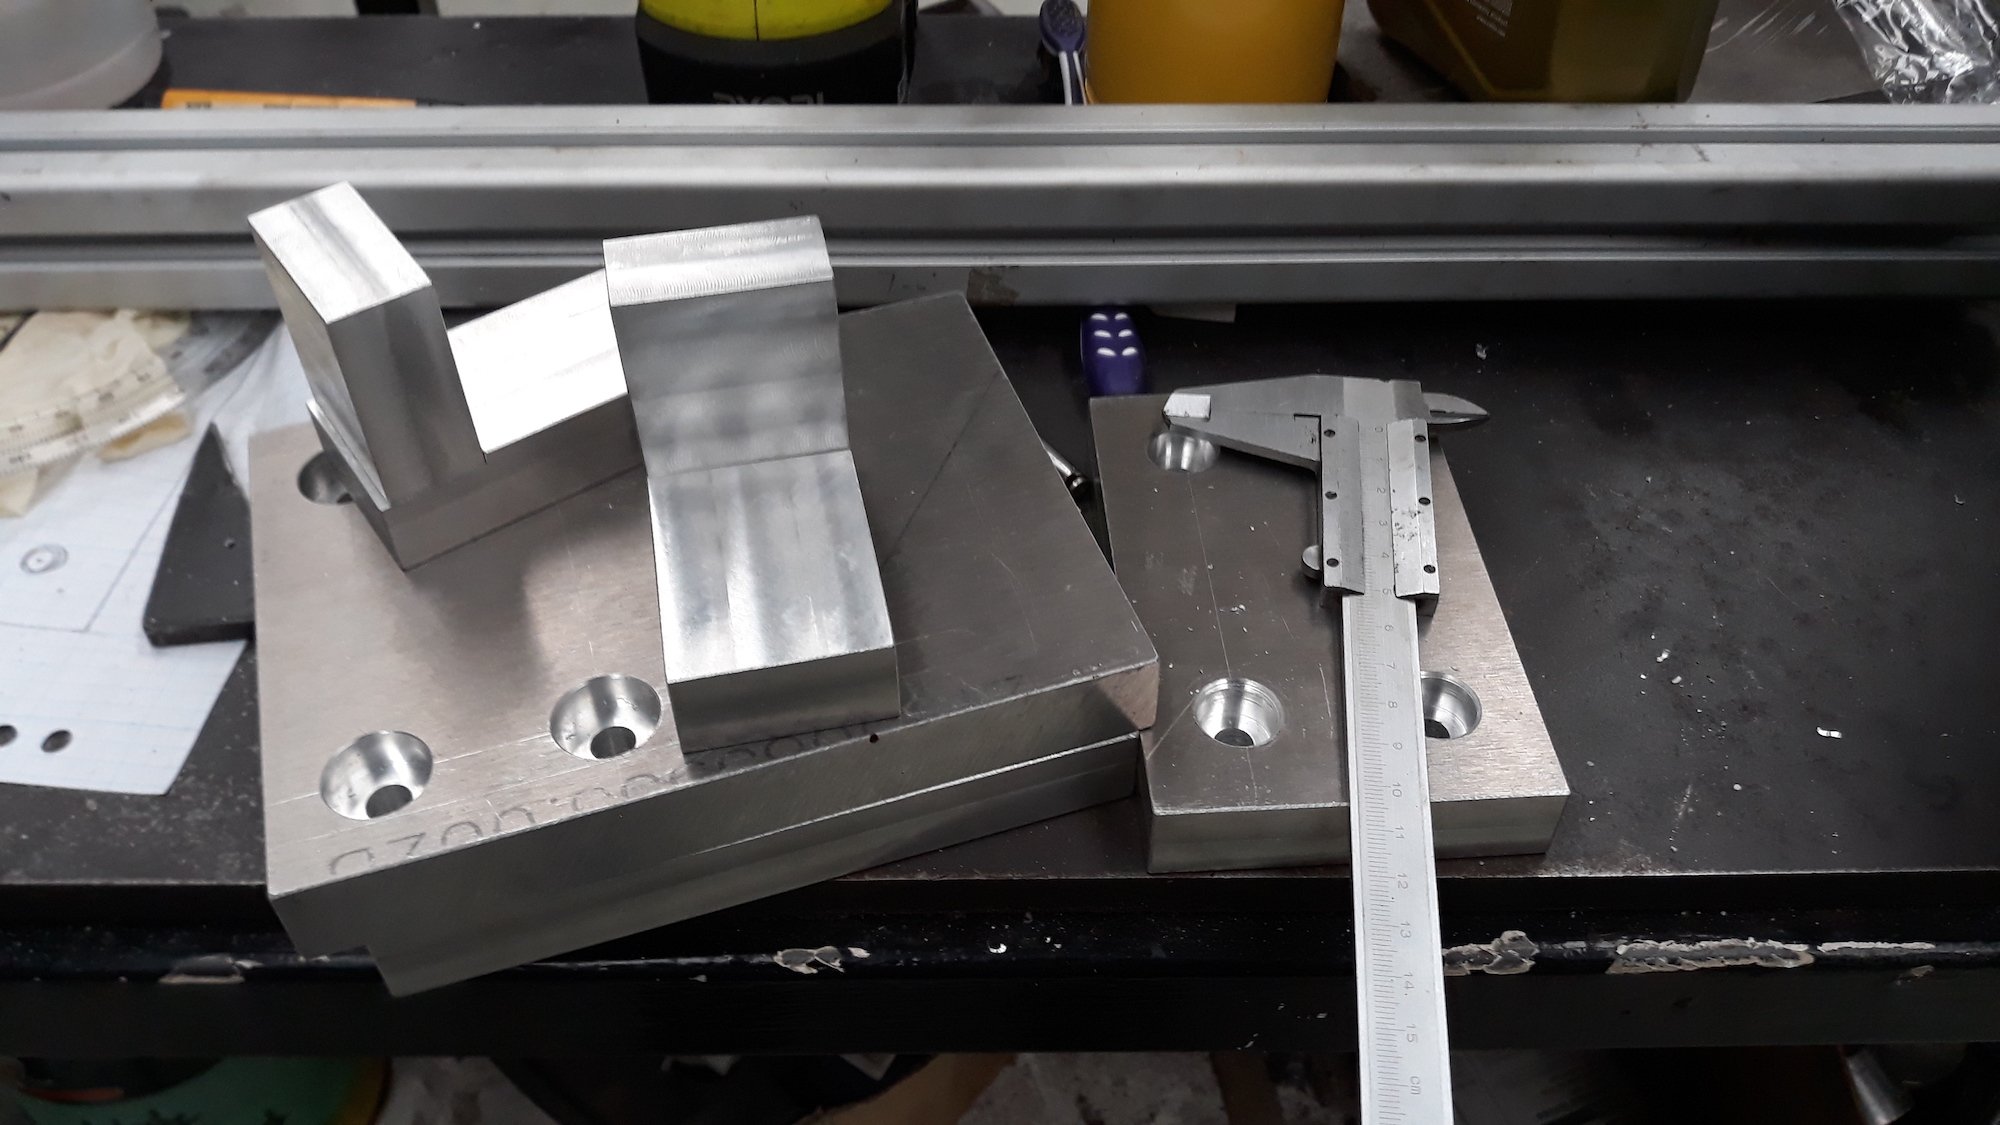
I didn't take photos of all the steps but here's a few of the highlights. I started off by bolting a 4080 extrusion to a 40120 at right angles for y and x axies (axises?axes?) and milled an arc into some plate to make the head tube angle plate. then milled and bolted some L shapes together for the headtube standoffs with a cone on the top end for centring and a stepped platform on the lower to make it easier to measure the lower edge of the headtube. I figured the lower edge was more important as fork length is more critical to the frame design vs stack height which is usually adjusted to suit the rider with stem choice/headset spacers/bar rise etc. The L brackets have alignment dowels to keep them in line with the t slot underneath. Seat tube plate was basically more of the same though I simplified the design a little with a horizontal slot instead of an arc.
-
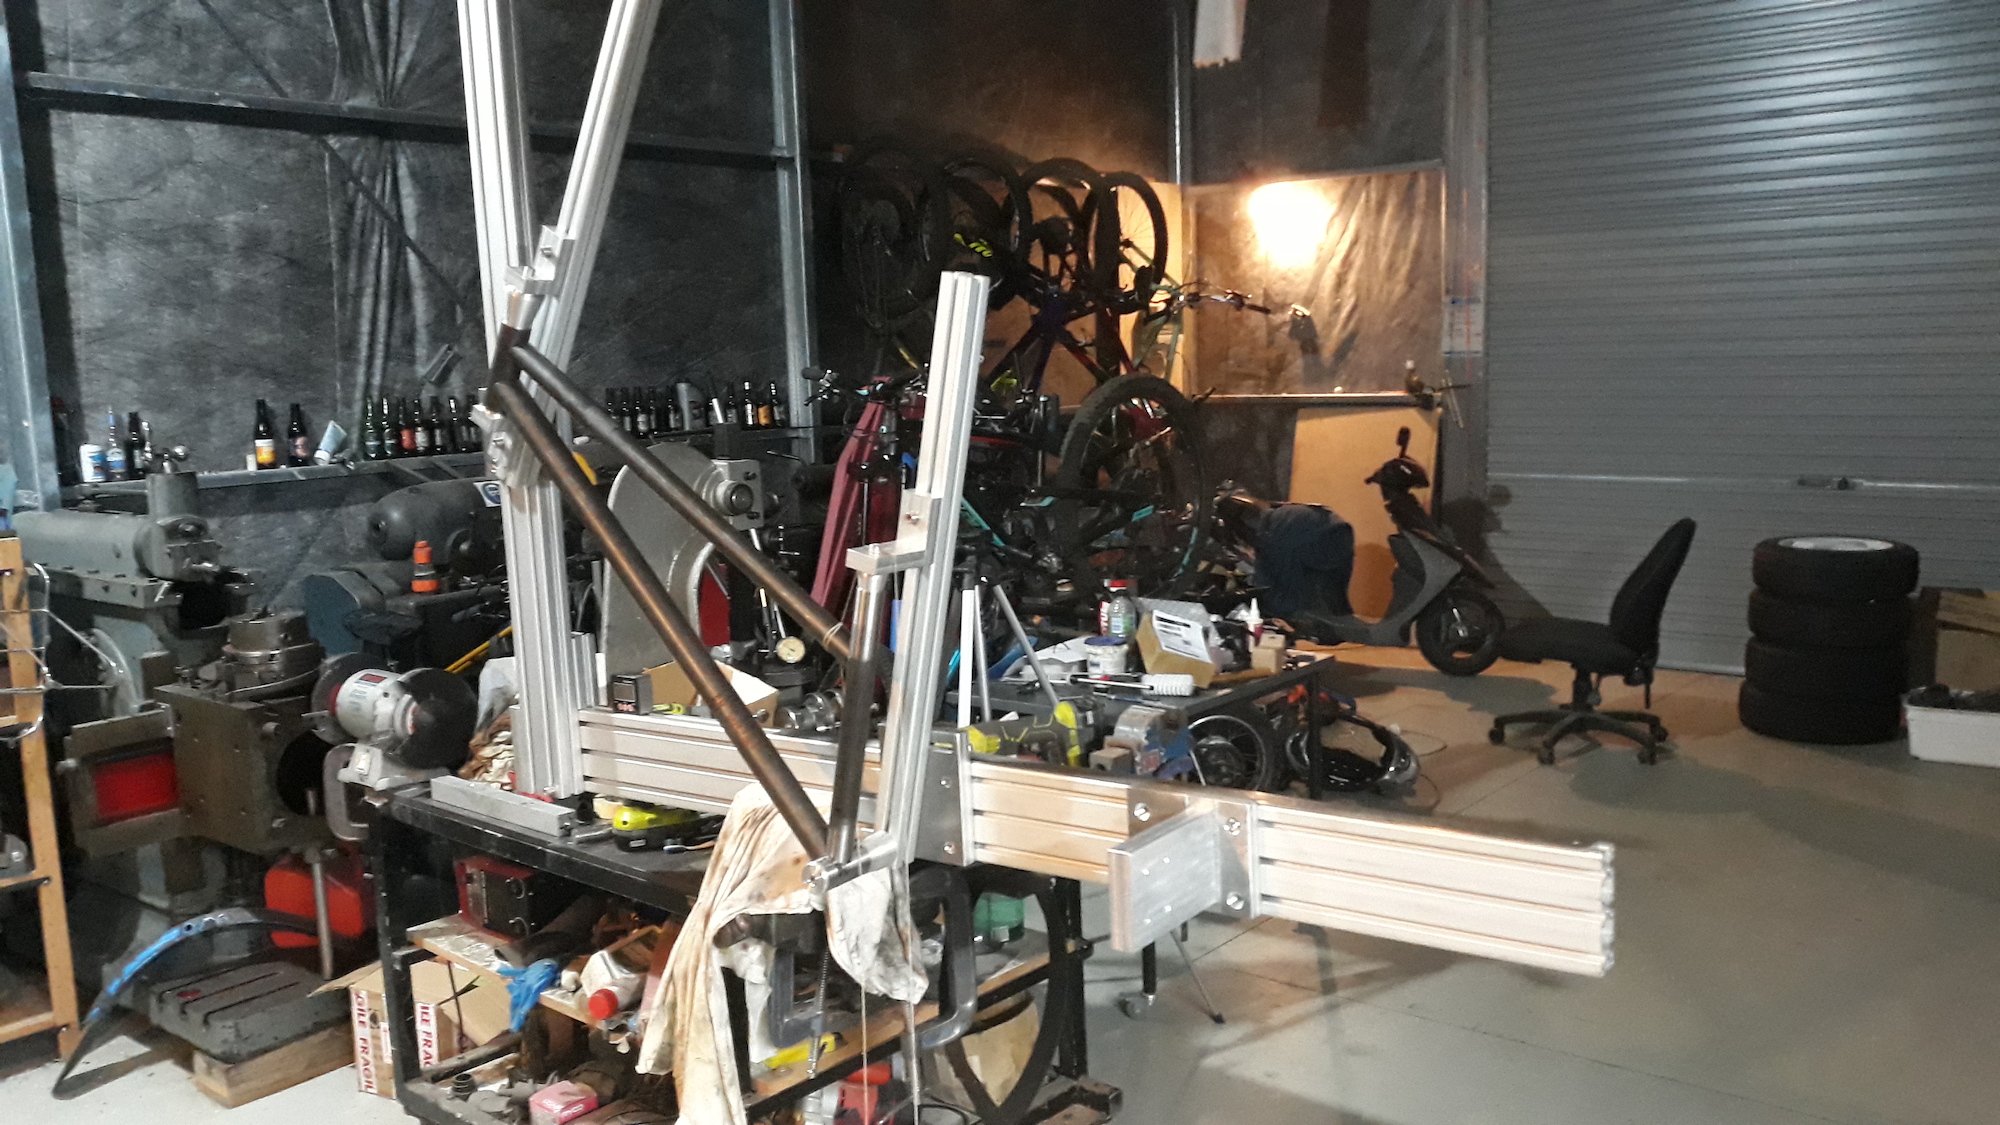
The paint job is a 3 tone fade, mazda starlight silver>1988 GM corvette gunmetal grey>black topped off with 2k clearcoat. I prettymuch use the bike like you would use an enduro bike since it pedals pretty well and it has been getting regular use up Pirongia. Anyway, since then the bike building shannanigans have been ongoing. I decided its finally time to make a jig since the milling machine is now available for use, so I ordered a slab of ali plate and some extrusions and got stuck in...
-
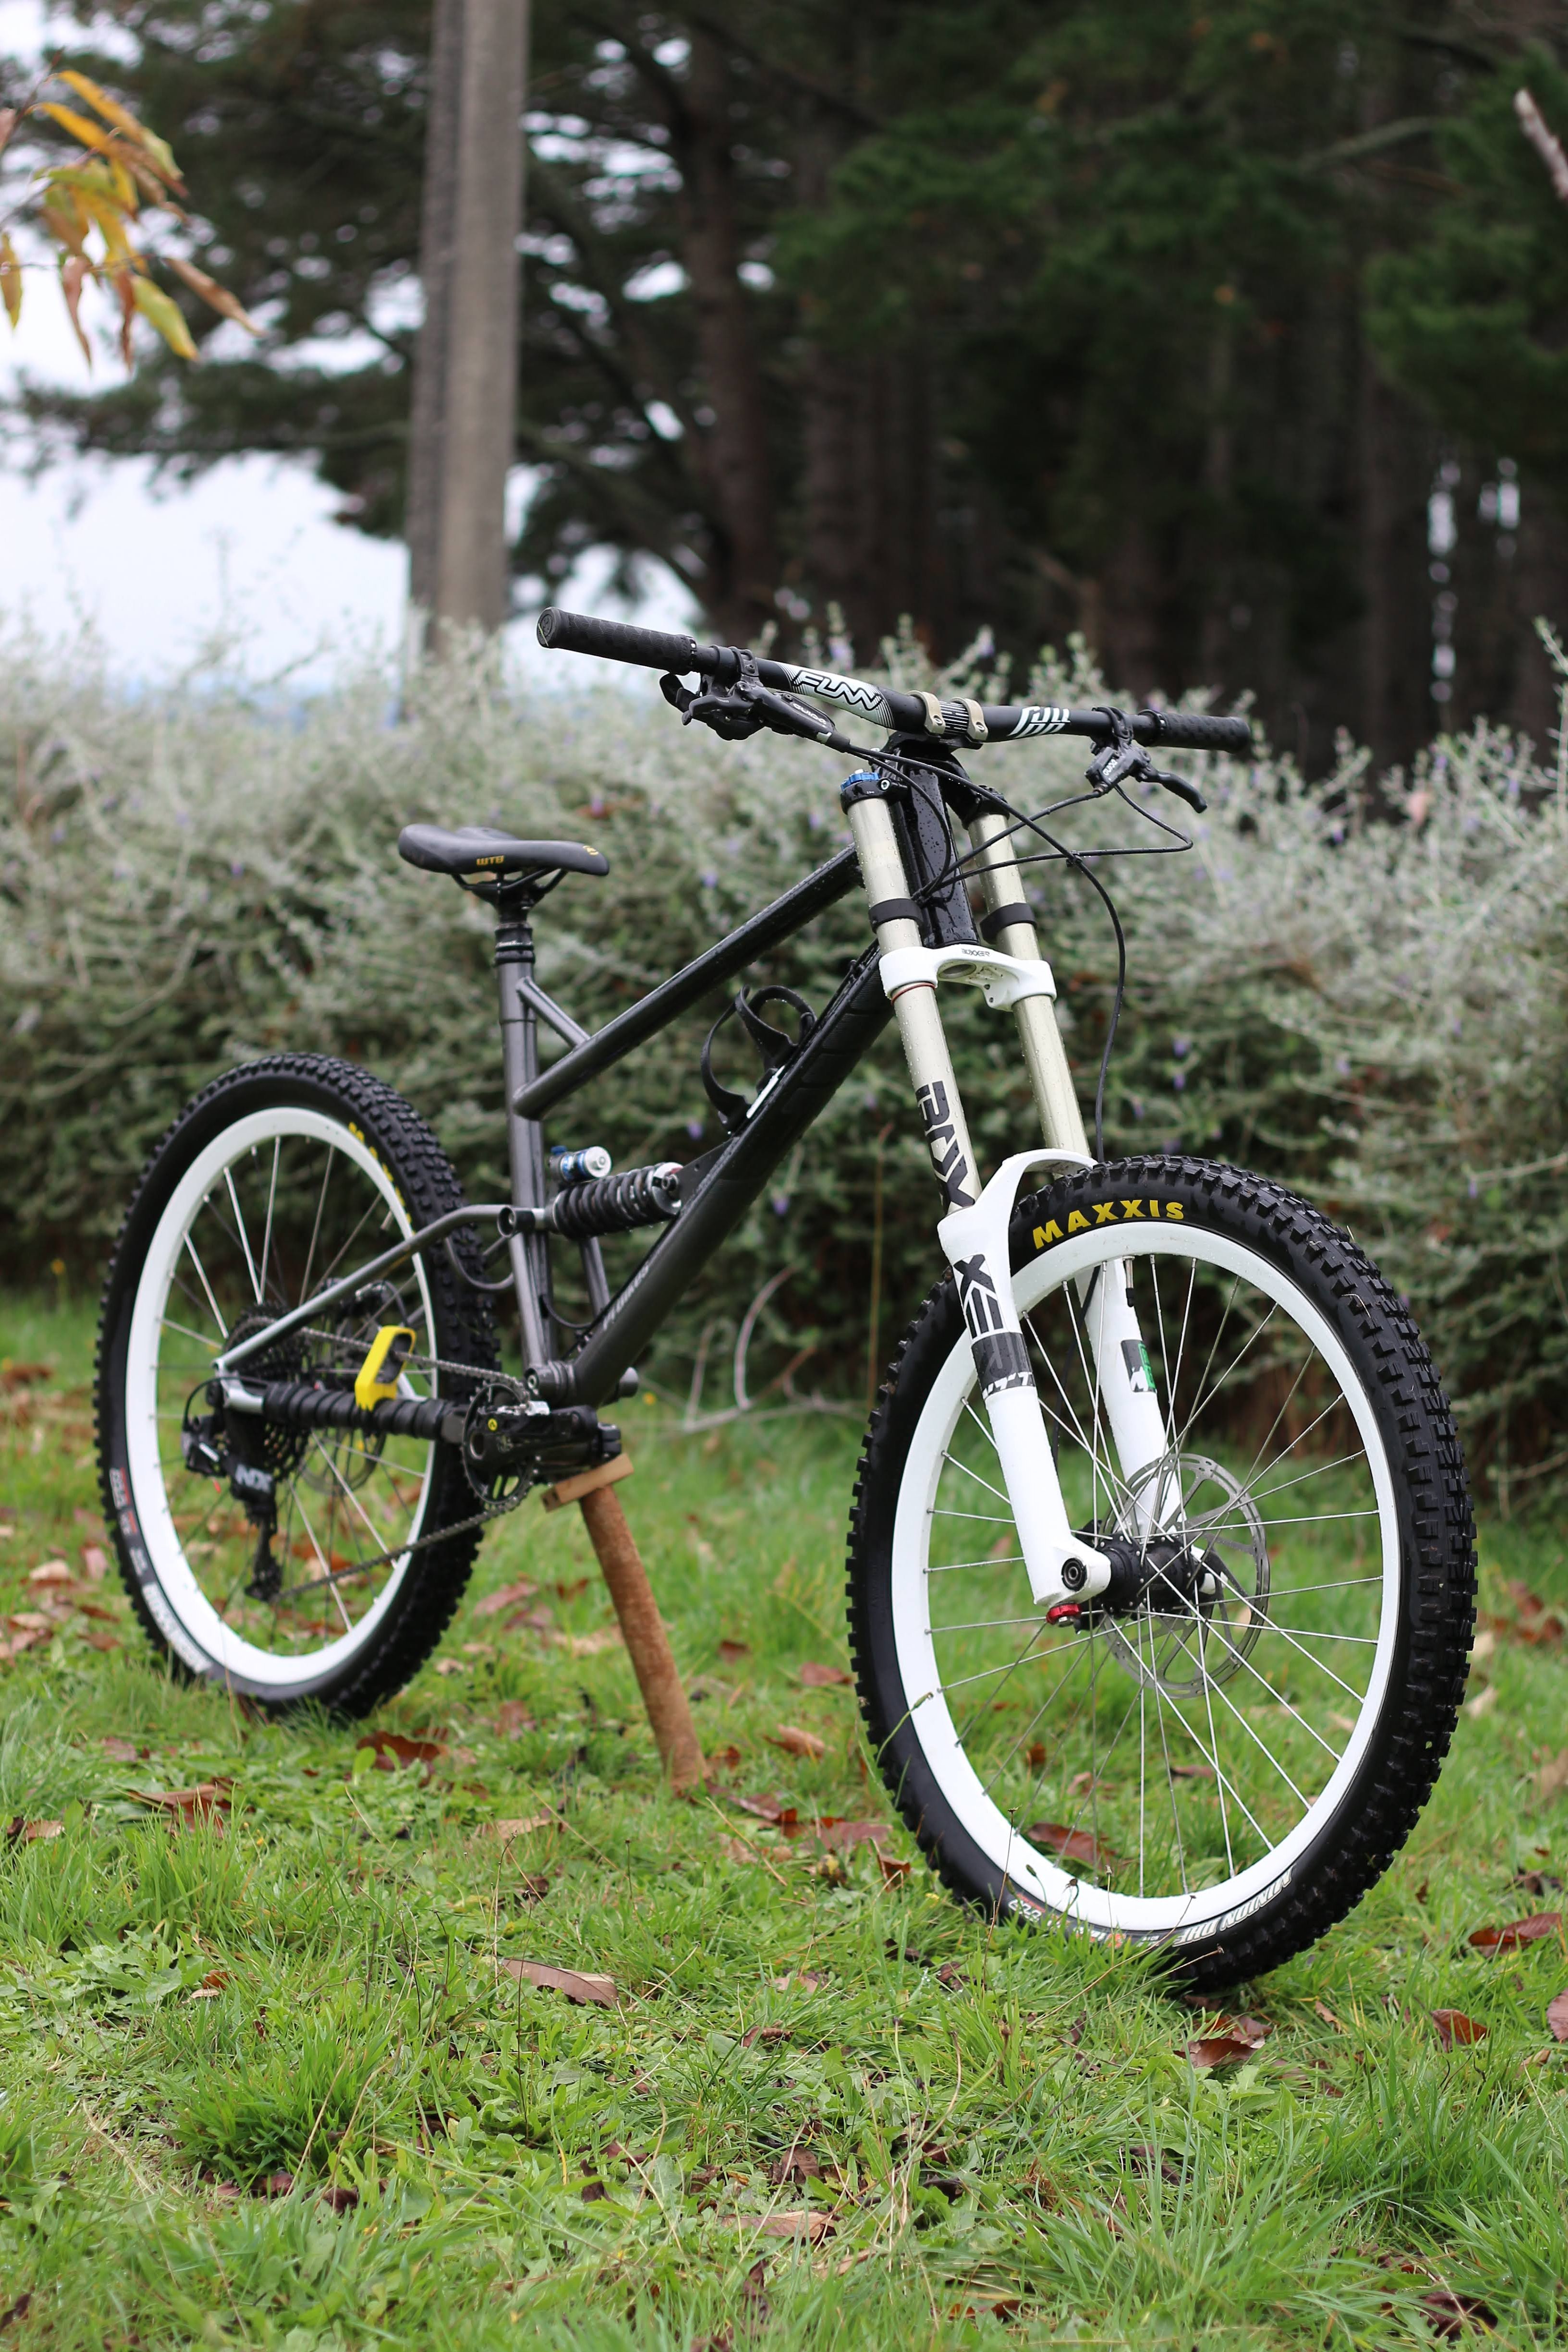
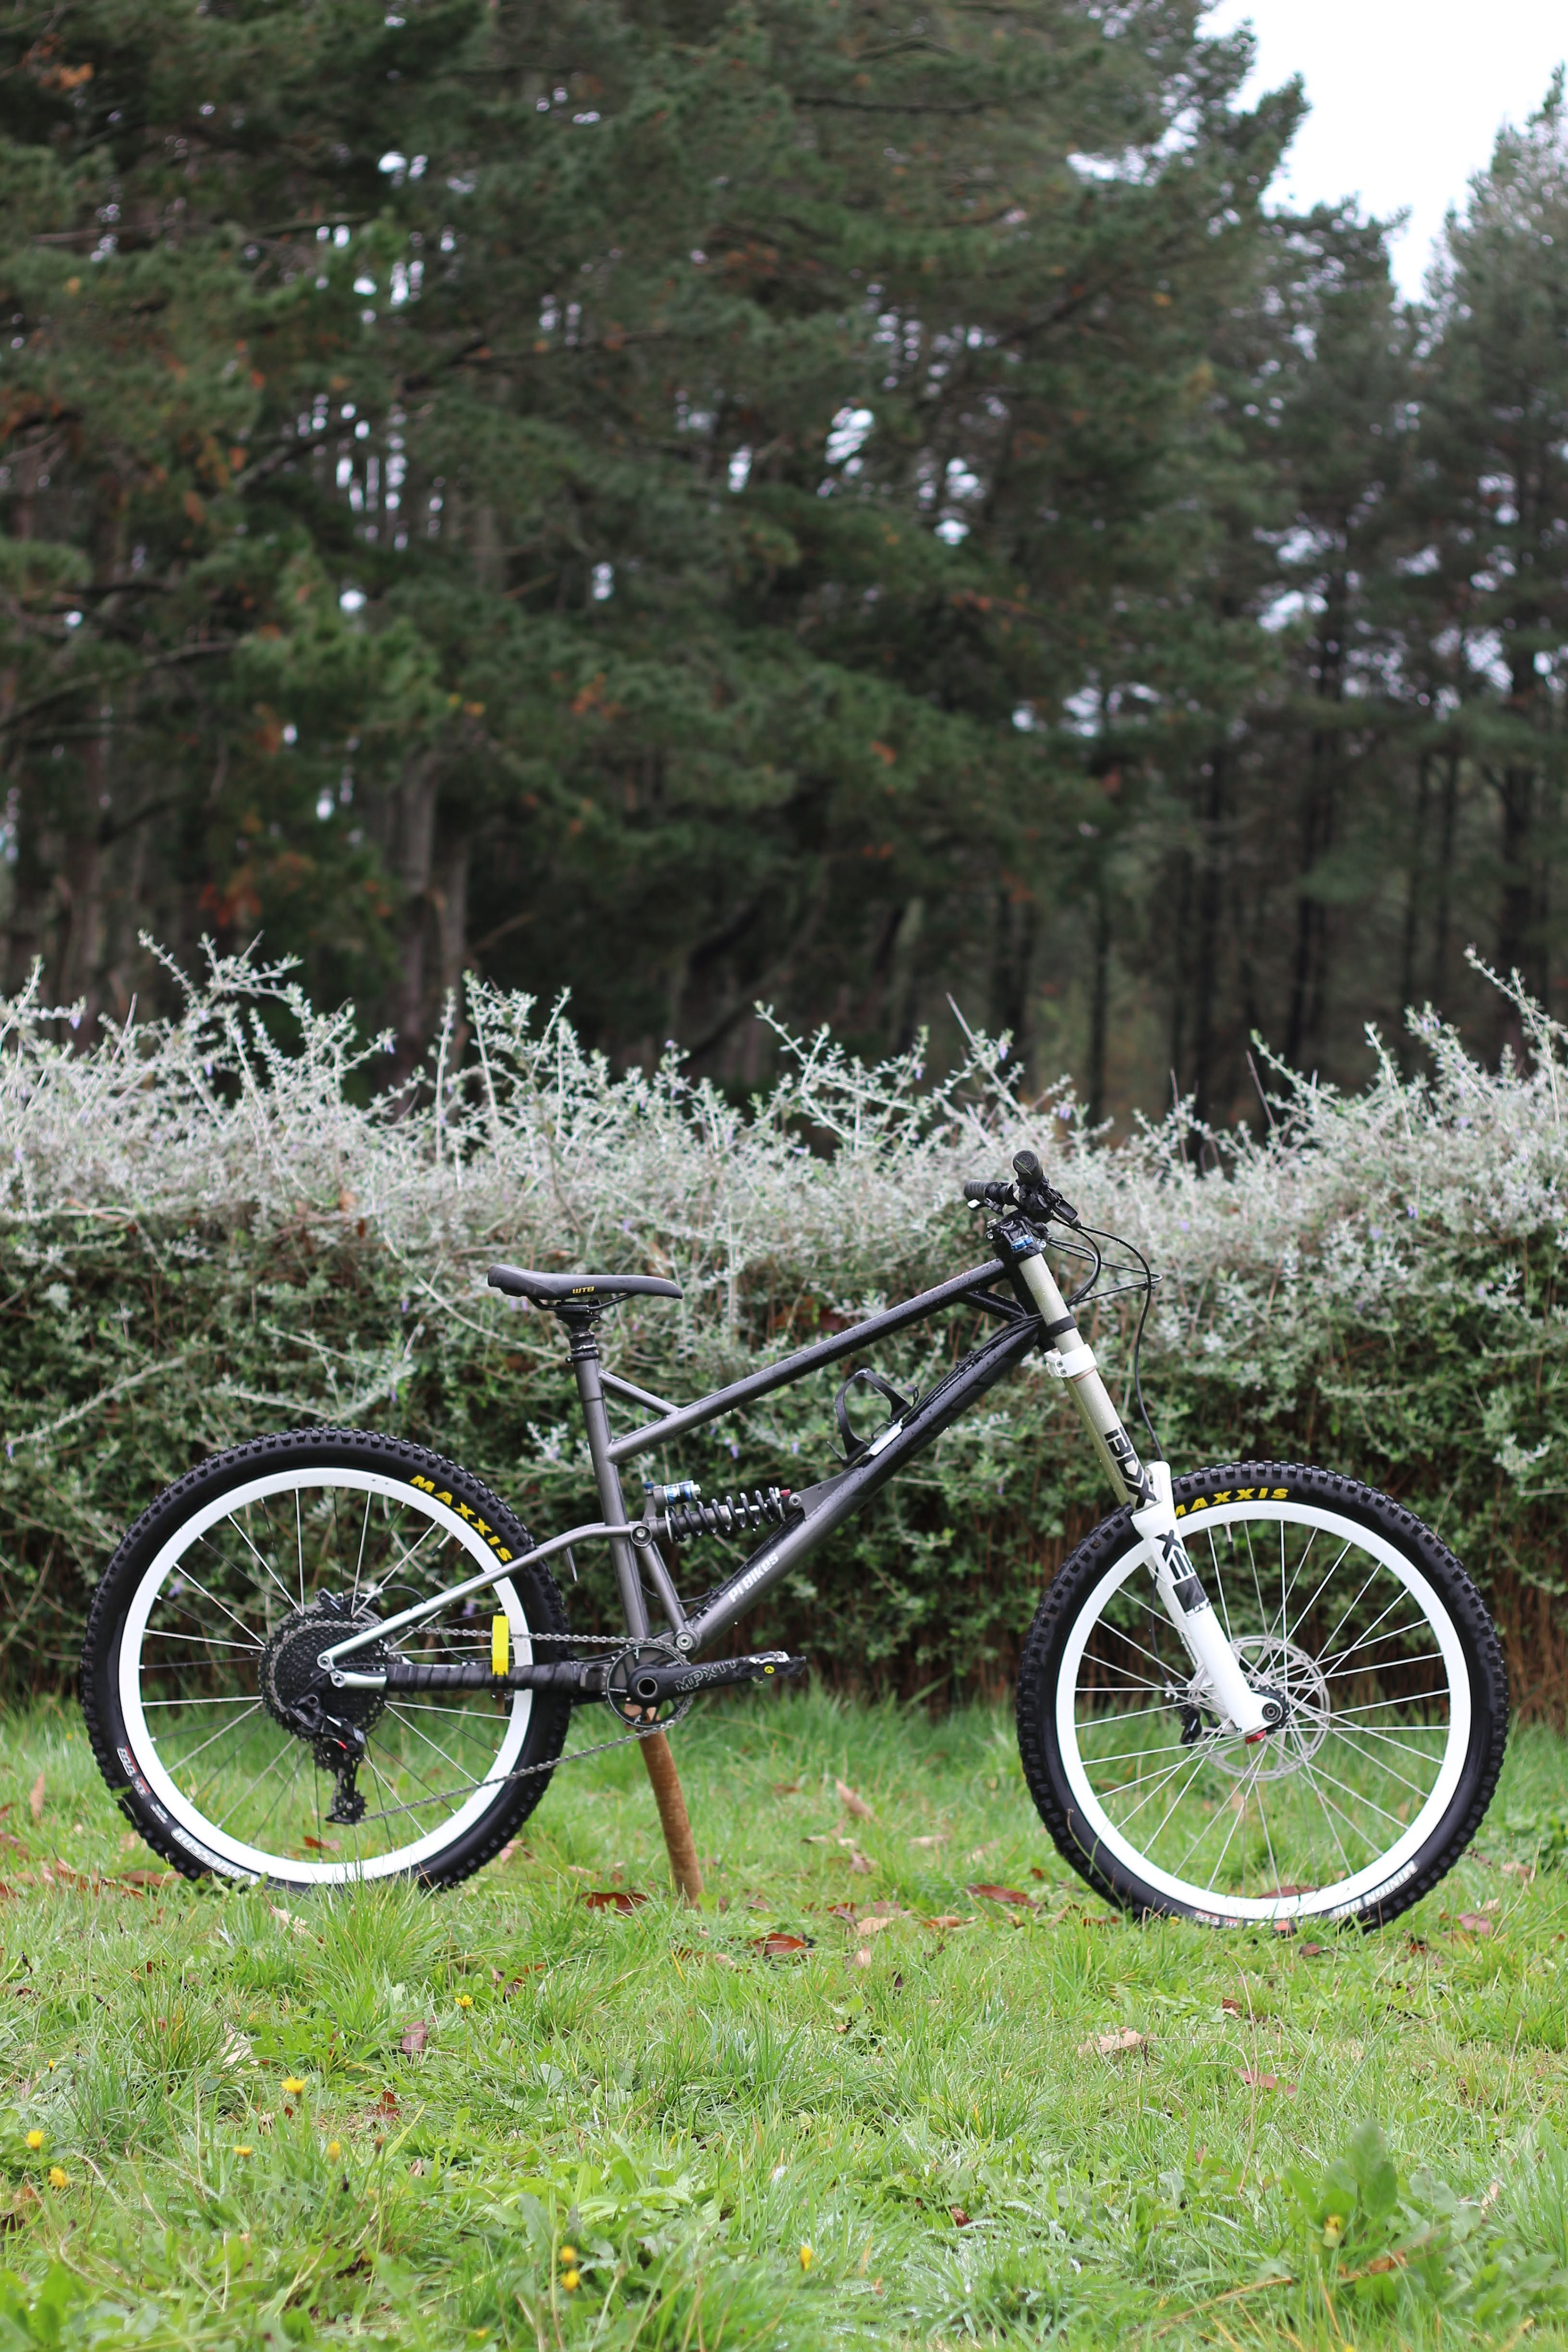
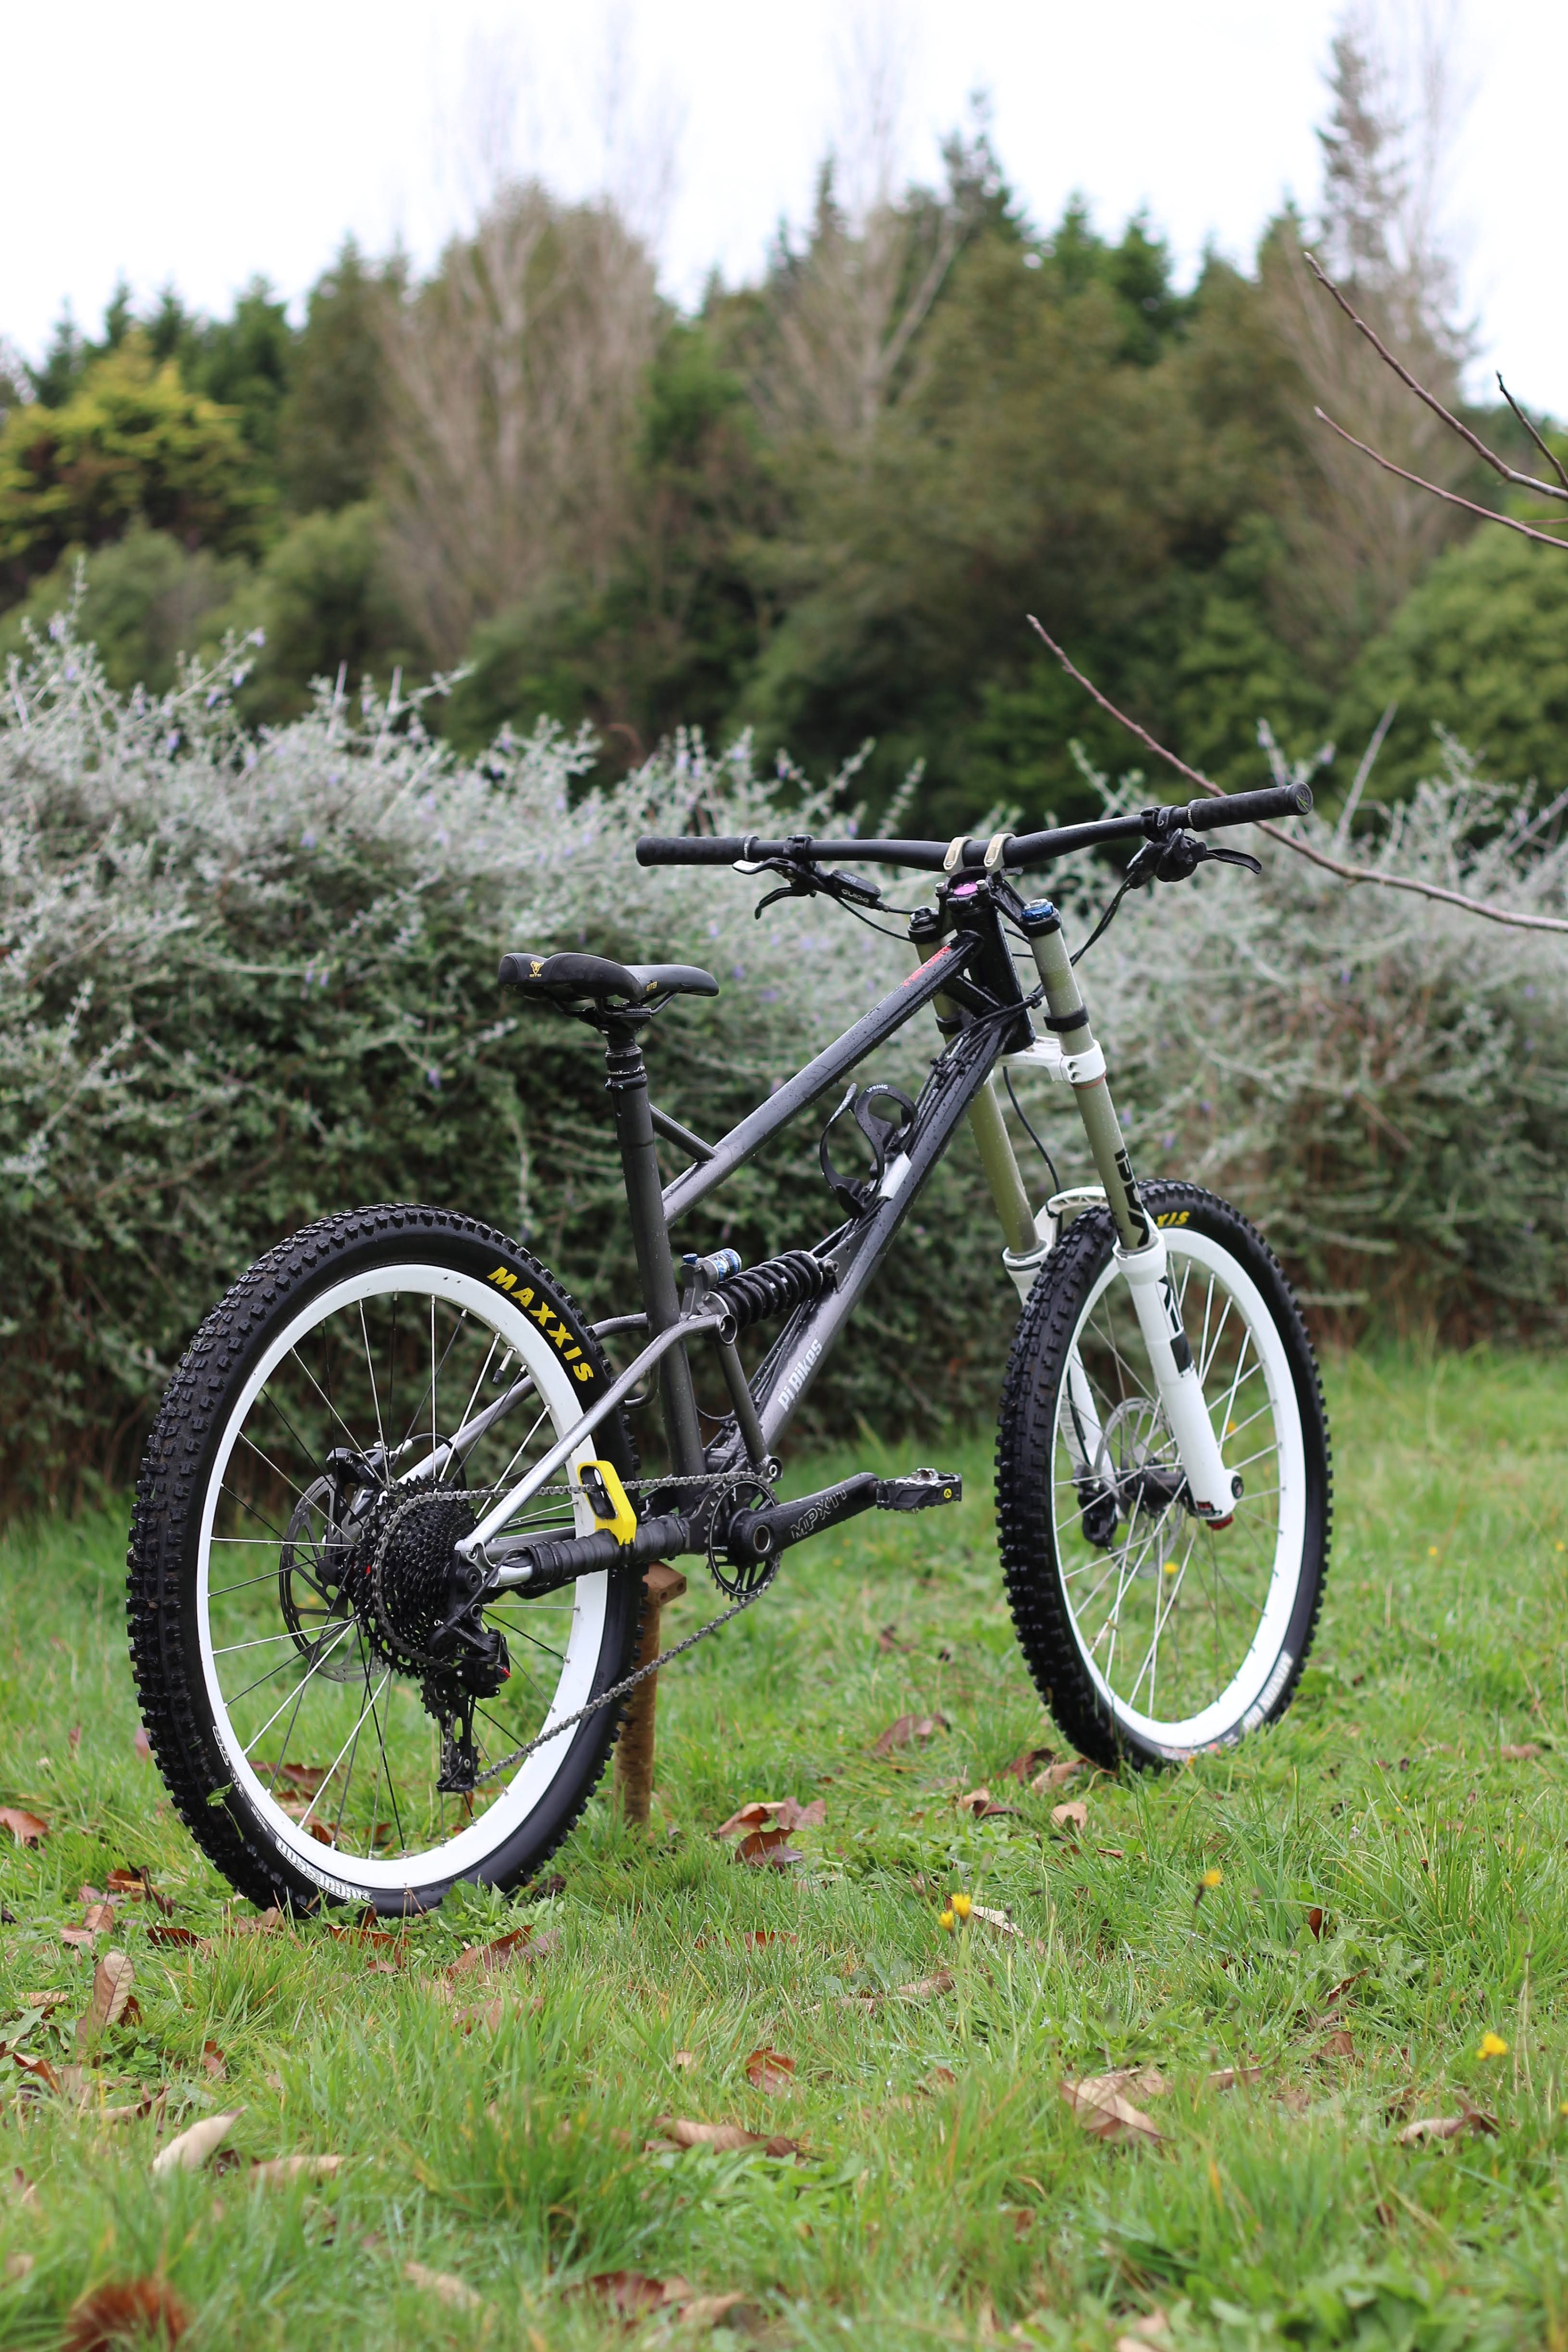
Finally got round to taking some pics after the paint job on this bike. Also, a few spec changes. Got an old boxxer WC and a fox van rc coil shock, both solid upgrades. Bicycle rides very well, life is good. Also made a 3d printed chain slap prevention thingee, its a bit ugly in yellow so I will probably redo it in a silver at some point cause I have some silver filament now.
-
I had a friend who used to do the recycled engine oil thing. He would settle it for a few months and then run it through a centrifuge and a filter. He had a 1kz prado and did some 180,000km or so on it if I remmeber correctly. He originally used transformer oil as he was a industrial electrician, I mentioned this to someone once and they said something about that stuff being super carcinogenic. I heard some nightmare stories from him too though, hoses popping off the centrifuge and staying up until 4am on a work night to clean up the mess. I always kind of thought it was in the too hard basket really.
-
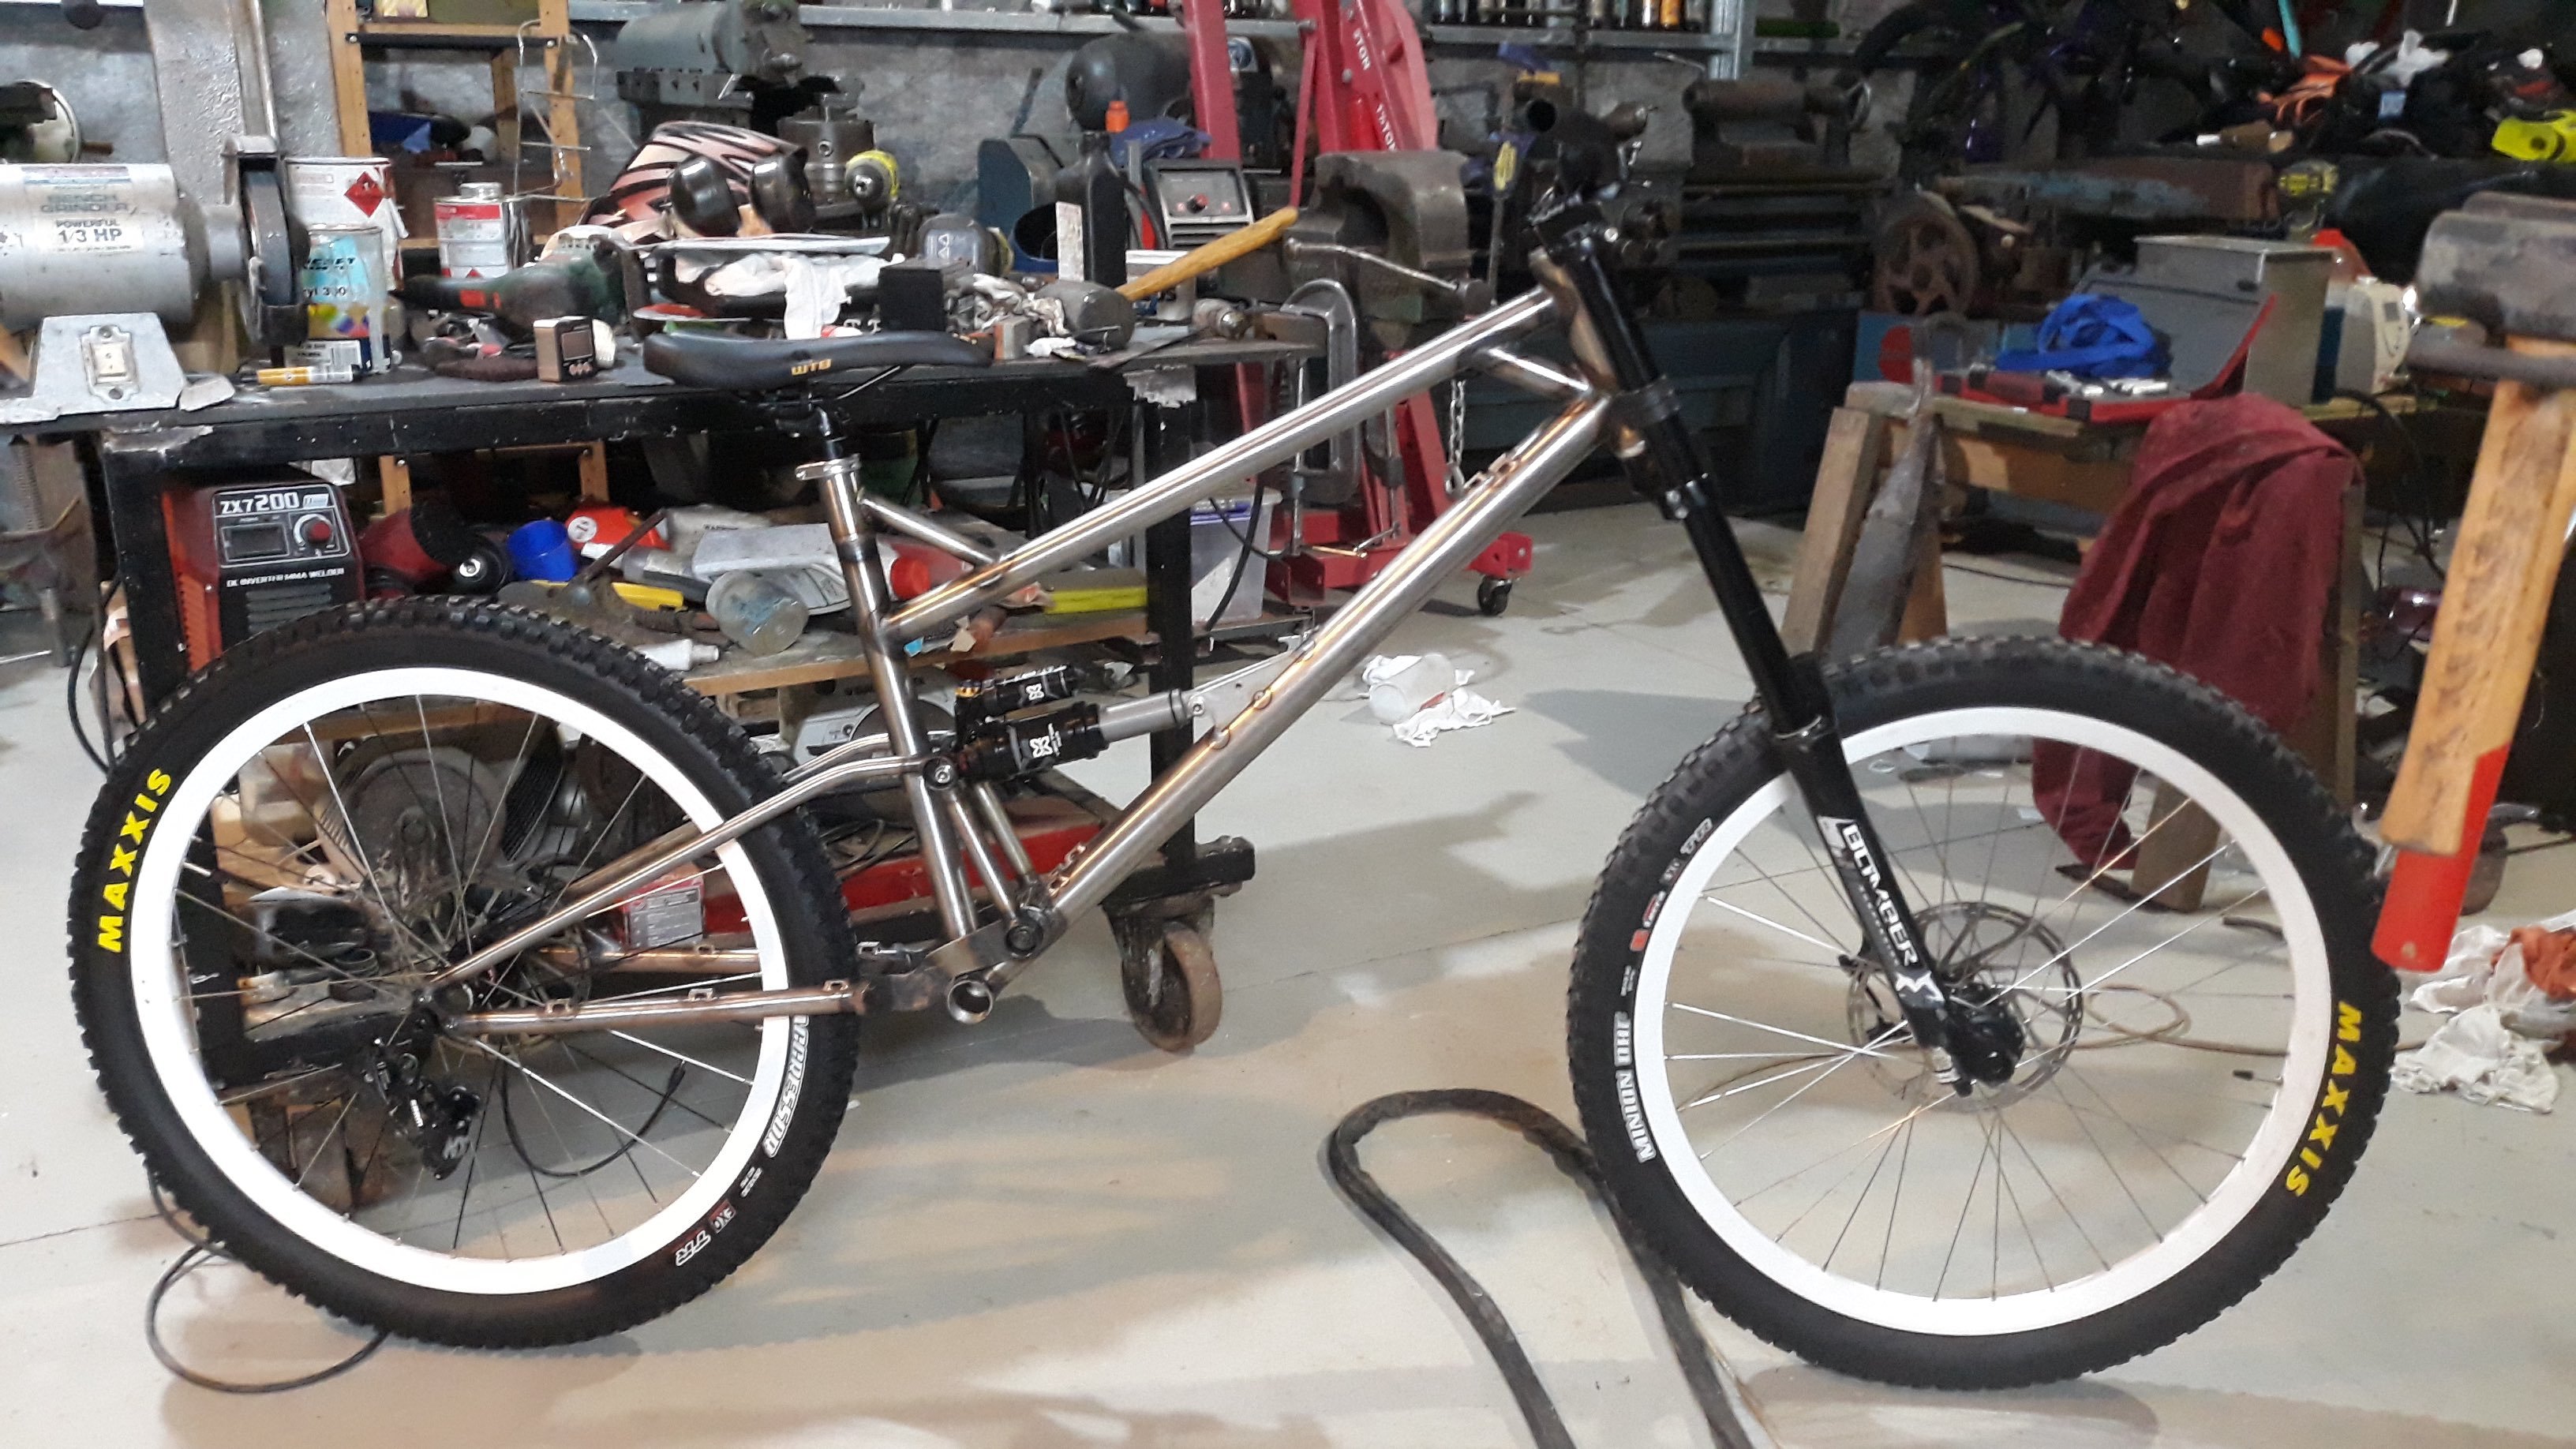
Slapped a coat of primer on this and took it up to the top of Pirongia on sunday for a couple of laps. What a machine! it's better than I expected. I was worried about the pedal kickback but it really isn't noticeable when decending. On the flow trails it pops really well and soaks up the larger chunky stuff and the big hits very well. Pirongia is pretty smooth so its hard to tell but I think its weakness will be high frequency chattery braking bumps and that kinda stuff. The other issue that might be able to be resolved by adjusting the shock damping settings/air chamber volume is it is lacking a bit of mid stroke support. Probably due to the linear nature of the single pivot so there's no ramp up at the end, though the bottom out is super smooth due to the position sensitive damping. It also pedals up pretty well, but it was hard work mostly due to the seat post being too short to get full leg extension. Though it does weigh in around 17kg so not super light, though it is certainly in the ballpark for a DH bike. On the whole, super stoked with how it rides. Will take it for a few more preliminary runs before giving it a proper paint job as there is a good chance I will figure out I need to change something in the mean time. It also needs a few parts swapped out as there are a few issues, not to mention I robbed 2 other bikes to scrounge enough parts to put it together.
- 102 replies
-
- 17
-
-
-
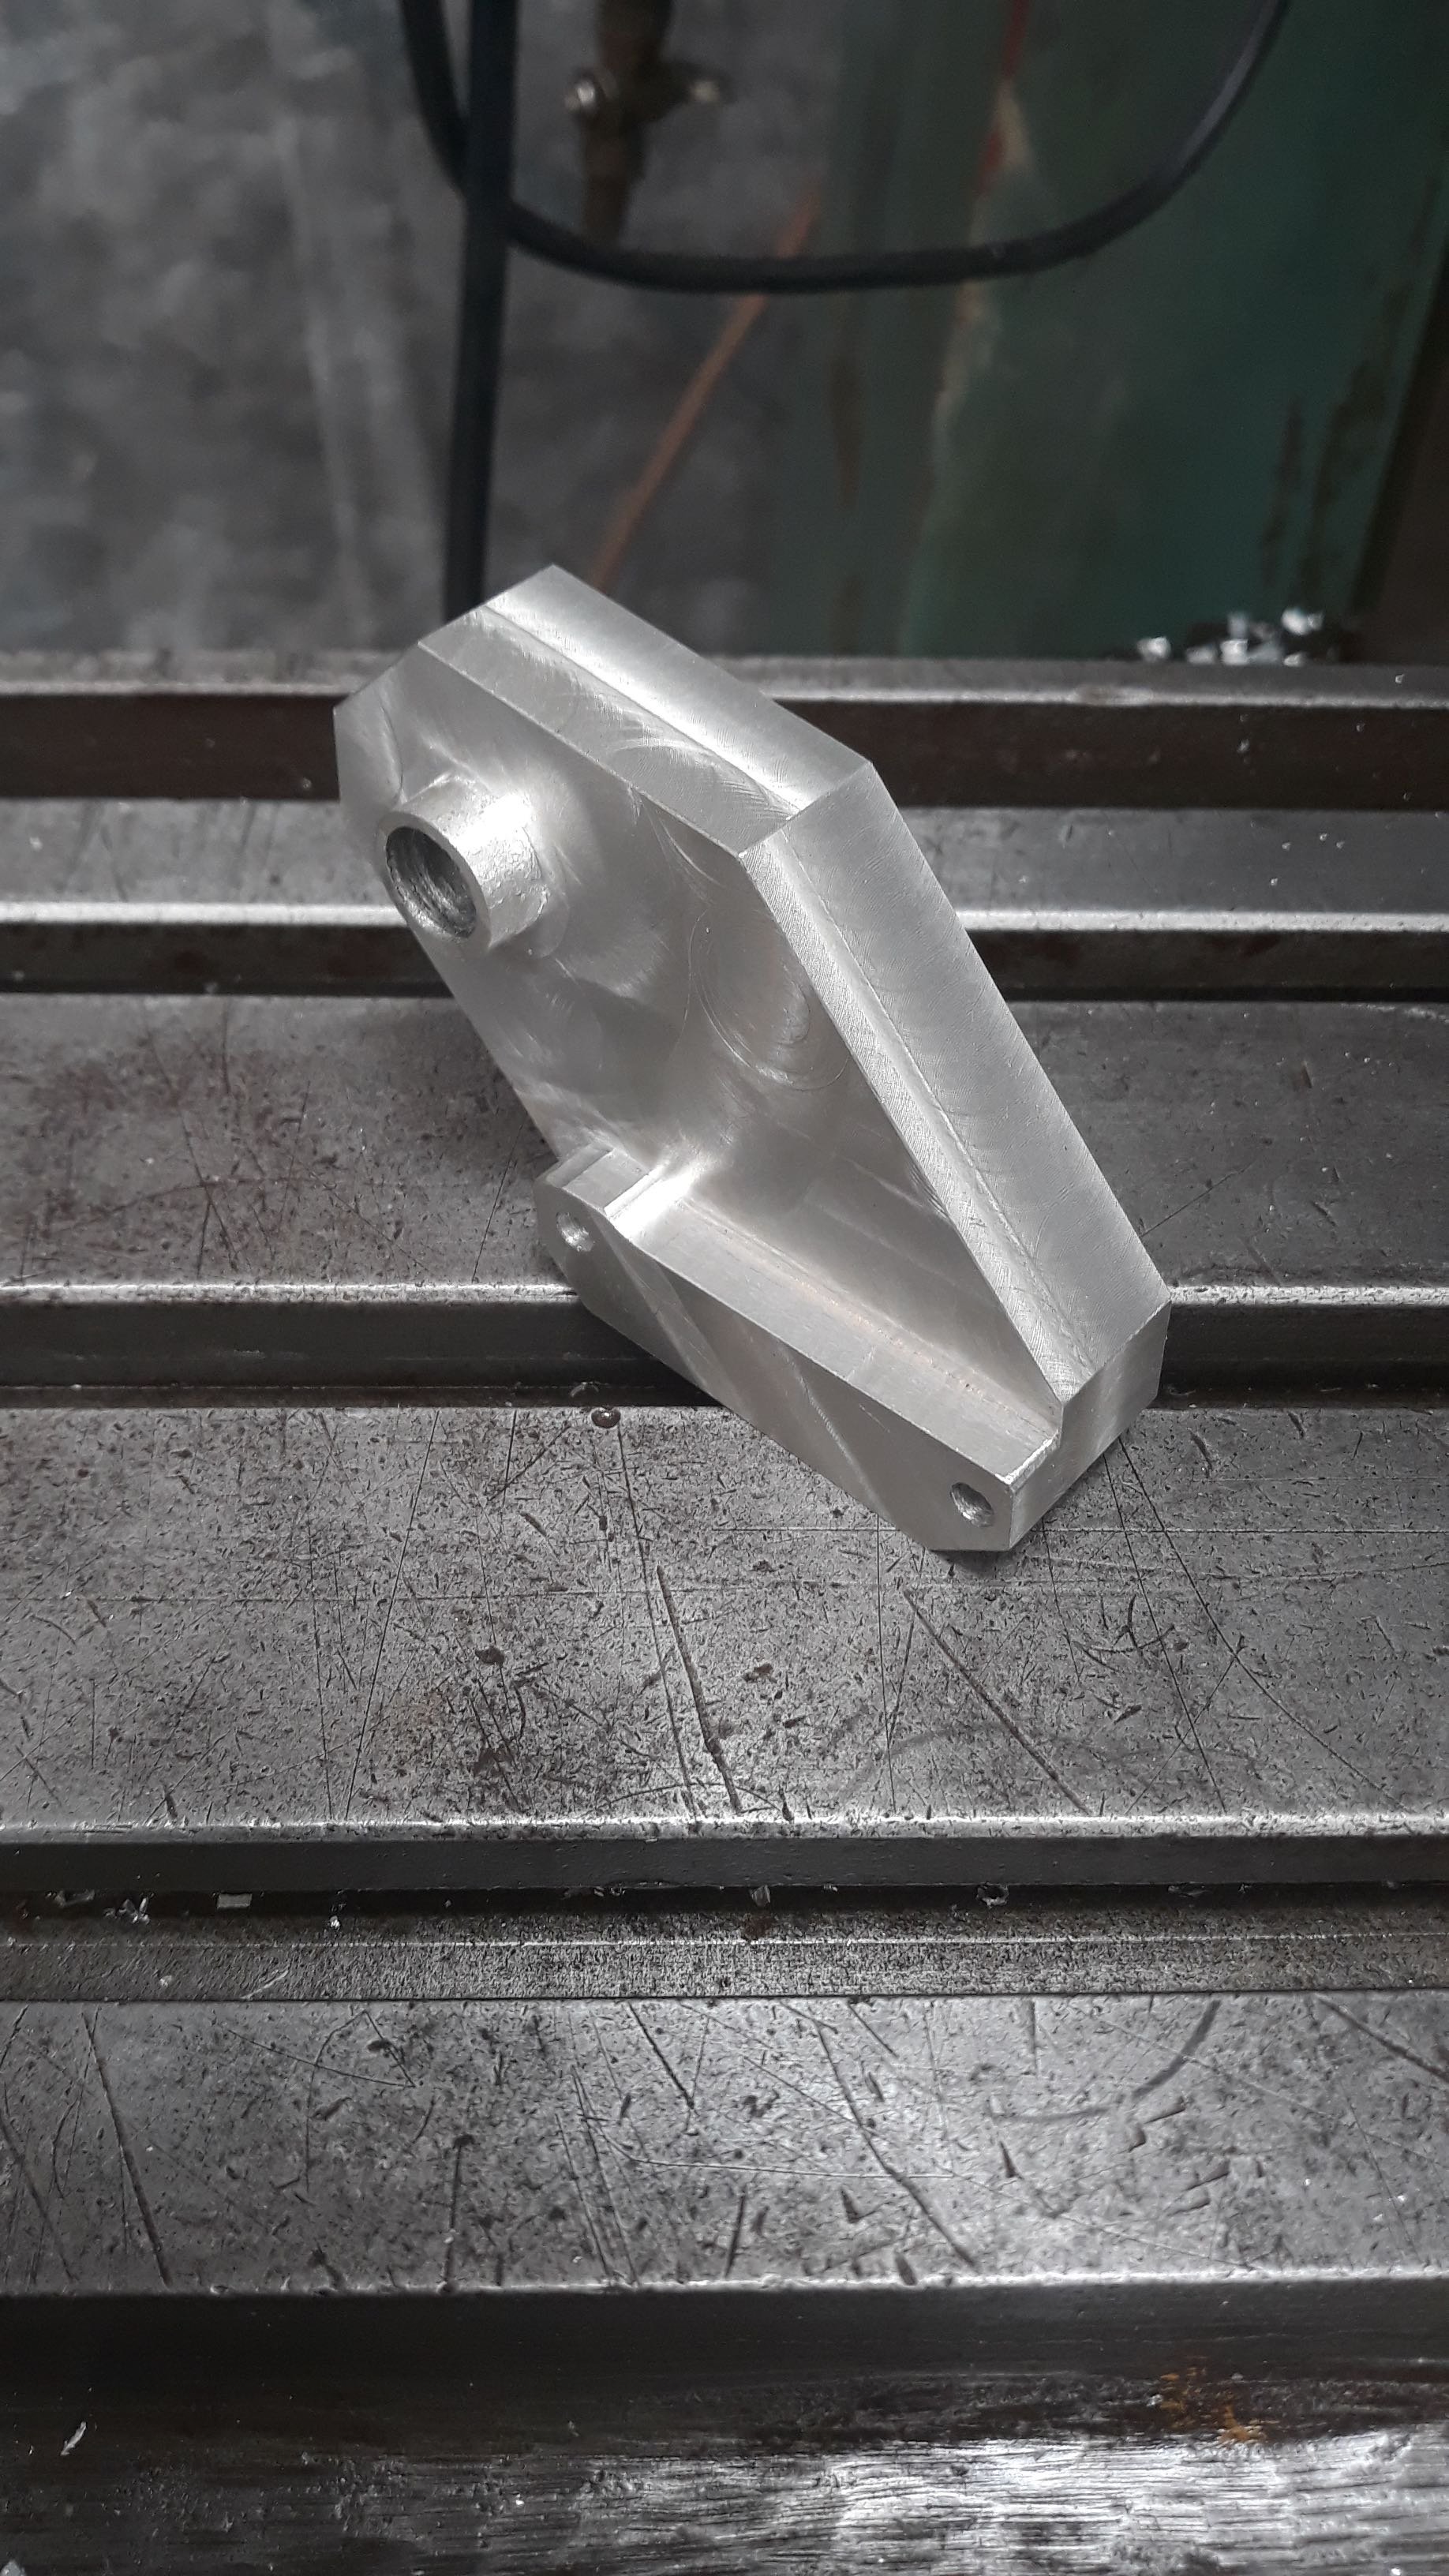
More tig brazed cable guides I drew up a little design for the shock mount on the down tube and got it sent away to a waterjet place. This is something that I would do again in future, but only if I had drawn them up right at the start of the project because the lead times on small jobs at industrial place is a bit painful. So I sat around for a few weeks waiting for my bits to come back and when the eventually did I finally got to see what the end product might be... (drumroll please) I finished welding the shock mount today, gave the front triangle a coat of primer and spun up a few spacers for the shock mounting today. I want to put one more brace in the rear triangle and then off to the bike shop to use their head tube reamer and assemble it for a shakedown ride.
- 102 replies
-
- 26
-
-
-
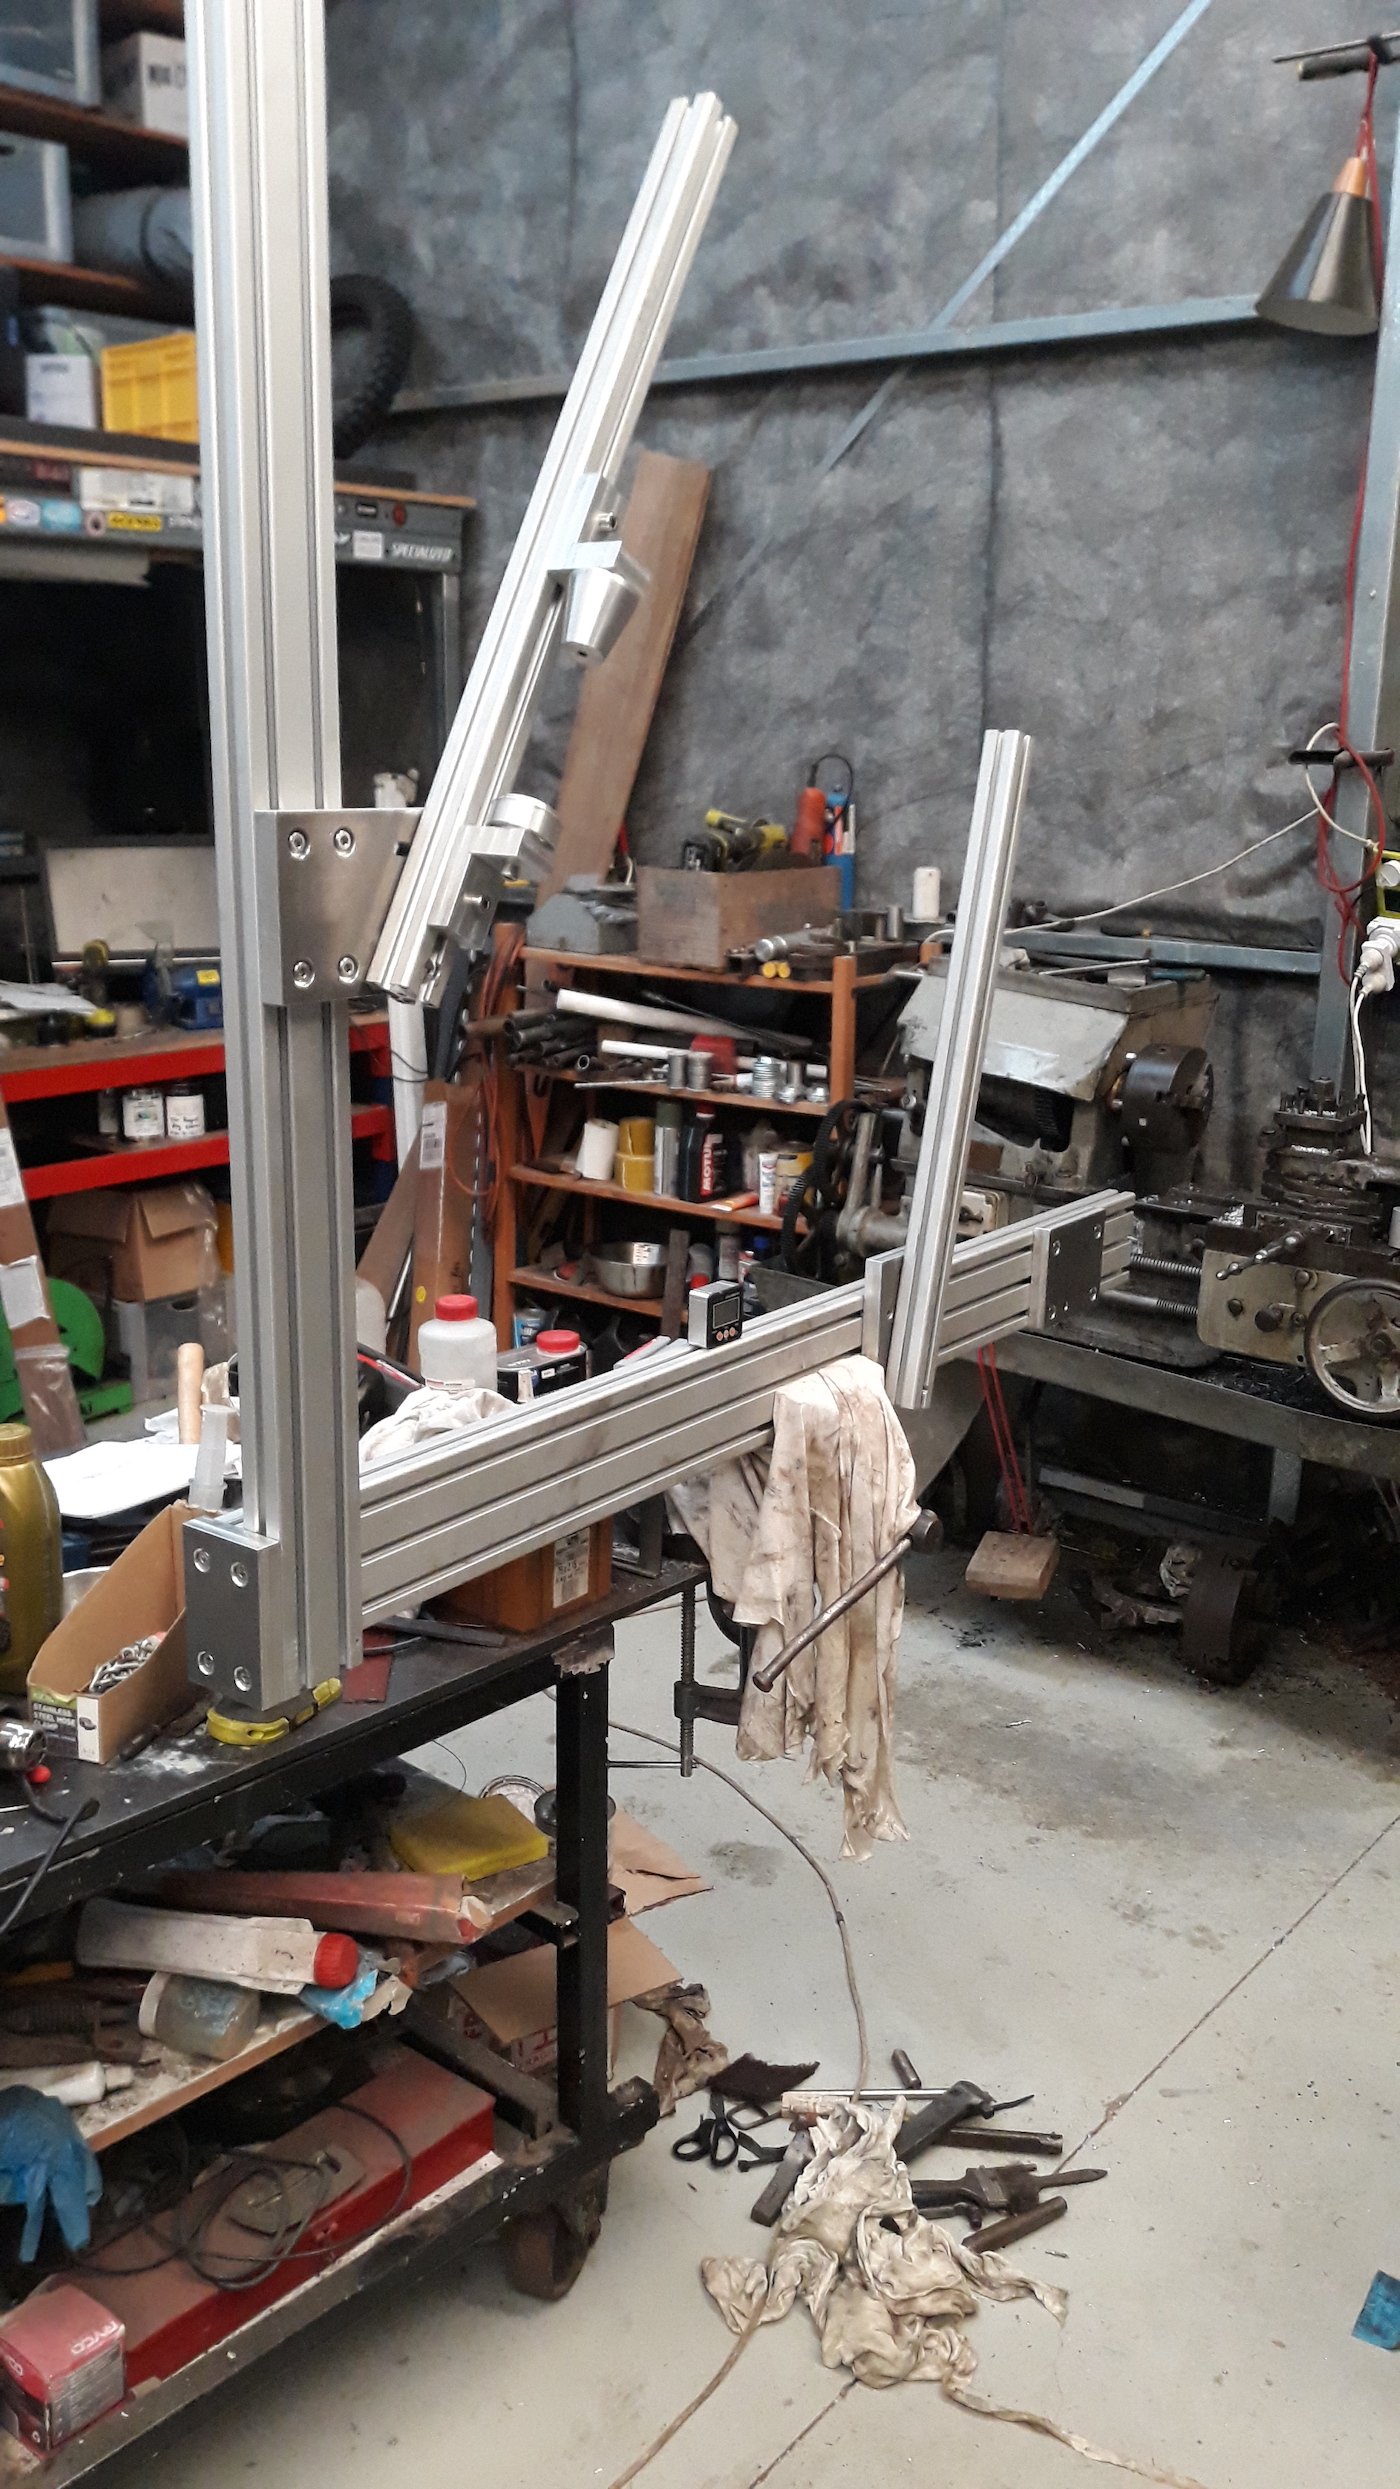
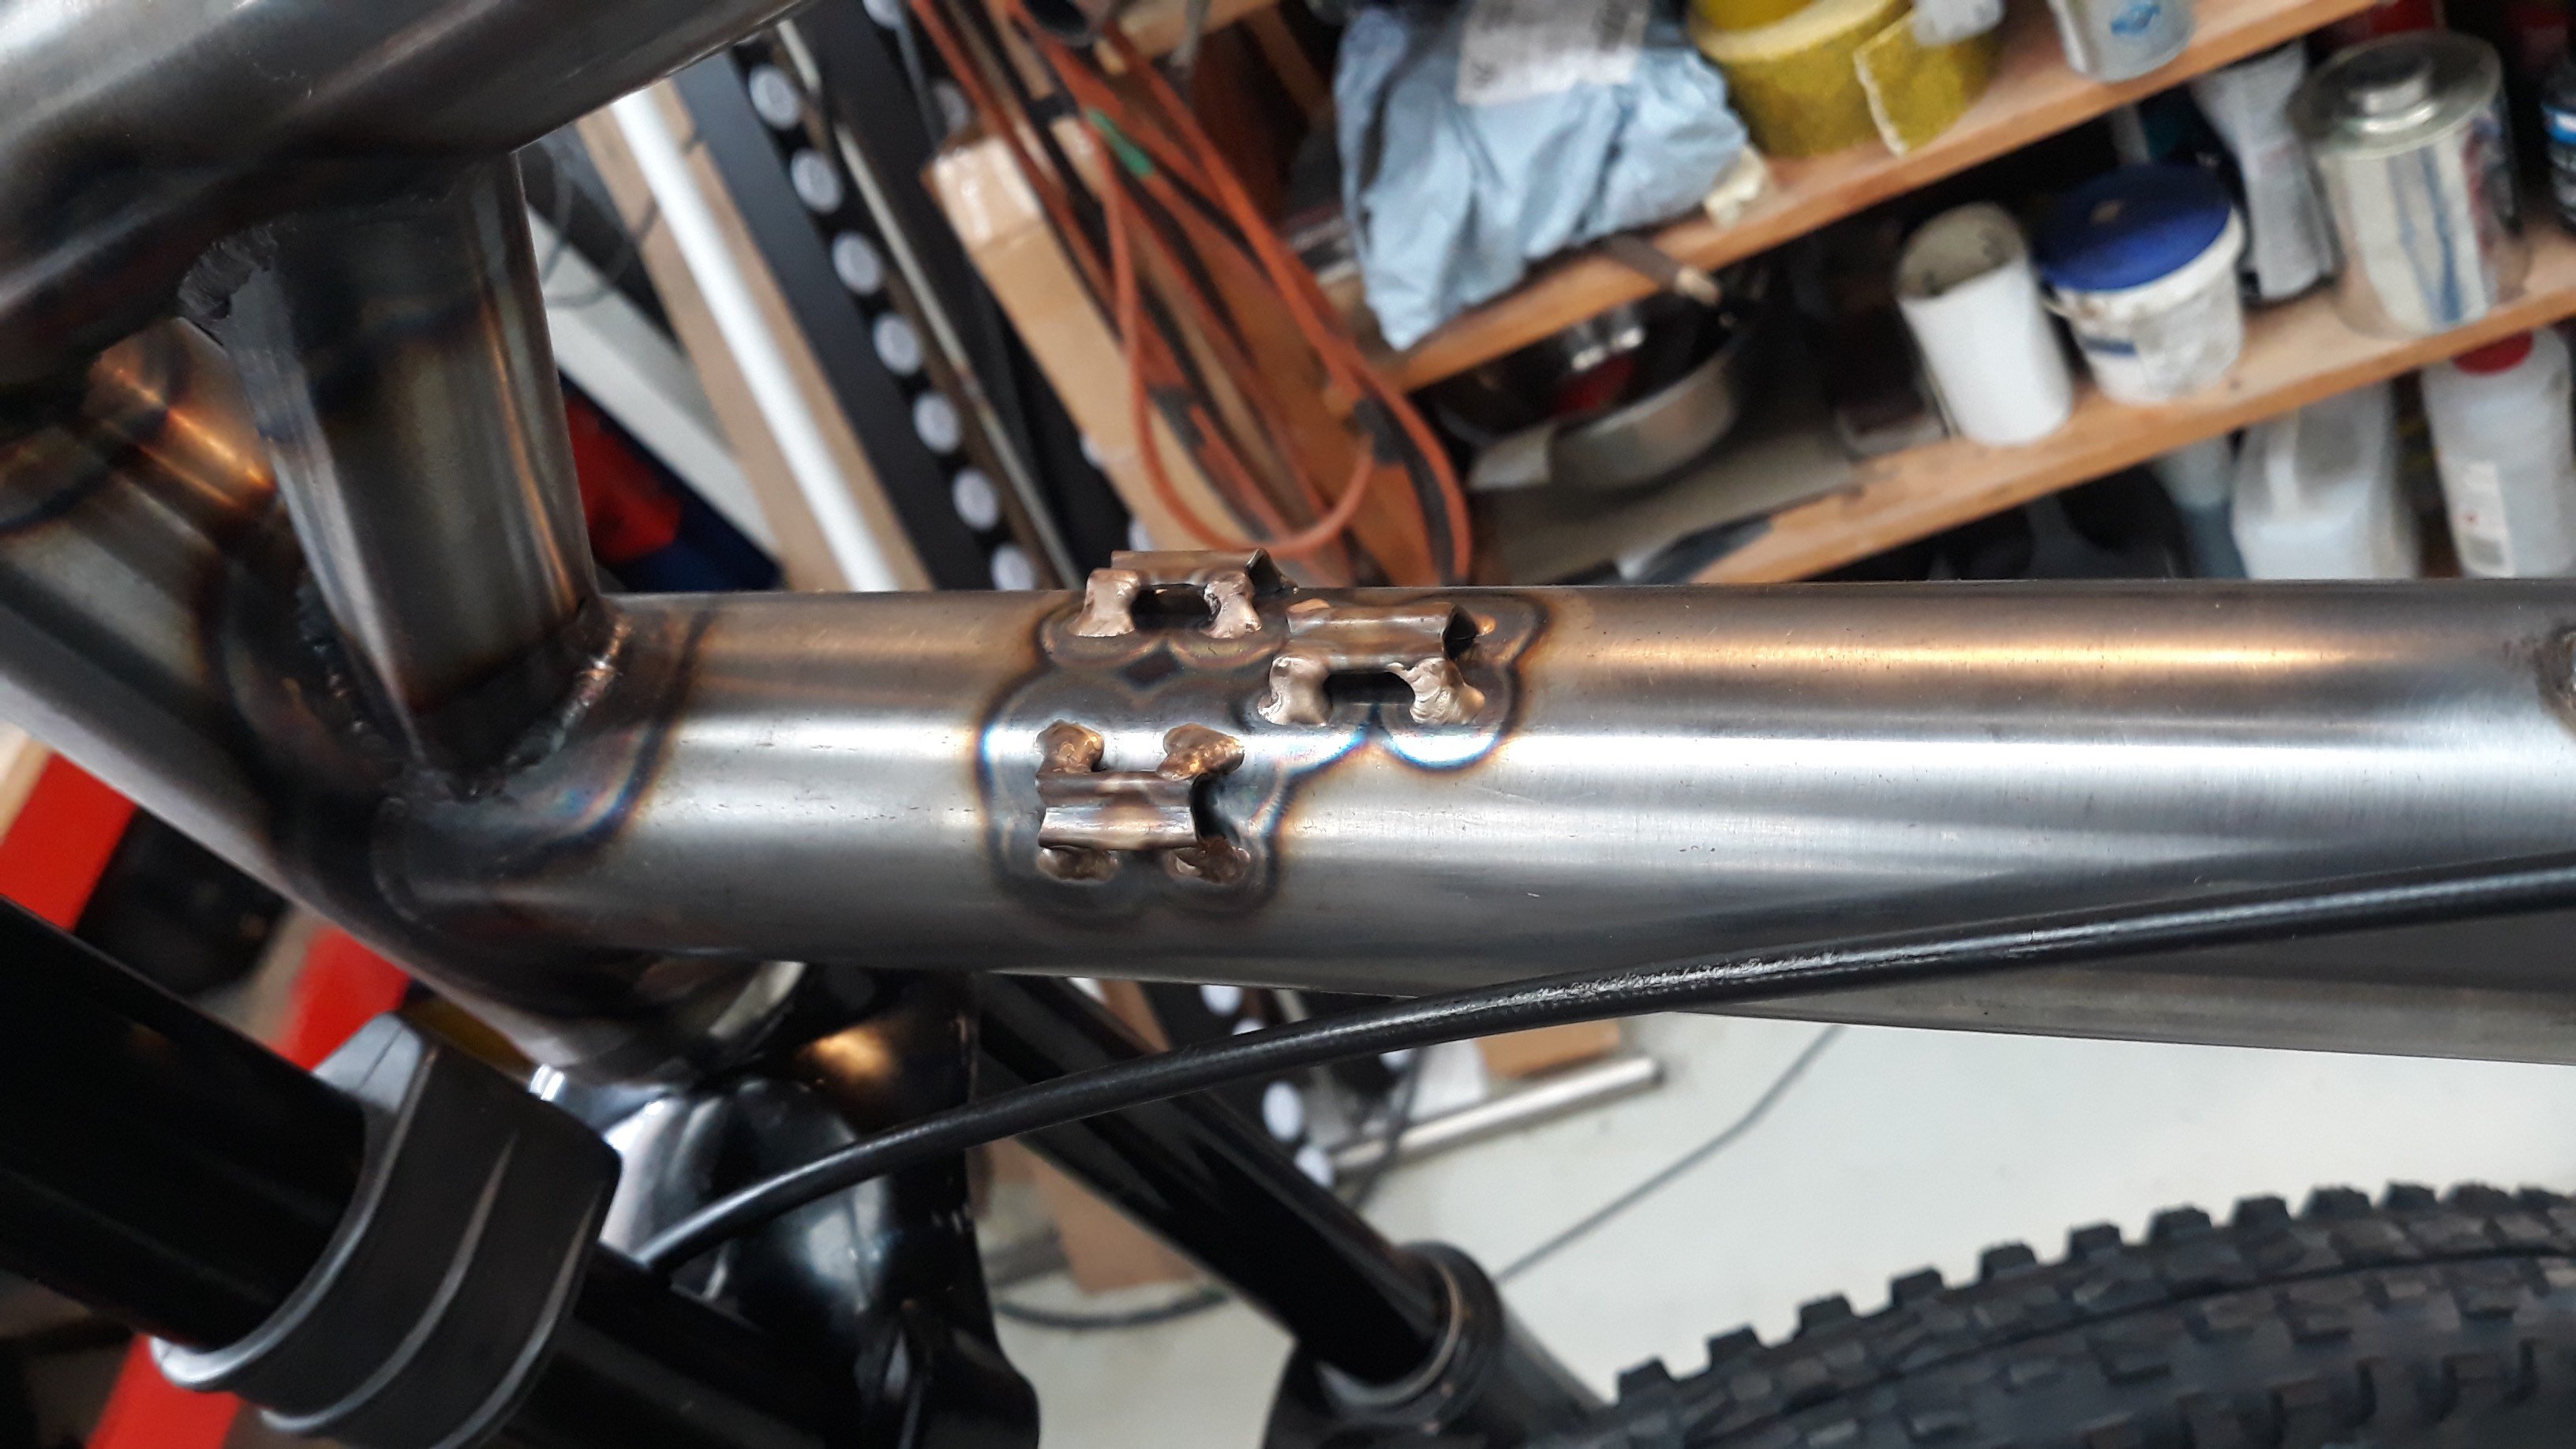
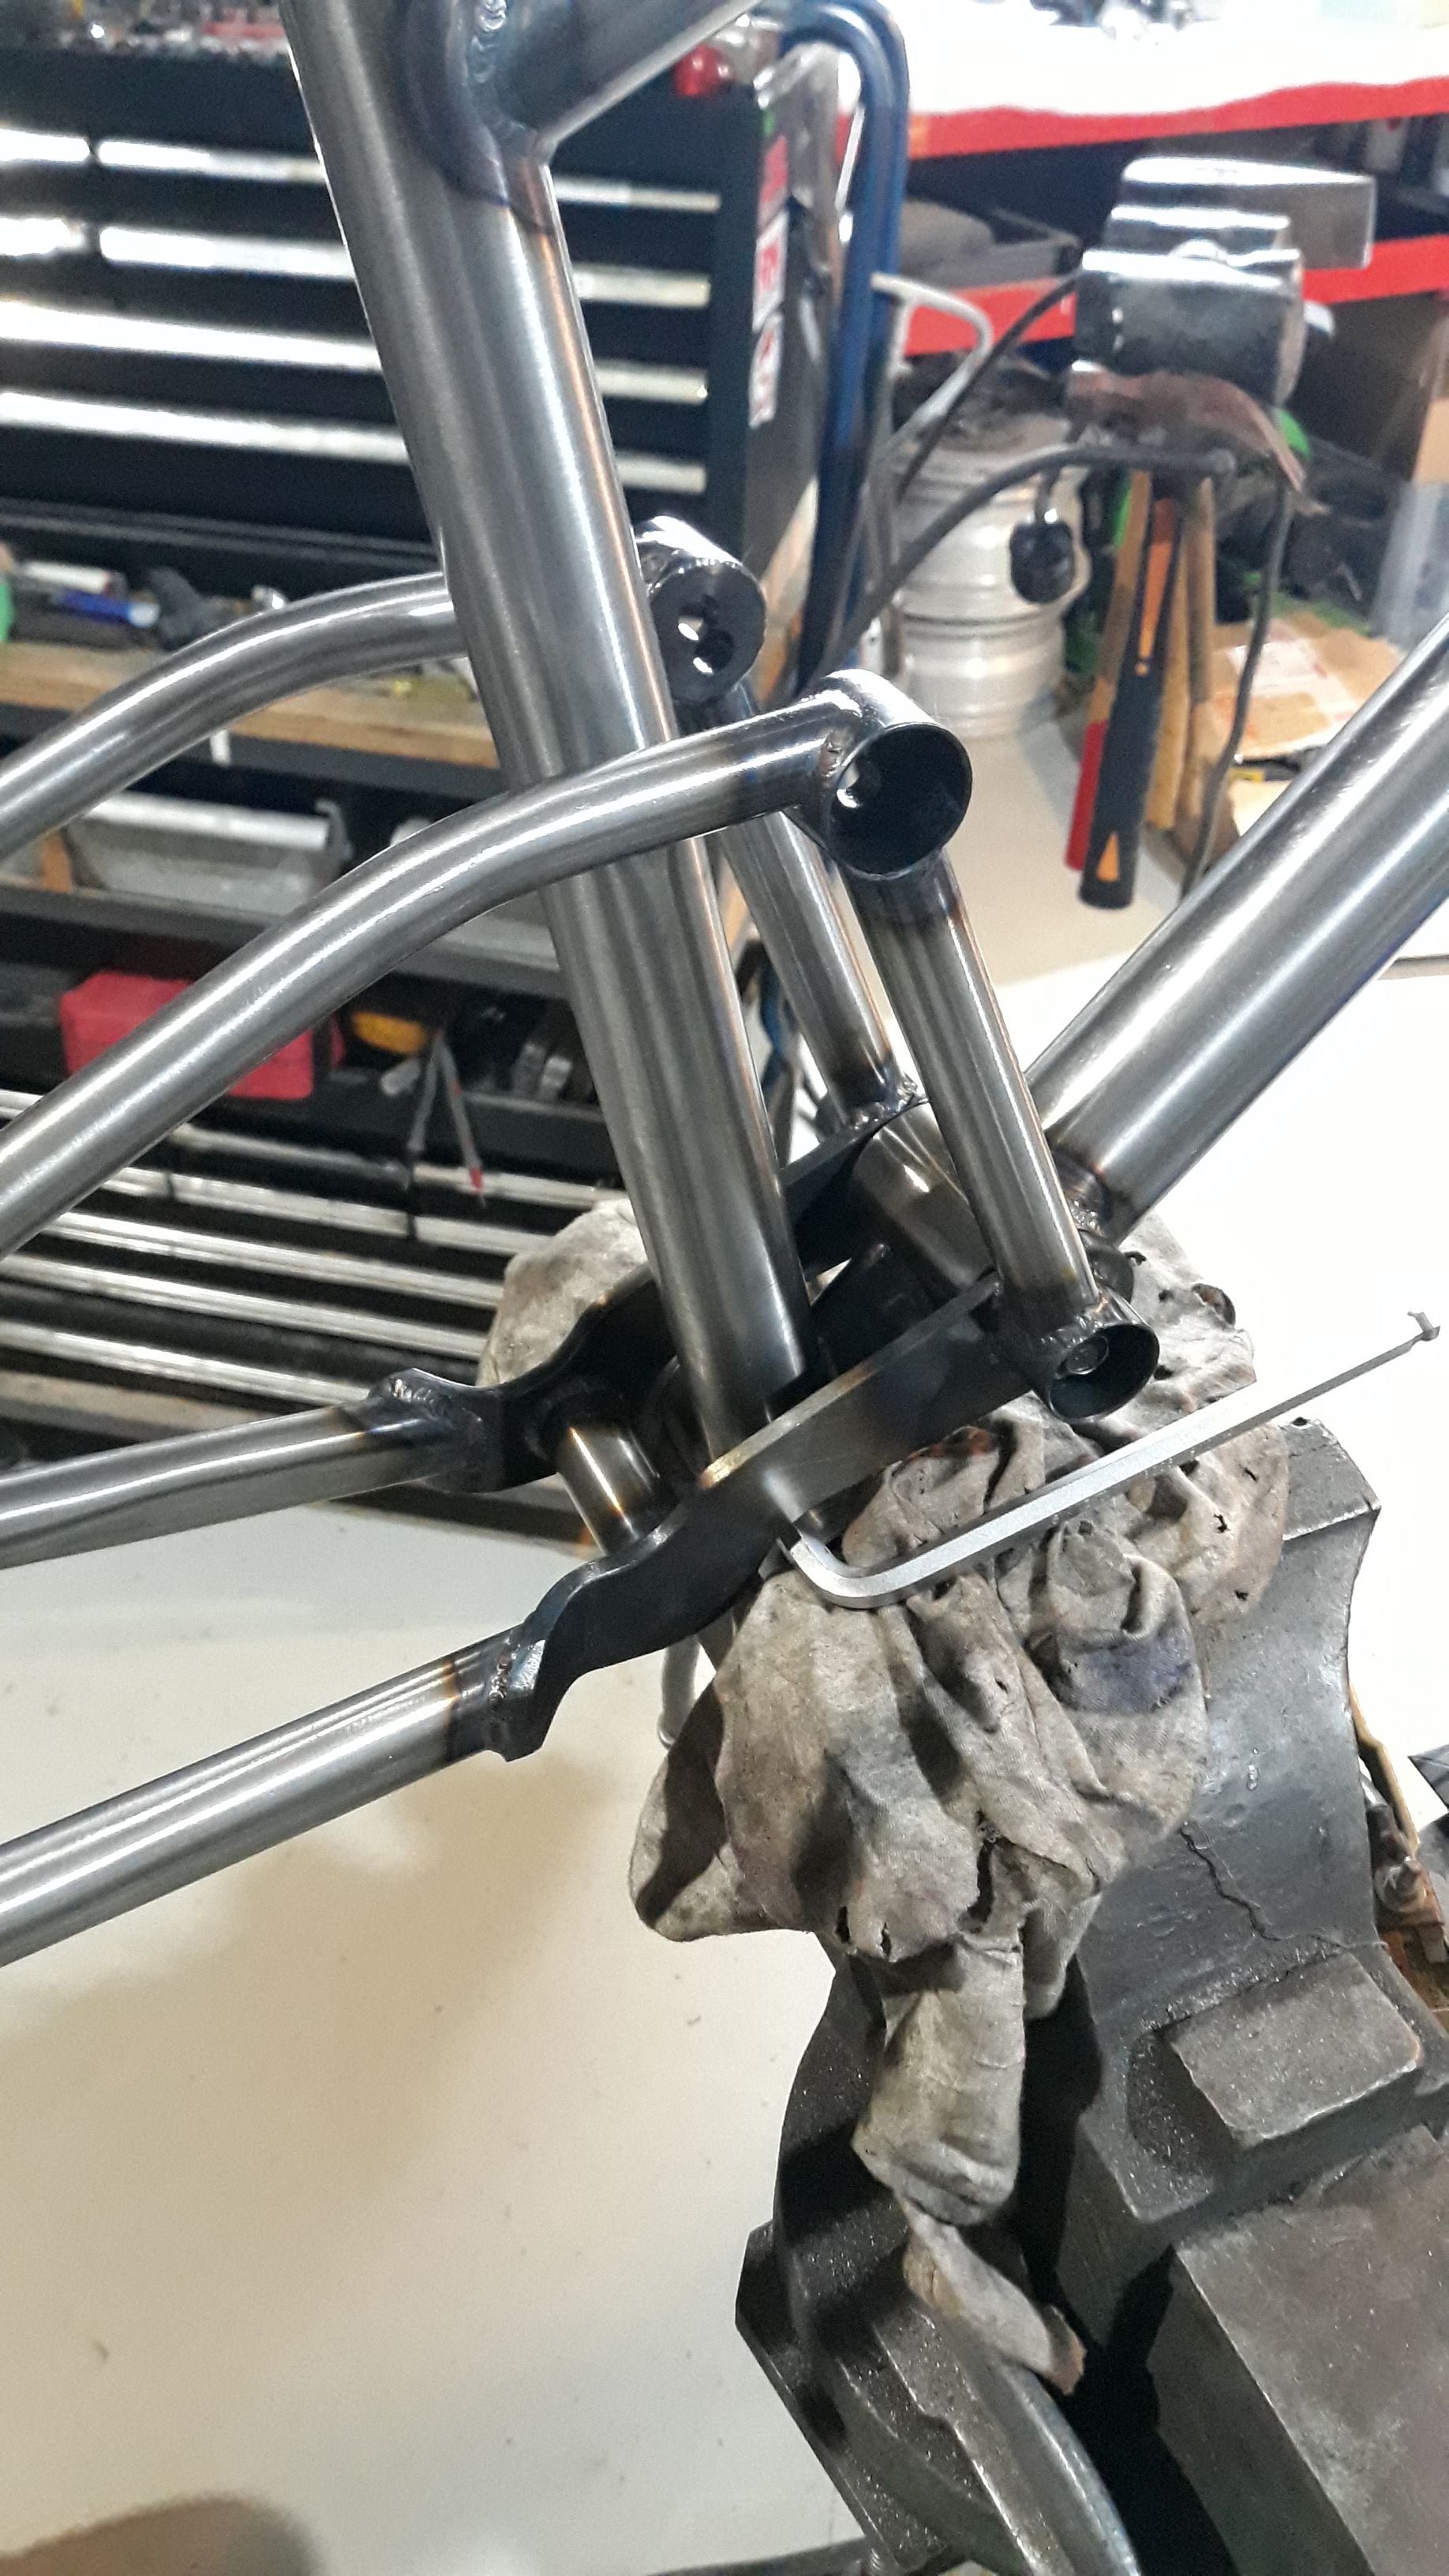
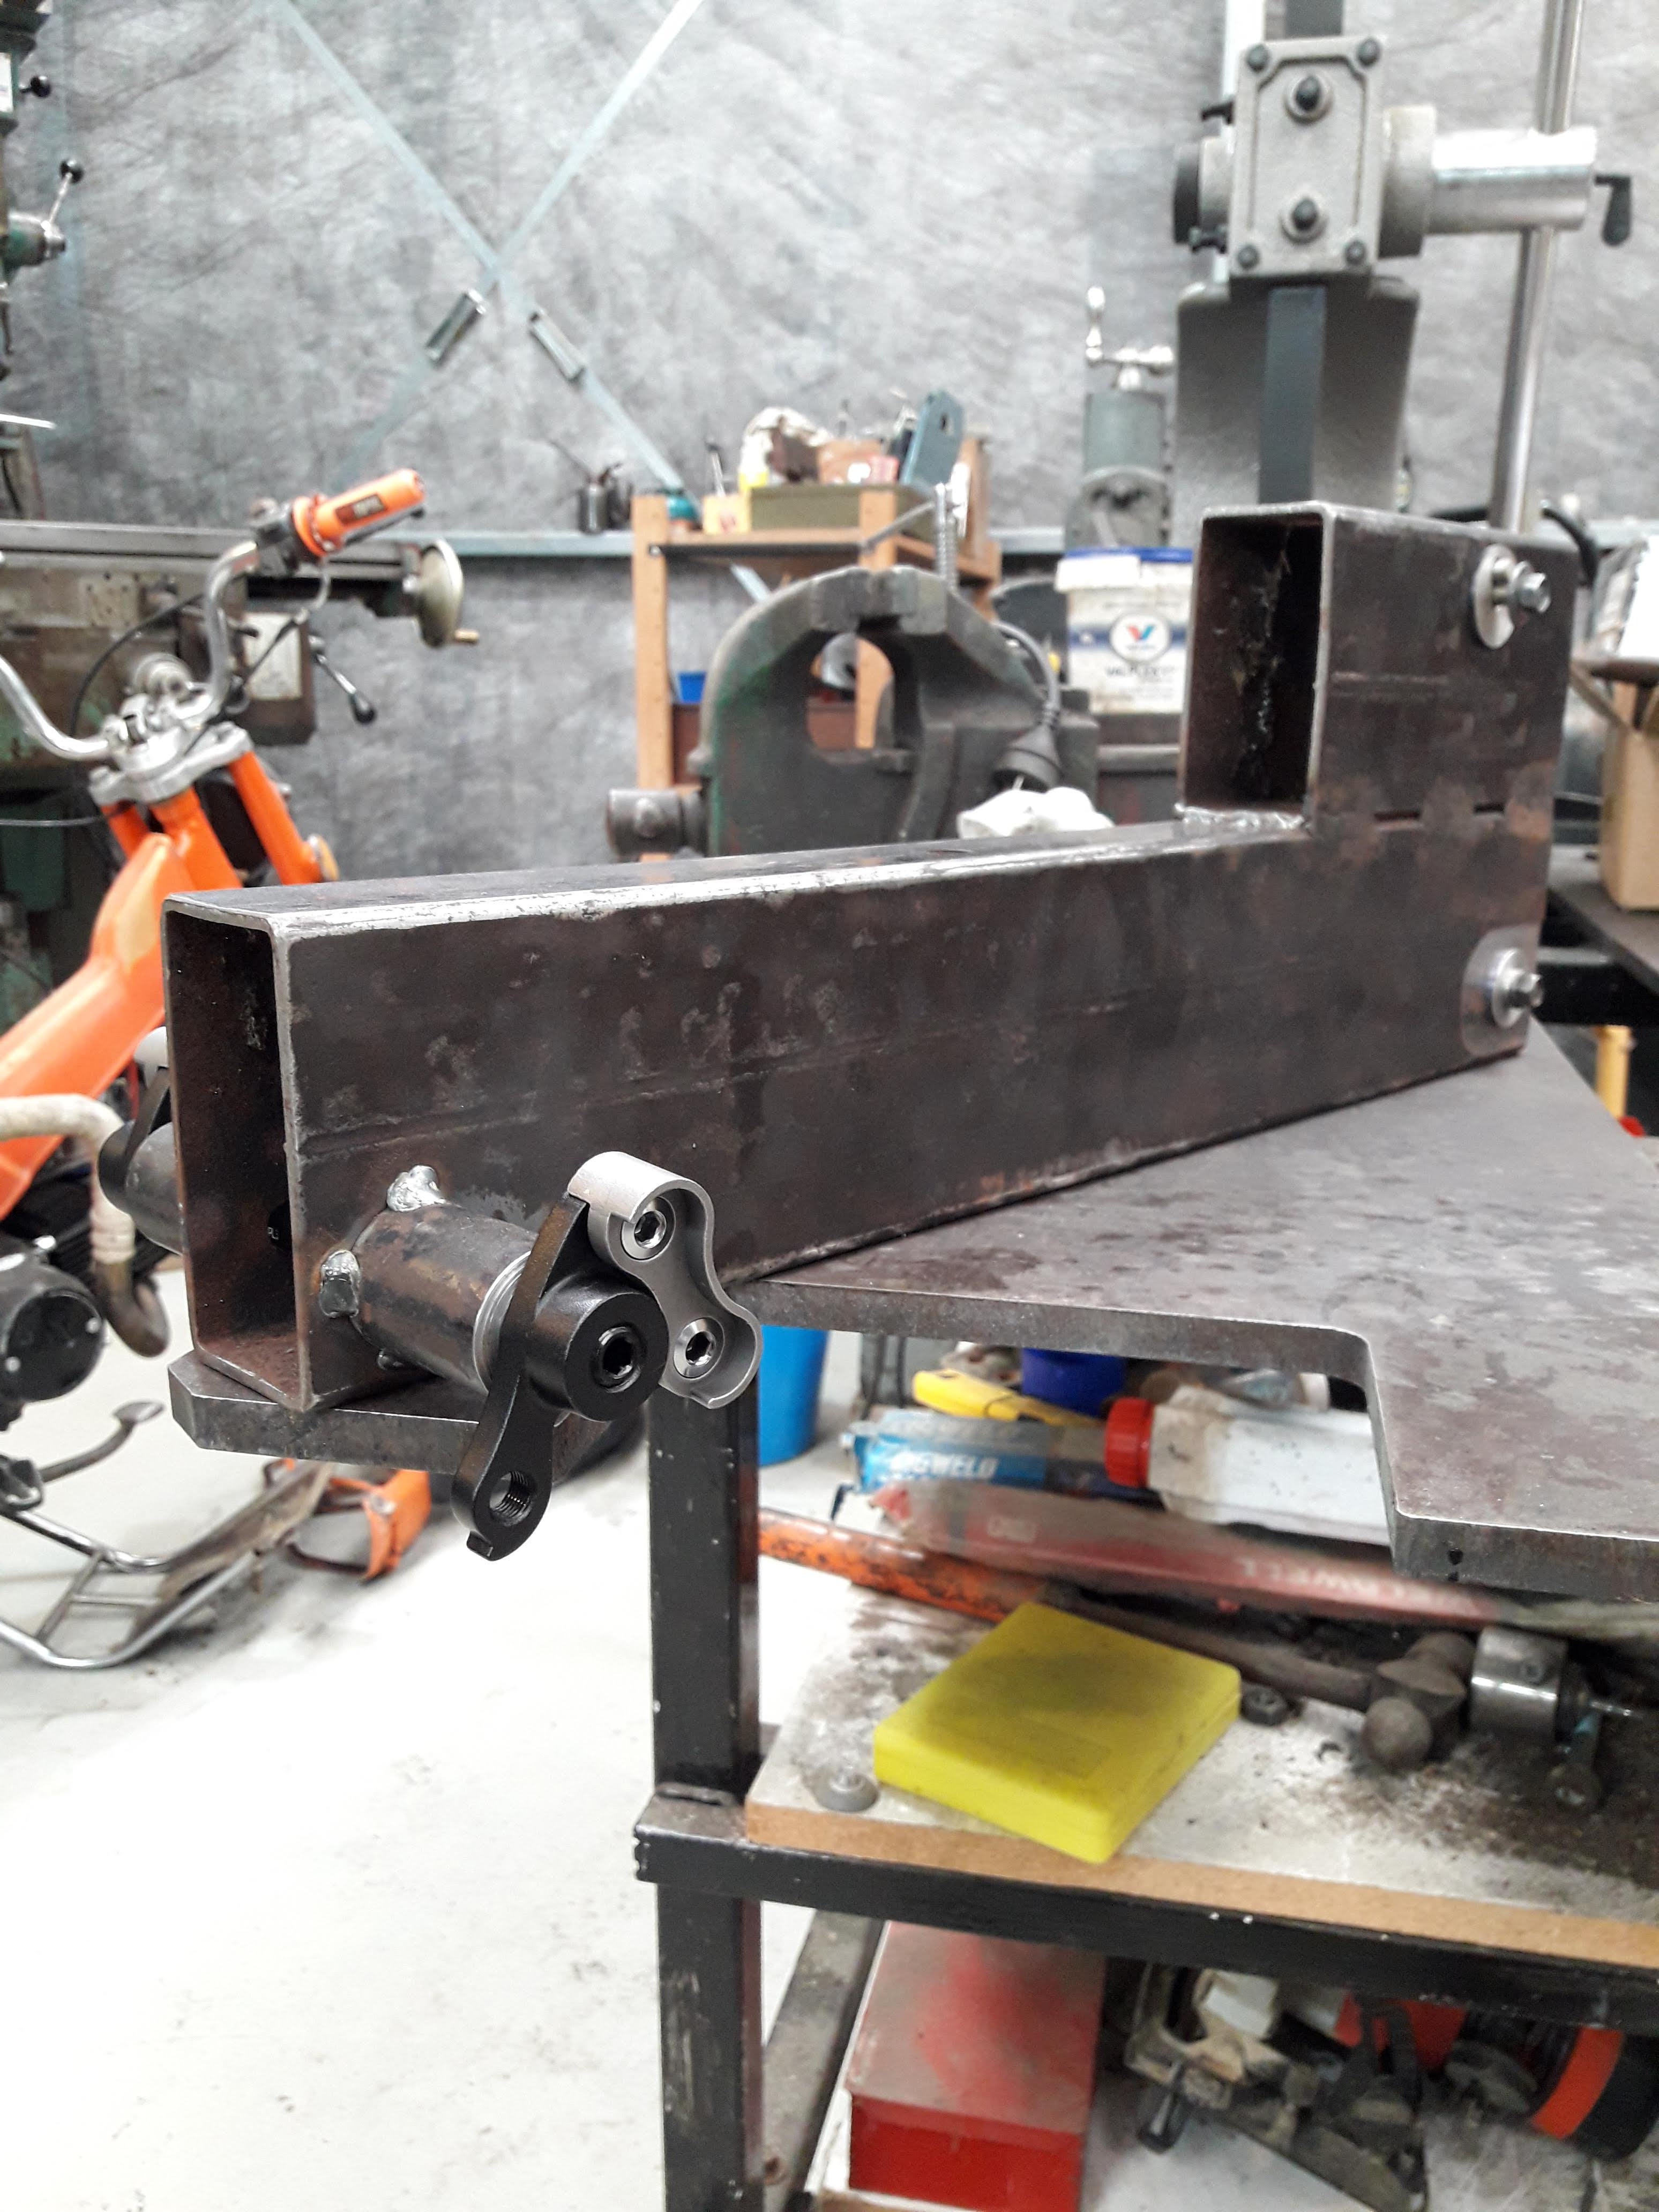
First thing I did once I got to this stage was to attach the front to the rear, mostly just to see how it looked. Looking good to me Pivot detail Next I made a little jig to attach the disc brake tab to the rear triangle Good bit of practice on the mill And it did the job, doesn't seem to rub and looks straight This time I bought cable guides ahead of time because the ones on bike #1 took an eternity to make. I tig brazed them on and was pretty happy with how they worked out. Got into a bit of a routine after the first couple of guides. Added a little brace there for the reinforcement below the disc tab
- 102 replies
-
- 11
-
-
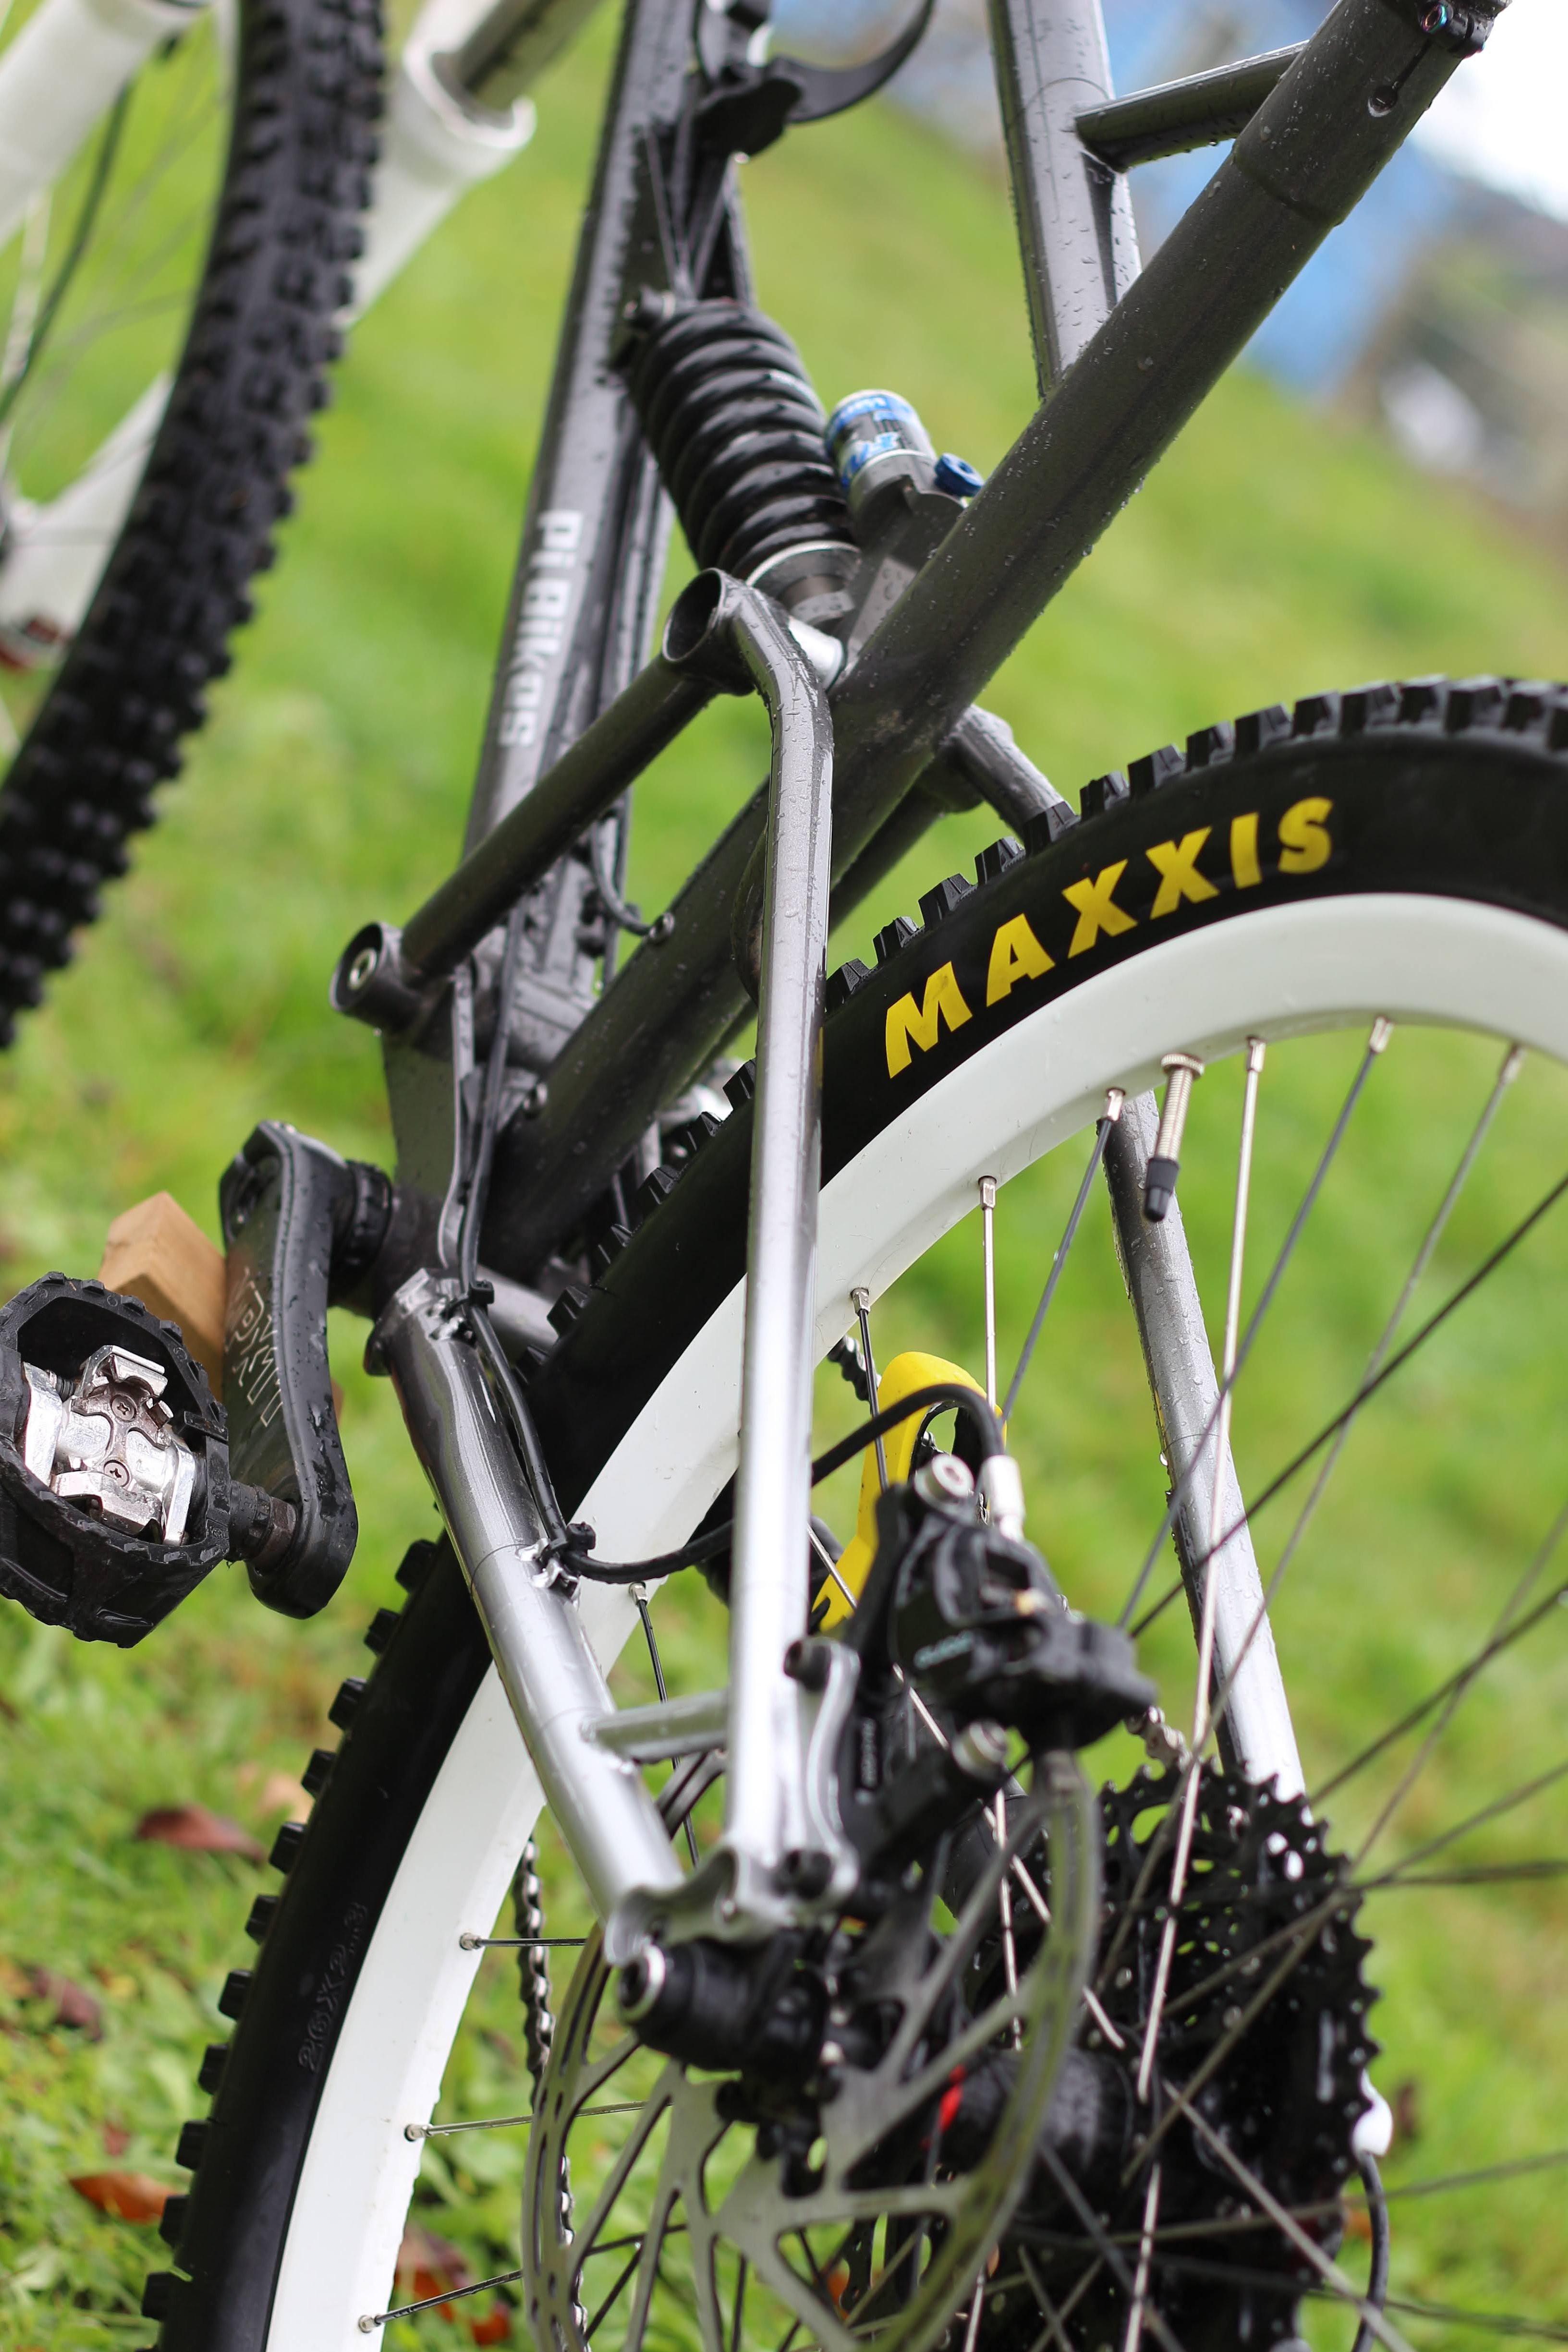
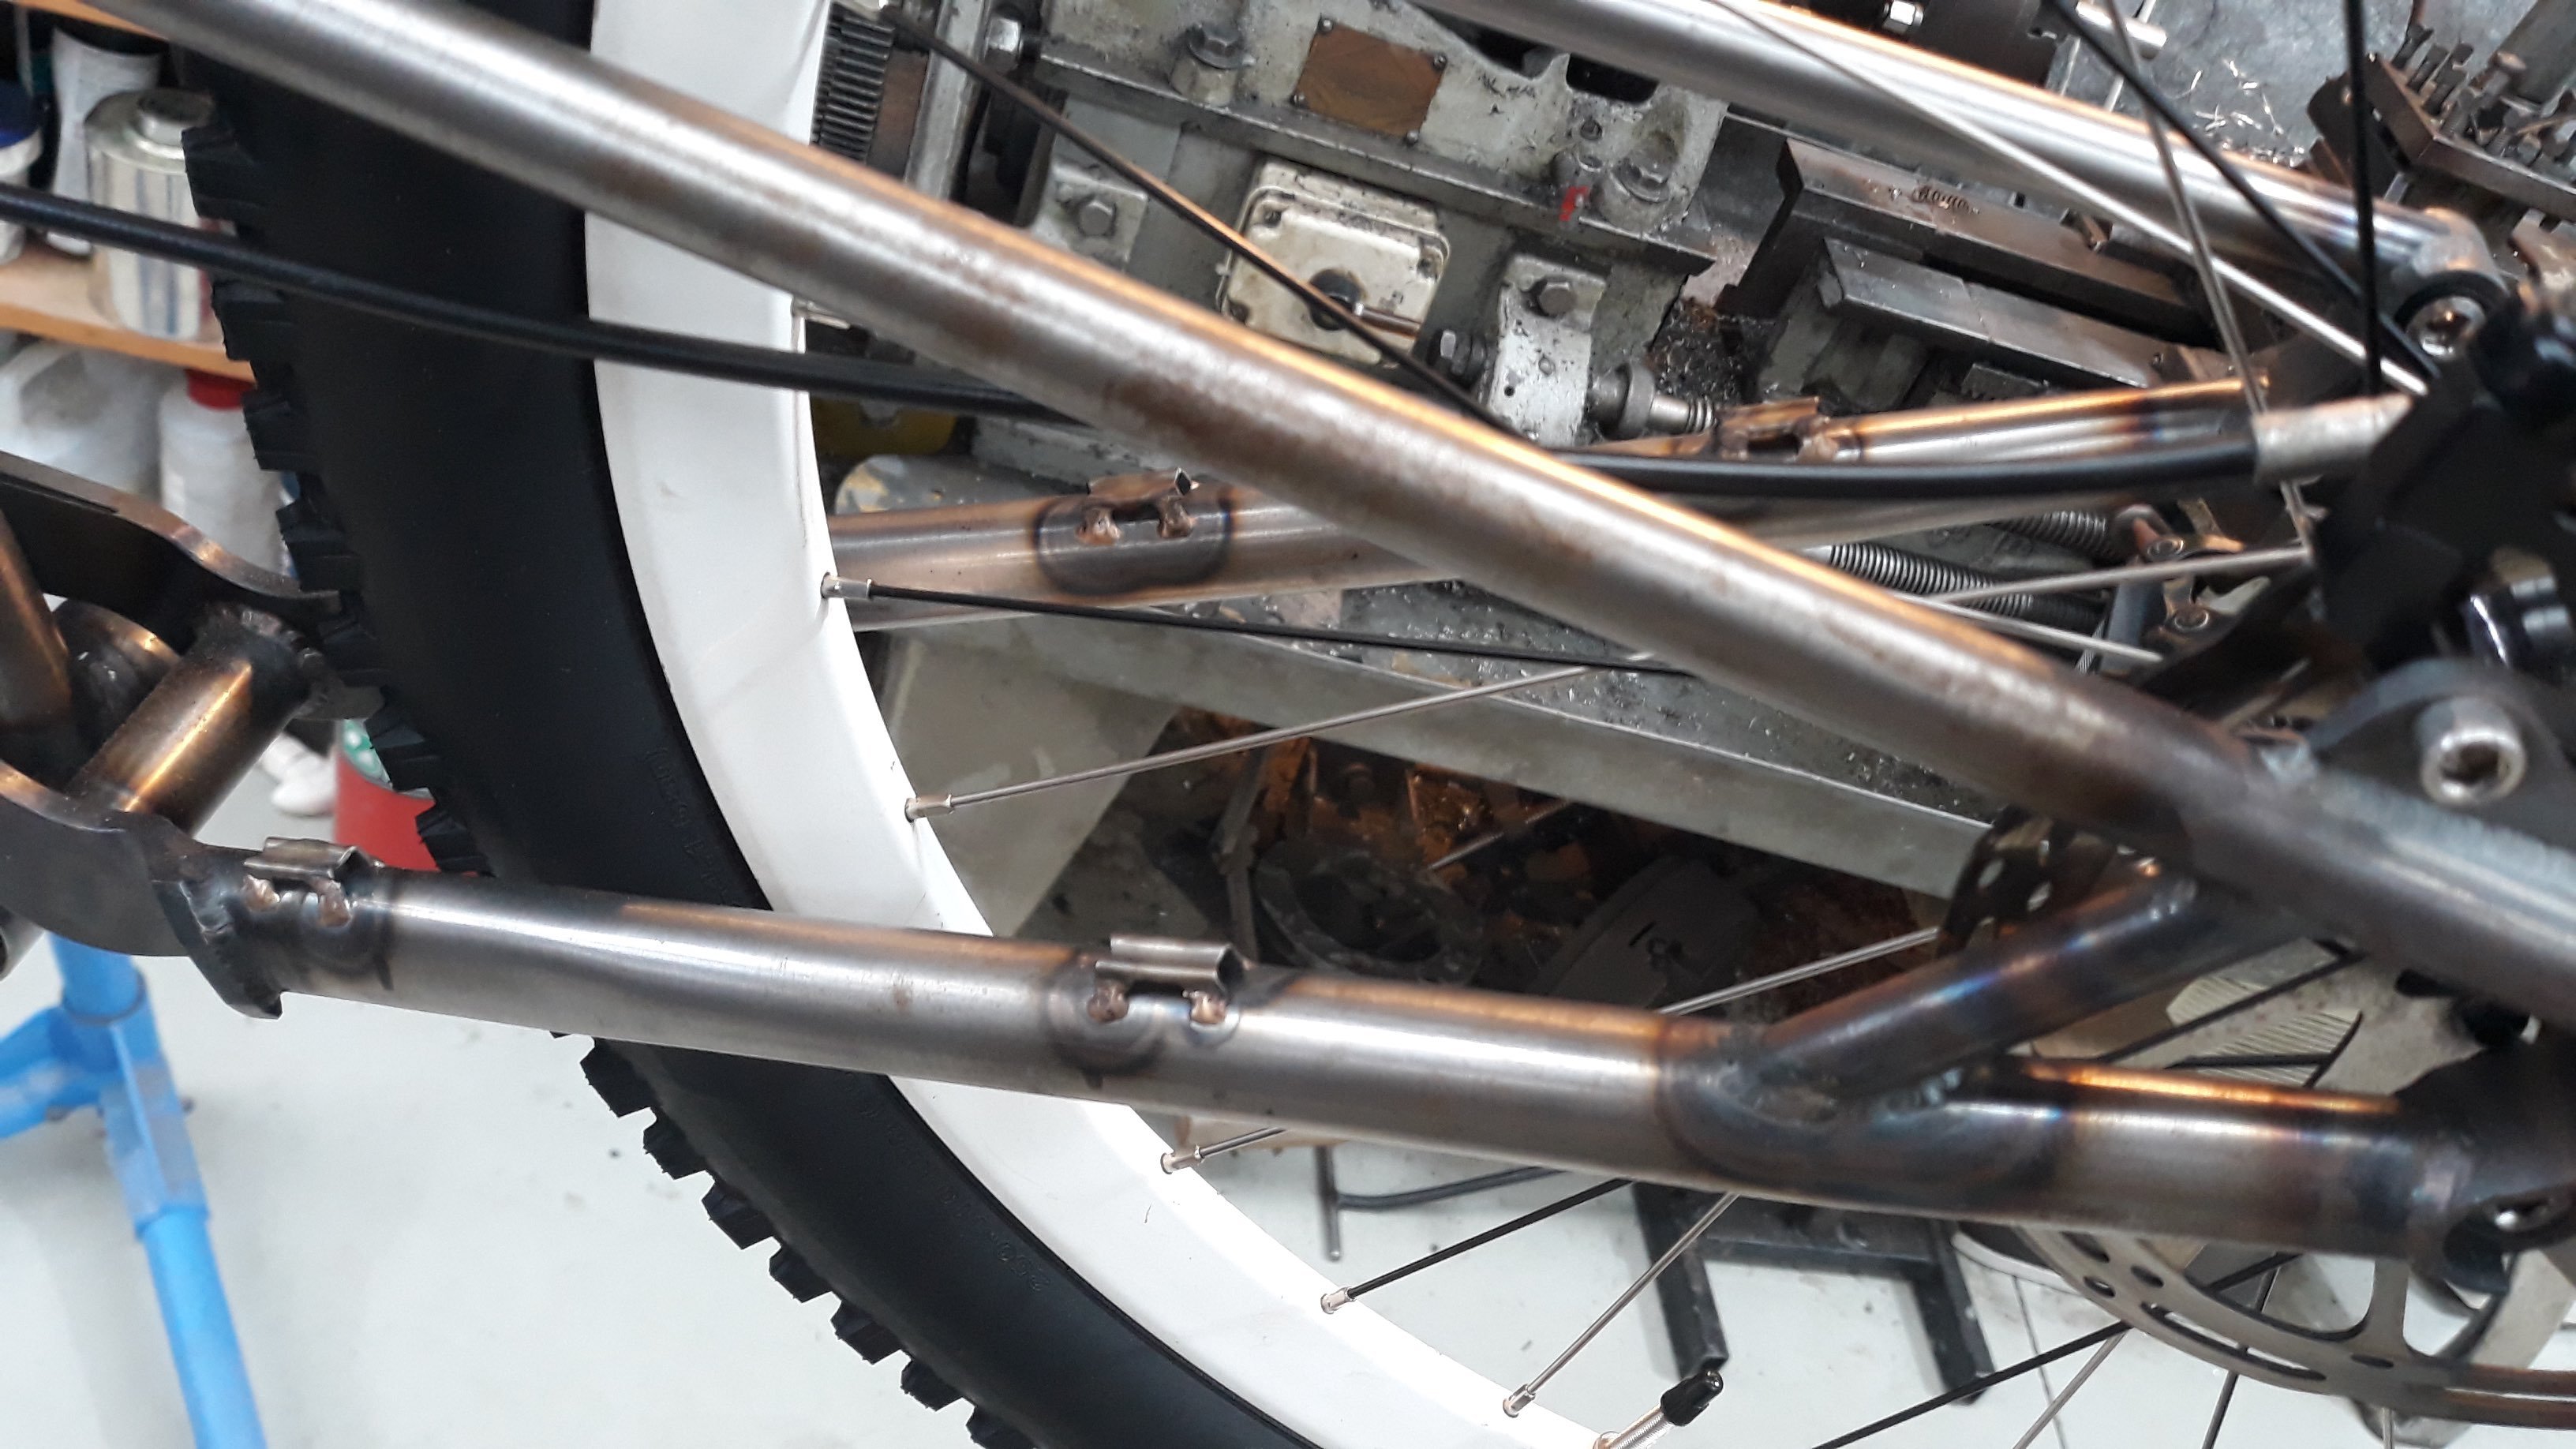
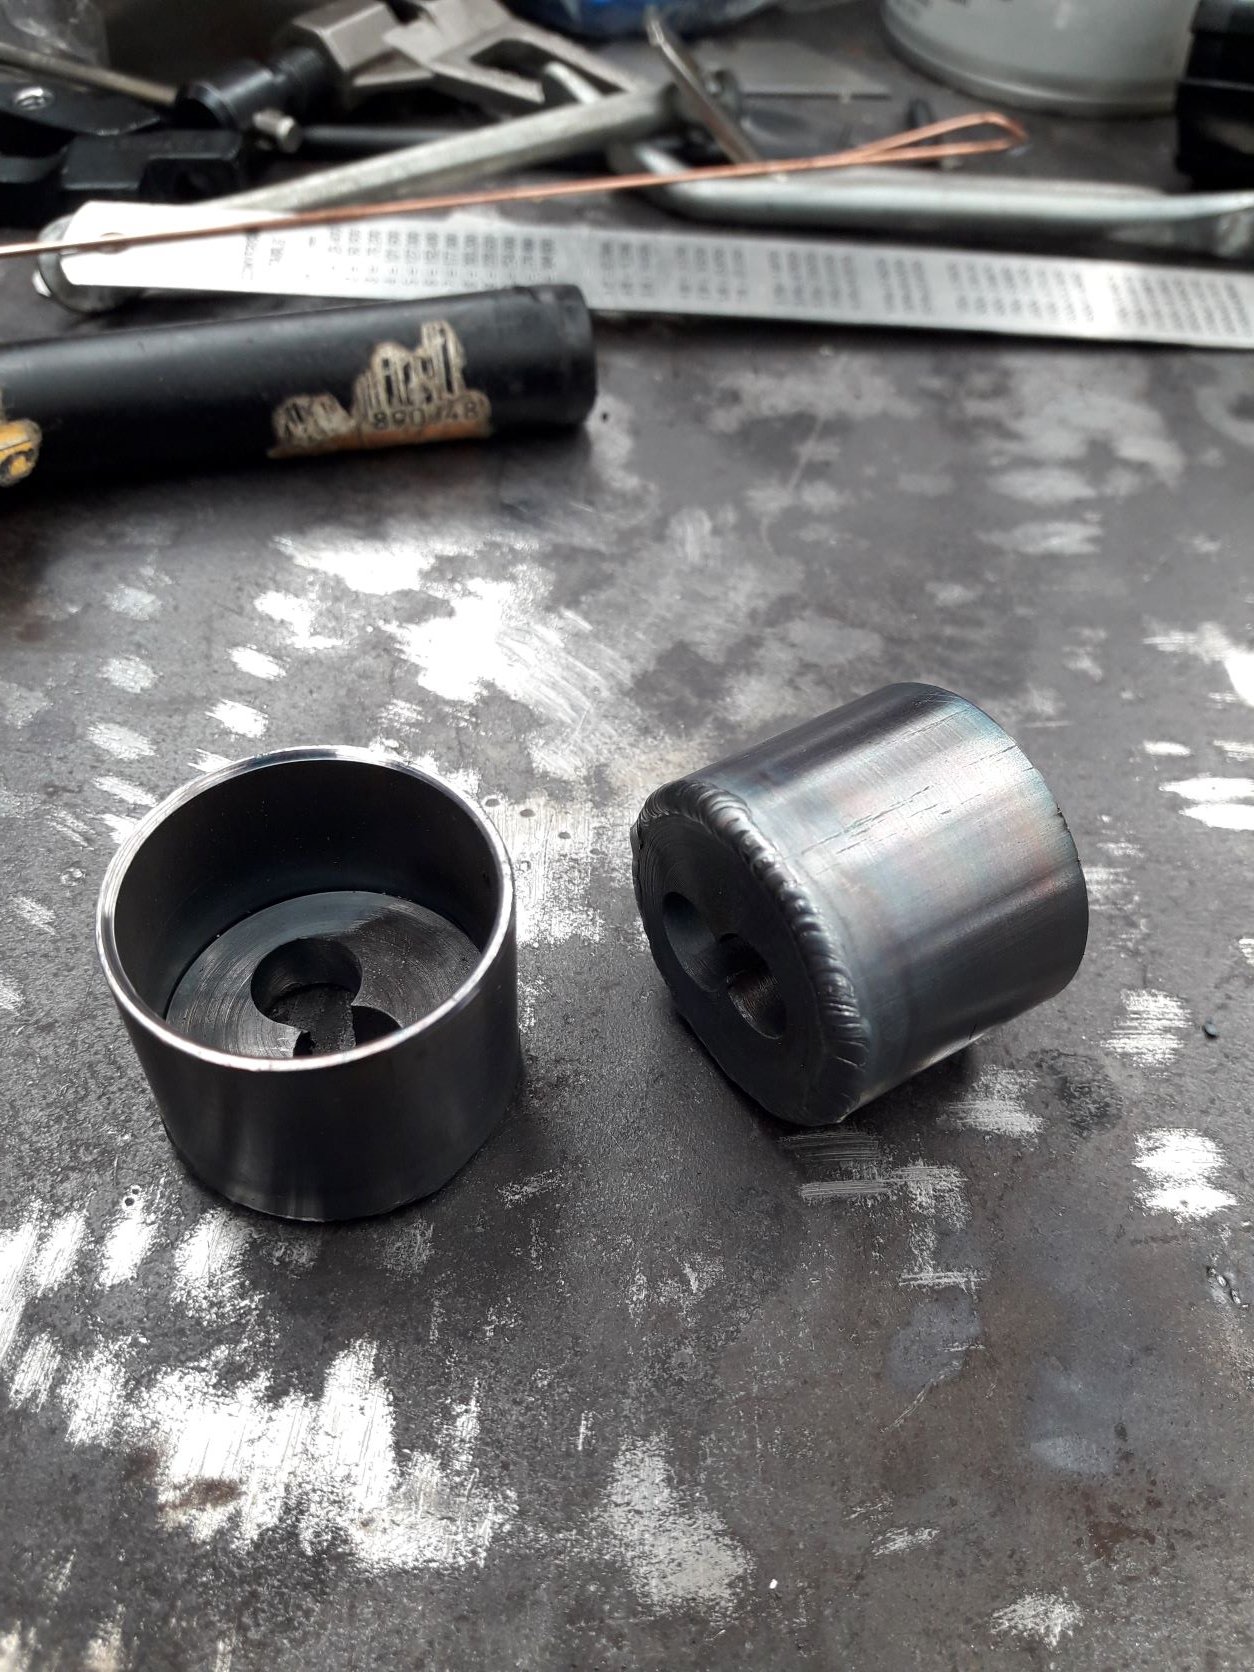
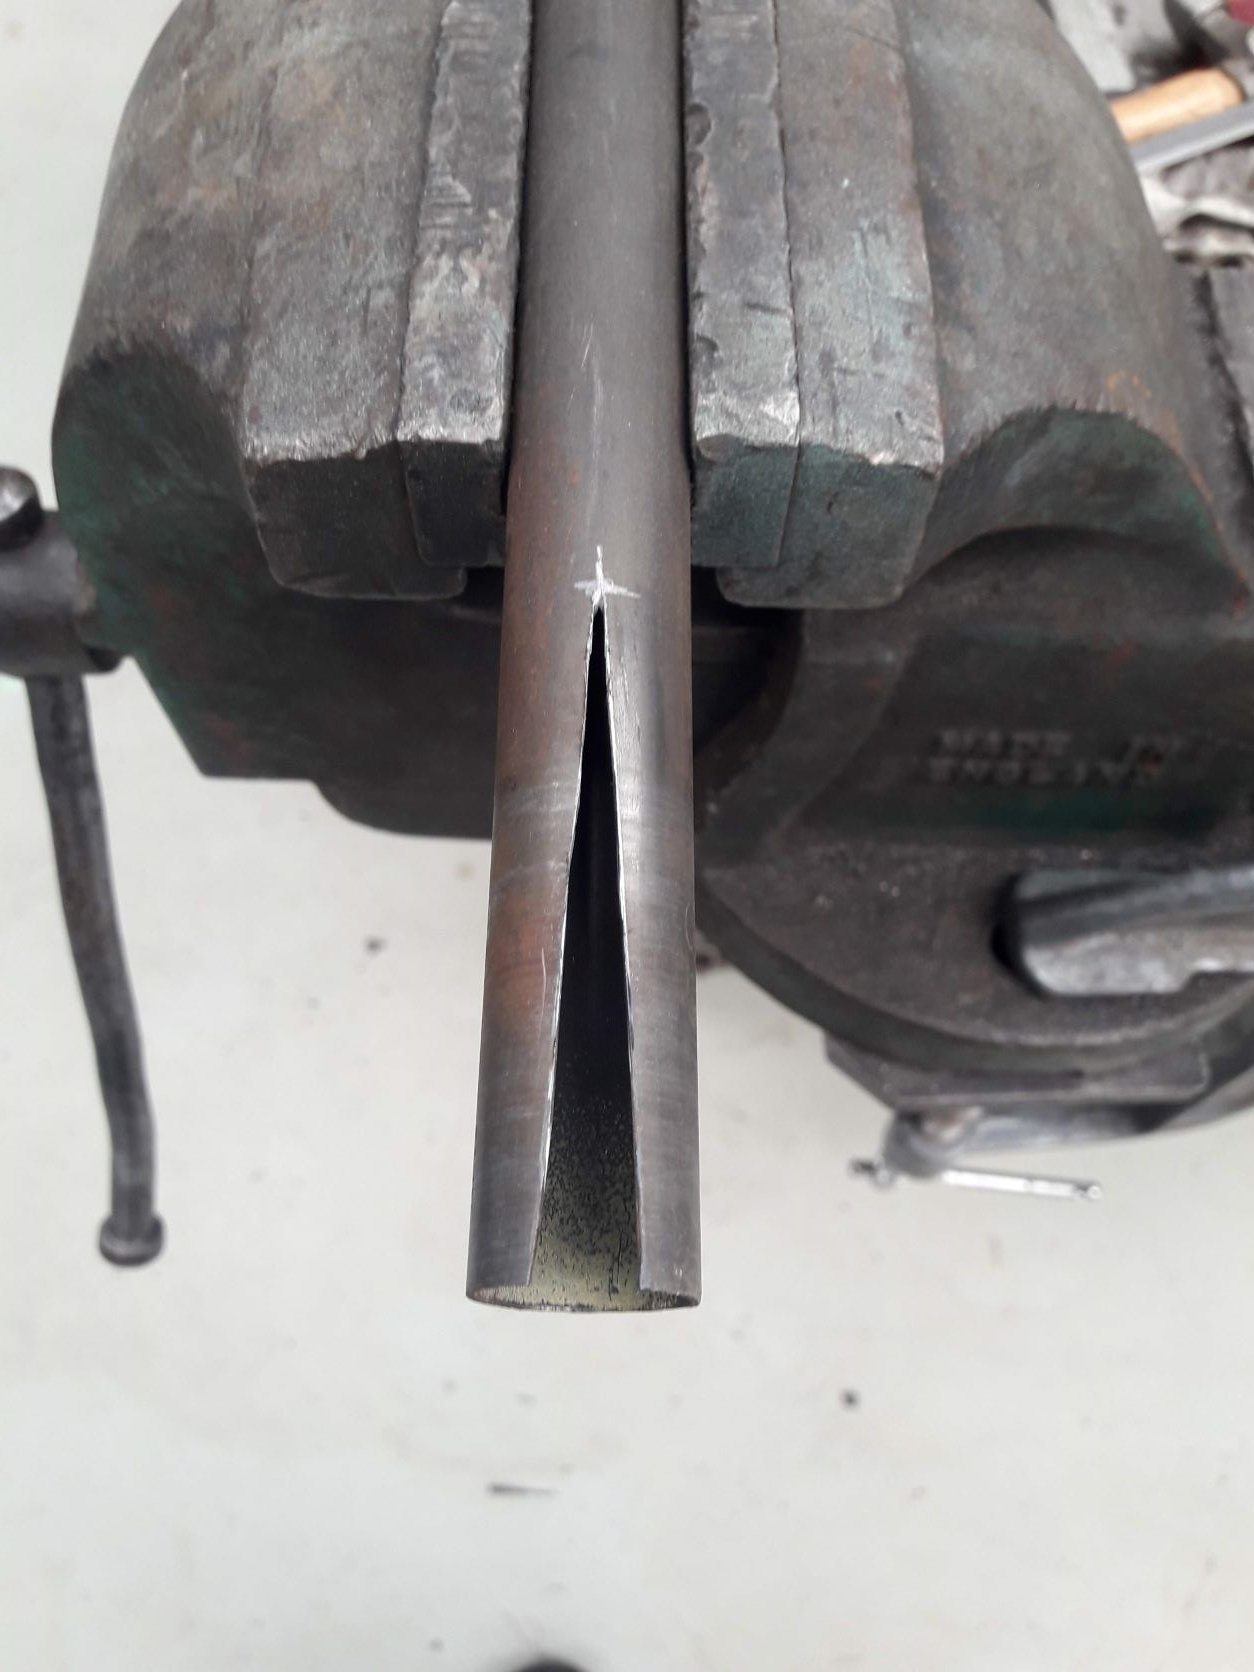
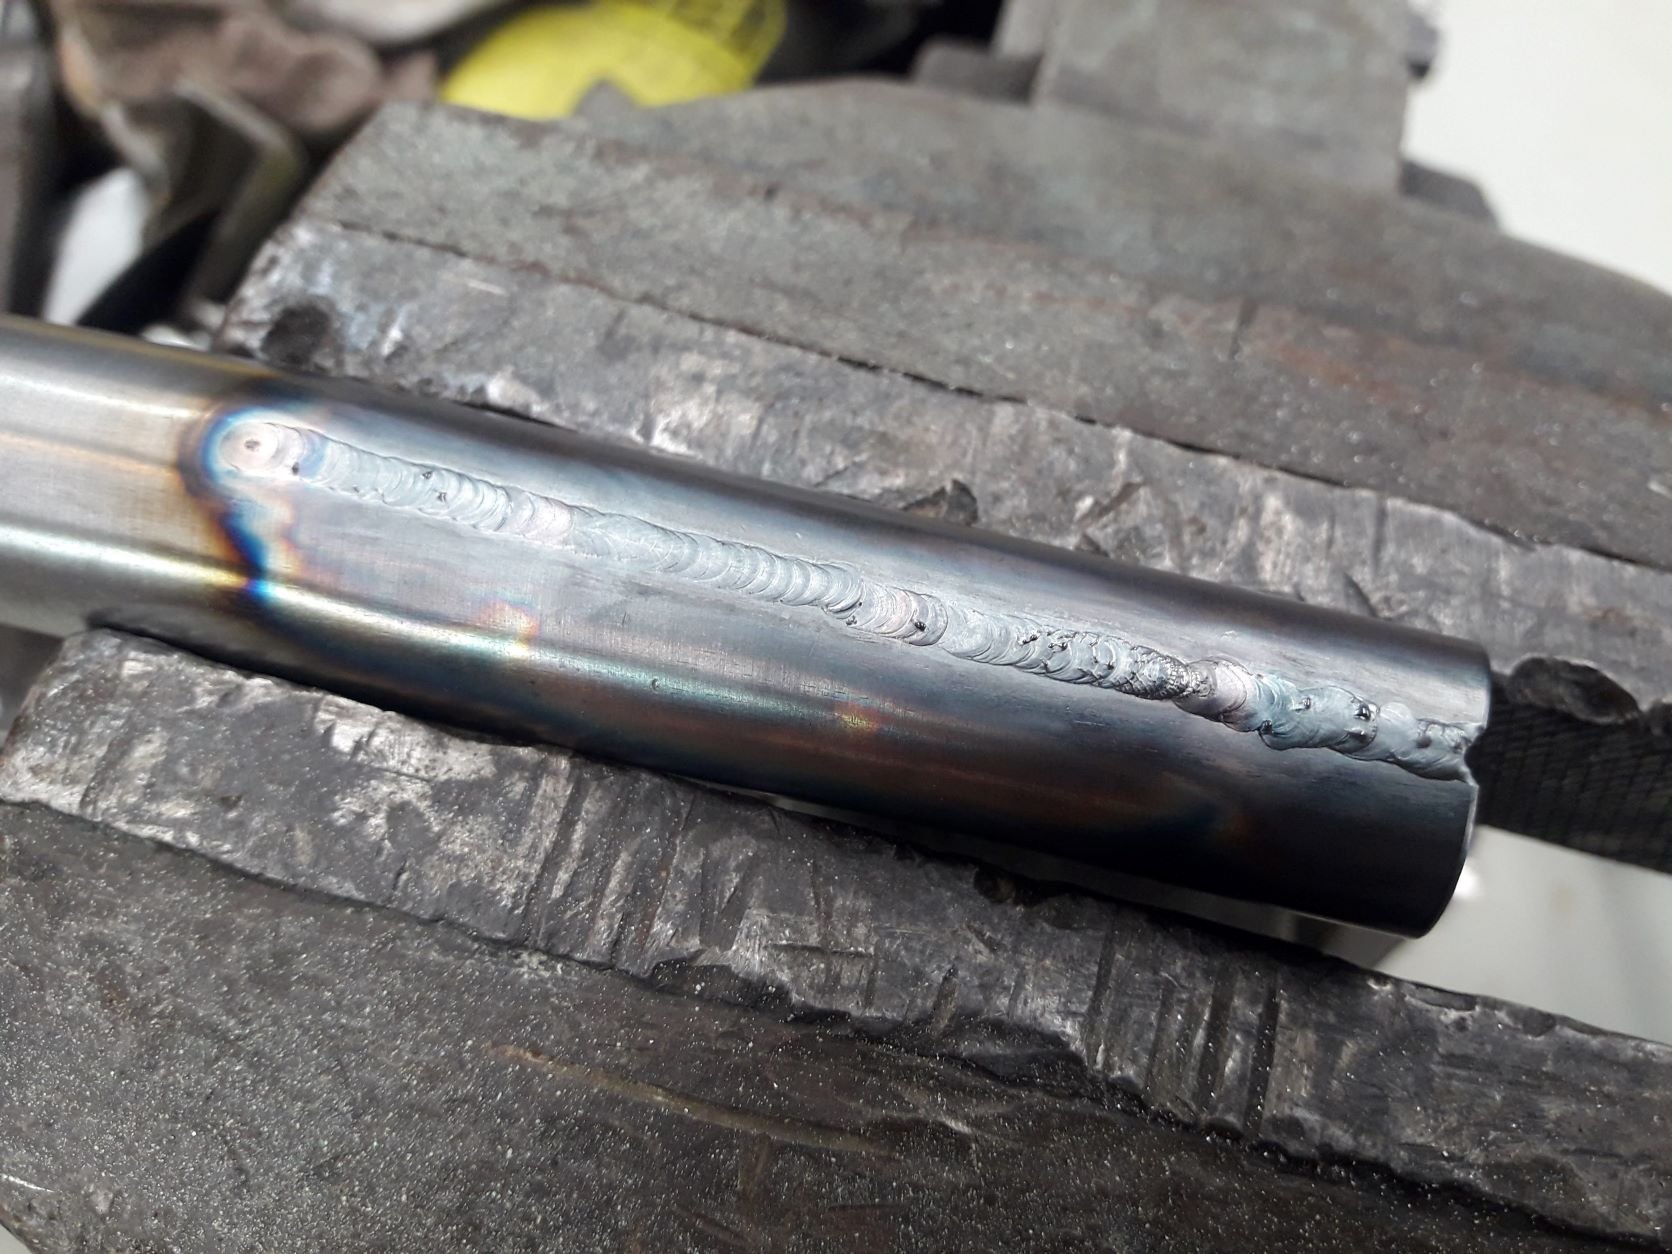
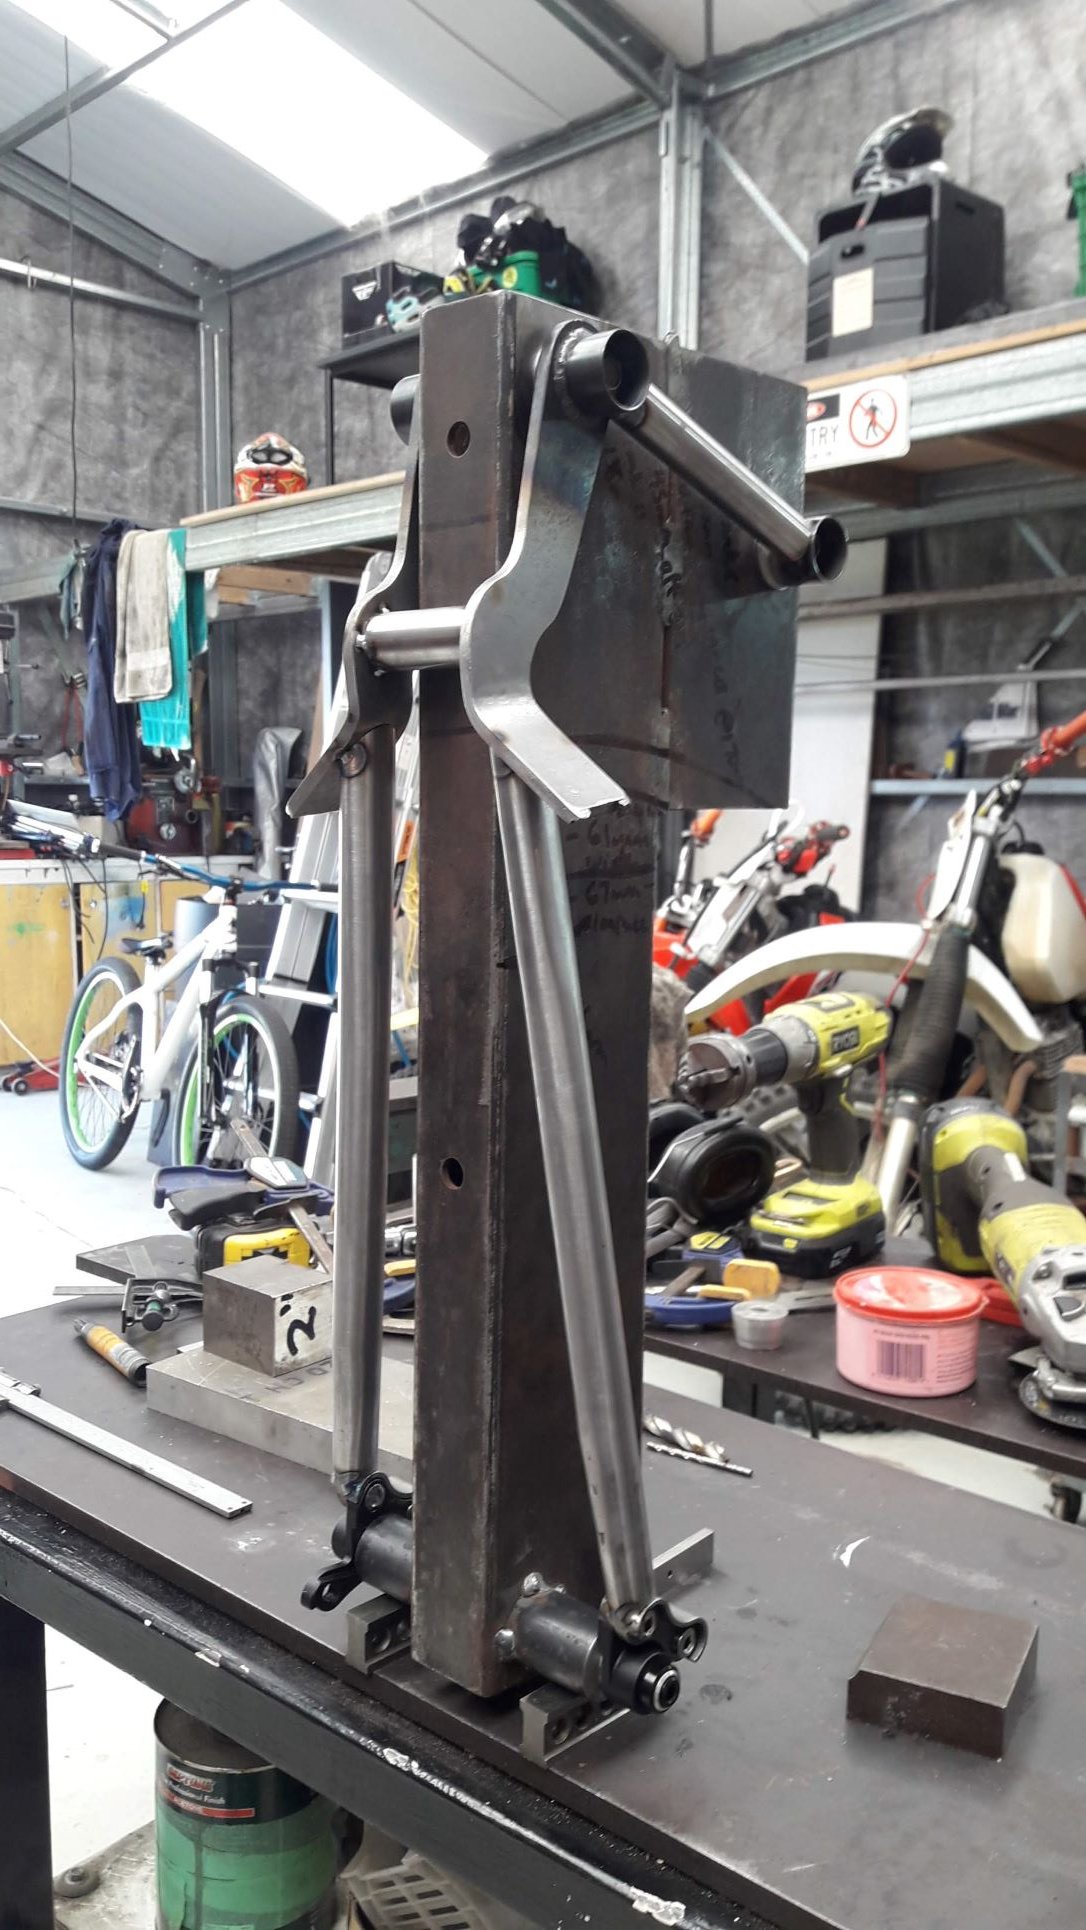
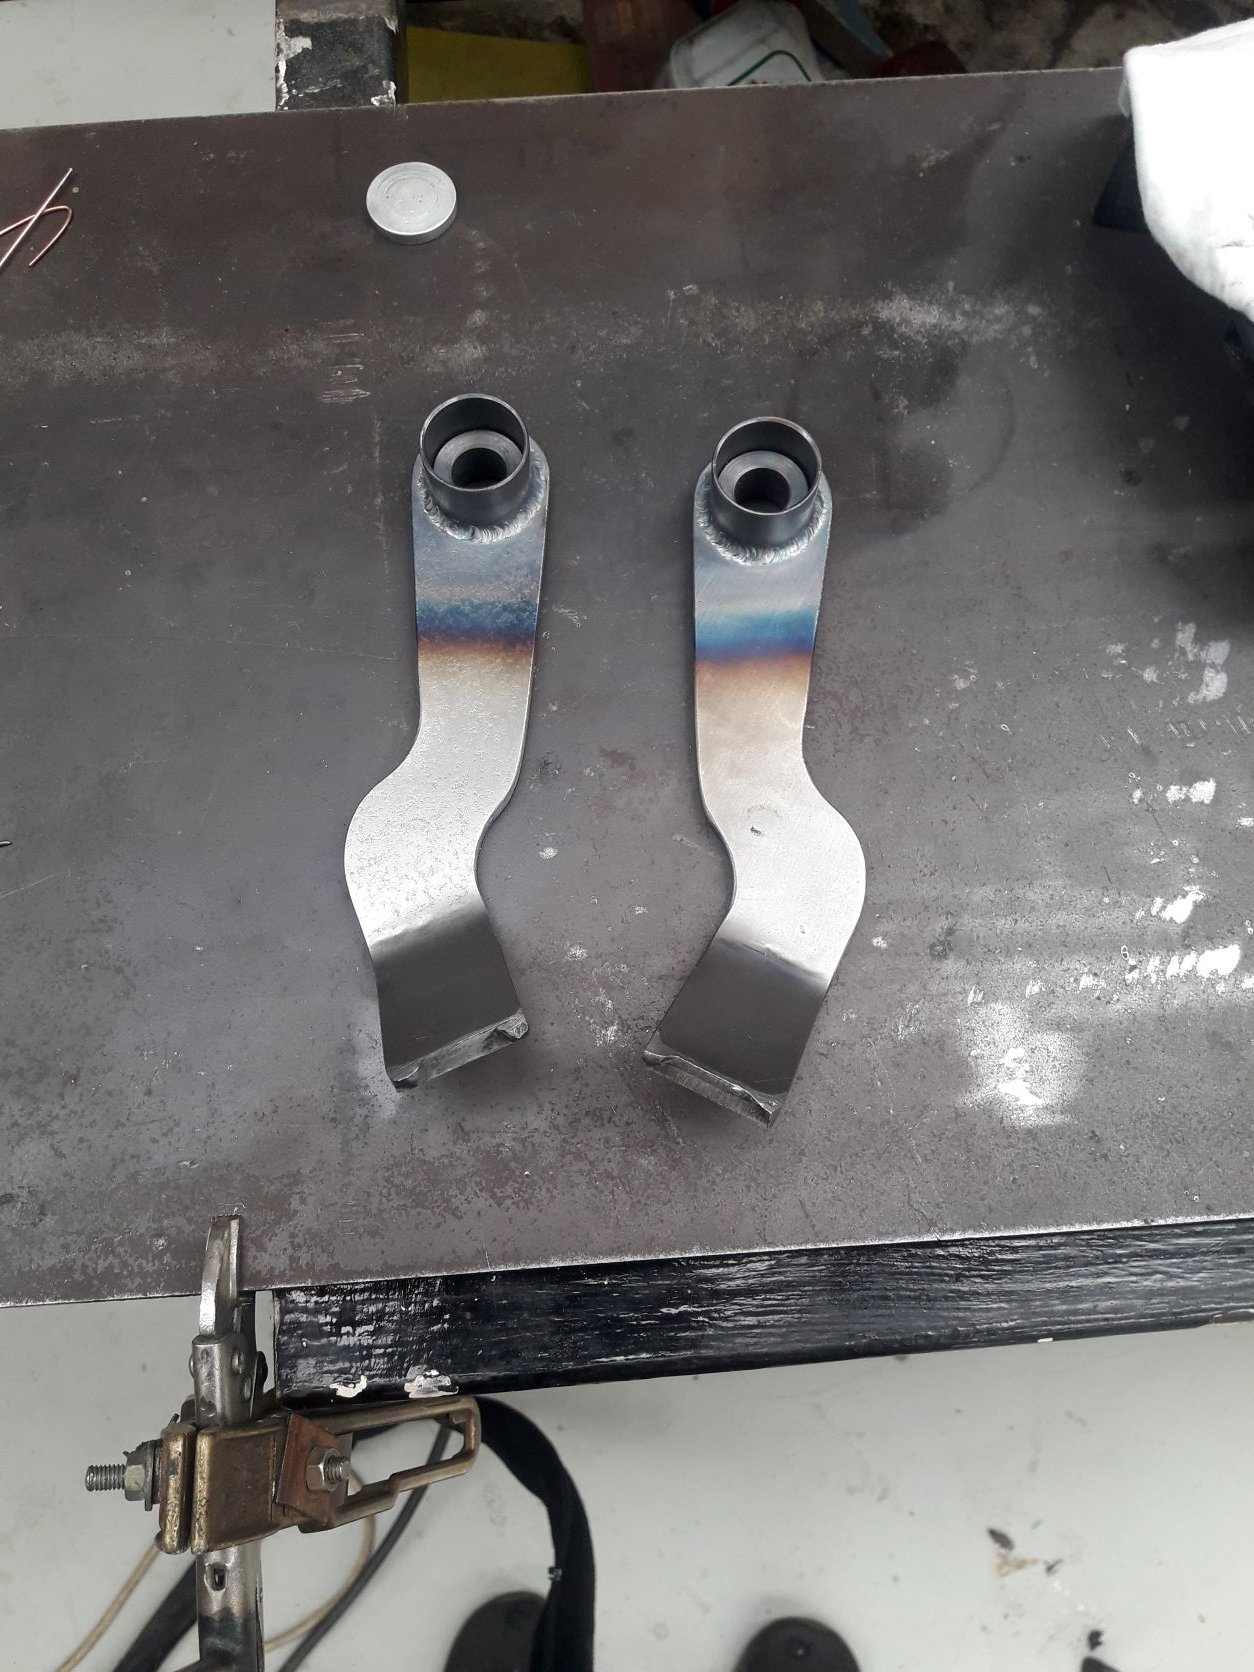
The rear triangle felt like it took forever to come together, mostly because each node point needed to be designed and fabricated and usually took a fair few hours. Especially because I stuff things up on a fairly regular basis. I started with the shock pivot points, there's 2 holes so you can go between 200mm travel and 190mm. This is futureproofing in case I decide I want to go to 27.5" wheels, it will rub the seat tube at full compression on 200mm setting otherwise. Some wiggly dog leg things for the chainstays Added some roundy things to the holes for attaching tubes and to preload the swingarm bearings The tubing for the Chainstays is 22mm and the dropouts are designed for 19mm max, so I pie sliced the end and welded it back together to get it to fit nicely Then started putting it all together I like this picture cause it looks like cthulu or a sea beast or something Lots of notes on the jig so I don't smack the cranks on the chainstay like last time hahaha And that's a mostly complete swingarm!
- 102 replies
-
- 13
-
-
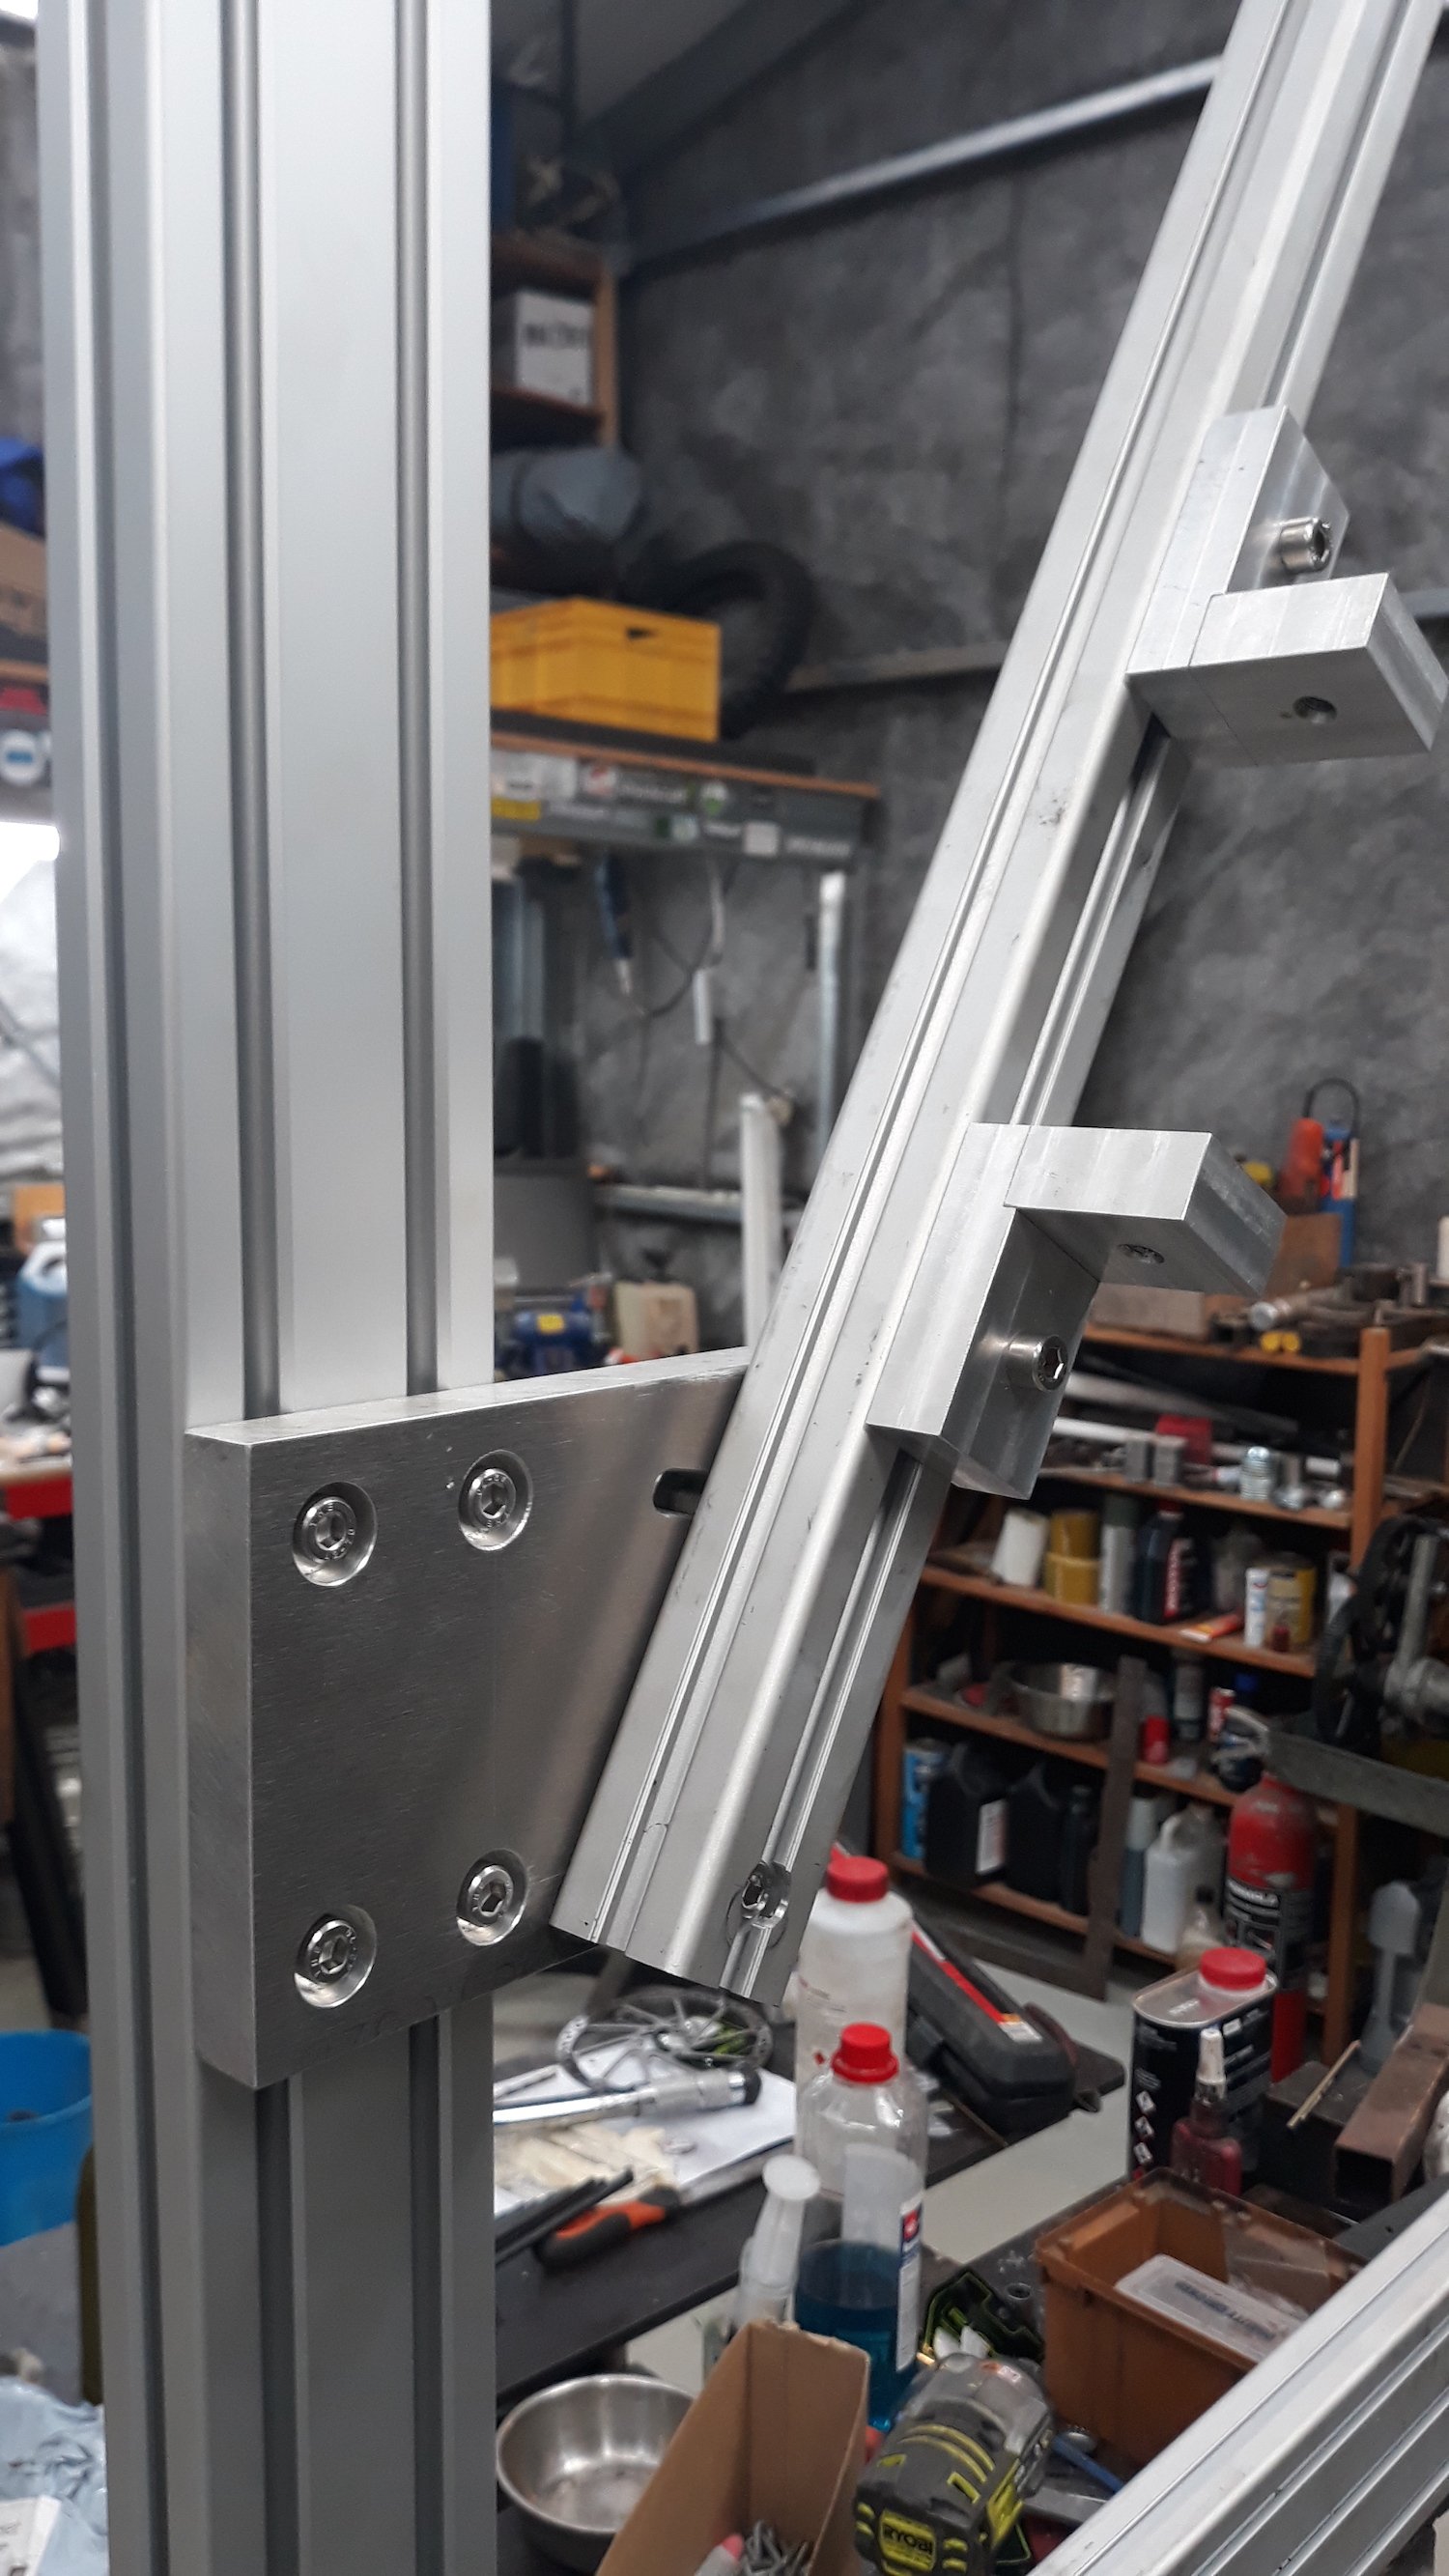
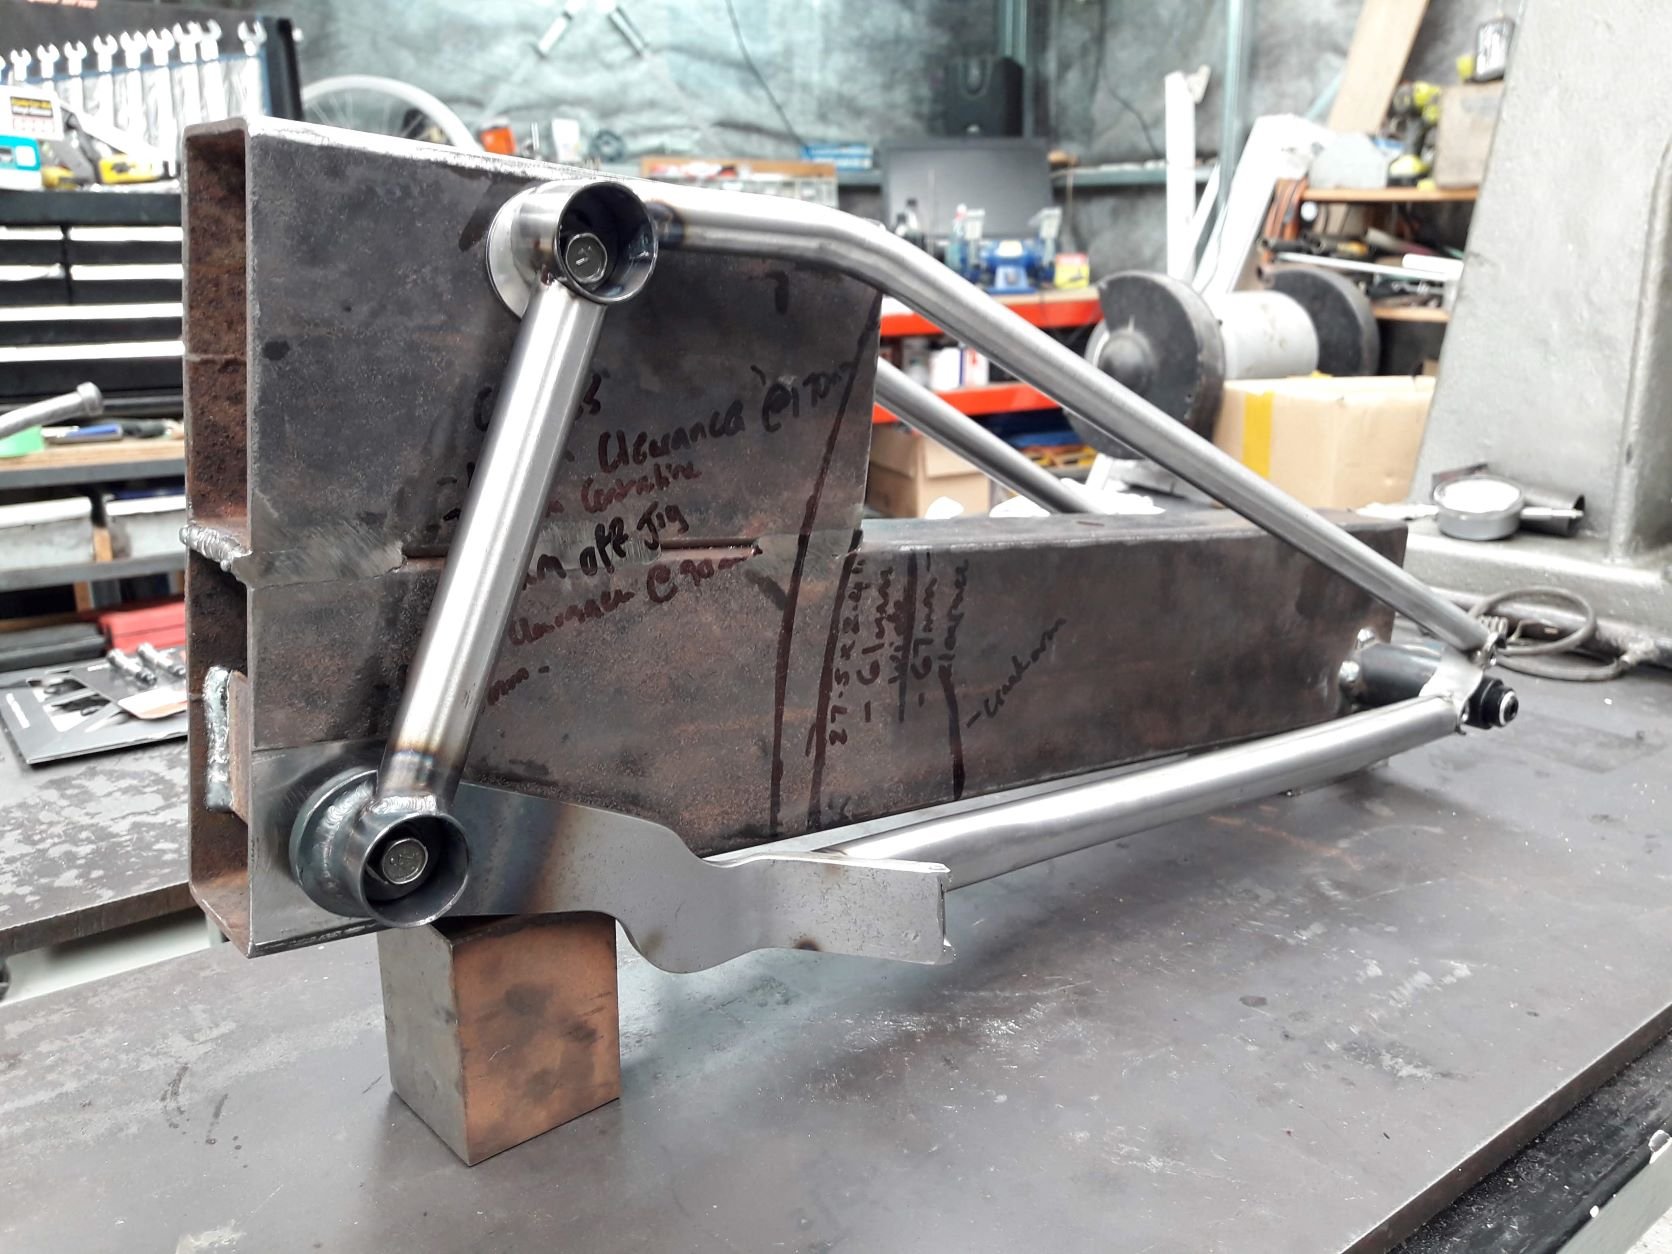
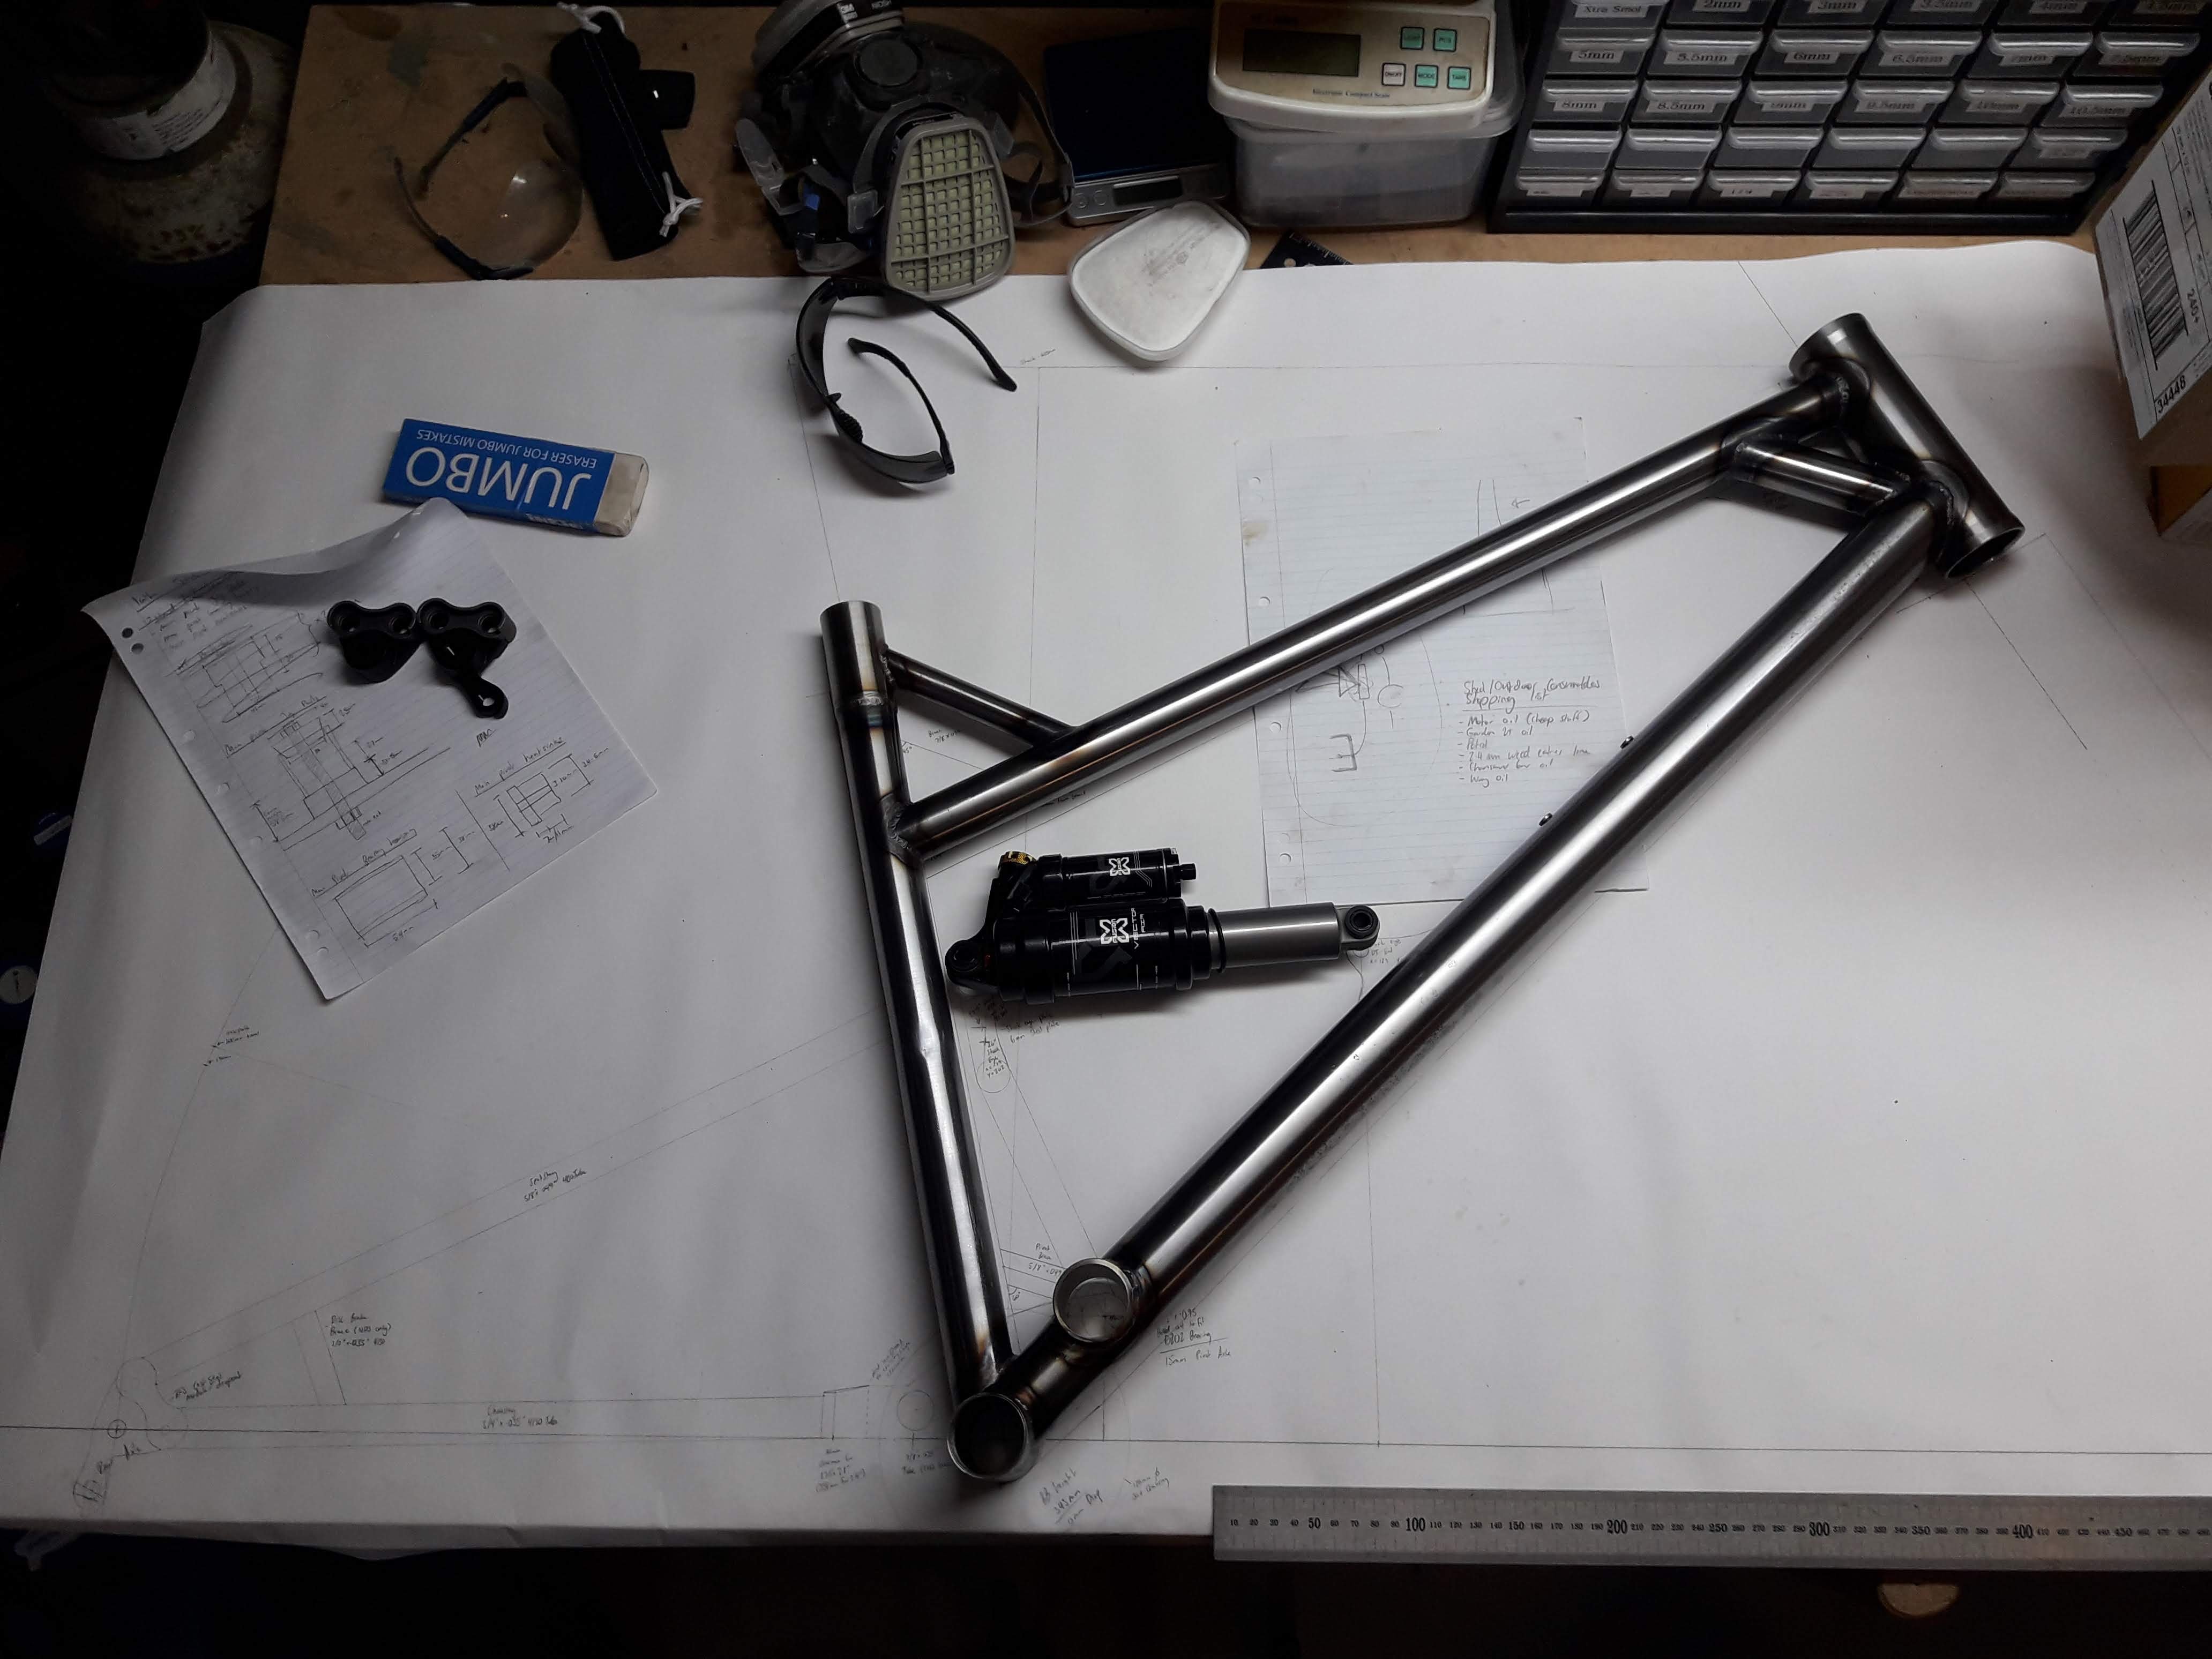
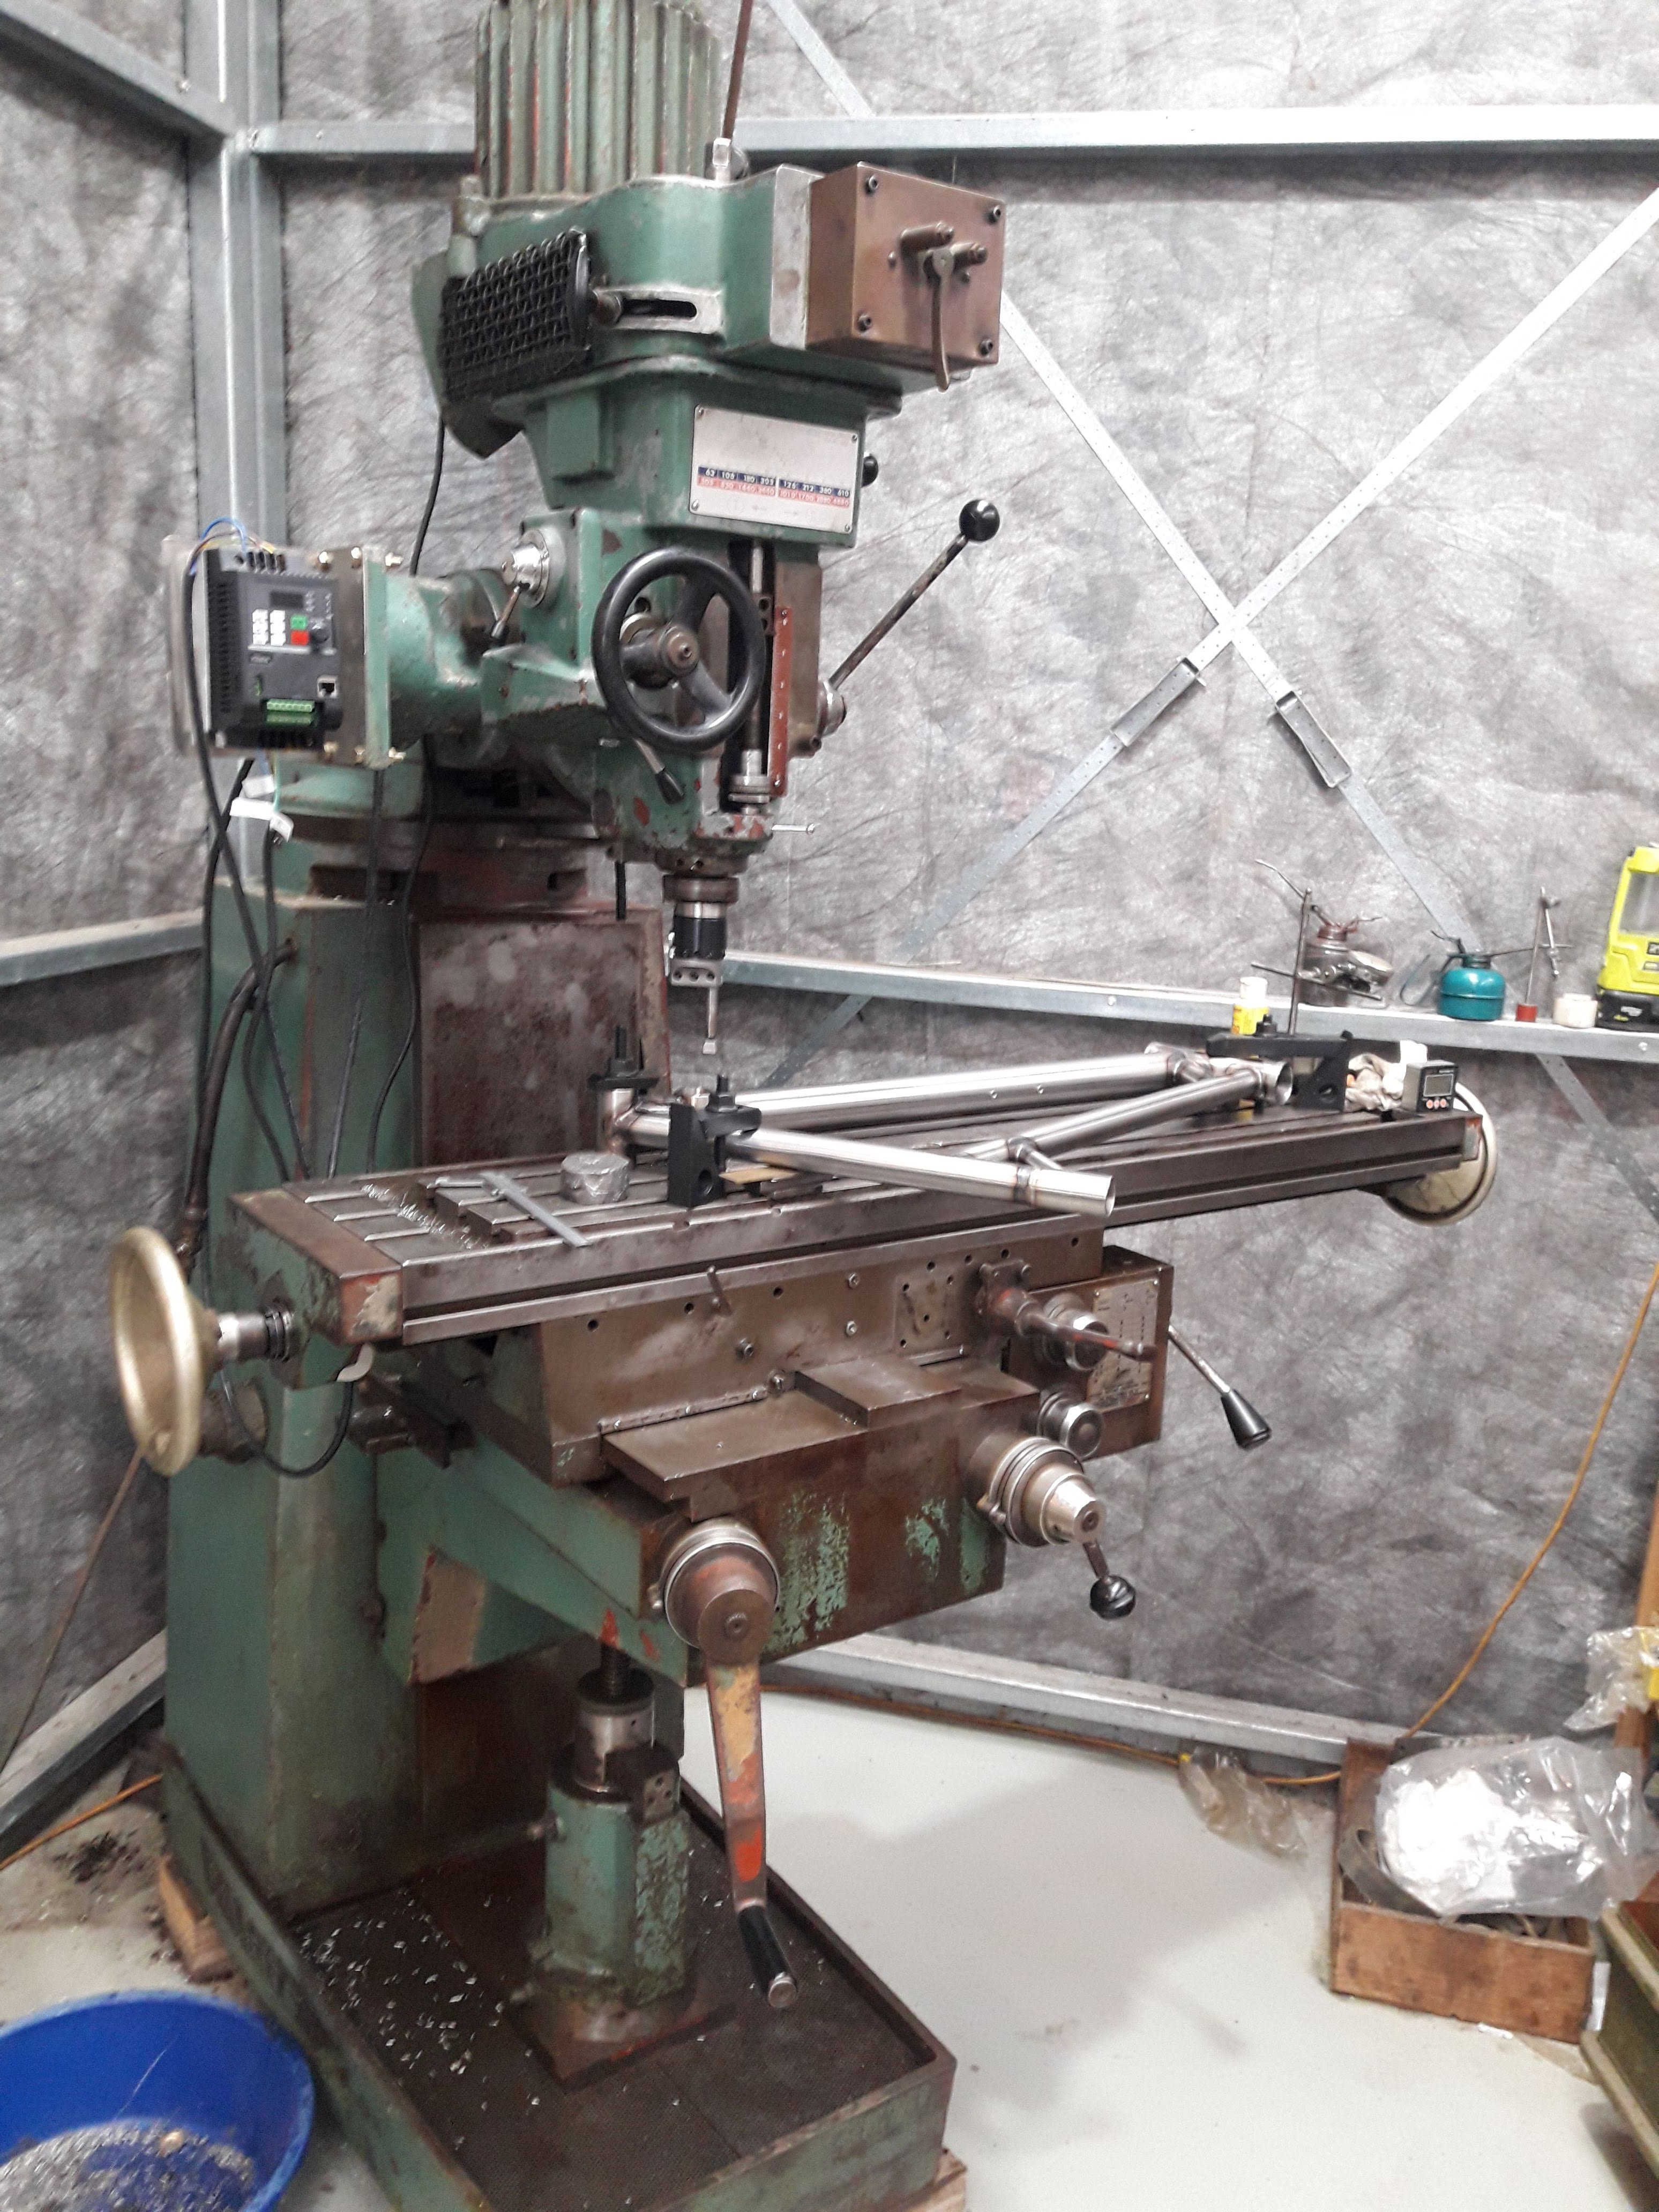
So once the mill had a VFD bolted to the side I welded in a sleeve for the main pivot and bored out the bearing pockets. I very nearly stuffed it up by trying to take to light a cut but with some advice from @Geophy I managed to get an acceptable surface finish and clearance for the bearings. Mocked it up on the drawing and it was looking pretty good! The pivot location had moved a little bit from the original design but I changed my linkage x3 save to match and it didn't look like it will cause any issues. This is why next time I will bore the pivot hole after welding the triangle together. Though I didn't have the mill running at the time either so not sure how I would have done it anyway. I didn't want to invest too heavily in this bike so its mostly made of stuff I had already. When I ordered the tube for bike #1 I ordered extra so I already had the top tube , seat stays, chain stays and seat tube. I ordered a length of 44x.9mm 4130 for the down tube. The wheels are an old 26" set that I already had, the fork is one we got free off facebook ages ago. The shock is also one I already had. I will probably be looking to upgrade the fork once I finish the bike as it is a damper rod/ orifice style which doesn't have speed sensitive damping. So if anyone has a boxxer/fox 40/rcv888/dorado or prettymuch any 200mm double crown fork with shimmed damper you want rid of let me know. Next up I needed to make a jig for the rear triangle. This is what I came up with: The dropouts are from bike fab supply because making my own last time took way too long and these were pretty cheap
-
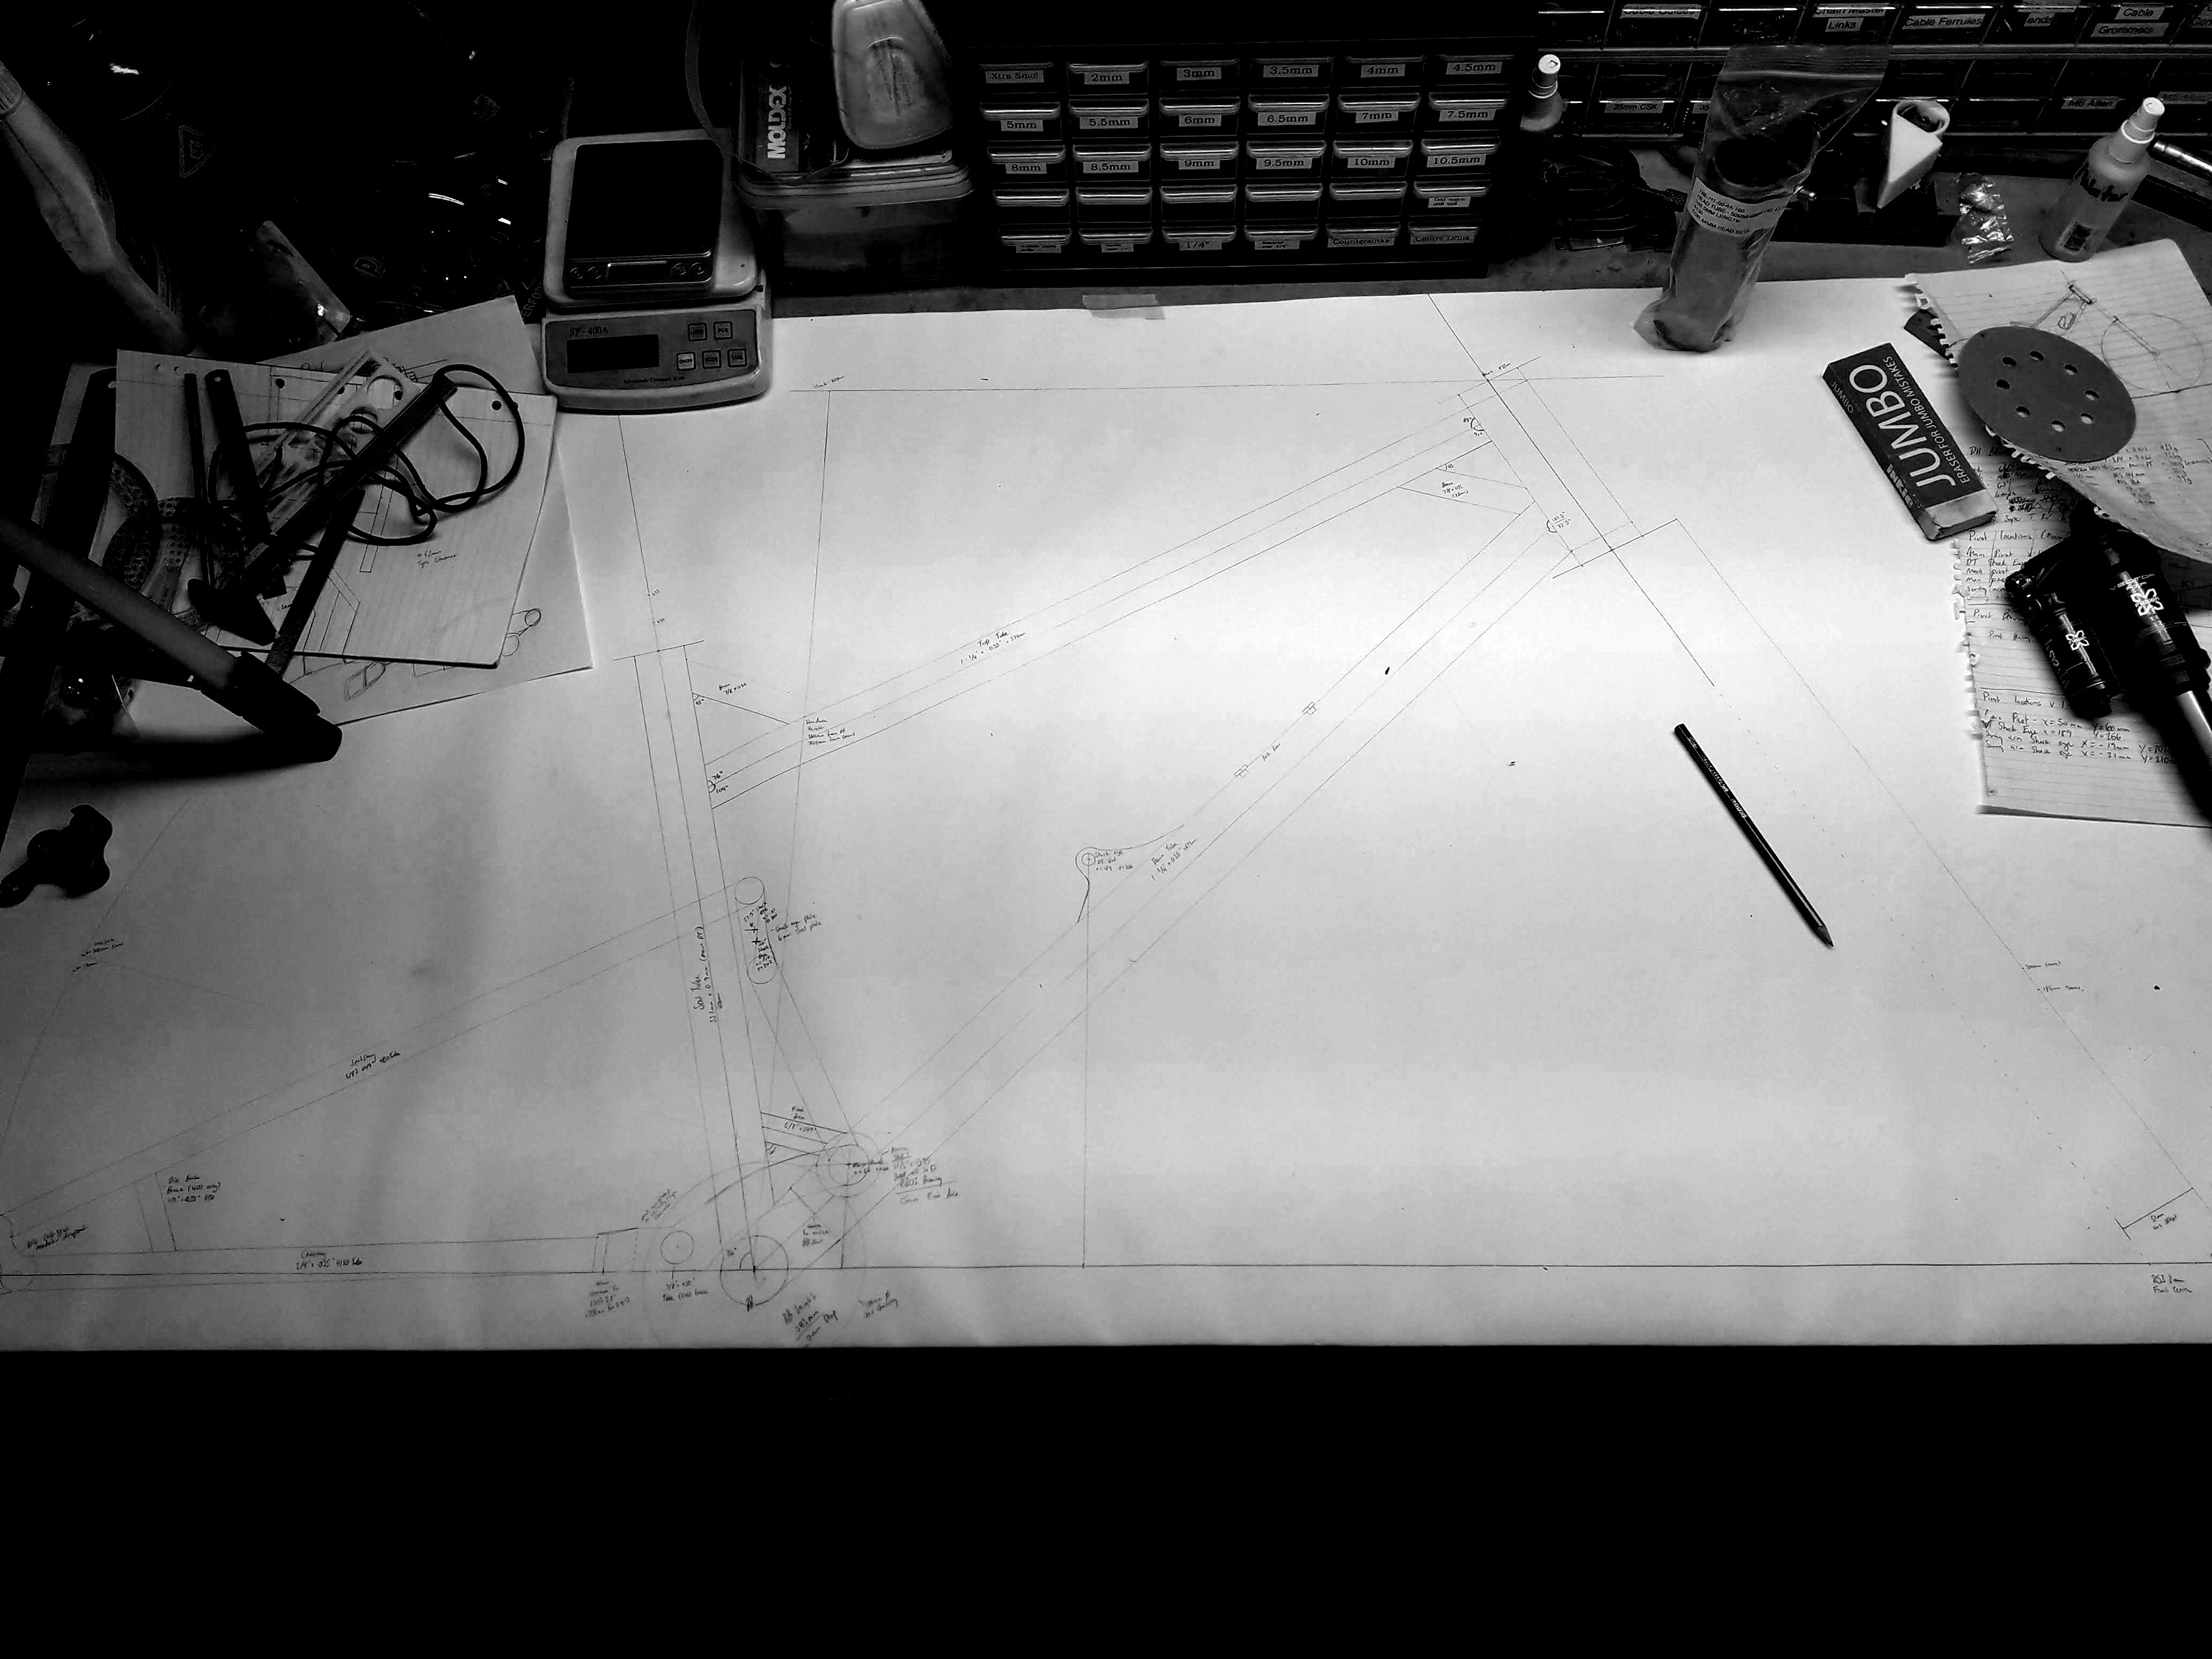
Well I let the cat out of the bag a little bit in the show us your shed thread so its time to share round 2. Bike number 1 is still working magnificently, but it is lacking something. A rigid bike is great fun, but boy does it beat you up on a rough trail. So I decided to start building bike number 2 with some suspension travel. I figured I would go right to the other extreme of mountain biking and make a 200mm travel DH bike. There's a couple of reasons for this number 1 - I have never had a downhill bike they seem like fun and looks sweet. Number 2 - I figured I would make a single pivot bike (for simplicity reasons) and wasn't sure if the suspension kinematics would be any good. So just make it have lots of travel to compensate for any flaws and don't worry too much about pedaling efficiency. I started out by figuring out what I wanted the geometry to be, its mostly very standard DH bike stuff. 63*hta, 450mm chainstays etc. I cant remember what the reach was but it was as long as I could go and still be comfortable. I bought a copy of linkage x3 (mtb suspension design program) and chose the pivot locations and all that kind of jazz, then when and drew a 1:1 scale drawing on paper. That has been super useful and I think I will be doing that for all builds in future. I had to mess around with the brightness/contrast to get it to show up in a photo but that gets you a rough idea. Next I copied that onto my "jig" that I used last time. It's a piece of MDF with 3d printed standoffs if you didn't follow my previous build. I had to print some bigger standoffs because this has a 44mm headtube vs the 34mm one on the previous frame. I did the cutty cutty thing with the holesaws and got to this stage: The seat tube is a recycled down tube from the old marin that donated its head tube and bottom bracket to bike number 1, hence the dent. it also has bottle bosses on the other side near the bottom haha. I cut the pivot hole at the same time as coping the bottom bracket but in future I would do that after welding the main triangle. I also added some bracing to the head tube and seat tube It was very difficult getting into the corners with the tig, lots of regrinding tungstens etc. After that I had to decide how I was going to make a nice bearing pocket welded into the frame. I decided the best way would involve a vertical mill and a boring bar. I happened to have a mill but no power for it or boring bar so I ordered some lovely aliexpress goodies and waited for them to turn up...
- 102 replies
-
- 12
-
-
Gaspro have always been excellent in my experience. One day I turned up with my CO2 and they filled it on the spot, I'm glad to hear they can sort out my argon bottle when it runs out.
-

SR2’s 1947 Vauxhall “Rigamortice” Discussion thread.
Guypie replied to sr2's topic in Project Discussion
I second this movement, neatsfoot oil is excellent. Also, when we ordered it last we got it under @hampie's name and they kept sending saddlery warehouse advertising stuff to her. Got to tease her about being a horse lady whenever it turned up til we moved house. -
my 2c - for the home handyman type stuff straight co2 is the best. Downsides: -It has its limitations in that it wont spray transfer, most little welders probably won't get there anyway. -about 5-10% more splatter (in my limited experience) -Probably other things, I'm not an expert Upsides: -owner bottles in the form of fire extinguisher bottles are cheap, usually around the $300 mark full. -it stores as a liquid unlike argoshield mixes. this means that you fit a whole lot more in the bottle. This is a massive upside in my book, when I want to run mig I want it to be cheap. -Last fill I got was at gaspro, cost $45, a lot better than the $130 swappa bottles for argosheild. The chap there said its $10 per kg, its a 5kg cylinder but it was a bit too warm to get the whole 5kg in one hit that day. -Apparently runs a bit hotter than argosheild mixes would for the same amperage on short circuit mig. For little machines this might be handy. In saying that I haven't had any issues welding panel steel either so not an issue for rust repairs. I have put a good number of hours on the mig over the last few years, built a couple of trailers and lots of random crap with co2 and haven't had any cracks/breakages or weld related issues. I guess the caveat is that I also have a tig so if I want a fancy weld I can use the tig but generally I use mig for most fabrication type things. Also, I'm just a guy in a shed sticking stuff together for fun so I don't really know what I'm talking about hahaha.
-
Not sure about the FB but on the F series with a little bit of work you can fit MG b gt front hubs. Combined with lowering springs it corrects the camber due to the angle of the spindle and adds extra low cause the spindle is higher on the hub. win win! Edit: Scrap that got confused between a couple of old cars I used to have, that was a morris oxford. duh.
-
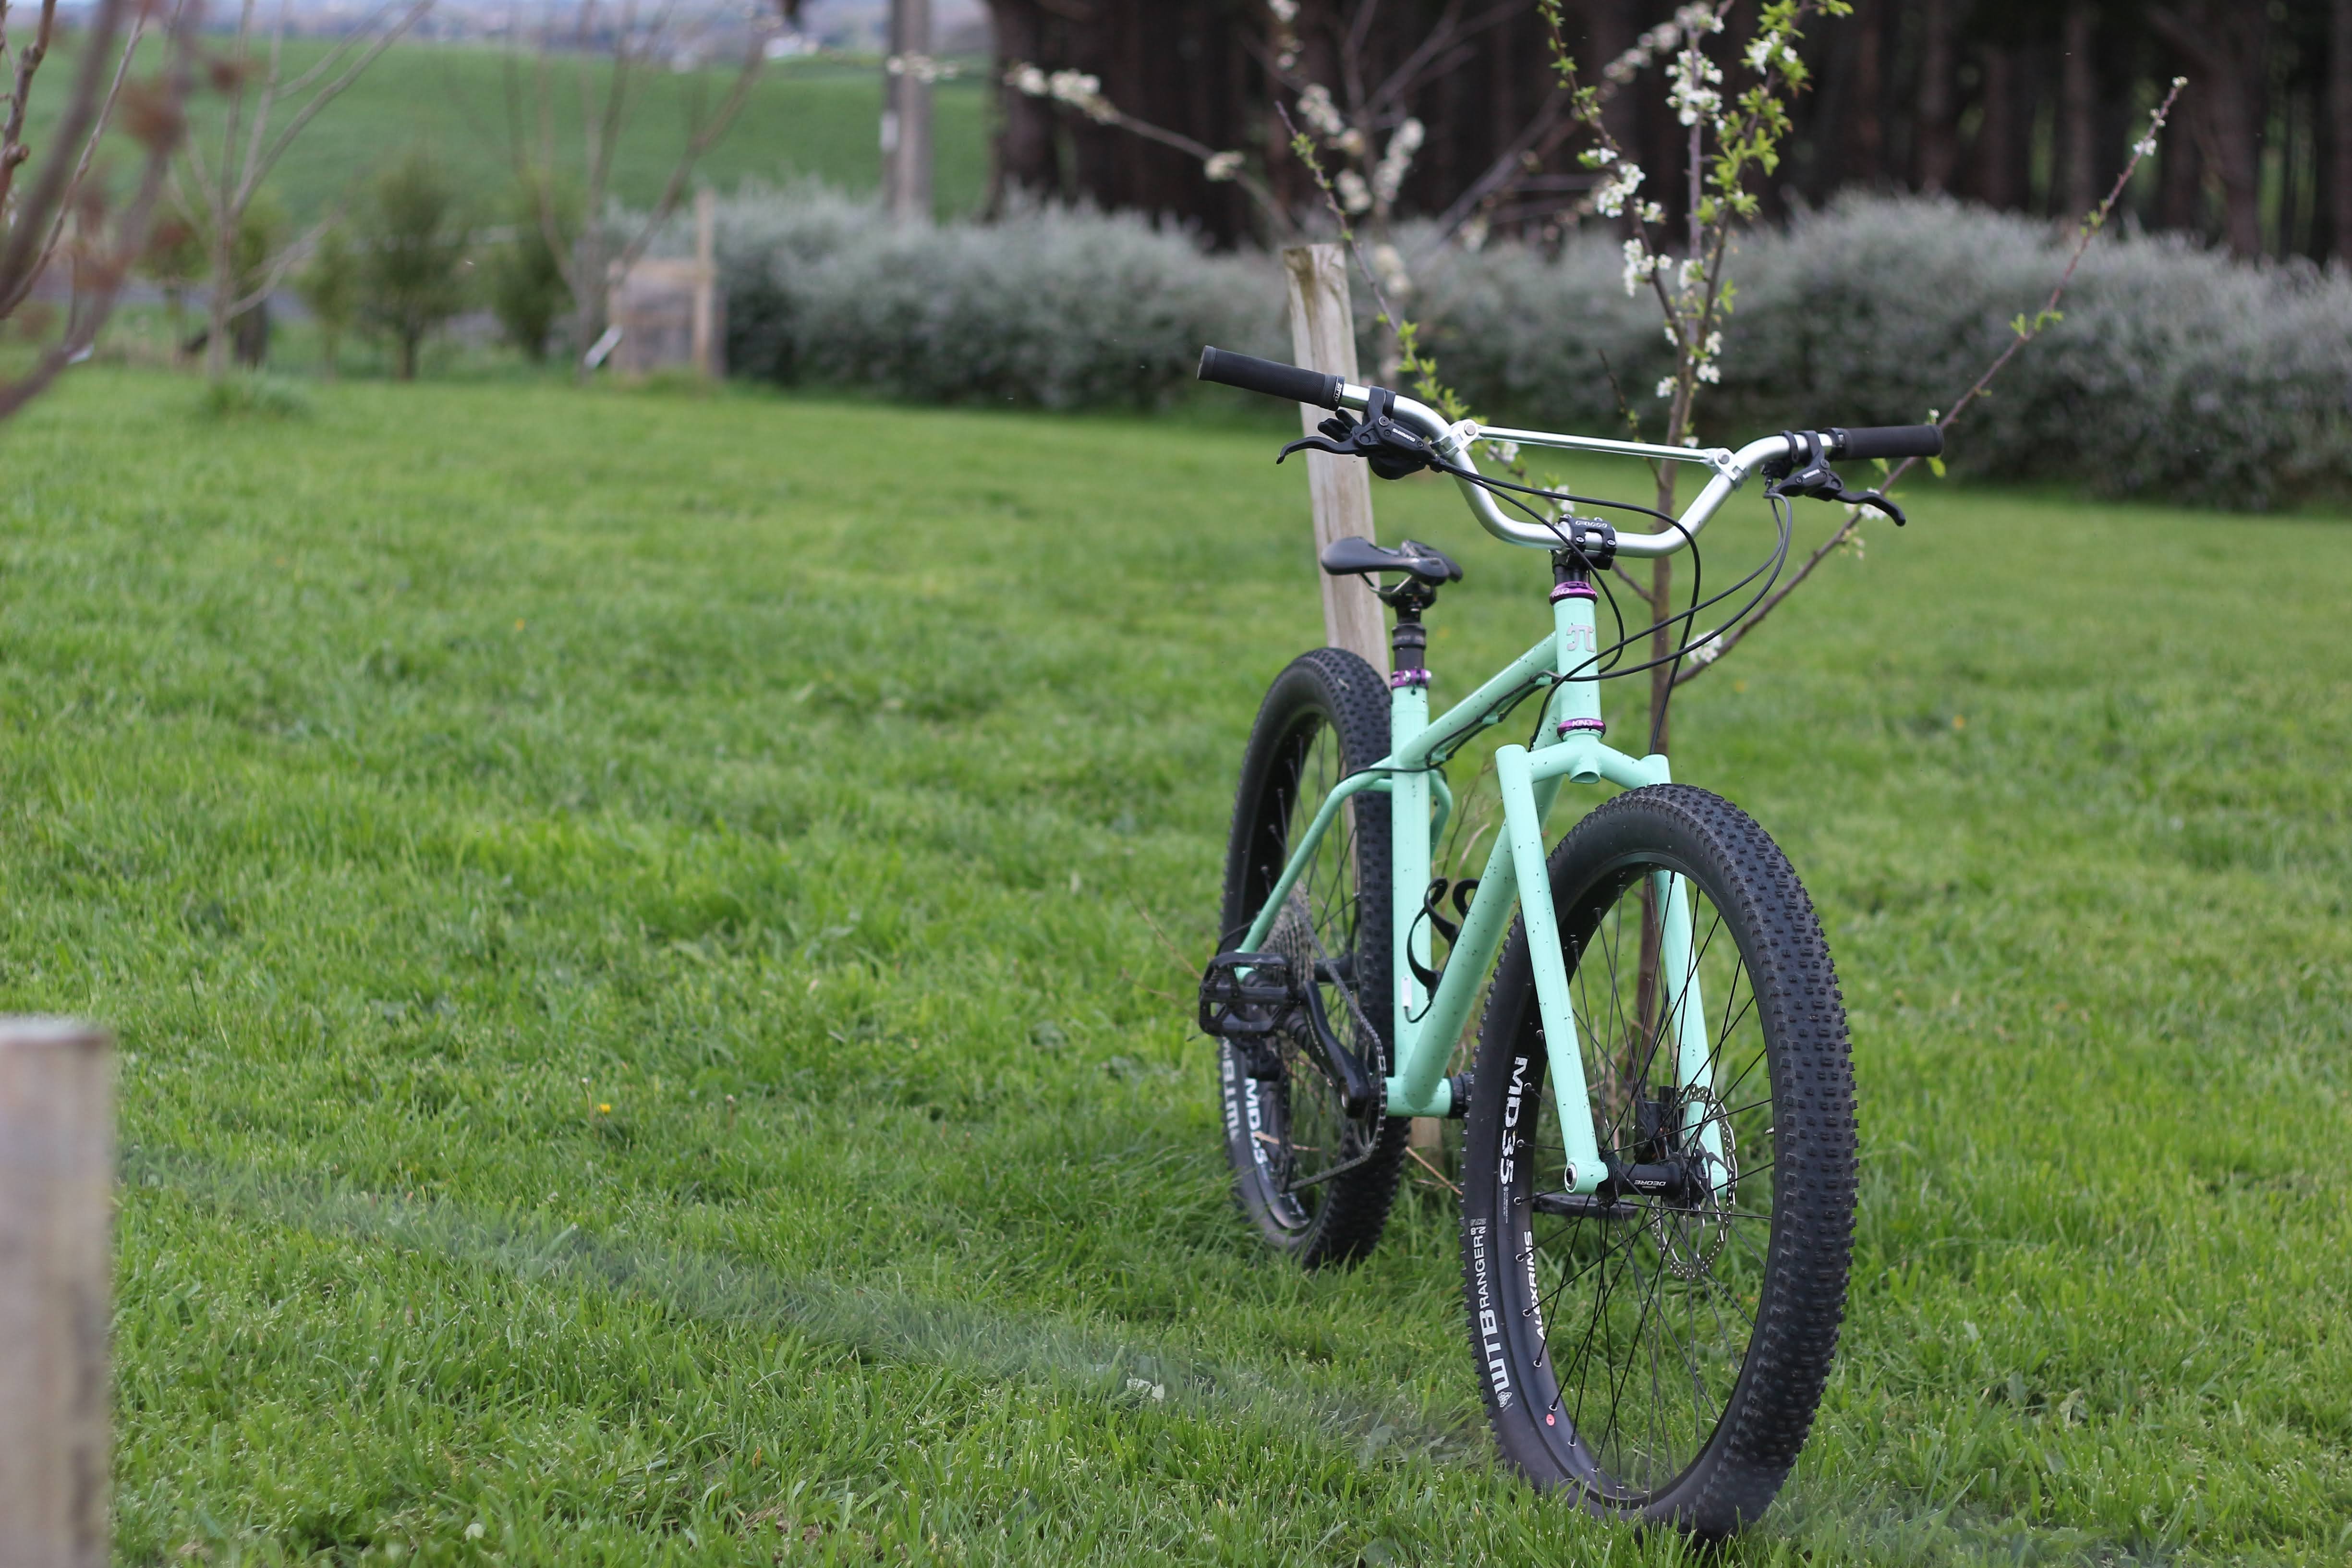
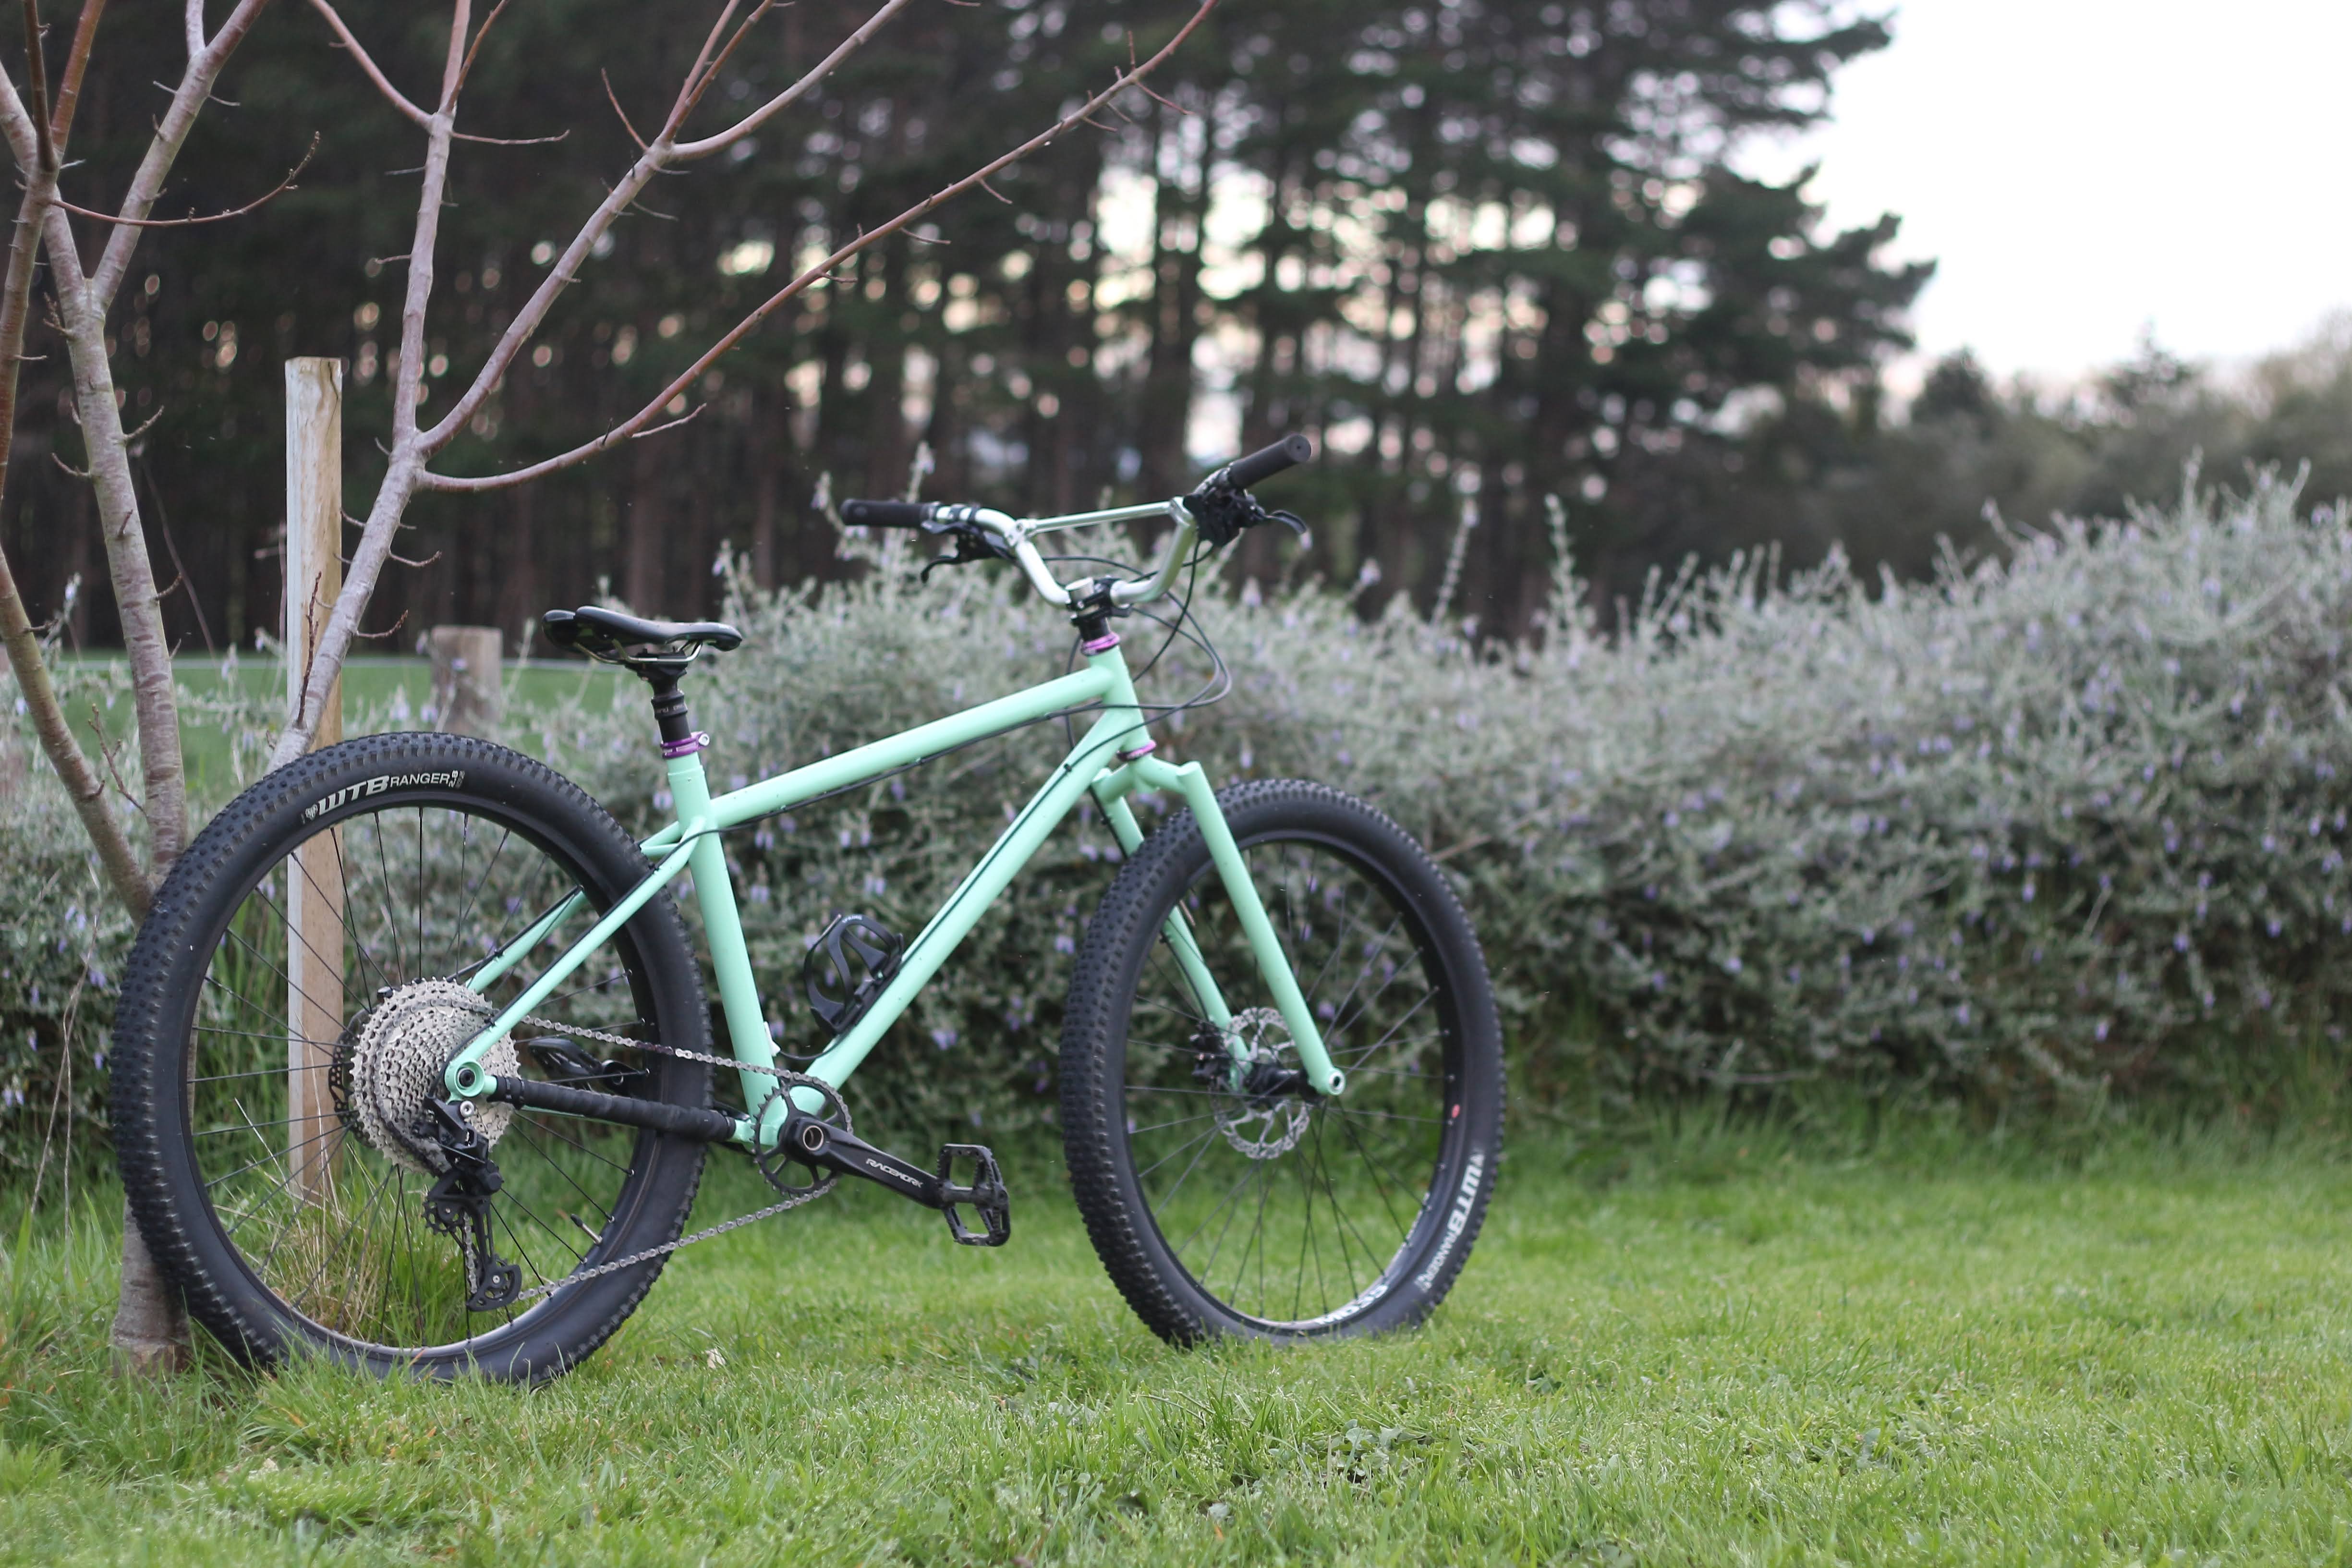
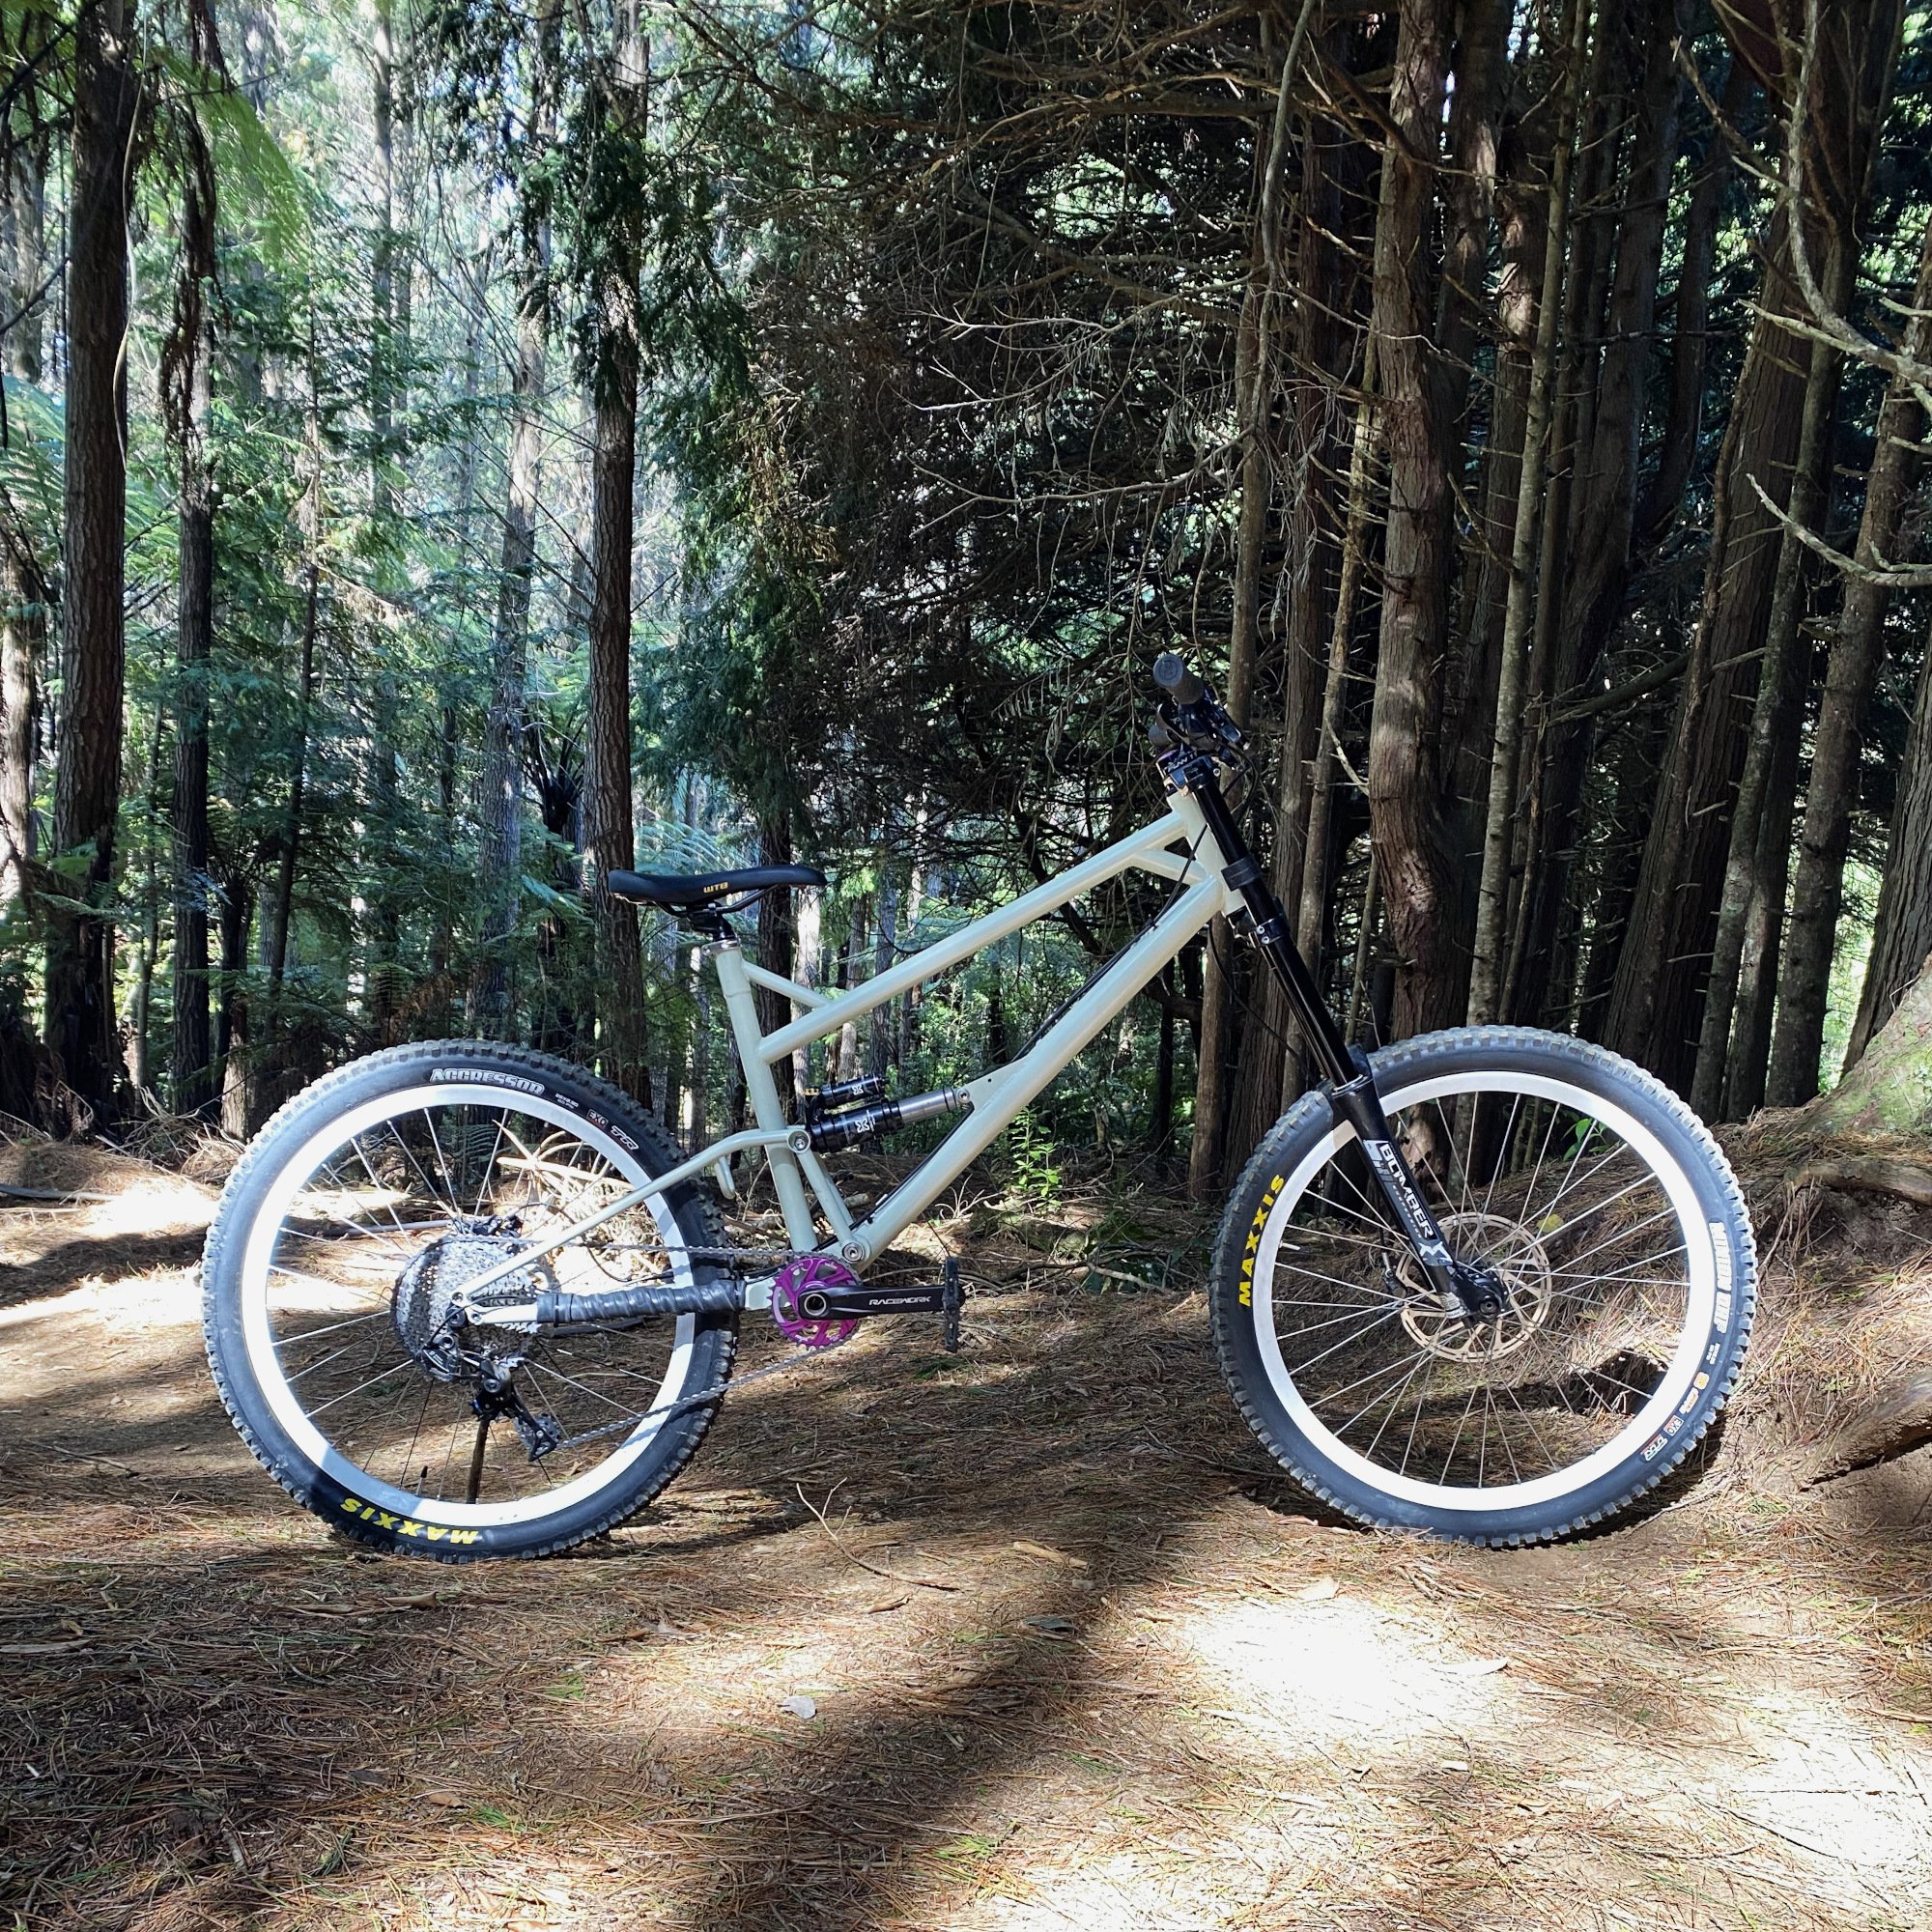
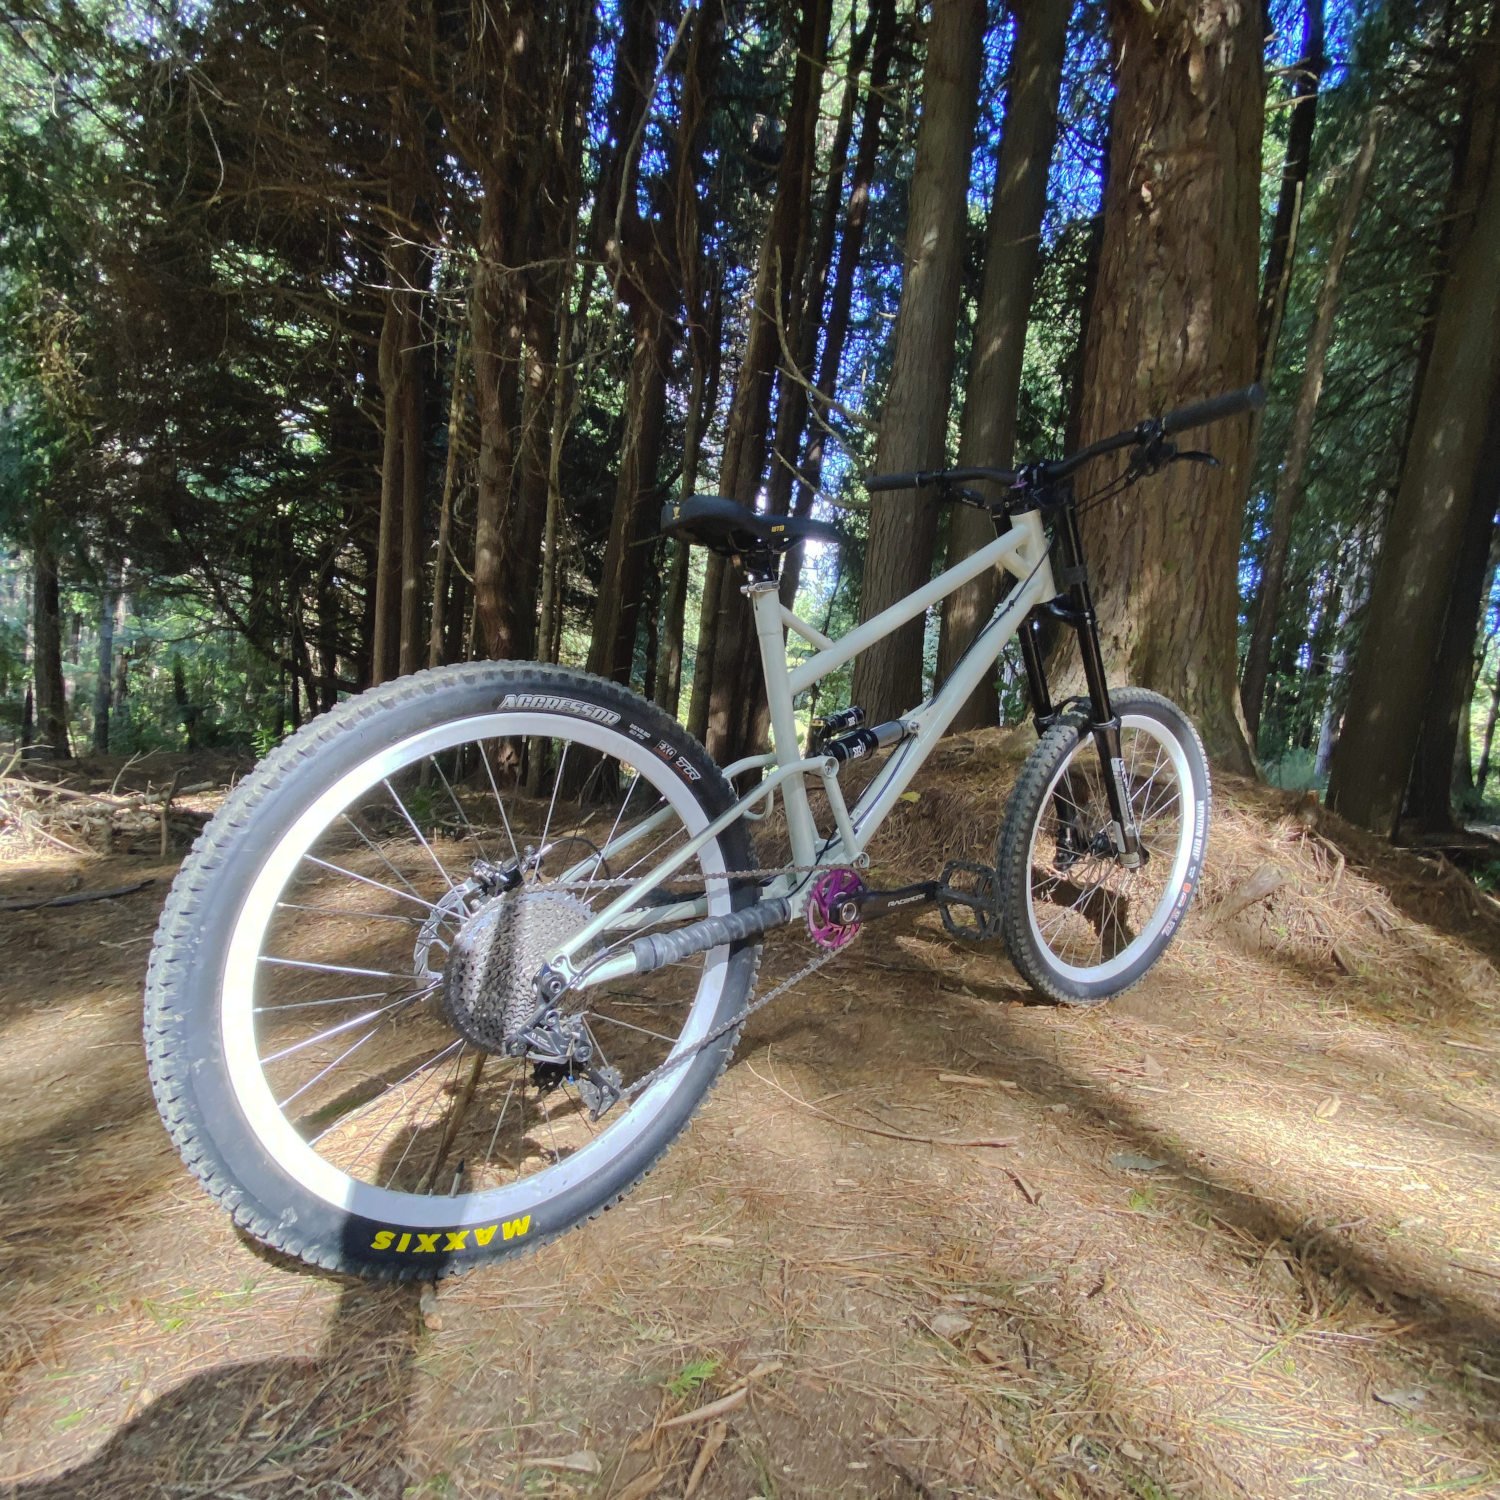
It's done! I found myself rooting for this particular colour on the poll and figured that was a strong indicator it was the right colour. Anodised purple accents for maximum 90's mtb style points. Will probably get some purple valve caps just to finish it off. On my computer the images look a bit more blue than the bike does in real life, probably because auto white balance on the camera or something. Side sharn, my first mountain bike was a 1995 marin rocky ridge. It was a chrome plated ali frame and when I got it second hand it had a purple anodised so it feels a bit like a throwback to that. I still have the frame hanging in one of my sheds, it has cracks in the headtube. Probably becuase of all the horrendous abuse I gave it. The bars are some aliexpress mx/pitbike bars that may or may not stay, they are way too flexy without the cross brace and the fasteners/holes for the cross brace are a bit sloppy so you can feel a bit of a clunk in the bars when you pull/push on them that is reminiscent of a loose headset. I could probably turn up some little bushings but I'm undecided. The paint is PPG deltron DG and it is by far the nicest paint to apply that I have ever used. So easy to tell when you have the right amount applied and not a single sag or run on the bike. Theres a couple of less than perfect spots but nothing anyone will notice. I put on some braap wrap to keep it tidy, would recommend so far in terms of application, went on really easily. Currently has the old tyre tube on the chain stay jobbie for protection from chain slap, will probably get some vhs tape when it comes back in stock. Now all I need to do is go get it dirty!
- 102 replies
-
- 18
-


.jpg.3f0d70b84fe642f7cf9e59212df93b2c.jpg)
.jpg.8c577ad49d40d8009c8cd552328451ce.jpg)
.jpg.86b32e059ec00cfb6b61110d14aeca92.jpg)
.jpg.1eaae9be6e76e6ec0fe558ed5ec3ef43.jpg)
.jpg.dfb8cec2f2a13068340c20832589fb51.jpg)