
Leaderboard


Popular Content
Showing content with the highest reputation on 04/24/24 in all areas
-
However, during the pre purchase inspection I picked up a few things in the engine bay and suspension wise that placed some doubt on how far the mechanical restoration had been taken. Nothing major, but just little signs that some items still needed attention. On getting it home, the first thing that I did was to fit an electronic unit to the existing distributor in the hopes of resolving an intermittent misfire. We then clocked up about 1000km during which time I was almost constantly fiddling about to try and get the timing right. In desperation I eventually pulled the dizzy out for a closer look and discovered excessive play in the shaft, so I ended up ordering a brand-new distributor from MiniSport in Adelaide. The new distributor came with its own set of electronic internals already fitted so the old unit went into the parts bin. This solved the misfire, and we ended up enjoying another 500km of trouble-free motoring until one day the Moke just suddenly cut out and left us stranded at the side of the road. Luckily, we were close to home, so I walked the rest of the way and returned with our Holden ute and a tow rope. After a bit of troubleshooting, I pinpointed a fuelling issue which turned out to be a faulty float valve. Got a new one sent up from MiniSport and we were back in business. Shortly after that the actual carby started playing up - again excessive wear - and we ended up ordering a reconditioned SU from MiniSport. Since then its literally been an annual oil and filter change and the fitting of a new battery and we are now up to around 2400km of travel that we have undertaken since purchase. And that pretty much brings us up to this point in time. In my next update I'll cover some additional maintenance work that has happened over the past few weeks. And no one likes a pictureless update so here is a group photo of our small fleet:
 10 points
 -
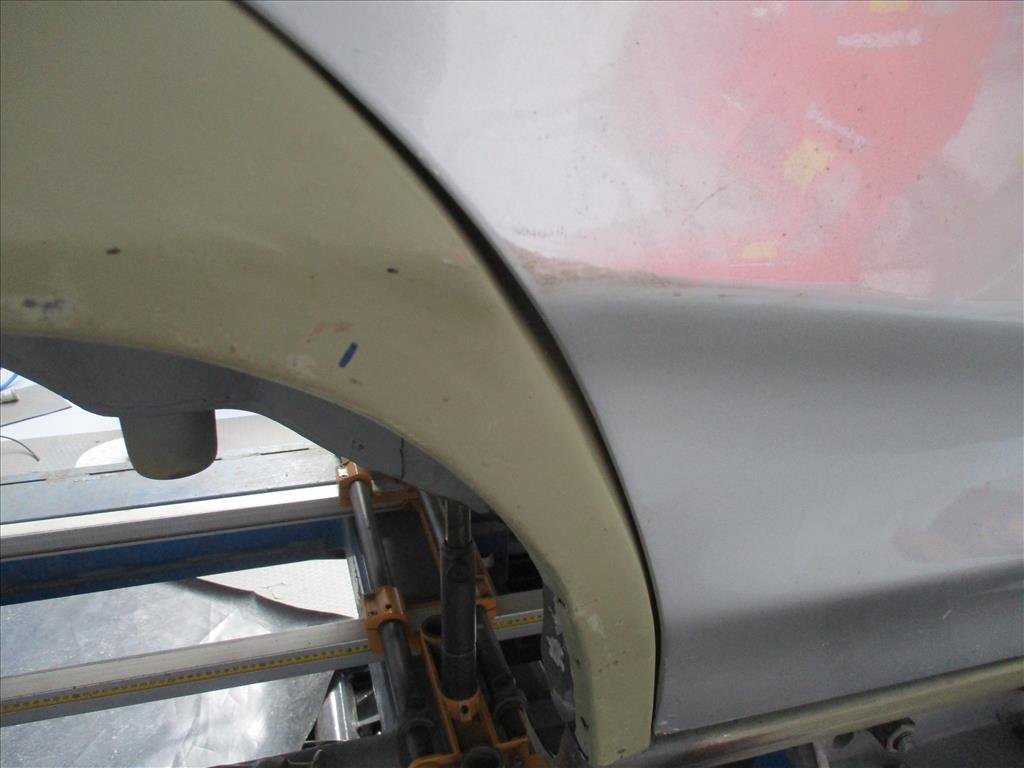
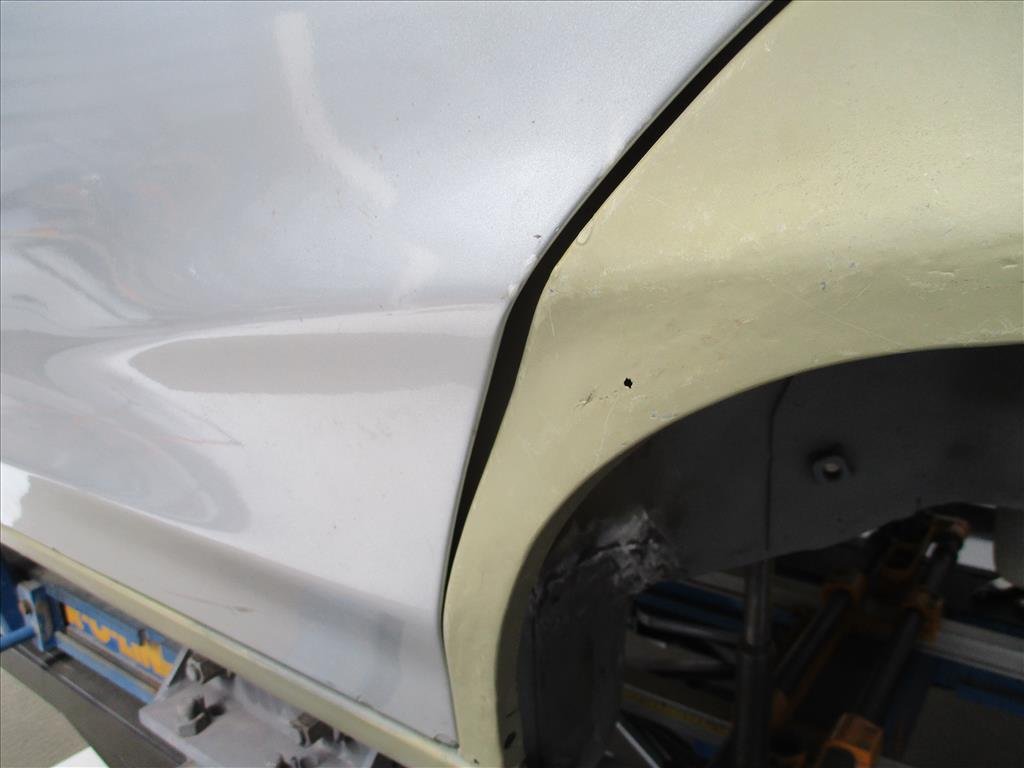
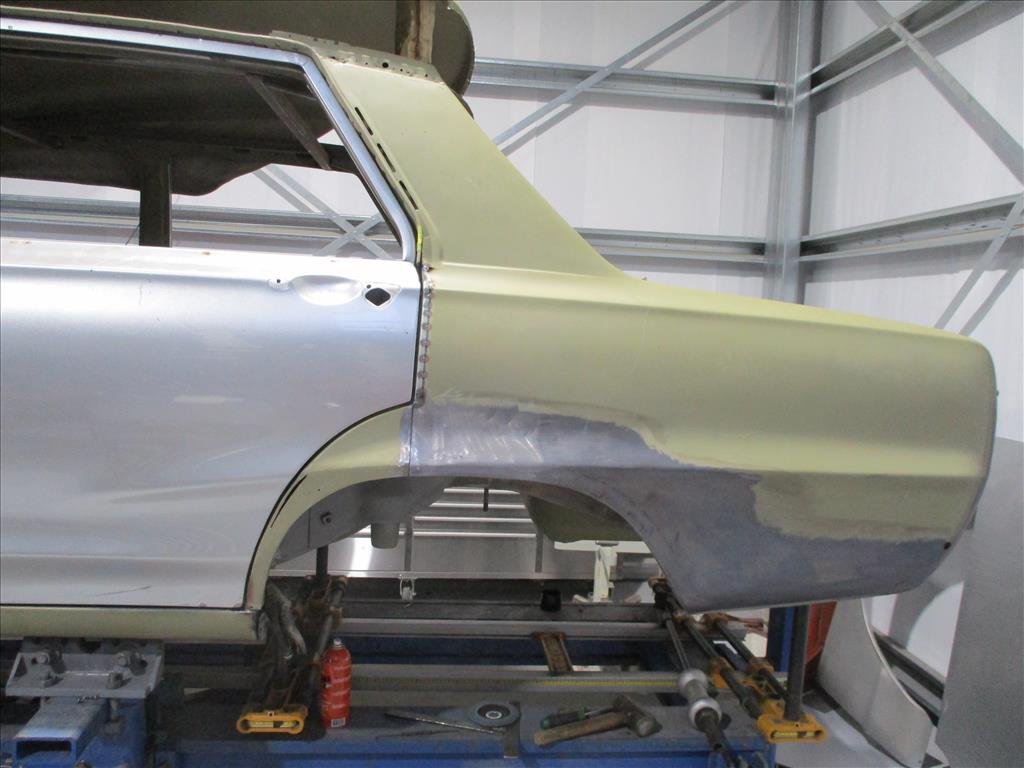
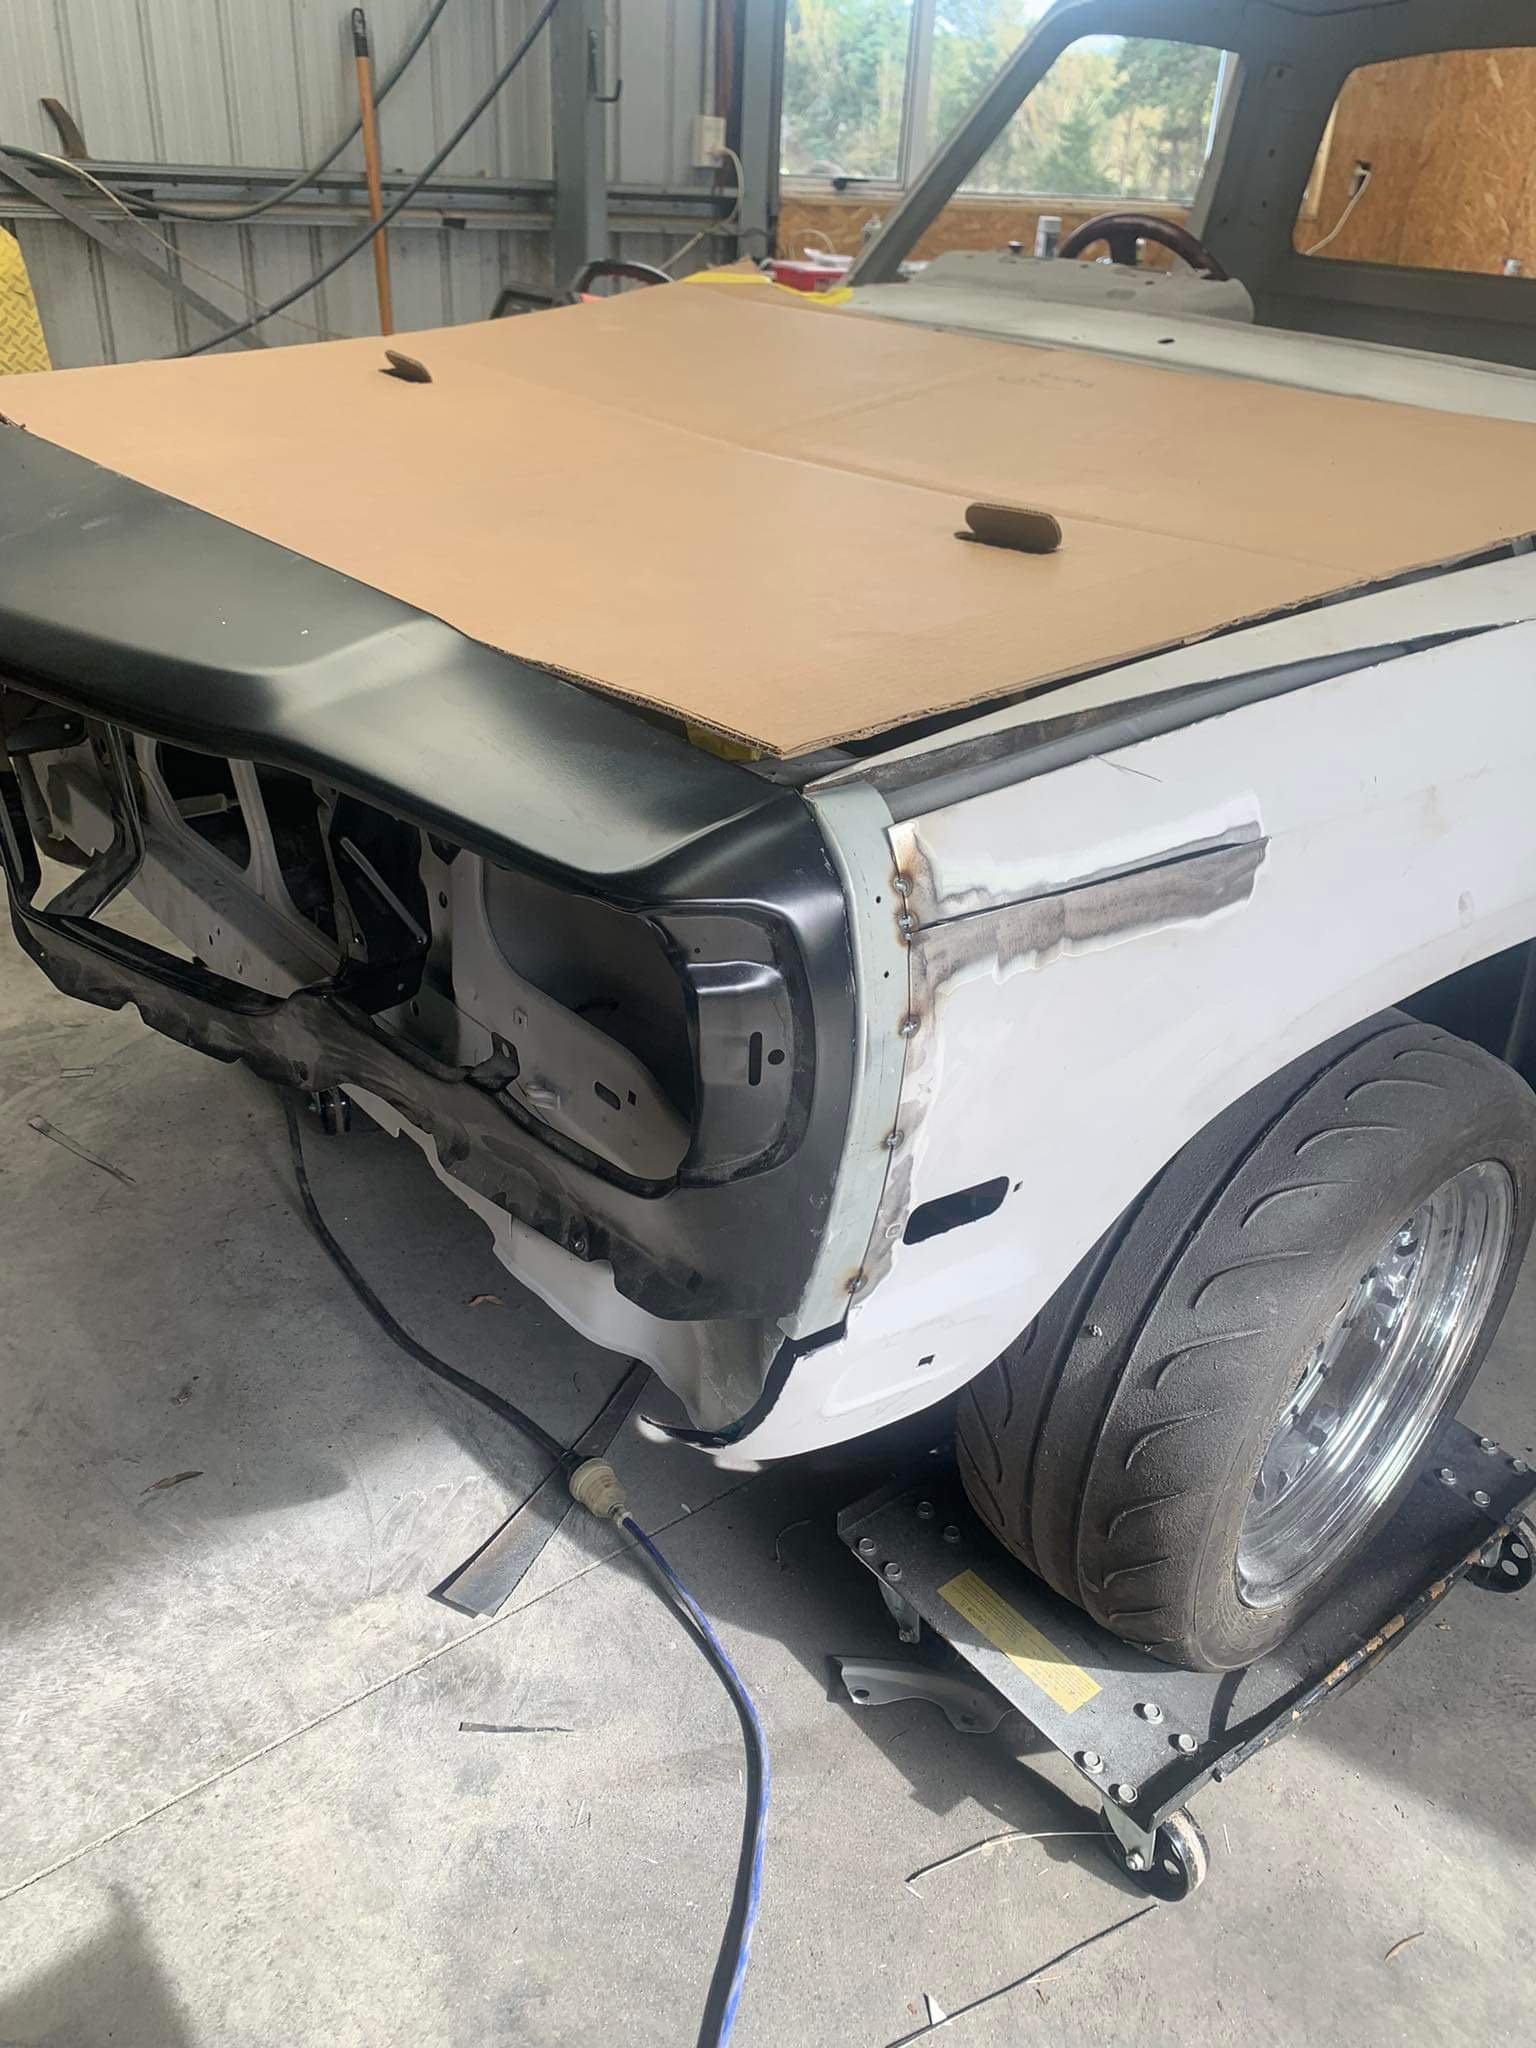
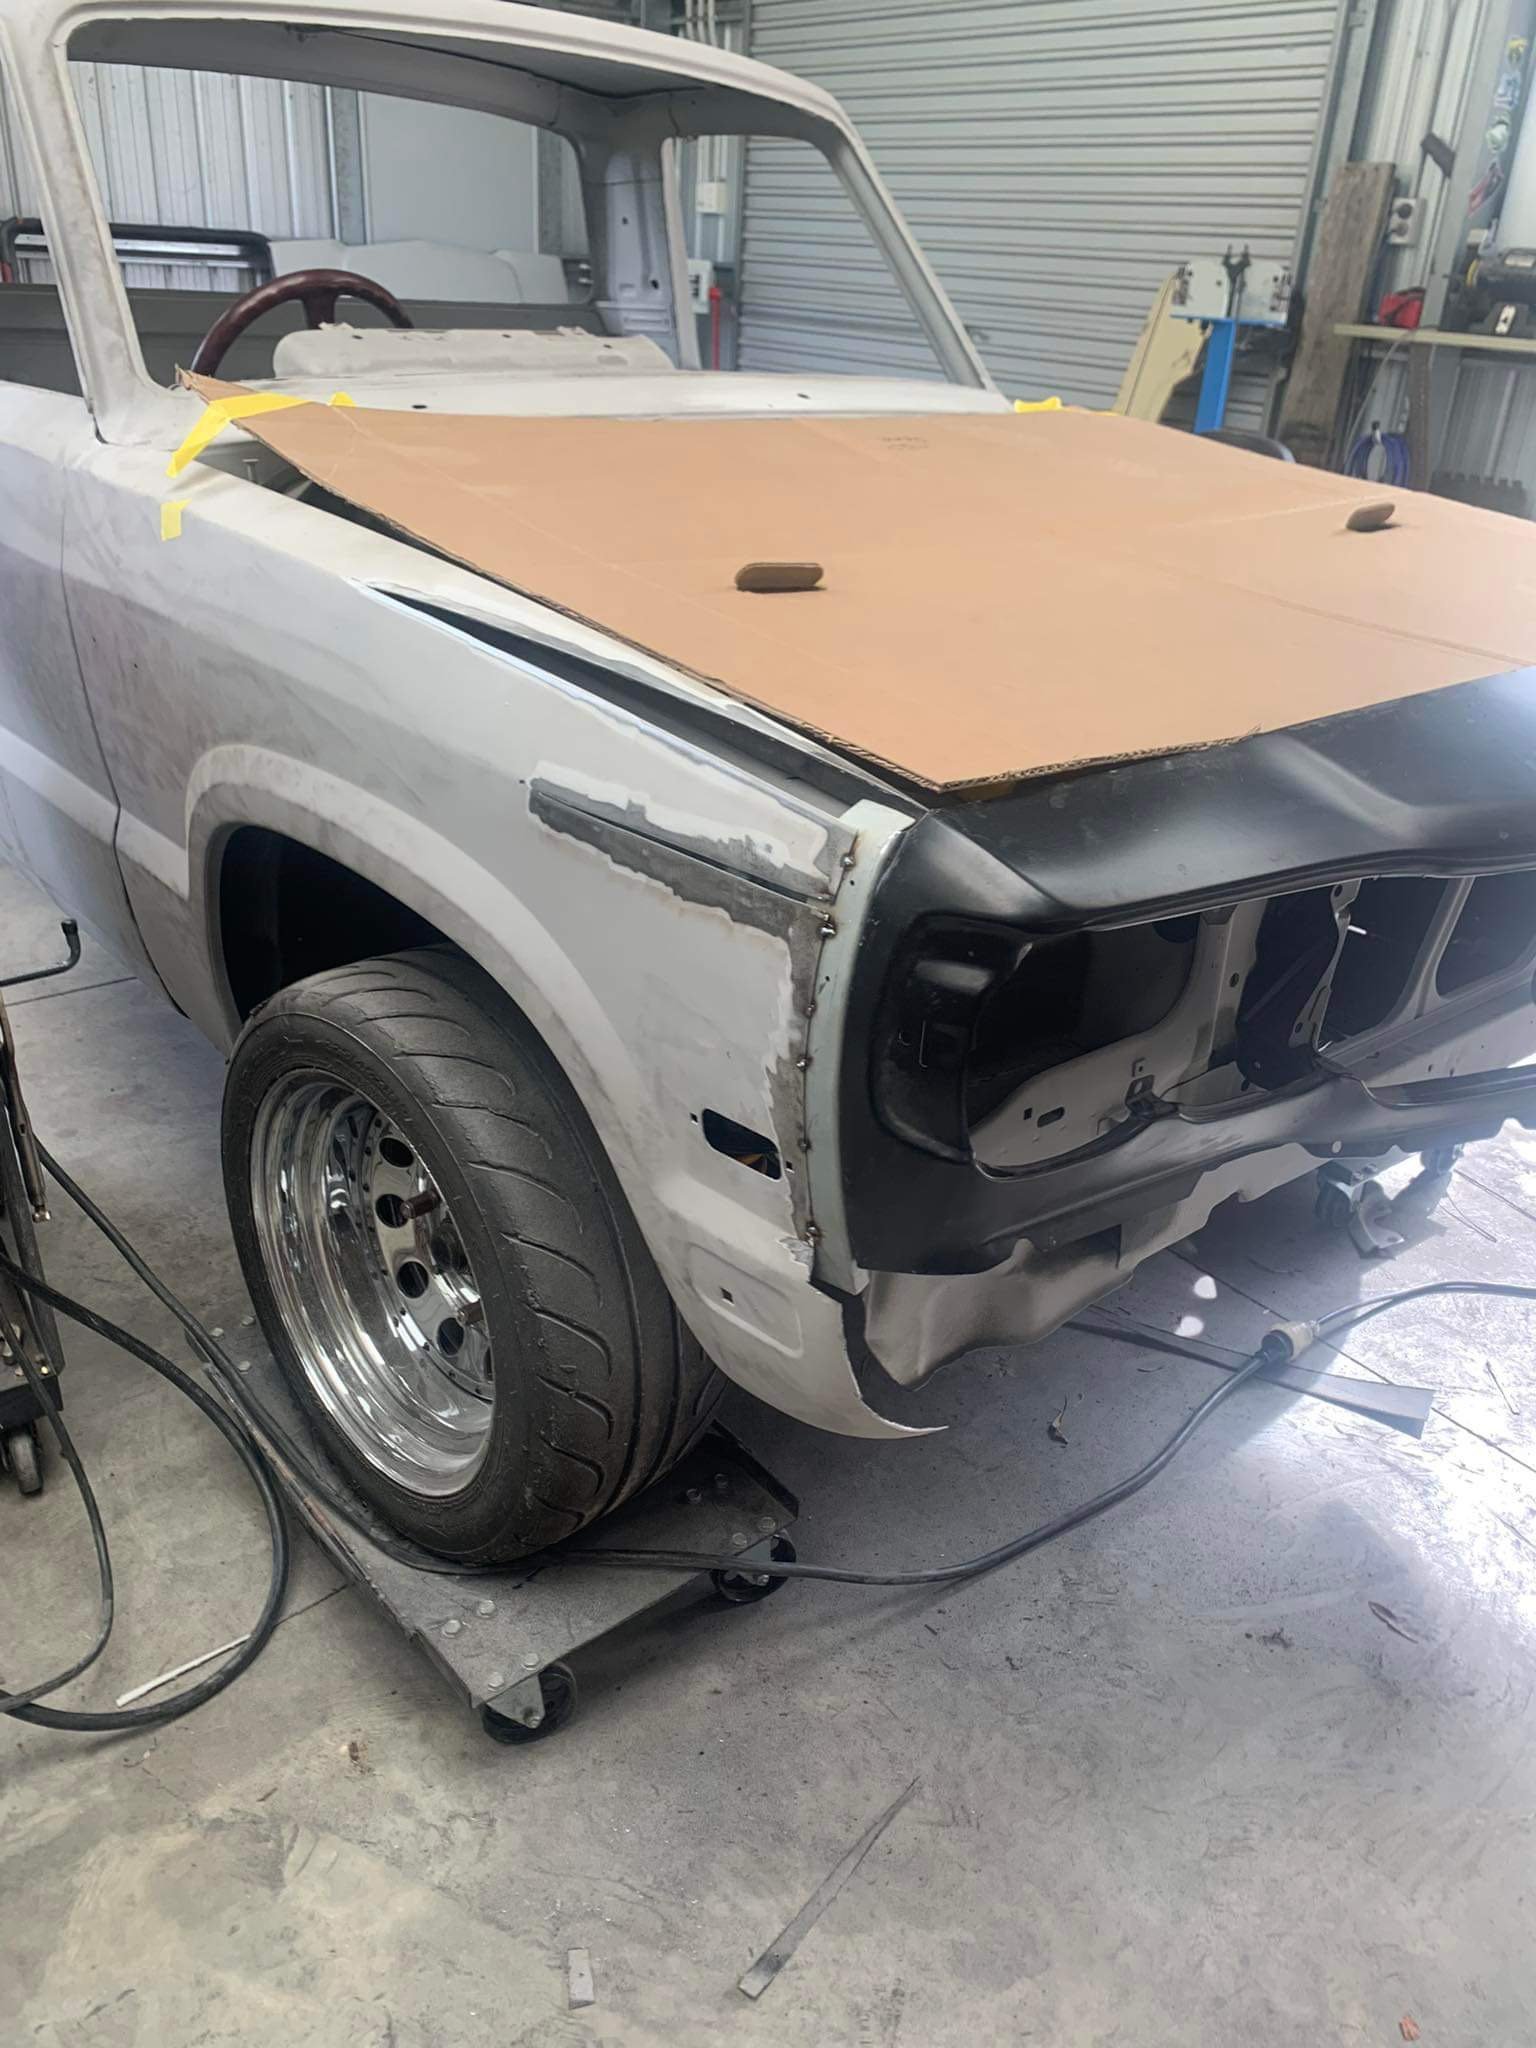
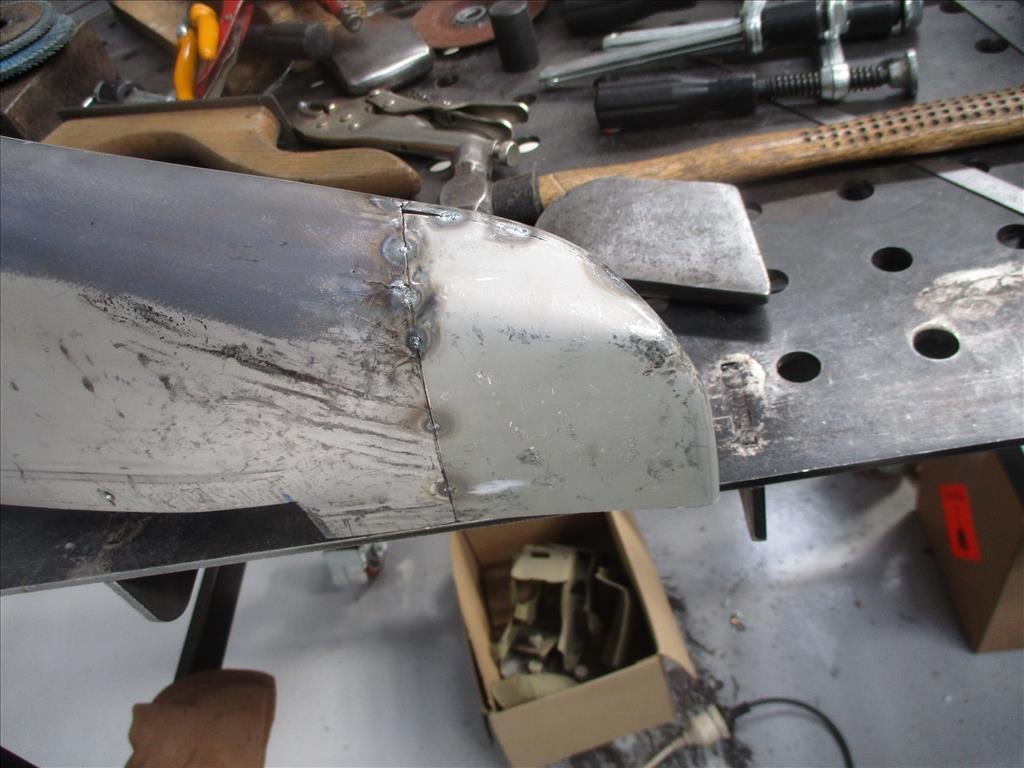
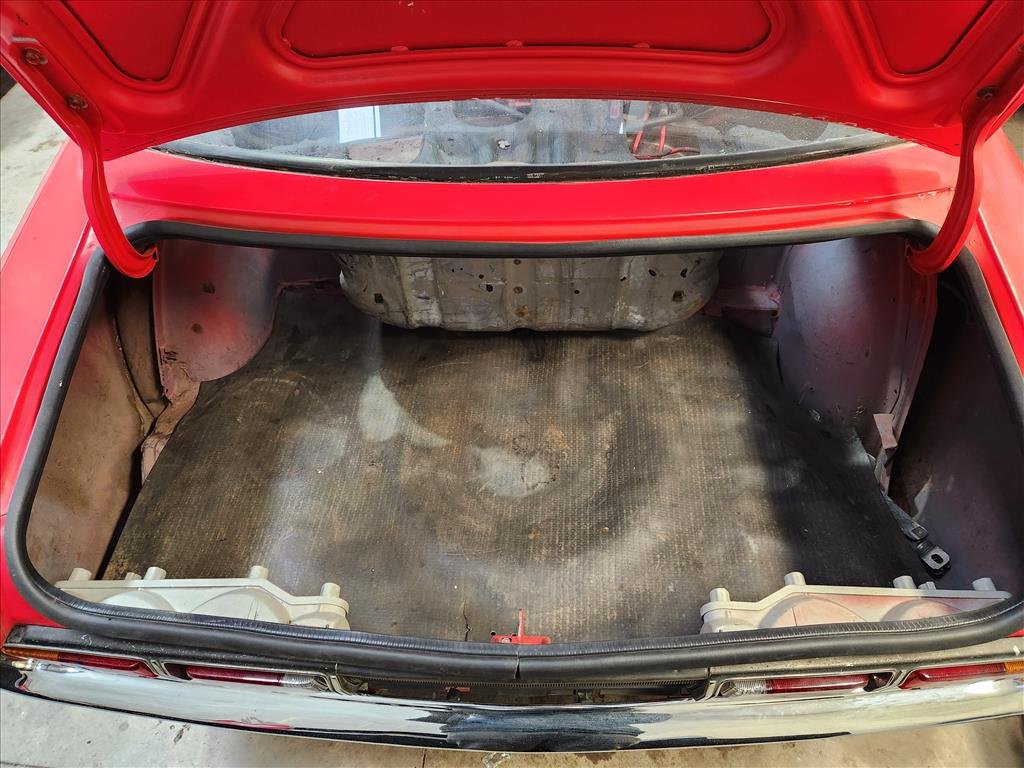
Panel Barry is a stickler for door gaps. Suppose he wouldn't be panel Barry if he wasn't a gap commander. These dogleg panels (his words) which cover the front portion of the rear arch were not lined up well with the doors and it was throwing off some other things. These little panels have always been messed up since I got it, probably since 30 years ago to be fair. So out comes the cutting and welding tools again. The doors also weren't perfect so fixed that up on both sides. I'm happy to hear, and his words "This is the end of the real time consuming type of repairs". We'll see about that I suppose as he works the front.
9 points
-
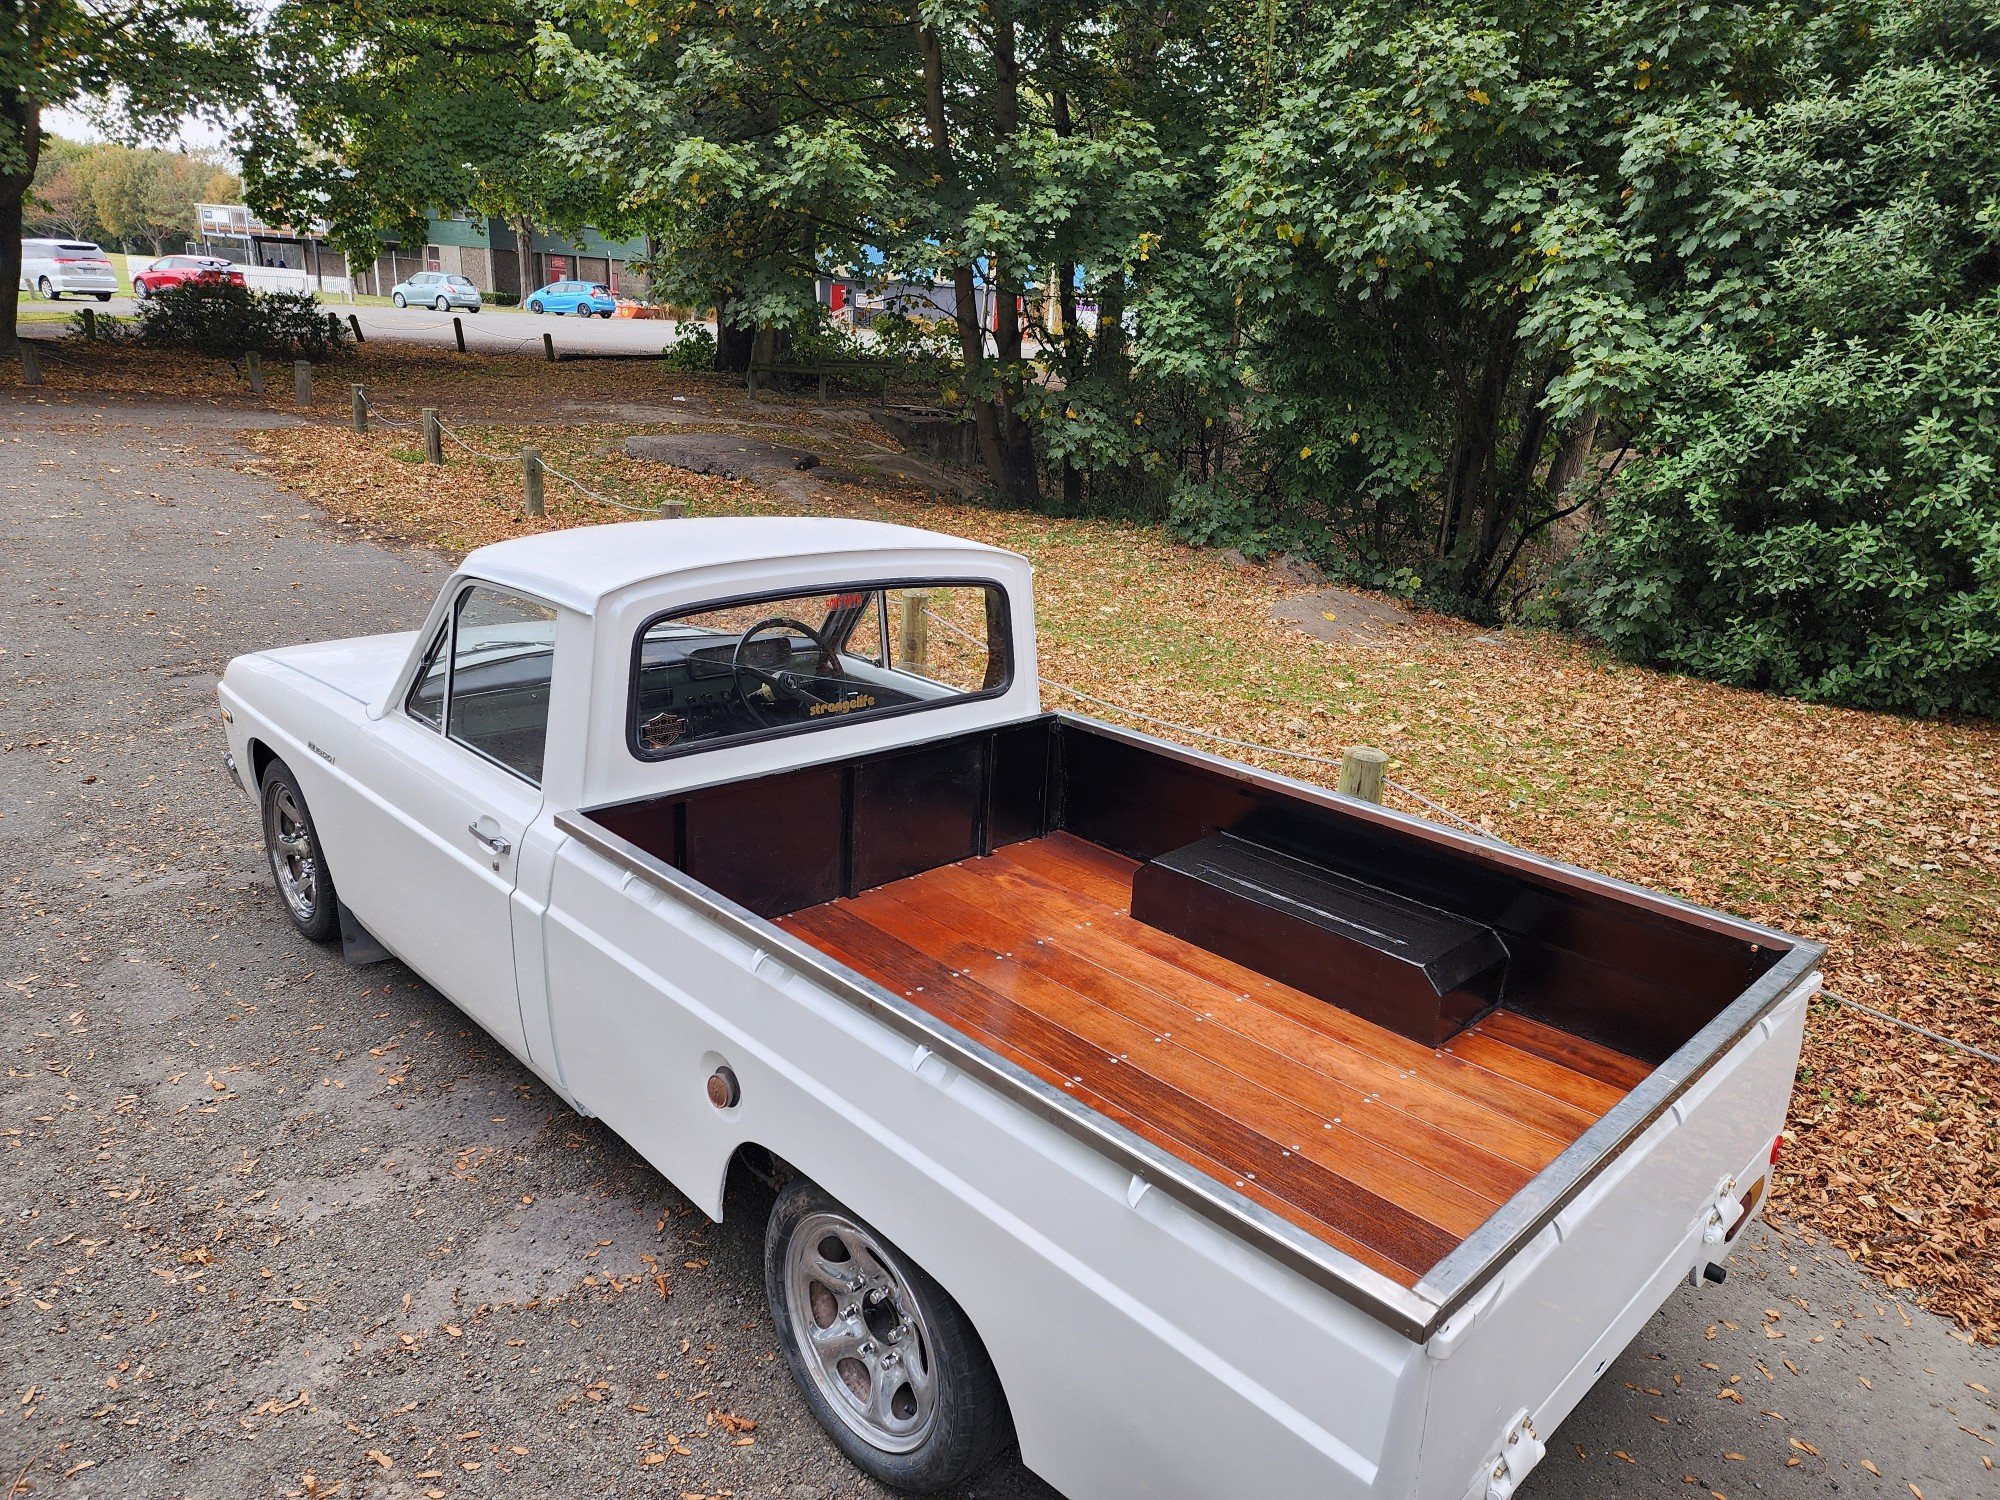
Continuing on with my how much can this thing carry series. Realistic flag added post production to avoid legal issues down the track.
8 points
-
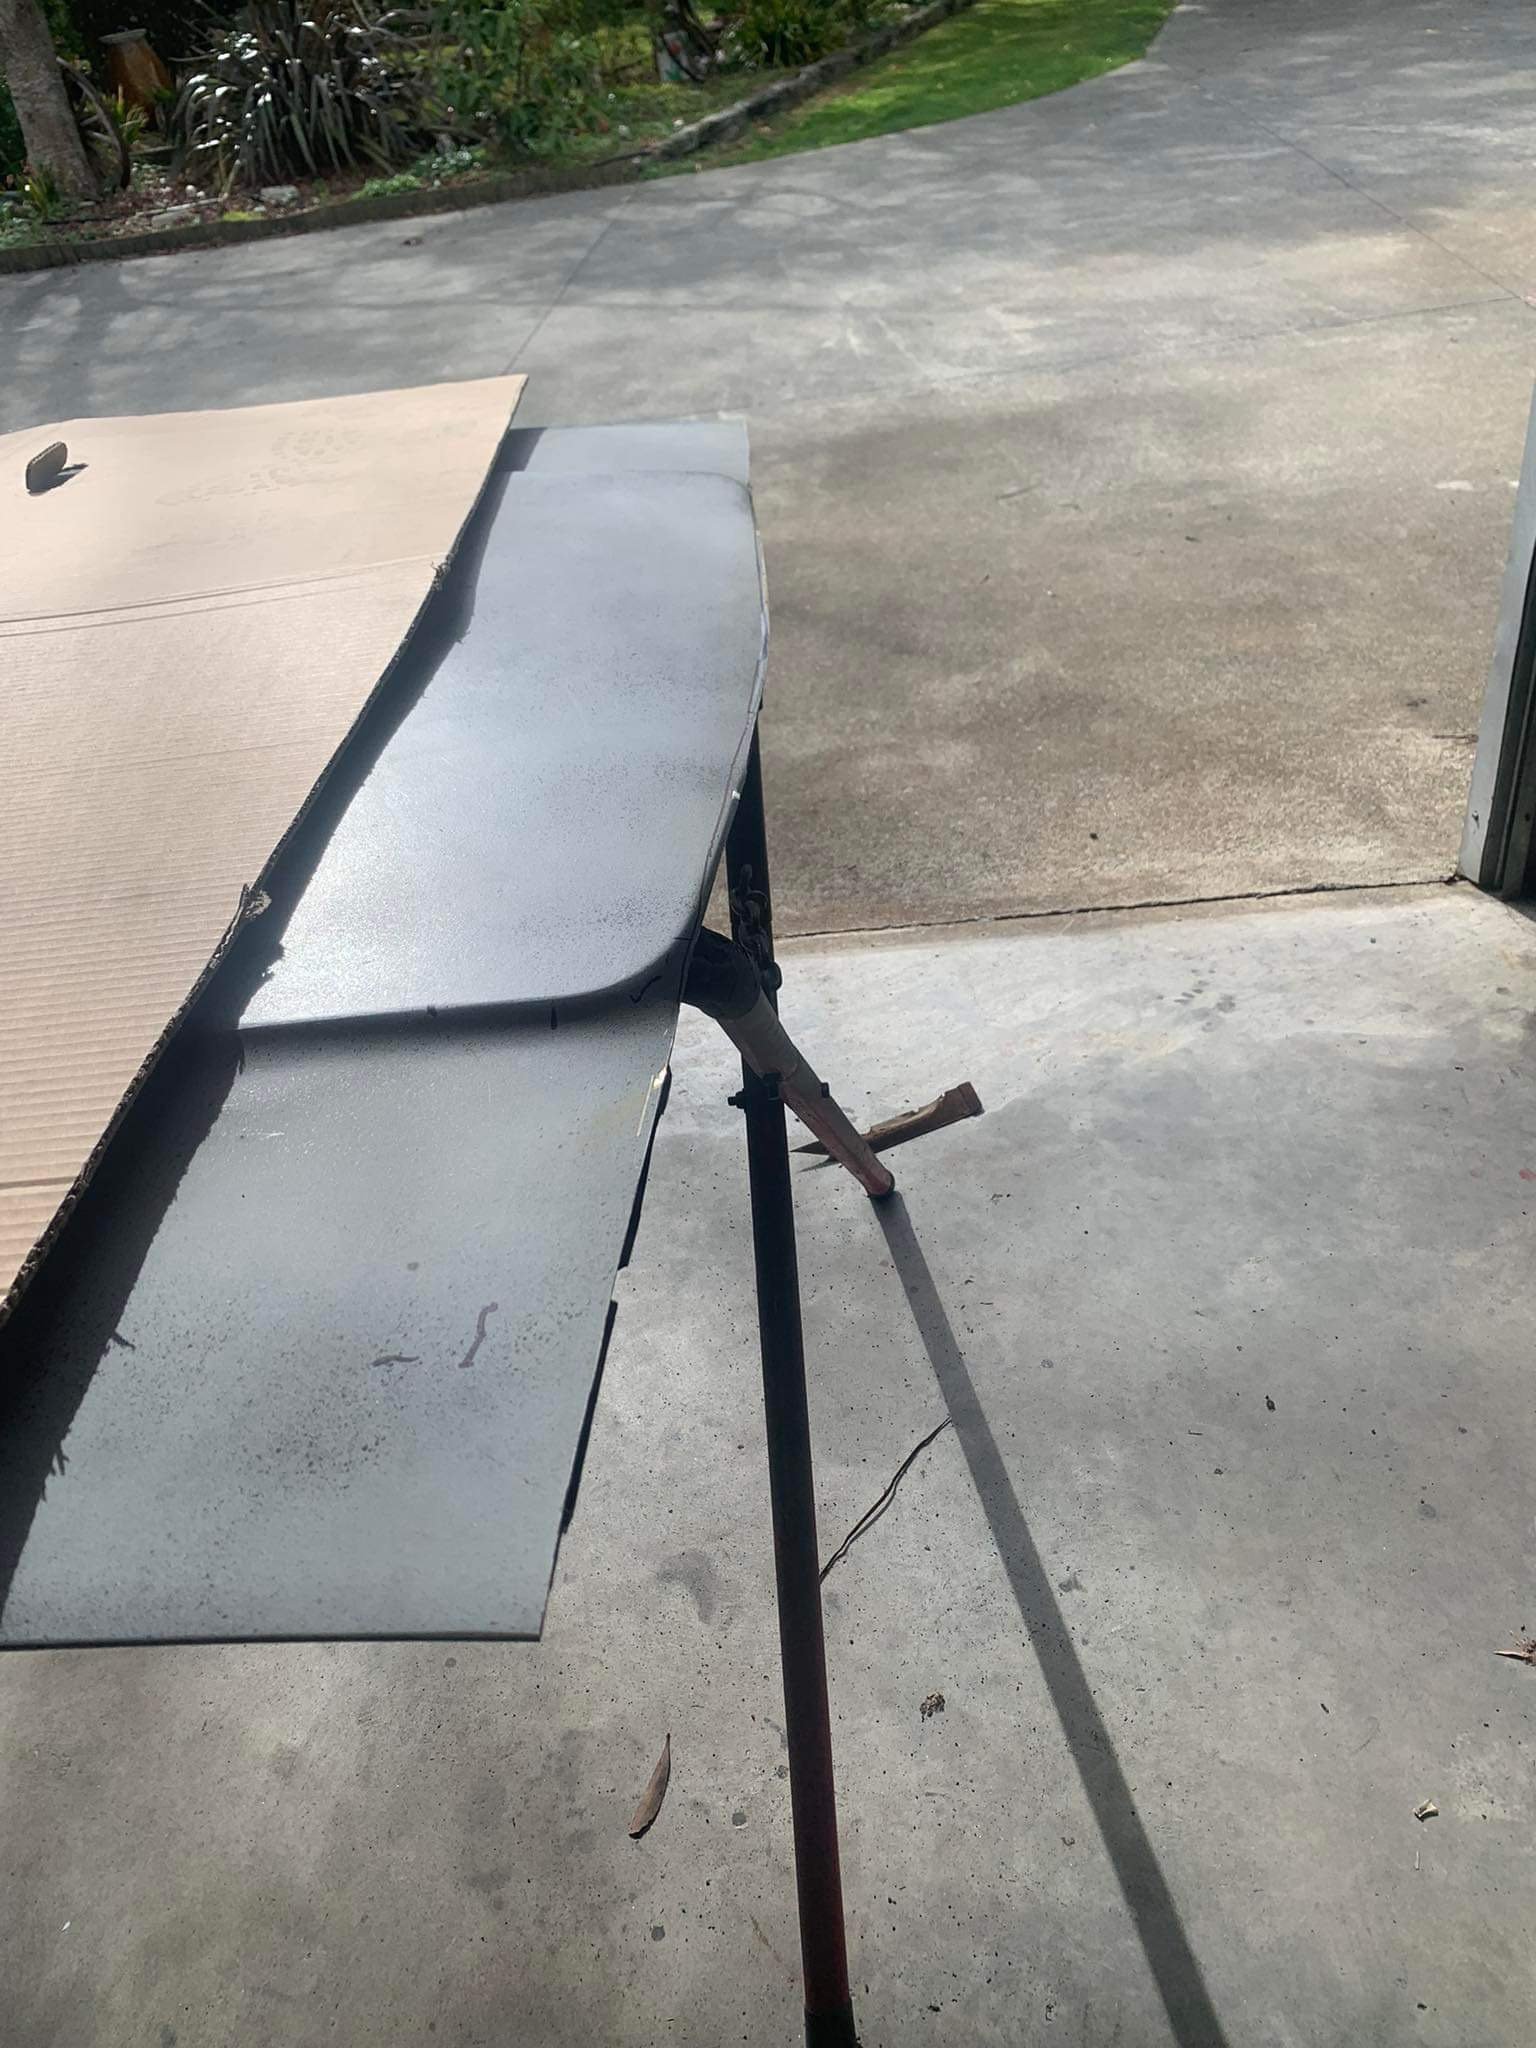
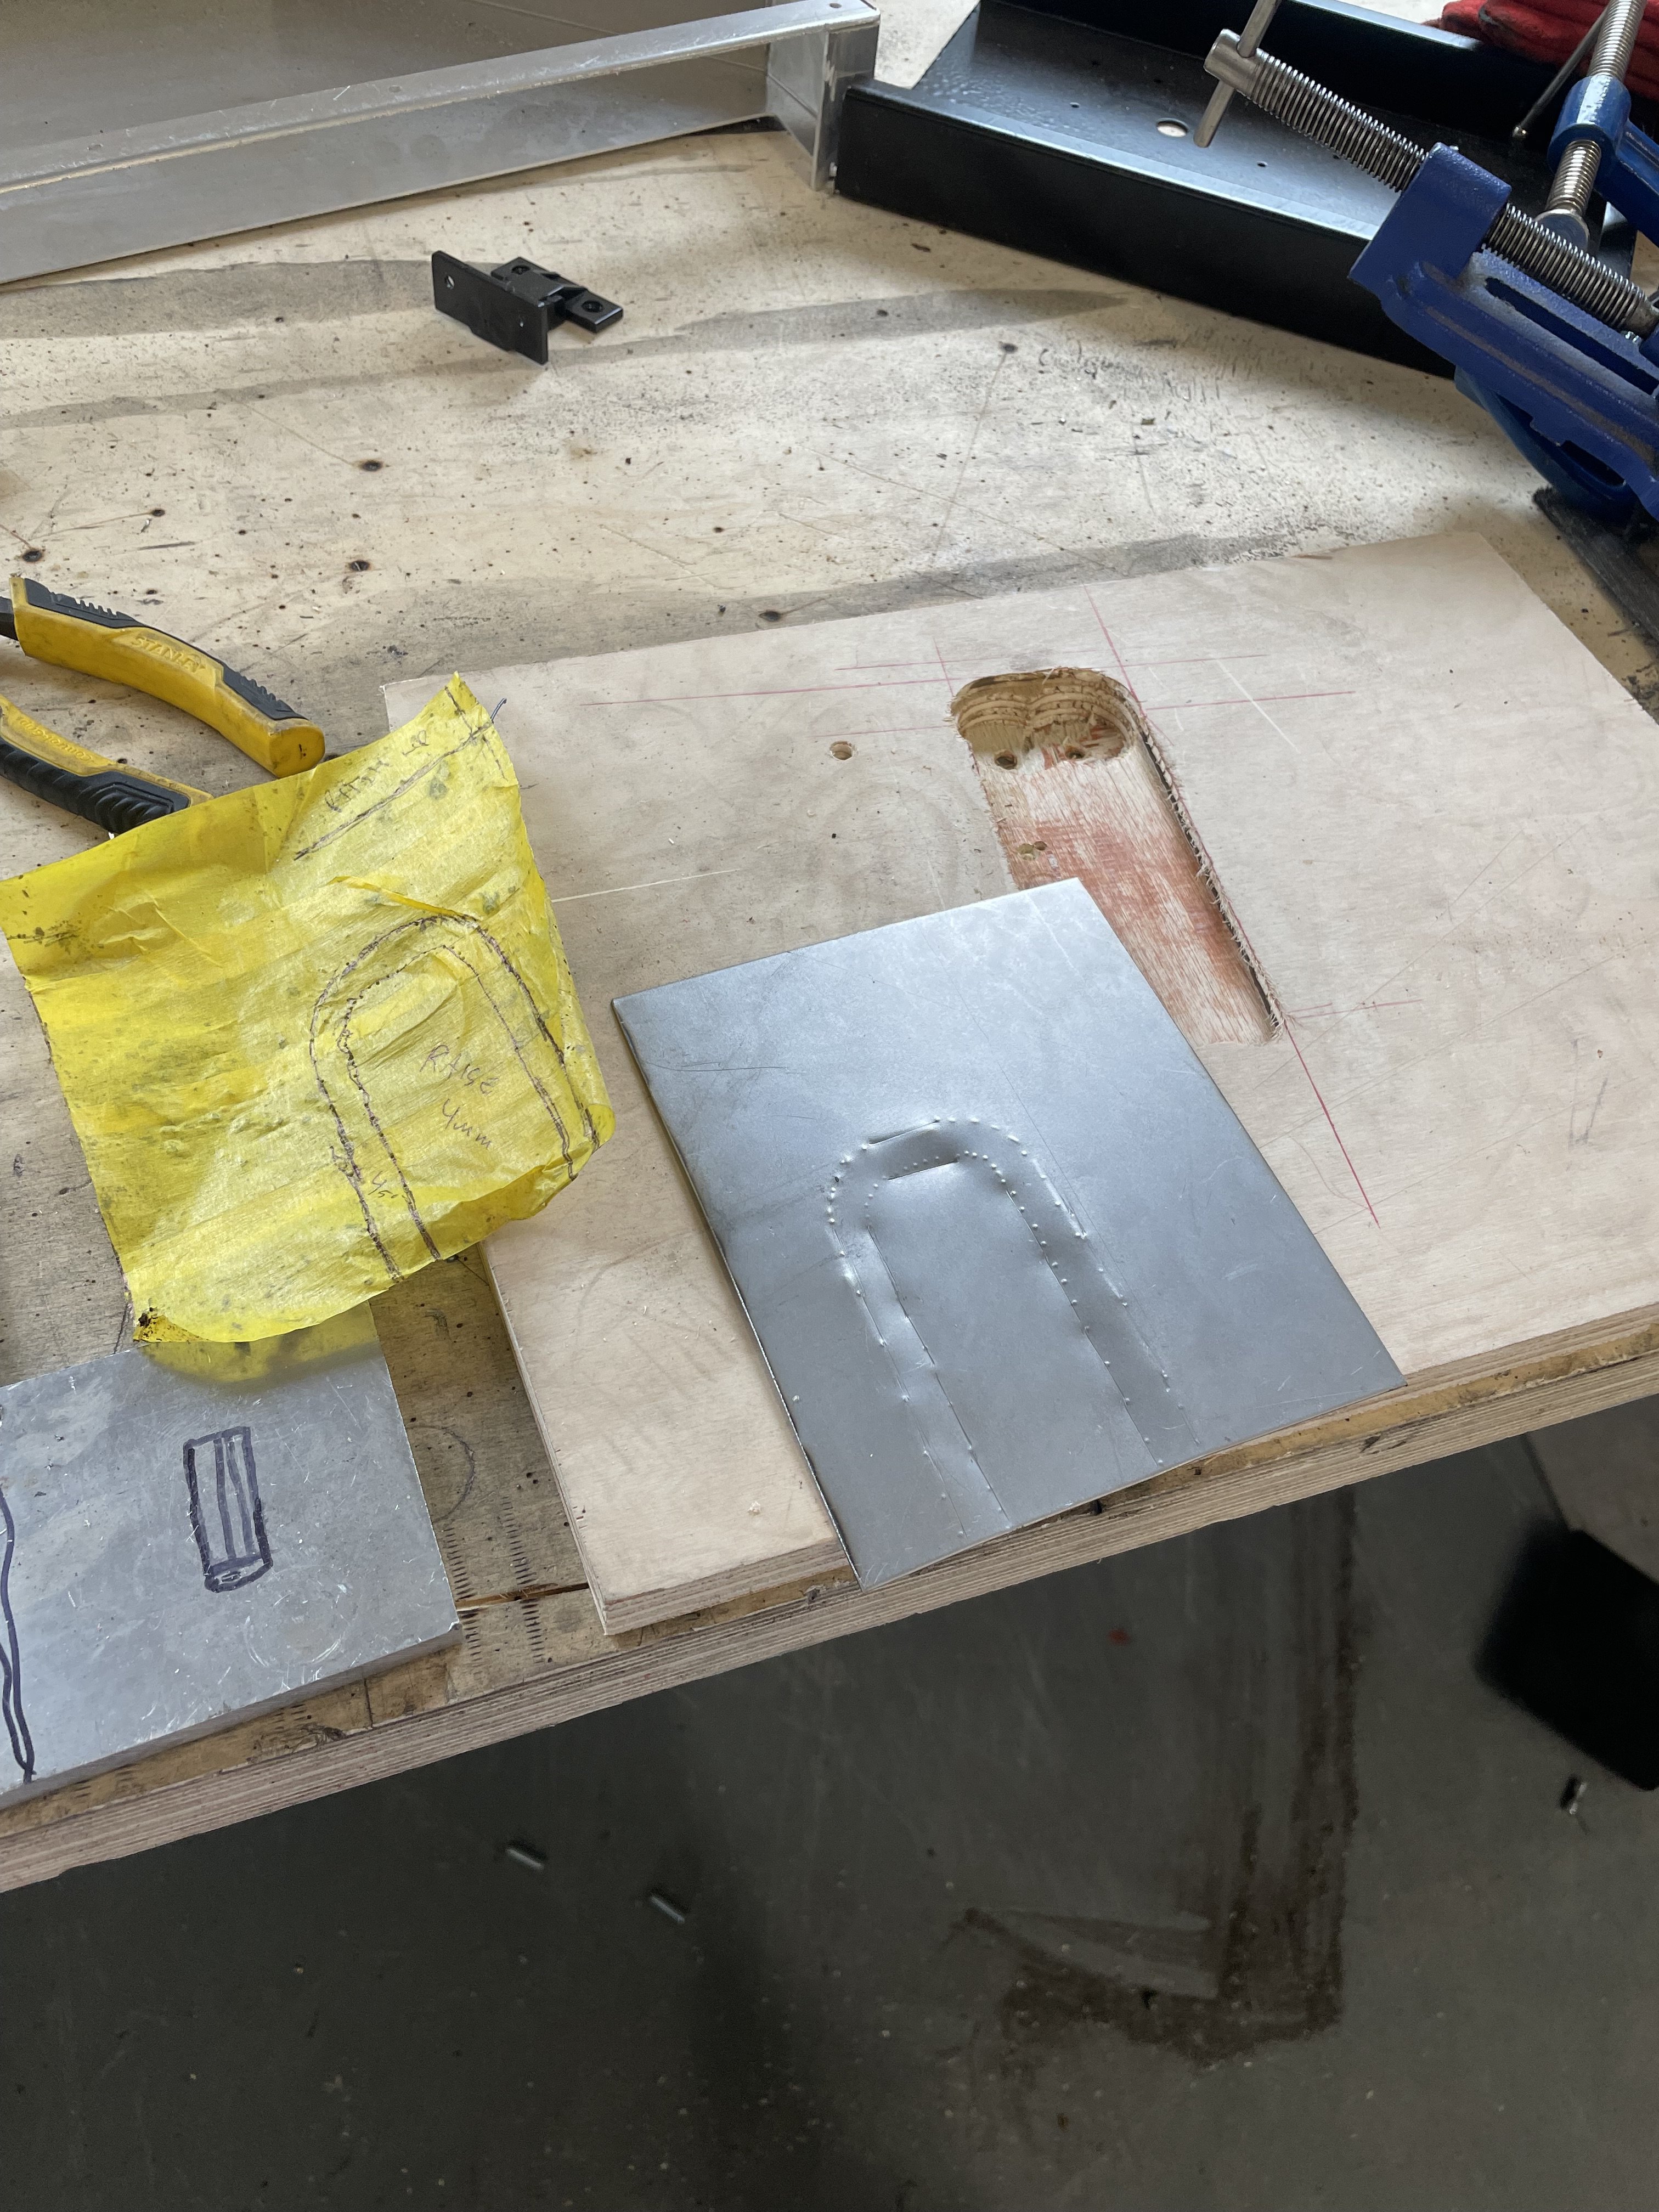
Next lil patch prepped
4 points
-
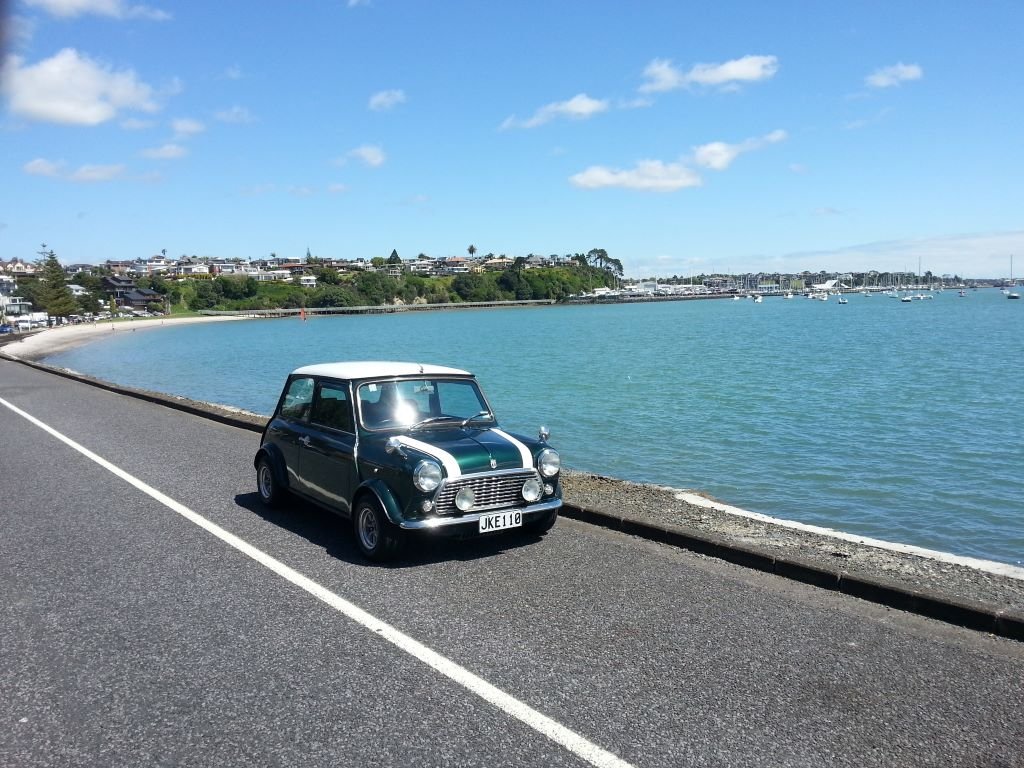
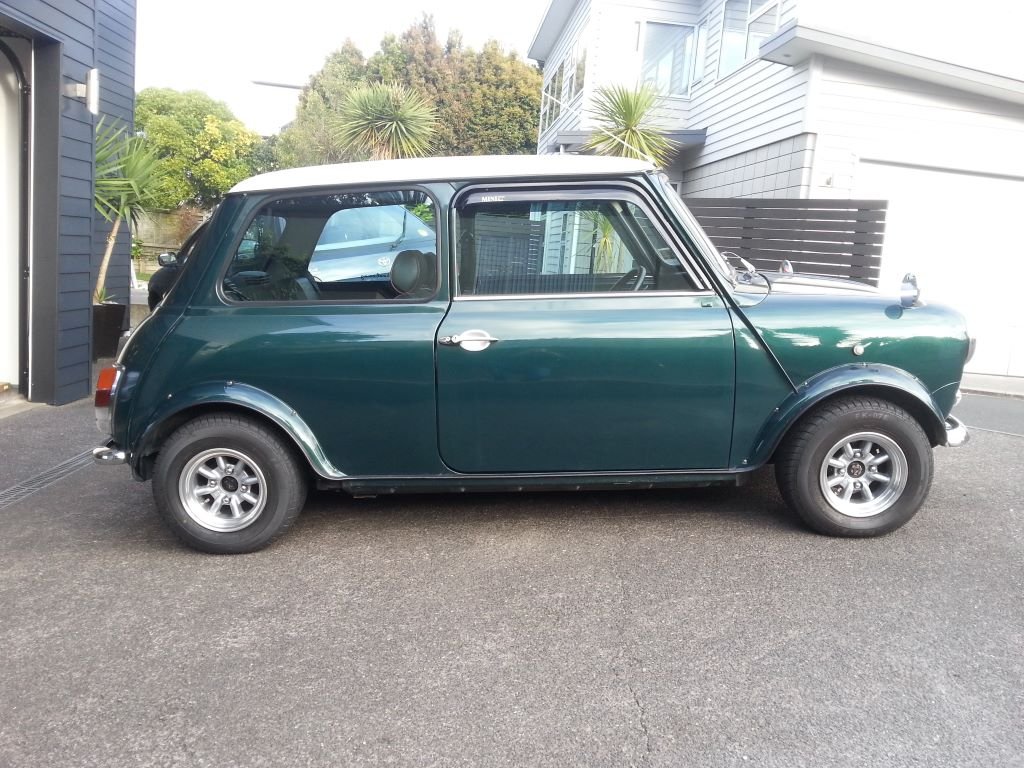
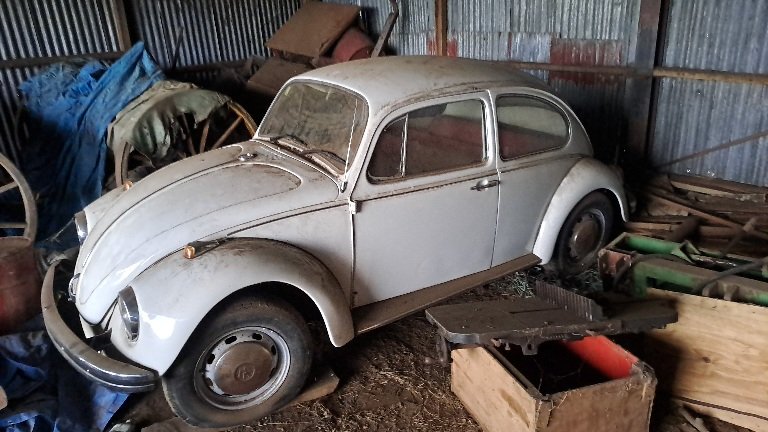
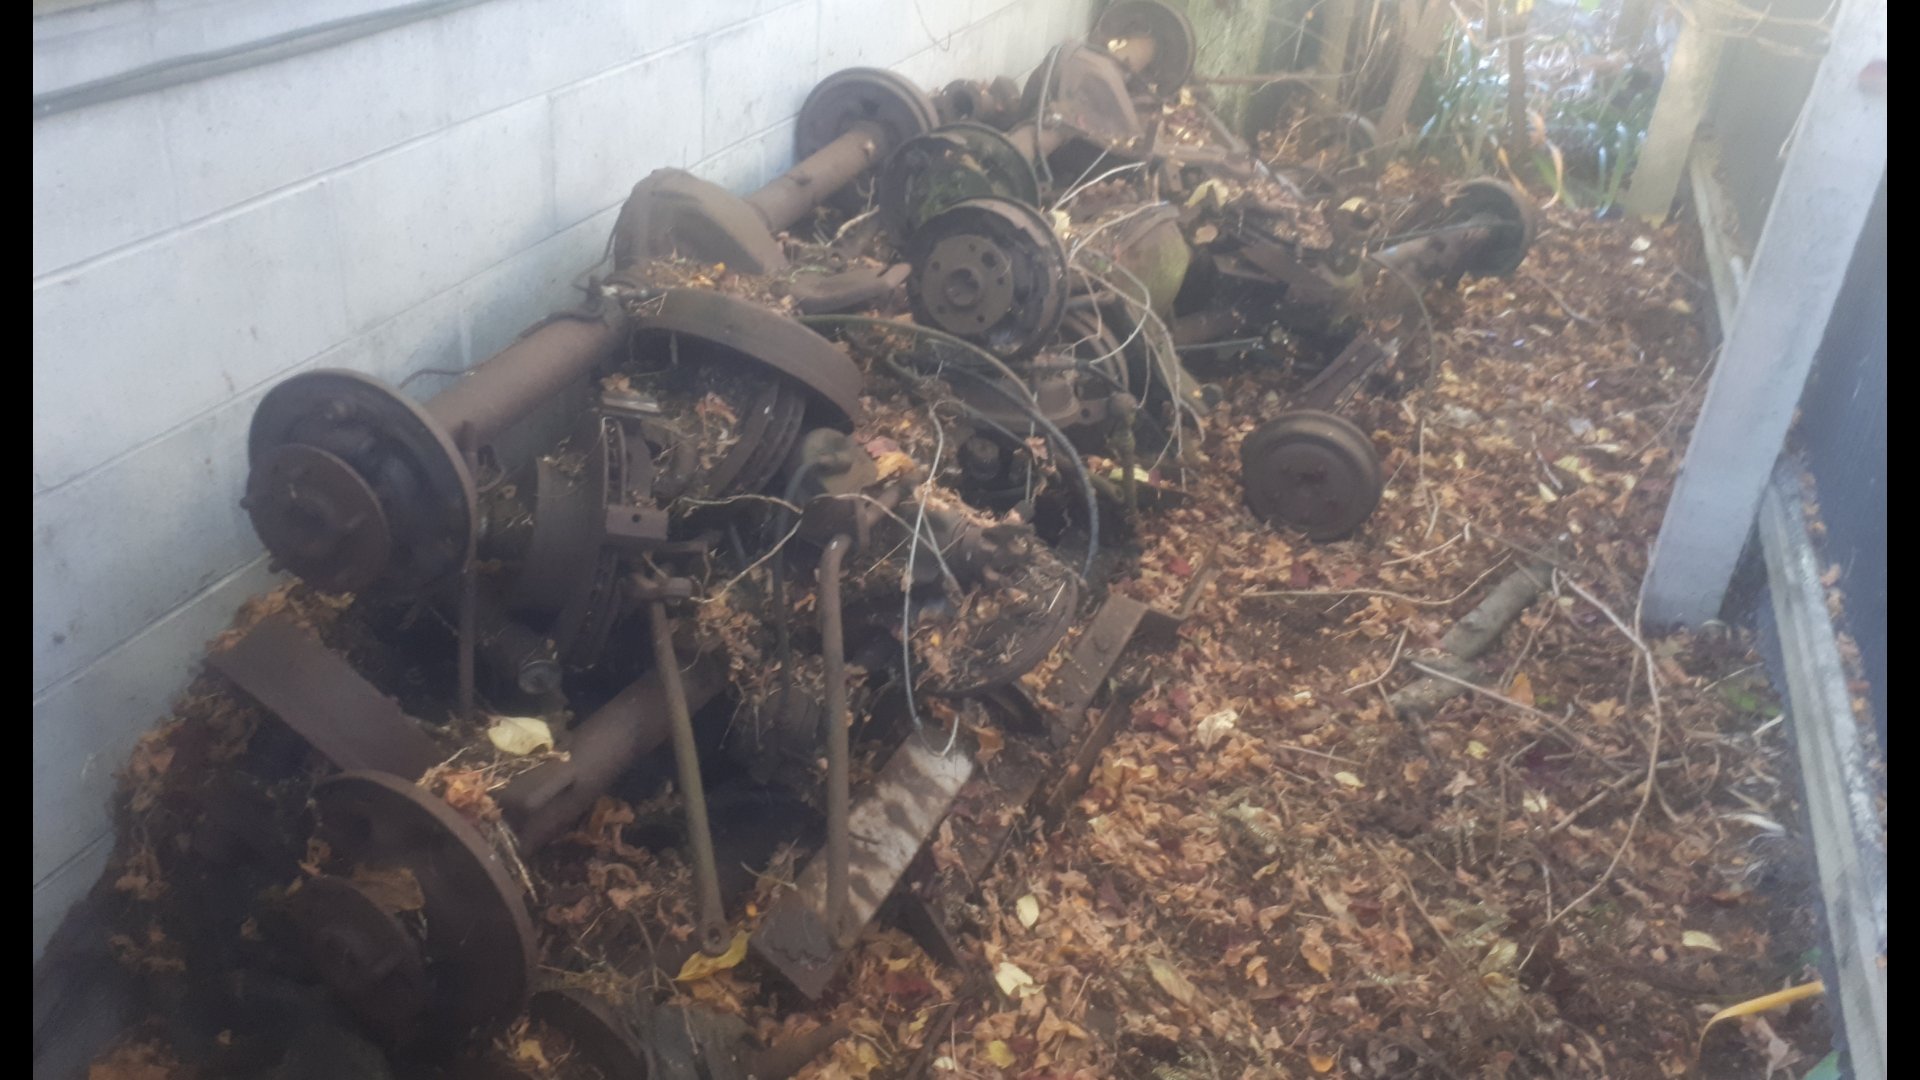
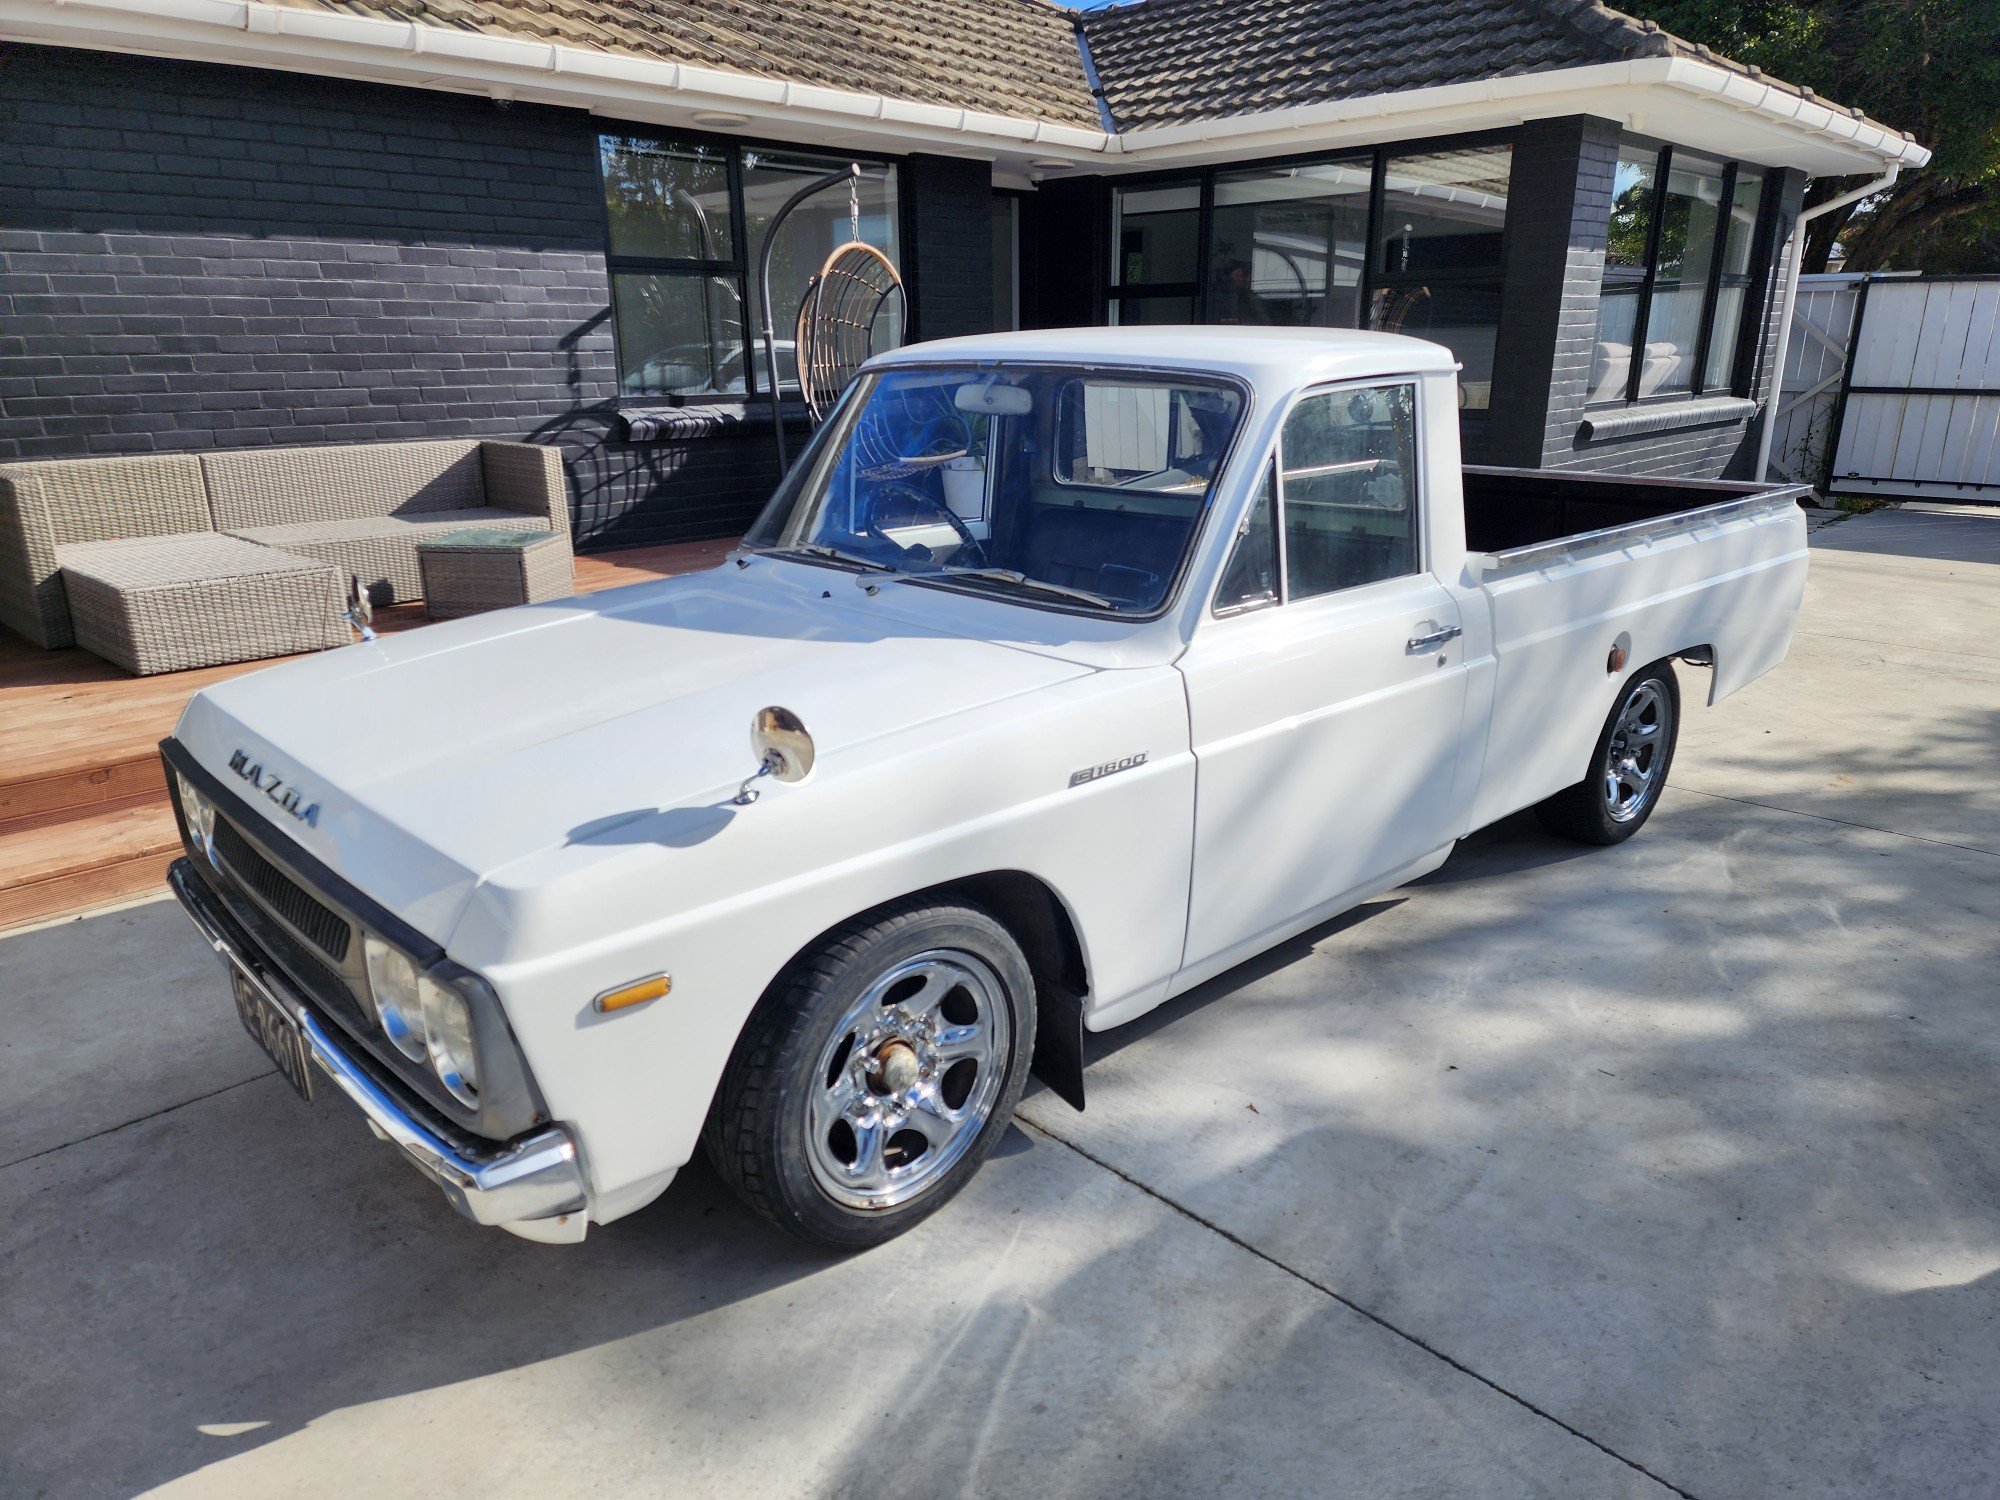
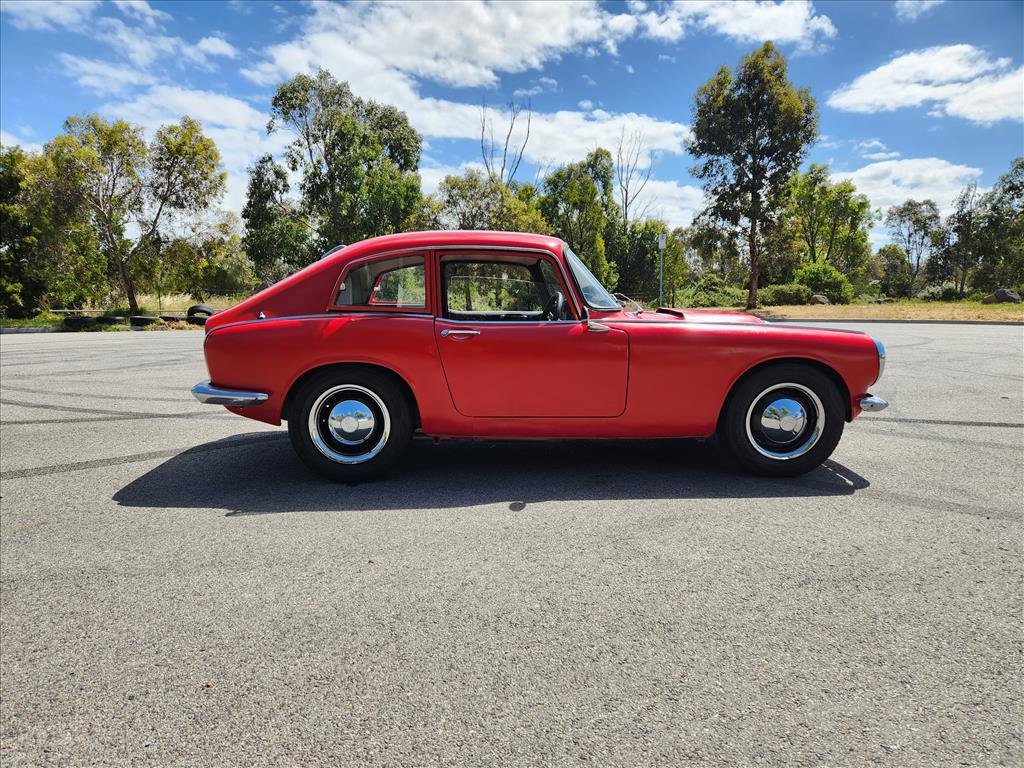
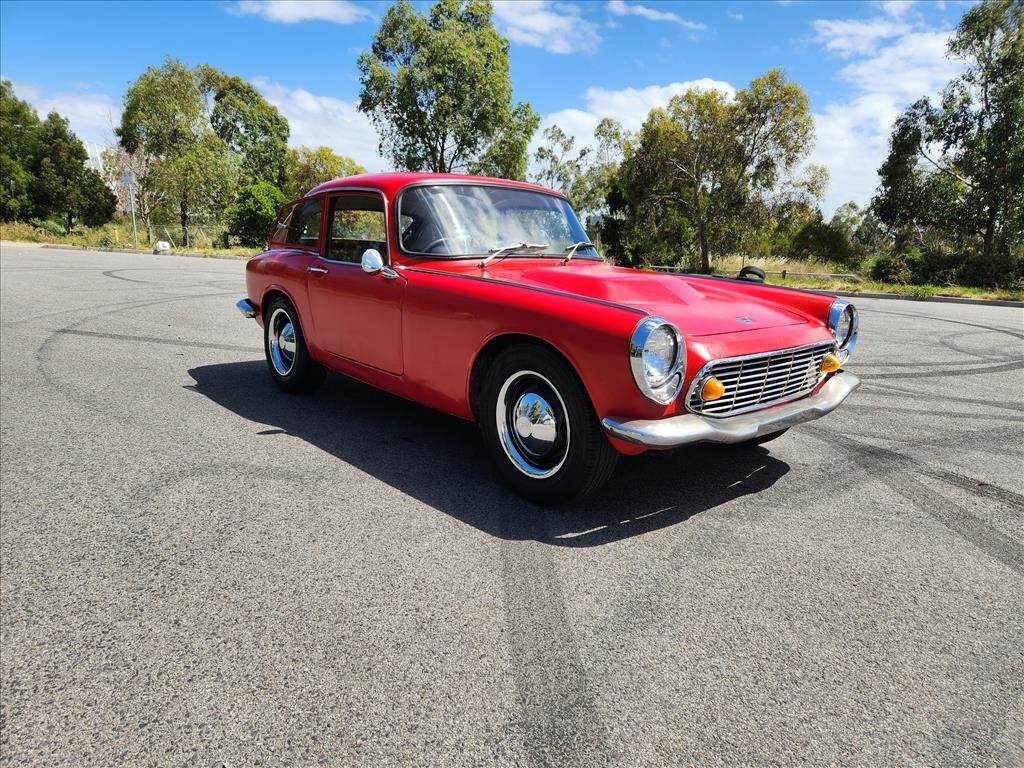
When we purchased the little Moke it had only travelled 1614km since being restored born witness by the odometer reading on the brand new Speedo. The story goes that a father restored the Moke for his disabled son. The son was wheelchair bound and old mate had even fitted 12 volt rams to the rear hinged fibreglass roof so that he could get the youngster in and out of the passenger seat. Problem was that the youngster didn't have much upper body control either and nearly fell out of the Moke on the first outing. The family got such a scare that the Moke got parked up for a while before they sold it on to a young fella from Noosa. I think that the new owner fell in love with the idea of owning an old classic without realising that it isn't like driving a modern hatchback with all the mod cons. He was also not mechanically minded so he ended up farming the maintenance out to a local mechanic and after receiving a few repair bills the novelty of owning the Moke wore off. And its at this point that Mrs Flash and I stepped in to take over the reins. So, both inwardly and outwardly the Moke looked absolutely immaculate as borne out by the below photos that I saved from the original advertisment:
4 points
-
So far away from committing. In Perth, Singapore Thursday. Will bring Caddy or whatever if something has a wof. Hope to have some idea of time on and off by the end of next month. Will be there if I am home.3 points
-
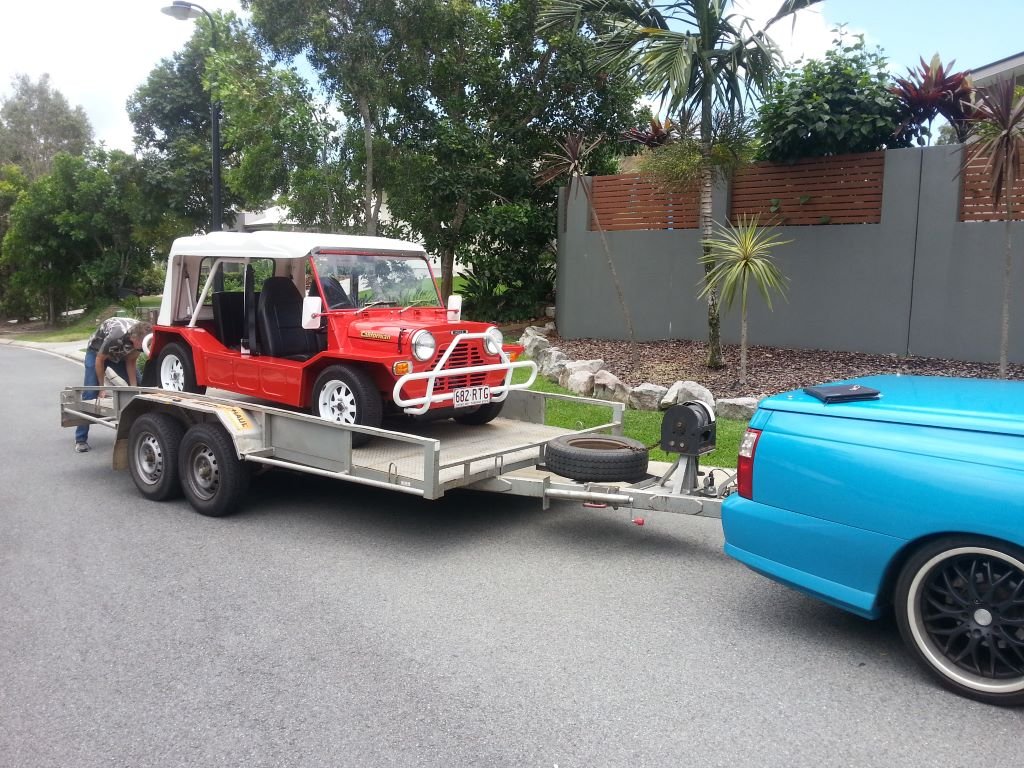
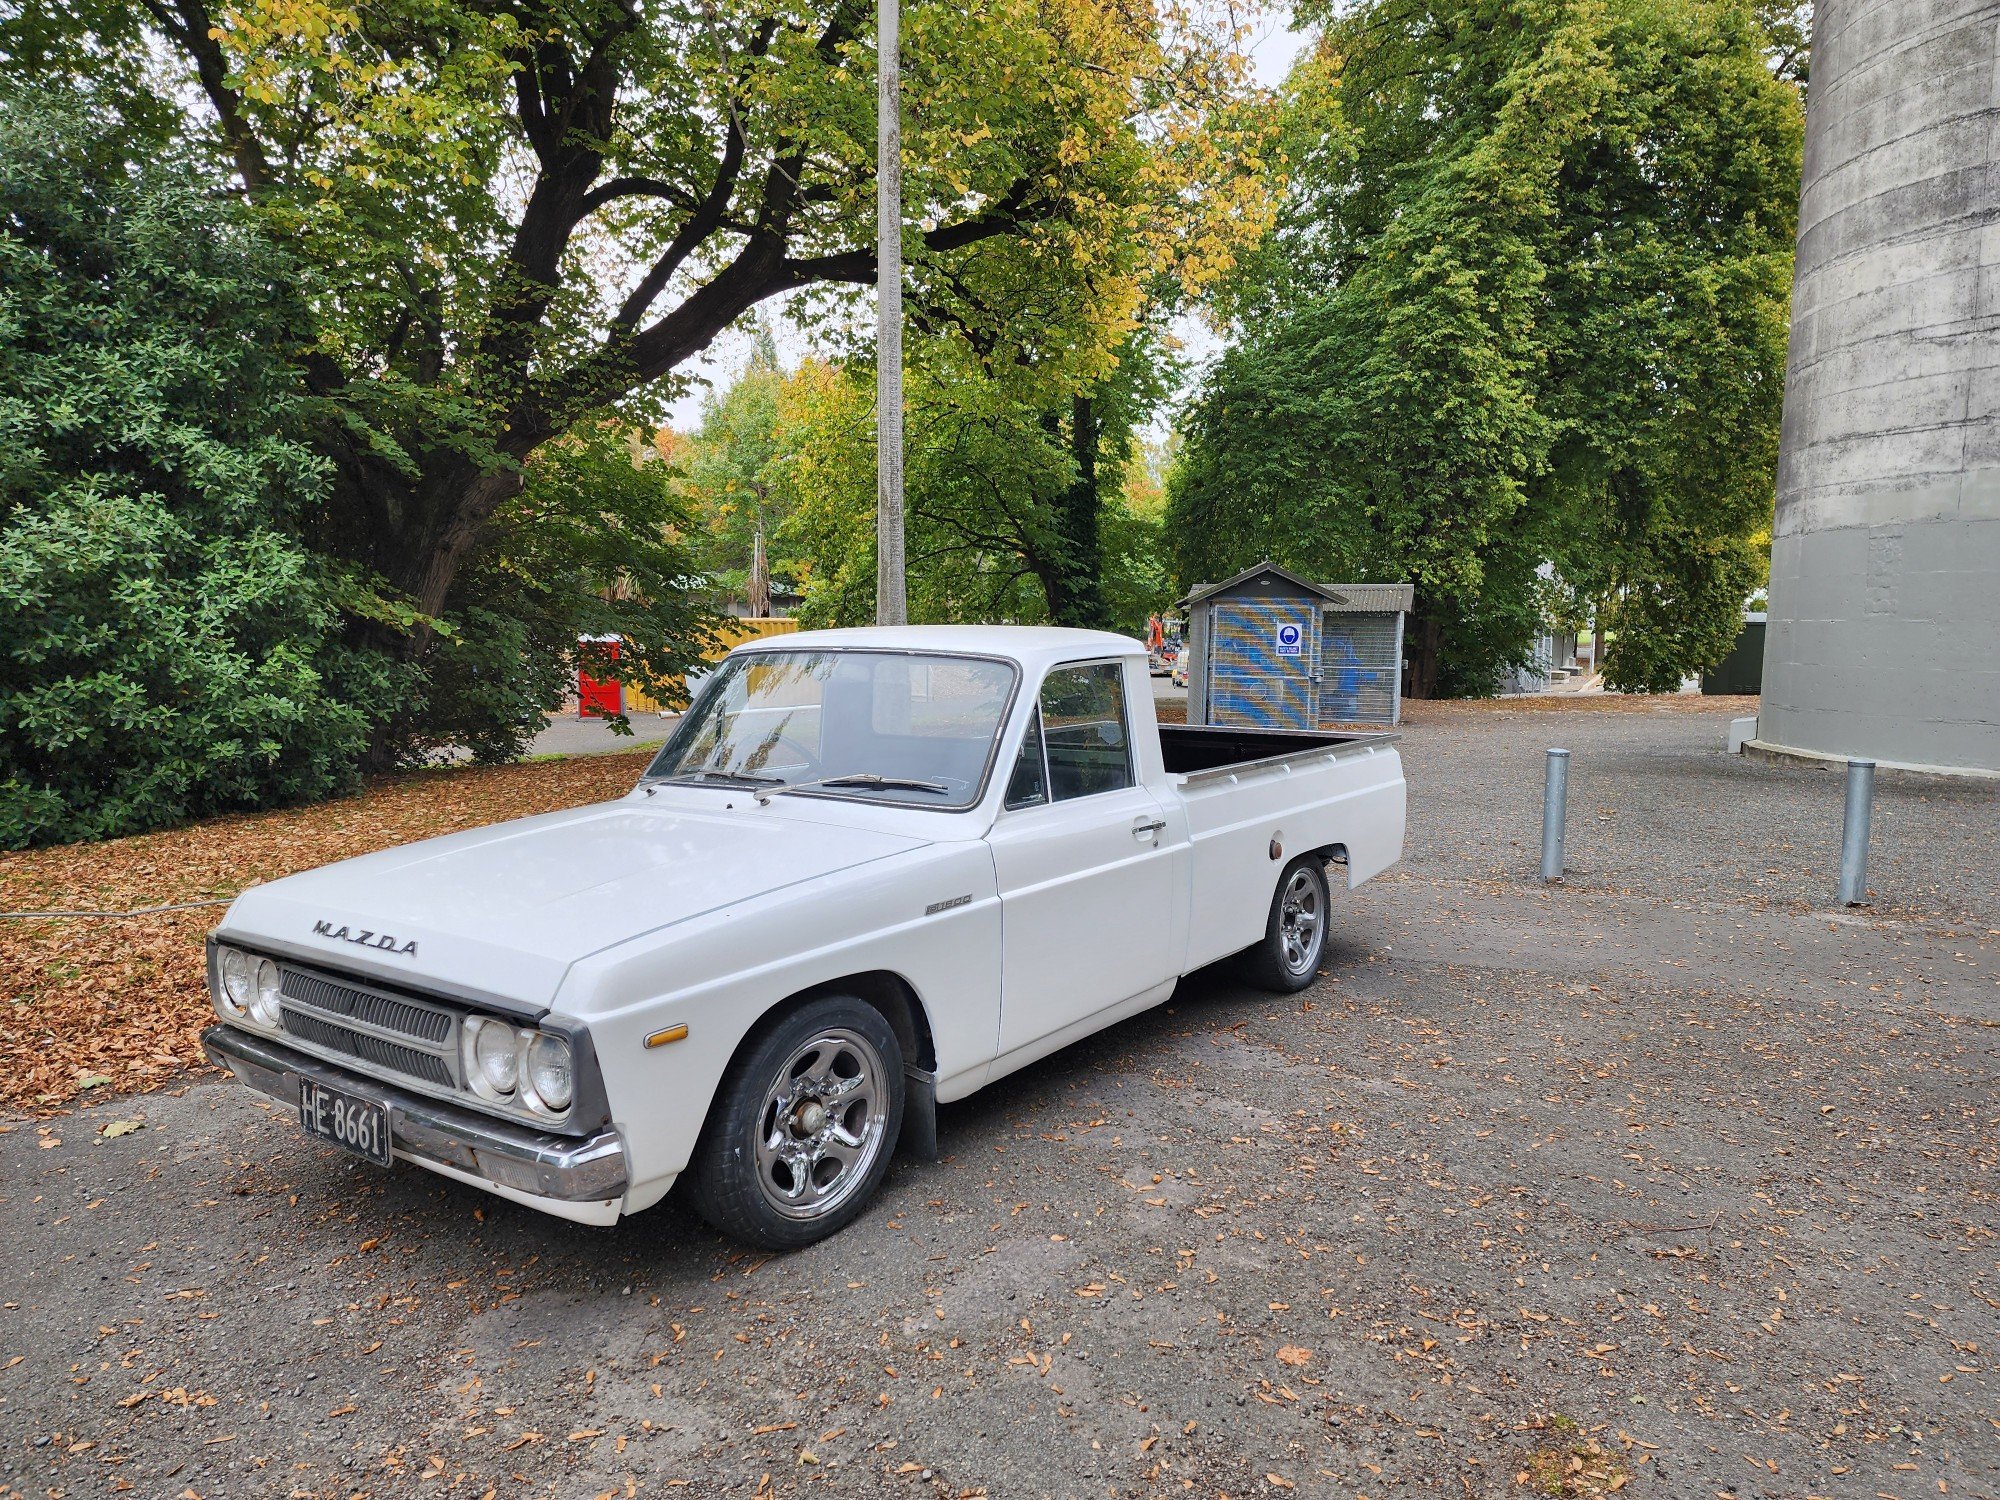
We have owned this little Moke for about 4 years now and since I'm starting to do a bit of work on it, I figured I'd start a thread as it might be of interest to others. So, first up a bit of background. When we lived in NZ, Mrs Flash owned one of those newish 1275cc SPI Rover Minis. It was a Jap import that someone had done quite a bit of back dating on. A lot of the changes were fairly subtle, but the most notable things were the fitting of 10-inch Watanabe rims to replace the original 13-inch units and the removal of the modern dashboard that was replaced with a classic centre mount speedo. The car was a little rocket and super fun to drive. Sadly, we made the decision to sell it before heading off on our Australian adventure and last I heard it was somewhere in Christchurch. So fast forward a few years and we are now permanently OZ based and looking to get back into some classics. We often thought back to the fun that we had with that little Mini and decided that owning another little Leyland would be good. The climate over in tropical Queensland lends itself to something a little more open and so we set our sights on a Moke. After checking out a few we ended up pulling the trigger on a fully restored 1100cc powered 1974 Californian look alike that was going for reasonable money. When I say reasonable I really mean that after doing my own sums I concluded that I couldn't have restored a clunker to this level for the money that was being asked. So, after swapping a few calls with the current owner together with the studying of some detailed photos a "deal in principle" was struck pending final inspection. We grabbed a hire trailer and headed south down to Noosa hoping to be returning with a loaded trailer. Gave it the once over, took it for a quick drive, some cash changed hands, and this happened: In my next update I'll talk about the maintenance undertaken to date and then a little bit about the current work being done. Thanks for looking.
2 points
-
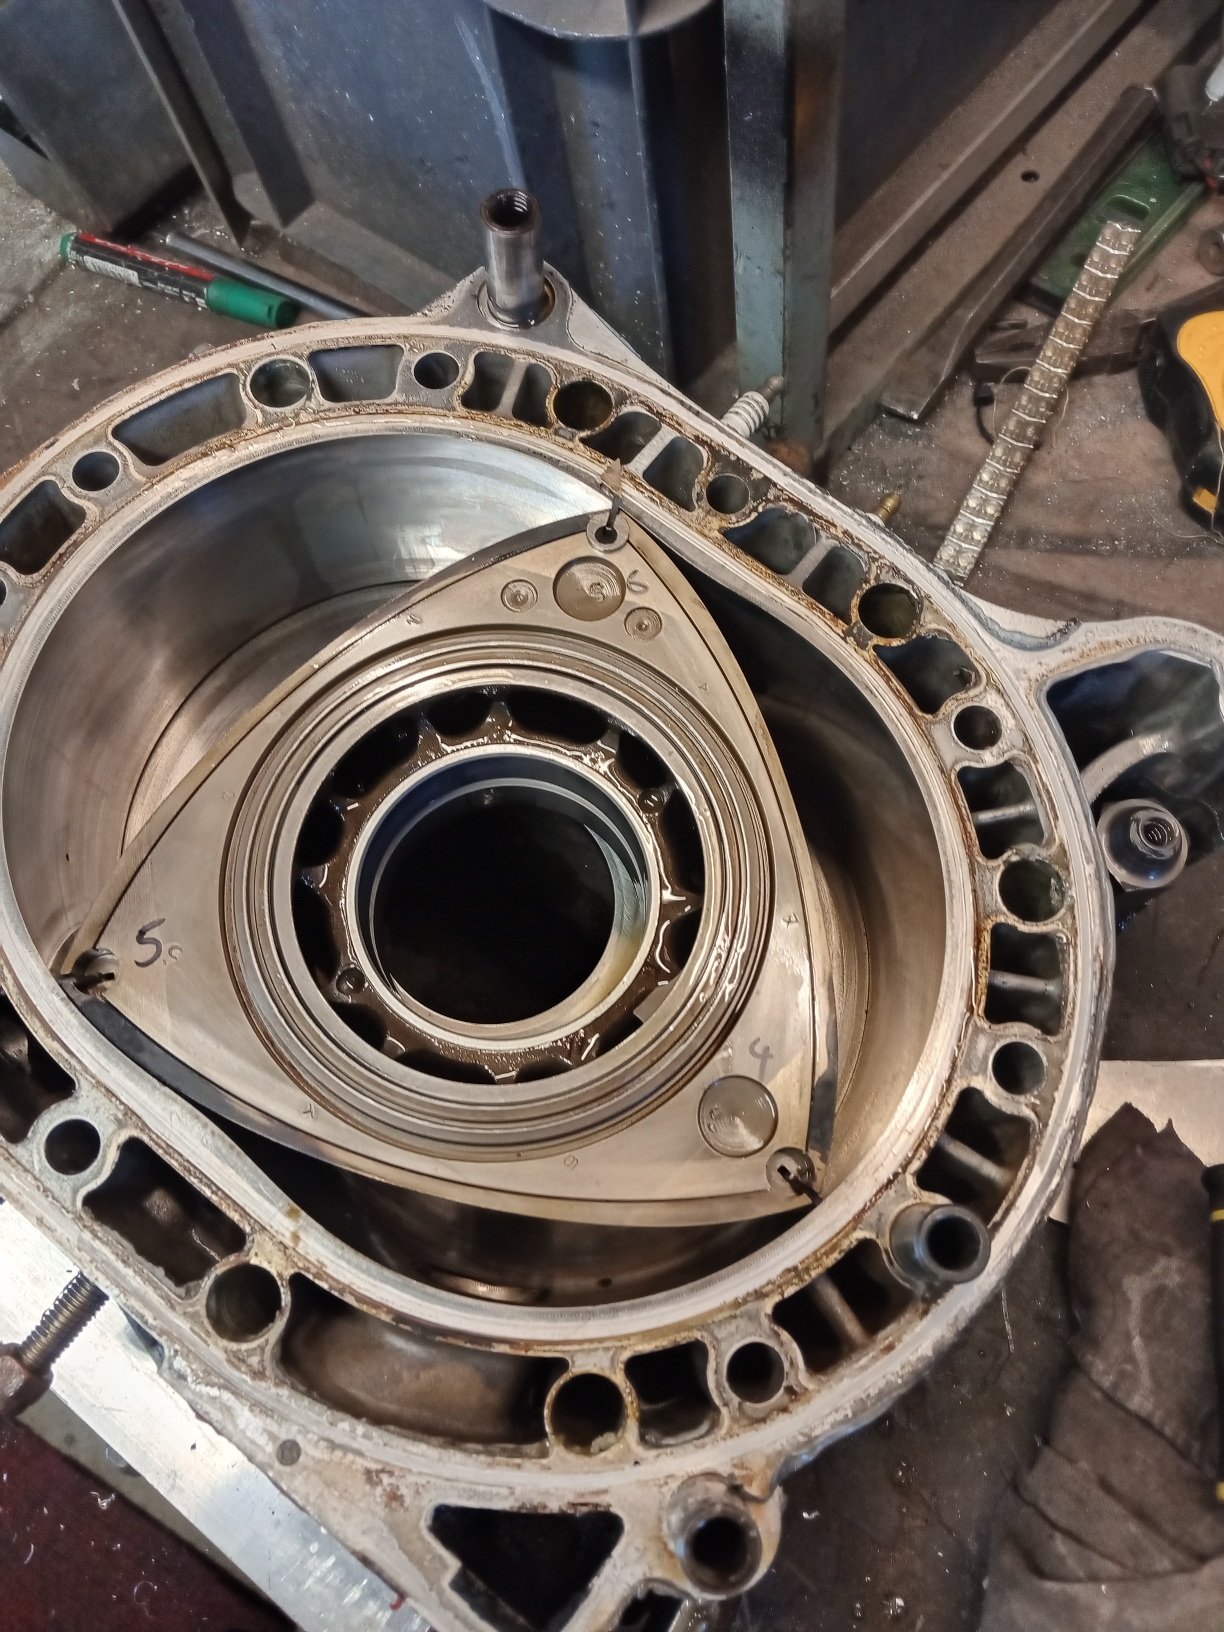
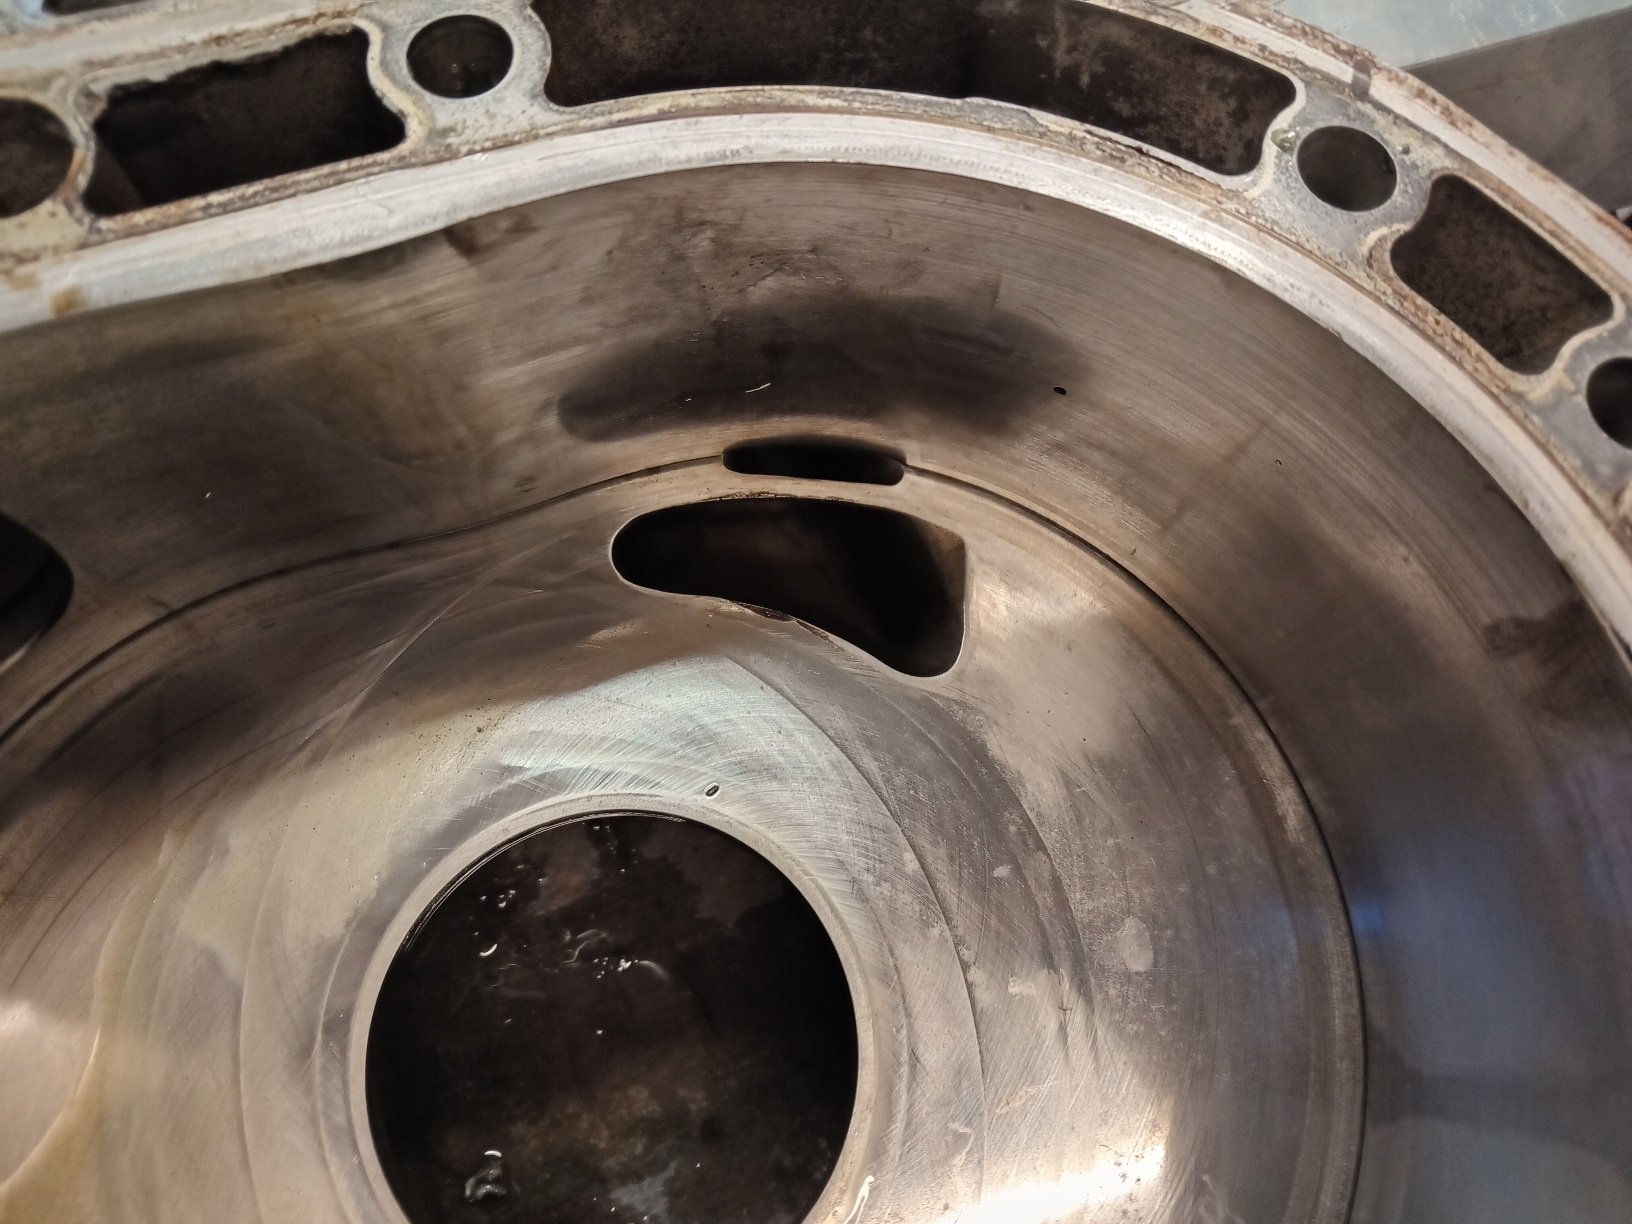
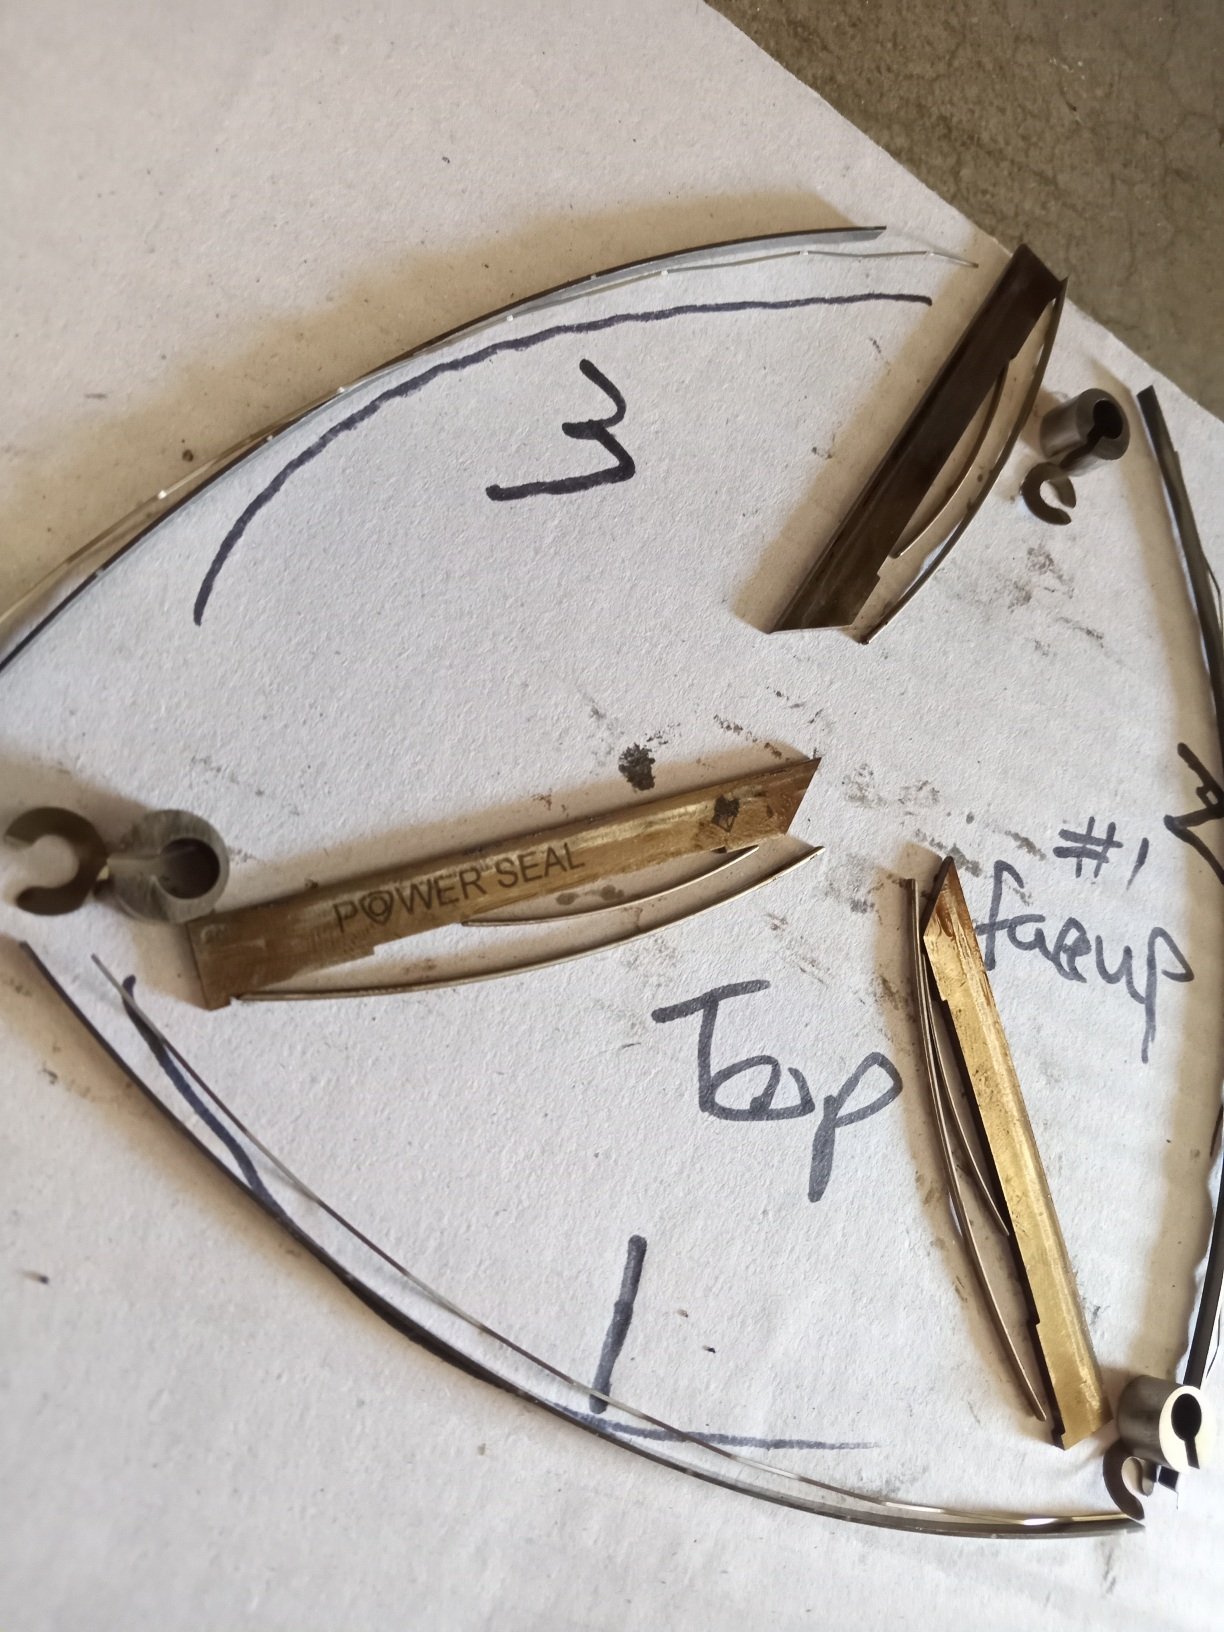
So i pulled the thing apart, good news all the bearings look fine and the rotors as well as all apex seals etc. and alloy housings look to be in good condition...
2 points
-
Not too long ago around Xmas I had heard that there was developing interest in my Auntys beetle and so in oldschool fashion I acquired another OS machine to add to my collection. To fill in some blanks we need to go back to 2007, I had a brush with the law lost my license and moved to Surfers for a few months for a cool off period.During my time there I got the use of this thing to commute around I had 2 jobs over there one a part time job at a tyre shop and another washing dishes up in Sanctuary cove at a high end seafood restaurant. The Lil bug was great and I only had issues with fuel delivery when it got too hot. I'd push it over to the side of the road between surfers and Miami and wait a while for it to chill... once I got fed up with part time work I managed to get a fleet job with Baurepairs down in west burleigh. First day on the job being kiwi got the general hazing from the lads and they got it back in equal amounts, they all enjoyed commies and falcons as long as it had a v8, so here we are with the Lil herby puttin about with a raspy exhaust note. Couple weeks later one of the lads had car issues and broke down and was resorting to the bus. I offered a lift as it was on the way home. Needless to say he was reluctant. Oh well suit yourself. Next day I offered again and he decided ok sure. We cruised along and headed up the coast towards his stop. At one of the lights I was waiting to turn right and this guy was beside himself, next to us was a beach blonde in her own bug waving at us. I wasn't paying attention and so I finally had a look and she was alright to look at. I played it down, so the next day he gets to work telling the crew about the ordeal and the bug is now dubbed a pussy wagon. The crew then insisted we do a Roady to Byron Bay via nimbin. It was a great time had by all and a few yarns about nimbin could be told. Better to not sharn on about that too much... back to the main yarn. A few years later... and a few more to be exact Since then it was exported to NZ about many years ago where it got parked in an old hanger and left to gather dust. I developed a curiosity about will it go and maybe putting it back into operation. At xmas last year I headed down to drag it out and see if it was still in one piece. Someone had wired fuel pump on backwards as I heard it bubbling into the tank so seemed like someone had borrowed the fp and then put it back. Got a fresh battery and a while later it barked into life. Dry rotted and coozed tyres were next on the list. 60 bux later we had a set of roadworthy treads the fronts were bad but they held out. 5 Hours later rolled into the 09 and parked her up. The was a mean mission. It's been parked up for the last month just waiting for garage space to accommodate this so we can begin stripping and assessing in conjunction with the viva
2 points
-
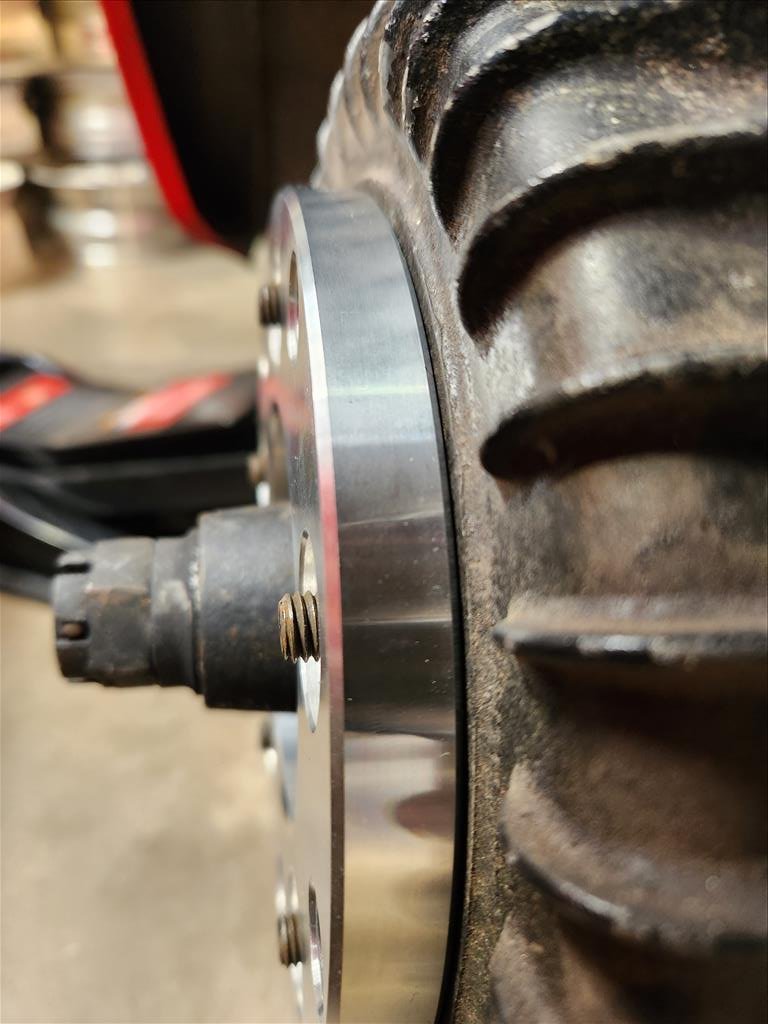
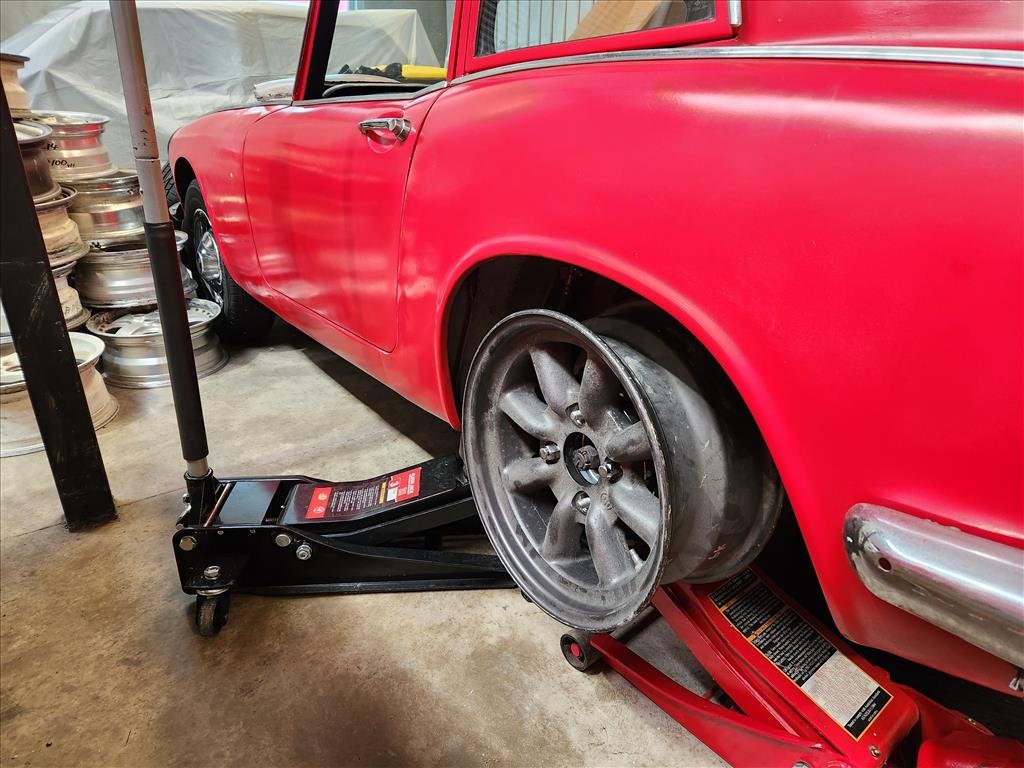
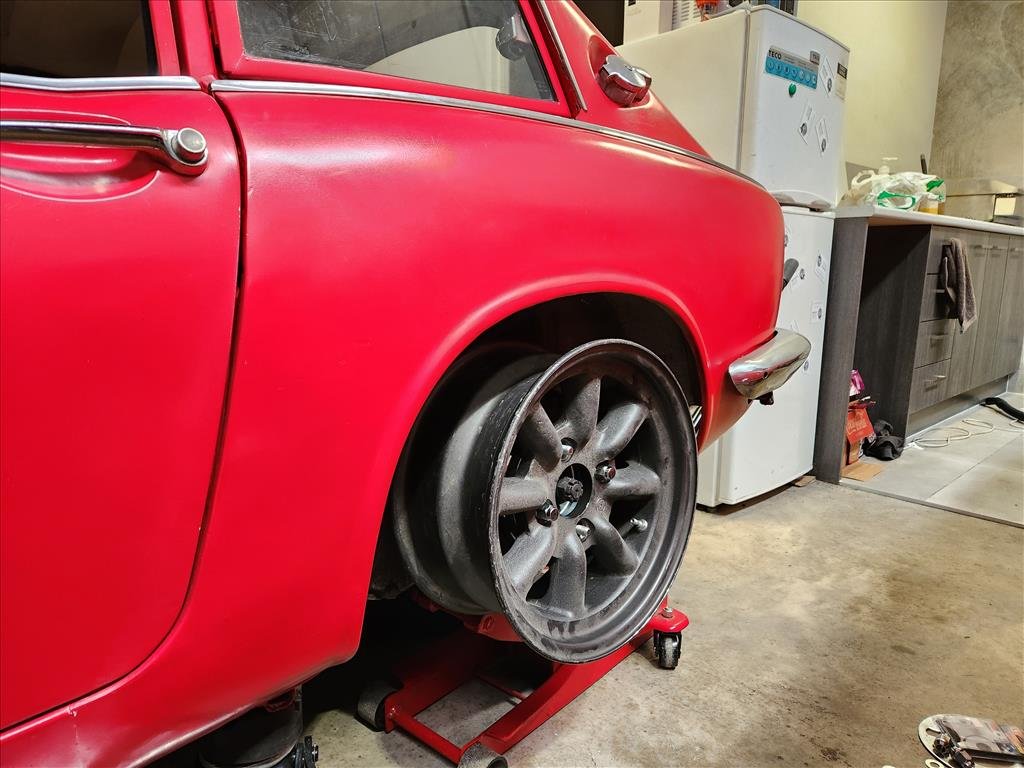
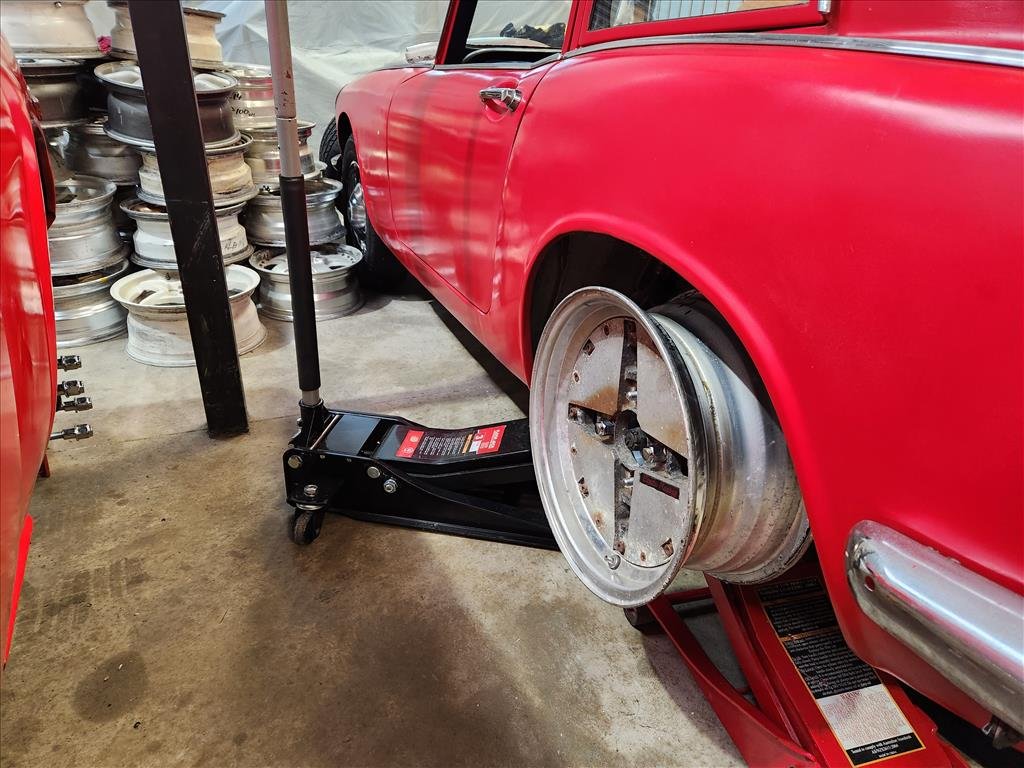
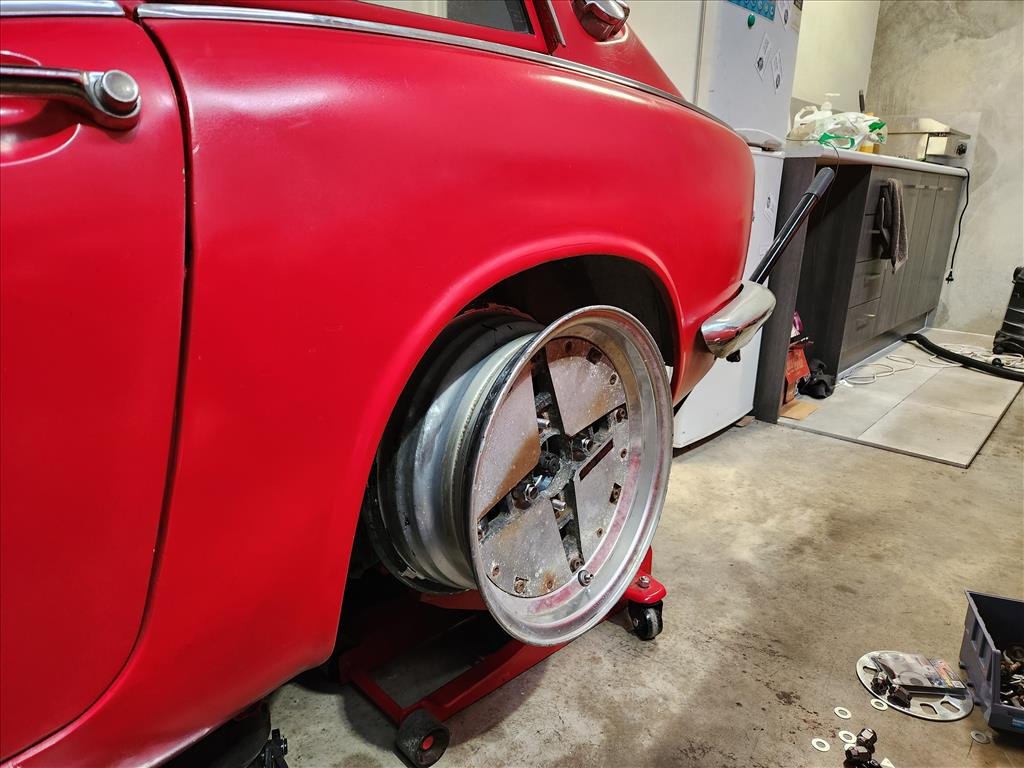
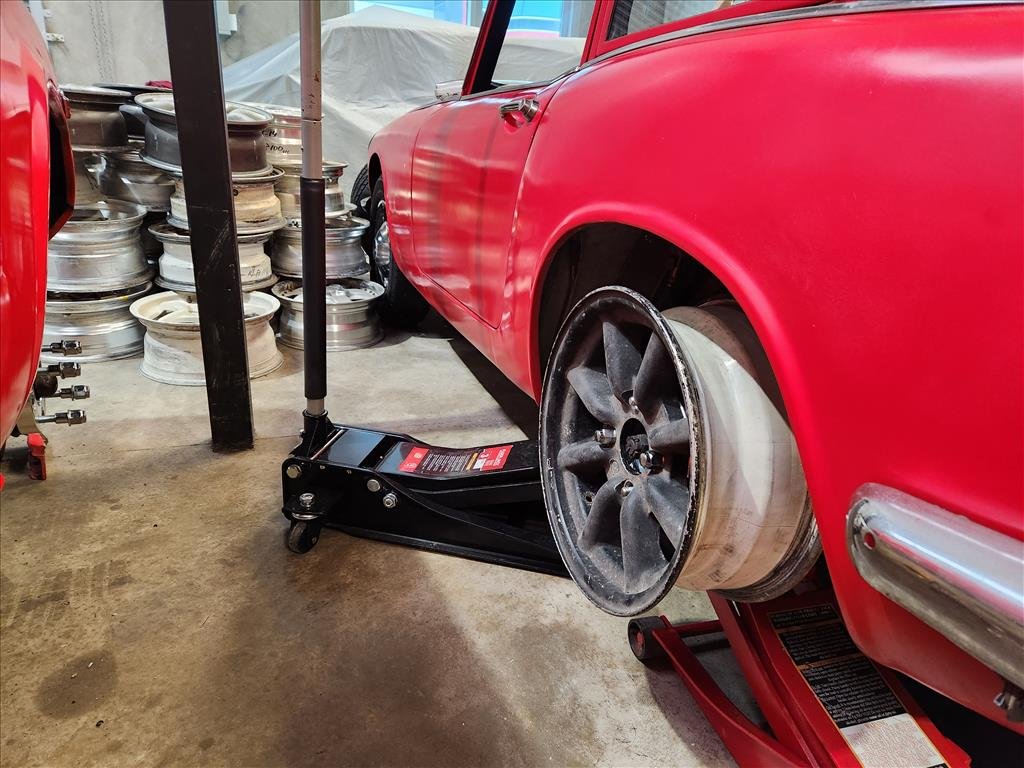
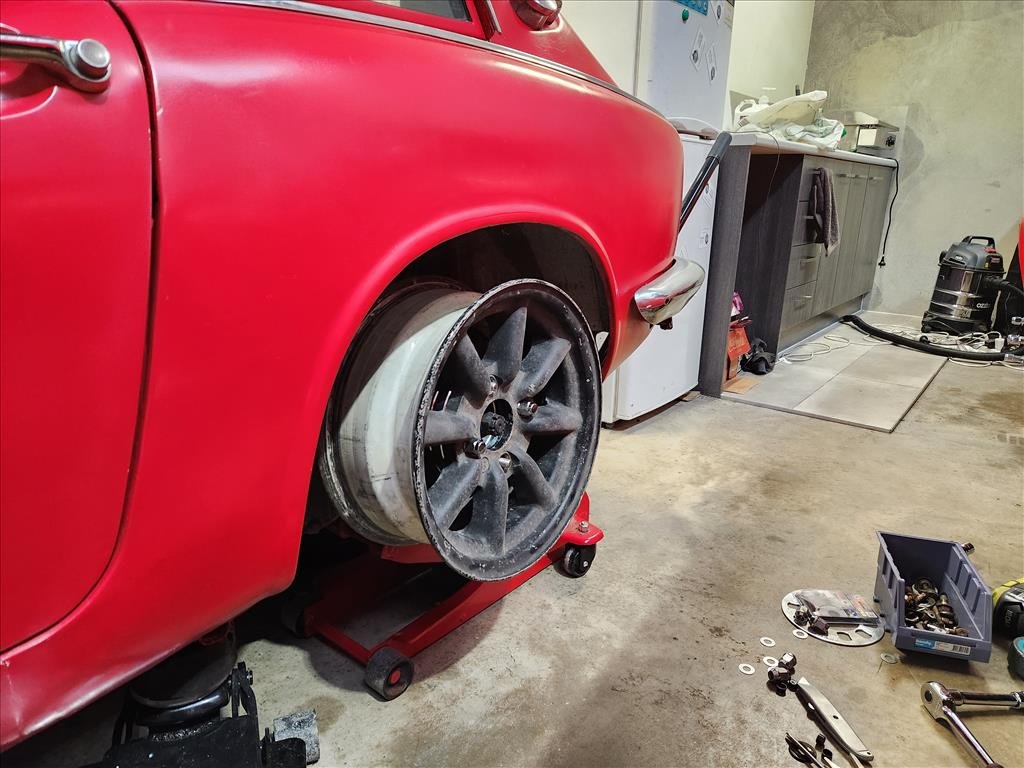
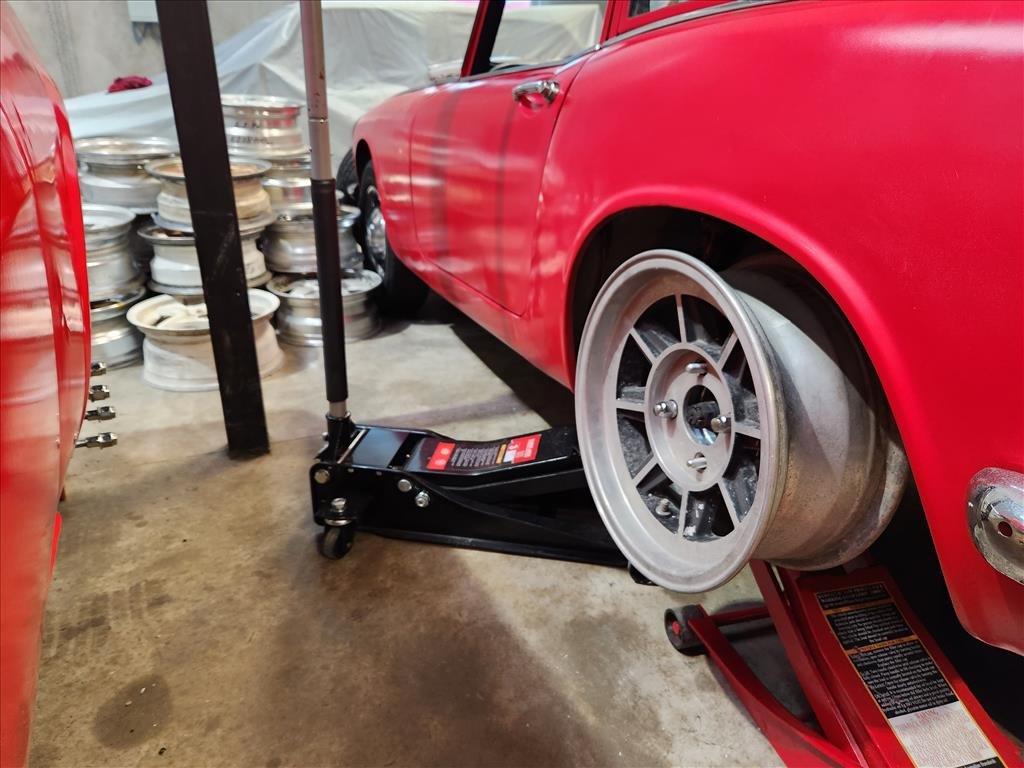
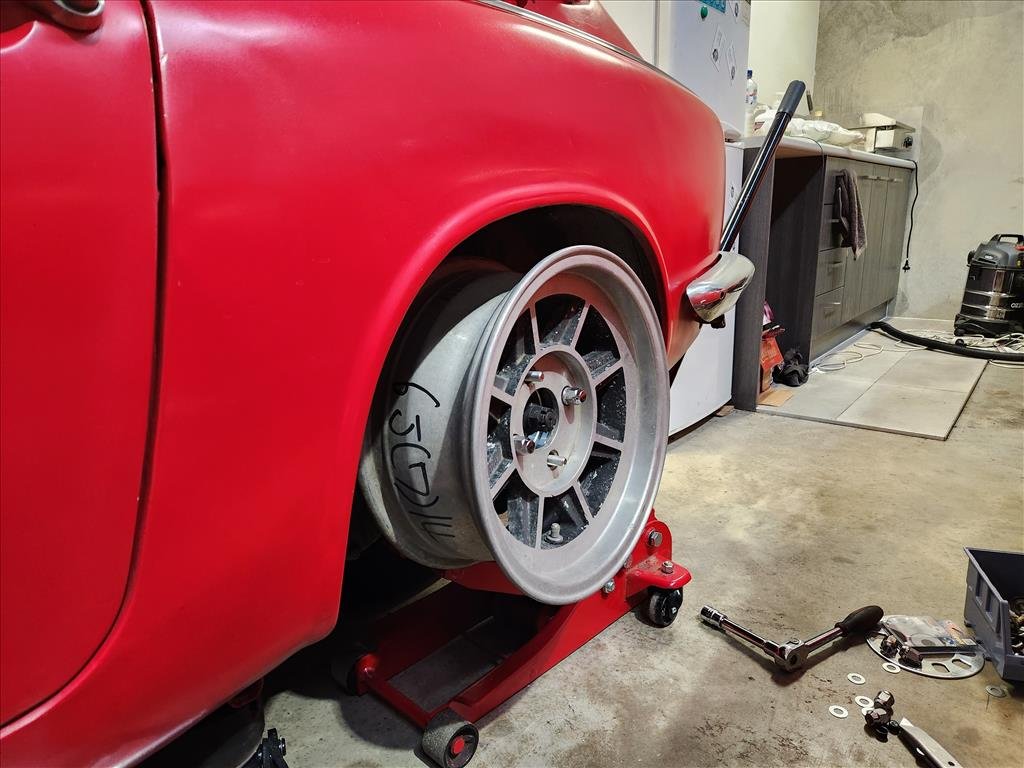
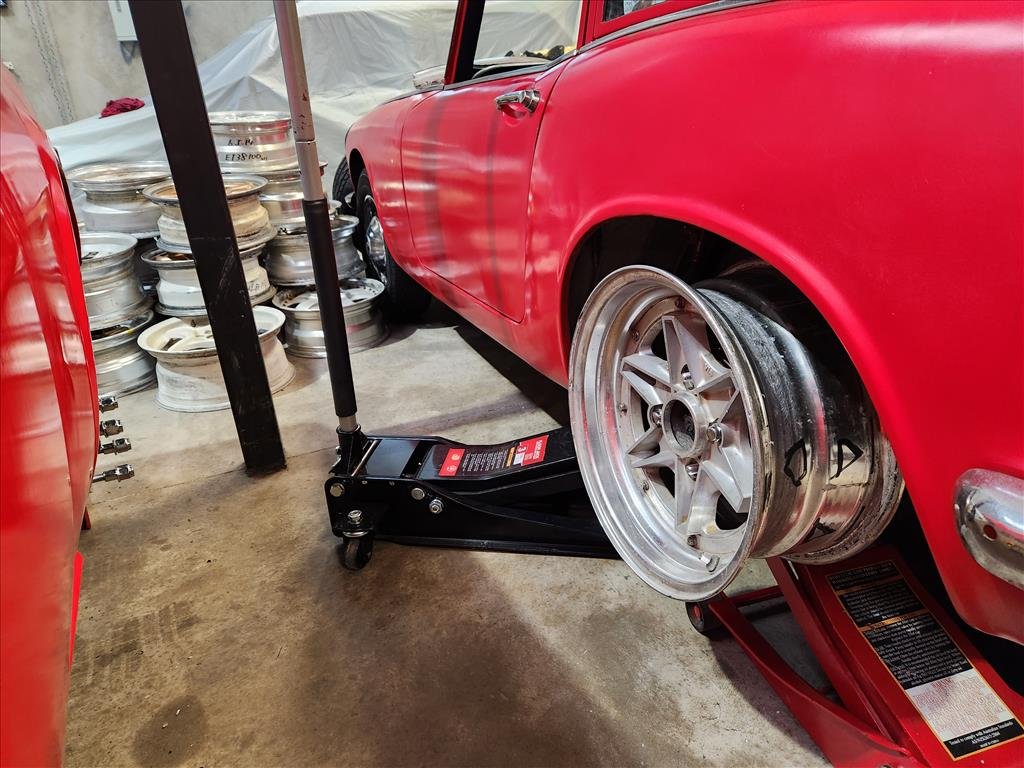
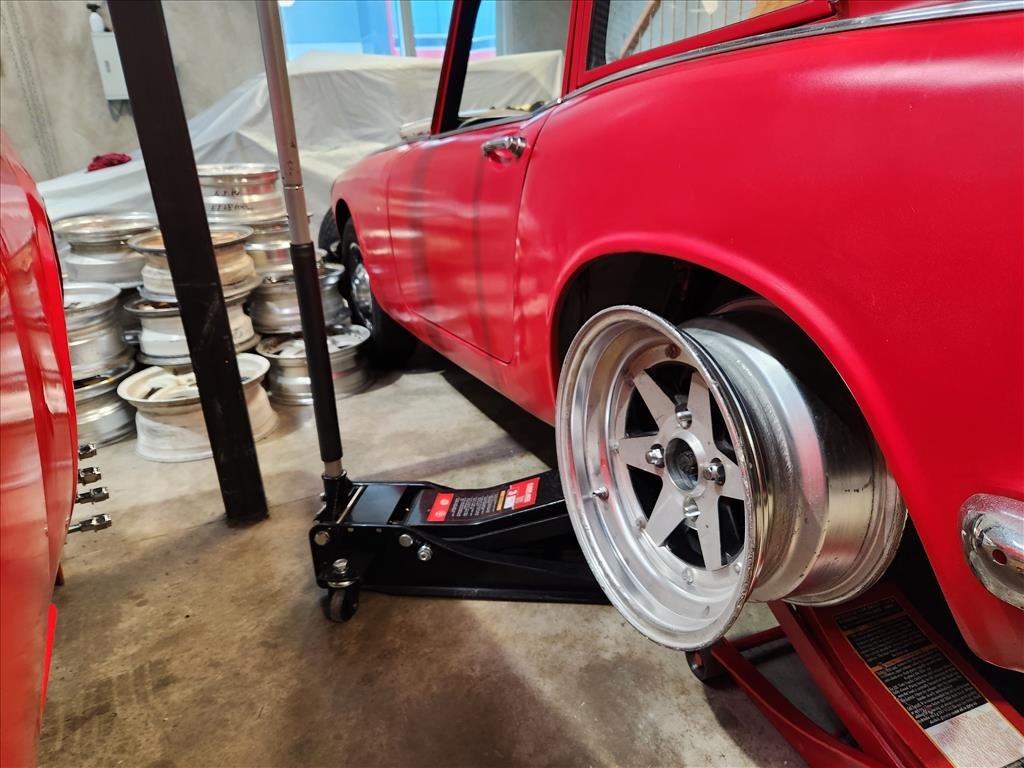
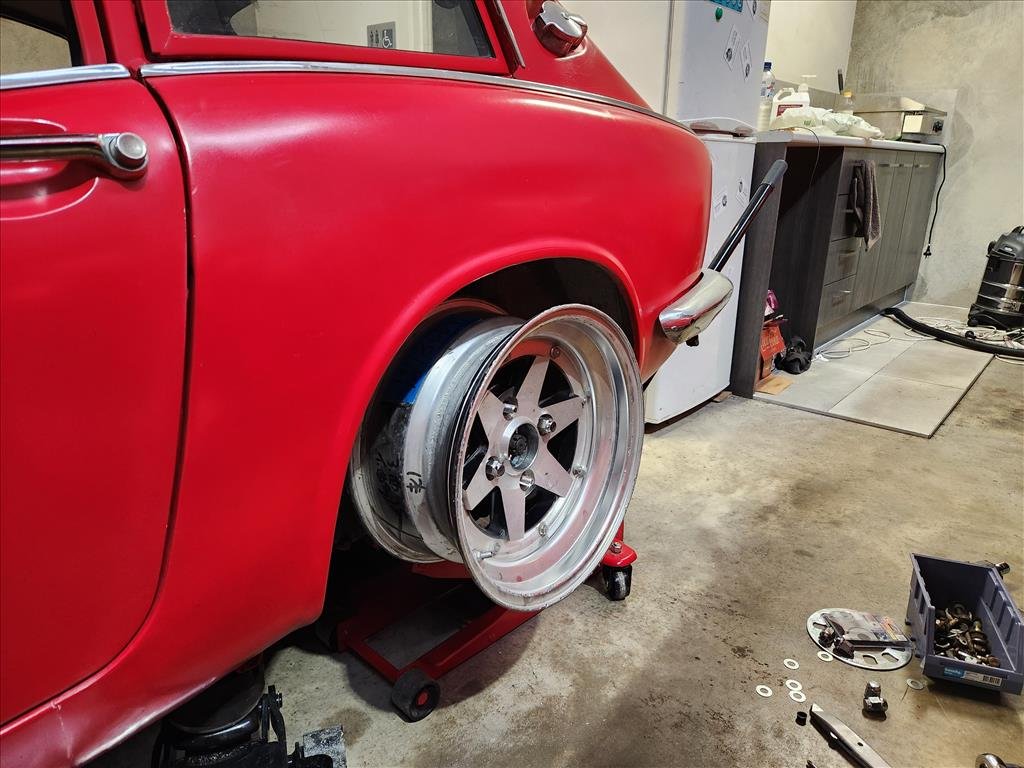
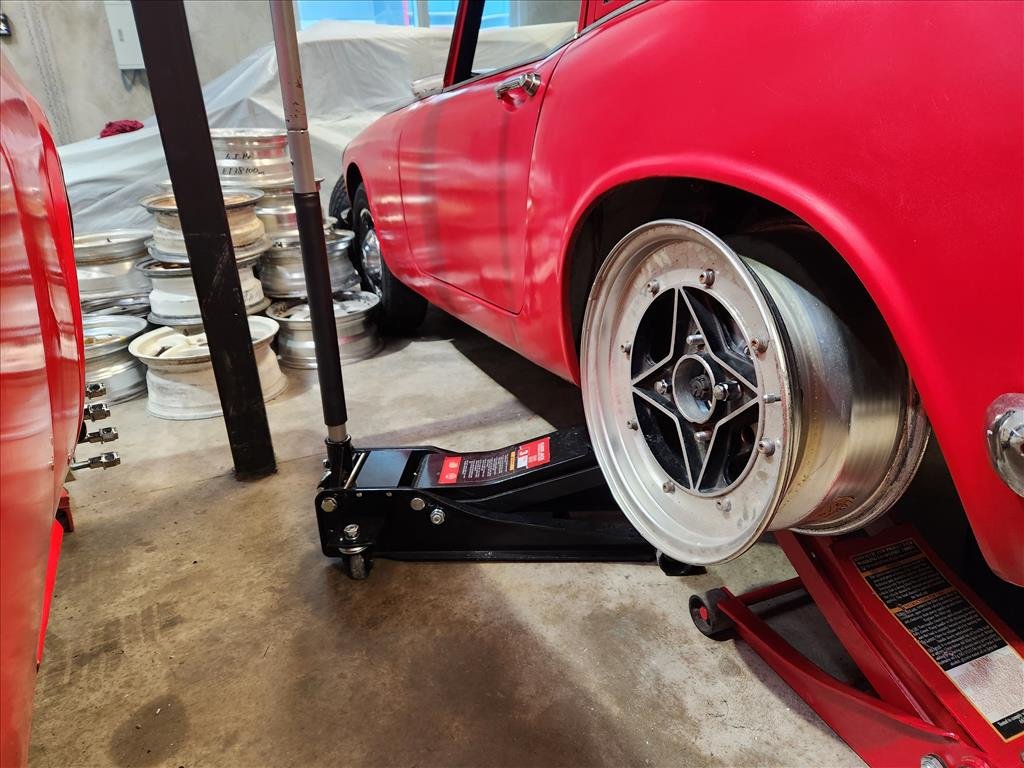
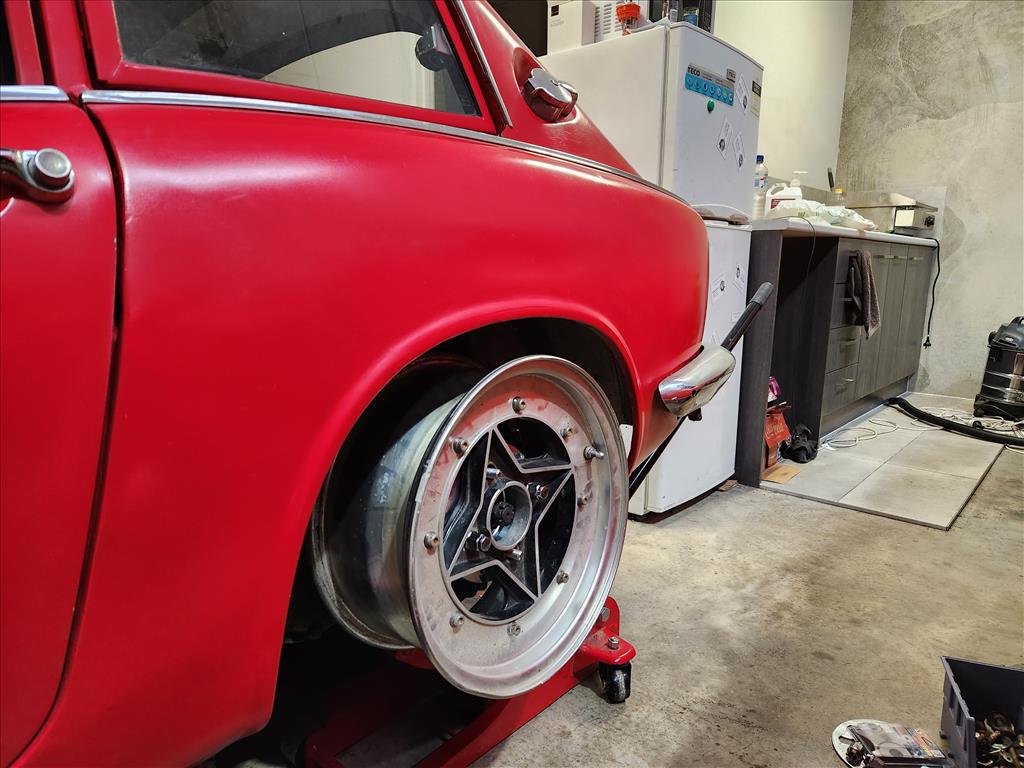
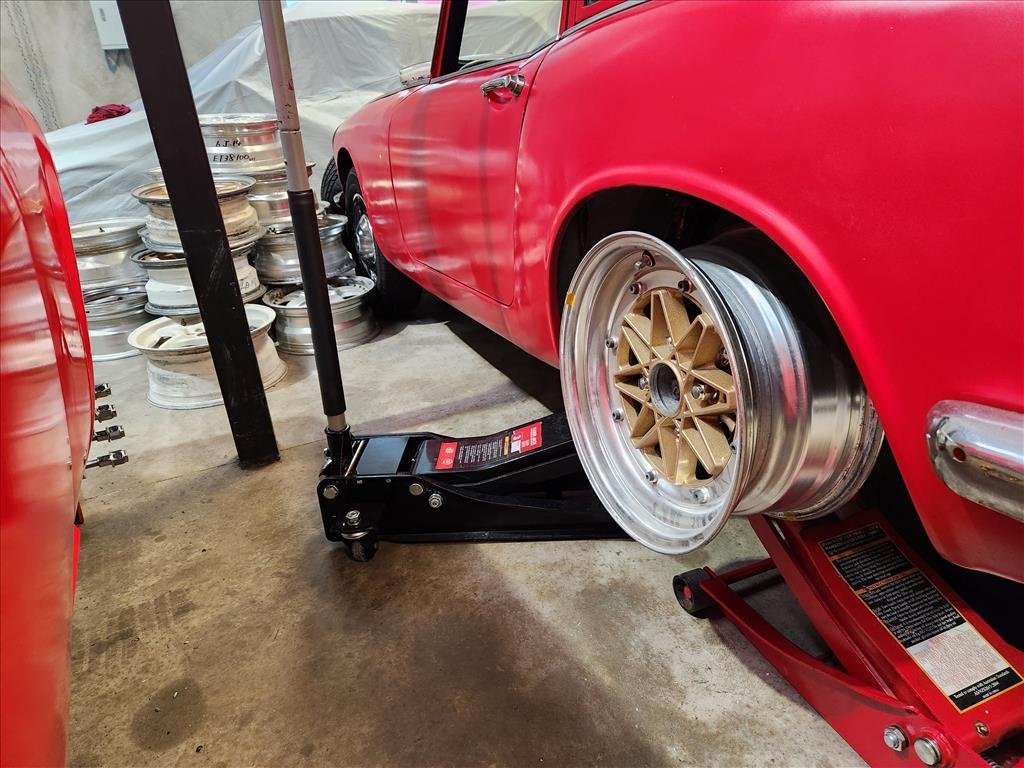
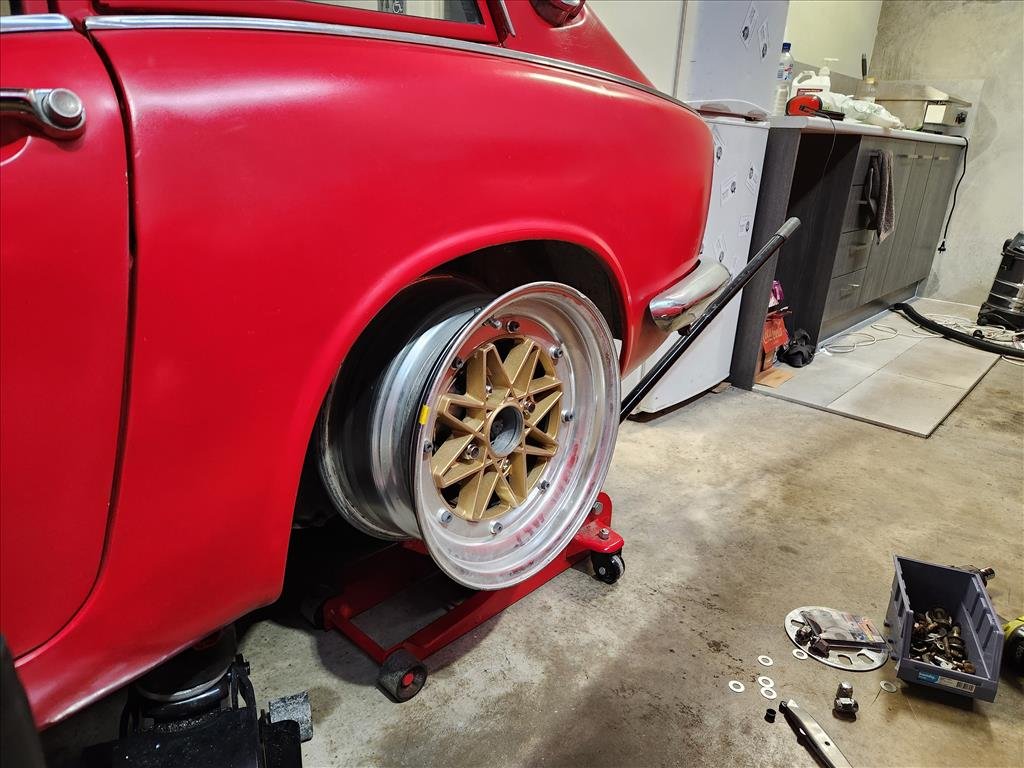
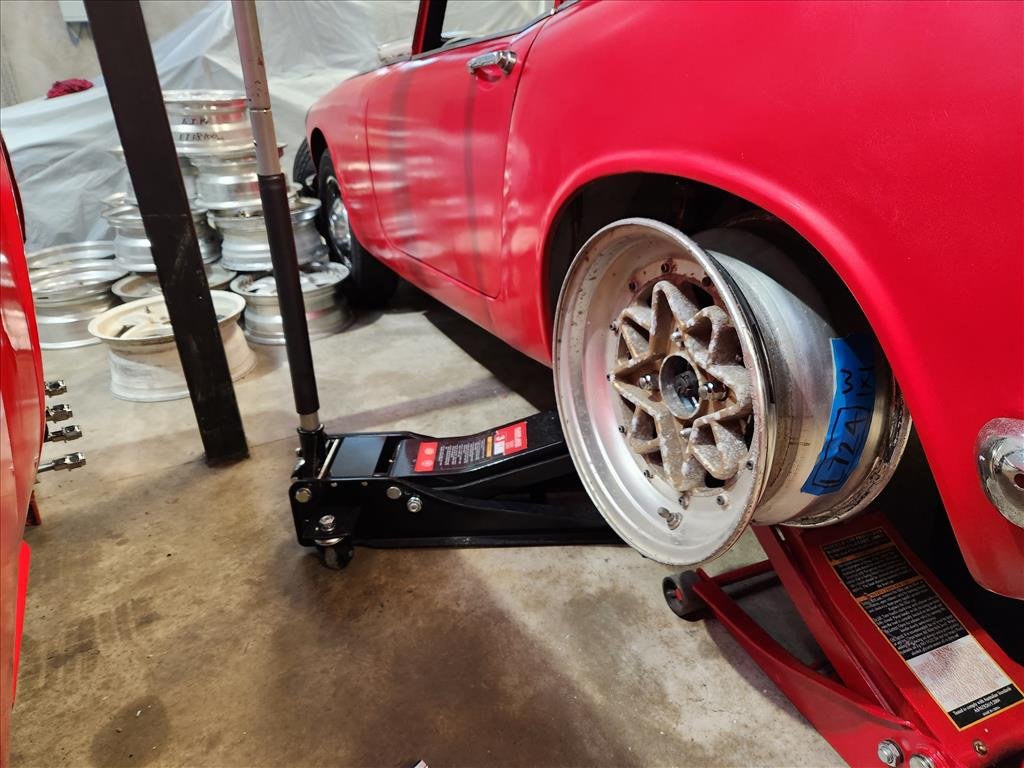
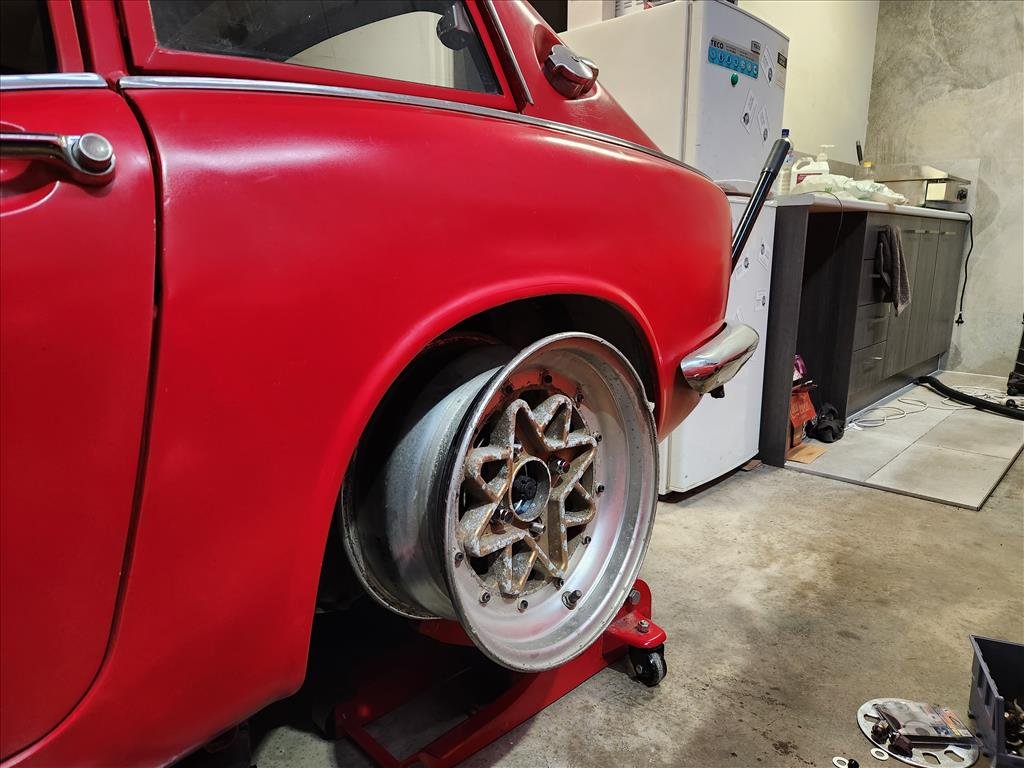
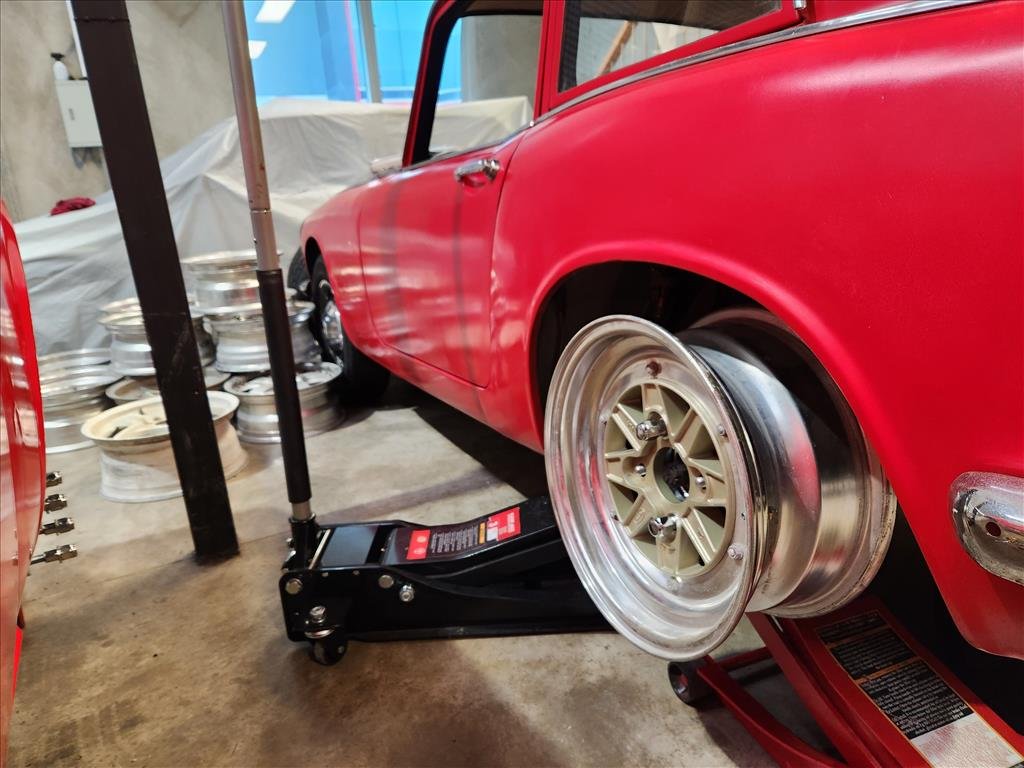
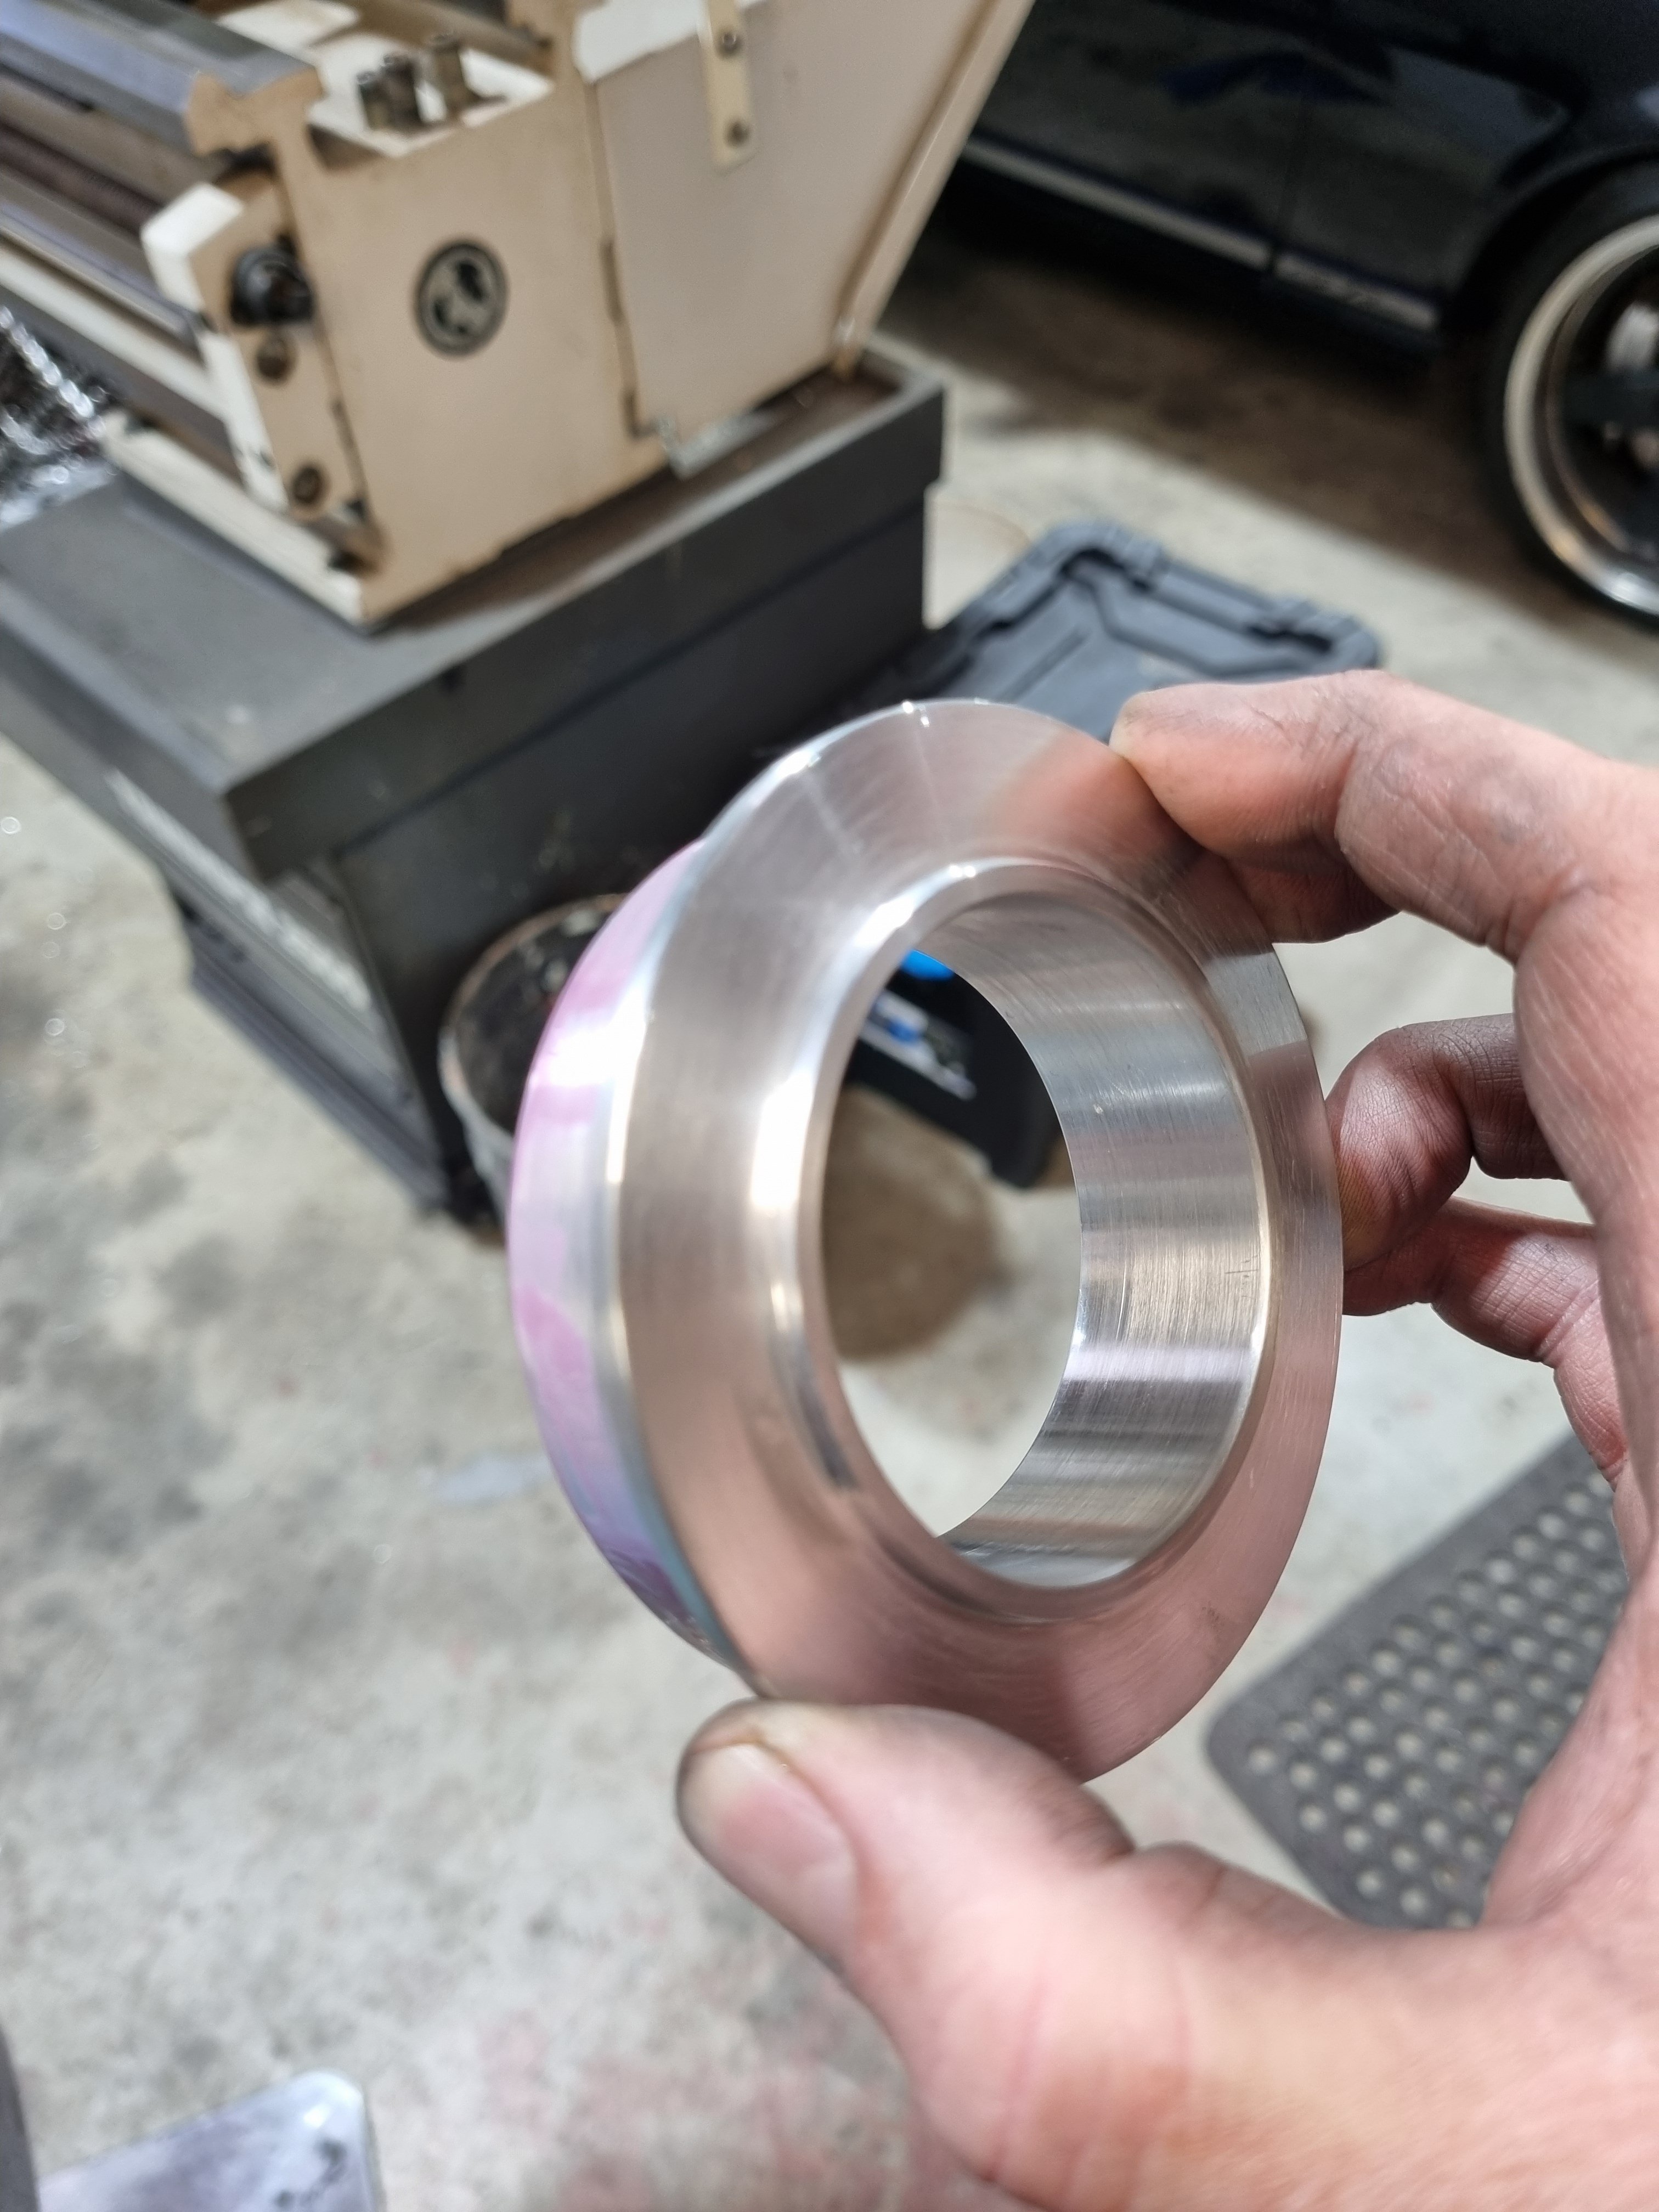
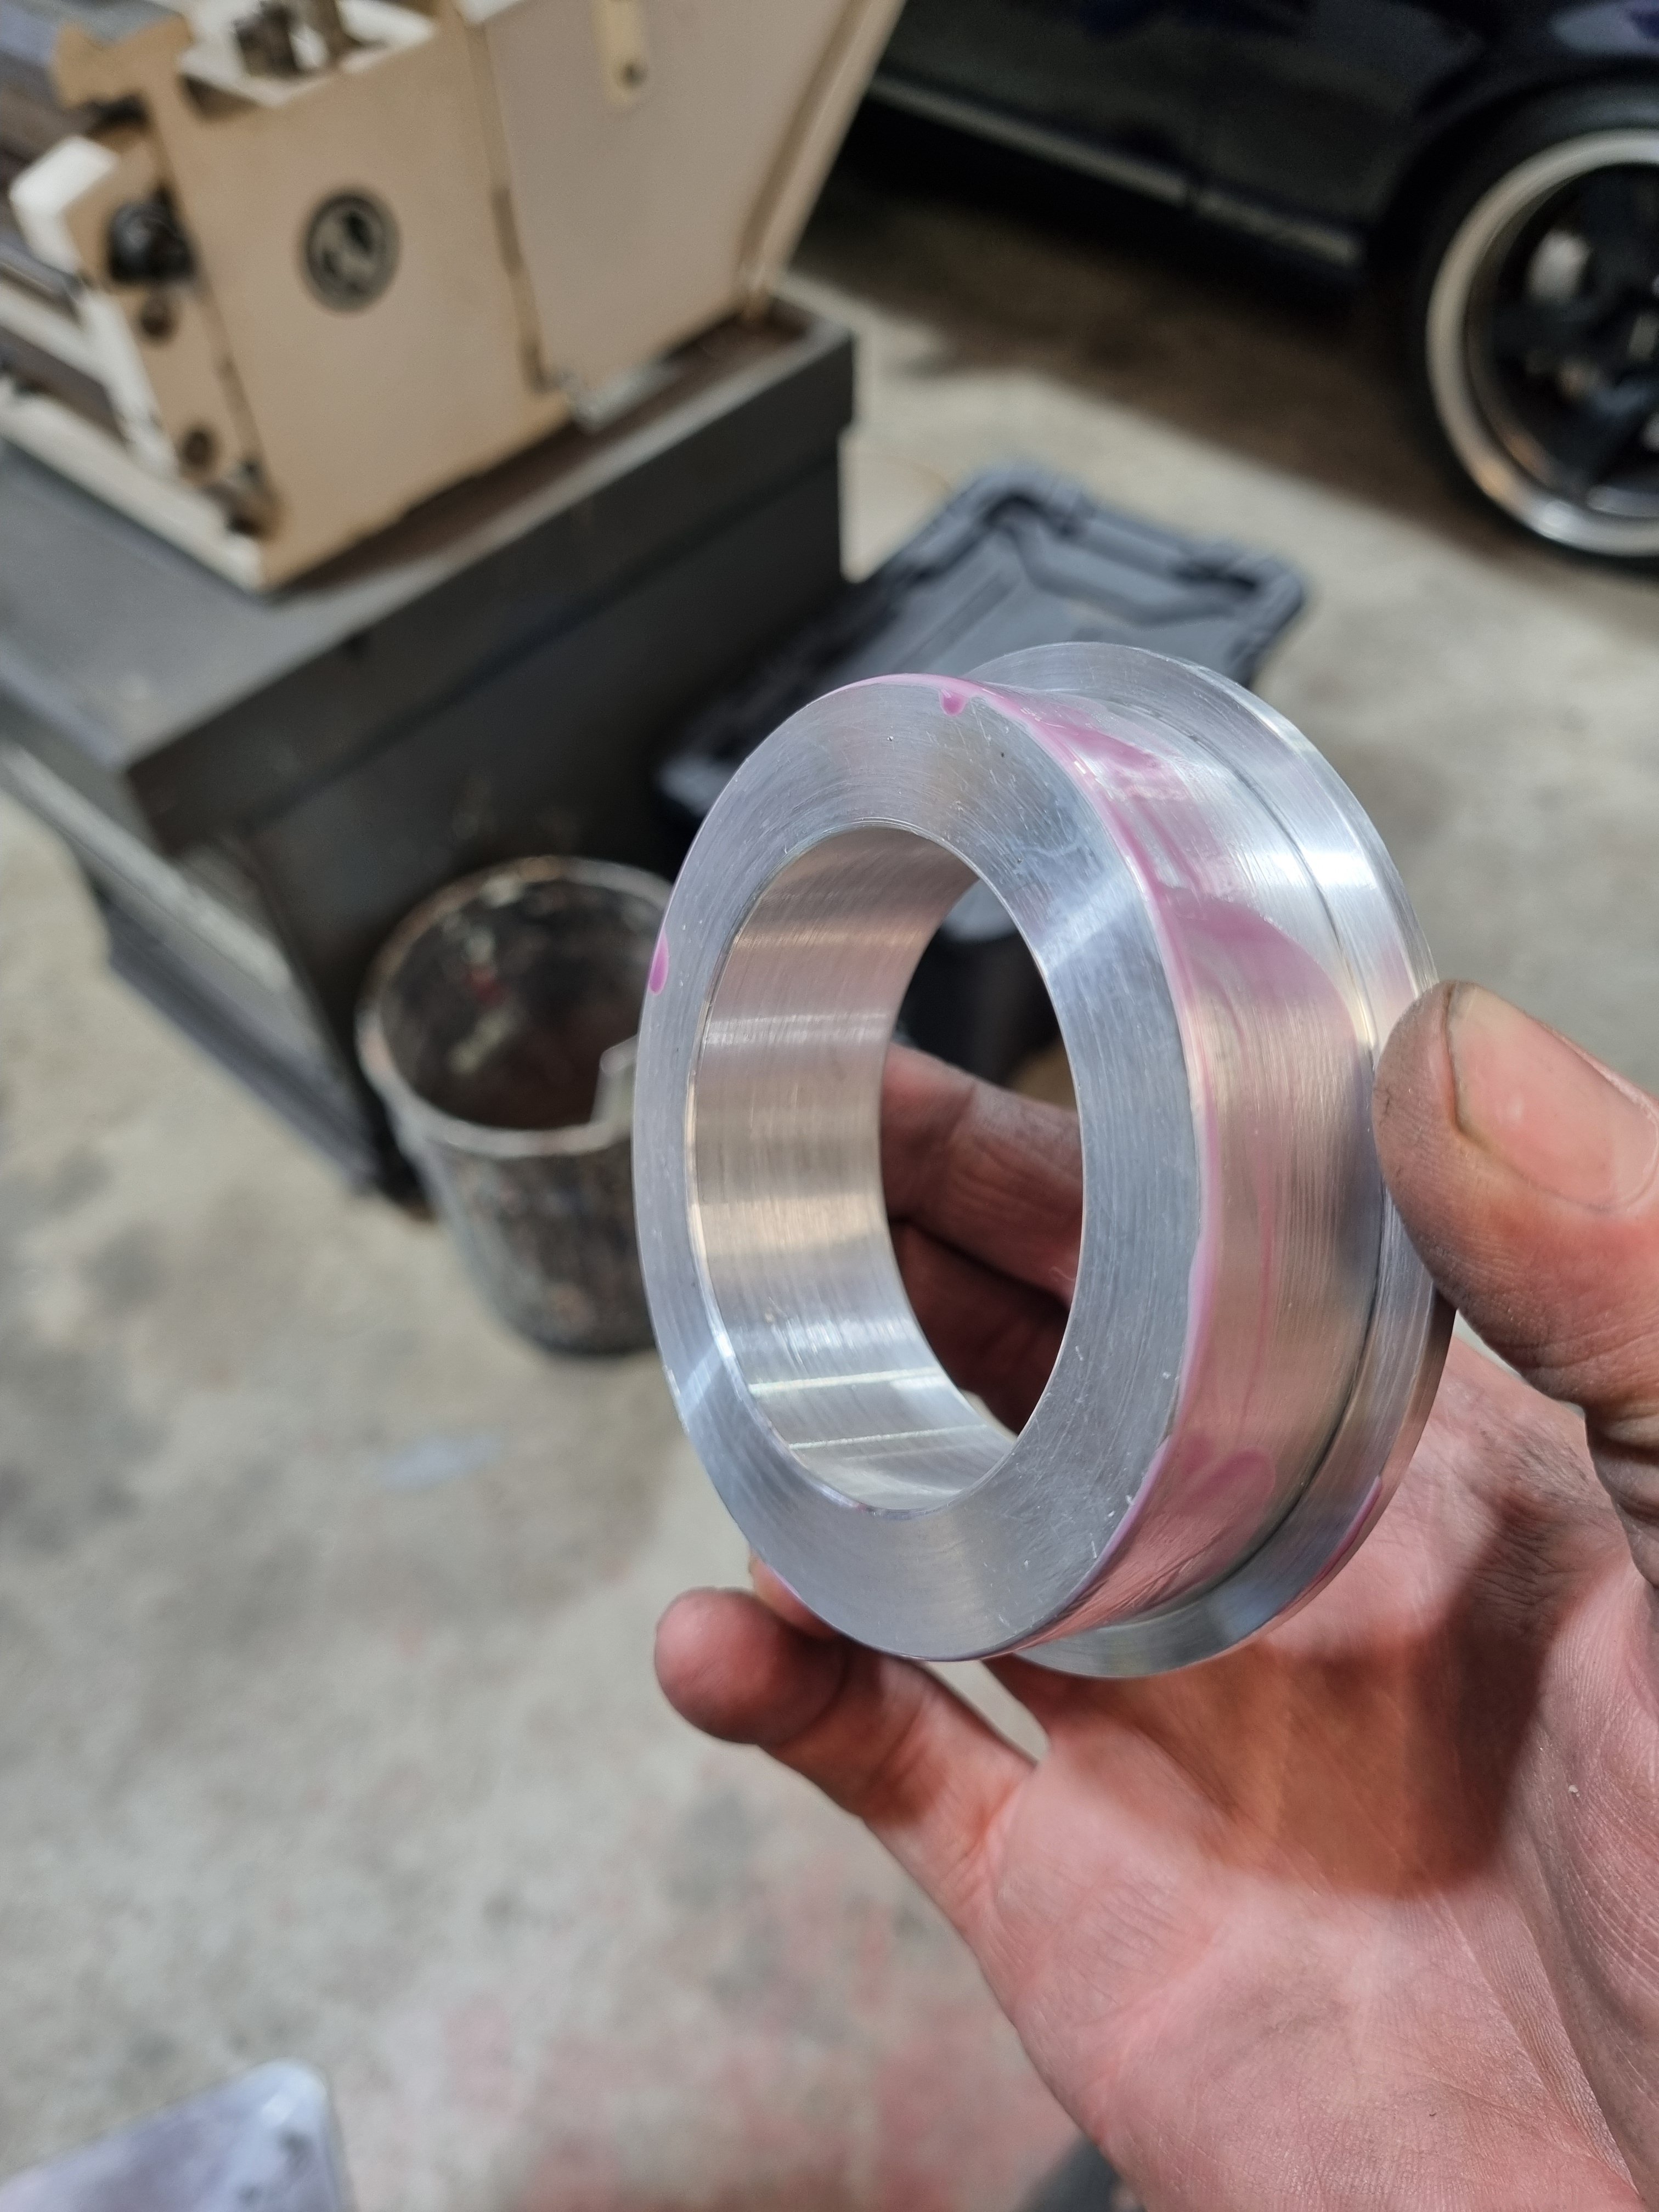
Strap in kids this one is image heavy. I received the spacer adapters during the week and this is how they work. There are two parts with the outer part being bolted to the inner part using those allen head screws. Not super into those allen screws as they have a tendency to round out but probably limited for choice. Apparently in 1965 M12 wheel studs were not invented yet so the S600 just has M10 and the spacer place didn't have a suitable small nut to use however the OEM nuts probably can work but they protrude past the spacer, along with the stud. We cannot machine anything out of the other side of the spacer because of where the studs are for the 4x114 portion so for the purposes of this exercise I've just used some washers. This makes the effective spacer 35mm instead of 30mm. So now, feast your eyes on a large variety of wheel testing in the rear. These are all 6-7 inch wide in varying offsets. Anything more than 6.5 is pretty much a no go due to the width and the spacer so no super deep dish sadly. In the front I knew it'd be a struggle so I didn't go crazy and just mounted up this watanabe which is 14x6 and it still pokes out a bit.. maybe I can find 14x5.5 or find some way to put a little camber up front. I also noticed a lot of grease and fluid up front that I decided to ignore. I like the look of the watanabes as the faded black coating that the used ones usually have matches the 30 year old dulux paint job on the car. I'll have the machine shop make a slightly wider inner spacer portion so I don't have to go cutting studs up I think and we'll go from there. Worst case maaybe I can find a smaller nut and cut stud but would prefer to avoid that.
2 points
-
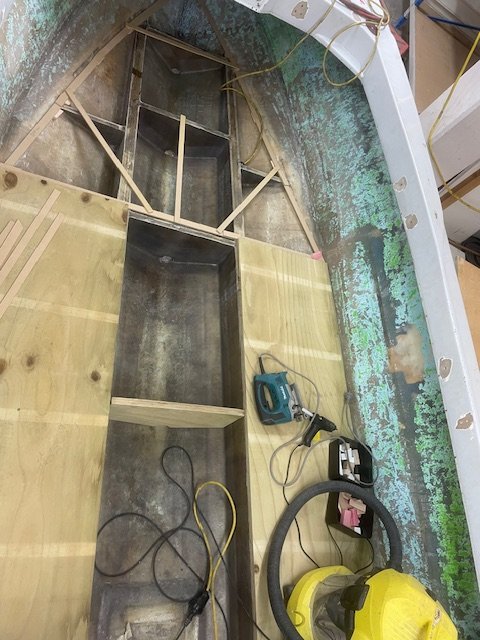
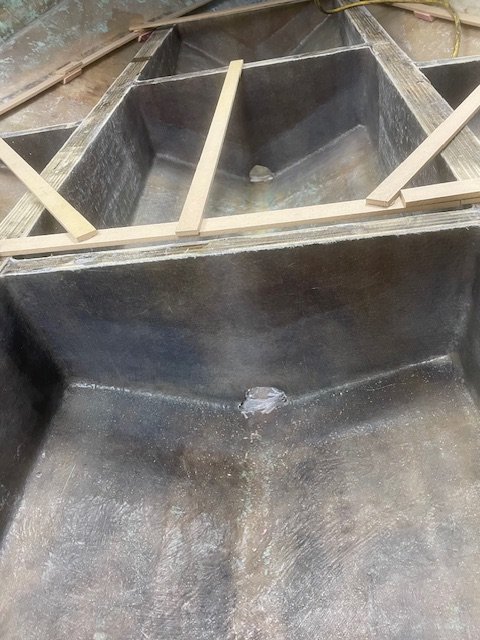
Uncle Neemia has been working away at this, one more bulkhead to go in, then it will be “flowcoated” with gel coat to make it smooth, and then the floor can go down, the flooring plywood will be encapsulated both sides with fiberglass, as much as I dislike wood, I couldn’t justify solid composite (coosaboard) material and I didn’t want soft foam core flooring.
1 point
-
Wil enter on pay day, then will figure out how I'm getting down!1 point
-
I'll need some tighter radius bends for the manifold and the dump pipe so ordered a donut and some more steam pipe bends. Also got some heat sleeving for the ac lines. If I'm lucky I'll be able to use it for the water and oil lines for the turbo1 point
-
Fuck, I must have spent at least 4 hours grinding the remains of those spring mounts off. There were so many spot welds, I basically has to turn 90% of it into dust on the floor.1 point
-
I got it all back together and has all of its gears so I'm calling that a win. It also does not appear to be leaking any transmission fluid, another win. So then I looked to the wheel bearing situation, and smashed that out. There is a dedicated X1/9 forum, Xweb, which has a lot of excellent info and how to's. I found a great pictorial run through of the process and set to. I did need to make a special tool to remove a locking ring but that was no drama. Octagonal lock ring fuckery. Special tool made by a special tool. That and the engine going in meant Sunday was quite a big day, so I left the tie rod end for tonight. On the basis of this minor last task I booked the car in for its recheck and a wheel alignment. After work I went down to sort it, only to find that the rod end is the wrong one, and about 50mm too short, GAHhhh! It took two weeks for the last one to arrive, I am so disappointed. Anyway. Previously to this weekends shenanigans I had done some messing with the jetting, and drilled the mains out to 130 from 125. So I took it out for a short run so I could bleed the cooling system properly and check the AFRs which were much improved, as was the idle to main circuit transition, so that at least was good.1 point
-
1 point
-
1 point
-
Filled one hole but found two more…
1 point
-
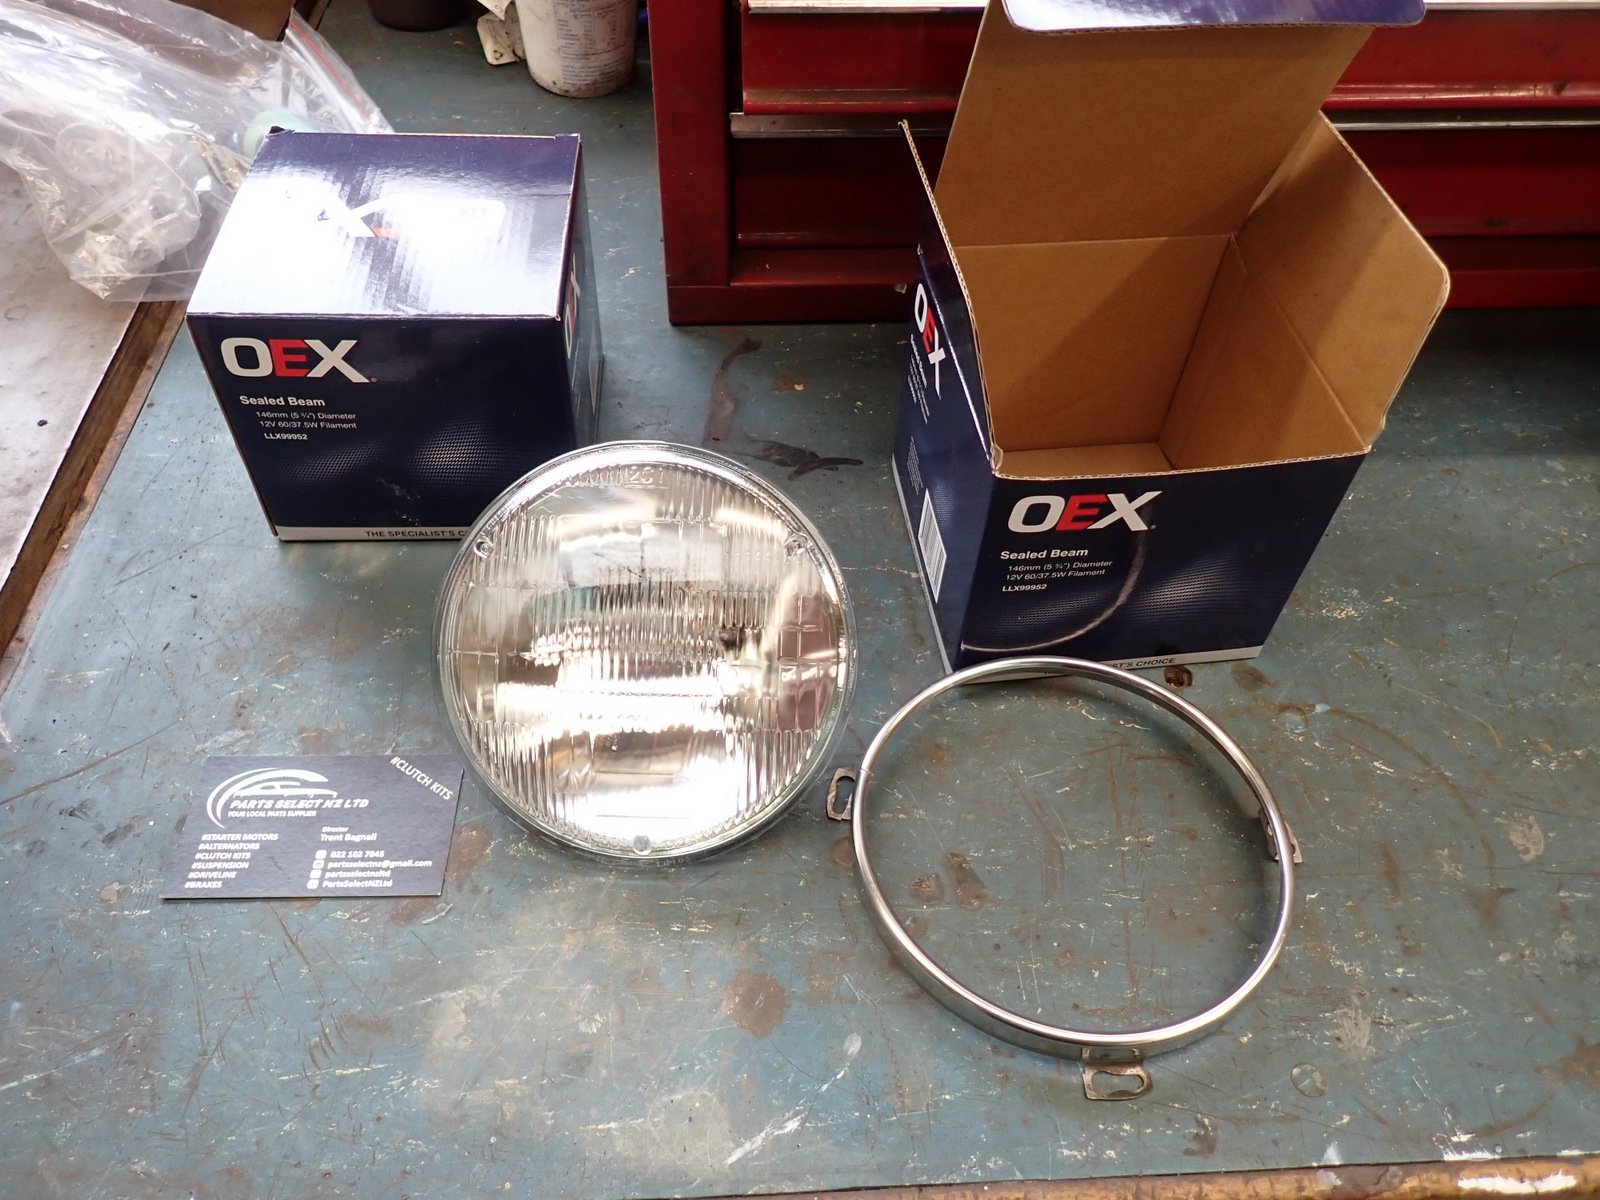
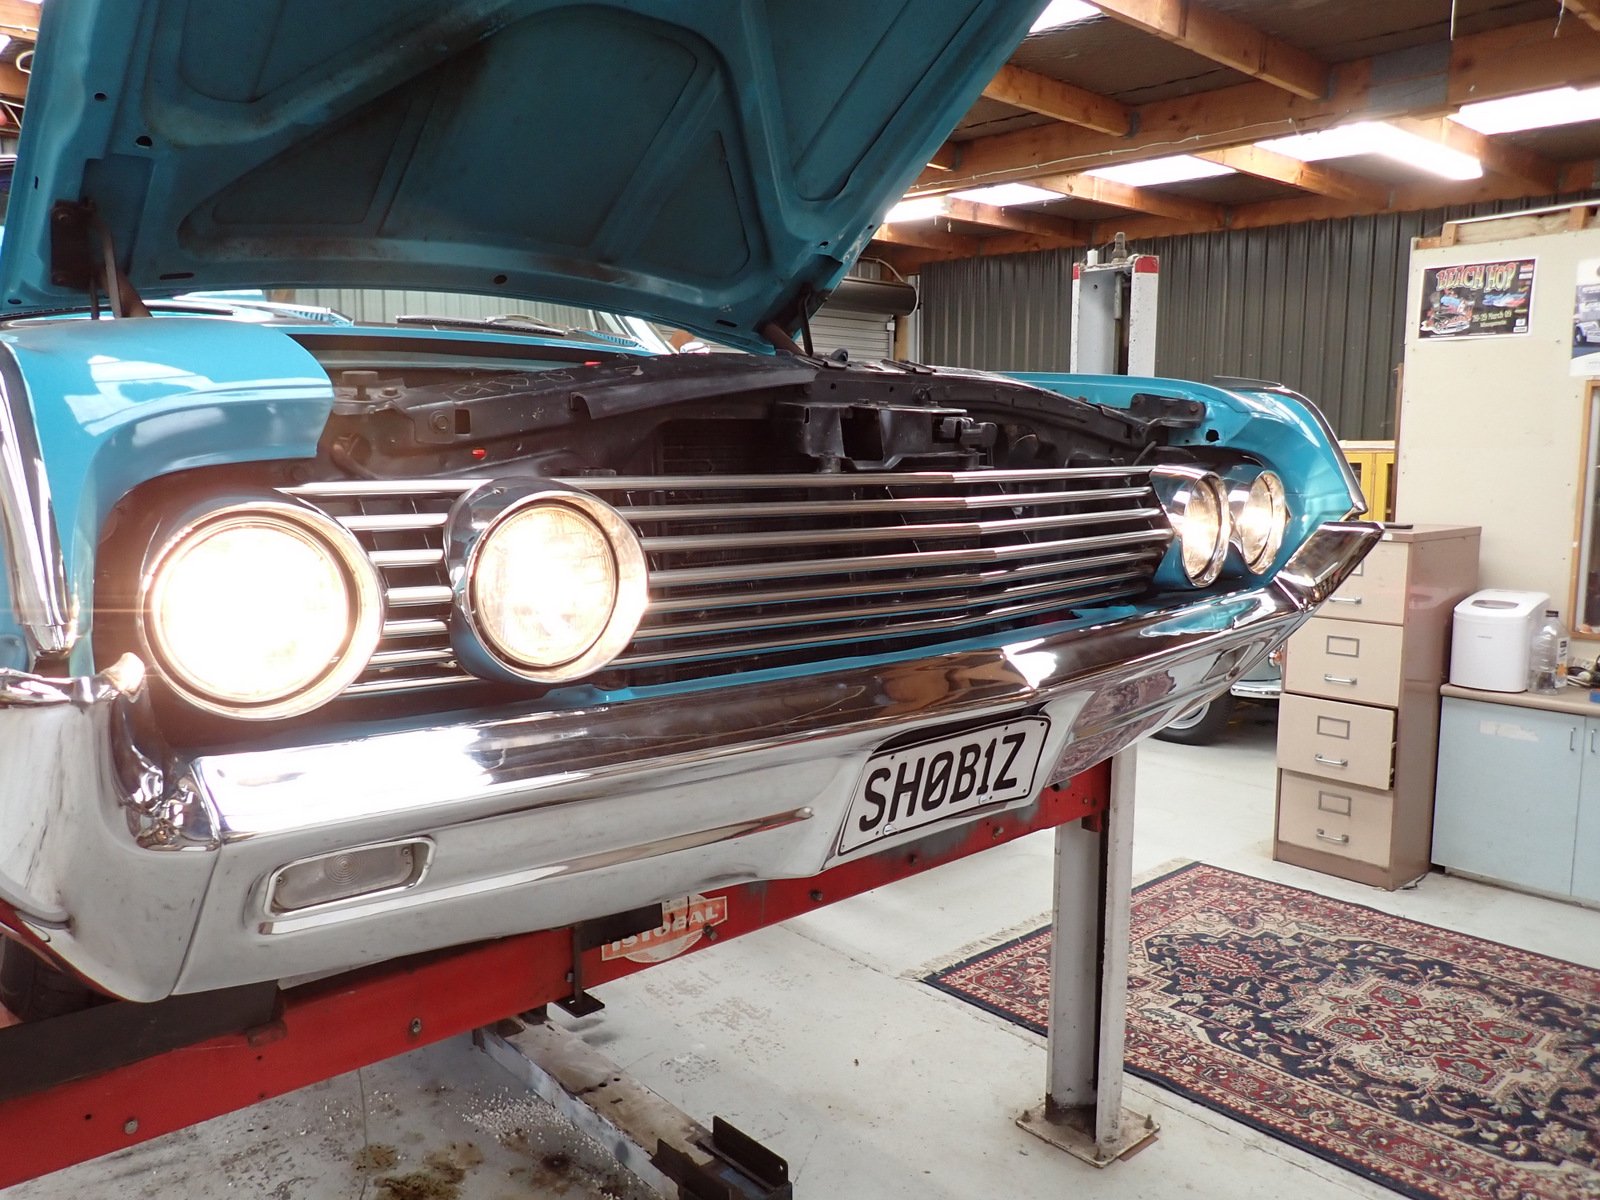
One outer headlight (dip/high beam) gave up the ghost during Beach Hop. I installed these when the car came to NZ in 2003, so last 21 years, fair I suppose. The working one looked a bit sad too so I though I'd replace both. The centre high beam set are the ones it had in Indiana and seem fine. Took them out and cleaned up the buckets (I ended up doing all 4) followed by a squirt of Black Zinc. I did the same for the small aluminium trim pieces that go in where the masking tape is, and the blacked-out areas behind the grille that were a bit scruffy. It turns out that modern Hella lights (stocked at BNT) are all semi-sealed and don't have the nice domed shape so I got a couple of 5 3/4 sealed peams from PartsSelect on TM Let there be light! Also picked up some used PP from Trademe.
1 point
-
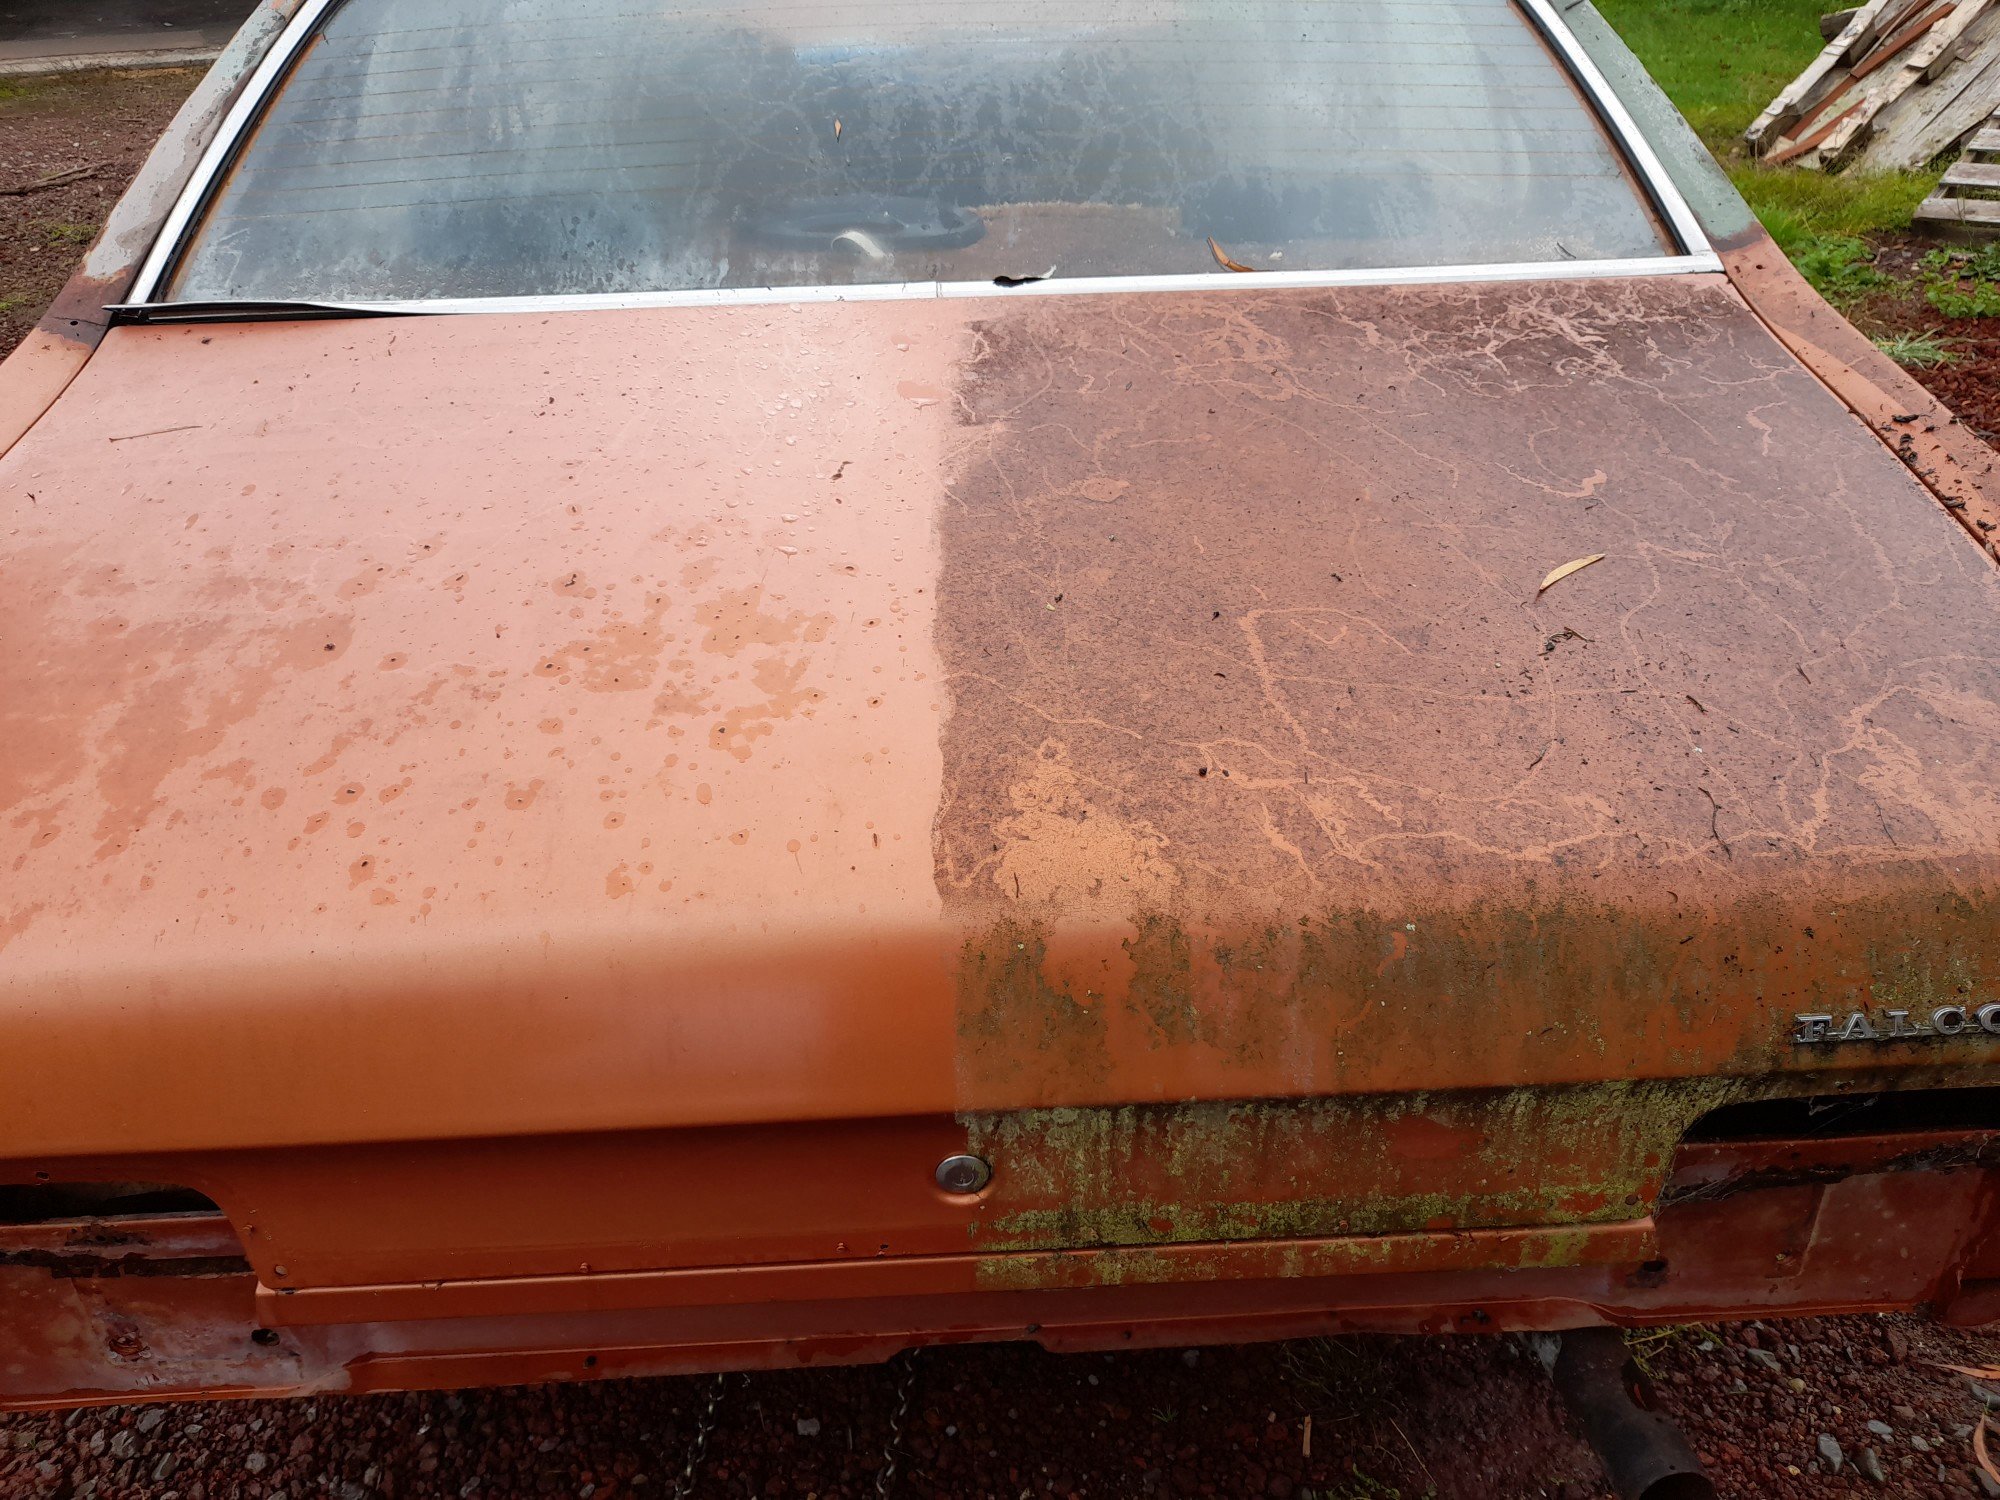
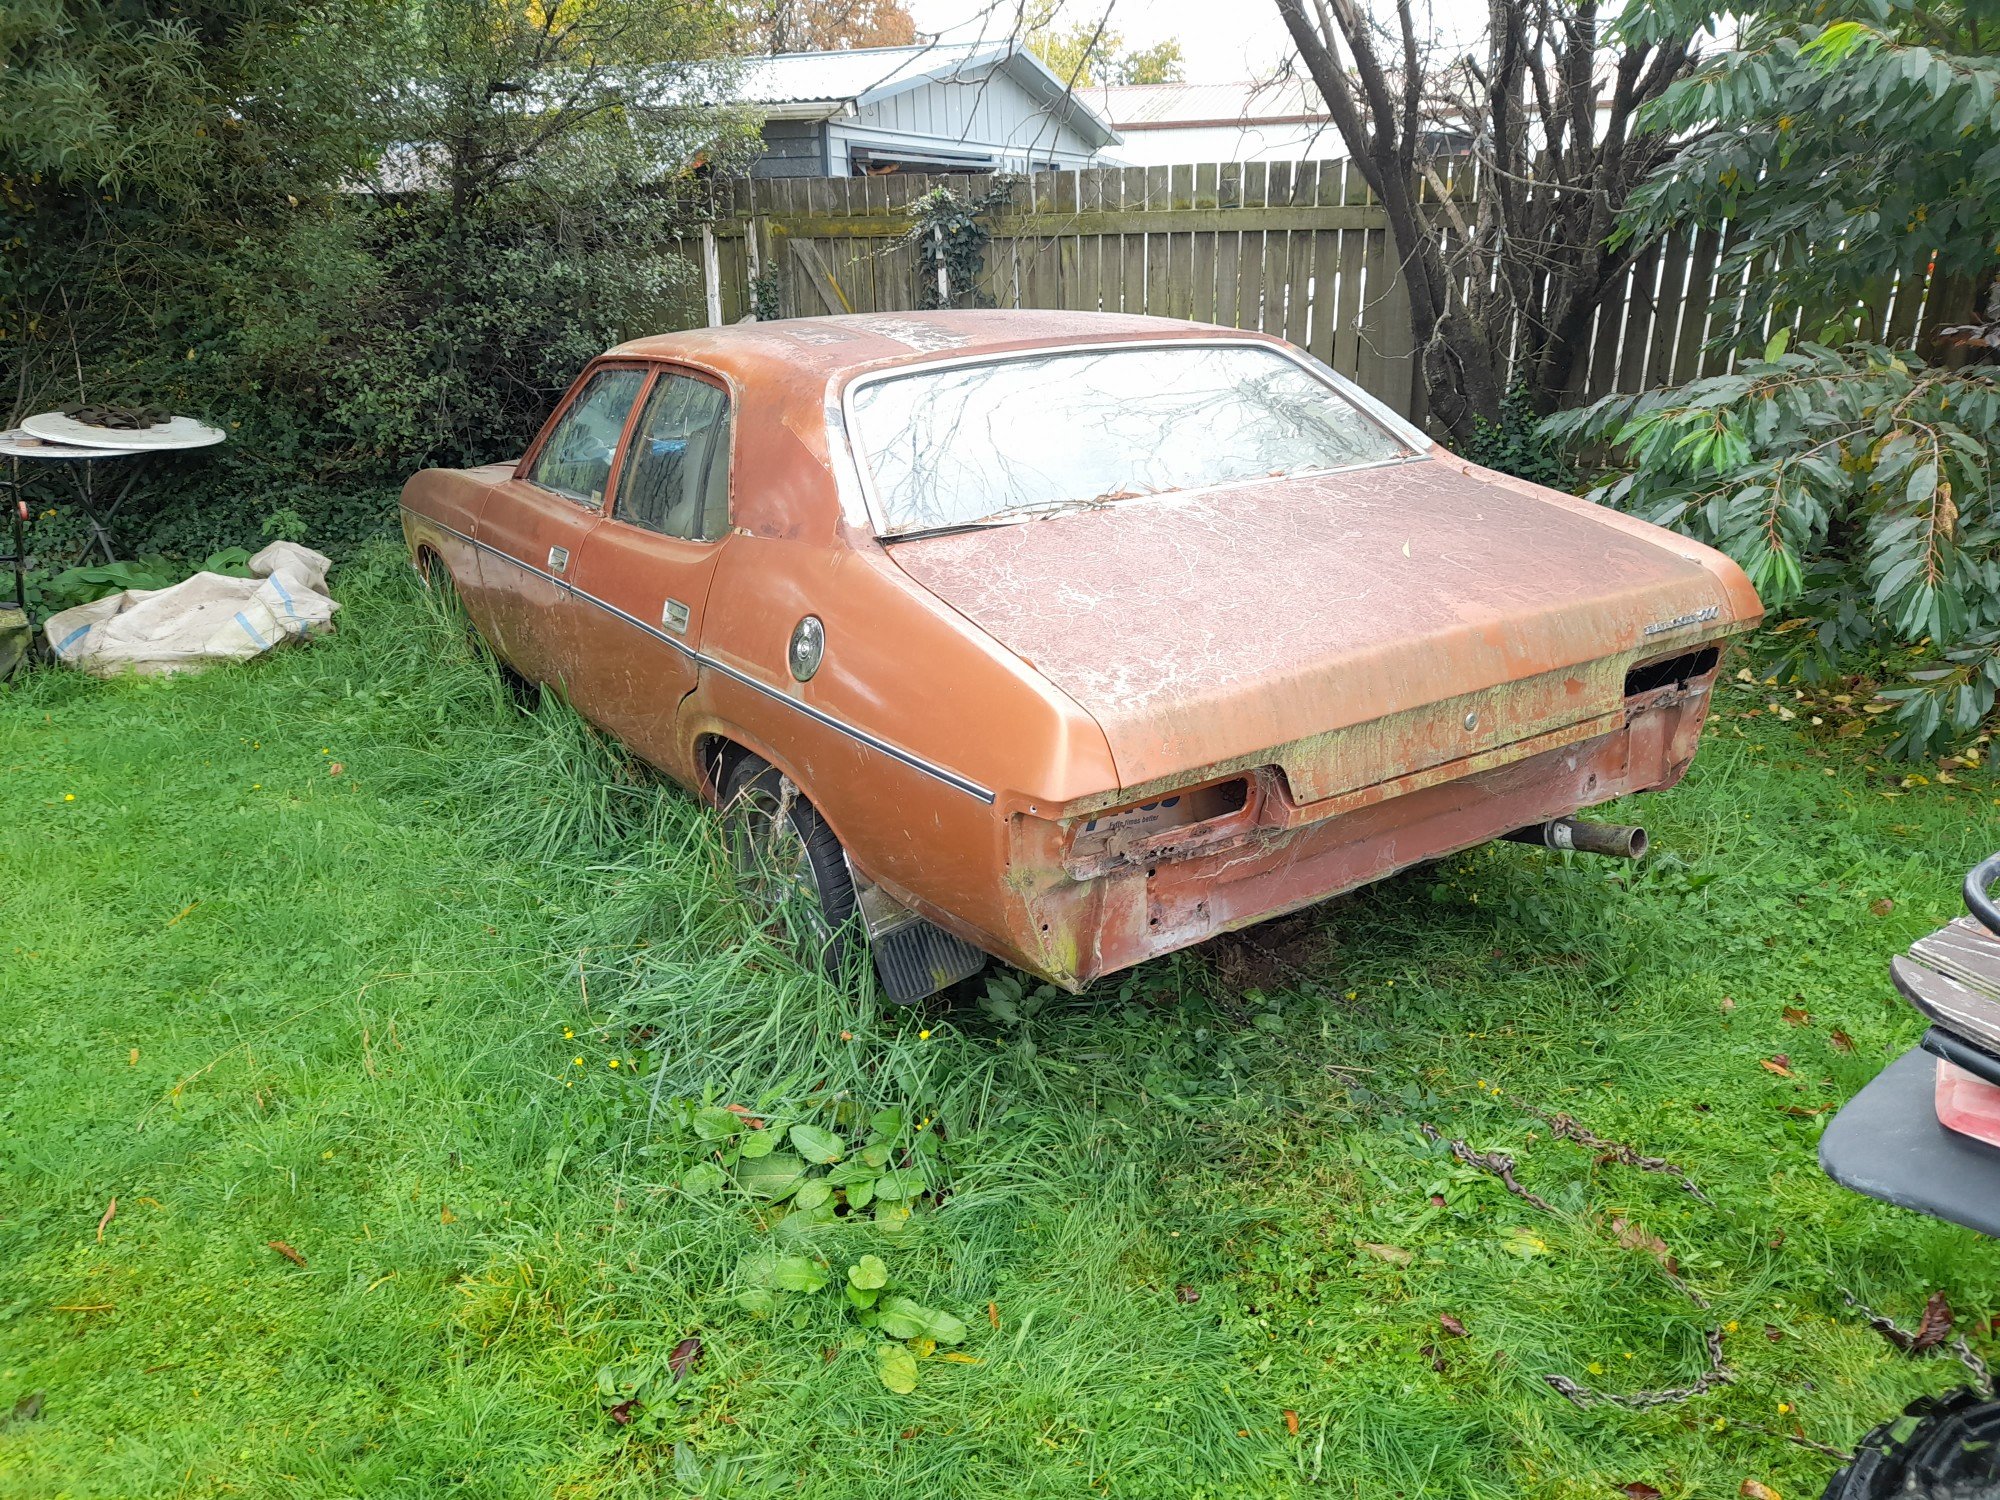
Today went pretty smoothly, managed to solo tow the old girl off the lawn and onto the driveway and waterblast 2 years worth of lichen off. Found lots of cancer had spread but not as bad as it could be. 15 yard test is still a pass. Also found lost of lifting bog from its life before me, will make for interesting times ahead. Had to use the quad with a bare tire on the front to push it into shed as the brakes were binding on, got wife to steer it and it went slowly rolling into the jack, axlestands and compressor. She hops out 'i tried using the brake but it didn't work, its not my fault!!' Calmed her down with 'if i told you it had no brakes would you have hopped in it?' Prolly no dinner for me tonight lol.
1 point
-
Believe it or not i worked on this today. I went over to mums to sell a valiant diff to a rooster off marketplace. While i was there i set about refitting the copper radiator. With a view to giving the block a good flush before fitting the purdy new rad. I got that in. But decided there wasnt enough day left for the actual flush. (We spent ages digging through my pile of diffs, turns out i have three spare VG diffs) I went to start the old bitch up, cos i havent heard it run for ages. But the fuel pump didnt seem to be able to fill the fuel filter. So i gave up on that too. Ill take an electric pump over some time, and finish what i started today. Pic of the pile of diffs for thread.
1 point
-
Speeduino is very flexible, so sensors won't be an issue as long as you can work out the calibration of them, and most trigger patterns are supported now. Its basically just a cheaper, more frequently updated, Megasquirt these days. Cool project, looking forward to seeing more progress1 point
-
As per the title this next stage of building the exhaust silencer/muffler/back box/ take your pick has taken much more time and effort than I had always expected. I started by taking the blue imp apart. To Woolf valley garage I went.... ..where I removed (rusty mild steel) exhaust, bumper and rear valance.. Popped it onto rusty imp shell... Now I knew exactly how much room I have to play with. Whatever I was going to build had to work with several things. I wanted the box to be mounted higher than the existing one behind the Datsun engine as I was sick of scraping it on steep driveway exits. It had to be built completely of stainless steel, no exceptions. No more corrosion. It had to look tidy and fit within the bumper line, tailpipes excluded. The tailpipes were to be twin centre exit. I had a very specific look in mind and they have to be just right. It had to be quiet enough and yet still sound sporty. This last one is tricky and will most likely need modifications to get right hence the last design point... It has to be modular, easy enough to disassemble and repack with sound deadening (most likely glass fibre) Now I knew the size I could build it to I started by making some flanges. This so I can unbolt the flexible sections between the V clamps and the box. Made to suit the 44mm tube as per the tube off the V clamps. Lifted the big folder we'd made onto the bench top and folded up some 1.2mm stainless. Although heftier than I could have used I've gone with this thickness to helped avoid the tinny sound thin stainless boxes can make. I wanted perforated stainless tube but couldn't find any within NZ. Got some perforated sheet instead - again 1.2... Which I cut strips from and formed up into tubes as such... Welded... Now I had the start of a box and some tube. I could sit down and nut out a design. I have had some basic ideas for ages on how it might look inside but it was really good to sit down and see how it might work. Drew some ideas up.. Nutted out something I think would work well and be easy enough to change if need be. Time to commit. I had to cut some blue steel. First actual act of modification to the imp in my quest to plonk a flat six in it. Now I could double check box sizing and weld the flanges in place. Folded up the second box side.. Complete with captive nuts to suit a lid.. Tail pipe time. I almost went with twin 2" exits but they were just a tad too big. Settled on twin 45mm. Tacked them to yet another stainless pair of flanges to work with the modular design aspect. Happy with the look I then fully welded them on the inside. The flanges will be sealed with a soft copper gasket. Happy I had the look right I cut the centre top from the box, created a recessed bit and carefully welded in the second threaded flange. So now I have inlets and outlets where I want them and just have to connect the dots. Ideally a nice long a route to dampen sound while keeping it as smooth flowing as possible. Plus, as per original brief, it has to allow for easy disassembly and re-packing. There was quite a bit of head scratching with this bit of the build but eventually I sorted a design out. I cut various bit of sheet and put big holes in them with a nice brand new holesaw set. Made little boxes with more big holes... Shaped bits like a heart...(#putmyheartandsoulintoit.....) Welded the ends onto the main box, curved in bit to help with flow and also hide the external bobbin mounts from view a little. Now I had a collection of parts that would come together and form a london underground of tubeways for the exhaust gases to follow. I was pretty happy with the layout for its potential silencing effect. However I now wondered if it might just end up being a touch too quiet and restrictive. Luckily I had come up with an idea early on where I could add some valves. Quite a little bit of extra work involved but the more I'd thought about it the more I was convinced it could work well. With this in mind I had built the middle chamber width to allow for some valves and made sure they could be removed to fit said valves in place. I cut some 44mm holes in the middle chamber lids and made some to valves to suit... Whipped up a little press form to create brackets.. Valves mounted. Underside of lids have the heart halves which help direct flow from one tube back too the next, or up and out through the open valves.. Valve shafts stick out through back of box. Sealing will be by a combination of spring loaded fibre and silicone washers. Now for an exciting point in life that every shed 'Barry' looks forward to. Emptying out those boxes of little random fittings that have been stashed away 'just in case you might need them'... Such fun! I selected my (stainless!!!) treats and scribbled on some alloy. Made lots of alloy swarf.. Ended up with these levers. Pinch bolted to the shafts along with added grub screws. The short length of threaded rod will be changed for a long length of stainless rod, actuation method from within the car yet undecided. Possibly a 12volt door lock motor etc or maybe mechanically with a bicycle cable. Recessed the backs to allow for seals.. So yeah. Lots of parts! Compulsory photo of thing exploded into many bits... All together now with some arrows. Remember each side is just a mirror of the other side (there is a small cross over hole in the centre plate that separates the sides) Valve closed... Valve open... I think it'll be quite a difference in sound and look forward to hearing it. Valves can be seen in action in this very exciting video... So It's pretty much complete except for the mount points which I'll do once I've got some bobbins from engineering shop along with seals. The lid will be sealed by running a bead of silicone which I'll let set before clamping the lid down. Oh I weighed it too. I was worried it might end up quite hefty but it will be only about 6.4 kg once all the bolts are in/packed with fibreglass.. The box will be painted satin/matt black leaving the tailpipes shiny. Silencer mounted in place... View from above showing plenty of room for the valve linkages in place. I ended up cutting a tiny bit more of the valance away so there's room for a stainless heatshield. I then covered the valance with some masking tape to help prevent it getting too scratched while I put back in some internal strengthening and capping it all off. I'll also be adding mount areas for the bobbins. I'll remove the engine next and add in the big multi-pin connector to the engine loom. Then I'll be seriously very close to removing the Datsun engine and cutting out the under seat area just as I have on this rusty shell. Wow!!1 point
-
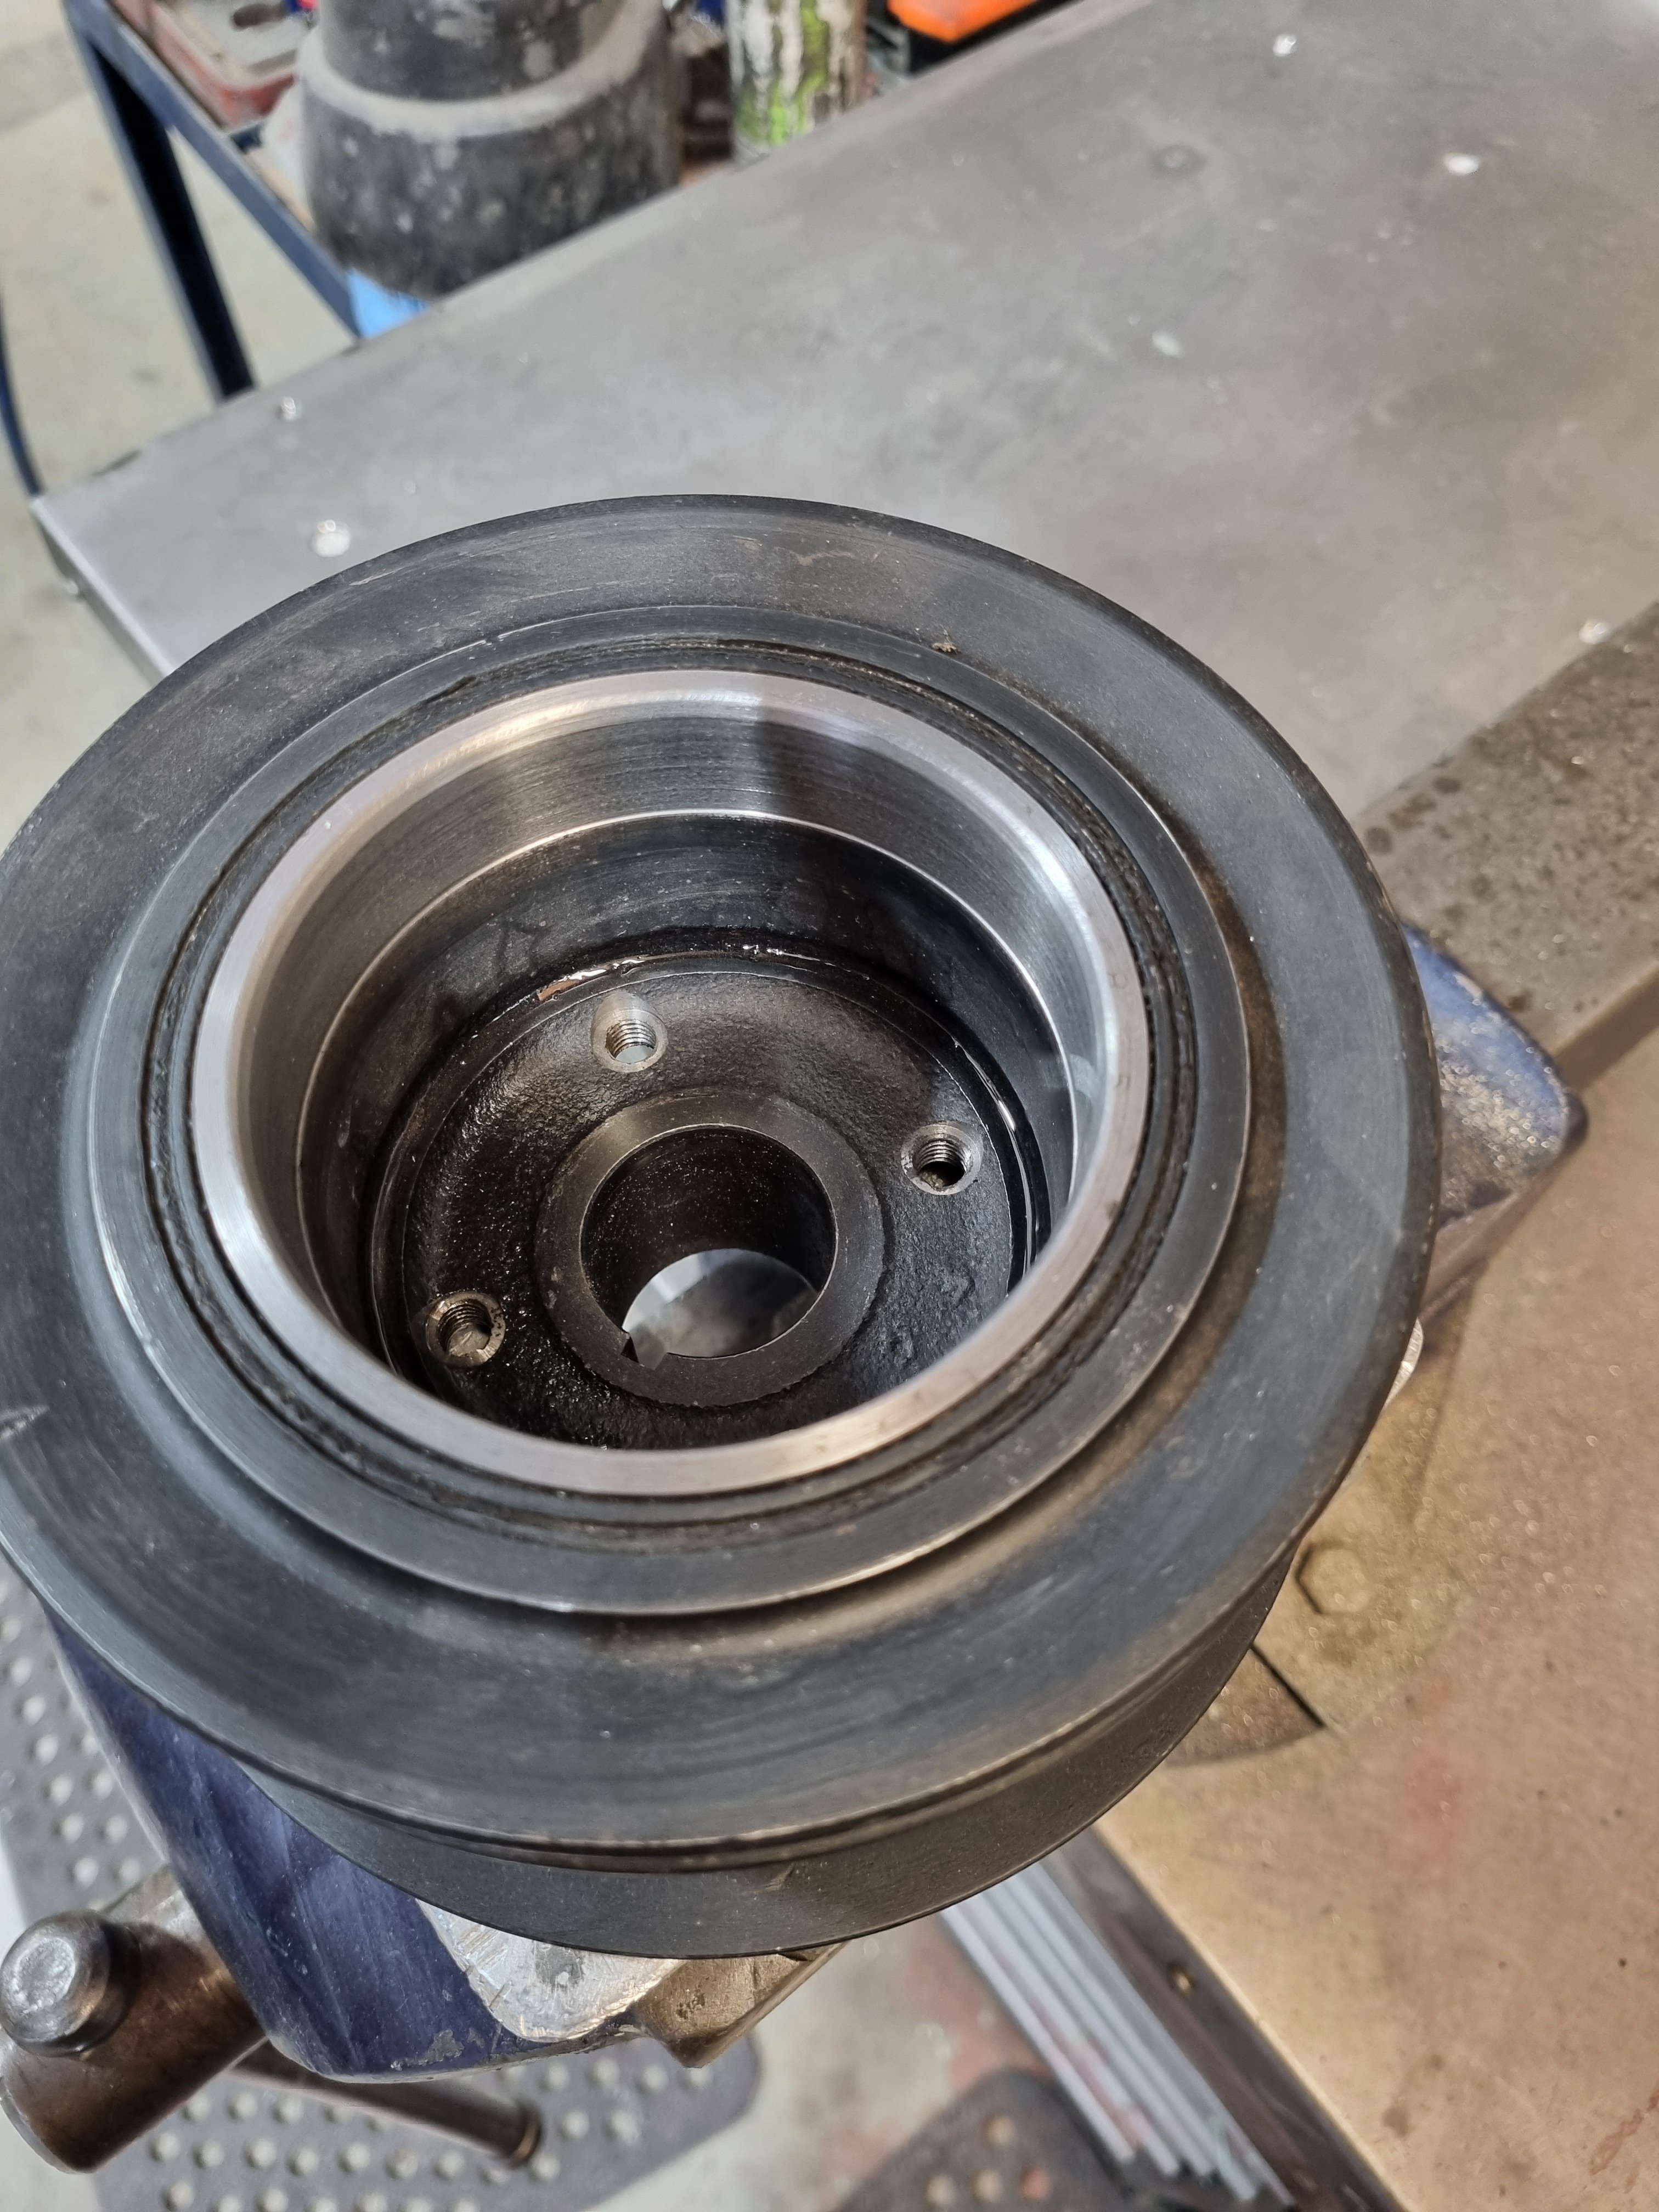
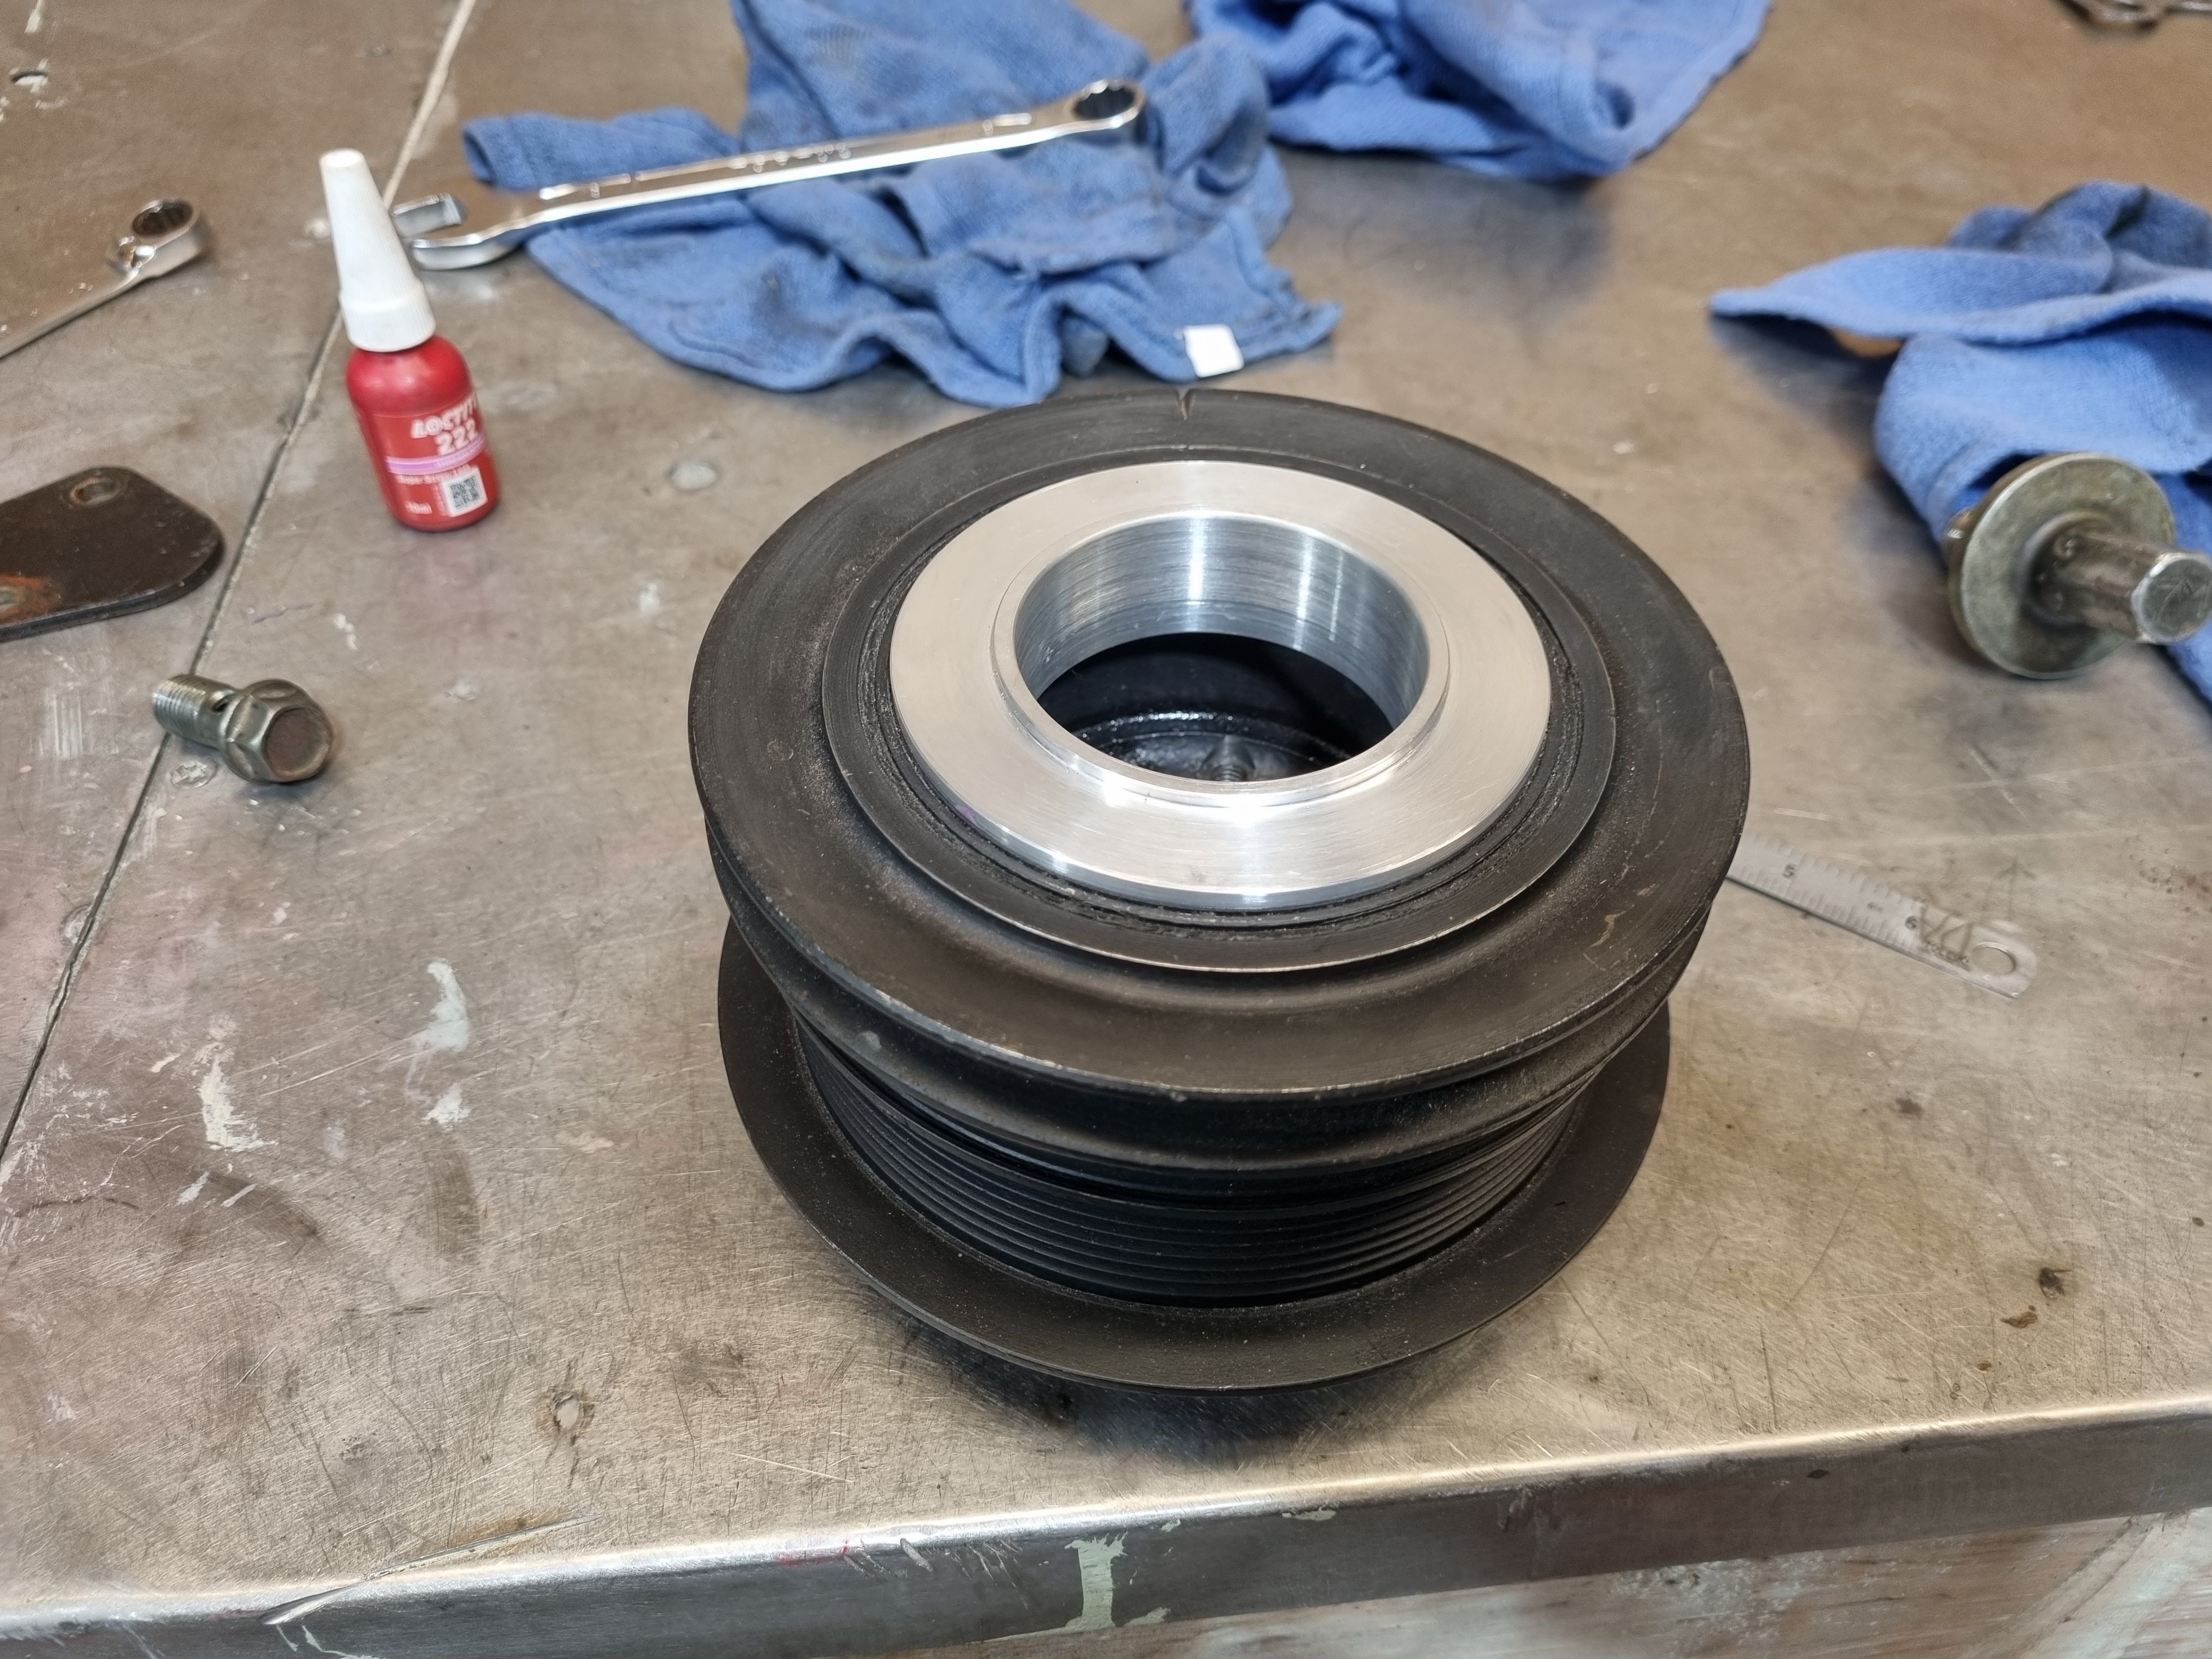
Triggers for the ecu. I couldn't use the stock 5M dizzy because it sits exactly where number 1 throttle needs to be. So after a bit of indecision and fucking around I decided to run a crank angle sensor off the front pulley. I machined the inside of the pulley to an accurate size then I made a boss to press into the pulley. The pulley is cast so I can't weld anything to it. She's a fucking tight fit in the pulley so it ain't going no place. By pressing this hub into the inside is not affected by the rubber isolation layer which can cause erratic triggering. I'll laser cut a trigger wheel and use it to accurately drill 4 mounting holes. Then all I have to do is mount the sensor off the front of the motor somehow.
1 point
-
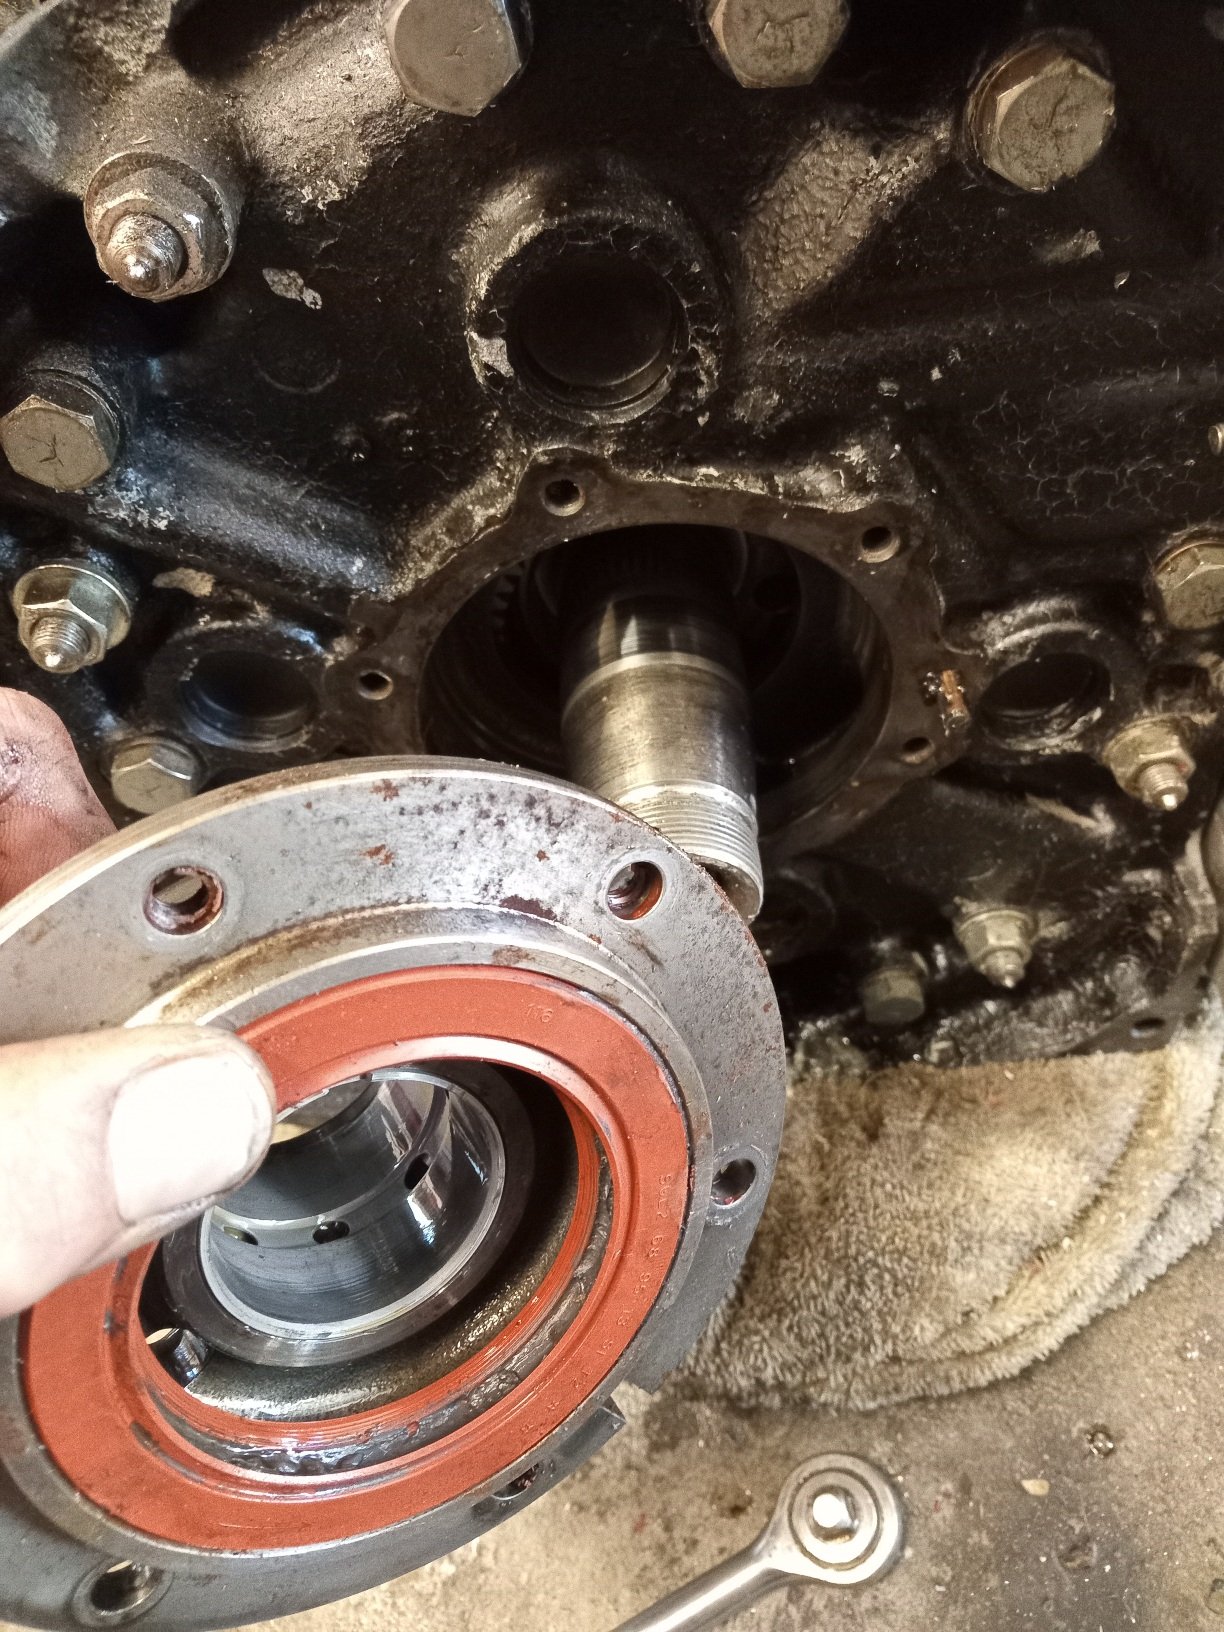
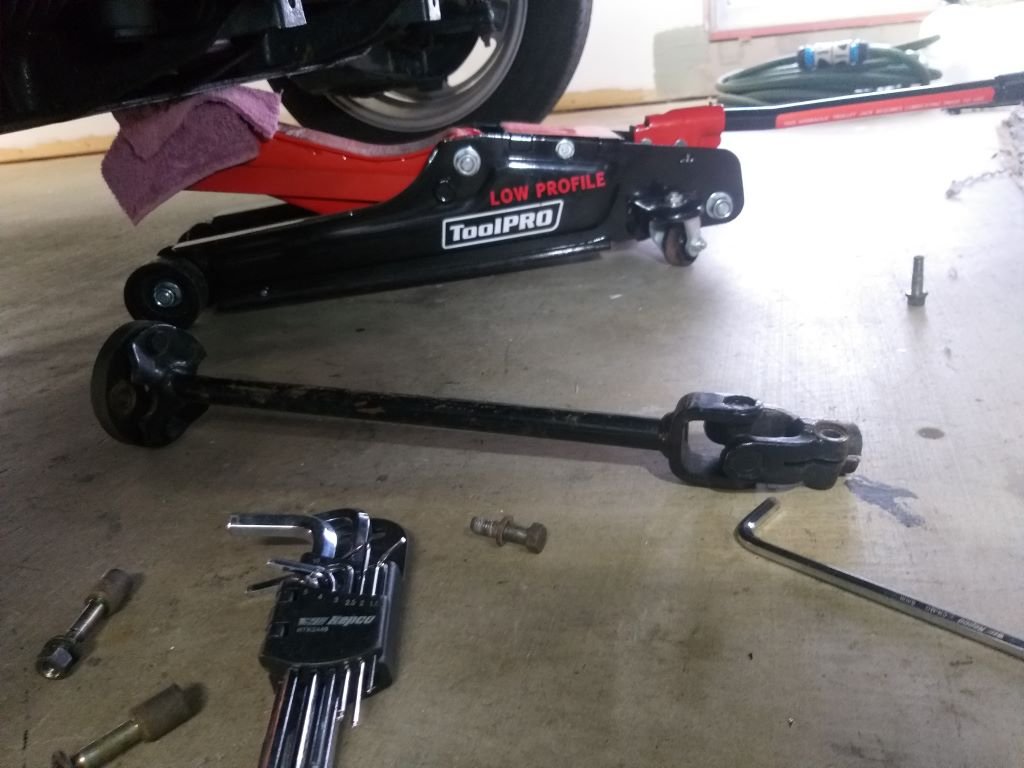
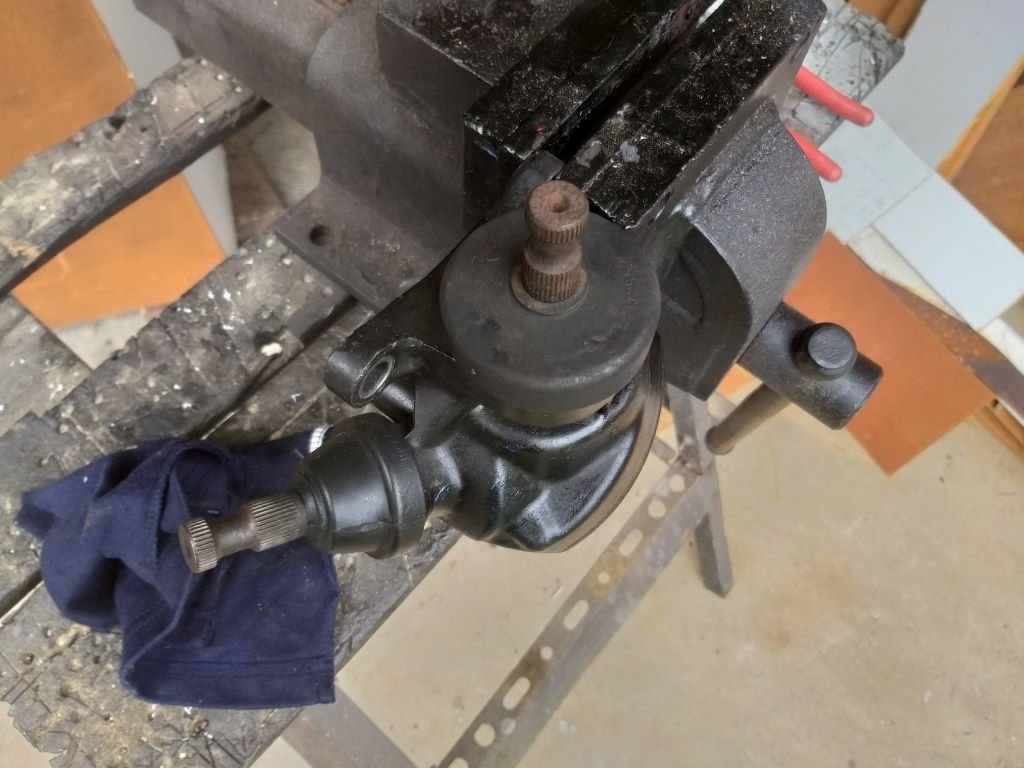
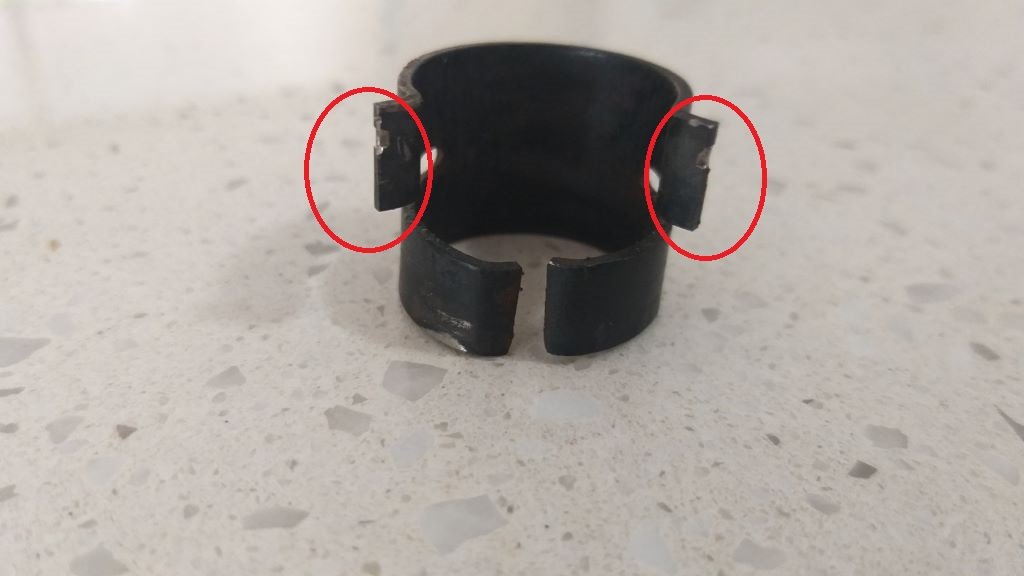
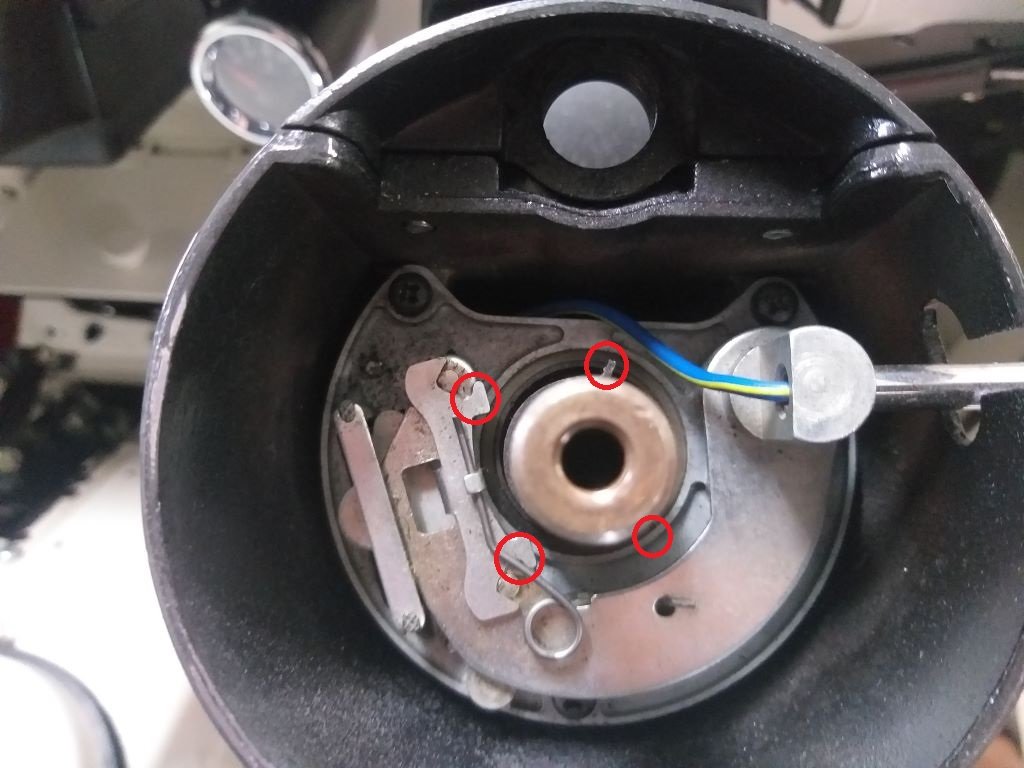
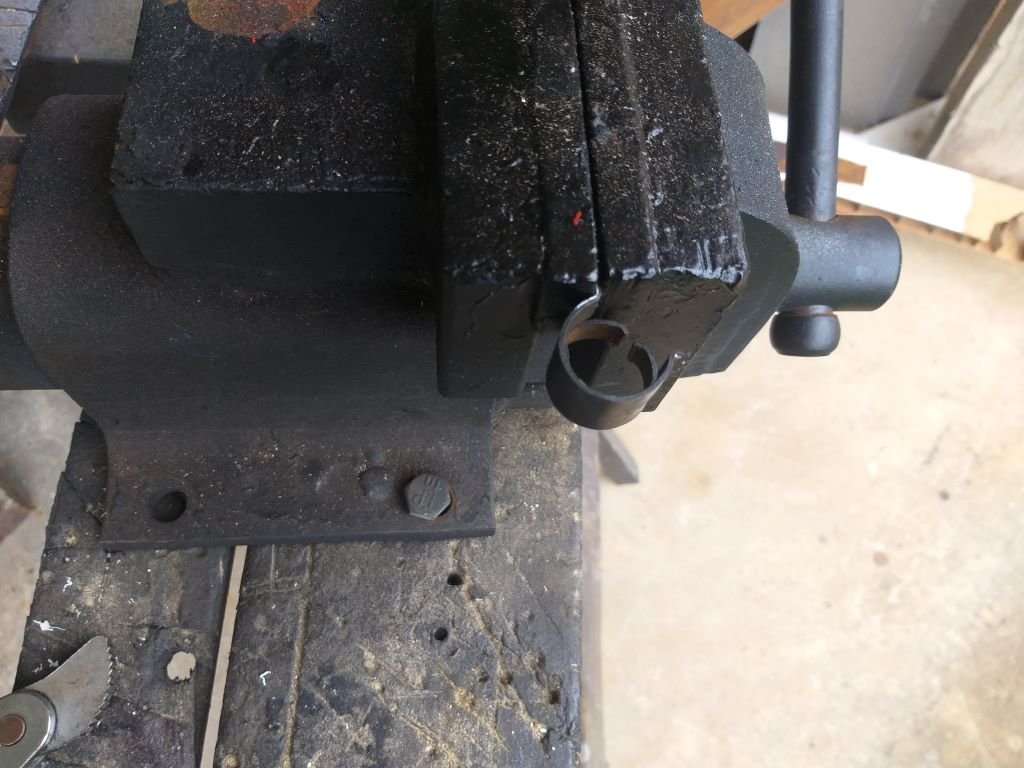
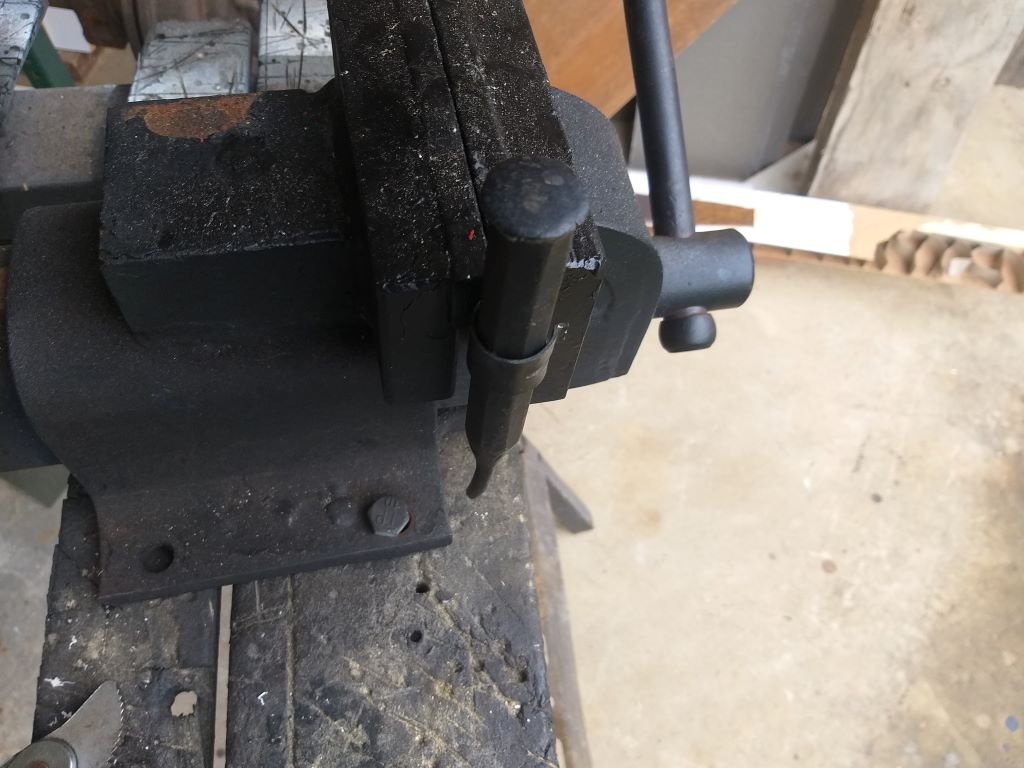
Over the last few weeks, I've noticed a steadily increasing stiffer steering and during last night's burger cruise it felt particularly bad. Figured I'd do a bit of fault finding today. First step was to remove the intermediate steering shaft to determine whether the issue was on the steering rack end or the column end. With the intermediate shaft out I fired up the engine and waited the few seconds for the Astra pump to come online. What a relief it was to find out that the issue is not on the rack/pump side of things. So turned my attention to the angled steering gearbox and the steering shaft itself. Pulled out the angled gearbox for a closer look. Popped the cover off to check the lubricant level. Turns out it uses grease - or at least mine is filled with grease. I'm hoping that is factory and not some previous owner's bodge job. Anyone know ? Anyway, I neglected to take a photo, but it looked like some of the grease had shifted leaving the top half of one of the gears dry. The grease looked to be clean and still in good condition, so I just topped up the level and fitted the cover plate back on. At the same time I spent a bit of time fine tuning the little adjusting thingy till I got the mechanism turning smoothly: While I had the angle box out, I pulled off the steering wheel and dropped the shaft so that I could grease the upper and lower bushes. They were pretty dry. With the steering wheel off I figured I'd tackle another annoying little issue. For a good while the indicator self cancelling feature on left turns hasn't been working. Works perfect on right turns though. Really aggravating as I keep forgetting to manually cancel the flashers and also pretty unsafe. Anyhoo, I took a closer look at the mechanism and it was visibly okay. There are two little "ears" on a spring steel collar that press fits over the inner steering shaft. Looks like so: Each little "ear" engages with a double ended lever attached to the indicator mechanism. One of the "ears" isn't visible due to the angle of my photo, but I've marked up where it is supposed to be. With a visible inspection not showing anything untoward I enlisted Mr's Flash's help to watch what was going on while I turned the steering shaft from below. Turns out the little "ear" on left turns was not triggering the self-cancelling lever. Pulled it out the collar for a closer look. Both "ears" are showing signs of wear with noticeably more wear on the left one. Thought I'd try and give it a tweak, so clamped the offending "ear" in my vice: Chucked an appropriately sized punch down the centre of the collar to maintain its shape: Then gave it a little bit of loving with a hammer. Popped it back on the column for another test and ... success! With the self-cancelling issue sorted I reassembled the steering and dropped the van back on its front wheels for a quick steering test. Nice and light once again. Loaded up my ratchet with the appropriately sized socket and headed out for a road test and also to re-centralise the steering wheel. It took a few goes until I got the steering wheel perfect, but I'm happy that things are now back to normal. Thanks for looking.
1 point
-
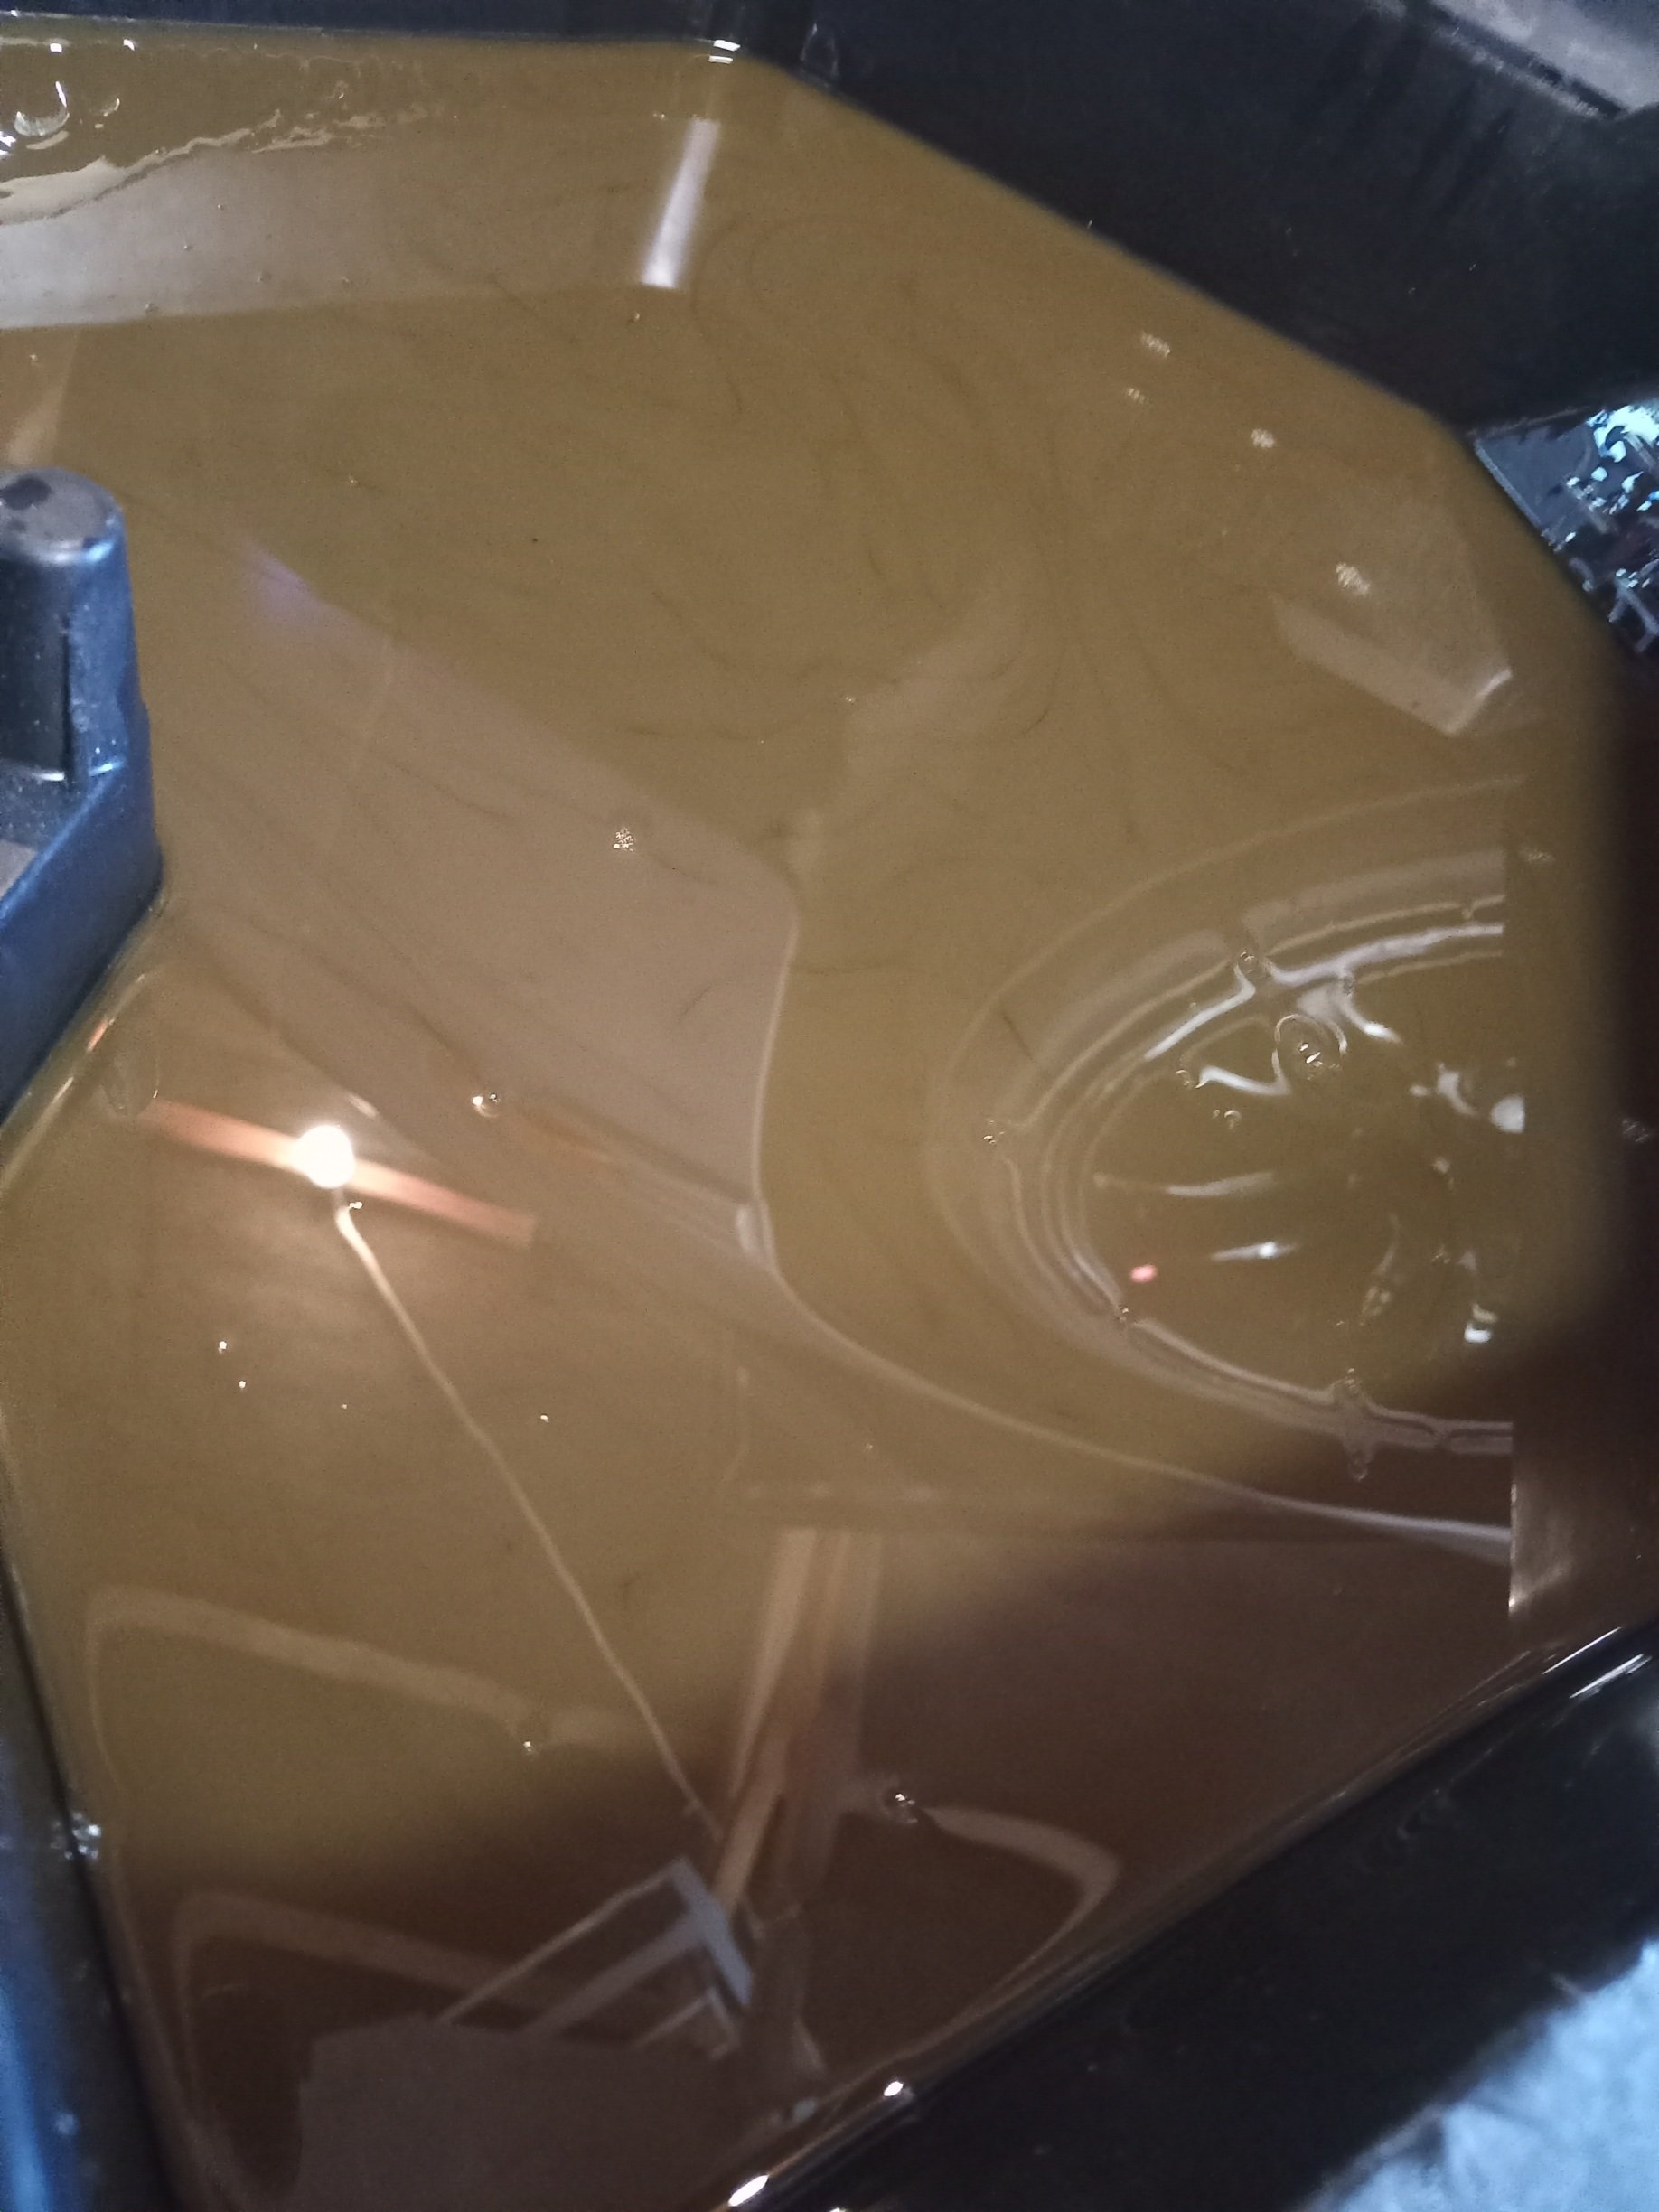
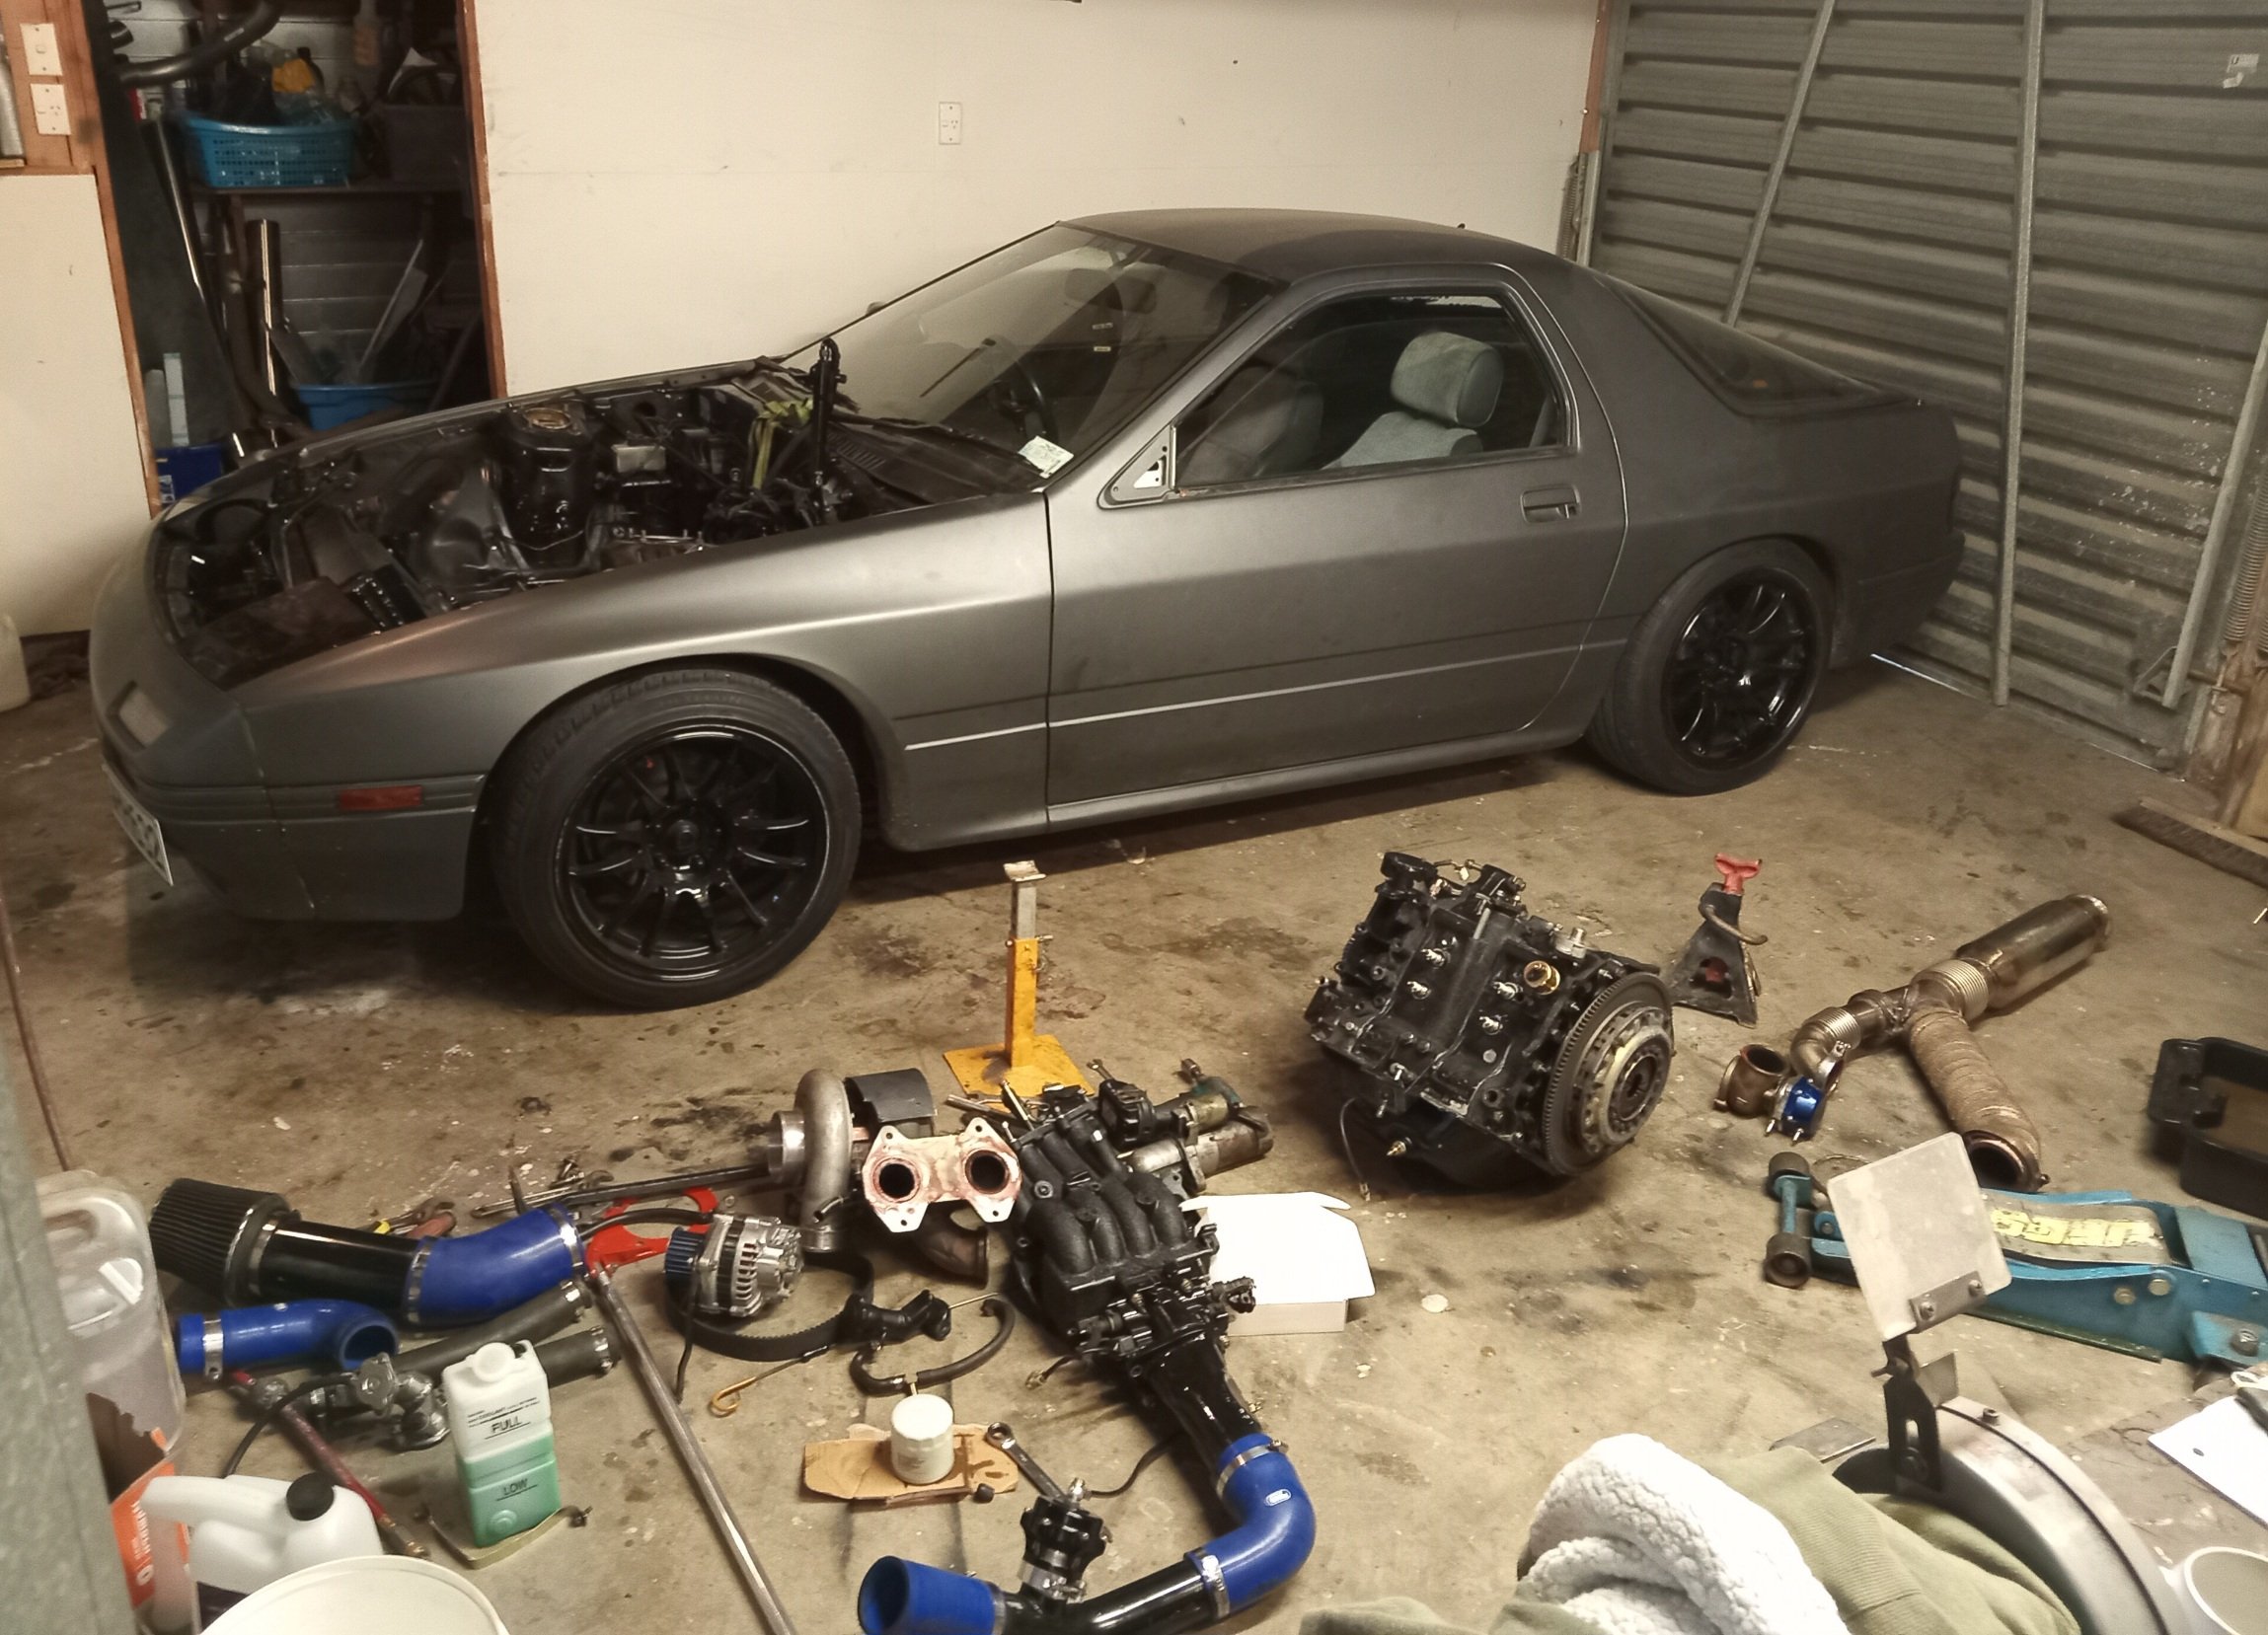
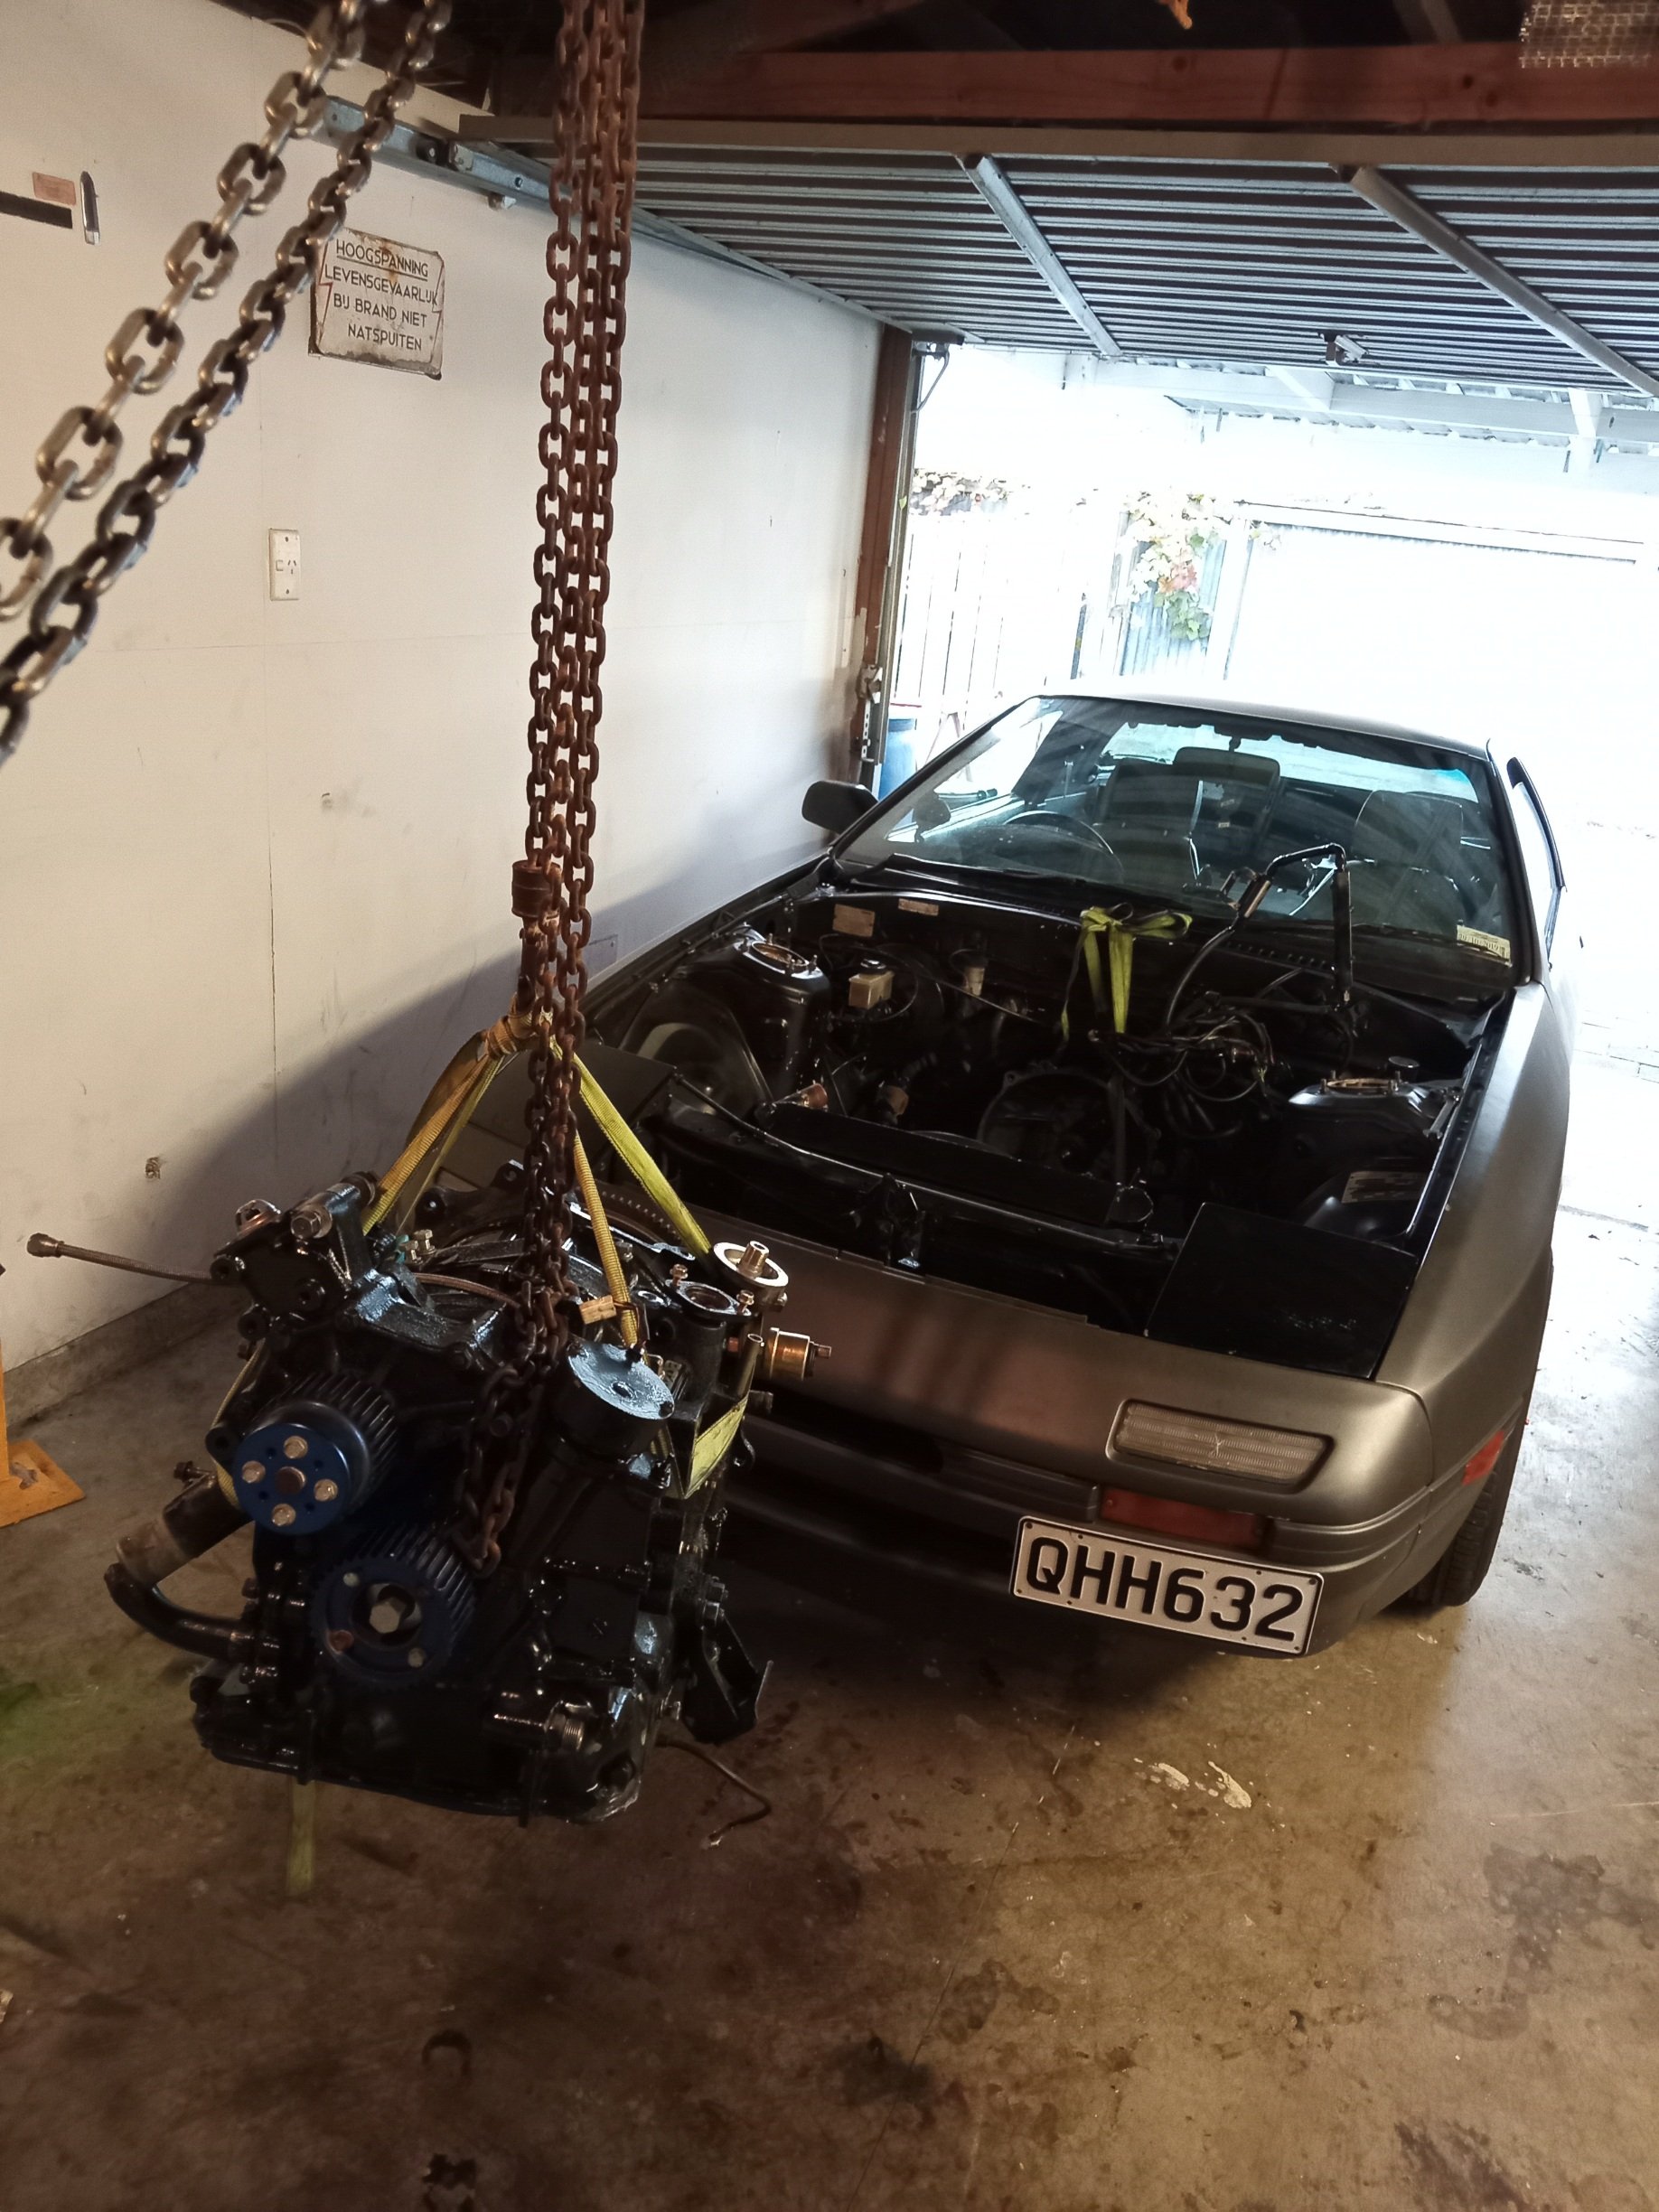
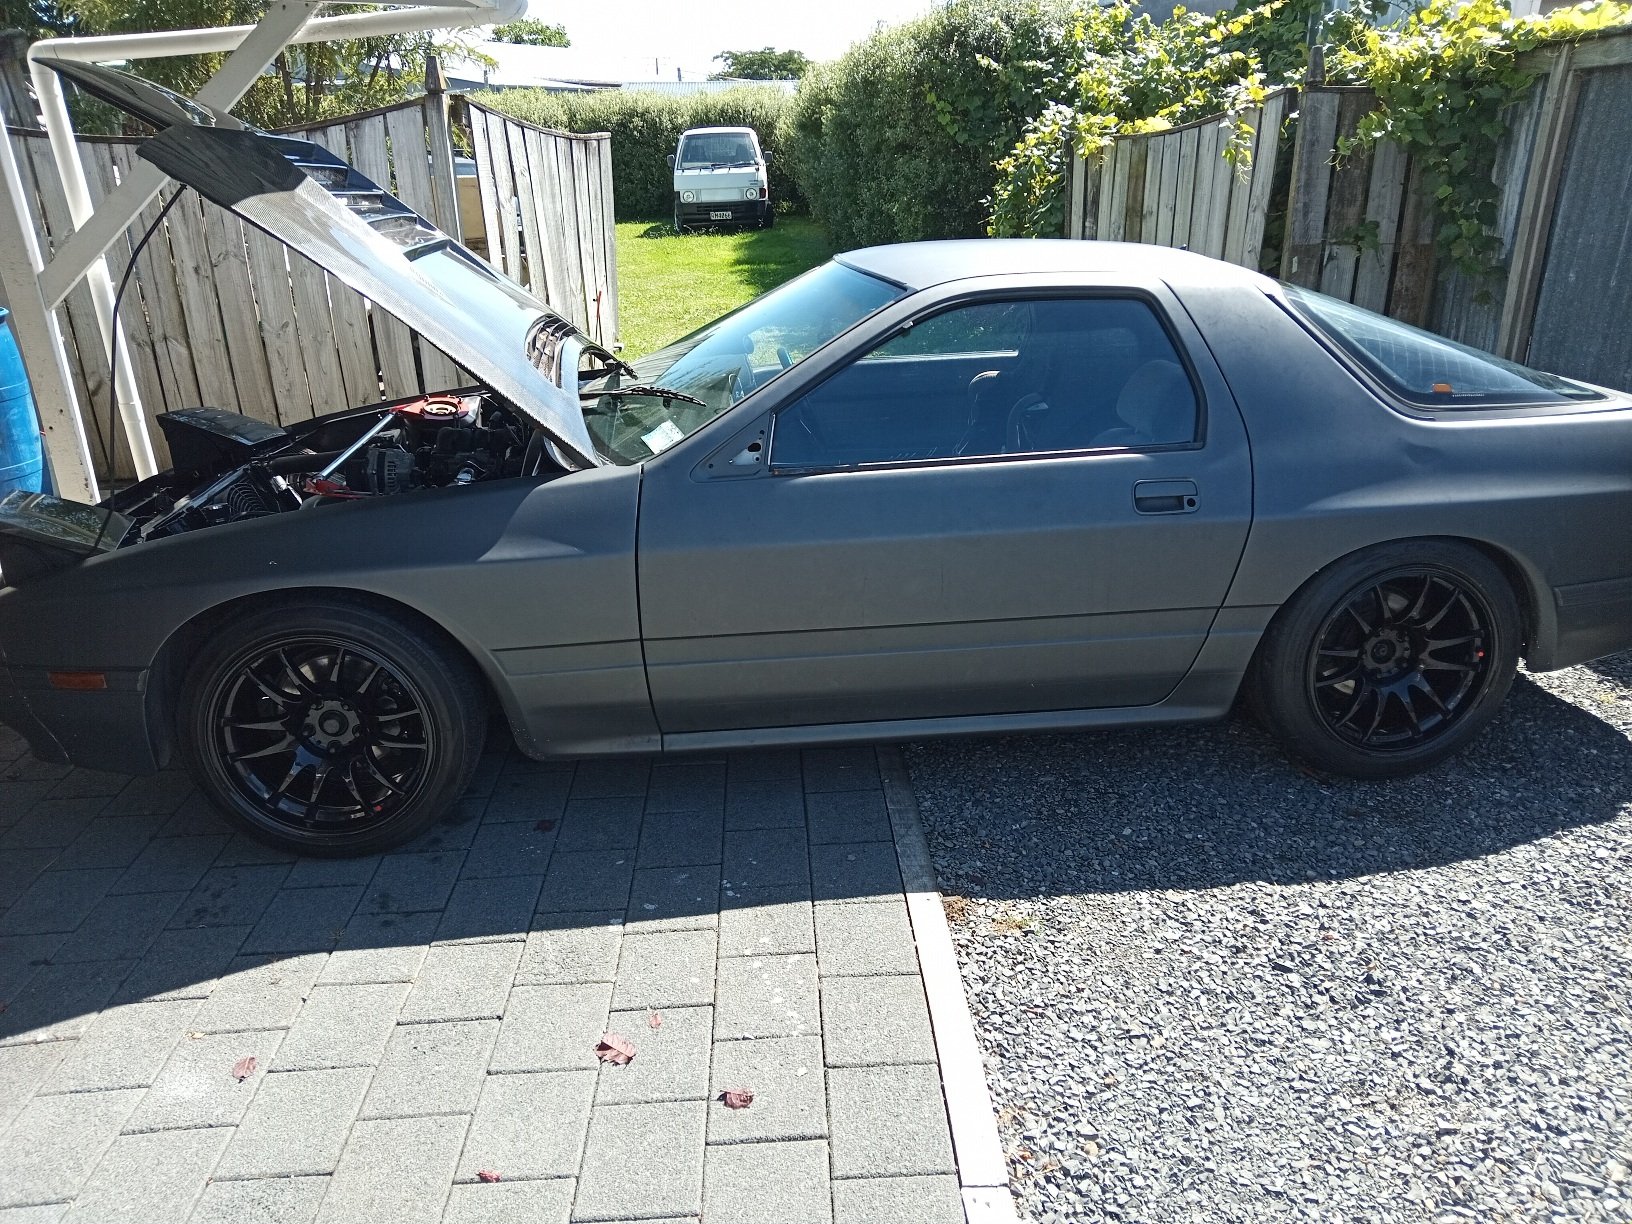
Well this ran with a misfire upon entering boost since i got it, now its really started being undriveable, i checked tps, coils, all the things that could cause that miss and came up with nothing definitive, it always smoked a bit but i thought this was as a result of being rotary and then i noticed the oil looked cloudy on the dipstick, changed it for fresh oil and filter.. The oil looked like this after 10min run time and smells kinda like coolant, time to rebuild, im guessing a water seal let go or something... I should be sad about this or something but im actually looking forward how a rotary engine looks inside, especially a 'worked' one.
1 point
-
*girly screams of excitement * just got these through
1 point
-
So the above teaser was me dropping the ute off to a panelbeater near palmy. this is his update pics. i just didn’t have the time or mental energy to grind my way through the stitching phase, or attacking the mint bonnet with a grinder. he has made up new flanges for the front of the guards , he won’t use the rx3 guards on this set up, all new steel. have also tasked him to fill over the fuel filler hole as I can’t utilise that once I drop tank it out the back anyway. So now I’m forced to drop tank it now instead of when I bag it. it means that I can carry on with the tubs when it’s back. I will end up using push button bonnet pins, hopefully they’re ok as a bonnet pin for road use. I’ll also fit a check strap as a secondary safety measure happy days
1 point
-
FIRST START! Turns out I'd bought a rotary thinking it was a 4AGE with the idle its currently got. Huge milestone and it doesnt make any metallic noises so thats a bonus. Its basically an unopened engine thats been sitting for god knows how long in some garage in Wellsford. Now has some extra bits bolted to it an a new ECU so Im surprised it did run okay for the 10 seconds it was on. Cant post a video unfortunately/ Now onto sorting everything else I've neglected. Theres a leak on the return line fuel fitting to sort, I probably need to extend a fuel hose down inside the tank so the fuel isnt aerating as it goes back into the tank. I need to track down the sick vacuum leak. Body side wiring to do, not all the gauge cluster works atm. Clutch fork retaining clips (due to some photo found, I did this already! woohoo), some oil in the gearbox is probably wise. Carpet seems to hide a multitude of sins...
1 point
-
I got the viva all ready to run through final compliance and a hot Rodder friend offered me a couple of old ford Ys at the same time and I’ve always wanted to build another hot rod so had to make a decision. The vivas gone to a great home so made the sale a lot easier for me. I need to learn how to chop a roof and am excited for the challenge.1 point
-
Bit of a bitter sweet update. After the last monthly meet the 2l decided to run a bearing on the way home leave me stranded on the side of the motorway. I managed to source a gamble na 1600 motor of a friend so whipped that in and after the legend himself @RUNAMUCK worked his wizardry swapping out the dizzy and timing the motor up I was back in business again . Have taken it for a wee drive around the block and the motor seems to be happy enough. Old water pump was shot so picked up another and slammed it in. Oil change and some new plugs and hopefully it's smooth sailing from here on in I also put some guard mirrors on it. Damn they're useless but they look the part
1 point
-
1 point
-
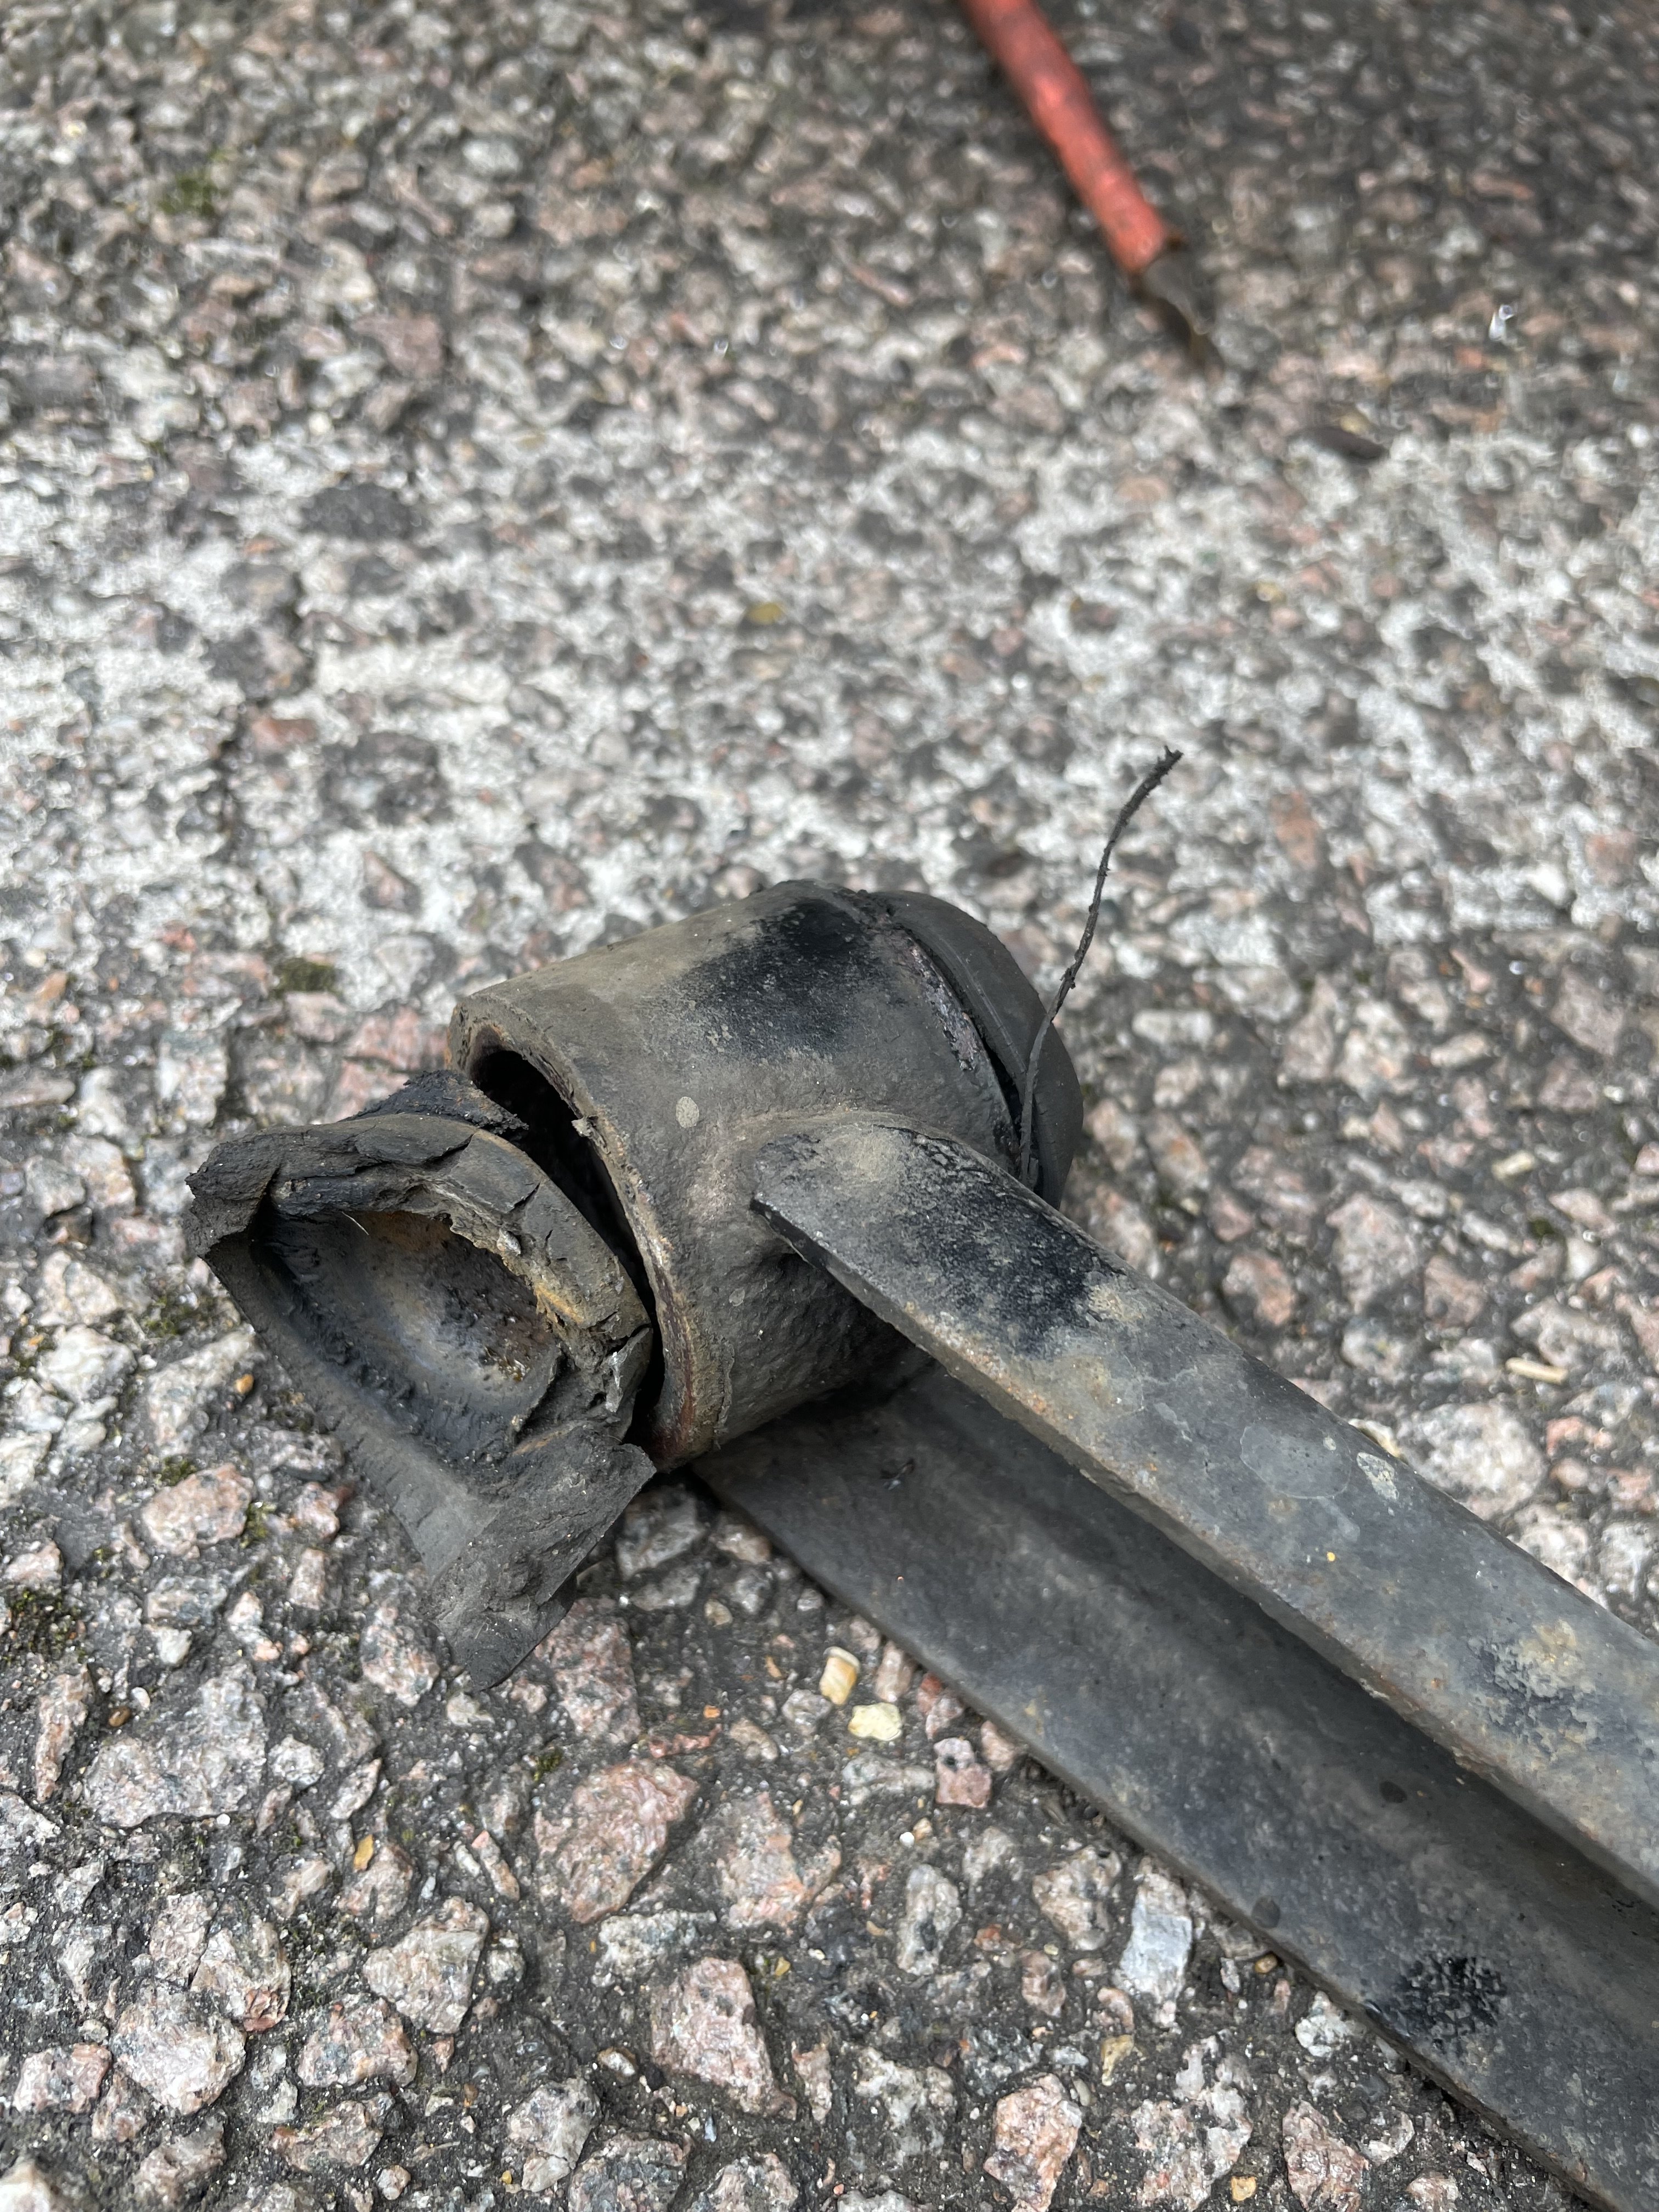
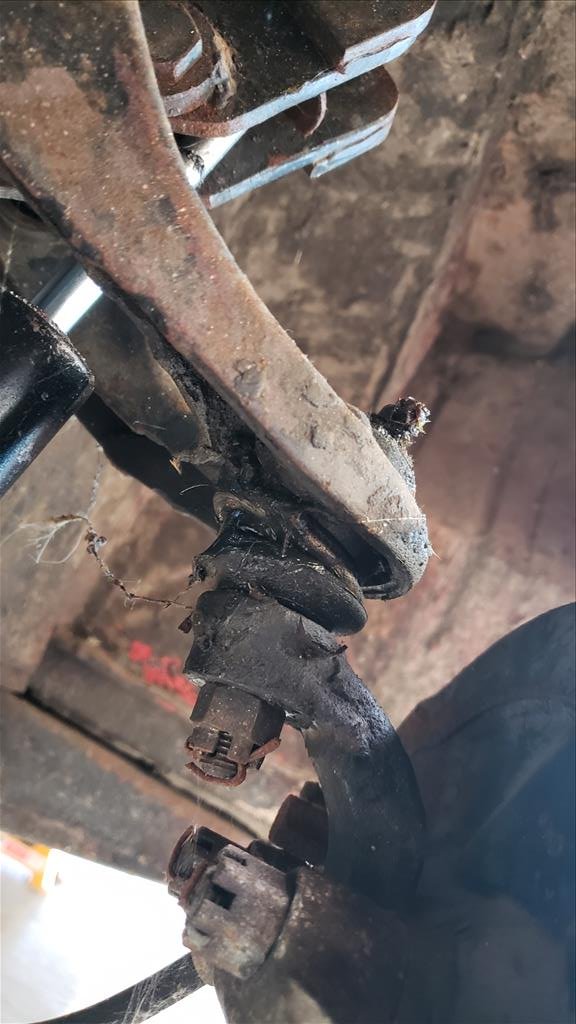
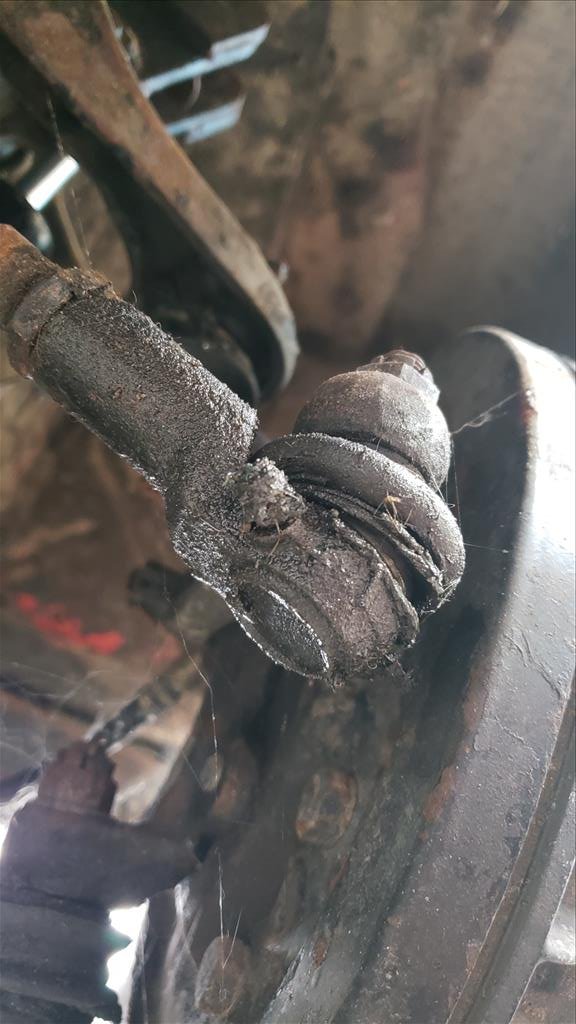
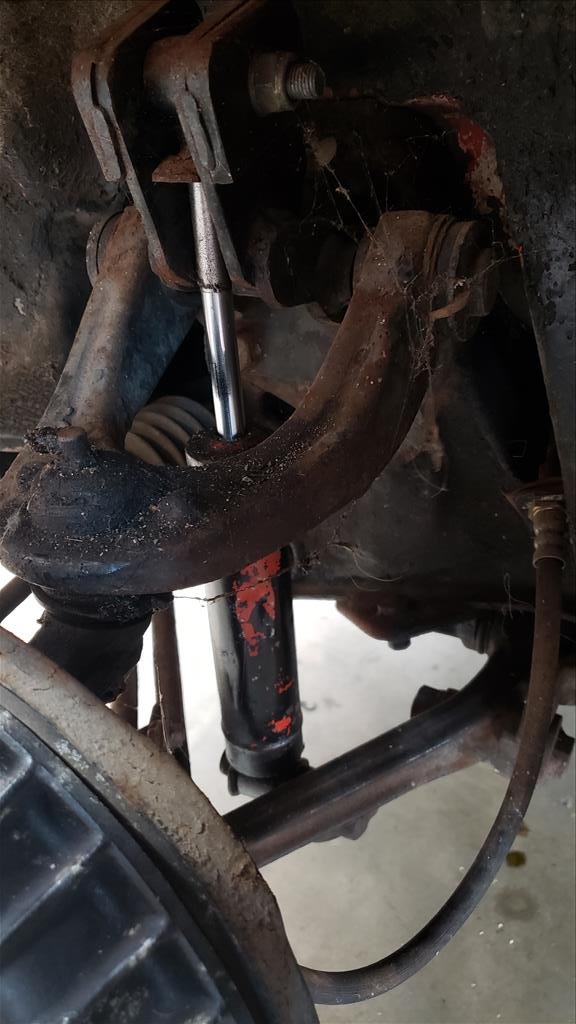
Would not recommend mg rubber bushes - they only lasted 6 months… would recommend greasing your stub axles though…. new poly bushes and axles installed this weekend with the help of @Sambo
1 point
-
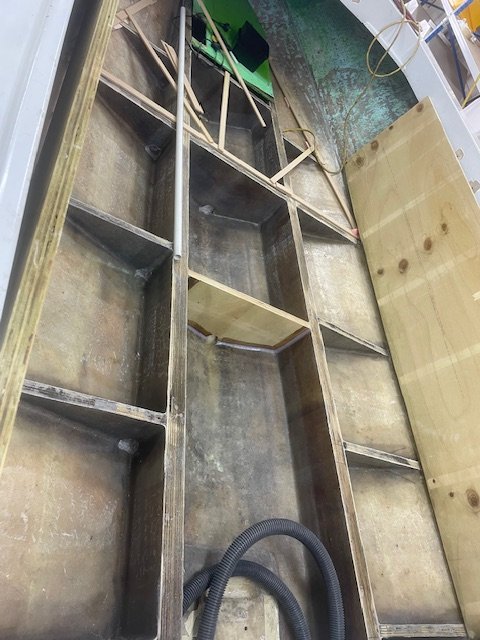
New beam’s laminated and machined from @Ned’s 3d scans, amazing outcome for such a big surface and “low cost” scanner Realising I don’t have enough talent for structural fiberglass work, talented uncle Neemia from work took over and is doing an excellent job, a layer of glass is over the inside of the hull and the beams bonded in place to be laminated over the top of.
1 point
-
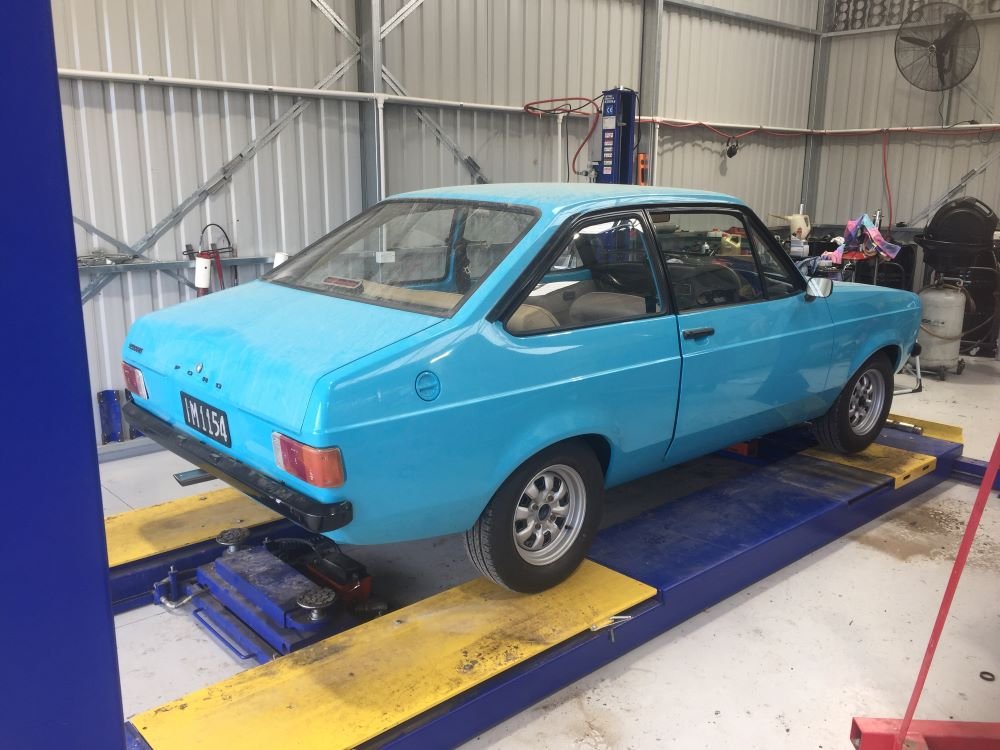
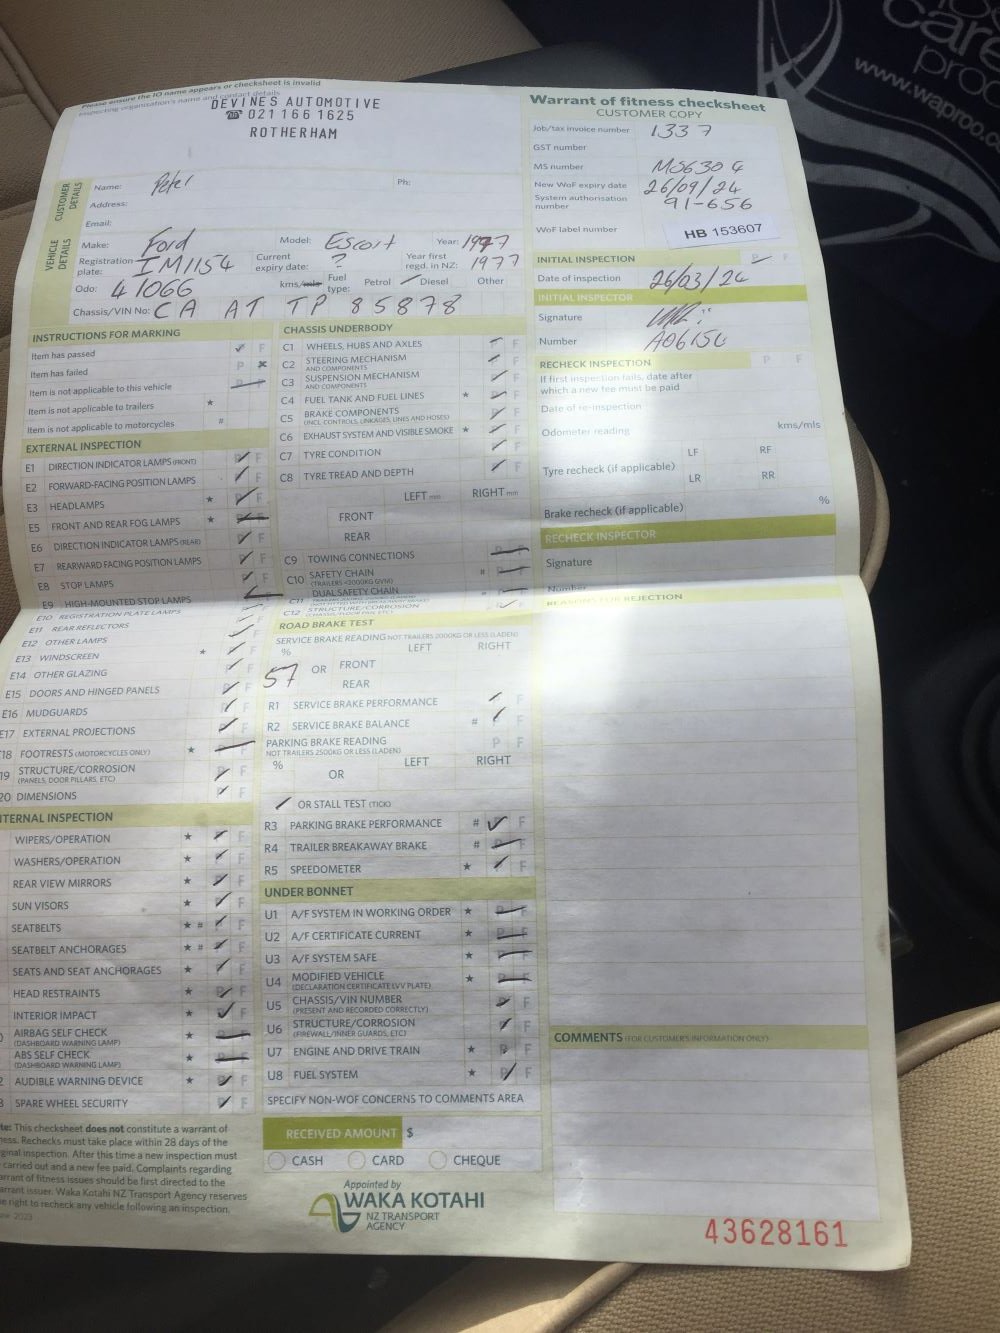
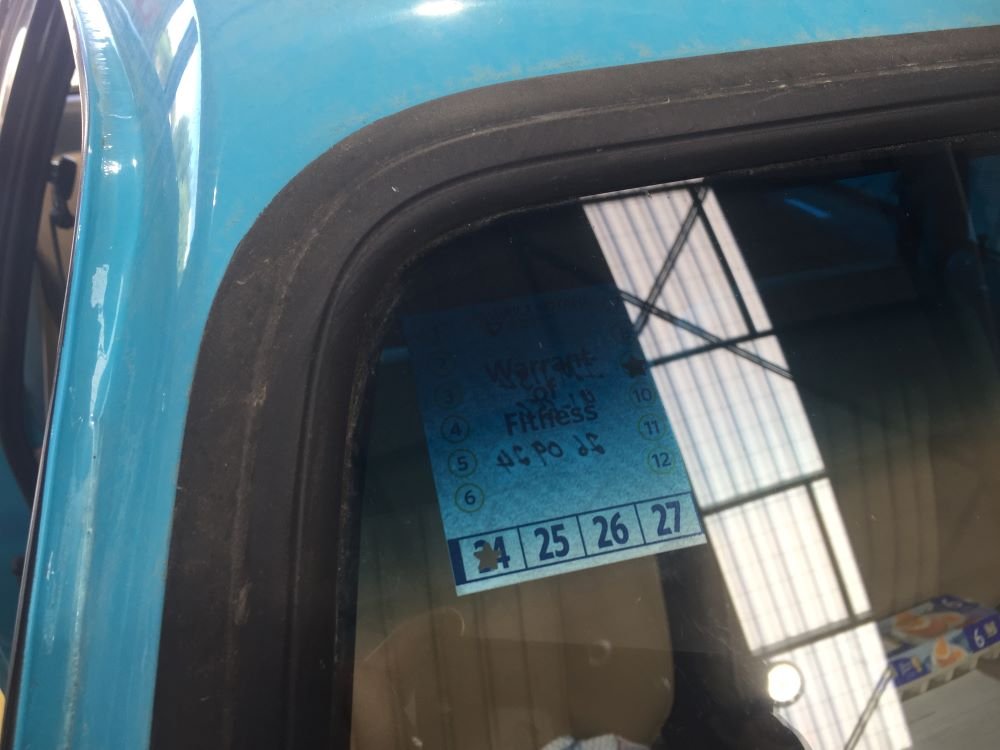
Escort back on the hoist again for its first WOF in approximately 18yrs. Have gone over everything and hope it will pass first time. Well, that went really well. Paperwork completed and sticker on windscreen. Quick trip home and now cars registartion done. Will feel more at ease driving around now. Tune is the next next thing to get sorted Project Discussion https://oldschool.co.nz/index.php?/topic/84912-petes-mk2-escort-1600-sports/page/3/#comment-2628128
1 point
-
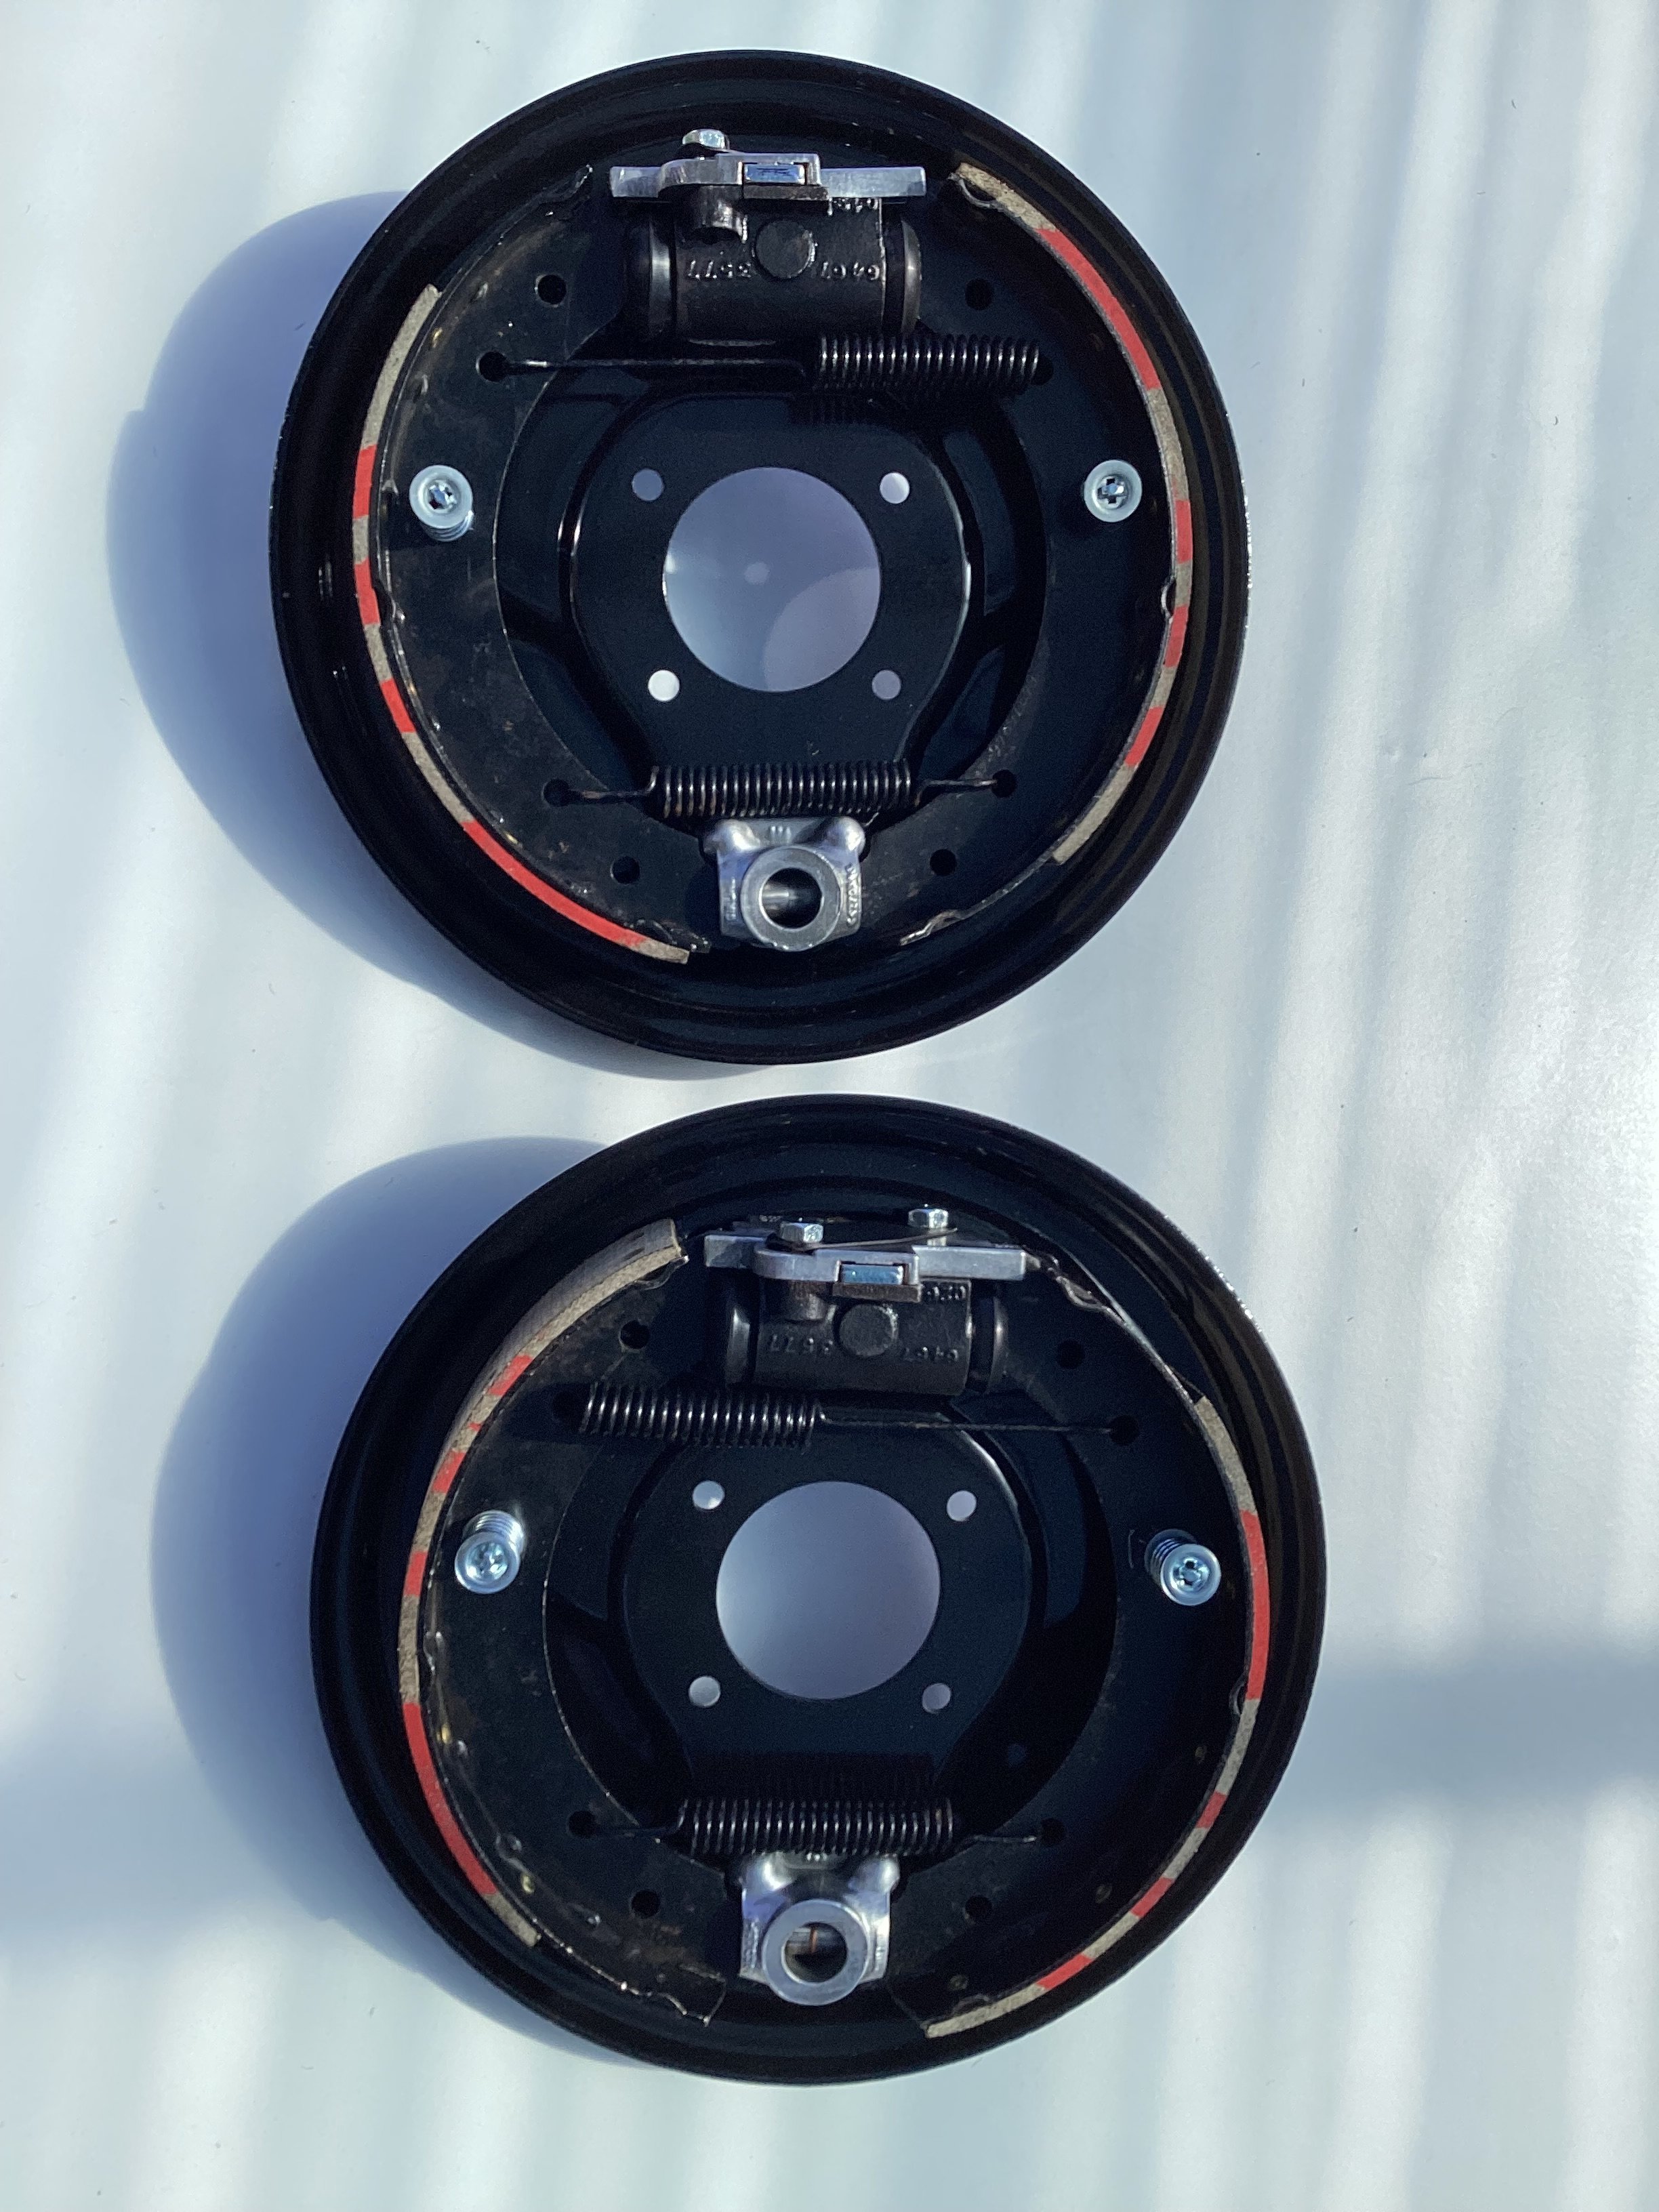
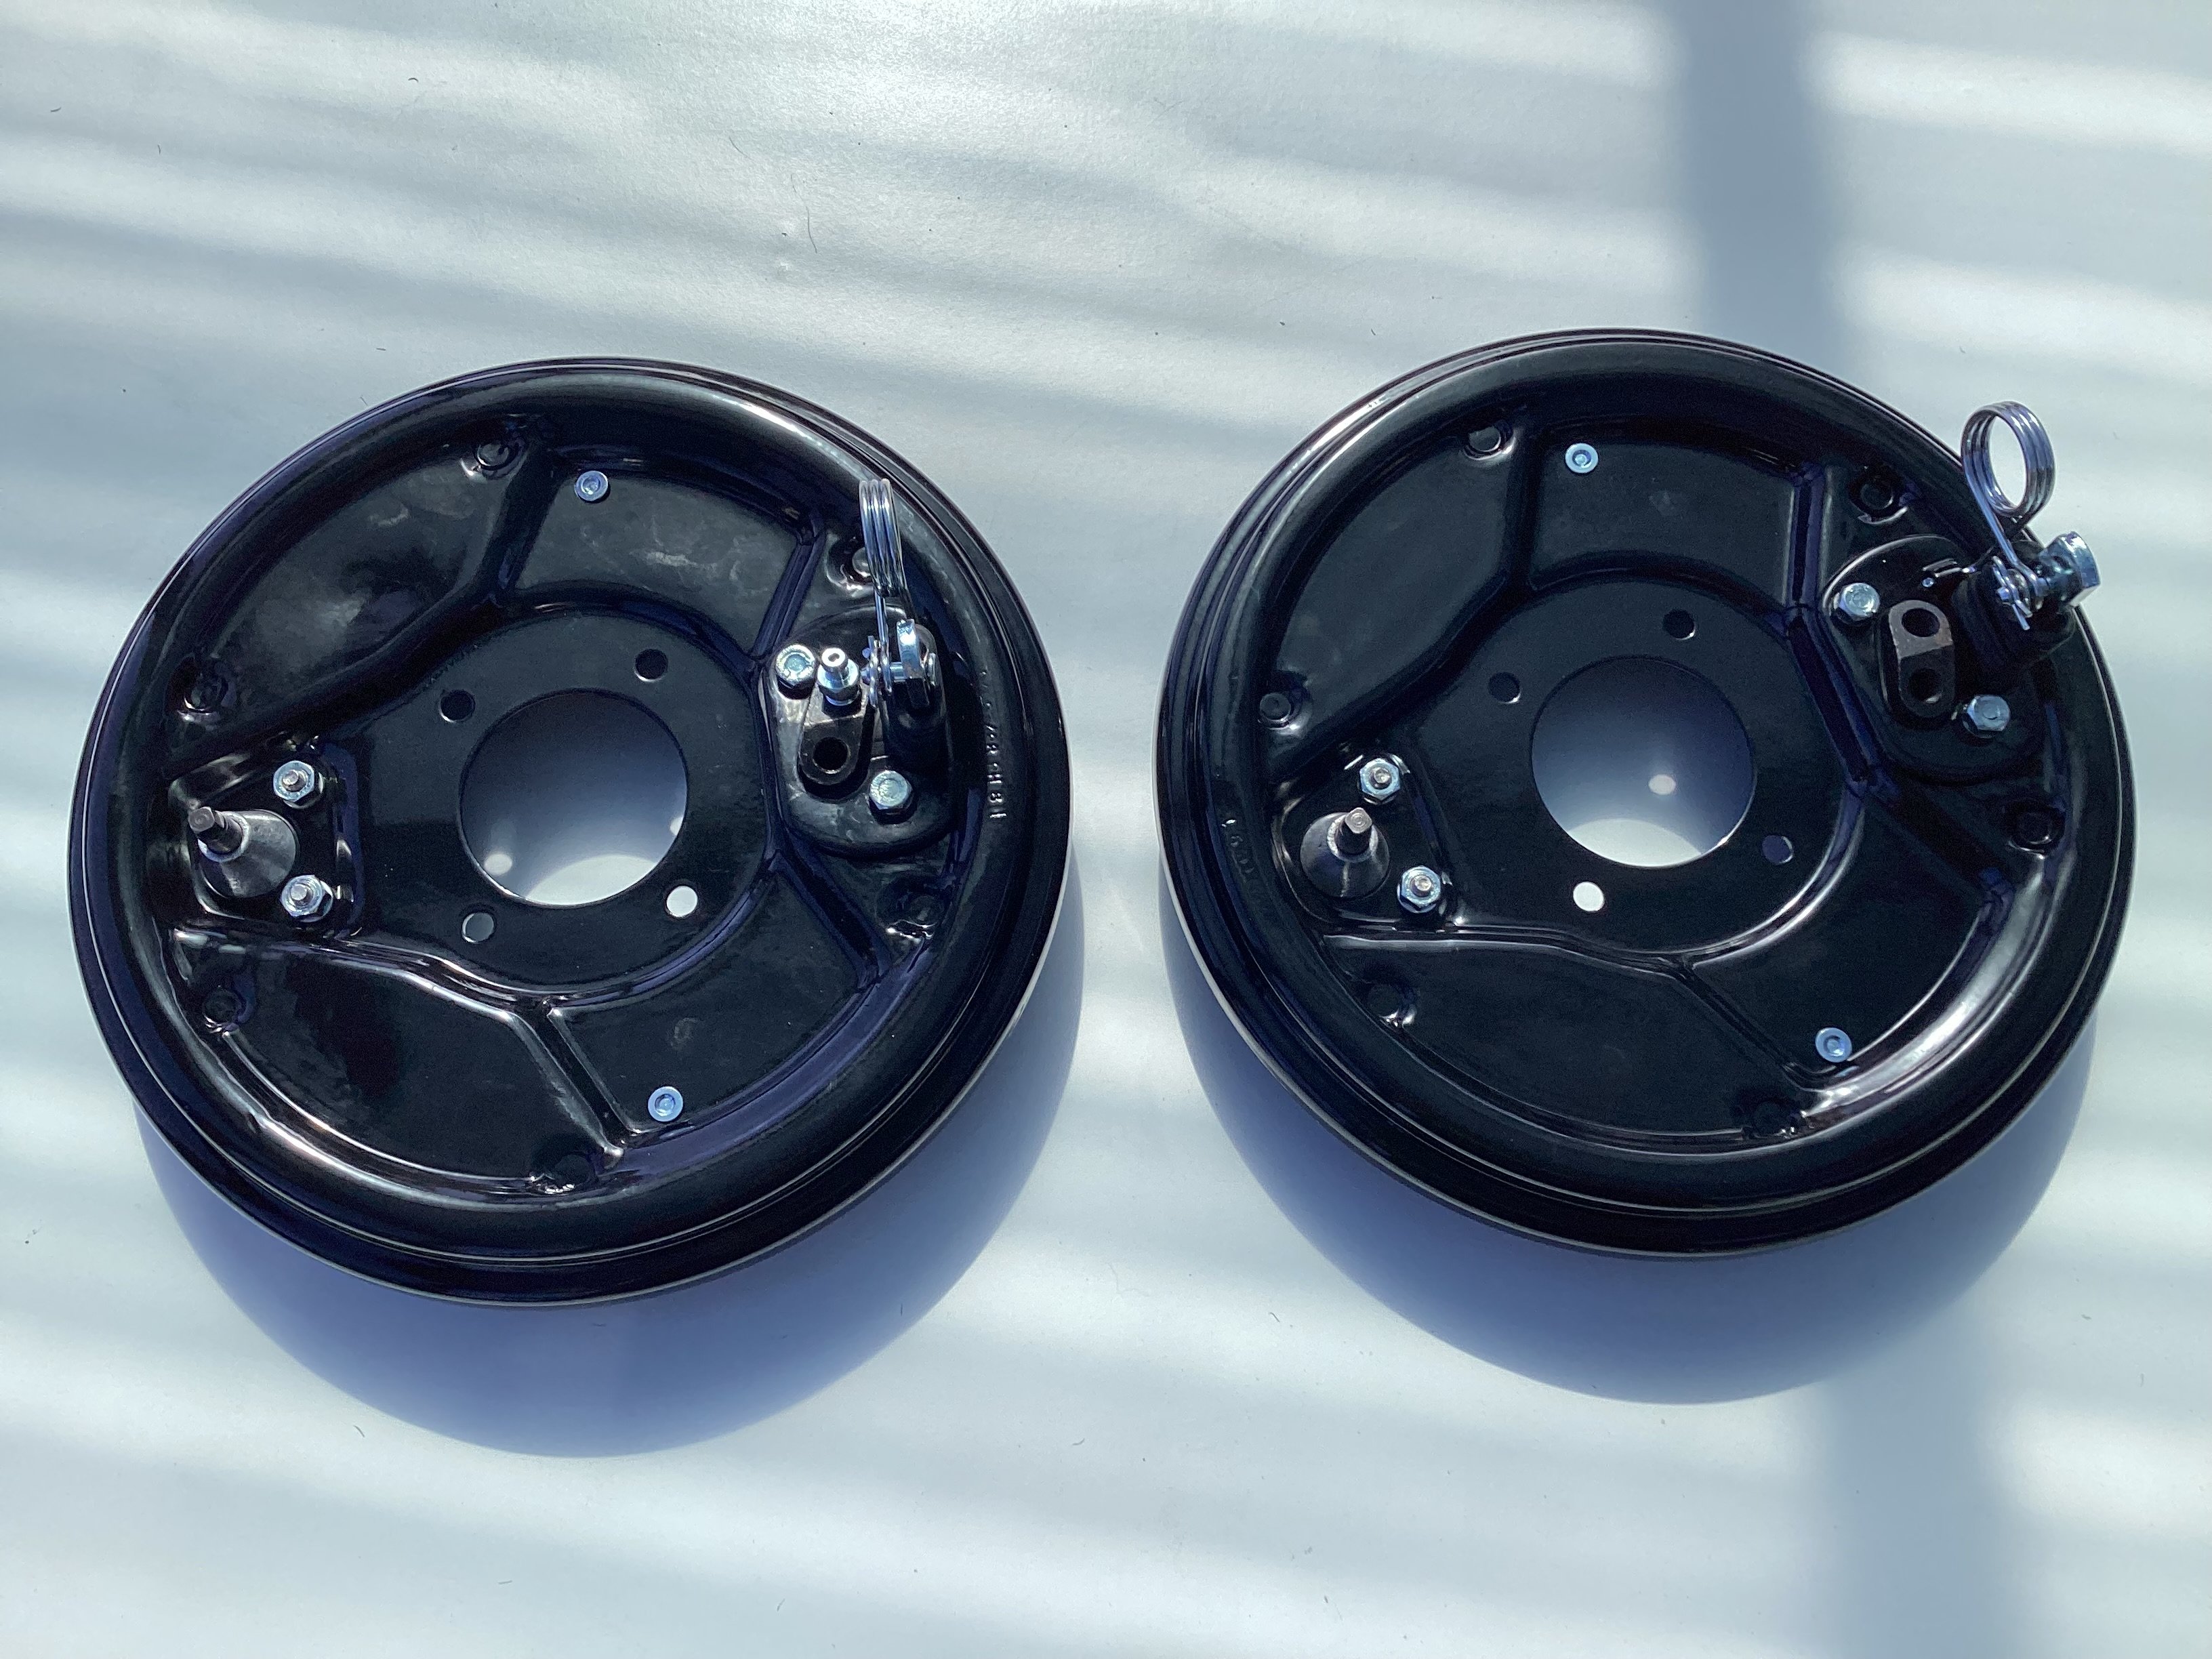
Back brakes done
1 point
-
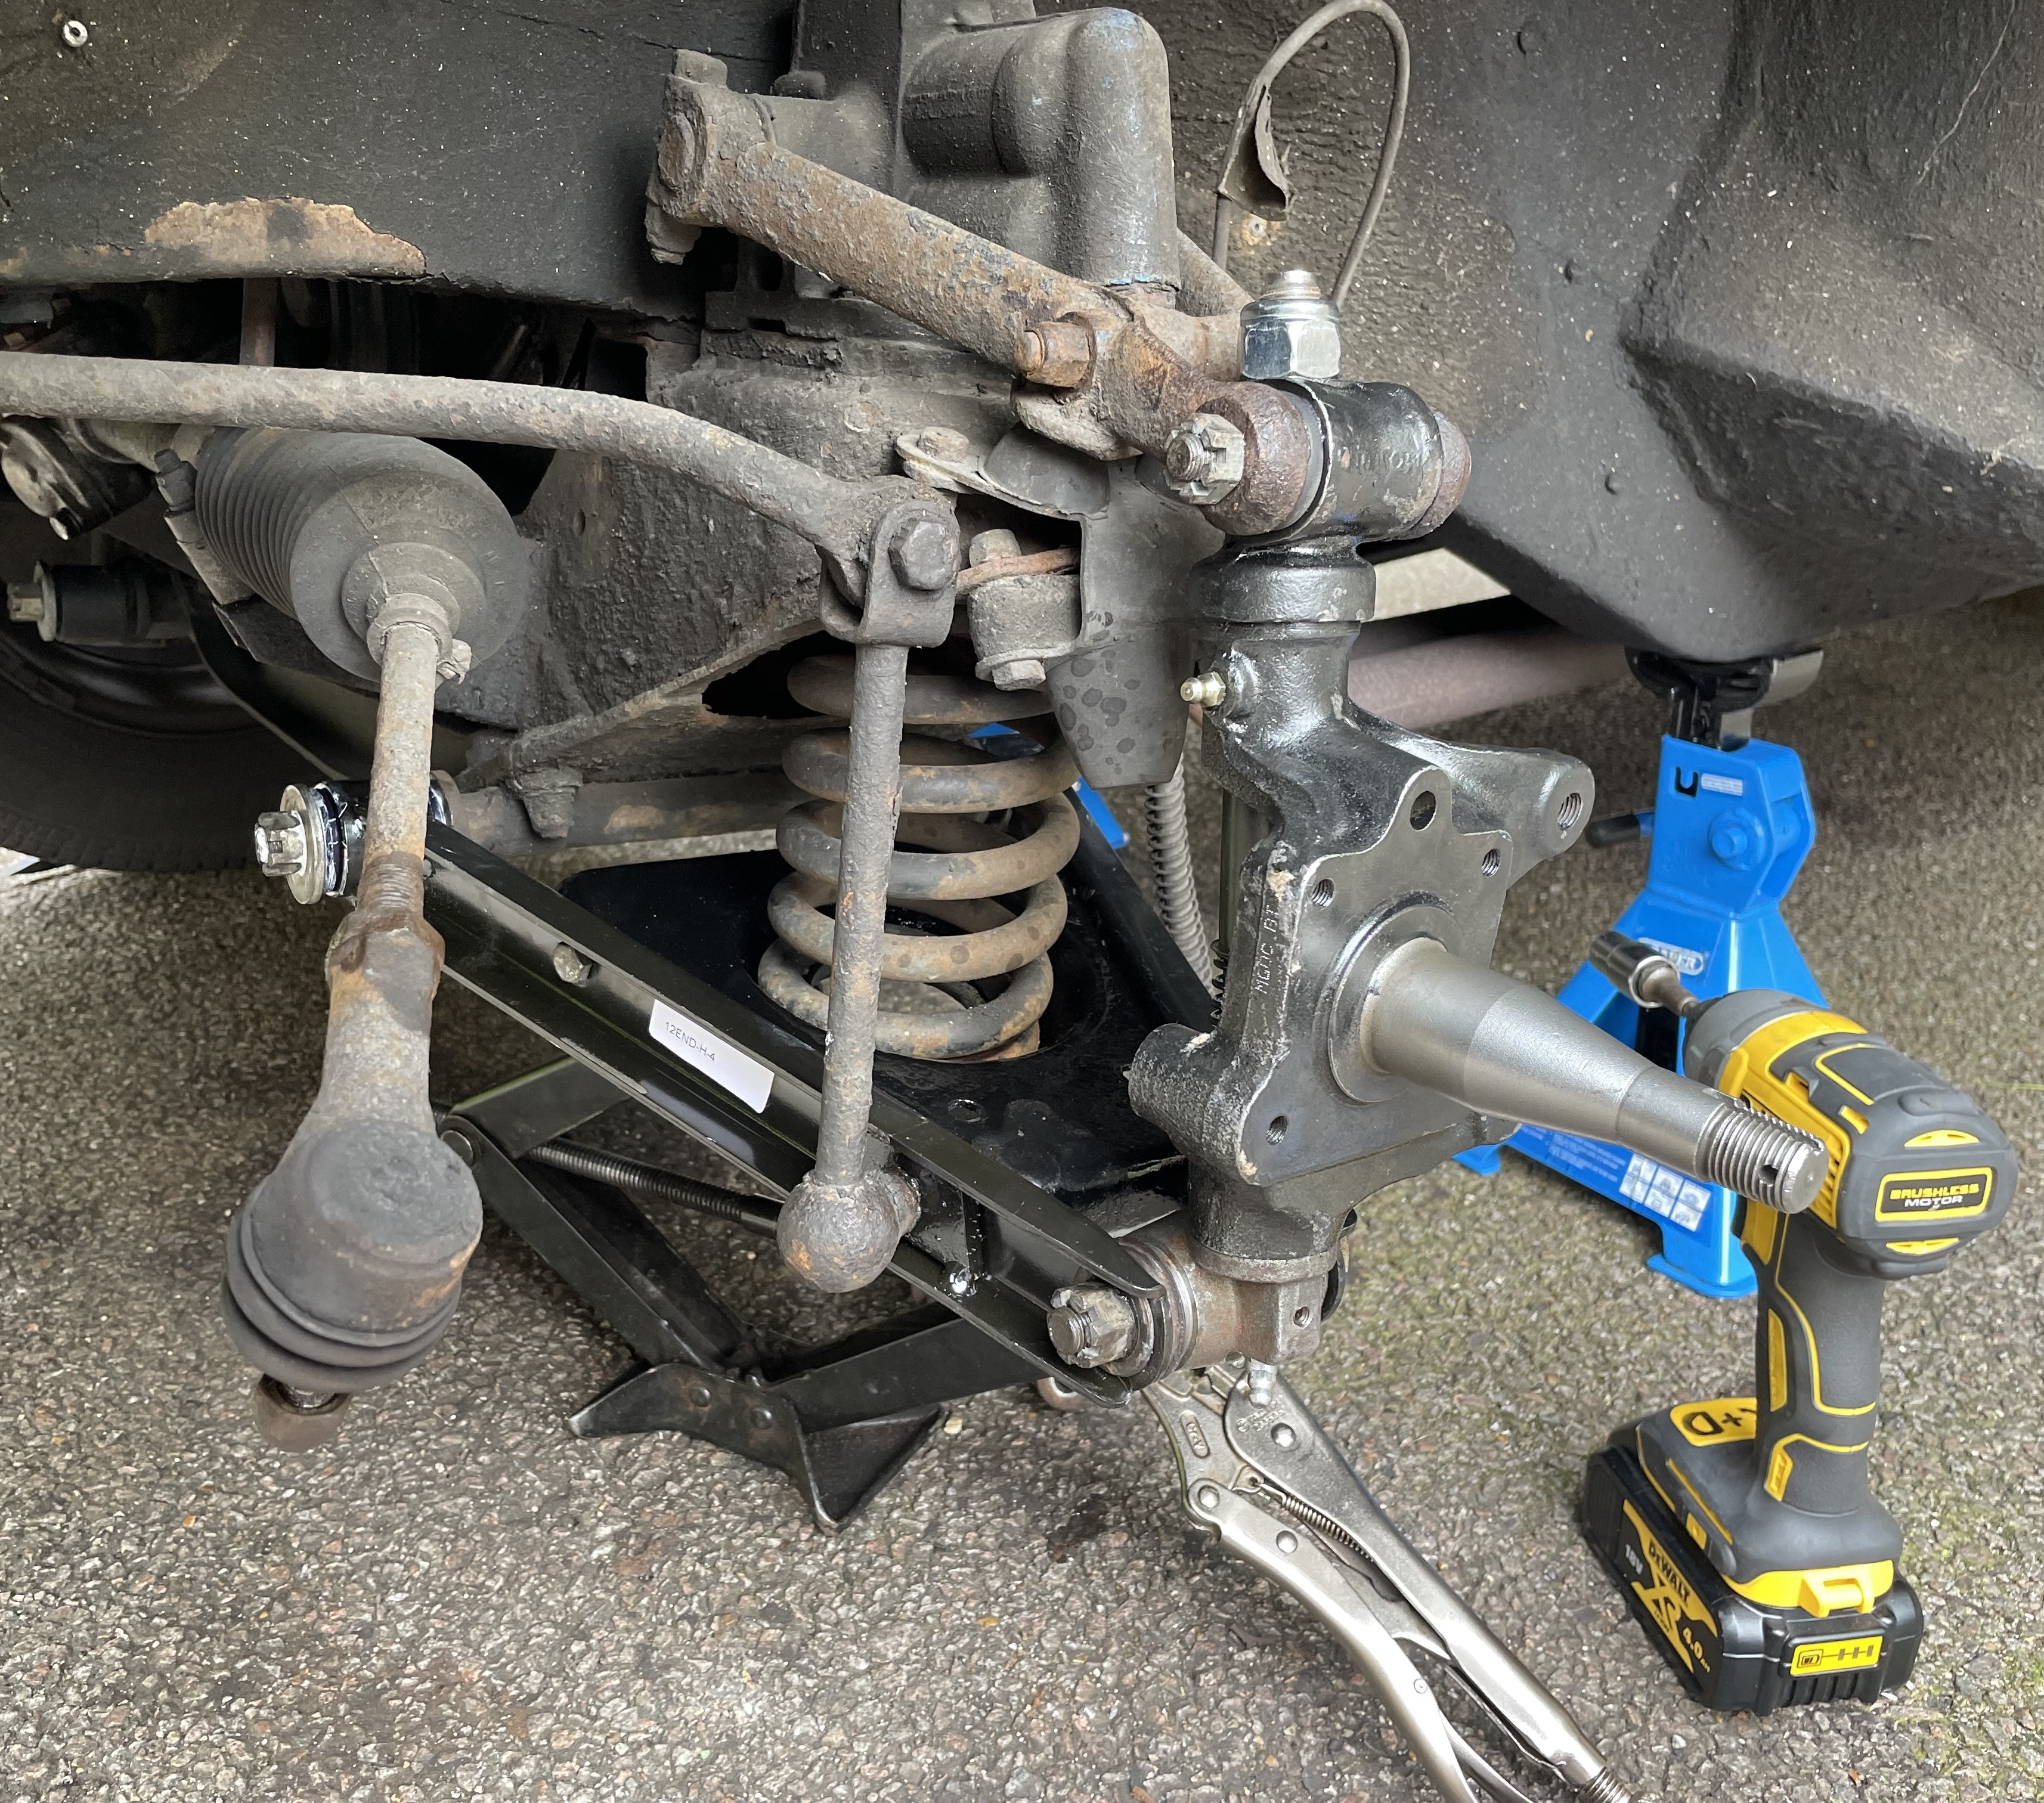
Beem working on this thing pretty flat out. Done a bunch of interior work and just rebuilt all the steering components. Everything feels a lot tighter now . Not too far away being ready for a warrant
1 point
-
Latest patch panel
1 point
-
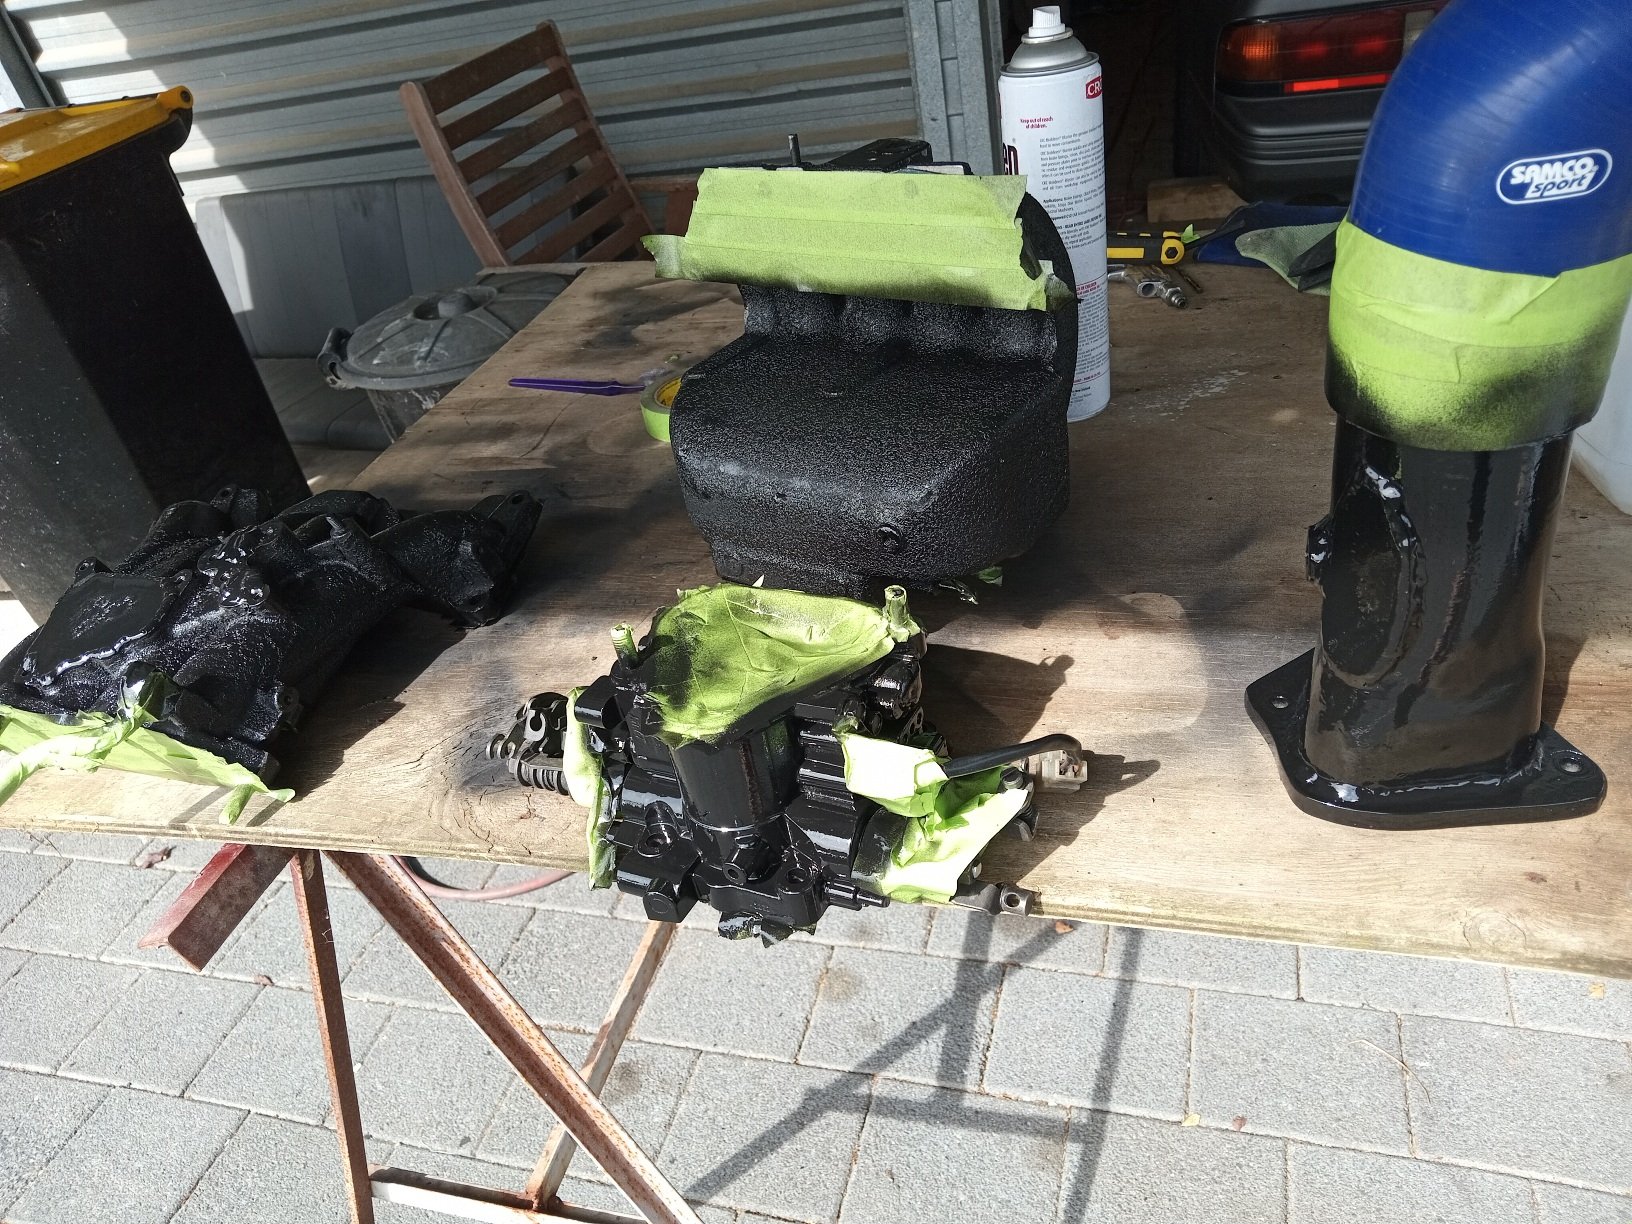
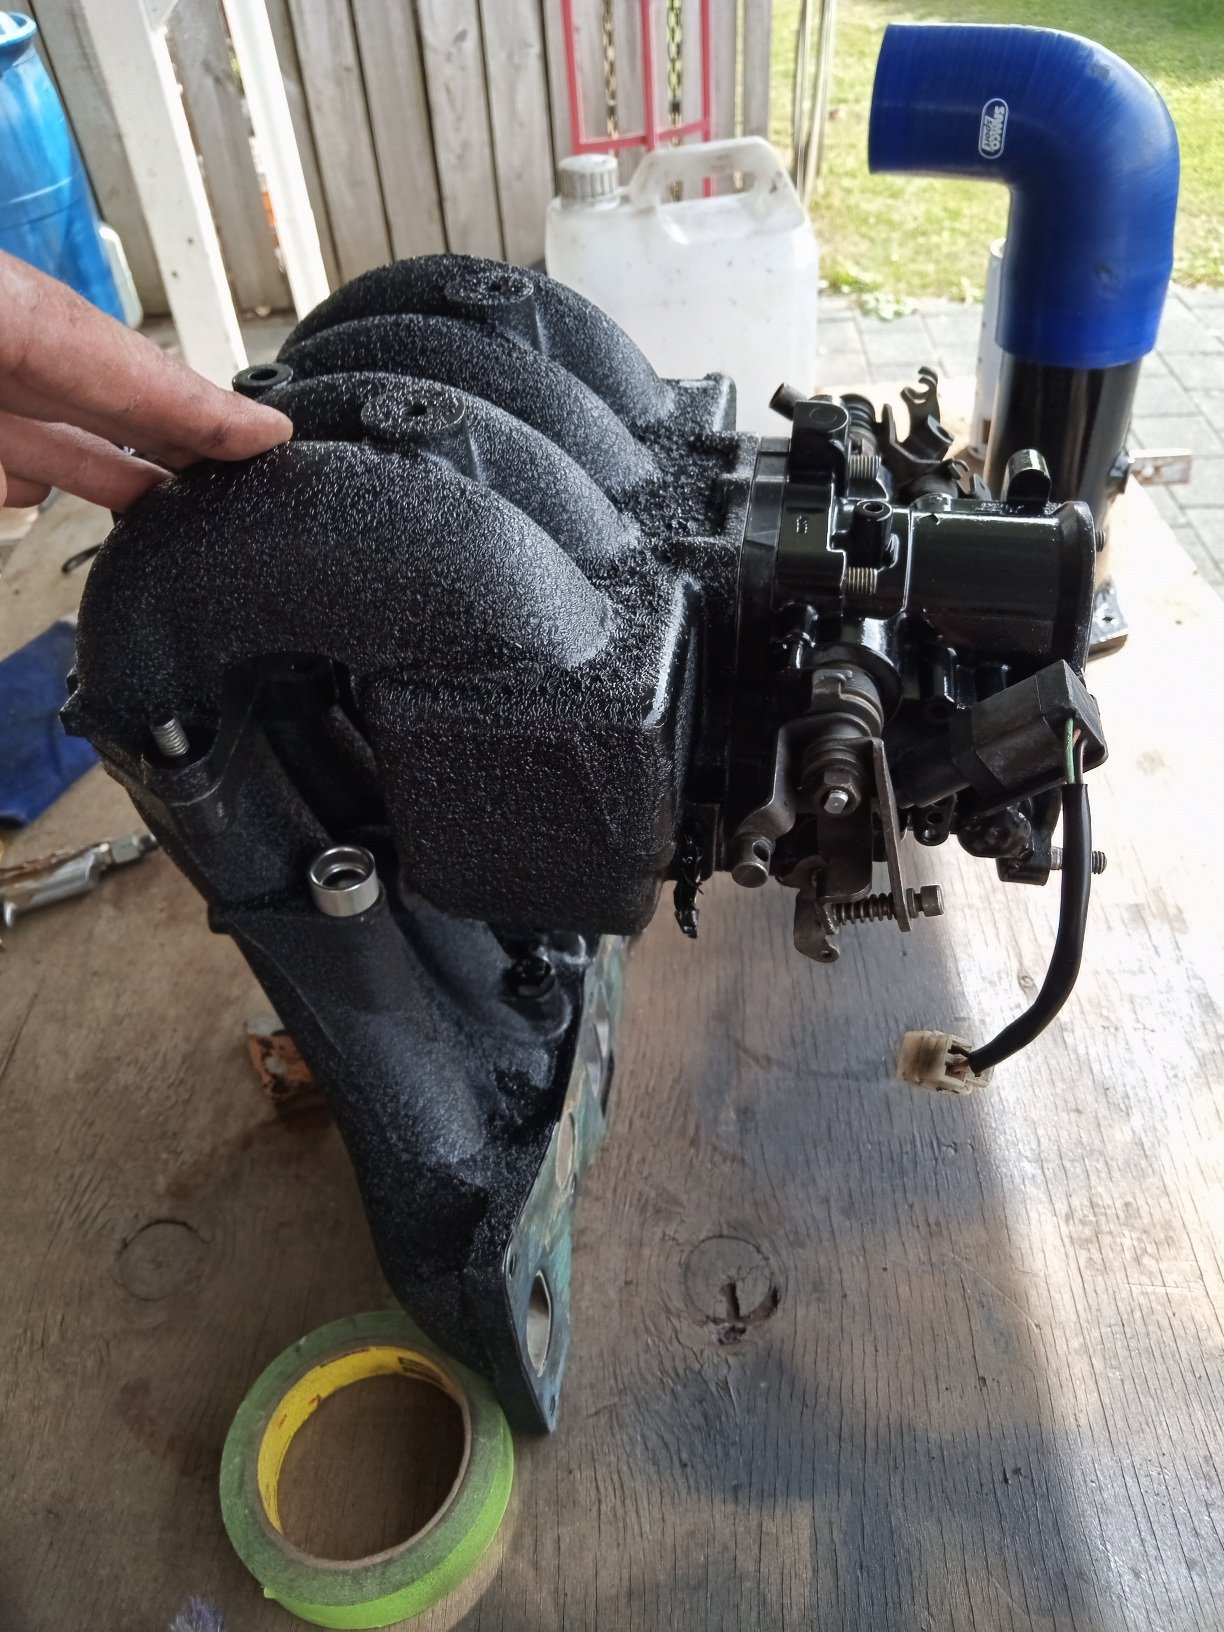
Welded up all the emissions and unused ports, this got rid of about 5 plates and gaskets as well as 3 or 4 hoses with bolts in them, sprayed in high temp black, should tidy things up a bit
1 point
-
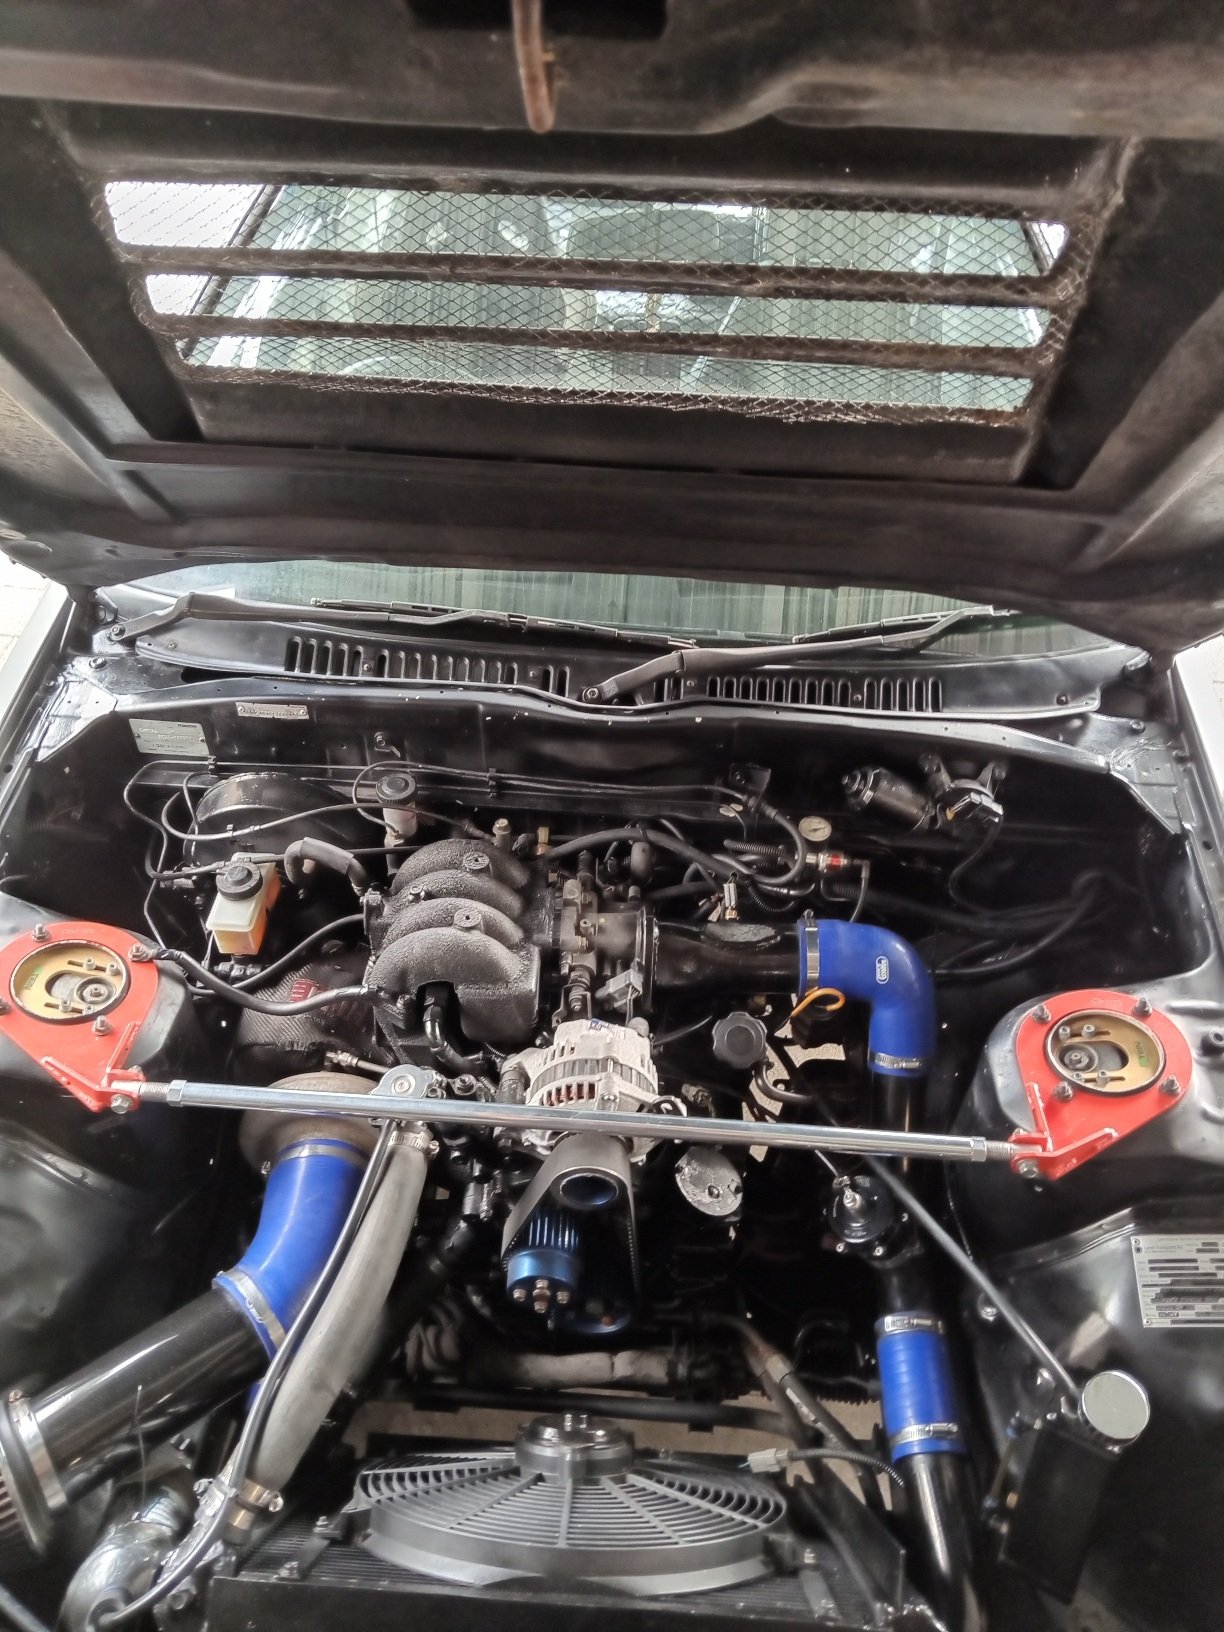
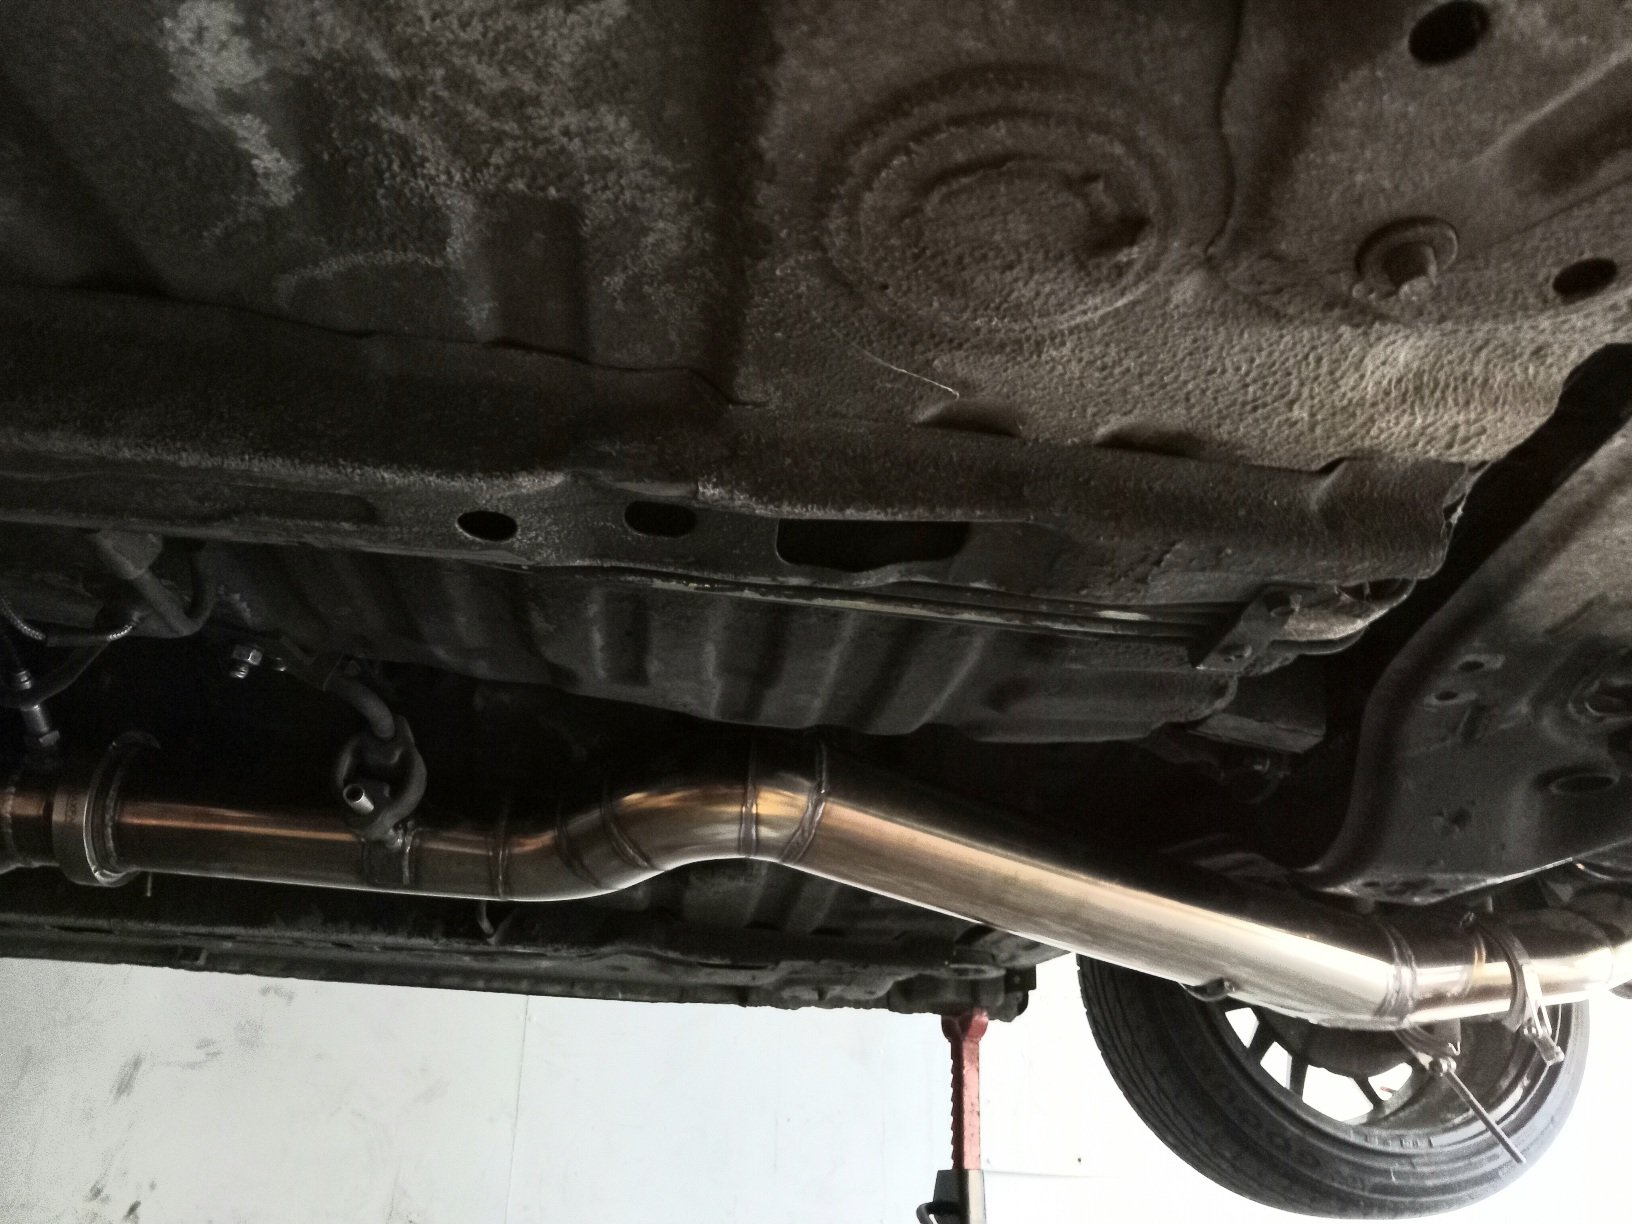
Have also been mucking around in the engine bay, i fixed a bunch of split hoses, put the strut brace back on that came with the spares for this car, cleaned up lots of areas, some paint, cleaned the wheels inside and out, put new tyres on the back took it for a drive and its running good, bit of a miss when it first goes into boost at low revs but im working on sorting that, still lights the tyres up in the dry pretty easily, but they are only 225s on the back ... Hooked up the boost gauge lighting to power so i can read it, and tidied some wiring away, i still need to buy parts for it, but these jobs all help, definitely will have to sort out some paint but i want to get all the parts on and working and warrantable before i do anything like that so excuse the mismatched colours and that haha
1 point
-
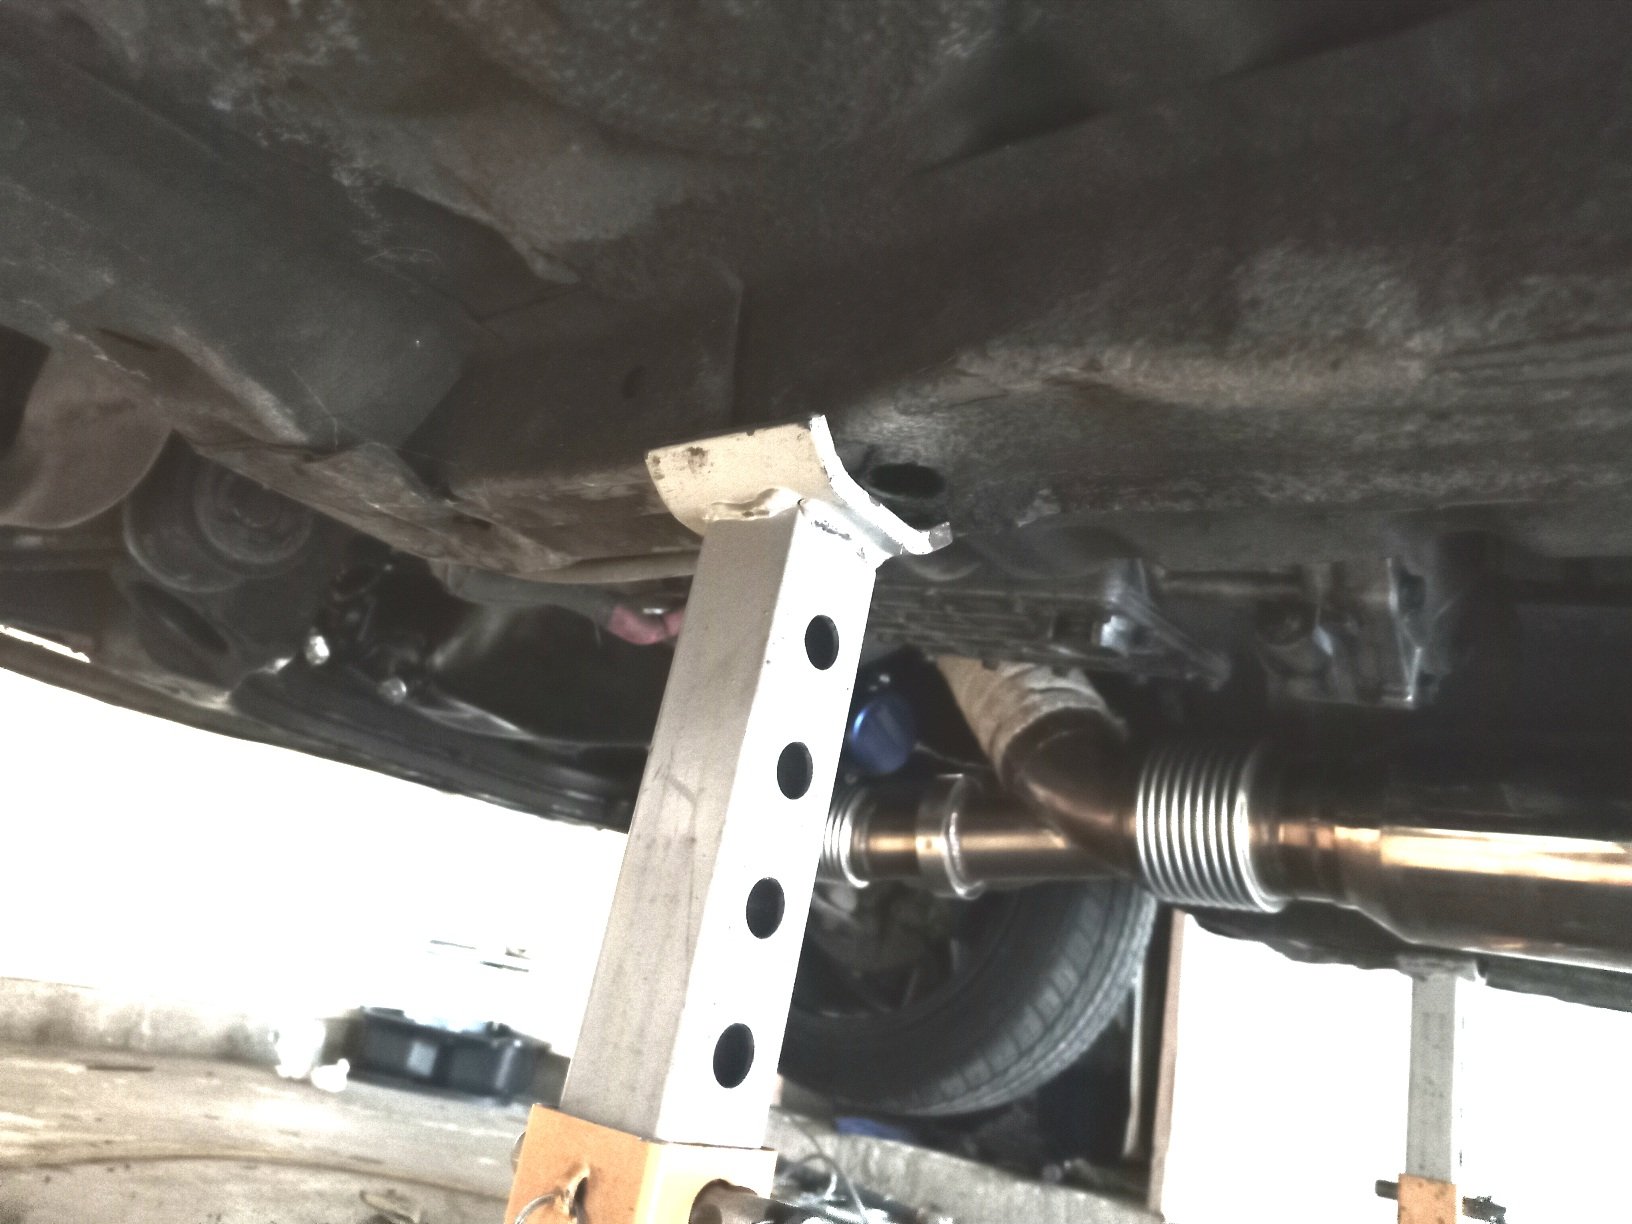
My chassis rails were a bit pushed in, and most likely would have failed a wof, so i took it to blairs panel repairs, he did an awesome job and even fixed the pinch weld areas that were also bent up, and undercoated it all for a great price and all done in a day, couldnt ask for more really, one less thing to fix on the road to a warrant ..
1 point
-
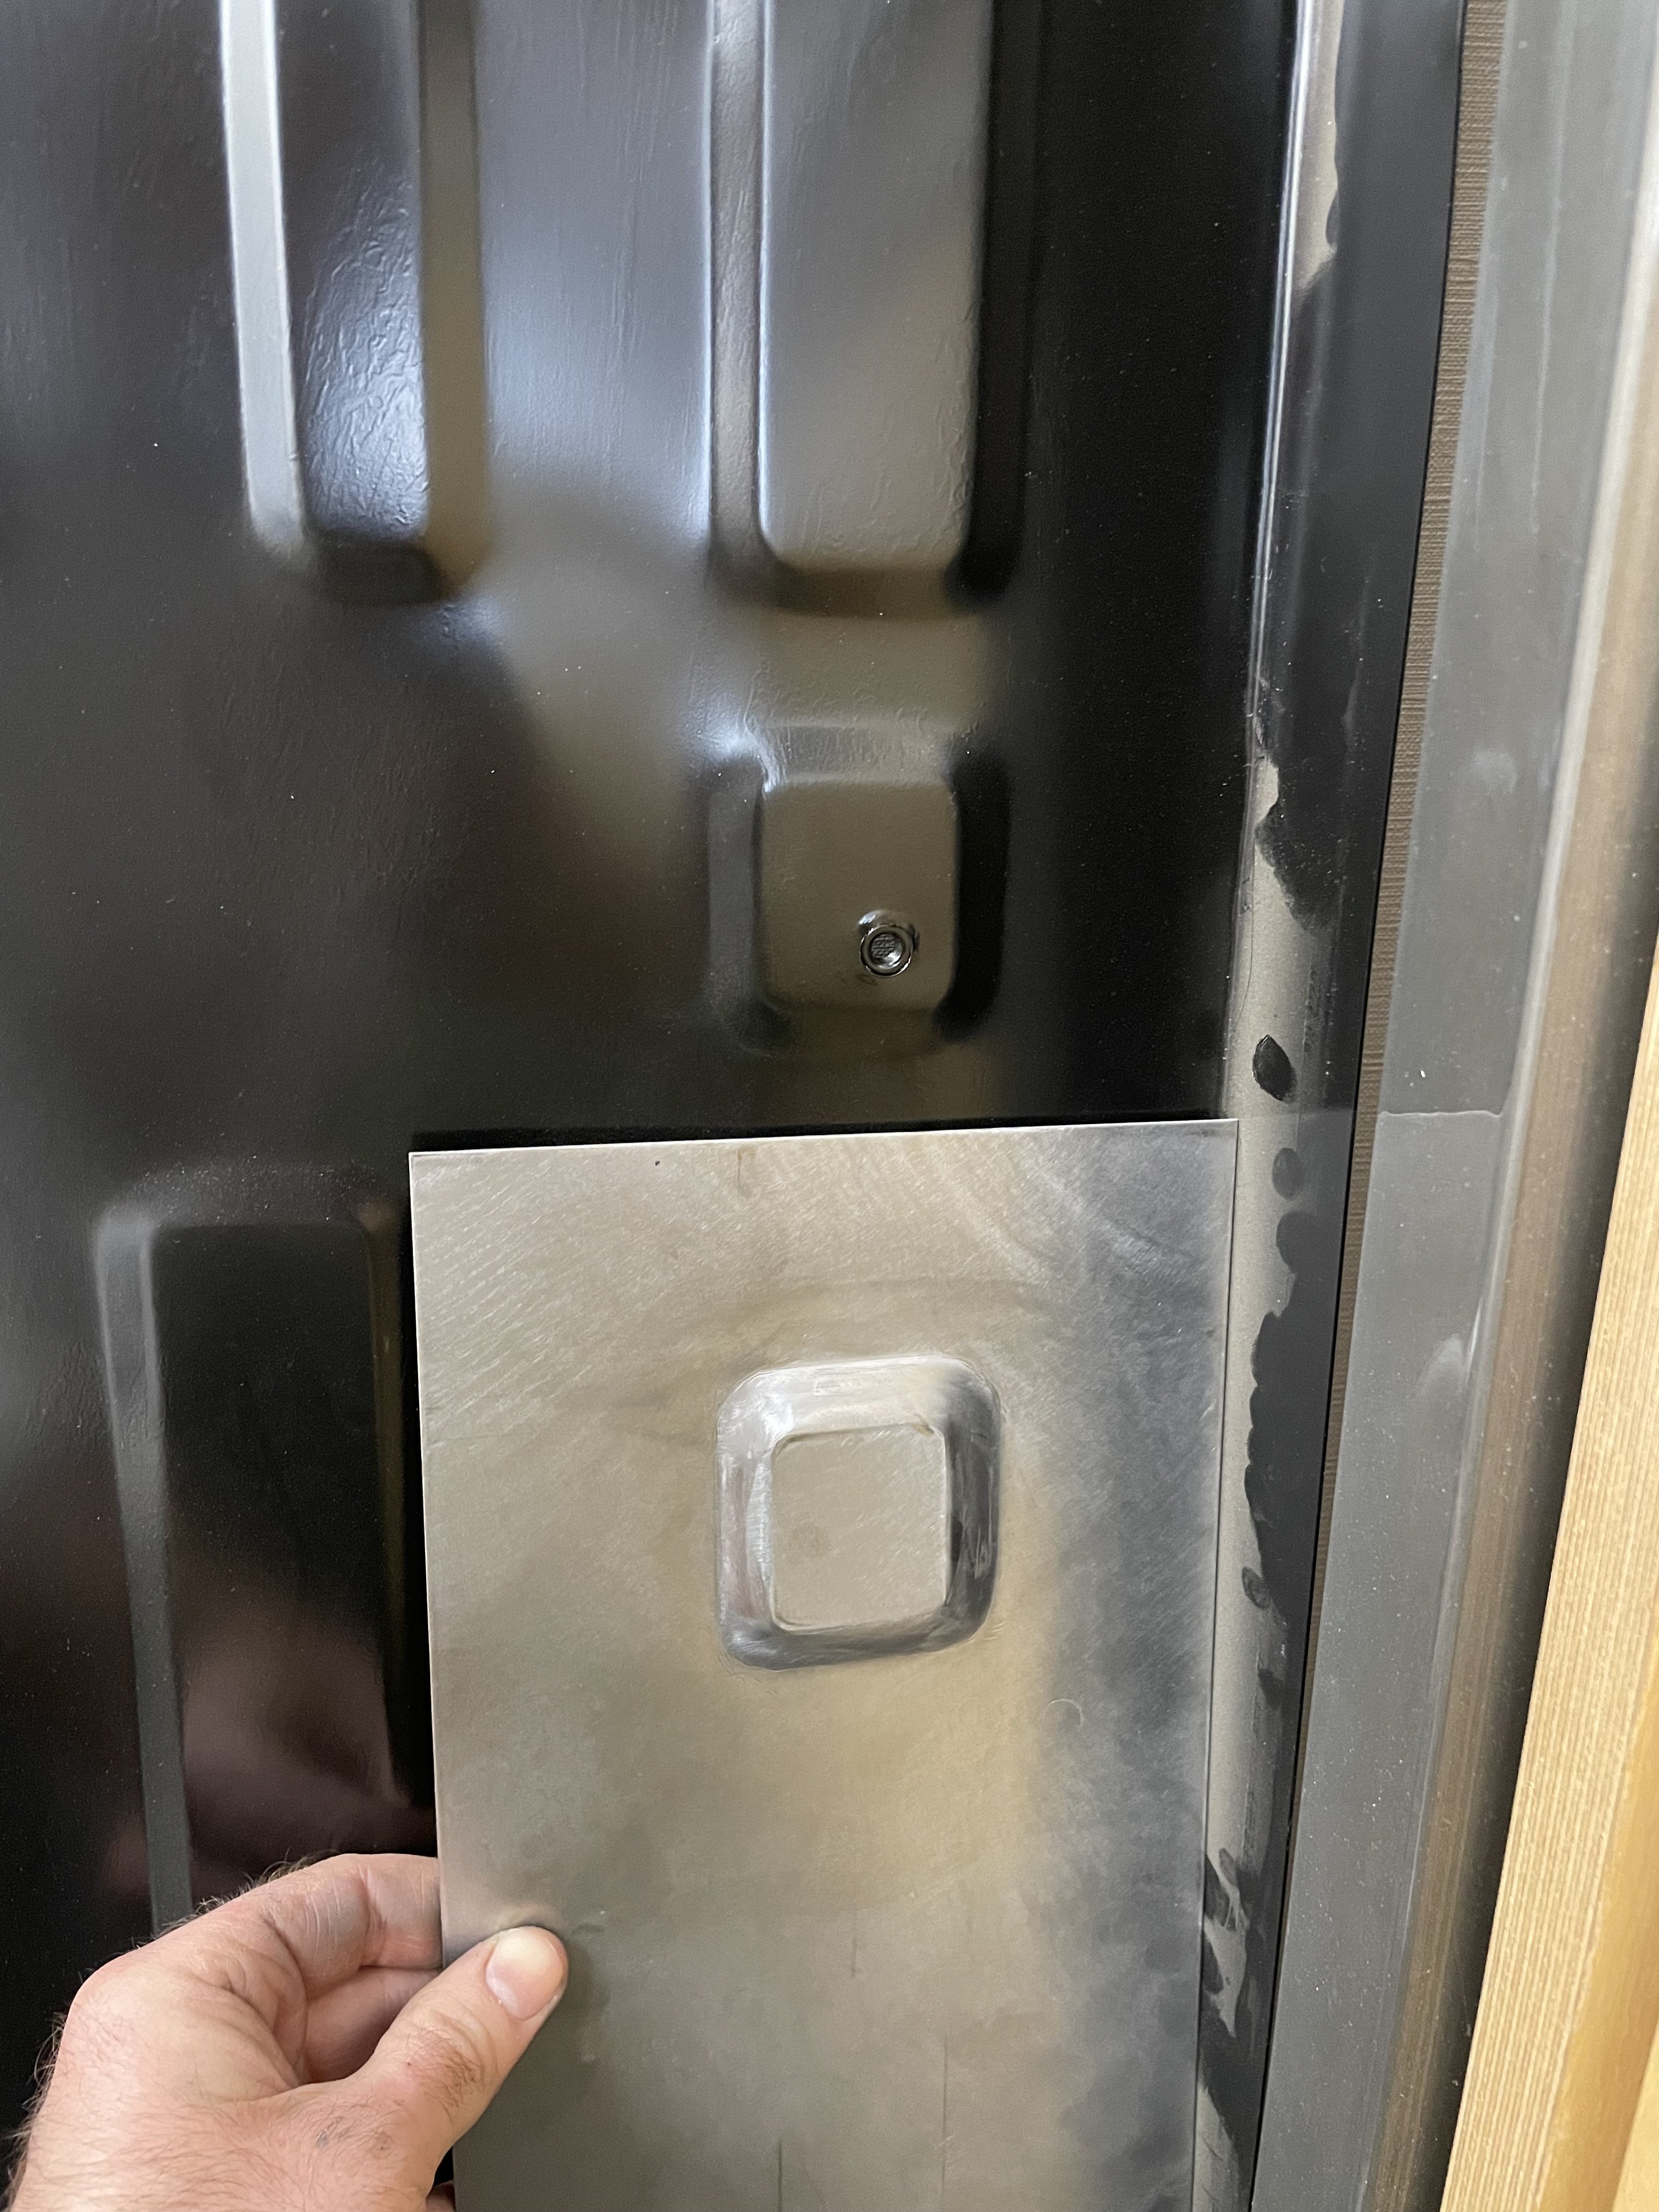
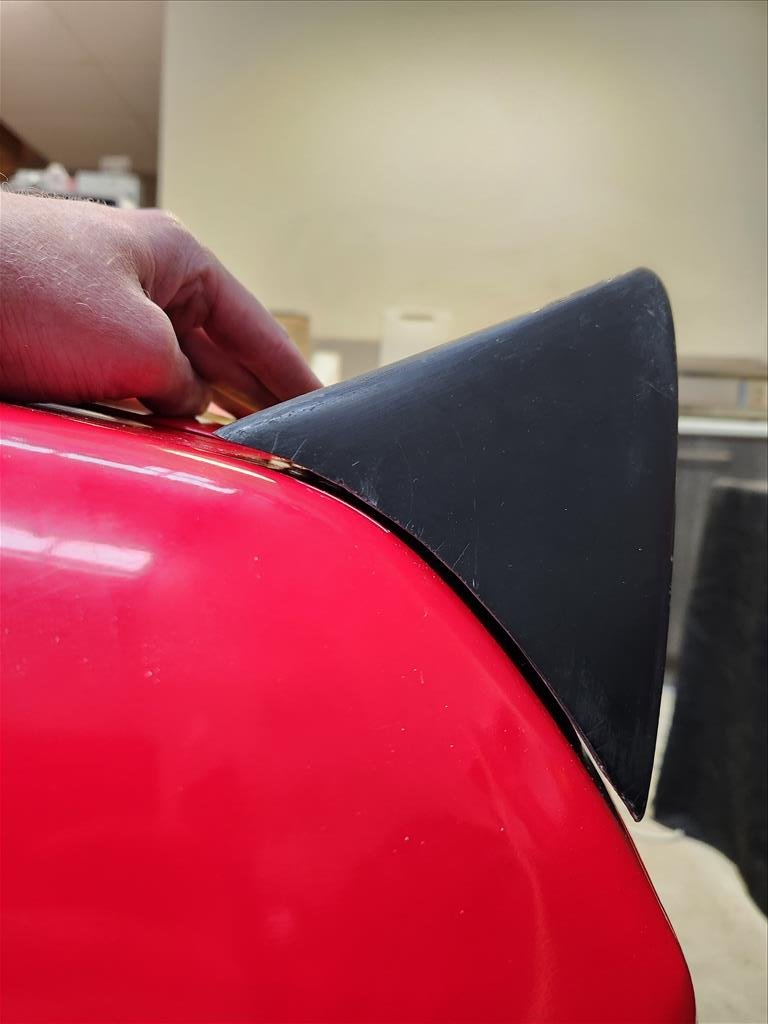
Cleaned it up as best I could around the edges, still a bit poo but oh well, good enough. Looks like it'll stay on there so that's the main thing. I slapped it and said "that's not going anywhere" so I can't see it falling off. One day I might paint the car so it's the same colour.
1 point
-
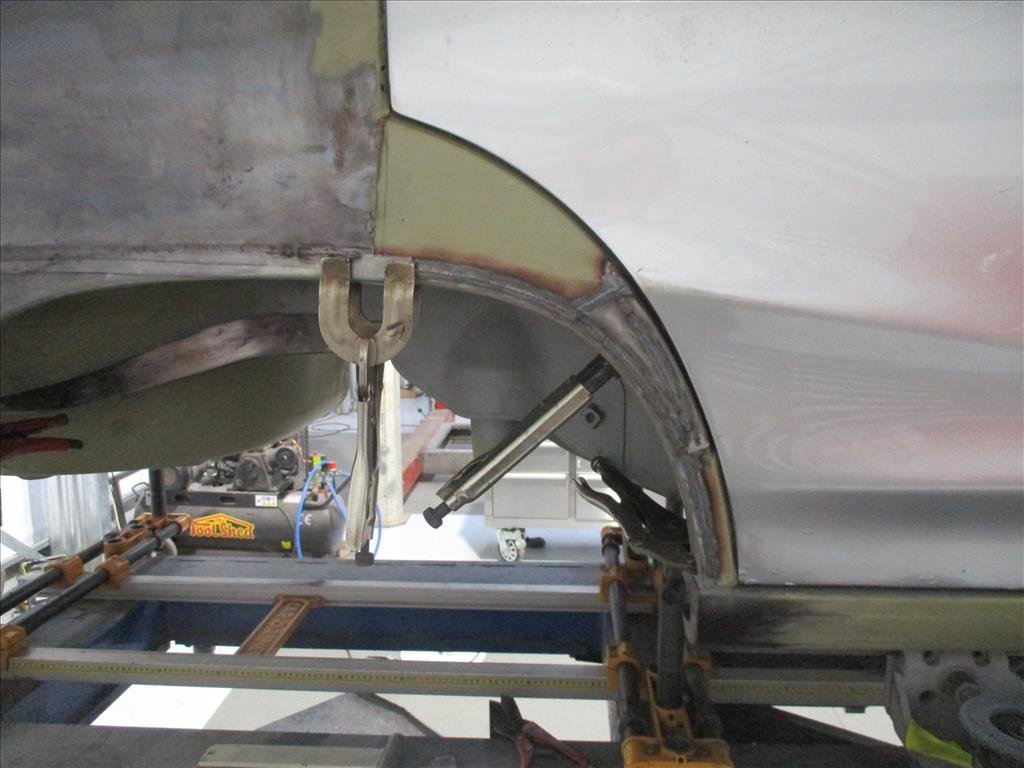
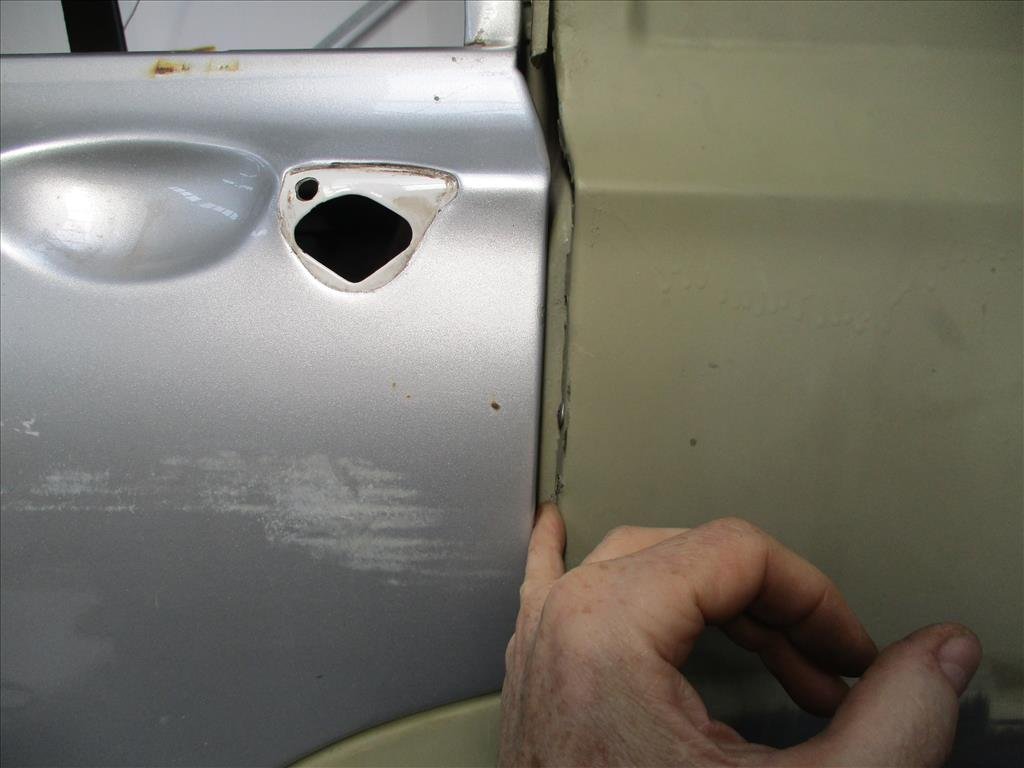
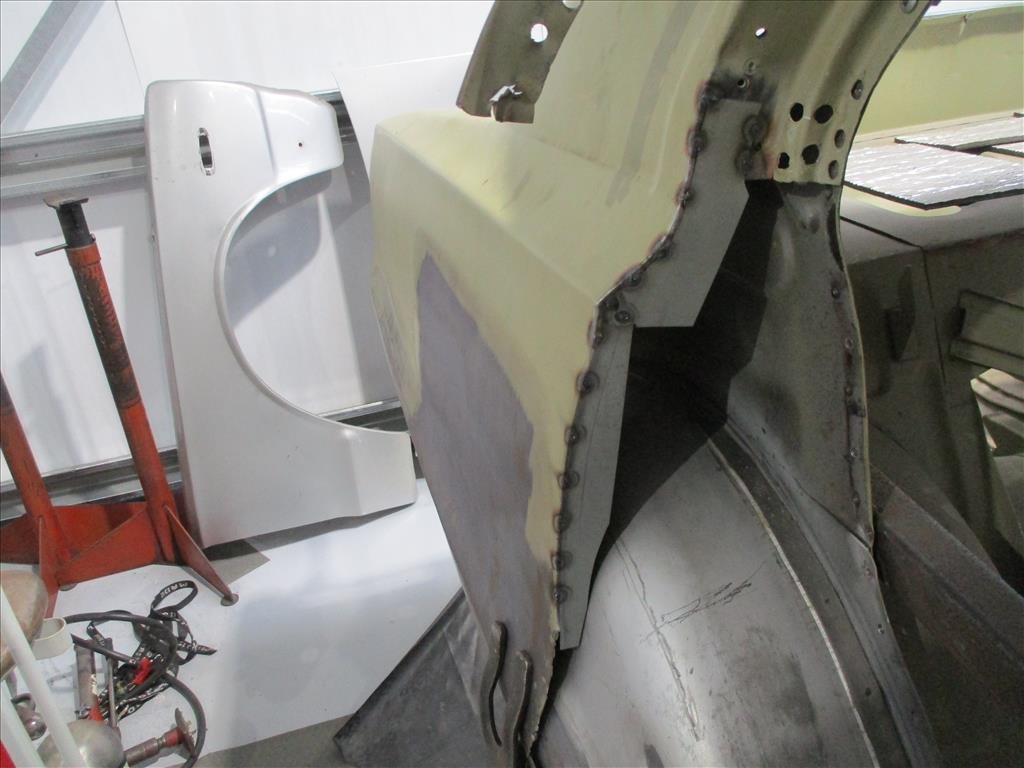
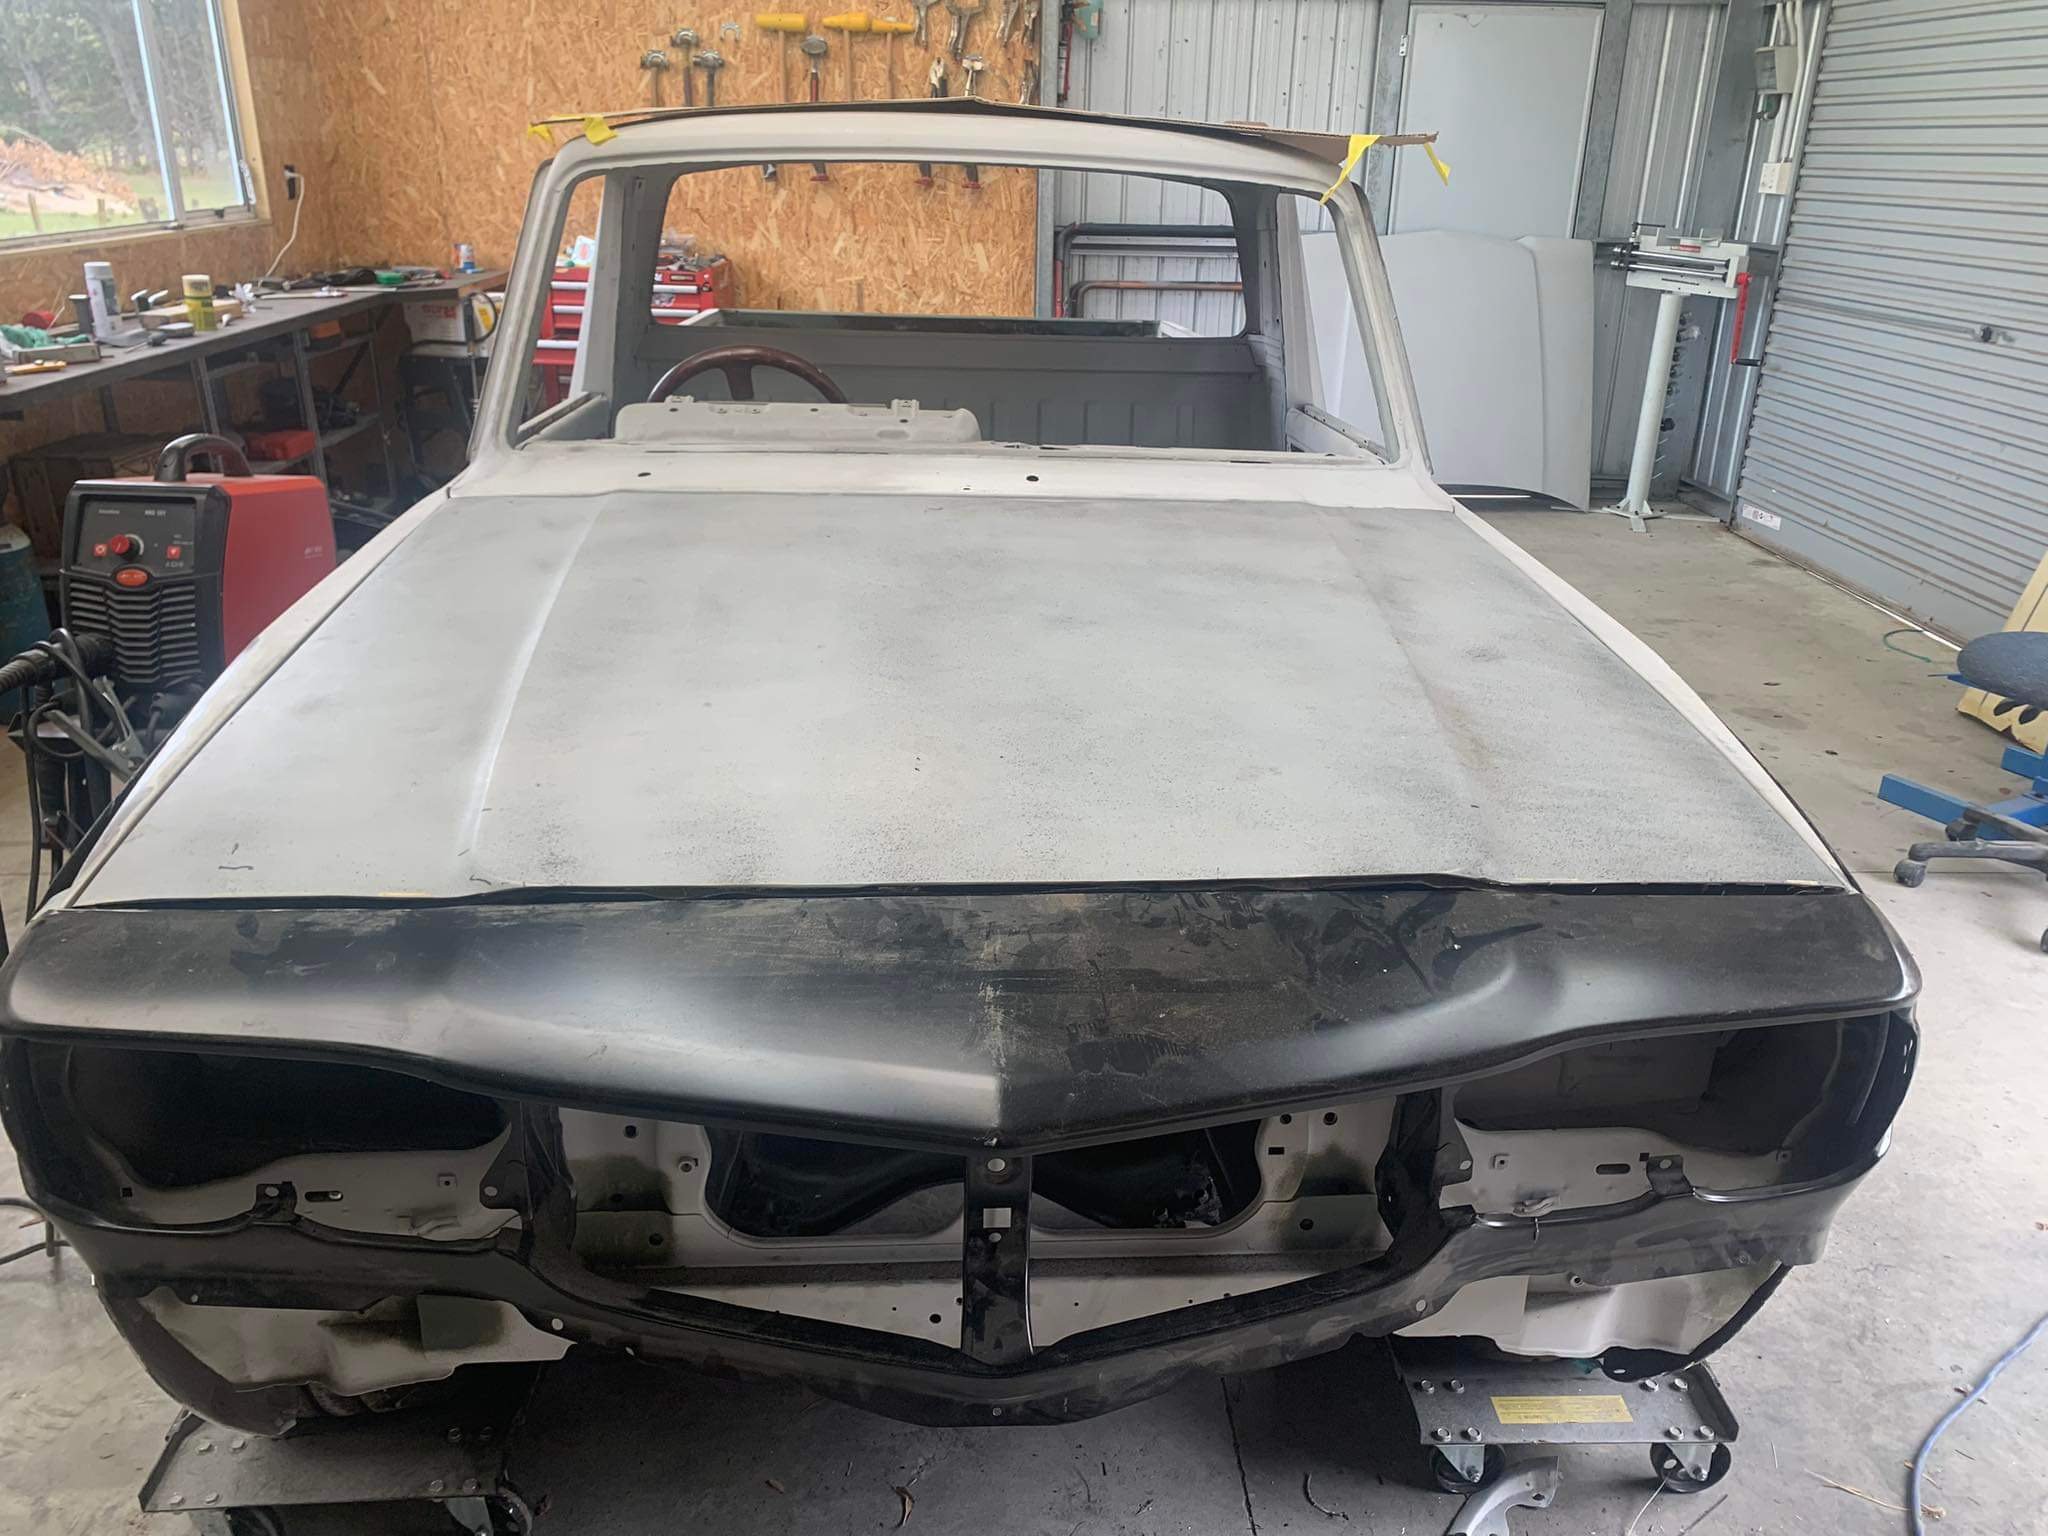
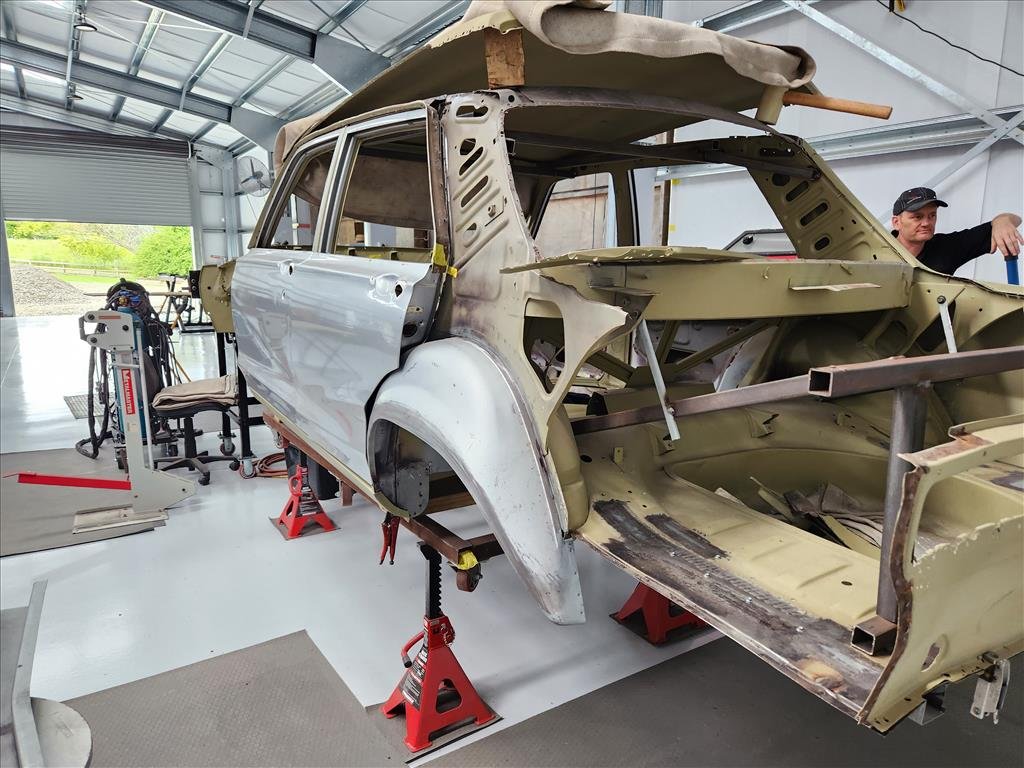
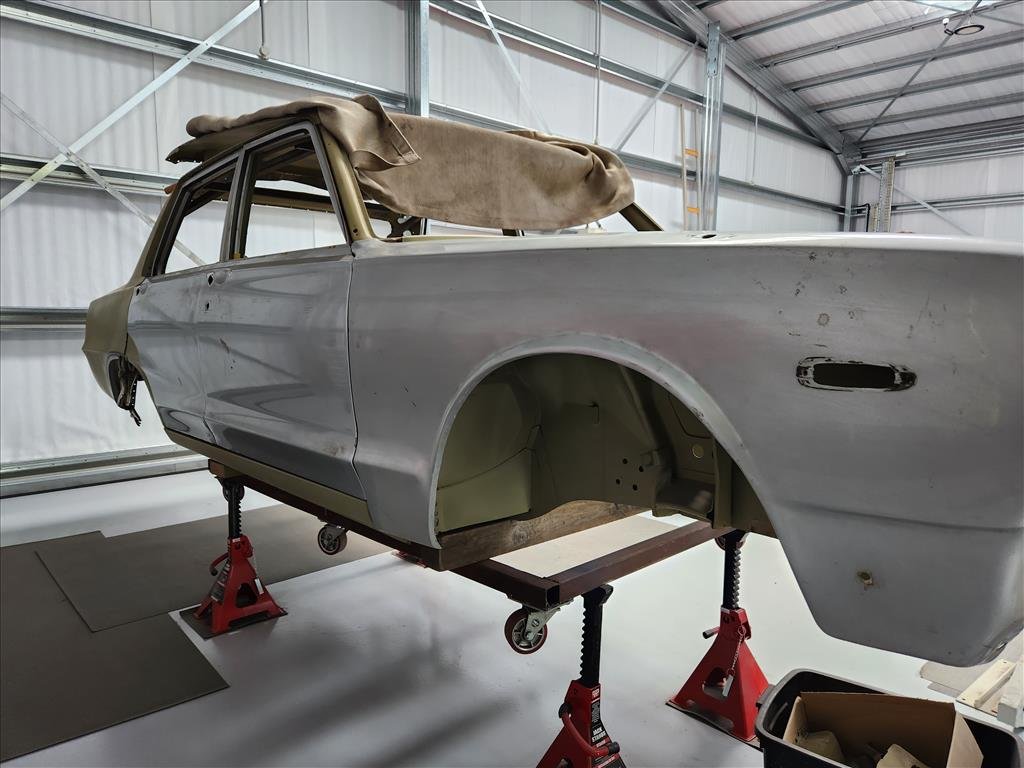
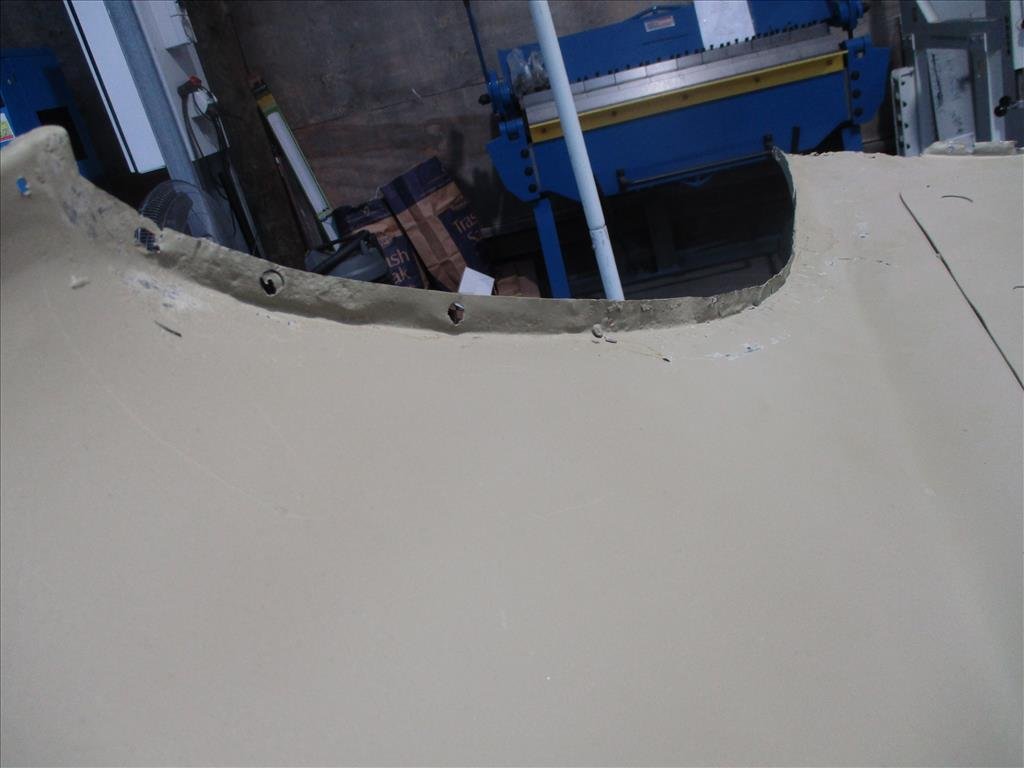
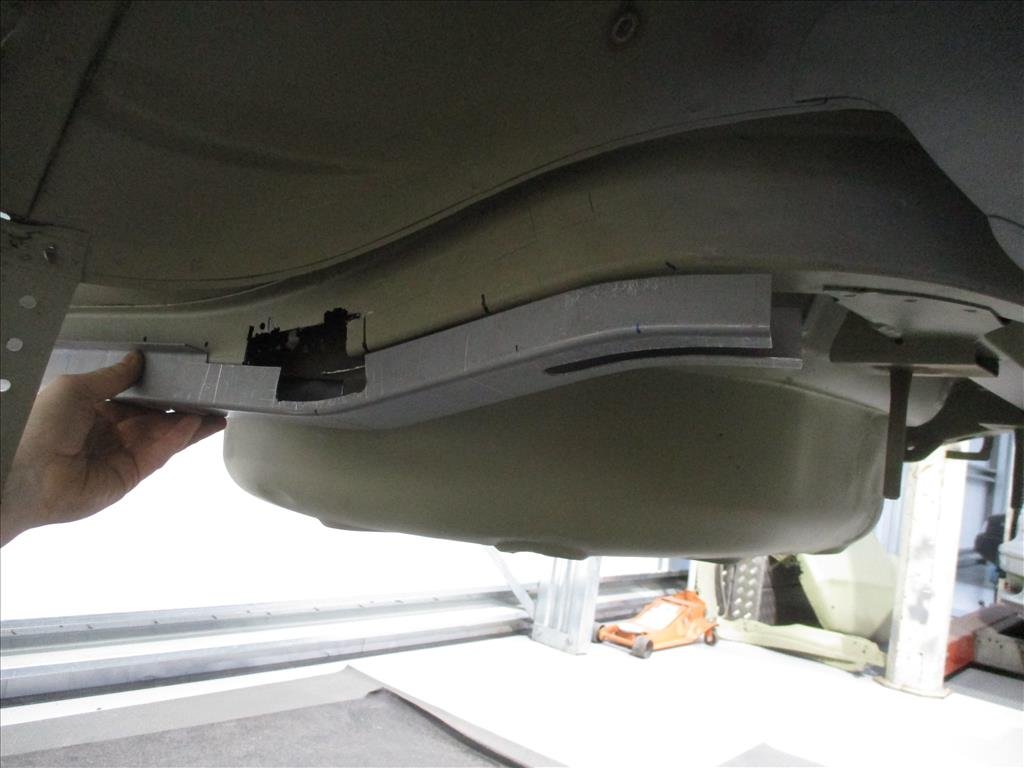
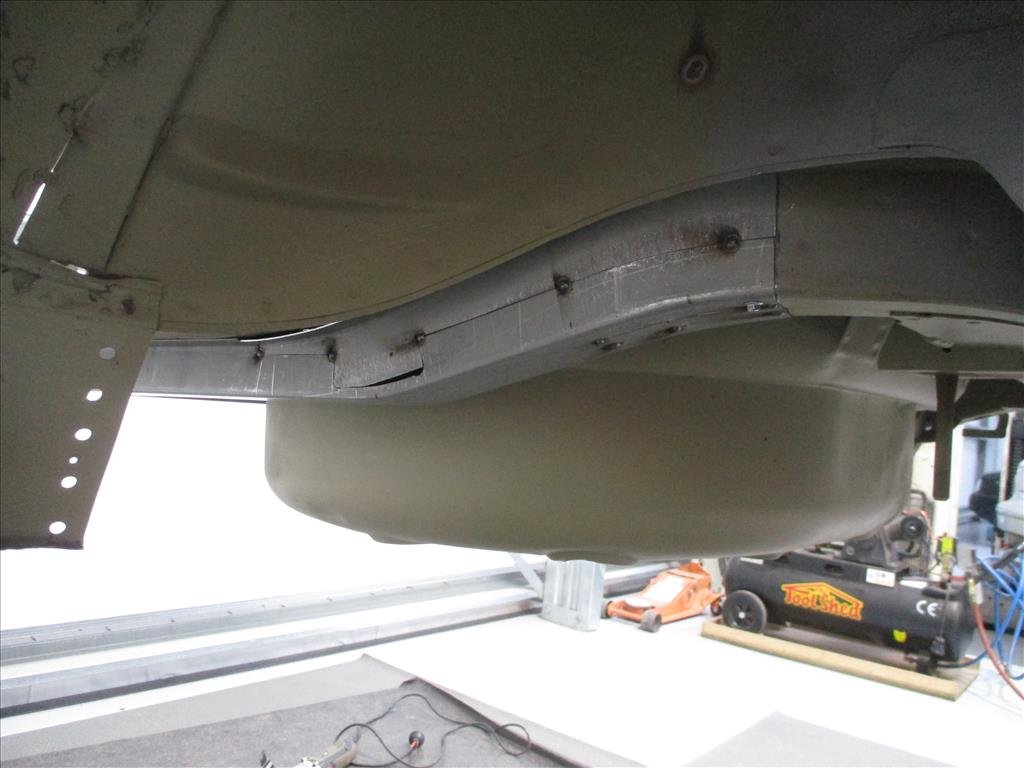
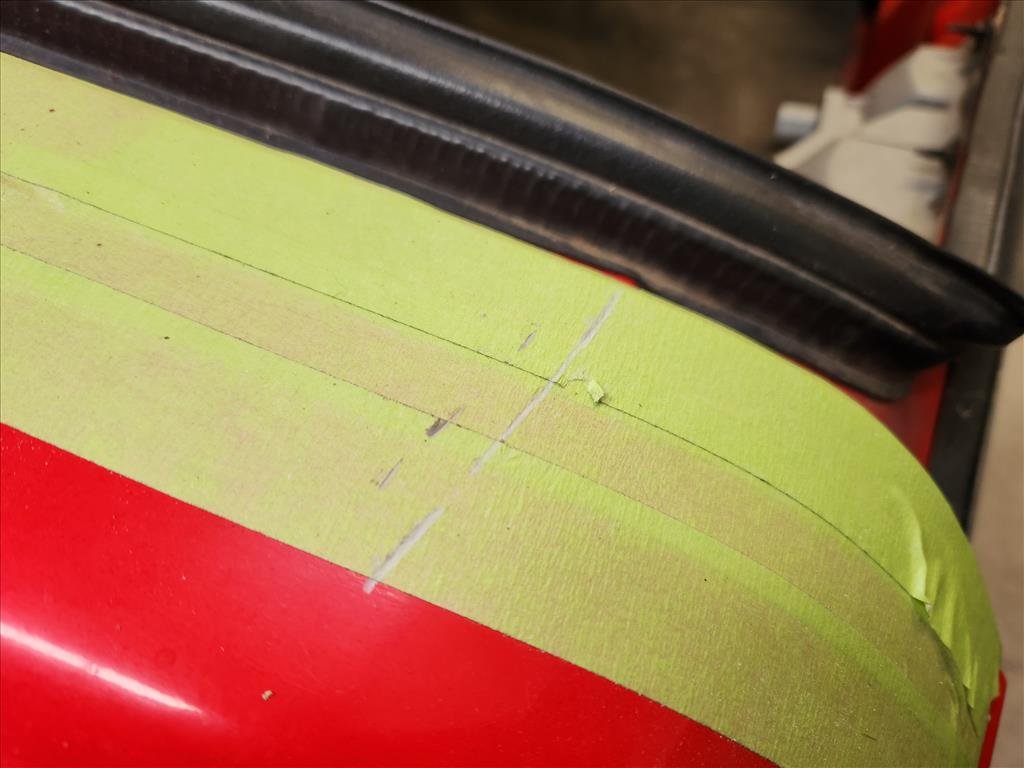
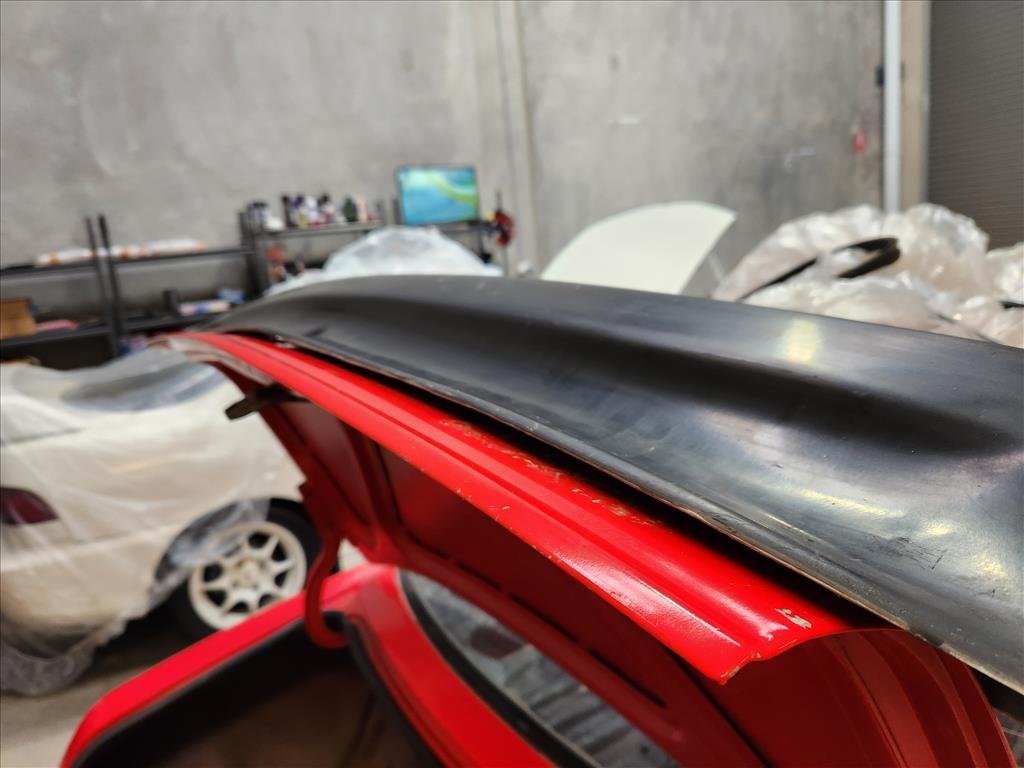
When I was back in NZ recently I made a trip down to see the old girl at panel Barry's shop. Nice place he's got and it's sure a long way out of the way! Can't imagine the fun transporters have going down there. She's come a long way and yet, there's a long way to go. We went over what's been done and what's still to be done and he was happy to show me things that he's worked on and the tools etc, nice guy and extremely knowledgeable. I'm happy the car is in his hands. Next step once he has completed up the other rear arch edges and lined them all up is to put the car on a chassis machine to get it as straight as possible, he happens to have one in-house. While that process is taking place the doors will be dipped to see what we're working with as a couple of them are messy around the bottom and one for sure is definitely full of bog.
1 point
-
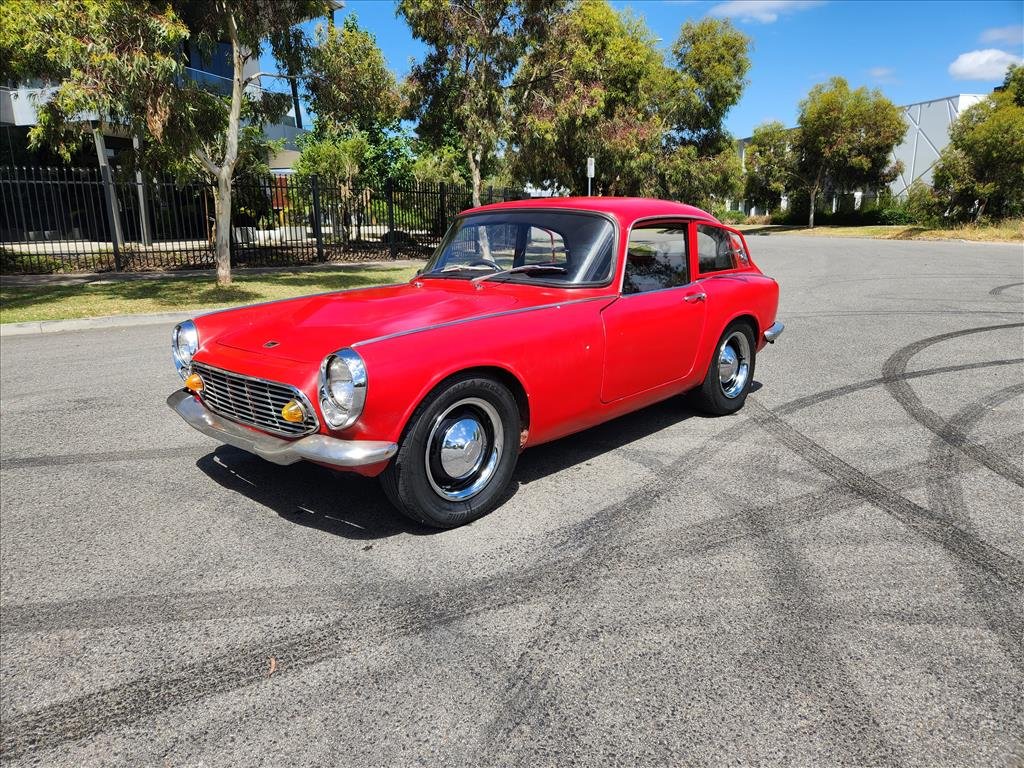
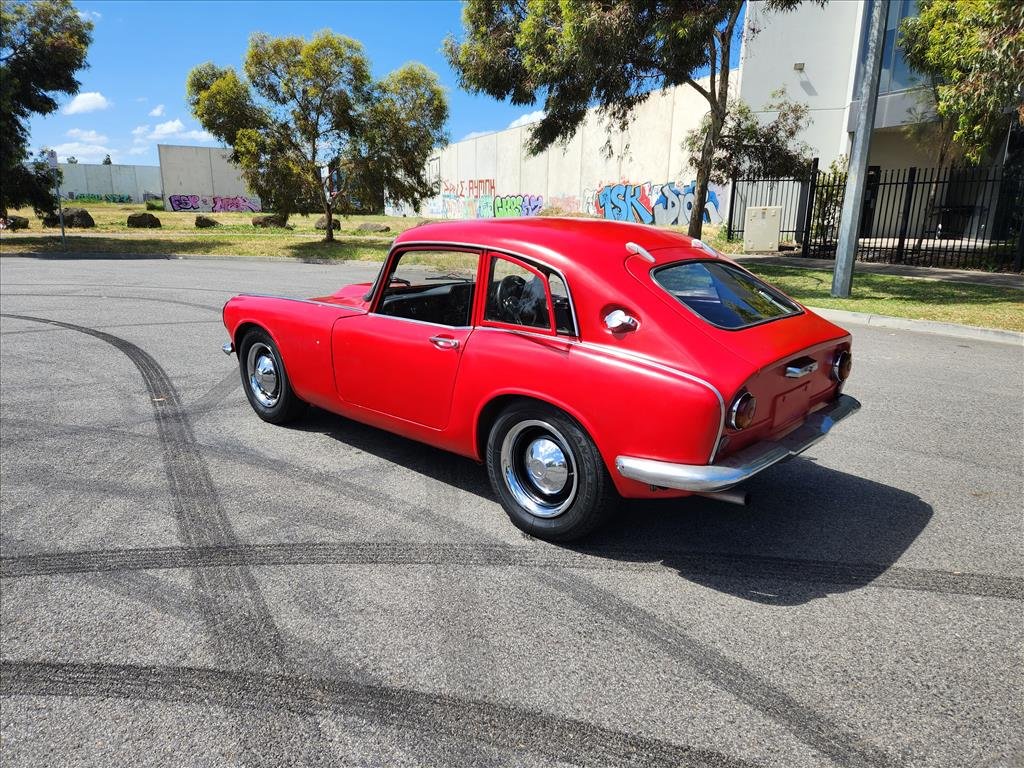
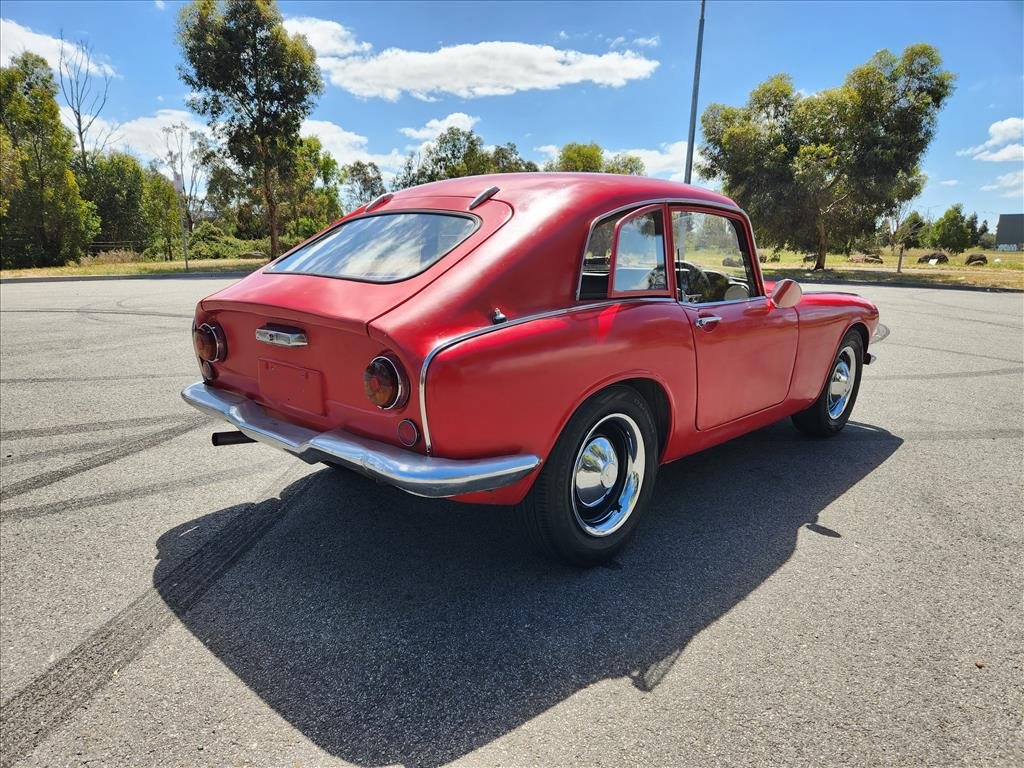
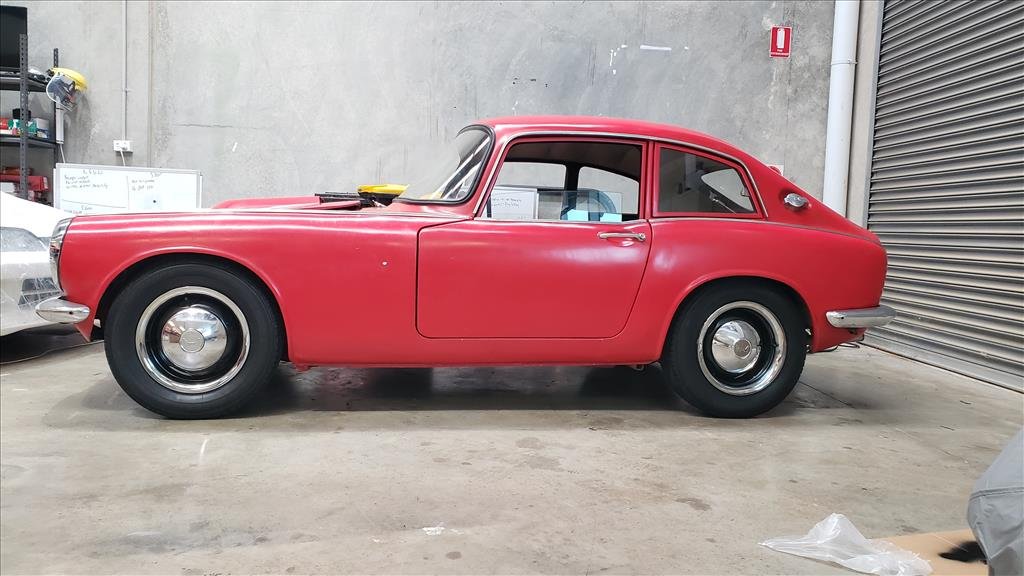
Not much to update recently as I've been doing things on other projects too new for Oldschool but today I cleaned up Barry the S600 and put some of the interior back together as I'll be looking to sell it soon. Just don't get the time to work on it with the other projects and honestly it was more of an impulse purchase being that my mate had it available. So here's some beauty shots.. if anyone is interested or knows someone that may be, I'll be happy to assist with shipping to NZ.
1 point
-
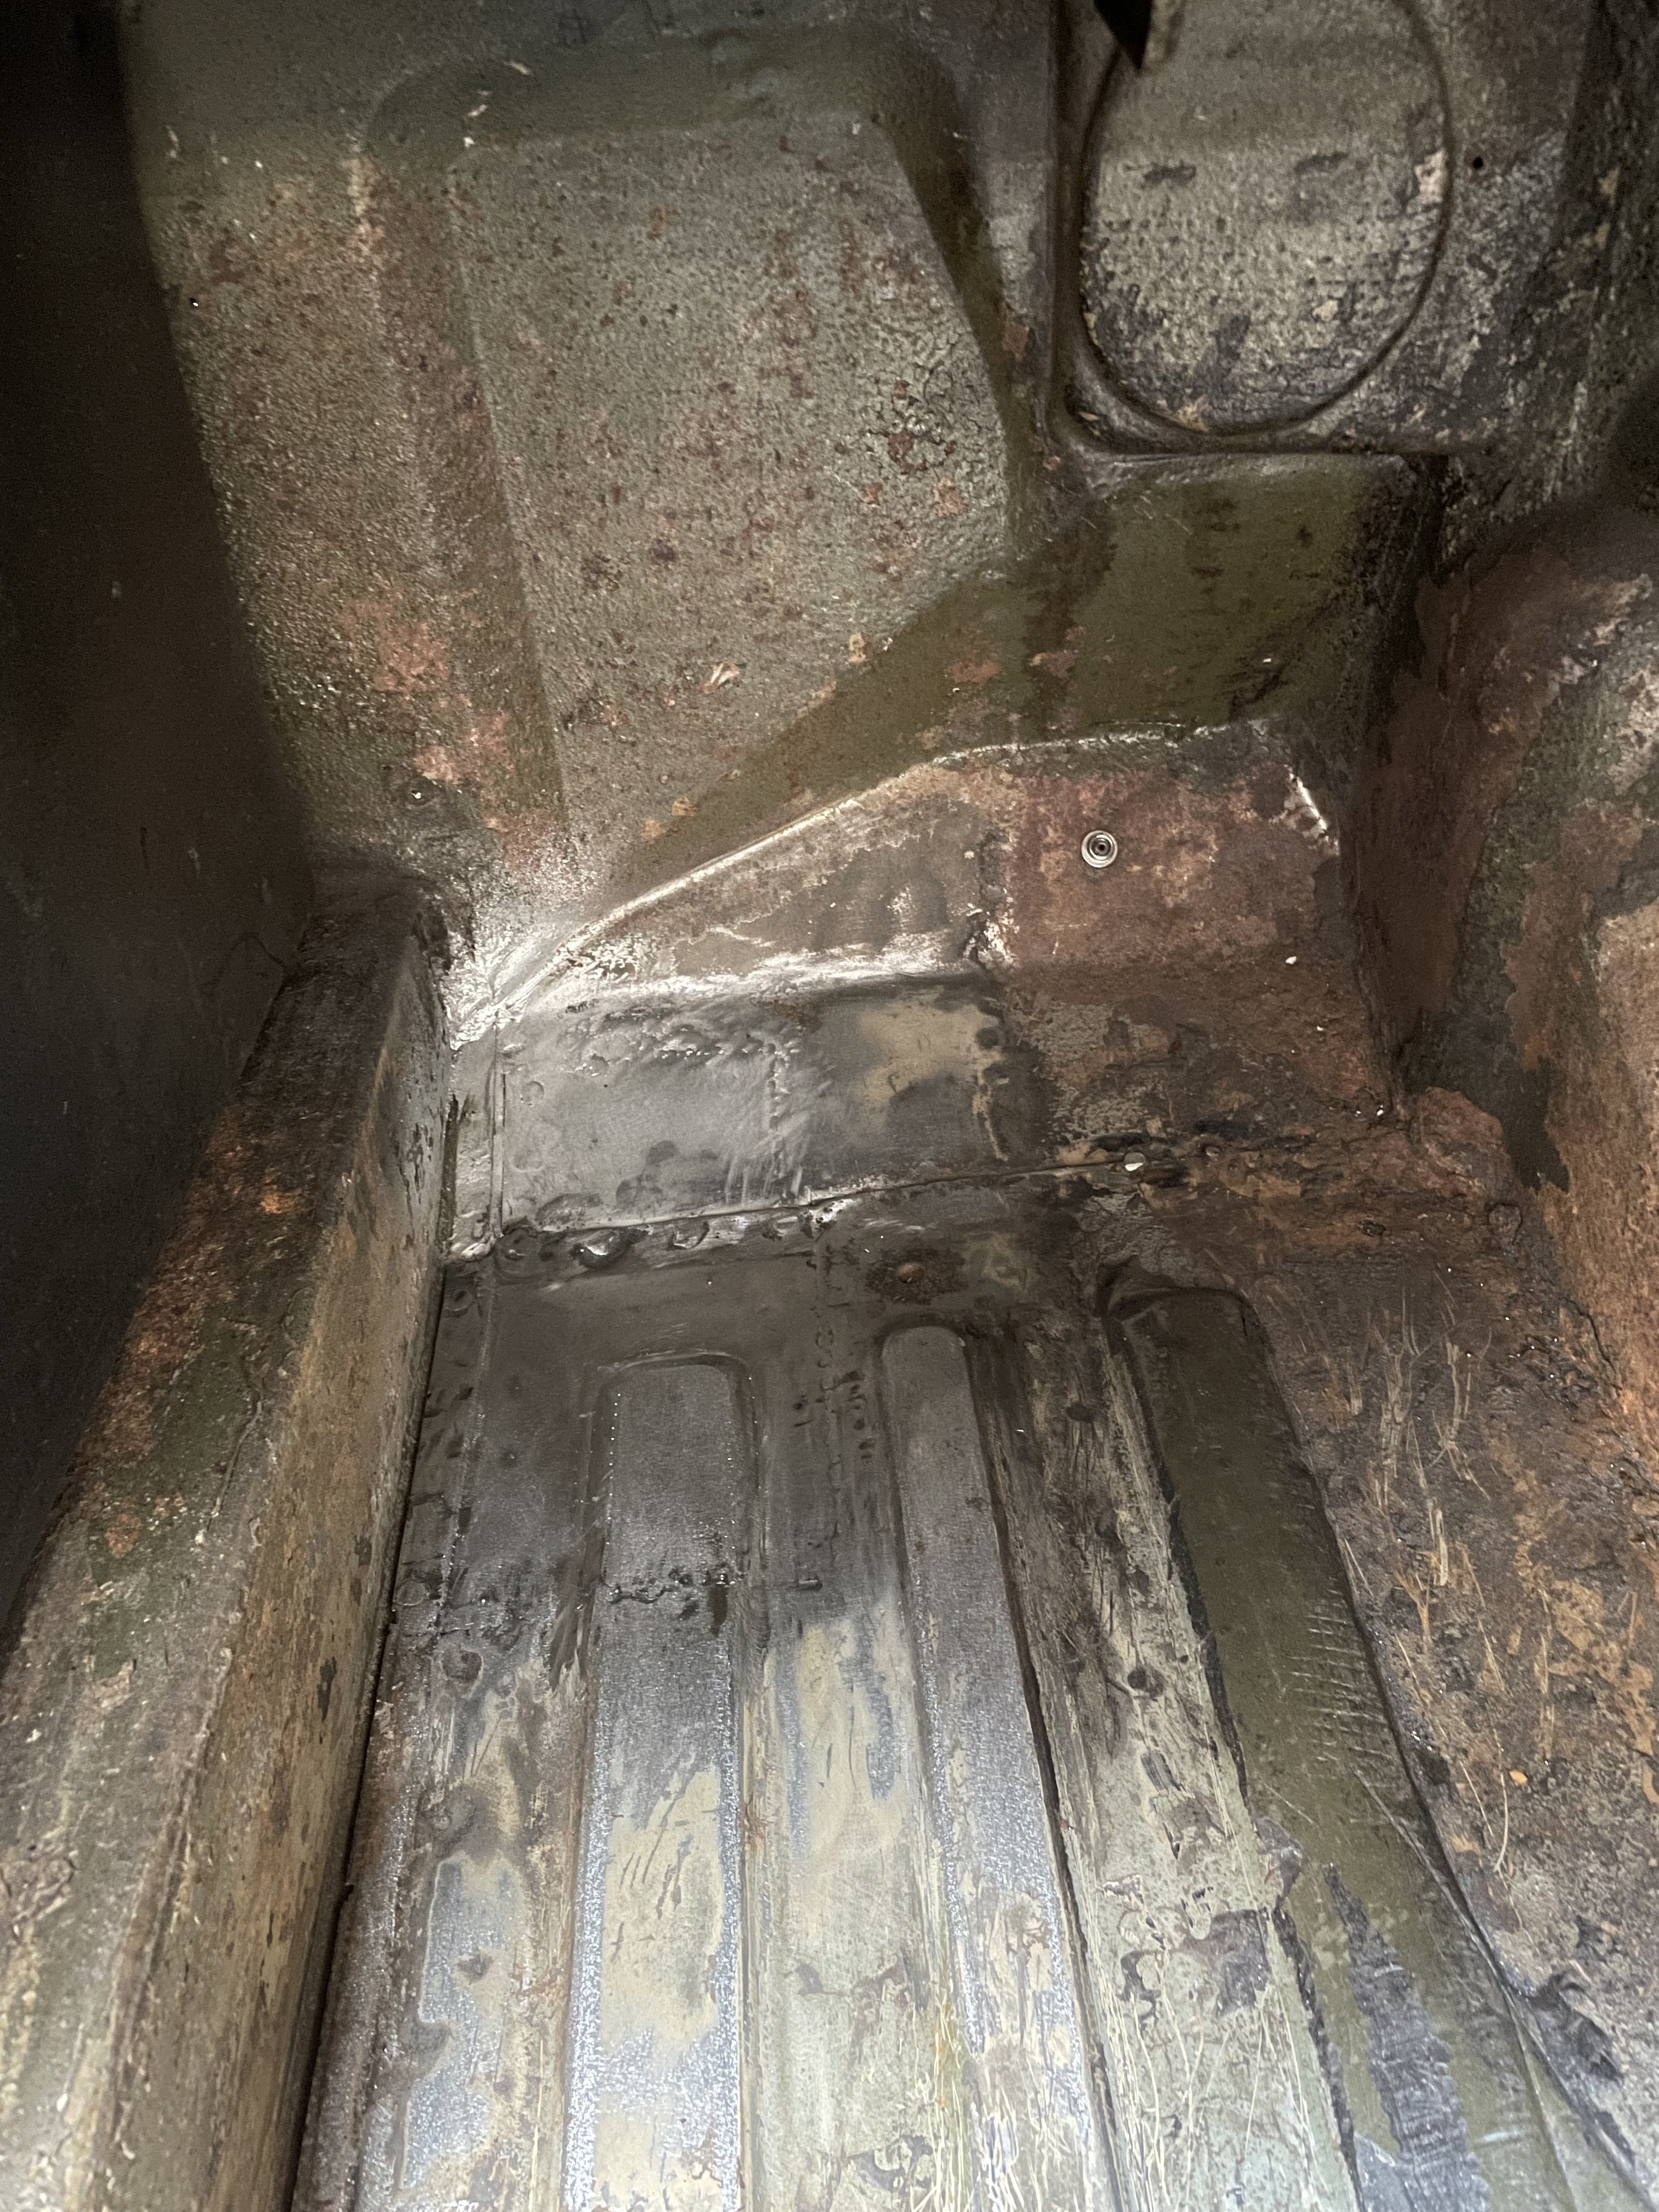
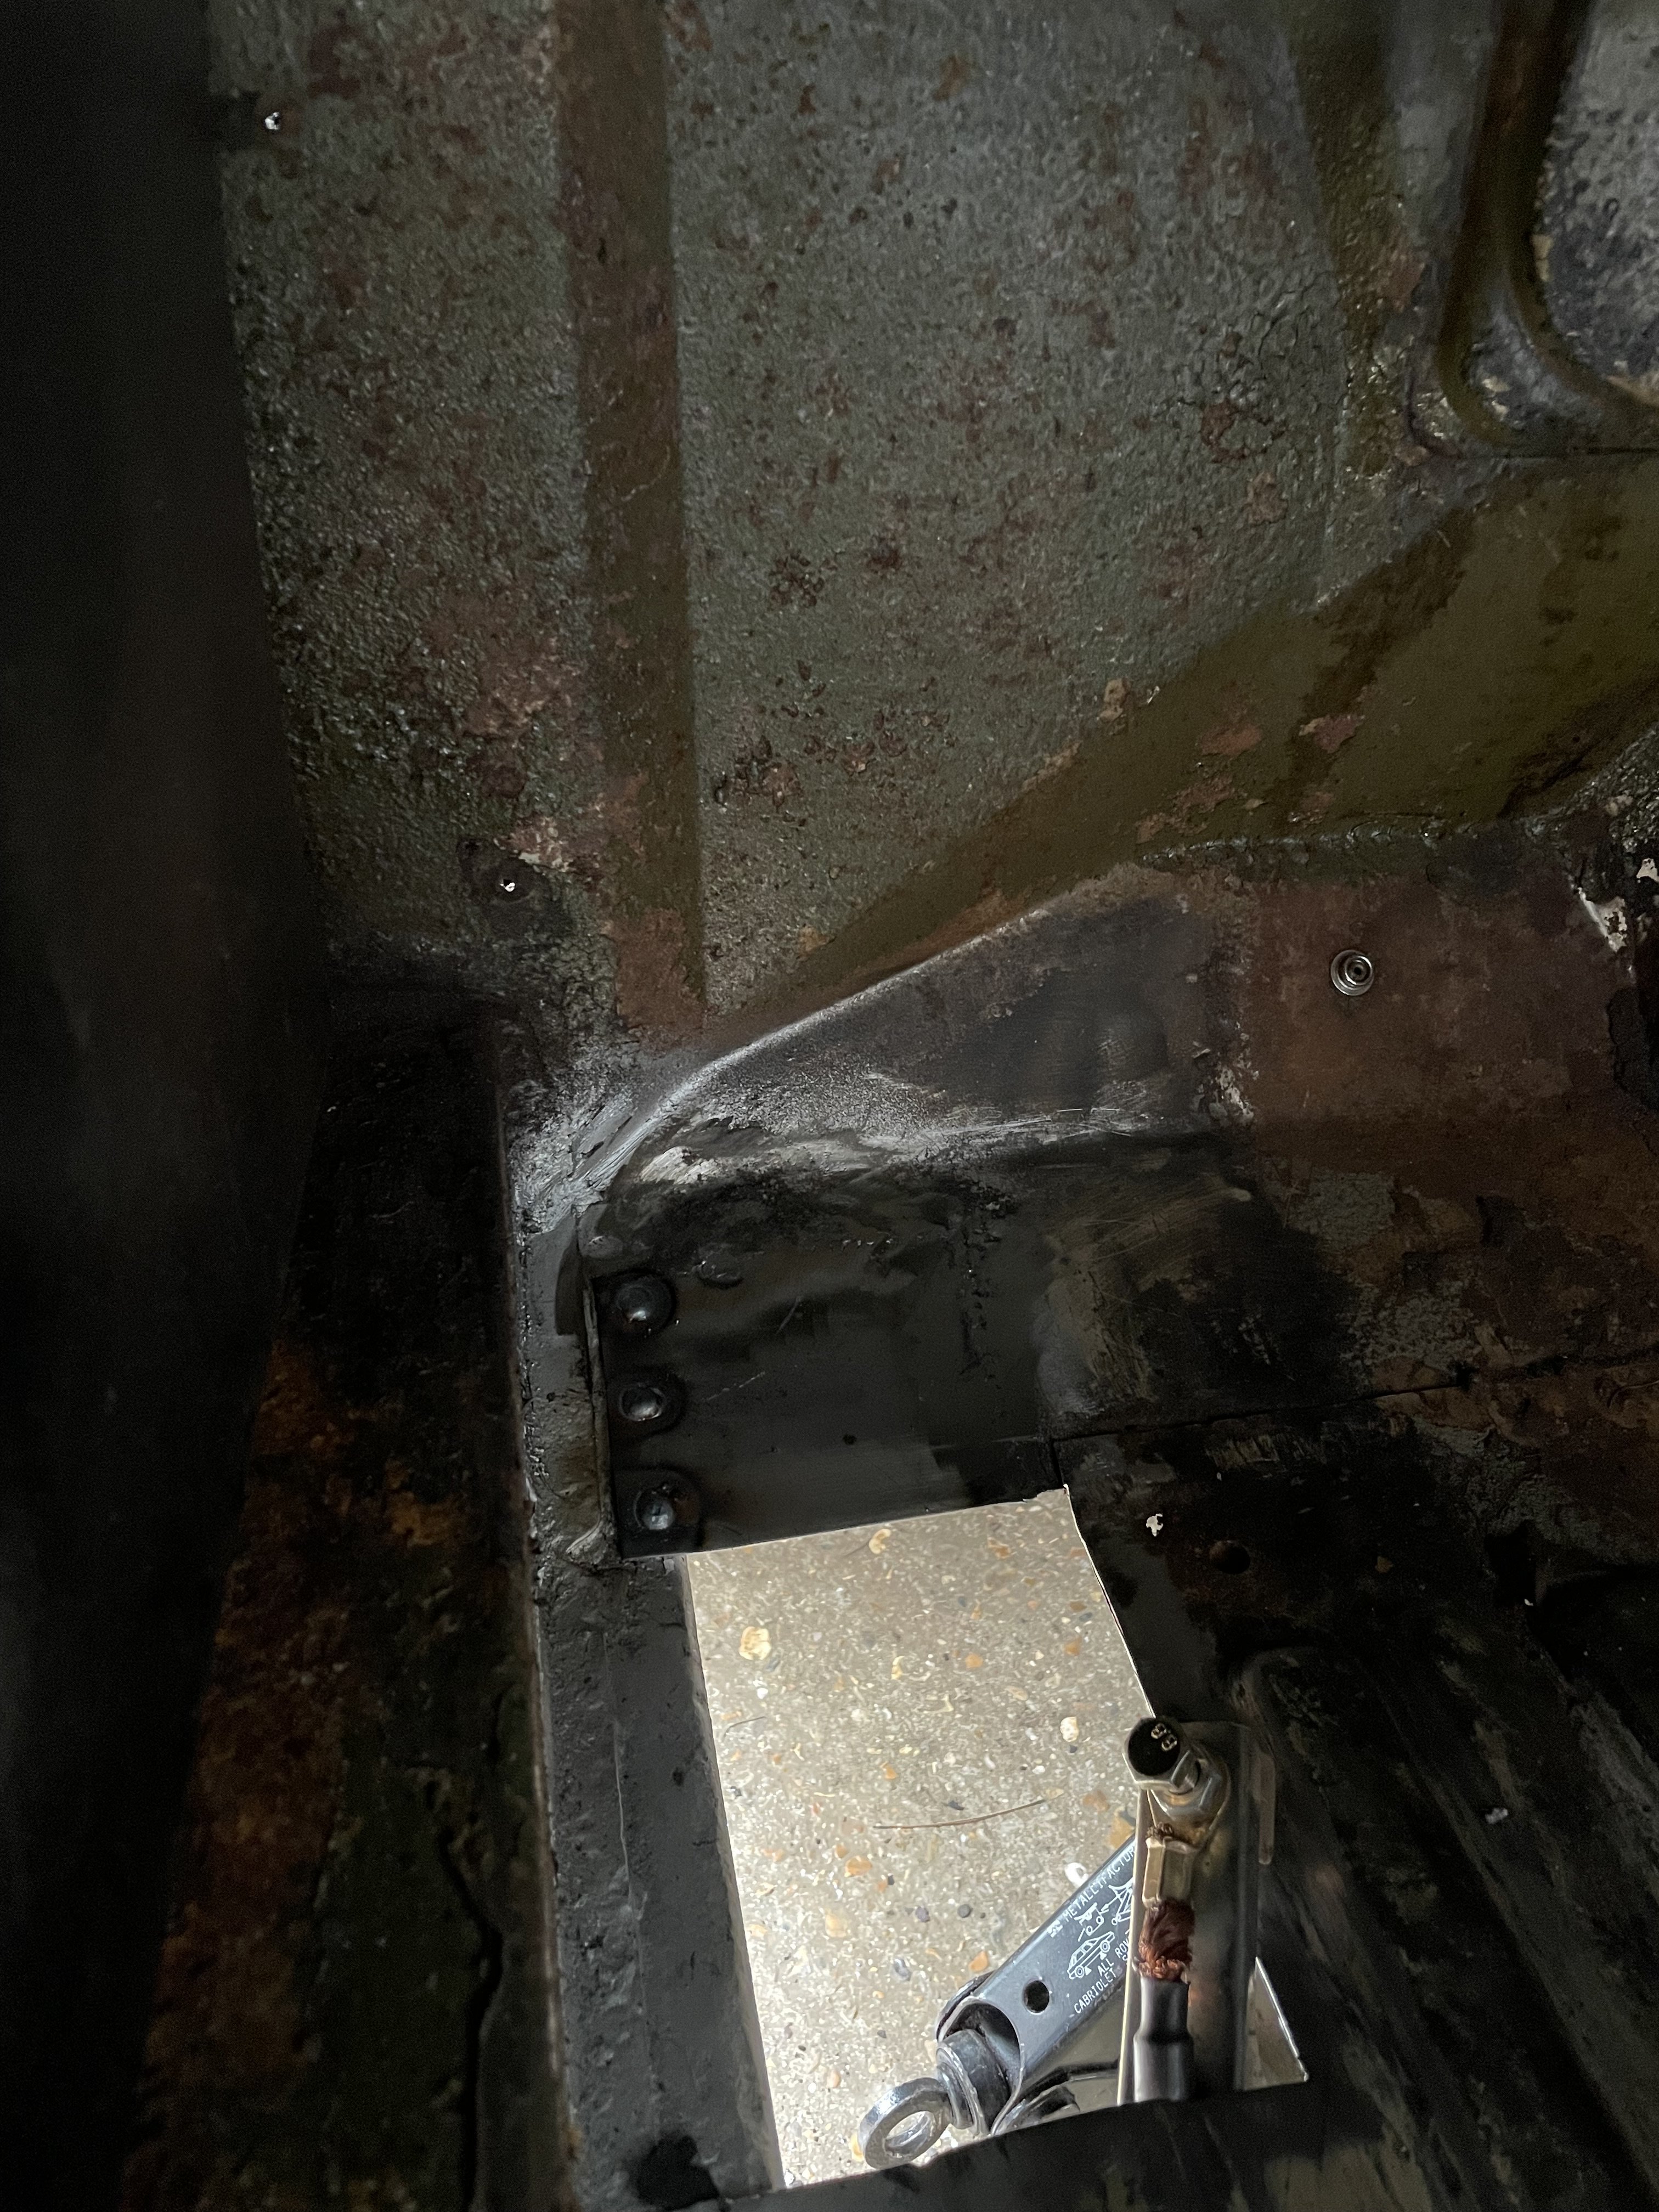
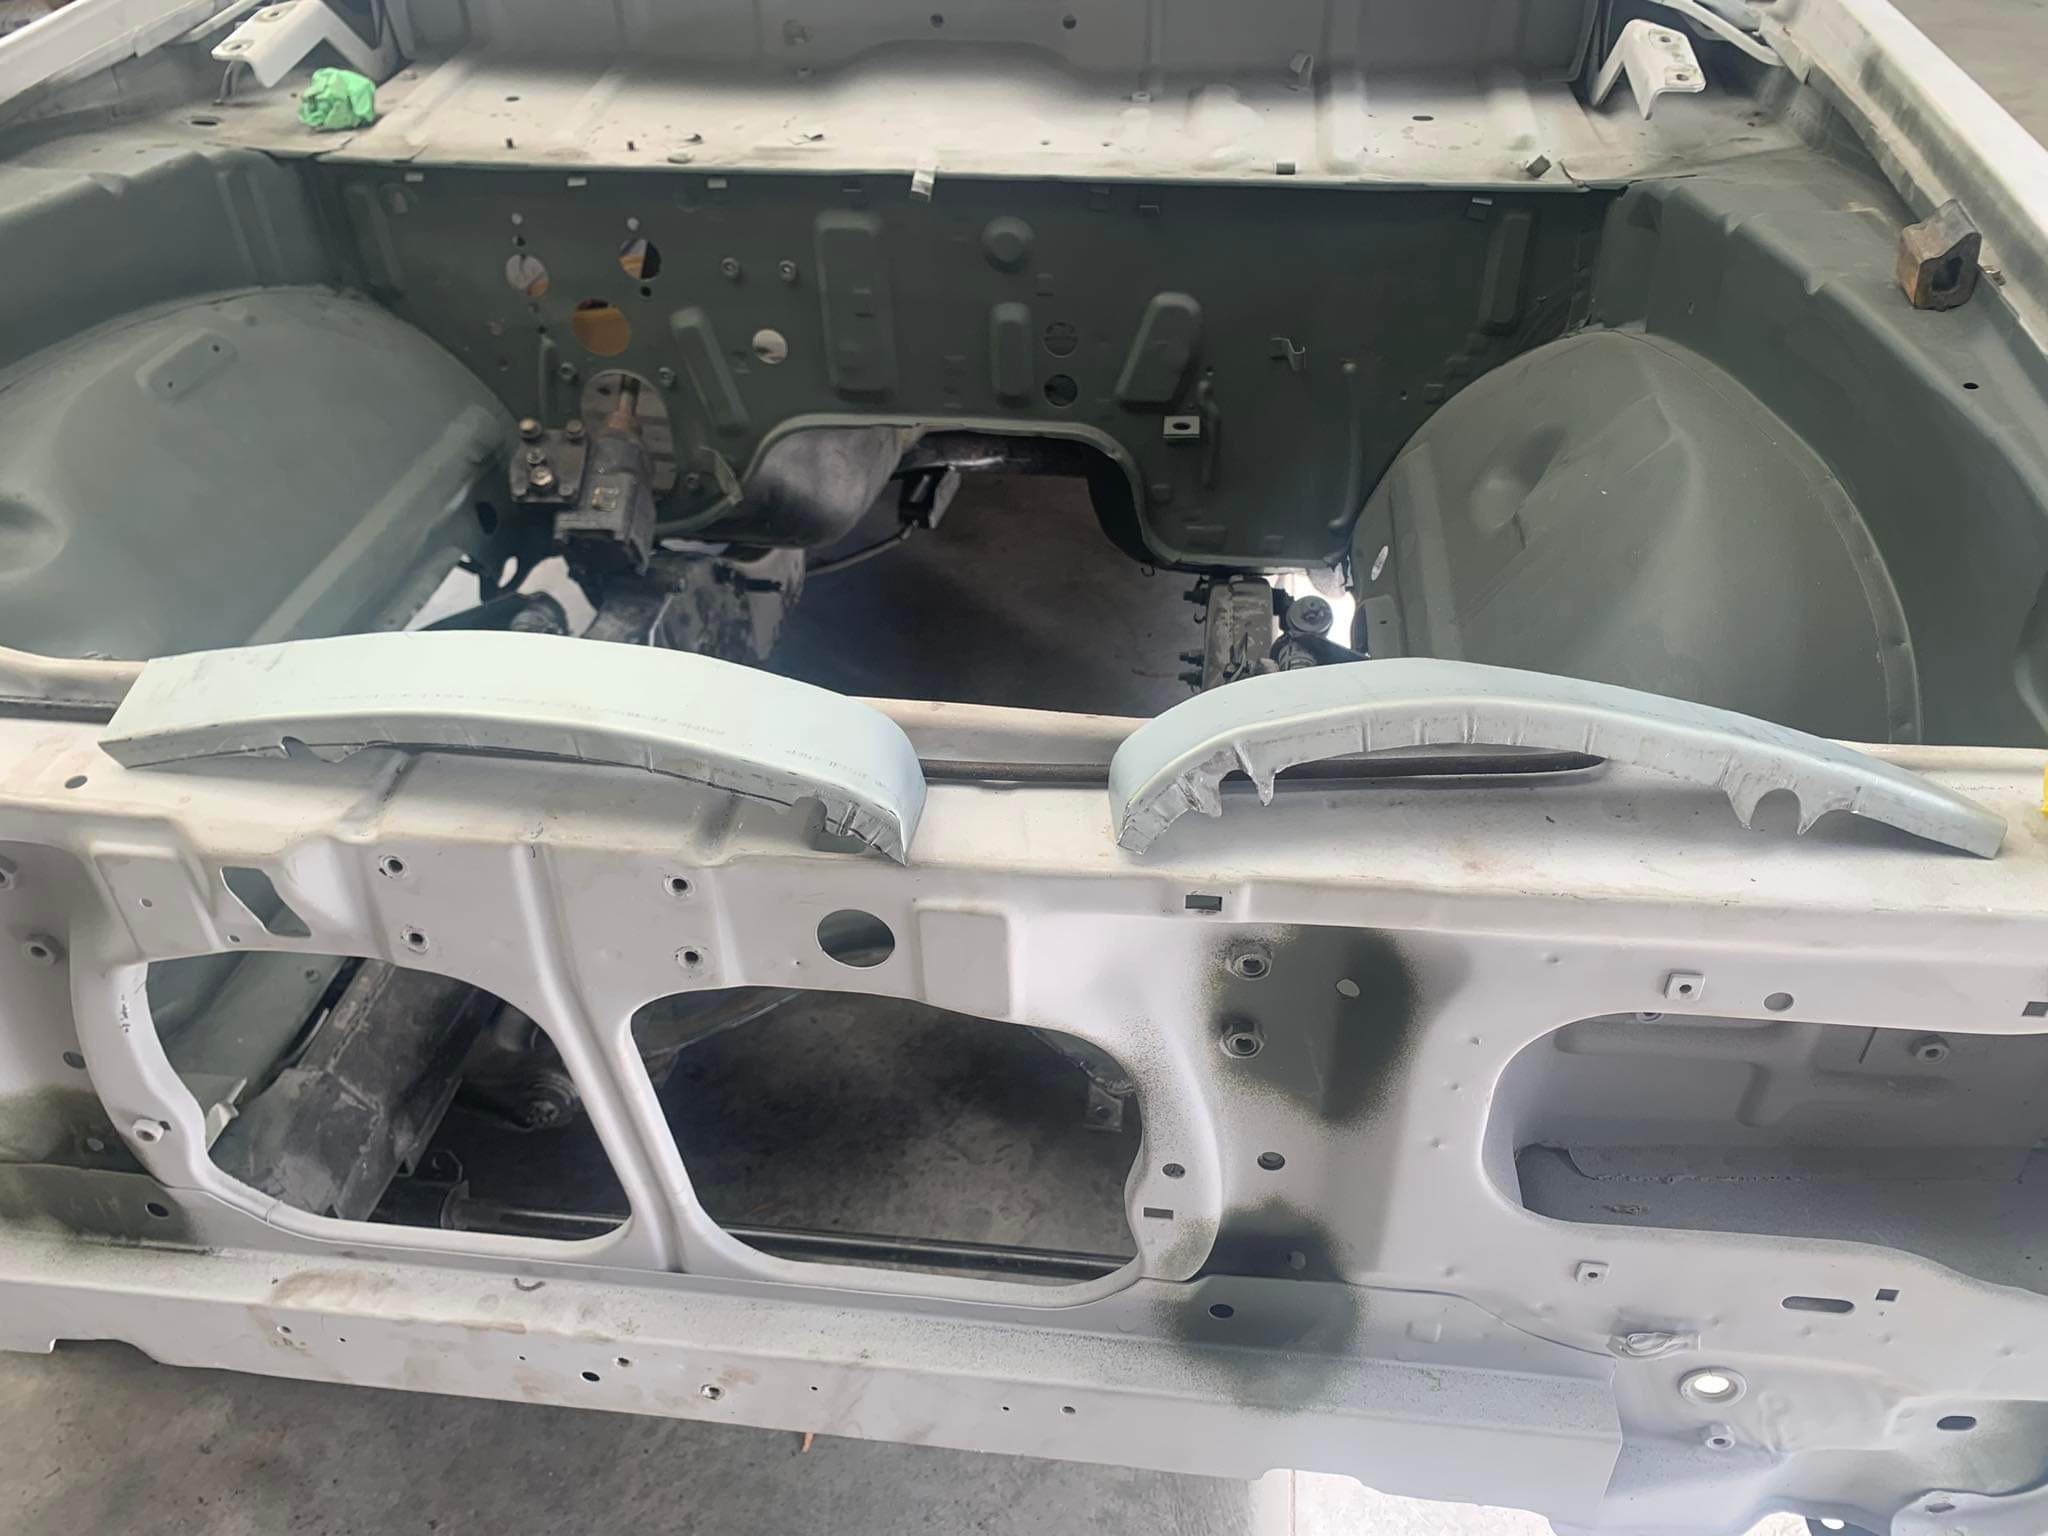
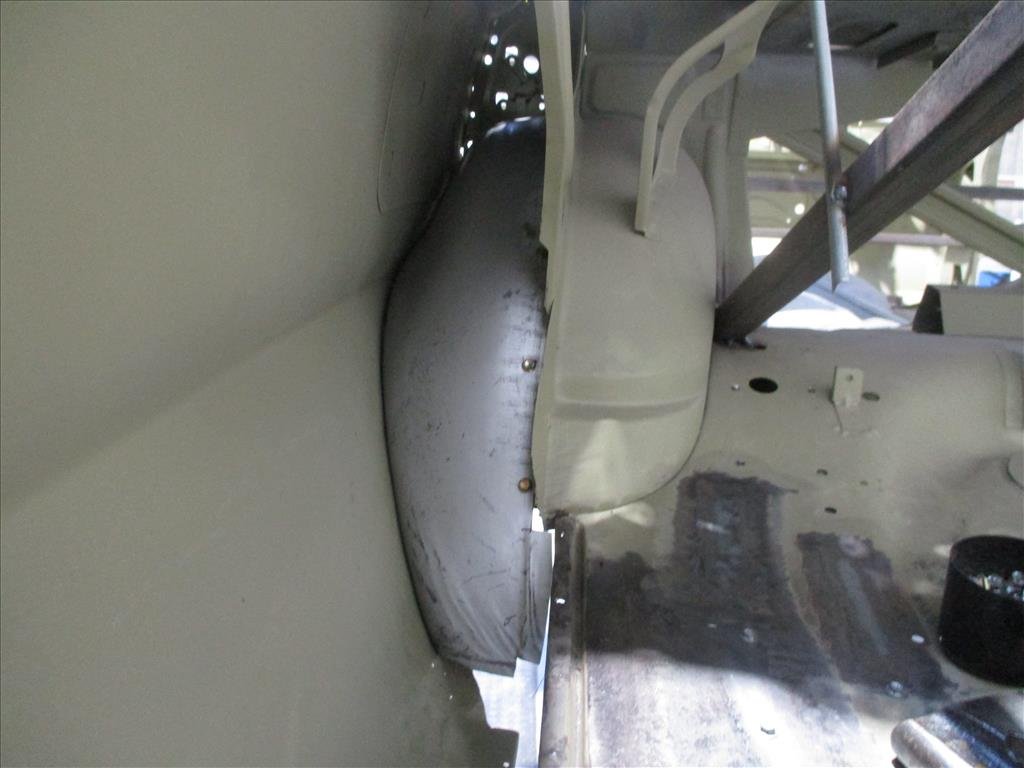
Another timely update from Mr Panel Barry arrived today. He's finished with the rear arches now on both sides and has tidied up some of the other boot floor area bits too. He's now going around the edges of the rear quarters to tidy up the mess there so they well nice and line up as best as possible. Still a little work to do but it's coming along really nicely. As you can see it's pretty pitted and mangled before. I think we're nearing the home straight for this rear end. The arches were one hell of a job and he's done excellent work.
1 point
-
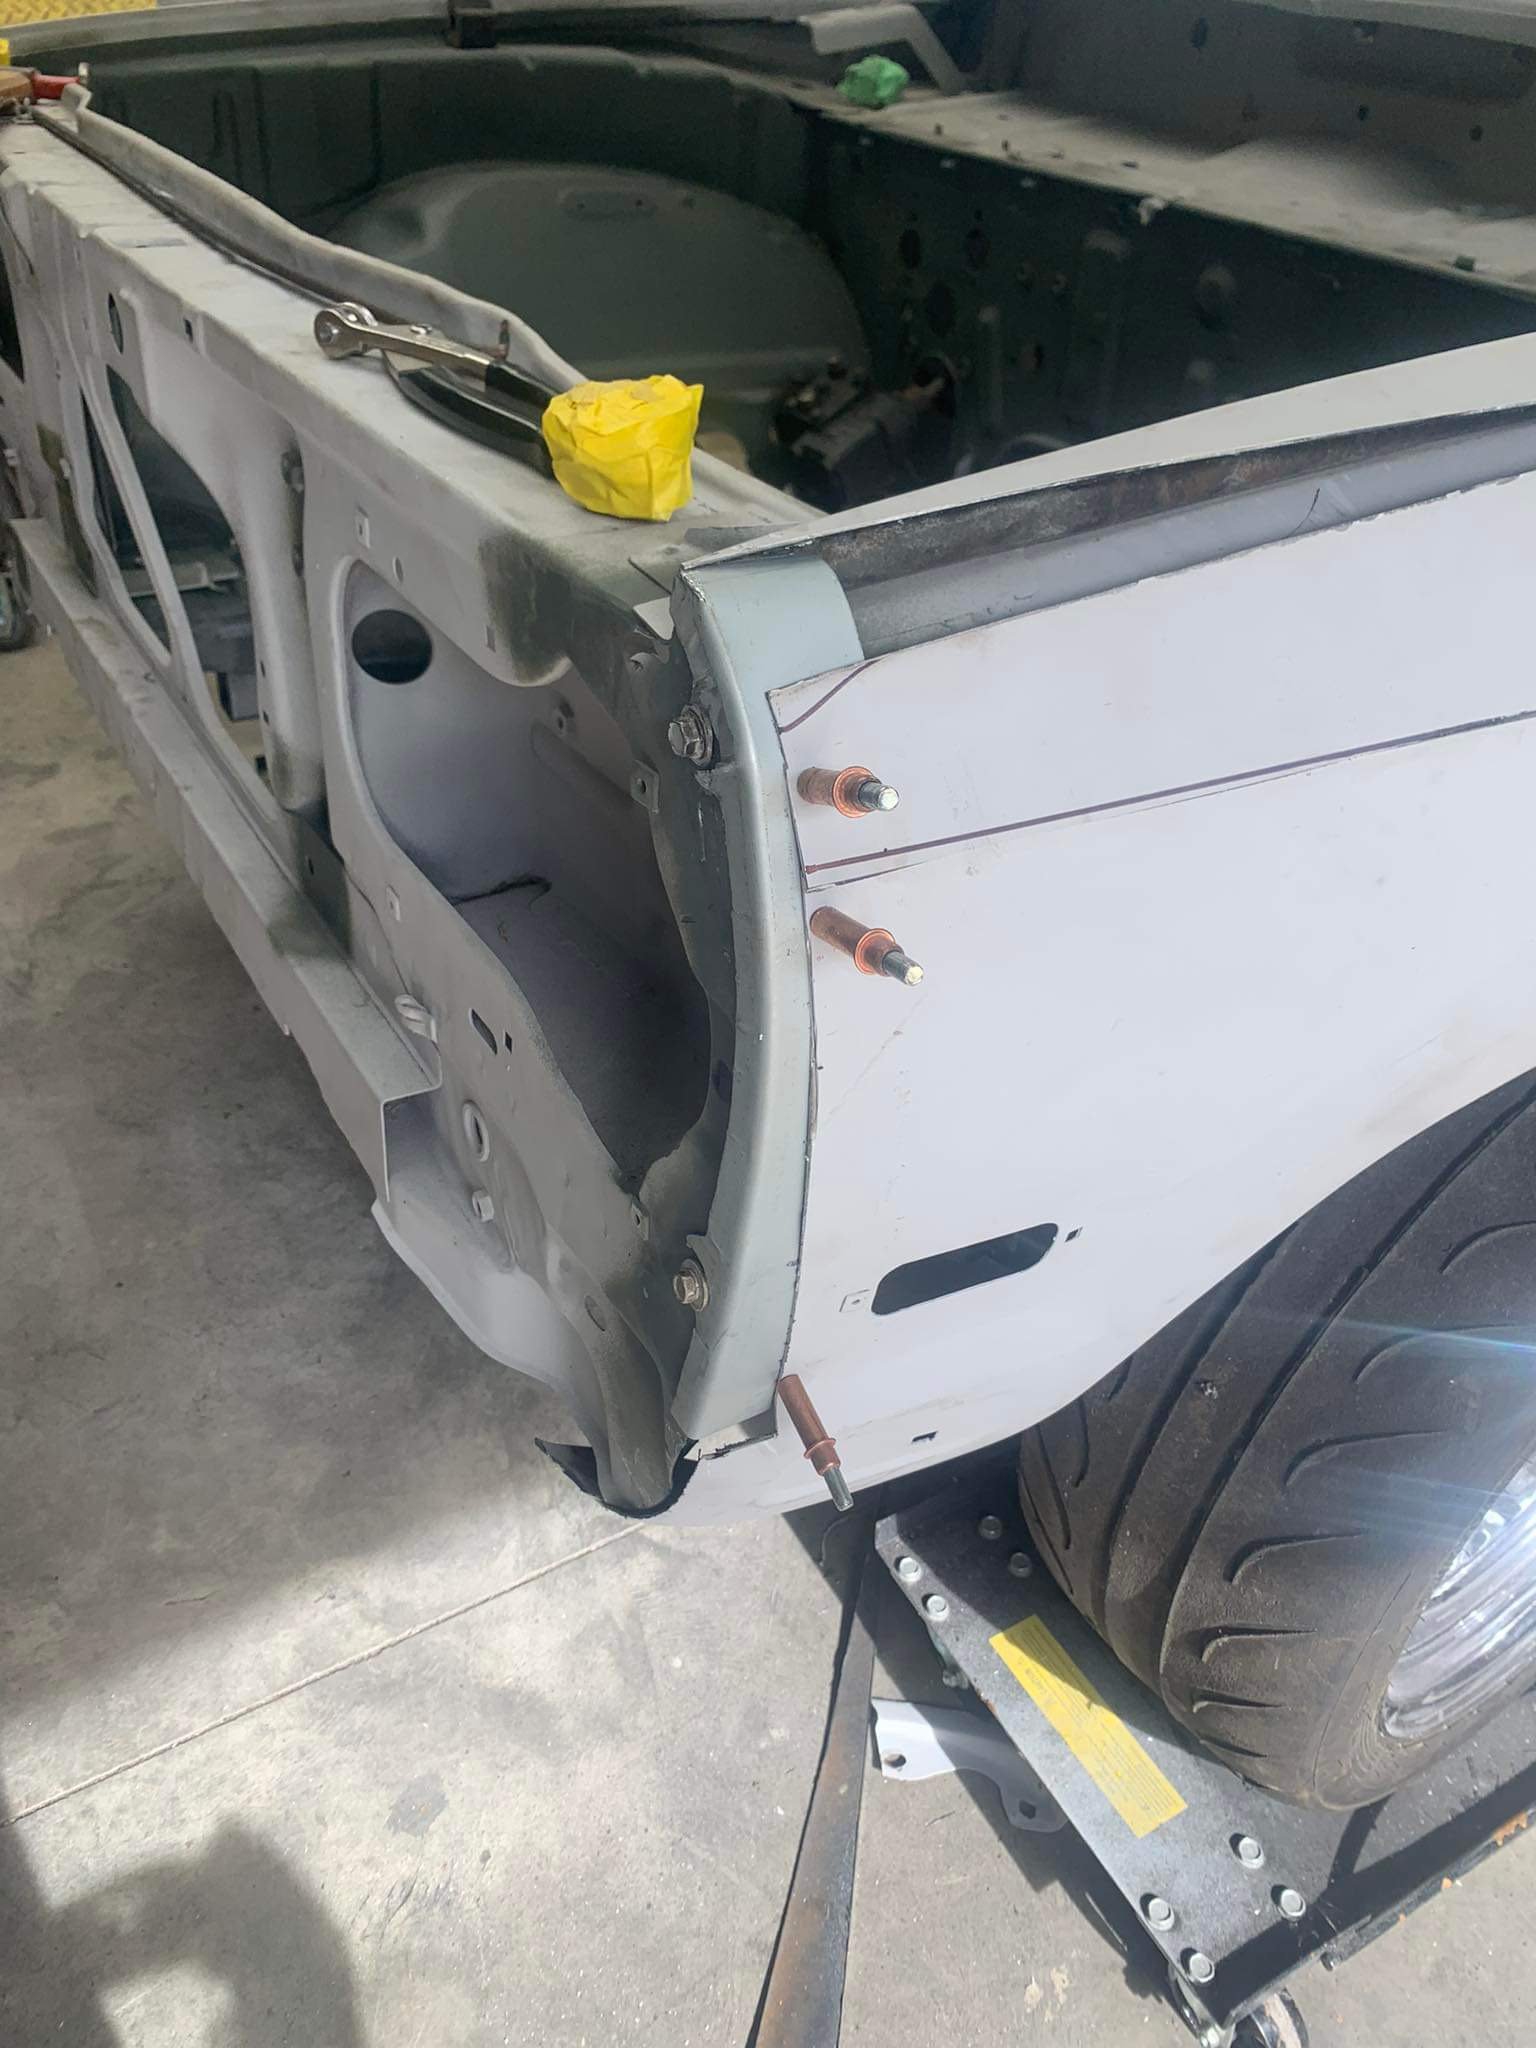
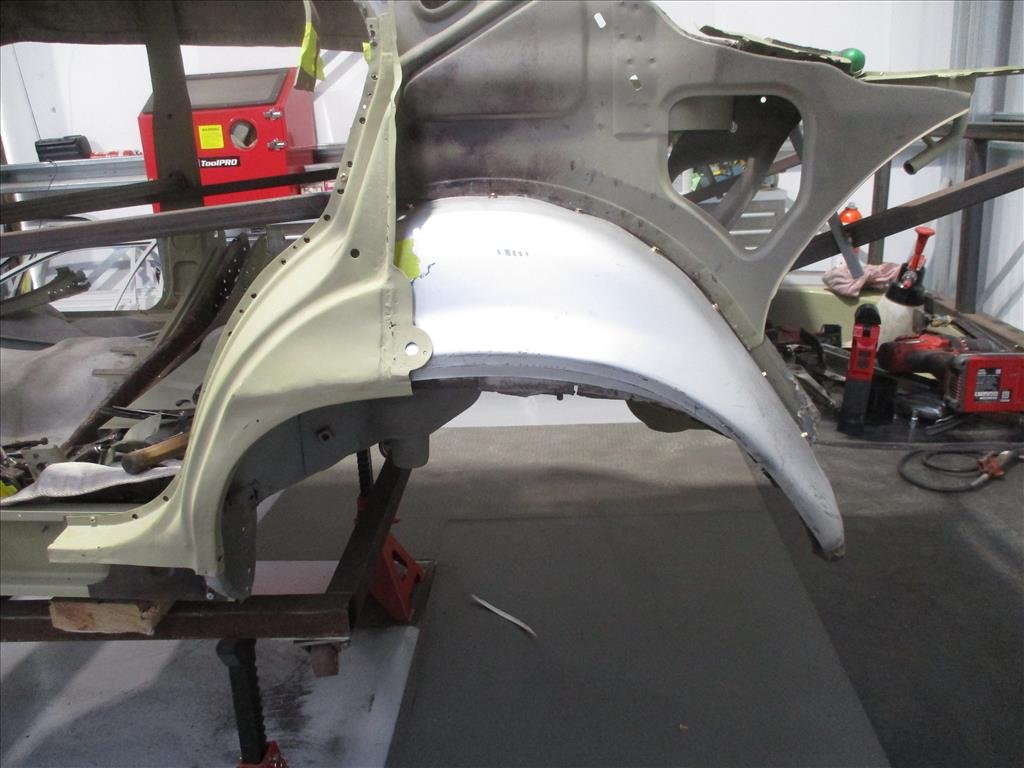
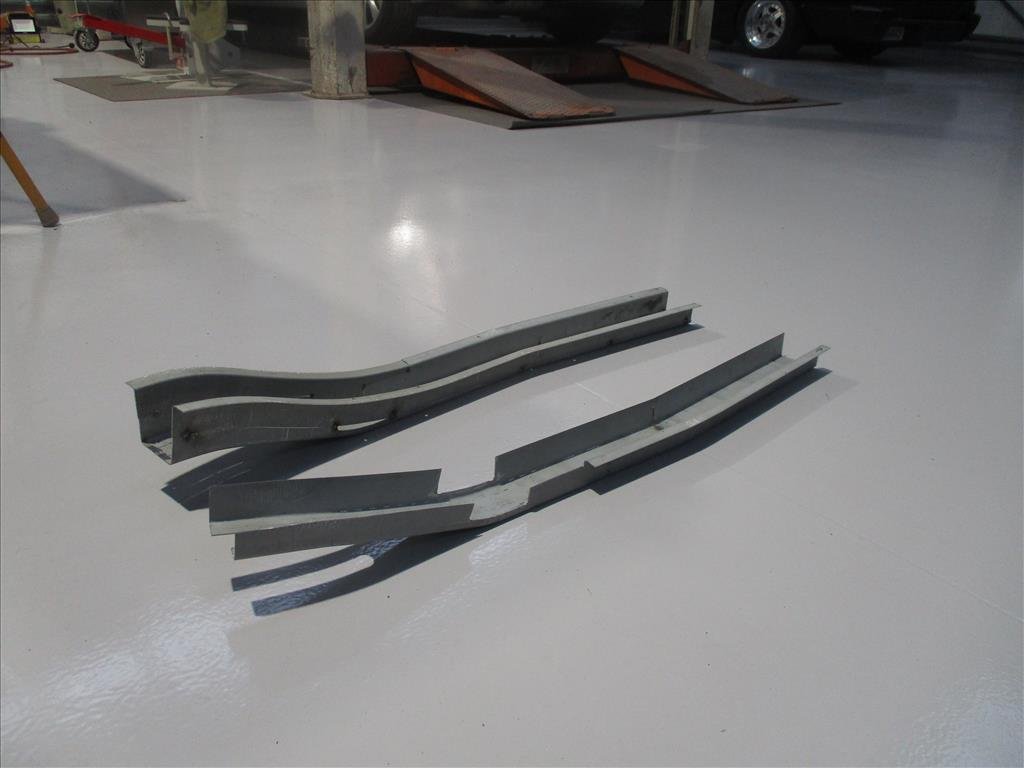
Panel Barry's been hard at work doing various small patch jobs and finishing up some chassis work on the Skyline as well as rebuilding basically the whole rear end. That's all very exciting but what's really exciting is this. The Ford Escort inner arches look like they will fit up really nicely with a little bit of finagling and a bit of extra metal. The curve is amazingly close. Might be a smidgen wide for the outer skin as I think it pushes it out slightly so it cannot join quite correctly but in the grand scheme of things I think that's fairly small all things considered.
1 point
-
Speaking of momentum, a bit more work getting done on the Skyline while we wait for those arches to be made. Bit of a hole in the back chassic leg here and the other side wasn't looking super flash either so some new bits being made up.
1 point
-
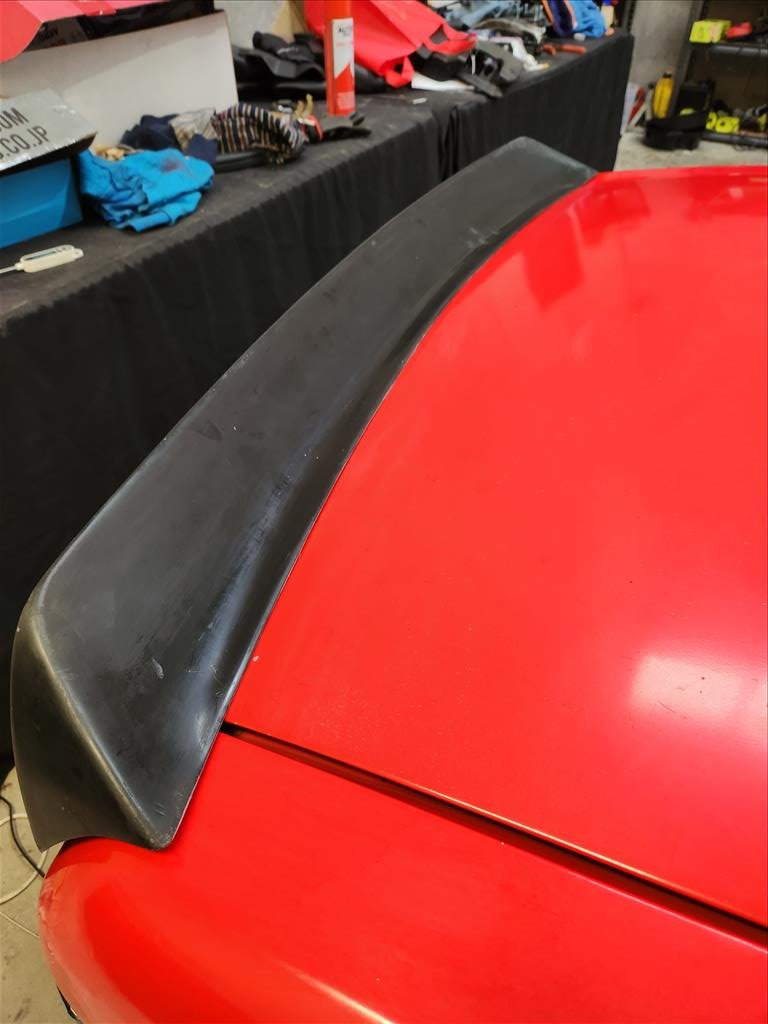
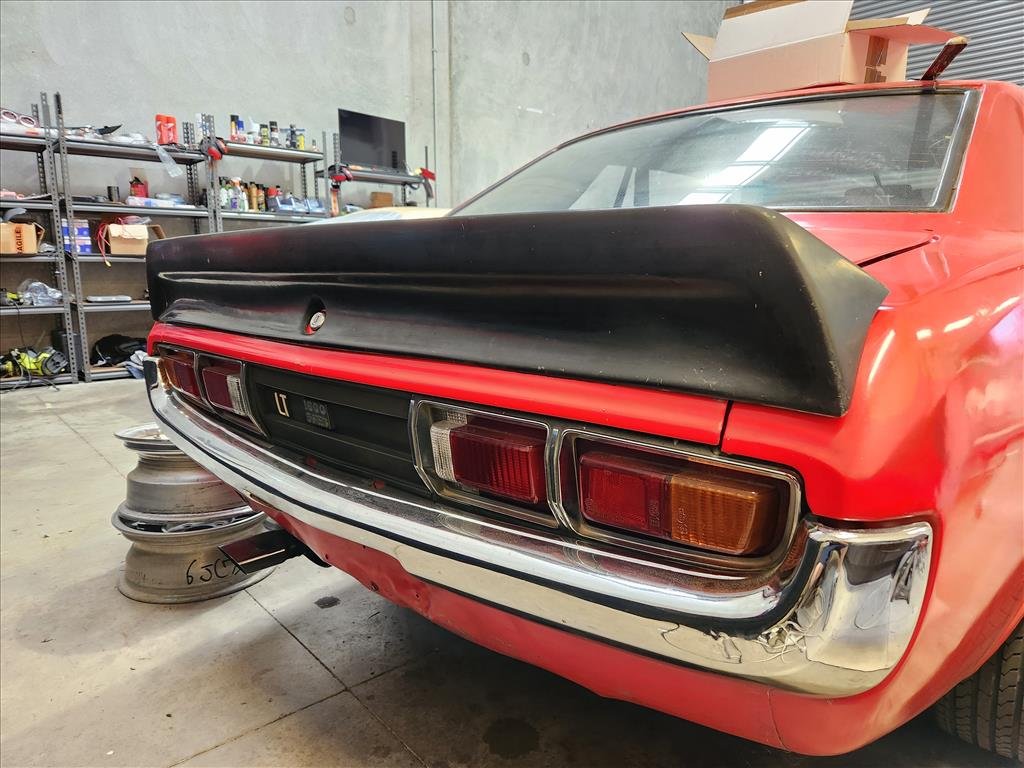
It's Sunday! That (usually) means workshop day. For the rear wing on the Celica because it's fibreglass and generally averagely put together I had the problem of the passenger side contacting on the rear guard. I thought maybe it was to do with the rubber boot seal so replaced that which did make a different, just not in the area I needed. Ended up just trimming a bunch of stuff off the edge which was the last step really and that's probably going to be good enough. As you can see the fit is pretty terrible on the back but I decided to make the top fit best then deal with the back fit later. When it's a bit warmer I'll Sikaflex it on.
1 point
-
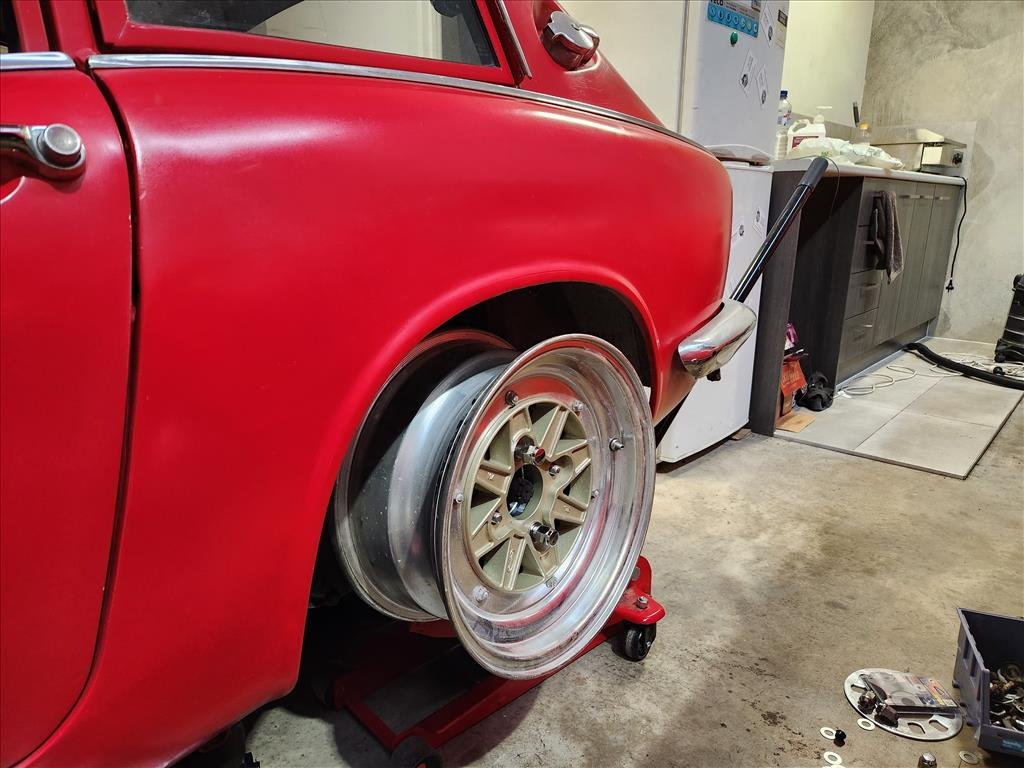
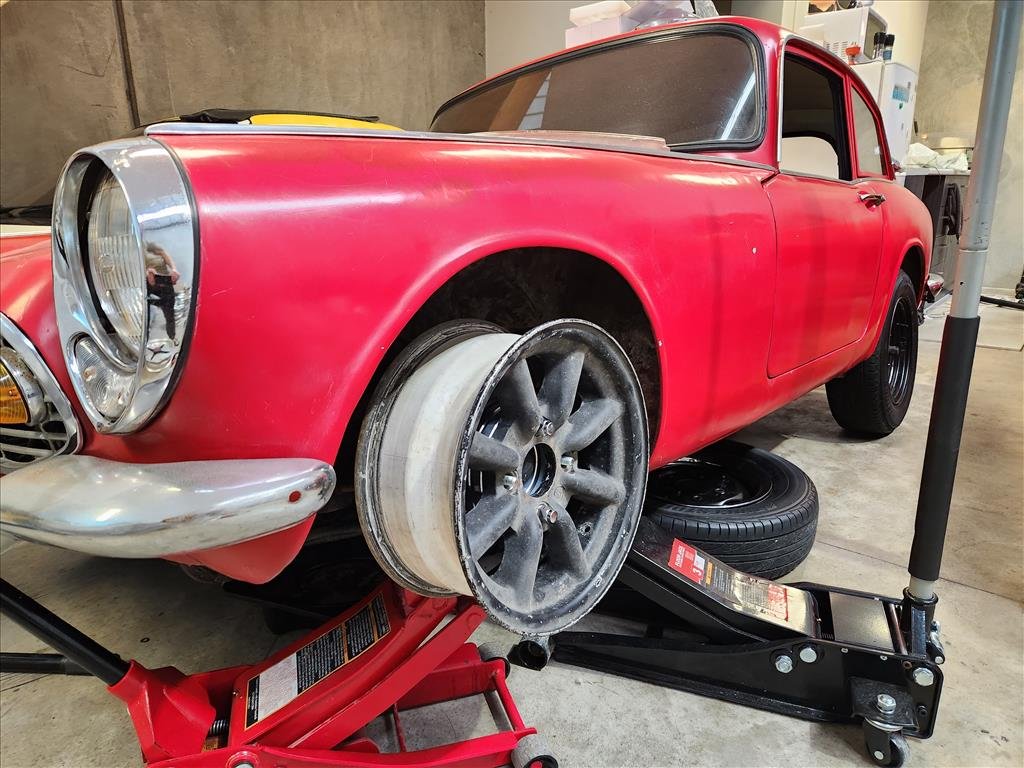
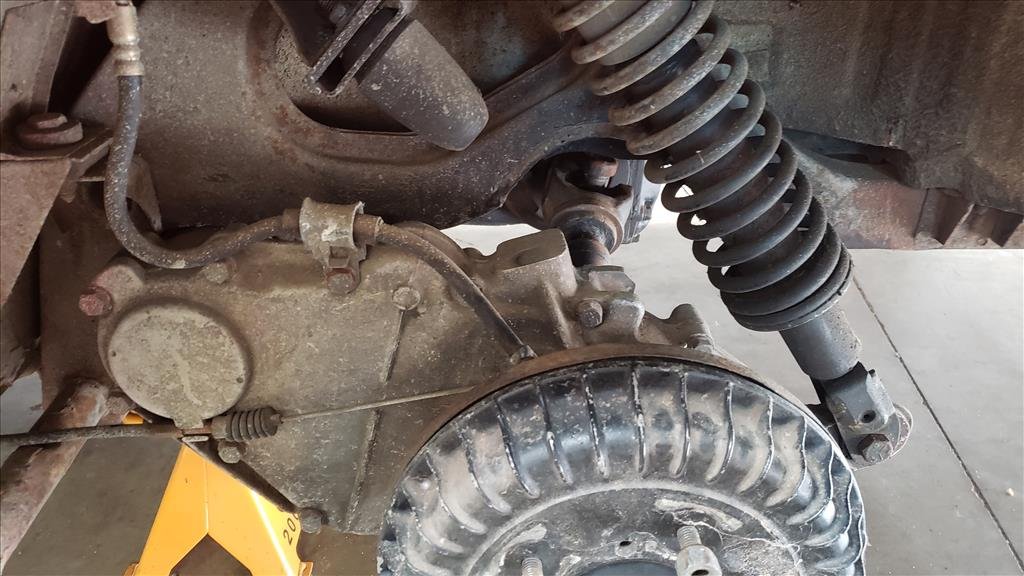
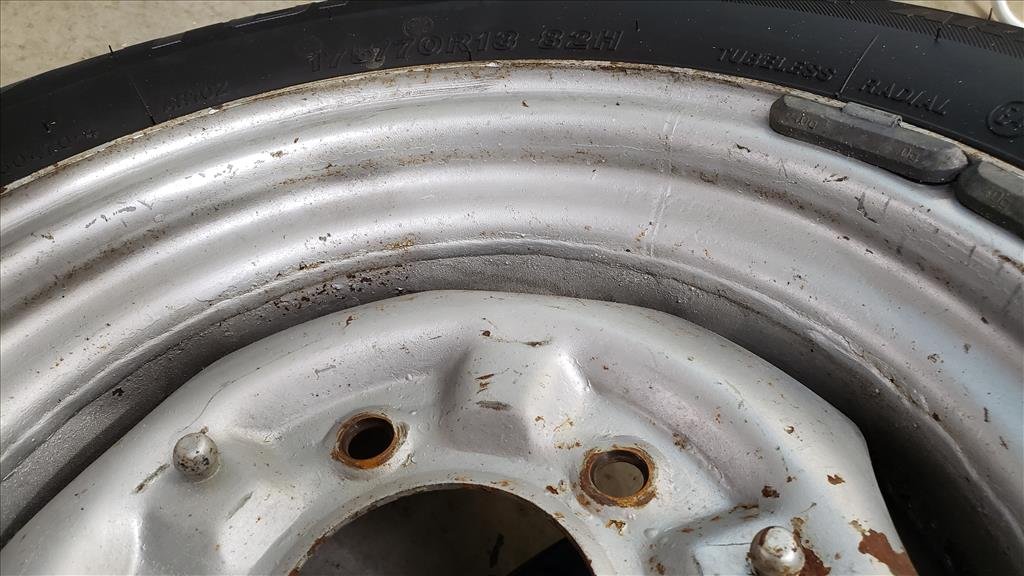
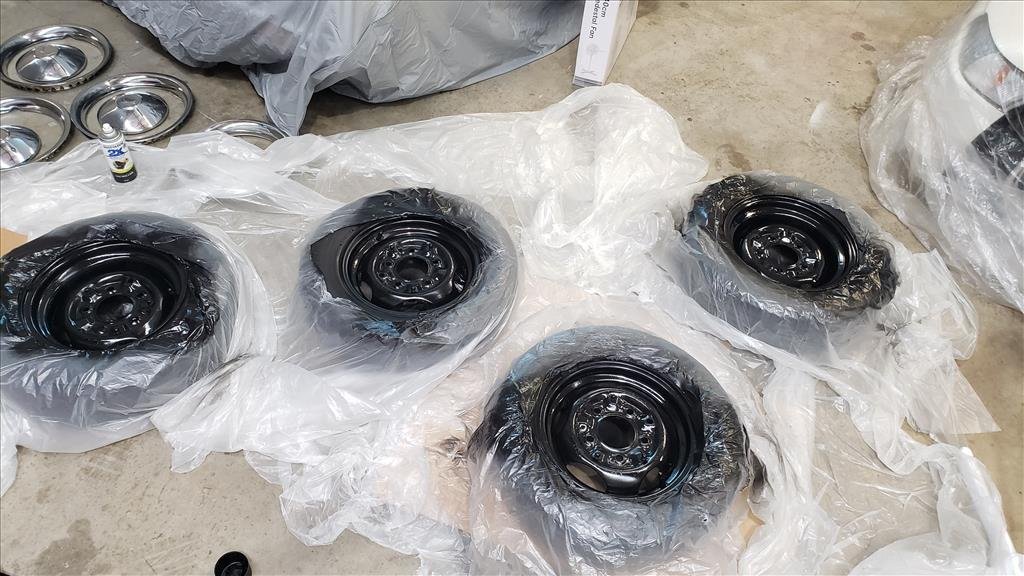
Bit of Barry love today. I'd not actually ever taken the wheels off yet to check what's going on under there but I wanted to paint them anyway to get rid of the crusty rusted bits and just try tidy it up a bit. Let's see what we're dealing with under here.. That's not looking good That's not looking good That's not looking good And that's just on one corner! All of the shocks need replacing, bump stops are different between the corners, springs are tiny in the rear.. it's just money right? This shot you can see how the rear originally worked with that chain drive. The shocks on this car look very much like motorbike items, or most likely some very close iteration of them considering the history of Honda. The spring I can compress with my hand so.. might need an upgrade. The rear wheels have been widened it looks like.. one of them runs wobbly but the tyre is big enough to absorb it. Anyway, to the main event. I fired up the paint booth and my favourite paint (Rustoleum) and go to work.. I kind of like it with all black.. shame there's a bunch of stuff that sticks out that looks terrible So this is what it looks nice now with the trim rings and the centre caps. Just a little bit nicer than crusted old rusty wheels I reckon
1 point
-
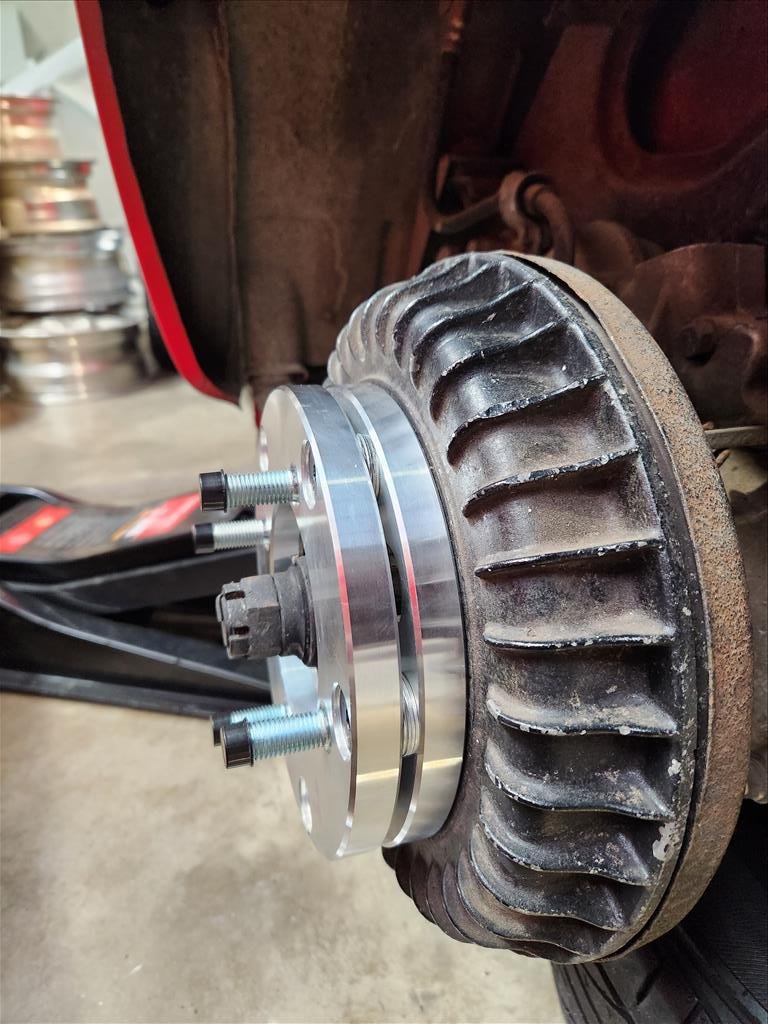
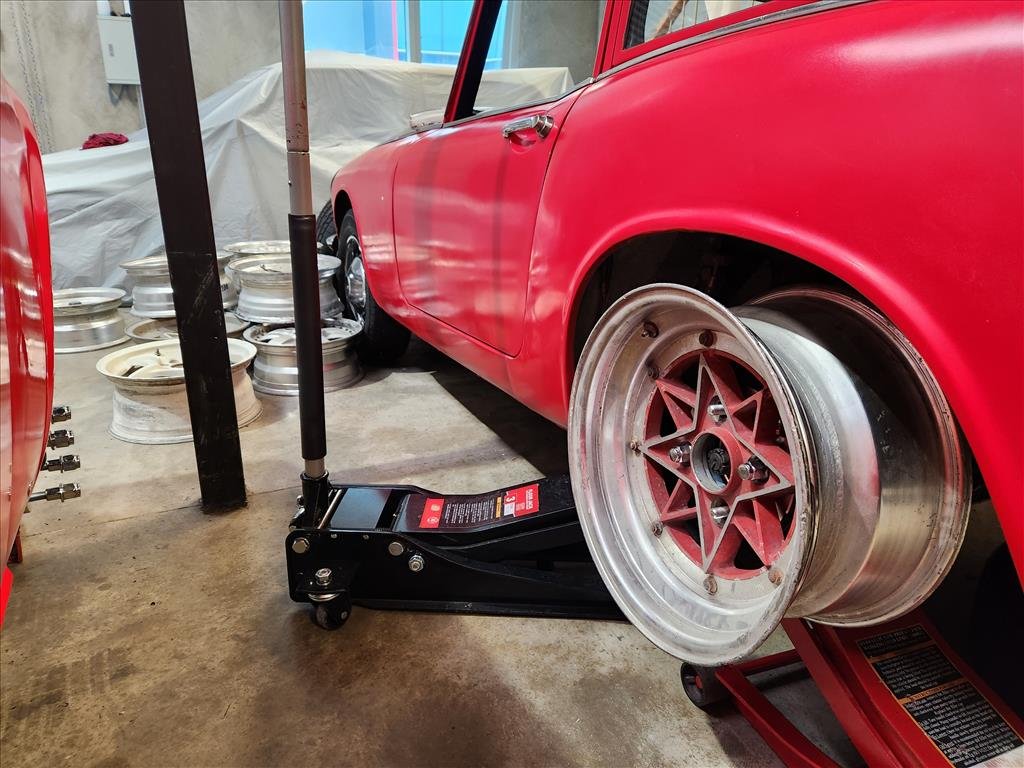
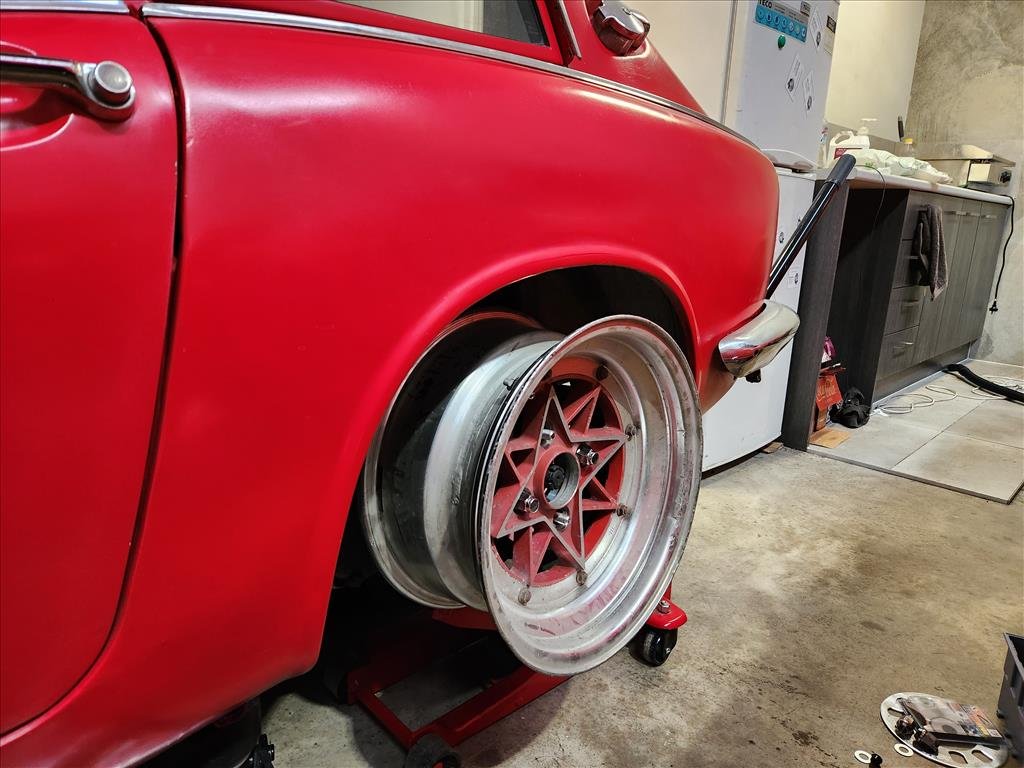
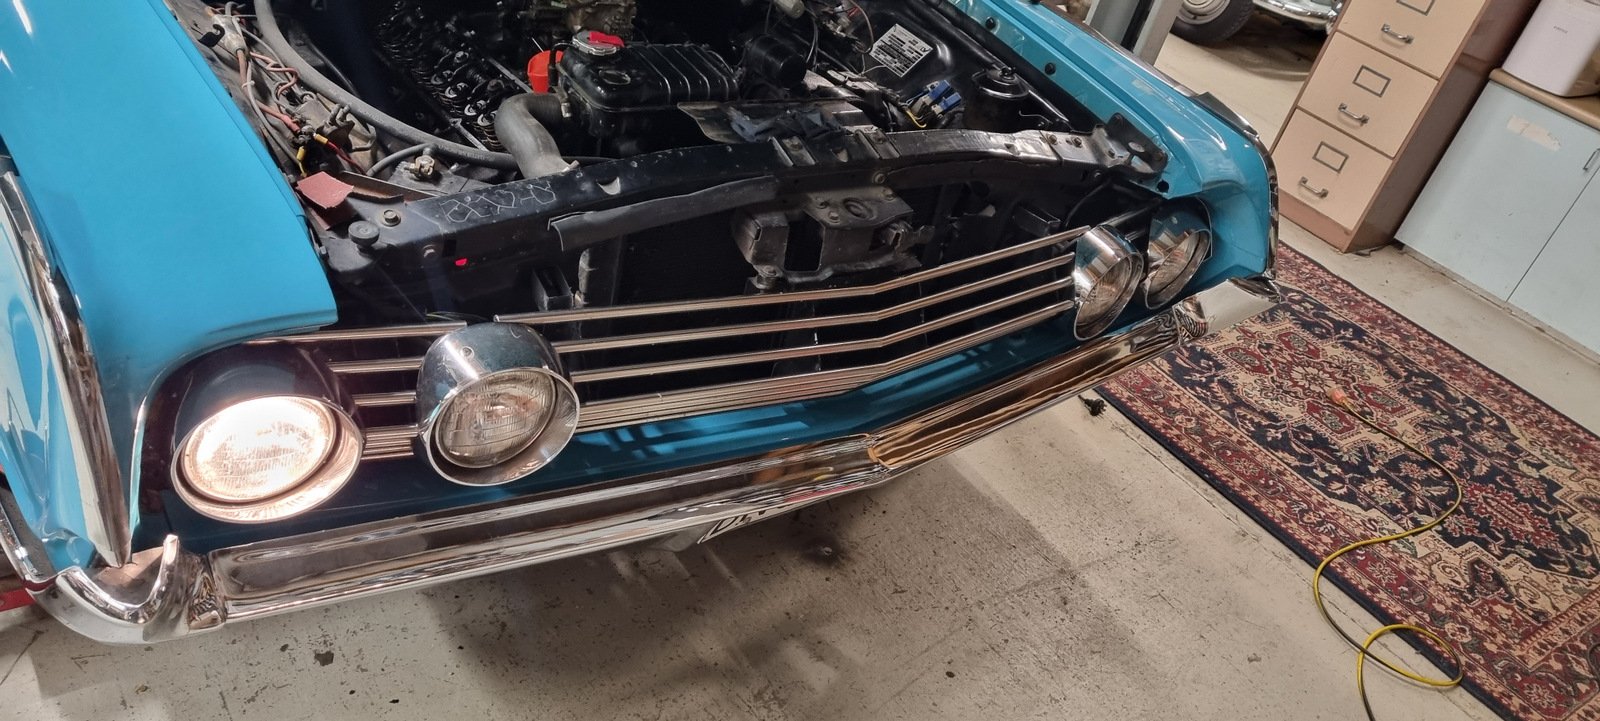
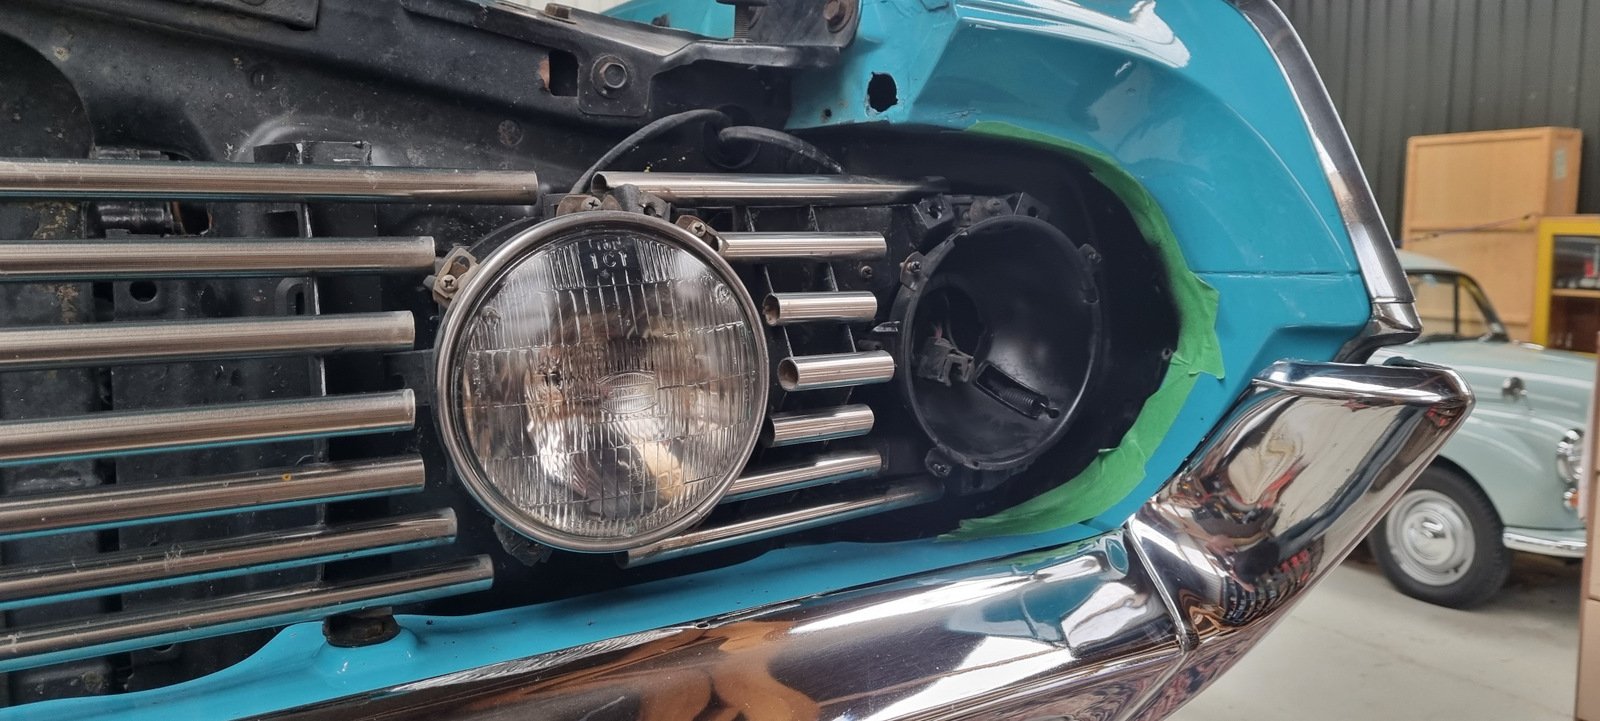
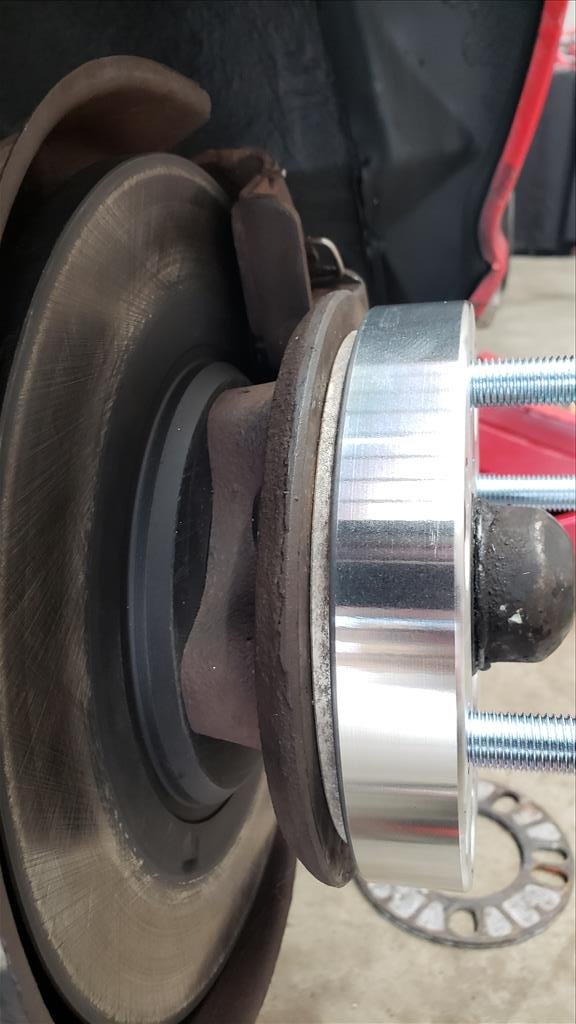
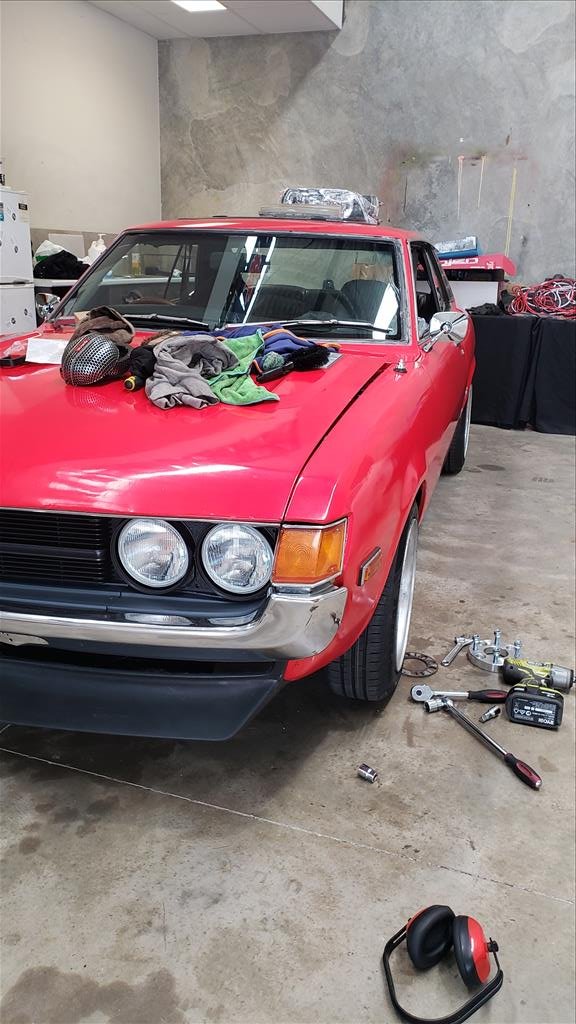
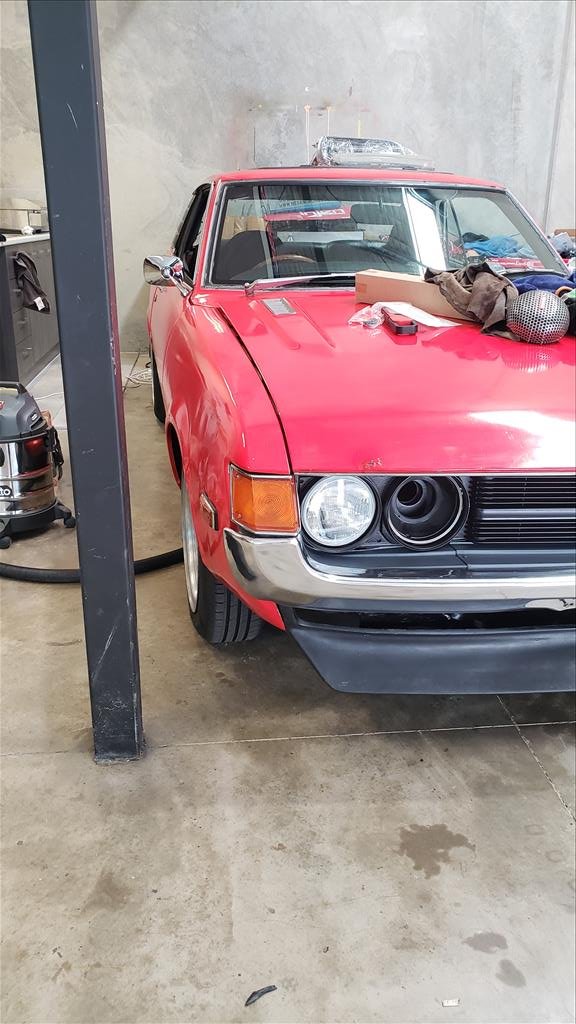
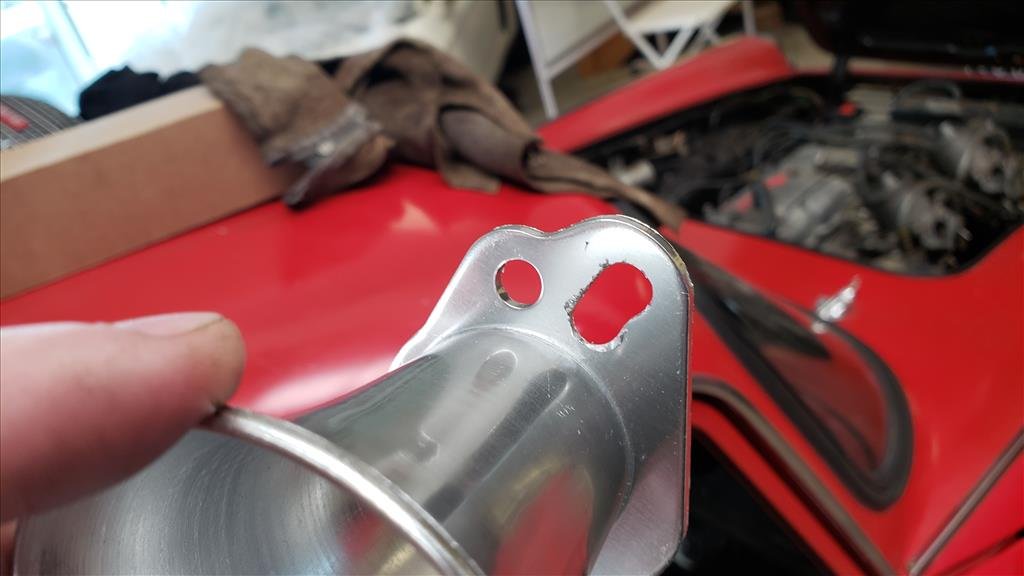
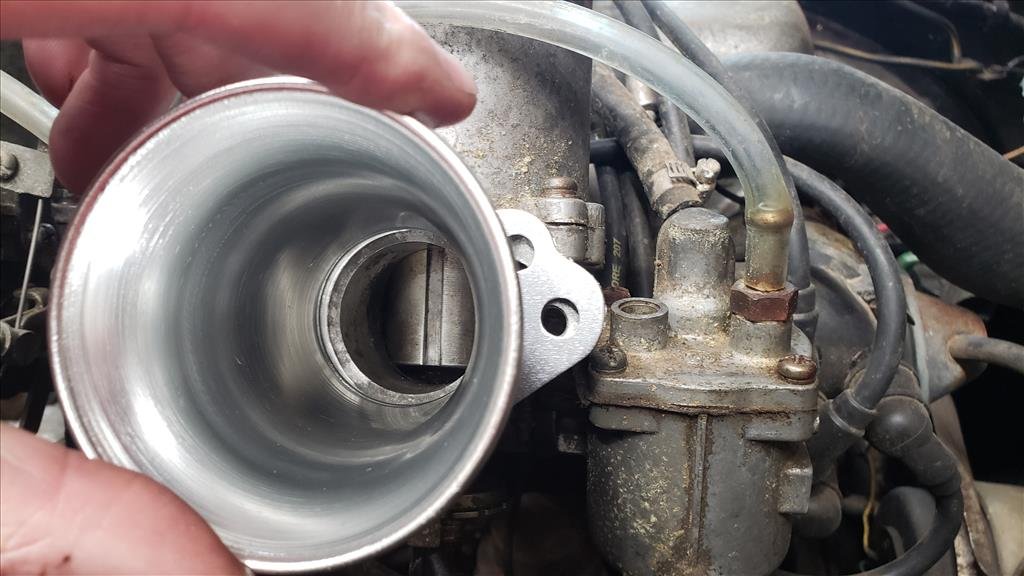
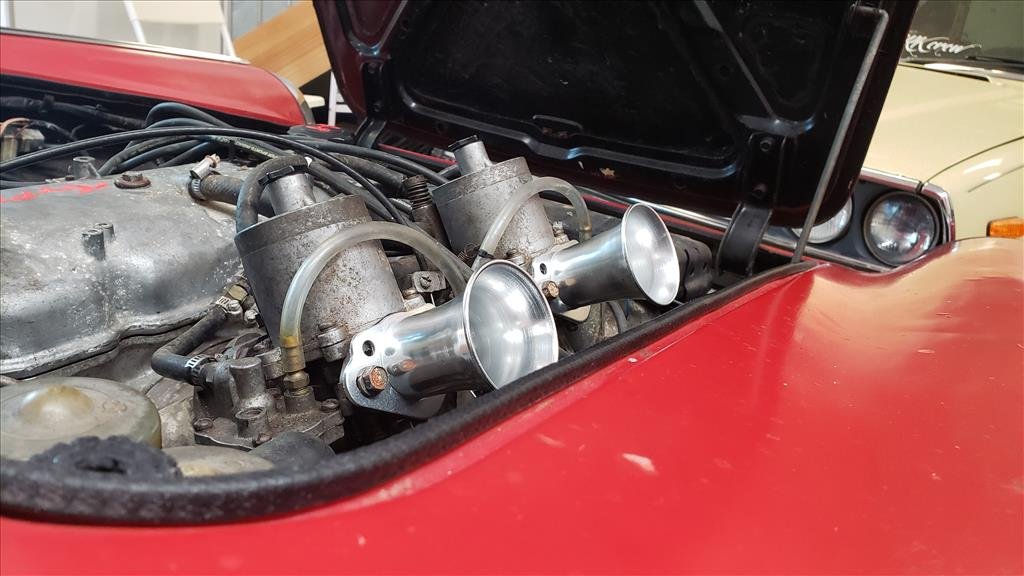
This weekend was actually doing mostly proper work related activities but I did manage to squeeze in a couple of little things. The S600 being a race car needs race car parts. I didn't like the look of the old Ramflo filters on there so ordered some trumpets. They didn't fit. seems like they were for a larger model of SU than mine. Fixed it. Aside from a visual change I'm happy to report this has made zero difference to sound or performance, clears the bonnet though and looks cooler so that's the main thing. Sometimes life is too simple so let's add some danger. I mentioned earlier that the bolt on spacers wouldn't work on the Celica properly on the front due to the stud being too long and hitting the wheel. I had a genius idea to put a slip on spacer behind the bolt on spacer, now it works. Before After Makes quite a difference being 30mm wide instead of 5mm. I still have a couple more 5mm slip ons so I think I will add additional danger.
1 point


.JPG.911996a57340489b89409222facd1532.JPG)
.JPG.32ca8111e8a98af724dd0f2e2c95b891.JPG)
.JPG.893e17939e59eecb0ff27421c7b47d00.JPG)
.JPG.4314fad55b635779c2c647b6d56b1709.JPG)
.JPG.5224b5e07dac0595316b8abde0085eb5.JPG)
.JPG.d527fed8e5a257d86f52d15d2c74e985.JPG)


This leaderboard is set to Auckland/GMT+12:00