
Leaderboard


Popular Content
Showing content with the highest reputation on 06/22/17 in all areas
-
Bit more progress today. Made up some bracketry to mount my generic electric fans to the slam panel, ahead of the ae86 rad. Really fiddly getting them to sit right against the rad without attaching them directly to it, but got there in the end. Even managed to modify the original kp radiator clamps to hold it all in place, pleasing. Also wrapped the exhaust manifold. Needs a bit more wrapping, but waiting for some more steel ties to turn up.8 points
-
been busy but heres pics of concrete 2017-06-21_03-22-28 by sheepers, on Flickr 2017-06-21_03-24-34 by sheepers, on Flickr 2017-06-21_07-59-25 by sheepers, on Flickr 2017-06-21_07-59-12 by sheepers, on Flickr8 points
-
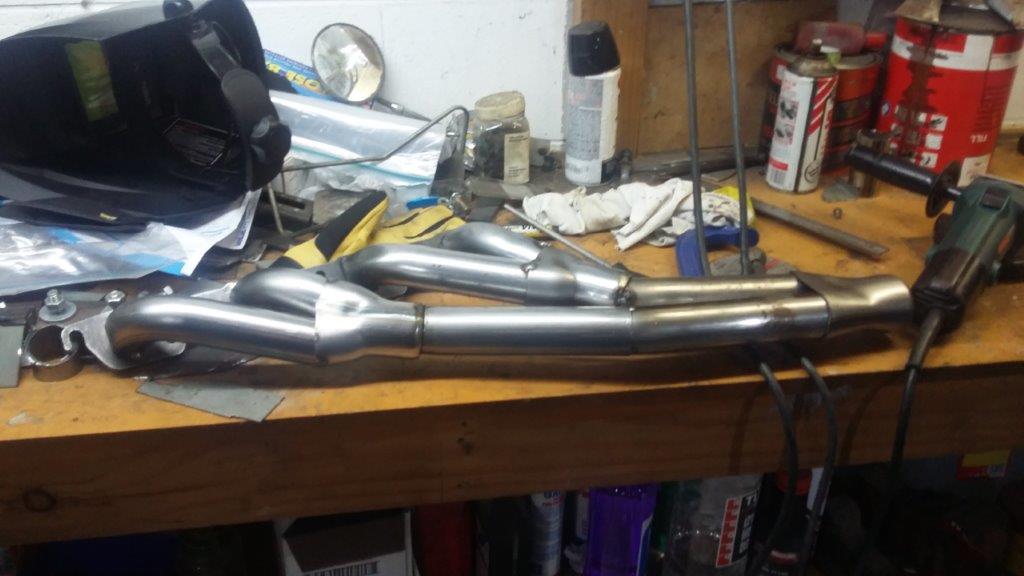
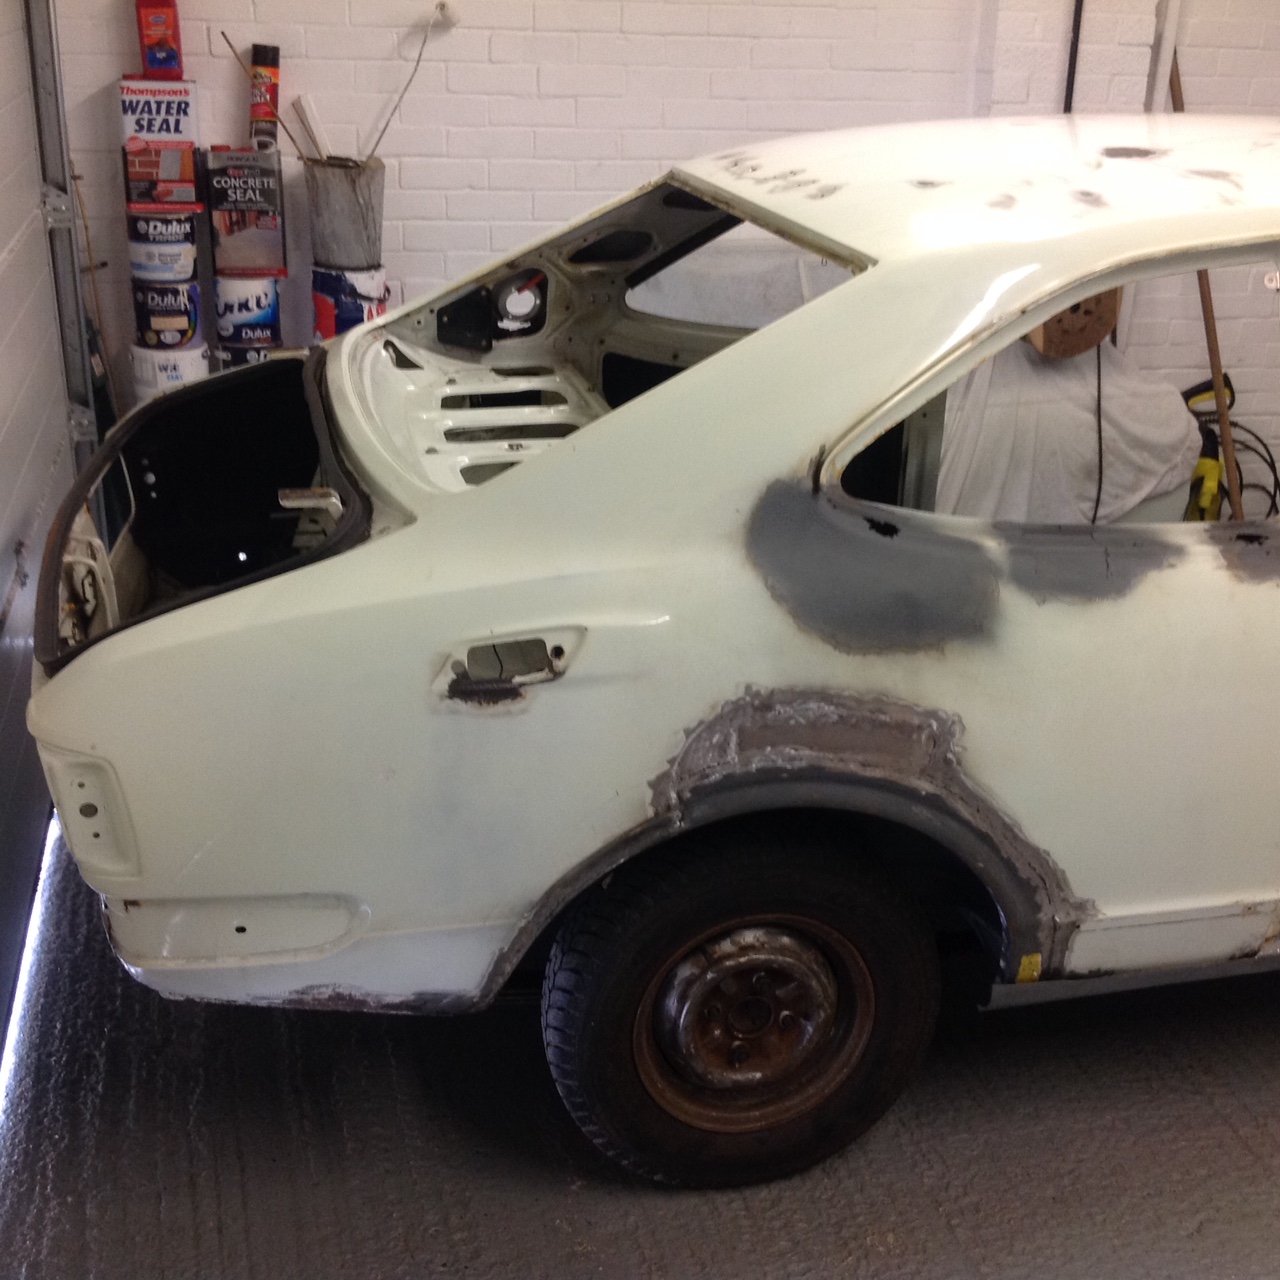
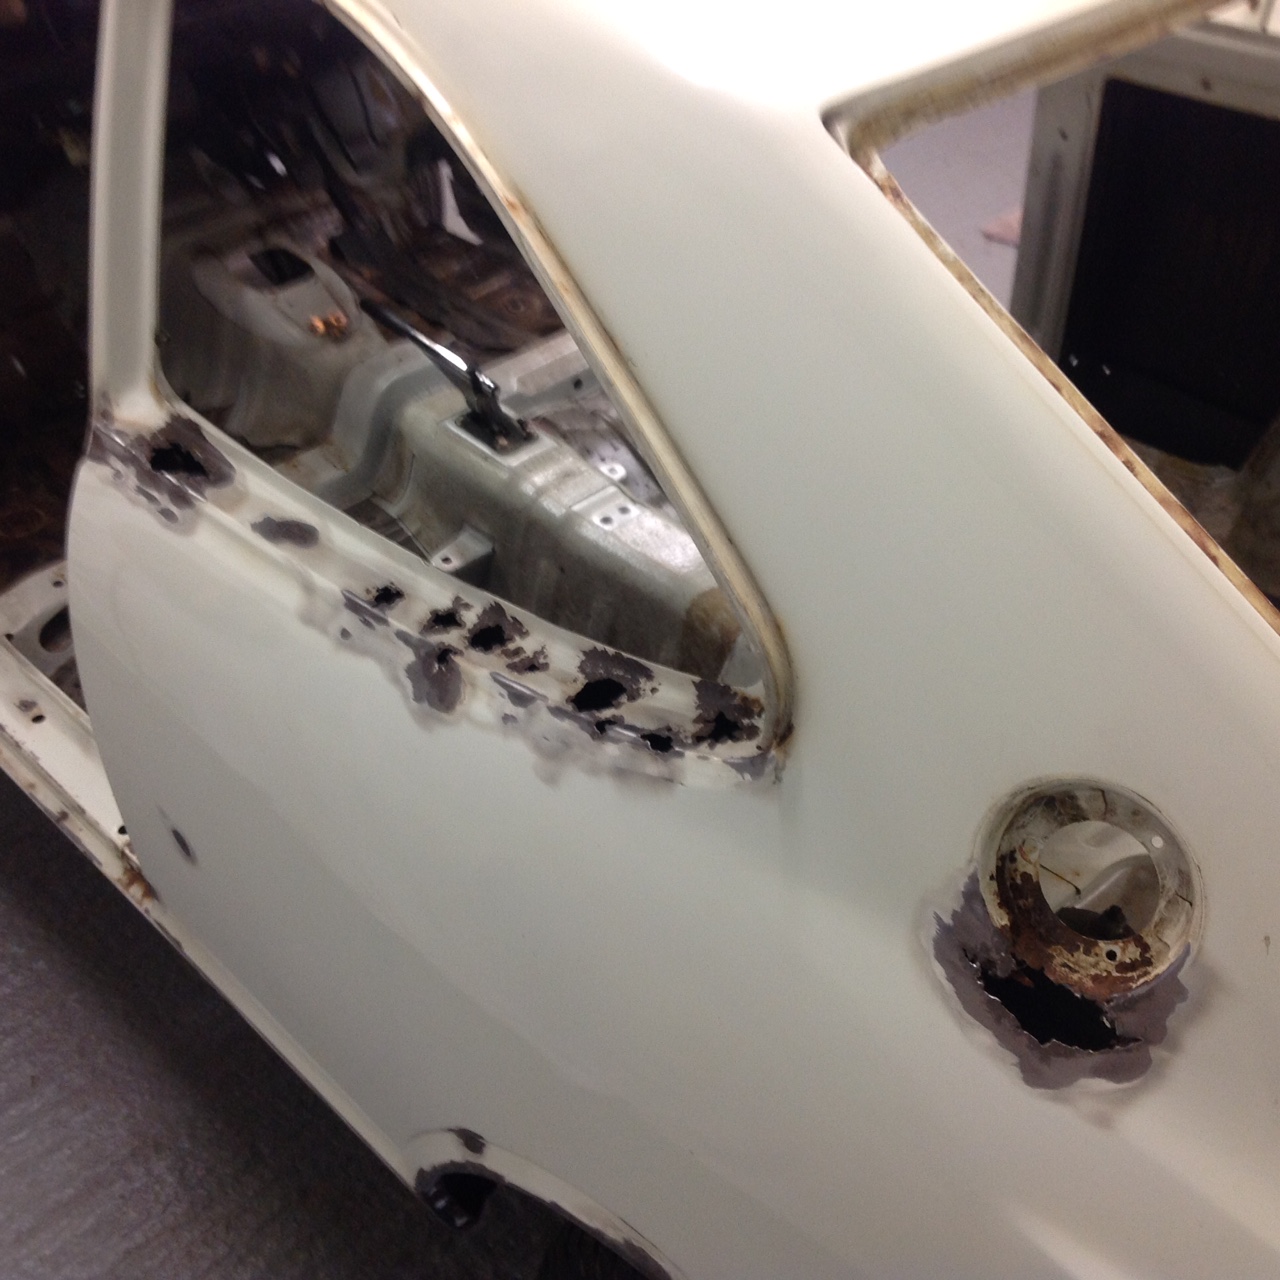
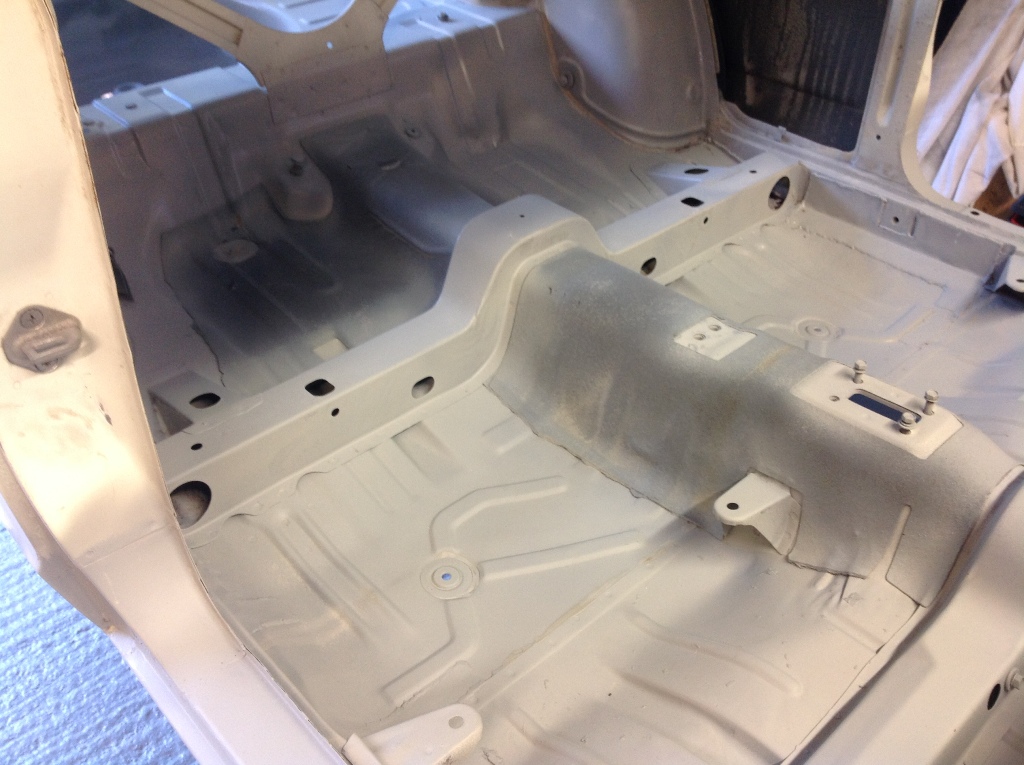
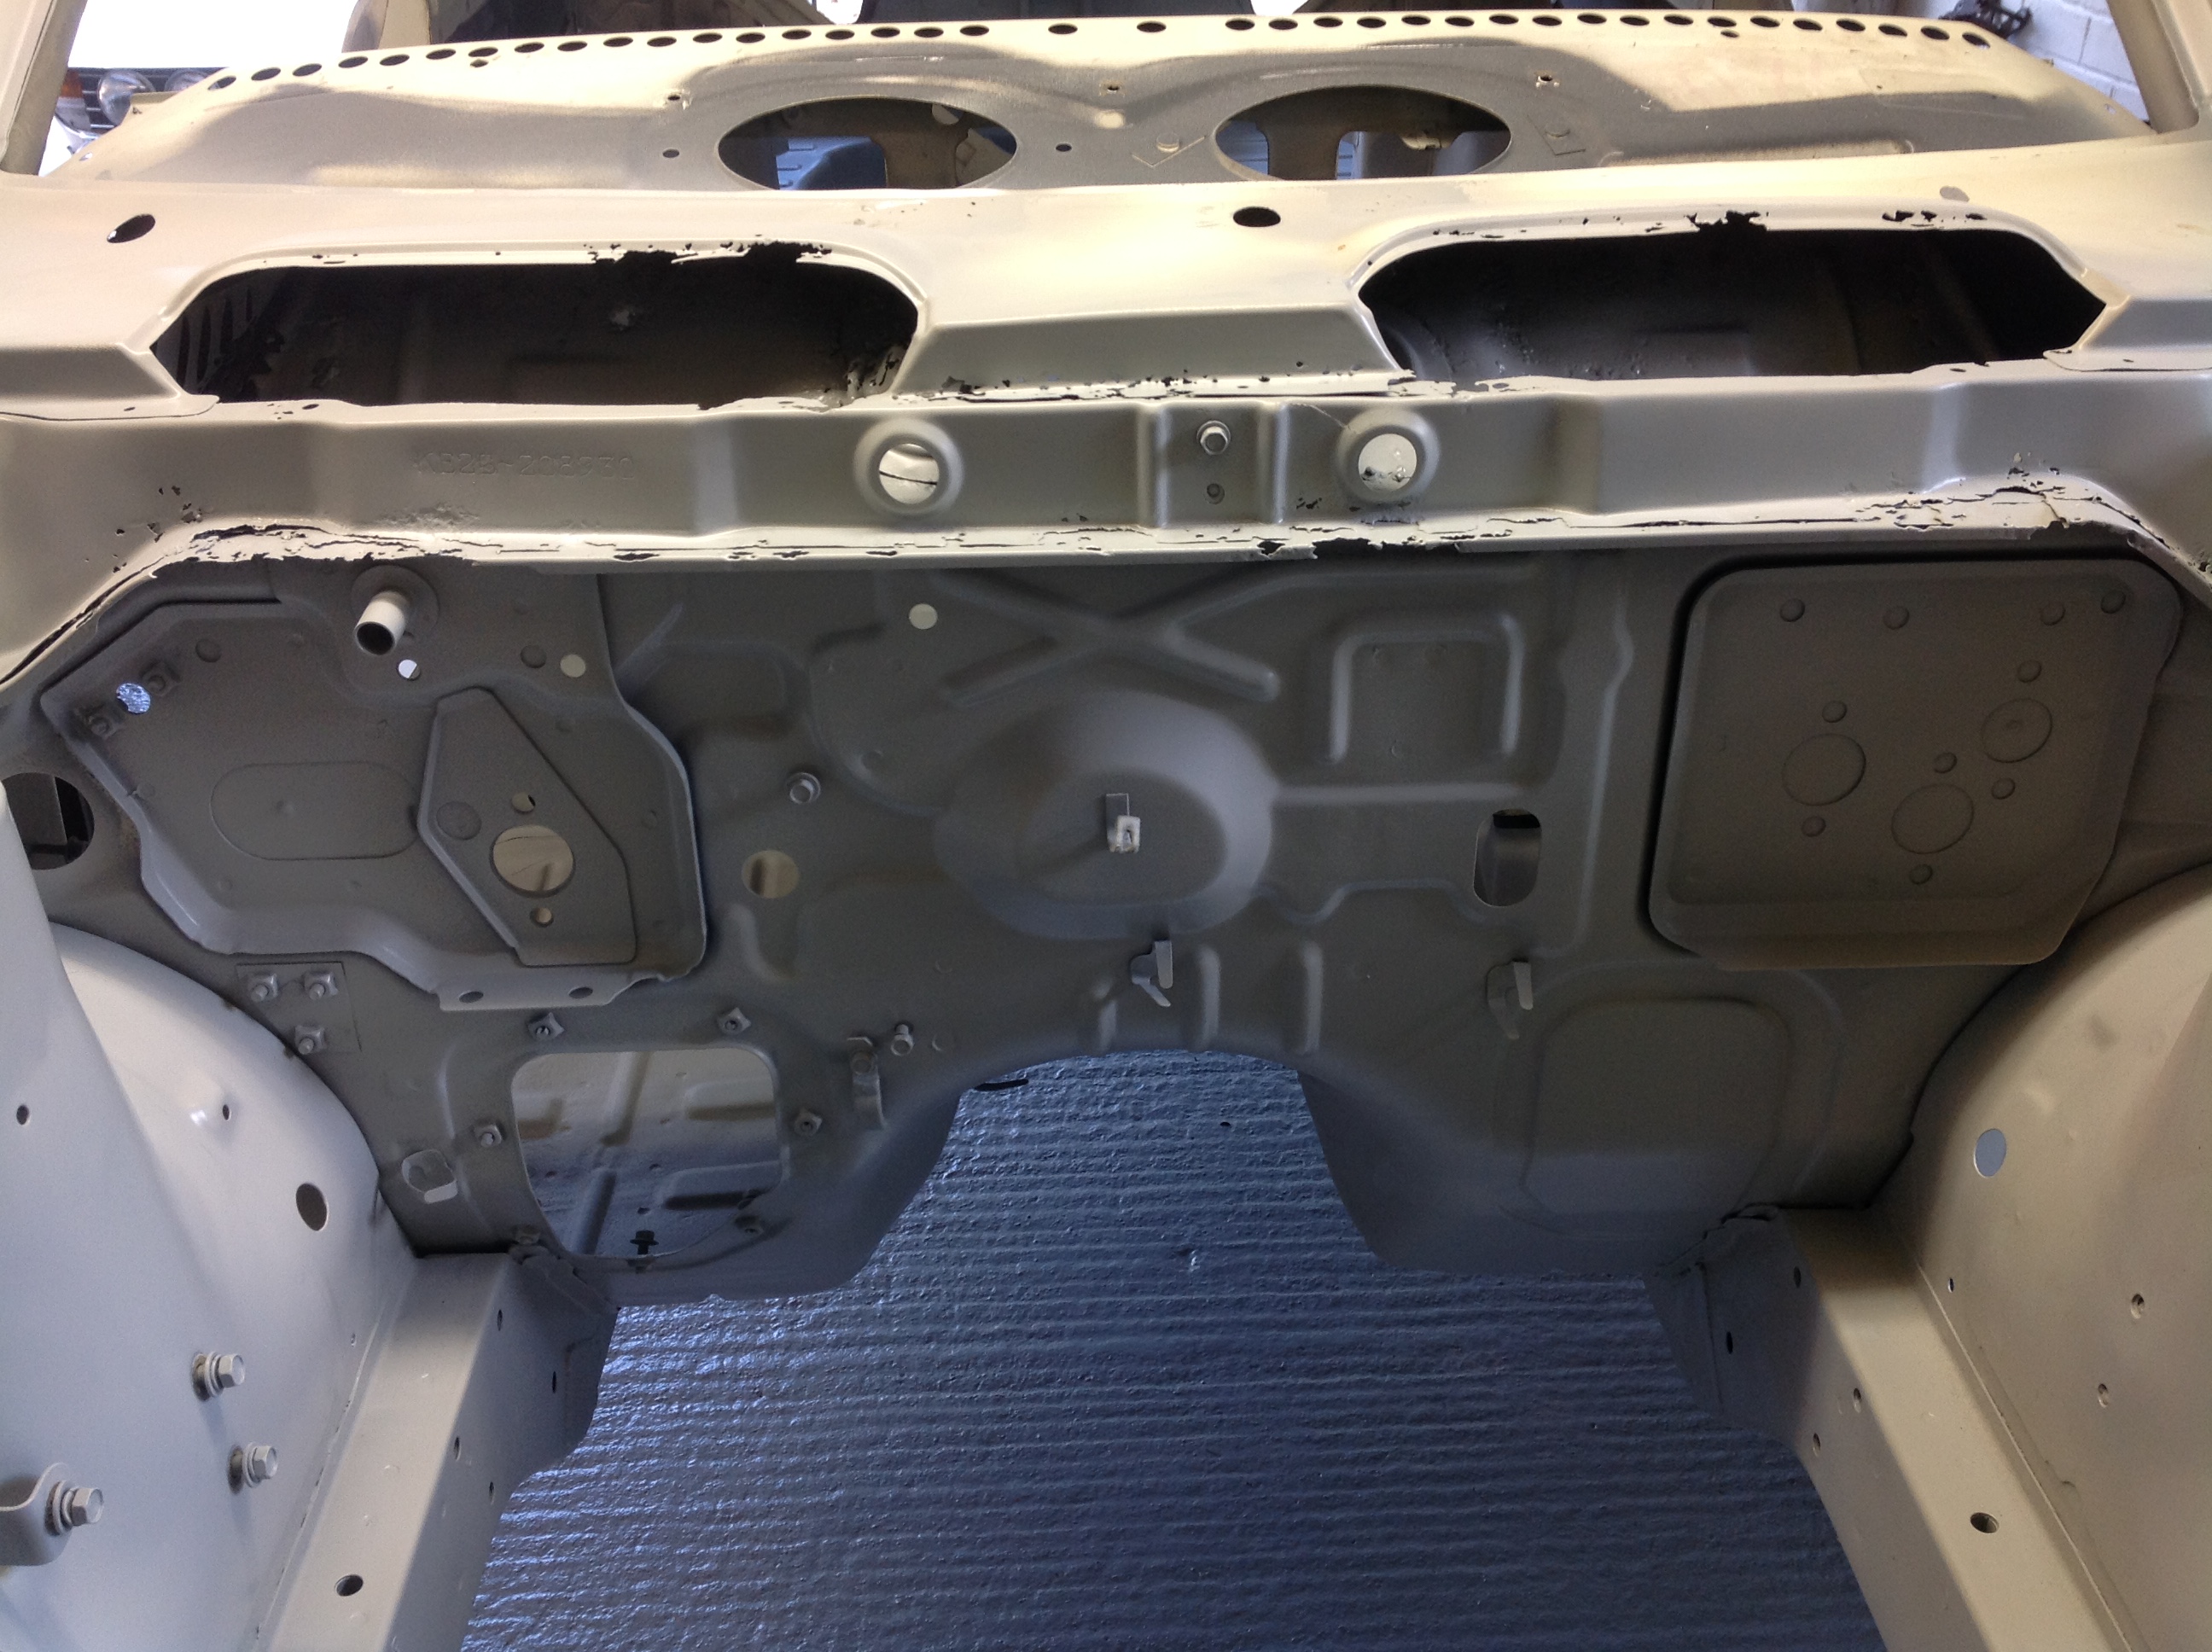
Okay, long overdue an update. Rust patches were sorted by the inimitable @Goat several months ago, sweet! Gearbox mount came together a couple of weeks ago, pretty pleased with it: Exhaust got some love last weekend. Please excuse horribad welds, I'm still new. Got a sweet new shirt: Also got a full set of nolathane bushes. Here's me downstairs bush collection: Rad mountings are also sorted, hurrah! Waiting on a brake kit from MRP, excite. Getting there now!7 points
-
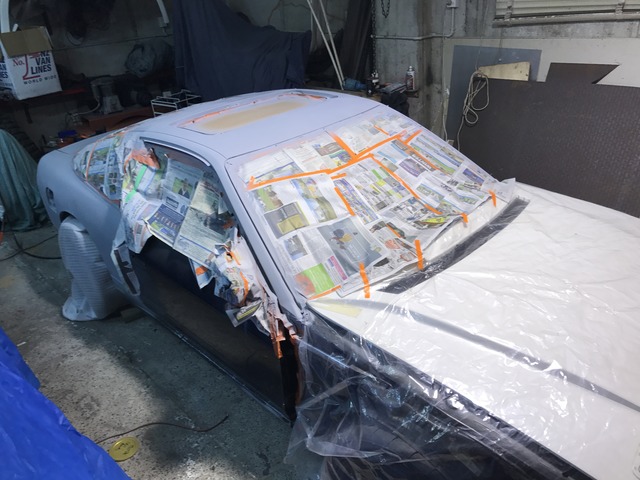
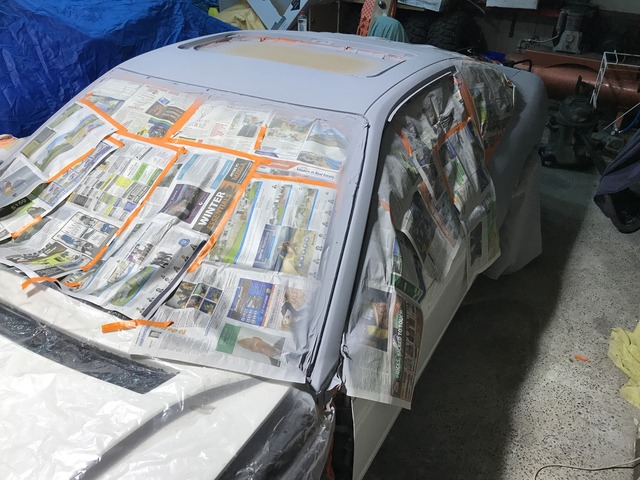
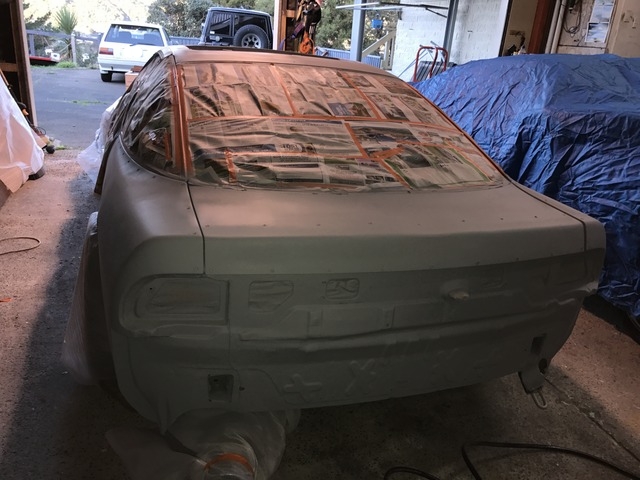
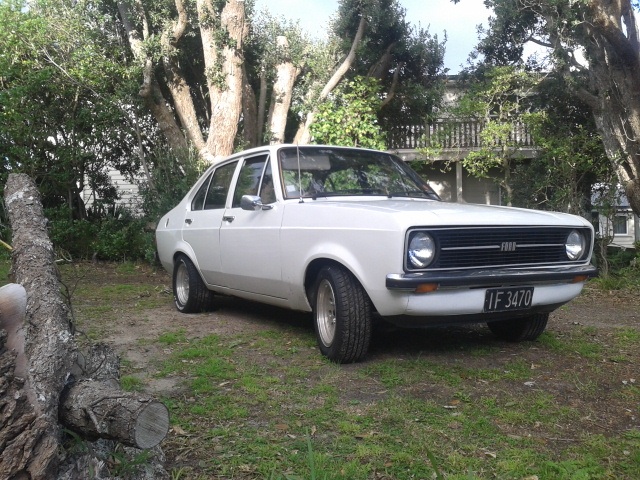
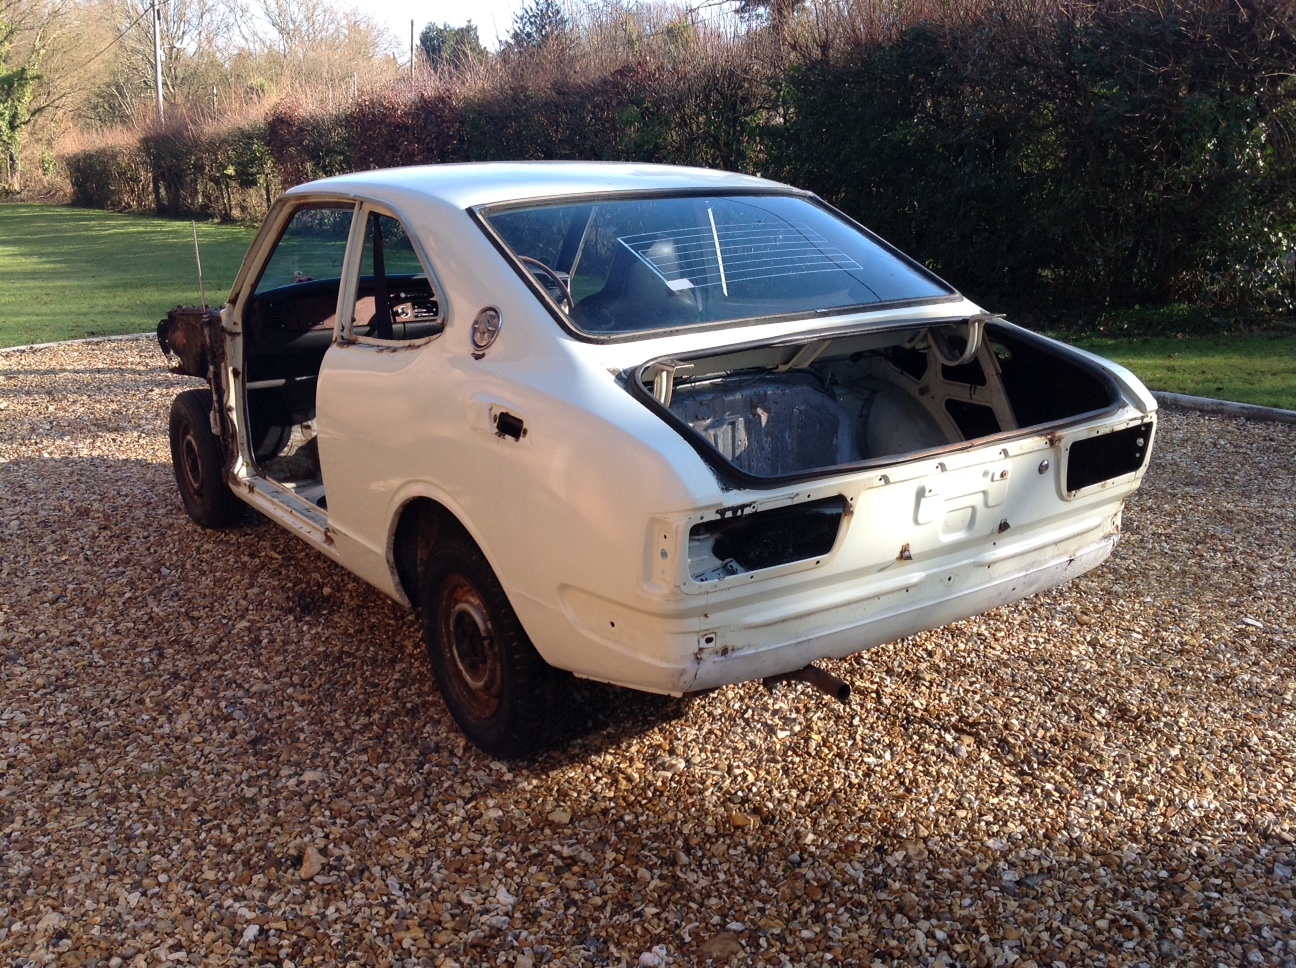
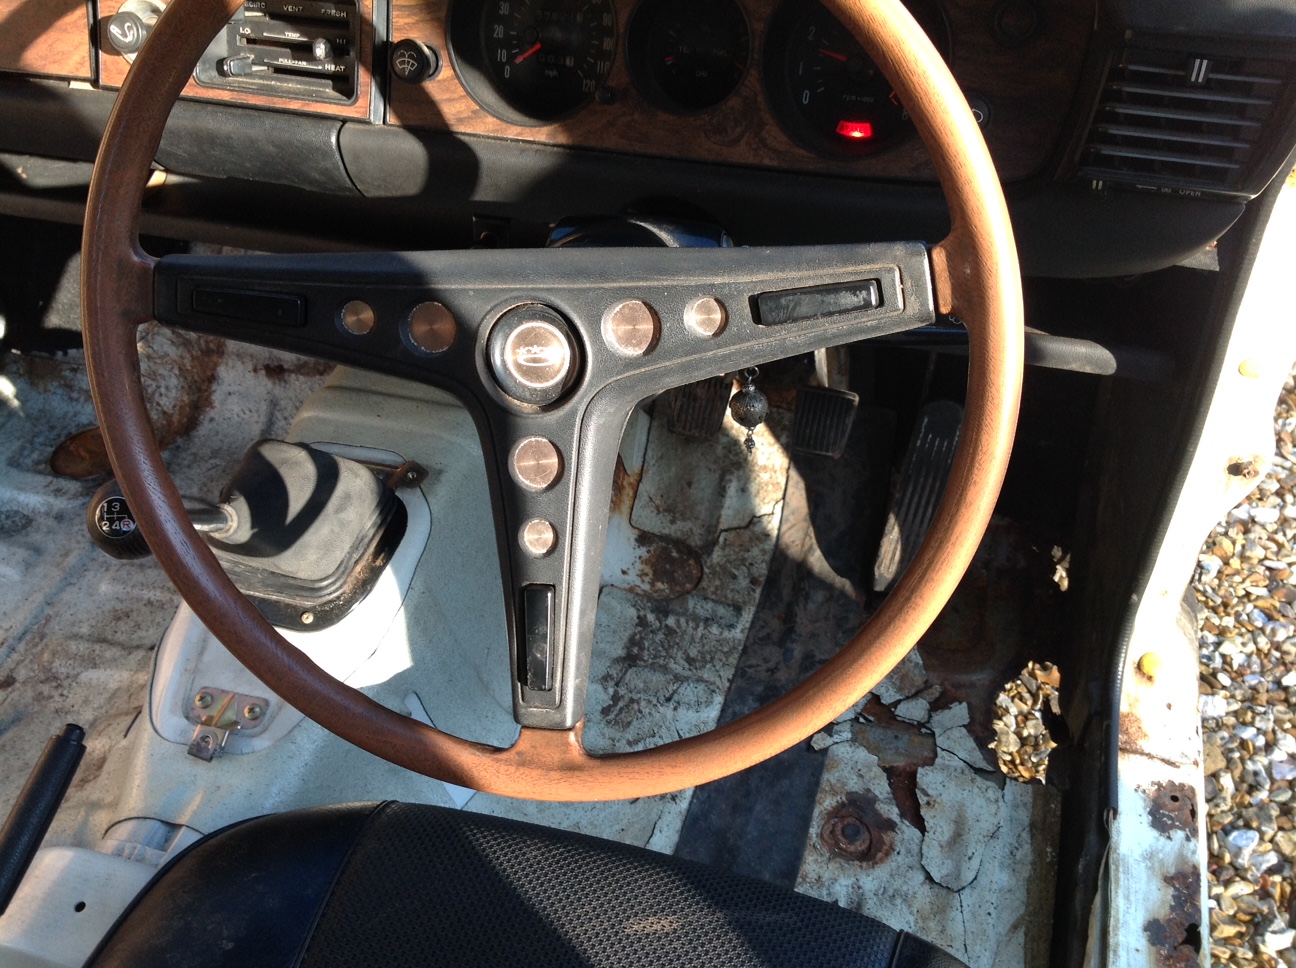
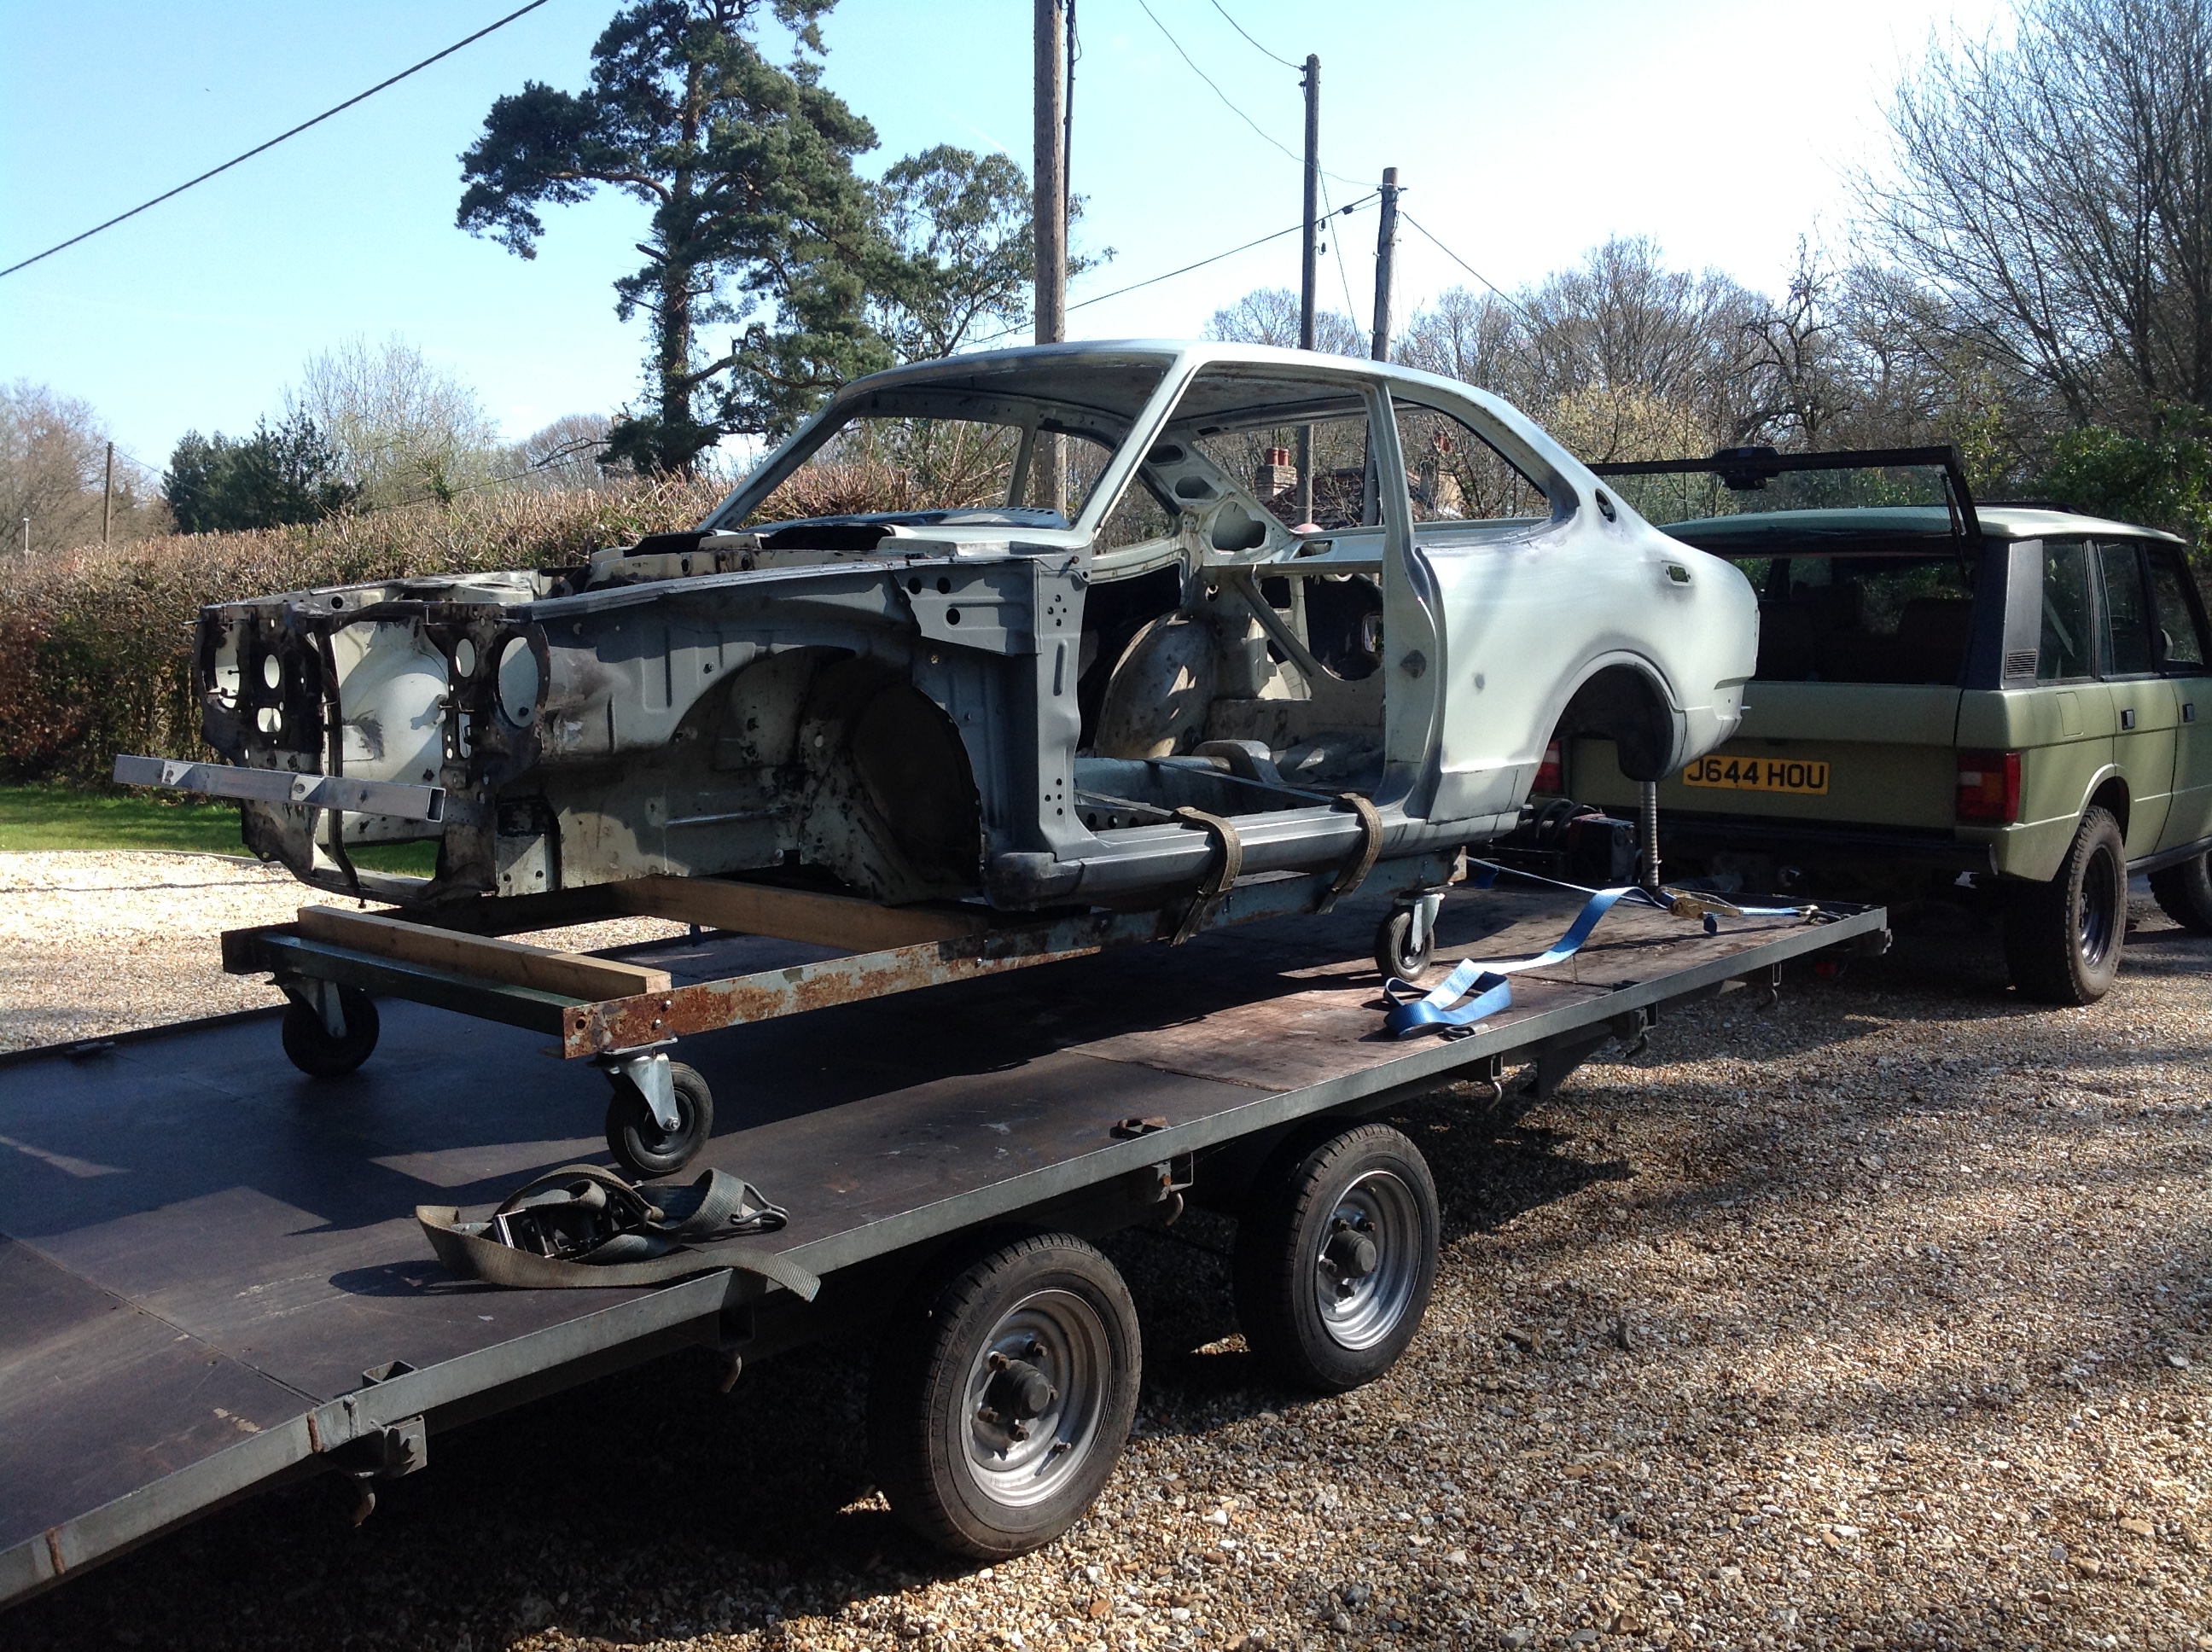
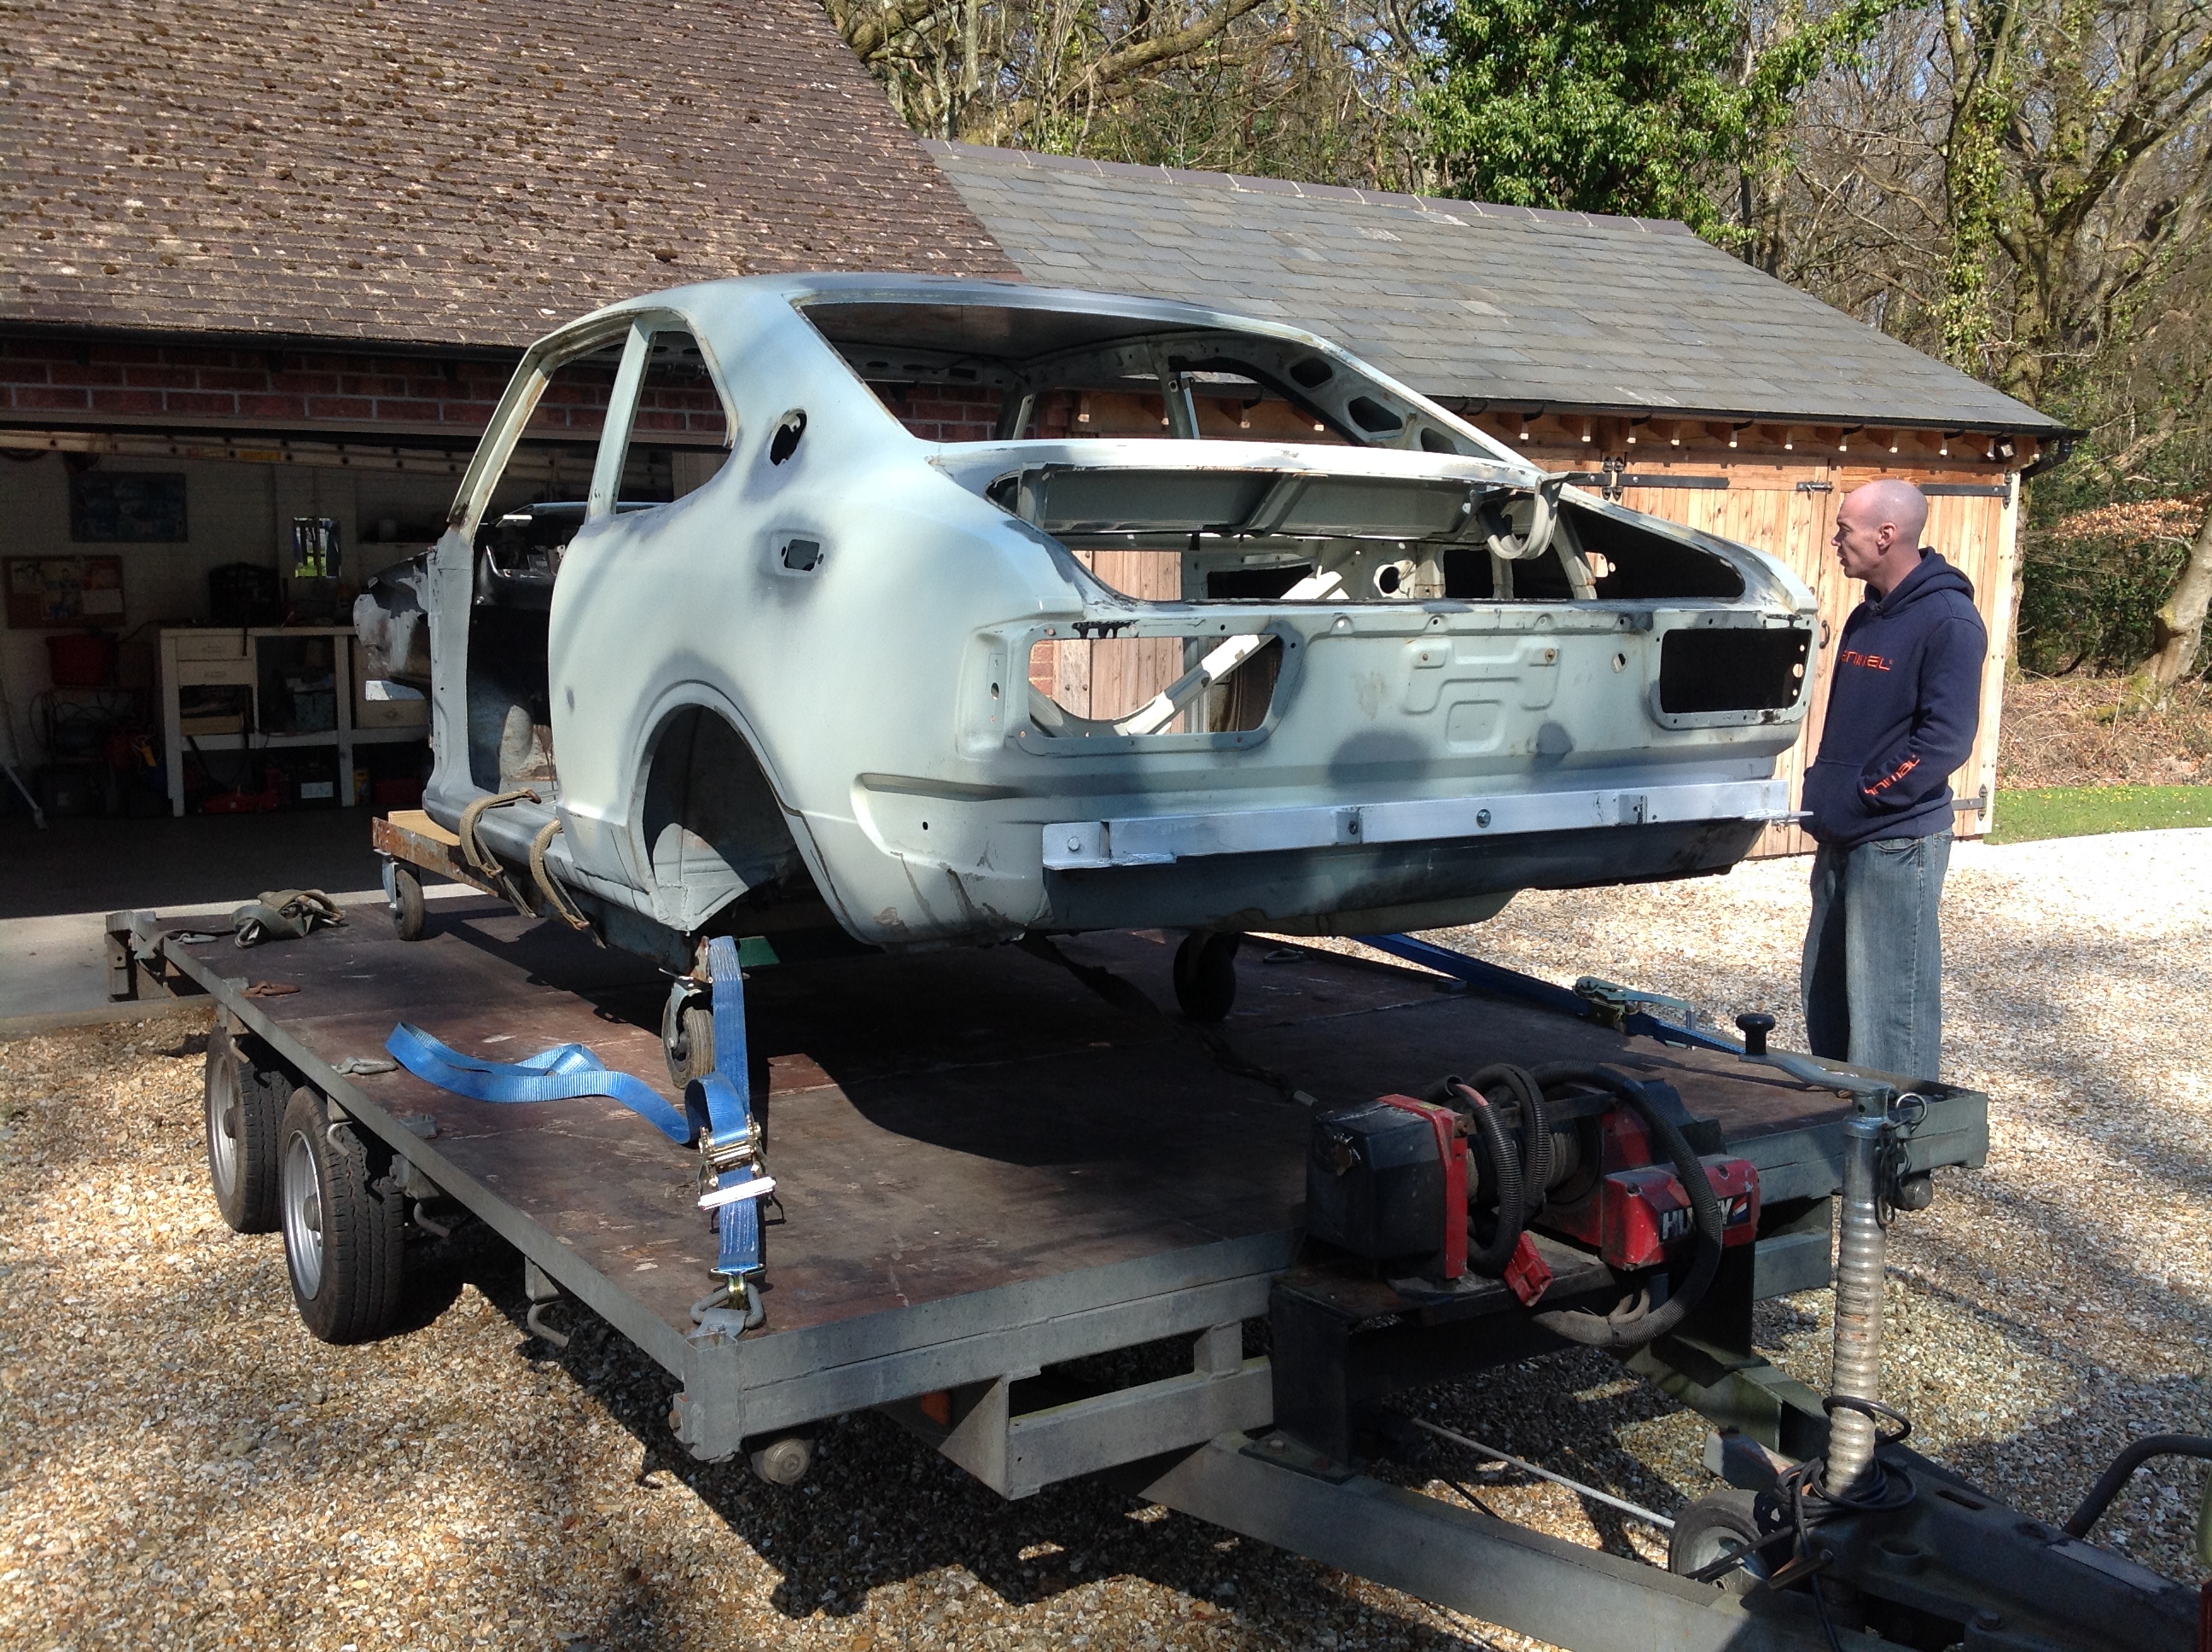
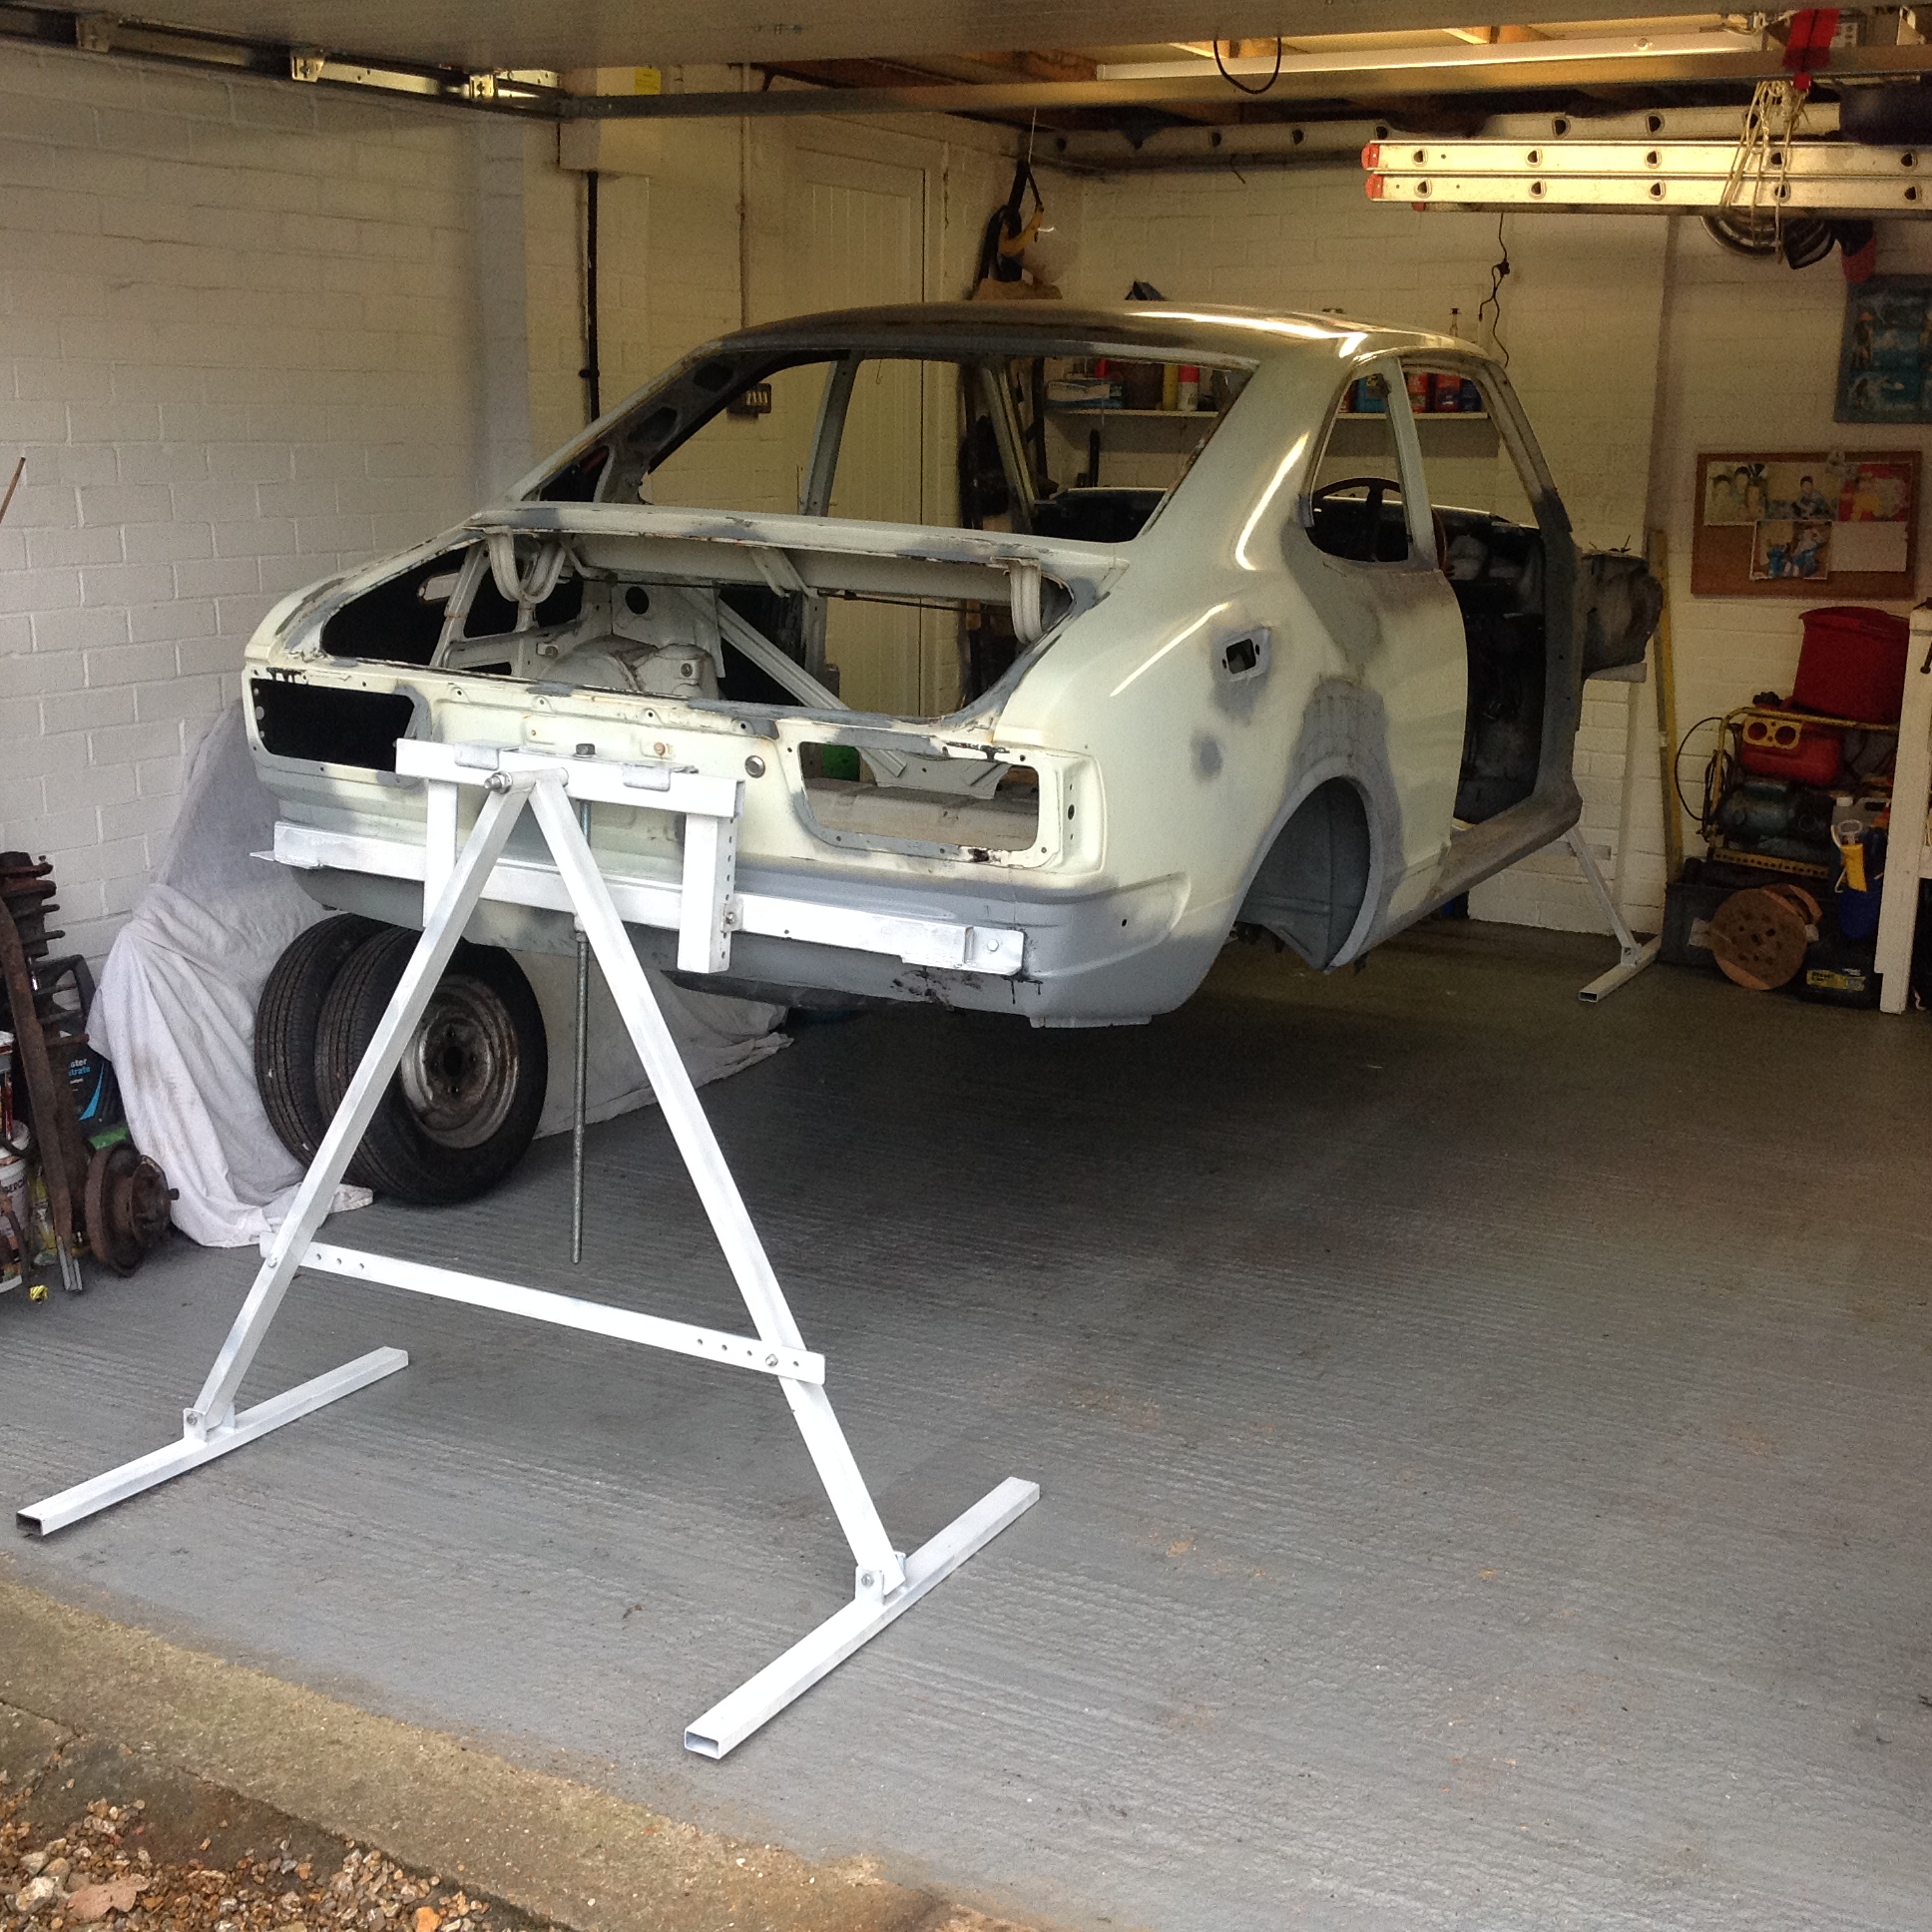
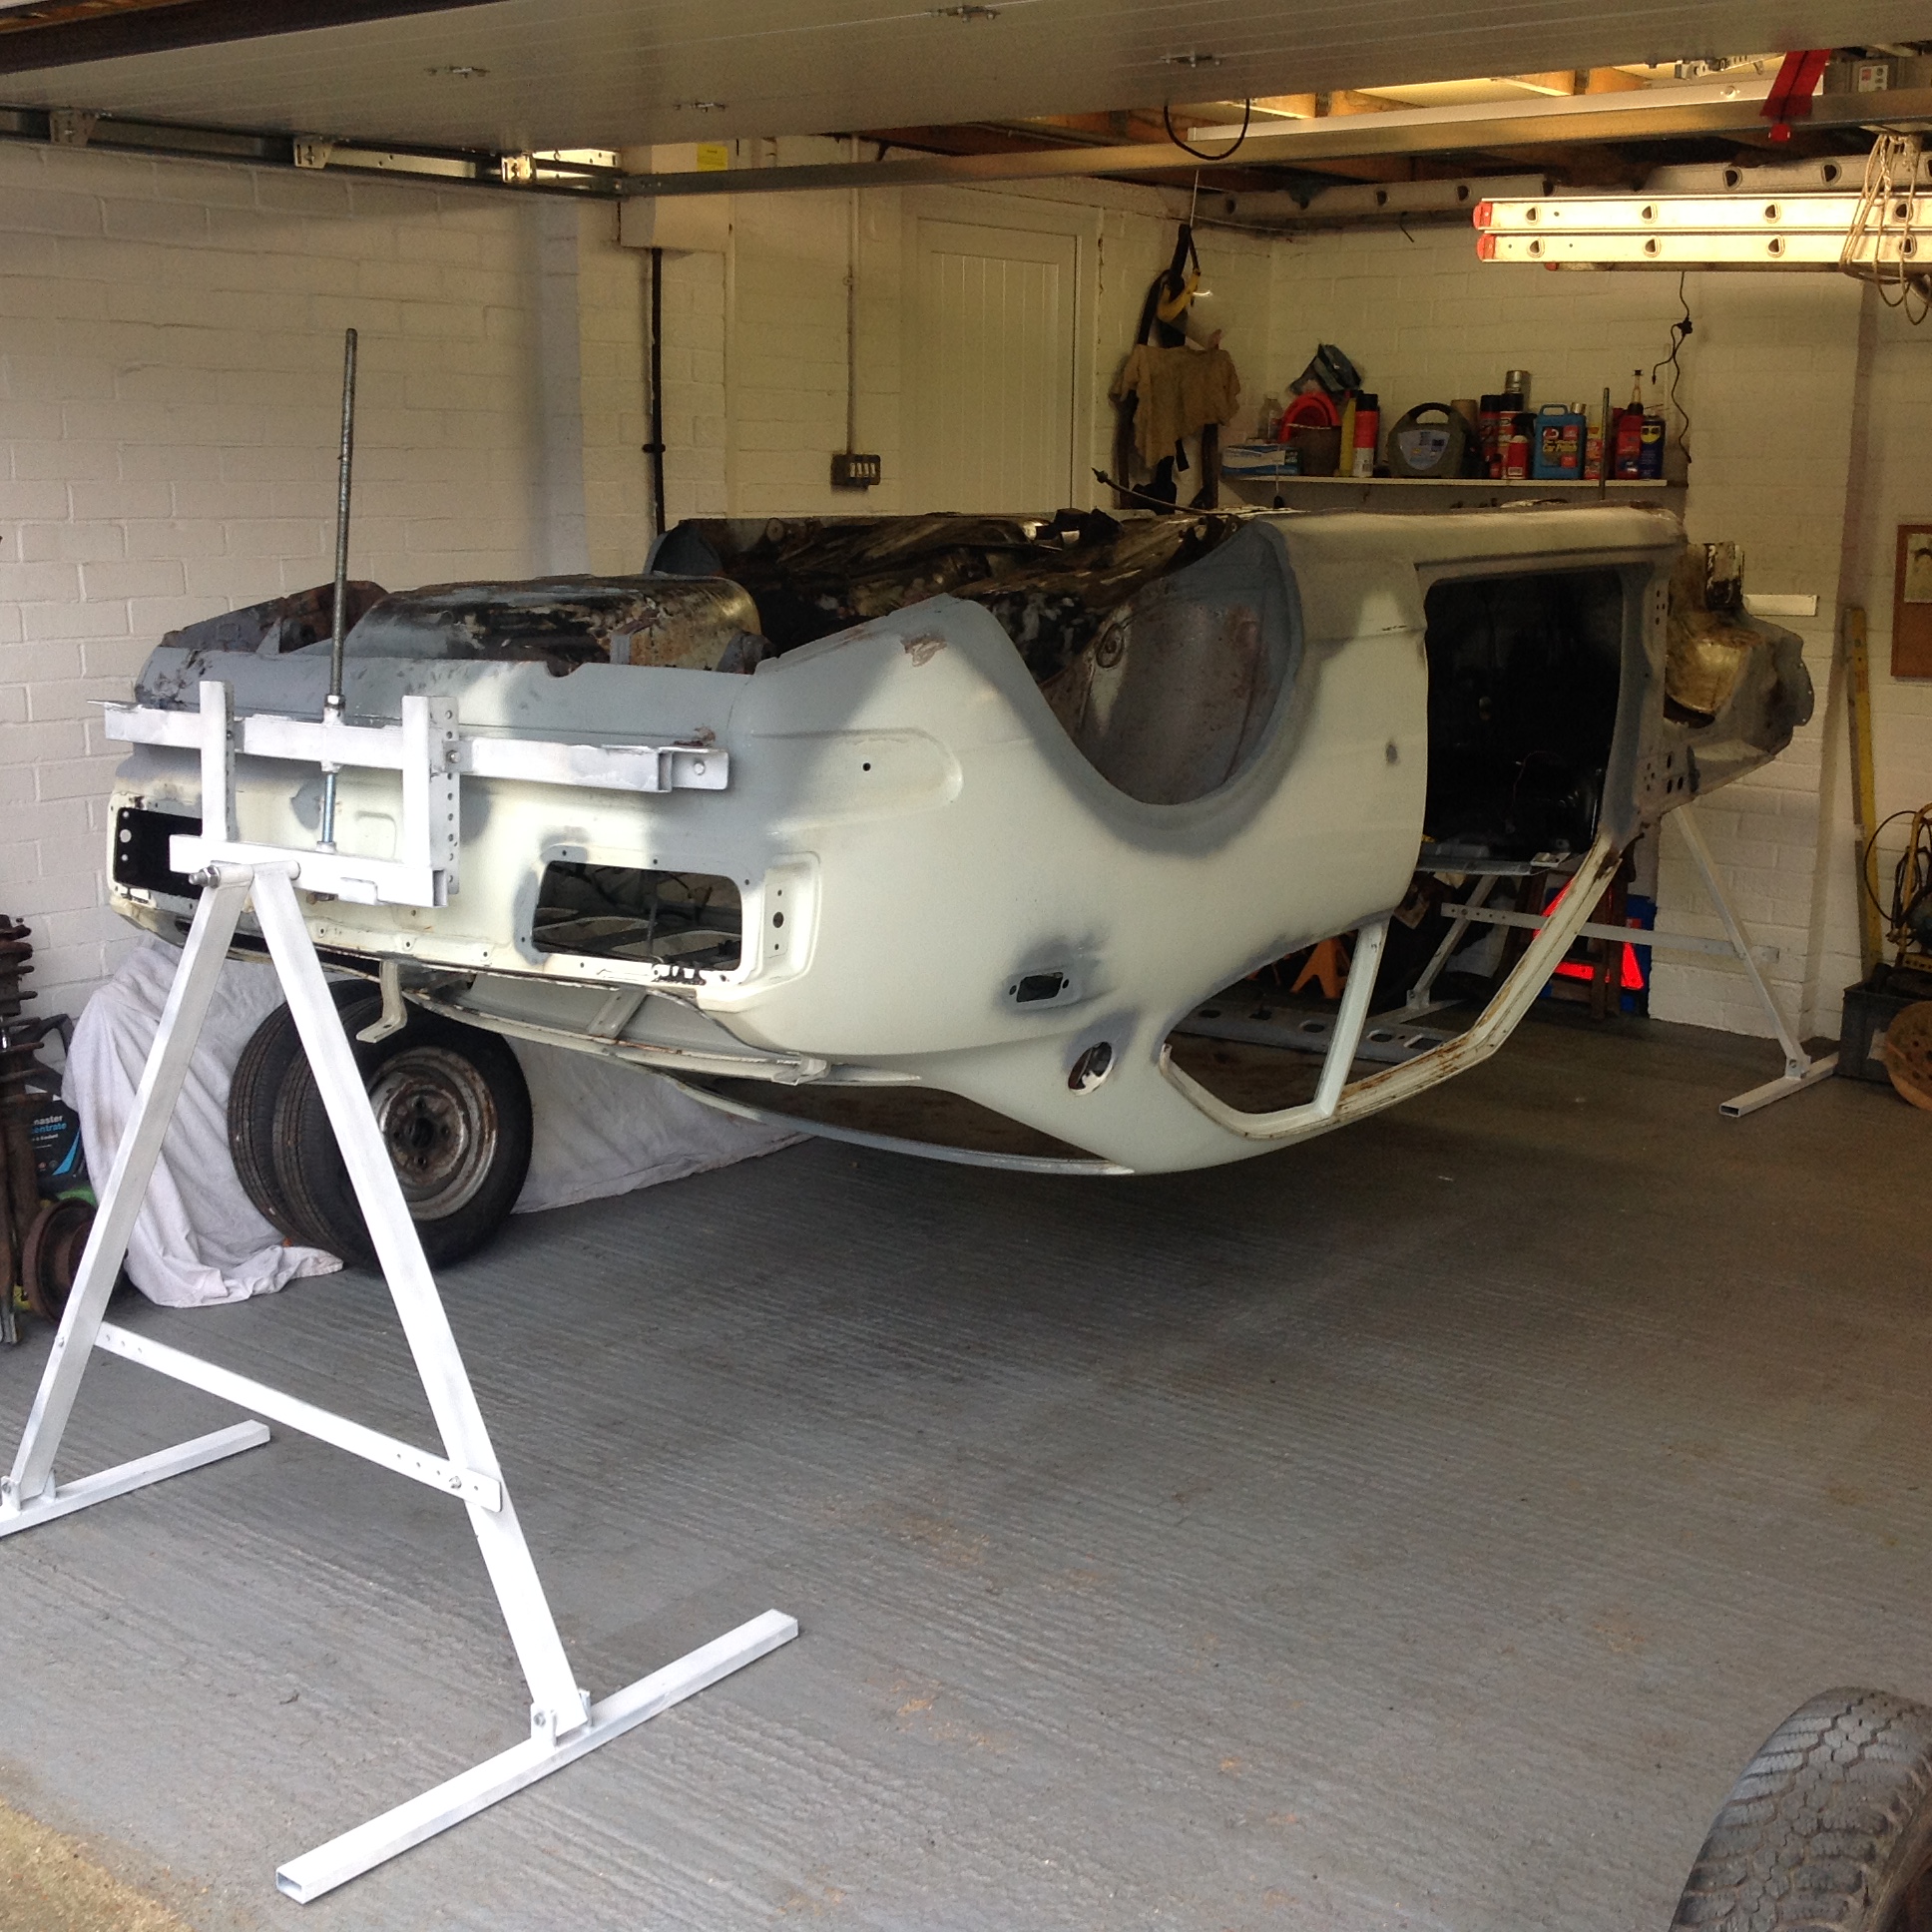
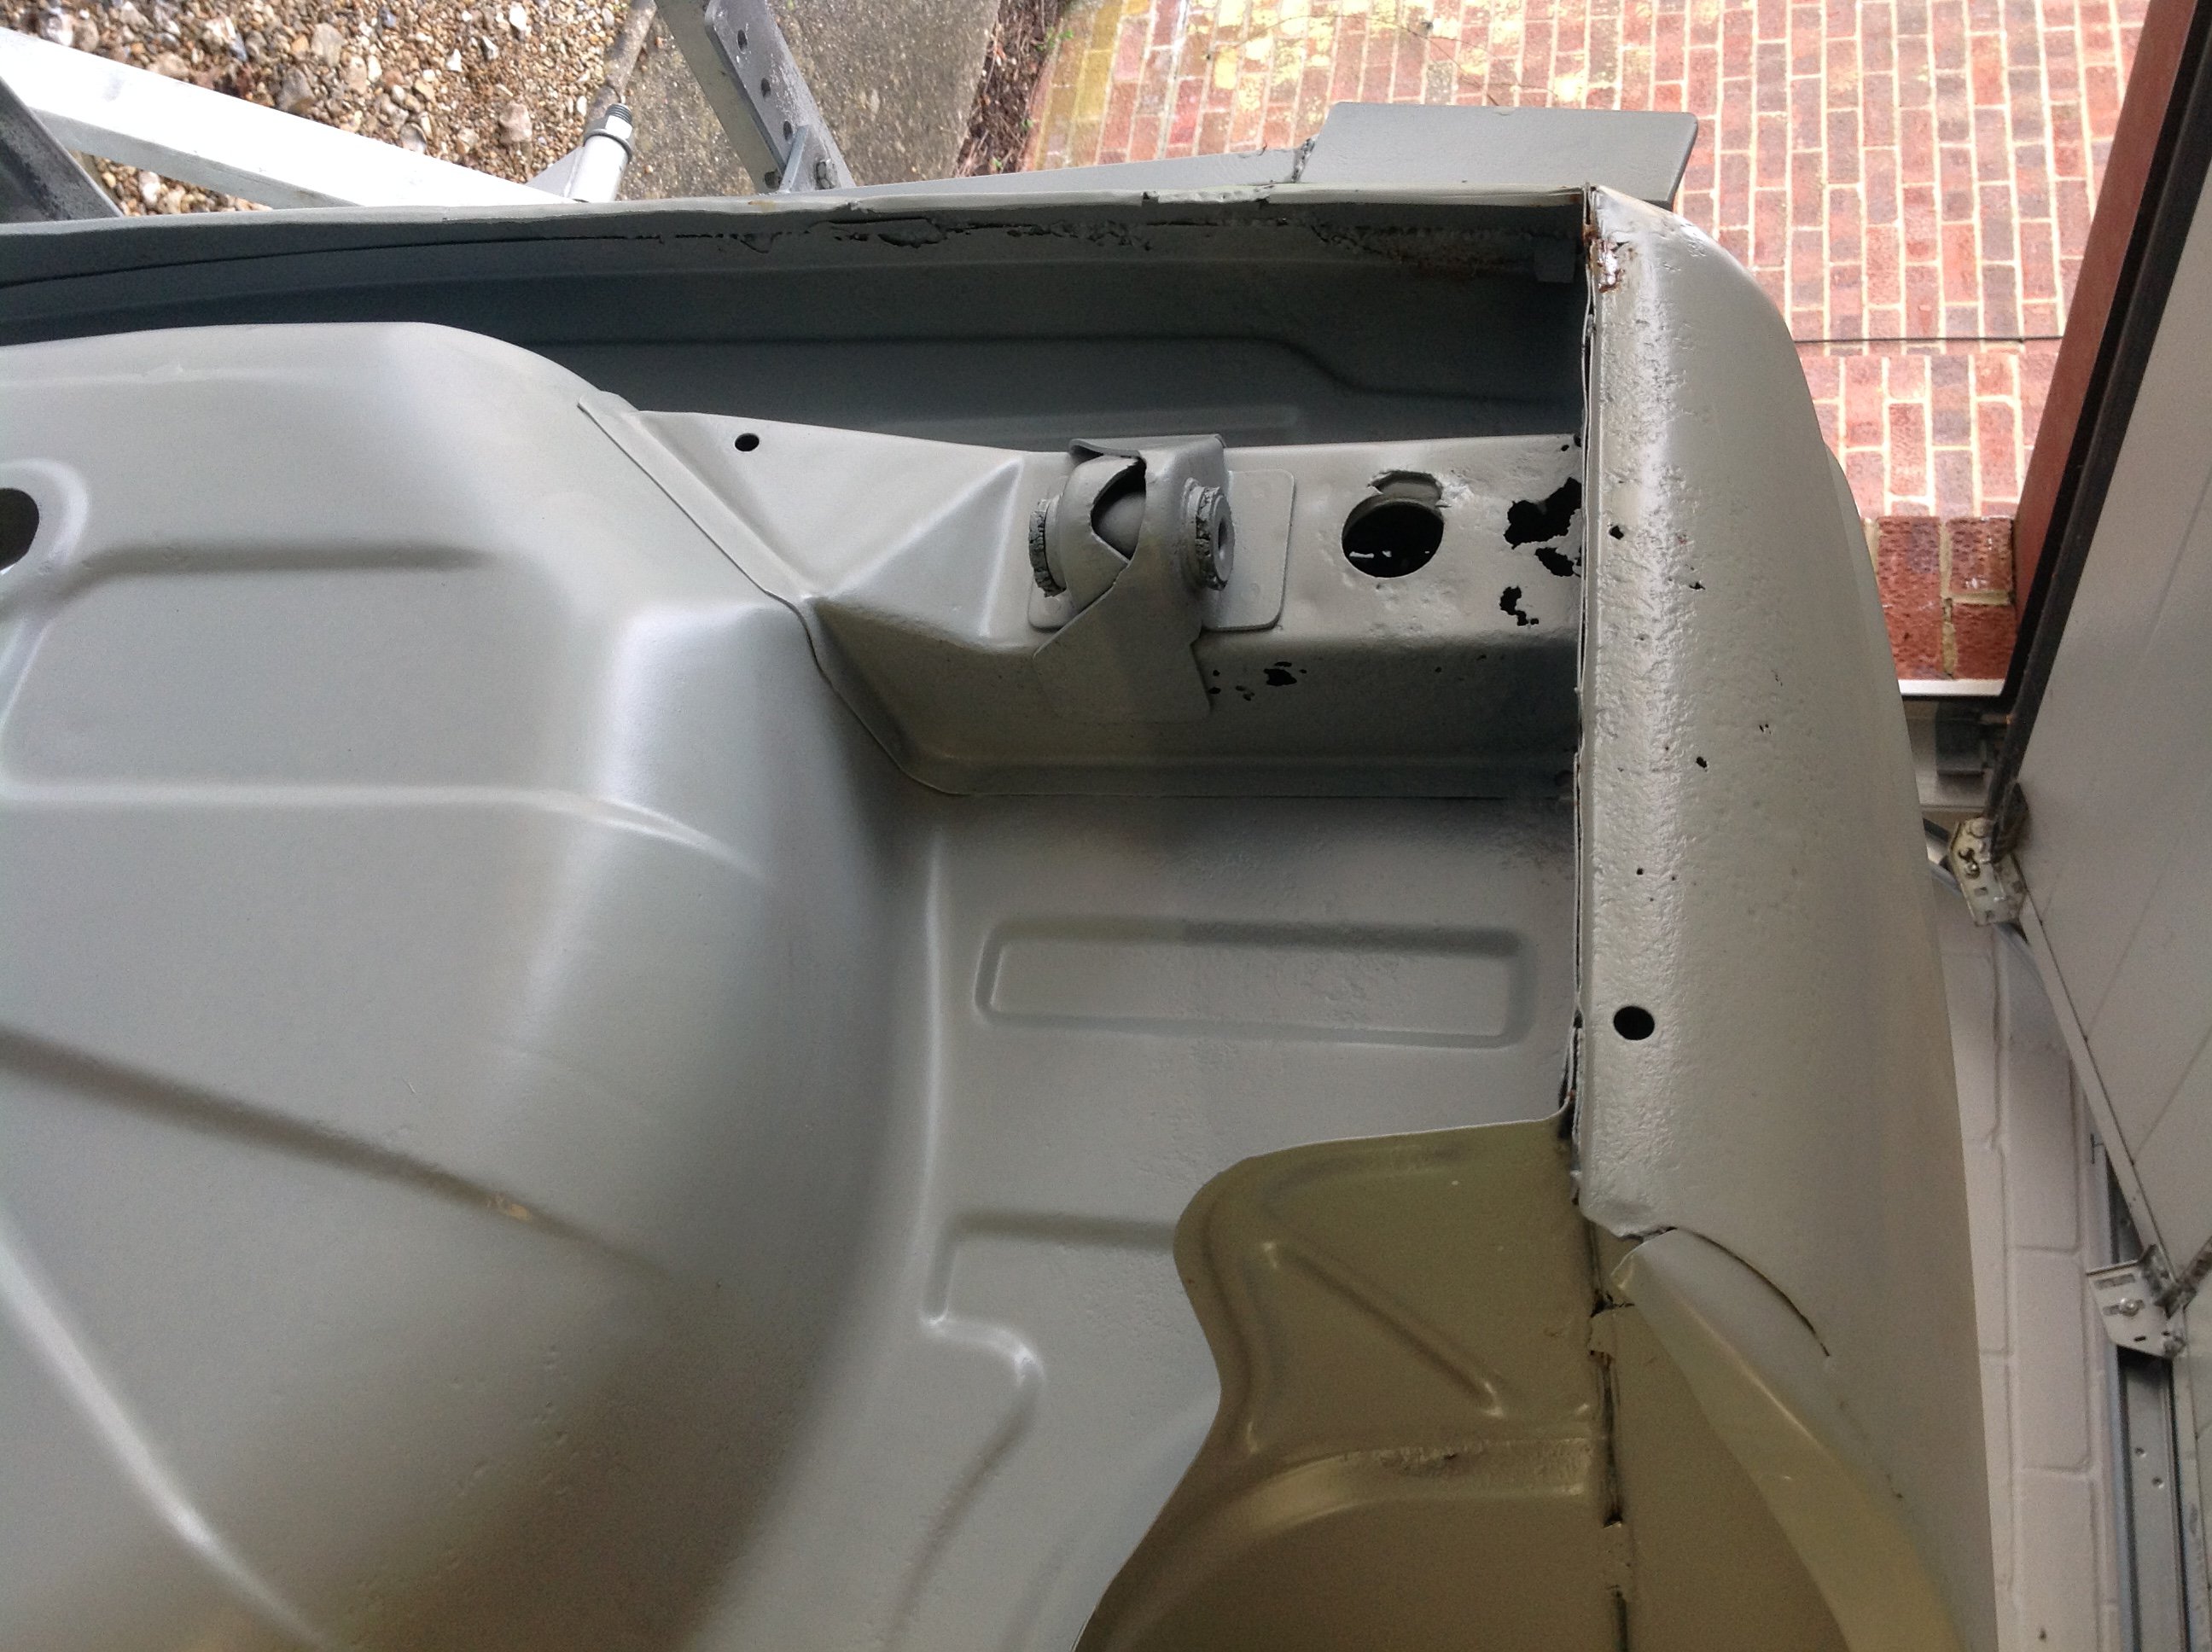
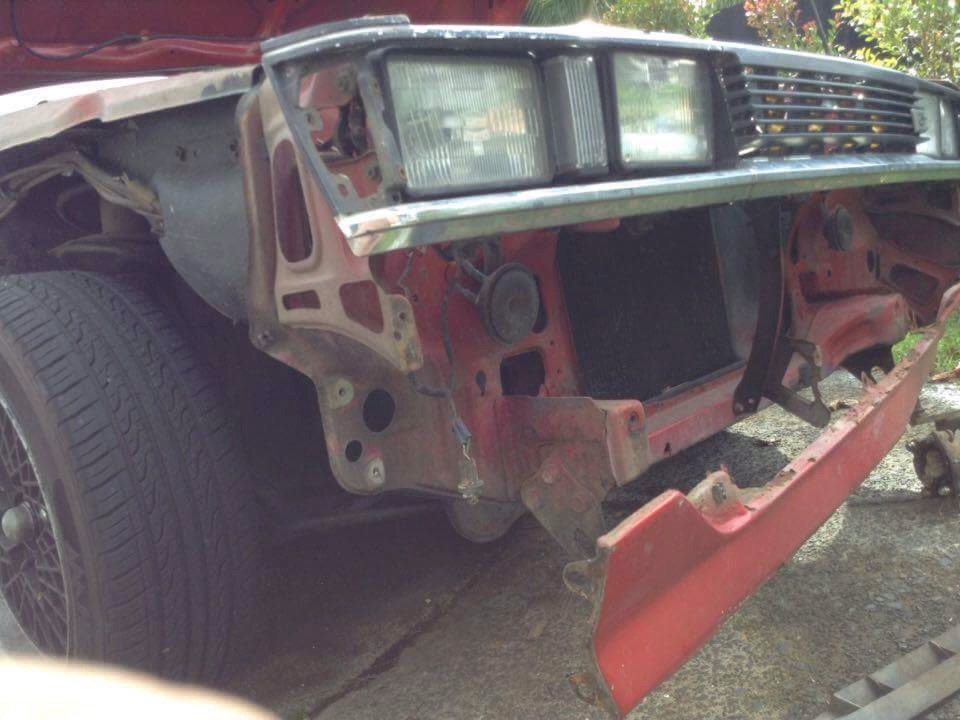
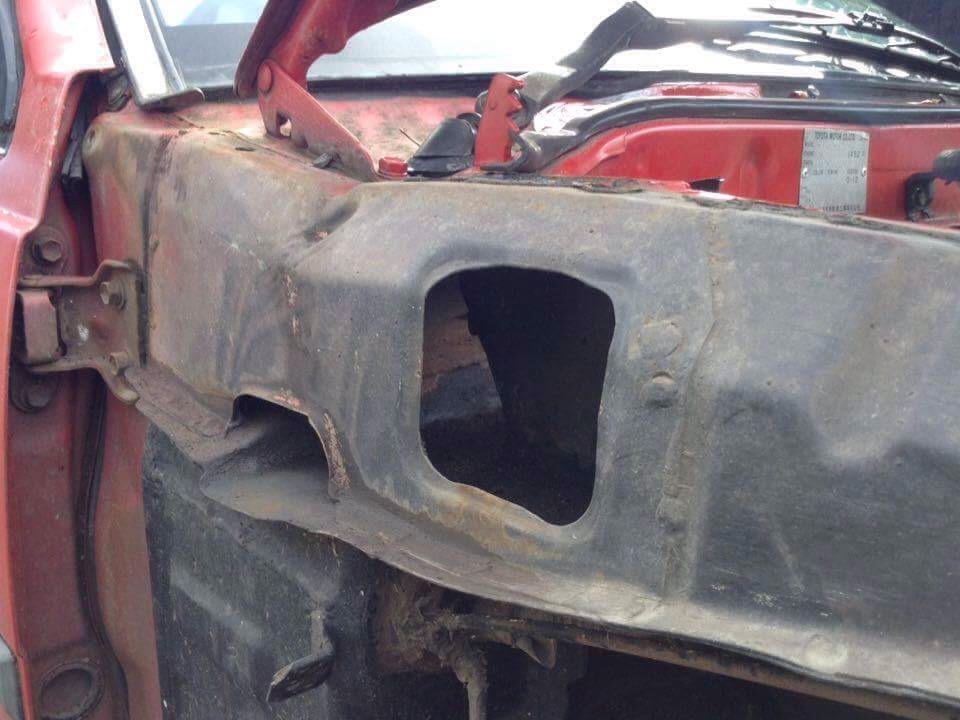
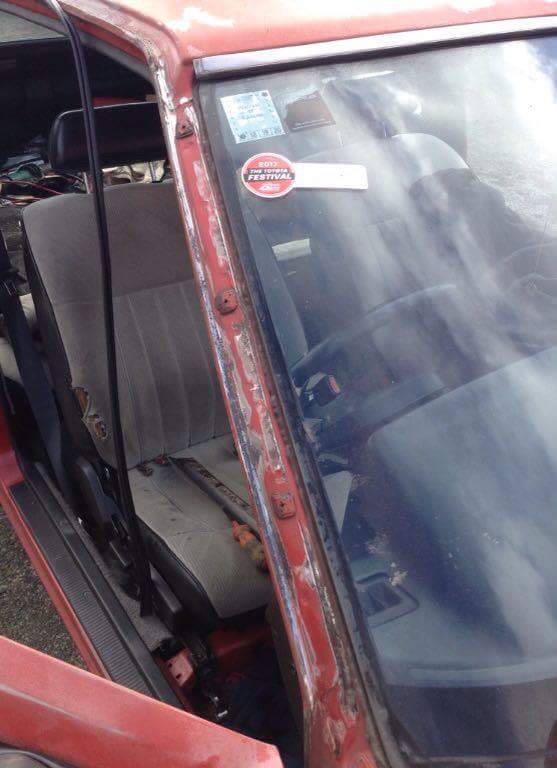
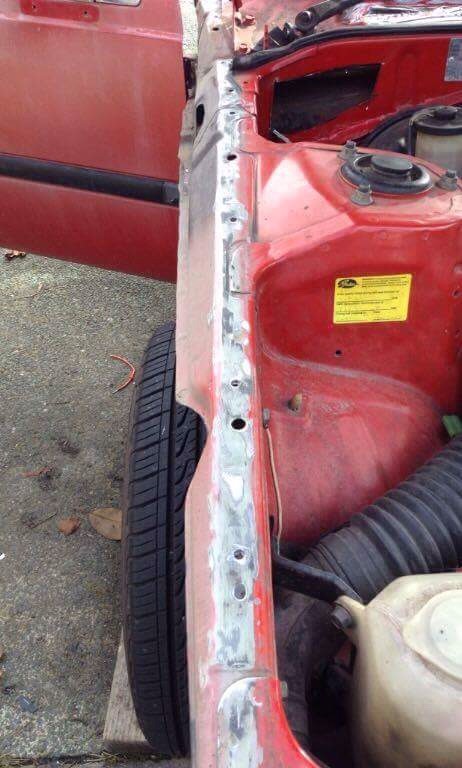
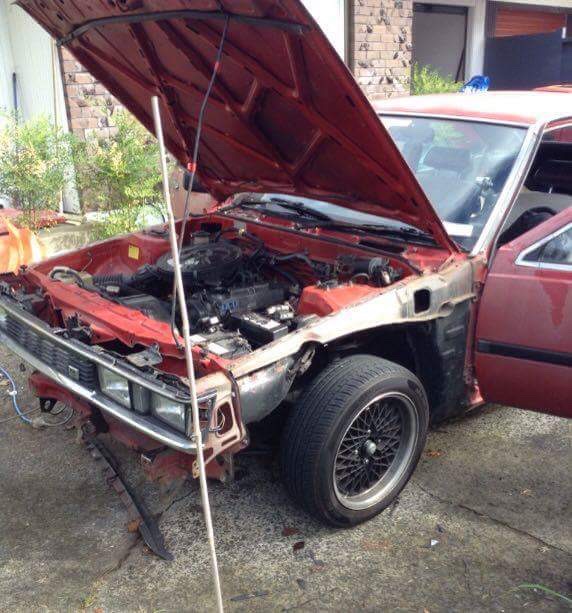
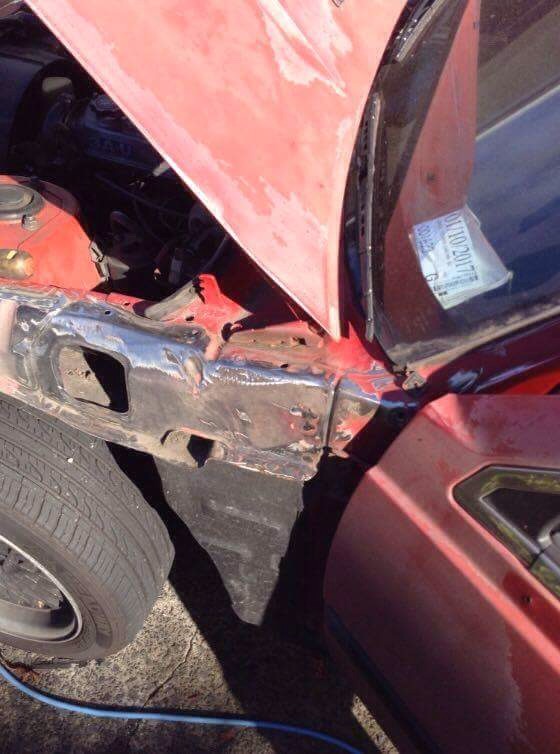
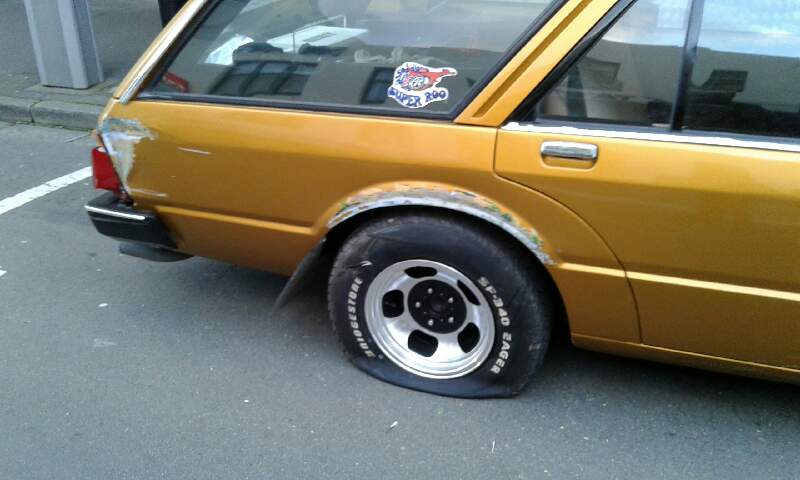
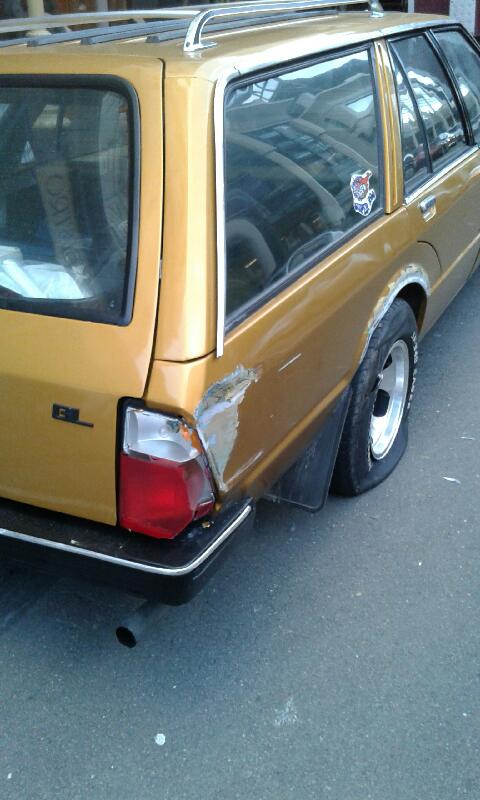
Stupid update #3Thought I'd save Darrell the shit job of bolting up the front fenders as some dickhead (me) thought Stainless allen head bolts would be "cool" pointless photo. shitty photo.they do look pretty, I hope I never have to touch them again, the ones up behind the headlight buckets were pigs!Started cleaning up all the dash components, ignition switch came up awesome! love the solid old quality these old "economy" cars have. I got a dip switch off tedz awhile ago, which I had also cleaned up and fitted.My original switch fucked out years ago and was replaced with a modern version which when used would make this hollow boing! sound. the lovely old one makes a very satisfying "click clack" like a small rifle being loaded. much better.had to test fit the tail lights. yeah.did a few other wee things like fitted the engine lid seal, polished up the dirty old fuel line and started to suss fitting that, also pulled the new wiring loom out of its box for the first time, would like to try and feed it through the roof before I stick the body back on the pan.6 points
-
5 points
-
Time has been marching on, and I haven't touched the van for ages, as I have been so busy with other things.So I decided to book it in at work, as we have a new fabricator just started, and he is rather good! First job was to make the trans mount, and exhaust system. The trans crossmember is a tubular design, from 1 3/4" roll cage tubing. The exhaust is TIG welded 304 stainless, 2" primaries into 3" main pipe, and large muffler with side exit pipe. Next week will be a new engine crossmember and mounts, to a similar tubular design as the trans mount. Also a swirl pot for the fuel injection, weld in the battery tray on the RH side, wiring, fuel lines, air intake, etc.
 4 points
 -
So the bolts were exactly were I left them. these two are getting all pally, who knows what it may lead to.... could be the start of a beautiful thang.4 points
-
The neighbours house who you share a roof with is going to look so shit! Like an ugly conjoined twin3 points
-
High fill primer: Getting there!
3 points
-
OK so this has been along time coming I have pined and pined, and was finally in the position I could do something about it Saw this on goo net but was put off on account of it being noted for damage. When another prospective one fell through I asked Ewan, Shane and Jessie from Stacked to take a look given it was in Osaka. SHane had a look and thought it was a bit rough initially for the asking price, so we low balled them and deeply upset the sellers honour. It looked like bridges were burnt until out of the blue one night Ewan rang me and we had a good ol yarn and he reckoned the guy selling was doing so on behalf of another yard, and that the real sellers were a garage that had sponsored a drift racer that the Stacked admin(?) girl new, so we went through the back door like your mum likes it and managed to do a deal. Its no gem, it needs love, but it runs sweet and it appears solid (compliance yet to confirm/deny). Oh yeah and it was less than half the price most 200zr's are asking in Japan so that helps. Bit of drama today as I got it delivered home while I wait for some parts it needs that Jessie from stacked has been trawling through YAJ for me for compliance (factory high stop light, new rear lenses) as well as some cosmetic items. So I'd asked autohub to give my number to the truckers so they could let me know a day to be home, eta was supposed to be tomorrow. I checked my online account with autohub which said today (the online account is ace btw can track the boat). SO i rang them back and they said oh yeah itll be today, but the driver will ring you, I'll make sure they have your details. I was in the car to go to a client meeting and the trucky rings me and said he'd just got the email from autohub then, not the day before, and that it had already been dropped off, with key on the tyre. Needless to say I bailed from car and meeting and got home to it TLDR Pics Some I chucked on instagram care of the guys from stacked before it was shipped, ill upload some more2 points
-
Lush concrete - hoist the RA up there and lay some 11's2 points
-
Tiny uneventful little album; https://www.facebook.com/media/set/?set=a.552649914859095.1073741886.340084572782298&type=1&l=eedf832ca52 points
-
Have since taken a break from the car and regained enough motivation to get back into it. With the Kaikoura hop coming up its the perfect time too. Both the Viva and the KE20 will be driven up there in the hope they both make it! Since the last update not a whole lot has been done. The fix for it running badly was very simple and purely the car over fueling to heck because of the carb supplied by the previous owner. I have since put the original carb on it and it runs a treat. Next i will be getting it re-ready for a warrant hopefully this week.2 points
-
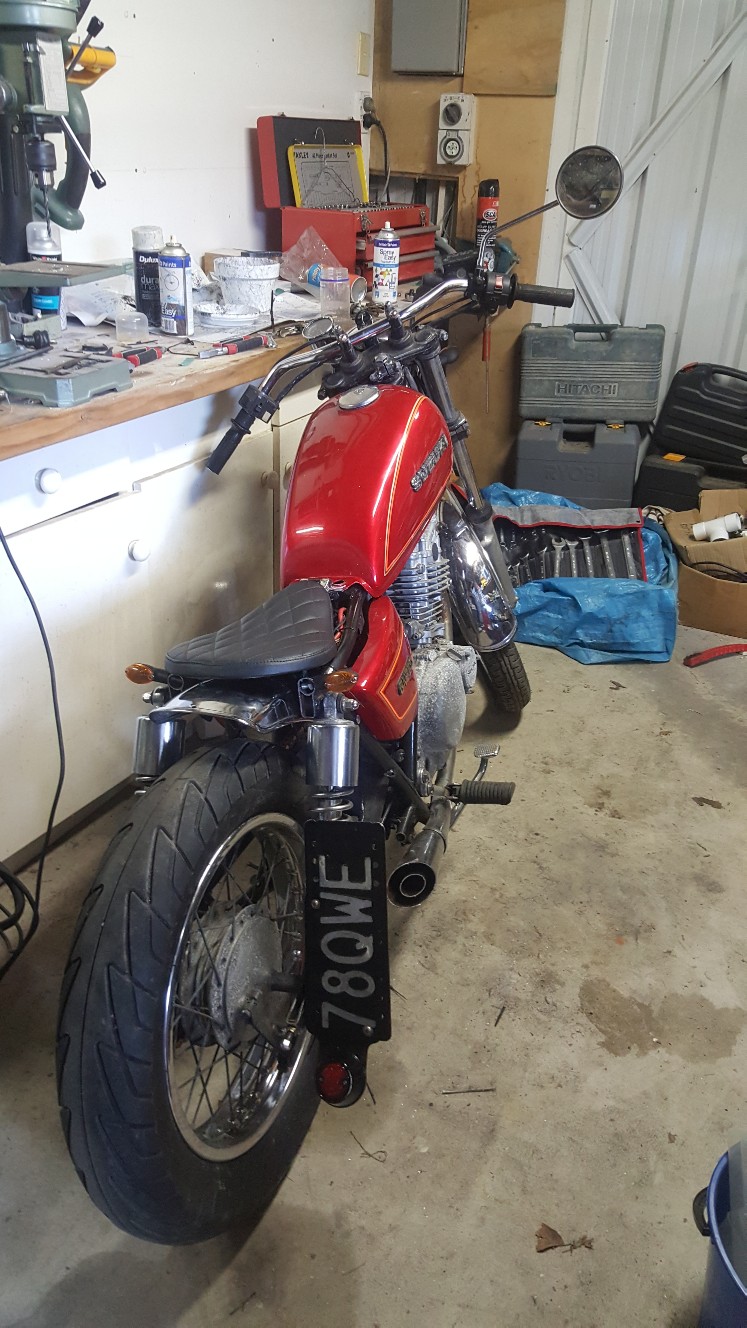
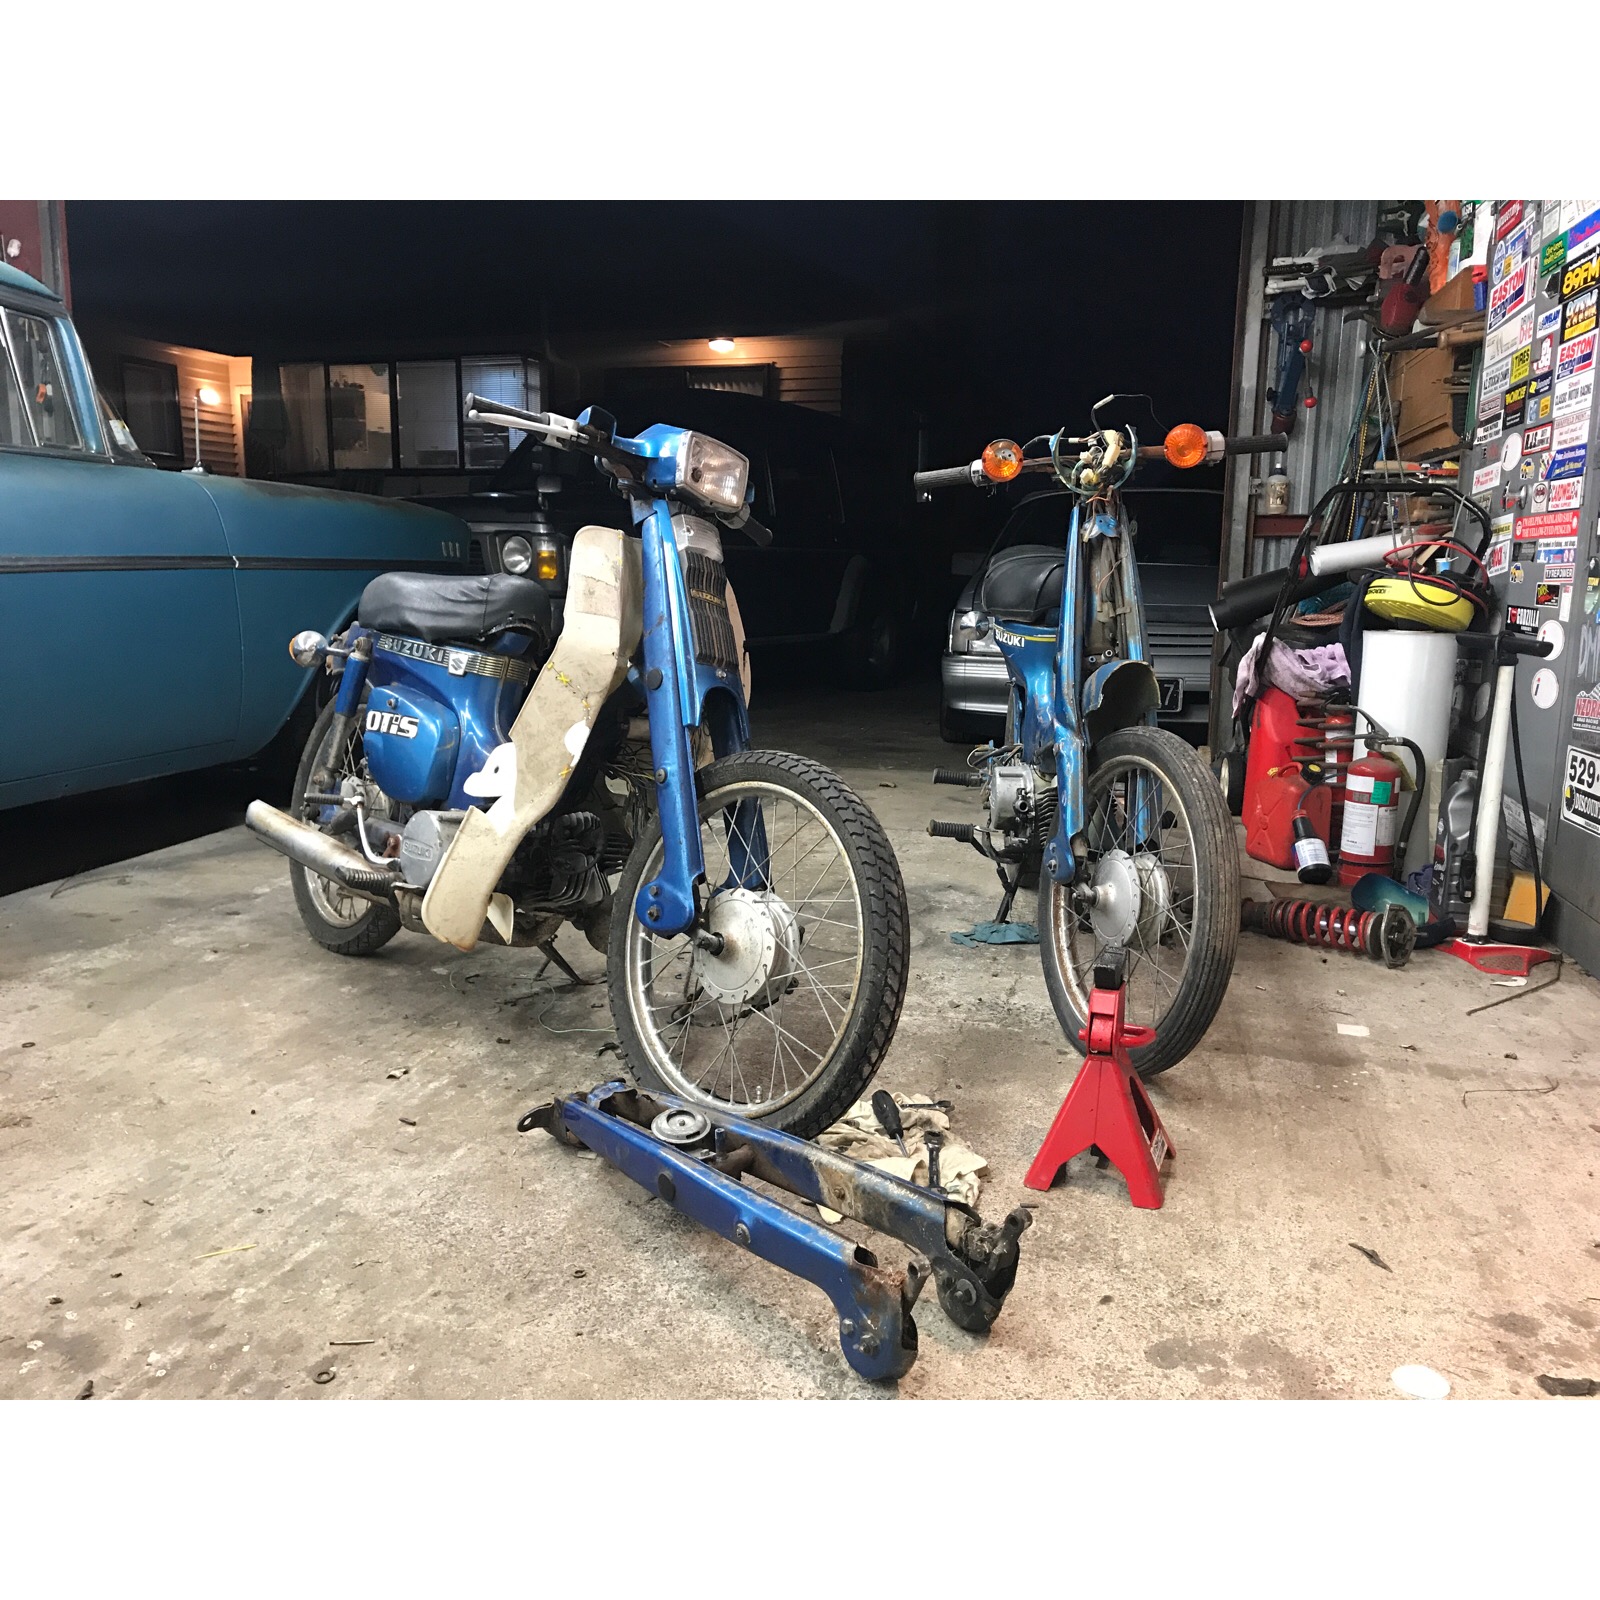
Finshed mounting the rear guard and indicators and also cut the exhaust up and put that back on. Ordered some things last night, I have a reproduction short front gaurd as well as a sweet lever set, as the ones on there at the moment dont match and look too bulky in my opinion. So hopefully they wont take too long. In any case. Id say its 75% there, it will be rideable once i have a new battery, and check everything is wired correctly. Still planning on possibly getting different bars, new controls, and i also want to look into how to lower it a little as it looks abit odd being so high. Cheers guys! (Edit - changed photo)
2 points
-
after selling GP125 it was time to move on to the next project. so i picked this thing up yesterday! 1983 Yamaha SR250, fully road legal and ready to go. at an extremely sharp price it was hard to say no. the dude i bought it off had gone overseas and was chillin in storage, hasnt been used for 4 months so took a wee bit to start it and warm up. gave it a good run today and blew off the cobwebs, such a great ride being able to keep up with open road traffic. sits at 100km/h no troubles if the wind has nothing to say about it. Experiencing finer luxuries like electric start, 12v charging system and a neutral light are a delightful bonus. ' will be a slow build but i plan to tidy it up and turn it into a street tracker/brat style bike. theres a few minor things to get sorted, few gaffa tape side cover repairs and some questionable braking ability at the top of the list. already ordered tracker bars, small speedo and a megaphone muffler. will probs buy tiny battery and gut out the midsection for max lushness. also bought a flat seat with great optimism, but after looking at the frame it is gonna be a real mission to get it to fit nicely without taking to it with a grinder. ideally id like to put a rear hoop in and get it super tidy so we'll see how we go. pix for inspiration1 point
-
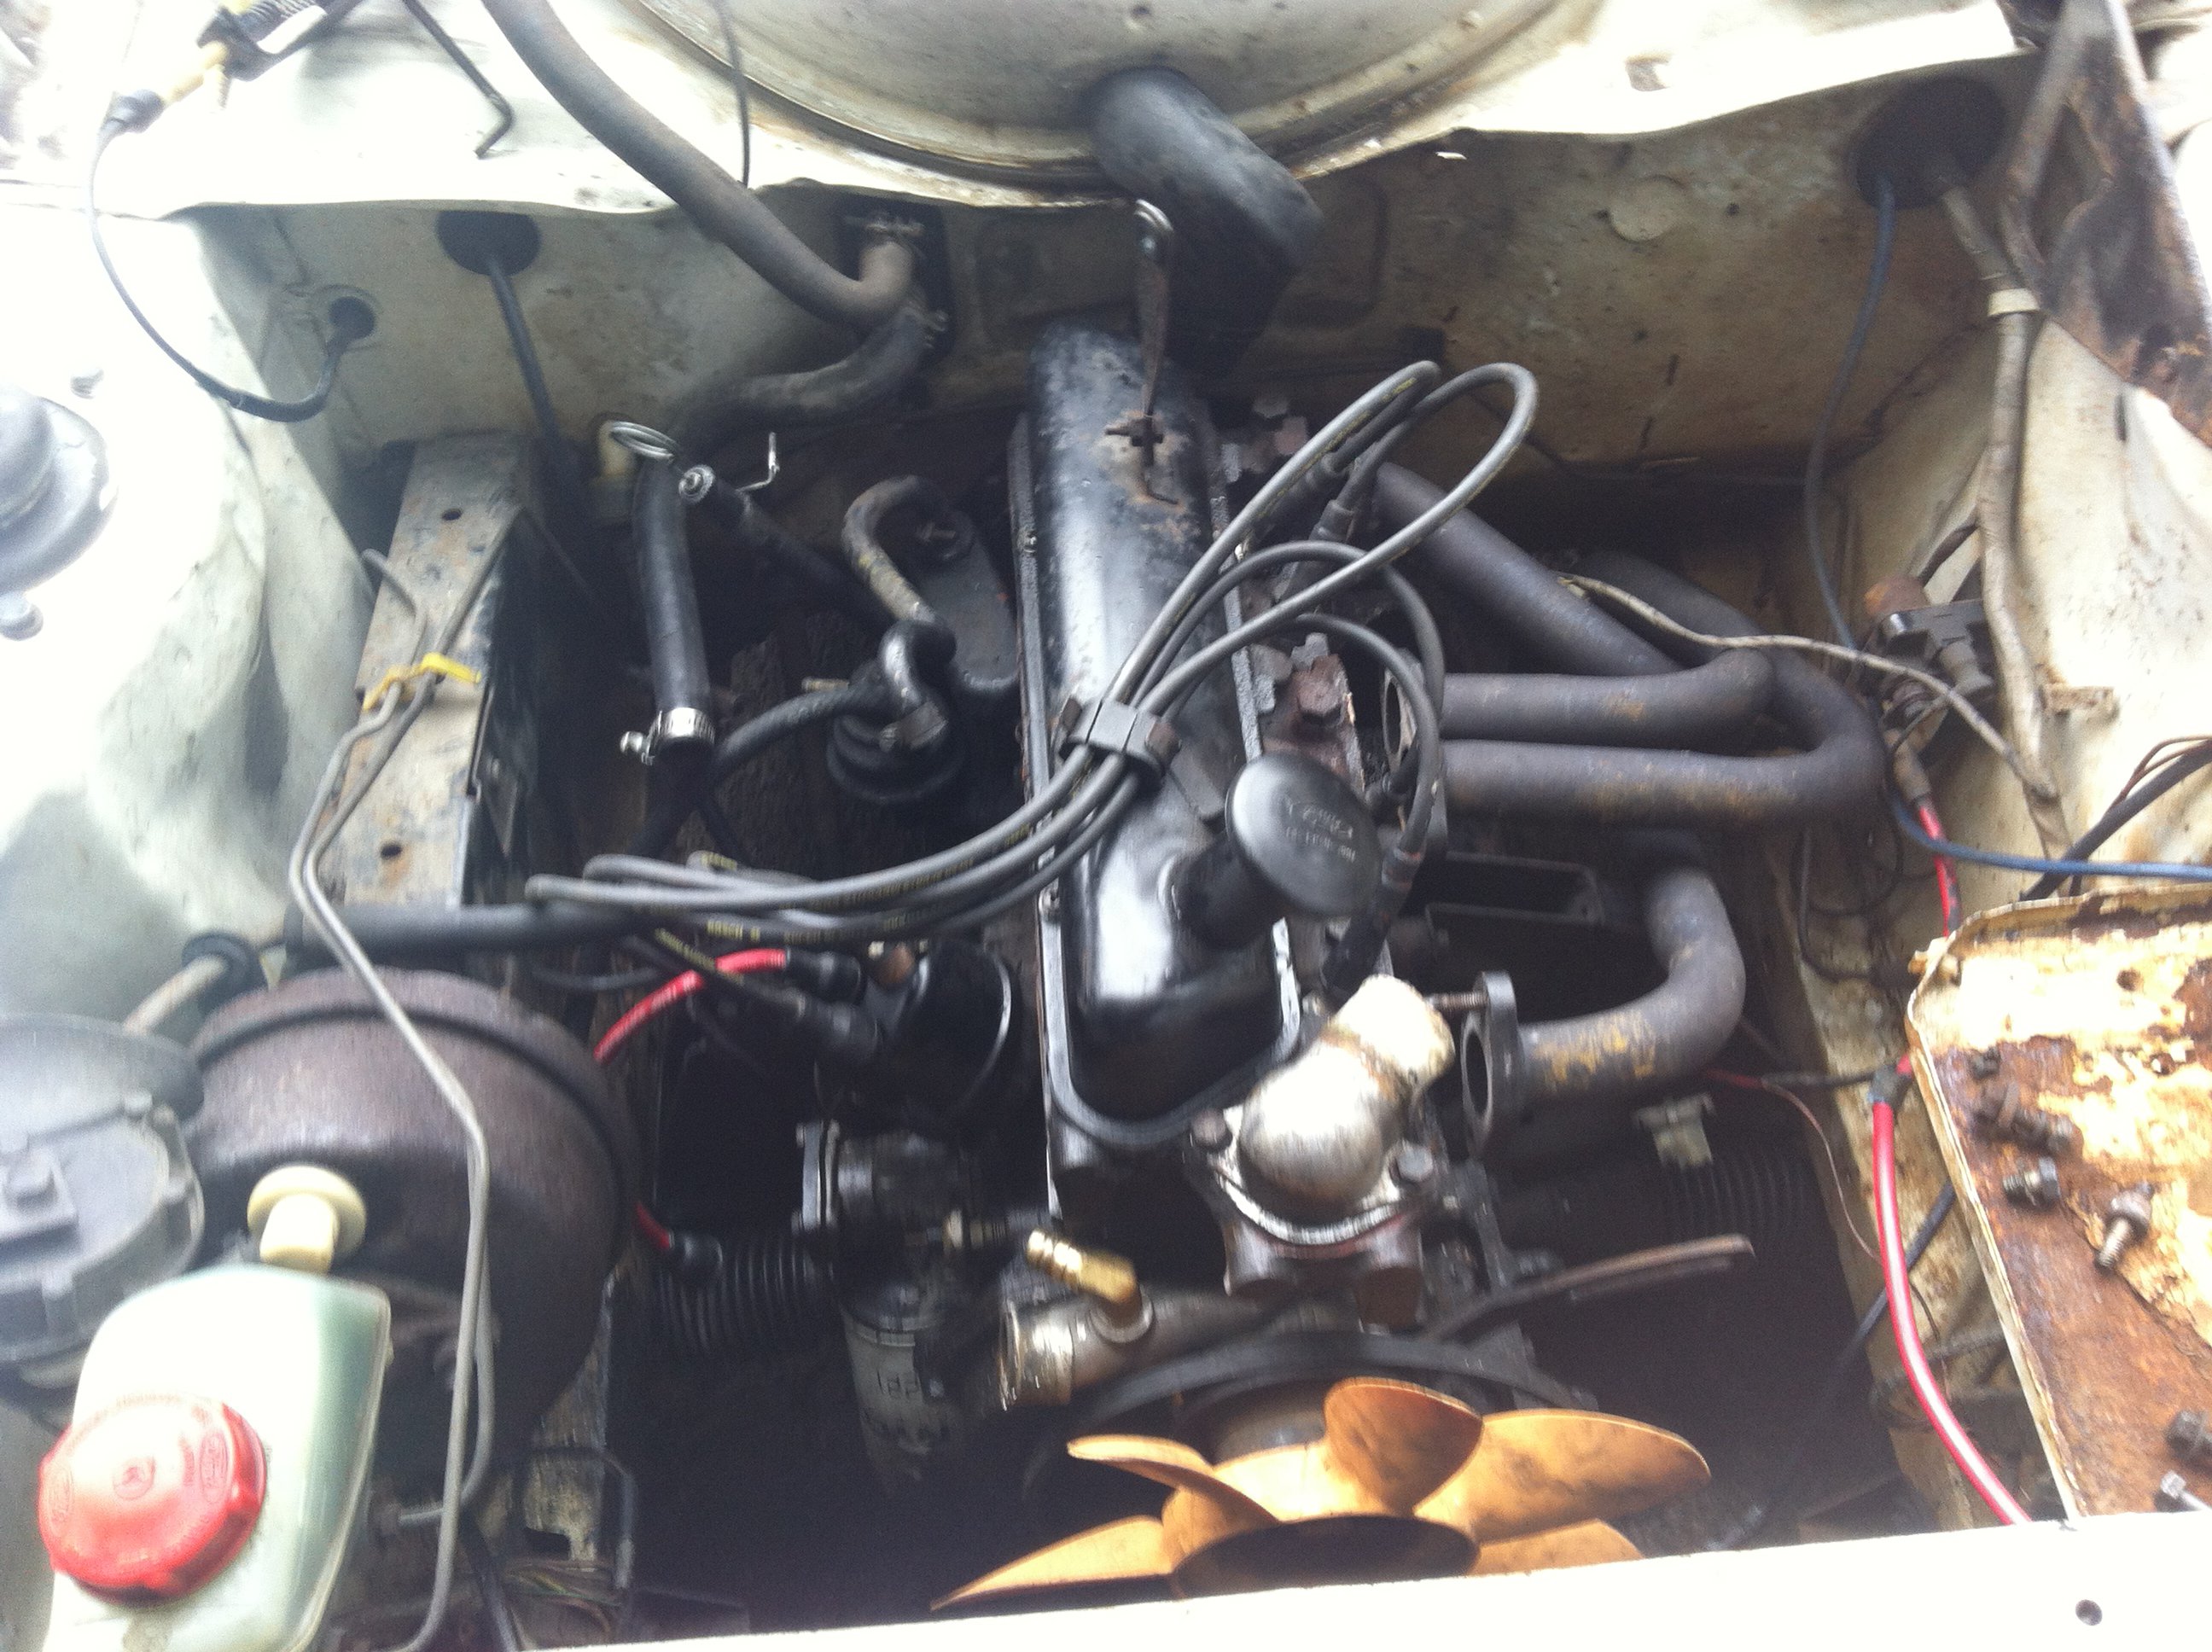
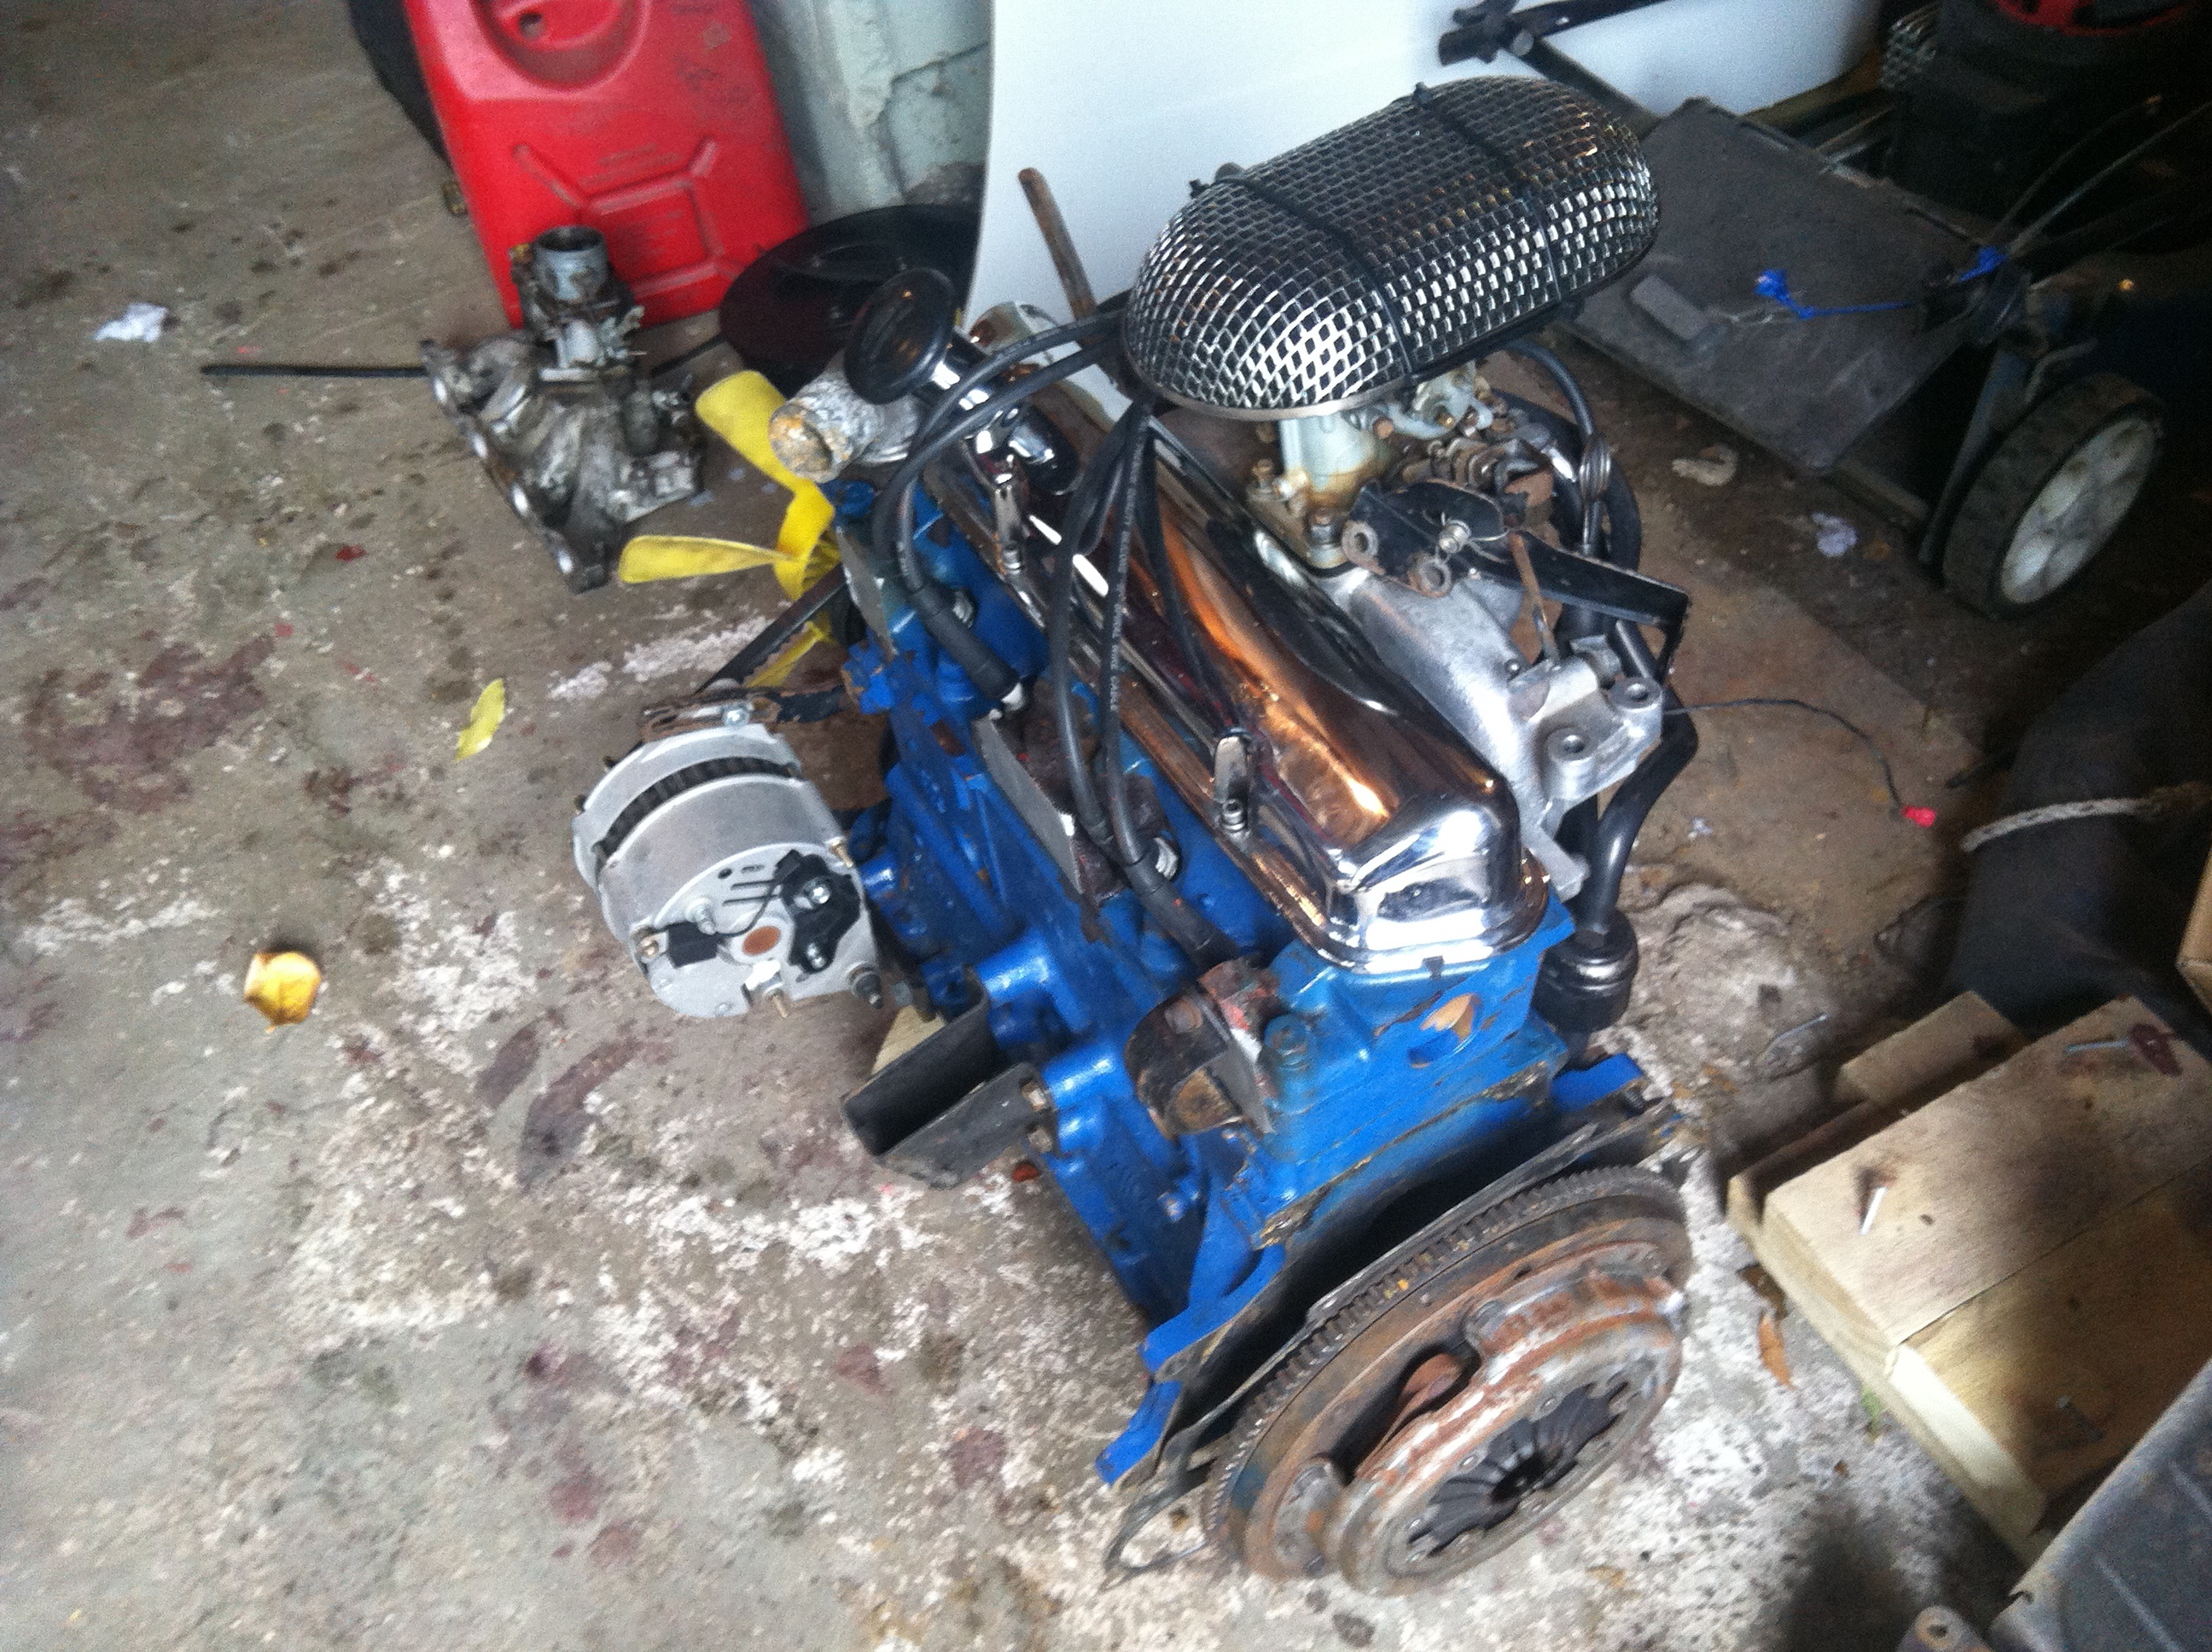
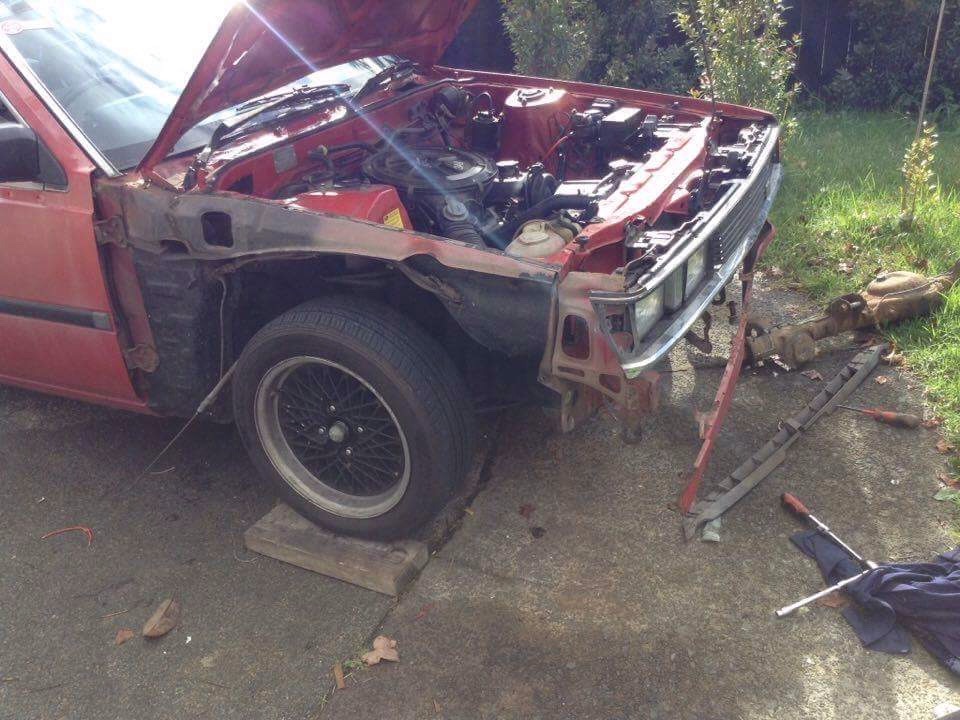
So.. about 4 years ago I brought this little banger off a kid in Cambridge. He didn't want it anymore as it wasn't as fast as all his friend's skylines and shit. I thought cool, I'll take it. This is pretty much how i brought it Nice standard and straight. Good little 1.3 that went hard for the first year i had it untill i managed to get hold of a 1.6 to chuck in. This is back in 2015. We put the 1.6 straight in, was a cunt of a job without the extractors being on a flange... many a curse word was yelled at me from my brother as he helped me out. The 1.6 went hard for about 6 months until christmas day 2015 where it decided to melt a piston going over the kaimais... So off i went on an adventure to melbourne to work and save money for this engine i wanted to get rebuilt. decided to stick with the 1.6 xflow over a pinto as i felt it suited it better than a pinto and also i wouldnt have to get a cert... 6 months past and i returned from melbourne and the rebuilt banger was ready to be picked up from Stick Automotives in Ohaupo. Fully rebuilt with all new internals. Bored out and honed, 1300 pistons, lumpy cam, 10-1 comp, Ported and Polished head.. blah blah the list goes on. Was made to have sidedrafts but they were not in the budget so it got the 28/36 dcd put back on it... Fast forward 7 months, the old twin throat just wasnt coping with the amount and gas i wanted to give it so managed to score me a set of twin 40 delorotos off trade me for next to nothing.. got them rebuilt and chucked on Another 6 months went by which to about feb this year. Moved back to tga from auckland, engine started running like a sack of shit so took it into dynopower to get it properly tuned and balanced... Boy what a difference that made. turns out the little banger is putting out 150hp..
1 point
-
Too Busy to do audio because of telstars.....1 point
-
You could probably just take it to a rad place and get it done for fuck all. Rad paint smells great.1 point
-
new pad skids have been discussed. it'd be pretty hard to get the car onto the pad. imagine the catastrophic fuckup if it went wrong and the car ended up in the old floor framing! so no, we're not doing that.1 point
-
Another good day today. took engine out and started to strip down the engine bay. taking out the brake servo tower was a cunt of a job i must say. feel like it took way longer that it should have.. dont even know if i want to put it back in... Left side is nice and straight, right is pretty patchy and rough.. Cleaned everything i could with the angle grinder. pretty much onto hand sanding now... any tips for getting right into the corners? right side panel work which looks like its been done by 10 different people.. also a pic of the painted floor which the dog walked over...1 point
-
nah just do it and be smart about application. Obviously thick coats of ceramic insulative paint will be a fail. I think there have been quite a few tests done about painted intercoolers and the results werent anything worth remembering.1 point
-
Be better to start with an Aussie 6 Tina if you wanna fit a Barra, factory modified firewall to fit the Falcon 200/250 with a BW75 diff and BW 4-speed. Half the work's done for aleady... https://www.streetmachine.com.au/street-machine-tv/1609/1100rwhp-barra-powered-ford-cortina-video1 point
-
1 point
-
Yeah- just strip it down, stretch the oil control springs out, give the plates a scuff with a belt sander, drill some ports and rebuild it using appropriate sized electrical cable for your new water seals. Start early in the morning and you'll be ready for a few laps and a feed of KFC by the evening! You can thank me later..my advice is free.1 point
-
IF i was going to put a barra in it mate i would go NA with 6 side suckers ....and some cams...that would be plenty of power and the sound.............oh the sound but no im not going to put a barra in it. now back to the valiant with you mate........go on..........off you go........i want to see that thing back on the road1 point
-
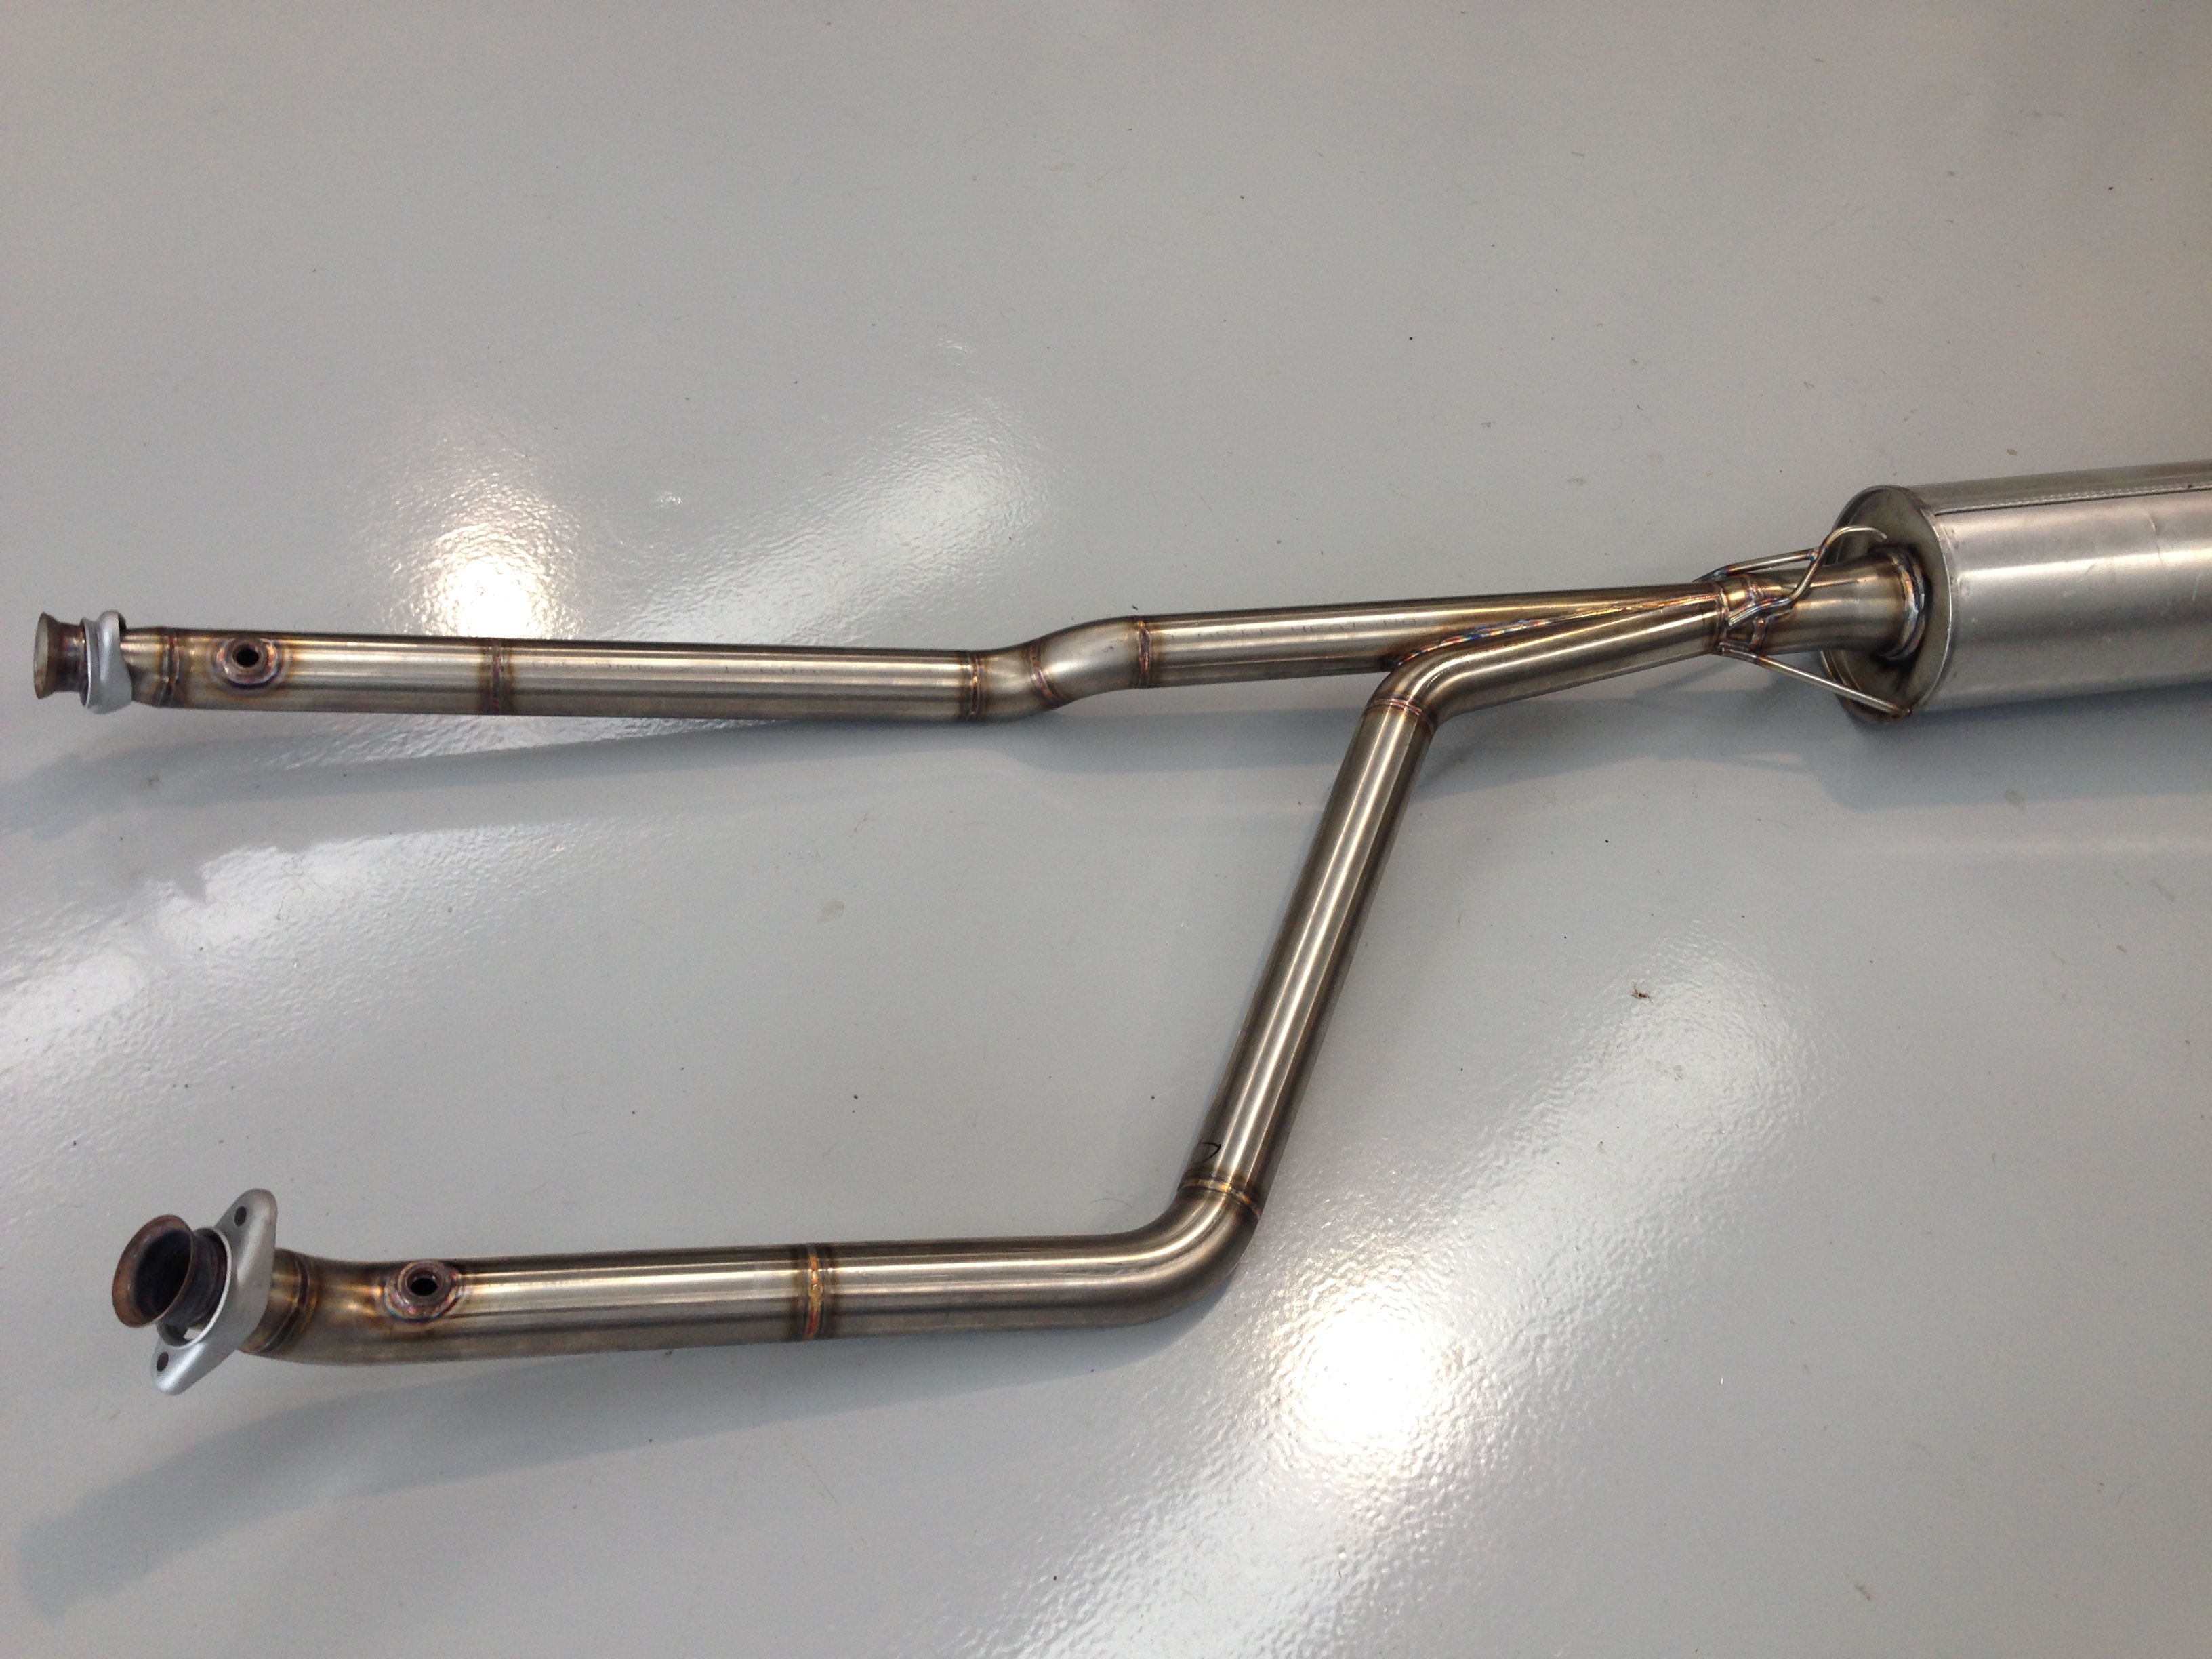
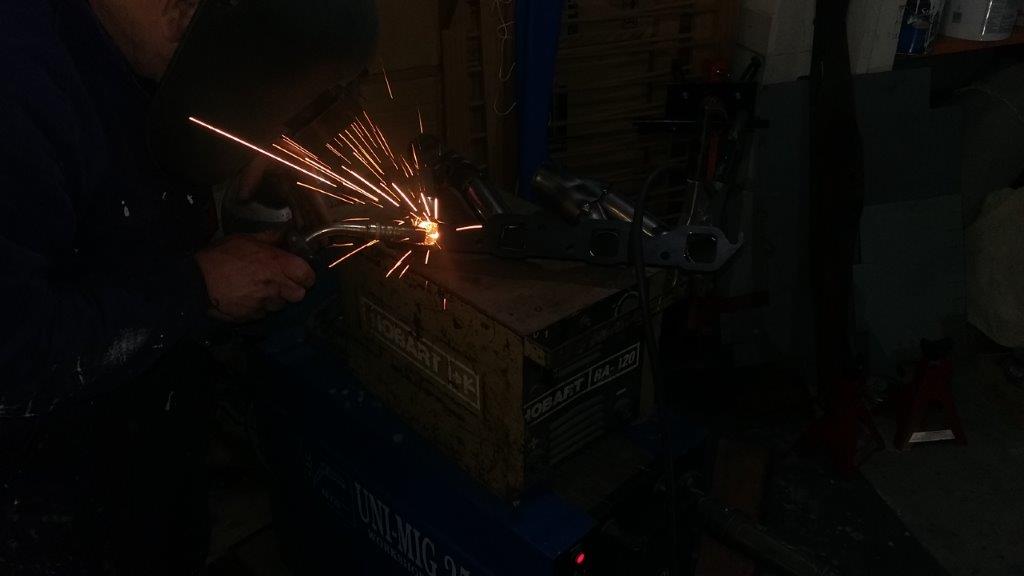
A quick up date before the monthly meeting tonight Big progress on the headers. I am glad I'm not paying for the time that has gone into building them. So far parts alone is $600 and still not finished. Here is the passenger side. It is only tacked together. Everything fits.........just. I am aware that the tube lengths are no where near optimal but I don't think dropping a few HP is going to be noticed. And the drivers side half done And a photo taken just as the welder lit up
1 point
-
1 point
-
Inadvertently got a good test of my solar system. Last week at Mount Tremblant I met a guy with a Westfalia in the parking lot who killed his batteries overnight. I isolated my house batteries at the switch and jumped him. I was looking at my volt meter today when driving and noticed it wasn't charging the house batteries off the alternator (not showing 14v). I was worried I had blown my charging relay or a fuse when I jumped him but my dumb ass had just forgot to de-isolate the battery banks. Switched it back on and all good. So I've been operating the fridge and other 12v on just solar all week with no issues and didn't even notice.1 point
-
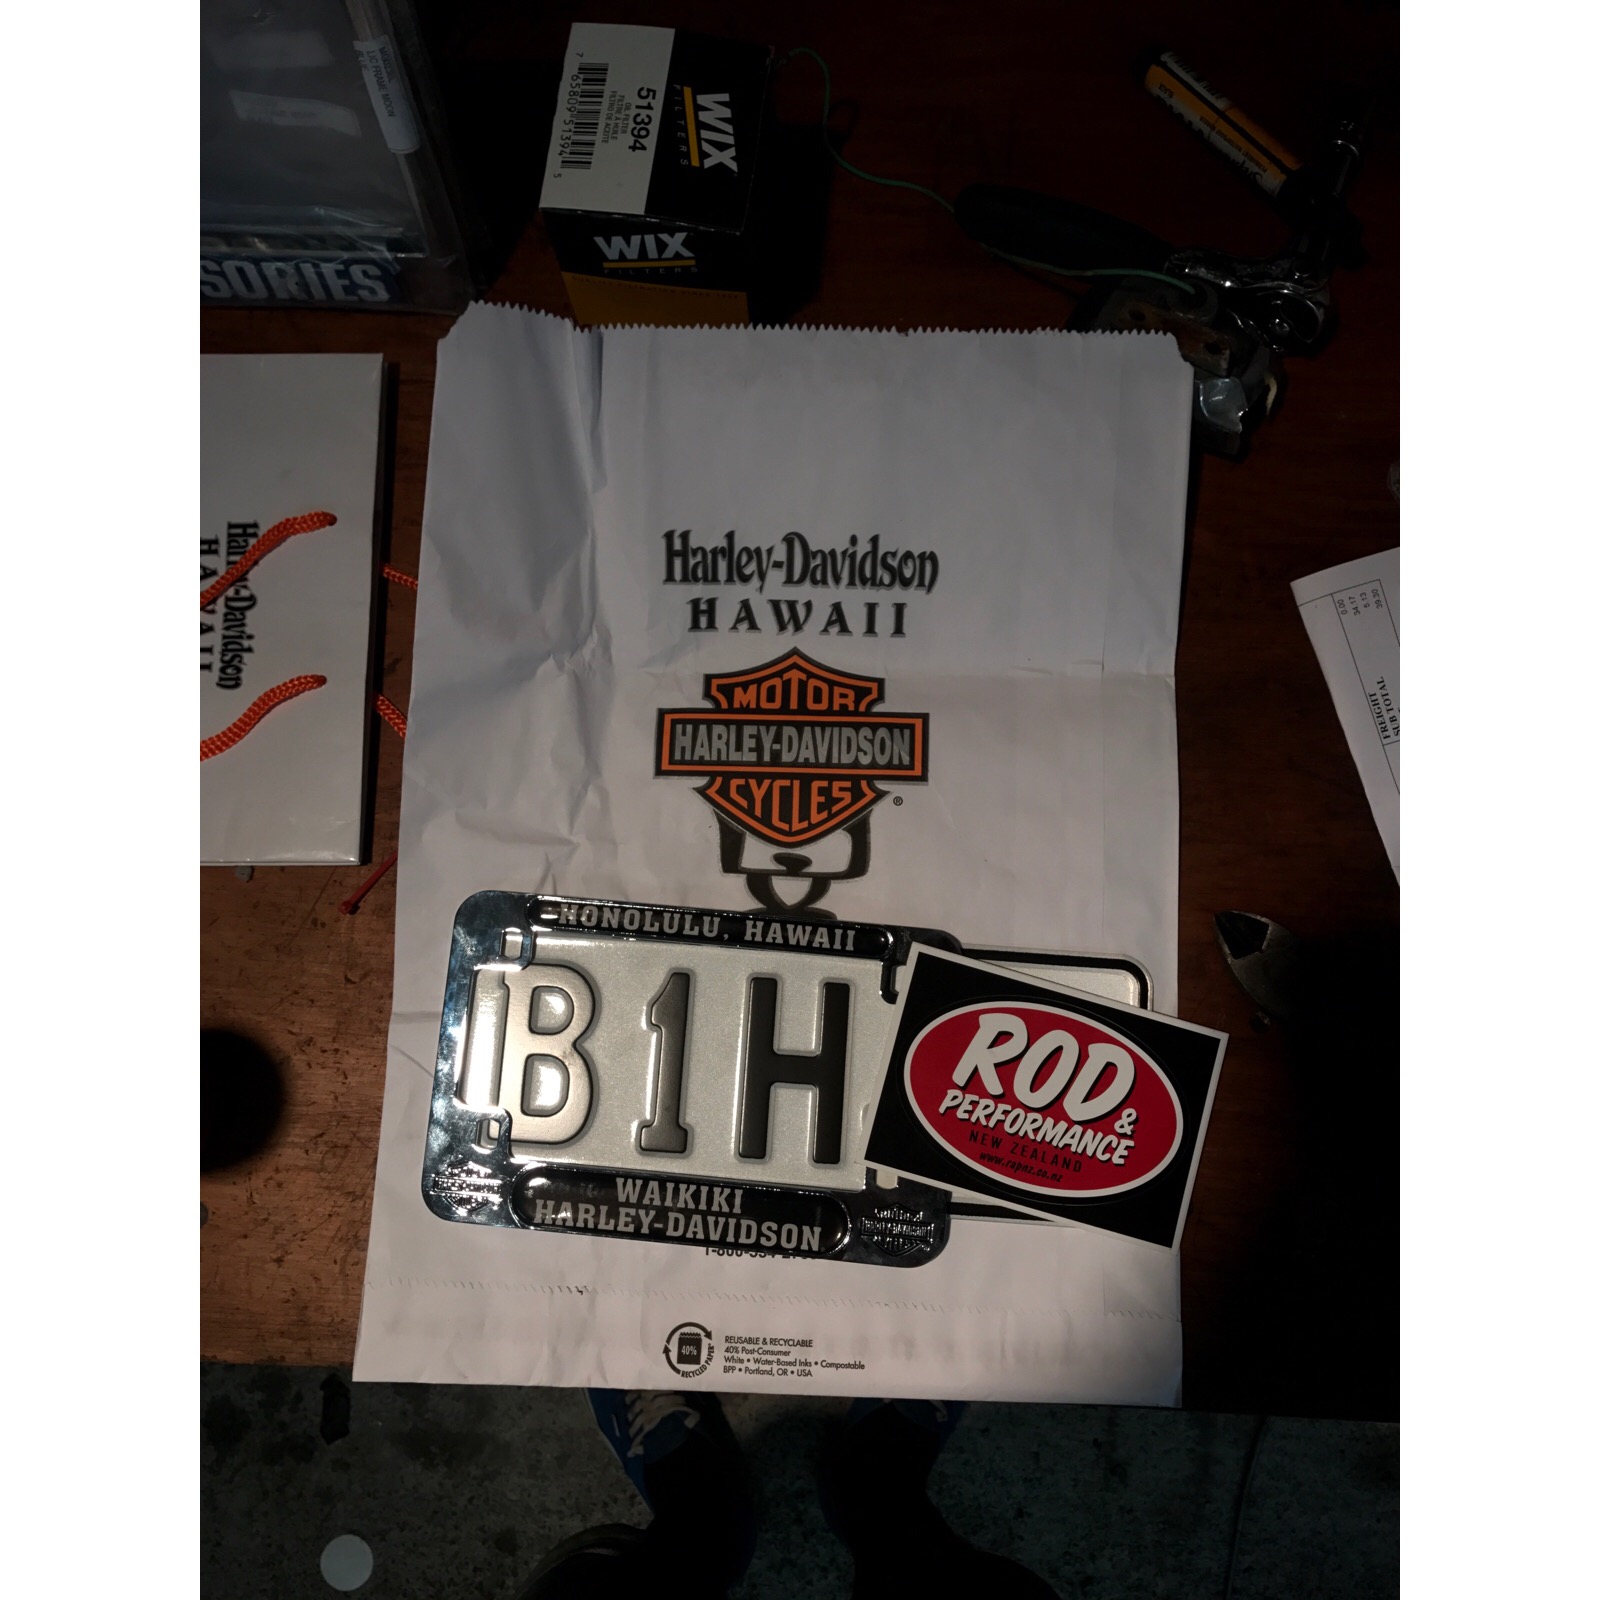
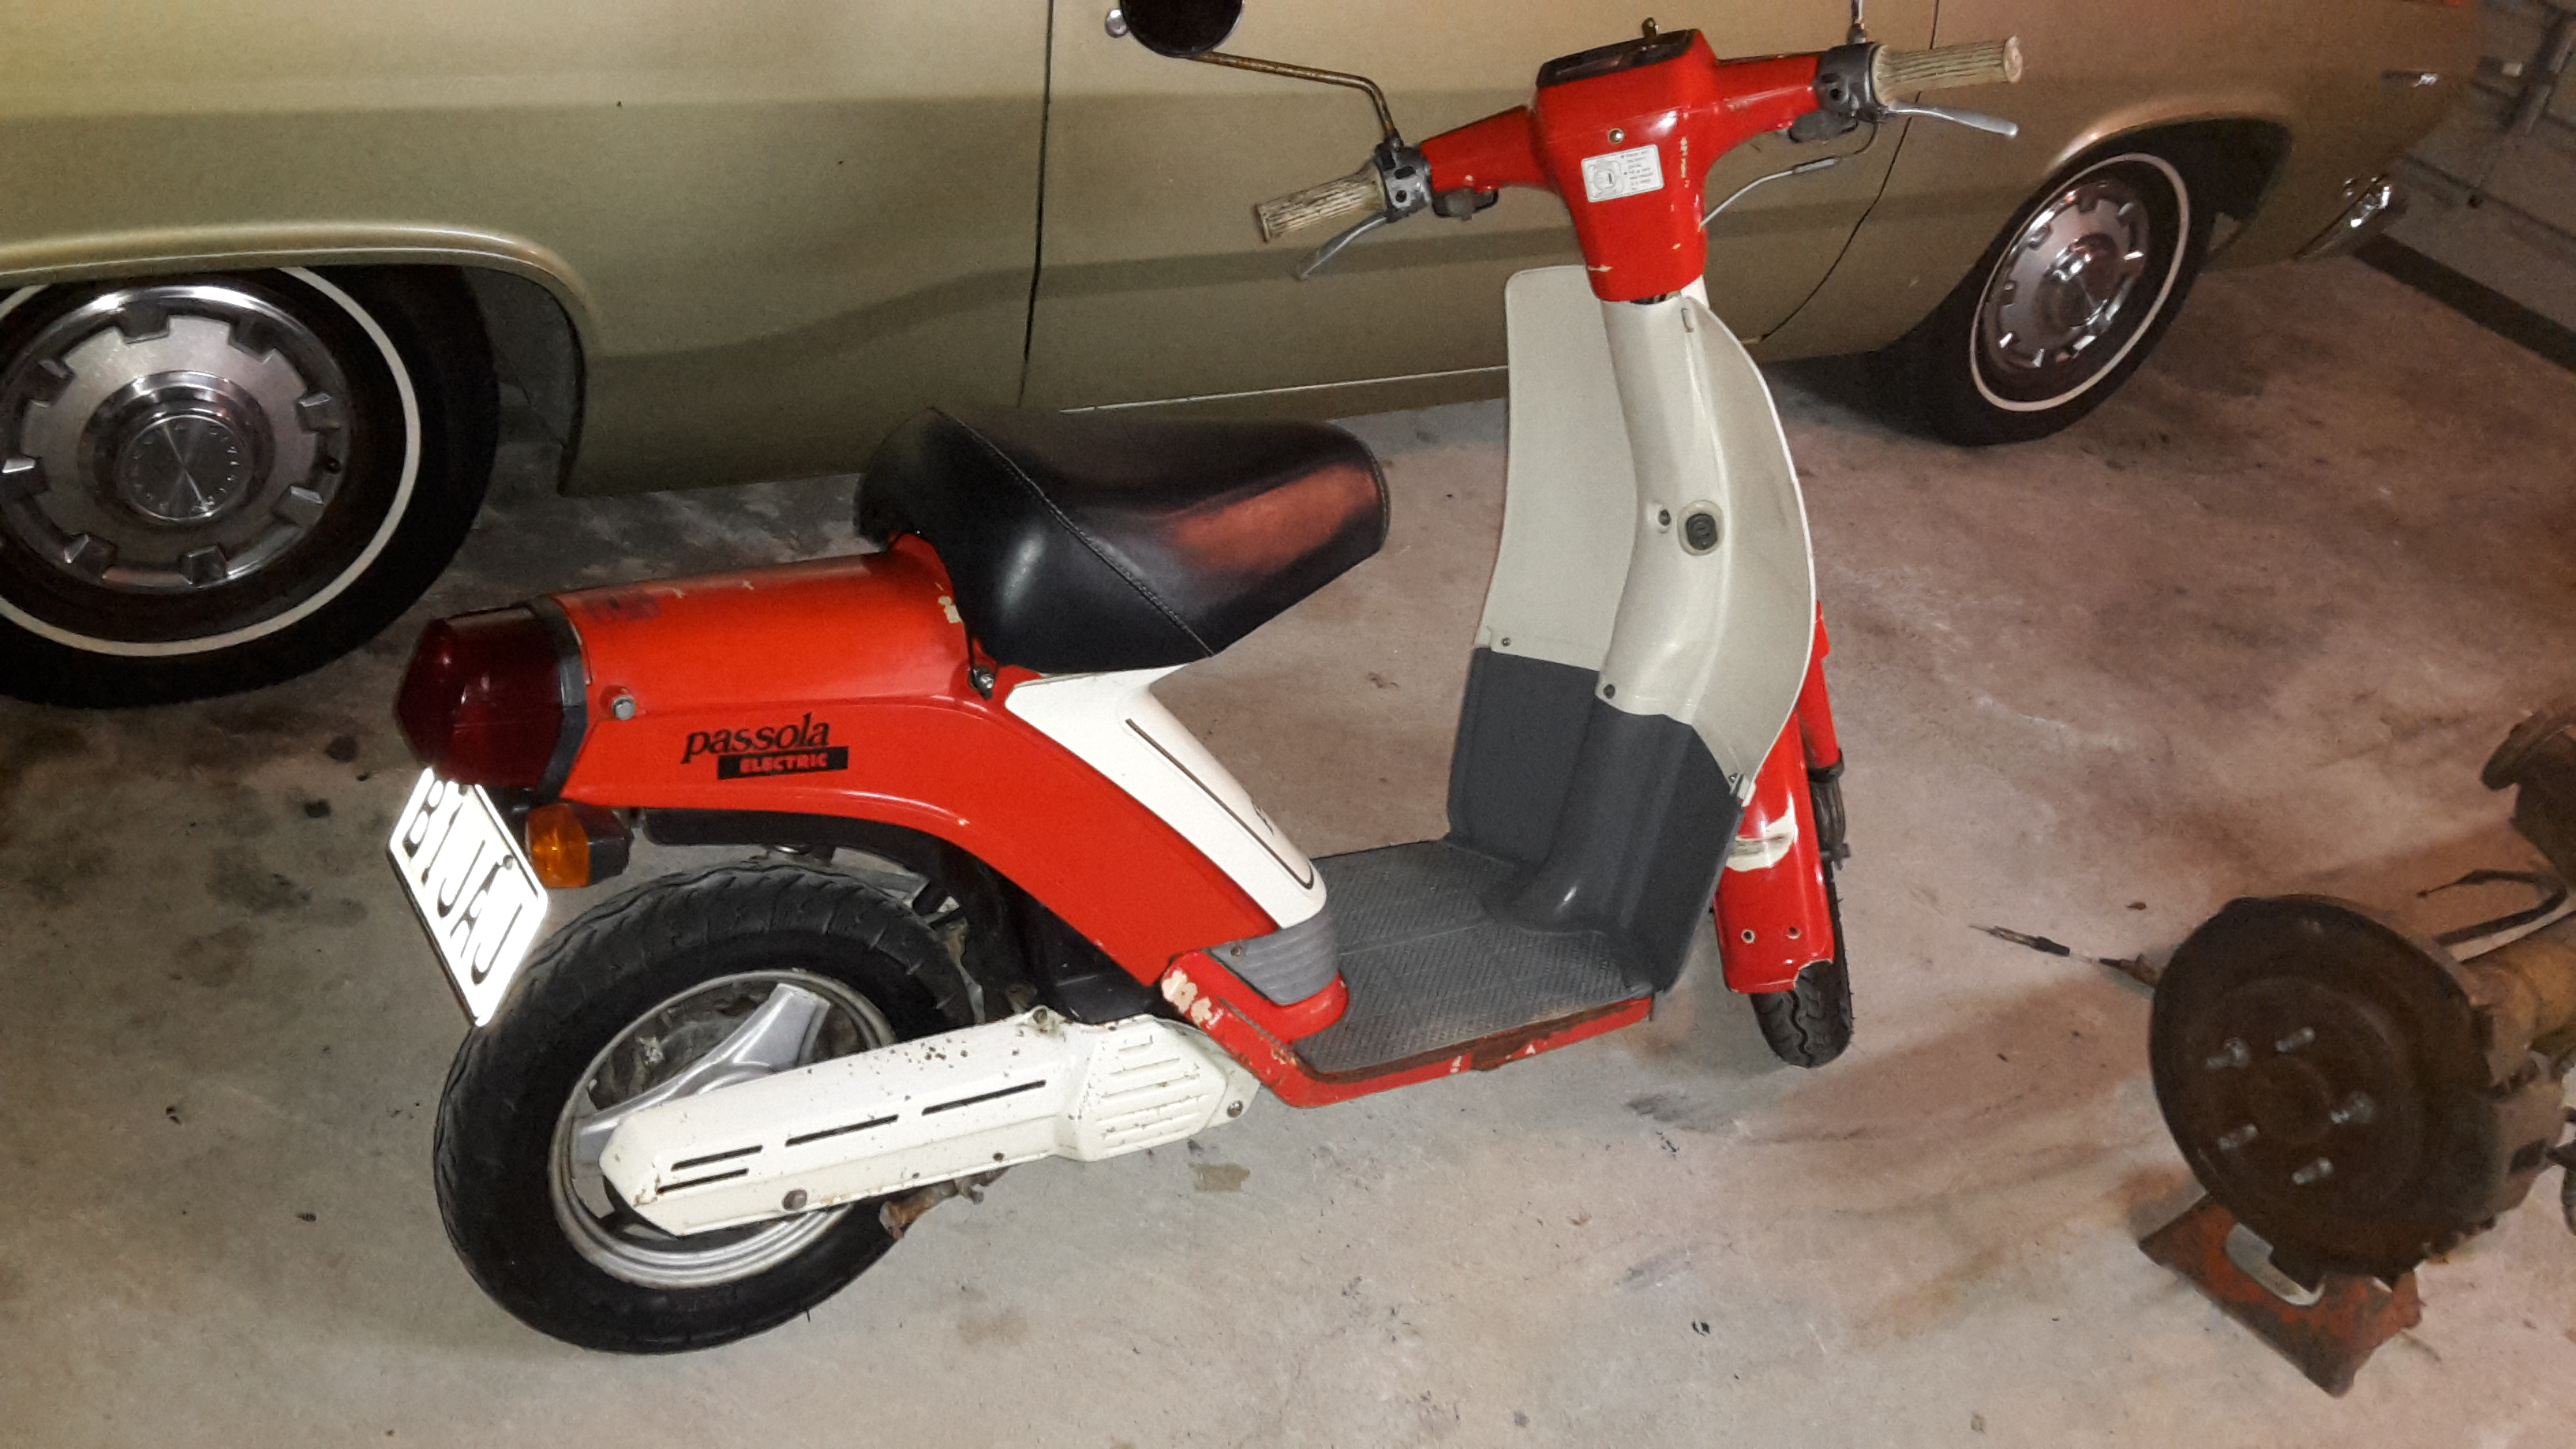
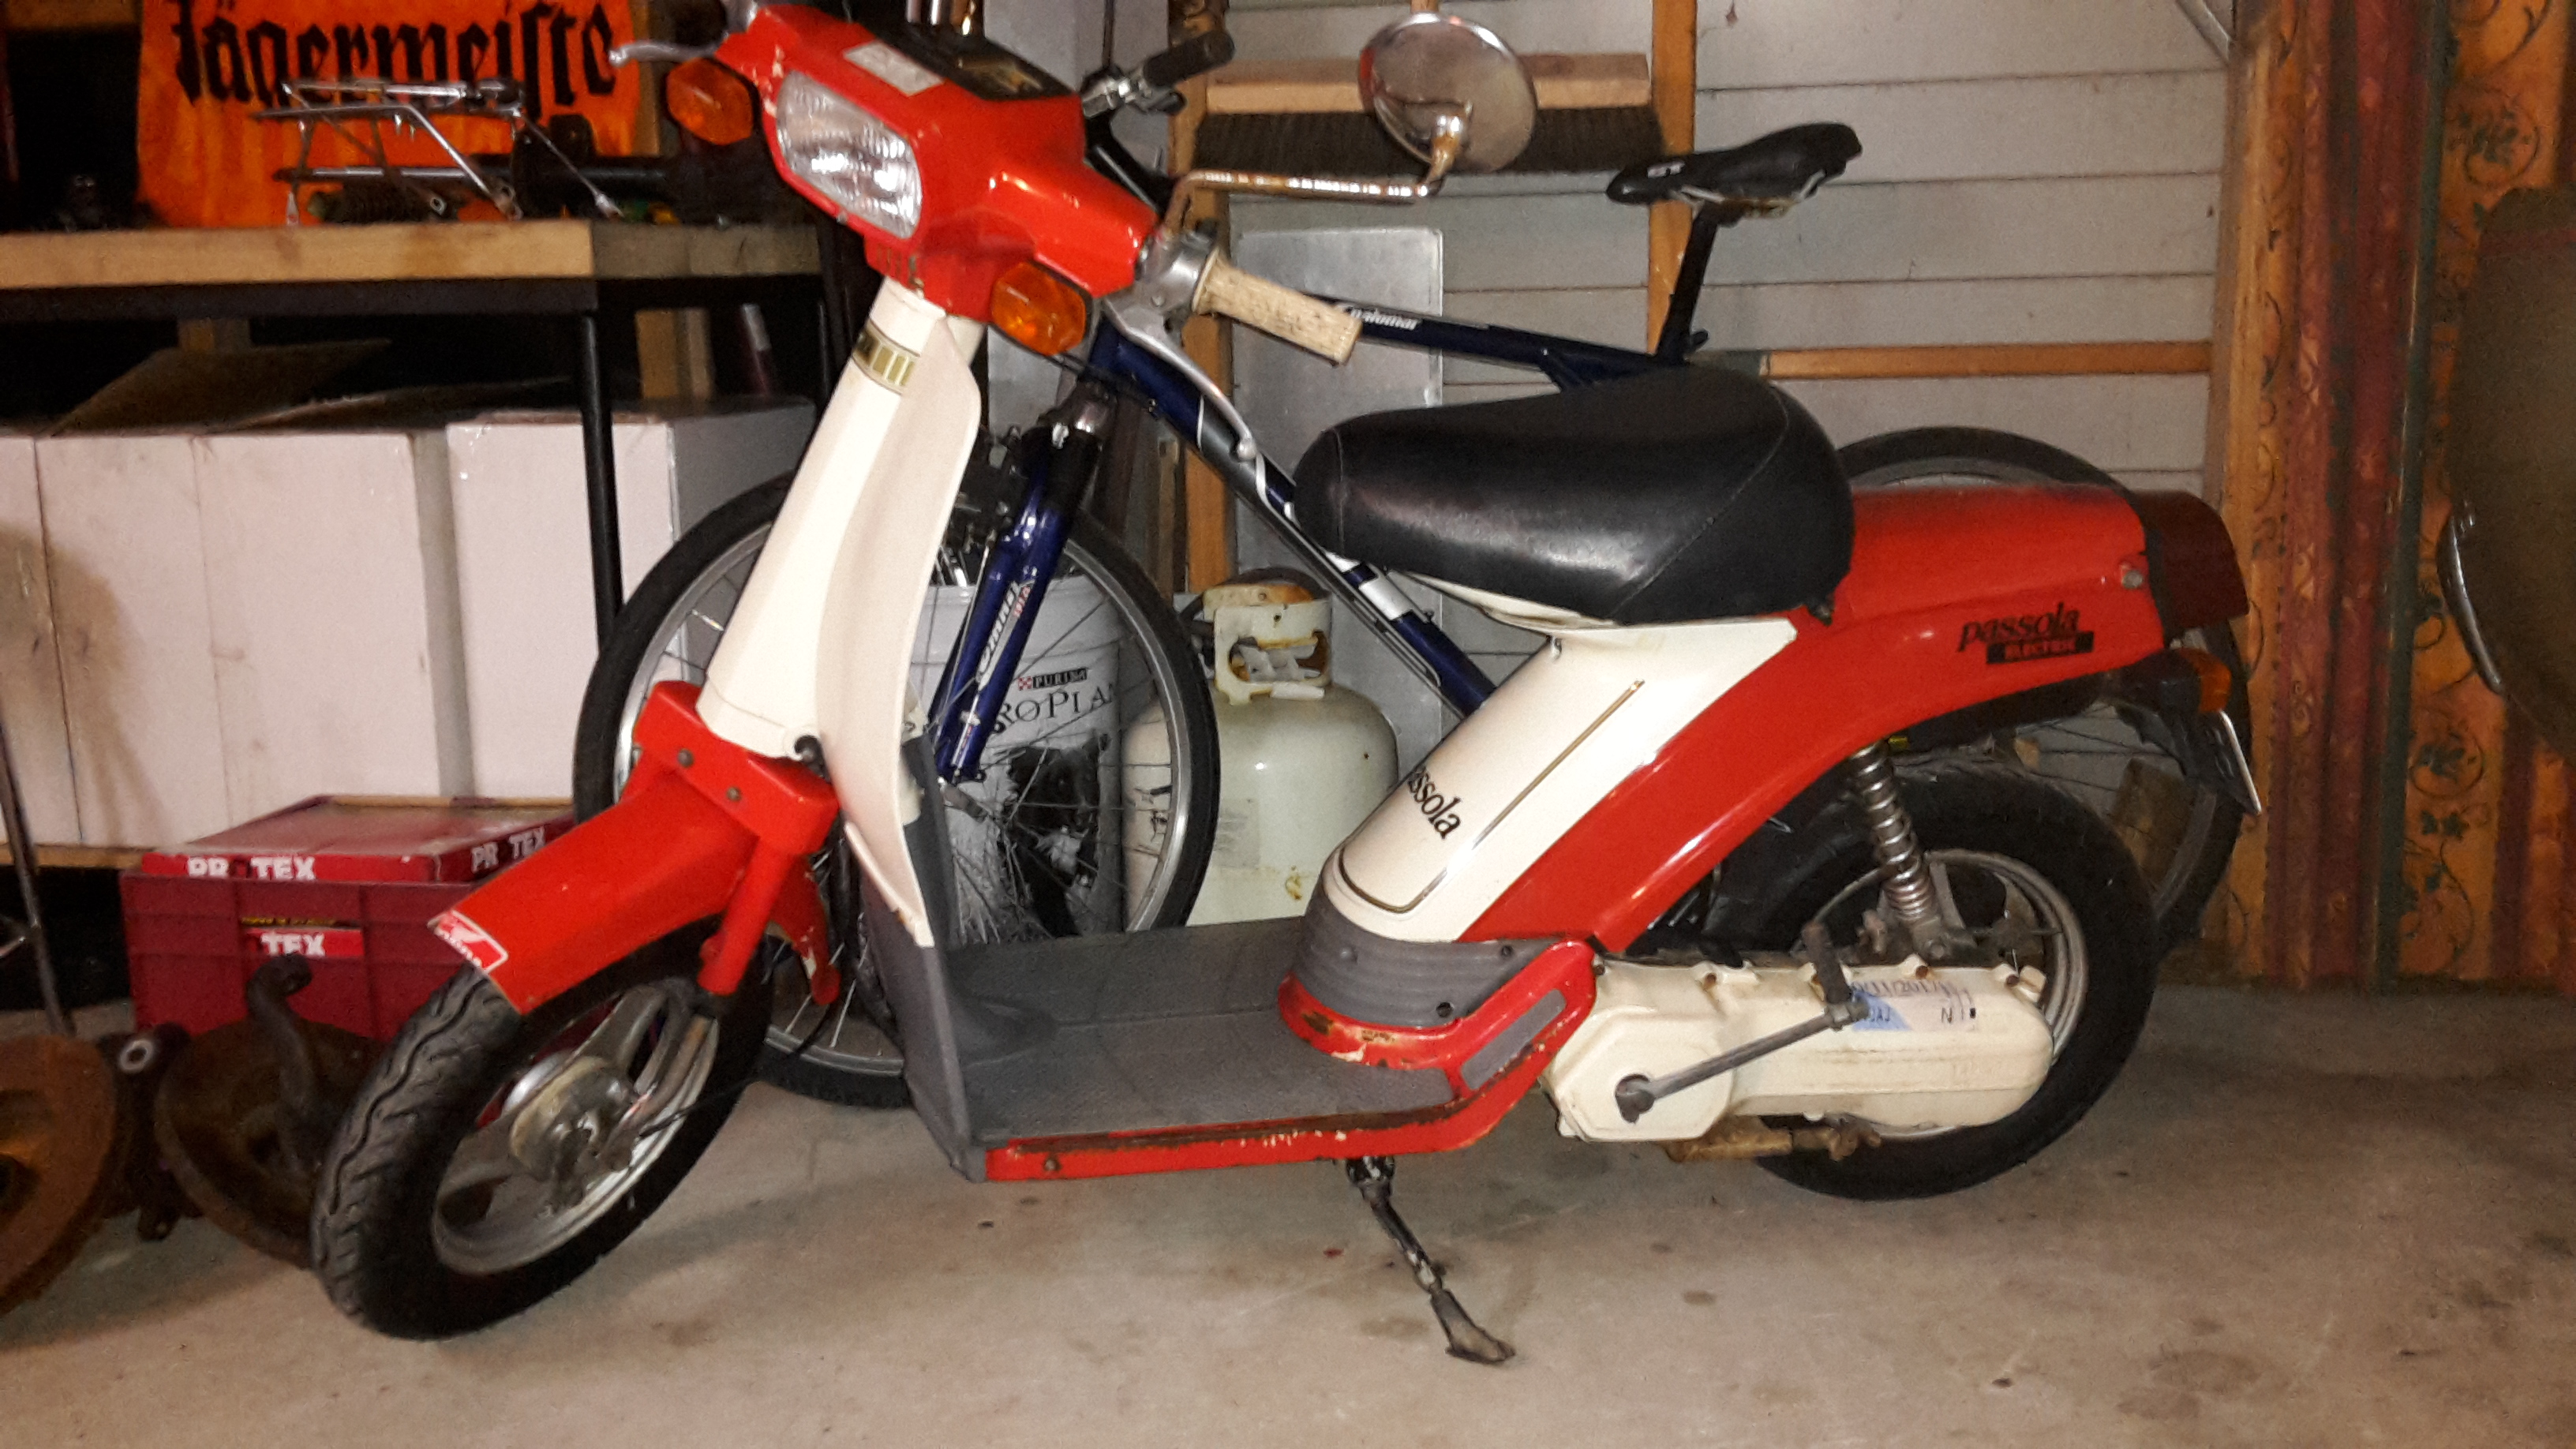
Then half a packet of cable ties later, I've reassembled the pile of broken plastic that came with the bike back into the gauge shape of a legsheild then decided I'd push my luck and ended up getting it registered aswell! 1979 Suzuki 50 EASY AS Pictured in my Harley Davidson plate frame I picked up in Hawaii. Need to get a Smaller plate made as NZ plates are HUGE compared to US plates. and just for old times sake, Showed the FA that started this love affair some affection and fixed a broken wire and fitted up the leg sheild Felix gave me aaaageeees ago
1 point
-
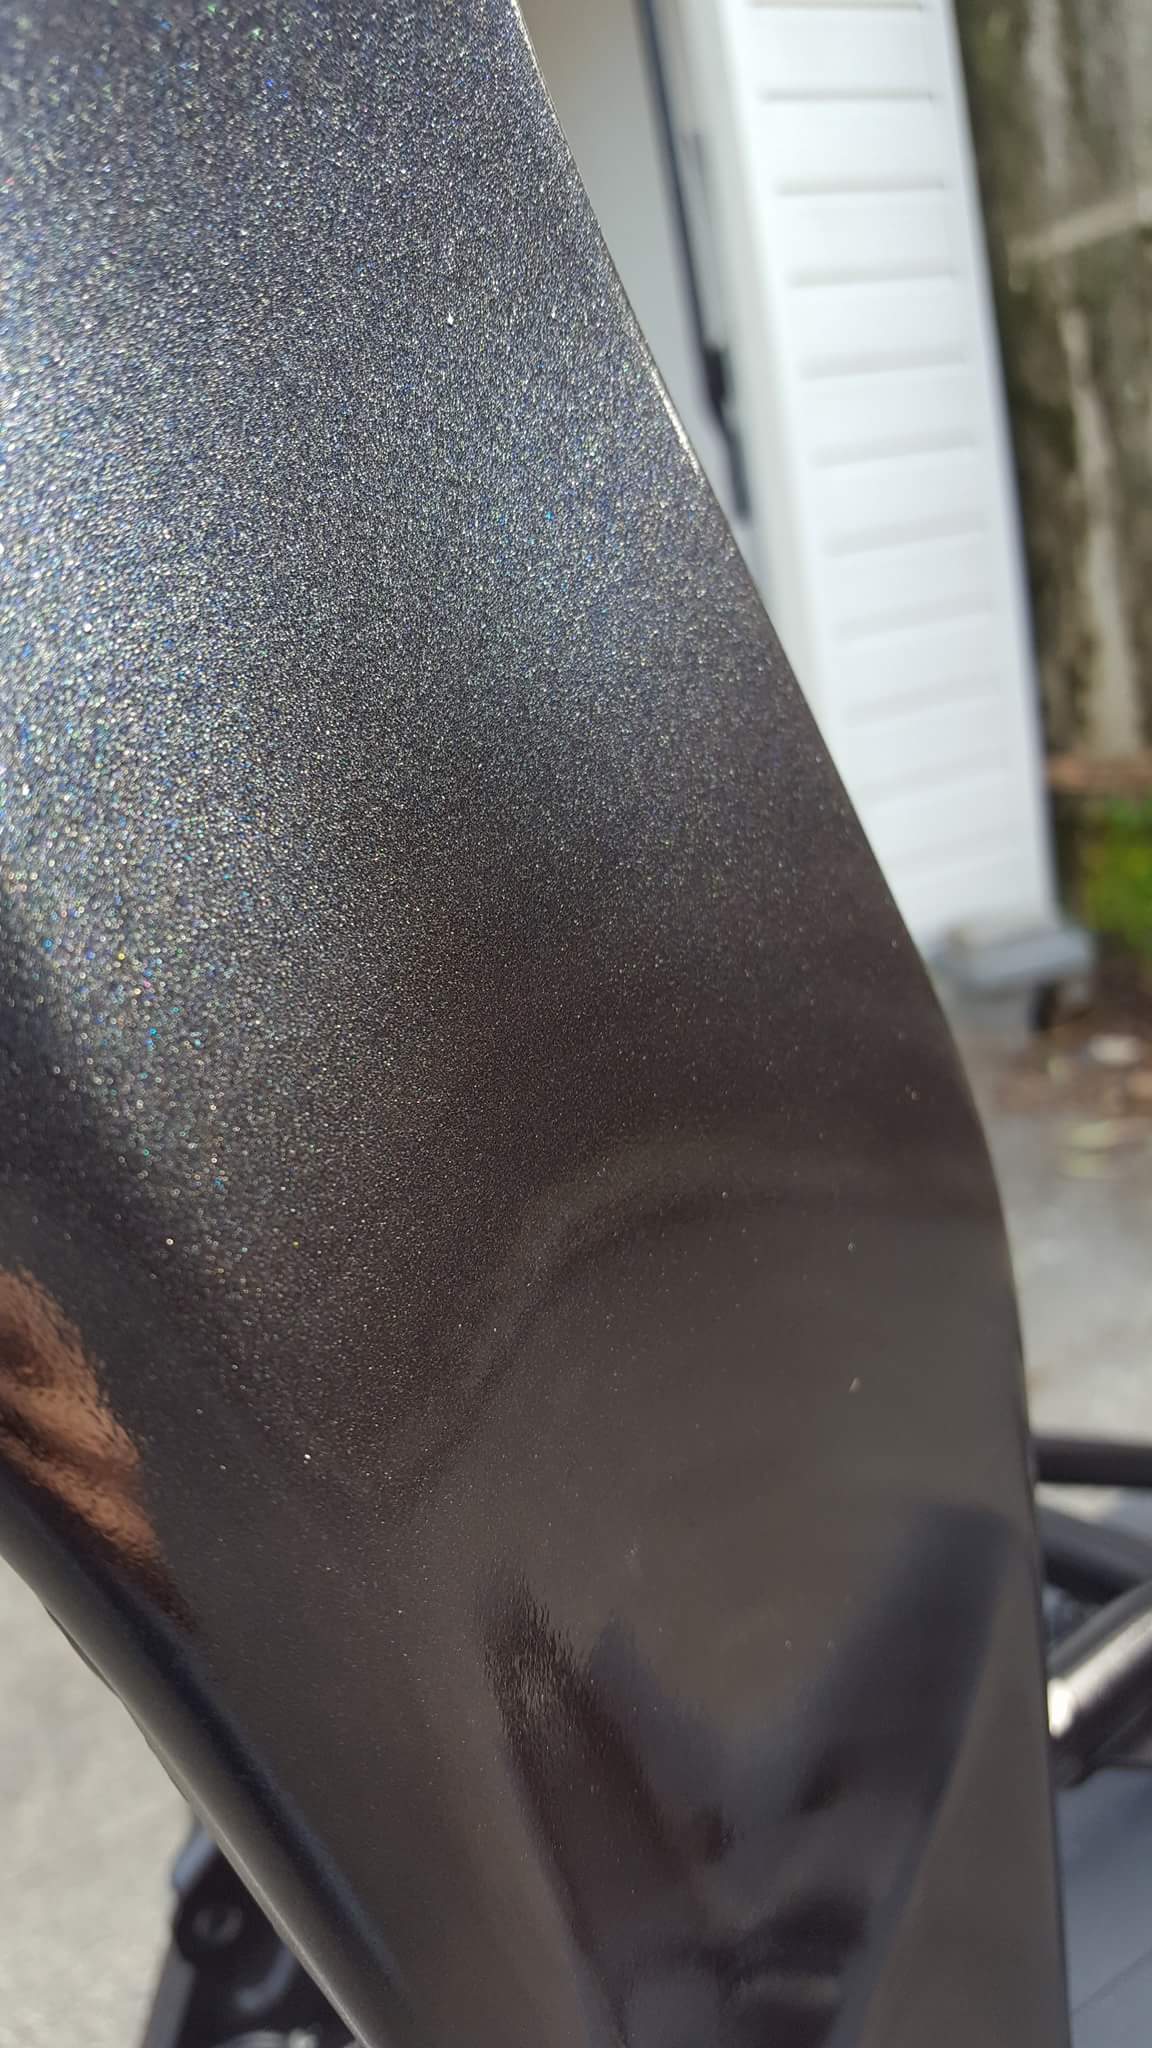
Got some clear on this afternoon. Not a perfect job but my first go painting with a gun, so I'm happy. Close up of the colour in faint sunlight:
1 point
-
everything ready to pour floors on Monday. the diagonal bit out the front is the extra thick part of the floor that goes over the main sewer line. 2017-06-16_03-25-27 by sheepers, on Flickr 2017-06-16_03-25-39 by sheepers, on Flickr 2017-06-16_03-25-47 by sheepers, on Flickr1 point
-
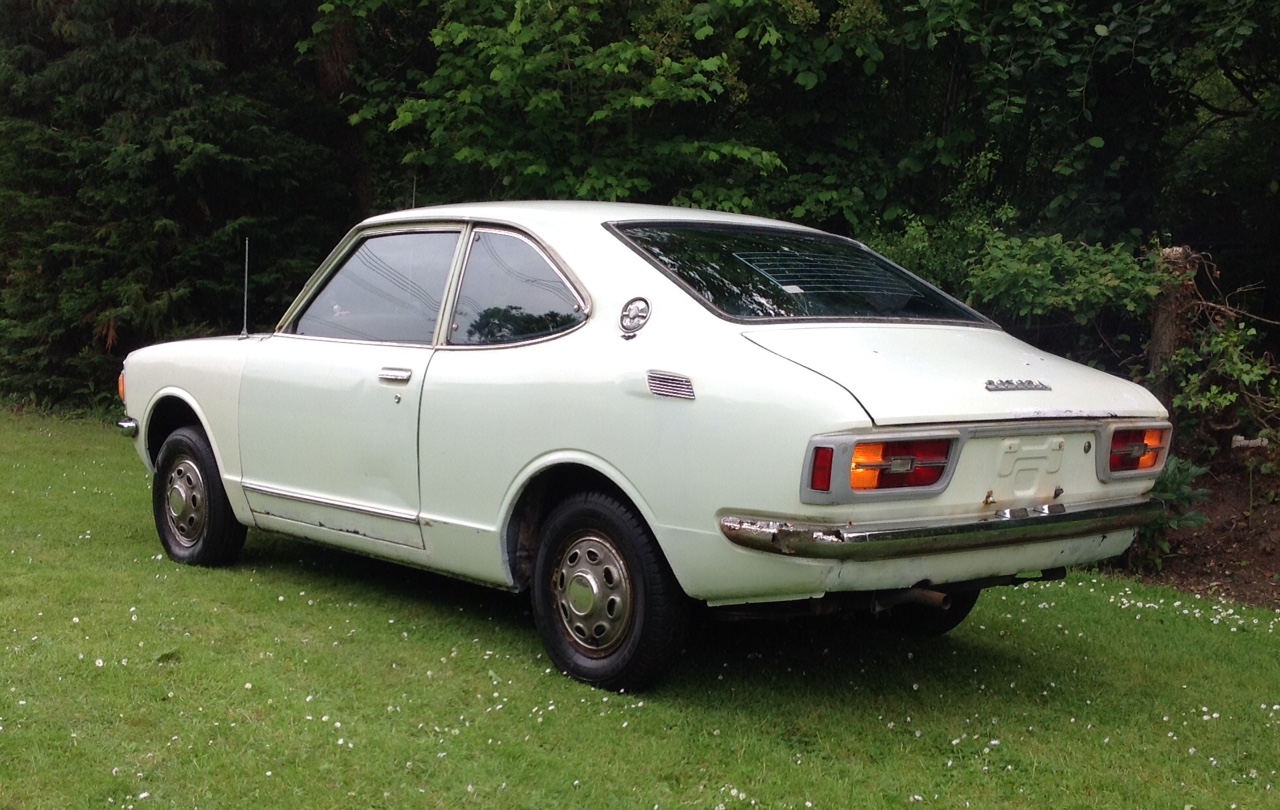
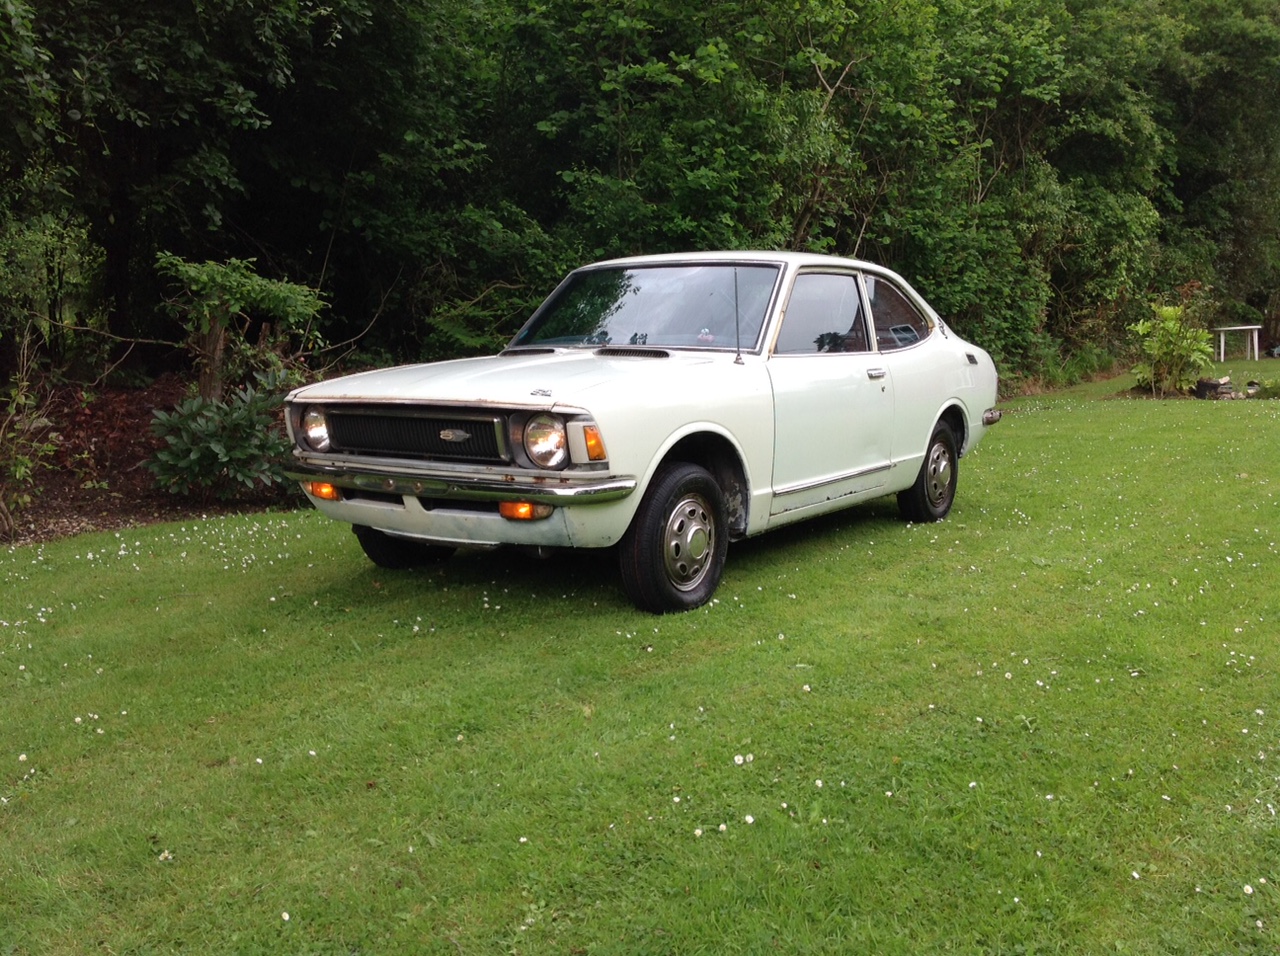
Hi to all im new on here and have the privlidge to start a project on a 1972 Ke25 Corolla im at the early stages at the moment just stripped the car down complete and had it sand blasted the plan is to fully upgrade to a Te27 all bodystyling, so will the help of you profesionals on here.
1 point
-
the good.the bad.the gun spat here on the left rear fender.so I stuck heaps of paint over it so I can hopefully polish it out so it sagged here.and when painting inside the air vent I made this mess, looks like I'll be learning to wet sand paint now!All in all I'm pretty stoked and glad it's over, heaps of runs and spots of over spray and areas of orange peel etc..but not bad for a noob in shed in west auckland.looking forward to assembly.1 point
-
1 point
-
Picked up a media blaster to sort the windscreen sill out. want to give it a layer of boat cloth and westsystem epoxi then paint. bits of trim were also hiding forren objects. glad all the chassis works nearly finished, just need panel and paint
1 point
-
1 point
-
Shut your whore mouth!1 point
-
I had to put the nuts back on the ends of some bolts witch were under the guard and I could only just get one finger in there with the nut and washer balancing on one finger but I would all ways drop it, but I found if I super glued the washer to the nut then super glued the nut to my finger it took 2 seconds do do the whole job. the glue doesn't bond permanently to your finger if they are dirty.1 point
-
Right, so i haven't been that great at keeping up to date and getting pictures but LARGE UPDATE TIME. The motor is in, with no issues getting it in except a pin the the rear flywheel being missing it all went to plan. After purchasing the needed parts we started it for the first time. Running on 95 it started and ran after having to get a small block out of the fuel line. After starting it and realizing that there was no temperature gauge nor indicator i went and purchased a oil pressure gauge and water temp. I have them placed currently like this but i am thinking of moving the oil pressure next to the water temp after i buy a new line for it. Ive had a few small leaks which ive fixed but still have an ongoing fuel leak. Ill have to buy some smaller line. The window was smashed by the previous owner so i replaced that with the help of dad and it is now water tight and able to be locked. Next on the list is to fix a small amount of rust in the inner guard, fix the bottom front indicator (Replace the wire) and fix the exhaust leaks/rust holes. It should go throught for its first attempt on Wednesday.1 point
-
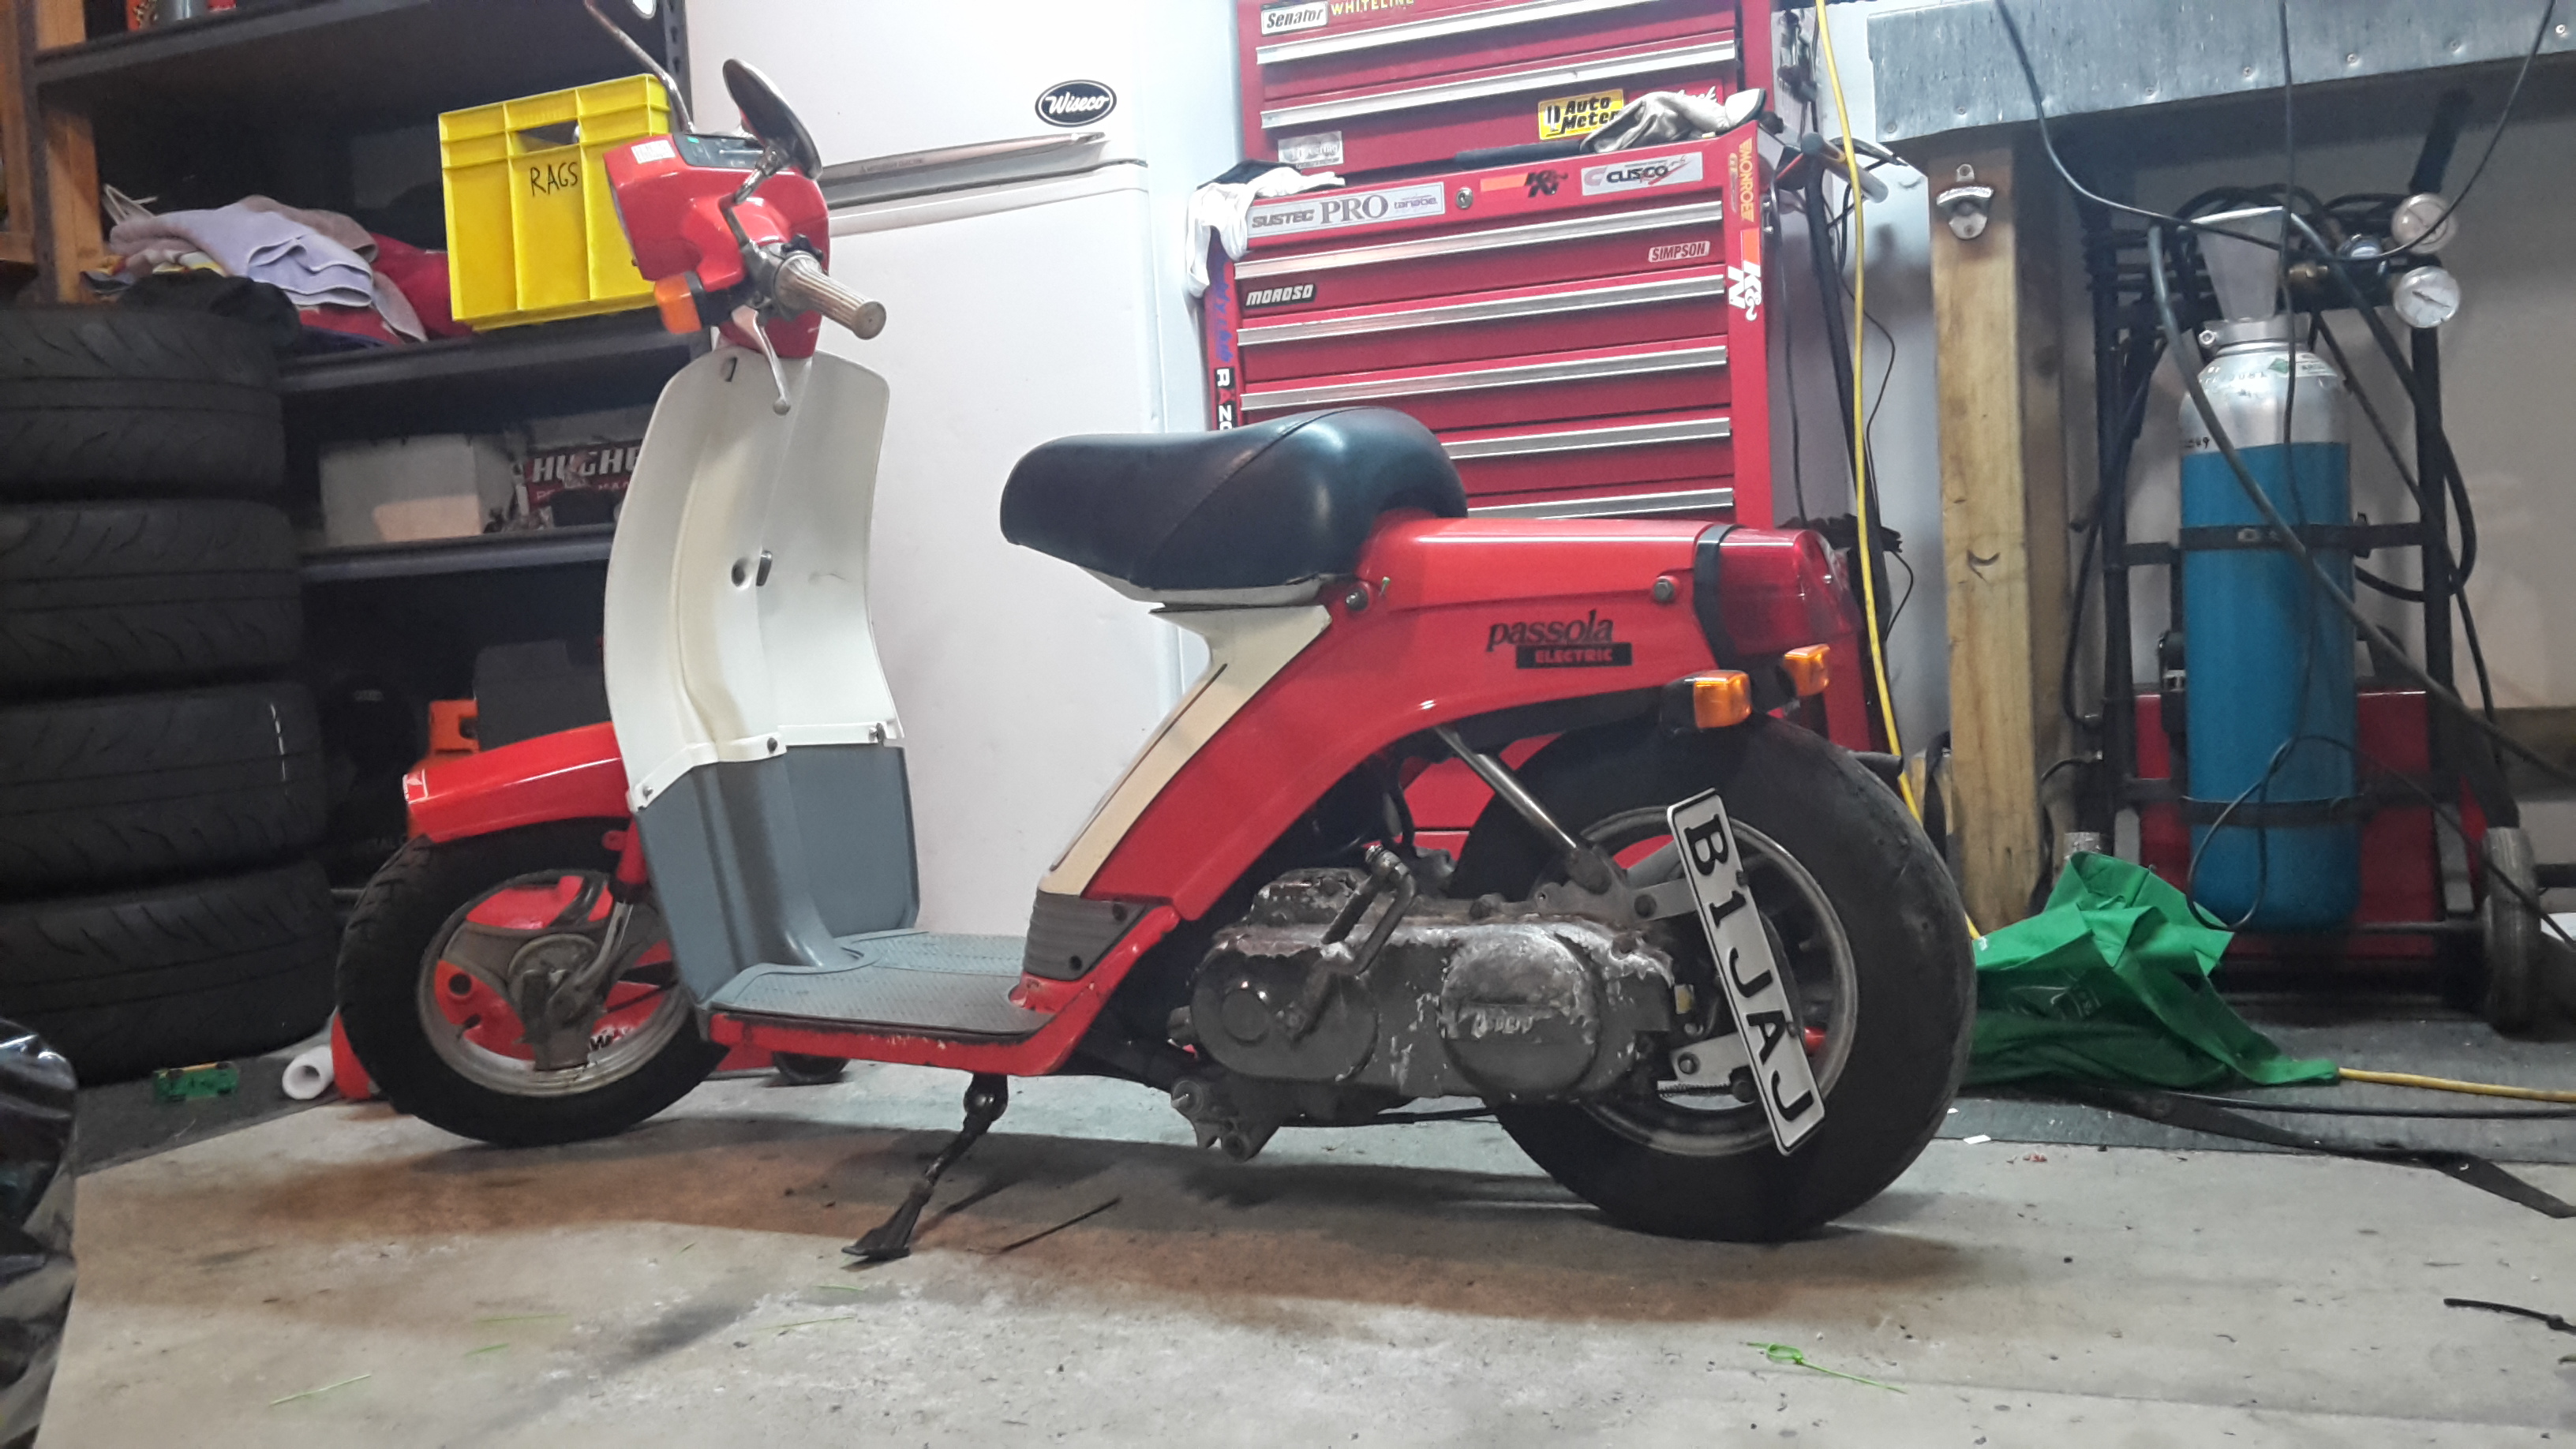
Other end of the engine size scale, I picked up this non running scooter from Scrubb, what a top bloke. I got it home and managed to lose the key somewhere, I disassembled the ignition switch to get that working and it had some water in it, and the air filter foam had fallen to bits so maybe it had sucked some of that into the carb. Anyway after that it started, I fixed the indicators, made a new air filter out of a car wash sponge, cleaned it, and got rego on it. At first I thought there was something wrong with the clutch but it turns out it has a automatic 2 speed. I have had some funny looks when riding it.
1 point
-
I have a few sets of chains. What size? I probably have both sizes. Too big and too small.1 point
-
I chopped off the mounting tabs and moved them so they would bolt onto the fc rad. The swift fan is a pretty good fit I think, its a score for $20 Got my monies worth out of the cutting disc Welding is getting less bad Lovely, the wiring even comes out in a nice place. I didn't plan it that well it needs a bit more tweaking making the holes bigger & nicer for the hoses but I'm happy with fitment for how little work it needed I tried warming it up again but it decided to do a few backfires and run on one rotor. I suspect the injectors are gummed up again and the fuel pump wiring is still shit. I need to stop being impatient and sort out the running problems instead of trying to get it good enough to do a skid go for a test drive. There is what looks like a thermo switch in the bottom of the rad so I'll test it to make sure it works and actually is a thermo switch and wire it up with a relay. I figured out the fan wiring, it appears there are two sets of brushes in the motor, if you have either powered up it'll be low speed and have both connected in parallel it'll go full tit. Another option could be series/parallel them for extra low but thats for later. I've ordered some of these for the shroud so hopefully it'll prevent any vibration etc1 point
-
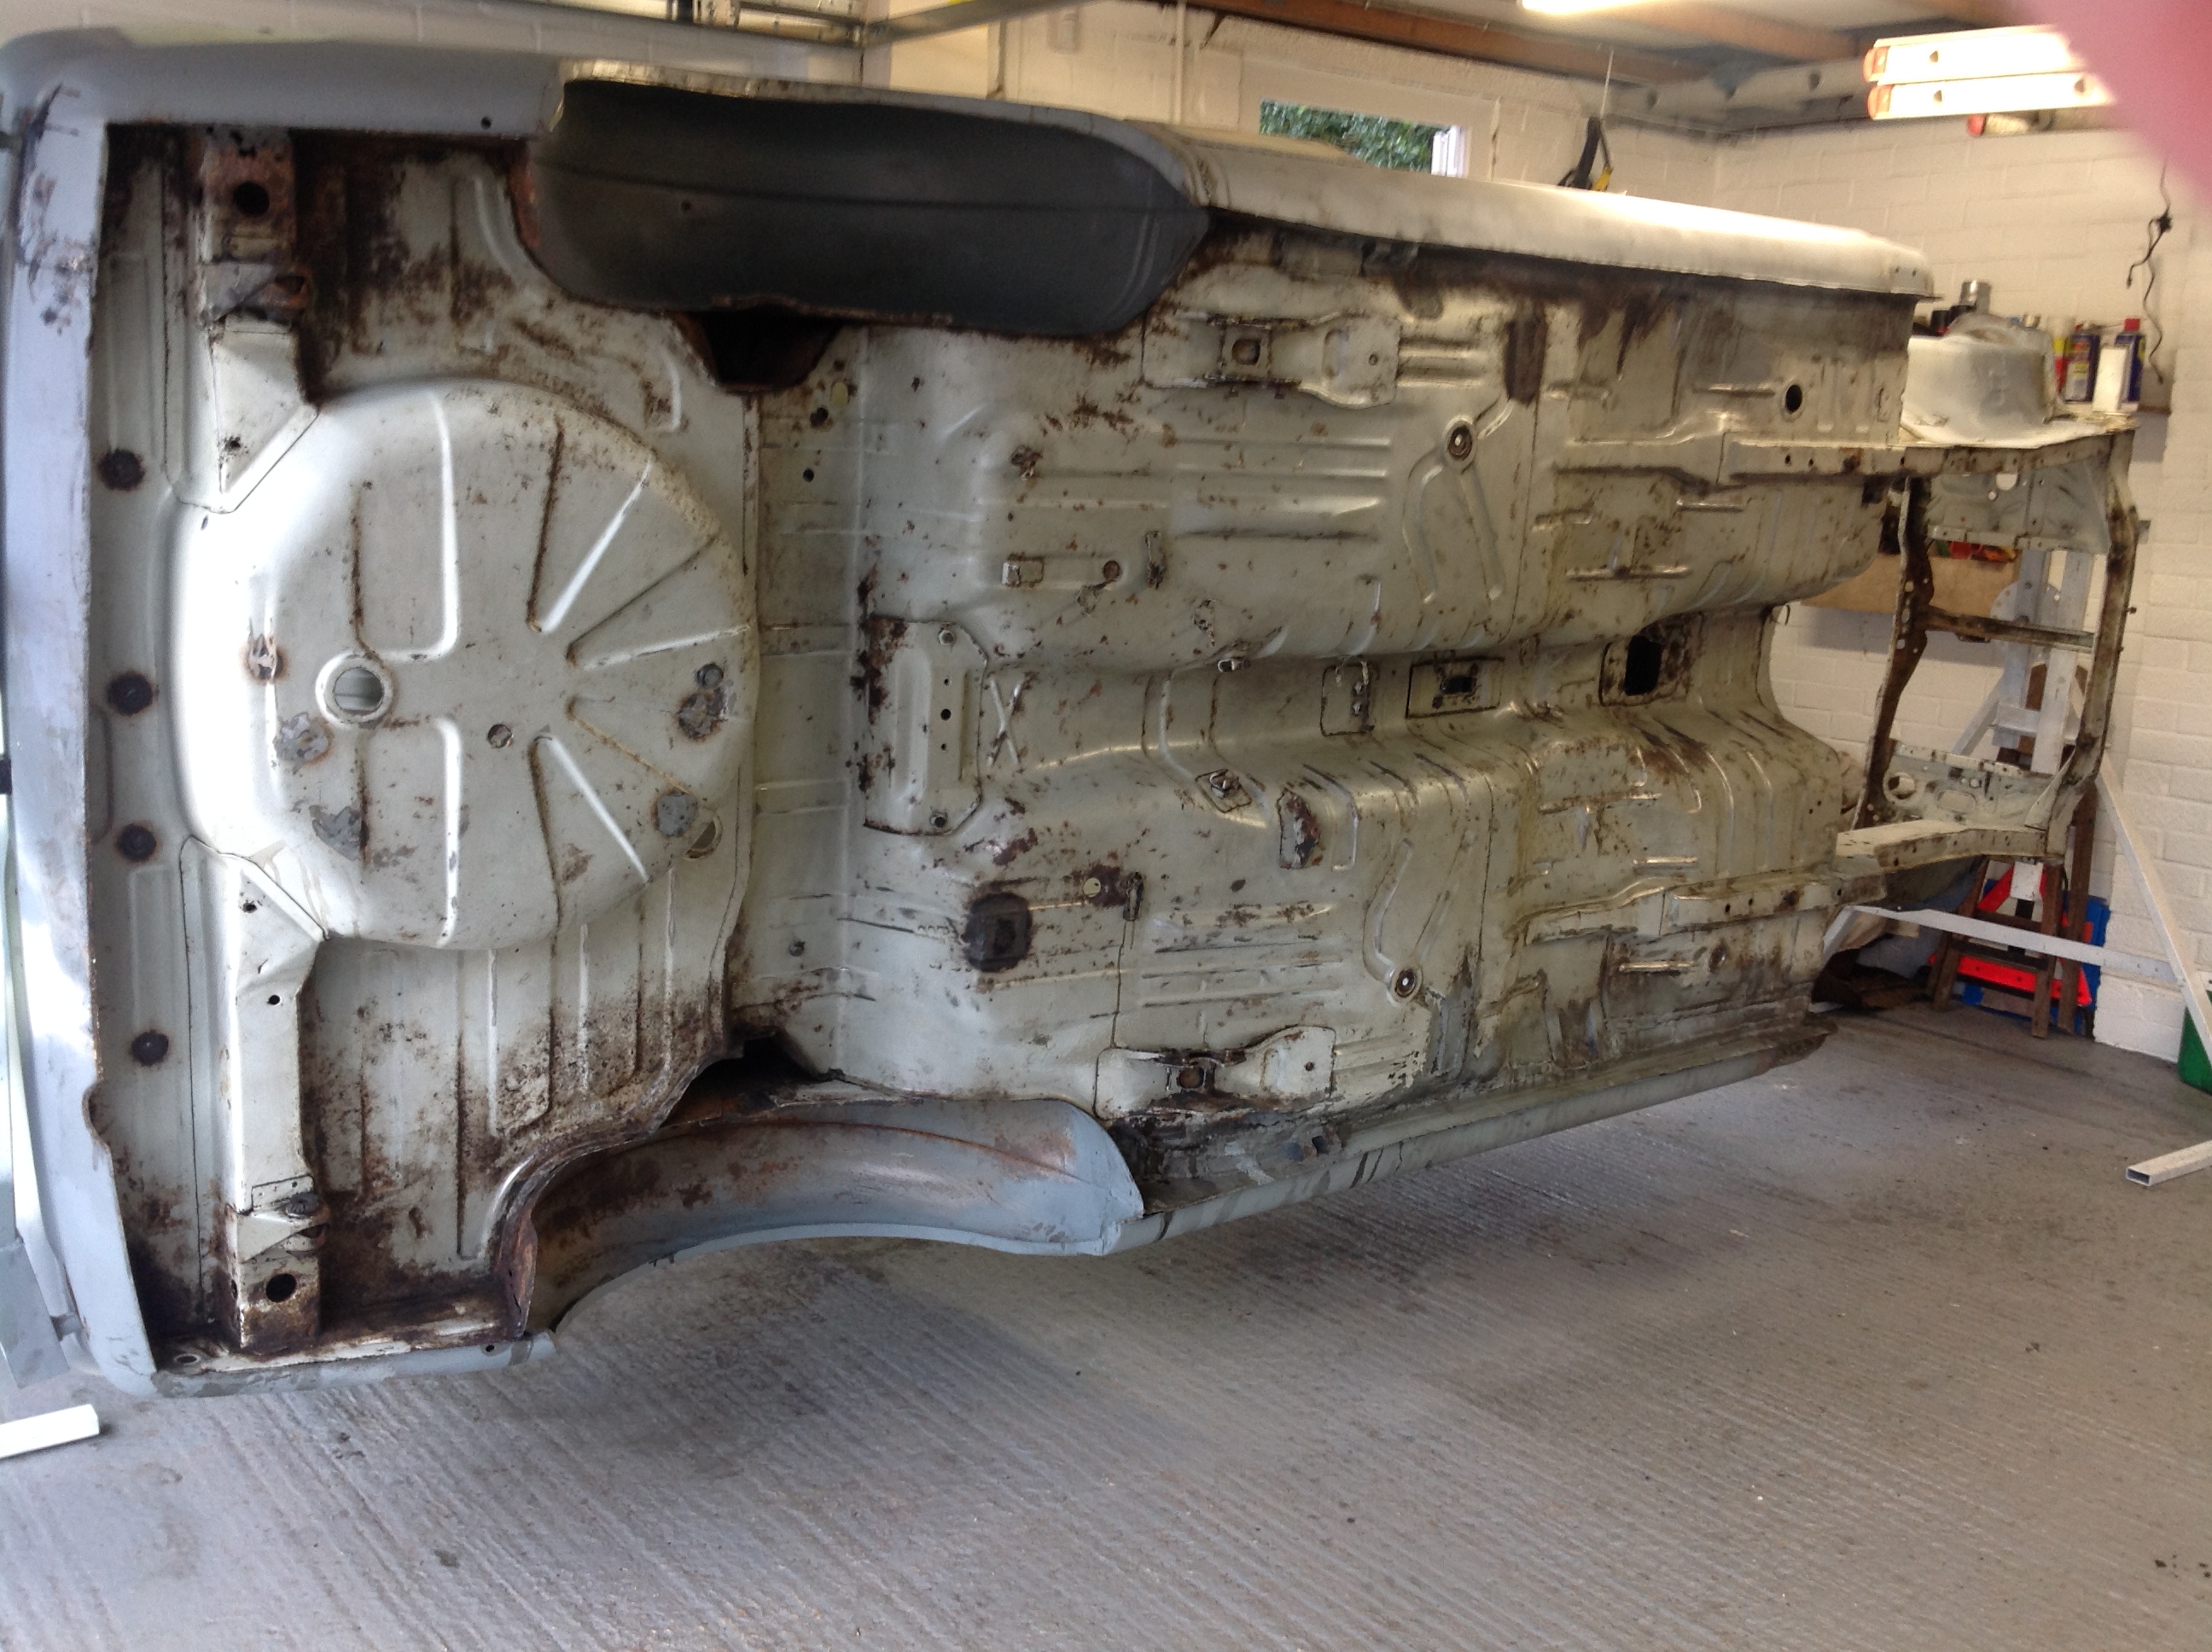
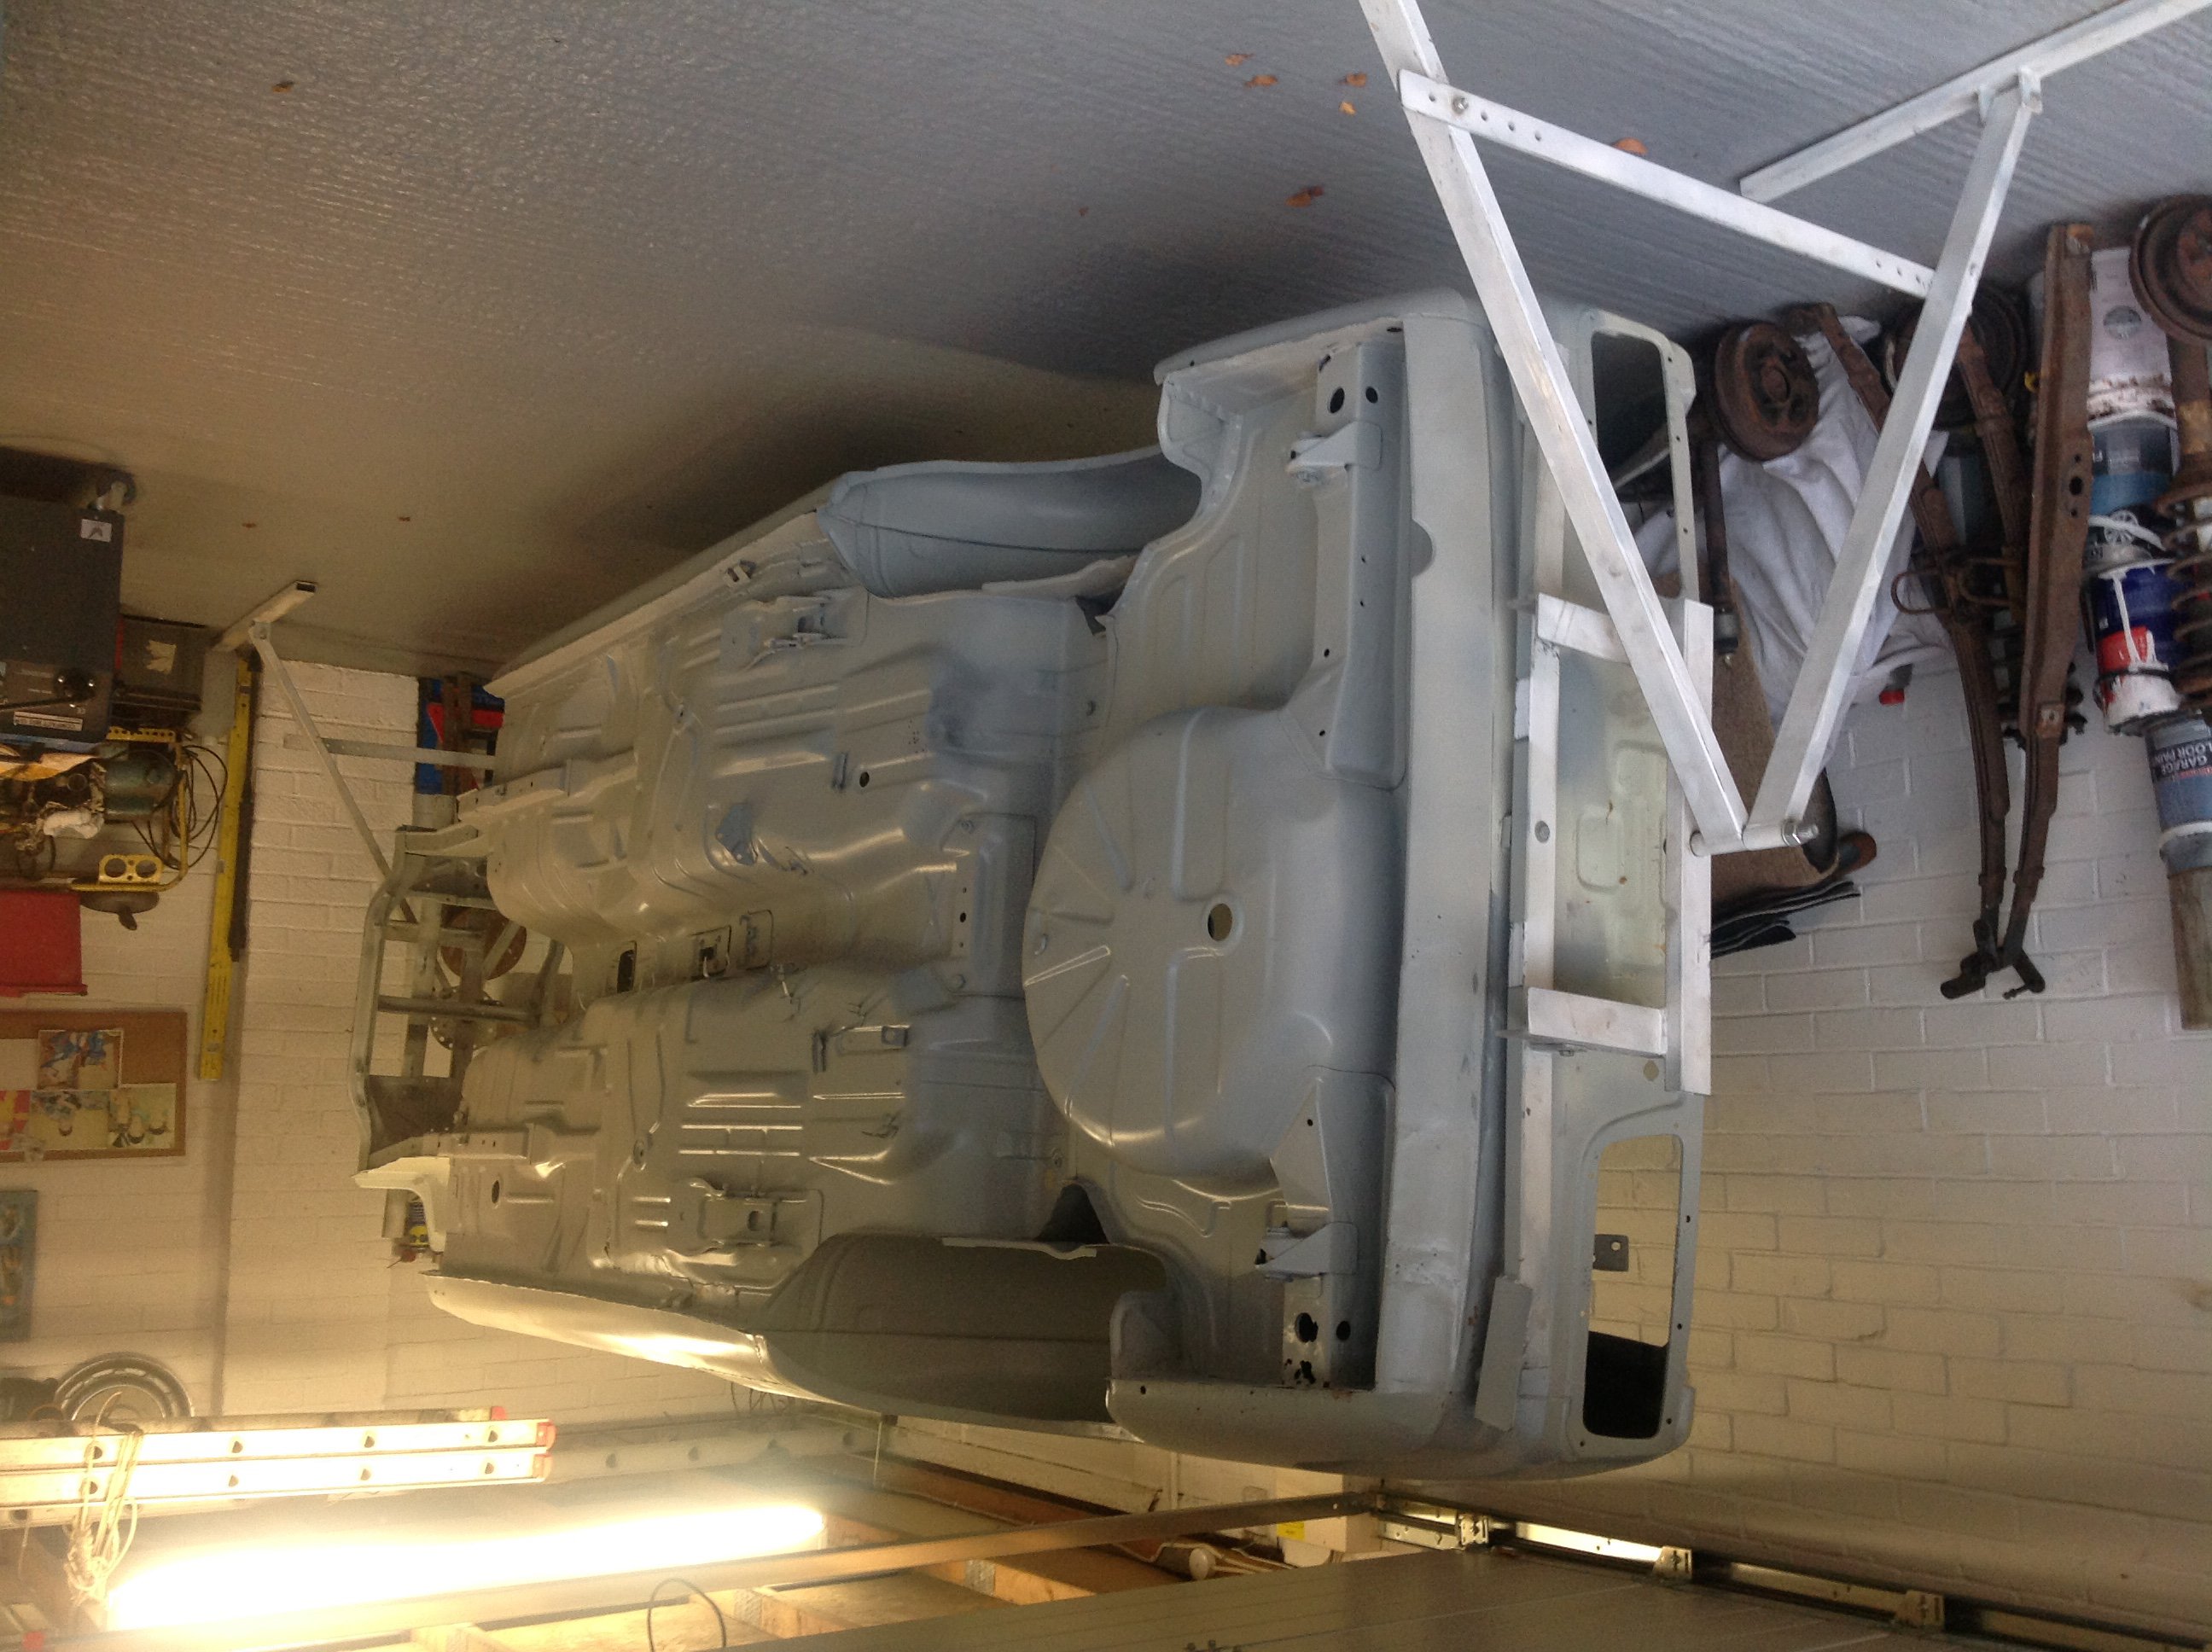
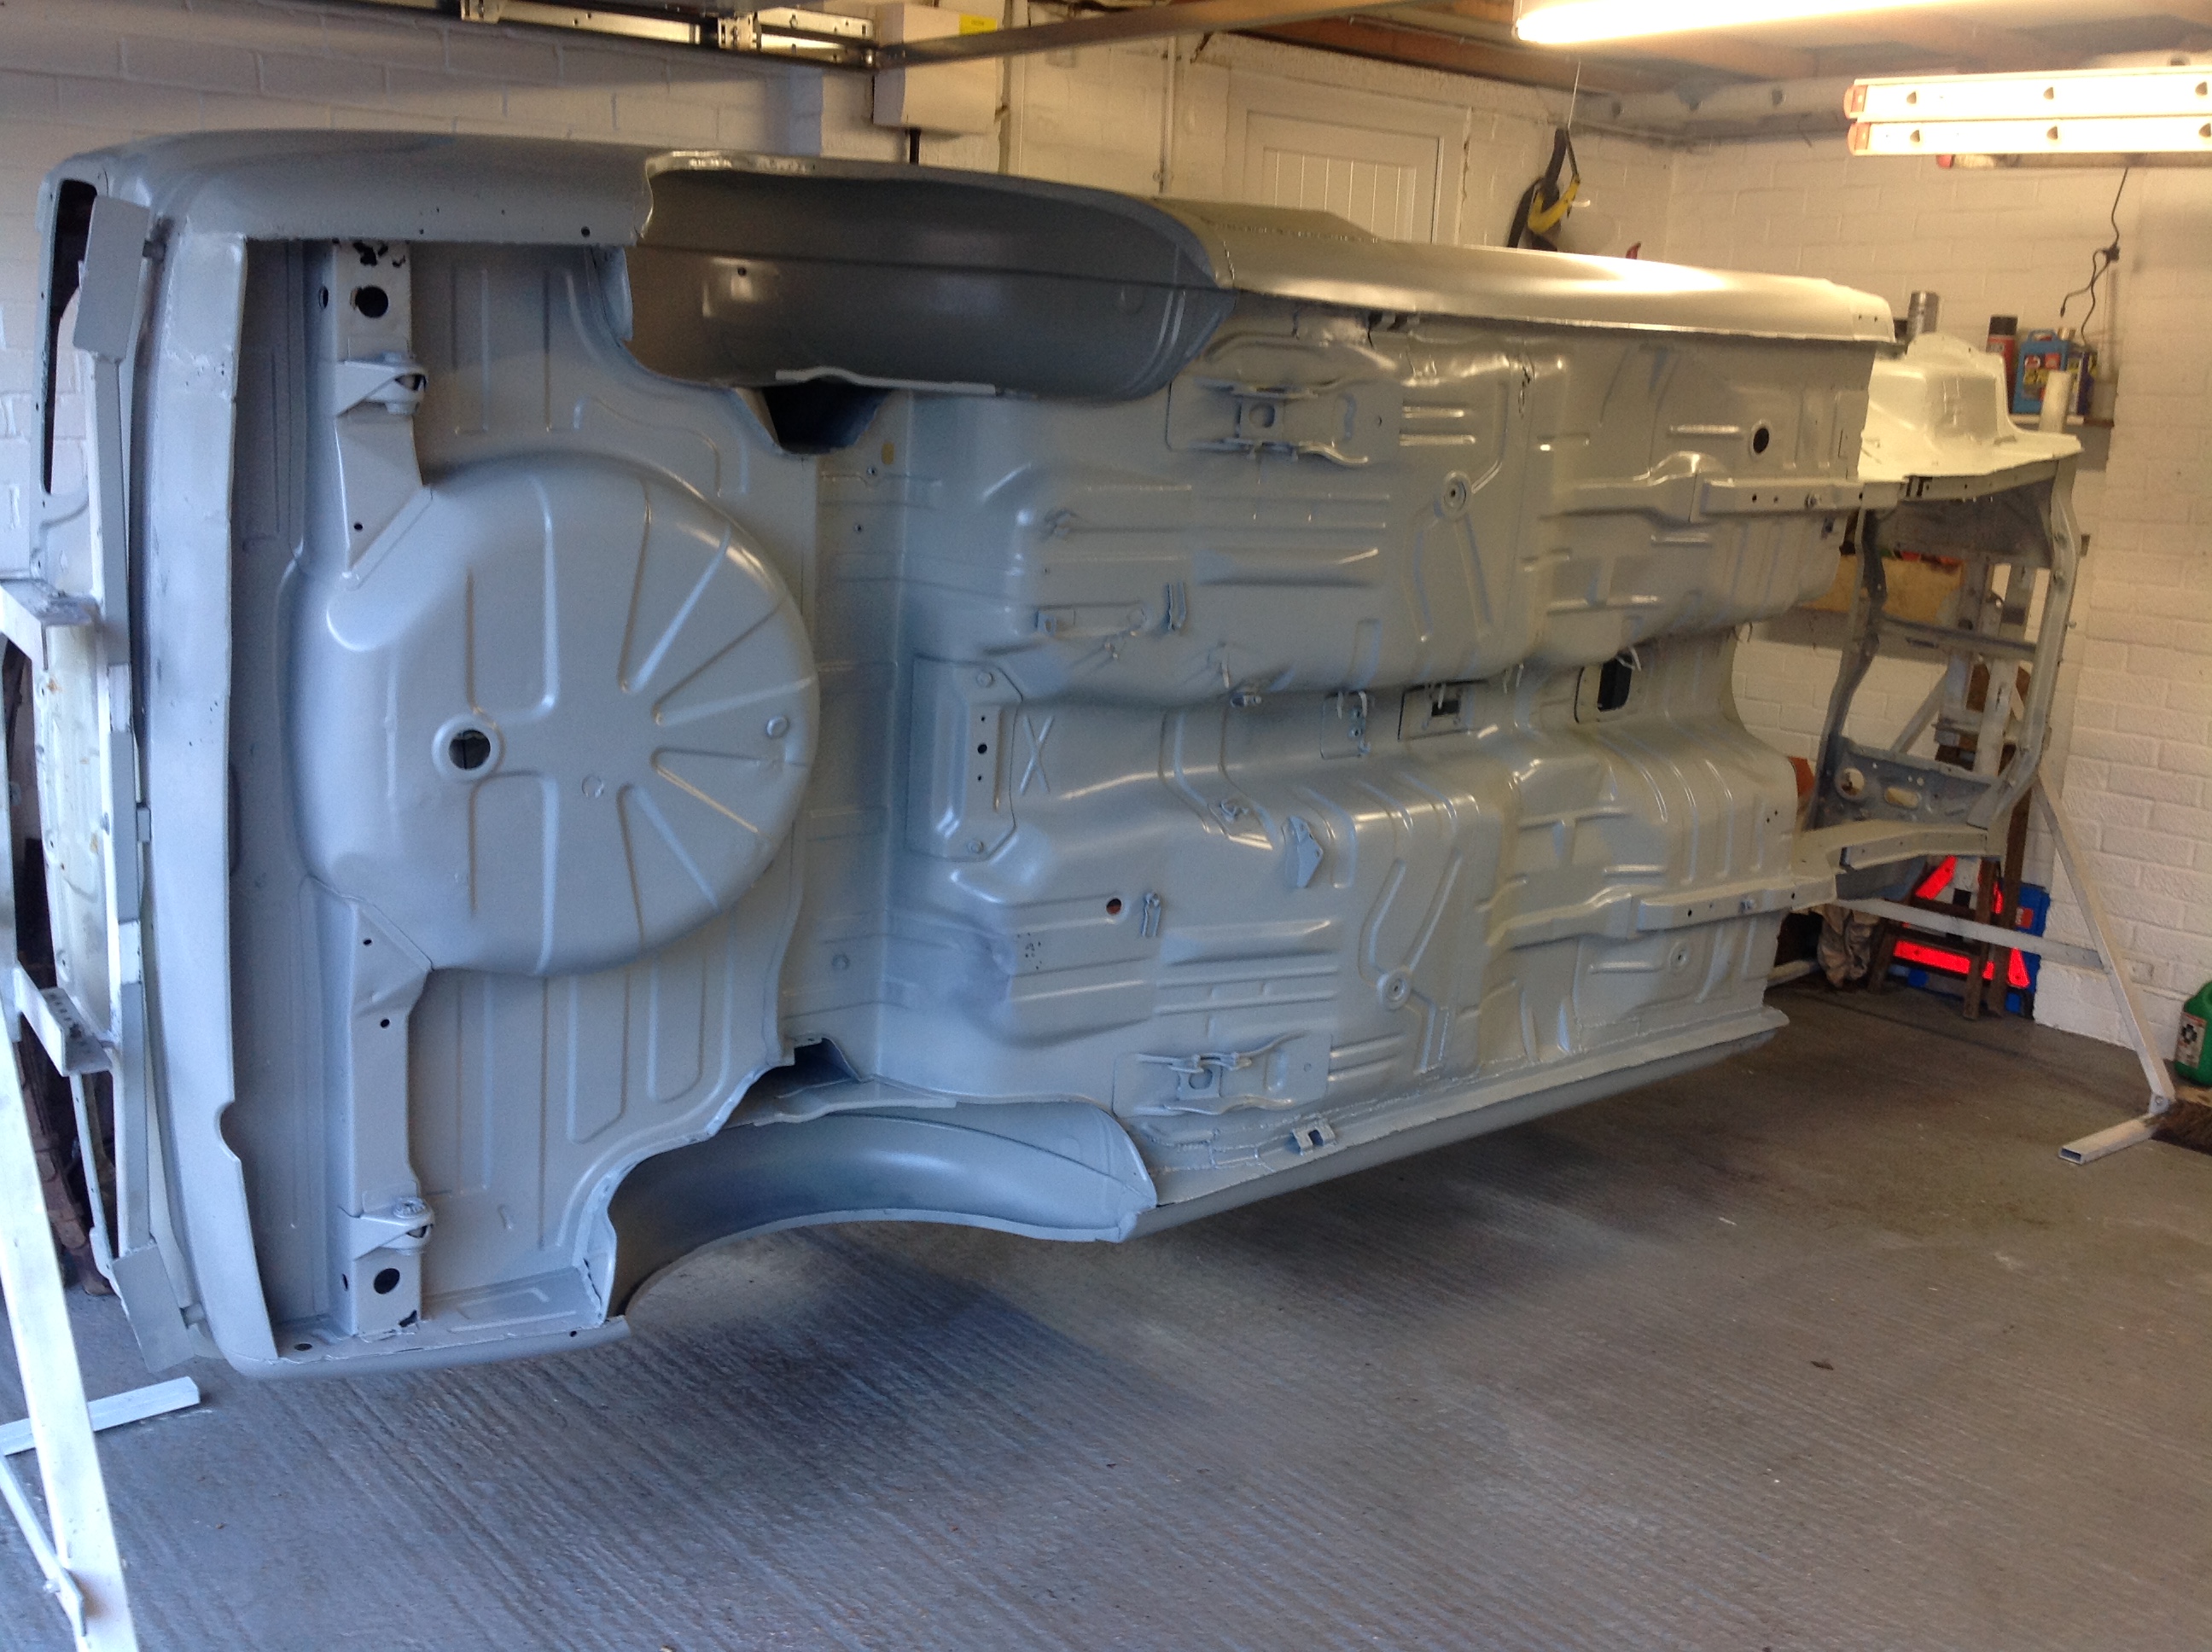
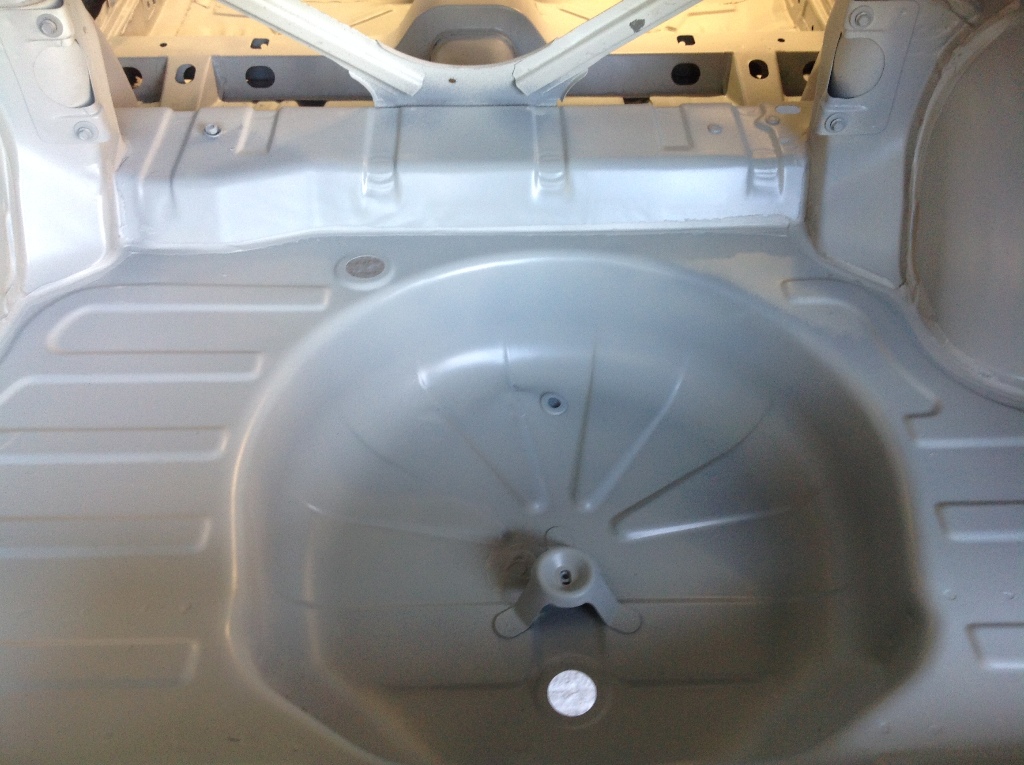
Shitty Update: The Z31 is STILL at compliance place, it needs: LR wheel bearing, steering rack leak fixed, 2 front tires, wiper blades, brake pedal pad. I went to see it yesterday, still hadnt been up on the hoist. A bit frustrated with how long its taken. It had to get a repair cert for a few things, old repairs and fixing some rust and floor pan damage, it all looks super lush under neath now as its been resealed. Couple of pics for an otherwise lame update1 point
-
I don't need the power if I'm not carrying your mum around /lingpost1 point
-
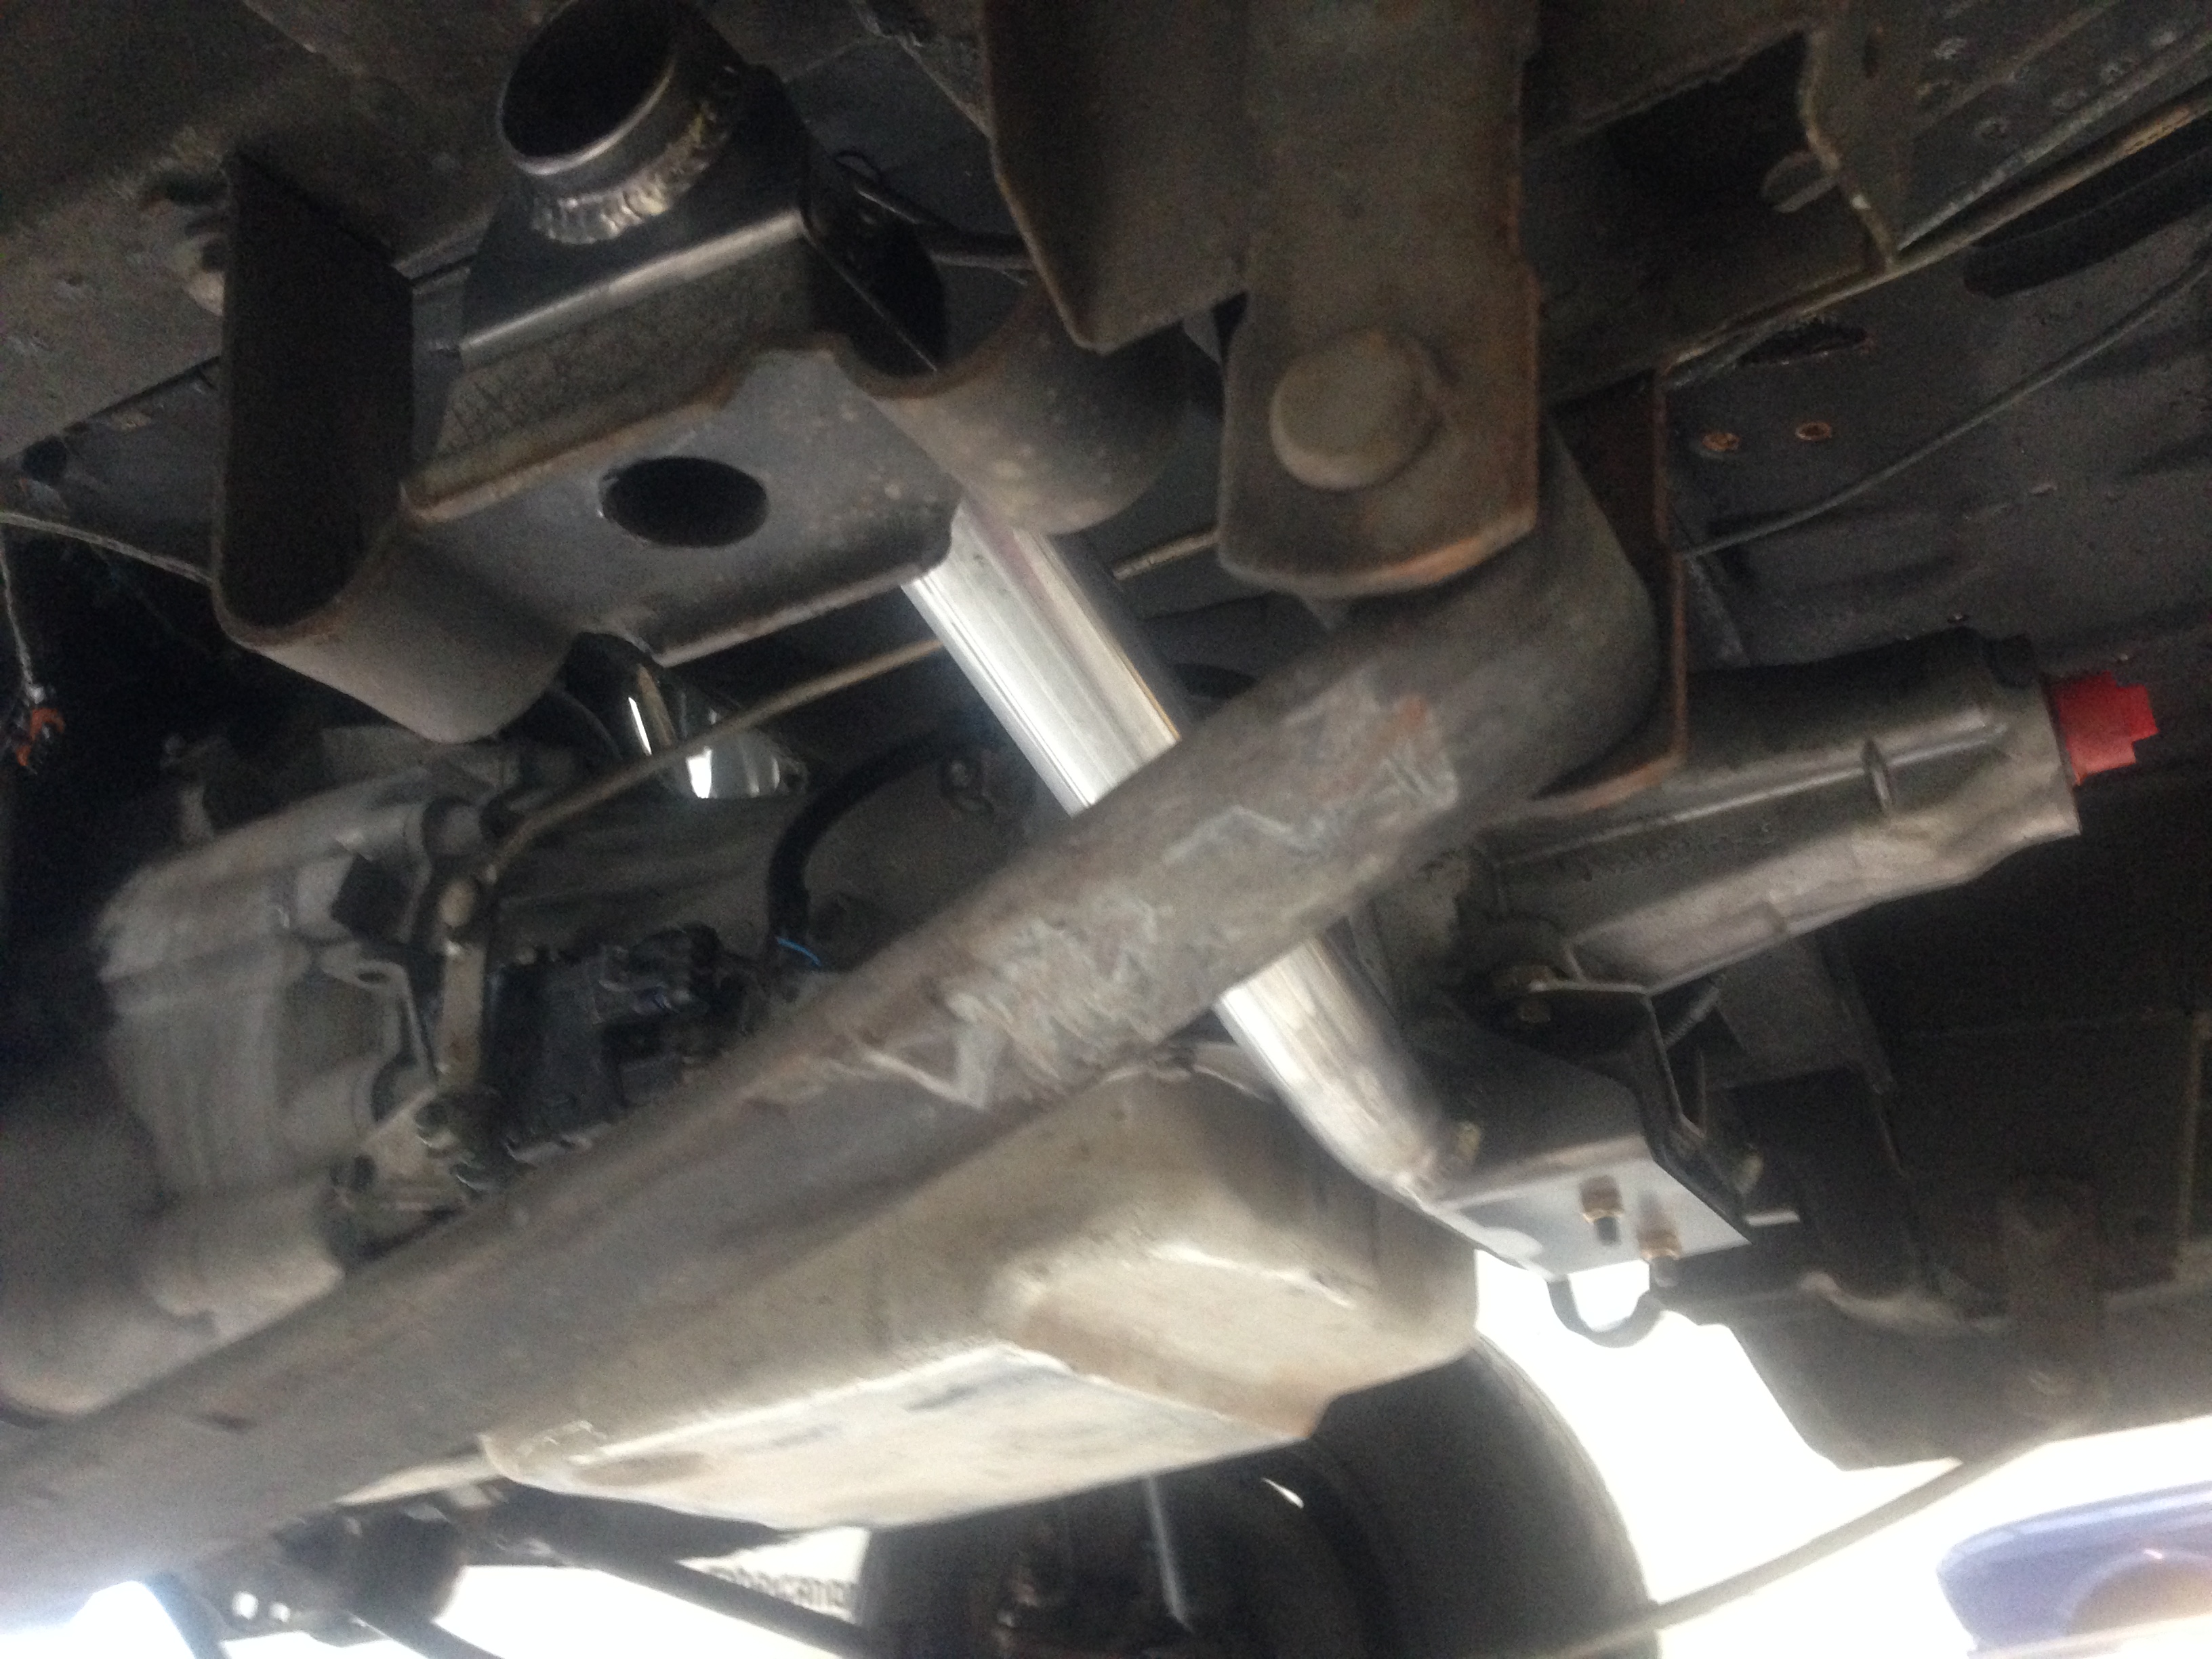
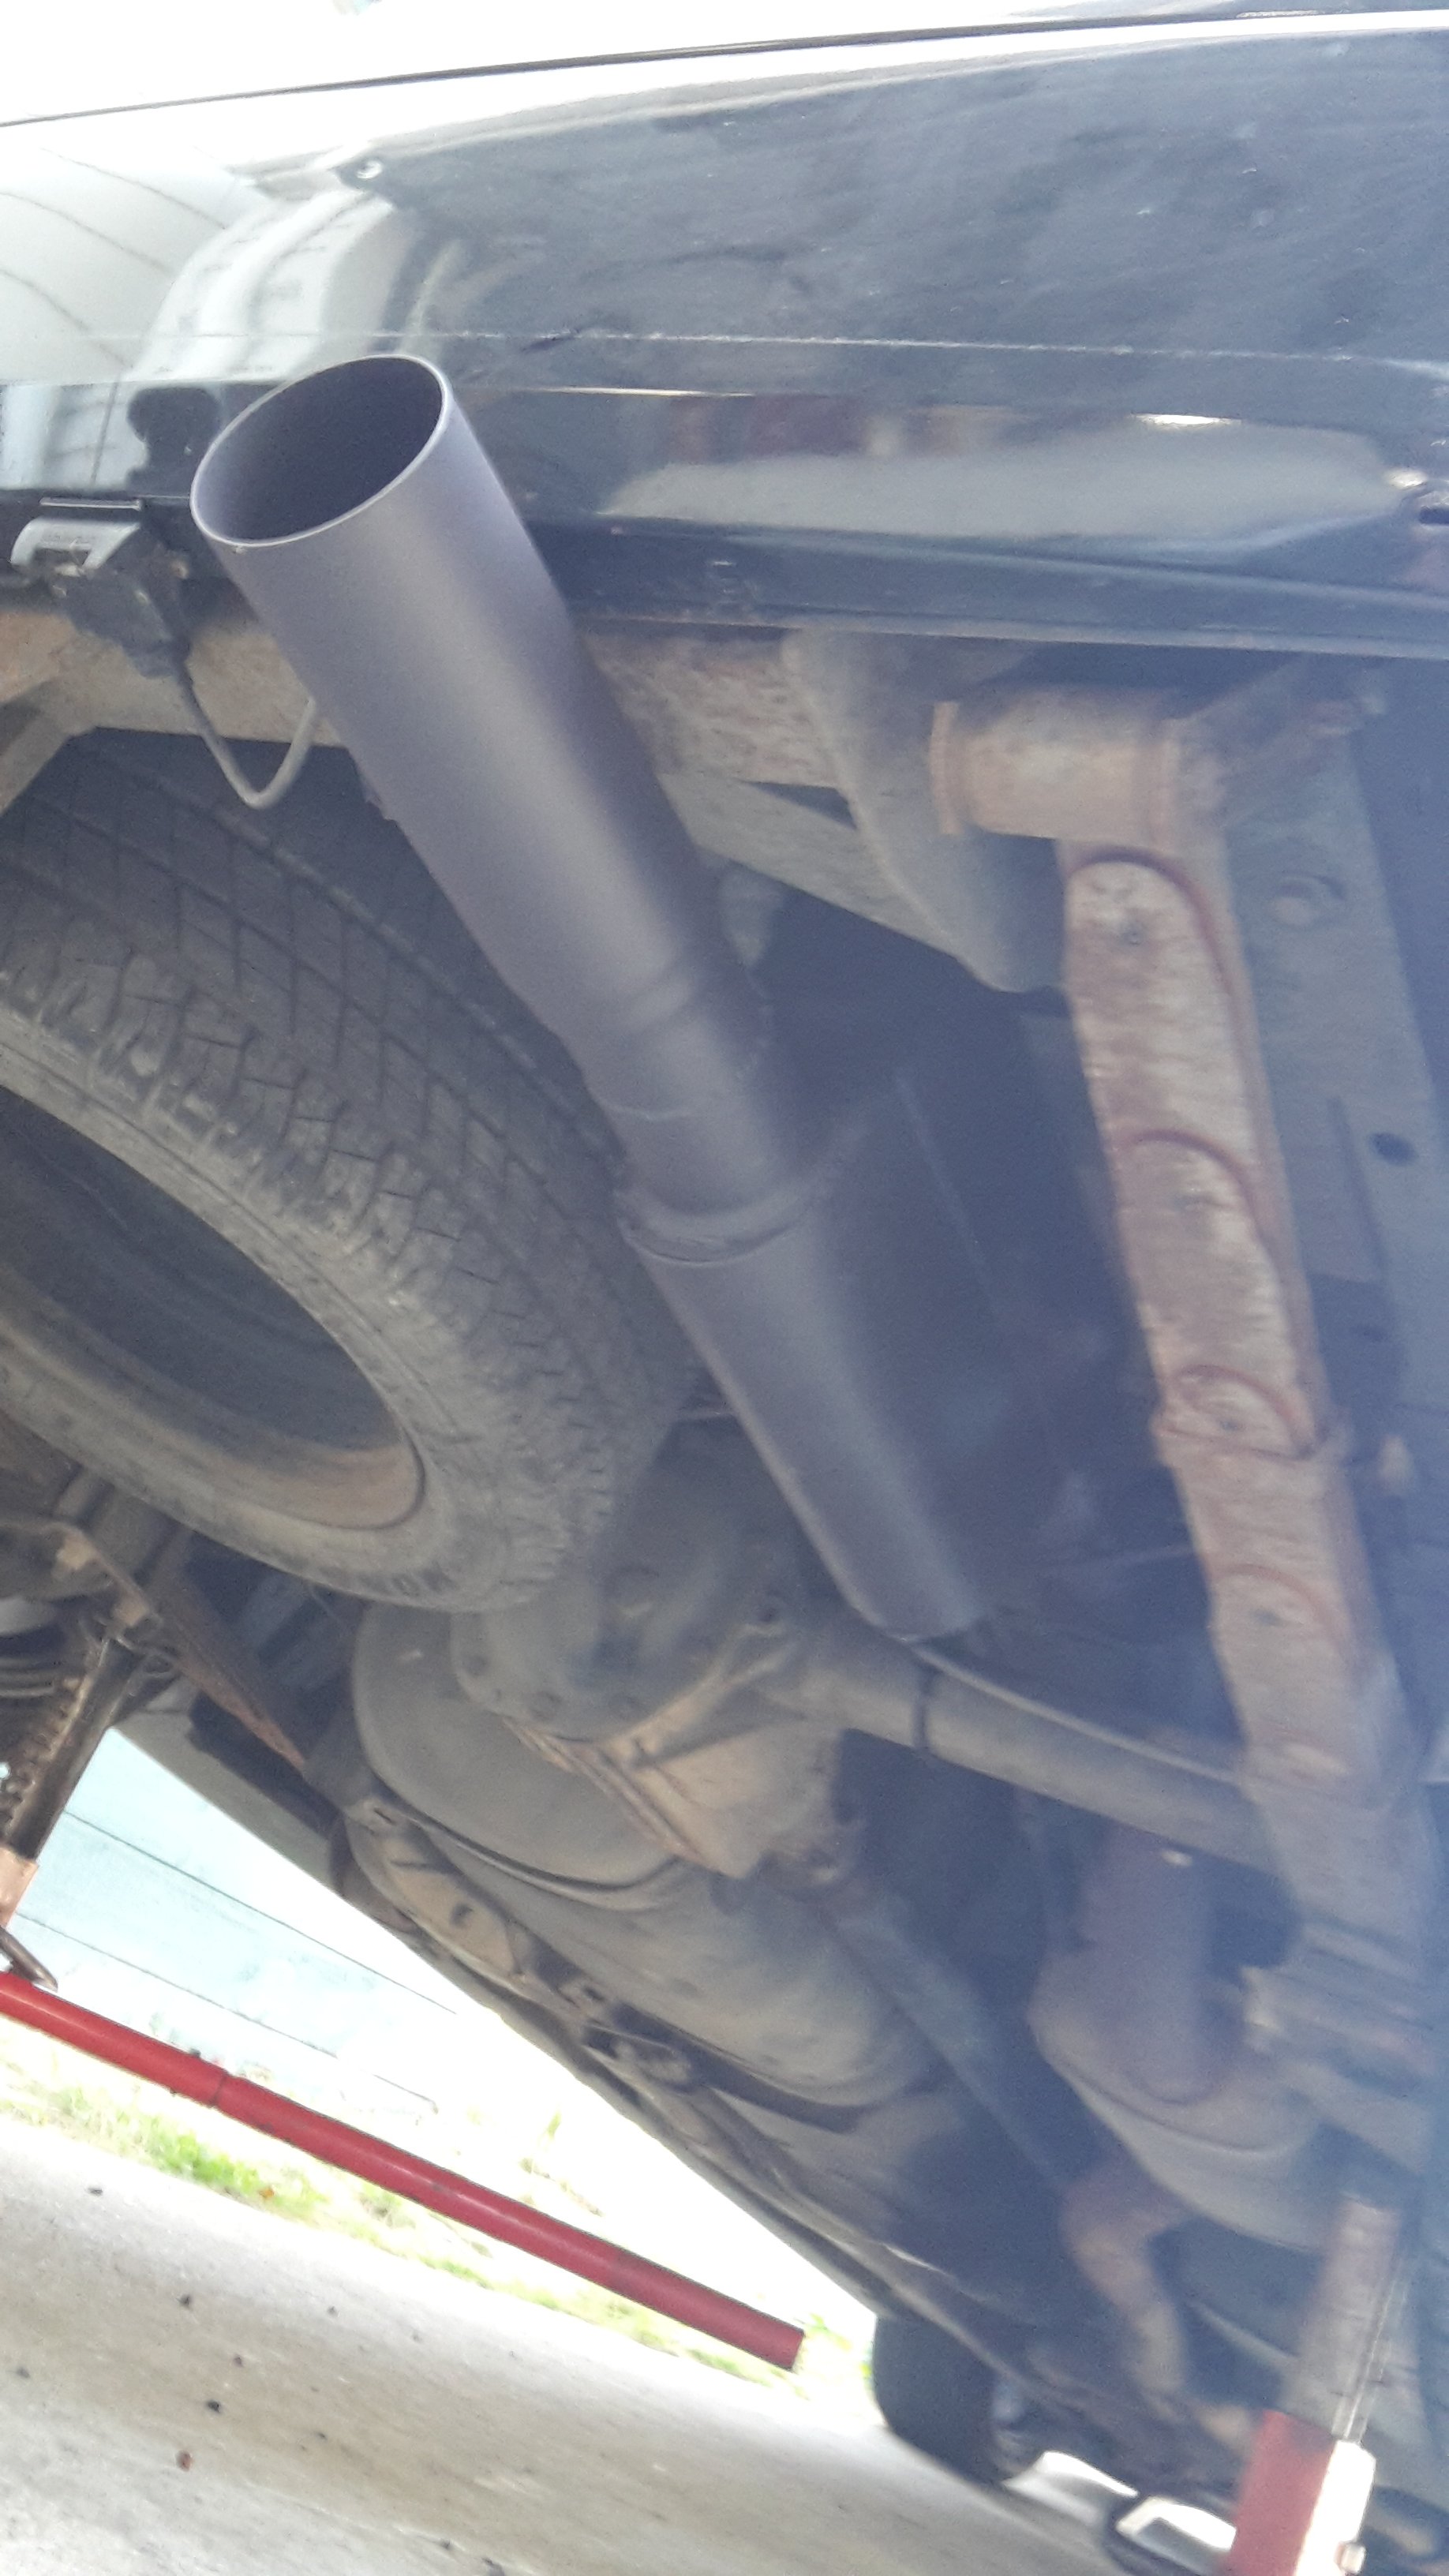
I put a China copy muffler (frowmaster? ) on te ute to shut it up, it was a bit droney. I ran out of pipe to make a tip but found a driveshaft under the house that is now an exhaust tip. One thing I have found useful when doing exhausts is some hi temp pot belly black paint from bunnings, cheaper than rattle cans and it lasts well
1 point
-
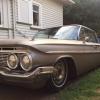
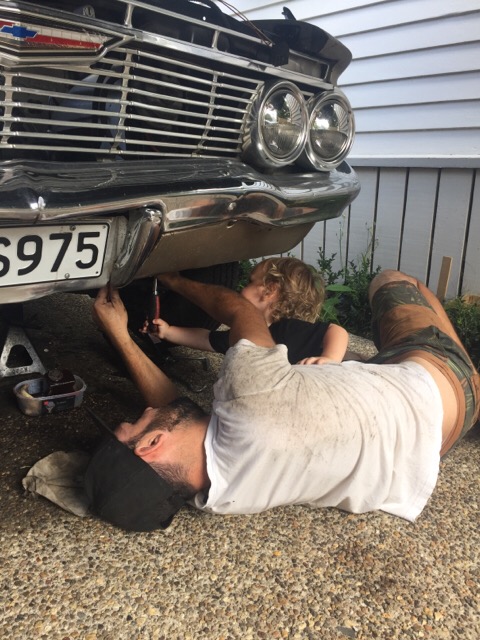
My boy doesn't know it yet, but hes working on the car he can drive when he gets his licence. Teach them young
1 point


.thumb.png.46e518f714cdc319554c389f990e75a4.png)


This leaderboard is set to Auckland/GMT+12:00