
Leaderboard


Popular Content
Showing content with the highest reputation on 06/21/17 in all areas
-
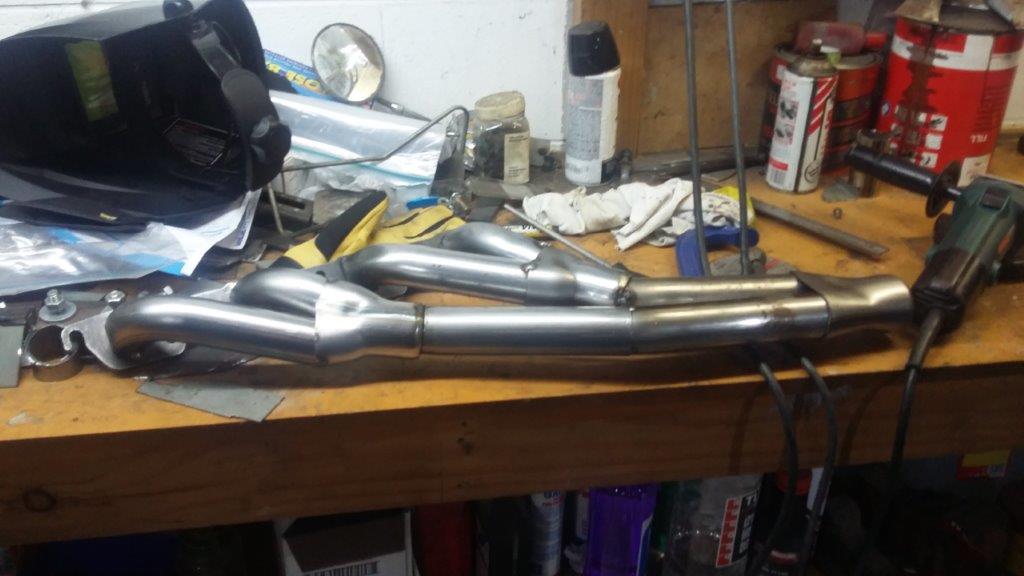
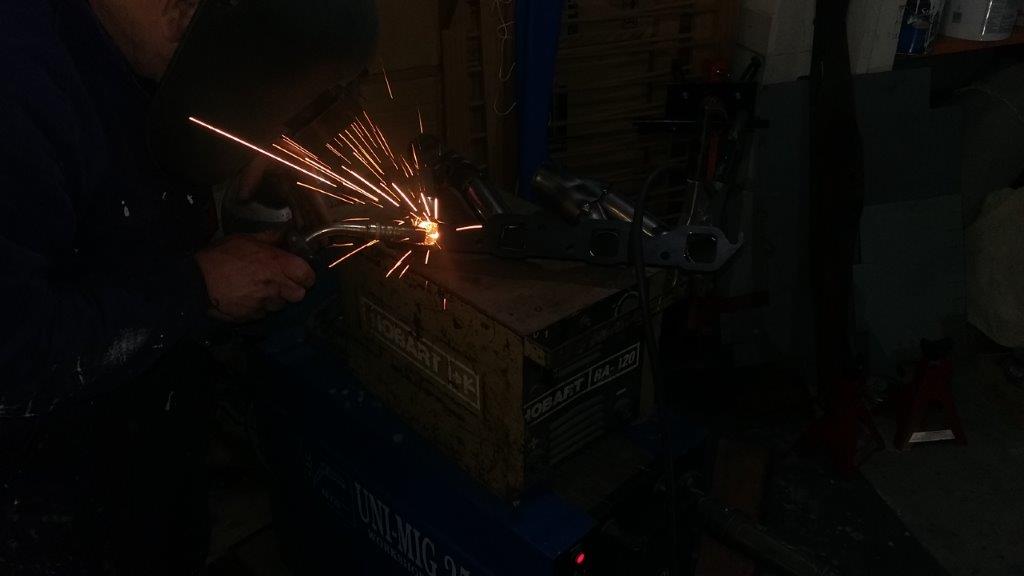
A quick up date before the monthly meeting tonight Big progress on the headers. I am glad I'm not paying for the time that has gone into building them. So far parts alone is $600 and still not finished. Here is the passenger side. It is only tacked together. Everything fits.........just. I am aware that the tube lengths are no where near optimal but I don't think dropping a few HP is going to be noticed. And the drivers side half done And a photo taken just as the welder lit up
 7 points
 -
So the bolts were exactly were I left them. these two are getting all pally, who knows what it may lead to.... could be the start of a beautiful thang.6 points
-
been busy but heres pics of concrete 2017-06-21_03-22-28 by sheepers, on Flickr 2017-06-21_03-24-34 by sheepers, on Flickr 2017-06-21_07-59-25 by sheepers, on Flickr 2017-06-21_07-59-12 by sheepers, on Flickr5 points
-
Yeah- just strip it down, stretch the oil control springs out, give the plates a scuff with a belt sander, drill some ports and rebuild it using appropriate sized electrical cable for your new water seals. Start early in the morning and you'll be ready for a few laps and a feed of KFC by the evening! You can thank me later..my advice is free.4 points
-
I'll be there I'll be there I'll be there4 points
-
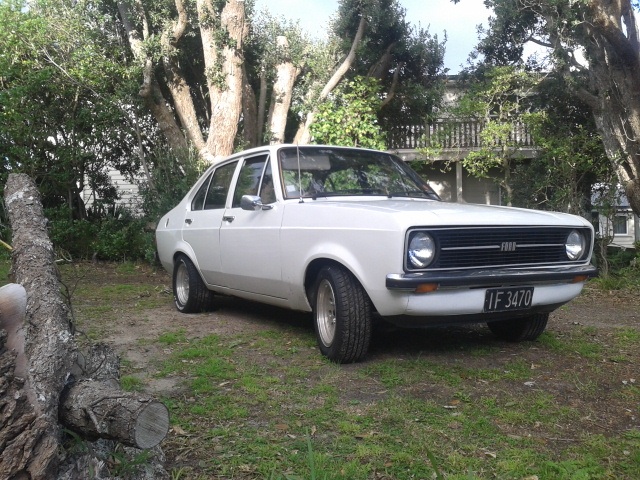
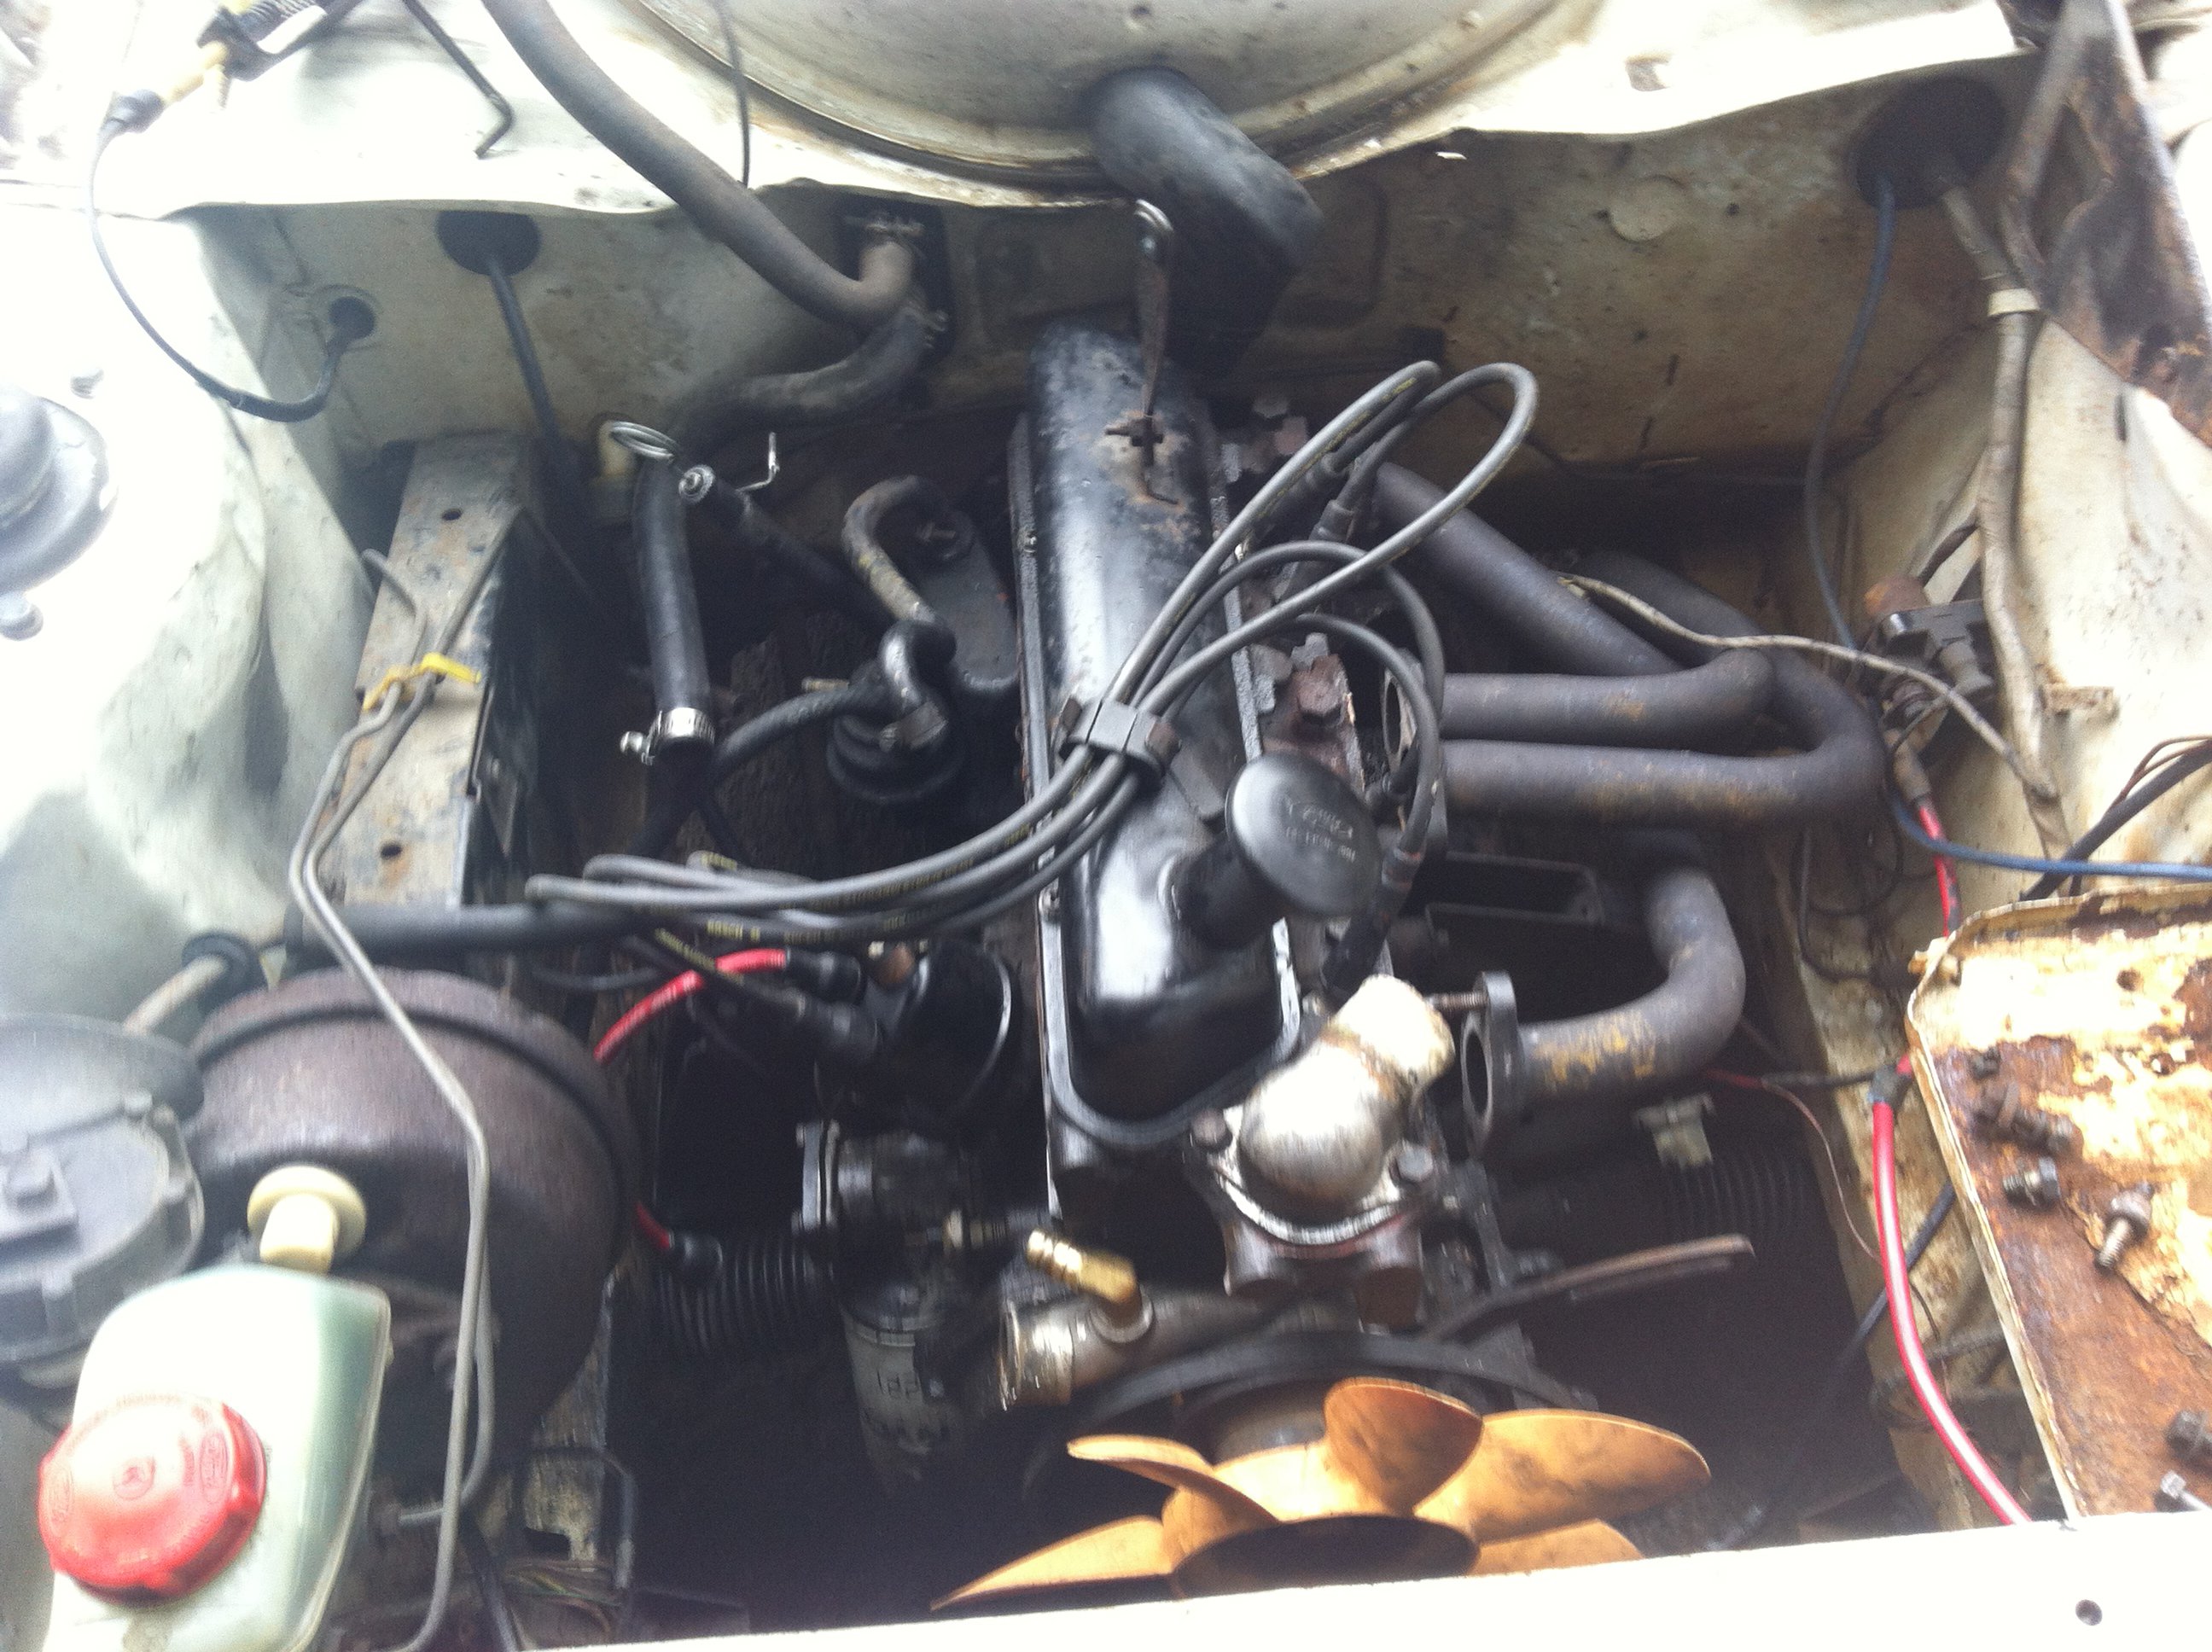
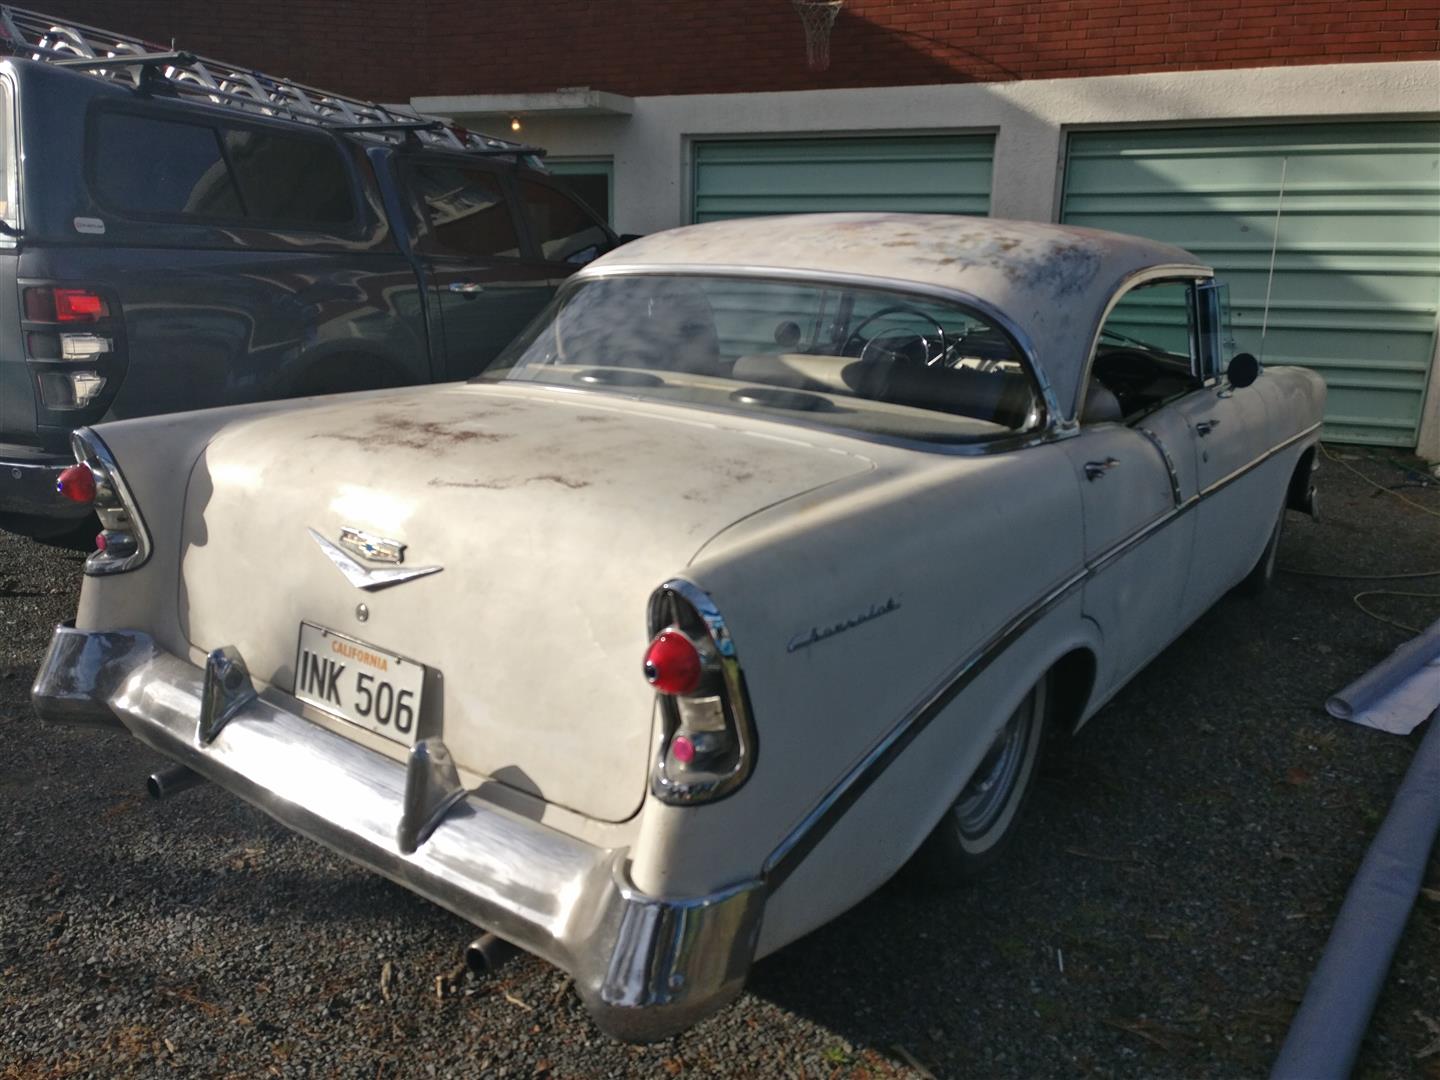
So.. about 4 years ago I brought this little banger off a kid in Cambridge. He didn't want it anymore as it wasn't as fast as all his friend's skylines and shit. I thought cool, I'll take it. This is pretty much how i brought it Nice standard and straight. Good little 1.3 that went hard for the first year i had it untill i managed to get hold of a 1.6 to chuck in. This is back in 2015. We put the 1.6 straight in, was a cunt of a job without the extractors being on a flange... many a curse word was yelled at me from my brother as he helped me out. The 1.6 went hard for about 6 months until christmas day 2015 where it decided to melt a piston going over the kaimais... So off i went on an adventure to melbourne to work and save money for this engine i wanted to get rebuilt. decided to stick with the 1.6 xflow over a pinto as i felt it suited it better than a pinto and also i wouldnt have to get a cert... 6 months past and i returned from melbourne and the rebuilt banger was ready to be picked up from Stick Automotives in Ohaupo. Fully rebuilt with all new internals. Bored out and honed, 1300 pistons, lumpy cam, 10-1 comp, Ported and Polished head.. blah blah the list goes on. Was made to have sidedrafts but they were not in the budget so it got the 28/36 dcd put back on it... Fast forward 7 months, the old twin throat just wasnt coping with the amount and gas i wanted to give it so managed to score me a set of twin 40 delorotos off trade me for next to nothing.. got them rebuilt and chucked on Another 6 months went by which to about feb this year. Moved back to tga from auckland, engine started running like a sack of shit so took it into dynopower to get it properly tuned and balanced... Boy what a difference that made. turns out the little banger is putting out 150hp..
3 points
-
I'll be there - but have mismatching tyres. Got the burn-out tyres* on the back y'all. *T's & C's apply,. Burn-out only possible if someone covers the carpark in a thick coating of lard, ky jelly and pamolive dishwash. Burn-out will actually be a combination of wheel bearings, tire rub and clutch exploding. Credit criteria and a $99 dollar booking fee apply. Goes hard for what it is. Cut cat M8. Like a shit on a rail wrapped in blanket.3 points
-
*laughter turns to tears*3 points
-
Got the floor back to bare steel, no holes to note which was pretty sweet Started to attack the front guards as they were starting to get quite a bit of acne. Hit some pretty intense bog on the right side of the grill... guessing its been in an accident. all the repairs that had been done have all started to fall away so it will all get cut out and done properly.. underside of bonnet was looking like a bag of dicks so sanded that back as well.. So thats up to date as of the 21st of june. Please note that im not a pro mechanic or panel beater... so any tips or anything would be helpful. Ive brought a big tin of 440 industrial primer, (along with a tin of wax and grease remover, a roll of 80 grit) which im going to chuck all over everything so its no longer bare metal.. Sorry for sideways pics, also any tips chuck them at me!2 points
-
IF i was going to put a barra in it mate i would go NA with 6 side suckers ....and some cams...that would be plenty of power and the sound.............oh the sound but no im not going to put a barra in it. now back to the valiant with you mate........go on..........off you go........i want to see that thing back on the road2 points
-
Aren't they the same thing? Puhuhuhuhu /I'll be there in a semi-modern car that isn't even mine so I can't talk.2 points
-
No panic seems their quiz nite is tuesday so no clash with old school eating/drinking/talking Thur nite2 points
-
well 1st trip with the trailer after finishing it. and glad to say both car and trailer survived it....arse end of the car dropped when he dumped the logs in.
2 points
-
Darrell came over and gave me a hand last night, Cheers D.Progress was hampered by my dumbass misplacing the pivot bolts for the bonnet hinges. I did get the engine lid on at least.2 points
-
Okay, looks like I found the issue. The timing was off 180 degrees hence it idled well when timing was retarded to 30deg. Nothing really wrong with the carbies although it still might need a tune.2 points
-
Parent hood is slowing progress but im determined to get this done for the next toyota fest. motor came out and striped the firewall ready for paint.I ended up getting the car touched up as i had put a few scratches and stone chips in it .Ive since just got it back from the painters at it looks so fresh,the metallic paint just pops off the shiny clear coat. things to do now is reassemble the whole car and get it ready for cert.i need to either fix my flywheel or find an aftermarket one,if my factory one doesn't work out would a JUN lightened flywheel work for street use? its 1.6kg lighter. Only thing stopping the motor going back in is flywheel,bolts and a clutch setup. also found a good set of SSR F.5 that just need a repaint and widen out to 14x8 hopefully this Canterbury weather holds out for weekend work on the car2 points
-
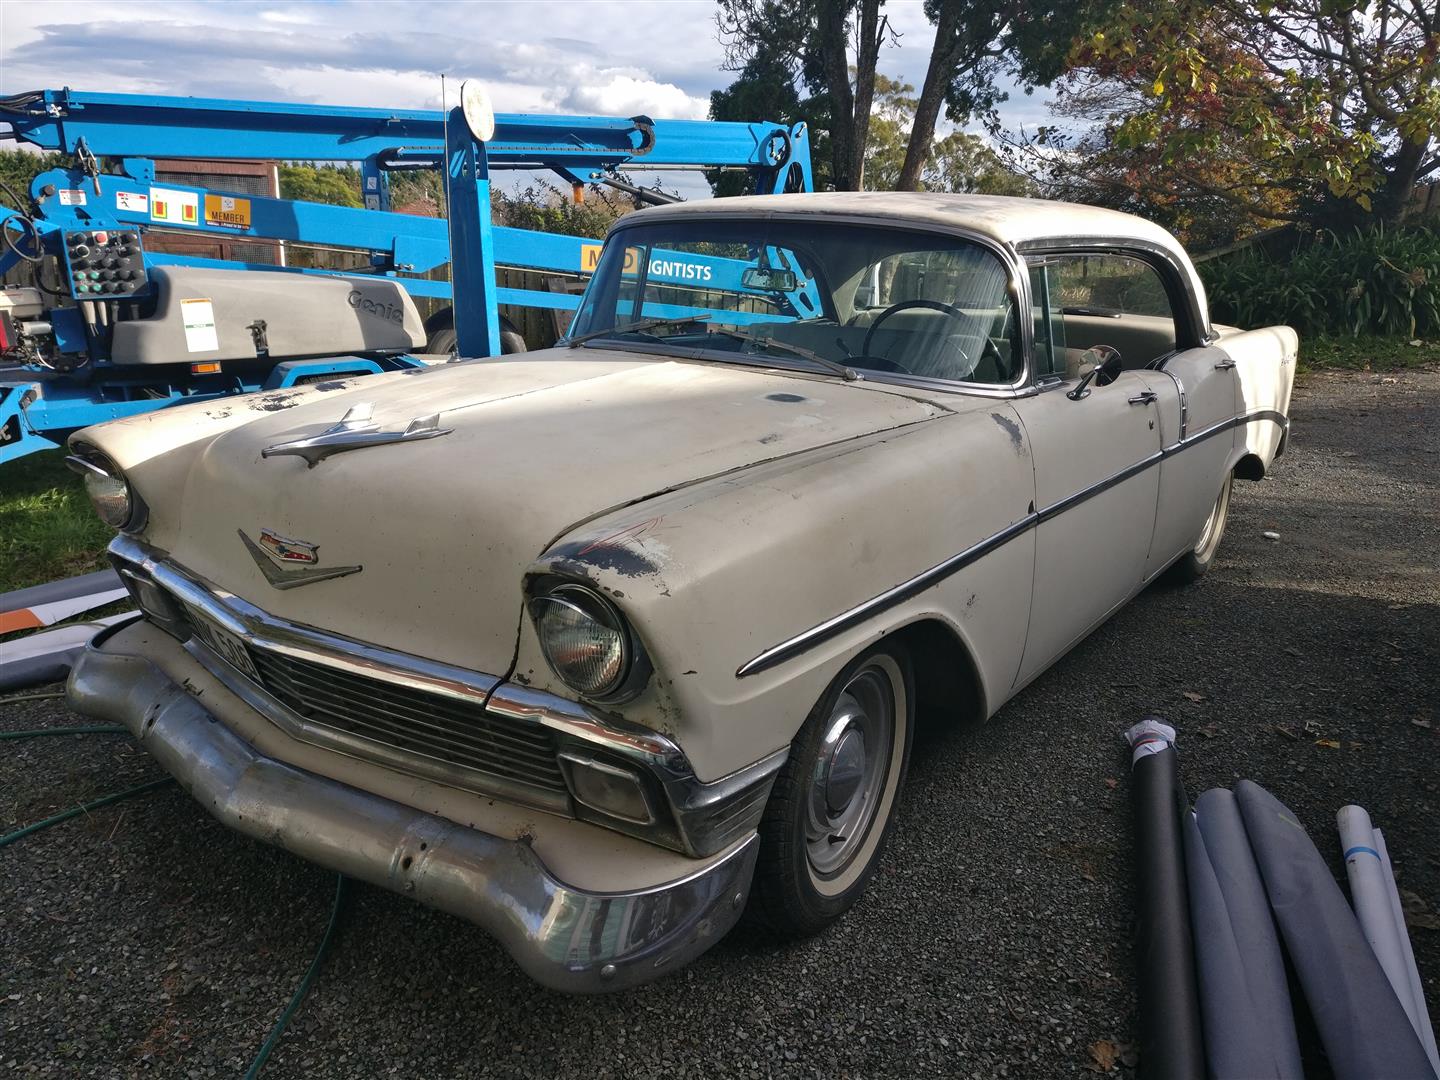
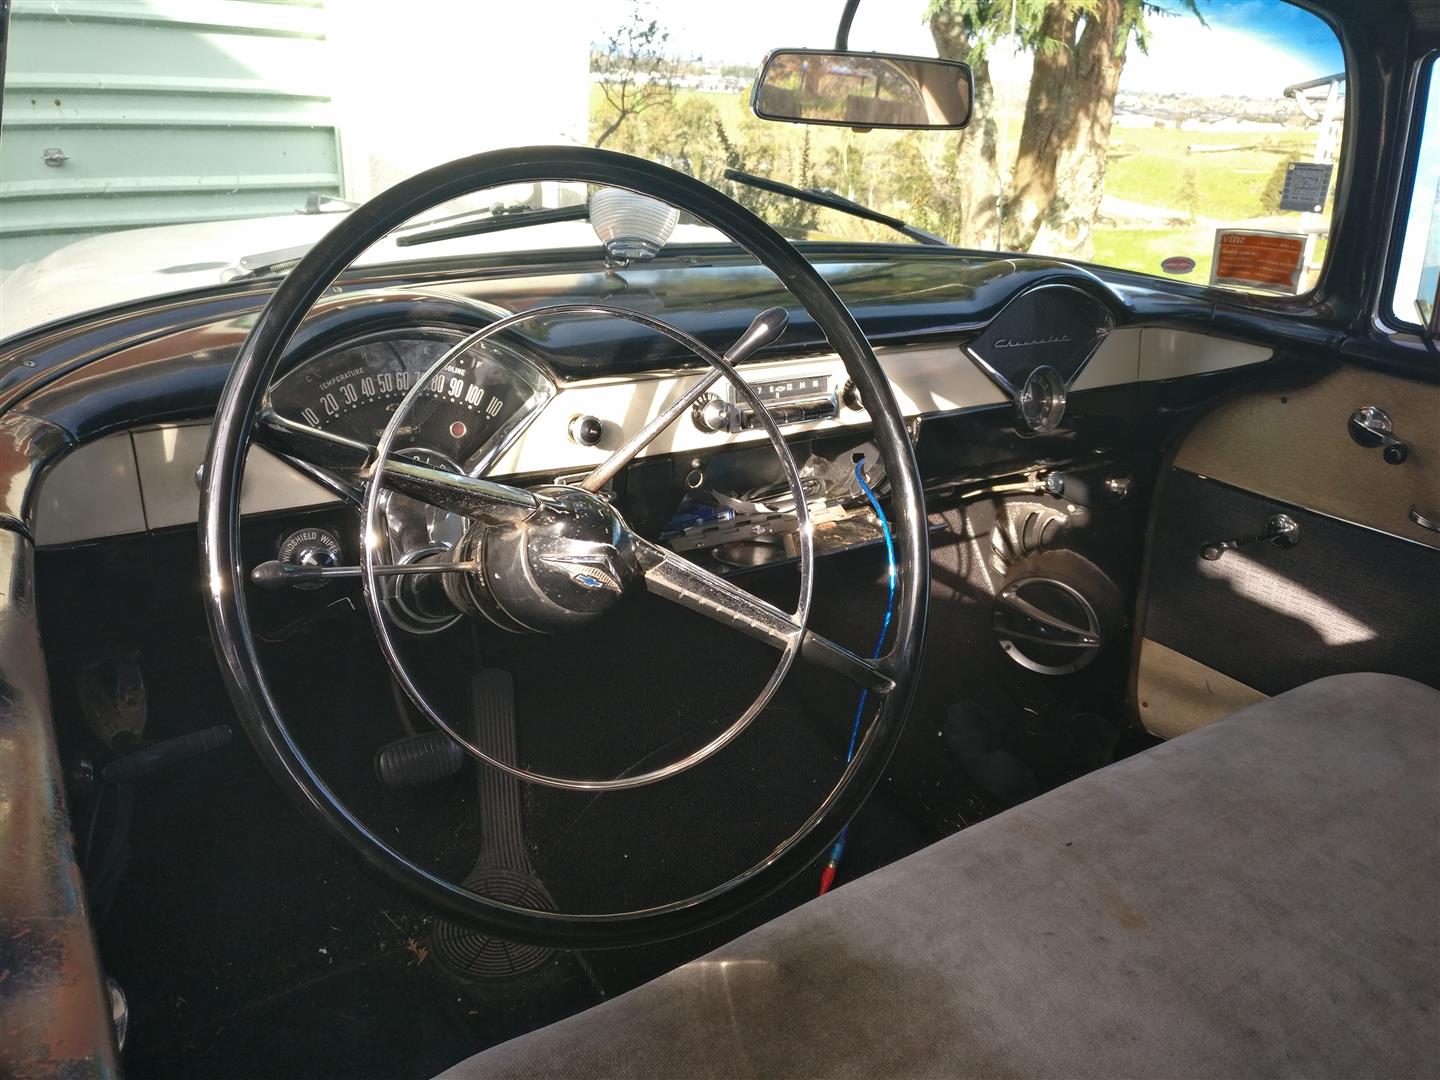
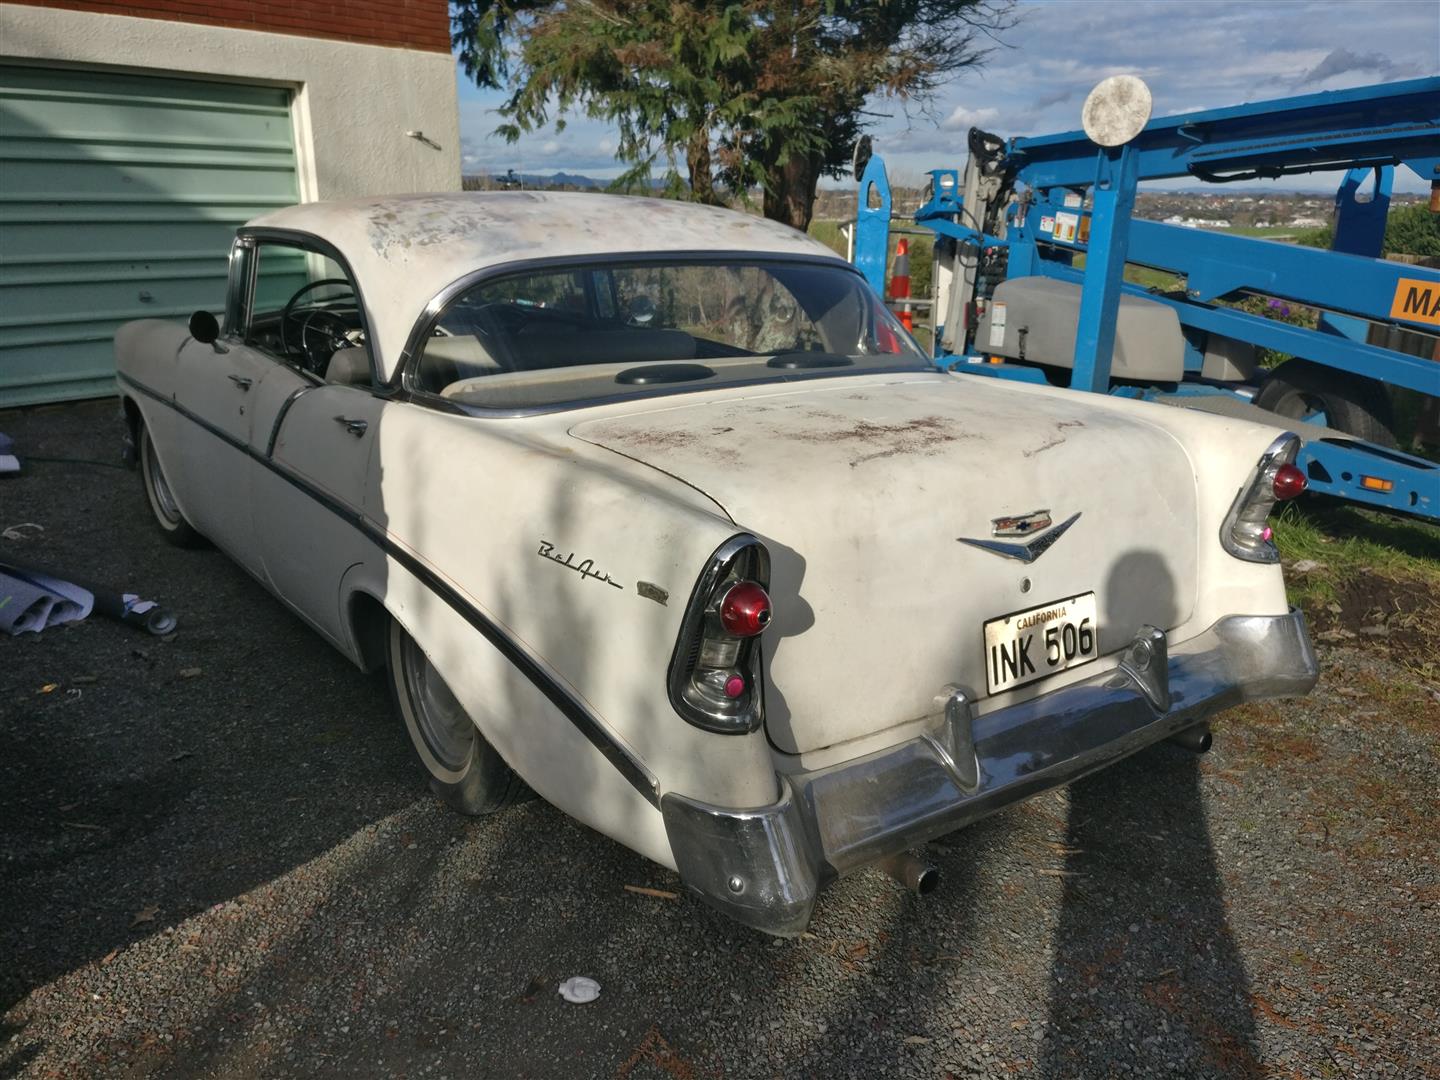
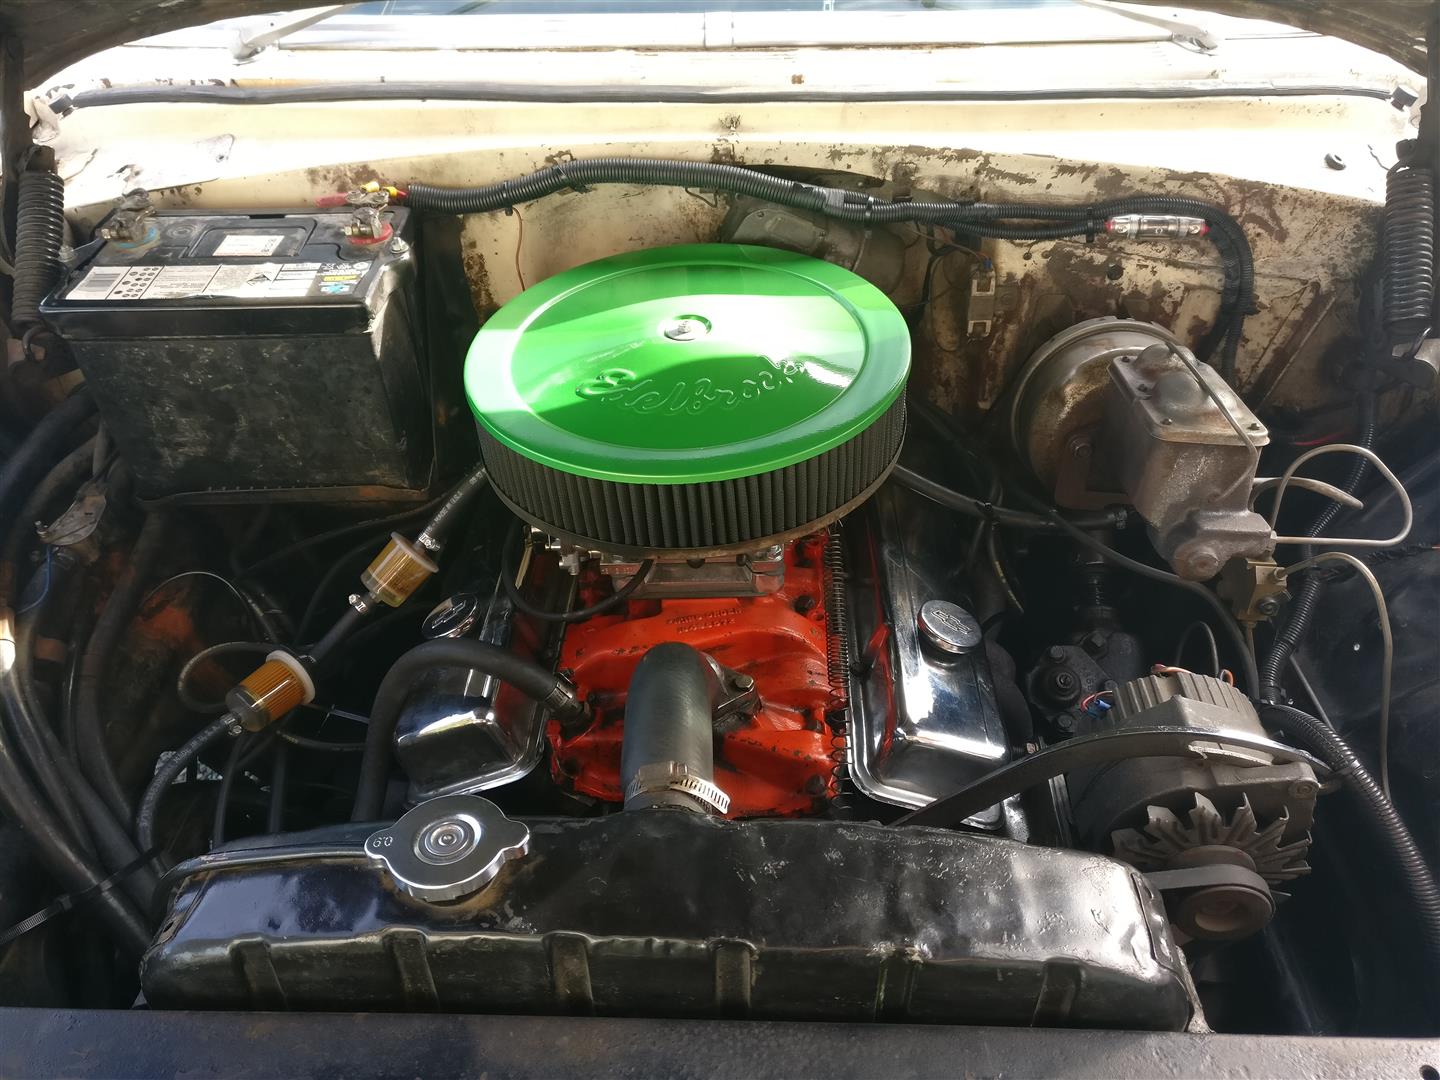
Bought about a month or so ago. Old man's and wanted it in family so that was a yes from me Plans.. Cruise and Enjoy. Running 265 V8, New Edelbrock 500 carby.
1 point
-
Okay, long overdue an update. Rust patches were sorted by the inimitable @Goat several months ago, sweet! Gearbox mount came together a couple of weeks ago, pretty pleased with it: Exhaust got some love last weekend. Please excuse horribad welds, I'm still new. Got a sweet new shirt: Also got a full set of nolathane bushes. Here's me downstairs bush collection: Rad mountings are also sorted, hurrah! Waiting on a brake kit from MRP, excite. Getting there now!1 point
-
kfc is down hill from our place so I don't even need to start it to get there!1 point
-
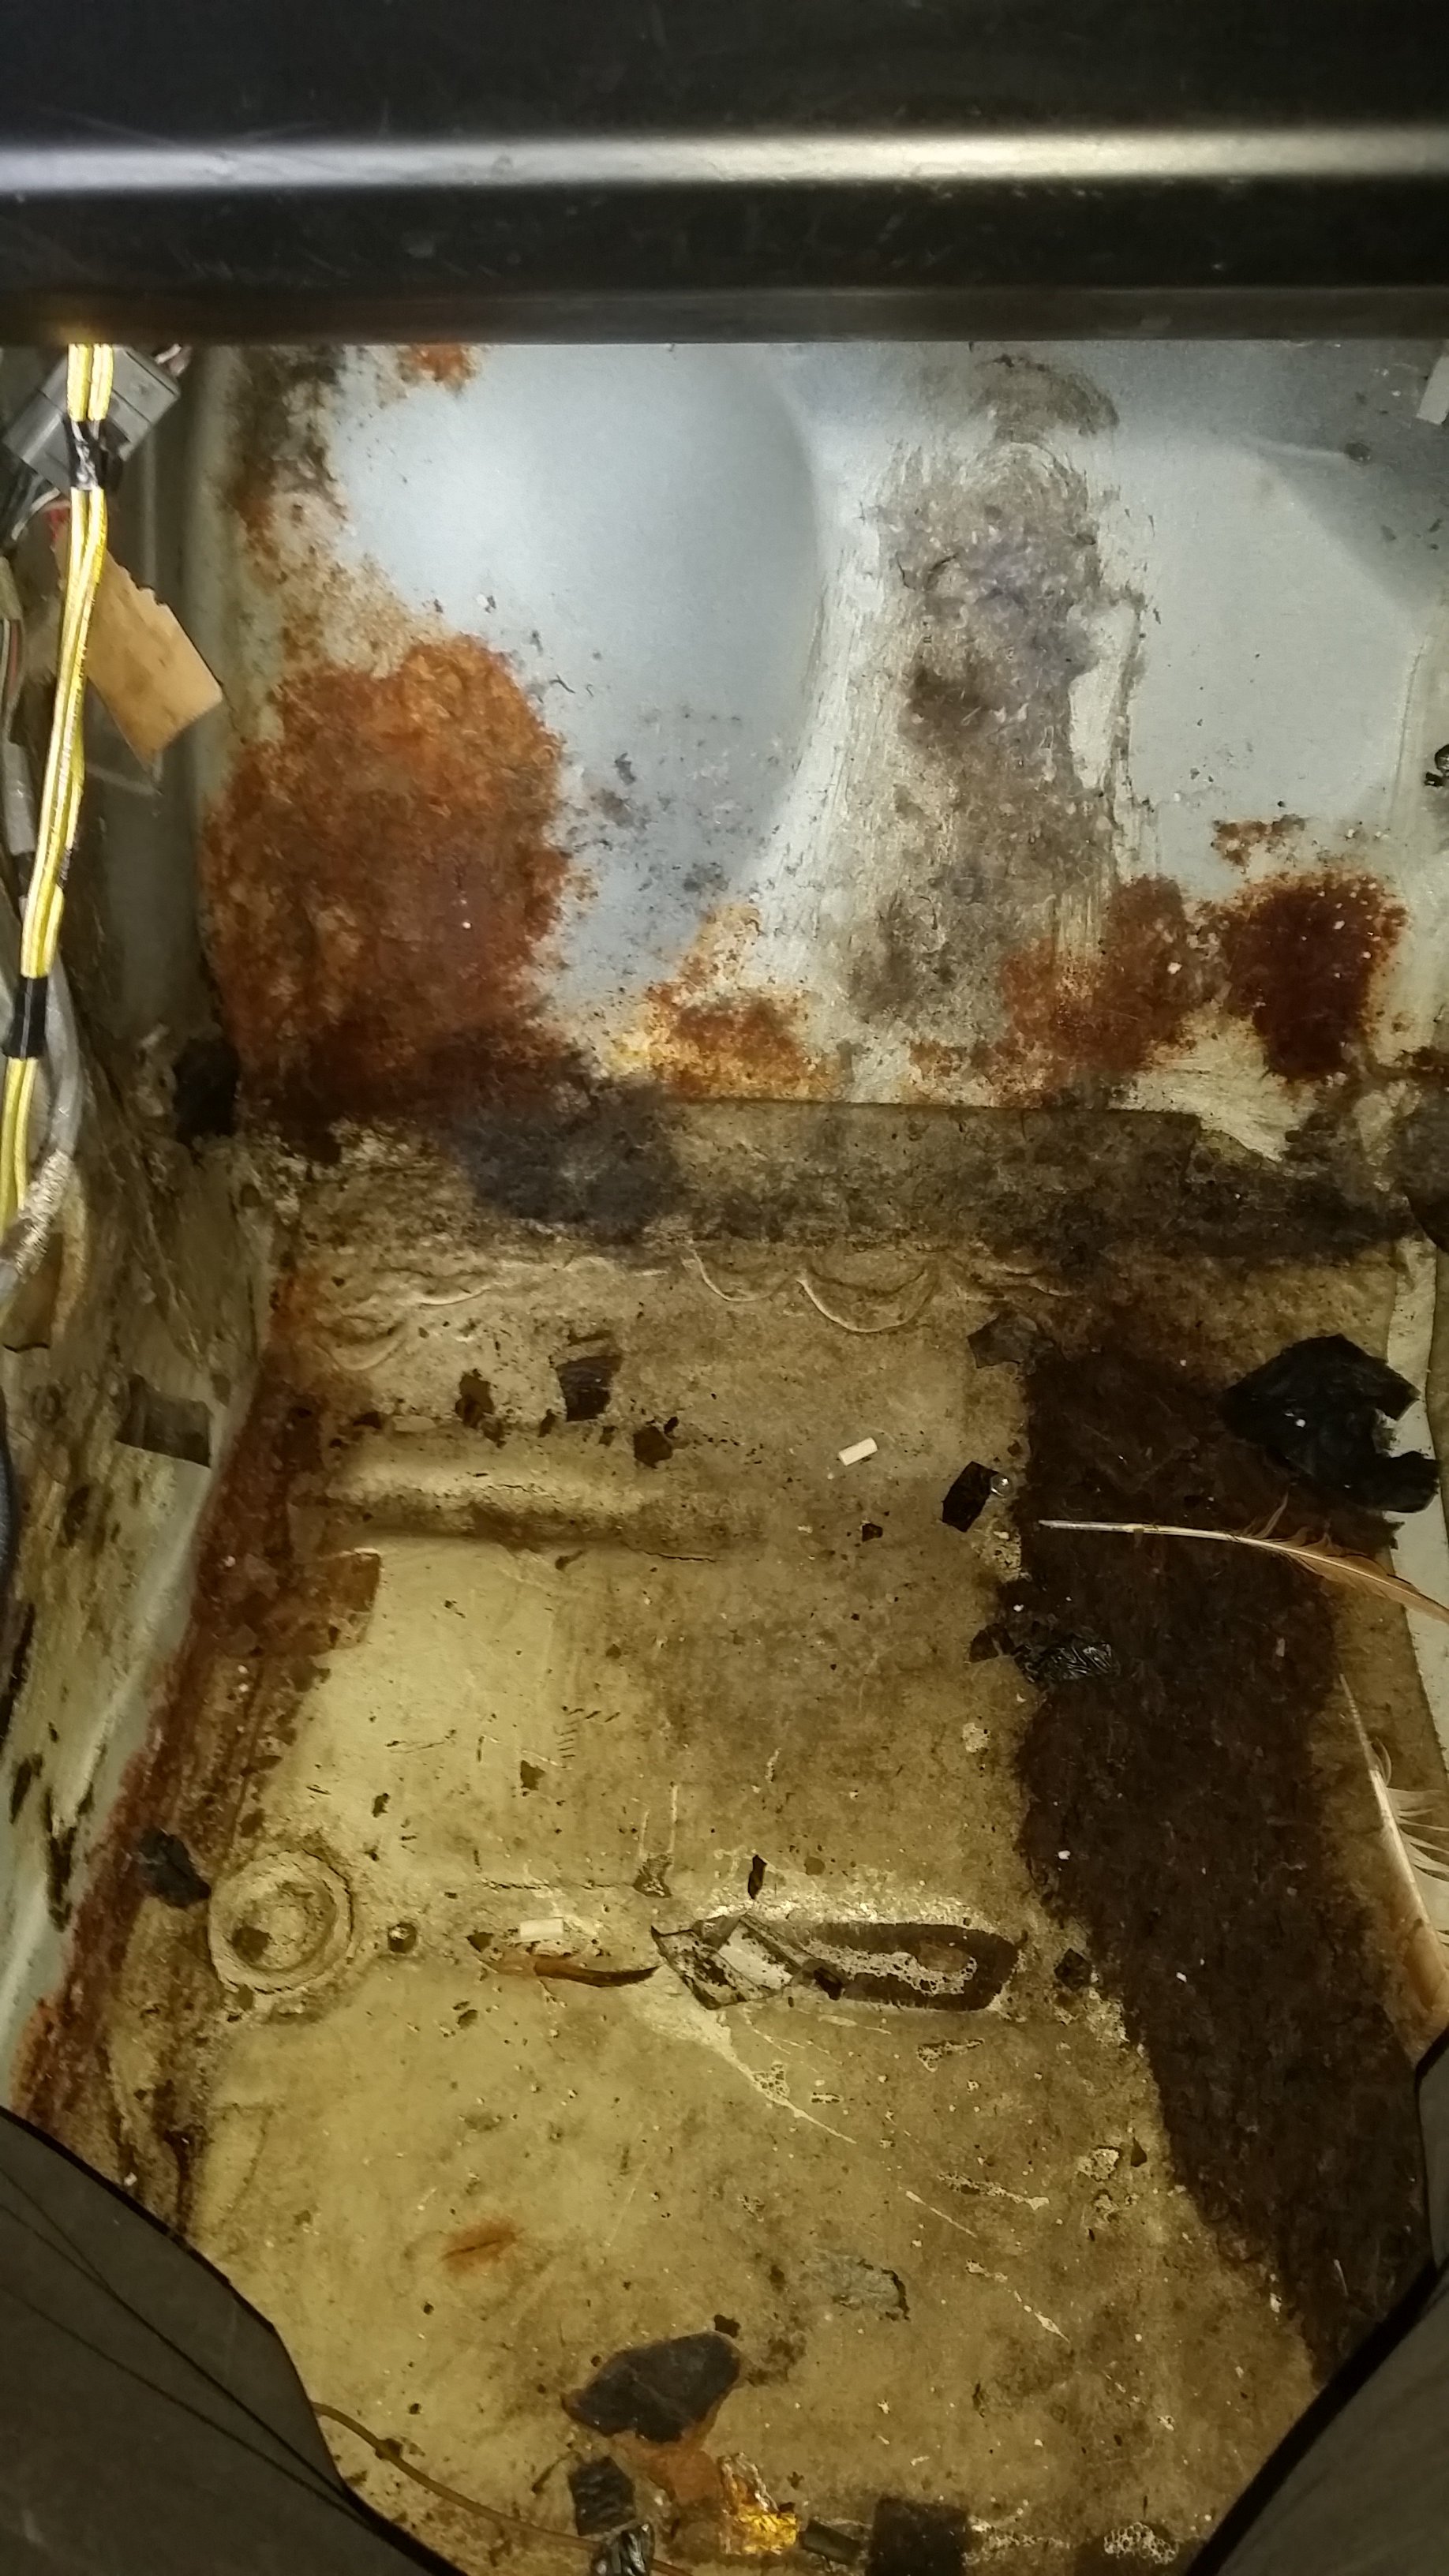
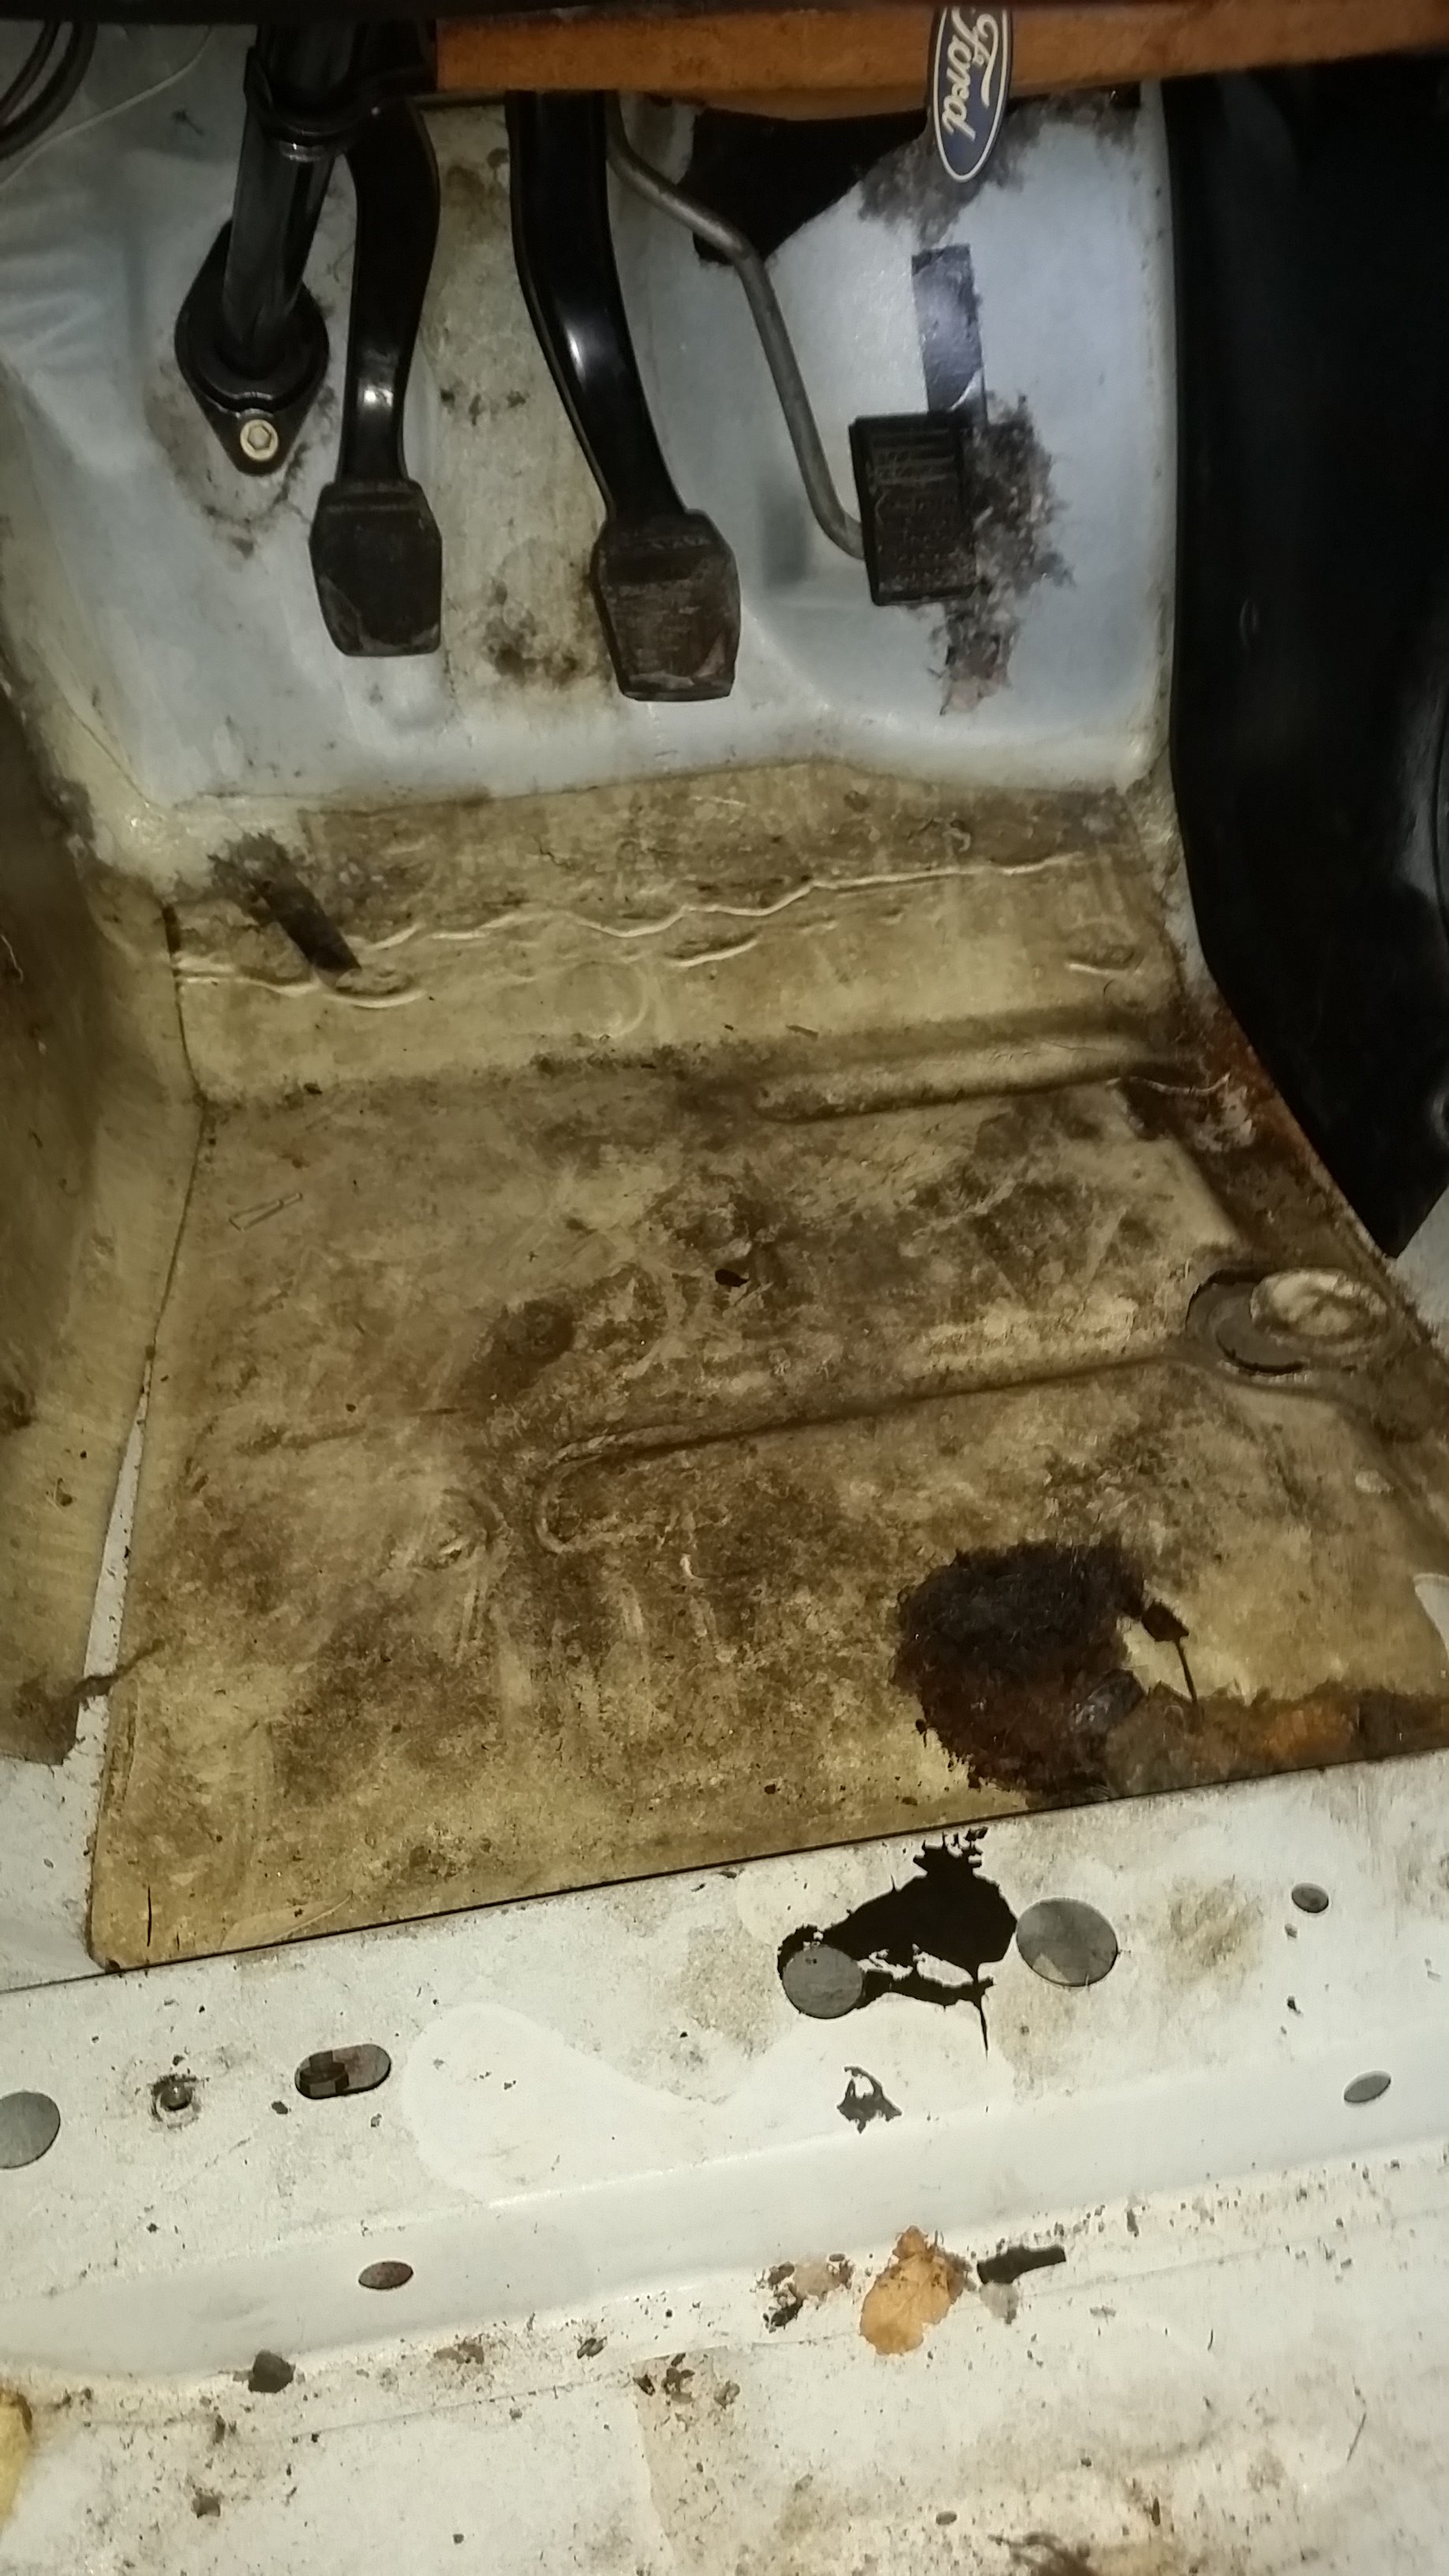
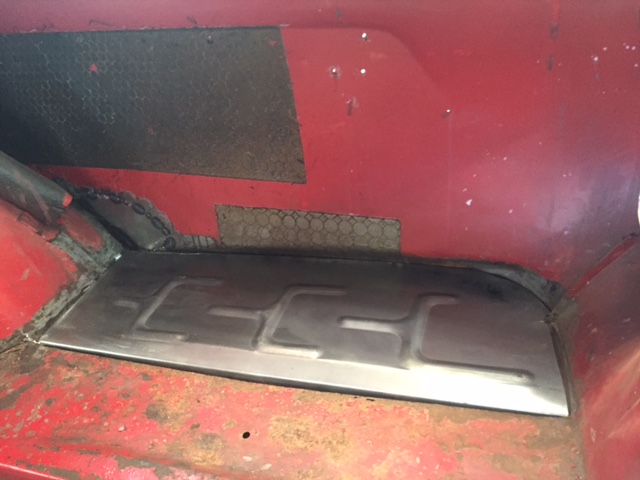
So basically... the 4speed fell apart. I got a type 9 cheap off the fat man at the mount, started ripping up my flooring to make modifications to make it fit. Got told by a few people i should strip it down to get rid of the rust and for some reason, i listened to them.. This is pretty much where I am to date... Ripped up the flooring. passenger side has obviously had a leak somewhere. nothing too serious though. drivers side was very nice!
1 point
-
Well, on the bright side, now you can port it, front mount it and butcher the front bumper!1 point
-
This month's meat details are up1 point
-
This month's Monthly Meat is Thursday the 29th of June (steak night) at the Ashhurst Inn. Easy to find, on Short St, just past the petrol station. Map available here Get some meat in you1 point
-
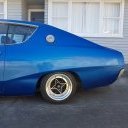
ahh, aint gona get it in 2 days from the states. If its the same box as the one above theres really no issue i watched this a couple of times before pulling mine out the difference was, theres no removable cap at the bottom, and all the bearings were the same size looks like this when in bits1 point
-
bugger, gotta strip the whole thing to get under that, theres just a cup seal. So may as well do the whole hog. Got my seal kit off rock auto, for mightymax/dodged50/starion1 point
-
i have a gen 2 power steering box in my 1st gen l200, like this http://i.imgur.com/fJptQfk.gif i think they are more or less the same chassis? are you planning on rebuilding it? easy as m8, dont even need a manual, just mark the body and cap so it goes back on at roughly the same torque http://www.onsiteconcrete.net/d-50/Factory_Manual/19_steering_manual_and_power.pdf This is the whole manual http://www.mightyram50.net/vbulletin/showthread.php/49-First-Gen-D-50-factory-manual-PDF Theres also a 2nd gen one floating around that site1 point
-
/ Arms deff needed doing (Some reason they are both different colors)1 point
-
Most excellent! I did ring them but my phone microphone is so buggered that they couldn't hear me. See you guys in a couple of days!1 point
-
could do but i love the height of it.......i tell ya lifting your car to factory spec will be the new slamming the shit out of your car.....like stance nation but will be 747 nation1 point
-
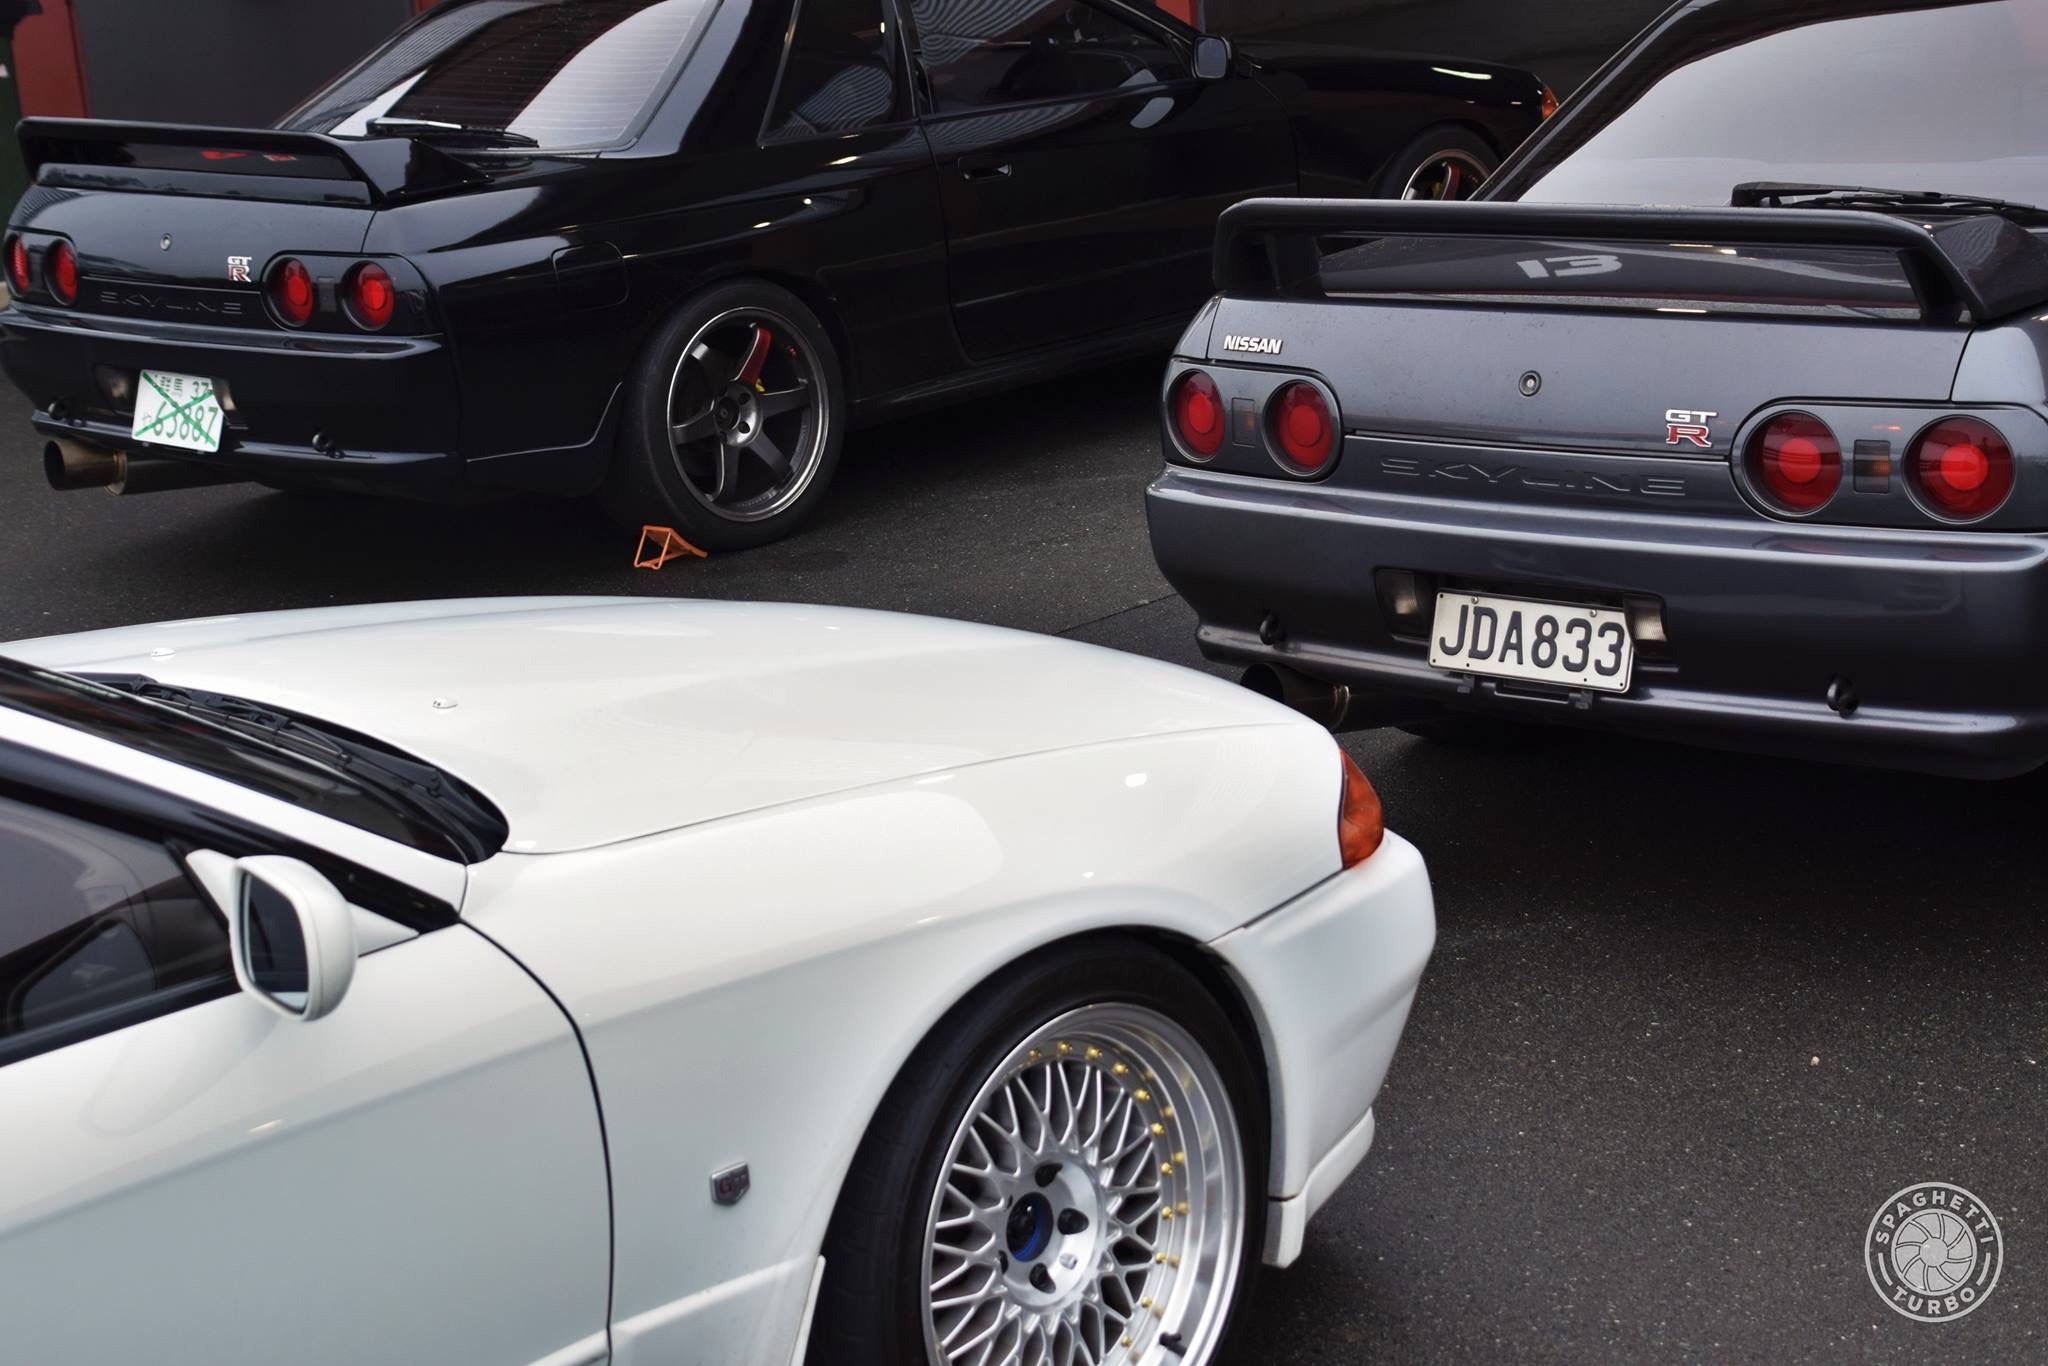
Wow A skyline with the passengers air vent still intact1 point
-
Yep, that's choice. needs neons and doof doof.1 point
-
Went Hampton downs sat for a club day. Was a bit wet and foggy to start with but dried out pretty quick.
1 point
-
1 point
-
Its Monday. Did the concrete get poured? HAS ANYONE DRAWN DICKS IN THE CONCRETE YET?1 point
-
Picked up my BRM 4 spokes today fully refurbed. Thanks to Nigel & Dan from Manukau Auto & Tyres for the top notch workmanship as always. You want your classic wheels restored these guys are the best.
1 point
-
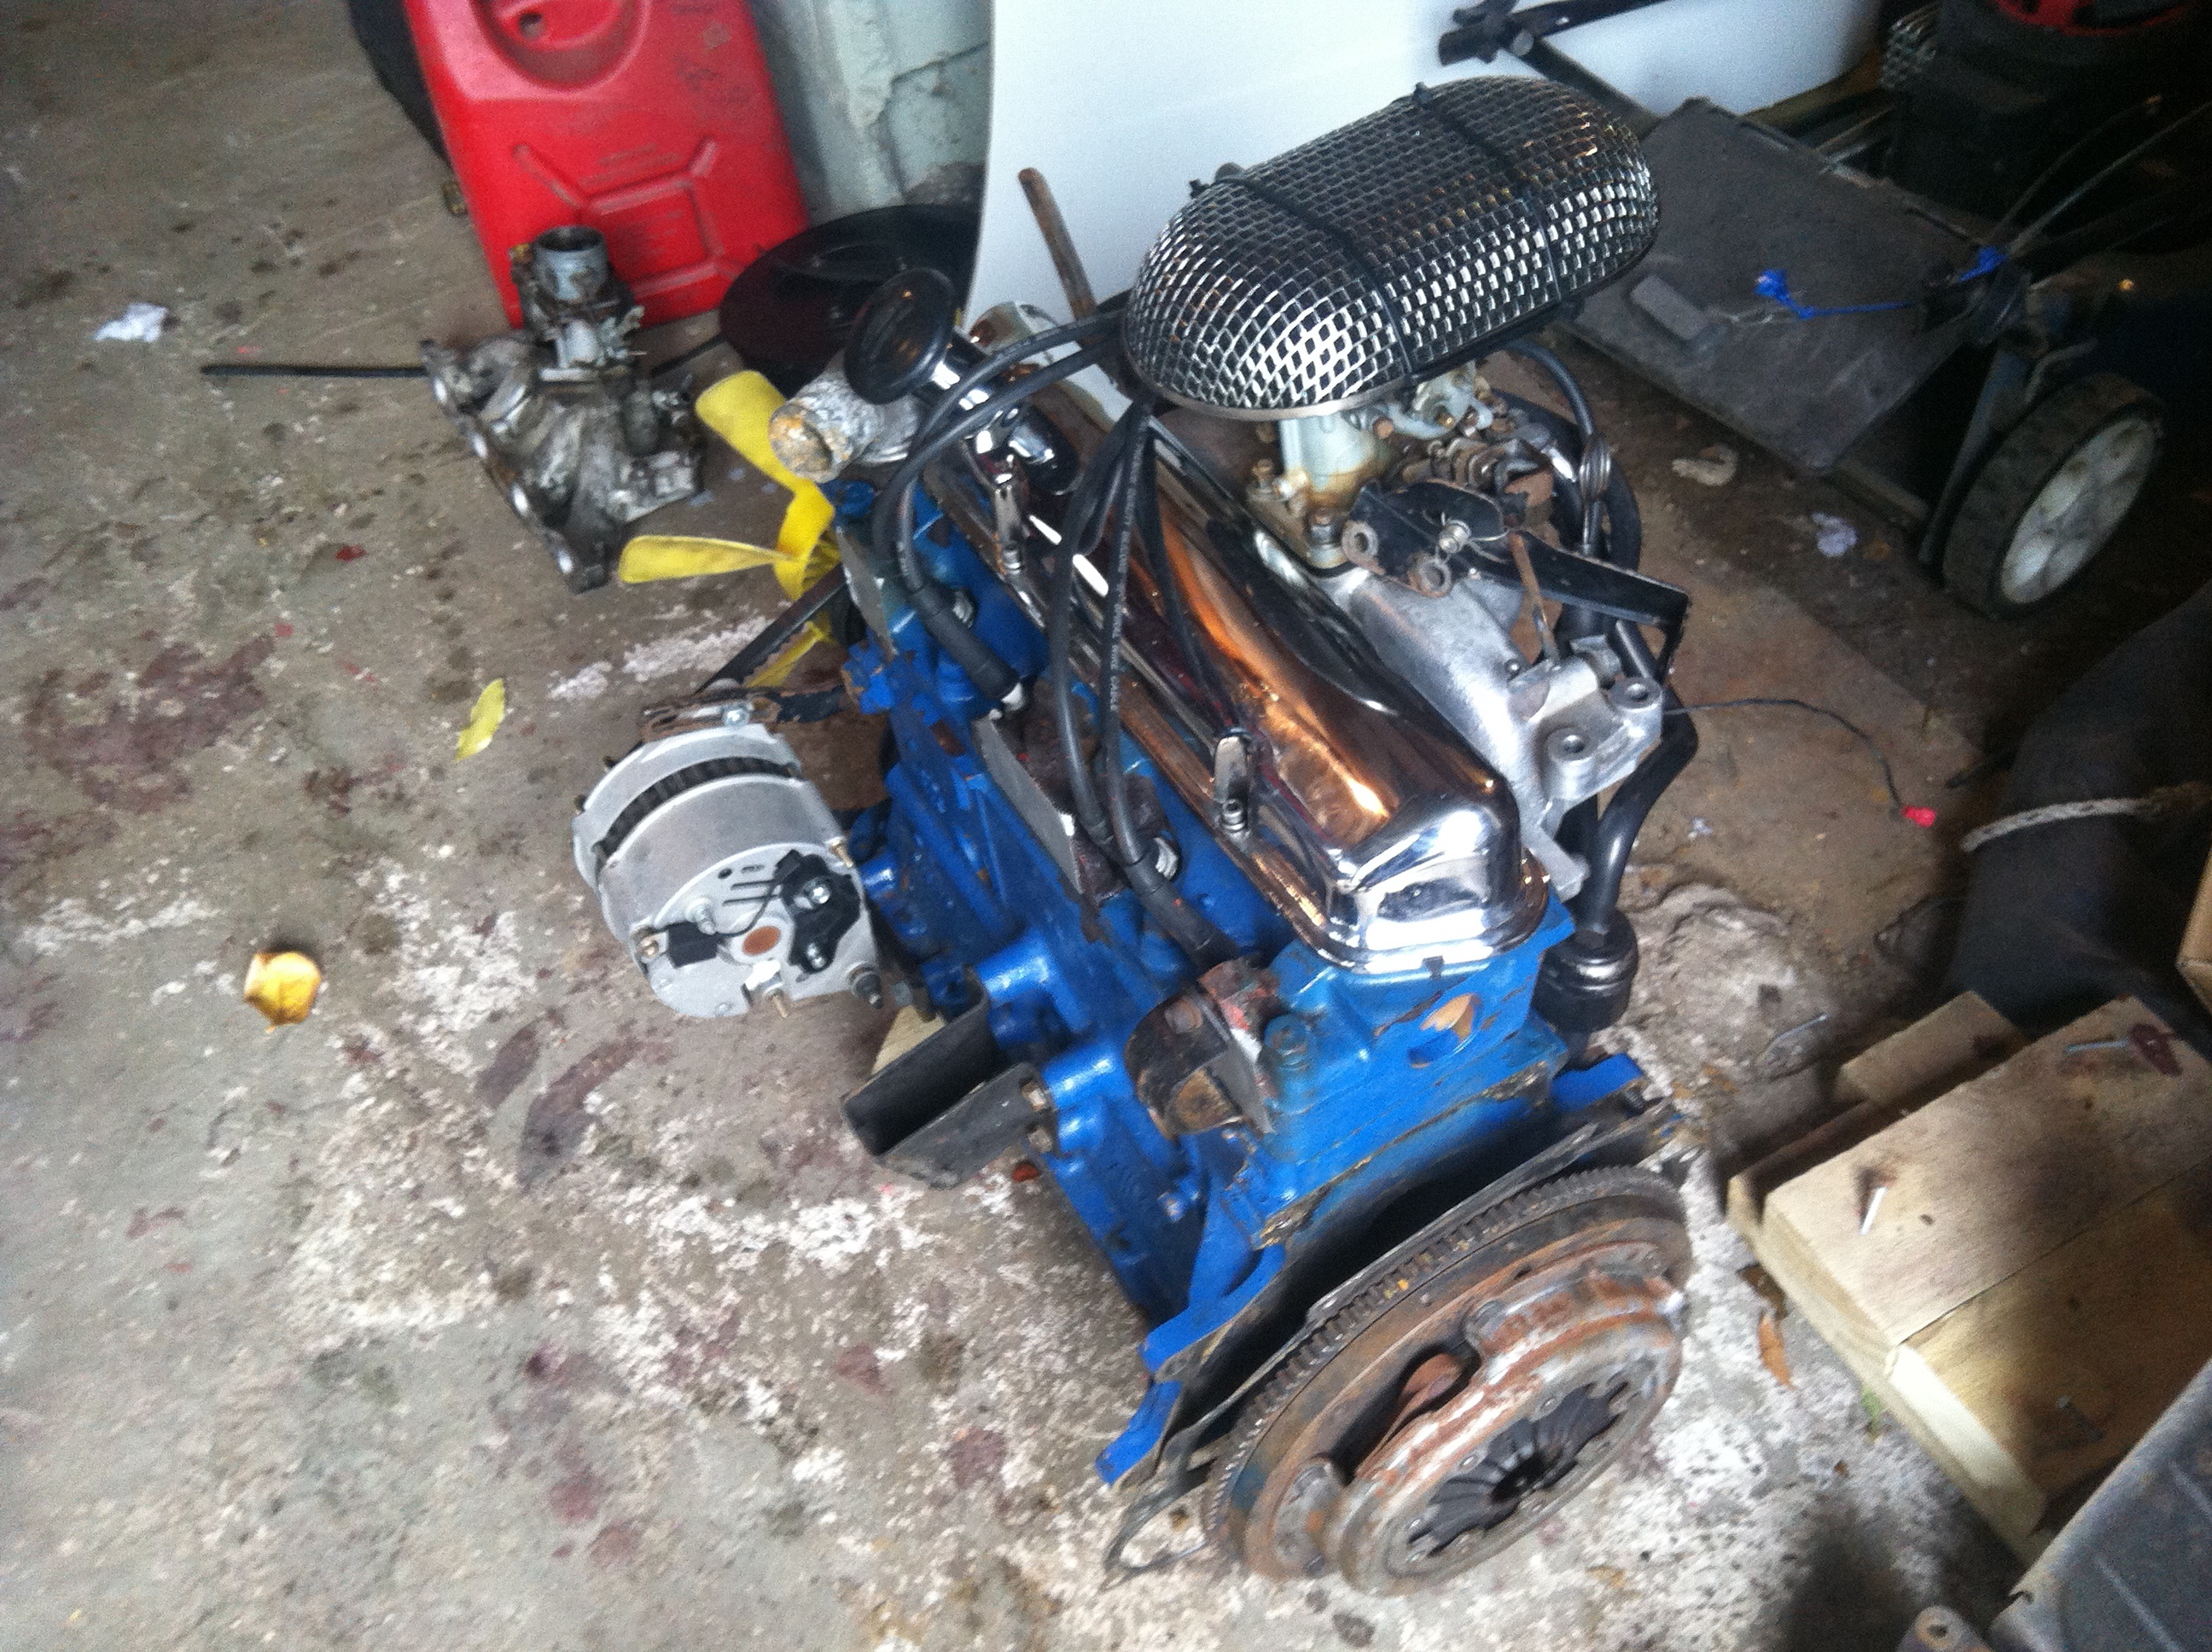
Not a fan of the green but got the whole filter cheap, Be keen to sand back and matt black or just rust it up.
1 point
-
the good.the bad.the gun spat here on the left rear fender.so I stuck heaps of paint over it so I can hopefully polish it out so it sagged here.and when painting inside the air vent I made this mess, looks like I'll be learning to wet sand paint now!All in all I'm pretty stoked and glad it's over, heaps of runs and spots of over spray and areas of orange peel etc..but not bad for a noob in shed in west auckland.looking forward to assembly.1 point
-
Usually to avoid warping you do small stitch welds on alternating parts of the job, let it cool in between. Try and clamp it to something solid that can help it stay in shape and sink some heat, big bit of steel or if you are lucky a slab of aluminum.1 point
-
Lol just get a wideband, so much easier than peering down a tiwncam valley at a sparkplug (which you can't check while driving). They are around $200 and probably the best investment you will ever make if you want to make a old carby car run good. With a step-drill and a mig you can install it 30min on any car, or exhaust shop will do it cheap. If you don't have a mig there is even shitty clamp on bungs. Ive had one constantly on my Buick for 5 years and its invaluable as your tune changes with the seasons and as conditions change, I got caught out the other day when I loaded it up my tune was too lean for the big load, easy to check and fix on the fly. No magic spark plug gives you this kind of accurate feedback.1 point
-
been commuting this a bit lately, more so since some dick crashed into the mrs corolla on a roundabout time to improve the one star safety rating and de-special the special bus at the same time nissan mistral SS nudge bar, secured to the still unboltable factory tow hooks IPF "super rally" spots from the old van controlled via a relayed dash rocker switch so they only come on with the high beam.1 point
-
got wheels sorted at M&T , admin can delete now1 point
-
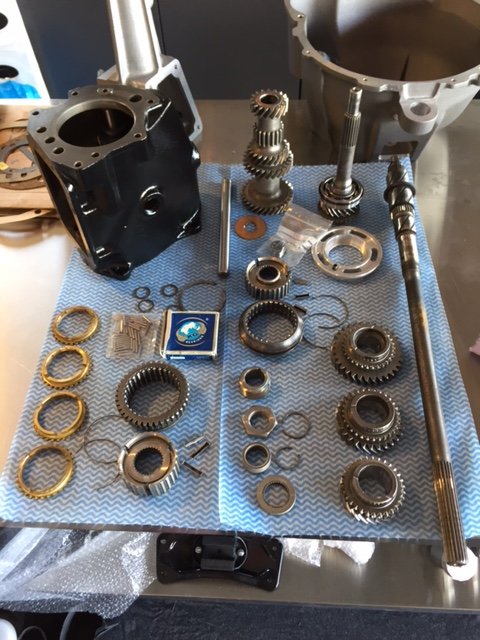
One complete box ready for action. Body work will start again in a couple of weeks so looking forward to finally getting progress
1 point
-
Finally assembled the gearbox last weekend. Here's the main case ready for the internals
1 point
-
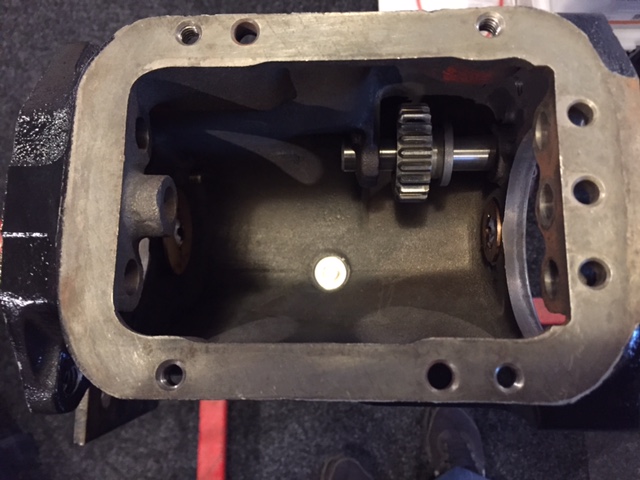
Stripped an old gearbox for the main case and then stripped and cleaned the mainshaft etc ready for reassembly. Hopefully I should get the mainshaft assembled tomorrow and it all installed in the case.
1 point
-
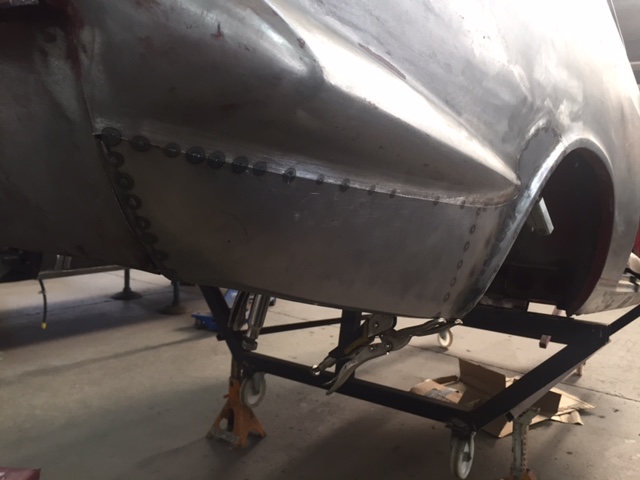
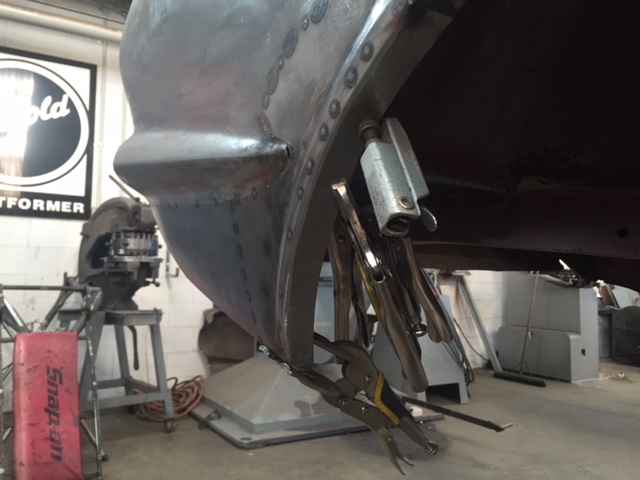
Progress on the lower right rear quarter. Need to drop some more parts to the powdercoater and plater.
1 point
-
So it turns out I'm not very good at keeping project threads up to date. Or using reliable image hosts (facebook? What was I thinking?!). Also can't seem to find the edit button, so the above posts will have to stay as-is for now. I'll try and give a bit of info on the direction the little KP has taken over the past 14 months. May well have missed out some major bits, so please comment in discussion thread if I've missed anything vital! Plenty of stumbling blocks in what I naively assumed would be a reasonably easy project, so hopefully some good points come out that will be useful for others. Bear in mind my only real previous projects were stripping a Saxo for track days and modifying my MR2 with new seats, chopped springs and banded steels... SO! Yes, got some Work Equip 01's from Beaver Shod them in rubber and got them bolted on. Arch gap present to an alarming degree, but this was imminently pre-nats '15 and I owned a socket set and some screwdrivers. Plus I was a little busy trying to get some shonky twin 40 DHLA Dell'ortos running. Had never tuned a carb in my life at this point. Eventually gave up on the rubbish linkage and bought a nice Mangoletsi one from Europe which helped balancing and throttle travel adjustment immensely. Seriously recommend these. Miracle of miracles, I got the car running pretty nicely on the crabs. New exhaust had turned up the previous day and didn't need to change the tune too much. Would cold start okay, idle happily, keep a sensible temp (I think, lol Toyota gauges) and over my (whole) 30 minute test drive was happy throughout the rev range and emitted plenty of doorts. Oh, this was the night before Nats, sweet. Nats started wonderfully, did a 4 hour burn up to Taupo after work the night before, stayed the night there, then set off for a further 4 hours to Coromandel the following morning. Cold starting an over-carbed 4k with a loud exhaust in a motel car park at 6am is a fun game. Got stuck behind a boat trailer on the wiggly Coromandel coastal road for about 40 minutes, meant a lot of partial throttle compared with the all-or-nothing it had been getting up to that point, and that's when I noticed something wasn't right. A bit of hesitancy coming out of corners, a little coughing. Quickly developed to a bigger problem... Plugs were coked to hell. I knew it was rich (safe, bruh), so cleaned them up and set off again. Better, but quickly buggered itself again. Noticed fuel pouring out of the rear carb, forming nice little fuelly waterfalls from the trumpets. Damn. Pulled the carb apart at Beaver's parents place, looked to be a float issue, the pivot for the float had broken and been bodged with a bit of wire at some point. Had worked for a while but the pissing fuel was almost certainly down to that. Abandoned the KP there, it would get shipped back thanks to AA plus (win), and I'd have a fun nats tagging along with Sparkle and Goat. When I finally got it home, I swapped the original carb and some fresh plugs on to see if it would run. No luck, barely ran on a couple of cylinders, rough as fuck. Suspect overfuelling on 3 and 4 had washed the bores or something? Oh well. Was thinking of getting a 5k anyway. 5ks were about $500 at this point for a runner. Not bad. Could rebuild carbs (arguably better suited to a 1.5 than a 1.3 anyway) and swap them over to the BIG BLOCK. Bought one! Oops. Looks like it needs a decat too. Mate back home made me a keyring to celebrate this new direction: Dragged the little green paperweight to Goat's workshop, and things started happening. Massive shout-out to Goat at this point, couldn't have gone any further with the car without his help. There are definite downsides to moving to a new country and not knowing anyone, but one of the major upsides is meeting ultimate GCs that are willing to help out at any point. 4k took about 15 nanoseconds to remove. Pulled off the 4age loom and sent it to that chap on trademe what chops wires. Meanwhile, fitted the SQ engineering waterline and dizzy relocation kits to get things more latitudinal than longitudinal. Lovely quality kits with pimp CNC, nice fittings etc. Shame its all covered up by 20 year old plastics but whatev's. I'd also picked up an A-series bellhousing pattern k50 gearbox to fit the 4age. Transferred the shifter and tailhousing from the starlet k50 so it'd line up with gbox mount, prop, gearstick hole etc. Handy. Got the engine and box sitting in the bay on trademe-special mounts (damn it Jim, I'm a vet, not a fabricator) but ran into a slight snag. The capped off dizzy mount was interfering with the firewall and the heater matrix pipes. Modified the mounting points and moved the engine forward 20mm, and got one of the heater matrix pipes brazed on a little further outboard, and this just about sorted it. Still tight, but no longer interference fit. Obviously this also changed the position of the gearbox, but that would be a problem for another day. Noticed at this point that the clutch cable locator on the gearbox had been chopped off by some enterprising dick somewhere along the line. Ballz. Was having second thoughts about using a k50 behind the XTREME POWER 9000 of the blacktop at this point anyway. Suppose a bracket wouldn't be too hard to fab. Oops^2. T50 is about the same length as a k50, handy. Also came with a beefier and longer corolla prop. The KP prop was too short, (we moved the engine forward 20mm, remember), so I had the corolla prop shortened and balanced to fit. While I was at the engineers shop I had them braze a second, wider pipe into the fuel tank pickup. Now using the wide one as the feed to my Carter low pressure lift pump. This sends the fuel forward through 8mm aluminium lines I routed alongside the 6mm factory ones. When it gets to the engine bay it deposits it into an Ali-Express-Special surge tank with an integrated Bosch 044 that supplies the fuel rail. Return from the surge tank runs through the narrower diameter factory fuel lines and back into the tank through the original (narrow) pickup. Seems to work quite well! Hopefully not all too noisy when the exhaust is on, we'll see. Starting to look pretty good in there now I reckon. One of the big differences between T50 and K50 boxes is the T50 is hydraulic clutch rather than cable. Came at this from a few angles; ended up buying an ae86 master and slave cylinder, as well as some nice braided clutch line, but didn't want to bugger around with the pedalbox too much. A lot of the modified ones out there looked a bit compromised, with big flex forces on the pedal where bits of steel bar had been tacked on to get it actuating the MC. Bought a pedalbox from an EG civic for super cheapz on trademe and the separate clutch pedal actually looks like a promising alternative. The other route seemed to be to fit a Wilwood pedalbox or similar, like Snoozin' is doing for his. Pimp, but didn't want to rush down that route just yet. I'm 6'2" and was worried that a floor mount pedalbox would sit closer to the drivers seat than the factory one, and I already struggle to get my gangly legs wedged in. Hmm. At this point, Nats '16 happened, shotgunned my way around for a stress-free time this year. Found a clone in Horopito, poor thing. Was having a chat with Beaver, Manu, Goat, Ned and Cam, and one of them suggested a cable fork conversion kit from a company in Ireland. Ideal! Some googling revealed that FLOS.IE was the company that did them. GCs to deal with and did me a discount for sending a k50 donor fork for them to molest into one of these: Got myself a Christmas present, an N2 style aluminium rear wing. Nicely modelled here by a goat majestically sunning itself in it's natural habitat: Flippity flip I hate wiring. Spent ages trying to work out why engine was turning over but not firing. Had spark but no injector pulse. Finally found this absolute treasure trove of 4age wiring goodness. Had to re-wire my fuel cutoff relay circuits to incorporate the ECU starter trigger like so: et voila! Much relief. A bit of rust to sort in the heater channel, so loom came back out for now (also to solder and wrap properly, rather than the twist-and-tapes that you can see in the video...) Gave the exhaust bits and bobs a tidy up. It's a 20v manifold (not sure what make, but the bolt spacing is 20v specific), and my original 2" system. What now? Oh yeah, lows. Got some other bling from T3, these are just lovely. Fitted up well (though they sent the wrong bolts with the RCAs). Gave the dust shields and calipers a bit of a spruce before shifting them onto the shiny legs. Have since swapped the brake lines out for some pimp gold (don't judge me) Hel stainless steel braided ones. Don't trust 32 year old brake lines too much, and while it was all apart... No pics unfortunately. As for the rear, figured a good low spring/short travel adjustable damper combo would be the way to go. Integrated shock/coilover units are available, but didn't want to go to the lengths of reinforcing turrets/axle spindle etc, at least not yet. If I eventually go T-series rear end that'll be the time for those fun and games. Seems some people use mk2 escort rear dampers as their short travel shock of choice. With the amount of competition options available for them I thought that'd be a sound choice, so got some GAZ (English company, played with some of their stuff before I came over here) 38-way adjustable shocks for the rear. Should be enough adjustability to get it riding well I hope! Expecting to have to modify the Cobra springs to get them low enough. We'll see. Current ultimate racecar spec as stands: Chassis: Stock kp61 Sprint body T3 adjustable front coilovers Cobra superlow rear springs GAZ adjustable dampers (mk2 escort) Hel braided SS brake lines 13x7 Work Equip 01s A-series to K-series engine mounts Battery relocated to boot. Engine: Stock 4AGE 20v blacktop from a Levin SQ engineering waterline kit SQ engineering Dizzy kit T3 100mm velocity stacks 4-1 20v manifold (unknown brand) with 2" custom exhaust. 1G-GE high torque starter with Niteparts spacer kit Simplified loom Carter Lift pump/engine bay surge tank/Bosch 044 EFI pump setup AE86 radiator Transmission: T50 20-spline FLOS.IE T50 clutch cable conversion kit Exedy 220mm clutch Shortened corolla driveshaft Stock U-code rear end Plans: Sort small rust patches in rain channel Make up gearbox mount Make up driveshaft loop Fit O2 sensor and flanges to exhaust manifold Fit rad and pipes Cert Doorts Other stuff I can't think of right now.1 point


This leaderboard is set to Auckland/GMT+12:00