
Leaderboard


Popular Content
Showing content with the highest reputation on 05/20/17 in all areas
-
It's time to waste a whole lot of time and money that should probably be spent on other stuff. Some people on the forum will know our 1963 AP5 Valiant Regal but for everybody else who is interested here is a little history. My Dad purchased this car in 1983 and it was our regular family car for many years. Here is a photo taken some time in the early 80's. Dad had 2 AP5's at the time, the grey one on the right was a dedicated tow vehicle and was modified accordingly. The green one on the left is ours. About 7 years ago we were lucky enough to get our hands on this original and well looked car however a few things needed attention fairly quickly. Almost immediately we did a few safety upgrades. The car got a front disc brake conversion, new seatbelts and we replaced the wheels and tires in order to make it safe to drive in the rain. Until fairly recently I was hanging out on another forum dedicated to the fine products of the Chrysler Corporation with a few other members that have since come across to Oldschool and unfortunately a lot of the details of the work completed on the car to date was lost when the forum closed earlier this year. Lucky for me the Oldschool forum is awesome and I am very happy to be joining you all over here. This is how the car looked after its first round of upgrades. We drove it around for a while with the stock drive-line and aside from a little oil burning/leaking issue all was well. Then this happened. This was coolant leaking from a very bad place, yep cracked block! So naturally this happened next. And finally with the help of a local engine builder here in Auckland this happened. Sounds simple enough but it actually took nearly 12 months to resurrect the Slant 6 as the engine was in bad shape. We were very keen to salvage the original block and keep the car numbers matching but it was no easy task. I did as much work myself as possible but given the challenges involved in fixing the engine I was very happy to be working with a skilled engine builder and I am very happy with the result. This engine is awesome and it's still a numbers matching car. That's all for now, next post will be all about the current build. Feel free to discuss here. //oldschool.co.nz/index.php?/topic/56384-1963-ap5s-valiant-regal-discussion/7 points
-
It seemed like a scratchy day and I didn't achieve as much as previous days but it all counts. Seam sealed where needed and threw the door back on, couple of patches where the guard bolts on Going to be a laugh making this cunt again! HAZAH! Moved the car across and Got the drivers guard off and the sill is far far better! Guard it's-self not as bad as passengers but the brace and bottom is still cooned5 points
-
Today I received my new shims, installed them and also the cams. Pretty self explanatory. I a have still got to dial in the cams which I will do sometime next weekend whilst I wait for my Dial gauge to arrive. Nearly complete, I have also ordered a brand new alternator and a starter motor also for a good price. still have to order a knock sensor and get the water pump -> back of head lines fabricated with a braided line. Have to do this due to the original piping interferes with the knock sensor, and I am also not running a water based heater so I will not be using those that are included on the original hard lines either. I have also ordered the SQEngineering COP valley cover plate to suit the 2nz coils that I will be using which I should receive sometime this week.5 points
-
Up in Nova Scotia now, just left cape Brenton national Park, quite an amazing drive if you get to do it. It's been a bit cold and rainy but I totally recommend the off season, apparently a zoo in the summer. All the campgrounds were "closed" but no one said anything about us parking there, so it was an affordable few days . Got some biking and hiking done. Also I totally recommend carrying tire plugs and and air on long trips, got a nail in the tire, much quicker to just fix it then swap it. I use a co2 paintball cylinder and a fixed pressure regulator but a 12v compressor would work too.5 points
-
Another option is put it in 4th gear, and rock it back and forward, instead of turning the crank via a socket4 points
-
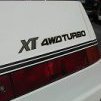
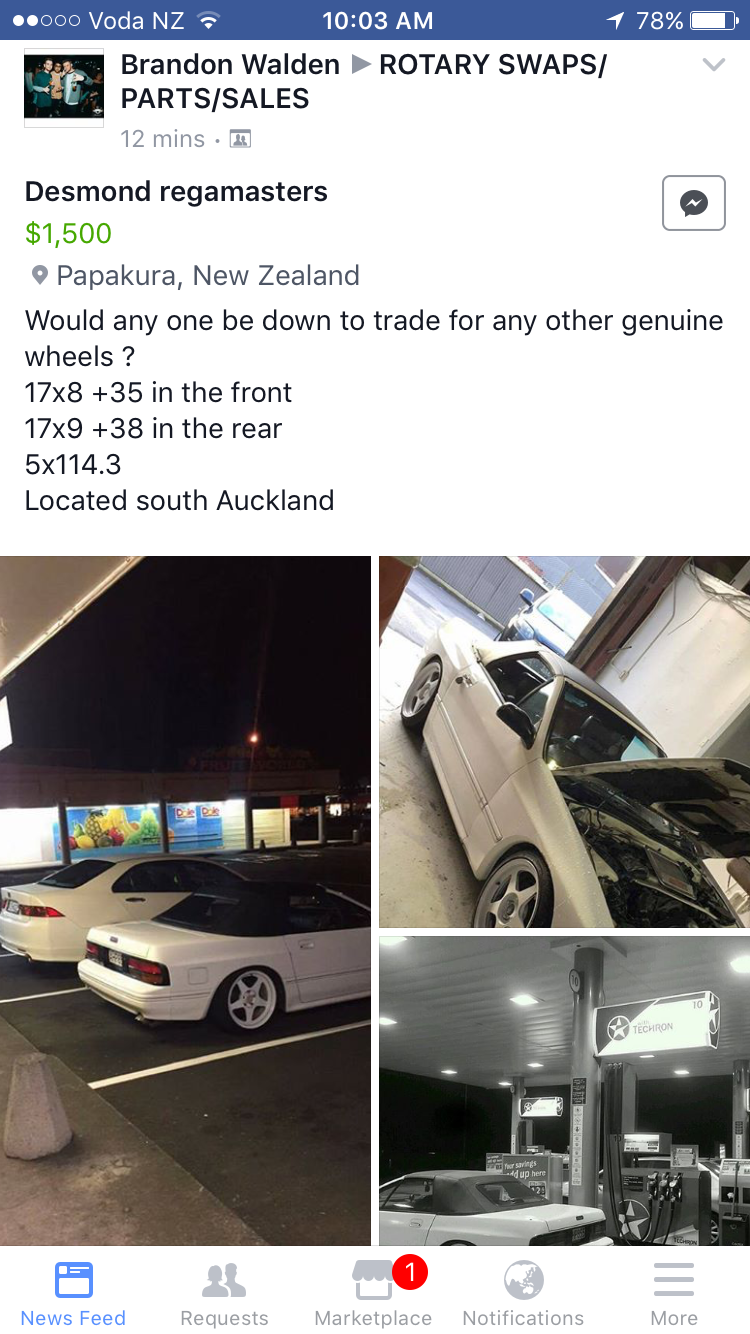
7" wide wheels have no place on that car4 points
-
Today I learn something interesting about caliper placement. The 350Z at work has some big ass Stoptech calipers with some big floating discs on it. Which now causes the problem of pad knockback... When you have a larger diameter disc, when the hub flexes it maginfies how much the outer edge of the disc moves. When you have a 4 pot caliper located on "top" of the disc, (as per 350Z) this means that the disc is being pushed against the pads which pushes the pistons in during hard cornering. A 2 or 1 pot slider caliper is more resilient to this problem because the caliper just moves with the disc. If you put the caliper at the 3 or 9 o clock position instead, with the start of the pad just above or below the centreline of the disc. Then you are much less affected by the hub flexing under cornering and you dont get knockback. (as much) There are kits for the 350Z to relocate the caliper to this position, for this reason. Pad knock back sounds scary as fuck. Coming in hot to a corner then your pedal sinks haha.4 points
-
cheers Russell, if that is your real name. im pretty keen to see it finished too. the floor joists in the bathroom are to far apart for the tiles substrate that were using do we need to add extra joists. in order to do that i had to remove the floor. like so, 2017-05-20_03-37-05 by sheepers, on Flickr there is also much to do to the existing footing wall to joint it to the new slab and so access needed around th edges. like so, 2017-05-20_03-36-55 by sheepers, on Flickr3 points
-
Thought I'd better post a pic of my latest family member and life long project car... NZ new, second owner and only 77 thou k's now, rust proofed when new so very very tidy, everything works including air ride, digital dash and not a single squeak or rattle while driving. I real gem I recon. Got a few reliability plans for the EA82T to keep it alive forever (under bonnet air/water intercooler to get that intake temps lower and stainless exhaust plus a few other tricks learnt over the years), but keeping it as standard as possible will be the mantra throughout. Bit of a dream car for me to be honest from the moment I saw one in 1985 at a motor show, i even had the Tamiya model of this exact car/colour/interior as a kid!. I think it's an interesting car from an interesting time that people either love or hate (both the time and the car haha) Joins my Brumby as a permanent member of the family along with the everyday drivers.2 points
-
OK, sweet. As assumed. Crank is in the centre, the big pulley below the fan, a belt should run from the pulley on the crank to the fan pulley. The crank pulley should have a nut on it that you can fit a socket on and then wiggle gently. Keep in mind. Gently. Don't wail on the thing just try ease it around a little at a time after you've let penetrating oil/atf soak into the bores a while.2 points
-
Oh yeah I'm in the habit of leaving stuff in gear due to British brakes2 points
-
il leave this here for ya
 2 points
 -
Interesting You can see a similar thing in motorcycle racing though not very common, a tank slapper can knock the caliper pistons back requiring a couple pumps of the brake to get pressure back but usually by then they have missed their braking marker and it's brown trouser time.2 points
-
Yea, certainly not the fastest, only 110 odd hp standard, but this one isn't about speed for me, it does the speed limit just fine and I'm not 12 anymore after all. I find there is more to life, like cruising with the 1980 tunes on the updated ICE, in a perfectly quiet, rattle free car with an air cushion ride. Suits me down to the ground. I should buy myself a leather bomber jacket and raybans just to drive it. I'm not re-powering it unless something goes totally wrong with the engine and i can't replace the heads or something, I've had my re-power fun with my Brumby which has gone from ea81, ea82, ea82T, ej22, ej25 then EJ20t and so on, Plus 3" suspension lift, Adjustable Suspension, Disk brakes upgraded, Link G4 ECU, Electronic throttle, Diff locks, fiddler brakes etc If it can be done to a old subbie, I've probably done to be honest. Times and attitudes change though. It's certainly push button AWD as Dell'orto said. Wee red button on the joystick control. They did make a 2wd only model in non turbo.2 points
-
concrete in the hole 2017-05-18_04-27-19 by sheepers, on Flickr2 points
-
sticky uppy steel things with hats on. 2017-05-17_03-22-07 by sheepers, on Flickr 2017-05-17_03-22-20 by sheepers, on Flickr pouring footings tomorrow.2 points
-
Dragged this home yesterday. IMG_20170513_102342 by John Bell, on Flickr Needs a little bit of a birthday, but really is in pretty good shape for its age. It came from some family friends who have had it since the beginning of time so has a bit of a history. I'm new to Land Rover details, but I think its an early Series 3, although the plate inside the cab says 2A. Its been fitted with a Nissan LD28, and has no sign of a cert, but has been issued Warrants in this configuration so I need to figure out if it ever had a declaration and if a copy still exists. The LD28 doesn't exactly fit very well though, and the diff head hits the oil pump, this apparently is a fairly common conversion so I'm curious as to how others have gotten around this. Apparently the original motor didn't have anything wrong with it, and is still available so if it is too difficult to get the LD28 to work (and legal) I may look into this. The tyres are a set of very perished 'oodYear' retreads which I find hilarious, my guess is that GoodYear didn't like you reusing their casings for retreads so they all have the 'G' rubbed off. The wooden deck is solid enough for now, but it might need a bit of attention, I'd love to be able to fit a wellside to it possibly. For now its home back indoors. I've got to sort out a few things before I get into it properly. I'm pretty excited to have a project that you can buy parts for. LD28 IMG_20170513_111906 by John Bell, on Flickr IMG_20170513_113127 by John Bell, on Flickr IMG_20170513_143948 by John Bell, on Flickr IMG_20170513_144002 by John Bell, on Flickr Tell me the secrets of Britannia here1 point
-
So you want to bring your vehicle home from the usa and can't find a write up either well here is the process I went/am going through. My memory isn't 100% but I'll make is as accurate as possibly I found my van in phoenix and had a friend look over it, He gave the ok and went and got it. If you are lucky you can get your friend/contact etc to act as a agent for you saving a $75 us title transfer fee. Make sure you get a bill of sale at this point in time. Now is the time to order whatever parts you want and stick them in said car. When you are ready contact your exporter/shipper, They will give you a SLI form. you'll need to fill in your details and the sellers or the person acting as your agents details. Complete it and send it off to the shipper. Your agent then should hand the title, bill of sale and and any receipts for parts along with the vehicle over to the shipper. When the container lands you will get a arrival notice. If you do not have a customs client code you'll fill in a form and send it off with proof of photo id. When that has been processed you will get a customs certificate shortly followed by a a invoice for gst and customs fees. For me in may 2017 they are customs import transaction fee of nz$42.85+gst and customs facility fee of 49.99 + gst, You will also pay import gst. My understanding is this worked out on the total cost of parts, the vehicle, and all shipping to nz. Pay this and a few days later you will get a invoice for shipping. I've broken it down here - Fumigation - 165+ - Destination cartage 235+ -Destination port service charge 395 - International freight 2270 - Origin cartage (im my case shipping from phoenix to la, $450 usd) - 687 - EDI processing fee 40+ - Customs clearance 65+ - Container handling - 150 - MPI inspection fee - 85.00+ - NZTA border inspection fee - 95+ Once that is cleared (I've just paid so i'll update this later) you'll receive the release documents and be able to collect your ride. I assume I will recieve my title and bill of sale upon collection of the van TLDR: A rough cost (less duty) for a van from LA to Auckland in a container is NZ$3611.74 Add $100 for customs fees and 15% of the vehicle purchase price & shipping. Hopefully this helps people on here who are thinking about bringing something back from usa. I asked/researched as much as I could and had a idea of the process but not what the costs were, its a bit more than I expected but I expected that I used cfrline to bring my van back and am happy with their service so far1 point
-
This is interesting if you can be bothered reading it and is important if you have an old manual car http://www.widman.biz/uploads/Transaxle_oil.pdf1 point
-
P11 primera.1 point
-
So what car are you talking about?1 point
-
It was a cool misty day , so ok going up . After 25 crossings , not much brakes going down so still ok1 point
-
Get a 500ml of shitty ATF and just squirt some in, it's not an exact science. Maybe 50ml? Let it sit for a week or so with it in and then put some more in and do the same waiting, basically you want to give it time to get past the rust that's potentially sticking the rings to the bores and allow for at least a little lubrication when you try move it. The biggest thing is to not get impatient and try move it too early. However you do it or whatever you use, once you've got it moving again you'll want to drain the oil and re-fill with fresh stuff before you fire it up to run it.1 point
-
true that, which is why I'm not buying any wheels right now haha1 point
-
yeh by the time you buy those plus tyres tho ... expensive1 point
-
Trojan trailer components has a sale on1 point
-
Ap5 make me smile. which forum got wound up? Nz mopar forum? I haven't been there for donkeys.1 point
-
Nice job Sheepers. Keep the updates coming I'm enjoying following this and looking forward to seeing the amazeball end results. Russ1 point
-
Going up some dirt tracks this Sunday so gave it a small birthday. Really should get a seat made! image upload no limit Removed one chain link and replaced pensioners. New Zorst. Removed center stand and made a side stand. Made blanking plate for starter motor (man the motor on the other side is ugly!). New bars. New Clutch & Brake leavers.1 point
-
20 K USD http://barnfinds.com/4wd-motorhome-1975-mercedes-l9111 point
-
Since the car has been on the road again, I’ve put on a set of Bridgestone Potenza RE003’s and printed some custom hub-centric rings. For the hub-centric rings I used ABS plastic which should be okay, its transition temperature is around 105c and it would probably still be okay around 140c. Really its only used to locate the wheels while doing them up and don’t really serve a purposed after that. This is where I am today, almost the middle of 2017, 12 years after buying the car. Where to from here?1 point
-
1 point
-
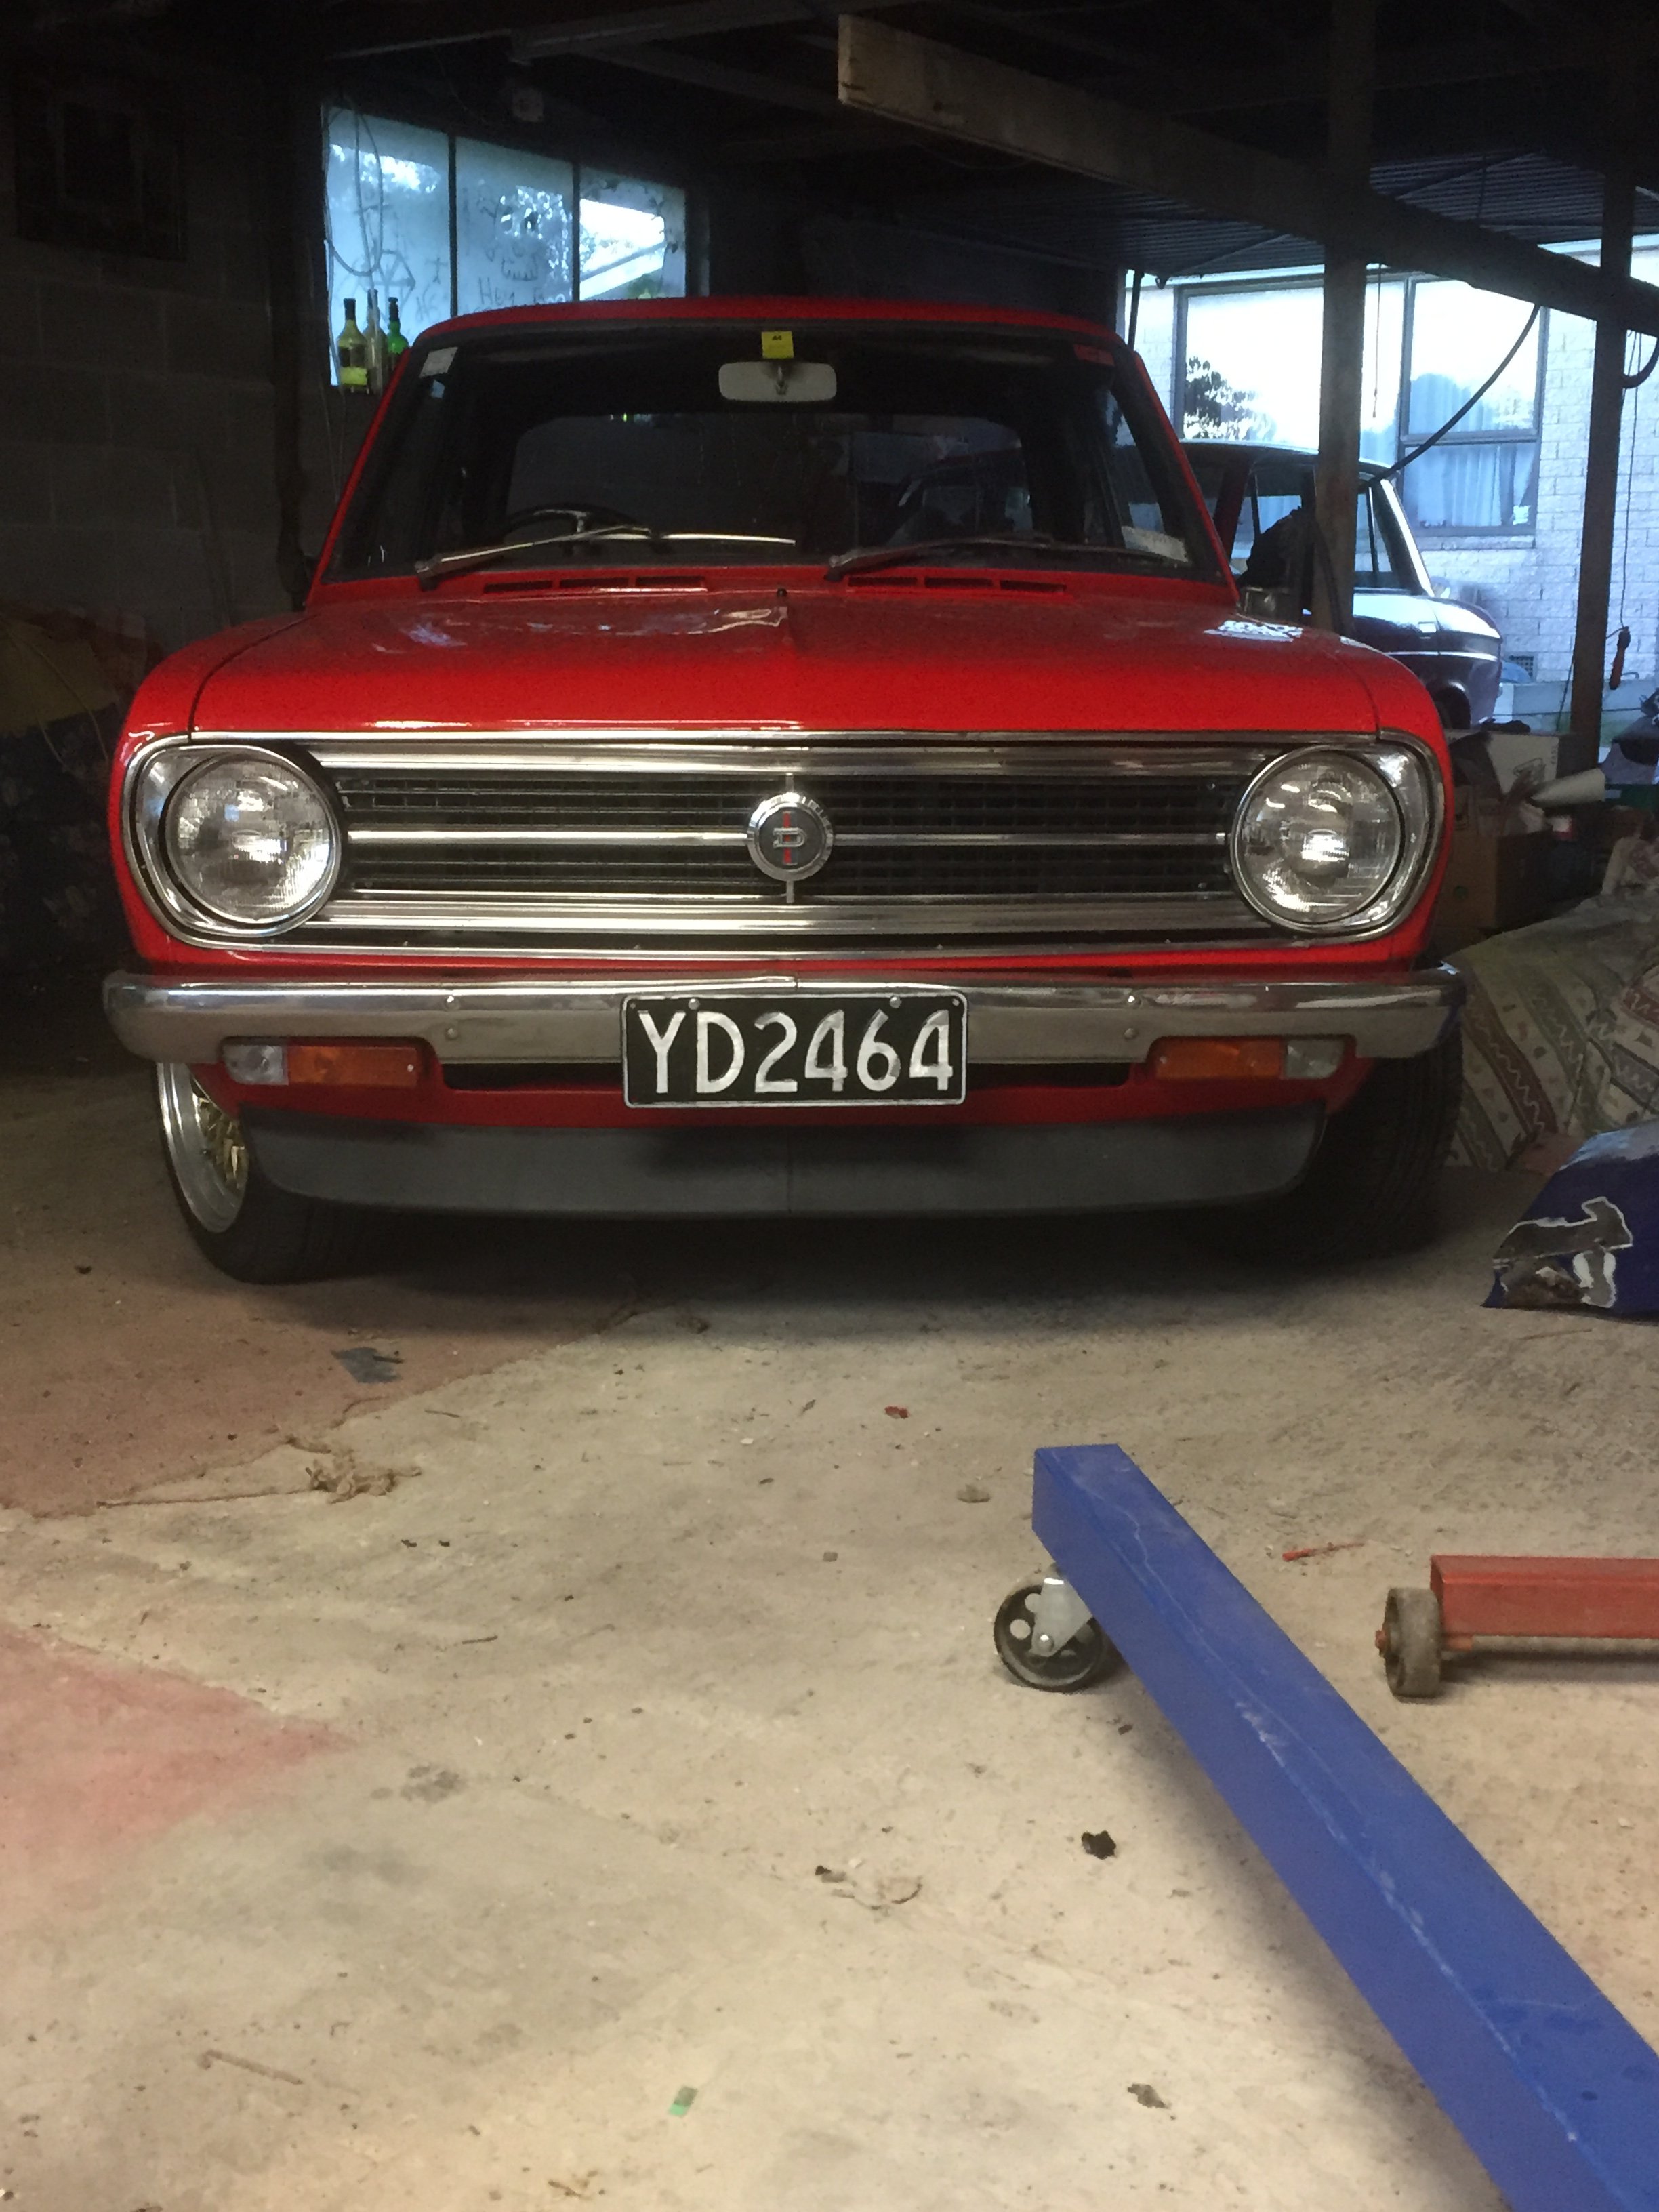
I got this golf lip for it, the valence I used had already had one on so I left the holes in when I painted it for this reason. it sits high, not hideous but I will lower it and see. That will change the angle too. i scrubbed clean and painted the sump yesterday1 point
-
Today was a good day! I got my head back from Barry at MRP. Here are some photos he sent me of the head. No need to take my own. The head had to have some extra work done on it so that the 10mm+ lift cams were able to rotate without hitting anything. With receiving my head I also received the last few gaskets and bolts that I was after. Especially for the intake side of things so I could get these beauties bollted together. I installed the front input shaft seal, the output shaft seal, and also the spacer ring between the box and the input shaft that I forgot to install first time round. Nice new slave cylinder I am using OEM head studs so I have used the Toyota torque specs, so need to do the +90 +90. I just did it by eye with my last engine, decided to do it properly this time round. [ Fastforward an hour of fiddling around I got everything bolted together. I am still waiting on some new shims to arrive from Australia so I will have to wait a little bit before I can install the cams etc. [ With that, not long to go before i drop it down the guts into the KE25 and can finally start on another task. I am thinking diff shortening next. Hopefully less expensive than this engine! Discussion //oldschool.co.nz/index.php?/topic/52401-pbaines-1971-toyota-corolla-ke25/1 point
-
Just over a week to go before this is on. If you're free tomorrow evening though, cruise your waka down the Waikato river and enjoy a culturally tu meke Hamilton Burgerfuel meet.1 point
-
It is possible there is water in your oil now. A guy asked me to find why his car was misfiring. Out of habit i checked the oil, was overflowing. After the oil drained out the dipstick a lot of green water came out. A whole piston and rod was lodged in the water jacket.1 point
-
fuck if engines were seizing after a year of garage life I would be fucked.1 point
-
No, that's one of the main reasons I've never got involved with them, there is very little in the way of rules for bikes. And trikes. I've only driven one and felt like it was going to kill me at any second. Yuck.1 point
-
I really hope the other side is better1 point
-
I have bought ally offcuts from Ulrich before1 point
-
Well. Bit of an update here. Saw a fella put up his KE25 on one of the pages on FaceBook, then the next weekend I was off to pick it up. Has been sand blasted and 80% epoxy primed. This shell is much straighter than the previous shell, though the rust patches are probably more prominent. Just little holes where as the old shell was covered in bog in areas and was all bent around the rear under the bumper. I think the new shell will be a lot easier to work on than the old one, and being sand blasted and primed means I don't have to do get it done. Here it is nicely tucked onto the smallish trailer I bought it back on. Did the job just fine And here we have the LOWRIDER KE25!! The height is atrocious for now, however I am waiting on some TE27 knuckes so can slap some AE86 struts in there Panda spotted in the background.. Dash is complete, interior is well on the way to being finished. Have got in touch with the only man for the job of retrimming my seats and getting new door cards for the old girl Also scored these interior pieces in from Japan. You'd think they were brand new the condition that they are in Sprinter air vents. Pretty much finished the sprinter conversion. Been a lot easier than I thought it was going to be. I've bought some 4A-GE - KE2X engine mounts and will get the engine rebuilt, drop it in then get it going Jan - February. Much more to come, exciting times ahead. Or is the word more appropriate "Expensive". Both I guess. chat - //oldschool.co.nz/index.php?/topic/52401-pbaines-1971-toyota-corolla-ke25/1 point


This leaderboard is set to Auckland/GMT+12:00