
Leaderboard


Popular Content
Showing content with the highest reputation on 05/07/17 in all areas
-
Now I need to buy a sheet metal folder to make these parts decent. I only have a vice and a chunk of railway iron to form shapes but this being structural, I need it to be proper.9 points
-
PLEASE READ THE FOLLOWING At last months' meet, we had a disgruntled resident turn up and cause a fuss. Accusing us of being unnecessarily loud and a blight on his tranquil neighbourhood. He was unreasonable and arrogant. He then complained to several of the businesses in the area and convinced other residents to also complain. We have since been asked by the majority tenant of the premises to refrain from using the upstairs carpark, though we have been unable to contact the property owner to confirm this. Even though the property owner themselves are the only party that can prevent us from using the carpark, this months' meet will go ahead BUT it will be in the downstairs carpark. DO NOT use the upstairs carpark. While we aim to sort out this issue, let's not try to agitate things any further. Also be aware that the same complaining resident may show up again. I will try to be there earlier this month so just direct him to me and I'll stand there and listen to him rant for as long as I need to. Cheers, Neal.8 points
-
So if you were wondering what those things do, they are 3" travel hydro bumpstops. If there are any hidden objects hidden in the grass, whilst rounding up the cows. these will prevent occupants of said vehicle, from cranium to moldy hood lining contact. or just doing skiz cunt jumps. pretty much overkill for this truck, but while im under there..6 points
-
pads welded on diff for hydro bumps. in the pic below the whole weight of the truck is on them. about 10-15mm travel left and they are super hard at this point. jumping up and down on the front of the truck, they move a little further. the first part of the travel is fairly soft, can push them down a bit by hand if put all my weight on them. Im not sure what kinda pressure they are shipped with, but they are tuneable by adjusting the nitrogen charge between 100 - 250psi. along with the coilovers, guessing im going to have to spend a bit of time getting it all to work together nicely. but should hopefully destroy the leaf spring setup out of the box . still have to fit limit straps and brake lines in there somehow..5 points
-
Thanks team for another super fun day out. 12 hour round trip and just over 600km's! The little red Mazda ran beautifully and had no troubles keeping up with the Honda. Plenty of laughs, sharns and Honda jokes. Great to see some new faces and see more of beautiful Southland. (as a FYI as a Auckland, Southland is considered anything south of the Bombay Hills...) I love exploring funny little towns in the middle of no where. And who would have thought the Matron of the Nightcaps Hotel was a rotary piner! Great work, good job etc.4 points
-
and after doing battle with the welder all day I got fed up and left it there. Have a patch tacked into last picture.4 points
-
Moral of the story is don't leave your freshly paneled and painted old car on the lawn for a decade.4 points
-
By some weird-arse miracle I started patching in the last part of the pillar I've been working on, and it was going supr sweet. My patch panel was sitting bang on, and my welds were sweet, and only half the sparks went in my hair and burnt my head. It was the best day ever. Pre bog pics shown here. So I gloated about it on spam here about how good my day was going. I was stoked; such a sweet, smooth process. Then I decided to take off some trim on the A Pillar to prime and respray it as part of the general overhaul. And of course, as soon as i pulled off the trim I found a big rusty fucking hole... Beware the jinx of Gloat3 points
-
new proportioning valve with one new line to the diff flexi (other one is from teh master and thats a hoist job, so nope!) - i slotted the adjustment slot a bit more than factory so it may even have enough rotation to work with the lowered suspension now. You can also see the end of the 'new' (i mean better) hand brake cable from my parts stash featuring intact dust boots and slightly less used new pinion seal in. New Remsa pads and discs, the old discs are ok, but the old pads were very sticky from when i was having caliper leaks ages ago. Id suspect the brake issues were: - sticky pads - master was a bit grogey - maybe old proportioning valve - everything else is nice to do and i may as well since ive got the bits now The blue HEL brake lines i installed a while ago. The calipers dont leak, so Ive theft them well enough alone! Also wanged in some lower rear shackle bushes, these were the only ones that needed replacing, lucky cause i only these ones to use - i got a 10 pack cheap, they fit the 2300 too but it used 4, so 4 still left!. Ended up with quite a pile of old and crusty stuff replaced Nearly ready to go back in, Just need to bleed them now. I have a few other things on the list to do including pondering the following questions: - why does the battery keep going flat? (ignition switch needs rewiring i think) - why do the tyres keep going flat? (time to swap the rims for another set) - why does my Italian car that lives at the beach like to rust? (time to extend the garage)3 points
-
No ladder yet, but it can't go on the back because these Chevy door hinges can't even hold up the doors when they are new. It's not bad climbing up there anyways. A company here makes heavy duty aluminum ladders that go on the side but 1. The van is already wide enough that you have trouble on narrow roads 2. They are ungodly expensive. We're on the road now anyways, so no more mods but the ones I can do with basic hand tools. Went up to New York state a few nights ago, now staying in Boston in a Walmart parking lot because none of the camp grounds around here open for the summer for another three weeks. We cooked dinner on a park bench somewhere in the city. They at least had some BBQ grills so I felt a bit less homeless about cooking there.3 points
-
so got this Austin 1100 for cheap here in nelson, was going to use it for its engine and interior for the white car but turned out wayyyyy to nice and needed less fixing then Emily, so after changing the alternator, all the lamps and a new exhaust pumping the suspension back up to an appropriate height she is now ready for a wof, paint is a bit rough but I'm not fussy =D happy days of owning now 2 austins2 points
-
Such a beast car! Awesome! Had to do some back stretching/yoga from bouncing in the sedan for hours yesterday... Haha. Good times2 points
-
Bump stops got a good workout on some of those roads this trip, there was a few bum biting the seat moments haha poor igor in the back with no belt to hold him in his seat2 points
-
after riving this all week the noise from the diff was driving me fucking mental! so swapped the diff out today ...pulled the head from the newish diff and cleaned it all up....used some brand new gear oil and repacked the bearings. also mix matched the best brake parts from both diff and adjusted them so the hand brake only takes 2 clicks......perfect. and oh so QUIET i then bleed the back brakes and the fluid was fucking disgusting ....so i then flushed and bleed all the air and water out of the front and ran some dot4 fluid threw out......much better now. i then had a play with some old cutting compound i had sitting in the garage for about a decade and combined with a buffer and sponge pad ive had since my old man sold his shop..(maybe 15+ years)....the paint is very this and i couldnt go hard out but even getting all the oil hand marks off was a bonus... looks much better now.
 2 points
 -
You know what im really excited for? Being sledged into by jason k on his harley again2 points
-
Probably time for a little update on the Trumpy. So the new engine is currently being built up from an old PI motor that was lying around in a garage down south. Basic details are .40 thou over, forged pistons, Newman cam, lightened flywheel, balanced pistons/rods and rotating bits, 10:1 comp, extractors, and the EFI setup based on the old PI bodies. There is also a power steering rack and pump getting the treatment in town which will go in at the same time... Please enjoy some pictures
2 points
-
Nearly done the transmission tunnel. This piece of the firewall has always annoyed me by how it isn't symmetrical, so cut it out and fixed that. Just need to do something with the little hole on either side where the tunnel, floor and firewall meet. Also built the fuel tank. Drew it up in Solidworks and then lasercut it. Added a couple of baffles that located and slotted into the top. Here it's fully welded, will give it a polish or something one day. The big flange is for the pump, the smaller one is for a sender unit and the small holes are for the return line and breather. I think it's just under 60 litres. Now to figure out how to mount it.2 points
-
not an exciting update today, more cutting, welding and grinding. i made my first ever patches that weren't flat pieces today too. had mad fun doing it too, Stan would draw the outline of the piece he wanted on the steel, then i'd make the cardboard template, cut out the piece with a nibbler (crazy fun to use) and attempt to bend and hammer it into a shape that resembled the original before cutting out the rotten piece. Stan would look at it, frown, give it a few taps after me spending 20 minutes on it and it looking like shit, within 20 seconds he had a perfectly shaped panel. thats experience for you. I had awesome fun learning basics of how to shape, shrink and stretch though. inimal pictures too cos the day just flew but i'll take some more soon anyway. she's looking like she might turn out alright after all. this picture really doesnt do justice to the work it took to rebuild the whole inner sill at the front, but most on here are far more skilled than me and know exactly the time and steps it takes anyway. plus with welding sparks and grinding dust all over the place i kept my camera across the workshop so it was a ballache to keep getting it. i wonder why this piece rotted out! also i've scored a sedan rear axle with lsd diff and disk brakes, i'm unsure out of what though. it was fitted to an XF sedan, did these come with rear disks? and i know i cant swap the whole thing over cos coil and leaf springs difference but does anyone know it i can swap the insides like for like? i havent started to look into it yet, but just after some info. chur. //oldschool.co.nz/index.php?/topic/54385-mighty-joes-xf-falcoon-of-filth/2 points
-
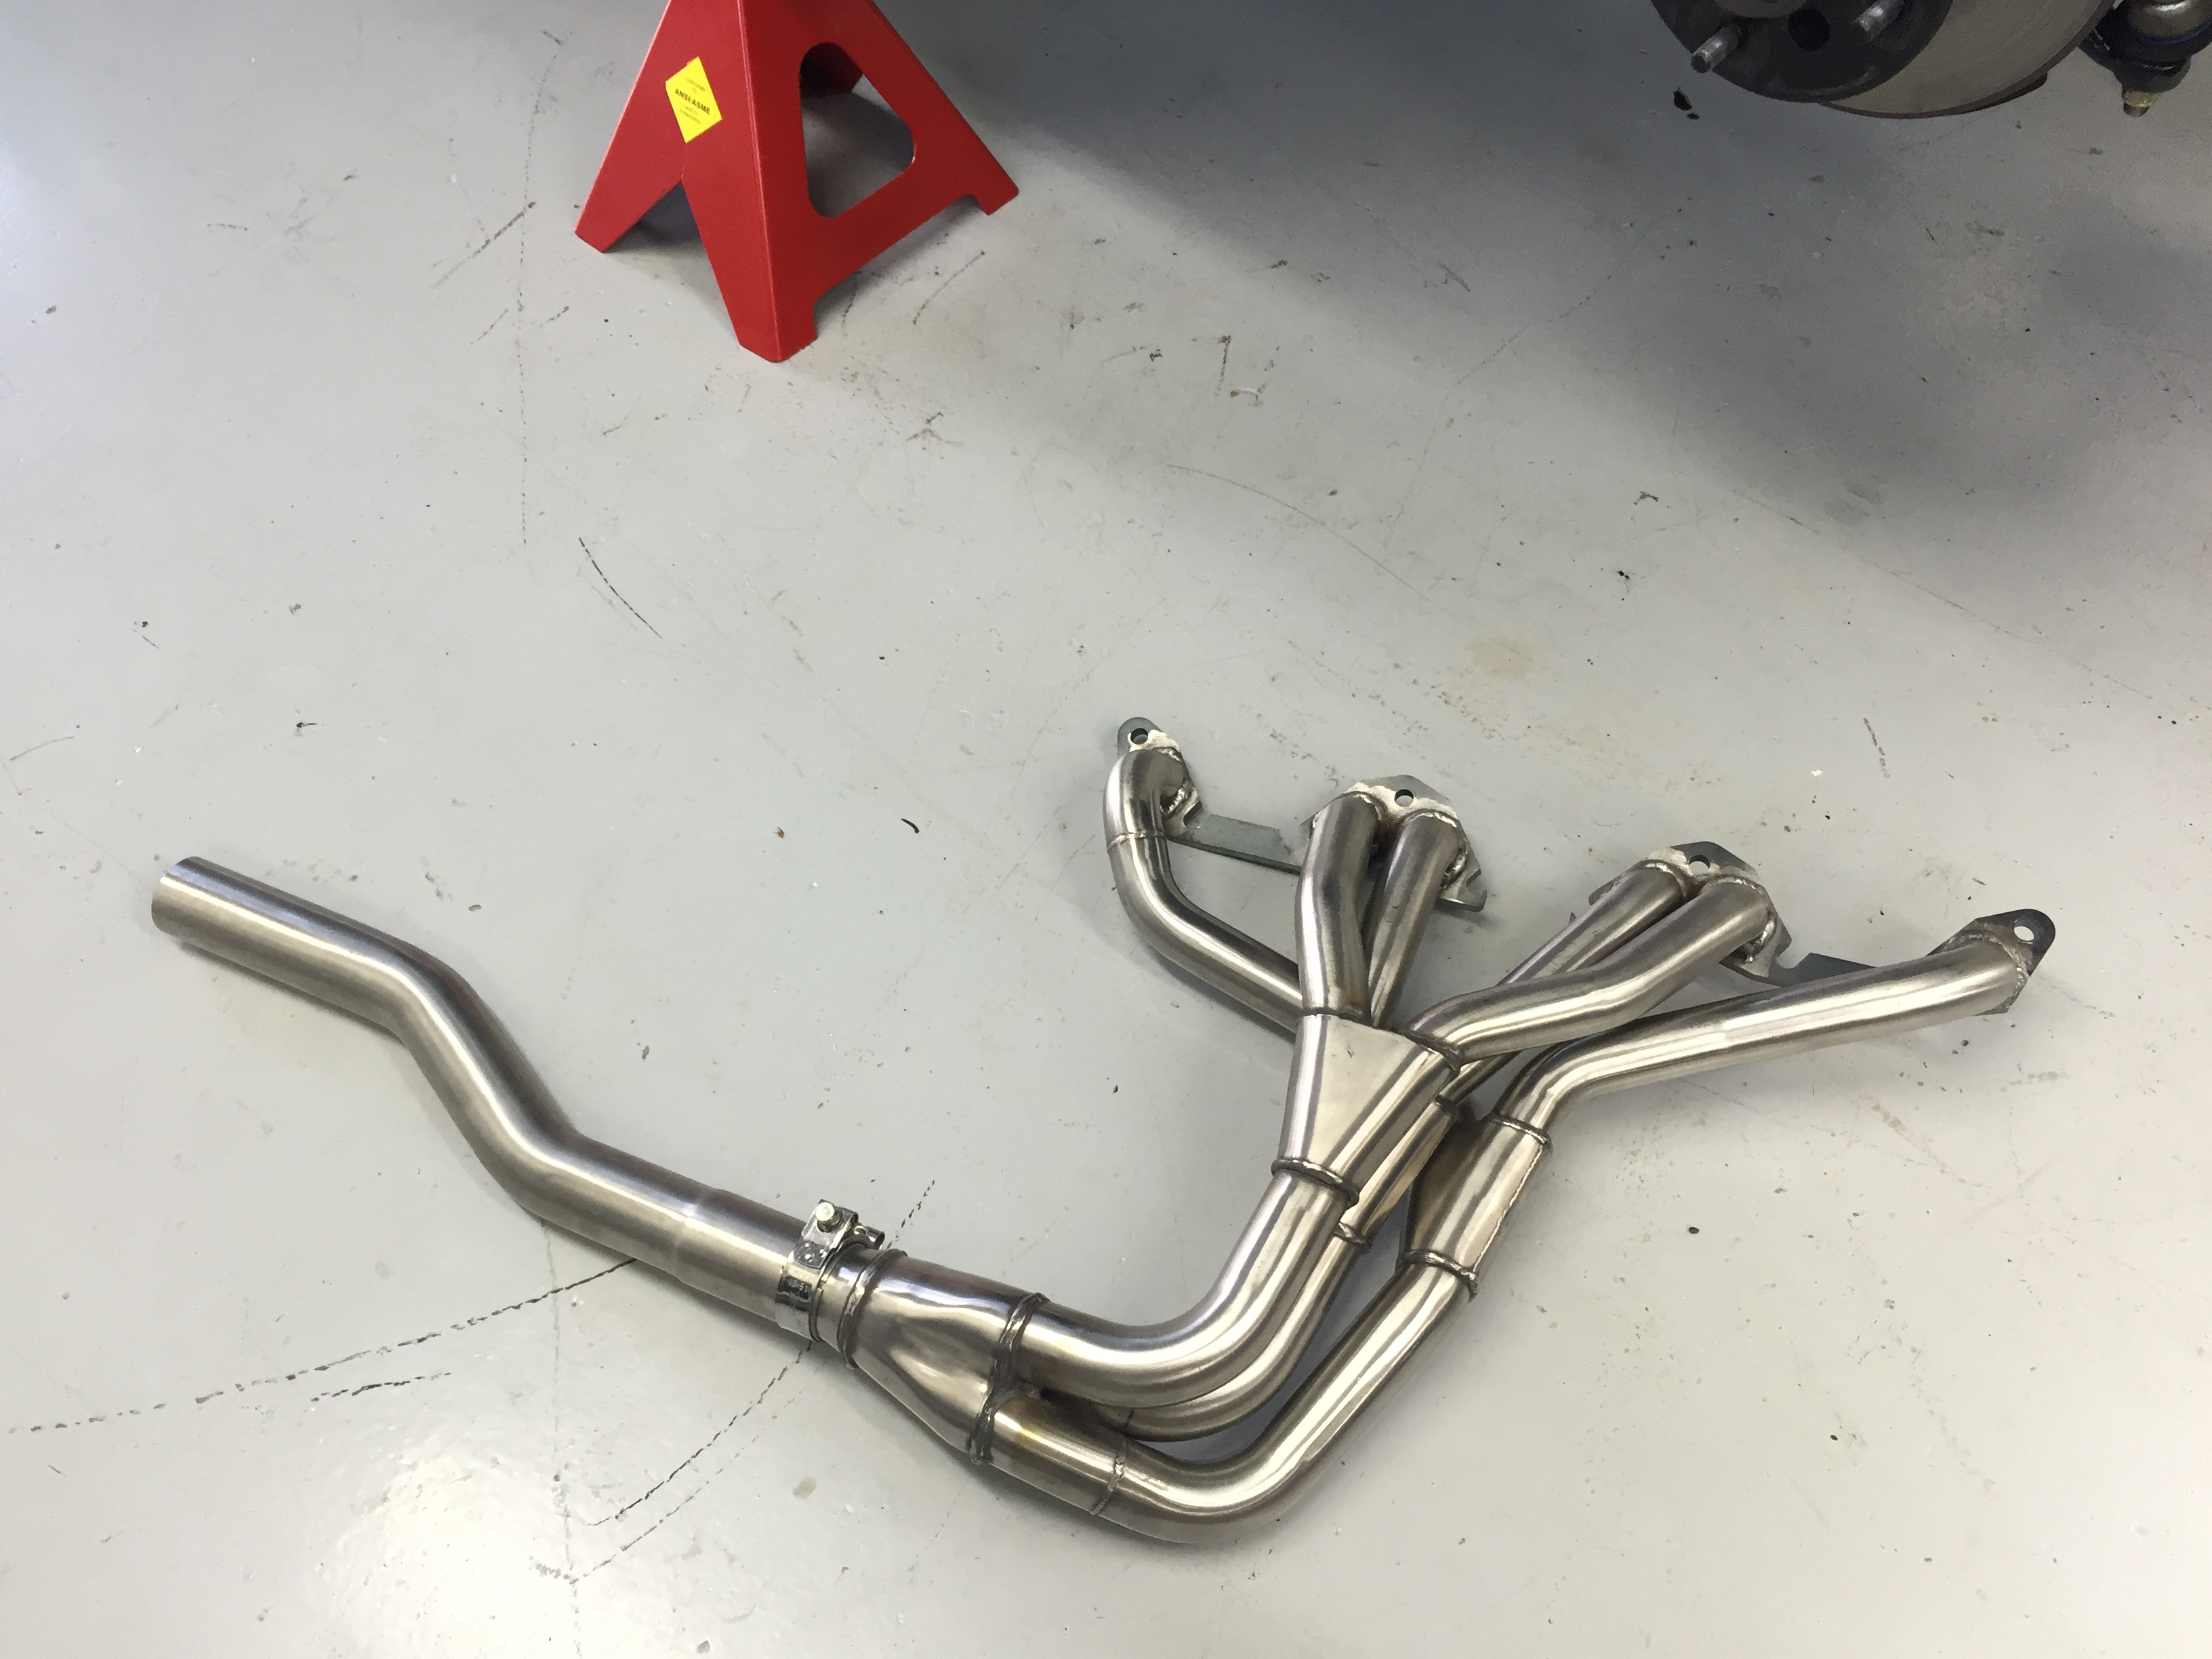
Turbo pipework all welded ready to go.2 points
-
Finally decided to do the coilover setup in the front, after forgetting how much work the rear was. But yeh the front is going to even more work, mostly because there is so much stuff that needs to be moved and shuffled around. Unless i was to do it half assed. Had to get in and chop a few things up before i could even order the coilovers, to make sure everything was going to fit, with the coilover length i want. Turbo was the first thing in the way. cut up manifold to relocate turbo closer to engine. Manifold is done. still need to finish sorting out the airbox and exhaust. After thinking the drivers side was going to be easy, turns out the brake master was going to be in the way. Had a wilwood reverse mount pedal box hanging around, i had brought for the trueno that didn't really fit. Looks like it will solve the problem in the hilux though. should fix the brake bias issue also. Still gotta make another bracket to mount to fire wall but this is where it will sit Ends for the link setup.2 points
-
Discussion Thread hi all after an epic trip to auckland i picked up a 1965 rambler classic verry tidy inside and out running the std 6 and auto lowered on charger rims just a mint tidy cruiser will upload more pics soon
1 point
-
so this just passed the 1 year in the shed mark and i have been plugging away at small things trying to make sure it all fits made a cut down sump using the bowl of another sump ... it was ugly welding and looked too small on capacity and leaked like a sieve so i made mk II version deeper and with new 2mm steel much easier to deal with made 1 flat plate right thru at cut line and then made the cutout and bowl for ford v8 pickup l very minor weeps on testing and i just hit it with the full POR tank sealer system to sort that out oil filter remote and oil cooler mounted and plumbing mocked up lots of little bits to sort so they dont try to occupy the same space under the bonnet1 point
-
Now the 2300 is pretty much done, it can move outside. so the 125 can get some long overdue attention. Since the shameful display on drag day (the brakes incident on the motorway) Its been started and moved around a bit but not driven anywhere. I have been collecting bits for a brake refresh tho. Fronts seem fine so concentrating on the rear. Most of the hoses etc from ladapower.com, hard line set from autoricambi.us and diff seal, pads, discs, regulator and master from fiatparts.co.nz Started with dropping this, oh yeah, the diff pinion seal is leaking too... hard brake lines are definitely grotty and a bit rusty, got a full set to suit a 124 spider cheap from the states - so far so good. bench bleeding the new master with old diff lines worked out very well! I had to replace the hoses with slightly longer ones as the new master has top entry tangs on it instead of side ones like the old one cleaned out the reservoirs and greased the pedal and booster pivots, new master on old booster, new vacuum hose to inlet manifold and one way valve thing. I should probably change out the front hard lines but they are actually fine, as were the rear ones to be fair. Maybe one day...1 point
-
Replaced the left hand control arm this weekend as the outer ball joint was absolutely rooted. As it turns out the control arm was a right hand arm fitted to the left hand side. The control arms on these things are handed which probably explains why the joint was so bad. At first glance the arms look the same but the ball joints are a few degrees off being parallel with the face of the inner bushes. I had trouble photographing it but if you look closely you can see where it looks like the stud has worn into the control arm. I pressed new bushes into both arms and fitted the new arm to the car. I thought the swaybar bushes were ok but on closer inspection they need to be replaced so I'll have to wait until tomorrow to grab a set from Enford. Still need to change the oil and wire up the horns and then I think I'll move this thing on as things haven't quite worked out the way I'd planned and I'd like to free some money up for other things. Yarns here:1 point
-
Facebook link: https://www.facebook.com/events/837040396450755/1 point
-
started on the other side today. i'm actually fed up now of finding more rust. i know its a ford but christ the way these are put together is nuts. the double skins, dirt and water traps,, and different channels and areas between panels that make no sense. anyway i'm just fed up of not being able to get to the part i want to fix in the first place yet! lol. i'm not going to work on it tomorrow i'm going up to hopefully remove an lsd rear disk axle. we shall see how that pans out. i made this side! came out well. proof we did this bit too! and with the front end welding finished i was able to give it a quick tidy up, etch prime any bare metal and then put stonechip on. it wont happen yet but i think i'm ready to fit the wings and align them for paint. progress! potato spec pics today sorry. til next week....1 point
-
Tuatapere Riverton1 point
-
As someone who works in advertising I find people like this offering contra for a central prop, especially with such a big company, pretty shit. front up with some cash you pricks.1 point
-
Use a Hillman Hunter clutch plate with xflow flywheel and pressure plate. Stock clutch cable, Cortina speedo cable.1 point
-
Few more details of stuff. Decided I needed a collapsable flagpole.... searched around on the internet a bunch for something that didn't suck, then realized I already owned the perfect thing. For those here who aren't back country skiers... it's an avalanche probe, essentially a thick tent pole with a spike on the end. I just cable tied the flag to it and it all folds up and rolls into the sleeve it comes in. Perfect. Changed out one of the grommets for a sport climbing bolt hanger so I didnt have to unthread the cam buckle strap every time. Yes... I realize it isn't a rated carabiner and the bolt hanger should pull down ... Window nets that rebecca made. There is also a big one for the side doors. The strip magnets don't hold for s#!%, glad I have the circle ones. The rear ones also are bolted through the hinge. Little ties to hold them up. Cargo net in the back. The tan bag is our sleeping bag. For anyone who wants a bada$$ two person backpacking bag I'm a huge fan of the Nemo Tango Duo, it allows the two of us to carry one less bag and weighs no more than one normal bag, 800fill down and backless. The window nets and flag pole live in the cargo net as well when not being used. The flags were brought to me last month from a friend who was in India. Some pics of the roof in use Needed a place to stand so I stole this idea from someone on Expedition Portal to use cut down ute loading ramps. Now I need to figure out what to do with the second ramp since they are only really useful in pairs... freebie if you pick it up to anyone who wants it. Had the van out for its first shakedown overnight run at Cunningham Falls State Park. We were the only people there. It of course rained, but I was very very happy with the ARB awning, we were still able to cook outside. Also took it out to a local horse race last weekend, Maryland Hunt Cup. The tailgating area was full of yuppies so I picked the coolest looking guy I could to park next to. The other guys van was more of a tail gaiting rig, he pretty much spends all weekend driving between porting events, but he did have a removable bed platform. He had only finished it a few months ago so we chatted a bunch about our builds, cool guy. Lots of TV lots of sound Lots of batteries Lots of amps and lots of air for an air horn1 point
-
I haven't done too well at photographing progress on this thing as it's my daily and I'm usually just trying to get the job done with as little fuss as possible but I made sure I got photos of the panel repairs. When I bought the car it had a big square dent with a tear below it in the sill. I don't know for sure but I suspect that it fell off a jack at some point and punched in the sill. Initially the panel beater thought the dent could be pulled out and a small patch welded in but unfortunately there was some rust on either side of the dent so we bit the bullet and cut the lot out. I stupidly didn't take a before photo but I'm very pleased with the quality of the repair and it's nice to know there's steel there and not just bog! I still need to fit the chrome trim to the sill and then that's one more thing off the list. Discuss here:1 point
-
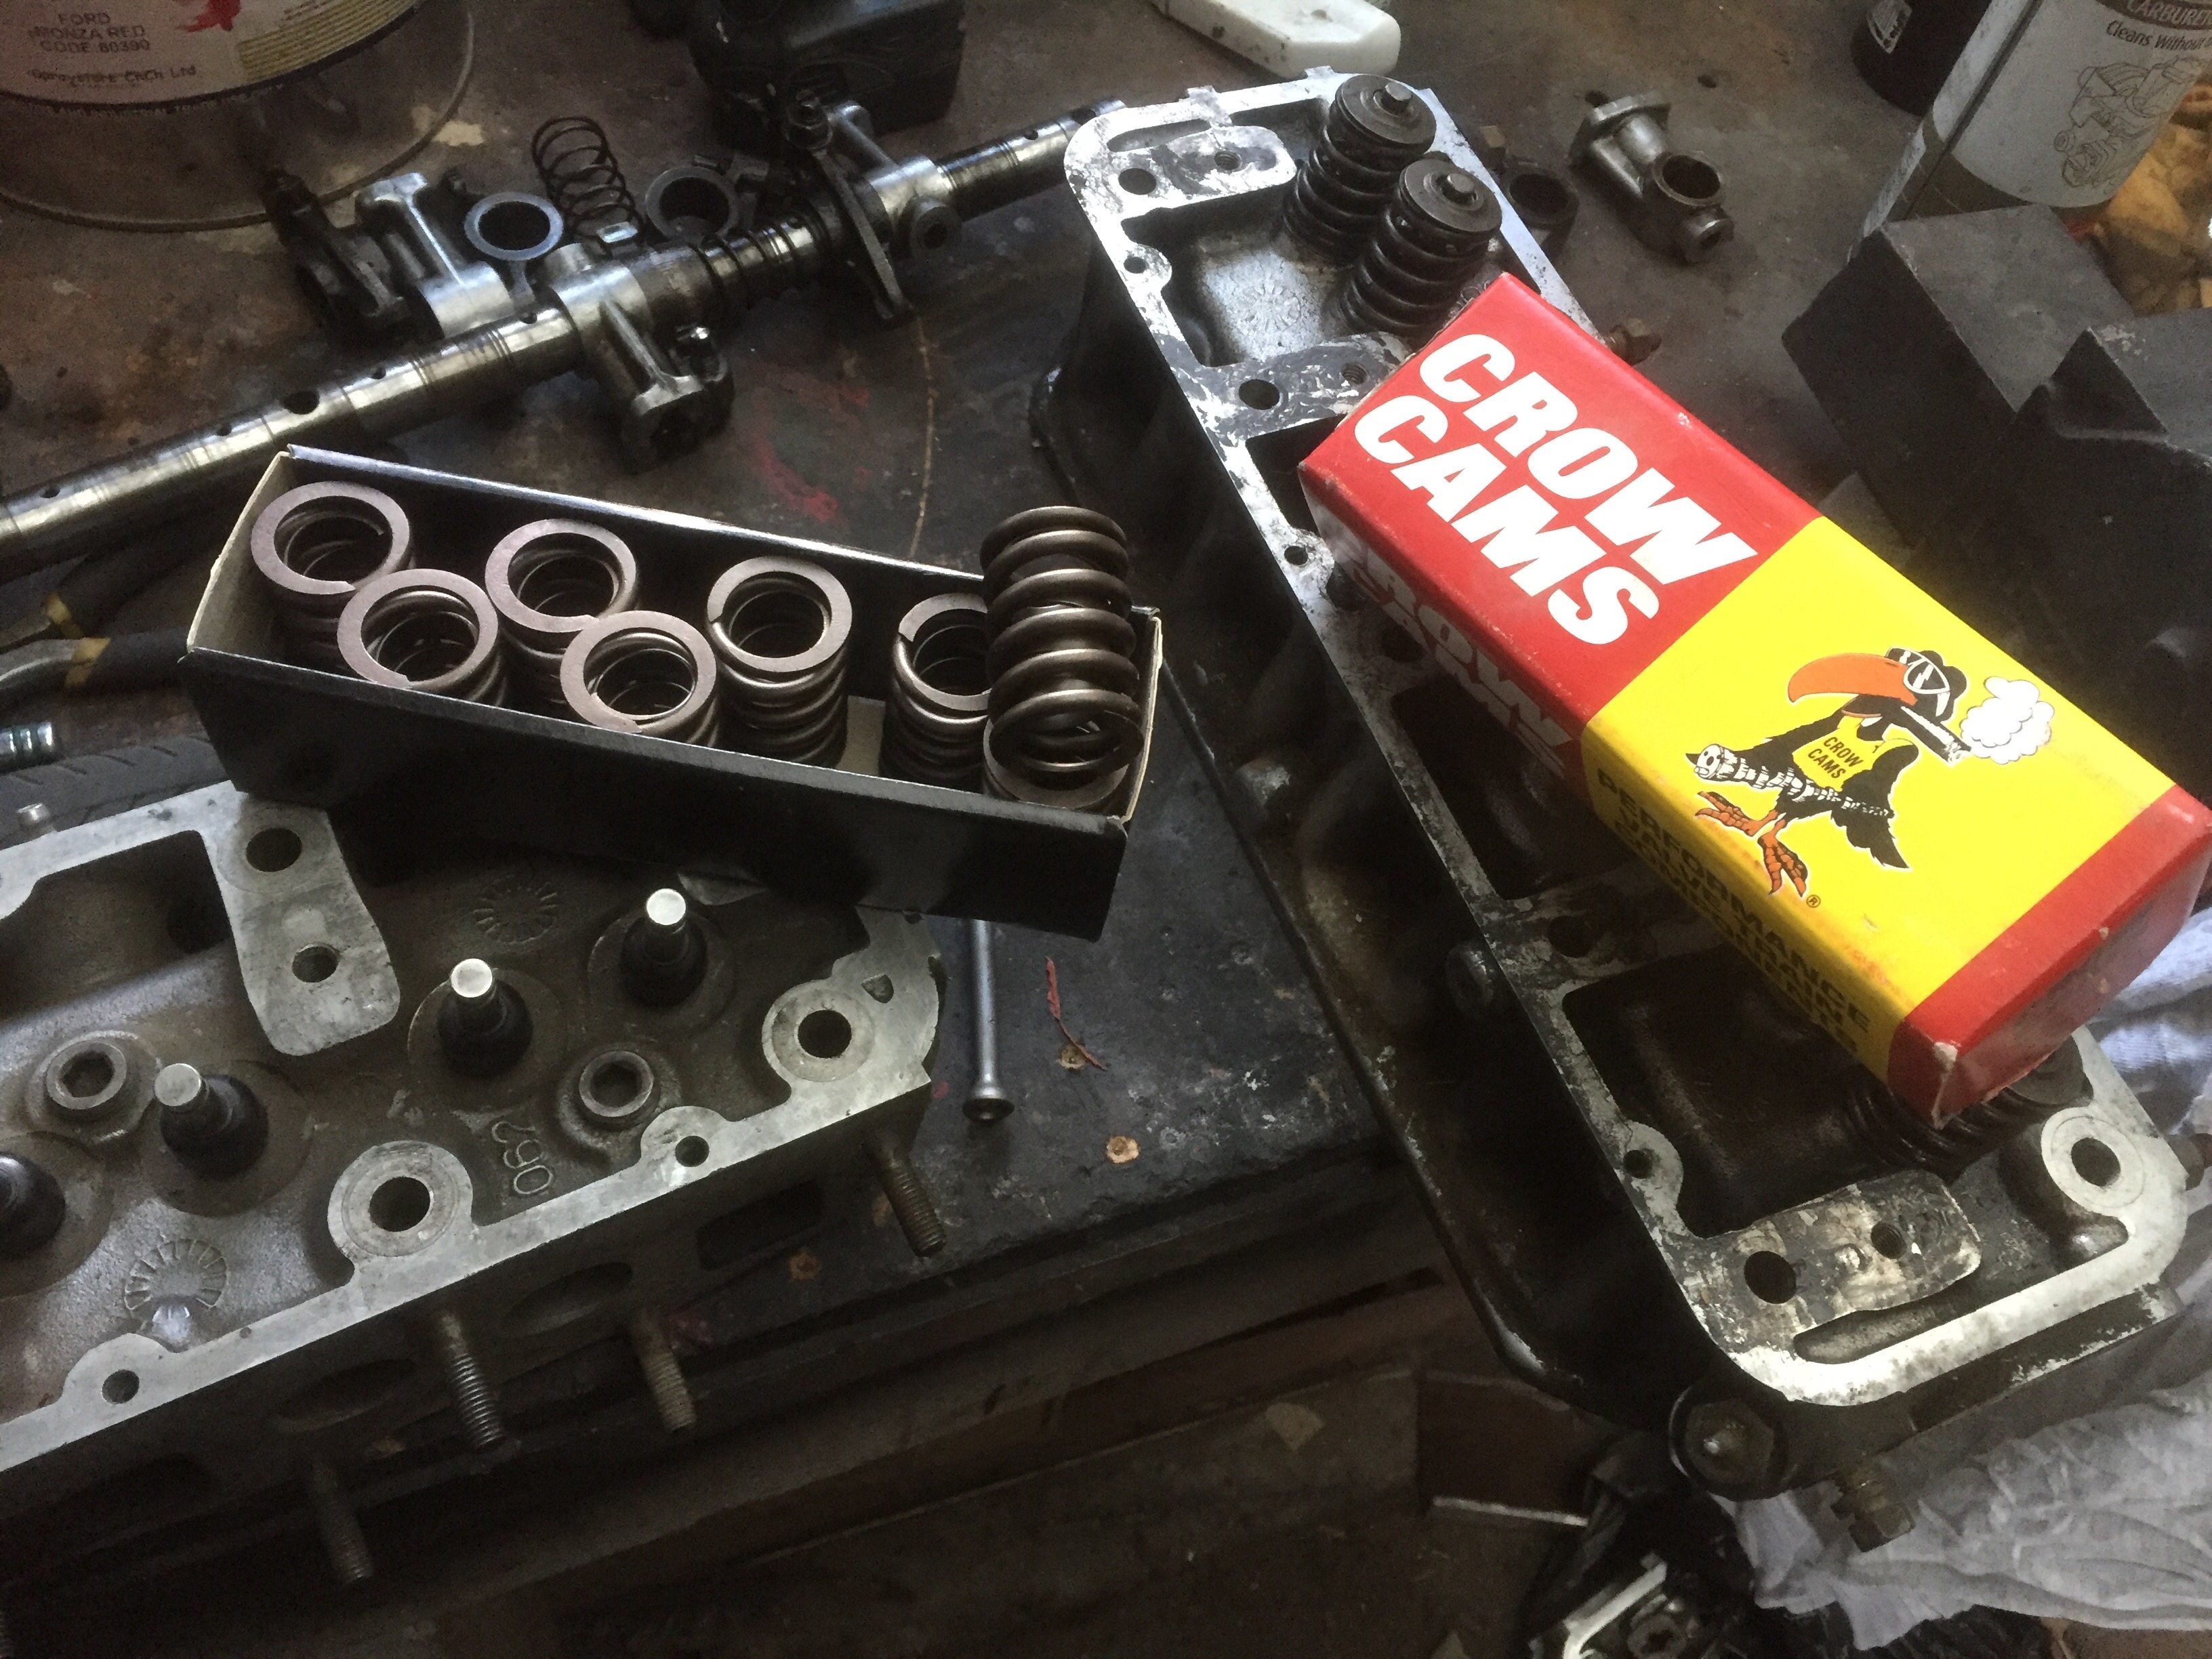
Pretty randomly our rep at work got to yarning with a codge who wanted rid of some Datsun stuff his son left in behind. $100 got me a set of new crow valve springs, 2 A12 heads and set of barely used valves and sparkie plugs. At least $300 worth realistically. Hoped one would have a rocker shaft cause all mine aren't quite 100% but alas. I also decided that cam bearings would be cheap insurance since mine weren't mint so got a set and a spare just in case but overthought it bitched out on installing them myself in case I wrecked the new cam soon after firing it up..they are buried inside the block, and scope for disaster is wide, so dropped the block and head off at reconditioners.
1 point
-
After having no luck with the jaycar speedo correctors (both units never even fired up or anything at all) i ordered a yellow box from aussie. Spliced it into the 3 speed sensor wires and im away, ran a few test modes to see how the speedo would react then set it to read 25% less than it had been since 1991. left the lead long and coiled it up under the shifter console so i can fiddle with it again if i change something, it also has top speed replay. About a week later i was just about to leave my first day of work and no start. starter cranked over fine, but no dash lights came up. it was by now dark and i was in no mood to try get it going with no torch or tools so got aaplus to take it back to papakura. AA bloke was really unpleased at the wiring and seemed to think it was my fault some how, he tapped the relays with the back of his screwdriver and tapped the fuses a little, demanded to see my ID, then told me it would cost me to get it towed. dunno what he was thinking there, but i got it towed back to papakura covered by AAplus, and with the same towie that last picked up my minor. Left it in the garage till the weekend when i could take a look. After probing a few things with my multimeter and hotwiring it to start, i chased the problem back to the fuse box. one of the fuses had blown, but even in the light of day it was very difficult to see where it had broken, and was only found by testing for voltage. It looks like when i was washing down the windscreen cowl to see if my patches were water proof i had gotten water into the fuse box. This happened because the Holden loom has been put through the firewall, through the cowl and not sealed up. this means that under the right conditions the water can run down the loom, and because of where the fuse box was hanging the water went right into it. The last owner mentioned that the drivers side footwell only leaked when parked on a hill, and this is why. i remounted the fuse box in a higher position, where any water coming in will drip off before getting into the fuses, il probably gob some seam sealant on the cut holes and hope it helps. I have since been dailying it and its going pretty well, other than having to top up the fuel every second day, tho i do usually drive around 200km in it a day. I swapped cars with my partner for something more economic (i get paid mileage, but can profit with her car haha) so she has been driving it around auckland, with the seat all the way forward and a pillow to prop her up. It blows barries minds. I took it back this week so i could put it through a wof. The instrument panel is playing up because of the crusty printed circuit degrading, and being damaged from being taken in and out, so just this week i had to get some LED lamps to replace the indicator and highbeam idiot lights because the copper tracks have broken. I have a second cluster at home, but its also damaged, less so and can be fixed with some conductive paint. However im going to live with the hacked up one for now because im eventually going to make a new instrument loom and swap all the gauges etc into an original l200 cluster so it has a more finished look rather than a cluster sort of half shoved in there. Had it die on me out at a farm, this time i had some tools and my multi meter with me, so i found that it was getting spark and the fuel pump/filter was fine, so that had me a bit stumped, so i started checking connectors as the engine check light wouldnt come on. after reseating a few it came right and started right up. I figure it was a connector that controls the injector pulses (cos if it was carbed it would have started). going to get some nice waterproof connectors and tidy the loom up. Took it for a wof today and it failed, i knew it would because i saw the brake machine dials failed on. -left rear brake lens and reflector faded rear brakes imbalance park brake imbalance right front outer tie rod play steering box leak not too major, glad the rust was sorted (well he didnt notice another patch that i found the other day). have ordered a new pair of tail lights (the other side is cracked as well so may as well), picked up the tie rod and il have to open up the brakes this weekend to see whats up. it failed on this last time too according to the sheet i found behind the seats, so i bet they never fixed it and conned a wof pass. also need to measure the shoes to check if they are the slightly larger later brakes or the 200mm originals. Steering box is the only real pain because its not original and is stated as a galant box on the cert, but it seems that they had rack and pinion, but is probably a sigma/later l200/ pajero unit1 point
-
It's been nearly a month since the last update. I had a 2 week holiday in Bali which slowed things up. Got back into it tonight working through the list of stuff to finish off, Universal is mounted to the steering rack, found that it hit the engine mount so that had to be clearanced, put the starter motor on and there is space to shift the knock sensor to the other side of the motor so the dip stick will fit into the HQ sump, clips fitted to the diff for the brake lines. Clint (Cletus as he is known here) is coming round for an inspection for certification next week so lots has to be done. I want his OK before it all get blown apart again and painted. Progress for sure.1 point
-
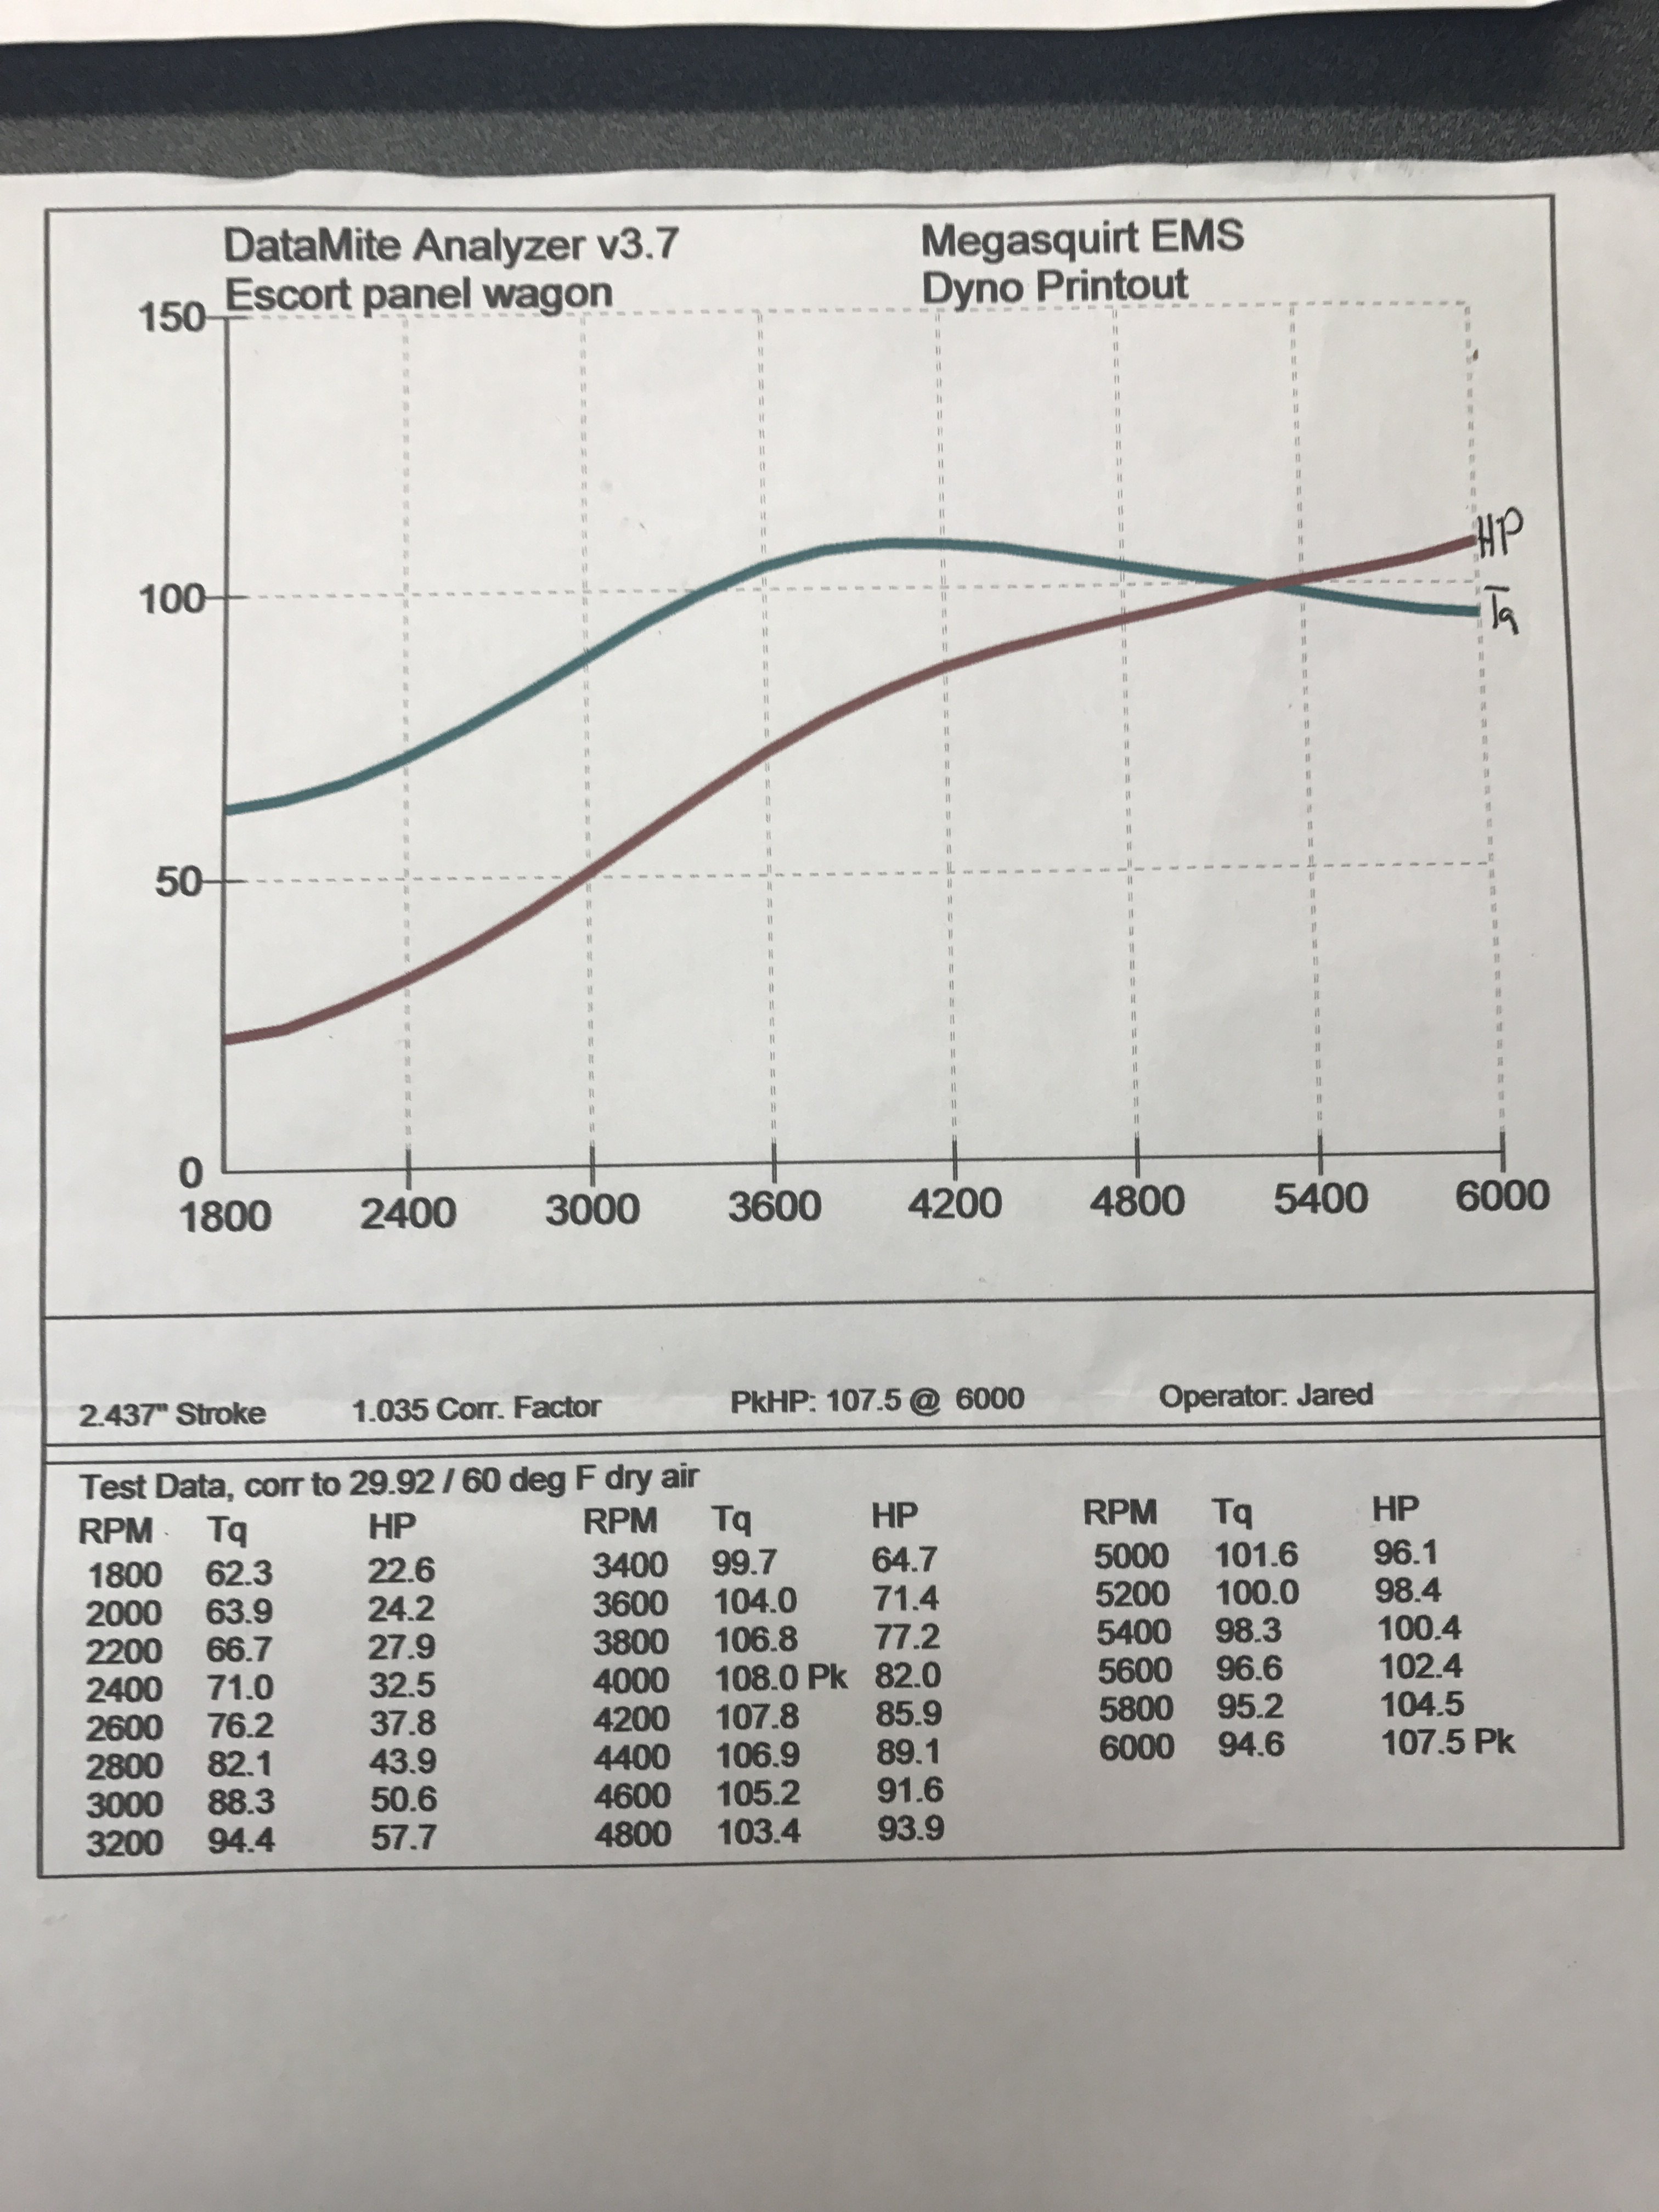
A little more No real power but ok for a 40 year old car
1 point
-
Where was I... Fillets, Floor came up okish.. Bought a kitchen, got fed up with looking at shit that was a mission to change/adapt to my kitchen. Its Chinese with German hinges.. 3.5k Put it together and semi installed in on Sat/sun and discovered they forgot to give me a bit.. That's better, Drilled some light holes, fucked one up but it was at 12am Tuesday morning so it's ok.. Crawling round in the ceilings a bit of a cunt, glad I'm not doing the insulation, Oh, and I spy with my brown eye.. Christened this one already, felt good.. Still not a fan of those taps as they're too new looking, would've preferred the ones I missed on the tard for a fiver.. getting closer and closer..was gonna get my mate to laminate my bench for me but I just found untreated 45mm laminate ply for $140 a sheet.. would be good for a temporary bench, see how the money goes.1 point
-
So Manfield finishes up... And I'm enjoying doing superlap and the camaraderie between competitors. Buuut everything else in life was starting to feel a little stale. I have been daydreaming about moving to the South Island for the last few years, but I'm not a planner person... I figure if I wait until I have a plan, I will never do it. So I made a bold move - To just hand in 30 days notice at my IT Manager job, with no idea what I'm going to do next. I knew this meant sacrificing the remaining rounds of Superlap, and would probably lead to some hard times financially and otherwise. But it was just what I felt was necessary. All I knew was that I wanted to move out of Auckland for a while and start on a fresh page after some tough times over last year or two. A few days after this, I see an ad pop up on facebook... "Remote Dyno tutor/manager at HP Academy in Queenstown" Awww hell yes, could that be any more the ideal career/city change, at exactly the right time?! I applied for the job - and got it Then not long after, thanks to Bigfoot, I had some accommodation sorted too. It was the most low effort career/city change ever! Within the course of a week it went from my family probably thinking I was a bit of an idiot for quitting my job without a plan. (and a fair bit of doubting myself as well) to, "God damn it you're a jammy bastard Dave" To anyone who has along the way thought "David why not just take your car to a tuner instead of wasting your time doing all of these stupid tests/graphs/etc" Well, all of these things that I've done were a major contributing factor towards me getting the job. So there's probably some motivational message there about following your dreams or something. But end result is I'm pretty happy right now, and working at a company where drawing graphs and looking at datalogs etc is par for the course. Which is bloody exciting. So I packed my echo full of essential stuff and drove on down to start a new way of life down here. So far so good! Keeping some relevance to this thread though - My Carina is still back up in Auckland. It's packed full of "want but dont need" items, it's ready to hit the road as soon as I've organized a place down here that has a garage to store it in. I've been learning so much from Andre and the team, it feels like getting an apprenticeship from one of the best engine tuners in the southern hemisphere. I feel like I'm only just smart enough to be on the cusp of understanding some of the stuff Andre talks about. But I think I know just enough, that he doesnt feel like it's a waste of time explaining things to me. I expect that by the time I've got the Carina down here, I'll be ready to redo my tune from scratch using the new knowledge and tools now available to me. Cant wait! A new southern chapter of graphs, nerdiness, and awesomeness awaits the Carina. The next post in this thread, when the time comes. There will be graphs, oh yes, there will be graphs.1 point
-
gasser Its way less finished than it looks1 point
-
And a waaaaayyyyy over engineered gas cap. But come on, its sexy eh! My OCD kicked in and I even domed the top because it looks better that way. Kj1 point
-
Nothing too exciting going on with this. just working my way through all the stuff in the way, to get the extra up travel. Driver side engine mount got chopped off and new one made higher up to clear the top link. Alternator had to go as well. will use a fwd bracket to move it up. a new inlet on the water pump should make it work with the rwd pump. Last thing giving me drama is one of the steering links and the the sump. if can get another 30mm clearance between the 2, this will be max up travel on bumpstops. kinda lost count but got around 3 inch more up travel than the leaves other than that just been welding... bottom chassis link mounts are on for good. i forgot to drill the lightweight hole in this one. Crossmember was way too much to weld with tig, and was to lazy to drive an hour to my old boys to use mig. Arc it was. still got a little work to go on it1 point
-
Today's effort. New (half finished) gearbox/transfer case cross member. Lower links don't agree with the old one. new one will have a tower for the upper link with some adjustment holes. +50mm shocks look pretty short.1 point
-
Went to wagnats Was fucking rad as predicted Vans now jacked up on axle stands with the front of the engine and sump coming off. Engine has had a bit of an odd noise for a while which I have put down to a combo of a timing chain rattle and Rockers needing adjusting, So have a full timing chain kit coming, At the same time, going to remove sump and clean any build up of crud, seeing as I bought a full gasket set from ozzy for fuck all. Today while pulling it apart I noticed there was a bit of crank thrust movement, so will also do the thrust bearings while I have the sump off, My guess is they will be like, $4.50 anyway. Other than that, just a generally tidy up for a 250km motor, new water pump, oil and filter, check plugs, new coolant, so in short, a hardcore service lol. Anyway pictureless updates are for amatures Rad, will Actually take some pictures of the engine tomorrow I guess, because thats heaps more fun right! Peace.1 point
-
Got the pedal box mounts finished. firewall mount is the back plate off the original pedal box with new brackets welded too it. picks up 7 bolts in the firewall, along with the top mount which picks up the last 2 factory pedal box holes, its solid as shit Was fairly straight forward compared to the setup in the starlet. since Hilux has a separate mount for the steering column, But that also meant the fluid reservoirs had to be remote mounted, since said steering column cross brace was in the way. I had originally planned mounting them in the engine bay, but lack of fall said that idea was a fail. which was making me think the whole thing was a fail. but eventually come up with this.. Stuff sticking through the dash is yuck. but. This thing used to have the roll and alt meter thing that alot of 4wd's have. will put a blank face in it to cover it all up. Just need to plumb it up and hope my master cylinder sizes are correct. Cant wait to try this out on some 4wd Barry's. Hopefully it will shoot some flames on the limiter1 point
-
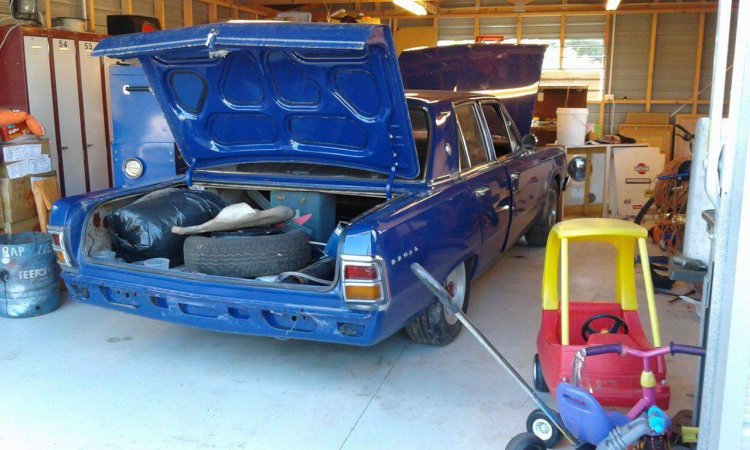
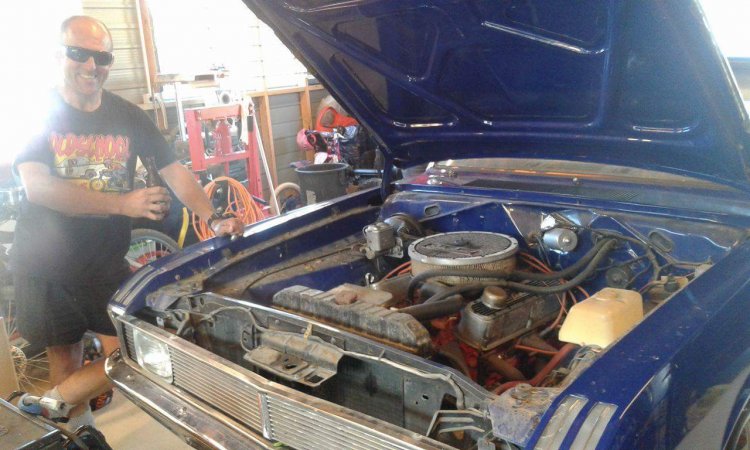
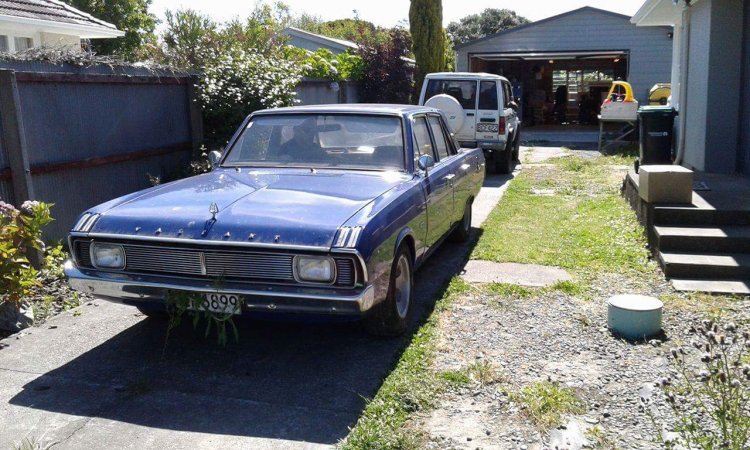
step 4 place valiant in the garage so remedial work can begin
1 point
-
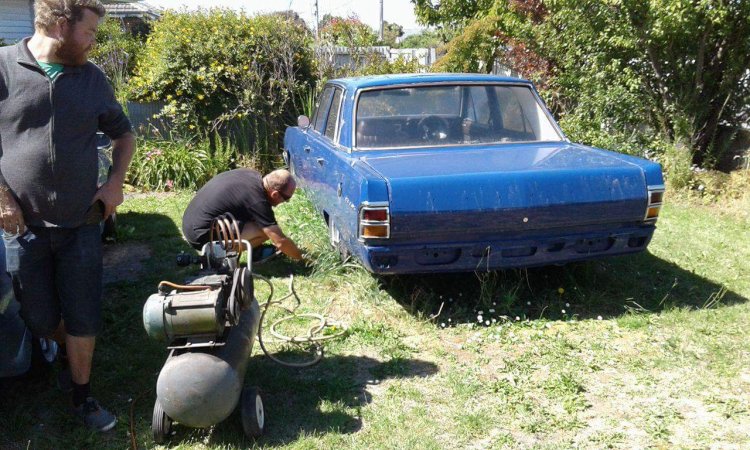
step 3 drag off the lawn using superior 4Jb1-t power
1 point
-
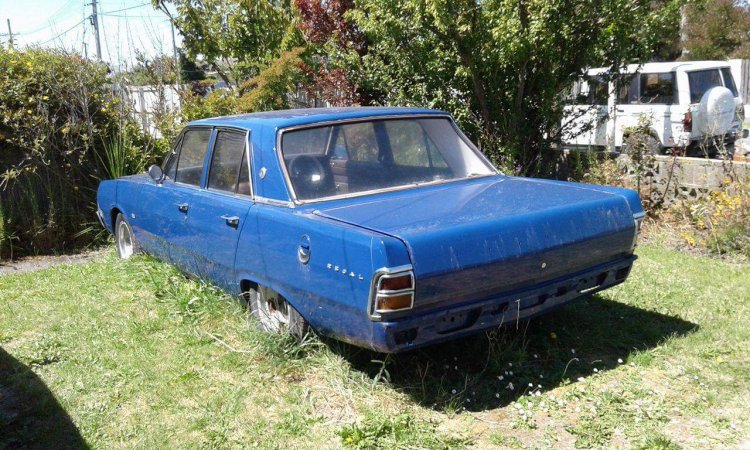
step 2 inflate tyres
1 point
-
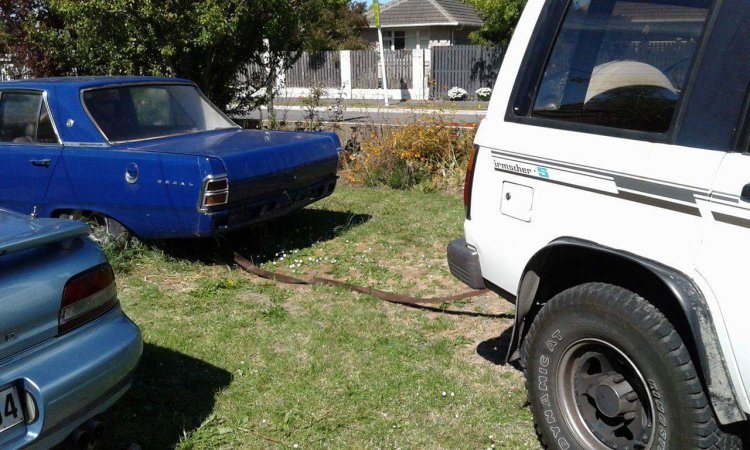
step 1. look at poor neglected valiant
1 point
-
SO A while agi, I mentioned I jammed some white walls into the tires on this thing, using the white walling machine at work. Was my first time, was fun but took me forever. Anyway. Heres some pic of how it does some shit Basicly has a grinder, with a alloy Disc on it with sand paper glued on the outside, Once you have lowered the car tire onto the roller on the bottom, you find where you want to run it, and cut a small line into the side wall, not very deep or anything crazy, just to give the paint something good to key to I think. Then, once you have that done, you fill up the little paint applicator, which has a roller on top and a plundger on the bottom to apply a little pressure to the paint. This is what I struggled with really, clean application of paint onto the side wall. Got better with each tire, but yeah, the over all effect is pretty good. As can be seen here So yeah, combined with the lowering and the chrome trims and painted steels, looks fucken rad If I do say so my self And have been having a bunch of fun with it too. Camping this weekend in it, which is going to be most radical as that was one of the main reasons for purchase haha And found another awesome feature. Turns out its also hand for transporting Scooters, while still retaining the bed! which means summer scooter missions in far away places! Not much else to report on this at the moment, but it does need a timing chain by the sounds, and I need the time to do the chain! Thanks for reading, until next time, have a good time.1 point


.thumb.jpg.b5491dbec1053270a4d99ed376fc2c36.jpg)


This leaderboard is set to Auckland/GMT+12:00