
Leaderboard


Popular Content
Showing content with the highest reputation on 04/08/17 in all areas
-
a mate came over and gave me a hand and we smashed it good. there are no ceilings and all the roof that im going to remove has been removed. only thing left is external walls which are wobbly as fuck. 2017-04-08_03-30-26 by sheepers, on Flickr 2017-04-08_03-29-43 by sheepers, on Flickr10 points
-
7 points
-
So I did something dumb, I bought another Zephyr. I bought a VL churbo wagon that turned out to be a turd so I flicked it after a few weeks and was looking for a tidy 5L VL and then this turned up on the tard. I had a couple of goes at organising to have a look at and got mucked around so I gave up and forgot about it. Came back from a holiday with no reception and discovered that the seller had dropped the asking price significantly. Finally managed to have a look at it and ended up buying it. Its running a 302 Windsor with a C4 and an 8" diff. Modified in 1992 and on declaration form not cert. I've had it for nearly two months now and so far I've had the left hand rear sill section replaced, made and installed a speedo cable, recored the heater, replaced the brake booster, rebuilt the carby and reset the massively retarded timing as well as a bunch of other fiddly little things. Doesn't sound like that much when I write it down but everything's been one step forward and two steps back so far, if I'd had any idea how much I was going to have to do to it I never would have bought it but them's the breaks I guess. I haven't taken many photos so far as it's gotten to the stage where I just want to get the thing going but I think I'm on the home stretch now, have new springs to go in it this weekend and then touchwood I'll be able to take it for a decent drive and take a few photos.5 points
-
4 points
-
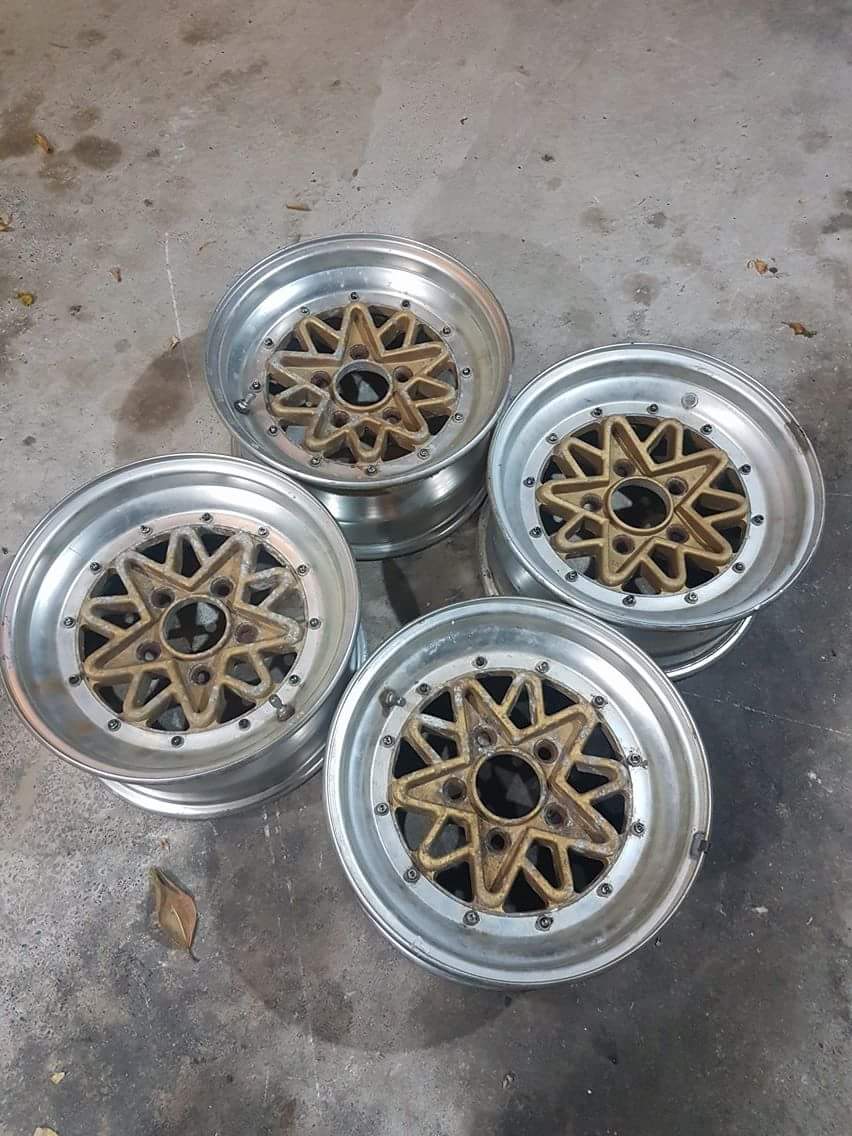
wheels from Japan ssr super stars 14x6.5
 4 points
 -
Waste of timber doing that. It wooden go very fast3 points
-
something i forgot to mention, while this is all going on we are living in the garage. i dont have any photos of that but its pretty cramped. i still needed to get a celica into the shed because its my daily and i need it. so i built a wall across at one celica depth in from the big door. the space we're living in is about 5.5 x 6. in one corner is a bathroom that is 2 x 2. so far its been fine. the rain on the roof has been so loud that we couldn't communicate verbally and it isn't winter yet so we'll see how that goes. all my crap, including lathe is in the celica end of the shed. ive built a bench which the nose of the celica fits under so i can still get it into the shed. 2017-04-02_04-55-31 by sheepers, on Flickr3 points
-
I thought I had updated this with some semi finished photos but here is one. It didn't perfectly adhere to the scaly stuff you can see in the above photo. Time will tell how that turns out. Hindsight says I should of found a s/h tank or gone for a new rock auto one and put it in the van (I found one for cheaper than the por15 kit AFTER I purchased the kit) and not bothered with all this mucking around for a potentially still crappy fuel tank. I'm not 100% happy with the result considering the hours that went into it. I think the failure is the person not the product. Where everything is clean and where it spilt/the remnants in the tin it has stuck extremely well and is a really tough coating. There is a reason I was given a estimate of 300-400 to clean and seal the tank. Its quite a lot of effort! I think the por15 kit is more intended for the older less baffled carby tanks rather than this silly shaped injected one. I have learned heaps with this exercise and would use the por-15 product again but in a less baffled tank2 points
-
Can you have a sweet outdoor fireplace on your neighbour's wall? That's lush.2 points
-
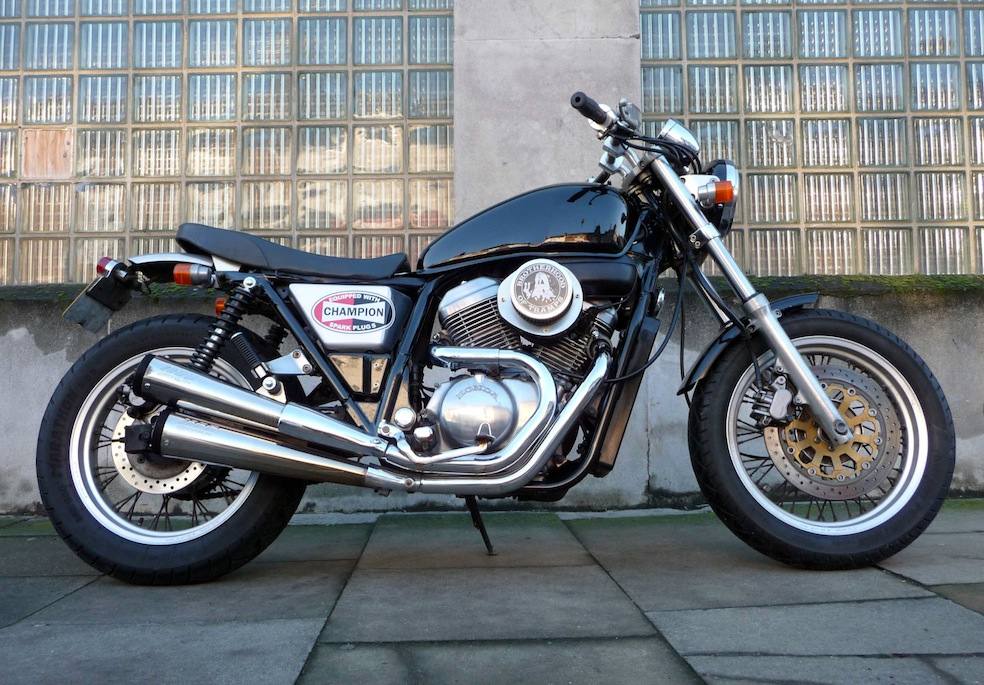
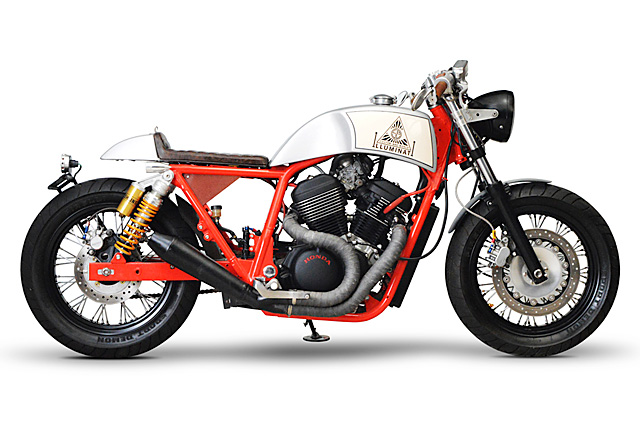
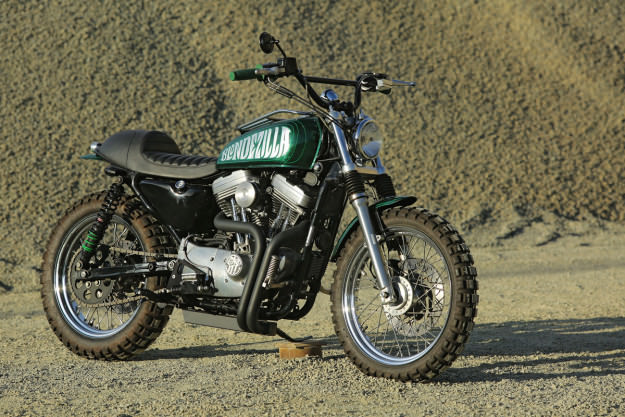
Aside from the above I've chased out a few little electrical things that were bugging me, I've got a couple left that I'm working on right now like the right rear indicator not working (not the bulb) and the neutral position sensor not always knowing it's in neutral. The neutral sensor thing is super annoying as I've gotta admit I've tried leaving the lights a couple times and been sitting there in N waiting for the light to change... and it also means that unless it's sensed N (15~25% of the time it works) it kills the motor as soon as the kick stand goes down. Here's a pic of a pretty clean one from japan, not quite where I'm heading with mine but I like the stance and the lack of colour. Those are the stock pipes and although I like them, the high side custom things on mine are great and sound awesome, I'll wrap more of the pipe round my boot area, and possibly make up a heat shield as they are super fucking hot/great for warming my hands at the lights. And I'll also change the cans at some stage either for straight pipes or just do something about that alloy, I'm not sure yet. Here's the most recent custom I've found it's from a shop in Sri Racha and I hate almost everything about it except the engine, the foot controls and those rear shocks (black springs though come on m9) Looking super closely at this custom I can't believe BikeEXIF featured it, lot's little details piss me off like th front guard drooping, the tribal looking tank, the gross colour way etc. but it's a shit tonne more built than mine at this stage so I can't pull it apart too much. Here's a bike that, although a harley, pulls off what I'm trying to do.
2 points
-
Well someone bought the old bitch off me, and it left the mainland this week; So yea. What I need now to distract me is a very cheap but live reg 60 series diesel landcruiser. You bitches make that happen for me.2 points
-
Nats Update: Drove Car. Rolled Guards Met GCs Did a skids Did a skids again and runded over a cone Went to the Warehouse Trained. Parked. Good trip. Would trade again. A+2 points
-
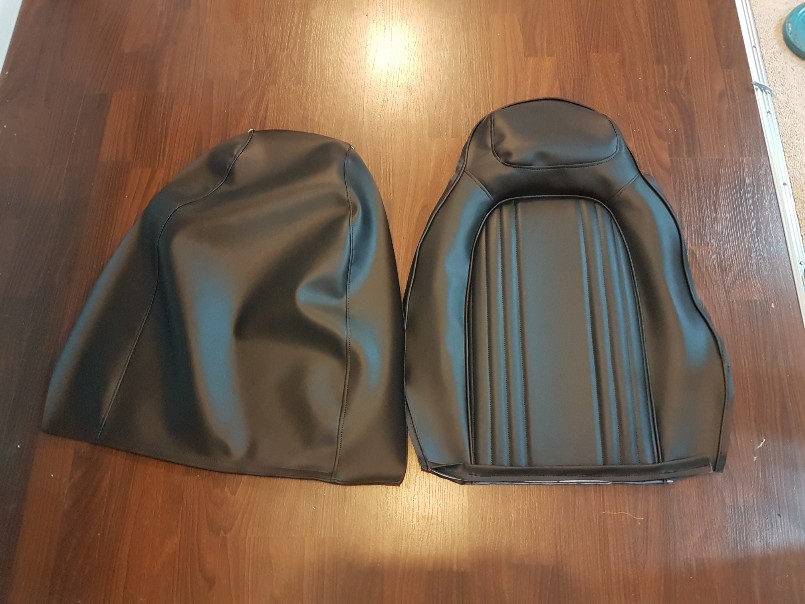
That's the finished product for one of the seats. Defanatly not as easy as I thought. I appreciate the work of pro upholsters. For a first attempt, I think it turned out alright, better then they were before, I think anyway. There's a few loose bits that need to be stretched out, but not sure how to do it without taking the cover back off and glueing it down.
2 points
-
I knew you were roofless2 points
-
Don't worry about it mate. Still cleaner than @yoeddynzs tank1 point
-
Highlanders should be epic tonite1 point
-
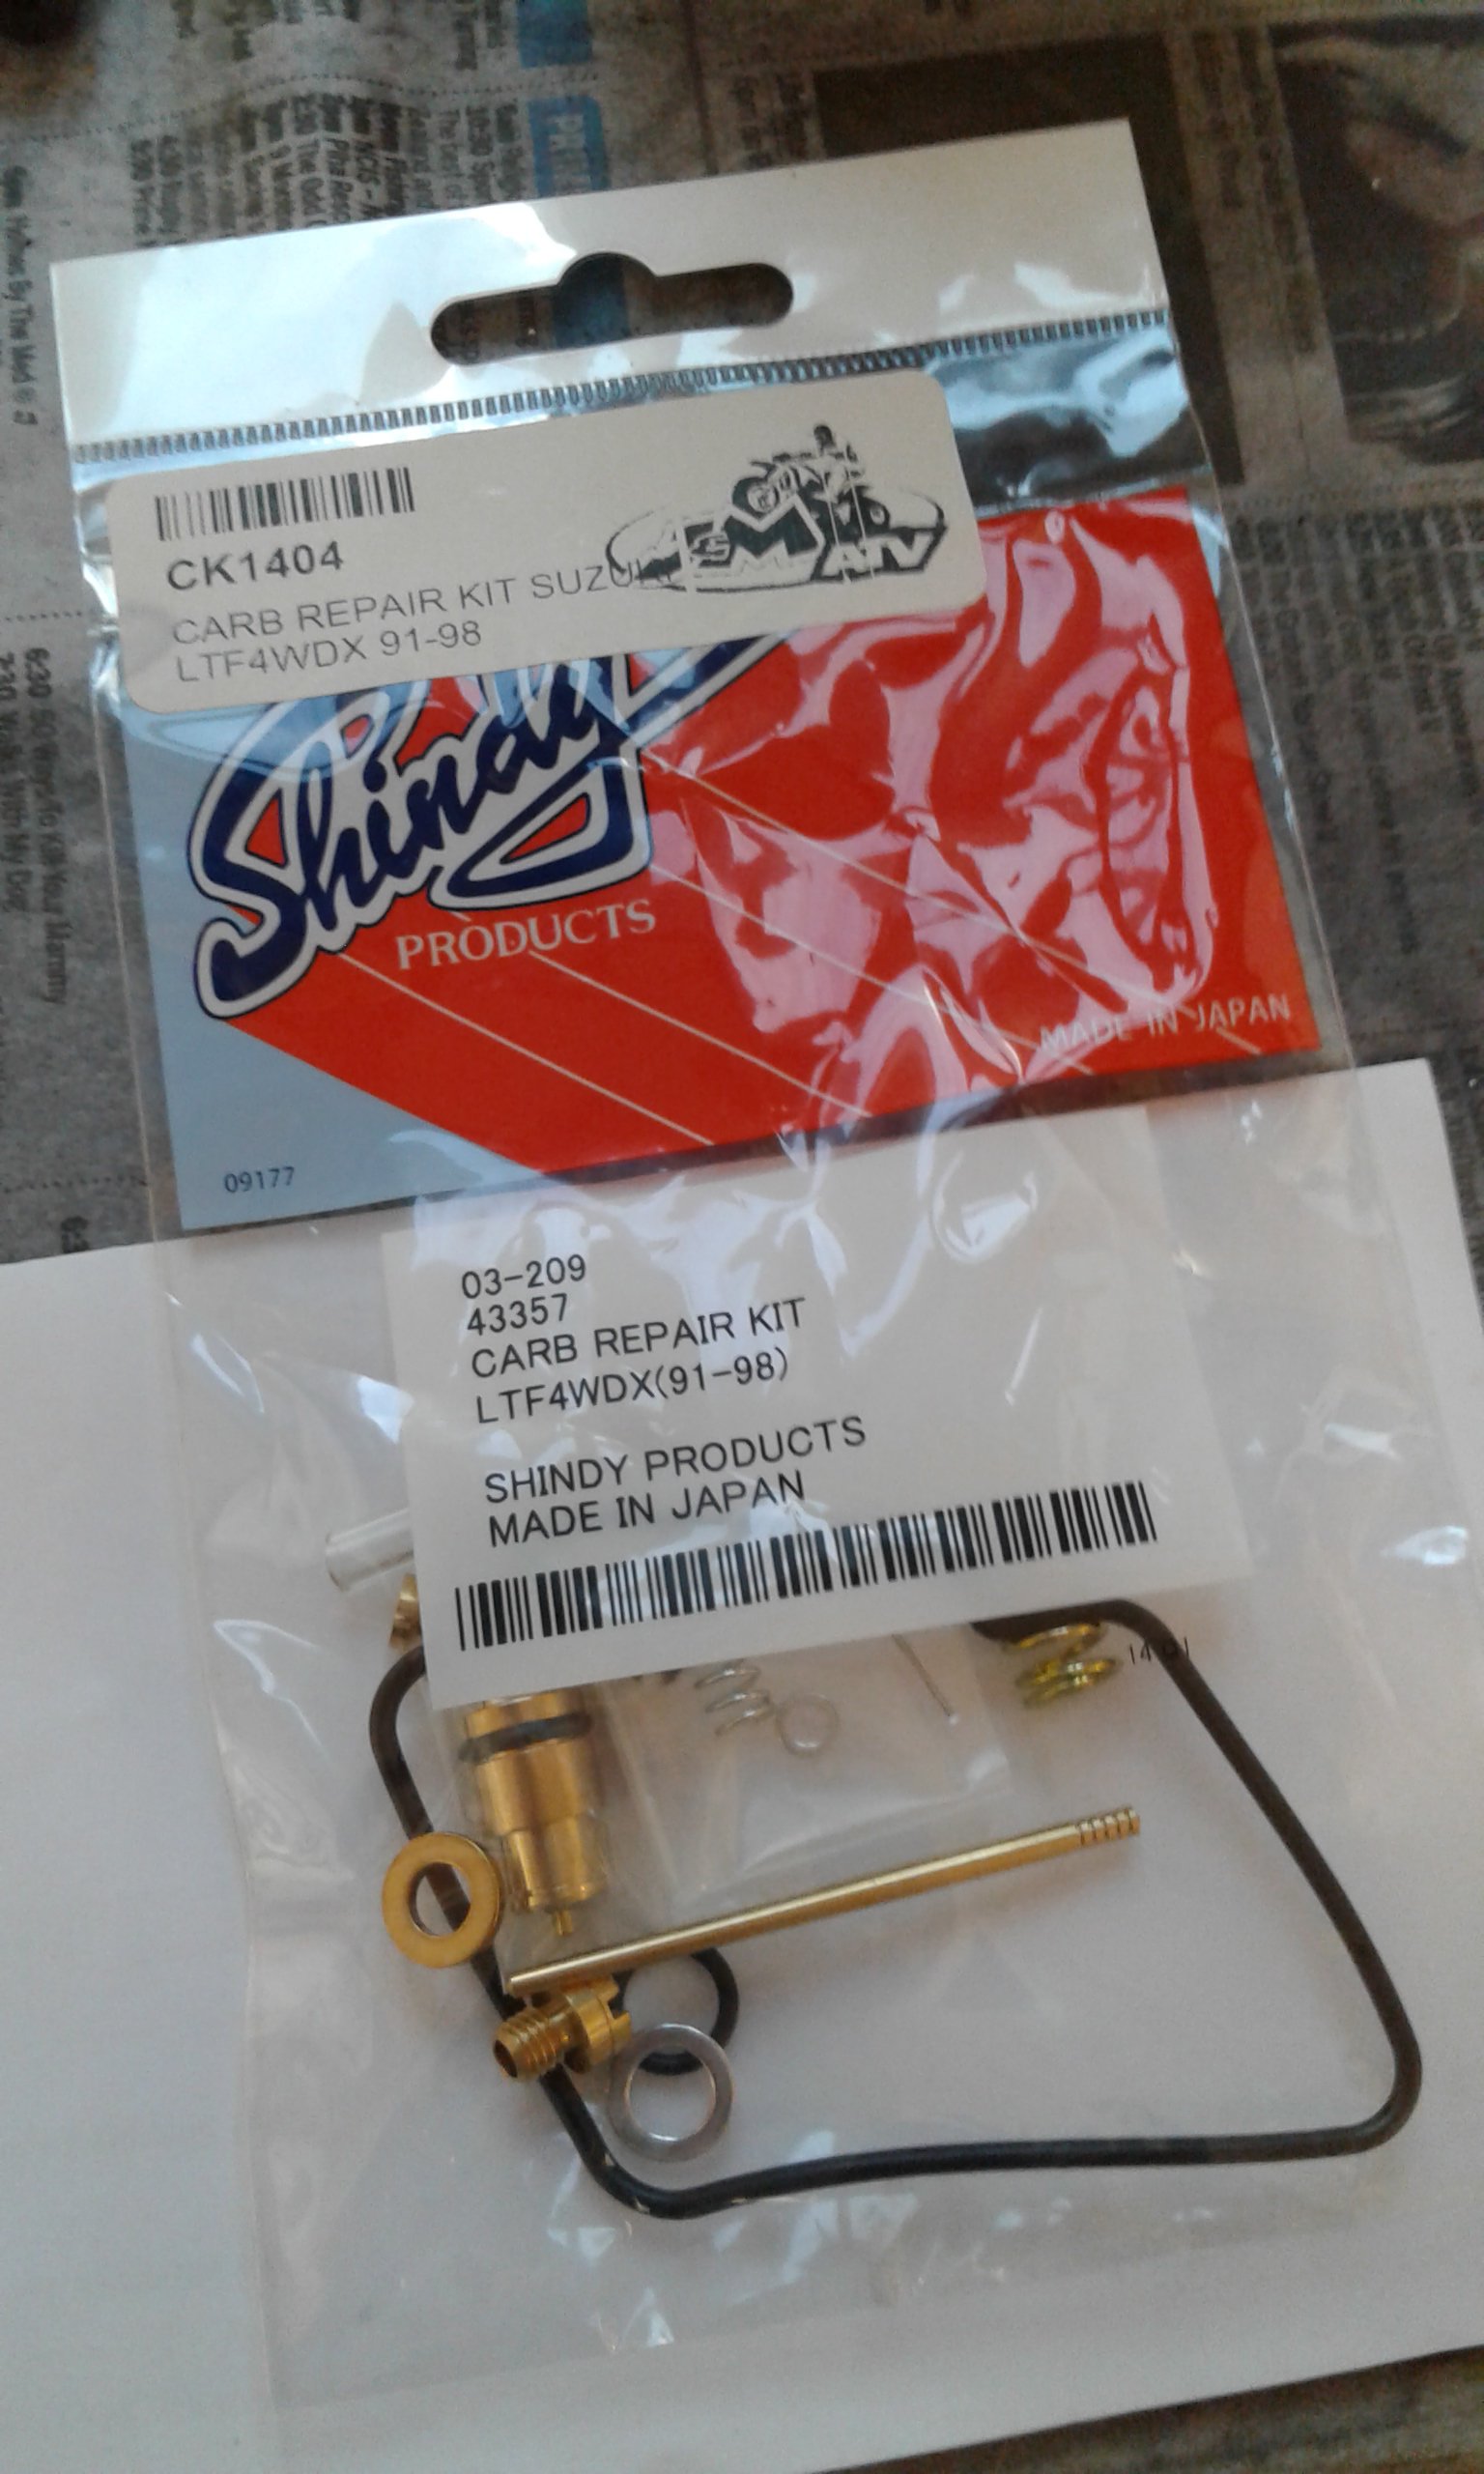
Got a carb rebuild kit . Found bits in the carb that don't look too good !!!. So put it all together . She started but now the vacuum pump isn't working . I've ordered a cheap replacement .
1 point
-
Highlands was fucking rad today. The pit lane was open and all the drivers were hanging by their cars happy to chat. Tomorrow should be epic.1 point
-
Someone once accused me of being a bush mechanic... I wonder why I went full barry today and made up a vent for the tank. I was trying to work out a way of suspending a hose at the highest point of the tank that was actually going to be achievable. I then realized the tank is not usable as it sits so its as good as fucked so I cant fuck it more right? I drilled a bolt and soldered a piece of brake line in the head, ground and filed down the end so the vent hose would fit and bolted/epoxied it in. Soldered it up, I did it three times in the end, this is the first or second attempt. I didnt have flux so just heaps of thick electronic solder. seemed to hold ok when I dropped it and pried off it I then epoxied a washer onto the bolt and tied a handy bin string to it to pull it through. I did put some expoxy on the washer facing the tank in a attempt to seal it if it isnt perfectly flat. I eyeballed the length of the hard line and it turned out pretty good. There is the ugliness from the outside, it should clear the floor (hopefully) Yes it is rough and a bit shit but you can see at the top of the tank where the sealant didn't quite stick/I didnt get all the rust out, so I am sort of expecting it to fail again at a inconvenient moment but I'll take a gamble after all that work and don't want to spend more money Hindsight says I should of found a s/h tankor gone for a new rock auto one and put it in the van (I found one for cheaper than the por15 kit AFTER I purchased the kit) and not bothered with all this mucking around for a potentially still crappy fuel tank. There is a reason I was given a estimate of 300-400 to clean and seal the tank. Its quite a lot of effort! I think the por15 kit is more intended for the older less baffled carby tanks1 point
-
Mean as hardpark bey1 point
-
I love Zephyrs. Ones with V8's even more so.1 point
-
saving every piece or Rimu that isint full of holes. there are some really nice pieces of timber and I'll use them for something. the tidal creek is about 300m away down the end of the road. I dunno about floor levels and mininum heights, is never come up in discussions. as I say the only thing regarding floor heights that we have had to deal with had been to do with distance from the dirt to the underside if the floor .1 point
-
I wholeheartedly concur.. and she's a good looking example to boot.1 point
-
1 point
-
open plan living. 2017-04-07_06-12-59 by sheepers, on Flickr 2017-04-07_06-13-08 by sheepers, on Flickr 2017-04-07_06-13-19 by sheepers, on Flickr1 point
-
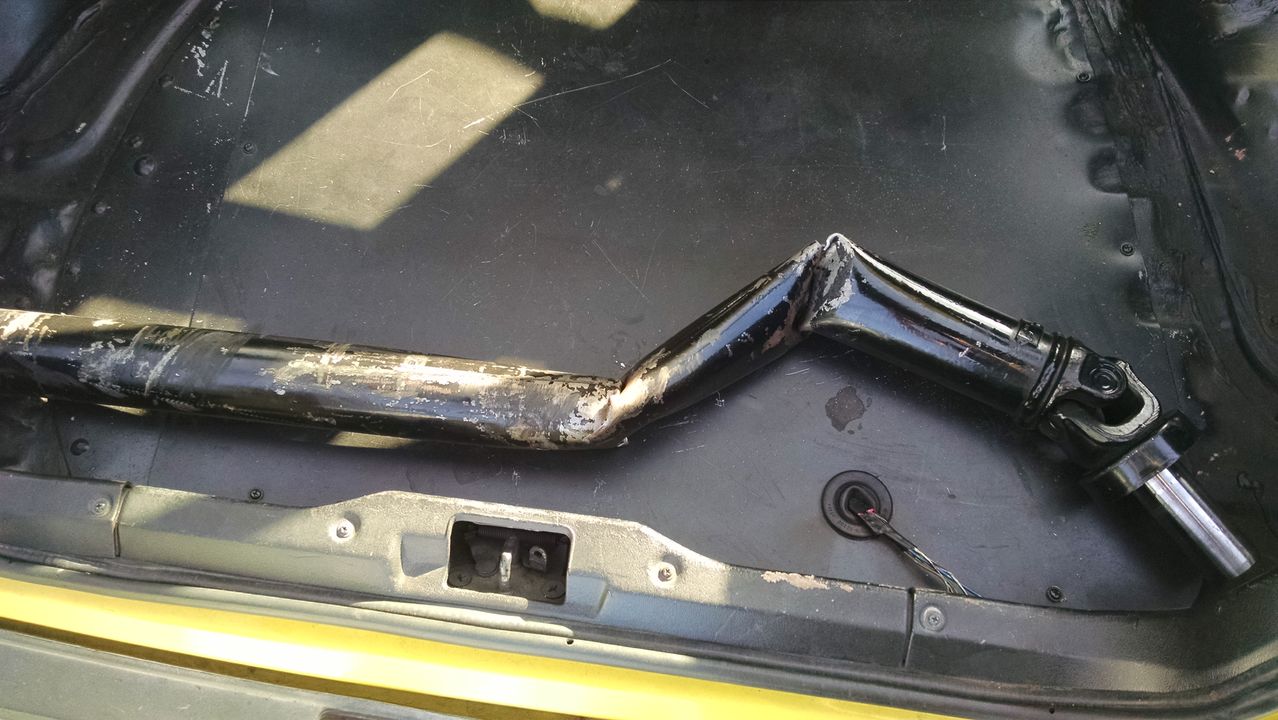
Mine at a slightly higher speed, driveshaft was a pretzel. Very glad for loop...
1 point
-
Scratch built velocity stack. There are easier ways of doing this...but I only had a scrap chunk of aluminum at hand. Yes I know you can buy these for very little money off trademe...but where's the fun in that?1 point
-
So head is taking a big longer than initially planned as a sensor on the CNC that was being used to port the head died so next week sometime I am expecting to receive the head so can finally piece it all together! Today to make me feel like things were still progressing I bolted up the flywheel... yeah. Exciting... I also made sure I put the sandwich plate on too as I have done it a couple of times where I bolted on the gearbox/flywheel/clutch to find I forgot to do it and have also seen a couple of others do it too Socket makes a great flywheel stopper too. Think the flywheel is 3.8kg's. Probably not ideal for a street car, but this won't be a daily so will still be fun when I get it out on the occasions. After driving the new spiggot bearing into place I thought it would be best to actually see how much contact was made on the input shaft. I just put vivid on the end of the shaft, slipped the box on and gave it a few rotations Looks like I drove the bearing in a bit too much... I whipped everything off and pulled the bearing out a bit. No need to recheck now, a few mm would have done the job I have chosen to go with SSR MK2 feet too. If you know of any, let me know! Thinking of going 8J in the rear and 6.5J in the front Mingling //oldschool.co.nz/index.php?/topic/52401-pbaines-1971-toyota-corolla-ke25/&page=21 point
-
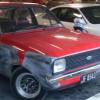
my mk2 escort shes not mint but runs well and has been a reliable daily driver for the 5 or so months ive owned it there is a patch of rust bubbling that I think ill need cut out and welded back up for next wof in November im hoping to sand it back and prep for paint early next year so if anyone has any tips that would be very helpful sometime next year I would also like to put a 1600 in it but im happy with the 1300 for now will post more pics and what not when shit gets done its a slow process tho lol Discussion Thread //oldschool.co.nz/index.php?/topic/40977-1979-ford-escort/1 point
-
Hey everyone. Had a few drives in the Cortina over the last few months and ran in to some trouble with my clutch gearbox. It was making noise when I put my foot on the clutch when stopped but alright when driving. So for the last 8-9 weeks I have been trying to fix this to no avail. I also noticed that when I would be driving at 90 - 100 kph it would be revving really high and I really missed that 5th gear. So on my 6th time taking out the gearbox I got grumpy and decided that if this was coming out again it isn't going back in without a upgrade. I did a bit of research on what I could replace it with and I ended up buying a t50 Toyota 5 speed to put in. At the moment I am making the adaptor for the bell housing to box so will keep you updated as I plod on with that. So with the car being out of commission I bought some wheels and made a centre console up for around the gear stick. here's some pics.1 point
-
do they know the type of cars that we have1 point
-
I've been emailing the local owner of Burgerfuel and the national marketing manager this week and they're really Keen for a good display of cars. We'll get preferential parking next to the restaurant and can park a couple of cars on the footpath by the entrance too. They've offered to put us to the front of the line for burgers and everyone will get a free full meal (burger, fries and drink from the fridge). So we get fed before the expected 150+ local punters. I'm Keen to get a good turnout for this one, so get the word out!1 point
-
Been one of those months that I have seemed to be playing catchup the whole time. Works flatout crazy but seems to be finally settling down as the Easter break approaches. The few breaks from work flashed by. One was a pretty cool car show we took the Buick to “Timaru Caroline Bay Rock n Hop” and the other was a mission to the docks to collect the 50 buick grille and other parts that landed from the states. Flockie has been busy as well but lately has been able to get back into the project. C-Notching the rear so we can get down nice and low. A few pics of the progress so far: Note the forum seems to be resizing the images weird. Making them squished in so if you want a better look click the images to see it in the correct proportions. Initial cuts to the frame and boot floor. Check out the gravel that fell out of the rails that piled up in the inner bottom wheel tub And thats after a bit of a cleanup.. Moser Diff with Wilwood break mockup to check clearances & how much of a notch is needed. Few more cuts made for the top links to fit etc. More cuts are needed to get the diff to sit where we need it air out/lowered. Flockie got his plasma cutter out and made up the plates needed for the C-Notch then tacked in place. As you can tell from this pic to the above a lot was cut out to accommodate the new rails. The angles are bent to keep the original bump stops that we will be reusing. Process of welding it all together started along with the internal braces. First side done! And both sides done. Again the forum is messing with images squishing them. so click em to see the images in correct proportions. Im pretty happy with how its turned out. Next will be the other ridetech triangulated four link bars. Only issue and it isn’t a biggie is the place i had planed to put the airtank & compressors etc was the floor that the c-notch has now invaded. Tank may still fit in the space not sure yet but im thinking it will need to be moved or parcel tray massaged what could be more of a pain than its worth.1 point
-
You're welcome. What can possibly go wrong? (Enter drunk antics with a motorized shopping trolley). Lol at the potato sack race suits, Also get one of those kids helmets that look like a water melon. Other option is dress them as Randy Campbell.1 point
-
Well, been a while. Much has happened with no photos taken. Man i'm awesome. -Have Willwoods in the front, man what a difference! -Have an alloy radiator in the front -Have a new windscreen as the one in it decided to shatter to pieces on the way home from Toyotafest at Hampton downs. 6 hour drive with A/C on full blast, myself and my girlfriend wore helmets the whole time with bugs exploding on our helmets. Cheers to the OS boys who stopped on the way back! I've got some photos somewhere that I will add sometime. These photos are courtesy of.. ahh..... 0MEGAH|HAGEM0 ? just did some cropping and visual edits for aesthetics. Toyotafest 2017 @ Hampton downs. Super happy with the car, once the narrow tyres warmed up it was a weapon on the track! Got it sideways a few times with a grin ear to ear. More track days are required. Due to come -Vertex body kit which will have to be painted1 point
-
Made a bit more progress on this thing. Fired up the car and noticed fuel leaking out of one of the stock injectors. Decided this was a good time to replace them. I scored some 550CC side injectors for a decent price, these are the newer style side feeds so you need an adapter kit to fit them to the early model Z32s. I ordered a kit online then threw them in. Stripped off plenum, removed injectors and fuel rails. Installed new injectors and adapter kits in the rails and then put back on the engine. As the injectors are the newer style I also had to replace the factory Z32 injector plugs with new style ones. I scored a second hand set cut from an old nissan loom and wired in. Thes plugs are so much nicer than the original Z32 ones which are a bitch to unplug and crack when you look at them. Plenum and other hardware reinstalled Due to new larger injectors the ECU needs to be modified to suit. You can socket the factory ECU and burn a new chip for it but I decided to go with the Nistune solution. Once your factory ECU is socketed you simply plug it in and have a fully programmable ECU. You can see the Nistune chip plugged in to the socket, you need to solder a few additional power wires and its sorted. Nistune are always adding functionality to their system. They now include features like flexfuel/e85 compatability, launch control and boost by gear etc. You simply tune via the laptop plugged into the factory nissan consult port. Thay have a pretty comprehensive software package to go along with it. Ready to go back in the car. Then its a case of firing up the laptop, using the resize injector feature in the software to enter the new injector size and you are away. There is additional tuning required to some settings to get idle and mixtures completely correct but the car fired up fine after the resize was done. Installed an Innovative MTX-L wideband to try and stop me turning the engine to flames I also installed a new alloy radiator as the old stock one I had found was pretty sketchy. Had to make up some new top mounting brackets. I also tracked down a factory fan shroud so chucked that on also. I managed to find another rear hatch that had the factory spoiler on it. Its in pretty rough condition but decided to fit it , I think I prefer the look over the wingless version. It will need some tidying up in the future. Still have interior stuff to tidy, front lip to install and lots of tuning to do...1 point
-
Pretty slow progress on the Red Rover. Spent the last few weekends sorting out my daily Rover with new brakes, hub seals and full service. Anyhow, started on rebuilding the front brakes on Red. Old discs were stuffed, very pitted and some of the brake lines were blocked as well as some very leaky hub seals and bad wheel bearings. Started by stripping them all down, big job cleaning it up! So much grime! Great fun removing caliper bolts that haven't come off in who knows how long. This week's job will be rebuilding the calipers and hubs with new seals and bearings. Then hopefully in the weekend installing them all with new rotors, pads and lines. Also been trying to get to the bottom of why it seems to be down on power. Starts and idles fine but very rich and plugs are coming out very black. Replaced a torn diaphragm in one of the carbs but still no luck. Think I will just take it to a carb wizard to sort - I have heard Hitec Motorsports in Dury are good. Any suggestions? Looking forward to bolting nice shinny bits on next weekend. Parts hauler is going well now. Wof passed and running well. Looks massive compared to the little Turbo City.1 point
-
All of the diffs have some kind of issue so the the one with the least slop went in. I also parted with some cash for someone to make a new front piece of the driveshaft and balance it. Been burning around in it today to make sure there are no issues. Gearbox - check Driveshaft vibration - check Diff - hmmmm. I'll take some bananas Front end - not so good I pulled the front left apart and the outer wheel bearing has decided to shit the bed. Same bearing as 80 series cruiser kingpins and the 12 roller version that I have is prone to dying. Tomorrow is Taranaki anniversary so no shops open. I'll try and get some overnight parts from Japan from Auckland. Leaving for chch Friday with my 2 yr old son. Don't think he will be that keen on sitting on the side of the road for a day waiting for help. Maybe I should join the aa? No photos of bearings due to me being busy swearing at the fucking thing.1 point
-
Replaced the manky rubber spacer bush in the column shift cross-shaft linkage with a short piece of heater hose. Hopefully this will prevent it falling out again. Also got an original brochure from the UK ebay. Quality First - nice to know. Moore power!1 point
-
The things you young fellas do to discover a new high1 point
-
yeah, put your safety nostrils on1 point
-
My friend welded up what i had tacked up with the arc so I had a go at doing the tip/bit that sticks out of the bumper with the arc. It started off well then turned to shit. I ended up smacking a long bit of pipe on and it mostly behaved, I can trim/cut the tip later but it'll probably stay like it is. I thought I'd check out the fuel pump as the fuel was aerating/smelled shit. It had a plastic emergency cap on the fuel filler and I think the car has sat/not been driven/had a few owners for the last few years. The tank was full of shit and the pump was rusty and the outlet had some brown shit in it. I'm glad I have just chucked a new fuel filter in this. I may have to get another one. I went nuts with vinegar/baking soda and the hose and got quite a bit of shit out It took 3 rinses worth of fuel for the cloudiness/shit to go away. I stole the pump out of the beagle and chucked that in, Hopefully it still works and is good enough. I'm quite glad I decided to drop the tank and check the pump. I'm also surprised it started and ran on this shitty fuel. The old fuel was disposed of responsibly...1 point
-
Took possession of my new donk the other weekend. Acquired this as part of the deal I did on the Hemi engine. It was on TM under Listing #: 1095158136 This will work way better for me than the other motor ... simpler, cheaper and should not break my ching ching gearbox. Bring back the old days I say ... 4BBL's, 4 speeds and 4.11 geared arse ends.1 point
-
Ahh - finally! 8 or more weeks ago I ordered some axles. Took the long way to get them to NZ by using surface freight instead of air. Worked out cheaper this way for me. They still cost me close to $600 kiwi (each) when all was said and done. They are beauties though. Currie 1541H 35 Spline Big Bearing. I ordered special HD retainers to allow me to run a fabricated disc brake system. I have chosen to run this size of stuff due to owning a couple of Strange Nodular Iron race heads left over from previous times. I was going to sell them then thought wtf - run them. I work with Hilux axles most weeks. This is the difference between the two. I considered making my own but the challenge was finding a suitable core. Its hard trying to locate a shaft big enuff to take 35 Splines that is not attached to a big fuck off truck hub at the other end. The problem with this is that by the time you turn it down to a car size you are in the soft portion of the axle - so ya fucked. Anyway ... progress.1 point
-
so ive finally started the build of my engine, have got main bearings big ends, full gasket and seal kit timing gear kit my crank got polished, new gudgen pin bushes in the pistons new piston rings my head is off to get skimmed and the valves re seated so progress is happening I painted the block and will paint the head when I have it back.. super excited cant wait to drive the fucking thing!1 point
-
I found dads old roof rack he had on his mk3 Cortina he had a while ago thought id try it out on the escort! looks pretty cool I might leave it on haha1 point
-
passed warrant today... but will need a few things for next warrant, rear break shoes left front strut, left steering rack boot will work on getting these done soon1 point
-
got it back from the welder the other day so here is some pics and i gave it a wash, off to get a new warrant tomorrow hopefully it will pass haha1 point

.thumb.jpg.b5491dbec1053270a4d99ed376fc2c36.jpg)


This leaderboard is set to Auckland/GMT+12:00