
Leaderboard


Popular Content
Showing content with the highest reputation on 04/02/17 in all areas
-
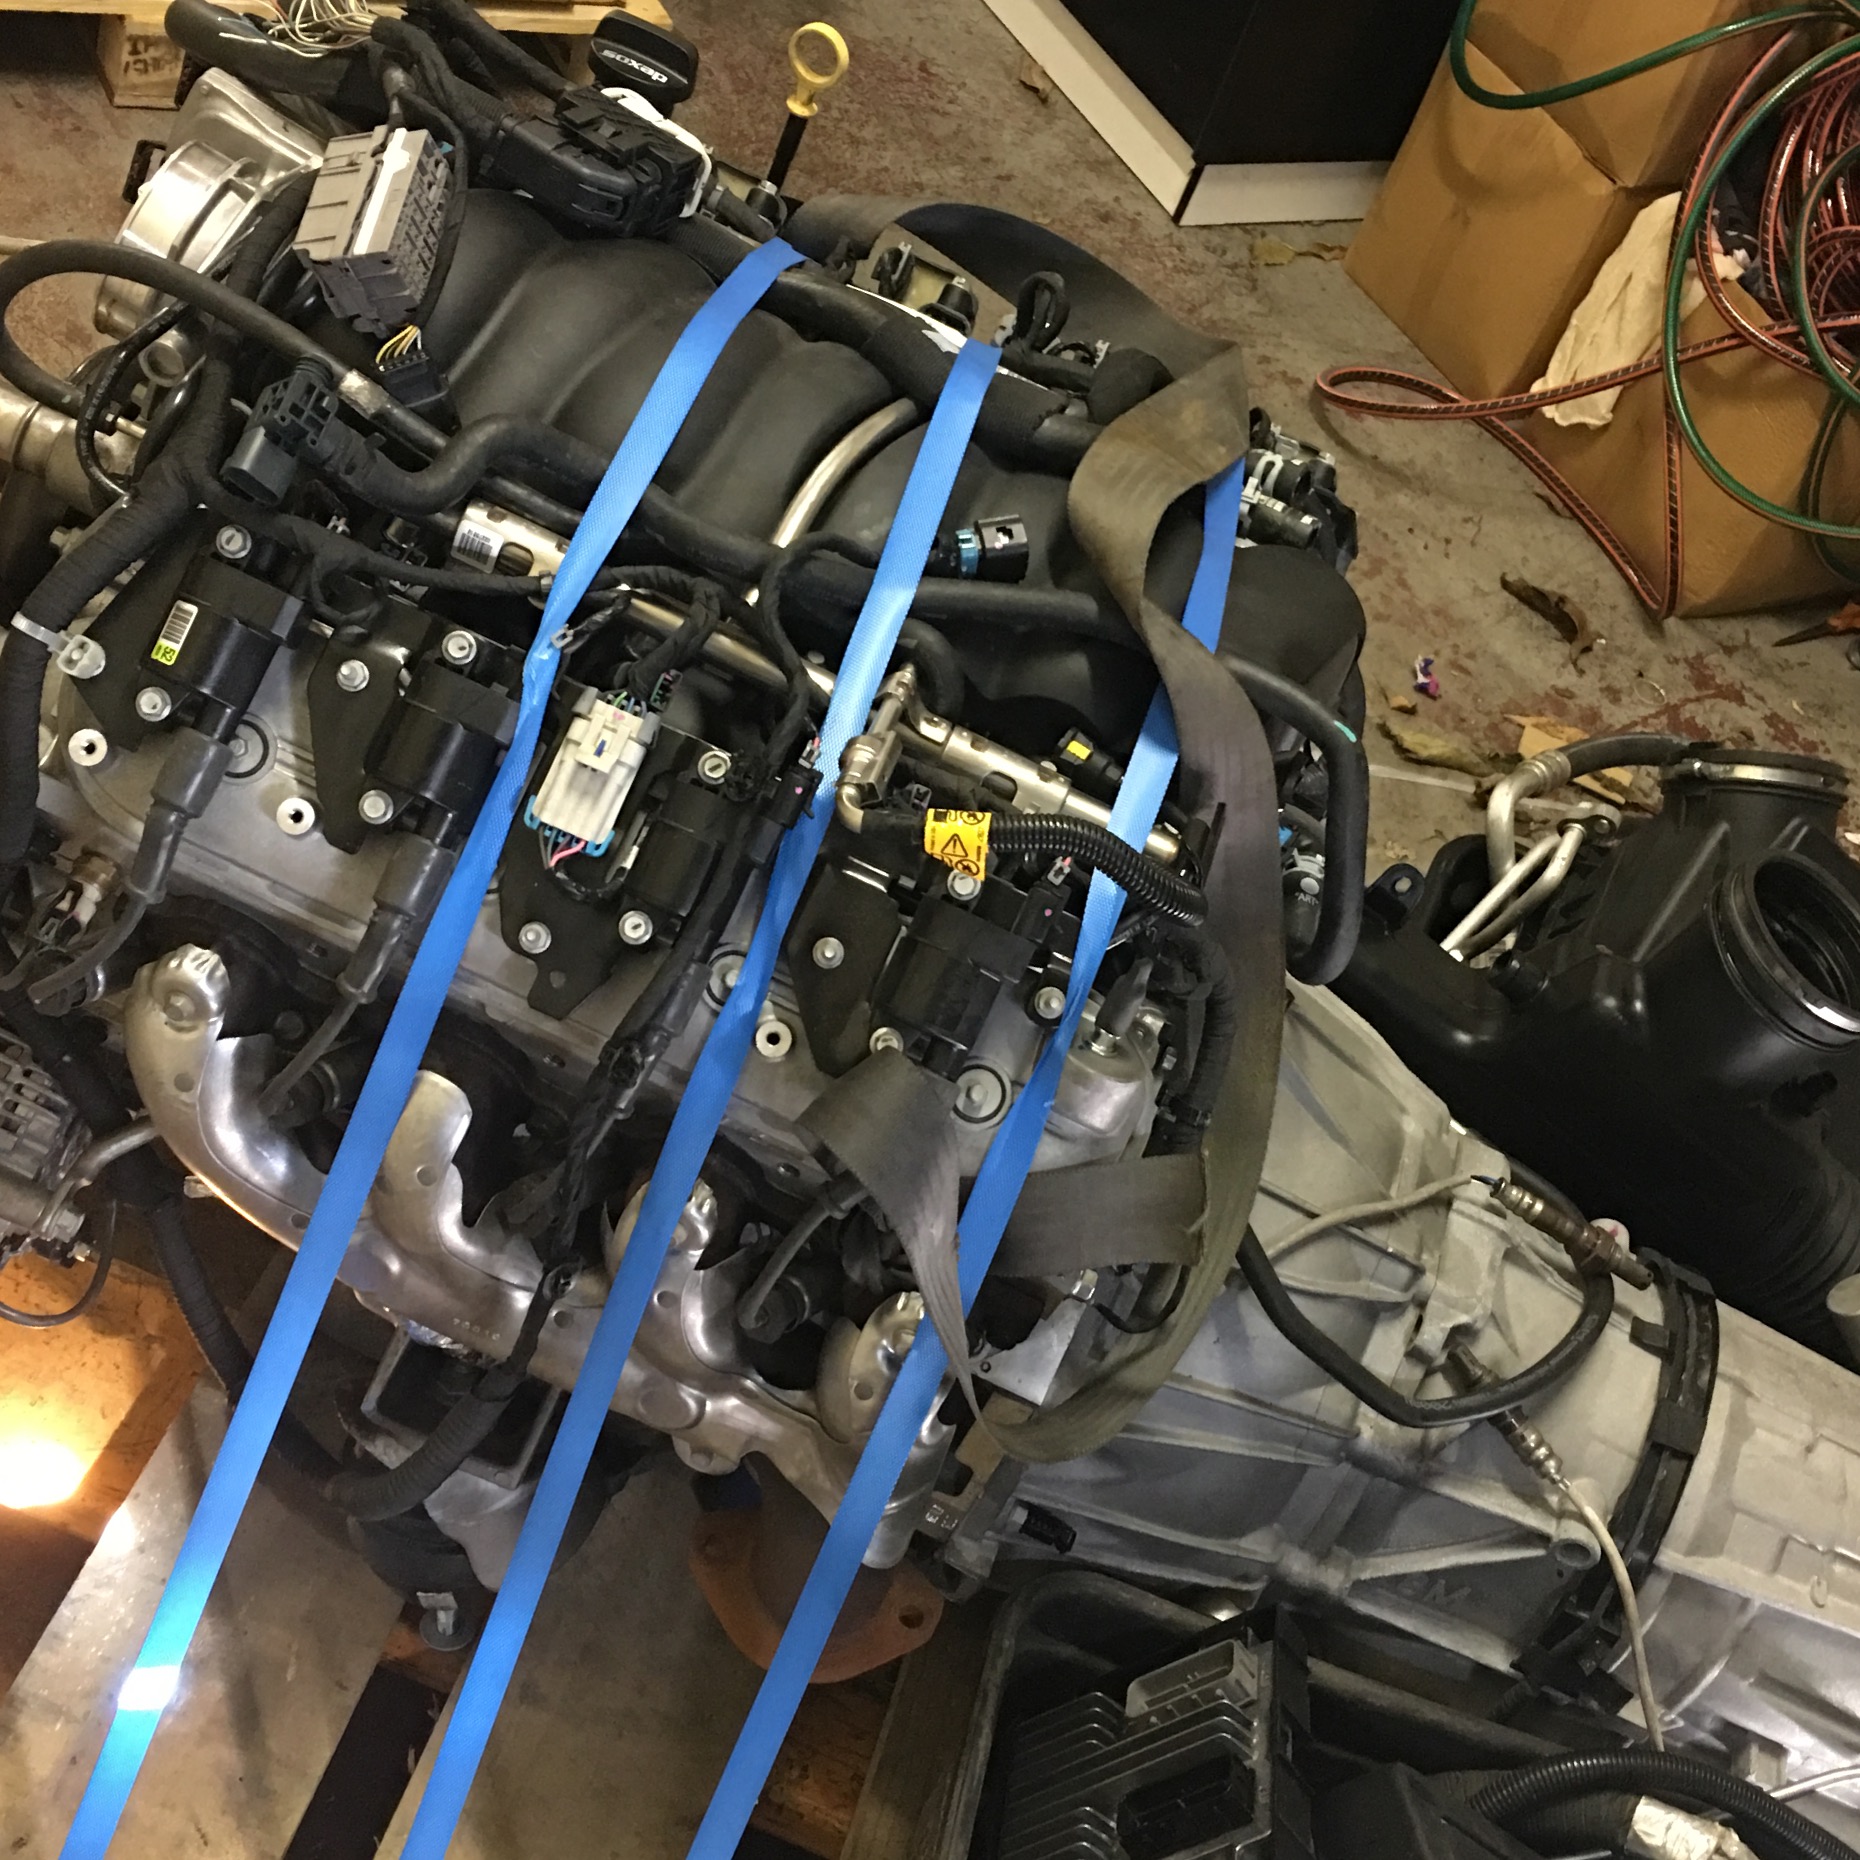
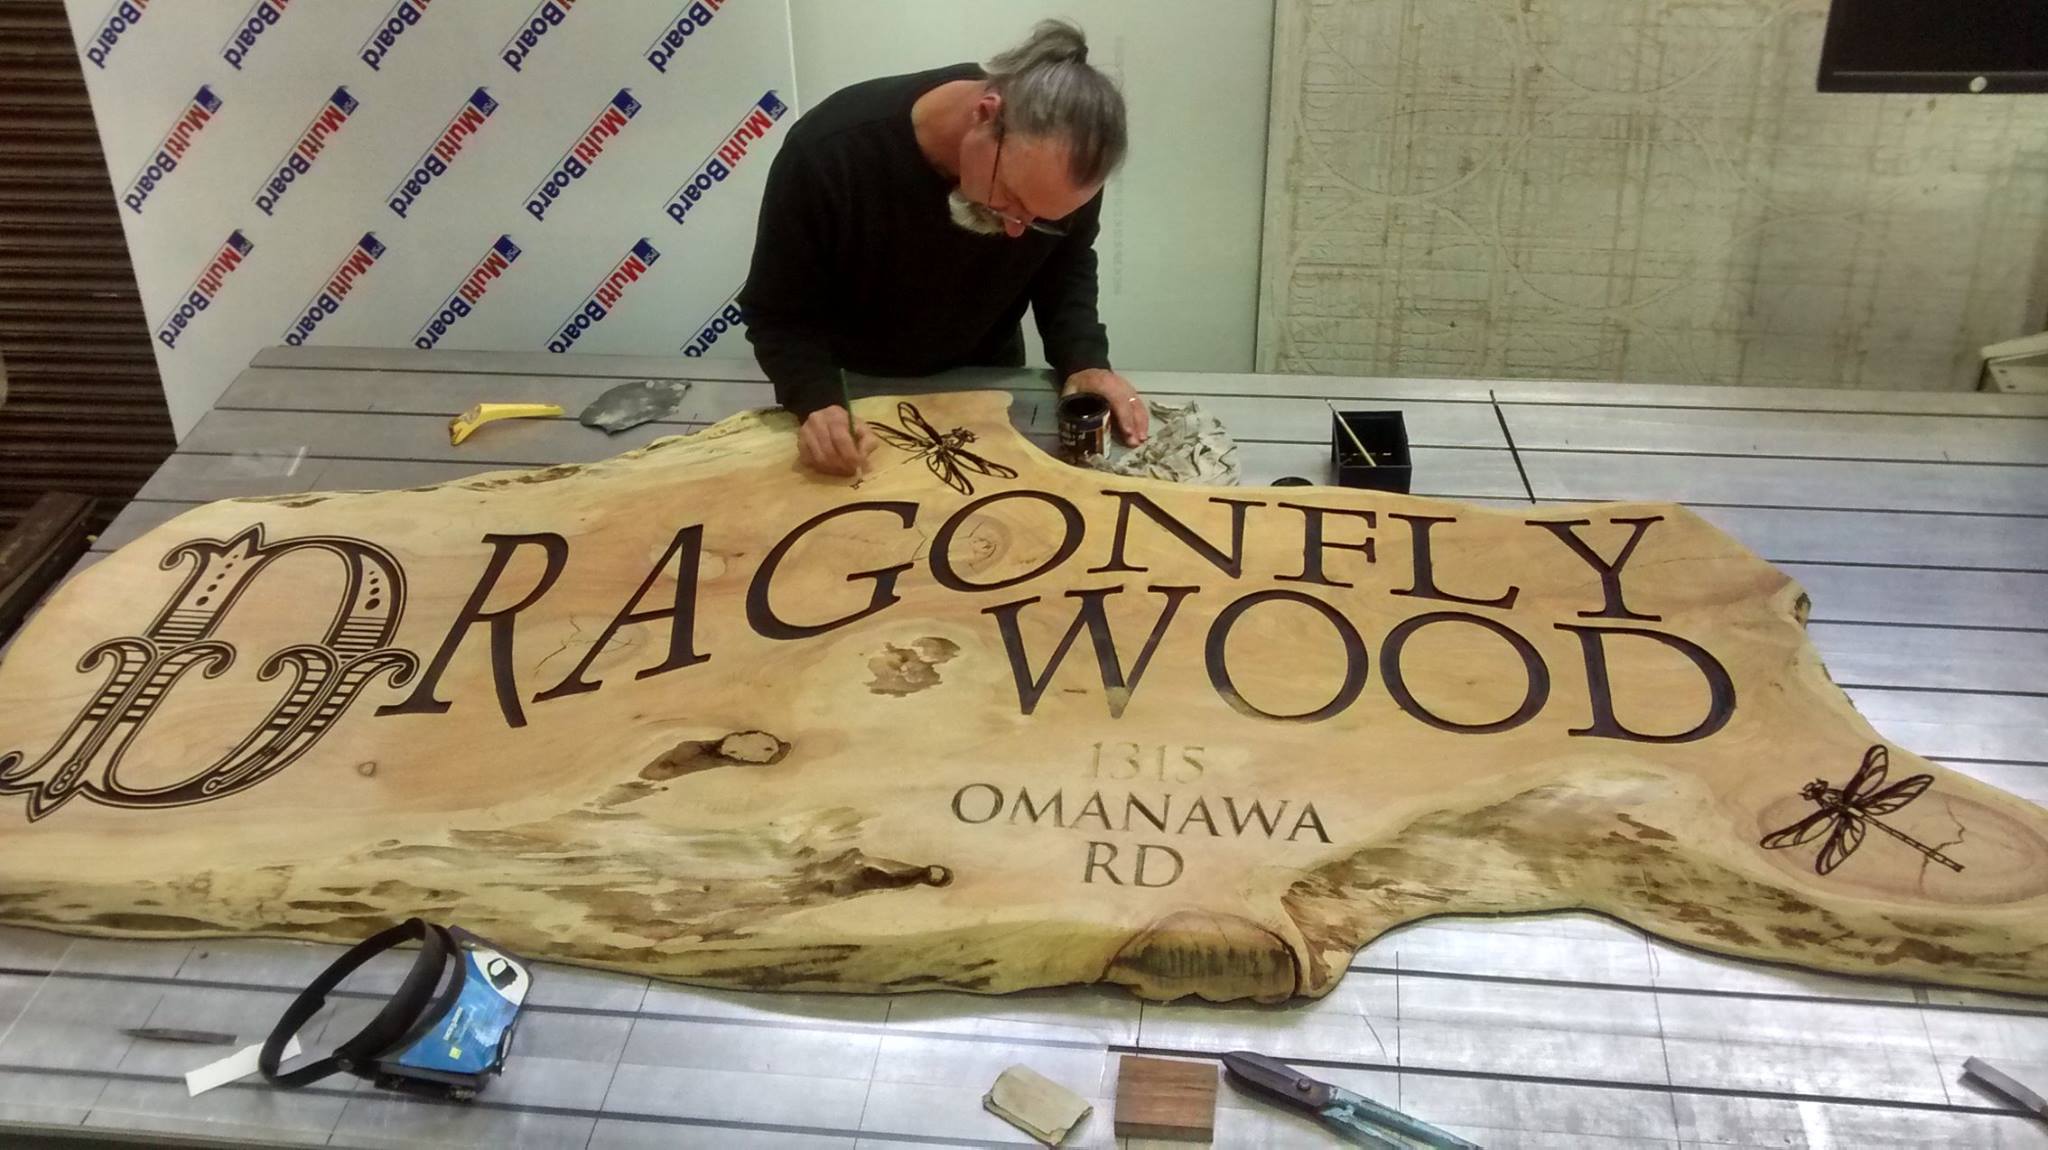
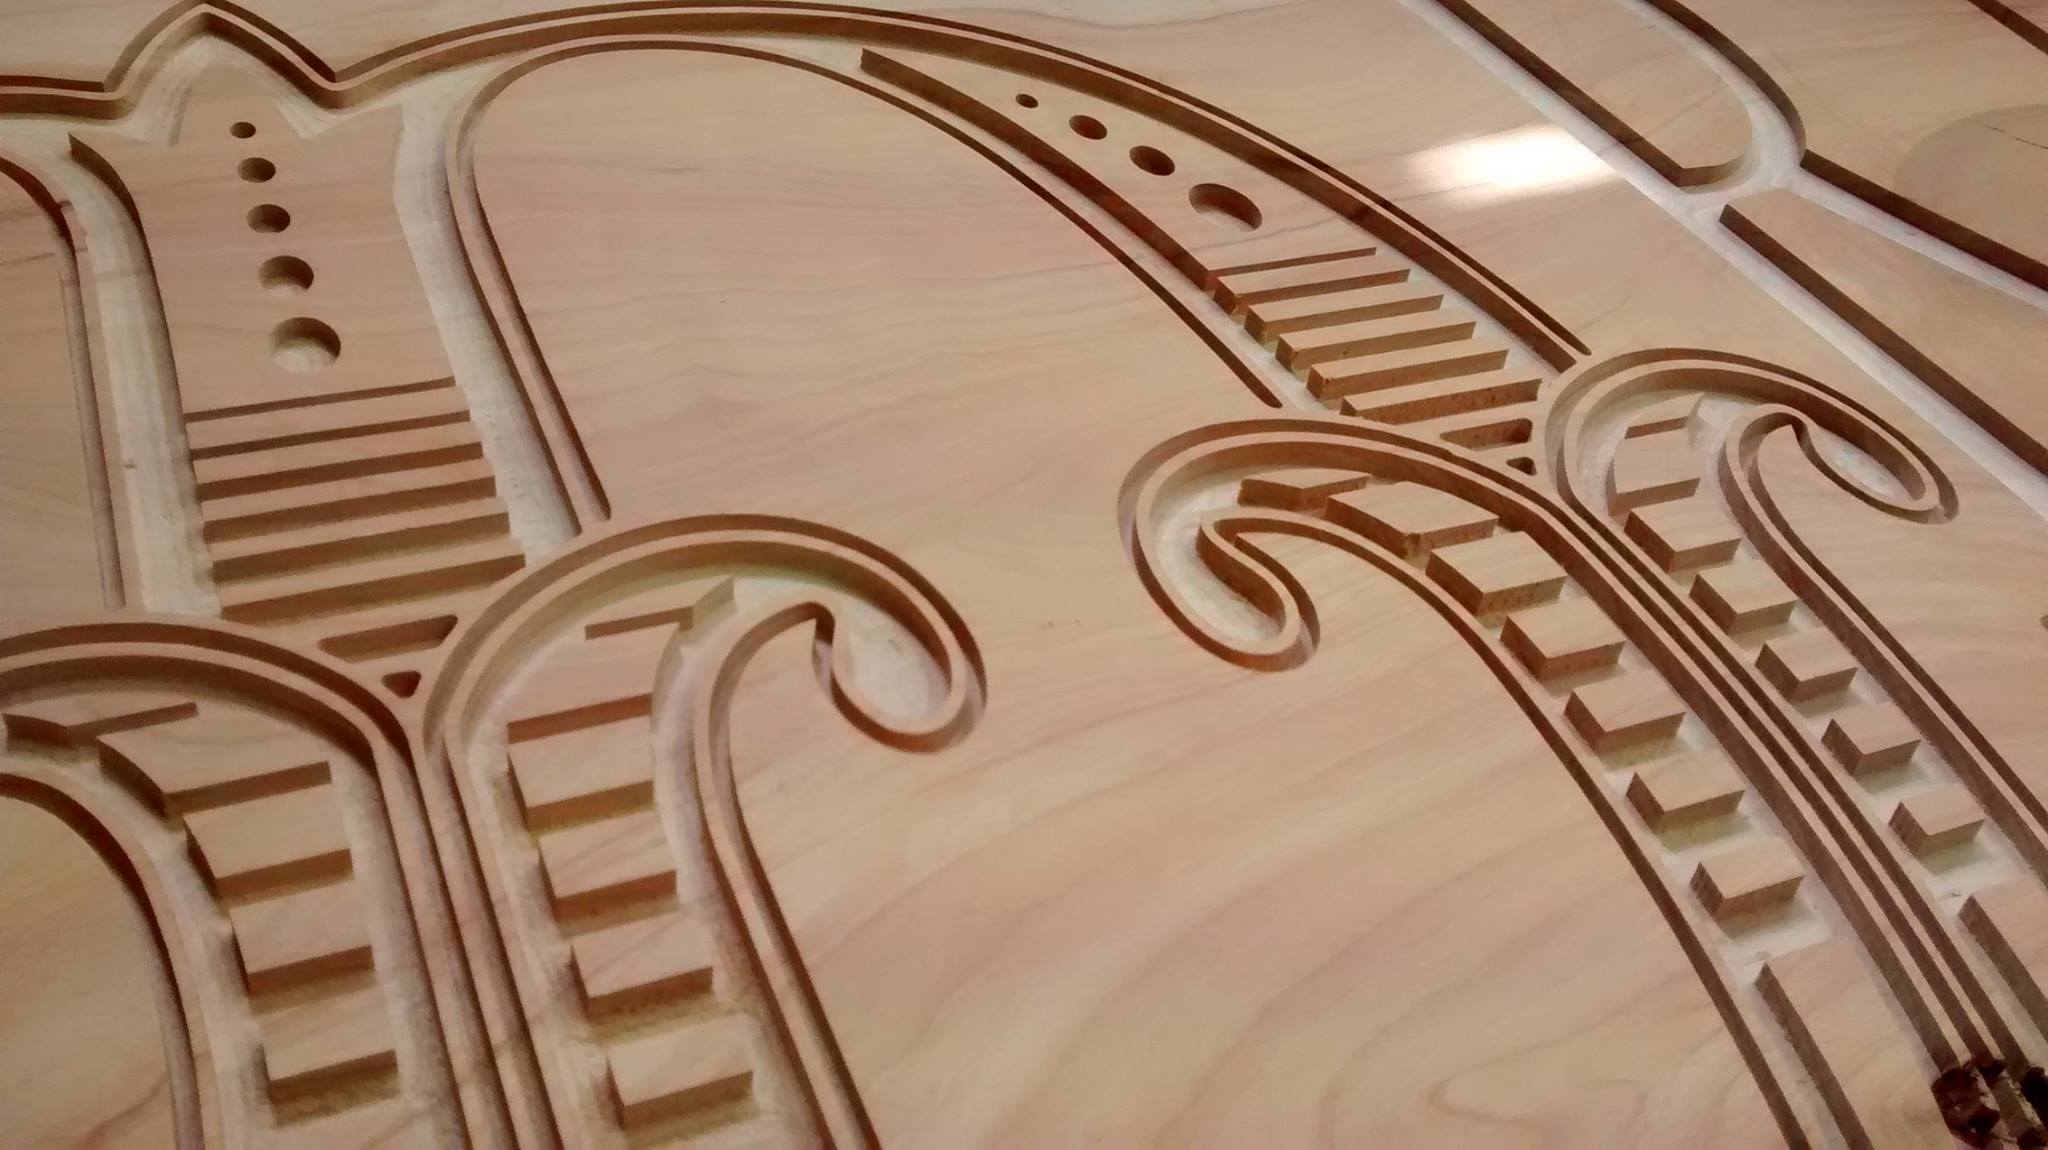
I have been looking around for a while for a new work truck, wanted to go old school and update it to modern running gear and some creature comforts. I didnt have much of an idea but liked the look of older Chev trucks, did some reading and looking and got to this point. Truck will be in the country mid April, it is currently running a 327 and manual gearbox, and pretty much stock apart from that. Plan is to get it complied with existing running gear then modernise a wee bit. I have an LS3 and 6L80 trans and all associated wires and mechanical stuff in my warehouse now (cart before horse) and maybe a front end suspension transplant from a later truck and a diff with a lower ratio. this one will be either a 4.11 or 4.56 ish I believe, so a bit on the highside. While the intention wasn't to start/have another project, Im quite fizzed up about it. Going to keep it stock looking, no fancy wheels or any of that crap. Will get some hand painted signage on it, I want it to look like it was always there.
 16 points
 -
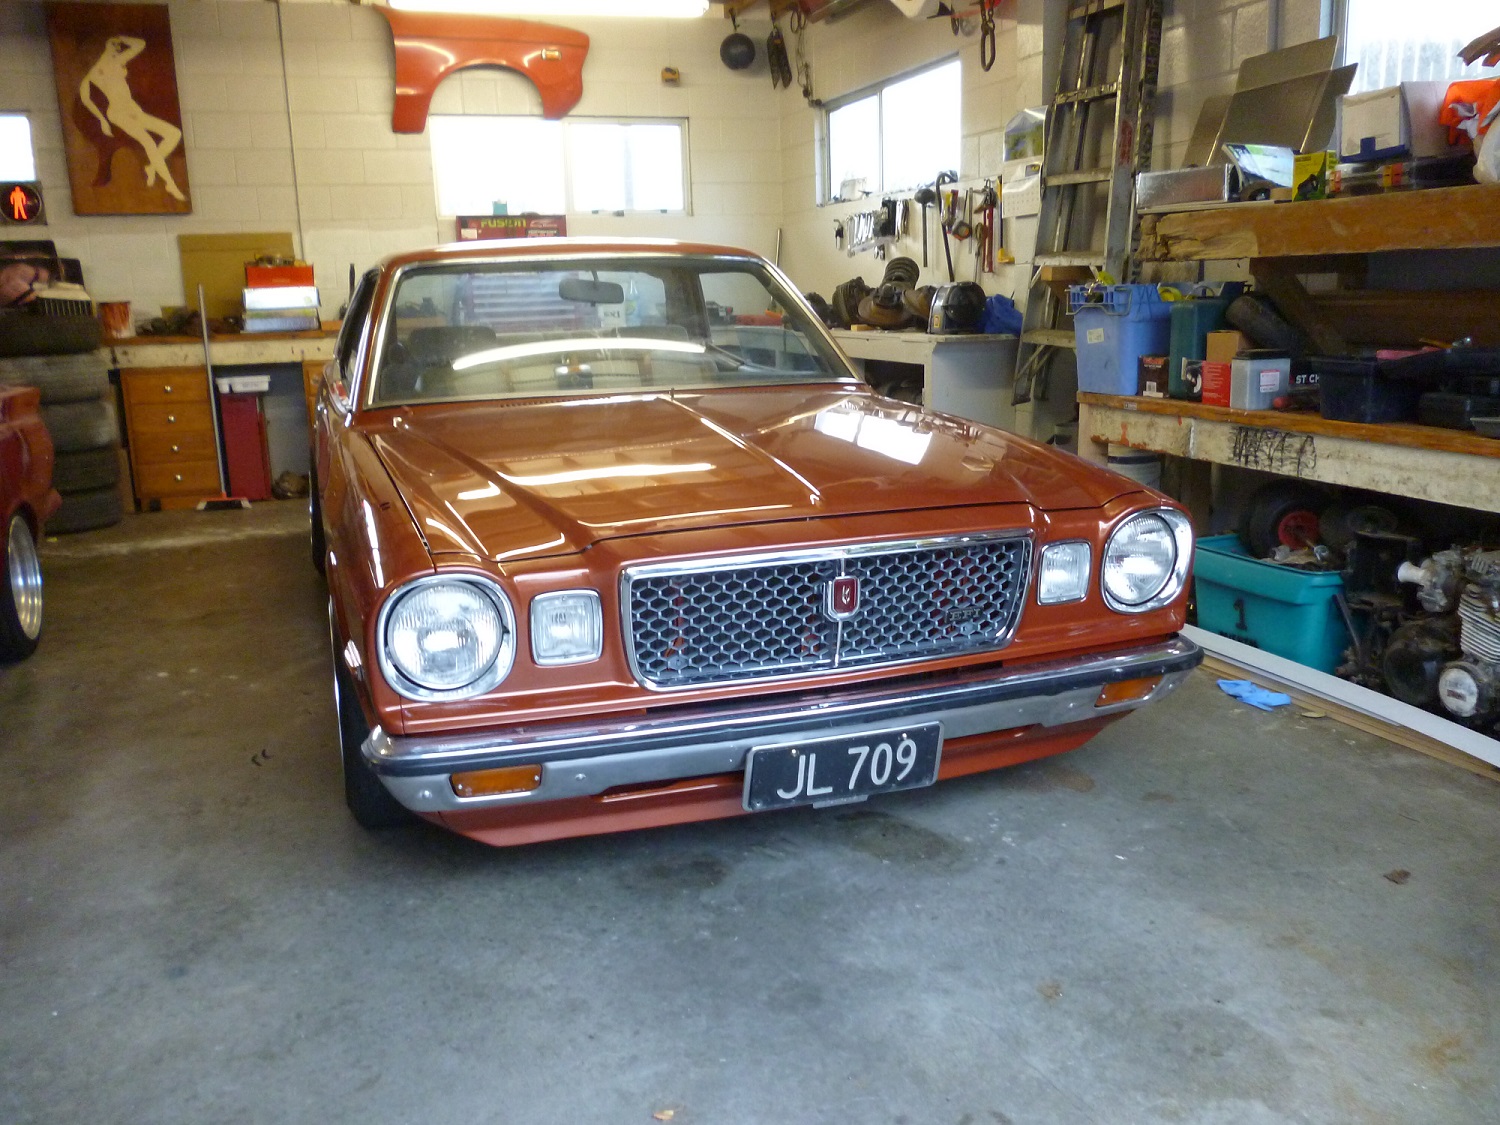
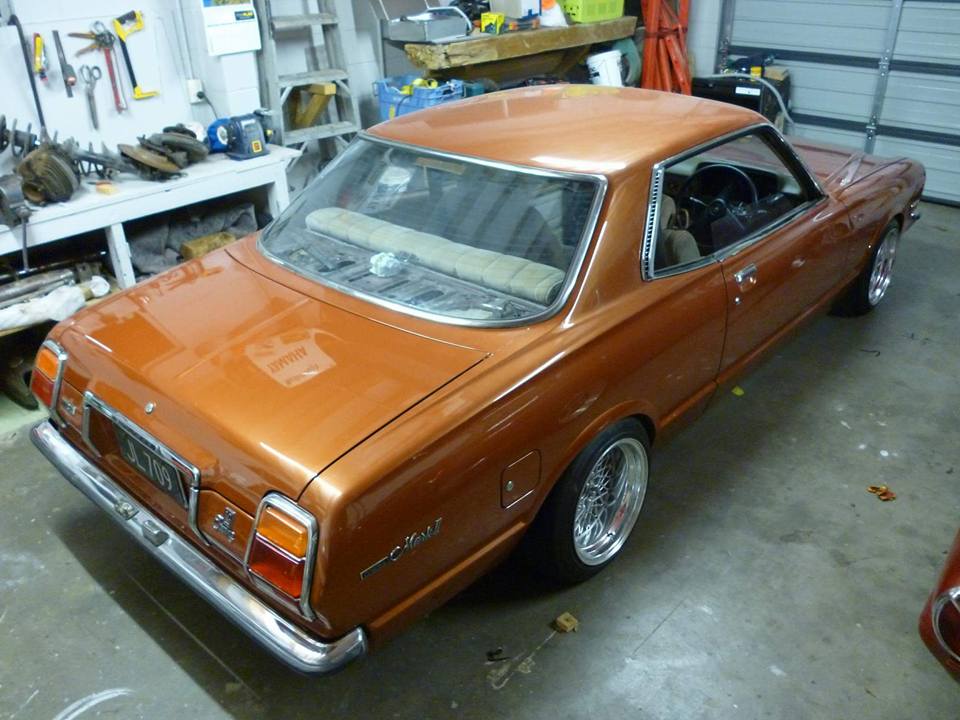
To be honest, I should have cut the springs in half from the get go. I cut the springs for no other reason that to make it more pleasant in the shed to look at until the coilovers go in. The right side of the car is a bit higher than the left, I will probably end up with a height similar to the higher side. Not long until the engine goes in!! I also installed my new valance courtesy of Yahoo Japan. The tape is holding the paint/rust on. I decided on a new one as the one I had previously wasn't the straightest and would require some more. Plus I didn't actually own it...7 points
-
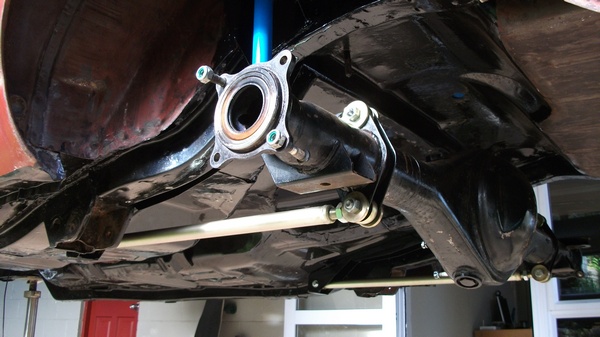
Manged to squeeze in a panhard rod today. may need a few tweaks, but should work. Will leave it half finished till get the coilovers mounted, to make sure everything works together bit hectic under there, yep.5 points
-
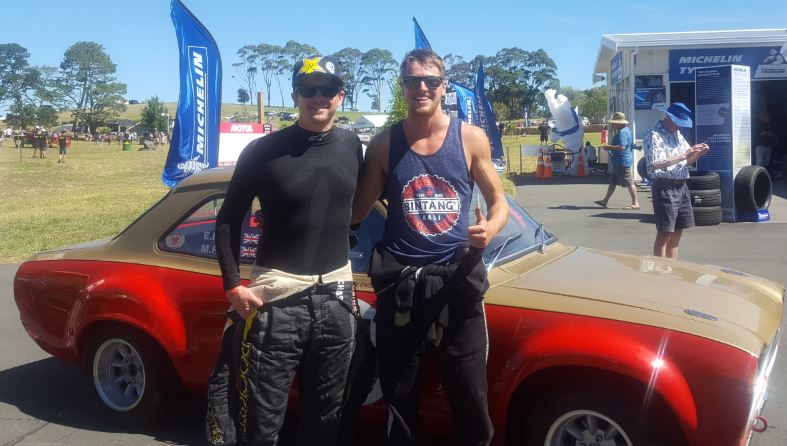
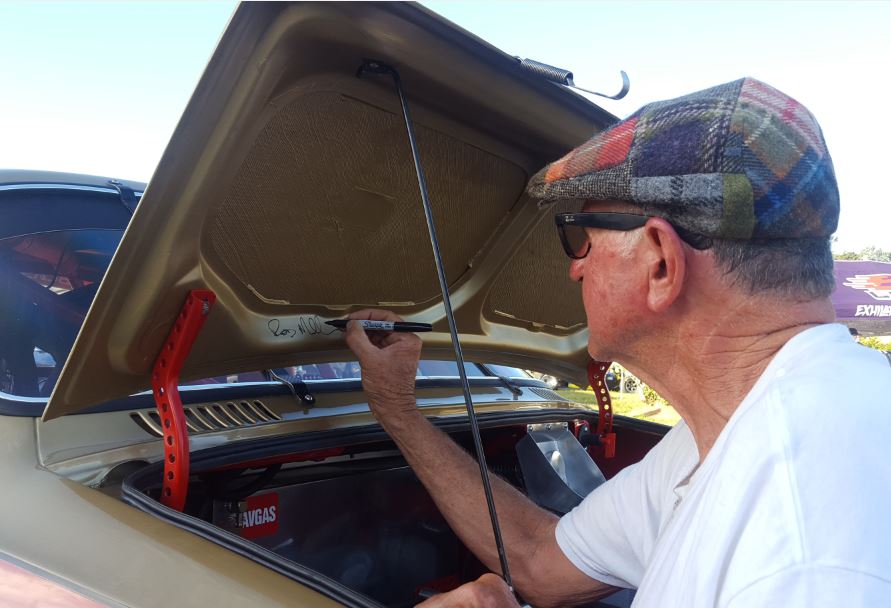
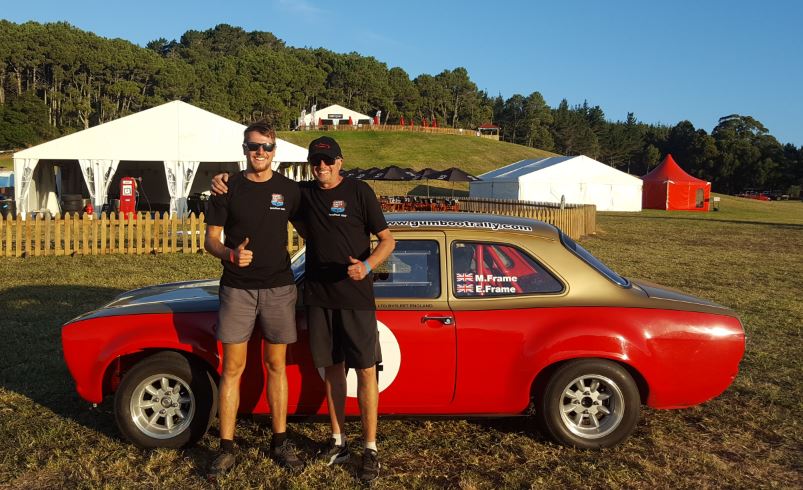
Leadfoot Time - Part 2 Sunday Sideways Here's Leadfoot from behind the wheel Caught up with Tanner in the pits who was super friendly just like everyone else I had talked to over the weekend. Top Bloke Times are in and here's mine for the weekend Prize Giving time Cheers Rod , Shelly and the Leadfoot crew for a very memorable weekend One very happy Father , Son Duo
4 points
-
you could go rice paddie style3 points
-
This arrived yesterday, picked it up this morning, Started unpacking it, for merchant grade is really good, better than I expected. It's also bandsawn not rip sawn which was unexpected, Made a frame up of offcuts the other night for it to sit while is dries out, Filleted and stored, gonna buy some cheap tiedowns to clamp it a bit and stop it twisting.. All the dried stuff I just stuck on timber hung from the secondary bearers, my only gripe with the timber is for the facings which he recommended dry, fair enough I'll get that, they could mill it down I asked if it was rough sawn and could they mill one side, the answer was yes but then I get this, Not at all what I want and doesn't match a single thing, bit annoying really as I now have to deal with it.. *sigh, add it to the list. At least I can use it to make my bench/s, Dried storage, Also my in laws have done a fucken great job leveling and clearing/preparing the rear of the section, I'm stoked.. Just gotta get all my levels right and I can start cladding.. Yay!3 points
-
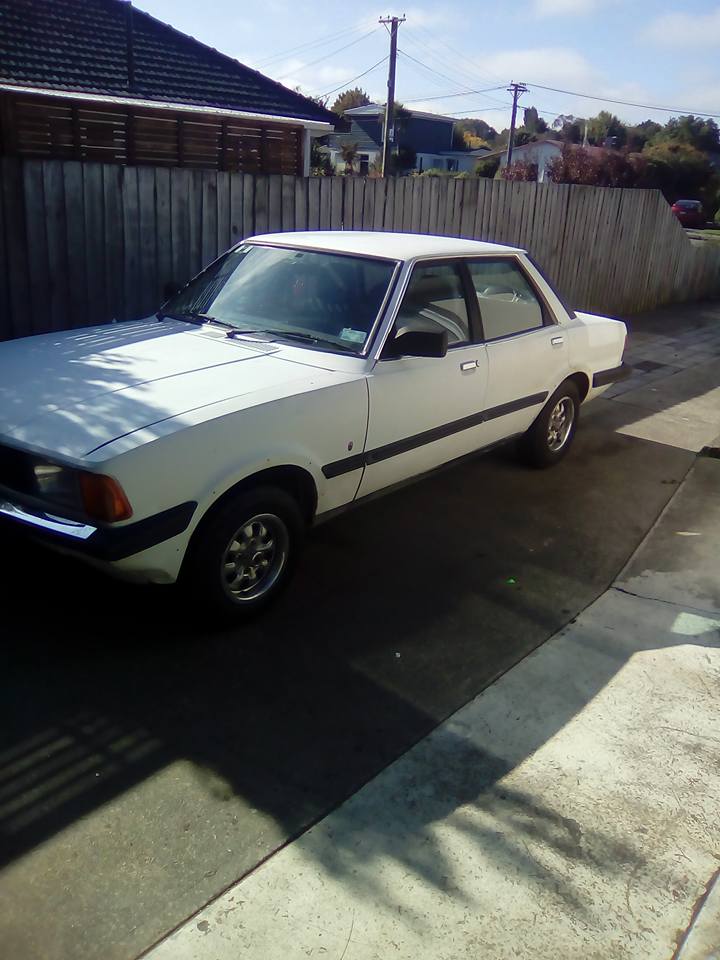
Got my manifold made up, as well as sold all the driveline out of the white car. Am hoping to have all my stuff in this week.3 points
-
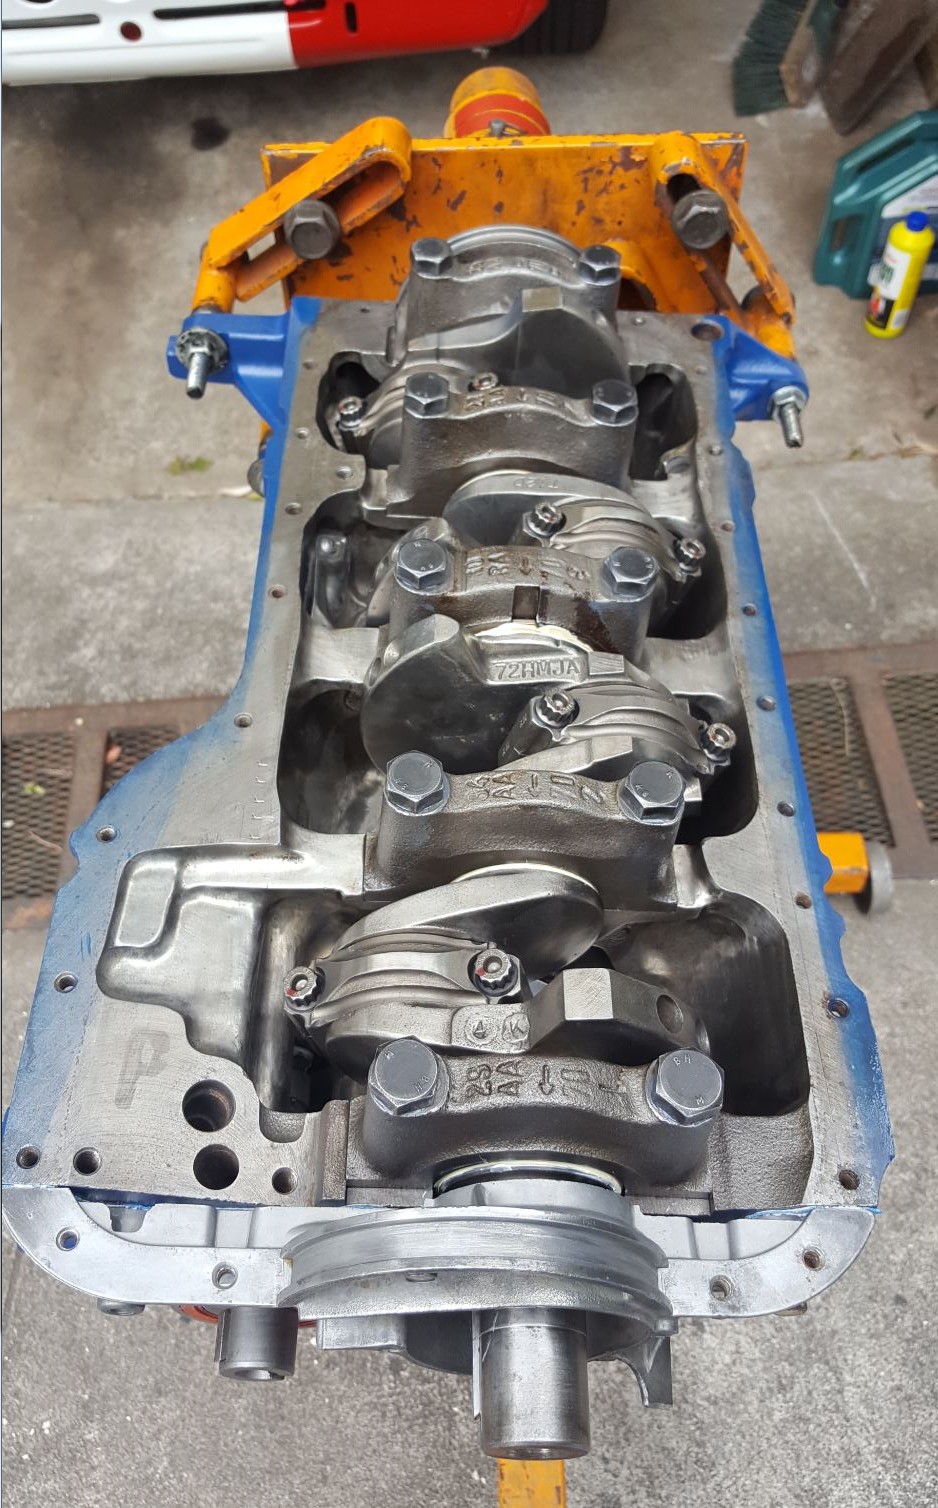
New gaskets, and engine mocked up.3 points
-
Perhaps that's more of a Shelbyville idea.2 points
-
had a busy week and weekend, got the first couple coats of red on the car.did the bottom and the inside and dash area,pretty pleased with it, did one coat on saturday, missed a couple spots, worst thing that happened was sweat running out of my glove on the wet paint, bugger it! gave it a wipe with thinners and it came really nice on the second coat today. Got a few small runs but stoked with it. not bad for a rookie!2 points
-
How far is it up the hill? Rig up a pulley/whinch system. Make a track kinda like a small monorail or even twin train track setup and winch it up the hill2 points
-
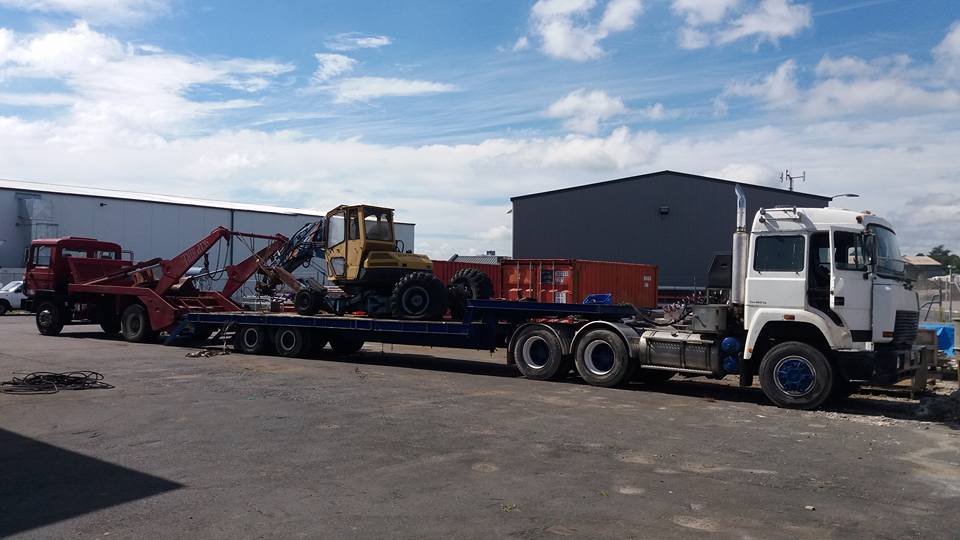
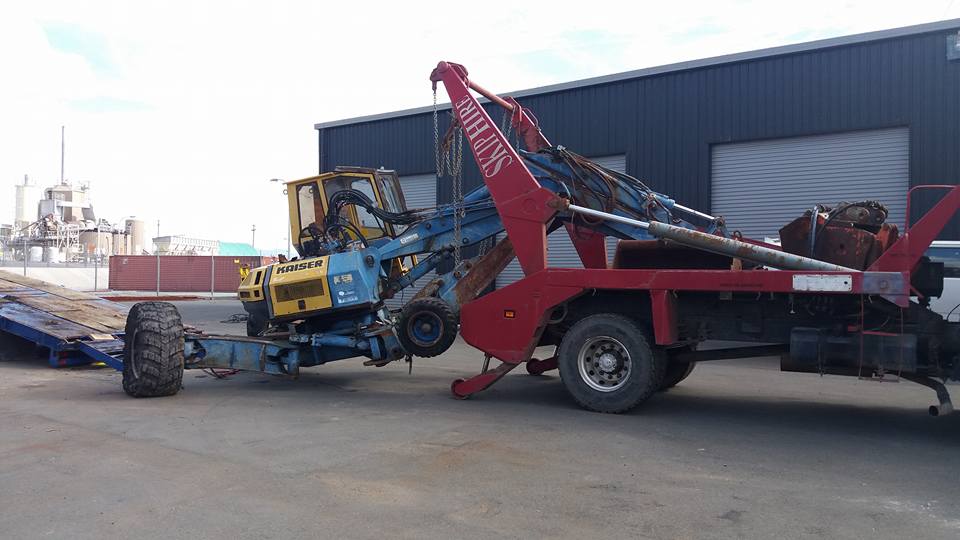
So its been a long time with no progress on this, those of you in the digger thread will have seen some of the other stuff ive been up to but we finally got this off te truck today, Bit of a fuckin mission since both the big diggers are out out site so we went full Barry n used our bin truck gantry! Next i have to shift my bobcat and fire engine to this yard then we'll start cracking into getting the Kaiser moving under its own steam.
2 points
-
Ok I lied. A few more photos. Rear T57 spring mounts. You can see them in this photo2 points
-
Not as epic as the kids table up there but I got epic satisfaction from this little project. We have a tiny home and it's important to free up pockets of space and remove clutter when possible (I'm not good at this) Greg popped in the other day and suggested I put TV on wall..It's been on the to-do list for ages. Measured wall and tv angles Had bracket laser cut Bend along dotted lines Draw corner of lounge and TV on table and use to get angles for steel (ends are not 45s) and weld Paint and screw onto wall Now just gotta add a power point and white cable so they exit walls higher. @flyingbrick Please rehost images on OS2 points
-
Fuck yeah, everyone needs a monorail1 point
-
Anyone DIY'd copper headgaskets? with waterjet cutting being quite cheap, i'm tempted to draw one up and give it a go.1 point
-
Yes. It isn't a factory colour, those panels have been resprayed in their time in Japan at some point. I'll get it colour matched to it though as i love the colour. Seeing the guards, bonnet and 1/2 the front end that turquoise blue it definitely got the vote from me too.1 point
-
I would be stripping them down and soaking/boiling them. Gaskets dry out too.Does the choke move fully Also vac lines, fuel lines, petcock lines, and air filter want checking1 point
-
Chokes stuck and or jets blocked. Long time sitting then fresh fuel, probably turned the hard varnish to jelly1 point
-
When I did air con we did De gassing for free. Just give aircon places a bell and they should be able to sort you out1 point
-
I used rivnuts in my bike frame to hold extra water and fuel bottles. So around 1kg constantly bouncing over cobble stones for 30000km including sea spray from ferries and water from river crossing ossings. Temp range from -30 to +50. So no sign of loosening and they then survived sandblasting and powdercoating.1 point
-
As someone who has stepped off one of those things as it started to tip and watched it roll/bounce it's way down the hill, I agree with the comment to be careful with your centre of gravity. Your concerns regarding steering when the front is heavily loaded is also justified. That said I think your biggest issue is going to be traction - it isn't hard to get all 4 spinning (I presume it is 4wd) when towing heavy loads (once it has traction, it will pull your house truck). Putting the weight over the wheels will help but then you are back to your heavy steering issue. I'm sure with your skills you will come up with something to amaze us all just like your other projects.1 point
-
Batteries on the frame... Took me way longer to drill, rivnut and bolt up then i want to tell... Lots of little complications. For some reason this whole battery thing took me a lot longer than i feel like it should have. Rebecca fortunately made progress on the sound deadening while i rolled around on the ground acting like a like a complete muppet. Did both sides, still have the roof and doors to do.1 point
-
Well so I had almost finished the conversion and ended up losing my licence for demerits literally a hour before spirited test drives, Great! I've had my licence back for a while now and have given it some very thorough testing and there was (and still is) things to be sorted. The exhaust system was a bit of a challenge using E36 328 pressed steel manifolds, the rear manifold flange needed to be cut and welded about 12mm closer to the block to clear the steering knuckle, I then just hacked up the e34 exhaust to get the manifolds to mate with the exhaust system that was already in it. Steering knuckle itself I removed the guibo and made a spacer and bolted the ewe jays together through the spacer. I did keep the e34 steering shaft in case I need to modify it to work but its fine now with plenty of clearance to the exhaust manifold. One of the more annoying issues it sometimes has, is that it will cough and sometimes die whenever it wants and if it dies it wont restart until the key has been turned off, it will fire up straight away after that. Other times it coughs and carries on as per usual, when this problem occurs I can hear one of the relays clicking under the dash but haven't figured out which relay it is and what its job is. This car has seemed to have an electrical gremlin the whole time i've had it with things like the window squirtys just going on their own, which in turn makes the wipers go. The next main problem is the fact that the sump sits about 70mm off the ground and i've already had some ass puckering moments when I was half expecting the oil pressure light to come on, luckily I haven't smashed it to bits So todays job was the removal of the crossmember and oil pan to cut the sump and wing it to retain volume. Cross member came out in no time at all and so did all of the sump bolts... or so I thought. It soon became clear that there was 2 bolts hidden behind the bellhousing, now the e34 gearboxes contain a recess to allow access to these bolts. the 260 gearbox does not so I had to call on the inner bro and holesaw and die grind out holes in the sump so I could get a rachet spanner onto em. I know its rough... but it worked and saved me hours of having to split the gearbox from the engine. So all going well tomorrow I will mark out where I want the sump to be cut and chop it, compute the required wing size and fold up some 3mm alloy to be welded in. Then move on to the oil pick up and shorten it, modify the factory baffles and we should be all go to weld it all up and chuck it back together. I also had a huge power steering leak in the last couple of weeks and found some fuckery that needed fixing. Return line had been hacked at some point and had some very rough repair done. anyway there's my long overdue update pics1 point
-
Tell you the truth I'm not sure, but I don't play with injector pumps, I let the experts do that.1 point
-
No! Don't touch those screws To bring fuel up to the filter (when fitting a new filter or run out of fuel) loosen the 'out' banjo bolt on the filter housing. And pump the primer until fuel flows from the loosened banjo. Tighten banjo. Pump a few more times until the plunger gets stiffer. And If you have run it out of fuel, after you get it to the filter, loosen the injector pipe fittings to the top of the injectors. Crank engine with foot down until fuel starts coming out around the loosened fittings. Tighten fittings. Should start then.1 point
-
Is it like the top one? It's possible it's letting a little air in/ not holding system pressure when shut off. Replace it with the bottom one, they're cheaper than the top one and better. @Hemi1 point
-
You can't just say "build space stuff" then bugger off. SPACE STUFF!!1 point
-
much better. thanks to i500gt for finding them and cul8r for swapping the tyres over.
1 point
-
I've never loved the factory rear drum brakes; I could never adjust them properly so the handbrake would work, but not drag. So I decided to do something about and do it for basically nothing. I was given some EL Falcon single-piston callipers, rotors and backing plates years ago. The backing plates were drilled out to the 240z bolt pattern, but I still had the rotors to drill. I didn't want to drive all around the place looking for a friendly engineer so I cad'd up a template with the Ford and Datsun stud pattern, taped it to the rotor, centre punched and drilled. Came out radical. Started bolting everything up. The EL Falcon backing plate & rotor work perfectly with the backspacing from the 240z hub face, so the calliper simply bolts to the Falcon backing plate as normal. Then I pinched some longer flexible brake lines from Pick-a-part and made a bracket for the line. Neat! The handbrake bracket required some fiddle to bring it closer to the drum lever. Piece of piss.1 point
-
No photos just quick update. Was doing some little maintenance things on the car. One of which involved fixing 4 leaks in the intake system. Once that was done, the car wouldn't run or idle or anything anymore. Went through so many different things trying to fix (injectors, CAS, replacing AFM, fuel pressure/fuel pump) turns out the guy I bought the motor off gave me the wrong AFM. (I bought one with the same part number) $40 later I had the right one and it runs primo. Replaced rear springs with 5kg rears. Looks like I had 8's in it which is why it was so hard riding. and big news; Cert booked for next week. nearly 7 years and it's almost legal.1 point
-
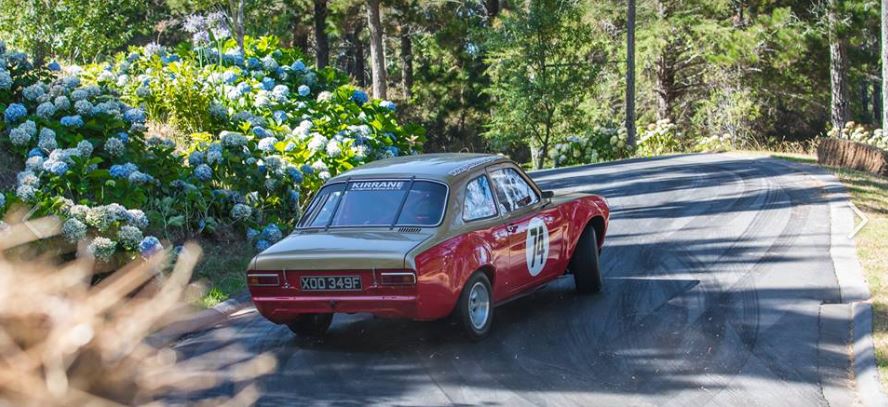
Been sharing these around a bit. Looking forward to a drive in the sun and a spin of the back wheels.
1 point
-
Look what I found ...............1 point
-
Engine out and need to tidy up the engine bay. The wiring and hoses need to be sorted out as someone and done some dodgy wiring. Also still on the hunt for another engine.
1 point
-
And a waaaaayyyyy over engineered gas cap. But come on, its sexy eh! My OCD kicked in and I even domed the top because it looks better that way. Kj1 point
-
Nothing too exciting going on with this. just working my way through all the stuff in the way, to get the extra up travel. Driver side engine mount got chopped off and new one made higher up to clear the top link. Alternator had to go as well. will use a fwd bracket to move it up. a new inlet on the water pump should make it work with the rwd pump. Last thing giving me drama is one of the steering links and the the sump. if can get another 30mm clearance between the 2, this will be max up travel on bumpstops. kinda lost count but got around 3 inch more up travel than the leaves other than that just been welding... bottom chassis link mounts are on for good. i forgot to drill the lightweight hole in this one. Crossmember was way too much to weld with tig, and was to lazy to drive an hour to my old boys to use mig. Arc it was. still got a little work to go on it1 point
-
Well hot damn it worked Things i learnt theres enough adjustment in the gauge to shift the range +- 40 ohms for fine tuning to a sender (i.e E can be shifted from 40, down to 0 or up to 80, and same with the F) The heating wire is ovbiously bloody small, but it looks to be about 50 coils i unwound 10 of them, and spread out the remaining along the bimetallic strip. and it appears that i have now adjusted the gauge to a full sweep over 90 ohms at around 10v, which seems to be what the gauge will see i the cluster. The bench set up i used was a bit rigged because i have the minimum of electrical tools, but in any case it seems to be proof of concept. i will have to pull the sender out and test it though its full arc to see how accurate the gauge will be in the points between F and E. Will post up a full walkthrough of what i did, because i cant find anyone modifying a bimetallic gauge anywere (dipole types look to be possible with resistors on the full and empty sides). I did find a case of a guy modifying the sender some how, and various senders chopped up and put into other units. But this method would appear to be rather cheap and easy1 point
-
Just got this out of the workshop Friday.....
1 point
-
This is also quite dandy, really good at seeing into the oil galleries and collecting all the bad bits.1 point
-
Sporting feeling paint. Well I'm sold.1 point
-
Nice new TRD oil filter Also scored some T3 castor arms and TE27 knuckles with RCA's. I will most likely be going with AE86 Blitz coil overs for this car I will also be going to Toyota Fest this year and will be picking up my head from Barry (MRP) then. Excited!! April 1st roll around already. //oldschool.co.nz/index.php?/topic/52401-pbaines-1971-toyota-corolla-ke25/1 point
-
Well, I bought the wrong piston rings as didn't know that there were two different sizes (the top ring on most is 1.5mm where as the small port and late GZE use a 1.2mm top ring) Ordered some overnight and installed everything today. Short block complete, will next have an update once Barry has finished with the head1 point
-
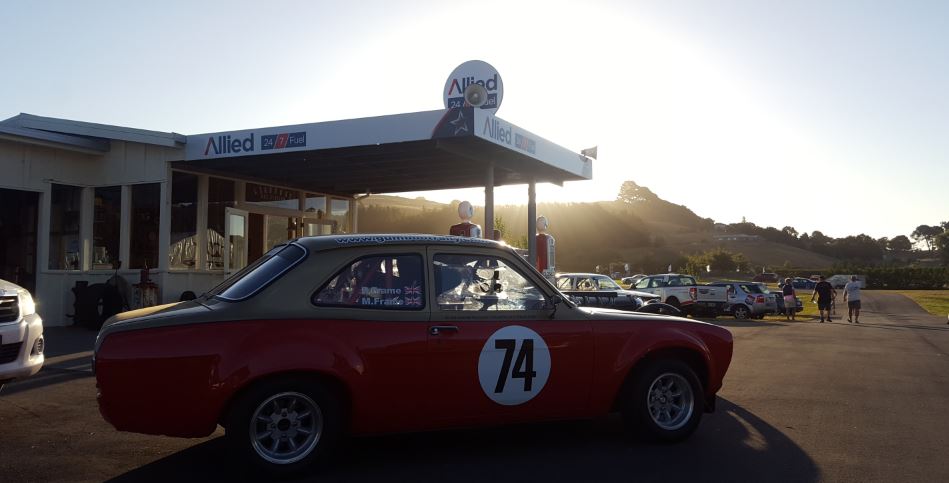
Home at last : I dunno how many miles I clocked up! Should do Clac's shortly since last Friday 27th DVK>AKL>Leadfoot>Whitianga x3>Napier>DVK Feb 8th Here's my last pic from Leadfoot, note they updated the Mobil 'livery' Car never missed a beat, used no water or oil that I could tell & a few of the other volunteers there also "used to have an Avenger once" half a tank of gas / 20L from Taupo via Napier to Dannevirke aint too bad i reckon edit : 1000 Miles or 1654km's round trip1 point
-
So Snuck up to the big A Last Saturday for a Surprise 40th (no not mine or the cars) then most of this week I've been pottering around this place then tonight @BillyTong checked in the campground for duties cooking up to be a fab weekend1 point
-
Ok.. so it seems now pb is working I'll have to go back and edit that other post, but for now... Spent the last few days putting up the soffits, did them out of grooved bandsawn shadowclad so as to match the final cladding.. And a bit of under floor insulation, Cleans it up a bit under there, also bought and installed a fuck off 200x200 Mac post... just to prop up that huge ridge beam and really heavy decromastic tiles.. Chippie came over to check my work and reckoned a couple of nail plates would be good to hold it, I went for bolts.. So far so good, will finish the porch soffits tomorrow and start some other shit..1 point
-
Went back to this possum palace place again, super muddy and slippery. Only one way to get around the place, max rpm. I also mowed their lawn, since im such a good cunt1 point
-
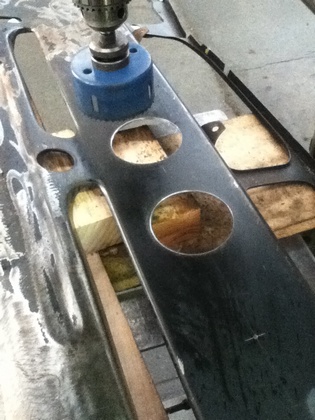
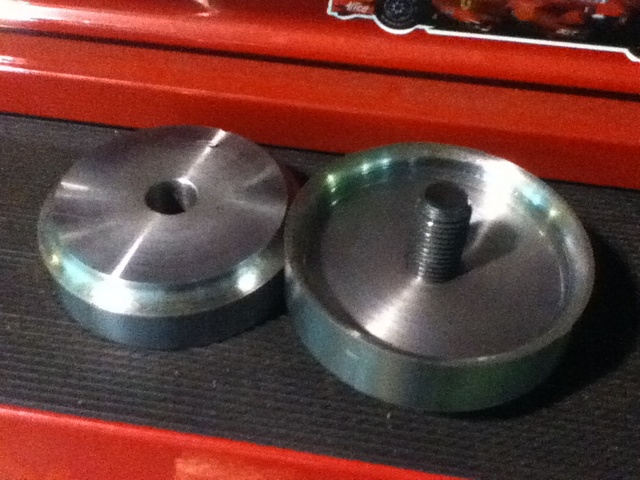
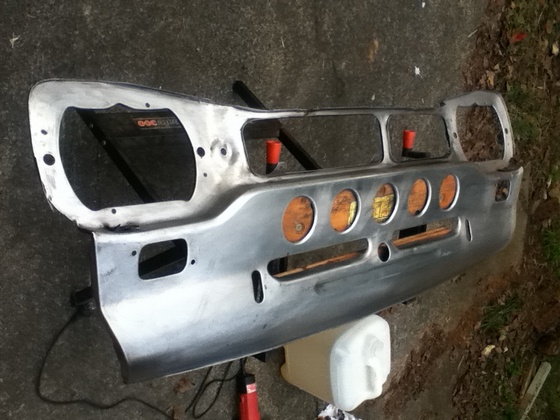
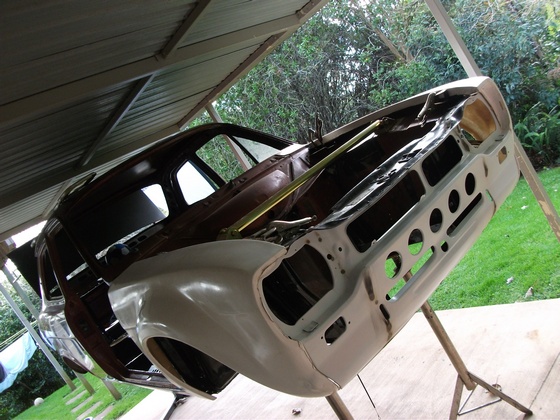
four link from underneath hole sawing front panel to add 3" swaged holes Made a press tool at work In the press Panel done and ready to weld on
1 point


This leaderboard is set to Auckland/GMT+12:00