
Leaderboard


Popular Content
Showing content with the highest reputation on 02/25/17 in all areas
-
I took some quick shots this morning before work just in case anyone crashed into it13 points
-
one of the reasons i put 17s on it was so i could run bigger brakes. i had to make some brackets (well, Neil at Whiters made them for me because he's a super GC) to get them to fit and it all went together perfectly. they are a Yellow Speed kit designed for a V spec R33 GTR - 330 dia x 32 thick with a 6 piston caliper. they arent bedded in properly yet but sweet baby jebus do they stop you in a hurry. i used a G meter to calibrate the difference between before and after and the calculations came out at 2 billion percent better. pictures of things. 2017-02-25_05-17-32 by sheepers, on Flickr 2017-02-25_04-36-53 by sheepers, on Flickr 2017-02-25_04-36-41 by sheepers, on Flickr 2017-02-25_04-36-28 by sheepers, on Flickr12 points
-
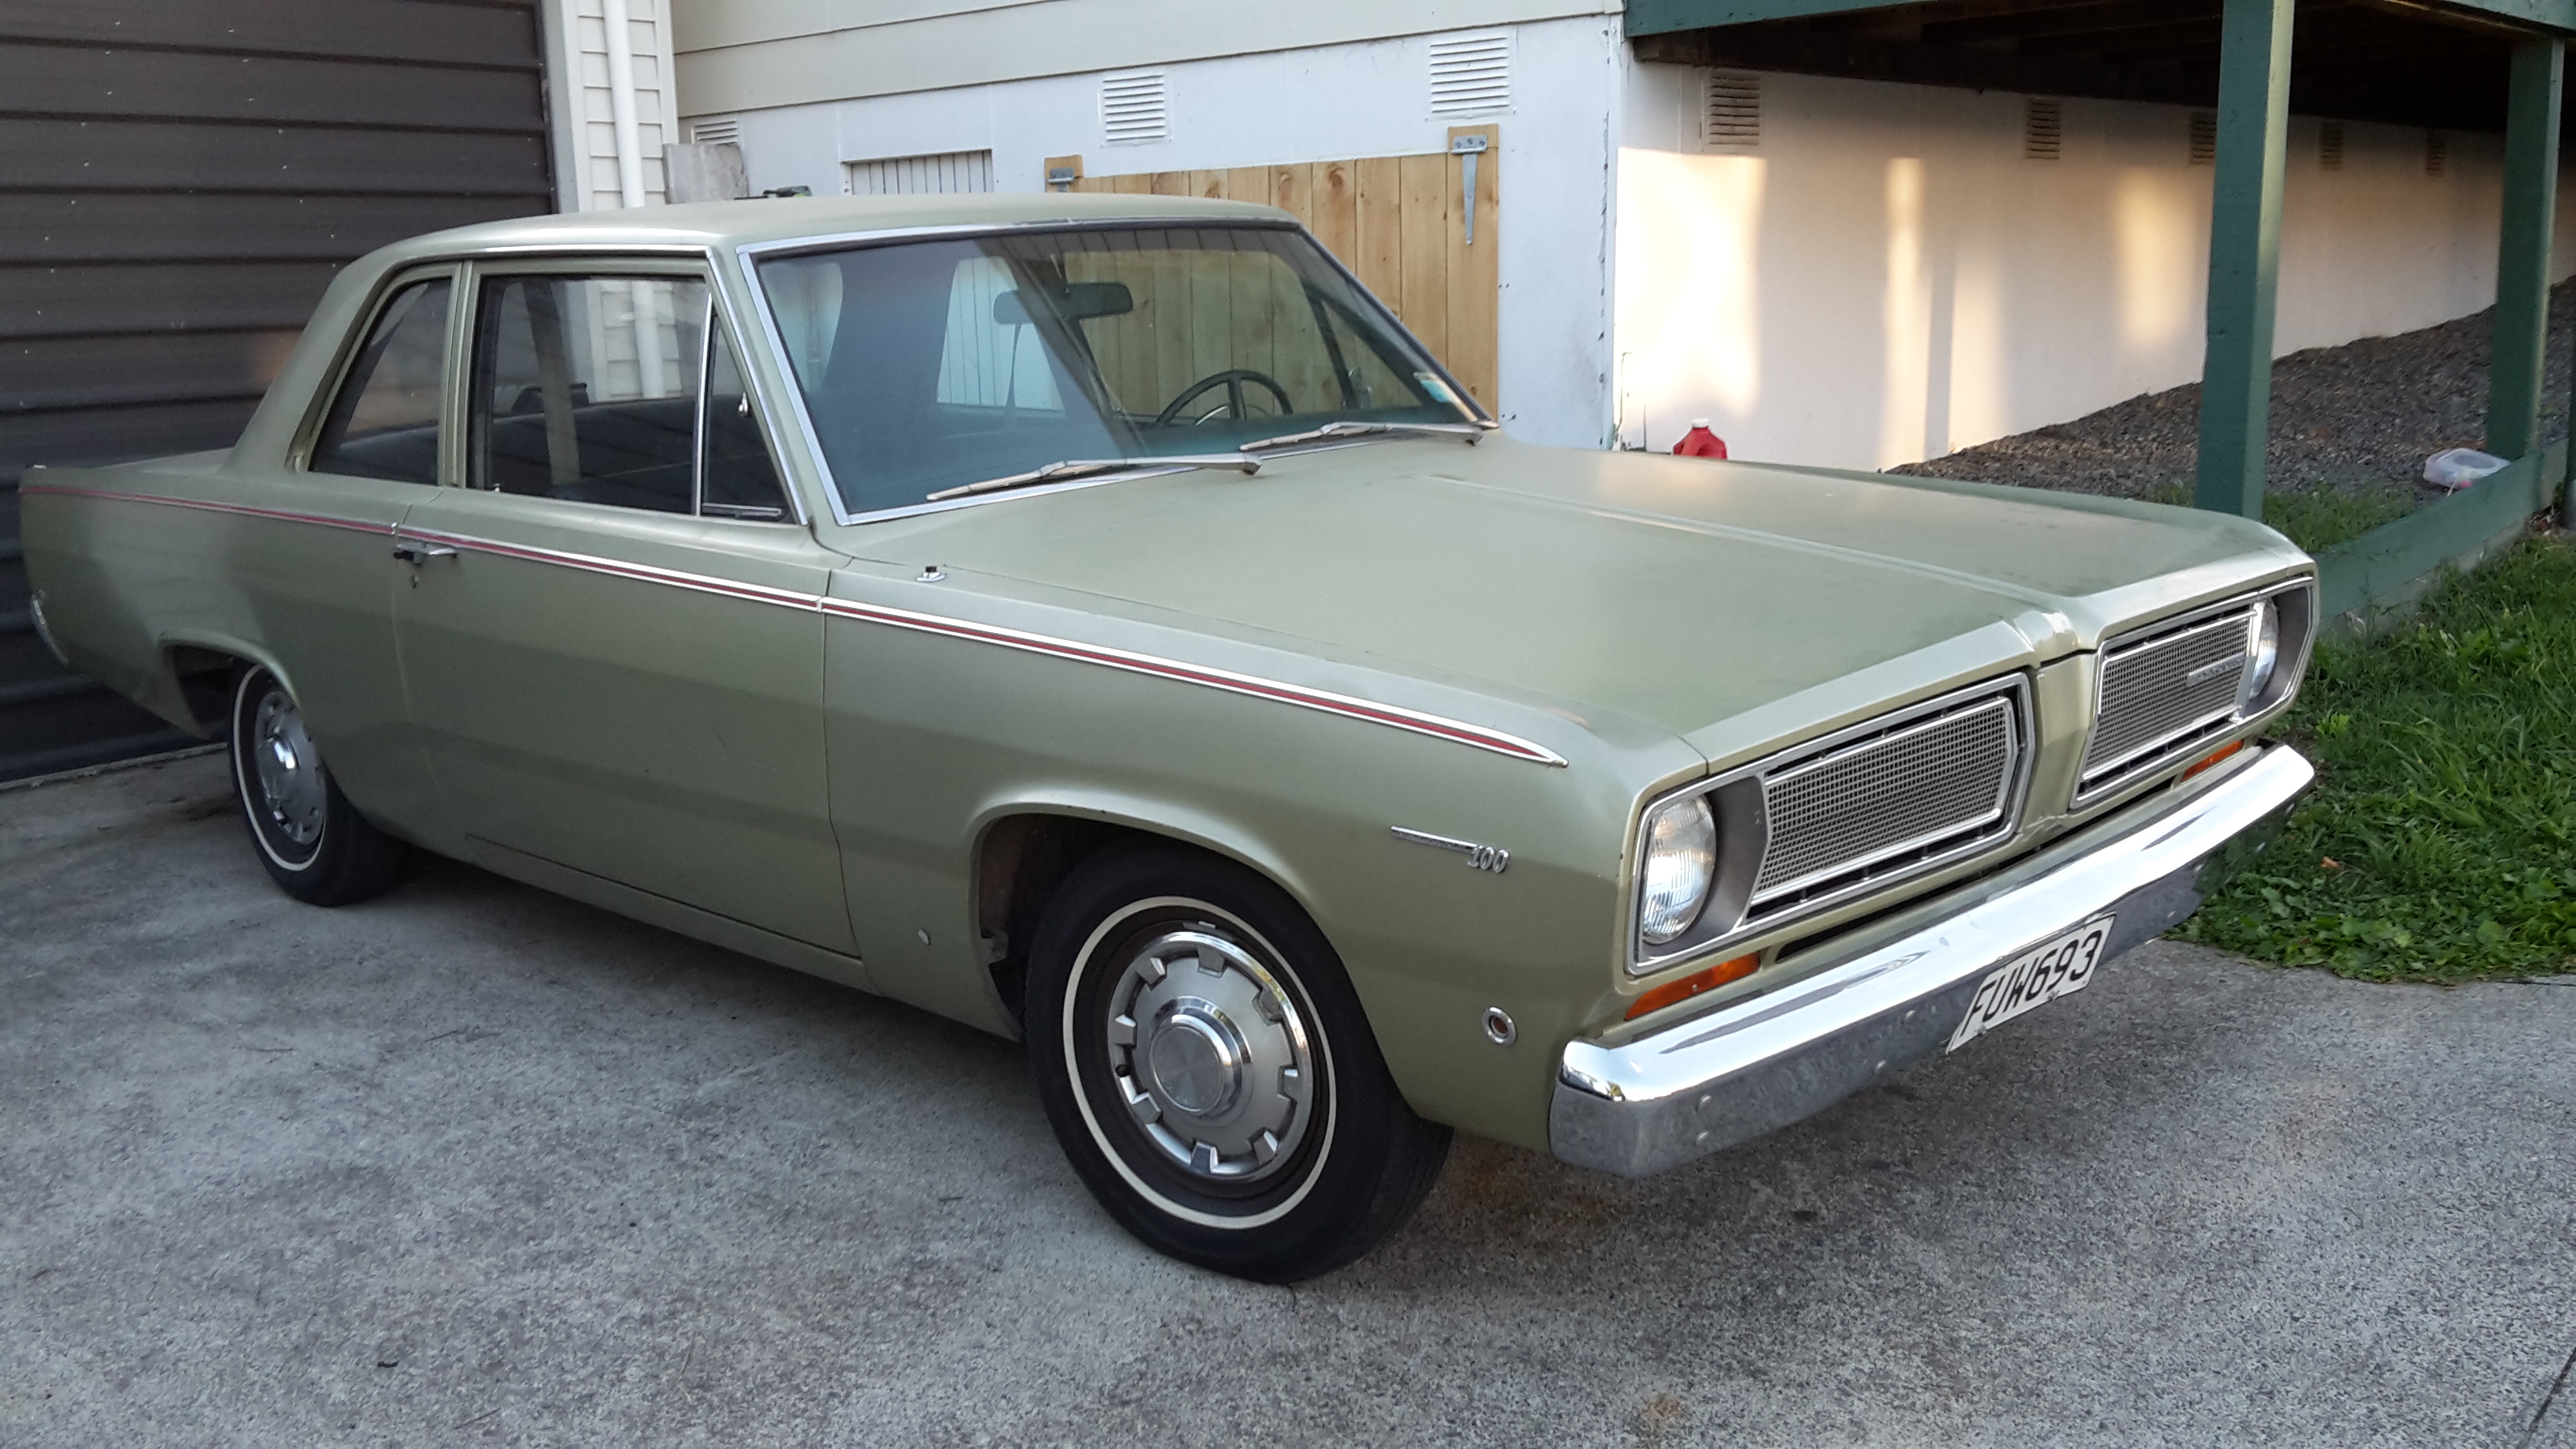
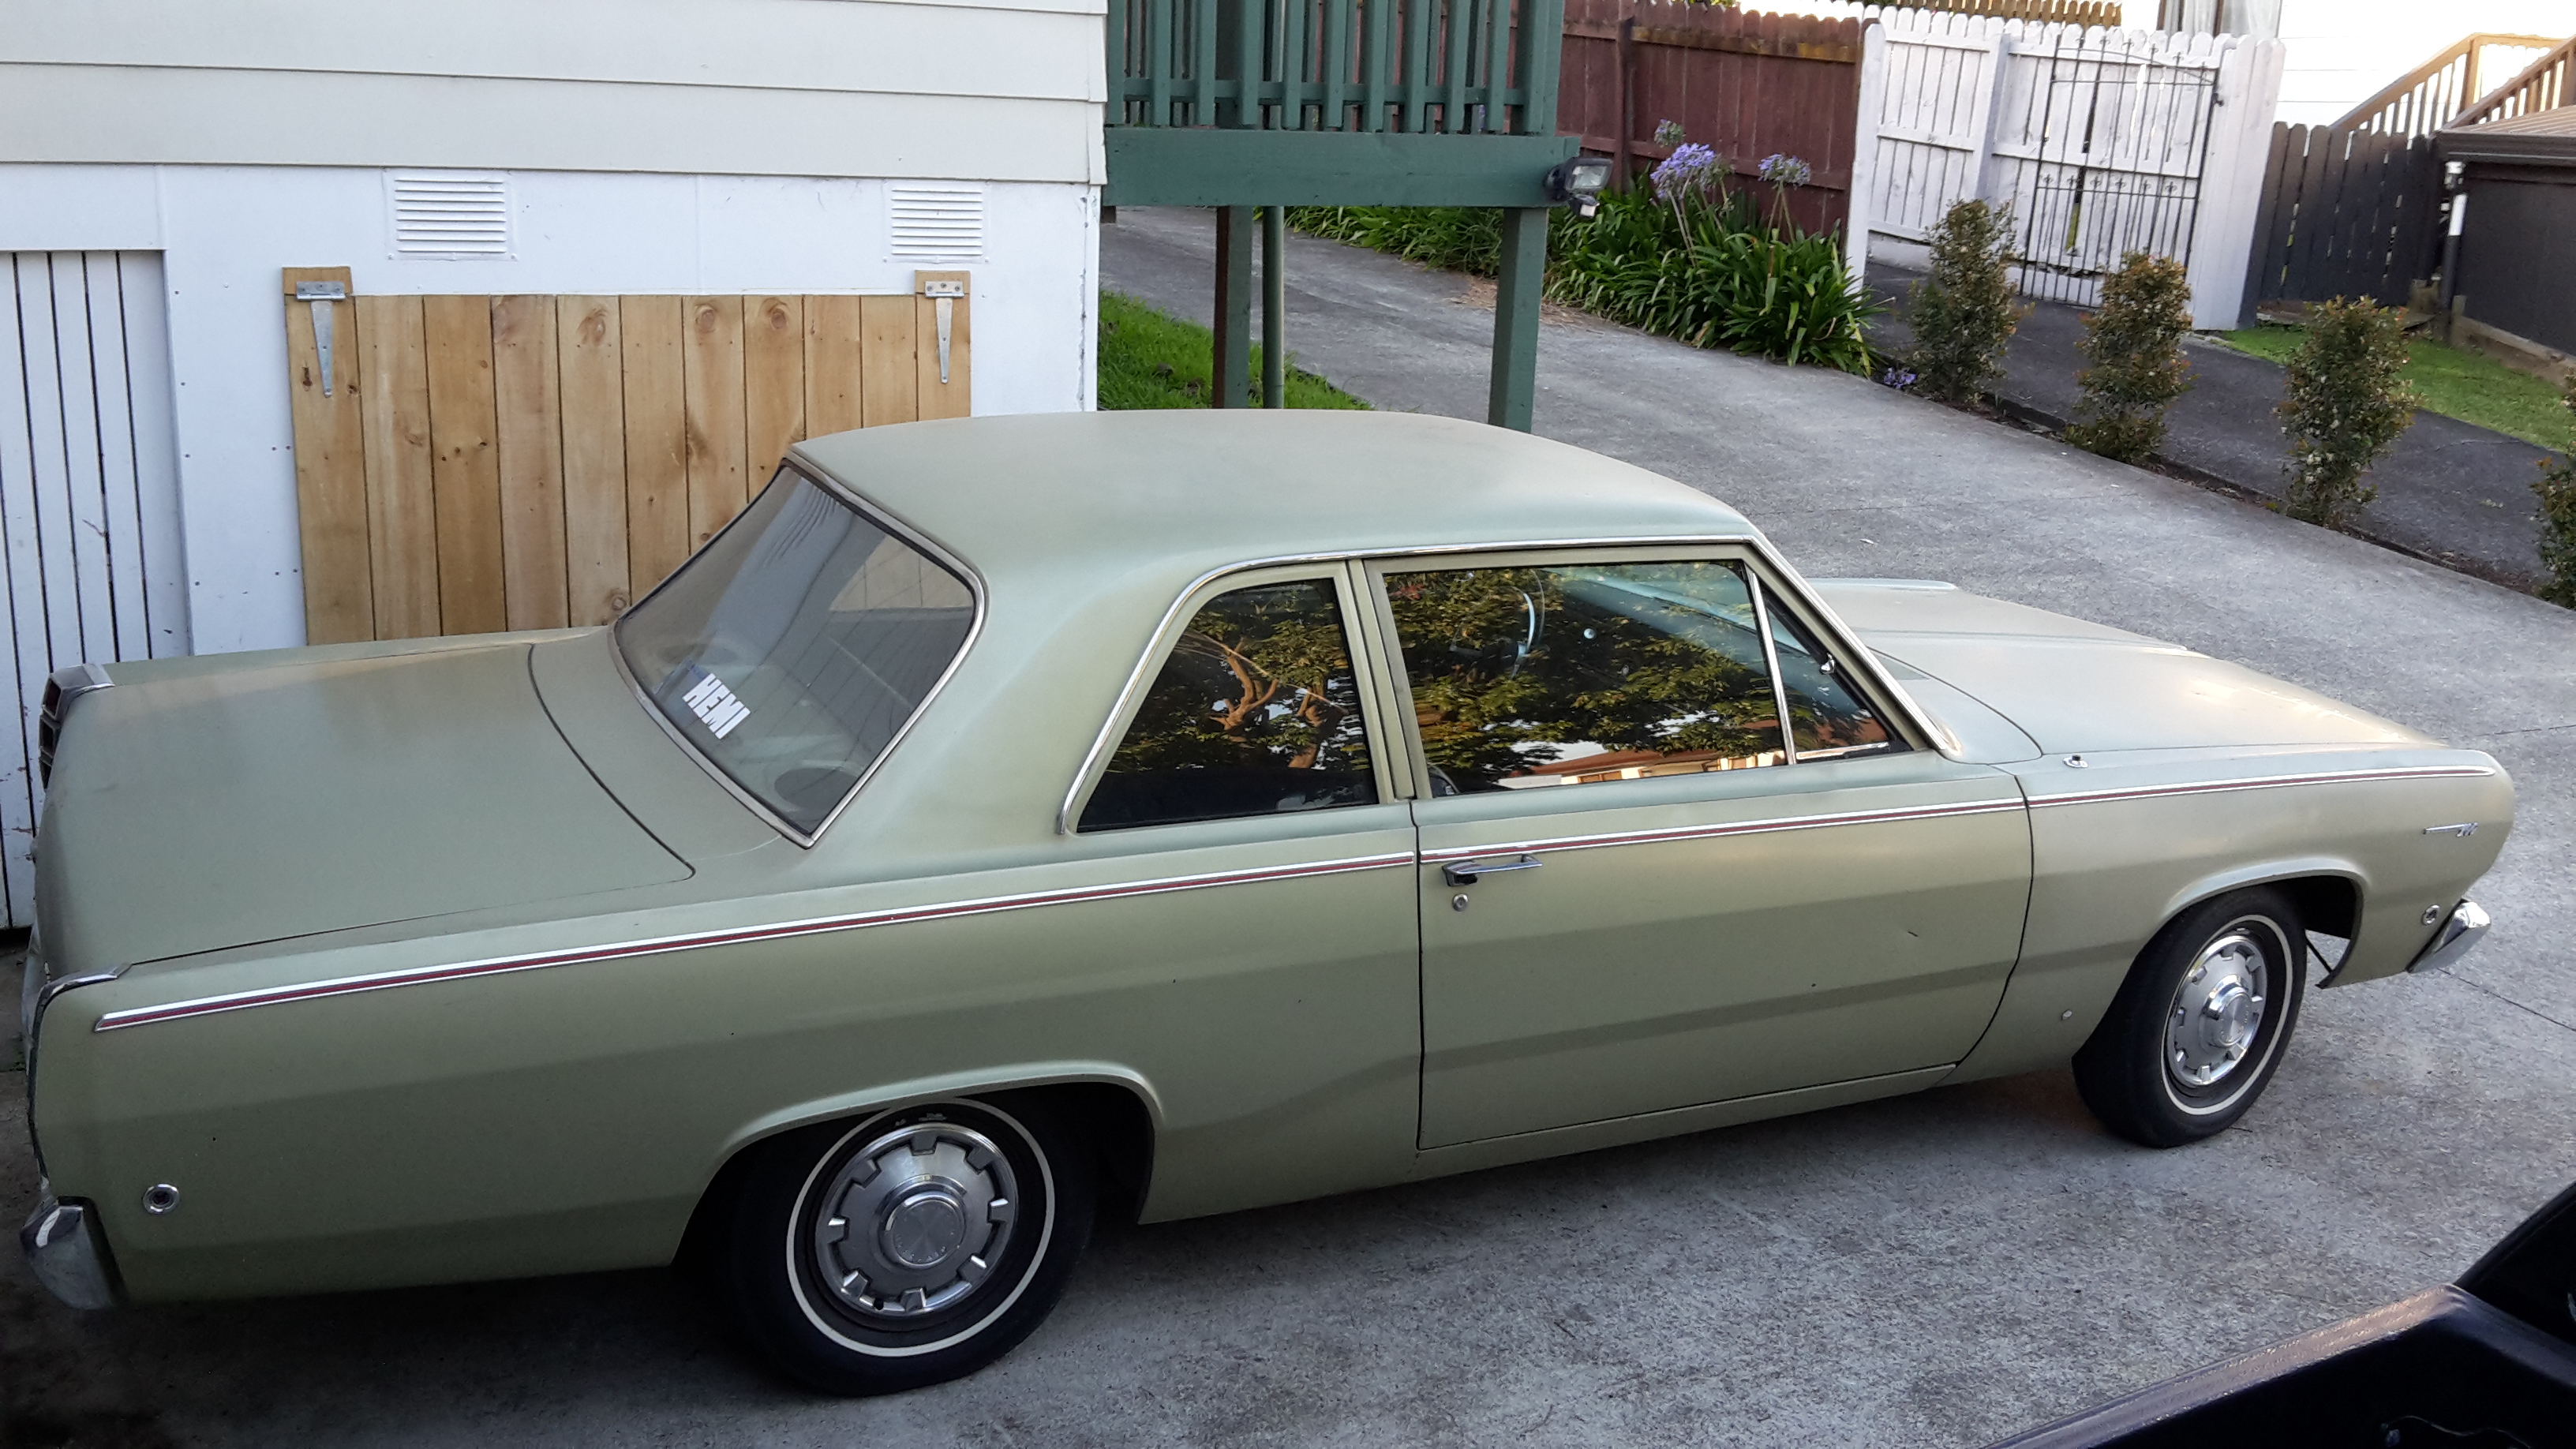
discussion Brought this home today, it's the reason for selling the hardtop. It's a 68 Plymouth Valiant, has a 'leaning tower of power' 225, auto, has power steer, 13" wheels hah, drums all round. Most of the paint is original, it has a couple of bits where it's been repaired that need touching up. I'll probably get it repainted in the same colour at some point. It belonged to a mate of mine that died in 2015. It's a bit special to me because of that, I went with him to have a look at it, had one of the sketchiest rides I've ever experienced when we went for a drive after he got out of hospital and was still on something. He always wanted to put a V8 etc in it but he ran out of time. His family kept it since but decided to sell it, and his mum rang me to give me first option on buying it. They are keen to see it get an 8 so it will get the turbo 318, 727 and 9" I was going to put in the hardtop. I'll drive it for a while till I've got everything ready then bolt it all in. Obviously this one will need a brake upgrade as well and I'll put some 15" wheels of some sort on it
 6 points
 -
Thought I'd have a crack at chucking the new springs in. Never done any suspension work before so playing it by ear. Pulled bump stop plate out inside guard and removed the shock. Things were really covered in crap, looked like decades of grease and dust had accumulated, and everything was pretty much seized when I had dug it out to get a spanner on it - one lower bolt sheared off the shock, then when I undid top bolts the thing didn't move upwards like I expected, guess shocks were well overdue for replacement... Spring pulled out no bother (scored set of compressors for $30) and rubber insulator on top looks ok... And I pulled the upper control arm out, this is after a clean, it was covered in around 10mm of dust coloured muck... And the spindle had issues with the o-rings, one end had bulged out, while the other had a section missing. This would explain why previous attempts at lubing had just pumped grease under the guard... And old vs new. new ones are Lovells lows, matching them with KYB shocks... I was hoping to just chuck the spring in and move onto replacing the rubber suspension bushes, but cleaning the pivot revealed some wear (potentially the source of my slight but annoying Falcon squeak) so looked at replacements... Upper ball joints were equally scruffy, so ordered new ones of those too. Under the crud in this pic is the lower ball joint, I suspect these are riveted in rather than bolted so will have to drill them out after I've cleaned up. The top joint resisted all my attempts at getting it out till I shot into supercheap and grabbed a $20 separator tool... and naturally the tie rod rubbers were also shagged... I looked at replacing the rubber on these but seems tie rod comes as a complete unit, so - have ordered: * new upper control arm pivot bushes * upper and lower ball joints * and inner and outer tie rod ends. More costs I hadn't intended, but might as well do it now...5 points
-
Sweet, I'll have a poke around and If it dosent improve I'll kit my spare with its bits
5 points
-
Turbo pipework all welded ready to go.5 points
-
what if we call for a breakdown at St Bathans and you accidentally have 5 shandies while loading the truck?4 points
-
ride in a EF wagon and free speights. what a time to be alive4 points
-
Hello. I have edited the date to the second to last Wednesday of every month. This is what it should be but I made a few fuckups last year and the date got all scrambled. Soz bowls'. I'll advertise it on facebook too so we can hopefully get a few more newbies and steer them away from the path of large diameter rims and back towards widened steels and cellular telephones used to measure the dish of said wheel. See you all there!4 points
-
@mint16 you need to head along to your first regional meet and suck in some two stroke fumes on the lake4 points
-
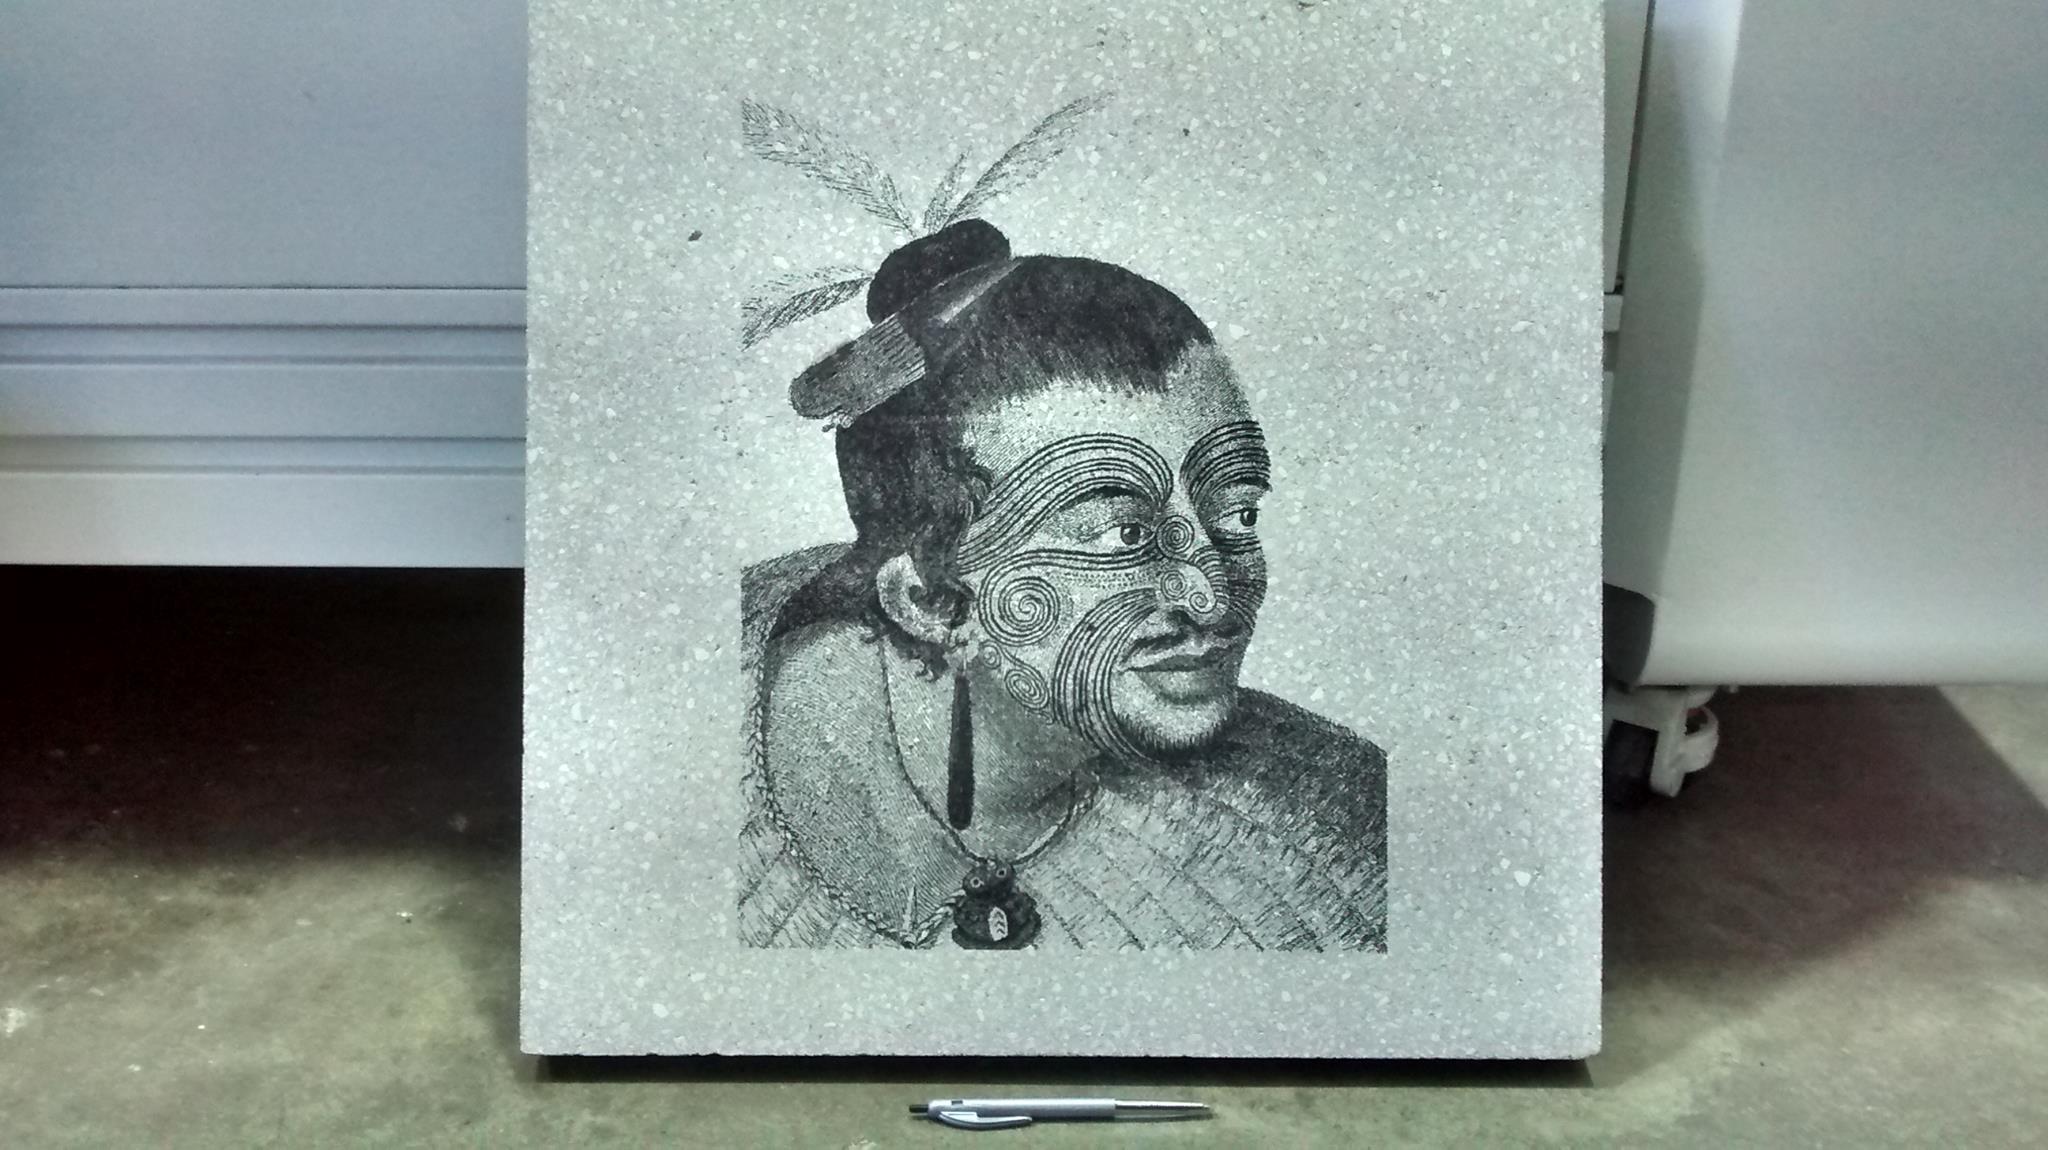
After much experimentation we've worked out how to laser etch into concrete pavers....much easier than sand blasting! We've got interest from some town planners up north, really need to get this in front of planners in Christchurch for their urban rebuild.
4 points
-
That's a pretty intense earthquake that flips the house while you're doing the brakes.3 points
-
grouse! the more the merrier. sucks to hear about the finances @igor, perhaps we can crowdfund your roadtrip?3 points
-
I didn't think mine leaked oil until I noted it had no oil. Normal service then resumed. Good to see the Oldschool stand is close to the edge so we can bugger off before the prescribed 3pm official. I say everyone bring a deck chair and pretend we're the Jowett club or something Barryish, and then advertise doing hourly displays on how to use your Makita to cut springs.3 points
-
So, Guypie's pic shows the name on the back. In one of the older threads it was mentioned that the Trudgeon business (painting and decorating) still exists in Ashburton I got a reply from Greg Trudgeon that the car was owned by Mr Russell Johnson who used to work for the business, and that the sign writing was a bit of joke as he had been with them for 30 years (has died since). Based on the modern papers i have the car was sold by Mr Johnson in 1979. Cool story bro.3 points
-
I don't know if you peeps know about thermettes, but basically they are the most awesome bit of OS camping kit there has ever been. Shit has been around since the 1900's; https://en.wikipedia.org/wiki/Kelly_Kettle You can still buy them new; http://www.wilsonandco.co.nz/thermette/ They are so sweet to use, you just need some twigs and you can boil 2 liters of water in 7 - 8 mins, plus cook on them as well. We used our neighbors one for the first couple of trips away in the bus, but we really needed one that lived in the bus. I was going to buy one but it really needed to be a bit bigger (hot water for the morning dishes) and I also thought it would be good to have a tap so you could siphon off water for cups of tea. So being the sort of boy I am, and just happening to have some copper sheet lying around the workshop I thought I would make one... The is the second one I have made, the first was a tiny 700ml one so you can boil up two cups of tea - I learned a lot of stuff building this one so No2 went a bit easier. Firstly I drew it up in Solidworks so I could get all the correct pattern sizes etc, then I cut all these out of the sheet. The copper is 0.5mm thick so you can do it with a decent set of scissors if need be. The outer sheet cut; Used the fingerbender to get a bend on each end; Roll it and hook them together; Gently hammer the seam together; Same for the inner cone; Then solder them up; I used lead free plumbers solder - lead poisoning does not appeal. For heat I used the oxy/lpg plant with a small tip. Then I made the cap; I actually sized the thermette around that bit of steel pipe so that it would be easy to make the cap etc. Now unfortunately, I did the rest the next day and was under serious time constraints before going away in the bus, so I forgot to take any more pics. So pretend you have just watched one of those time lapse thingies of me crashing about the workshop doing things at stupid speeds.... As you can see I soldered it all together, added a pouring orifice, made a firebox on a stand, made a handle out of a broomstick handle, added a wee brass tap, made a top mounted cooking frame and then rushed to Marahau to use it. I brought it back to the workshop for a few wee mods after the trip - it needed a lip at the opening of the firebox to stop shit falling out, and I did not get a chance to put the pipe on the tap that you can see. This made for amusing dances when filling up cups of tea as you would get boiling water dropping into your safety crocs. I also made a wooden handle for the tap handle as the brass would get very hot as well. It is pretty much perfect now, here it is heating 3 litres of water plus boiling some spuds for tea.. And next to the camping brazier and a human for scale (she is a midget so it looks quite tall, the pot base is about a meter off the ground - perfect height for me to work at);2 points
-
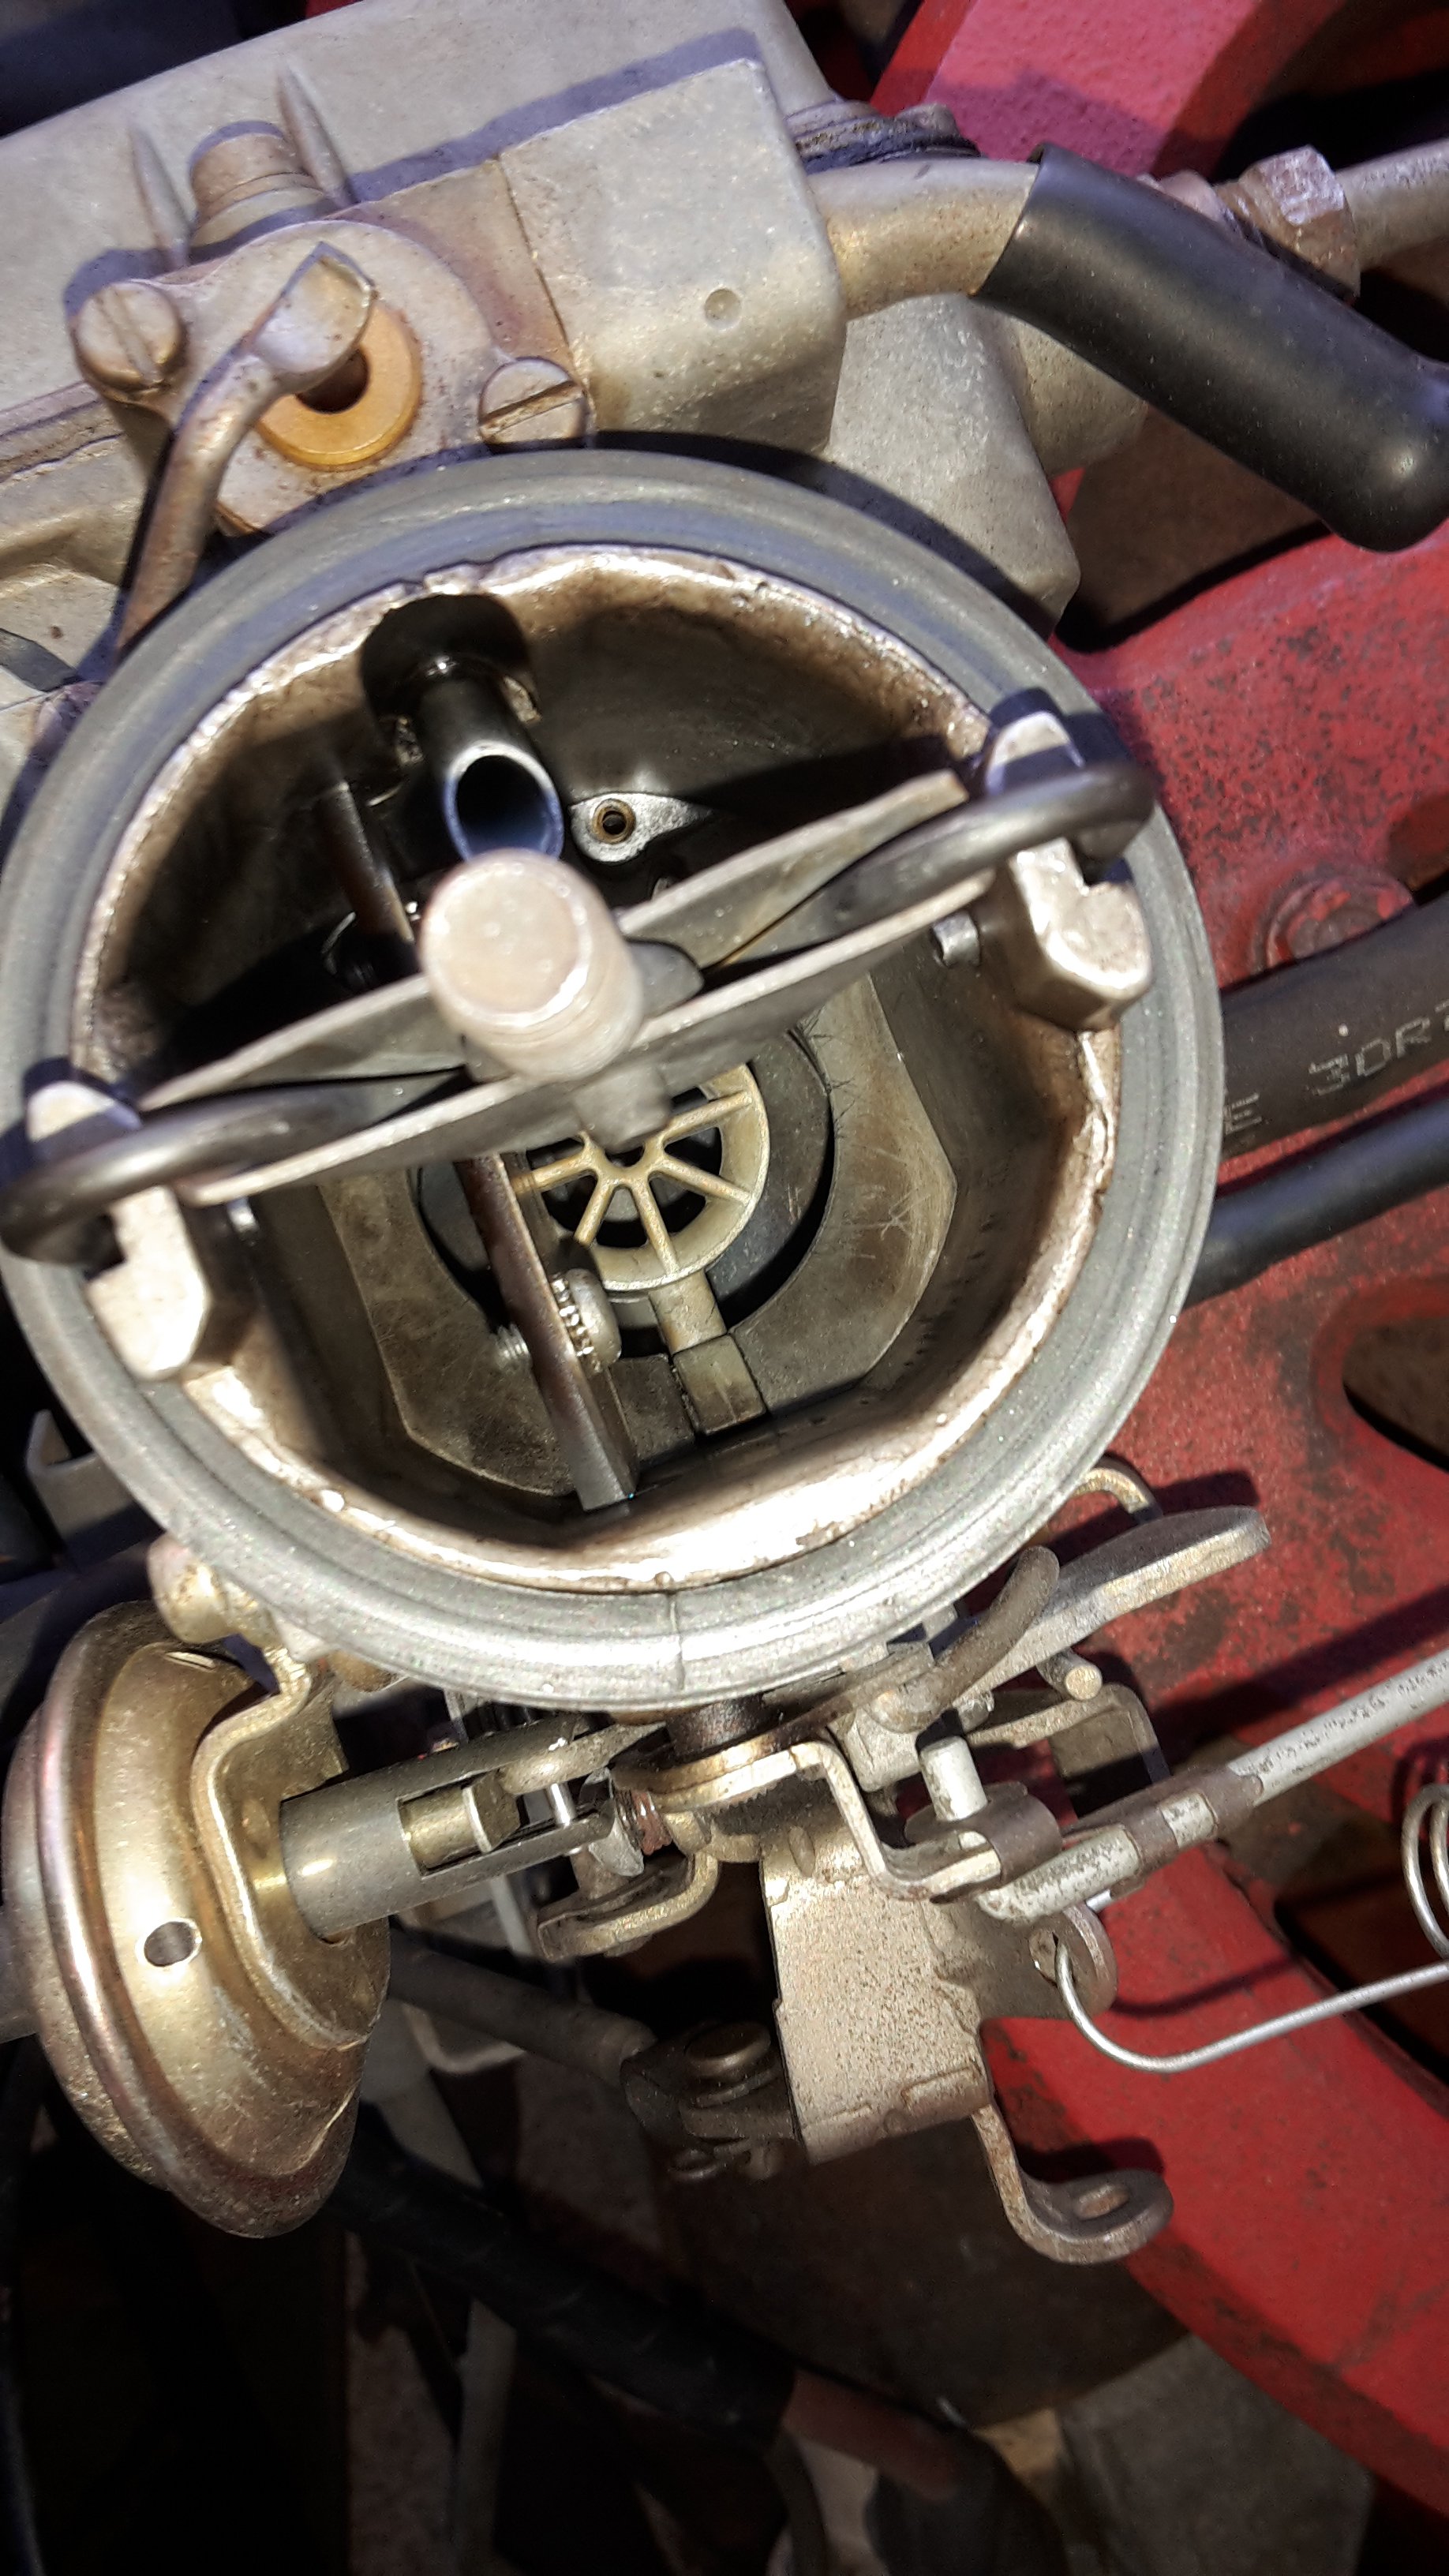
Also, look how tiny the carb is
2 points
-
The wags will fit on the AA truck, we've had a 63 on there with room to spare. Also, I want to bring either the Gloria or the Merc, not a fookin' truck m8.2 points
-
If you do it anything like me, you might as well just let it run out on the floor as that's where most of it will end up when the house flips out of the container or I knock it over.2 points
-
#pray4kyteler2 points
-
You need to do it like this: 1. Open Bleeder 2. Assist pushes pedal down and holds down 3. Close Bleeder 4. Assistant lets pedal up Repeat until no air comes out, remembering to check reservoir. Unless you are using a special hose with a valve of some sort on the end to stop the air/fluid from sucking back up2 points
-
Didnt end up going to the car show last month but id be keen for a roadtrip. @igor feel free to come along for the ride if you want ill probably take the lush ef wagoon so youd be riding in style2 points
-
Thanks all! Pretty stoked how it's come up now tomorrows job is to glue the roof foam good and proper then perhaps the roof lining, and get it sorted for a warrant. And clean the damn windows! carb/choke is a bit gammy so will see if I can adjust that. Accordingly has had a kit but may be something sticking. where do you work nick? I had to chuckle, it fits in between the stains the wagon left from the fuel tank and the sump2 points
-
Finished this patch Made a start on the exhaust and realised I have a problem with it fitting between the crossmembers. It's going to have to be made of lots of different sections with a heap of flanges, otherwise it won't be able to be removed or fitted. It's fairly tight just to get the x-flow bit in. Might be better if I put the x-flow underneath, so then that whole section to the headers can be one piece and just drop straight down to remove. Only problem with doing that will make the exhaust sit very close to the ground, but should be fine as it won't be as low as the running boards. Will run a resonator on either side in the middle and hopefully those sections can be slid out the back if there's a flange just before the diff kick-up.2 points
-
Thursday night was wagnats packing and jamming the CB radio and aerial on. The gas fridge took a lot of room in the back, and I contemplated putting the towbar on so I could take a trailer. Couldn't get the bolts to line up easily so I jacked that option in and just packed more carefully. My Mrs was coming camping too so that reduced the space available, and it was raining. Anyone with an old wagon knows about water leaks! Loaded for bear! Tagged onto the OS convoy in Te Horo and headed north. Prior to this I'd only driven the thing for about 5km in total. It went well though. Leaks as expected around the windscreen and rear side windows mostly. Some hesitation developed at higher throttle when getting near Hunterville. I suspected a blocked fuel filter due to the rusty tank, so picked up a new filter at the BP in Hunterville. Still got us to Vinegar Hill though. It's big enough for two to sleep in (so long as a few drinkies first) and did the job expected at Wagnats. I replaced the filter over the weekend and the old one (which was only little) was well clogged. Ran fine on the way home, even in the stop-go traffic coming in to Otaki. Might have been a bit smokey there, as reported on the CB. The cross-shaft in the gear linkage between the body and engine popped out when I was backing it into the garage so I lost gear selection. It was easy to lever back - looks like a new rubber bush is needed there. Still plenty to get done, but I'll leave the next steps until after British Car Day. ObPic of rusty metal removed:2 points
-
Needed a small sandbag for going under the corners of my floor patch while hammering.. I love making something from nothing so used an old glove as the cuffs don't wear out. And then Greg did the sewing ( so basically he did 90% of it haha)2 points
-
Finished off the sink unit, nice teak super yacht ply from my buddy who used to work there. lower shelf is a bit frufru compared with the rest, but meh. Sink drains through the ash tray and out a grommet underneath. i have also added a hand pump tap to a 20L water container that lives under the bed Used up the last of the checkered vinyl to cover the grotty brown panels Went for a surf mission to Port Waikato, had a meet with another high roof caravaneer, a slightly later facelift one. Surf was a bit shite so drove the coast road to Raglan. 2 hours of windy gravel though some lovely country, Raglan was better but still shit, Van went great tho, and looked cool doing it Ive bought some awnings (2xfor $20 each!) so apart from adding something to connect them too above the door, finishing the curtains, a bit of underlay/foam for the bed a nd some minor electrics shes already for missions1 point
-
I made a video of some of the stuff1 point
-
I would have to bring the truck for that.1 point
-
This. I did the brakes on a club sport today with some 5mm hose from Bunnings and a Powerade bottle with a hole drilled in the lid, hose down to the bottom of the bottle and a bit of fluid and your set. It'll pull back a little bit for the first couple pumps but once up to the bottle it's sweet, and you use clear hose your can tell when all the bubbles are gone/ fluid is clean.1 point
-
I'm keen.1 point
-
@kyteler @danger you guys in?1 point
-
Sweet rammer I built out of a rfb25det gearbox mainshaft with some glue heatshrink and a bit of 32mm electrical conduit. Plus some yards I have been building after hours. This is the reason I have no drive shaft or working gearbox and my trip to Nats via chch is only 3 weeks away. ....1 point
-
@igor Happy to buy you a beersies or two if you come along.1 point
-
19th's good for me, probably shouldn't but good excuse for a roadtrip1 point
-
My Civic got knocked back more than once for oil leaks at wof time. Must be extremely contagious. Just having them sold in Britain badged as Triumphs made mine leak oil here.1 point
-
Goddamn this came out great ! Good work brother1 point
-
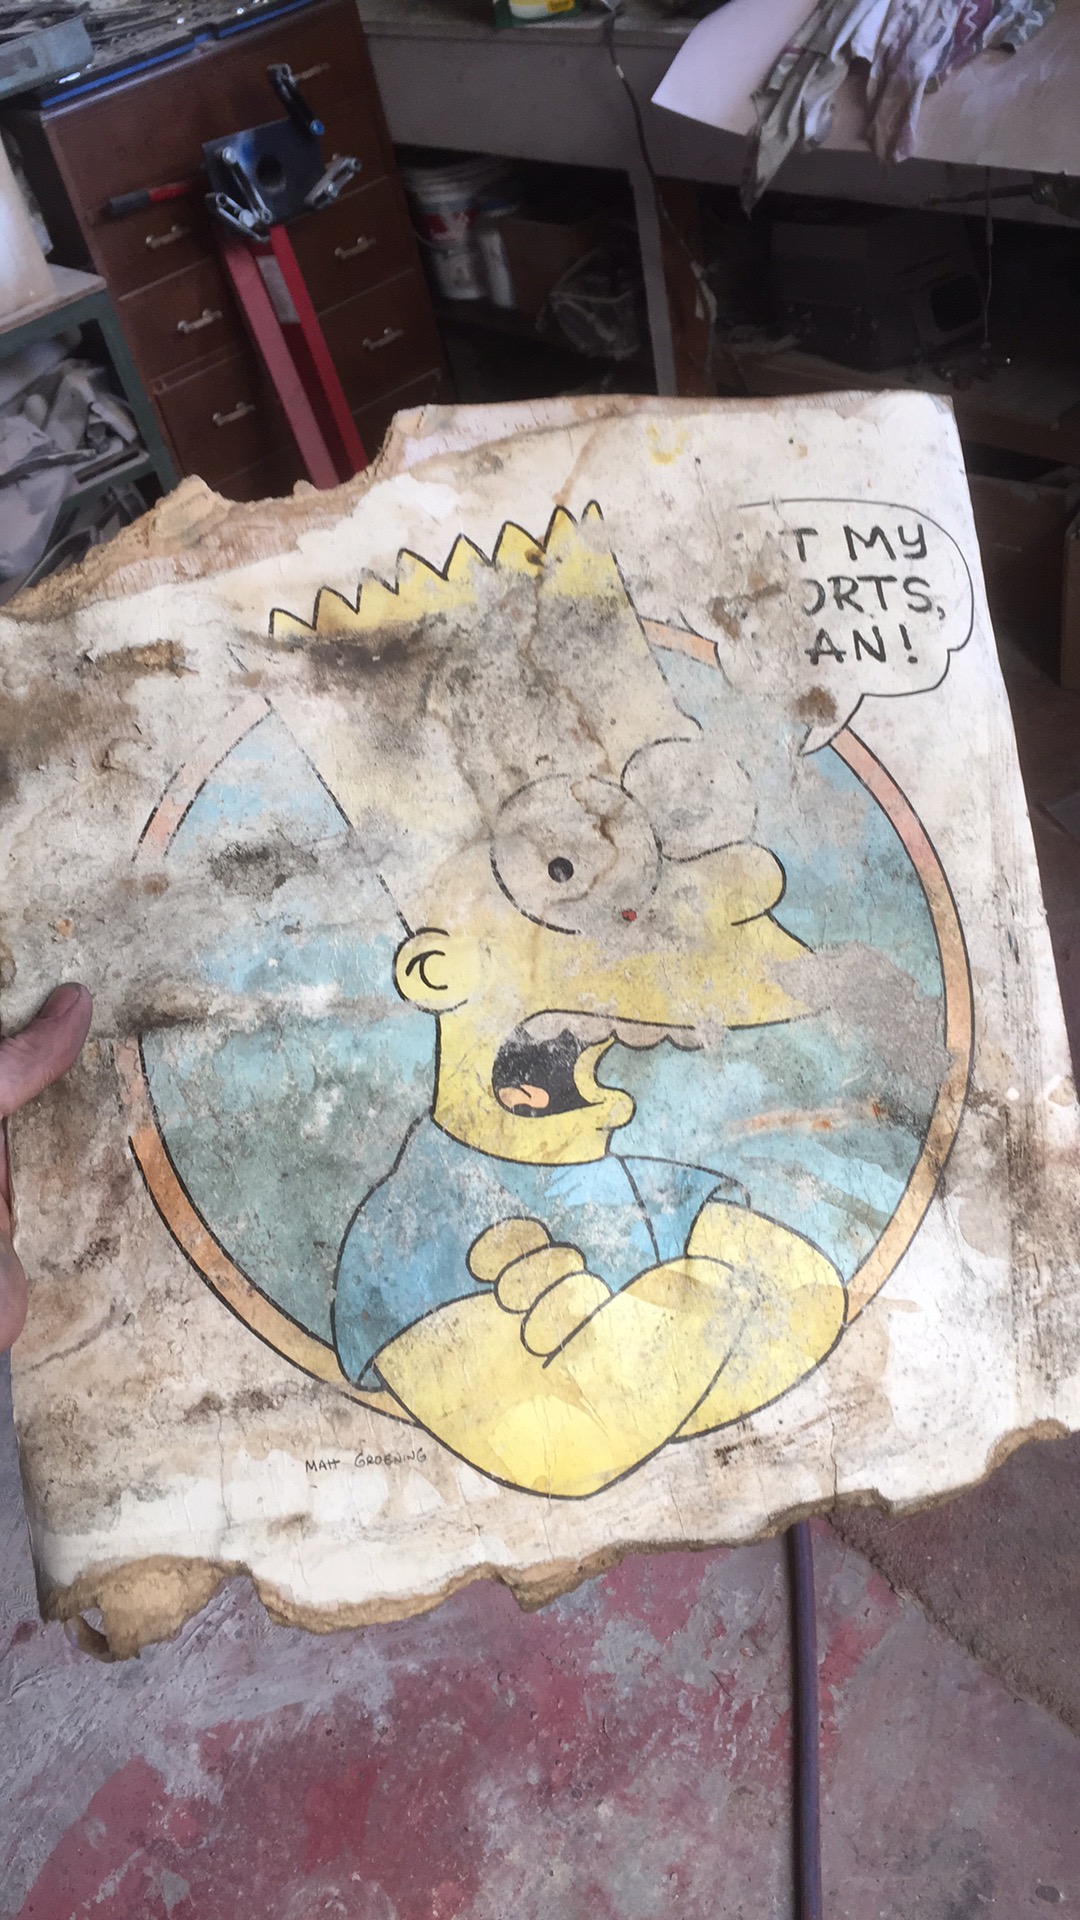
So awesome man, well done you. The part that entertains me the most is that at absolutely no point in time will anyone ever come up to you and say "This looks familiar, this didn't use to be Bart's 1200 did it?" Ain't no telling.1 point
-
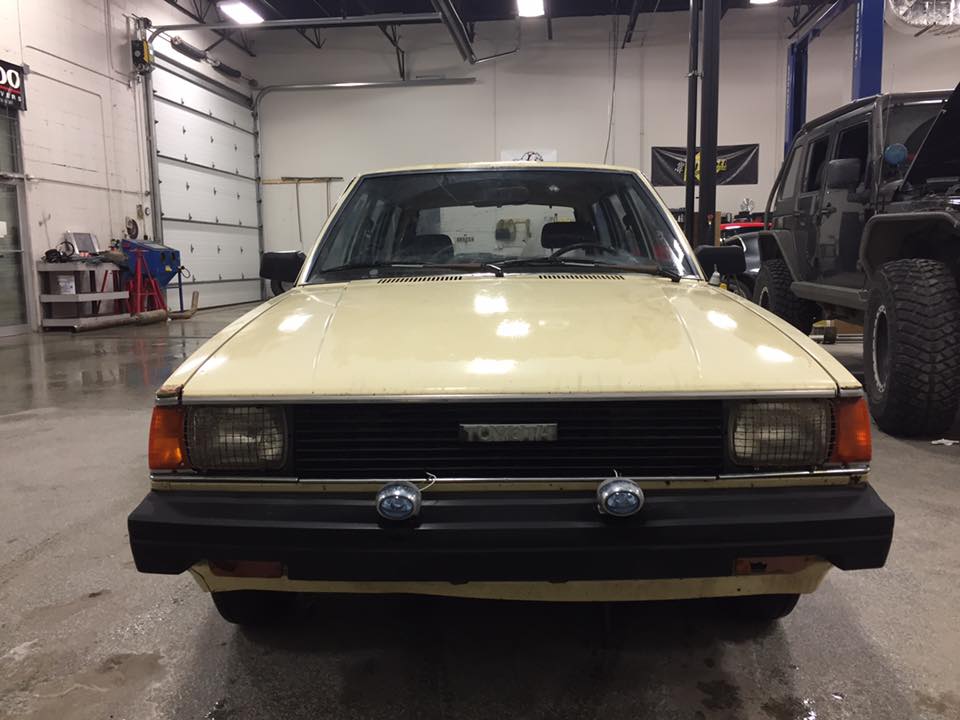
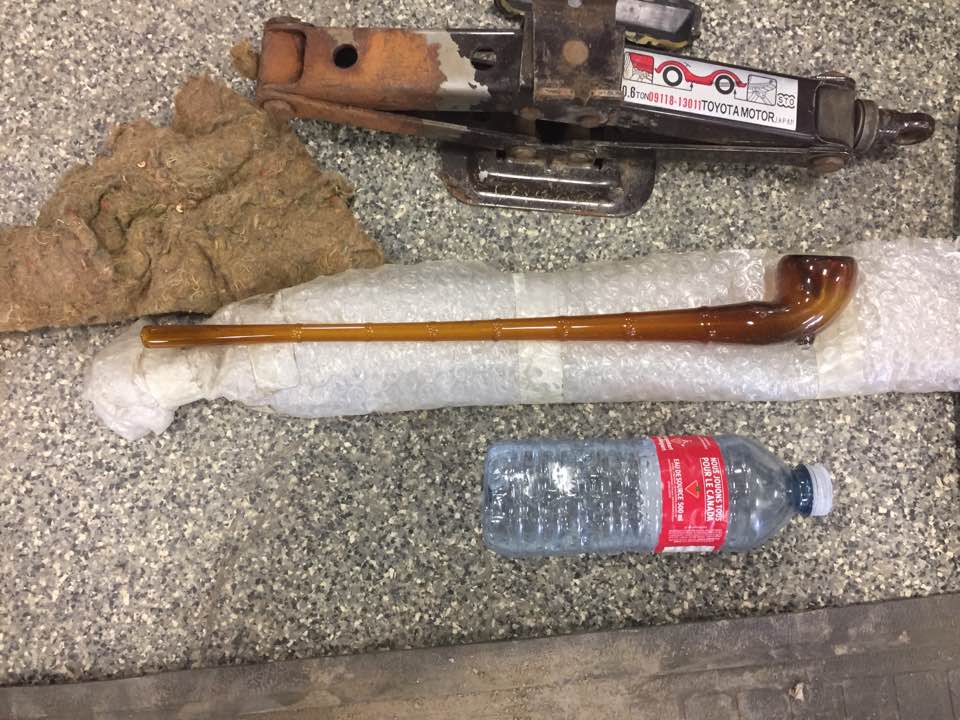
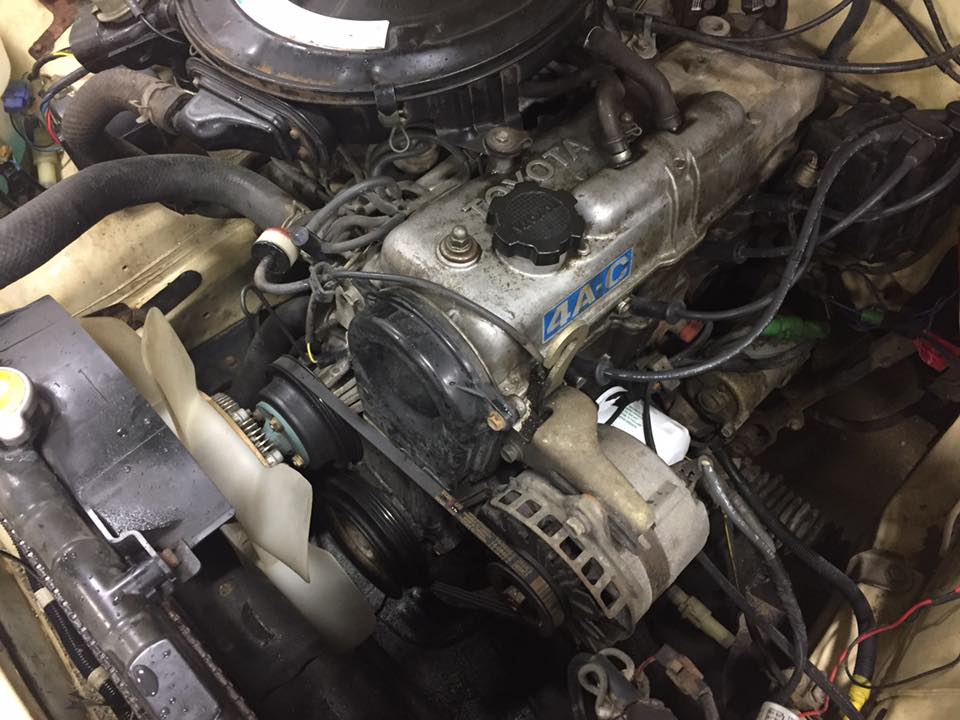
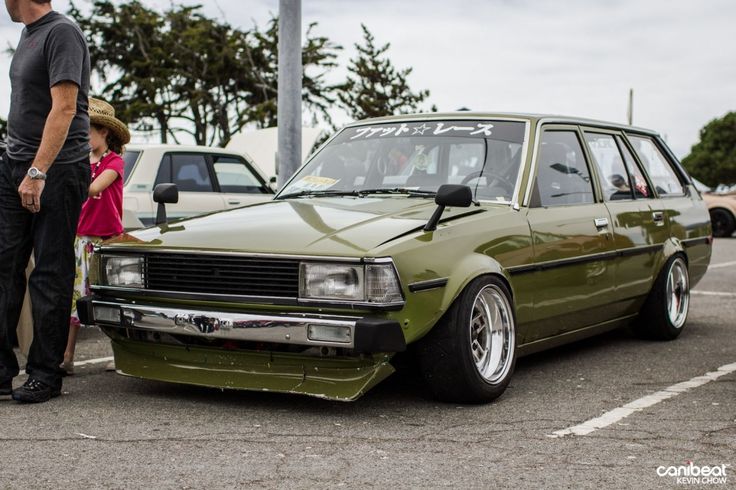
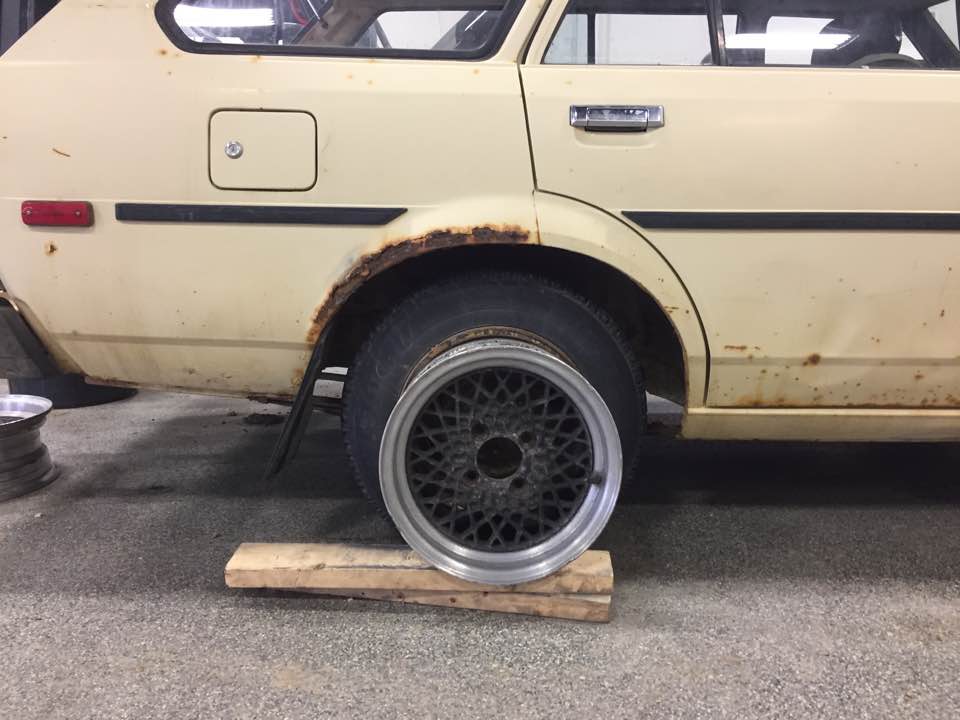
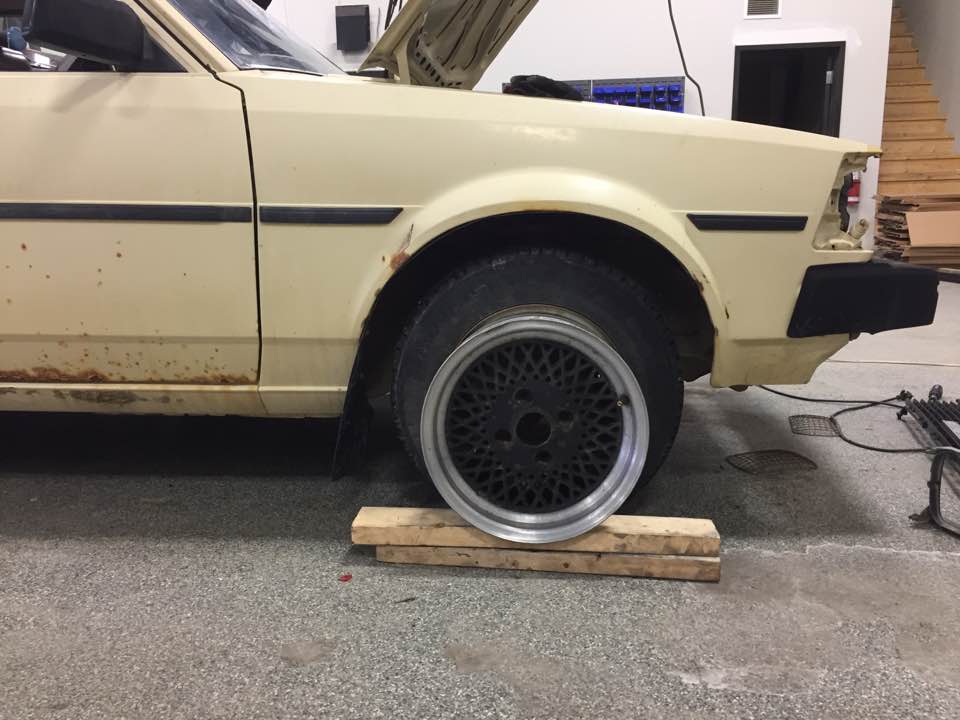
Since picking her up, I've had a little bit of time to play around and work on it. I have a new born at home, so time is mostly spent taking care of her. One of the first things I did was pick up the wheels I mentioned up top. The guy had them listed as Enkei's and SSR's. When I got to his place and found out they were Rikens, I pretended to get upset and told him that they weren't worth the $400 he was originally asking for them, and bascially worked him down to $200. Works for me. One thing I hate about buying used wheels here, for some reason apparently people can't drive and find a way to rash wheels easily. You can see in the picture of the Enkei's above where the lip is slightly bent and rashed at the top. I'll be sending these out to get straightened and the rash fixed, then I'll be painting the wheels. During my time working on it, I decided to clean the car out of all the old junk and cigarette butts the previous owner decided to leave me. My buddy was giving me a hand and saw this big bubble wrapped thing in the back seat and decided to pull it out. He unwrapped it found this thing in it. It's for tobaco use, I swear..... No other major surprises, but I did manage to get $4 back from loose change, so car only cost me $746. I also got rid of the stupid ugly fog lamps and head lamp grills. The engine is in good shape, runs great except the car flood out when it reached operating temperature. I have a carb rebuild kit on order right now too, so once it comes in, I should have the car drivable. Here is my headlight/front end question. So, the front end currently on the car has 5"x7" sealed beam headlights and as i stated before the marker lenses are broken and one side is discontinued from Toyota. I've done a bunch of looking around online and it looks like the TE71 panel vans have a similar lens for the marker. We never got the panel vans up here, so does anyone have one they can measure the lens to see if it will fit?? Second question is I've been looking on ebay for the marker lens and have come across parts to do a flush face conversion. Since my front guards have the angled cutout from where the markers fit, I don't want to try and track down some earlier model guards to do a quad conversion to it, so i was wondering if anyone knew if I could do this front end without modifying the apron?? also already have those same mirrors on order too.
1 point
-
sorry it's a shitter but the lights blew on that side of the garage and it was late. Is wet also. Gonna drive to work tomorrow. Lights came right, did hoon a fuse so easy fix. practically everything it had, has been re-attached, but plenty of tidying inside to do. liking the direction it's going in. The rubber sample will work, just has less contact area for glue but seems to sit in the grooves better. Likely have 13m of that tomorrow to slug in this weekend. Is not the same profile as the boot so have chucked the old skode one back in for now.1 point
-
The European aspect is so the electrical problems can ignite the English oil spills. Scorched earth car show.1 point
-
Good day today, lots achieved and a cracker day for it. As you always do, I hoped it would spray out immaculate and I'd never have to touch it but it ended up a little peely and some shit stuck in it. So I'll have to cut and buff it, I really hate doing it but. both my repairs on the mounting areas for the cowl vents cracked when I screwed in, bit gay but not super phased. Very jazzed on the original front, looks so much better than the plastic grille. while I was waiting for it to flash off I replaced the diff pinion in the pontiac so double project win. tomorrow I'll crack into painting the pillars and doors satin black in and out then wham on the new rubbers I got from basis and hang the doors back on.1 point
-
Got the cab back from sandblasting. Has also been etch primed. They did a very good job of it. Patch panels for the right hand side floor should be here in the next week or two. Made up a plate to replace the door hinge captive nuts that were turning. Plug welded it in. Pic for thread because these updates aren't that exciting and so I don't forget how cool this will look once it's done.1 point
-
I'm sure many of us have bought similarly shagged cars with new wofs only to have a huge list of stuff to fix for the next one.1 point
-
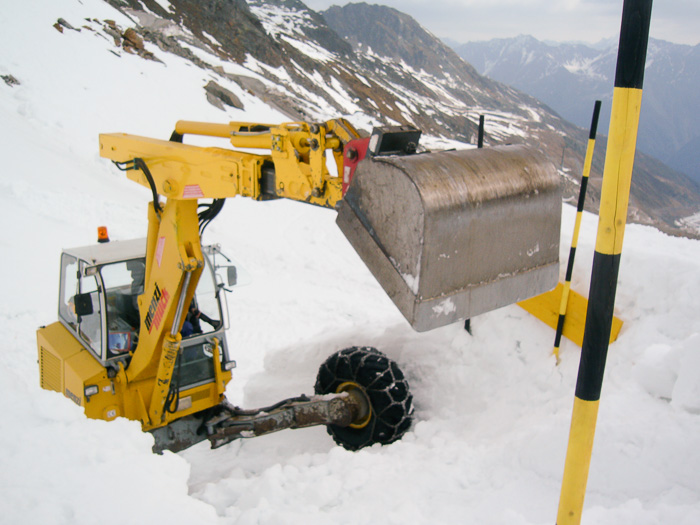
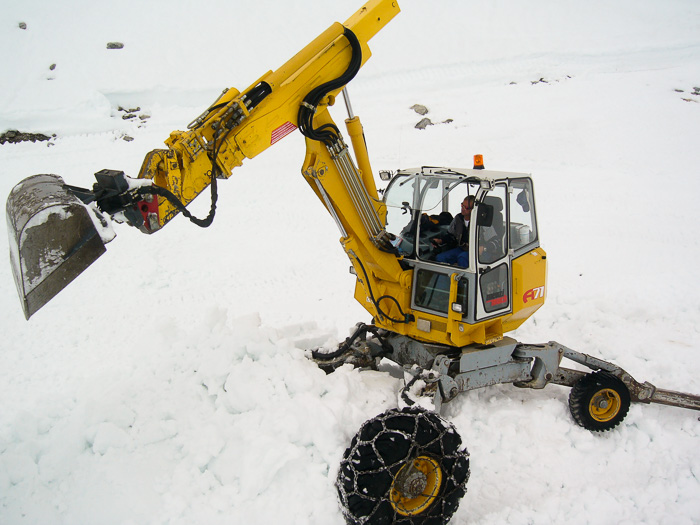
So cool! I never knew any made it over here. have worked with them a bunch in Europe, just the ticket for snow at odd angles. It was pretty much the secret allowing us to build this thing
1 point
-
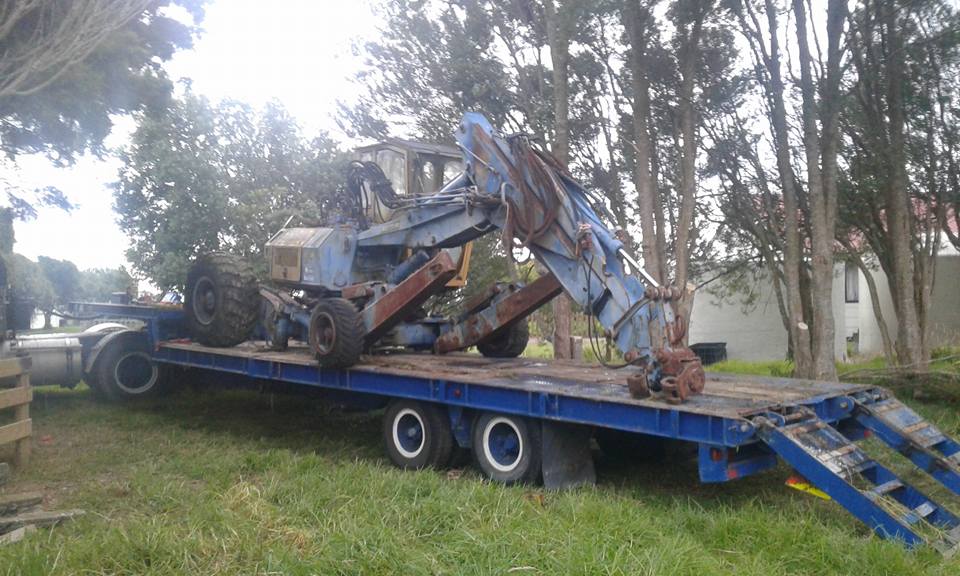
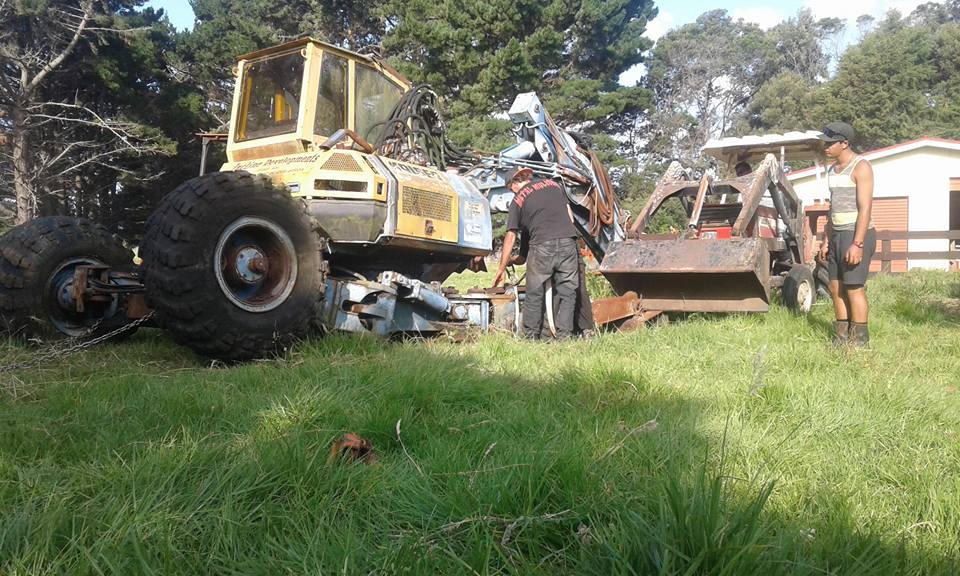
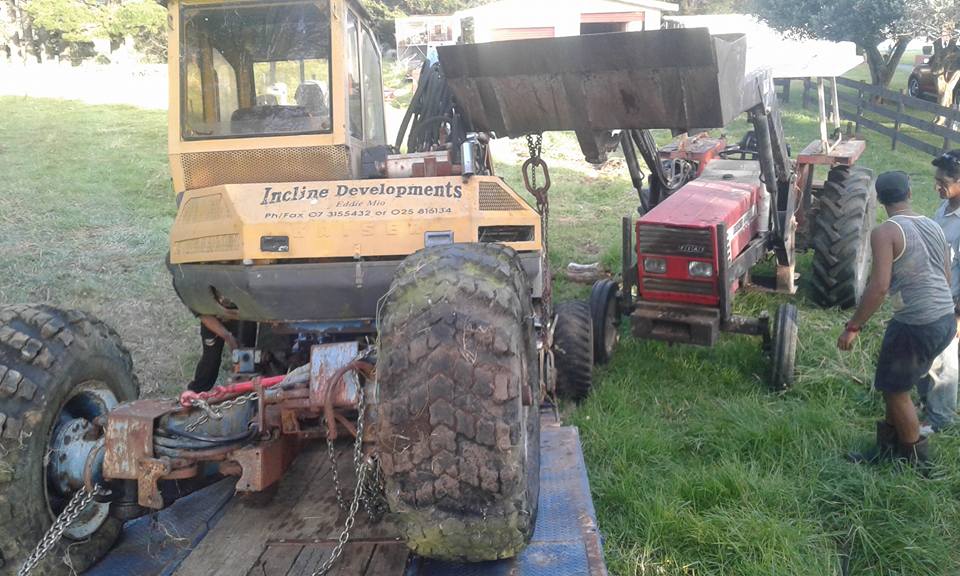
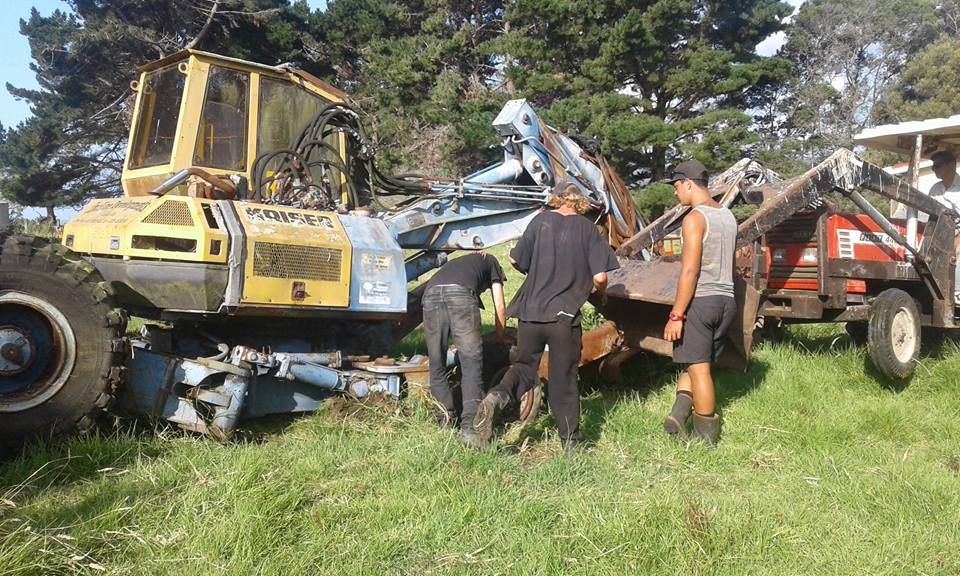
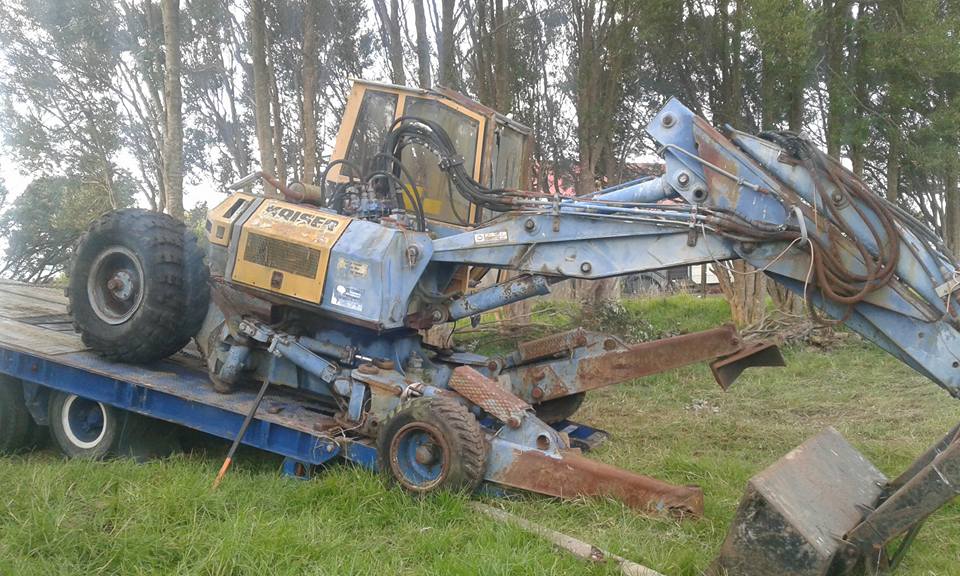
Loading her up. This was a nightmare.. It doesn't run so no hydraulics, which meant cutting hoses and allowing the bleed out of the legs so we could move them manually. Obviously the flip side of this means they went wherever the fuck they wanted and with a machine weighing 7 Tonne this made things farking hard!! In the end it took 6 hours, 4 of us, 2 block n tackles, the hydraulic winch of the transporter (snapped its cable twice) and a very underpowered old tractor
1 point
-
I made a muffler, its a a chambered style, makes my car sound mean.1 point
-
Now that botophucket works again, i can show off the record cabinet i built over Christmas. The slowly collapsing cube boxes perched on the speaker just weren't going to cut it, and it was a good excuse to categorise some records properly. So I donned my best Al Borland flannel, and $50 worth of MDF and a few hours resulted in this: Much better.1 point
-
I will put my hand up to bring a car along, consider me there! I reckon reserve like 12-15 spots now? We should be able to fill it! Grab the banner and represent OS!1 point
-
Another day full of win. I left the loctite to chooch overnight and it worked perfect. Once I took a hour to diagnose a blown fuse.... New copper crush washers did the trick on the filter too. Happy with that result. I set the idle stop screw so now it actually idles and no more hunting. Attempted to do a stationary cooling test but the back is so light it drags it along, It has lots of revs now and speedo seems to be working still. it isnt too loud with the cannon gone and the muffler not leaking The loudest part is the gearbox now1 point


This leaderboard is set to Auckland/GMT+12:00