
Leaderboard


Popular Content
Showing content with the highest reputation on 11/15/16 in all areas
-
drove it around the motorways of auckland city and have clocked up about 120 ks in it so far. all seems well at this point…….10 points
-
Finally got my steering column mounted after waiting for a chance to collect the correct fasteners with a busy few weeks at work. Pretty happy with the result it gives me plenty of adjustment still and is substantially lighter than the factory mechanism. Got a steering boss kit on the way so I can mock up steering wheel position and make sure I'm happy with it before I fully weld. Also got a new TIG torch on the way so if that helps my crappy TIG out I might weld the dash bar into the cage.. It adjusts on the matrix of tapped holes and rotates around the centre of the UJ in 1-2deg increments as such. Plan is to get all this Gold zinc passivated like my subframes so should look pretty swish So dad just ordered a set of Enkei RPF1's for the AE82 so I thought I better test fit them on the AE101. Think I need to buy myself a set cause they are stupidly reasonably priced through Barry Manon/MRP and fit my car perfectly! 15x8 +28 for those that are interested. Because slammage... Love these wheels Apart from some photo's I've been planning and organising the build properly for a change. I find myself going out to the shed, staring at the car and not knowing where to start so I decided to write myself a list on this massive whiteboard-like panel I had lying there. It's helping me plan and know what bits I can get underway and what parts I need to order at each stage. This project is 100x more of an undertaking than I ever thought it would be and my progress thus far has been pretty pitiful IMO so time to get organised and get it finished! This list only scratches the surface in terms of what needs doing but should get the car to a good point and give me something to work towards Also in a burst of shed-organisation motivation I finally wired up the 4x 3-tube fluorescent lights I had lying around. First time trying electrical thingys and I haven't burnt the place down yet. Garage is well lit now for night time motivation10 points
-
Sill repair panel is done. To get the curve I used a couple of strips of inner tube on the upper wheel of my english wheel (home made a few years ago). This lets the metal curve over the lower anvil without stretching it so you get an arc in the panel rather than a compound curve. It's not perfect because my lower anvils have a flat piece in the centre (which you need for normal wheeling) but the linear marks are pretty light / should sand out I think. I welded some tabs to the remaining parts of the sill so I could clamp the new bit in with clecos. Also made the inner sill closing panel up, but its a bit ugly so no pics. It won't be seen once it's all together. Have picked up the front panel from Metal Immersions but it hasn't made it out of the Nissan's boot yet. Next is to make a new piece for the bottom of the guard. I could probably weld the old bits back in, but I had to make two cuts (didn't cut far enough up the first time) so it's probably better to renew it all. Have a paint issue I'll ask about elsewhere.7 points
-
One job that I've had to do since ages ago is replace the rubber bushes in the rear suspension arms. The car has always had a bit tyre shake or axle tramp when briskly accelerating from a standing start. The rubber bushes in rear arms of the car were in good shape, just soft. So in preperation for the //oldschool.co.nz/index.php?/topic/53865-oldschool-christmas-tree-drag-day-mark-4-december-10th-meremere/ I enlisted the help of Dave/Sentra and the improved hoist. There's a couple of pictures that I took before the battery on my phone went flat. Not so wobbly hoist: Floppy rubber: Red stuff: Dave!!! Notice the hub bushes around the wrong way??? Whoops. They also needed to be linished to get the hub to fit back in. In: And just because its a pain to get it into 3rd on the dragstrip (rest of the time the gearbox is mint): We also changed the engine oil to a thicker grade......Not much of a change, it still smokes. The tyres shake less under heavy acceleration, but still present. I'll look at getting the car aligned and setup at some point.6 points
-
back in business. few teething issues getting it started but its going well so far (have covered two Ks in it up to this point so not a huge test). ill put some more Ks on it and see what happens. 2016-11-14_07-55-07 by sheepers, on Flickr 2016-11-14_07-54-56 by sheepers, on Flickr6 points
-
5 points
-
Looking forward to seeing this beast at Drag Day.3 points
-
Pulled the lump out and took off the bits I need. Untitled by GuyWithAviators, on Flickr Threw them at the new block along with the new parts. Untitled by GuyWithAviators, on Flickr Went to install the rings, assumed they were STD size pistons but to my surprise after cleaning them up found they're max oversize. Cue quick trip to ACL to get bigger ones as Dad (mo999) was only up for the weekend to help me. Untitled by GuyWithAviators, on Flickr Untitled by GuyWithAviators, on Flickr Put that in and went for a test drive around the block. Had the bonnet off so saw the smoke escaping the loom before we smelt it. Coil had moved over in it's bracket and shorted against the block. Melted the power wire throughout the loom so unstitched that and put it back together with this stuff. Neat. Test drive was good other than that. 5DMK7195 by GuyWithAviators, on Flickr Untitled by GuyWithAviators, on Flickr Also loving the new mesh grilles from Neal and the Channel-Master gutter mount ariel from a Morris 1300 at PaP Takanini.3 points
-
Did you know that Stirling Moss raced a Super Snipe in a rally across 15 countries in 5 days in December 1952? I accidentally went for a long drive on the weekend, from Auckland down to Kaiawa through the back roads, then turned left back up the coast road. This road has a few twists & turns including a hairpin or three, some hill climbs and sweepers. Rally country. I wasn't in a hurry. I never am. But then, from nowhere, I noticed some of BMC's finest front wheel drive wizardry looming large in my mirror. I thought I'd slow a bit further and let him pass, after all, 'said Barry was right up my bumper with lights on. Barry won't pass. Hmmm. Nailed it. First, Whooooorp! Second, Whoooorp! Third, Cough Whooorp! Speedo bouncing around 30ish. Whoosh! Strangely (probably gasping from the blue exhaust smoke?) I left him behind. However, the first set of twisties were coming.... Slowed down hard. Bow thrusters full to port. Tyres protesting. HARD into a left hander. Mid corner bump in the road..... SHIT..... That's right - the rear shocks are stuffed..... Entertaining I'll tell you. Said hydrolastic car passed while I changed my pants, however, not to be outdone I thought I'd give chase. Surprisingly, I kept up - no substitute for cubes in the hill-climb section I suppose. Anyway, I knew the rear shocks were poked after some hairy corners on the way back from Hawkes Boes so promptly did some research and found that a Toymota Cressida (circa 1978-80) should do the trick. I ordered a set of Gabriels (because they are red) from Rock Auto. Yes, they cost $14 each + $20 shipping. Ordered them on the 9th. Arrived today. Makes me wonder how Repco stays in business. Old vs new. GABRIEL 81340 [shock Absorber] Guardian Shock for those playing at home Old shocks came out easily. There doesn't seem to be any oil in them at all. Compressed with a finger and no chance of bouncing back. New shocks near perfect fit. Bushes are a little smaller, however some dish-washing liquid and a rubber mallet sorted fitment. Red for Racing. Look out Alec Issigonis. We shall meet again...... All in all a trouble-free hour long Monday night job. Quick jaunt around the block yielded much nicer dampening. Might have to look at a sway-bar next.....3 points
-
This better seedy?3 points
-
Got the new trumpets on. pretty much the same results as when had wood test spacers in there, good gains. Now back to the exhaust side to fix the reversion at 5k. have started making a new collector3 points
-
Had an update from the metal worker: So happy with the work!2 points
-
Have a couple of leads going for truck driving, hopefully have something to do by the end of the week. Fingers crossed anyway2 points
-
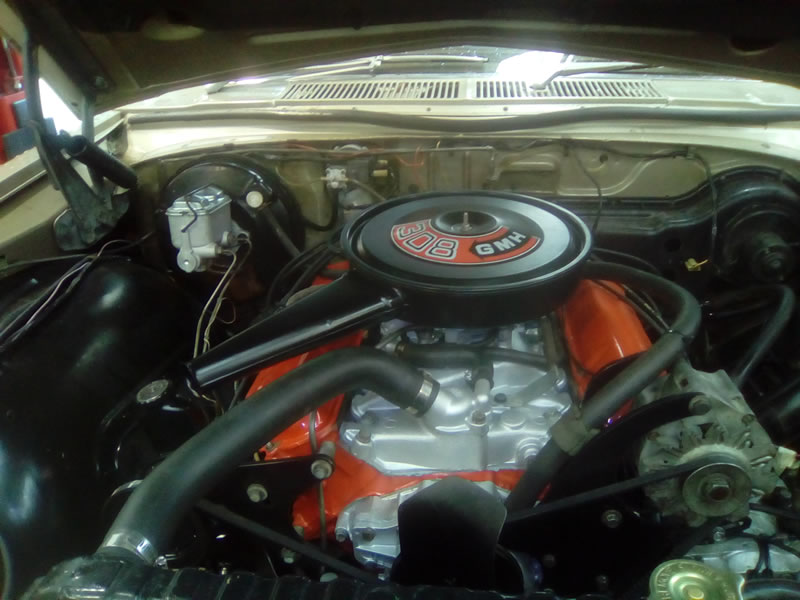
Finally, its ready for pickup Friday. needs few minor rechecks like things re-tightened. dud new oil pump or gasket, leaks a lil oil.. so replacement tomorrow and it is cruising time.. touch wood. Starts easy as. Runs like a well oiled sewing machine with a very subtle but noticeable lumpy idle at the rear.. woop re sanded/ polished & finally painted the tridents. wasnt happy with the subtle scratch marks left from the first time round, so used about 10 different grades of wet n dry.. never again by hand! much happier, but doesnt hide the subtle casting flaws close enough to near mirror finish. looks good from about 20cms away. im told the 352s produce some good smoke, 8mm tread currently just need to replace the front A arm and sway bar bushes, lowered springs. might get the paint professional touched up and cut/polished, undecided on window tint and im done!...
 2 points
 -
My trusty twin carbs were being a right PITA to tune - even OS-GC Threeonthetree couldn't properly tame them. Untitled by GuyWithAviators, on Flickr So thank you to some other GCs, Tim and Sam I have a single carb to run while I get my twins looked at/rebuilt. Had to get overnight parts from Christchurch to run it though, my OG manifold is already suited for extractors. I've noticed a couple of frost plugs are weeping so I will have to pull them out and put new ones in with some sealant according to the internet. No dramas though as the thermostat gasket needs the same treatment. 5DMK7194 by GuyWithAviators, on Flickr Also did a temp repair to the major rust spots, looks okay. Just need to wipe an oily rag over the new paint right? 5DMK7193 by GuyWithAviators, on Flickr And more excitingly/speaking of rust. I pulled the dash out and changed over the middle section to my black vinyl GT dash with tacho (not yet connected). While I had it out poked around the air vent channel and dug out some rubbish and uncovered some rust holes. Put rust kill acid on them for now and will get those repaired eventually. Dash looks swish though / not the yellowed wiper switch / anyone have a decent spare? 5DMK7189 by GuyWithAviators, on Flickr2 points
-
M8, this lived a few houses down from my place. I was pining over it hard and wanted my mate to buy it but he's a pussy /cool story2 points
-
Been a long time with this one too! Greg smashed out the seat a couple weeks ago in time for me to take it to the Smash Palace bike show! Fucking love the seat so much but since its done ive discovered my bars pull back too much and its made it quite awkward which I knew it was kinda gonna be but wanted to push on. Last night I crashed at a mates place for the night and talked Harleys as we both have Ironheads and while talking about my new seating positions and he mentioned some bars I brought a few years back by mistake I sold him So I brought them back from him and tried them on this arva. Will run standard switches on the bars to simplify things and getting brake lines sorted in a couple weeks so ill be able to ride this thing before the end of the years out. Enjoy these photos in the mean time2 points
-
Shit its been awhile since ivbe updated this. Missing a few photos of the adventures this bike has been on. This year from memory Ive ridden to the west coast 250k in one hit on the 50 motor and it loved it. Heaps of local rides too. prob close to 5000k in the last few years on it. For this years Dirtmasters I fitted Suzuki B120 forks and Rear shocks and Dirt tires and it carved up the track and handled the jump all good. Then in October Hogan hooked me up a deal on a YB100 so a new piston and rings and gasket set and this thing was strumming so the following weekend I stole the motor and it bolted into my F5 frame and everything swapped over easy and have done a couple hill rides on it and its so much fun. way more power way more fun I fucking love this bike so much. so much fun for 10 bucks gas and so many trouble free miles.2 points
-
Its been a while since ive posted anything and its been a while since ive done anything to the bike. I recently bought a bedford van and have been chipping away at the bedford every weekend to get it ready for the Burt Munroe Challenge. Over the past week and after getting motivated from the Smash Palace Bike Show. I bought a new pedal rubber at the Mcleans Island swapmeet, but the shaft was too small in diameter so i cut it off and welded a piece of 16mm round bar. To mount the mudguard i turned up some steel bungs and drilled and tapped them to M8, then cut and drilled a bracket out of some 50x50 angle. The angle was tacked to the frame. I wasnt too happy with the match of the radius of the mudguard and the tyre so i remedied it by using a method i saw on the lowbrow website using 2 bits of 2x4 to widen the distance inbetween the guard and in turn tightening the radius.. The black marks are refernce markd every 50mm To mount the middle of the mudguard i drilled and tapped some 16mm roundbard and cut some 22mm tube for the round bar to slip in to. I tig'd the 2 together and faced it up on the lathe. Another bung was made to go in the mudguard in the centre of the rib so the 2 bolt up flat together. Knocked up a kickstand at work from some 16mm round bar and some 25x25 shs Tacked on the brake stay tab on the chainstays and held it in place with a strong hand tools magtab. I'd recommend thes to anyone Front brake stay2 points
-
2 points
-
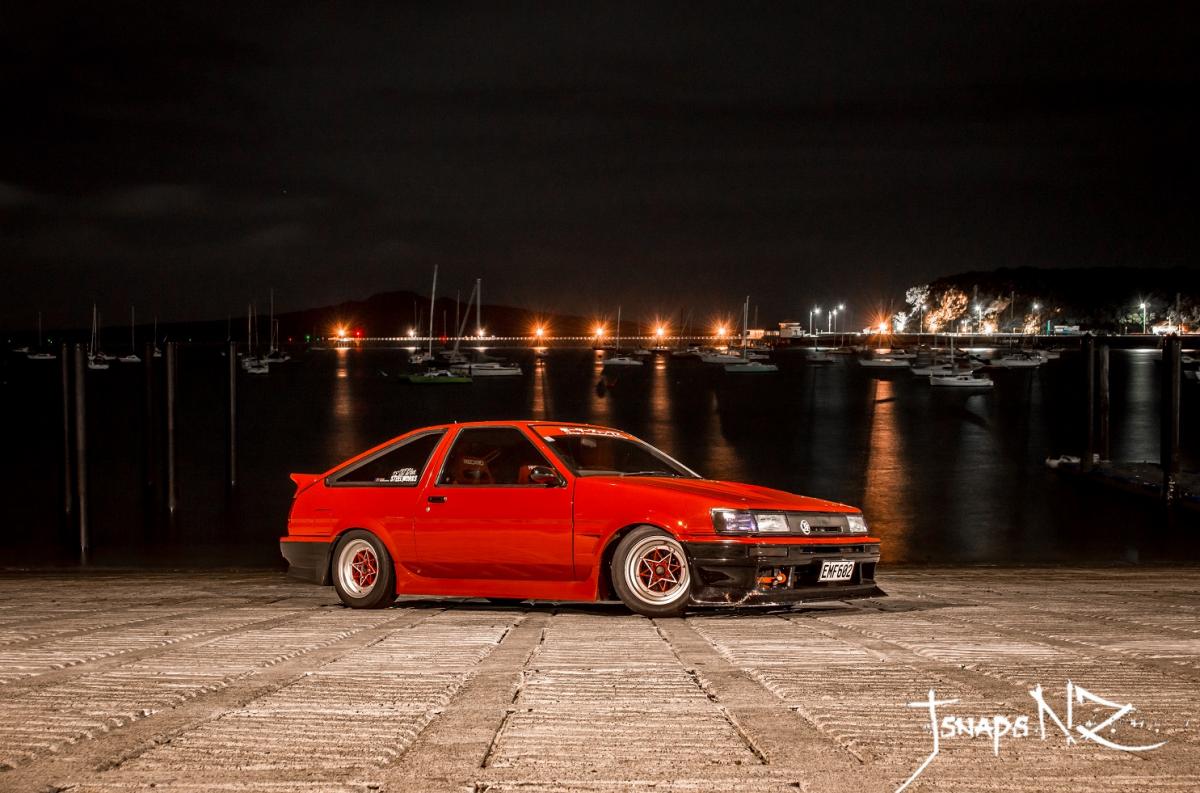
Not particularly proud of my AE86s' cleanliness but what a backdrop! A bit of processing required to make the Levin red instead or orange but not too shabby spot Rangitoto lurking in the background shadow... Pretty good lighting at the marina! Anyone need snaps taken of their pride and joy in AKL?
1 point
-
And the engine looking right at home... The clutch and flywheel assembly is fitted now. So next we continue with the assembly, alternator sidemount needs to get fabricated to clear the chassis rail, attach the other ancillaries, remount the fuel system components etc. Looks like i'll be getting some custom MCA coilovers made up for the front as well. This way we can achieve more low as it is currently sitting on its bumpstops and there is no suspension travel so would bottom out everywhere as is. We will probably put off the interior retrim until i'm back in NZ now. Cheers, Tai1 point
-
The engine didn't require much force to turn over after 24hrs of soaking. And now spins well with what feels like good compression. I'll need to grab my comp tester from dad soon though. Almost slung the engine in for good, till I realized all the brake booster and seize issues had side tracked me from my other main consideration, which is fitting a high pressure pump and fuel lines, which will be much easier without the engine in the bay. So that's next on the agenda.1 point
-
I just finished my final year of uni, had a job lined up and at the 11th hour they pulled the plug, so until I work out were i'm off to next i'm looking for some work to keep things ticking over, i'm keen, capable and have quite a varied CV but preferably looking for machinery/truck driving if possible, i'm licenced to class 4 + wtr with experience in civil (water cart/digger/roller/shovel stand) and agricultural (baling/stacking/wrapping/rolling ect). Anyone need an over qualified operator to fill in some gaps?1 point
-
Out testing the watertightness while getting coffee. Spoiler alert: ...Still leaks.1 point
-
I think HEB has the Marlborough kiaks road maint contract. but she's a pretty big job Jim. I imagine it will wind up being done by a collection of companies.1 point
-
you'll see them in my project thread once I've got them bolted up to the car1 point
-
1 point
-
would you like to buy another set off toyo 215 50 13s?1 point
-
nice! yep they'll look good on it for sure, there used to be a red series 1 coupe from Christchurch i think that used to get about with hotwires on it. Yep 14's would be ideal, mine are 13's, but beggars can't be choosers with 4x110 as ya know.1 point
-
Hey guys Got a bit more done today was a bit of a stuggle as I was really really hung over.. but my brother needed to put his car in garage so I had to do something. Yesterday got the clutch on and motor back in place. Was a bit of a struggle to get new clutch on and aligned but got there in the end ! Didn't take a photo yet but the underside of my car looks really good now all black with clean gearbox Brought some GL4 gearbox oil and replaced that and topped up diff at same time. Driveshaft all back in place just have to put carbs back on n hope it all works haha Have some time off work for wedding this week so hopefully get it a wof by end of week all going well.1 point
-
Yeh so, this has become a very long term project. I haven't touched it in a very long time, but recently got a second hand front brake set up. I have to machine up some new front stub axles to accommodate them, but should do the trick. This morning it was pissing down with rain, couldn't do any other chores, so quickly whipped up the first half of the exhaust. Chur my bro.1 point
-
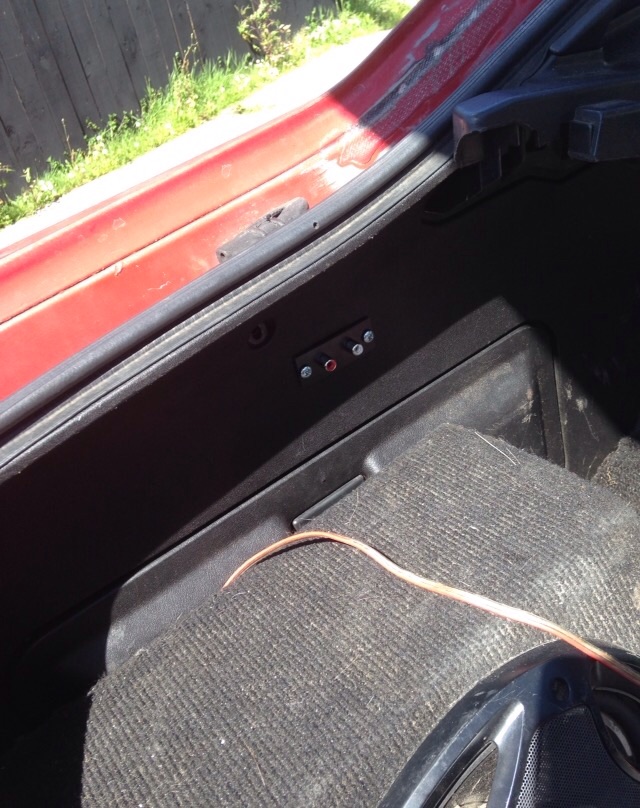
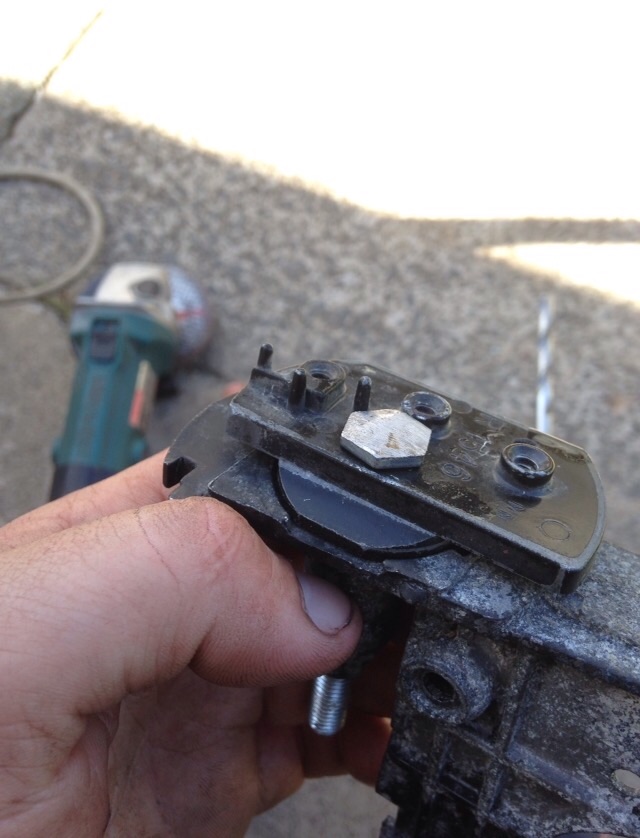
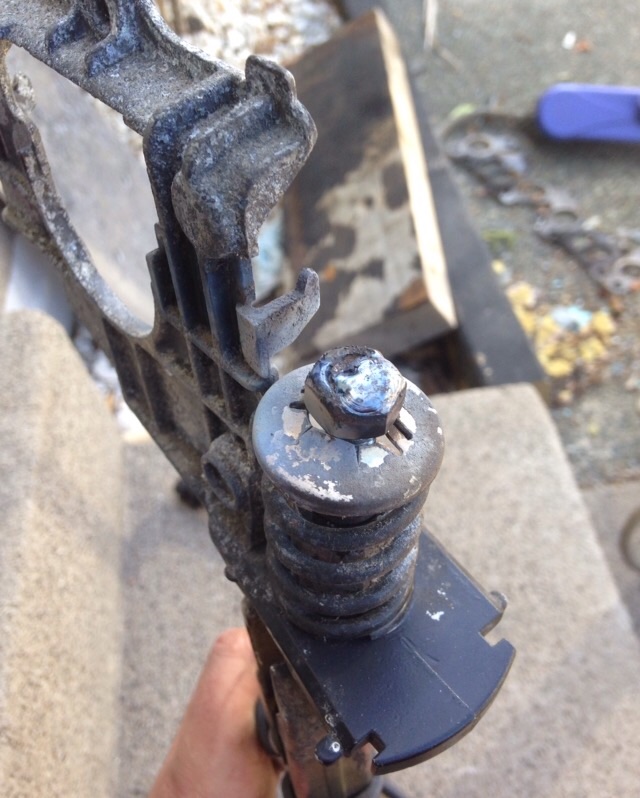
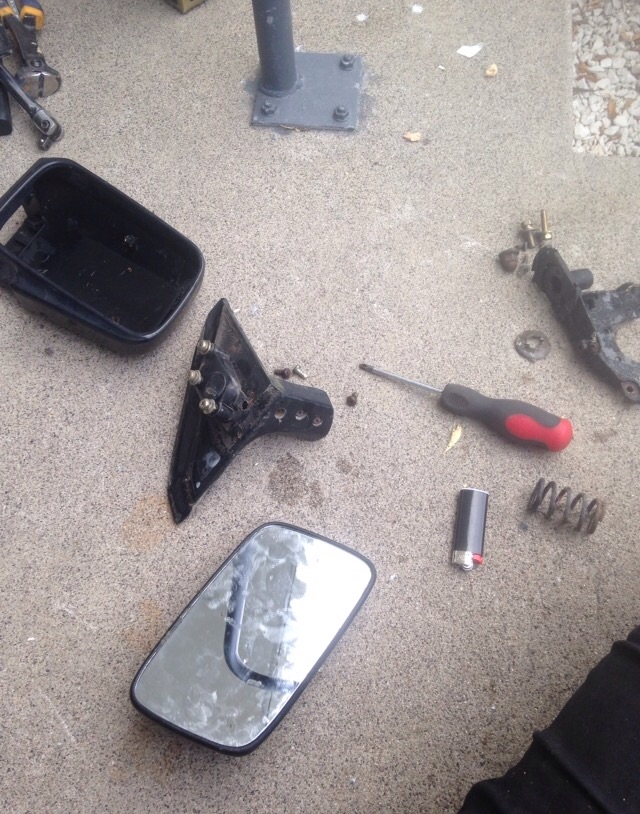
Since the car is pretty much a daily driven ute I thought I'd make life a little easier. 6x9's make for a good sound system on long trips but moving wheels/engines and other crap is a pain in the ass. Thought I'd keep it OG with the White and red plugs. Sorced from jaycar they didn't break the bank and make every day useage miles easier. Other thing that's been bugging me is the hideous repco wing mirrors someone put on. Prefacelift mirrors are ok I guess, big improvement over repco jobies. Just running drivers side. Big ups to the bloke who drilled holes in my doors for no reason Spring thinger retainer clip thingy had come off on both mirrors of donor car, nor did they want to go back on. Stopped by steel masters and picked up a bolt long enough with an 8mm shank. Had to cut the head down to clear mounting bracket. And I welded the nut on for good measure. Was pretty fiddly pulling apart and getting back together so want to avoid doing that again
1 point
-
Fritzal chamber1 point
-
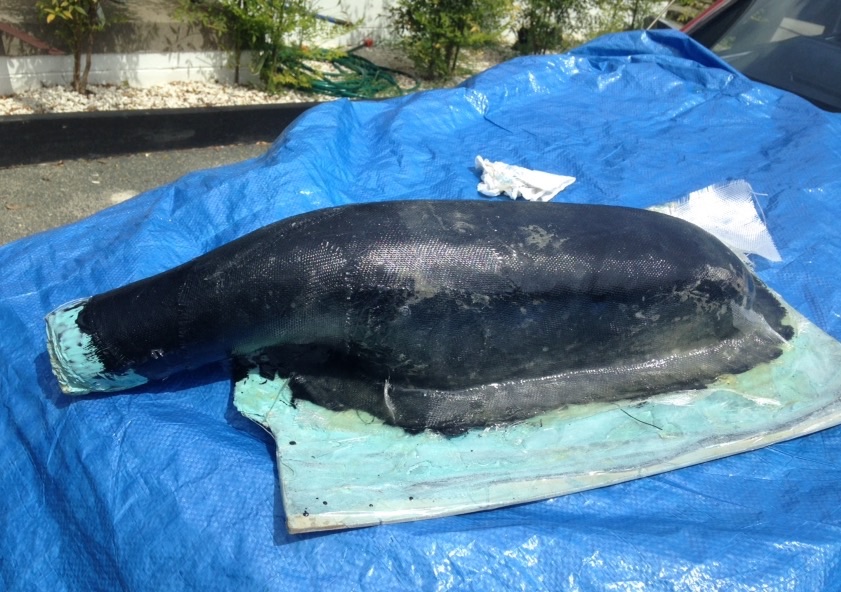
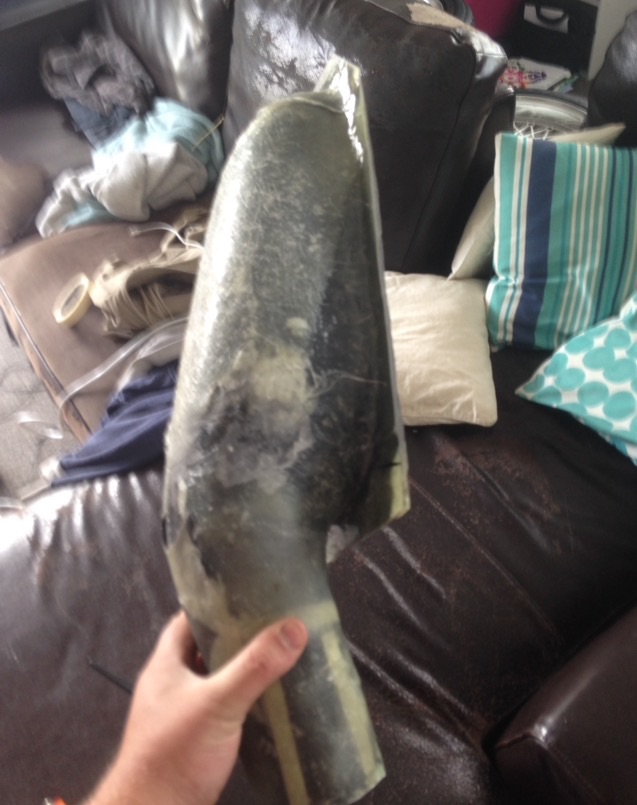
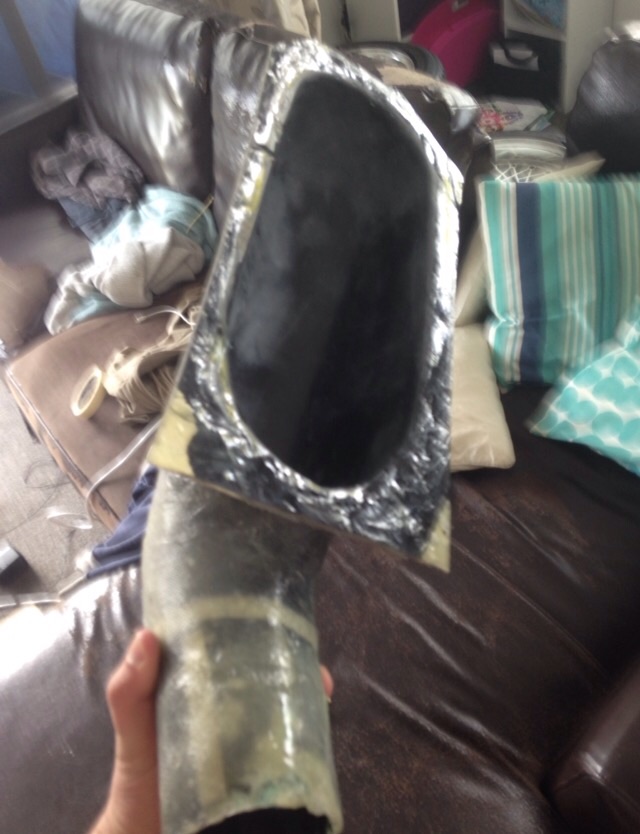
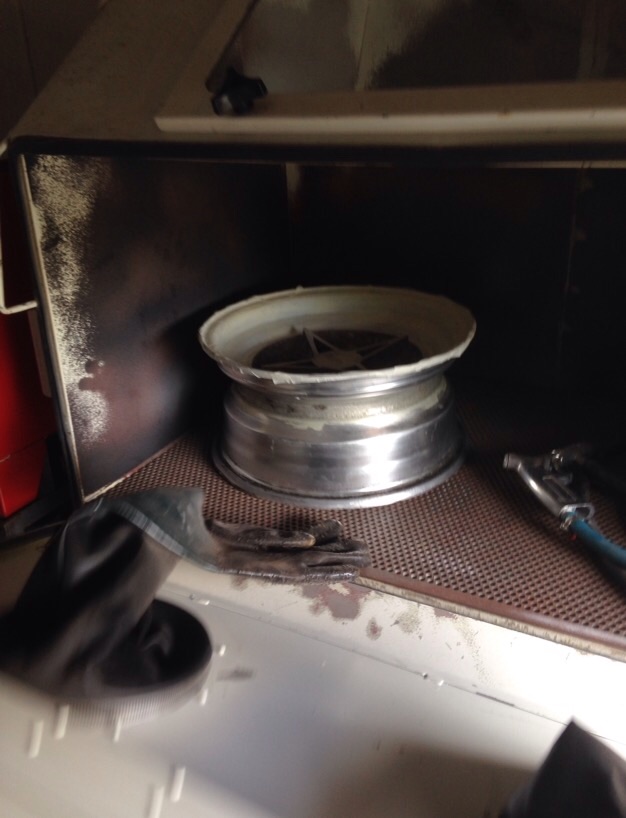
Moulds getting there, little more to do still. Haft to touch up the gel coat where I got s bubble between the gel and glass. I little support to do and maybe a base so it sits flat. Went to a mates and started sand blasting some OG wheels I picked up. Finally picked up a drivers side window mount mirror so can pull thoughts hidious rep I things off!! Cars got fender mirror door on passenger side so I can probably just run drivers side and if get hit up I'll just say it's factory like that
1 point
-
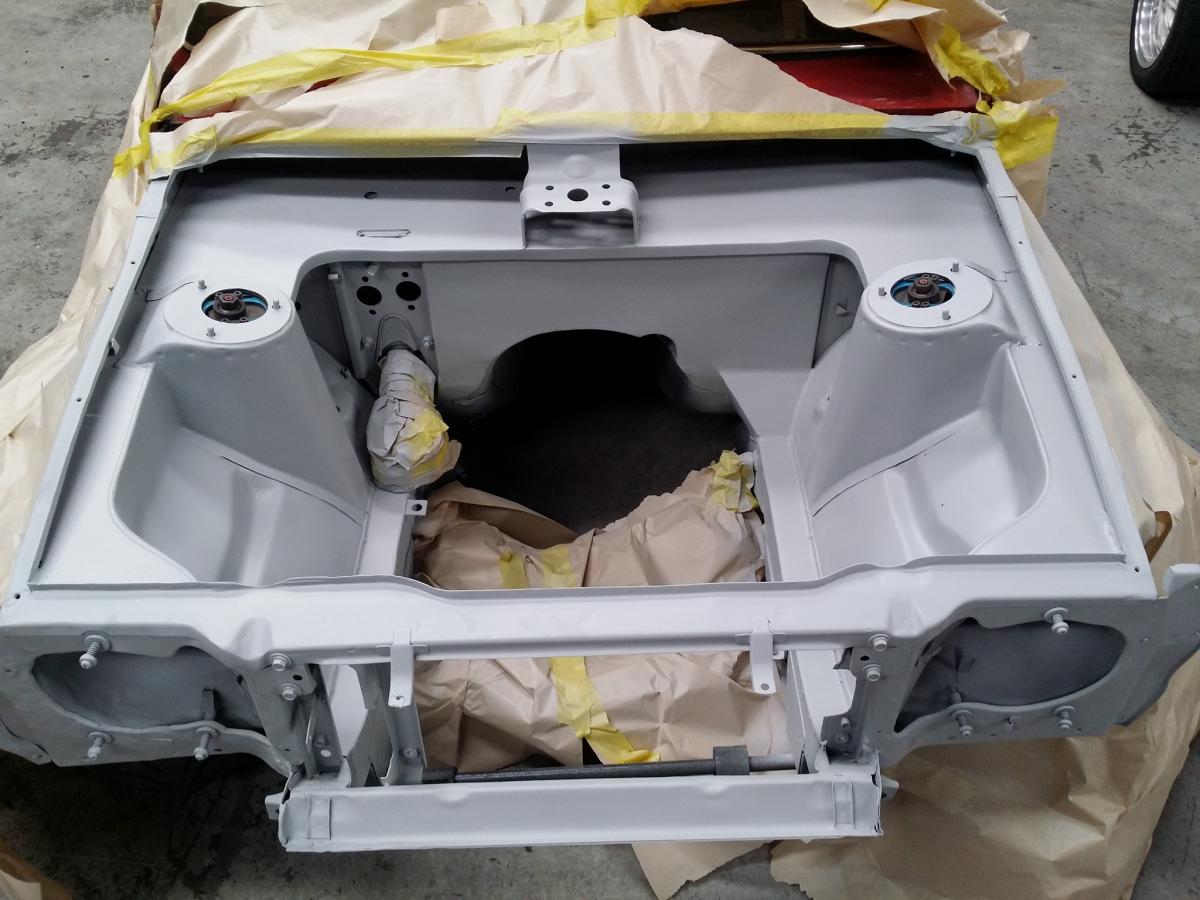
Engine bay finally sitting in primer now.. Also picked up a bosskit for the steering wheel. Just got a SAAS unit as not to keen on shelling out $200 for a nardi one. So hopefully the engine bay will be painted this week then reassembly can start. Will also look at fitting up the steering wheel sometime this week. Small update but thats it for now. Cheers, Tai
1 point
-
These are going inside the air filter. currently 75mm long. have left some meat at the bellmouth end, so can make them shorter if needed. otherwise if they work good will trim the excess off. They spigot onto the first section and will clamp the filter backing plate between. I shaped a bit of tool steel, to get the elliptical bell mouth shape Also made some more slip joints. for when i get around to making a new collector or 2, to test on big extractors.1 point
-
Bit more polishing/sanding runs and putting the last of the bling on, looks nice out in the sun for a change The short drive and out of the shed confirms the engine has to come out, it starts and revs ok, idles away, quiet tappets, but blowby is silly, just steamy/smoking out the engine bay and a good coaster sized blob of oil under the bell housing (that only leaks when engine is running). Lesson learned - i should have pulled it completely apart to check and clean properly when i had the sump of the first time, i checked the bores and a couple of bearings and just assumed . So good timing for the main parts needed turned up from Mr Fiat ,Headgaskets x2, rear main seal (x2) and some random coolant hoses to buff out the shipping. I already have a set of std NOS rings i found cheap on ebay. IN winscreend news, AALAWS put me onto a chap who can get Screens made new (custom tinted) from a place in the UK for ~$500-650 which seems fair, BUT + ~$2200 for custom crate, insurance, shipping, GST and etc. Chucking even one additional screen in would halve the landed per unit cost, but even then its still $1800 bucks and a 12 week wait Fingers crossed for a NOS or second hand one a bit closer to home. I will try an actual phone call to the big windscreen warehouse places as their 'contact us' forms dont seem to generate any responses, but i have sent a rough template off too a guy who knows a guy with a shed full of old FIAT screens (amongst other stuff). I need to do some work on the 125 for drag day/wof , and have a big tidy out the lockup for a shuffle around( get the parts wagon in and parts 125 out stripped and off to the scrappers), so i dont think i will make too much more substantive progress on this for a while as im waiting to find a screen anyway and at least its complete, looks cool, and can move itself around.1 point
-
2016-10-30_12-33-05 by sheepers, on Flickr 2016-10-30_12-32-55 by sheepers, on Flickr1 point
-
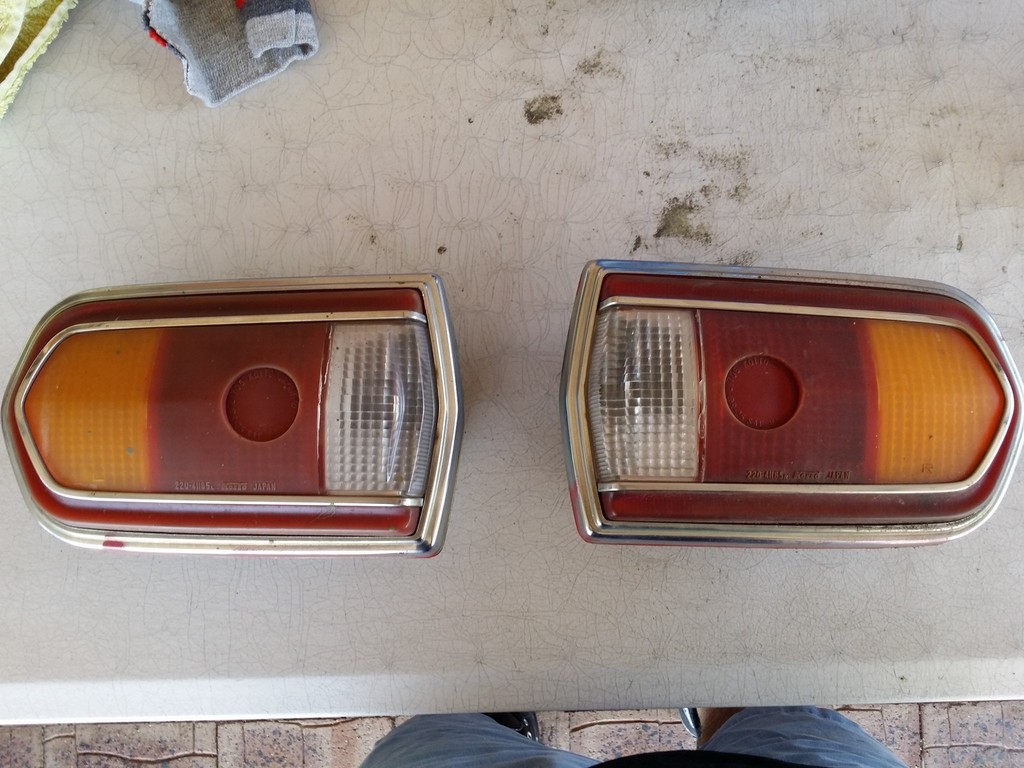
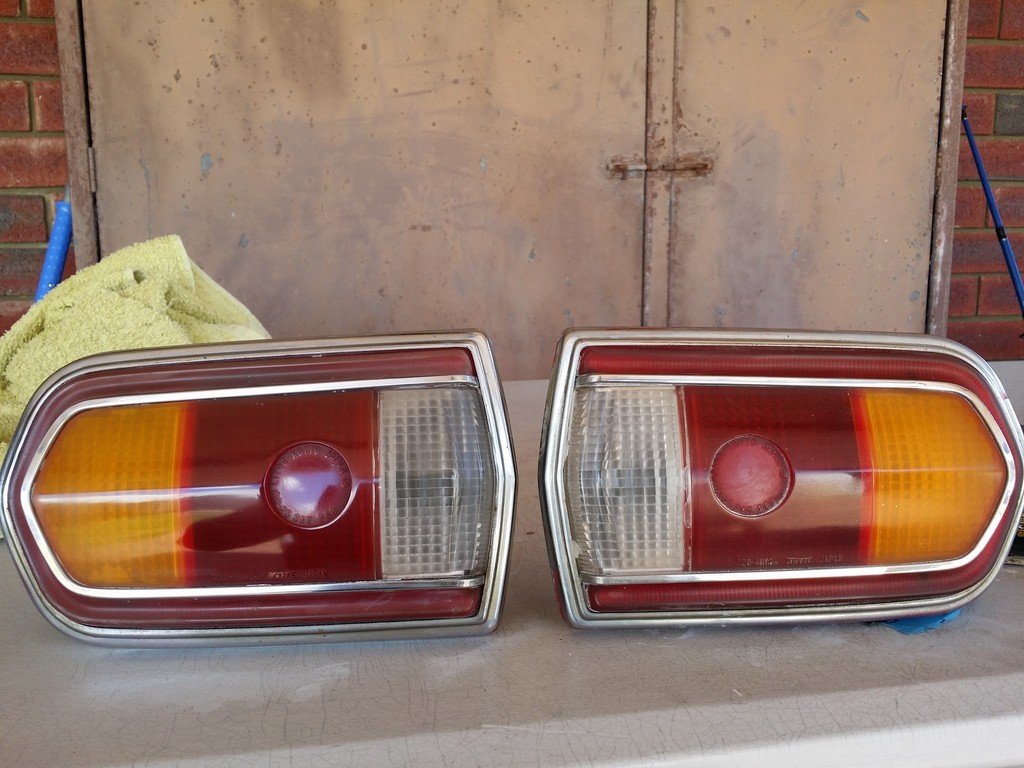
I've also started restoring the standard rear taillights as they had some overspray on them and the lenses were super cloudy. With the left side I have sanded (and wet sanded) to try and cut it back as well as running some polish on it. With the right I have only cleaned and used polish - tested it out to see the different finishes I can achieve but I'm going to go over them again, I also need to do the outer lens sections yet. Huge improvement so far though. Before: After: And here's a picture of the old sleeping 1300 ready to be awoken. What's next? Final assembly of engine and drivetrain then installation > Fit cooling system and thermo fans, pressure test and check for leaks etc > Finalise and fit fuel system, check over > Fit oil cooler and lines, check over > Mount electric ancillaries (starter, battery, alternator) and wire up > Finalise and check over front and rear suspension setup (install blocks and traction rods), set ride height > Fit brake lines and check over brake system, install pull type handbrake setup > widen and weld up rear outer wheel arches. All of this will be sorted over the next month then it should be ignition wiring, base tune and exhaust then ready to fire up. It's getting so close, excitement is through the roof! Chur, Tai
1 point
-
Started on a new inlet/trumpet setup, to get the extra 50mm runner length as tested with the mdf spacers. will be setup so i can add some extra injectors at a later date, like in this choice drawing: had a burn on the old boys lathe yesterday. machined ends off the existing trumpets and made some new ends. To get max room for extra runner length and new filter, have also modified the inlet manifold. tweaking it up so the trumpets aim at the cut out in the strut tower better. filter is just sitting there not mounted yet.1 point
-
Night missions for the insomniac's These tires are a bit thinner and balder then the previous, ended up facing the other way at one point haha
1 point
-
finally, after sixeleventhousandbillion years my other seat turned up. long story but basically the mold for the seat i already had was damaged so i had to wait until they repaired the mold before i could get the other seat for the a passengers side. well I've got it now so i chucked it in. i made the mounts for it ages ago so it took all of about 1 minute to bolt it up. while i was at it i made some minor adjustments to the drivers seat position and now its fucking perfect. down sides, back seat in no longer accessible which is no surprise. there are no other down sides. 2016-09-17_04-05-34 by sheepers, on Flickr 2016-09-17_04-05-22 by sheepers, on Flickr 2016-09-17_04-04-55 by sheepers, on Flickr 2016-09-17_04-04-38 by sheepers, on Flickr1 point
-
the temperature was climbing if it sat stationary and i wasn't happy with that. it would climb ever so slowly but it was still climbing, the 14" fan wasn't dropping the temperature, in fact it wasn't keeping up at all. the second the car was moving the temp dropped straight away but still it was no good in traffic. i figured if i made the radiator a cross flow with the tanks on the sides i could fit a bigger fan that would cover every tube. so thats what i did. Dave at real deal radiators made a new triple pass radiator and i mounted a 16" fan on it. problem solved. the fan now comes on and clicks off when its sitting stationary which means the fan is now able to pull 3 degrees out of the engine temp without any hassle. while the car is moving it has no issue at all but I'm sure the new radiator will be much more efficient on the track. old vs new, 2016-09-10_01-16-42 by sheepers, on Flickr1 point
-
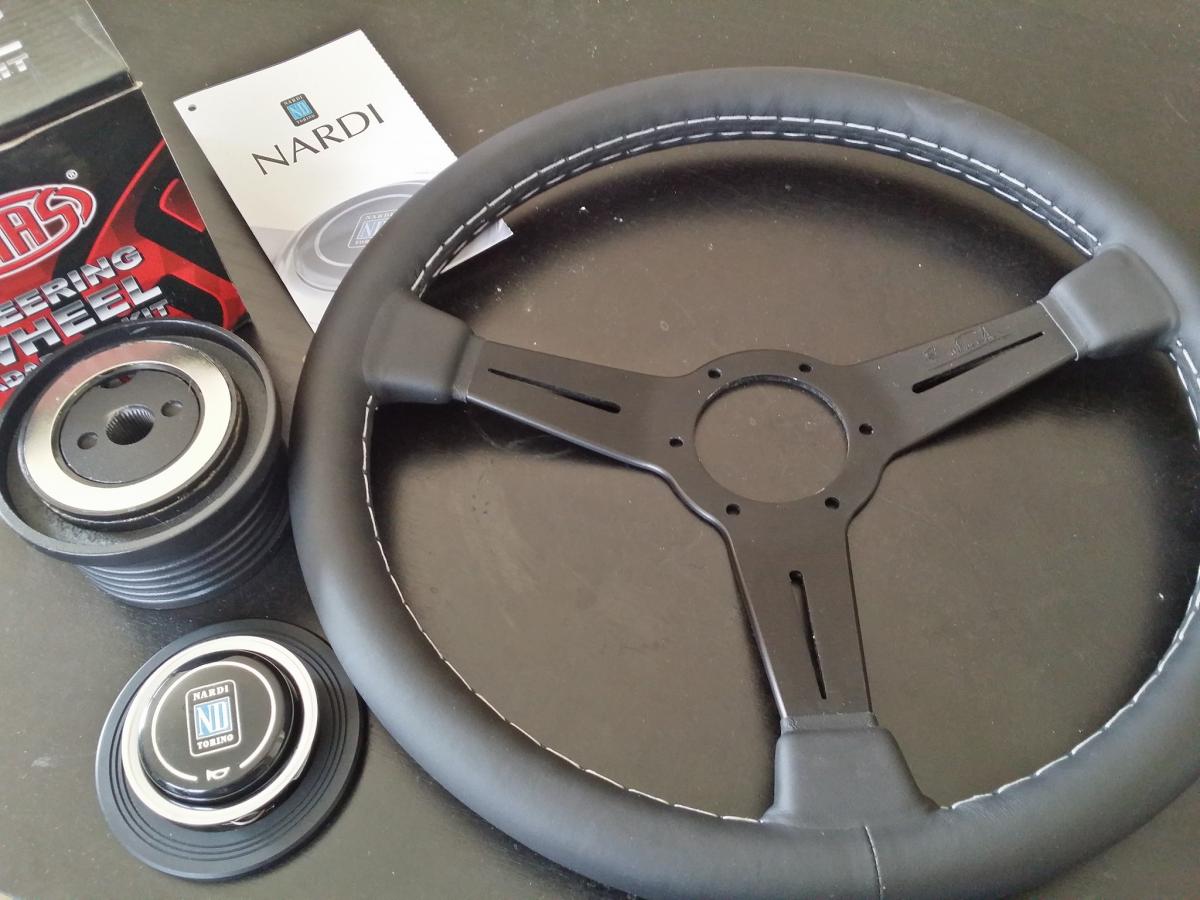
Small update Got a Nardi deep corn wheel through Moonlight racing to help with leg room. Then fitted the rear bumper and some friends talked me into doing a livery on the car instead of painting it all black. Took it on gumboot rally the next day so dont have any pics of it without the sponsor stickers on it.1 point
-
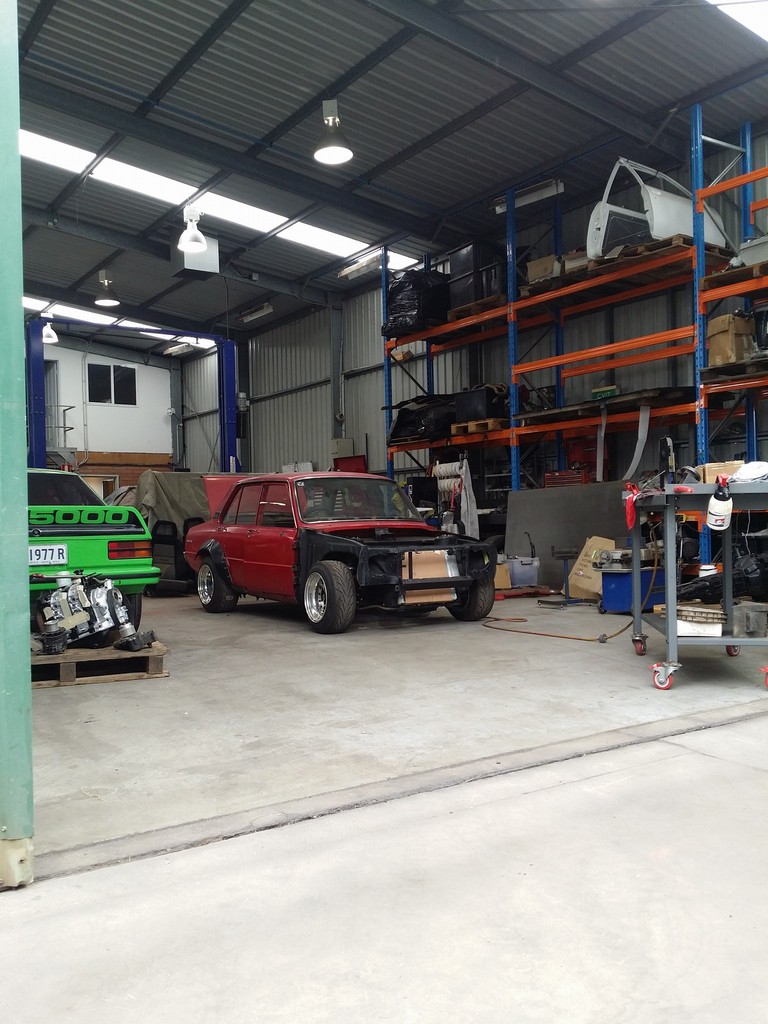
I only drove it a few more times after my last post. Decided after the second time it died on Queen Street with low oil pressure that it wasn't going to be practical driving it everyday. Picked up a sweet Nissan Sentra Sportwagon from Zebra to serve daily duties and give me time to fix the Austin properly. That put the Austin the garage (first time since I bought it in 2012 that it's had dry storage (the paintwork shows this )) Also you may recall in a post from last year I mentioned it was used for filming... Well it was aired not long ago. Season two of Westside! Complete with lopsided hydrolastic. vlcsnap-2016-08-09-16h53m54s756 by GuyWithAviators, on Flickr vlcsnap-2016-08-09-16h55m30s144 by GuyWithAviators, on Flickr1 point
-
Back to making 'pssh woboboble' noises.1 point
-
Every day is a school day when Phil is around.1 point
-
well my thread on my series 2 LHD bought this out the back of nowhere in n.ireland, haggled over price etc as was looking bit much for a rusty car lol heres a picture of what it was like when i bought it her factory series 2 rotor wheels discussion thread - //oldschool.co.nz/index.php?/topic/44328-rotor-dude-mazda-cars-discussion/1 point
-
and a couple more. FUNCARGO !!!1 point


.thumb.jpeg.f619b2b09d6205c0ecd09f9f2fed36f0.jpeg)
.thumb.jpeg.384ff72c8d2b0ee0d34a7bdedb55bdcf.jpeg)


This leaderboard is set to Auckland/GMT+12:00