
Leaderboard


Popular Content
Showing content with the highest reputation on 06/22/15 in all areas
-
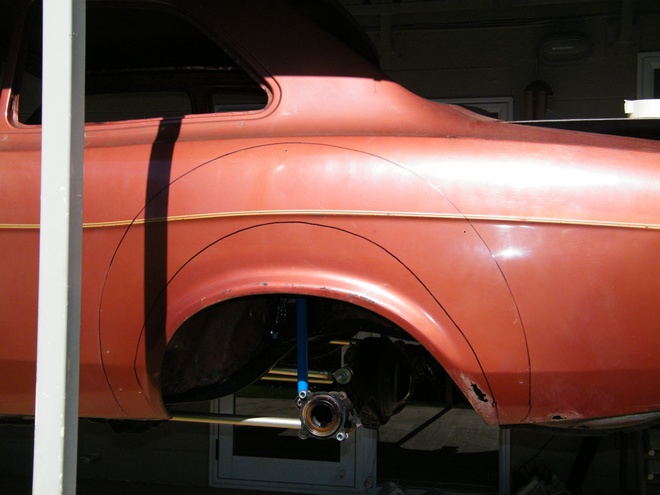
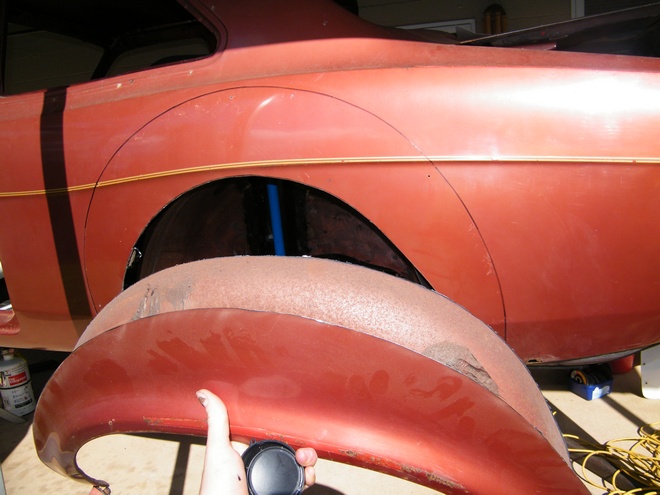
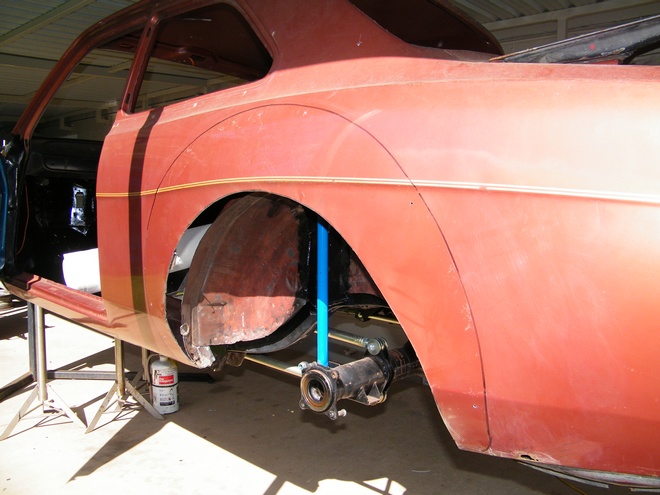
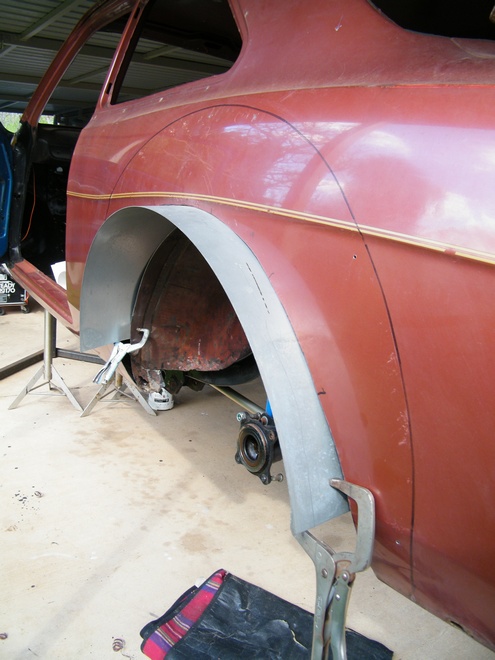
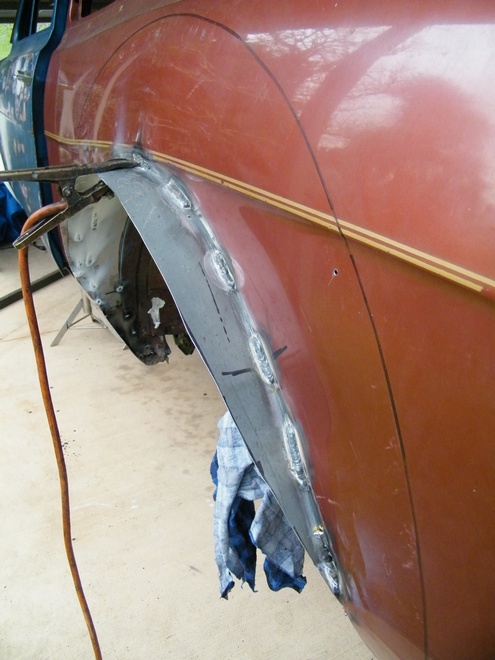
Bubble arch Fitting Time marked and measured this 100 times before cutting One cut off wheel later new tub ready to weld in
 11 points
 -
I just picked up my new Daily Driver and will sell my trusty NZ new BMW 535i Manual so if you want it pm me and join the line as I have 3 interested so far. Anyway. VK Commodore 1986 (First Registered 1987) Some call these a VA as the A designates the last of the VK The Last Holden that used a Holden 6 3.3 Carby motor Manual 5-speed 137,000kms (116k by the original owner and prior to the guy i bought it from 2 owners were father & son) Full seat and door trim I need to add some trime which 90% of it came with the car It has had a full bare metal paint The engine needs some TLC as it has some sludge build up and the carby floods when turned off7 points
-
Roughly threw on fuel tank (Stu my good friend says hes gonna make me a sweet ali one... ) and some other bits together, so could test a few things. Seems to be working well apart from a few drama's. Brakes don't work, need bigger master cylinder im thinking. and the spring situation. some soft 10" springs should fix that. Droped the clutch with a few rev's, and the ass didn't jump up in the air or squat from what i could see. so the 4 link angles must be pretty close! Extra light weight version. / Show us your 4age7 points
-
Rust repairs
6 points
-
Accomplishing in 3weeks what the previous owner couldn't do in 2yrs.
6 points
-
Update time. Wow! I thought this would be a quick little write up but actually turned into an essay length spiel. Best you put the kettle on... So a fair bit has been going on in our little valley. I've been trying to remember to take photos but usually get carried away and have finished whatever before I remember. I did go up to the ridge a wee while back and take a pretty photo or two of the sunrise. Very nice up there. Cant wait to build a cabin for that place! Coming back down to the truck via the ridge track- Tuis playing morning tunes in the Lucerne tree next to truck. Since getting that lathe in place the shed has been getting used and sort of just evolving in doing so. Things/tools have found a place. With the winter weather it feels cosy- especially in heavy rain. Really needs a wood burner or waste oil burner for the colder days because man can it be chilly in the evening. I will make something but accept that it will only heat up a little area and be hugely inefficient trying to heat it all. Maybe something arond the main bench/lathe area would be good. One thing that we are both stoked with getting is the hoist. We could only afford it because we bought the secondhand lathe instead of a new chinese lathe. The bank balance is getting low as and we ummed a bit about spending the coin on a hoist but so glad we bought it instead of waiting because man its useful! I ordered it from trademe and had it delivered to a Nelson depot. Just managed to squeeze it in the van for a slow trip home which saved on the silly rural delivery charges. Shane came round the next day and helped put up the main structure. It went up pretty fuss free and seems fine for a cheaper chinese hoist. I can see where the costs are cut when compared to a Heshbon etc but its strong and well built where it needs to be. Currently we just plug the hoist into extension cord. Must order appropriate lecky supplies and lights then wire up shed! It dwarfs the Viva. Oh yeah- also note the steel rack we recently built. Was great to get all the steel we have found while clearing the block out of the rain and inside. Stepping away from the workshop we have been busy with many other things. First off we needed to get the ever growing piles of firewood out of the coming winter rains. Into our pile of telephone poles and old iron and we built this. I also nabbed some old wooden shed doors left outside a nelson garage doorplace. Free to take- i like. These I turned into a storage bin for all them little offcuts of wood that are a pain to stack. So now we have some storage but will need more. We have at least 50 pine trees big and small to chop down over next few years. Some in the gullies will just rot or be made into north shore style bike trails. Many we can use to keep us warm. Then that little sailing boat. The sun and the rain wont help it at all plus it was in the way- taking up space I could fill with another old car. So more telepoles and the 6m lengths of NEW iron that had been left in the bush edge by previous land owner came in handy. We built this... (turns out to be also very handy for lawnmower, old pushbikes and bike trailer storage) Meanwhile our neighbour has offered us her field which was overgrown with gorse and blackberry for the past 20 years. We wanted to clear it out so our view was nicer and had been intending to ask her if that was cool. Then she just said one day- hey how about we make it into a fruit orchard. OK ! So it was out with the scrub cutter and chainsaw and with a couple of days hard graft we had it all clear. It looks so much better and the soil is amazing as it originally had two pigs there then getting nitrogen fixed by gorse for past two decades. Next step is to plant it out but for now its just great the have a view with out gorse and masses of blackberry. Before.. During.. After... That little fence we have left up to plant grapes and kiwis on. We are both still very much newbies when it comes to growing things but no being stressy types what grows will grow etc etc Our neighbour- well shes very green fingered and will help us out heaps. Plus there's the nerd net for info. Main thing is I'm enjoying this whole land thingee and planting stuff way more that I thought I would Then there is the track up to our ridge. We had been planning to clear it for ages so a day or so with the scrubcutter and now its way nicer to walk up. Horse and Jen happened to turn up one day whikle there were up here for holiday so they got a tour of our freshly cleared track. We have now almost cleared out the building site at the top where we are planning another cabin build. Not photos of the now cleared track but I did take this one the other evening when we went up to watch the sunset and drink beer. When we got to the ridge a huge deer went storming away from us over the gully. Quite a sight ! What is cooler was the picture on my beer bottle... Speaking of tracks.. Hannah went away on a few days trip with her sister who was visiting. While they were gone I hooked into the start of our first mtb track. We have always planned the first track to head as gently as possible up to the ridgetop- a gentle enough gradient for an easy ride or walk. I really wanted to get something done while hannah was away as a surprise. I cut, dug, raked, carted, stacked, walked, toiled, bashed a track through the Kanuka grove just behind the cabin over two days and built whole first track. I really enjoyed it and worked through till it was almost dark. I was knackered at the end of the second day. Hannah got back from the tramp and I surprised them both with my new track. Its still a touch too steep to ride up easily up so Ive worked out a path for a track that seperates off where it gets steeper and will head back towards the truck then back again. Pretty much..more hairpins = more track = easier gradient (but also = more work....) Big thing getting built right now is our outside bathroom. We have had this planned ever since first viewing the property but had not yet decided on where, what and how. The 'what' bit we have sort of picked away at since before moving here. Discussed over coffee or beer (but not both) we have gone over ideas that have come about from years of using various homemade showers and dealing with a variety of toilets. Fascinating stuff. The 'where' bit sort of just fell in place once the cabin was up in its new location. Its on a slope backed with bush which is ideal for what we envisaged. Situated halfway between the cabin and the back of the shed its in a handy location for us and the cabin and its private with lovely views. The 'how' bit is just evolving as we build. Its an elevated building over composting toilet system. For now its the well proven batch type setup with wheelie bins. Rotated as they fill with a minimum of 1 year composting in the bins before going into a seperate compost area up off the driveway for another 6 months. Then the compost can be used in places like the fruit orchard and areas we are building the native bush back up. From all the reading we have done this is total overkill as far as dealing to any pathogens but hey. No harm there. Its going to be awesome having a decent setup that has a minimum amount of moving shit about, he he, and not have to pay or worry about involving outside services like septic systems. In the future Id like to build our own 'Clivus multrum' style system, a setup that uses a sloped bottom vessel and is continuous in operation. You can buy 1 m3 capacity units made in plastic if you have a spare $4000...which is an absurd price considering our 25000 litre tank cost $2600. I'll use stainless steel to make the structure. But that still involves more pingas and time which we dont have- the latter due to the longdrop filling fast. The grey water will be treated using a reed bed system. This is pretty easy espicially on our type of land because of the clay below. The water will only go down so far and then move along. Moving water through soil is the quickest way of treating it. It does not take many meters before any nasties are dealt to. First off we dug out the bank. This did take quite a while. I had to take breaks and sit down to sip at beer while looking at the mountains. We would take turns at this after Hannah saw how nice that looked. Eventually a large 'void'? was created and funny enough a hill appeared somewhere else. Much of this hill appeared next to the graden because there's some very lush dirt with some mighty fine looking well fed worms in it. Kevin just watched or chased clods down the slope. We also had this fella stroll out of the dirt where we had sadly destroyed his underground lair. What a huge bugger he (or she) is. I released him later further up in the bush but not until Id worked out what brand he was.. Turns out he's of the 'Stanwellia' species- related to trapdoor spiders and quite rarely seen as usually underground. His burrow was massive and we had sliced right through it with the spade. See here for another one.. http://www.nzherald.co.nz/nz/news/article.cfm?c_id=1&objectid=11307026 Then we planted four H5 treated poles set well down into the granity clay below. A thick plastic groundsheet runs up past the decking and right up the walls sealing in the treated plywood clad basement. The decking is insulated below with 40 mm thick insulation and the inside has reflective foil insulation. We want to create a heat trap to keep the interior as hot as possible so promoting a decent heat in the compost. Inbetween building we cleared out the bush around that area. When intially clearing the land last year of gorse we worked up to the bush edge and only so far in. We had left the gorse hiding within because its dying back anyway. But this area was still pretty bad so a few hours and we not only had a lovely little spot but yet heaps more firewood. Some of the old gorse was huge! So much more light into that area and on the bathroom. The pile on the left is gorse from just that little area. Above this we've built a nice solid little bathroom that measures 4 m2. It'll contain sssb - the shitter, a shower, a sink and a bench. Then we built steps using some more of the telephone poles. Its quite high up and we have to allow for our olds etc when they visit so easy to climb steps they had to be. Must build a rail soon because man I'd hate to go trippin off that ledge... We have made a little track through the bush and once tidied up will be a sweet way to walk to the bathroom from the truck. The steps come right down to this track. We picked through our pile of Rimu, picked out some possibly nice bits- possibly because you really cant tell until it goes through the planer. These became window and door frames plus some rafters. When the main shed was delivered the piles of sheets were protected some extra packing sheets in a dark grey colour. There were just enough of them to clad the roof with a decent overhang. Sweet! We still have a little left over for another wood shed too My old boss gave us a whole heap of wood leftover from his house build. All Cedar, Macrocarpa and some Douglas fir. Ideal timbers for building things with! So the Douglas fir we ripped down and planed then made doors with. They are barn style doors and Hannah has oiled them. They look nice. Photos later of them completed but heres a action shot.. Hannah painted the outside of the window frames with paint left over from the housetruck. Then I scored 4 litres of 'mist green' paint from nelson house parts. Its the same colour as the water tank and similar too the main shed. It should help the building blend into the bush nicely. I have a neat idea on an overlay method using random wood to break up what will other wise look like a tall painted ply building. I think it will work well. We will see. Here is the building so far with the primer coat on...6 points
-
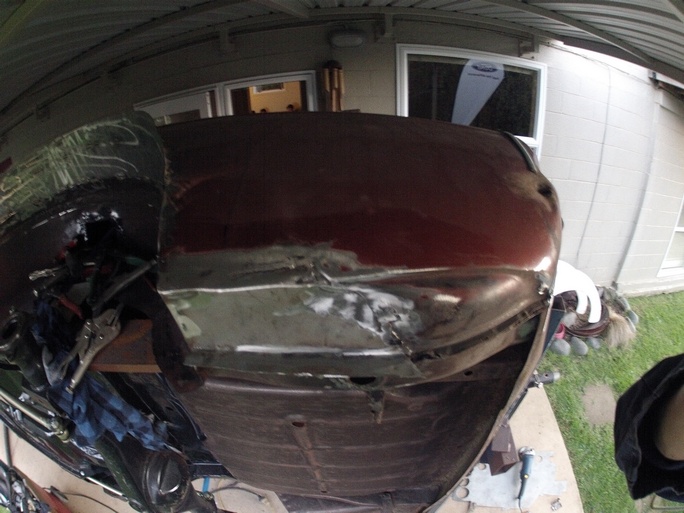
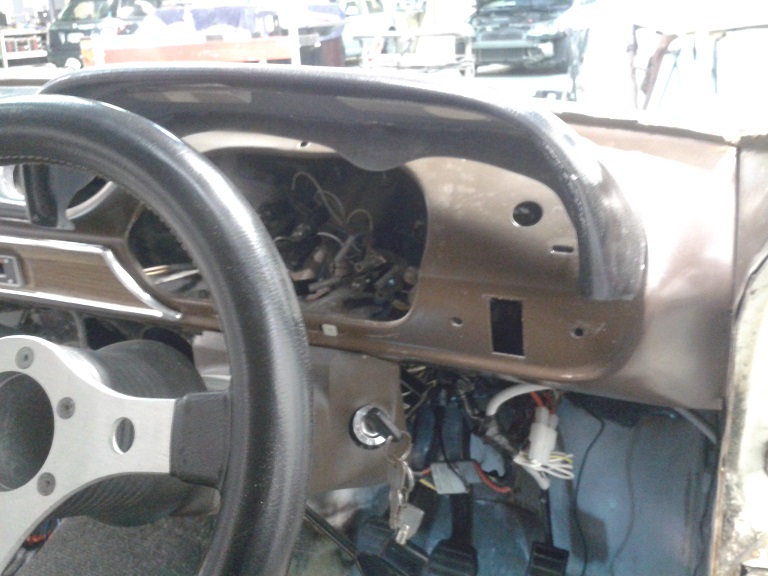
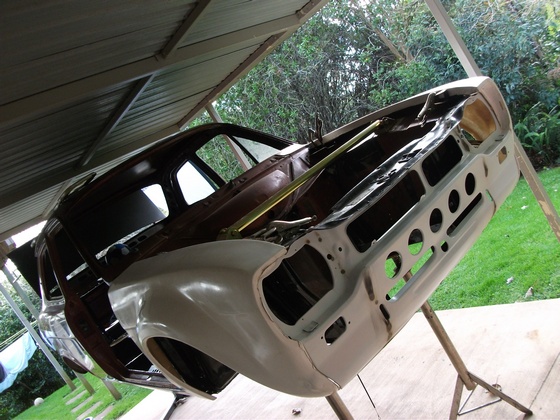
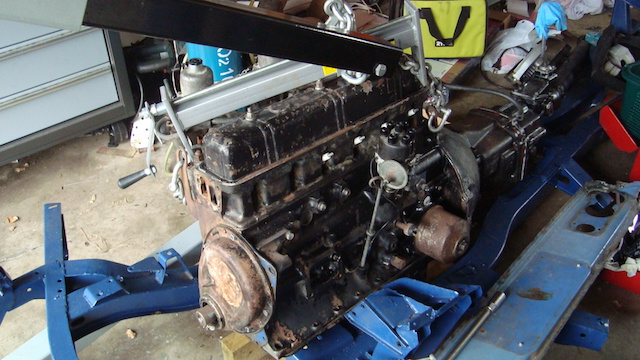
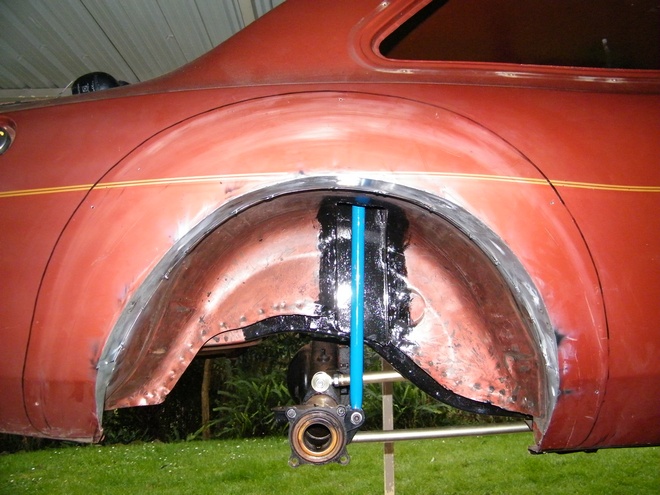
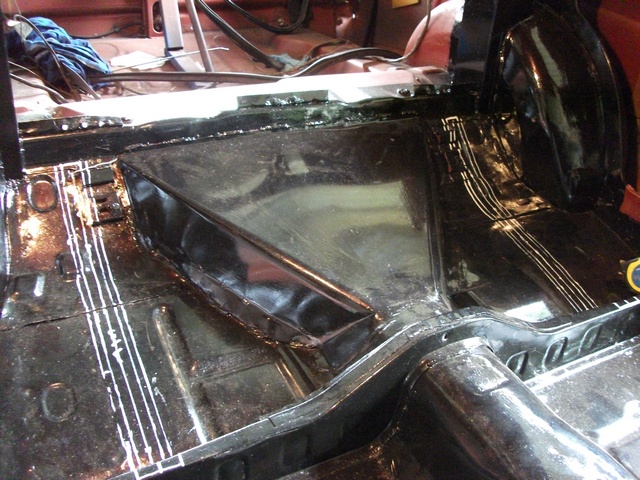
Sorry to keep you waiting. I know this is a long overdue update so I'll keep it brief with lotsa photos Here's it's current state Removed the subframe and struts then water blasted the muck out and had a look for signs of serious rot - which there was none! Just some light surface rust. The boots almost ready to go. Just need to cut, fold up and weld in a support bracket that spans the lock assembly support (took ages to hammer that back into shape) to the end between the shock towers. Then it's ready for base coat (that's POR-15 painted there so far) I was lucky enough to get a pair of awesome mounting brackets form a chap in the states that was making a few for himself and his mates! This will make the m20 mount onto the standard subframe mounts! Another benefit is it will push the engine further back into the center of the car and means I don't need to hack the nose-panel up to make it fit! Woo! Here's the test fit on the subframe - lookin good! I'll need to drill new mounting holes in the drivers side subframe mount as it sits roughly 15-20mm out which is no biggy. I'll do that once the subframe is bolted back into the car and the engine is resting on there naturally. Don't want to drill now in-case it's not straight etc and don't want to put extra stress on the mounts. So vice grips will do for now. However, the passenger side is perfect! Will add a strengthening plate to the inside of that subframe mount as thats a classic spot for stress cracks. One issue is the steering box vs the headers. In short.. It fits! but... The guibo heat shield is touching the headers. Not by much, but those headers will cook the guibo and the steering box in no time. I'll have to make up some headers myself one day. I'll also need to look into an oil filter relocation kit as the steering box definitely interferes with the filter. All in all - I'm very happy that the engine fits and there's space for future headers to flow around the steering box! I was starting to stress if there was going to be enough space and would have to forego the M20. I always figured I'd need to make up some headers and think about relocating the oil filter anyway. So next up is bolting the subframe back into the car, dropping the engine back on and align it all, drill those holes and check the clearance on the firewall end (thinking of taking out the rain tray there) then get the engine tested to see if it's worth building back up. I'll also be prepping the engine bay ready for paint. EXCITING!4 points
-
Been awhile but things have been done since last update. Got driveshaft sorted, went to drive in and what a good crowd to deal with. For the same price as ADL they pretty much remade the drive shaft using v8 universals and the front half of a jzx90 shaft. It's stronger and probably for the first time since I owned it balanced haha. I also put smaller Intercooler in and put headlights/ front end together. Got wiring done....went for a drive...didn't latch bonnet and it flew up bending the corners, I'm lucky the hinges are so beasty..Got off pretty lightly. Got mail order wof and drove around abit. So happy with performance of the factory 1j compared to what it was...next is some track fun then once my shed is built will tidy everything up over winter including rust and possibly a color change come next summer. Pretty poo update but will include better photos and videos next time4 points
-
Finally got this running issue sorted. Was doing a bit of a service in the weekend and when fitting new spark plugs i found that the main earth cable from the battery to chassis to engine had come of at the engine. Refitted that along with new plugs, leads and fuel filter ands its like a completely different car to drive now!4 points
-
Spent a large amount of time getting these closer to ready this weekend. The wheel centre's took the longest. Removed old clear and hand sanded them to mirror finish. Very happy with the results. Going to look into coating them with something (ideas?) to keep them from oxidising. Yarns -> //oldschool.co.nz/index.php?/topic/47514-ants-tc24-gx71/4 points
-
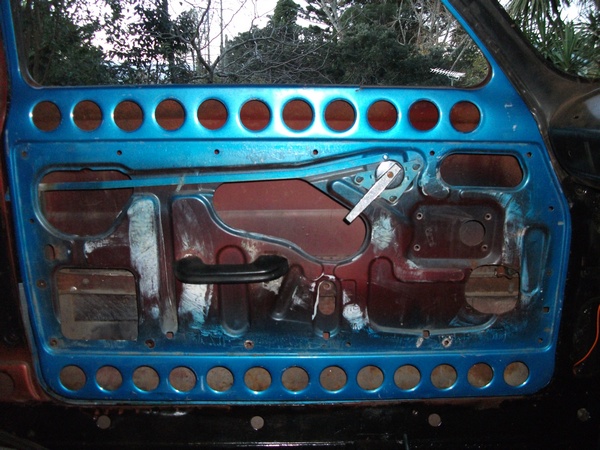
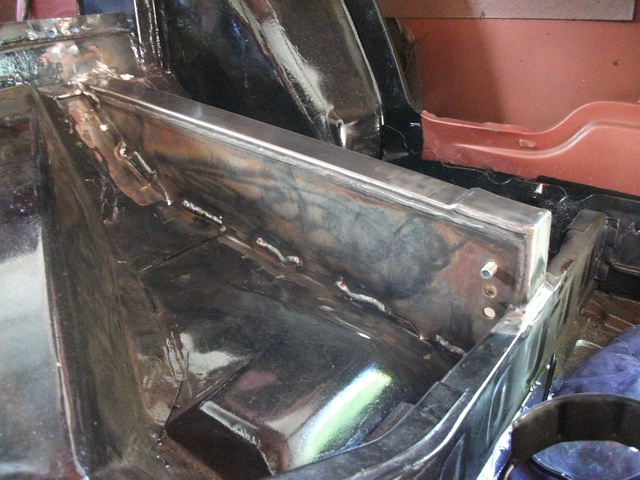
Going to swiss cheese the inside panels Chassis Punch Made another 2" hand swage tool rear quarters swaged Doors Done
4 points
-
Ok so over the week, the stubs received the tick from the NDT guys (recommend X-Ray Laboratories on Leonard Rd, Penrose for this kind of work if you need it, very fast turnaround and a good price) and then I ambled across to Clint and received a frowny cert-man approval for them after examination and photos. So, then they got painted in gloss black and reunited with their shocks. I didn't take any pictures of that finished article because I was pretty excited and impatient to put them in the car. So here's this. IMG_3138 by Richard Opie, on Flickr IMG_3160 by Richard Opie, on Flickr IMG_3170 by Richard Opie, on Flickr Oh and the Streets are now polished and with Levi for a dab of paint between the spokes and on the inner barrels. Plenty of room in a single piece 13" wheel vs the 3 piece for the brakes too. IMG_3205 by Richard Opie, on Flickr IMG_3218 by Richard Opie, on Flickr Cheers for having a nosy, if you want to discuss anything the link is below!4 points
-
I'm almost ready to PM those wanting to attend the tour with an itinerary. We now have four sheds, thanks to Shakotom. All of the sheds are located in the lower central to South Auckland area. The tour will start at about midday on Saturday the 11th of July and run through until about 5-6pm. Possibly later as a BBQ will be provided with some meat etc on the house. At this stage we will start with Kempy's shed first and then work our way further South to Shakotom's place, Zebra Dude's yard and then Zebra Dude's shed. Zebra Dude and I will supply some meat etc for the BBQ which should be enough to give everyone a snack. If you are attending, it would be great if you could bring either some food for the BBQ, drinks or a combination of both to make the food stretch further. Stay tuned for final details! Look out for more information heading your way soon.3 points
-
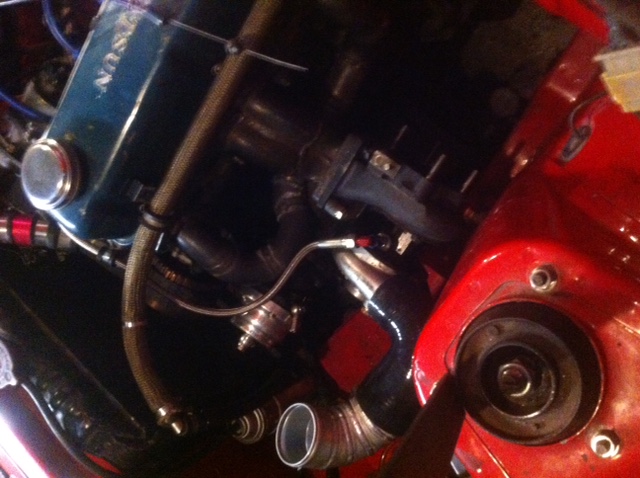
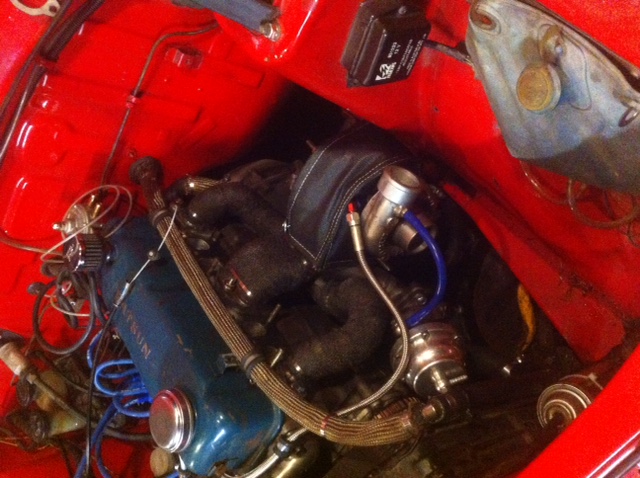
inside plenum
3 points
-
engine bay
3 points
-
I'll do a write up of how to convert your old car to micro squirt one day if anyone is keen but its not a super cheap solve all but definitely worthwhile3 points
-
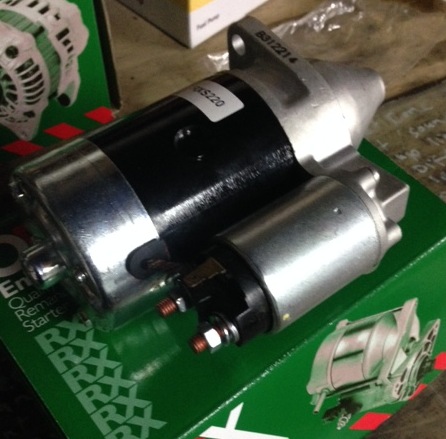
OK so took the car to work today big thanks to viva speed for the car trailer hire and a huge thanks CDL for taking the car in on the trailer and putting up with the crash start issues that came with it. So went to start the car today, started by cleaning the spark plugs to discover one was damage so I had to go buy a replacement, then the battery was super flat and even jumping off a running car wasn't turning it over properly, eventually after charging the battery and jumping it I managed to start the car. I let it warm up then shifted out of the garage. Soon after leaving the garage I managed to stall it, now you think it would be easy to restart now it was warm..? HAH the starter decided to give up, didn't turn over at all! Had to get the GF to help crash start it, eventually got it going again but manage to stall it a couple times trying to load onto trailer, crash start every time to get it going again. After that CDL trailered it into my work where we had to crash start it again and then a couple more times again after stalling some more. Anyway it's now waiting at work for me Monday morning. Here's some pictures of the car on a trailer. As you cabn see some of the car is in expoy from when I started trying to fix the boday last time and one panel is still in bare steel. Metal prep worked fairly well as the rust isn't that bare considering it's been bare steel for years! So some more things to add to the list of things I want to get done: get new starter(hopefully a gear reduction one) fix hand brake put oldschool sticker on window
3 points
-
four link from underneath hole sawing front panel to add 3" swaged holes Made a press tool at work In the press Panel done and ready to weld on
3 points
-
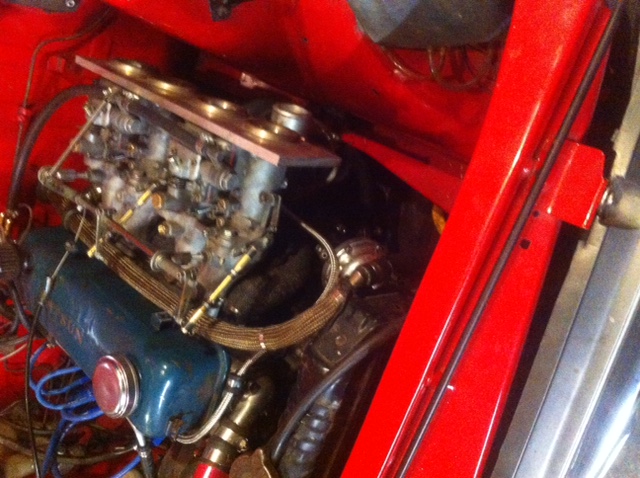
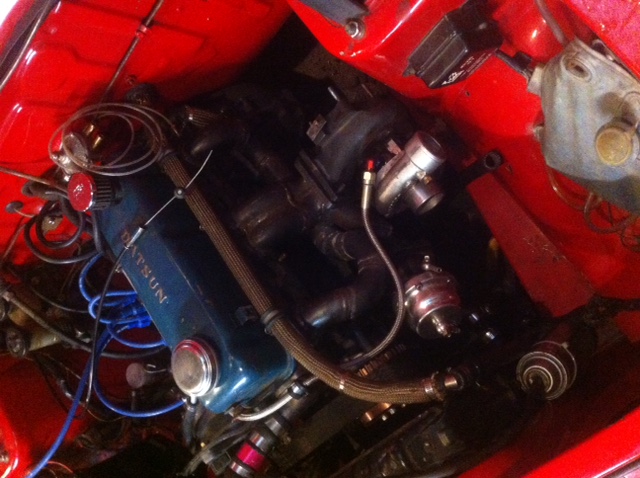
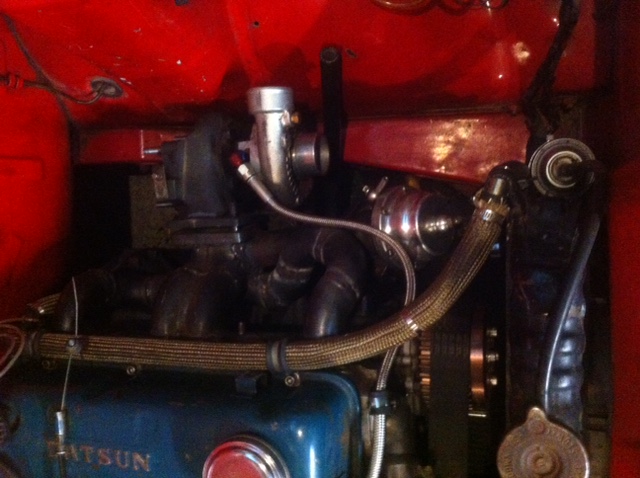
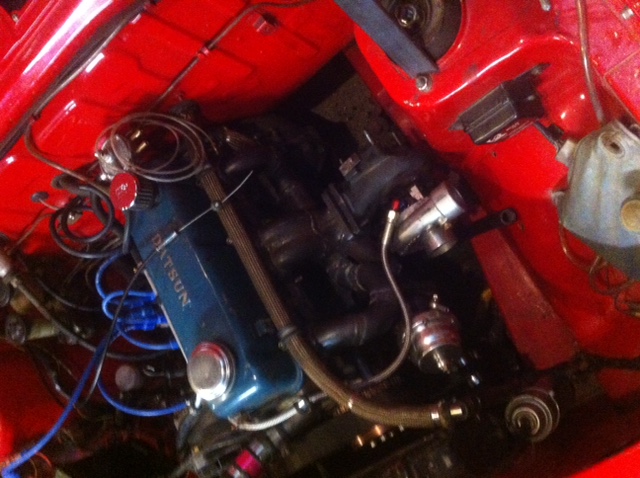
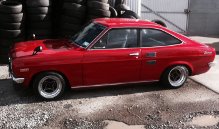
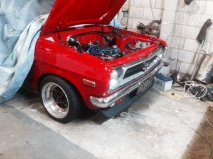
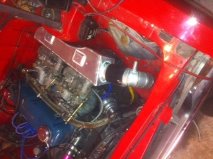
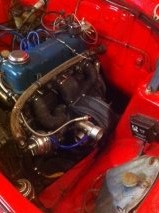
Been on here for years so thought id better make my own thread. Its a Datsun 1200 coupe. Its been through many changes but finally got it pretty much how i want,minus a few small exceptions. Its running a rebuilt A15+T. The turbo is a small garrrett blowing through twin dellorto sidedrafts. Currently running at 9PSI via a Tial external wastegate. Wheels are 13x7 and 13x7.5 SSR Starsharks wrapped in 175/50r13 Yokohamas. The only other plans at this stage are some adjustable coilovers for the front, S13 brake conversion and getthing the front rims widened to 13x8 and moving them to the rear, then putting the rear rims on the front.
2 points
-
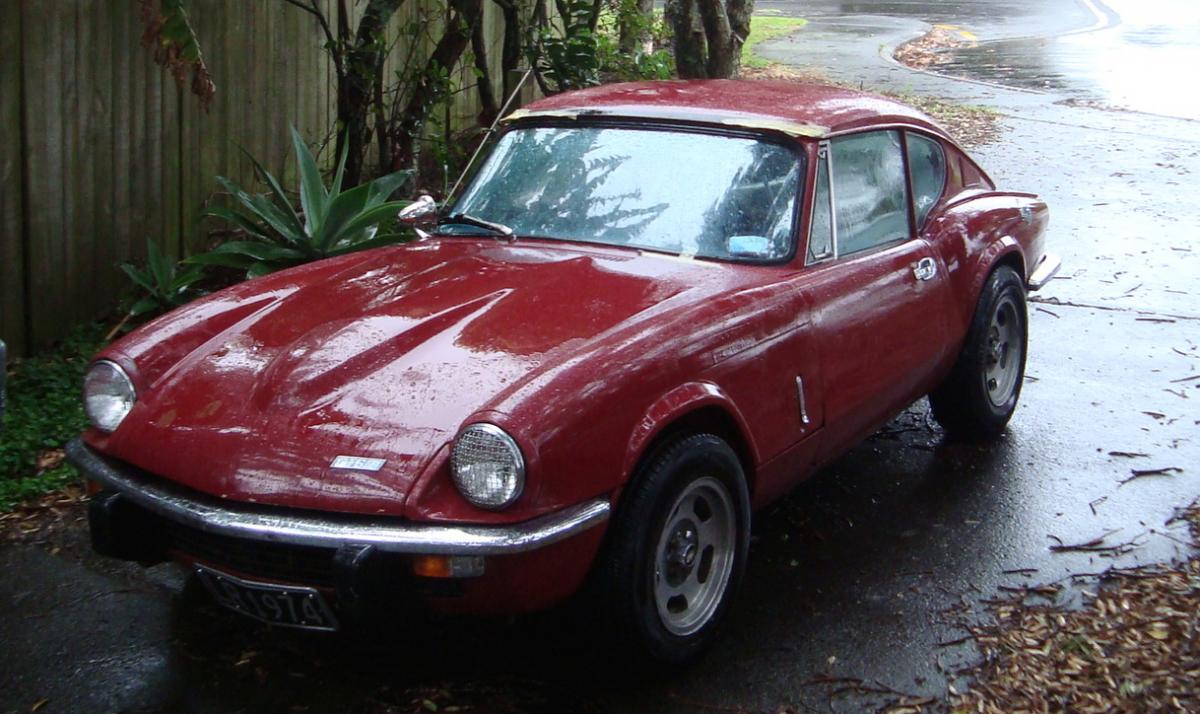
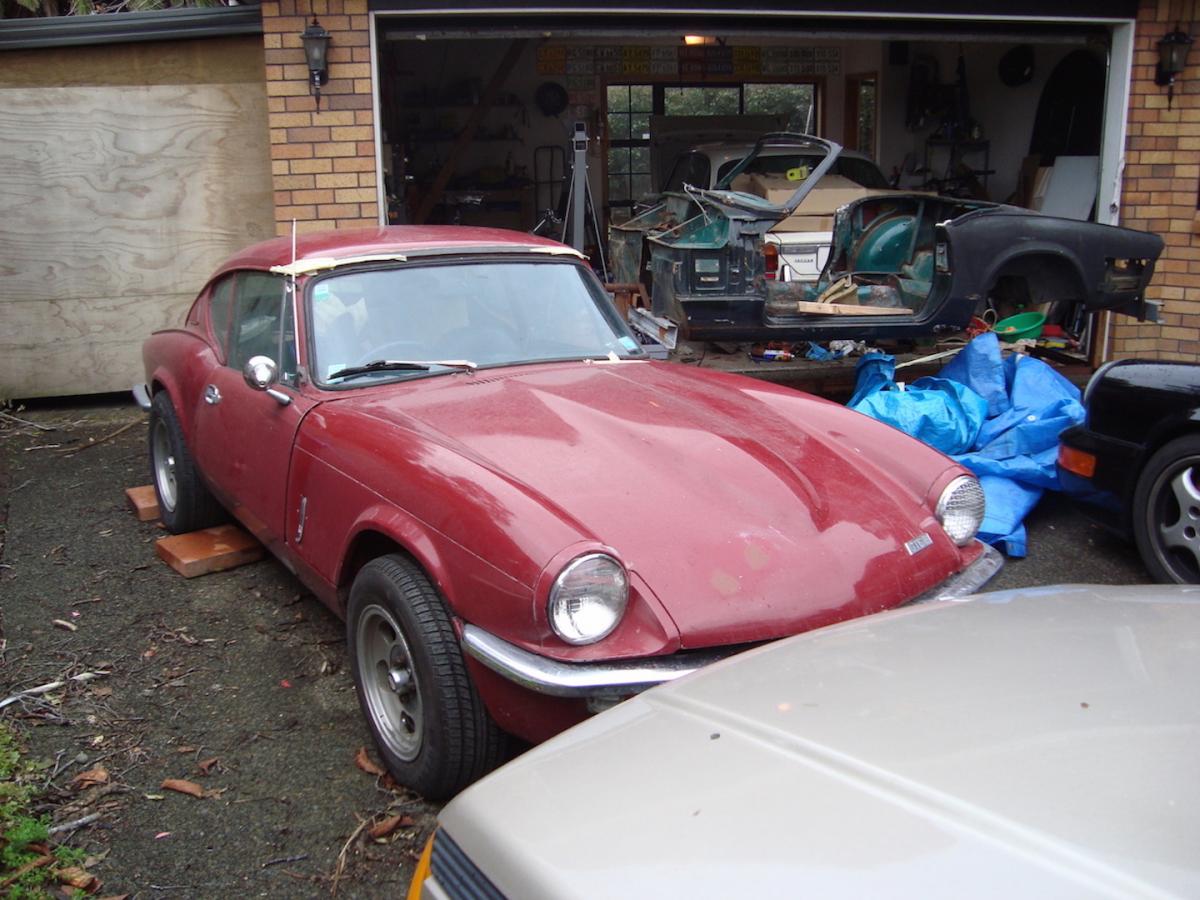
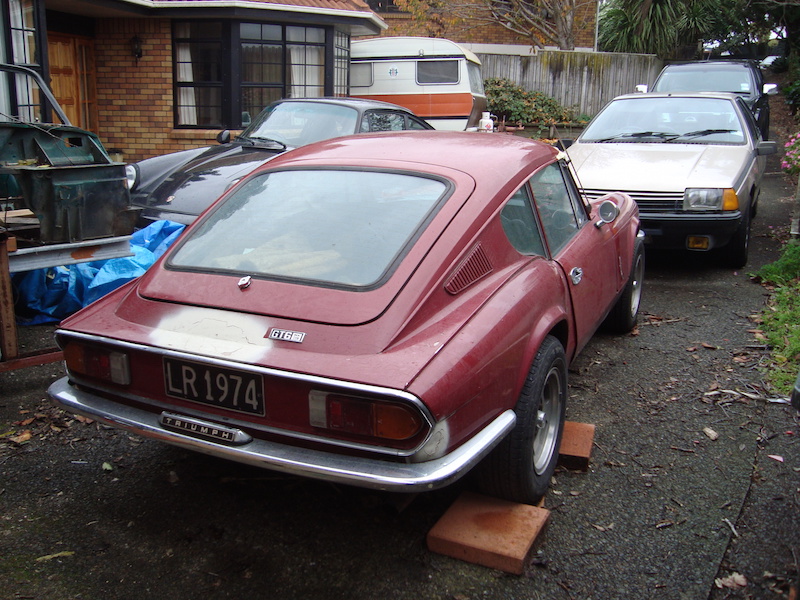
Our new Gt6 It came up for sale in specialist cars on TradeMe for a reasonable price. We already have a project (or two) car so why not another The Lancia Gamma was sold so we have some money and space in the driveway. The universe doesn't like a vacuum. I put an autobid on it up to $5005 and decided if it went higher than that, then I would miss out. Its reserve was $5K and I won it. I was surprised there weren’t more bids but it was listed in specialist cars and not the cars for sale so maybe not many people saw it. I organised getting it shipped to Auckland from Napier which turned out to be a hassle because it wasn't running. It would have much more fun to go down there and do a road trip with a trailer…..or even maybe getting it mobile and drive it home. I just didn't have the time to spare and the buyer wanted it gone. It arrived during the week while I was in OZ so today my son turned up and we decided to get into it and have a look. It turned out to be better than we expected. No brakes Paint is all cracked and faded Rust at the top of the windscreen. Rust in the B pillar Engine didn't start Clutch pedal went to the floor and didn't come back up Hood lining was ripped and had pieces missing Seats were just sitting loose Windscreen wiper was missing (in fact the whole mechanism was gone) Engine numbers didn't match (original engine long gone and who knows what put in its place) More parts in the back hatch than on the car No original wheels So….to sum it up……. it was perfect. So Perfect that Ethan named it Vyvyan from the young ones. First Job… Get engine running. It had a good battery so that went on charge. It had no gas so we went up the road to get some fuel (no 91 for this baby) Dropped in the battery and filled her up Cranked it over and it started after 30 seconds of cranking. https://www.youtube.com/watch?v=qPzWs1kgZog Little worried……its only running on three. Give it a rev…….now its running on 4.5 Rev really hard…..running on some weird combination of cylinders but not all at once. https://www.youtube.com/watch?v=wkwQRi80b1k We decided to investigate the misfire. It seemed to be coming from only two or three cylinders at the back of the engine so we tried swapping the leads and still it was there. We were beginning to worry that it may be low compression so …out with the compression tester….they checked OK….phew. So the next idea was it must be the plugs. They are BP5ES so we went to one of our other engines and checked what was in that. Turns out it had a whole mix of them but we found 4 BP6ES and chucked them in. That fixed the problem and it now runs semi OK so I will get a new set of 6 BP6ES for it and fit them tomorrow. https://www.youtube.com/watch?v=USYK_lOpssA Time for a tea break and to look up the engine and head numbers. Turns out it has a high compression PI 2.5 saloon motor in it……..nice! 132hp stock….150 with PI and a tr6 cam. Next I jumped in and tested the clutch again. First I pulled it off the floor and pumped and push it down and lifted back. After a couple of these I managed to get it working. The only problem is that when I started it up I could hear a noisy thrust bearing….when I pressed the clutch it went away…damn. Looks like the engine will be out over the next couple of weeks. Next job….The brakes go straight to the floor. When we opened the reservoir it had that nice black oxidised fluid that a car siting for 5 years get. The best thing about a tilt front car is that we could bleed the front brakes without taking off the wheel or lying on the ground (as it had started to rain) . We bleed out all the brown/black fluid and air in the front. We couldn't be bothered doing the back as that would mean taking the wheels off and getting on the ground in the rain. Ethan said the pedal felt average but OK so we decided it was good enough to take to a drive. https://www.youtube.com/watch?v=EmRYXpeCHlw Fun…. Enough work for today…..tomorrow we will bleed the brakes better and bolt the seats in and look at the rust a little closer.
2 points
-
Welding the tubs Guards Screwed on Next thing to tackle
2 points
-
When does your Riviera arrive?2 points
-
Not enough Bogans in Tauranga.2 points
-
Yeah was a bit average alright. $3 steak sandwich was best deal of the day I reckon.2 points
-
50mm itb's and big cams roman2 points
-
dang I have been slack in updating this build thread Since the last update I have fitted the pedal box, played around with the tune alot and get the car running pretty good. I have raced it around hamptons a couple of times and broken lots of things I can even remember. It has a locked diff now which is actually super great. Actually I broke all the flywheel bolts off at around 7500rpm, they were brand new oem bolts done up to spec, it is quite unusual for this to happen I am lead to believe. Amazingly it did no damage, so I fitted a new set of ARP bolts and I havent had any problems since I took the car to nats and raced around a bit. During this time a 'tappet' noise would not go away and the drivers footwell flooded pretty good while driving through the rain. The exhaust headers also broken after being re welded while driving back along the gravel road to thames. I will take the engine out as I think I know what the noise is. I saw some material missing off one of the cam lobes when I put the engine back together after checking for engine damage when the flywheel broke off. I took a pic as per below but I was in a rush to get racing again so I left it. Pretty much all the welds looked like this before being re welded. now they look like this again. The main flange is mild steel and the pipes are very thin SS. I have the thing braced to the gearbox and it still breaks!!! they cost alot of money but they are fairly well trash if they keep breaking In the mean time though I thought I would check out where all the water was coming from. I found a previous fix which I had no noticed before which had rust through. The previous fix hadnt really sealed the problem so water had been getting in and sitting between several layers and caused a bit of damage. The drivers floor was also full of holes being held together with paint and underseal. I have now re sealed the interior of the car and now I am in the process of remaking the bits on the outside to refit/reweld the lower part of the gaurd back on hmm hmmmmm I also partied with dane in the middle. dont worry his gf was cool with it I am yet to remake this retarded peice, so much of it has rusted I am not really sure how it fits together and some fancy conveyors that will be conveying all of your sour cream products in the near future but dont forget2 points
-
2 points
-
new page, new happenings. mainly this. Untitled by sheepers, on Flickr Untitled by sheepers, on Flickr Untitled by sheepers, on Flickr many thanks to Dan (ta63-1uzze) for the dummy engine. with it i have been able to see that the manifold i made actually fits the motor and also that i should be able to get the whole shebang under the bonnet. using science (taping a crown horn button to the front of the motor and closing the bonnet) i have calculated that i should have about 10mm gap between the bonnet and the pulley. pretty happy about this. Untitled by sheepers, on Flickr Untitled by sheepers, on Flickr other things that have come to light, i should be able to get the pulley forward enough by making a new one with a slightly different offset. i had previously thought that id have to make a new snout but a pulley should do the trick to get the belt drives to line up. gotta make an adaptor plate to bolt the superdupercharger to the manifold. I've done most of the work for this so that shouldn't take to long. excitement!!!!!2 points
-
Yep, obviously 30 or 40 years of abuse in a rally car isnt testament to longevity. The same thing can be said about welded wedges on Escort front struts. Really makes you wonder about common sense2 points
-
You can view the CAD library by clicking the CAD library tab above. We have had a few iterations of the cad library so the below discussion may no longer be relevant. But use this thread to discuss any problems you have, or to request someone to help you draw something you need. Ask away. Oh and if you actually get a file cut and its shit use the comments section! or get in contact and we can fix or delete it! Also it is use at your own risk or whatever, half of that stuff is just from the wilderness of the internet so measure the drawings against your parts or ask for help before dropping $$ on cutting.1 point
-
This is my recently acquired KP60. Its has a 2K and 4 speed, will probably give her an upgrade soon. Only mod it has is some cobra lowering springs, other than that it's all fairly standard. Need to get a new windscreen rubber in there asap, since it's leaking. Short term plan is to tidy her up a bit more - paint bumpers, grill and wheels etc. Are the bumpers and grill/headlight surrounds meant to be black or dark grey? Not sure what paint to use. Might be pretty slow progress. One day.... //oldschool.co.nz/index.php?/topic/48889-matts-81-kp60-starlet-discussion/1 point
-
Don't know if you have seen this. http://www.trademe.co.nz/Browse/Listing.aspx?id=894326063 An interesting combination of quad throttles and standard intake.1 point
-
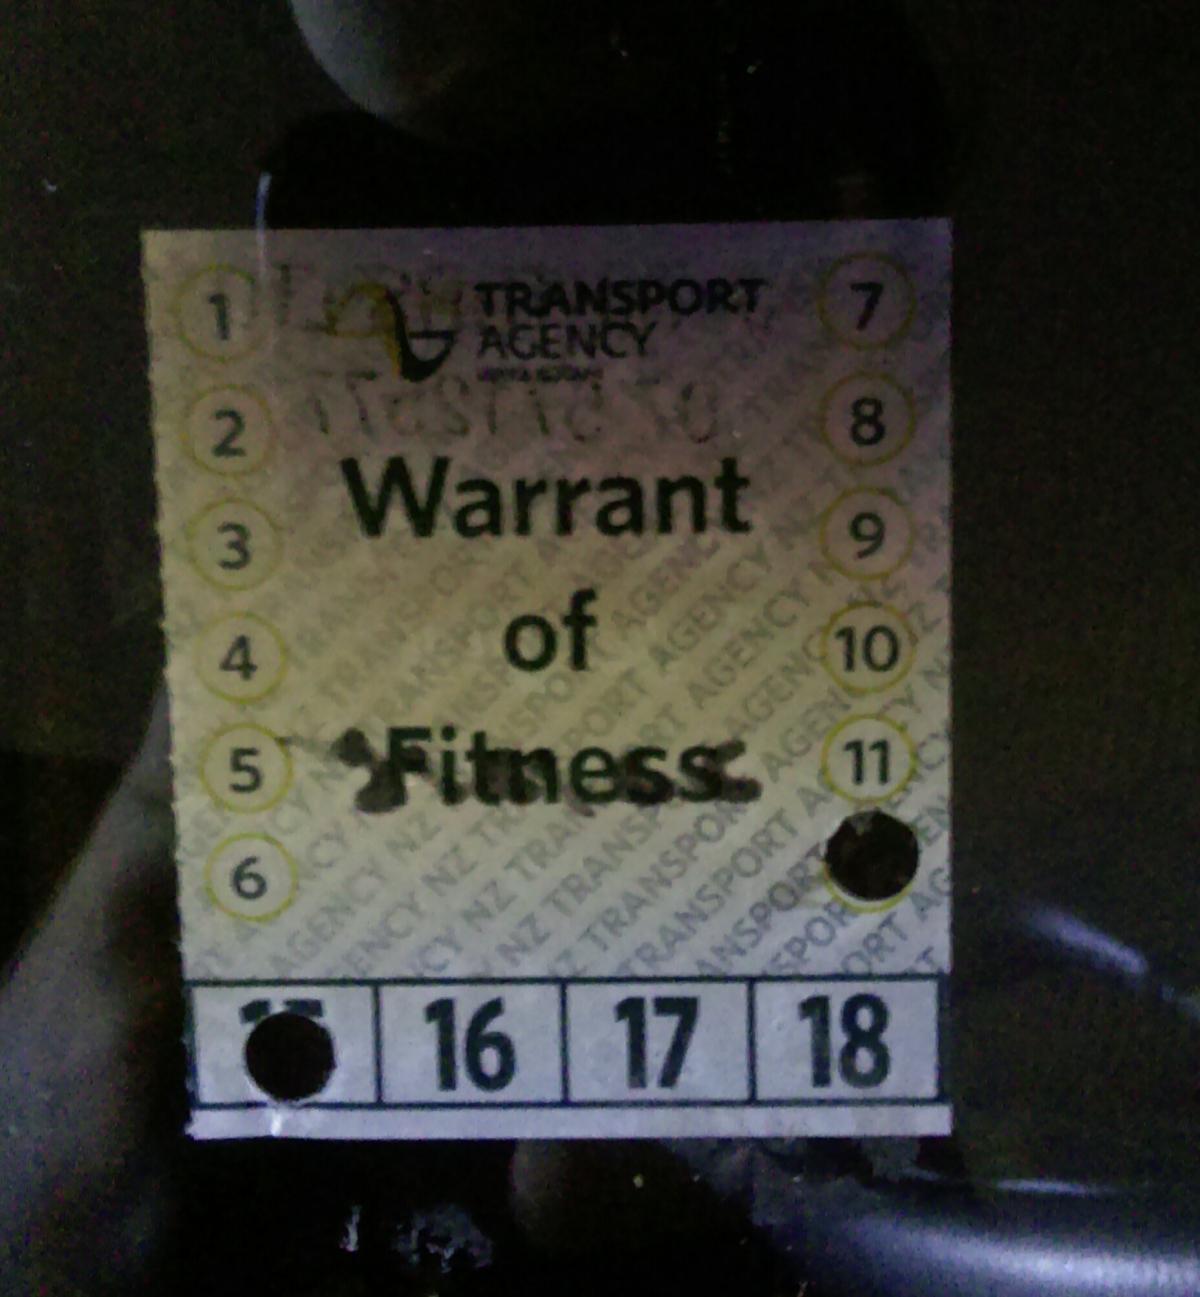
Good jawb on the Wof1 point
-
Very interesting, i may just need to get around to removing my silvertops and replacing with my blacktop ITB's on. The other option is GTR ITB's. Which surprisingly are not to hard to find. They are 45mm too from what i have read, will confirm soon.1 point
-
https://www.google.co.nz/url?sa=t&source=web&rct=j&ei=MDSHVeqiJZL28QXtw4KYAQ&url=http://www.lvvta.org.nz/documents/standards/LVVTA_STD_Wheels_%26_Tyres.pdf&ved=0CCsQFjAB&usg=AFQjCNHZdcZn94DxTLESaZ3N6nwnZe9FMQ&sig2=Y_P25QQJuxS2Ro-a0-ndhg All your info is in there1 point
-
Hi, story time! Holy fuckaluckalucka the K20 motors have got so much more cam duration than a beams motor. And a bit more lift. Apart from that the other specs seem reasonably similar to the M/T Altezza engine (Comparison is against my single VVTI engine) Way smaller throttle body on a K20 which is odd. The big hp builds seem to go for gigantic throttle bodies though and 4" intake pipes. And the age old question, 20v throttles on a beams motor, or standard manifold? The standard intake manifold has 45mm diameter runners. With bell mouths on the end. In a fancy plenum with a big throttle body. Silvertop 20v throttles at the throttle plate are 43mm diameter. Blacktop 20v throttles at the throttle plate are 45mm diameter. buuuutttt a throttle body still has the throttle shaft blocking some cross sectional area when it's open, so it's effective area is more like this: So: (Altezza manifold) 45mm dia no throttle: 1590mm square of cross sectional area (Blacktop 4age) 45mm dia 4mm thick throttle shaft: 1410mm square of cross sectional area (88% area of standard runner) (silvertop 4age) 43mm dia 4mm thick throttle shaft: 1280mm square of cross sectional area (80% area of standard runner) You'd need a 47-48mm throttle body (if it had a 4mm shaft) to get a similar cross sectional area to a standard 45mm standard runner. In other unrelated news also took the yellow car for a bit of a spin to blow the cobwebs out, still going strong! (Or, at least as strong as a 3AU is capable of going haha)1 point
-
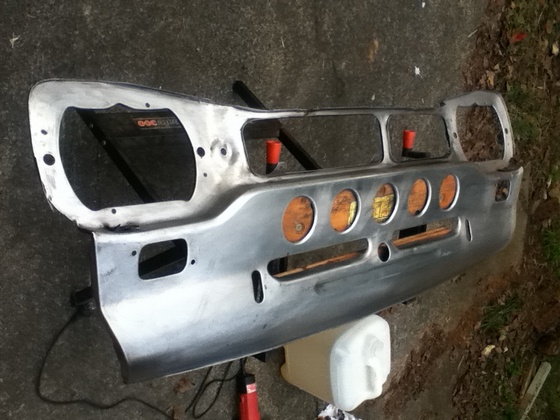
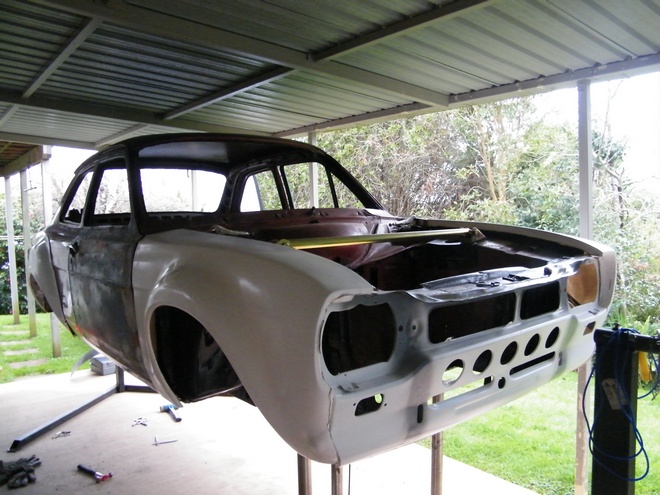
Ever have one of those days where you have an epic post with photos and blood and awesomeness and dragons, and then the internet takes a giant shit and you lose the lot? Hello You... And Welcome to Starship Cortina. This week. Grinders suck. My thumbs hurt. My wrists ache. I'm still pulling wire bristles out of my dreads. There was some of this... Followed by some of this... (When they disintergrate they really actually do disintergrate huh?) Then there was some of this... Found some swiss cheese in the boot. And a small hole just breaking through in the tire well. still really happy with the condition of the car in general especially since now I figure all the rust is exposed. Remember how I stored all those bolts and shit together for future me... Took me 2 days find the box with all the bolt bags... Fail. Finding the missing seat runner nut right where it should be... WIN! Next on the cards is to do the panel beating on the underside. Being really anal retentive about it. There's a couple of dings to smooth out. And those couple of patches to do. Seaming up all the factory stuff and smoothing it all off. Ready for new seal next week.1 point
-
This is The Little Caravan called Daphne! It came about as we planned for our wedding and had a similar one booked but changed the date then the caravan couldn't make the new date. We then decided we liked the idea so much to build our own. Essentially the caravan is made to serve drinks at any special occasion or event. The person hiring it supplies the alcohol and we keep it cool and flowing to the guests. So we found a caravan brought it home and stripped it out. It had leaks and rotten framing to be expected from a 60's (we think) caravan. The building side was abit beyond my skill level and tools available so I searched and found a guy perfect for the job. He replaced all the rotten framing and lined it all with ply to strengthen what was quite a wobbly old girl Next was make an install cabinets for bench top to sit on Next was install bench top and the big one was custom make the Windows which took the builder many hours but using rimu did an amazing job and came better than we could of imagined. We used perpsex to keep the weight down. Next was my turn to tackle the outside and respray. Every trim had to be removed and resealed and countless hours went into getting it painted. Also our wedding date was approaching quick so pressure was on. So now all painted it was time to tidy up the inside, install sinks, finish Lighting and seal up joinery and benchtop. Me and my brother were still working on it at 11 the morning of the wedding....last minute but we made it...just! Now open for business! We have Facebook page active and the website is getting done as we speak. Enjoy1 point
-
thanks to everyone who came along today. The next one will most likely be on the 19th of July1 point
-
Yea Im slow Current plan is on the road by Late October, but I've never met a deadline in the past. I have been working away on it though. Changed to lower profile front tires, to help with clearance took the rear coilover bases to Polytech and milled the bush down to the correct size Started work on a new front bump stop timmed the edge of the LCA because it rubbed at full bump at full lock had new bearing pressed into my front hubs Its been nice making progress1 point
-
Wouldn't it be a shame if the supercharger pulley hit the bonnet and you had to use a smaller one1 point
-
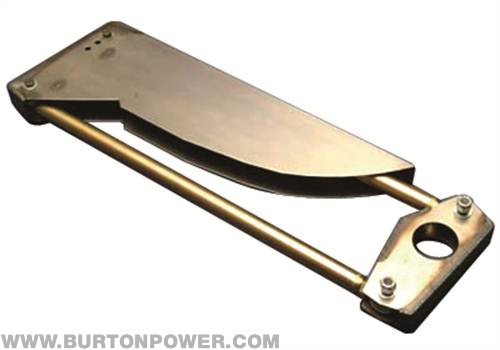
plans have changed and now adding a four link kit. purchased from Burton (uk) marking the four link boxes welding time done
1 point
-
Visiting NZ for the week so got to drive the datsun again, will try post some bigger photos as well. Heres some videos for anyone interested. The white sedan is running a SR20det1 point
-
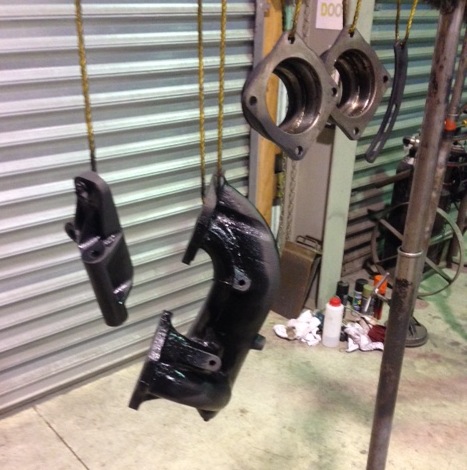
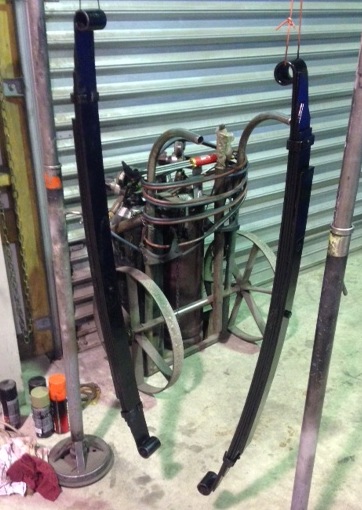
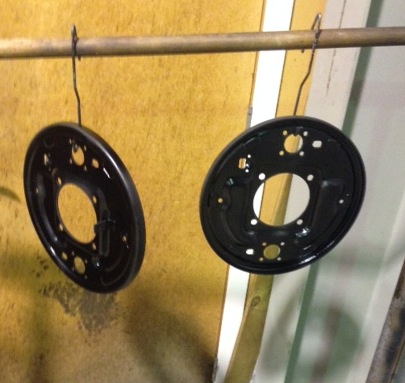
well been collecting up all the bits to get this thing going, new starter has arrived have painted up the reset leaf springs also painted up alternator brackets, exhaust manifold and done another pair of axels/ backing plates ect have also got a new battery, thinking of mounting it in the tray as its had the battery holder removed from the inner guard and was running a motorbike battery behind the seat but i would rather have a decent sized battery and had a battery box laying around. also have a new carpet on its way from autodec looking forward to putting that in along with the bench seat. looking into getting a new radiator or get the old one re-cored as its pretty rotten.
1 point
-
Hi Craig. Yeah there has been a little. I've turned up a new bottom pulley with a 5pk drive so I can drive a hydraulic pump. I splashed out last week and brought a new Massey Ferguson TE20 radiator for it. It's a bit cold here today but hopefully this weekend I'll do a little more on it. Worthwhile update to follow at some stage.1 point
-
Here she is, arived in my new garage, packed full of parts and tools Wheels are takechi project racing hart 7G7 in 15x6.5j Engine is z20e(+)t1 point
-
Dude, this is fucking epic. Was not expecting such a sweet build when I clicked your thread. I kept on showing/annoying the gf things. Apparently she doesn't care about parallel 4 links with watts links. Weird. Love your work Matt1 point
-
Making a start on your cage. Pretty happy with how its coming along. Got it fitting pretty good. That's a piece of card slipped between roof skin and roof diagonal1 point
-
dat ass CNC1 point


.thumb.png.46e518f714cdc319554c389f990e75a4.png)


This leaderboard is set to Auckland/GMT+12:00